|
|

Expert
Posts: 1730
   
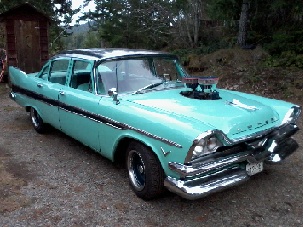
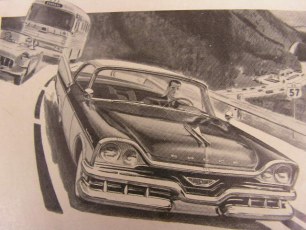
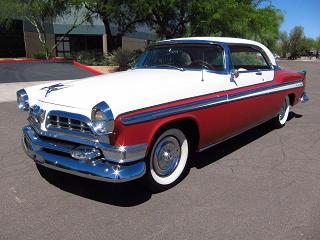
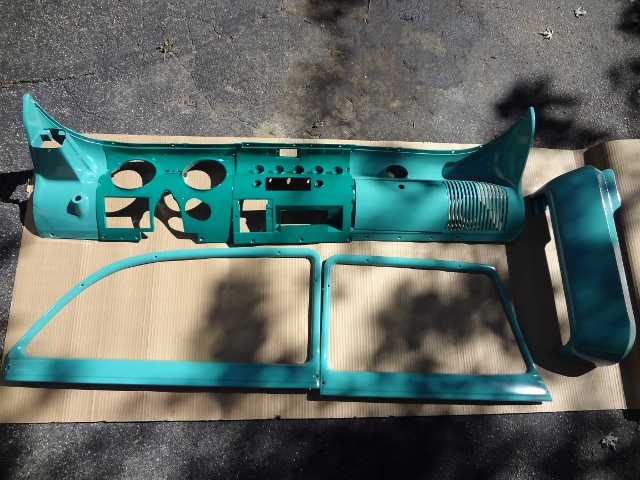
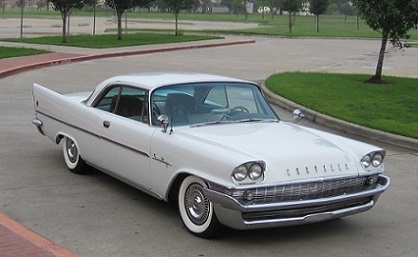
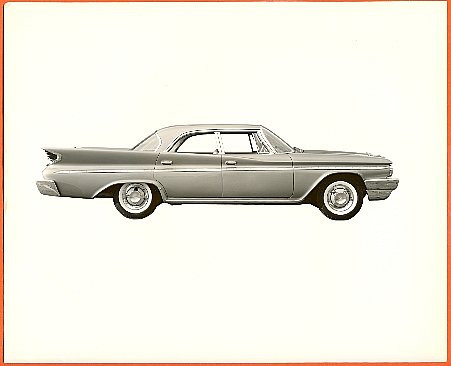
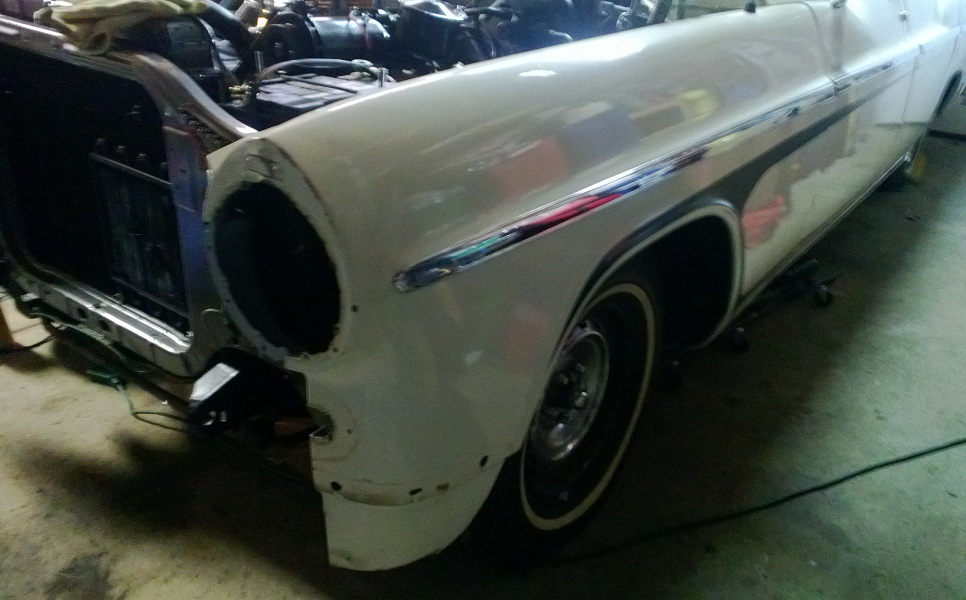
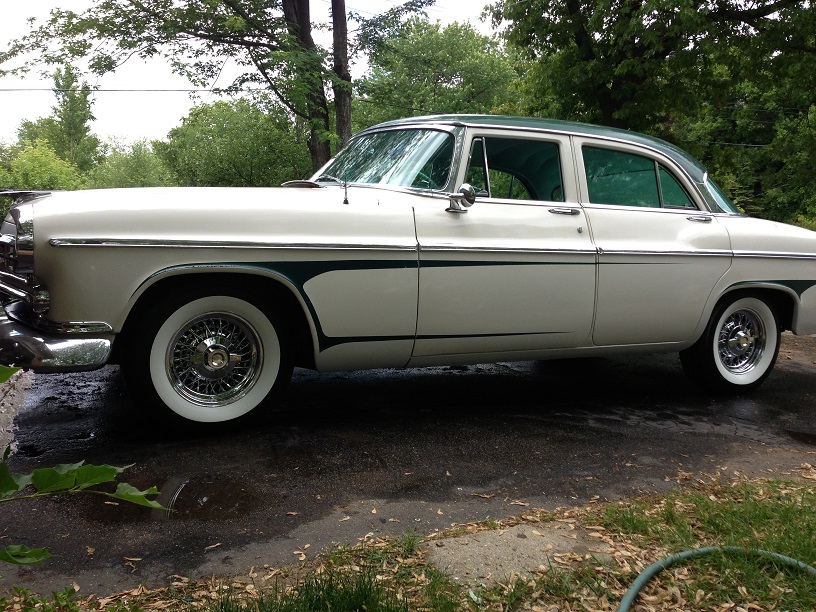
Location: Michigan | Well it all started with this incredible deal on a 55 Chrysler Windsor.
Then my high school dream of having a hemi car came back to me.
Then a conversation with a friend lead me to a set of Marine Hemi engines.
A year after tearing down, selling / trading off parts I have an engine nearly ready to be fired.
But after reviewing the options, I think I not only have to change out the engine but clean up the engine compartment and heck.. why not upgrade that trans too.
So here we are, front end off, fabricating parts to get the new and old to play well. But it's progress and one thing thats great about this project. I don't have a time line, budget to track or approvals to get. It gets there.... when it gets there.
 (2010 sideview.JPG) (2010 sideview.JPG)
 (IMG_6398.JPG) (IMG_6398.JPG)
 (tired bearings.JPG) (tired bearings.JPG)
 (A vision.JPG) (A vision.JPG)
 (Cleaning the block.JPG) (Cleaning the block.JPG)
 (Some assembly required.JPG) (Some assembly required.JPG)
 (IMG_0524.JPG) (IMG_0524.JPG)
 (Best laid plans.JPG) (Best laid plans.JPG)
 (Factory Adjustments.JPG) (Factory Adjustments.JPG)
 (Topless.JPG) (Topless.JPG)
 (60yrs of grease jobs.JPG) (60yrs of grease jobs.JPG)
 (profile view.JPG) (profile view.JPG)
Attachments
----------------
 2010 sideview.JPG (155KB - 315 downloads) 2010 sideview.JPG (155KB - 315 downloads)
IMG_6398.JPG (238KB - 320 downloads)
tired bearings.JPG (176KB - 415 downloads)
A vision.JPG (198KB - 309 downloads)
Cleaning the block.JPG (192KB - 301 downloads)
Some assembly required.JPG (137KB - 302 downloads)
IMG_0524.JPG (157KB - 303 downloads)
Best laid plans.JPG (148KB - 313 downloads)
Factory Adjustments.JPG (129KB - 302 downloads)
Topless.JPG (253KB - 300 downloads)
60yrs of grease jobs.JPG (152KB - 298 downloads)
profile view.JPG (268KB - 298 downloads)
|
|
| |
|
Regular
Posts: 53
| awesome car and can i have the engine? |
|
| |
|
Expert
Posts: 1730
Location: Michigan | I intend to keep it for now.  |
|
| |
|
Expert
Posts: 3155

Location: NY & VT | If you aren't keeping the poly I may need one.... |
|
| |
|
Exner Expert 19,174 posts. Neil passed away 18 Sep 2015. You will be missed, Neil!
Posts: 19146

Location: bishop, ca | Mark, think I've mentioned this, before, but the 55 Windsor Poly-head has hands-down, the best FWDLK era distributor
on its engine.
If you've got IAZ 4001E, there, it has dual points (for Pertonix under-cap E.I. installation), plus 28 degrees of Mechanical
Advancement, and its vacuum advance should have a "7" stamped on its lever arm.
You should check to see if the V.A. is operable, by sucking on its orifice, to feel/hear if its diaphram is moving.
Edited by d500neil 2012-02-24 6:21 PM
|
|
| |
|
Expert
Posts: 1730
Location: Michigan | I have a pertronix in it right now. Should I just pick that distributor out and put it on the other engine, no changes? It works well but it is 6v and I will be changing it over to 12v. I think I only need to get a new pertronix unit.
Edited by Beltran 2012-03-04 10:34 AM
|
|
| |
|

Expert
Posts: 2612
Location: Parts Unknown |
 |
|
| |
|
Expert
Posts: 1730
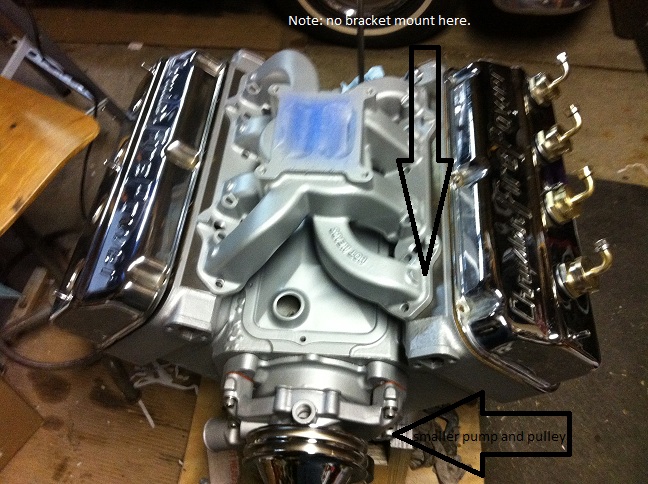
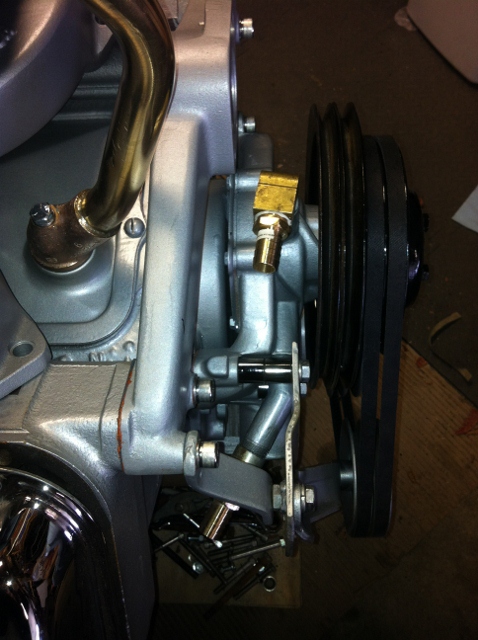
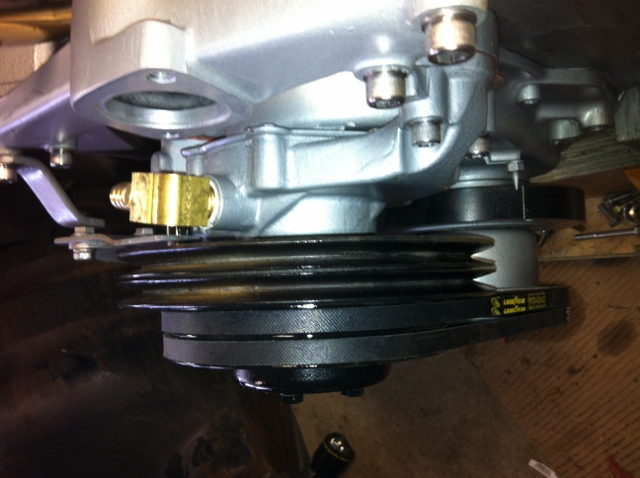
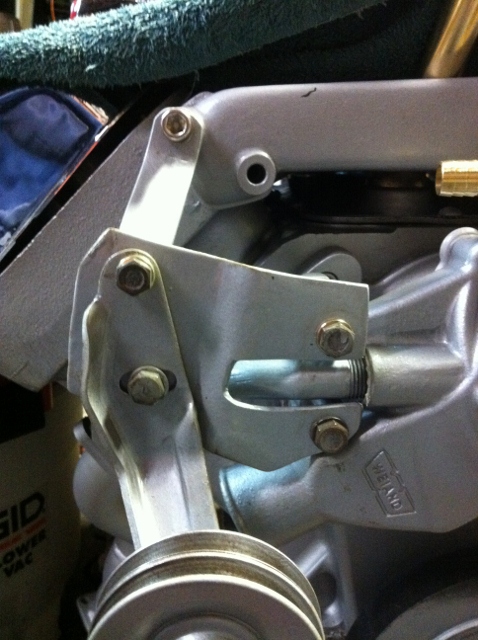
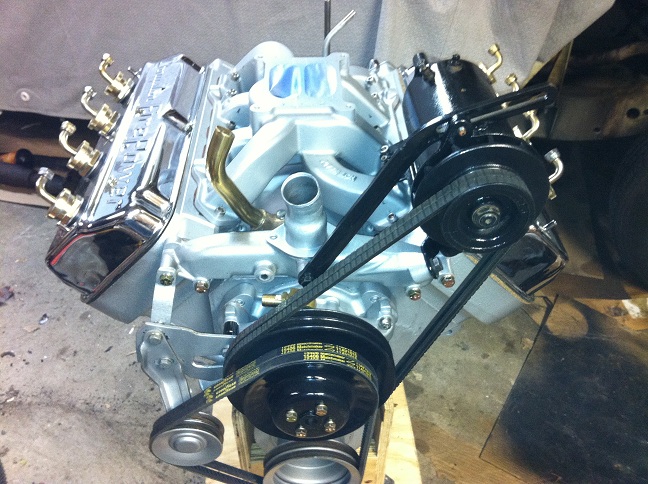
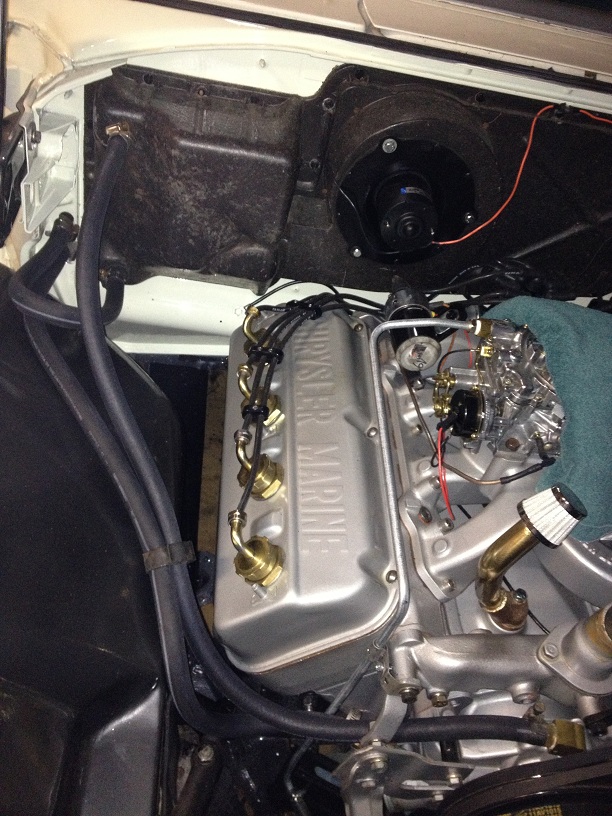
Location: Michigan | Made some critical progress this weekend. Got the pulley system for the water pump worked out with the help of my neighbor Kirk. Anything is possible when you have the right tools for the job.
This is a 57 marine block which as I learned is a combination of 51-54 and 56-57 fittings. The oil pan and timing chain cover plate are 51-54 (the water jacket holes in the block are cut closer together) and the rest is 56-57. I have the HH cover and a GM short pump and will retain the original pulley system with the help of the custom fixtures for the belt tensioner.
 (IMG_0553 (478x640).jpg) (IMG_0553 (478x640).jpg)
 (IMG_0554 (478x640) (2).jpg) (IMG_0554 (478x640) (2).jpg)
 (IMG_0555 (640x478).jpg) (IMG_0555 (640x478).jpg)
 (IMG_0547 (478x640).jpg) (IMG_0547 (478x640).jpg)
 (IMG_0548 (478x640).jpg) (IMG_0548 (478x640).jpg)
Attachments
----------------
IMG_0553 (478x640).jpg (212KB - 293 downloads)
IMG_0554 (478x640) (2).jpg (174KB - 385 downloads)
IMG_0555 (640x478).jpg (166KB - 460 downloads)
IMG_0547 (478x640).jpg (205KB - 298 downloads)
IMG_0548 (478x640).jpg (186KB - 287 downloads)
|
|
| |
|
Expert
Posts: 1730
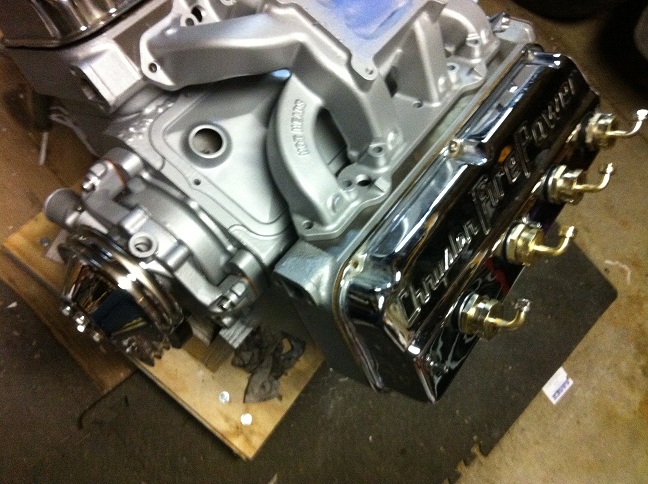
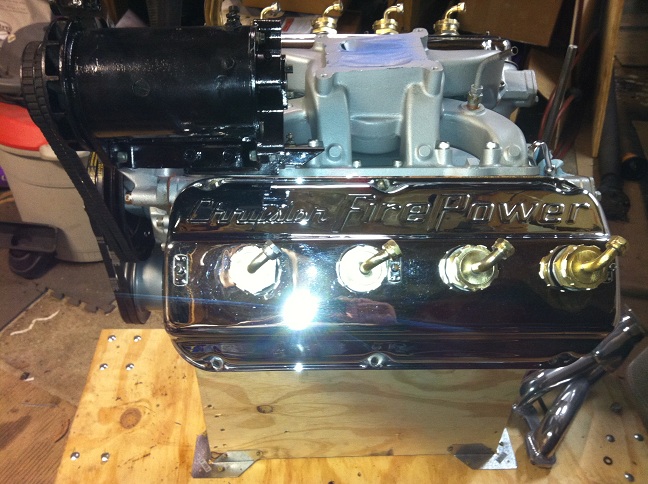
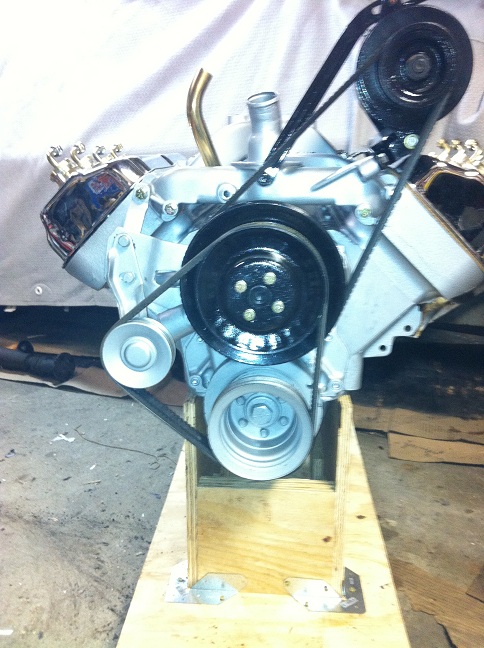
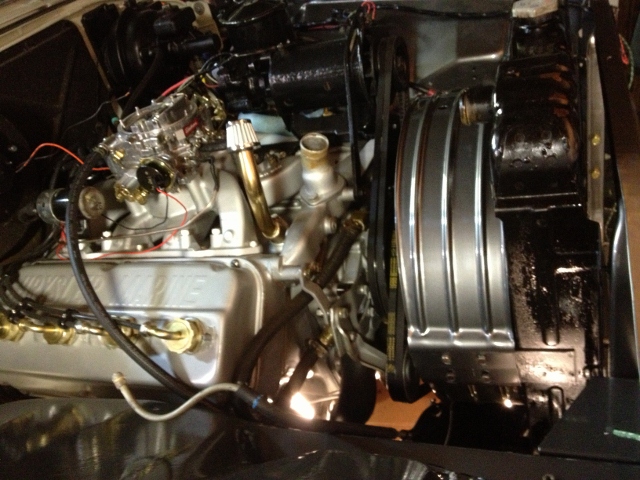
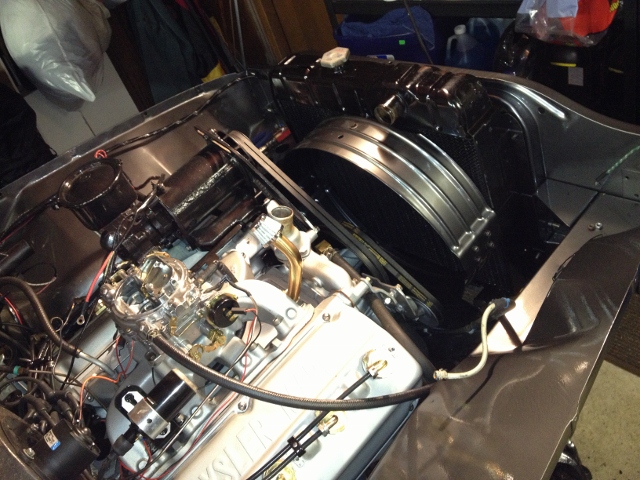
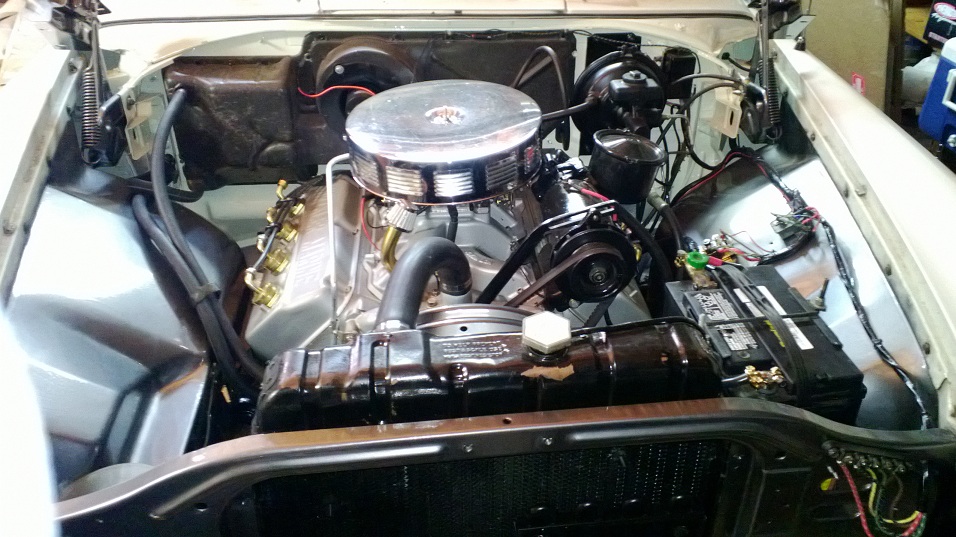
Location: Michigan | This months progress involved settling on a transmission built by Art Carr a few years ago. Not exactly what I wanted but it will do for now. I managed to sort out my plumbing and belt conflict issues by using a 354 cross over that has the water outlet facing up. Could not get the forward facing one to work with only 2.25 inches of clearance to the generator belt. Here are the finished shots of the engine.
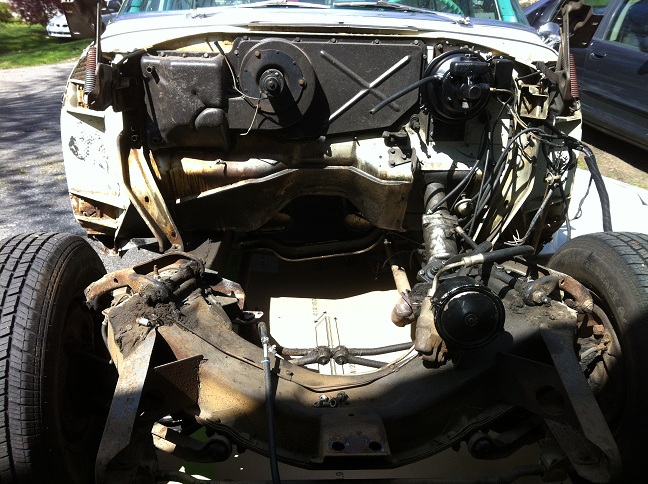
I also got the old poly and trans out of the vehicle and can begin the cleanup and rebuild of the front end and engine compartment.
 (IMG_0563.JPG) (IMG_0563.JPG)
 (IMG_0564.JPG) (IMG_0564.JPG)
 (IMG_0565.JPG) (IMG_0565.JPG)
 (IMG_0567.JPG) (IMG_0567.JPG)
Attachments
----------------
IMG_0563.JPG (156KB - 292 downloads)
IMG_0564.JPG (139KB - 280 downloads)
IMG_0565.JPG (151KB - 297 downloads)
IMG_0567.JPG (136KB - 293 downloads)
|
|
| |
|
Expert
Posts: 1730
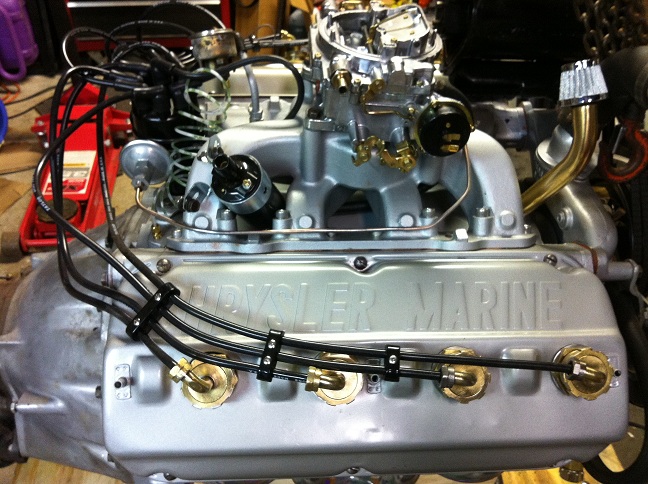
Location: Michigan | Here is the latest progress on the engine. Valve covers are switched back to ones with da bumps... I was told an untruth about the Chrome ones I got. Bumps are required, no matter what the year of the valve covers.
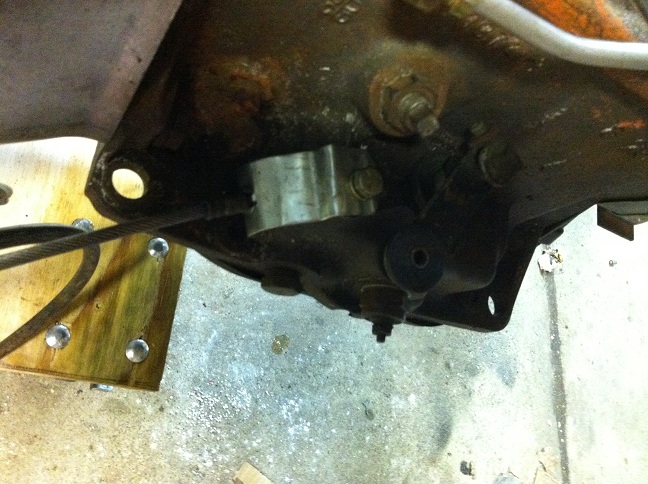
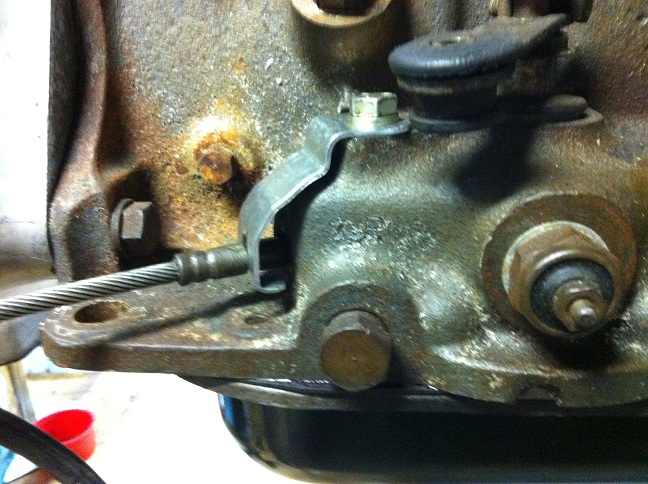
Tranny is mounted and the 56 cable Big M sold me fits nicely. Had to fabricate a lock down for it though. Didn't have a picture or anything so I hope this will suffice. Amazing what you can do with a curtain rod bracket. I knew I saved those for a reason... 5 yrs ago...
Mounting the torque converter sucked. I hope I don't have to take it off for any reason. I used some loctite on the nuts.
Got an issue with the stock starter. Not gonna fit in that spot. Any suggestions?
Edited by Beltran 2012-06-30 6:46 PM
 (IMG_0745.JPG) (IMG_0745.JPG)
 (IMG_0746.JPG) (IMG_0746.JPG)
 (IMG_0747.JPG) (IMG_0747.JPG)
 (IMG_0748.JPG) (IMG_0748.JPG)
 (IMG_0749.JPG) (IMG_0749.JPG)
Attachments
----------------
IMG_0745.JPG (138KB - 290 downloads)
IMG_0746.JPG (145KB - 312 downloads)
IMG_0747.JPG (137KB - 300 downloads)
IMG_0748.JPG (147KB - 302 downloads)
IMG_0749.JPG (156KB - 279 downloads)
|
|
| |
|
Expert
Posts: 1730
Location: Michigan | The starter from HH came today. It's about 1/3 the size of the OEM. Adjusts to different angles so you can get it in anywhere and I was able to put it in place on my engine cradle without too much hassle.
- need to finish hooking up the carb
- need to set up the fuel pump
- need to hook up some exhaust pipes at least to get it pointing behind the trans.
- need to rig up the TAC and control board
- need to add trans fluid and a quart or two of oil.
I think I could start it for the first time within a week or two... getting pumped! |
|
| |
|
Expert
Posts: 1730
Location: Michigan | Almost there... plan to start it up on Sunday... video pending on youtube. |
|
| |
|
Expert
Posts: 1730
Location: Michigan | Well it started! Here is the video for those interested. http://www.youtube.com/watch?v=mH0hX0WsksE&feature=g-upl |
|
| |
|
Expert
Posts: 1730
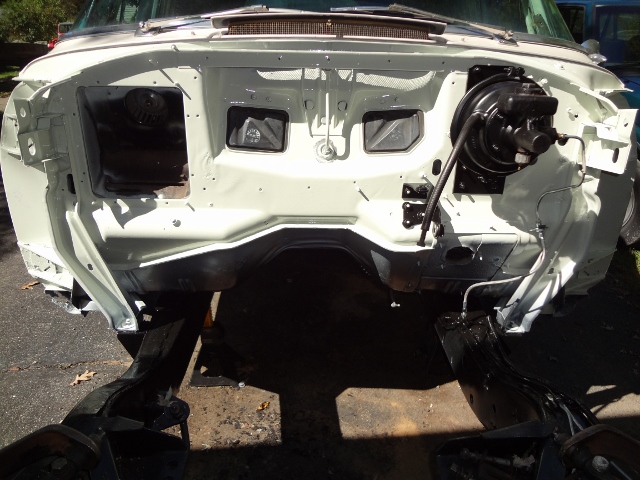
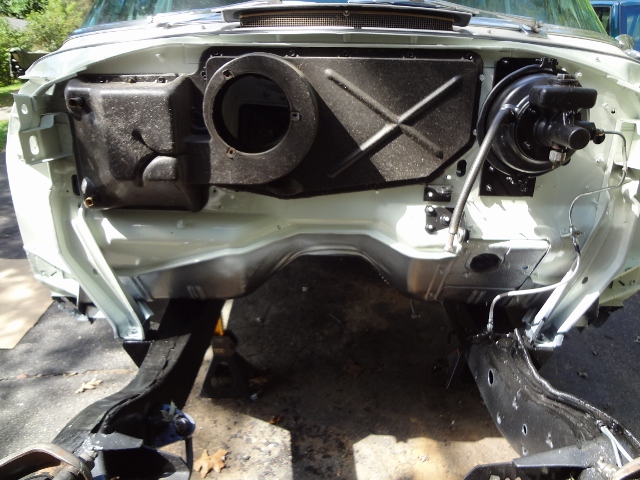
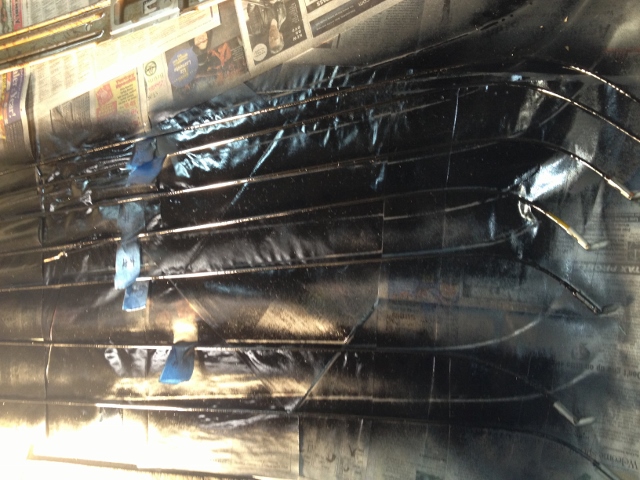
Location: Michigan | Got the firewall painted this week. Before and after shots included.
 (before firewall.jpg) (before firewall.jpg)
 (before firewall2.jpg) (before firewall2.jpg)
 (firewall1.jpg) (firewall1.jpg)
Attachments
----------------
before firewall.jpg (161KB - 284 downloads)
before firewall2.jpg (145KB - 279 downloads)
firewall1.jpg (139KB - 288 downloads)
|
|
| |
|
Veteran
Posts: 126
Location: Castlemaine Victoria Australia | Keep em coming! |
|
| |
|
Expert
Posts: 1730
Location: Michigan | Latest efforts.
Firewall coming together.
New wiring harness from Rhode Island Wiring installed and ready for the newly powdercoated instrament cluster to be installed.
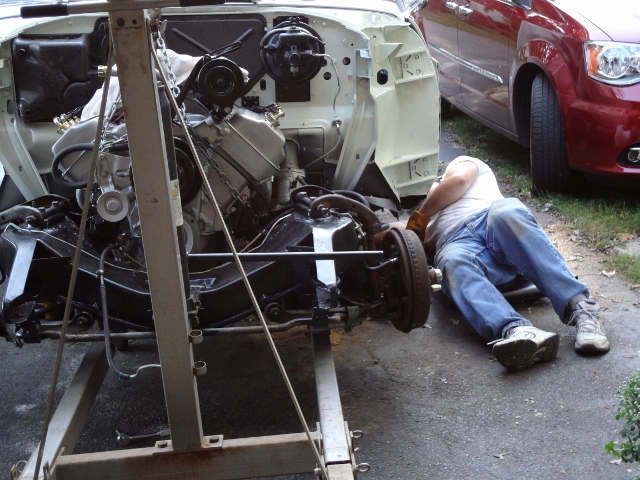
Engine going into the bay... guess who is underneath...
The engine bay holding it's new heart!
Edited by Beltran 2012-09-17 8:14 PM
 (DSC01700 (640x480).jpg) (DSC01700 (640x480).jpg)
 (DSC01706 (640x480).jpg) (DSC01706 (640x480).jpg)
 (DSC01701 (640x480).jpg) (DSC01701 (640x480).jpg)
 (DSC01703 (640x480).jpg) (DSC01703 (640x480).jpg)
 (DSC01709 (640x480).jpg) (DSC01709 (640x480).jpg)
 (DSC01710 (640x480).jpg) (DSC01710 (640x480).jpg)
 (DSC01711 (640x480).jpg) (DSC01711 (640x480).jpg)
 (DSC01712 (640x480).jpg) (DSC01712 (640x480).jpg)
Attachments
----------------
DSC01700 (640x480).jpg (220KB - 323 downloads)
DSC01706 (640x480).jpg (229KB - 283 downloads)
DSC01701 (640x480).jpg (274KB - 295 downloads)
DSC01703 (640x480).jpg (245KB - 304 downloads)
DSC01709 (640x480).jpg (246KB - 301 downloads)
DSC01710 (640x480).jpg (235KB - 281 downloads)
DSC01711 (640x480).jpg (226KB - 310 downloads)
DSC01712 (640x480).jpg (229KB - 281 downloads)
|
|
| |
|
Expert
Posts: 1730
Location: Michigan | Got a line on some Chrysler Firepower Valve covers with Dimples and they should be arriving soon.... don't worry.. it won't say Marine when it's completed. |
|
| |
|
Expert
Posts: 2905
Location: little rock, AR | It could be a dual purpose Chrysler, Land and Sea!!! It really great to see this one coming together. |
|
| |
|
Veteran
Posts: 126
Location: Castlemaine Victoria Australia | No way, leave the marine rocker covers on they, look cool az!!! |
|
| |
|
Expert
Posts: 1730
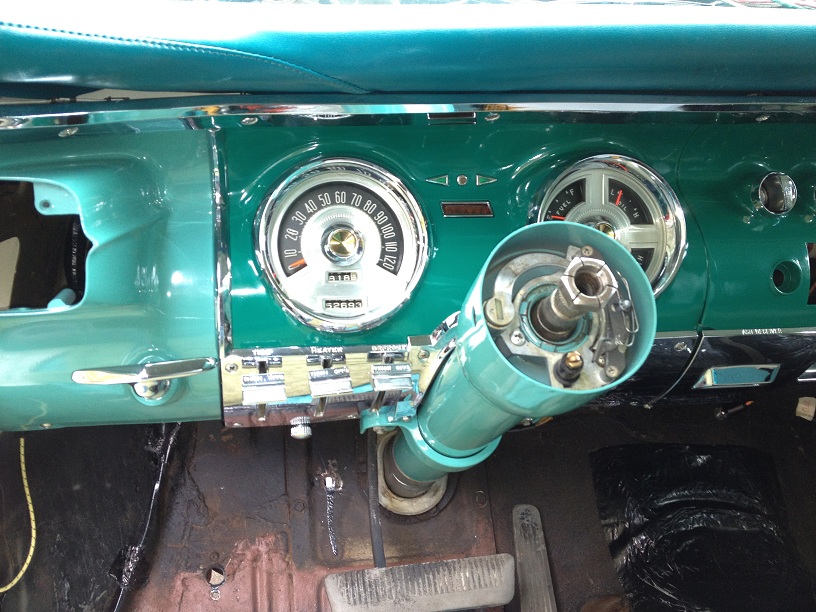
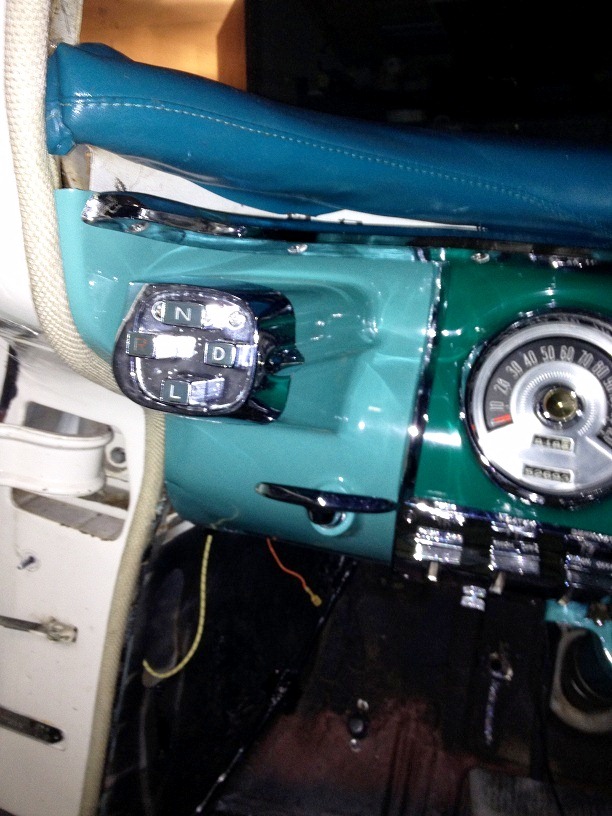
Location: Michigan | Been putting in stupid amounts of hours at work so I took off Friday and spent three days outside from sun up to sundown.
Here is the latest progress.... It took a full day to get the dash in... funny it didn't take that long to get it out...
 (IMG_0756.JPG) (IMG_0756.JPG)
 (IMG_0757.JPG) (IMG_0757.JPG)
 (IMG_0758.JPG) (IMG_0758.JPG)
 (IMG_0759.JPG) (IMG_0759.JPG)
 (IMG_0761.JPG) (IMG_0761.JPG)
 (IMG_0760.JPG) (IMG_0760.JPG)
Attachments
----------------
IMG_0756.JPG (204KB - 302 downloads)
IMG_0757.JPG (184KB - 274 downloads)
IMG_0758.JPG (180KB - 362 downloads)
IMG_0759.JPG (170KB - 354 downloads)
IMG_0761.JPG (177KB - 370 downloads)
IMG_0760.JPG (245KB - 265 downloads)
|
|
| |
|

Expert
Posts: 1295
Location: Nasco , SWEDEN | Awesome work Beltran! I´m in to this soon to, my engine compartment isn´t the nicest to say the least... tell me , whats gonna happen to the other hemi engine? |
|
| |
|
Expert
Posts: 1730
Location: Michigan | It is sitting in a wood stand... looming as a future project of some kind. I don't know what it is yet but in time it will reveal itself to me.
Today's progress was moving the car into the garage because I got a letter from the township telling me that no inopperable vehicles are allowed to be kept outside of a closed building in our township. I have 7 days to comply or I will receive a 300-500 dollar fine. (mind you I can site several examples around the neighborhood, but someone in the back of the subdivision feels the need to complain because they drive by my house on their way home)
Tomorrow I am going to call the township and ask for a permit for a greenhouse. This will be erected on my driveway to be my second 'closed building'. I will also request a permit for a billboard to be placed facing the road in front of my house that says. 'to the asshat that complained to the township about my covered vintage car in my driveway. Hope you like the township approved view better now. " |
|
| |
|
Expert
Posts: 1730
Location: Michigan | Oh and by the way. That rubber flashing is from Gary Goers. AWESOME Quality! |
|
| |
|
Expert
Posts: 2905
Location: little rock, AR | I feel your pain as I have the neighbor that probably placed a complaint on you. I have to leave early and come home late. |
|
| |
|
Expert
Posts: 2524
Location: Houston | Nice work. Any time I hear the word 'township' I know there will be troubles.
You're lucky...in 55 the hood were taller and you can fit that Hot Heads intake underneath. On my 58 there's no way it would clear. |
|
| |
|
Expert
Posts: 1730
Location: Michigan | Been busy lately. Here are some pics of the progress.
The rubber flashing went on great. Had to pop-rivit them in place.
The wiring is from Rhode Island Wiring Service.
 (IMG_0798 (640x480).jpg) (IMG_0798 (640x480).jpg)
 (IMG_0772 (640x480).jpg) (IMG_0772 (640x480).jpg)
 (IMG_0776 (640x480).jpg) (IMG_0776 (640x480).jpg)
 (IMG_0797 (640x480).jpg) (IMG_0797 (640x480).jpg)
 (IMG_0796 (640x480).jpg) (IMG_0796 (640x480).jpg)
Attachments
----------------
IMG_0798 (640x480).jpg (212KB - 284 downloads)
IMG_0772 (640x480).jpg (209KB - 273 downloads)
IMG_0776 (640x480).jpg (179KB - 375 downloads)
IMG_0797 (640x480).jpg (225KB - 280 downloads)
IMG_0796 (640x480).jpg (149KB - 259 downloads)
|
|
| |
|
Expert
Posts: 1730
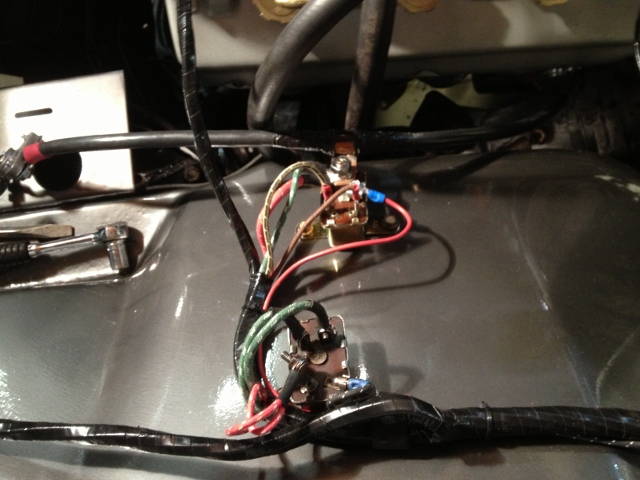
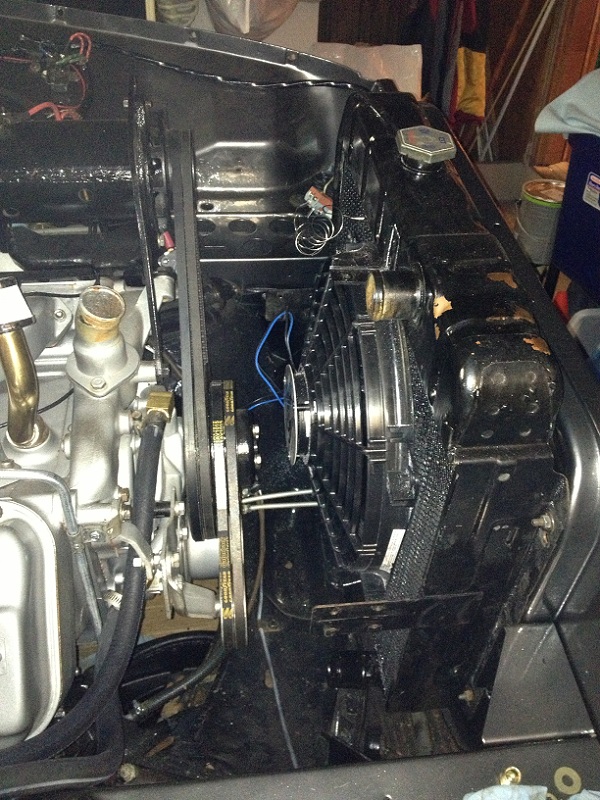
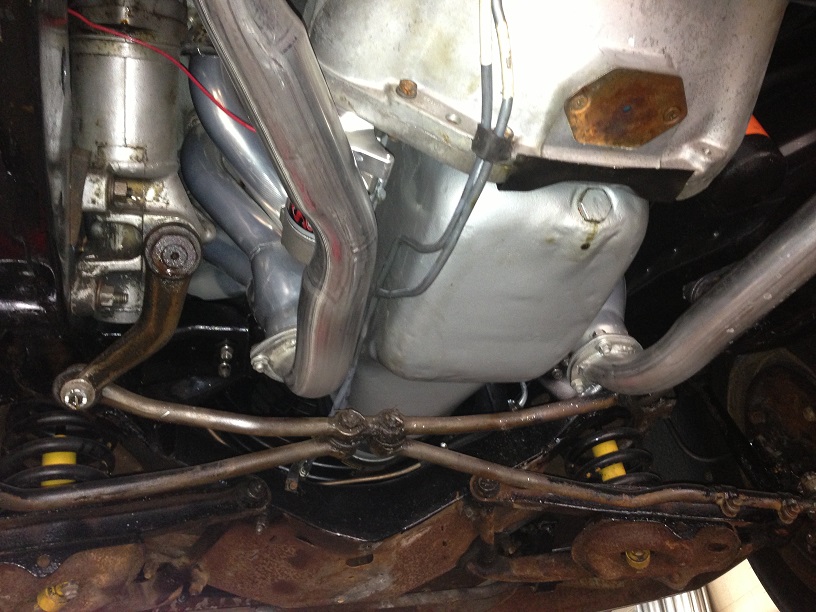
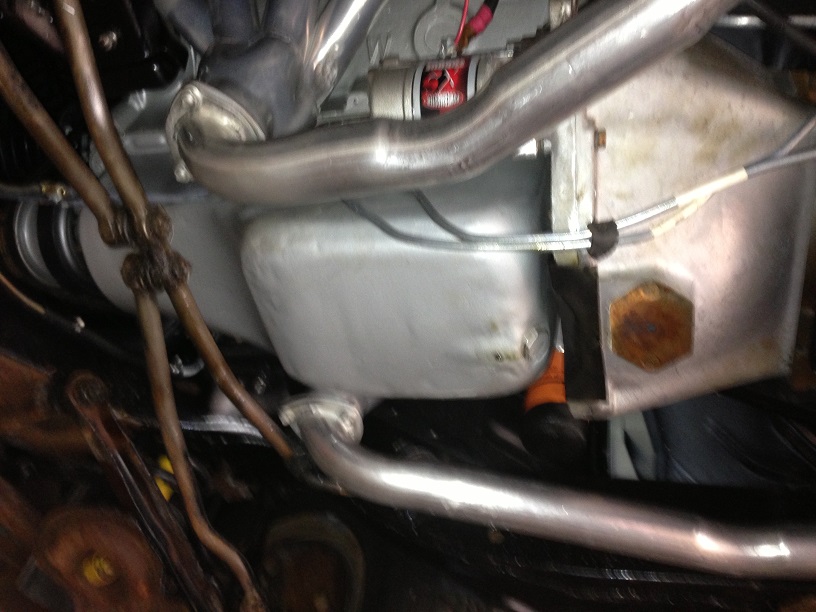
Location: Michigan | Well I have been working on the car some over the last few weeks but the progress isn't very visible.
1) Big M sent me the trans pieces I needed... oh that is a picture I can include.
2) I got the push button cable installed and connected in the trans with the proper fixture
3) Had the radiator bottom outlet moved to the other side to accomdate the GM pump I have. Had to get it set up at a 30 degree angle to allow clearance for the K member.
4) trying to get the right custom hoses to fit the radiator. 2in outlet on the pump to 1-3/4" on the radiator and then 1 3/4" on both ends of the top hose. A few more trips to Mazza's to search through the hose book...
5) trans lines are connected with the cooler I added to the front of the radiator. Electric Fan mounted on the radiator but will be hidden under the shroud so you don't see it.
6) Fuel line hooked up to the carb and the new electric pump and filter connected up along the frame rail with new line out of the tank.
And thanks to NEIL !!! I now have another project.....
Edited by Beltran 2012-11-15 11:10 PM
 (IMG_0811.JPG) (IMG_0811.JPG)
 (IMG_0808.JPG) (IMG_0808.JPG)
 (IMG_0809.JPG) (IMG_0809.JPG)
 (IMG_0810.JPG) (IMG_0810.JPG)
 (IMG_0812.JPG) (IMG_0812.JPG)
 (IMG_0813.JPG) (IMG_0813.JPG)
Attachments
----------------
IMG_0811.JPG (148KB - 287 downloads)
IMG_0808.JPG (216KB - 275 downloads)
IMG_0809.JPG (228KB - 286 downloads)
IMG_0810.JPG (207KB - 267 downloads)
IMG_0812.JPG (226KB - 289 downloads)
IMG_0813.JPG (143KB - 269 downloads)
|
|
| |
|

Expert
Posts: 2788
Location: USA - KY |
I know you've heard this before, Marc...but your car is going to be seriously awesome!
Please keep the reports coming!
|
|
| |
|
Expert
Posts: 1730
Location: Michigan | Got the pump hooked up electrically tonight. Did the electrical test of my new wiring to make sure it all works. Pumps and motors all work as expected! I tested the lights and blinkers and the only thing that wasn't working was the brake lights. I think that may have something to do with my pressure switch which is easy enough to verify. Turned over the engine and it fired after 2 rotations!.. oops! Didn't have the exhaust or the cooling system connected so I shut it down right away. Just wanted to make sure the starter wiring was ok and the neutral safety switch were ok.
All I need to do now is finish the cooling, connect the temporary exhaust up and top off all the fluids, connect up the Carb / Trans linkage thats due in this week and I can really start it up. I think Pennence may be running by next weekend!
Edited by Beltran 2012-11-18 9:15 PM
|
|
| |
|
Veteran
Posts: 234
Location: Chambersburg,PA | Nice job! Love the pic's, had a 56 w/the poly 331 2bbl,was a great driving car,had a ton of fun w/it all up and down the East coast, can't wait to see more pic's. |
|
| |
|
Expert
Posts: 1730
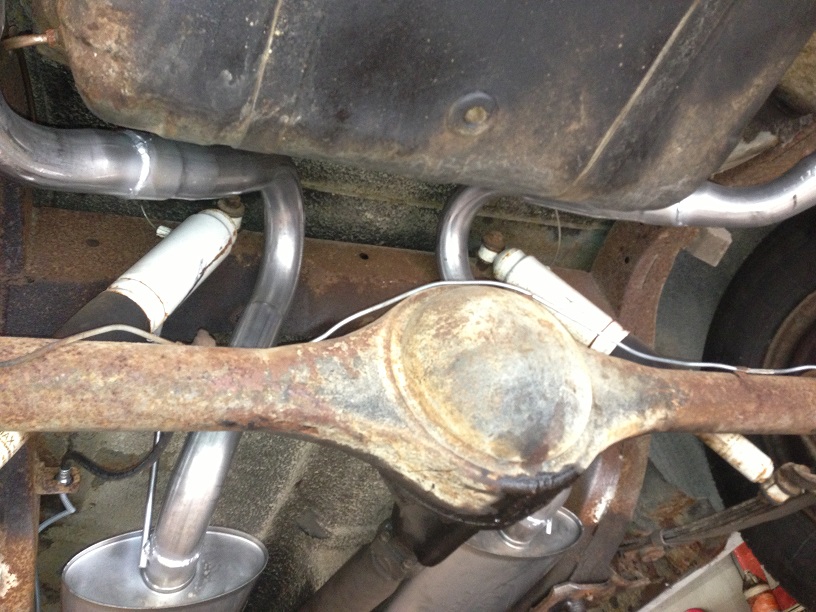
Location: Michigan | Well I just got in from the Garage. Got the cooling system fully connected and fluids topped off. Spent 4-5 hours on the Carb linkage, getting that tweaked and ensuring I have full travel so those secondaries will open up. I started on the exhaust but I need to make a 90 Deg pipe from a straight pipe with a little cutting and welding. The store bought curved 90 deg. pipe just will not allow enough clearance when I lower the car. Will work on that tomorrow. Then it's time to fire it up! |
|
| |
|
Expert
Posts: 1730
Location: Michigan | Well I got it running today and everything works! Trans shifts into reverse and drive properly. Hopefully I can get a video of it posted. |
|
| |
|
Expert
Posts: 1730
Location: Michigan | Posted Video on youtube.
http://youtu.be/-qulz6oxFDA
|
|
| |
|
Elite Veteran
Posts: 781
Location: Montreal, Canada | Love the video!!!!!!
I just adore the engine sound. 
Kool man !!!!!
|
|
| |
|
Expert
Posts: 2905
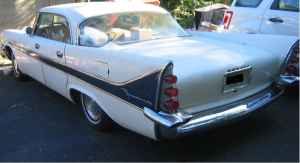
Location: little rock, AR | Whats really nice about your projects is that its not a complete resto. When it's broken in and a few miles have been logged maybe you can pull up beside one of those rice burners and let them see what the tail lights look like. |
|
| |
|
Expert
Posts: 1730
Location: Michigan | Dam straight.

Edited by Beltran 2012-11-27 6:31 PM
|
|
| |
|
Expert
Posts: 1730
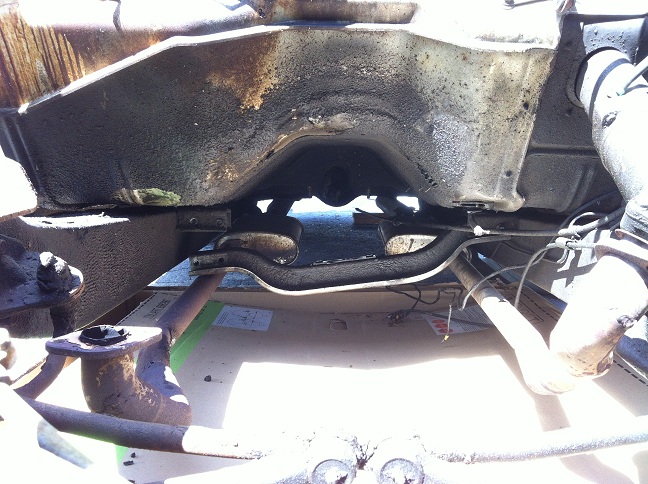
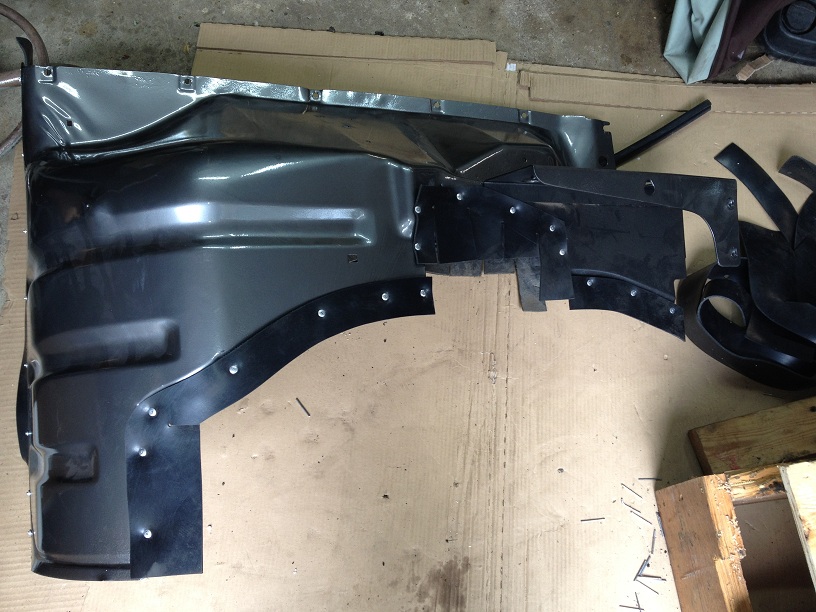
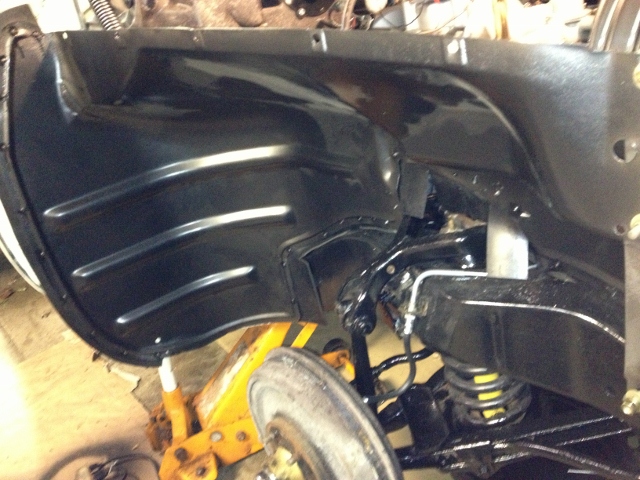
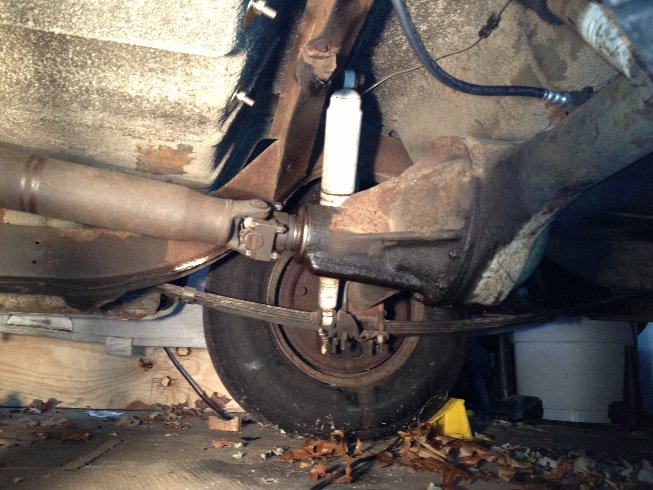
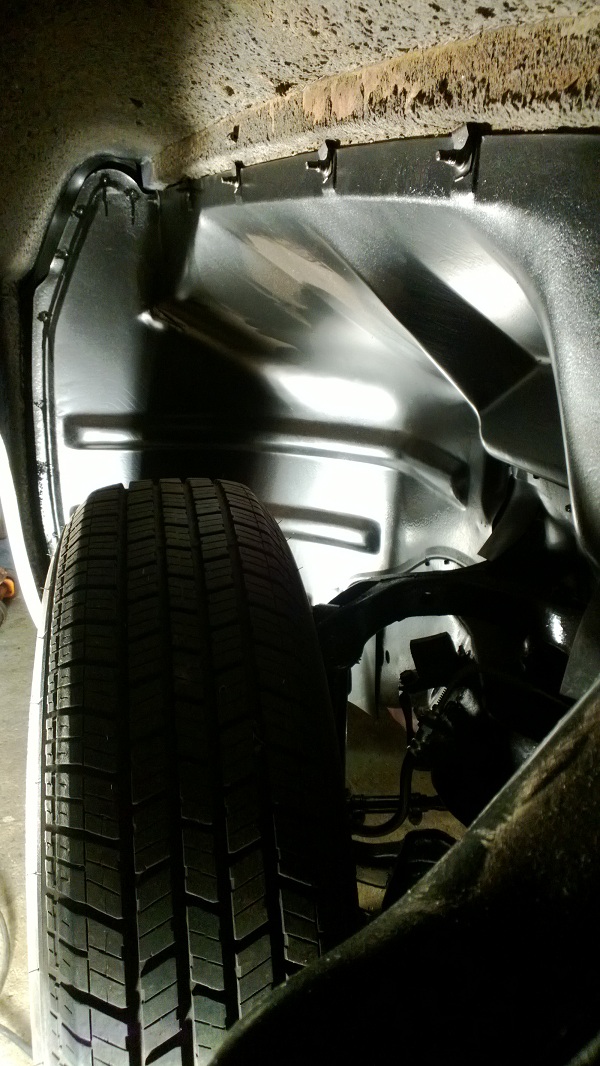
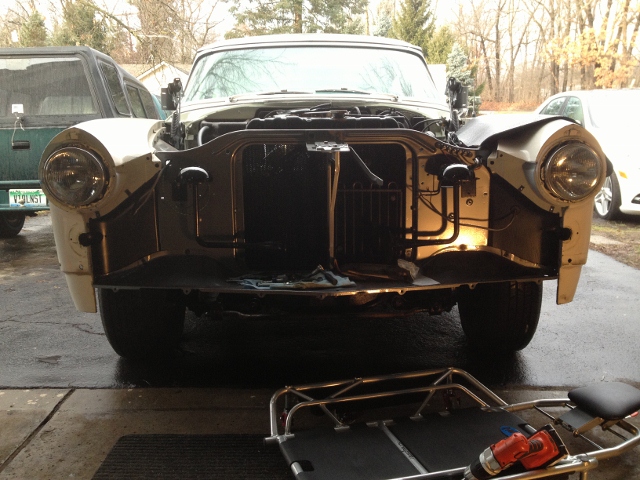
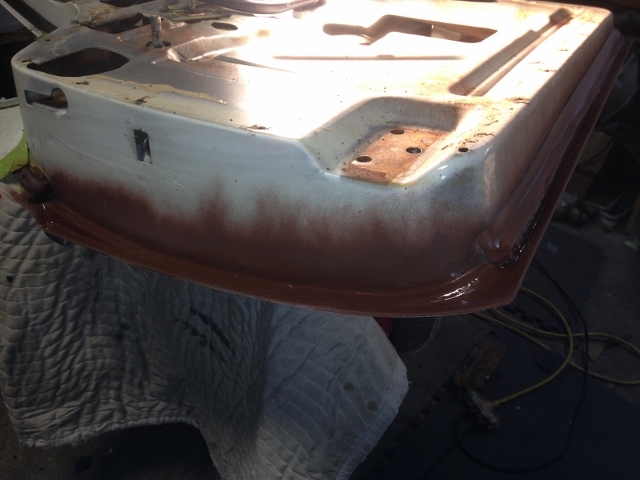
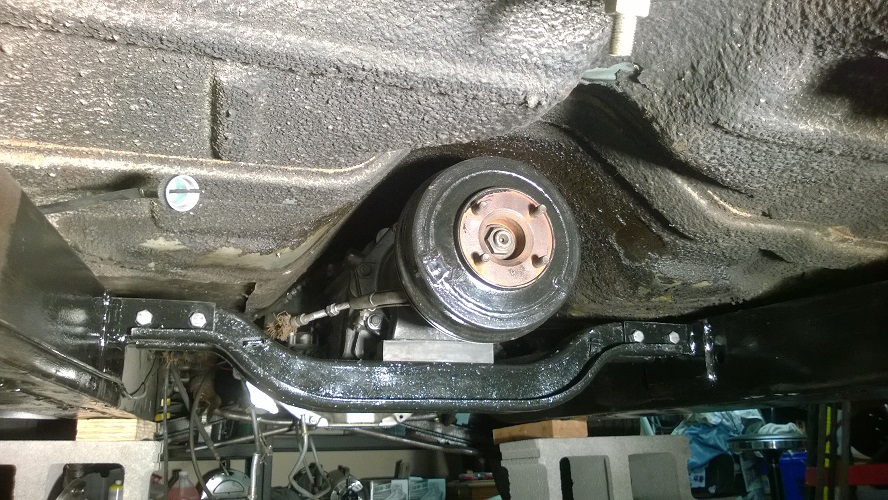
Location: Michigan | This weeks progress got the fenders back on the body after a cleaning and re-application of undercoat on the bare spots. First couple of photos shows the exposed / damaged areas. That is factory undercoat on that inner fender and although that upper area was accessible they didn't have anything protecting it. That spot is behind the inner fender well.
The next photos show the Gary Goers rubber shields mating nicely up to the fenders, frame area and suspension. Cleanest it will ever look again.
Edited by Beltran 2012-12-09 4:47 PM
 (WP_20121209_006.jpg) (WP_20121209_006.jpg)
 (WP_20121209_011.jpg) (WP_20121209_011.jpg)
 (WP_20121209_008.jpg) (WP_20121209_008.jpg)
 (WP_20121209_013.jpg) (WP_20121209_013.jpg)
 (WP_20121209_014.jpg) (WP_20121209_014.jpg)
 (WP_20121209_012.jpg) (WP_20121209_012.jpg)
 (WP_20121209_017.jpg) (WP_20121209_017.jpg)
Attachments
----------------
WP_20121209_006.jpg (180KB - 318 downloads)
WP_20121209_011.jpg (80KB - 266 downloads)
WP_20121209_008.jpg (199KB - 272 downloads)
WP_20121209_013.jpg (226KB - 268 downloads)
WP_20121209_014.jpg (231KB - 254 downloads)
WP_20121209_012.jpg (188KB - 256 downloads)
WP_20121209_017.jpg (219KB - 260 downloads)
|
|
| |
|
Elite Veteran
Posts: 1120
Location: Brisbane, Australia | Looking good Mark!! |
|
| |
|
Expert
Posts: 2905
Location: little rock, AR | We are all waiting for your updated youtube video's. Especially the ones where you have your foot down the throat of that carb. |
|
| |
|
Exner Expert 19,174 posts. Neil passed away 18 Sep 2015. You will be missed, Neil!
Posts: 19146
Location: bishop, ca | I forget, Mark; did you upgrade your ride's springs and shocks?
|
|
| |
|
Expert
Posts: 1730
Location: Michigan | That was the first thing I did Neil when I got the vehicle. They are new all around. Made a HUGE difference in the ride quality of the vehicle. So much quieter too.
Dorsey I can't wait to take her out but it's getting very wintery here and I think I will not have the opportunity until spring. I have to take the front valence to the powdercoater. It's just too rusty and I want to protect it from further deterioration. I will have him do my FirePower Valve covers as well.
My SMS stuff is starting to show up. I have the headliner now and hoping to have the seat fabric soon. I can get the interior redone over the winter and have it all ready to drive in the spring! |
|
| |
|

| Man, that is some tricky ass spark-plug wiring. |
|
| |
|
Exner Expert 19,174 posts. Neil passed away 18 Sep 2015. You will be missed, Neil!
Posts: 19146
Location: bishop, ca | That's because that's a NAVY engine, there, Robert!
|
|
| |
|
Expert
Posts: 1730
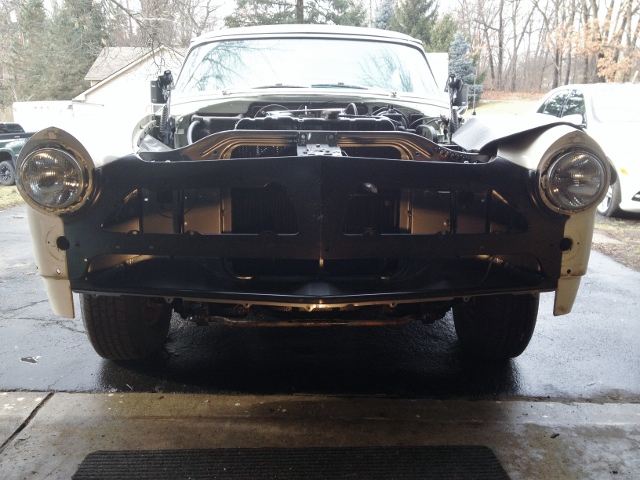
Location: Michigan | So today it was 60 Degrees in Michigan... could not miss the opportunity to be outside without the heaters running! So today I got the front facia bolted up and got the engine tuned properly, setting the carb, choke, timing and idle. As well set the kick down properly so it downshifts when it's supposed too. All in all I'm pleased with how it's running, starting and idling. Got pics and video of how it sounds.
http://www.youtube.com/watch?v=qaH7tIBvu3E
Edited by Beltran 2013-01-12 11:55 PM
 (IMG_0854 (640x480).jpg) (IMG_0854 (640x480).jpg)
 (IMG_0858 (640x480).jpg) (IMG_0858 (640x480).jpg)
Attachments
----------------
IMG_0854 (640x480).jpg (216KB - 260 downloads)
IMG_0858 (640x480).jpg (214KB - 313 downloads)
|
|
| |
|
Exner Expert 19,174 posts. Neil passed away 18 Sep 2015. You will be missed, Neil!
Posts: 19146
Location: bishop, ca | Nice; assuming that your getting the gas from the tank, and that your gas gauge is operational, you can
see that you can run the 'gauge' all the way to the "E" before running out of gas.
|
|
| |
|
Expert
Posts: 1730
Location: Michigan | Actually the needle is hanging up inside.. If I tap on the lense it moves up. Got it to half a tank. I had a bunch of stuff in the trunk and moved it out of the way yesterday to get to the wire and connect it up. I had not completed that when I put the wiring in. Going to have to take that guage back out and fix it...argh.
A little disappointed that I cannot break the tires loose with the new motor, even with a brake torque. Gearing with the two speed is just too low I think. Although when it gets rolling it has a lot of pull. More incentive to get my three spd from Mike and get it in there at some point. I will need to find a 56 Chrysler with a 3sp trans push button chrome bezel for the dash though. I have the mechanism but not the outside bezel. Maybe I can get Bob's guys to fab one for me.
Edited by Beltran 2013-01-13 1:11 PM
|
|
| |
|
Elite Veteran
Posts: 1120
Location: Brisbane, Australia | Beltran - 2013-01-14 3:00 AM
Actually the needle is hanging up inside.. If I tap on the lense it moves up. Got it to half a tank. I had a bunch of stuff in the trunk and moved it out of the way yesterday to get to the wire and connect it up. I had not completed that when I put the wiring in. Going to have to take that guage back out and fix it...argh.
A little disappointed that I cannot break the tires loose with the new motor, even with a brake torque. Gearing with the two speed is just too low I think. Although when it gets rolling it has a lot of pull. More incentive to get my three spd from Mike and get it in there at some point. I will need to find a 56 Chrysler with a 3sp trans push button chrome bezel for the dash though. I have the mechanism but not the outside bezel. Maybe I can get Bob's guys to fab one for me. :)
What have you got in mind Mark, maybe you can email me some details/photos? |
|
| |
|
Elite Veteran
Posts: 1120
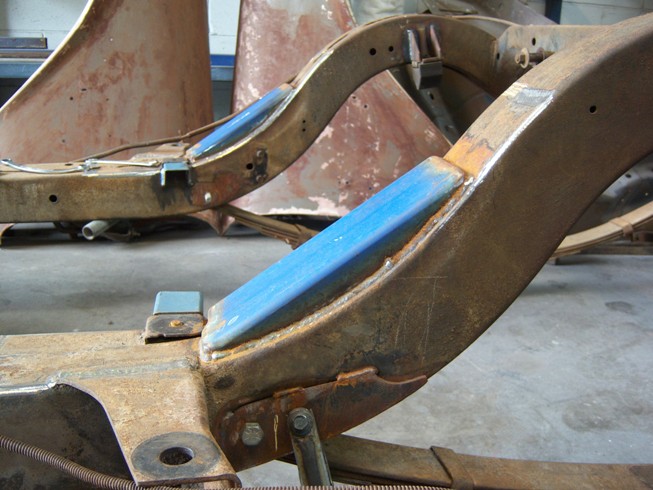
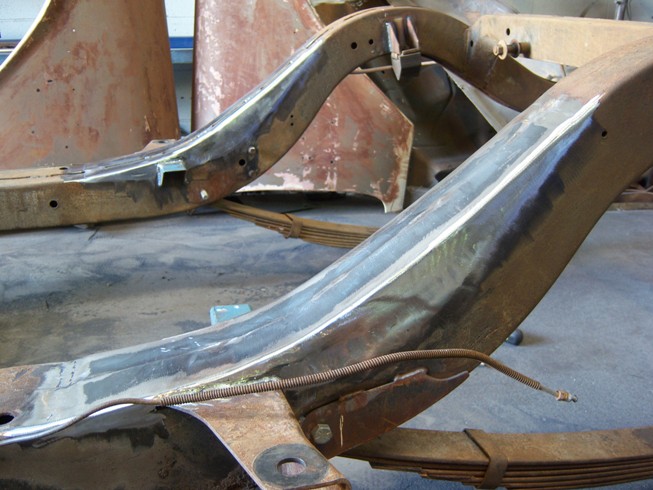
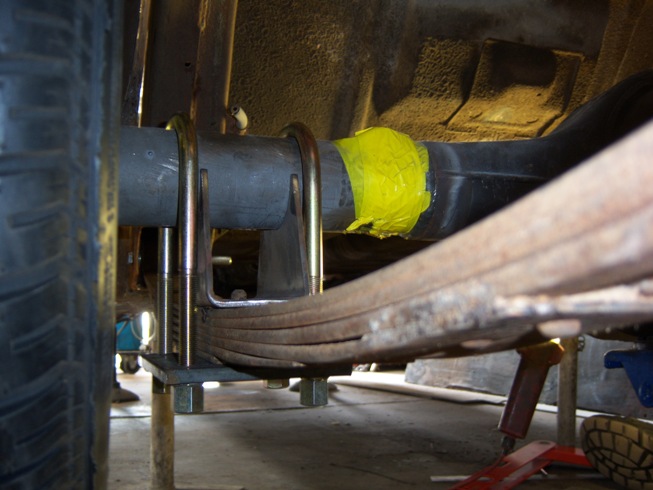
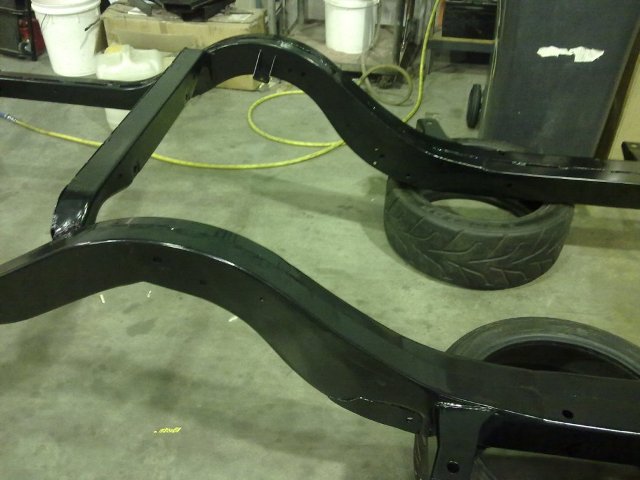
Location: Brisbane, Australia | There is a bit of integration required to tub the guards enough to stick 9 inch rubber on the back. For a start the springs lie beside the chassis and the rear inner guards are too small to accept the wheels. The wheels themselves run a 15” centre originally made for a Chevelle, available from vintage wheels. The rims are aftermarket and the off-set is determined by the width of rear axle. I shortened the rear housing so I could get that old school deep dish of the 60s drag racing rims. Initially it was thought that removing and replacing the wheels on the car would pose a problem (which it didn’t) so we opted for bolts rather than studs. You can see in one of the photos we made the axle housing tubes adjustable and taped them (YELLOW TAPE) in place when we had decided on the desired width. The diff itself is 9”ford (aftermarket.
I have been tossing about the wheels I want to use on my 55. I see how you have gotten yours tucked under the fenders and they look so nice with the wide stance. Did you have to modify the axle to accomplish that? YES What rims did you get? CHEVELLE CENTRES 15” I know the bolt pattern is specific WE USED BLANK MOSS AXLES AND CHOSE FORD PATTERN BUT YOU COULD USE WHAT EVER YOU WANT and I don’t quite know how to measure mine to ensure I get the right rims. YOU PLACE A STEEL RULE ON THE TIP OF THE OUTER INSIDE SAFETY ROLL ON THE RIM AND MEASURE DOWN TO THE BACK OF THE CENTRE IN LINE WITH THE STUD/BOLD HOLES ( THE PEOPLE YOU GET TO BUILD THE WHEELS CAN HELP WITH THIS MEASUREMENT ) Any advice here would be appreciated. I would love to duplicate what you have done with your Desoto rims.
 (_5314.jpg) (_5314.jpg)
 (_5317.jpg) (_5317.jpg)
 (13_5794.jpg) (13_5794.jpg)
 (13_5817.jpg) (13_5817.jpg)
 (13_5840.jpg) (13_5840.jpg)
 (13_5844.jpg) (13_5844.jpg)
 (13_5847.jpg) (13_5847.jpg)
 (137_5973.jpg) (137_5973.jpg)
 (137_6071.jpg) (137_6071.jpg)
 (137_6121.jpg) (137_6121.jpg)
 (06052011006.jpg) (06052011006.jpg)
 (12052011033.jpg) (12052011033.jpg)
Attachments
----------------
_5314.jpg (115KB - 265 downloads)
_5317.jpg (110KB - 257 downloads)
13_5794.jpg (115KB - 257 downloads)
13_5817.jpg (115KB - 261 downloads)
13_5840.jpg (121KB - 257 downloads)
13_5844.jpg (119KB - 269 downloads)
13_5847.jpg (125KB - 265 downloads)
137_5973.jpg (114KB - 275 downloads)
137_6071.jpg (106KB - 300 downloads)
137_6121.jpg (111KB - 259 downloads)
06052011006.jpg (59KB - 248 downloads)
12052011033.jpg (78KB - 255 downloads)
|
|
| |
|
Expert
Posts: 1730
Location: Michigan | Hey, Bob thanks for the post. A bit more than I can handle but at least I know what is required. I am curious about the way you added metal to the frame at the body (?) mount points. Was that to strengthen the frame or another reason?
It looks like you moved the body mounts up higher on the frame? Or was that an optical illusion? Pics 13_5794 and 13_5817.
Your springs are integrated into the frame. Mine are on the outside of the frame. I could move the springs inboard on the frame. Give me say... 3 more inches for tires? That would be an interesting mod...
Edited by Beltran 2013-01-20 5:27 PM
|
|
| |
|
Elite Veteran
Posts: 1120
Location: Brisbane, Australia | Beltran - 2013-01-21 7:25 AM
Hey, Bob thanks for the post. A bit more than I can handle but at least I know what is required. I am curious about the way you added metal to the frame at the body (?) mount points. Was that to strengthen the frame or another reason?
It looks like you moved the body mounts up higher on the frame? Or was that an optical illusion? Pics 13_5794 and 13_5817.
Your springs are integrated into the frame. Mine are on the outside of the frame. I could move the springs inboard on the frame. Give me say... 3 more inches for tires? That would be an interesting mod...
When I moved the springs into the chassis, the DOT engineer insisted that the frame be strengthened as shown. I added the extra sheet metal on top of the frame so it looked like it was original! Very observant, we did move them up a little so the body would clear the modified chassis. Moving the springs inboard would certainly give a couple of inches but 9" tyres might be a bit of a squeeze without tubbing the inner guards. |
|
| |
|
Location: North Australia | Mark, love your work, and the car, especially the engine. Top job. A couple of things of note on the first vid. The engine test stand is gold! The way it swayed when the engine RPM increased was mesmerising. The paper towel screwed into the ears is also a ripper. Safety first I say! I also have a couple of neighbors willing to help, like yours. They are of limited value though, having one hand and all (Mine also have one craw out of action with a glass of beer!). As far as the neighbors go ( the ones who don't drink beer), what the hell are they complaining about? an unmuffled Hemispherical V8 engine makes one of the sweetest sound in nature. Unapreciative buggers!
Top job mate.
Steve.
p.s. the marine spark plug leads/covers look neat.
|
|
| |
|
Expert
Posts: 1730
Location: Michigan | Thanks Steve. I had this check list of things to do and one was get the ear plugs. Well, as the moment approached I forgot to go over the list again and had to make due with what was on hand. Not being one to concern myself with wanting to impress, didn't consider the look of the tissue, until the video of course. Oh well. It is what it is.
The engine test stand is an idea from Hemi Haines. Look him up on you tube. Didn't really have dimensions to work with so I 'judged' it. Seems I needed a little more latteral support. It was unnerving at times. |
|
| |
|
Elite Veteran
Posts: 1120
Location: Brisbane, Australia | 60 Imp - 2013-01-21 9:25 PM
Mark, love your work, and the car, especially the engine. Top job. A couple of things of note on the first vid. The engine test stand is gold! The way it swayed when the engine RPM increased was mesmerising. The paper towel screwed into the ears is also a ripper. Safety first I say! I also have a couple of neighbors willing to help, like yours. They are of limited value though, having one hand and all (Mine also have one craw out of action with a glass of beer!). As far as the neighbors go ( the ones who don't drink beer), what the hell are they complaining about? an unmuffled Hemispherical V8 engine makes one of the sweetest sound in nature. Unapreciative buggers!
Top job mate.
Steve.
p.s. the marine spark plug leads/covers look neat.
Very observant Steve, had to go back to the vid to check it out for myself. Mark, I also love the paper towel Shrek ears! The engine stand is a very practical and cost effective device which also emphasizes visually the torque in that mighty hemi!!! Ha! Ha! |
|
| |
|
Walter passed away on Jul 29, 2014. We will miss you, Walt!
Posts: 5358
Location: Heaven Above (Formerly Oklahoma City,OK) | Mark, looking good, and great to see a '55 so near to going back on the road. I do have a question about your fuel pump. I plan on using a similiar pump on my '55 Dodge CRL with a pressure switch from the oil pressure port to trigger the electric fuel pump relay in the event of collision etc and the engine shuts down. How did you handle your electricl supply to the fuel pump? |
|
| |
|
Expert
Posts: 1730
Location: Michigan | Mine is a hard line from the ignition switch. Turn the key and it comes on. Interesting thought you have there. How are you going to manage that from oil pressure? When your engine is off there is no oil pressure so how will you get the pump to come on at all if the activation is tied to positive oil pressure? |
|
| |
|
Expert
Posts: 1730
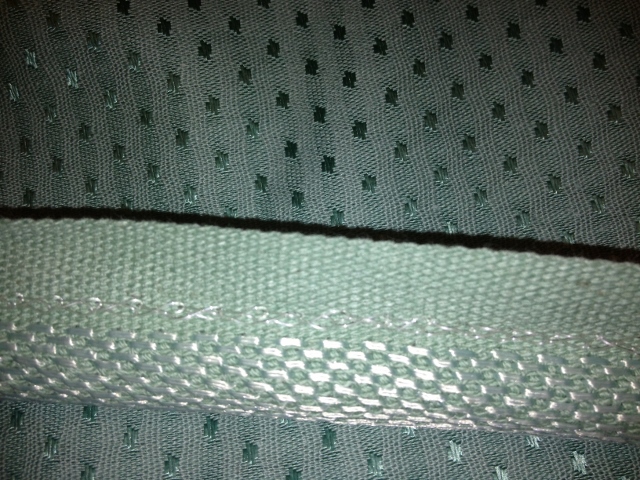
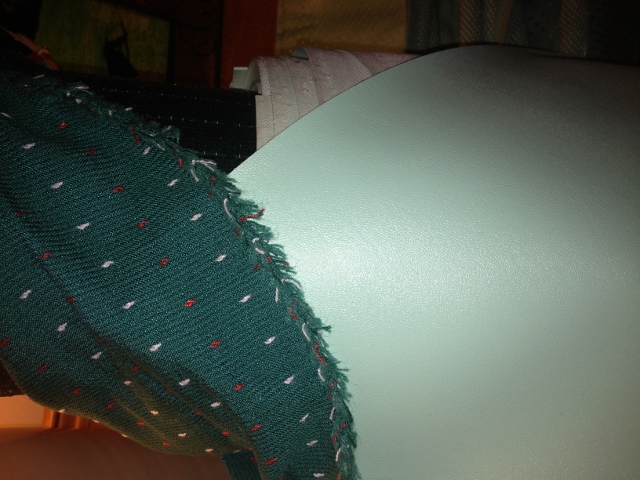
Location: Michigan | Well the supplies finally arrived from SMS today. Here are some shots of fabric and vinyl.
Headliner and the Windlace.
Seat Vinyl and fabric.
Now to decide on a shop to rework the seats.
Edited by Beltran 2013-03-06 7:27 PM
 (IMG_0903 (640x480).jpg) (IMG_0903 (640x480).jpg)
 (IMG_0905 (640x480).jpg) (IMG_0905 (640x480).jpg)
Attachments
----------------
IMG_0903 (640x480).jpg (245KB - 287 downloads)
IMG_0905 (640x480).jpg (184KB - 270 downloads)
|
|
| |
|
Expert 5K+
Posts: 8443
Location: Perth Australia | The oil pressure swith set up for the fuel pump is a must have to me
When you crank the engine, it will build up oil pressure and allow the pump to start.
The other thing is the carby should hold enough fuel for the initial start anyway.
the main reason for it is (god forbid) the car gets upside down, without an oil pressure cut out, the fuel pump will keep pumping fuel out the carby top
Not ideal
|
|
| |
|
Expert
Posts: 2788
Location: USA - KY | Beltran - 2013-03-06 7:25 PM
Well the supplies finally arrived from SMS today. Here are some shots of fabric and vinyl.
Headliner and the Windlace.
Congrats on the arrival of your supplies from SMS!
It's like Christmas!
They look good - hope you're pleased with them.
|
|
| |
|
Expert
Posts: 1730
Location: Michigan | Yes so far so good. I now need to decide on a shop to rework the seats. The first one I went to was full of heavy smokers. I was thinking, ya right, I am going to put my 1200 fabric and vinyl in this place for two weeks while you rework these seats and then live with cigarette smell in my car.... not. On to the next shop. |
|
| |
|
Expert
Posts: 1730
Location: Michigan | Michael, Thats a good safety feature. Going to have to share that setup once you figure it out. |
|
| |
|
Expert
Posts: 1730
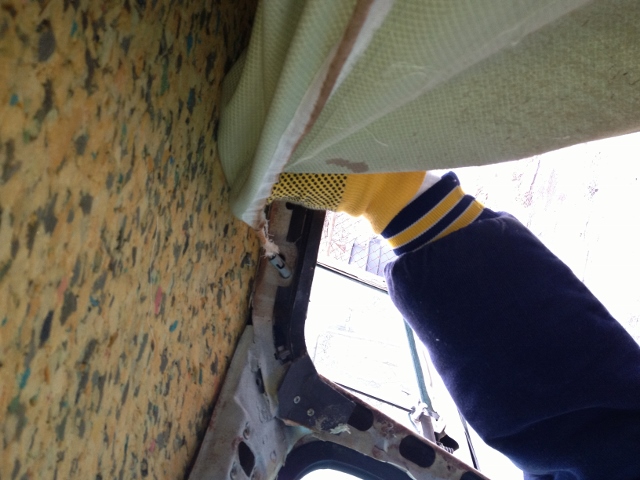
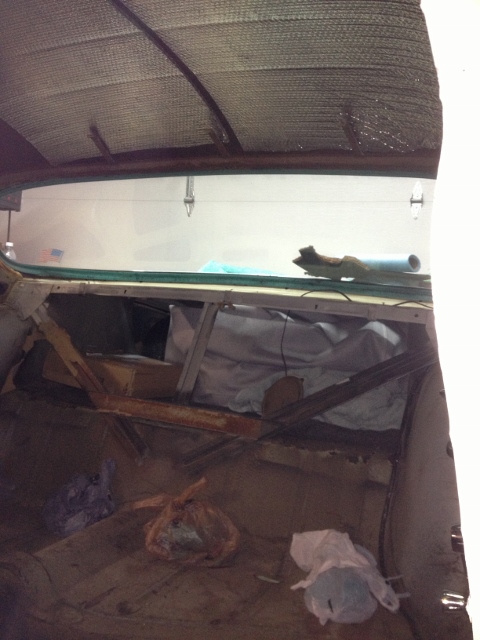
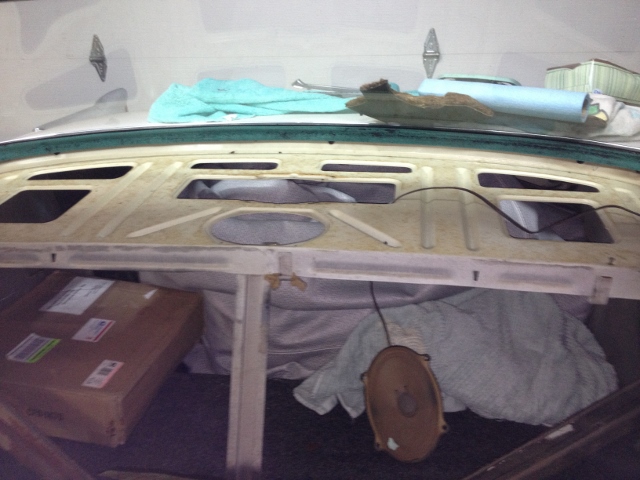
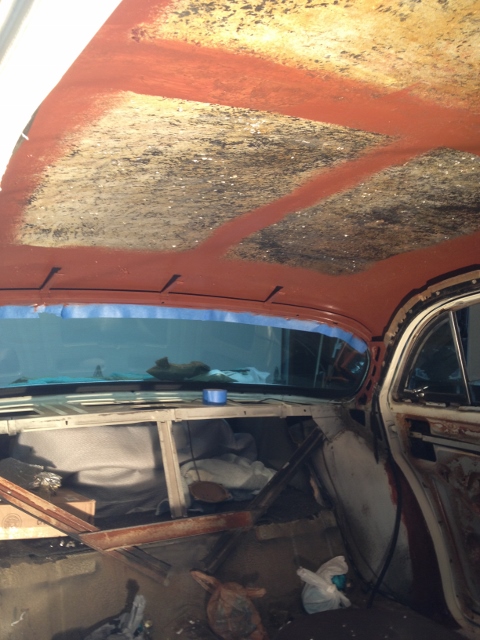
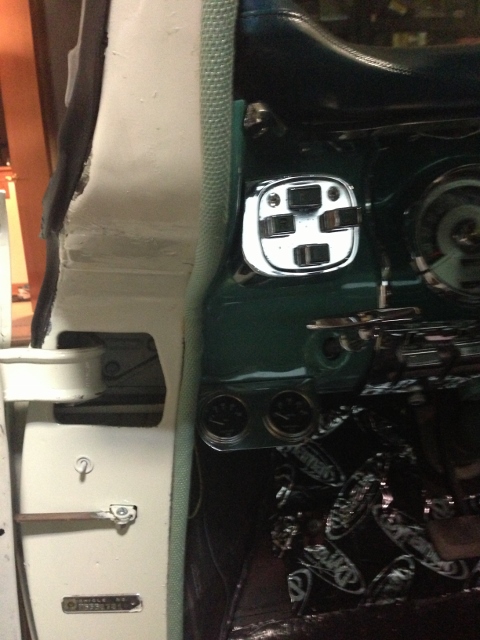
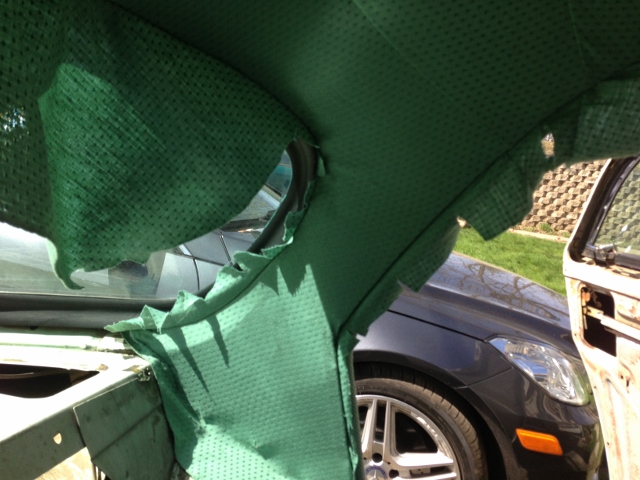
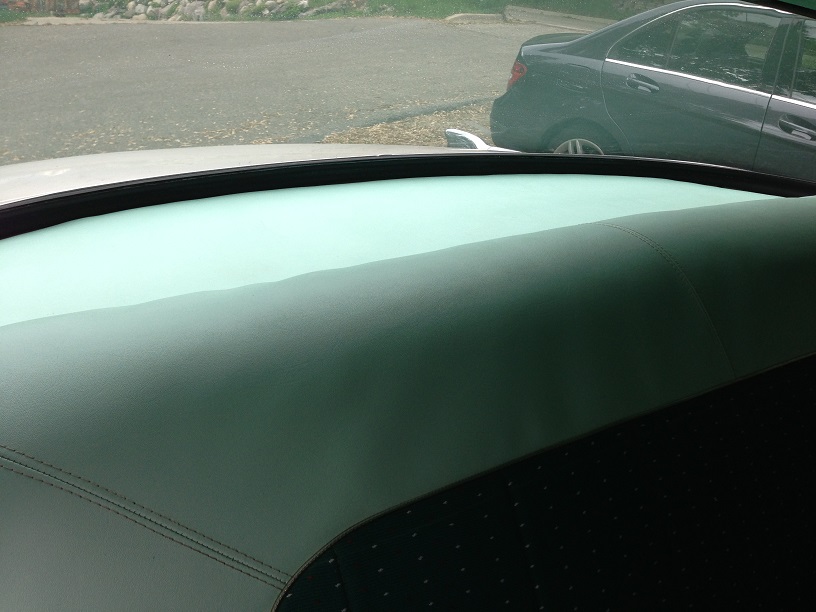
Location: Michigan | Ok the Seats and the fabric / vinyl are at the shop and hope to have them back by the end of April. I have the head liner down and noticed that this isn't the first time the head liner has been removed. Some old insulation is up there and a mouse nest. There were no holes so I have no idea how they got in there...
Now to decide how to clean it all up, rework a package tray and fix the painted rubber gasket around the rear window.
|
|
| |
|
Expert
Posts: 1730
Location: Michigan | Some overdue updates to the work effort.
Gutted the interior and cleaning up all the metal before putting in the new fabrics and lacing.
 (IMG_0944 (640x480).jpg) (IMG_0944 (640x480).jpg)
 (IMG_0945 (640x480).jpg) (IMG_0945 (640x480).jpg)
 (IMG_0947 (480x640).jpg) (IMG_0947 (480x640).jpg)
 (IMG_0948 (640x480).jpg) (IMG_0948 (640x480).jpg)
 (IMG_0949 (640x480).jpg) (IMG_0949 (640x480).jpg)
 (IMG_0950 (480x640).jpg) (IMG_0950 (480x640).jpg)
 (IMG_0952 (480x640).jpg) (IMG_0952 (480x640).jpg)
 (IMG_0953 (640x480).jpg) (IMG_0953 (640x480).jpg)
 (IMG_0955 (480x640).jpg) (IMG_0955 (480x640).jpg)
Attachments
----------------
IMG_0944 (640x480).jpg (165KB - 268 downloads)
IMG_0945 (640x480).jpg (198KB - 274 downloads)
IMG_0947 (480x640).jpg (162KB - 263 downloads)
IMG_0948 (640x480).jpg (230KB - 267 downloads)
IMG_0949 (640x480).jpg (164KB - 269 downloads)
IMG_0950 (480x640).jpg (126KB - 264 downloads)
IMG_0952 (480x640).jpg (186KB - 268 downloads)
IMG_0953 (640x480).jpg (144KB - 270 downloads)
IMG_0955 (480x640).jpg (171KB - 352 downloads)
|
|
| |
|
Expert
Posts: 1730
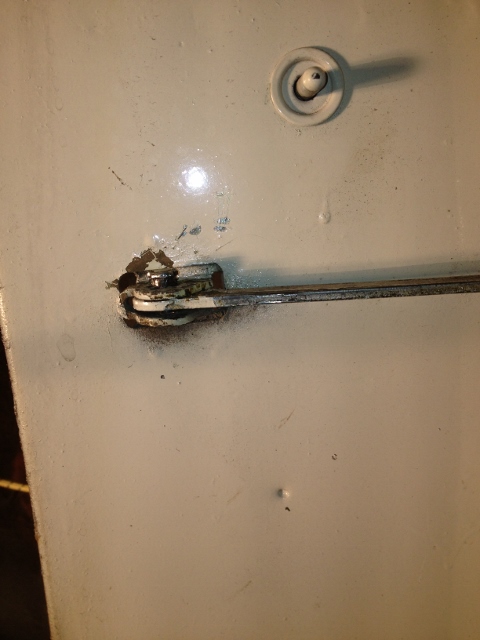
Location: Michigan | That pin holding the door catch on was the hardest part of taking the door off. Could not punch that through. Had to cut off the top and drive it down.
Each door will get cleaned, primed and then a layer of sound deadner and a complete re-moulding. |
|
| |
|
Expert
Posts: 1730
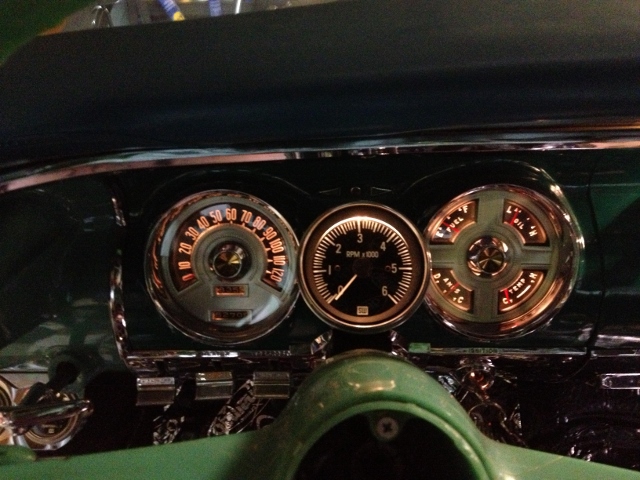
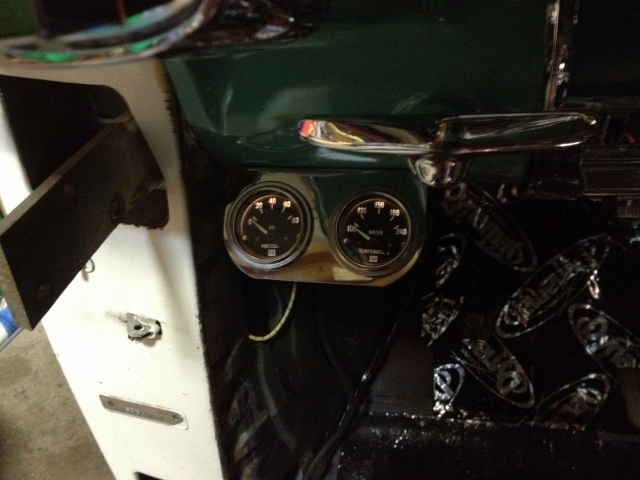
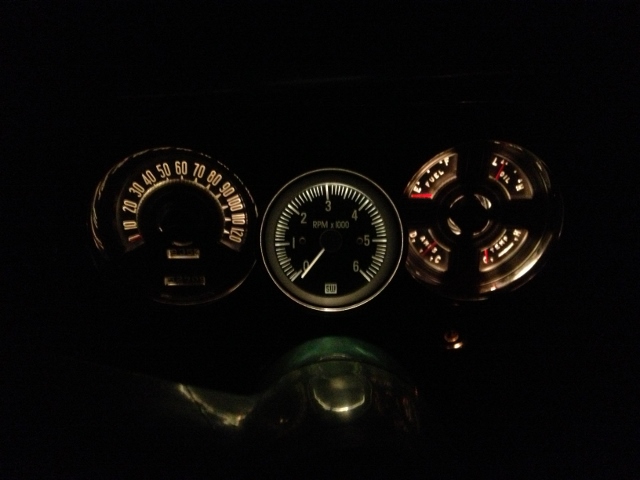
Location: Michigan | Made some progress this today. Got the new guages in, wired up and successfully modified my Stewart Warner Tach to fit into a Sun chrome cup so I can hide all the wiring.
 (IMG_0983 (640x480).jpg) (IMG_0983 (640x480).jpg)
 (IMG_0984 (640x480).jpg) (IMG_0984 (640x480).jpg)
 (IMG_0985 (480x640).jpg) (IMG_0985 (480x640).jpg)
 (IMG_0986 (640x480).jpg) (IMG_0986 (640x480).jpg)
Attachments
----------------
IMG_0983 (640x480).jpg (191KB - 264 downloads)
IMG_0984 (640x480).jpg (162KB - 270 downloads)
IMG_0985 (480x640).jpg (108KB - 263 downloads)
IMG_0986 (640x480).jpg (118KB - 254 downloads)
|
|
| |
|
Expert
Posts: 1730
Location: Michigan | So I have the windlace in now and the headliner hardware was cleaned up, painted and installed. On Sunday I will get my helper over here and we will put in the headliner. More pictures then. |
|
| |
|
Expert 5K+
Posts: 8443
Location: Perth Australia | What are you going to use for roof insulation?
I was thinking dynamat or simmilar for mine, just not sure about how well it will stay up
|
|
| |
|
Extreme Veteran
Posts: 537
Location: Upstate NY | Let me know the struggles and tricks to install a headliner. You have done such a good job with the rest I know you will end up with a good job. It seems like headliners and padded dashes are the jobs that are some of the most difficult, at least in the interior. How was the wind lace install and now did you attach it?
Thanks and a really nice car. Oh yeah, I also wanted to ask do you notice any difference between your oil gauge and the factory one? I always wondered how accurate they were. |
|
| |
|
Expert
Posts: 1730
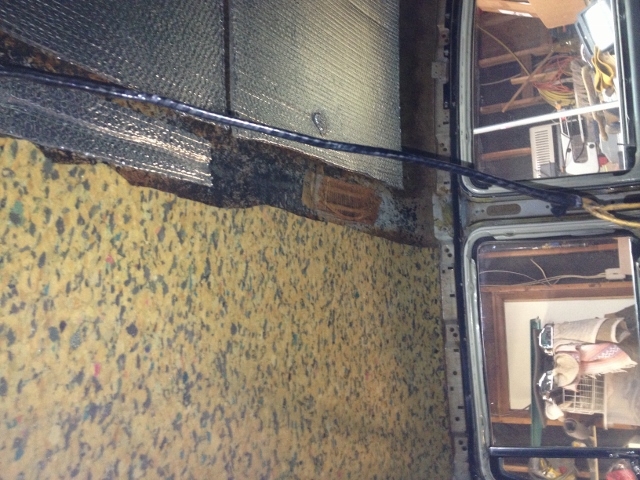
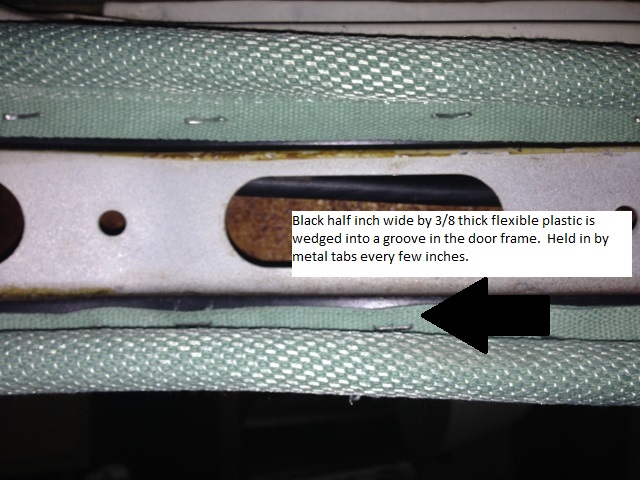
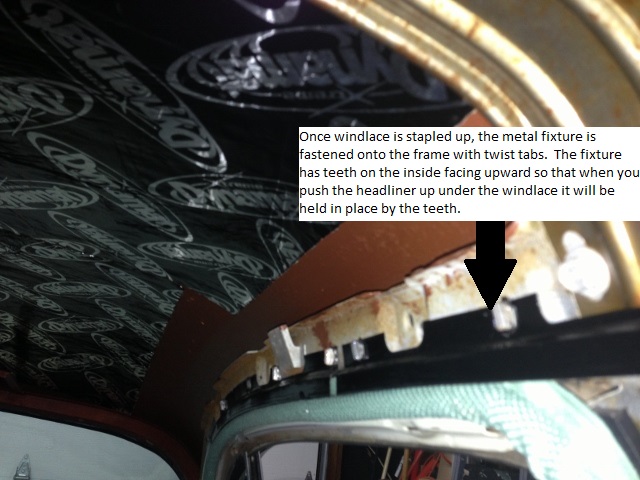
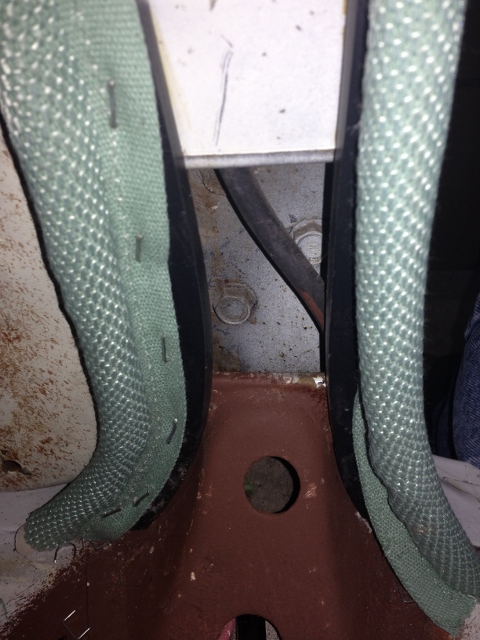
Location: Michigan | Well I wasn't gonna post these pictures but since your asking I guess I will. So the windlace is stapled to this flexible plastic runner. Amazing really given how old it is that it in such good shape. The staples go in it pretty well although I am only using a standard staple gun and I have to use a hammer to tap them in completely. They come out easily so if you need to make an adjustment you just use a pliers to pull the staple out and tack it again.
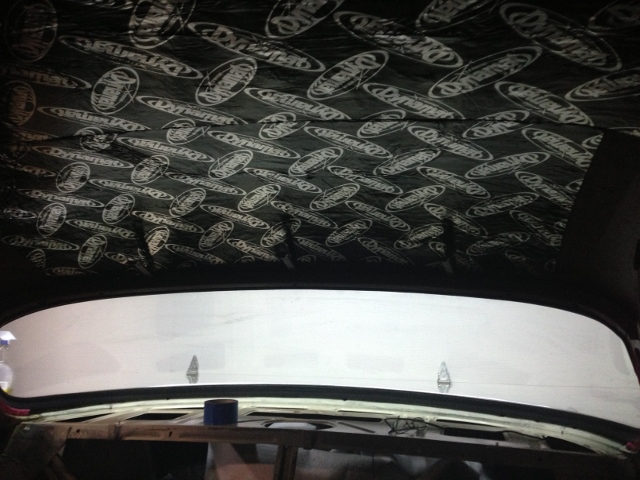
I used Dynamat all over the car. Bought the $300 box of 9 sheets and put it on the floor, ceiling, outer door panels (on the inside of course) and up the firewall as far as i could go given that the dash is already in. Considering the car never came with insulation up there it should make a big difference.
 (IMG_1003 (480x640).jpg) (IMG_1003 (480x640).jpg)
 (IMG_1005 (640x480).jpg) (IMG_1005 (640x480).jpg)
 (IMG_1006 (640x480).jpg) (IMG_1006 (640x480).jpg)
 (IMG_1008 (640x480).jpg) (IMG_1008 (640x480).jpg)
 (IMG_1007 (640x480).jpg) (IMG_1007 (640x480).jpg)
Attachments
----------------
IMG_1003 (480x640).jpg (166KB - 352 downloads)
IMG_1005 (640x480).jpg (131KB - 266 downloads)
IMG_1006 (640x480).jpg (124KB - 261 downloads)
IMG_1008 (640x480).jpg (177KB - 347 downloads)
IMG_1007 (640x480).jpg (180KB - 363 downloads)
|
|
| |
|
Expert
Posts: 1730
Location: Michigan | Note the Dynamat is very sticky and doesn't have any problem adhering to the roof.
As far as the oil guages go I haven't got to compare them much yet, but 60 PSI is at the higher end of the 'range' of the stock oil pressure guage. Once the engine was warmed up, at idle I would have just under 20psi and that would read on the lower end of the 'range' of the stock guage. I am running Brad Penn Break in oil at the moment. Can't remember the viscosity rating of that you need to consider that as well. |
|
| |
|
Expert 5K+
Posts: 8443
Location: Perth Australia | Thanks for the dynamat info Beltran
I was just thinking, as your doing the interior, are you going for strict orriginality?
If so, dont forget to throw (carelessly) a few items on the floor to be covered by the carpet and found again in 50 odd years
|
|
| |
|
Extreme Veteran
Posts: 537
Location: Upstate NY | Yes, great info. The wind lace looks really good. I will have to use the insulation too. Thanks a lot. |
|
| |
|
Expert
Posts: 1730
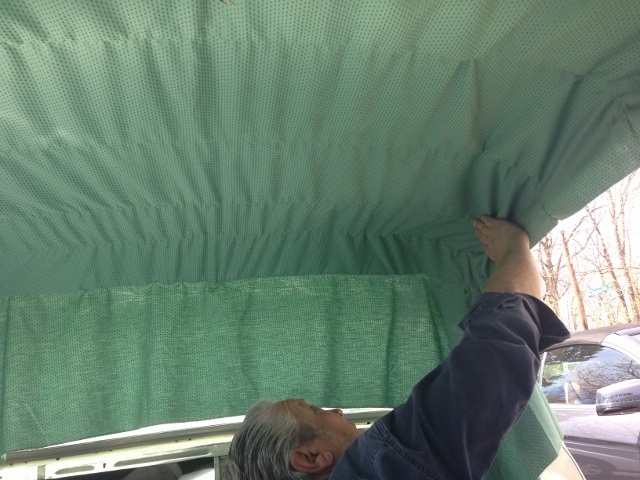
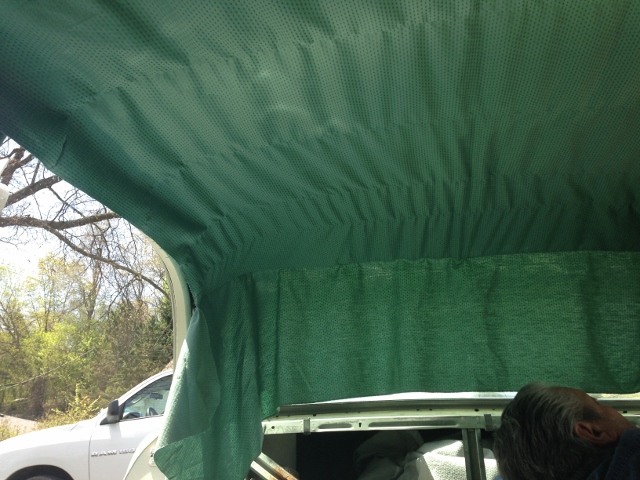
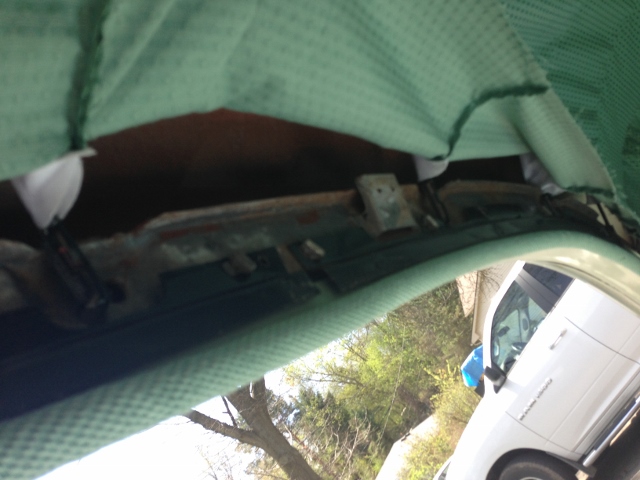
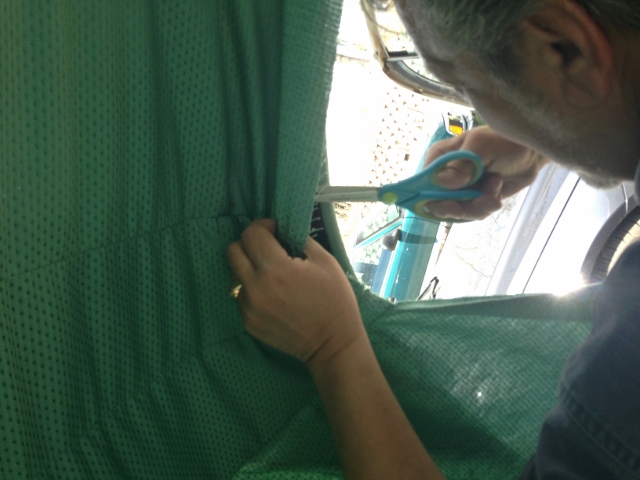
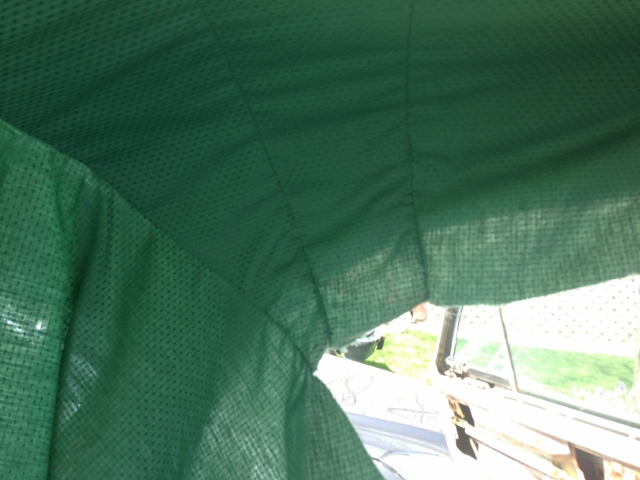
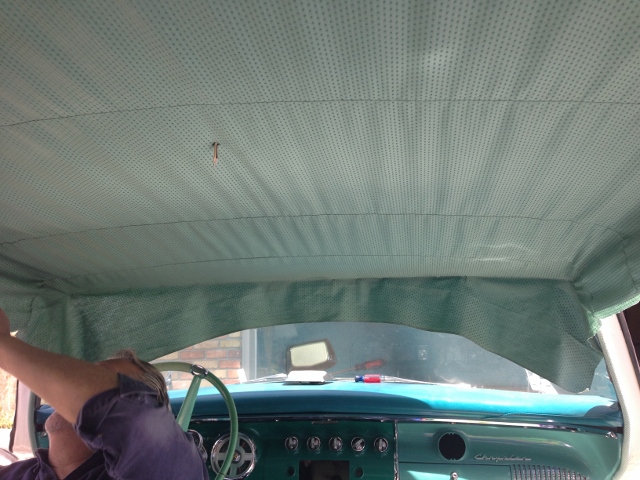
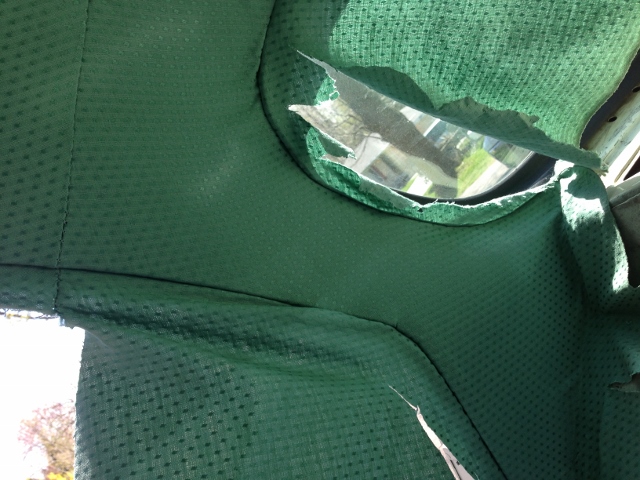
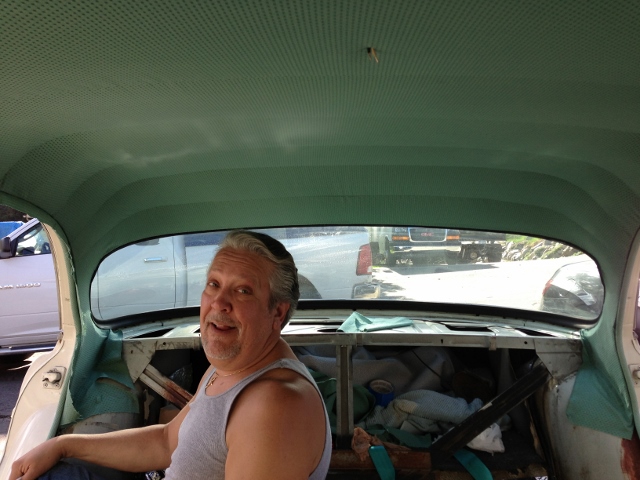
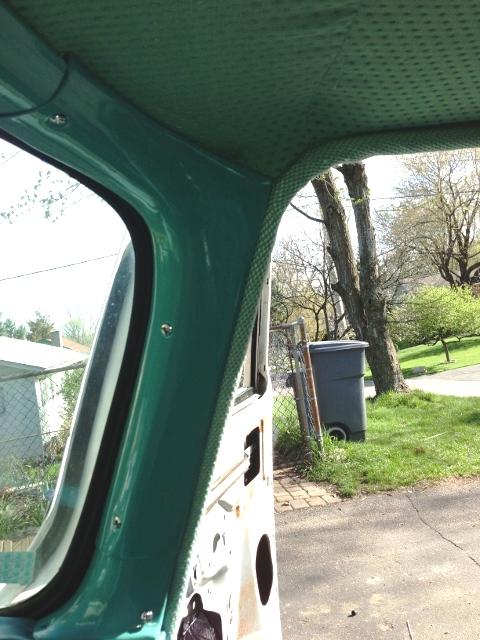
Location: Michigan | So the headliner went in this weekend and here are the snapshots of the process.
1) Bows are in the sleaves and the headliner is hung up in the car and spread evenly across the roof.
2) couple of views of the bows holding the headliner up.
3) The glue I used to tack the front and rear of the headliner to keep it in place against the fabric hooks.
4) Trimming the sleaves to allow the headliner to be stretched to its fullest and remove the wrinkles.
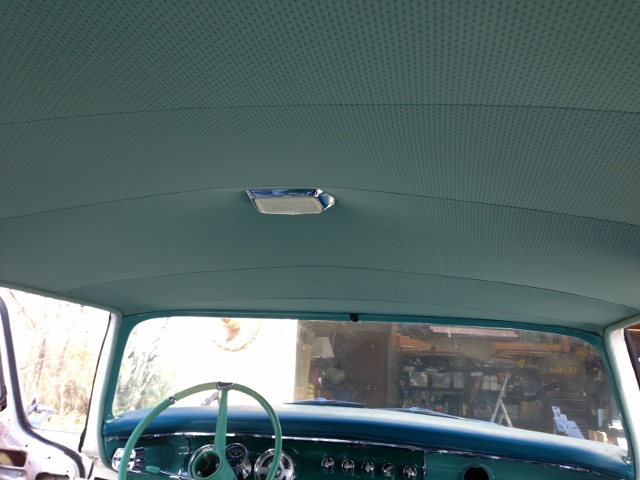
5) Headliner with less wrinkles!
6) Located the dome light wires and cut a small hole for them to hang out.
7) view of the sides of the C pillars. Spent a bit of time here getting this to look good.
8) Job Done! My coach and former line worker that put cuda headliners in the vehicle in 4 car lengths... took us 4 hours! Well.. at least it looks nice after all that time.
Edited by Beltran 2013-05-06 11:31 PM
 (IMG_1009 (640x480).jpg) (IMG_1009 (640x480).jpg)
 (IMG_1010 (640x480).jpg) (IMG_1010 (640x480).jpg)
 (IMG_1012 (640x480).jpg) (IMG_1012 (640x480).jpg)
 (IMG_1014 (640x480).jpg) (IMG_1014 (640x480).jpg)
 (IMG_1016 (480x640).jpg) (IMG_1016 (480x640).jpg)
 (IMG_1017 (640x480).jpg) (IMG_1017 (640x480).jpg)
 (IMG_1019 (640x480).jpg) (IMG_1019 (640x480).jpg)
 (IMG_1020 (640x480).jpg) (IMG_1020 (640x480).jpg)
 (IMG_1022 (640x480).jpg) (IMG_1022 (640x480).jpg)
 (IMG_1023 (640x480).jpg) (IMG_1023 (640x480).jpg)
 (IMG_1025 (640x480).jpg) (IMG_1025 (640x480).jpg)
 (IMG_1026 (640x480).jpg) (IMG_1026 (640x480).jpg)
 (IMG_1028 (640x480).jpg) (IMG_1028 (640x480).jpg)
Attachments
----------------
IMG_1009 (640x480).jpg (195KB - 259 downloads)
IMG_1010 (640x480).jpg (195KB - 269 downloads)
IMG_1012 (640x480).jpg (153KB - 263 downloads)
IMG_1014 (640x480).jpg (141KB - 273 downloads)
IMG_1016 (480x640).jpg (260KB - 272 downloads)
IMG_1017 (640x480).jpg (139KB - 267 downloads)
IMG_1019 (640x480).jpg (141KB - 257 downloads)
IMG_1020 (640x480).jpg (188KB - 256 downloads)
IMG_1022 (640x480).jpg (193KB - 261 downloads)
IMG_1023 (640x480).jpg (174KB - 344 downloads)
IMG_1025 (640x480).jpg (168KB - 313 downloads)
IMG_1026 (640x480).jpg (167KB - 360 downloads)
IMG_1028 (640x480).jpg (167KB - 310 downloads)
|
|
| |
|
Expert
Posts: 2905
Location: little rock, AR | I'll bring my '60 Ply. right up. Great looking job!! |
|
| |
|
Elite Veteran
Posts: 1120
Location: Brisbane, Australia | It's starting to take shape now Mark!
and lookin good!!! |
|
| |
|
Expert
Posts: 1730
Location: Michigan | bah I went out there tonight and it has wrinkles again.. it stretched a bit it seems so I have to spend time tightning it up again. I was wondering if that would happen. |
|
| |
|
Expert 5K+
Posts: 8443
Location: Perth Australia | They should make headlining like heat shrink
Just heat it and its done
This is all fun I have yet to have
|
|
| |
|
Elite Veteran
Posts: 1120
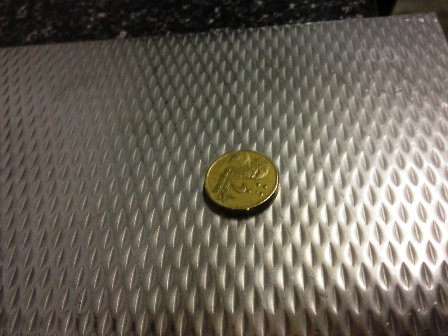
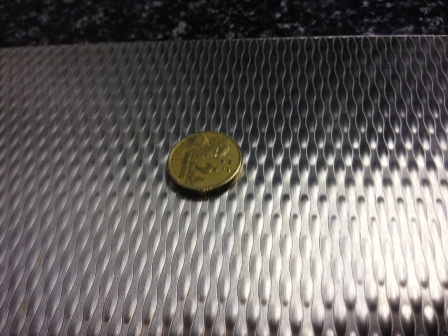
Location: Brisbane, Australia | Mark do either of these take your fancy?
I personally like 2
BTW one is the reverse side of two and the coin is about the size of a quarter
Edited by earleebob1 2013-05-22 7:22 AM
 (trans facia 1.jpg) (trans facia 1.jpg)
 (trans facia 2.jpg) (trans facia 2.jpg)
Attachments
----------------
trans facia 1.jpg (71KB - 269 downloads)
trans facia 2.jpg (73KB - 265 downloads)
|
|
| |
|

Expert 5K+
Posts: 9650
Location: So. Cal | Beltran - 2012-10-01 7:10 PM
...
Today's progress was moving the car into the garage because I got a letter from the township telling me that no inopperable vehicles are allowed to be kept outside of a closed building in our township. I have 7 days to comply or I will receive a 300-500 dollar fine. (mind you I can site several examples around the neighborhood, but someone in the back of the subdivision feels the need to complain because they drive by my house on their way home)
Tomorrow I am going to call the township and ask for a permit for a greenhouse. This will be erected on my driveway to be my second 'closed building'. I will also request a permit for a billboard to be placed facing the road in front of my house that says. 'to the asshat that complained to the township about my covered vintage car in my driveway. Hope you like the township approved view better now. "
I wanna see this greenhouse! Great work. |
|
| |
|
Expert
Posts: 1730
Location: Michigan | Bob, I agree number 2. I assume the package arrived?
Edited by Beltran 2013-05-23 6:57 PM
|
|
| |
|
Expert
Posts: 1730
Location: Michigan | The rims and tires came yesterday. They look great. Tomorrow I get a portion of my interior. The front and back seats I hope. Then I can get it to an exhaust shop to get that work done. Still working the front facia. But weather has been crappy and I haven't been able to get out there and work on it... too many hours at work as of late. |
|
| |
|
Elite Veteran
Posts: 1120
Location: Brisbane, Australia | Beltran - 2013-05-24 8:56 AM
Bob, I agree number 2. I assume the package arrived?
number 2 it is
package arrived yesterday Friday and looks good to do the job I can do the final assembly on the doors now |
|
| |
|
Expert
Posts: 2312
Location: Arizona | I tried putting in a headliner once. What a clusterf#$^ that was. Had to take it to a pro to have them do it right. Your's looks great. |
|
| |
|

Expert 5K+
Posts: 7806
Location: Williams California | Your car is looking great, Mark!! Keep up the good work!!
---John |
|
| |
|
Expert
Posts: 1730
Location: Michigan | So I get the front end fully assembled and we are struggling with the hood. It doesn't seem to want to settle at the cowl when closed without pushing it down and the side to side alignment was off. Played with it quite a bit and finally got it to drop properly. When I got the cowl alignment right I still could not get the front of the hood to align to the fenders and fascia. Sat there and studied it for awhile and it came to me that the hood wasn't aligning because the fenders where off. Then it hit me. The whole front of the car is held on to the frame by two bolts. All that I needed to do was unloosen those two front crossmember bolts, use a crow bar to push it to the right a half inch and whala, the front end is right as rain. That car teaches me something new every week I swear.
Pictures coming soon. I also have my interior back. It's going to come together fast now. |
|
| |
|
Expert
Posts: 1730
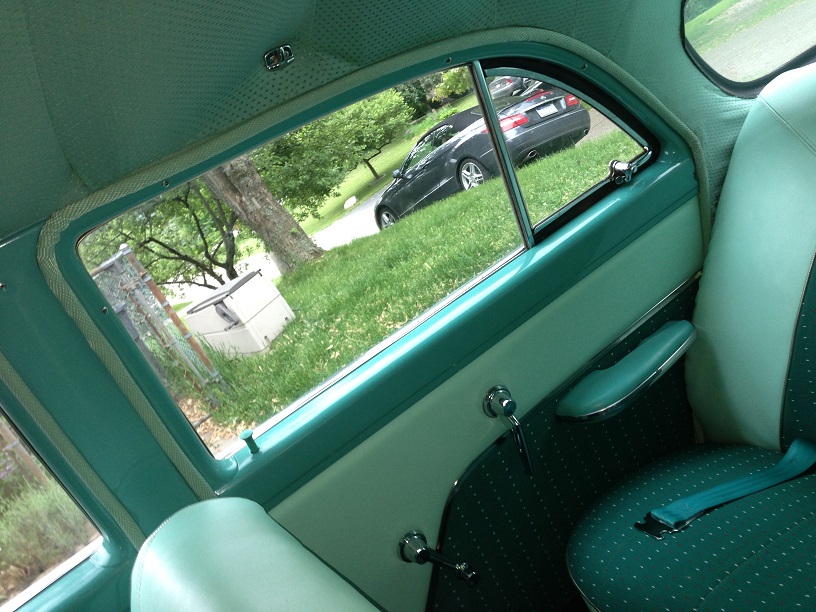
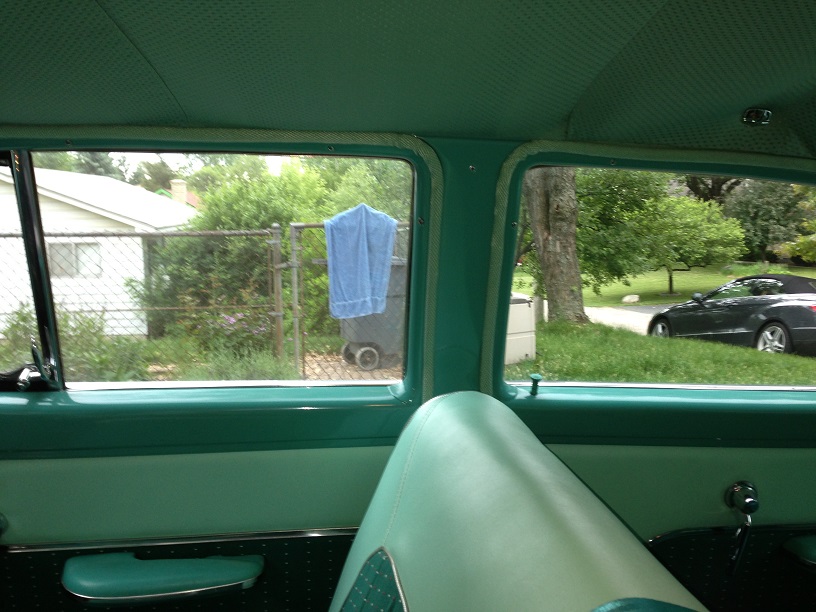
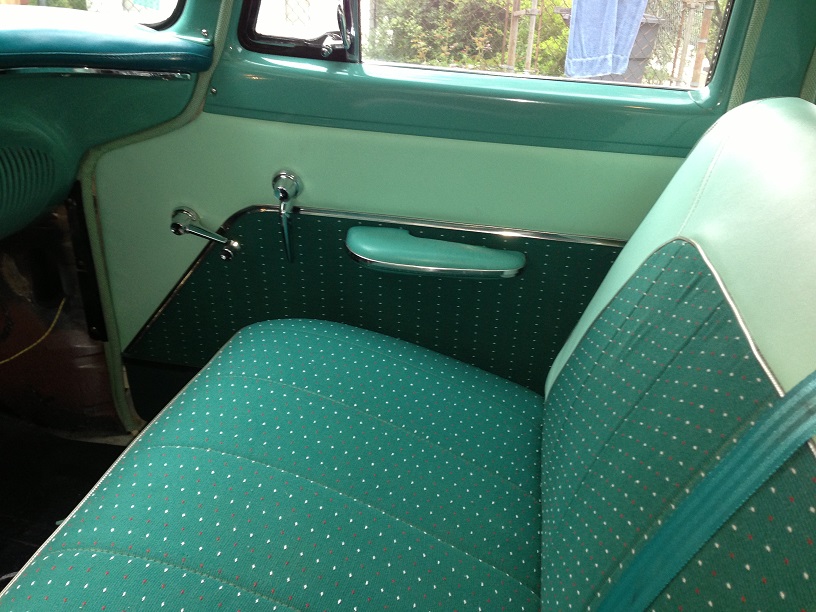
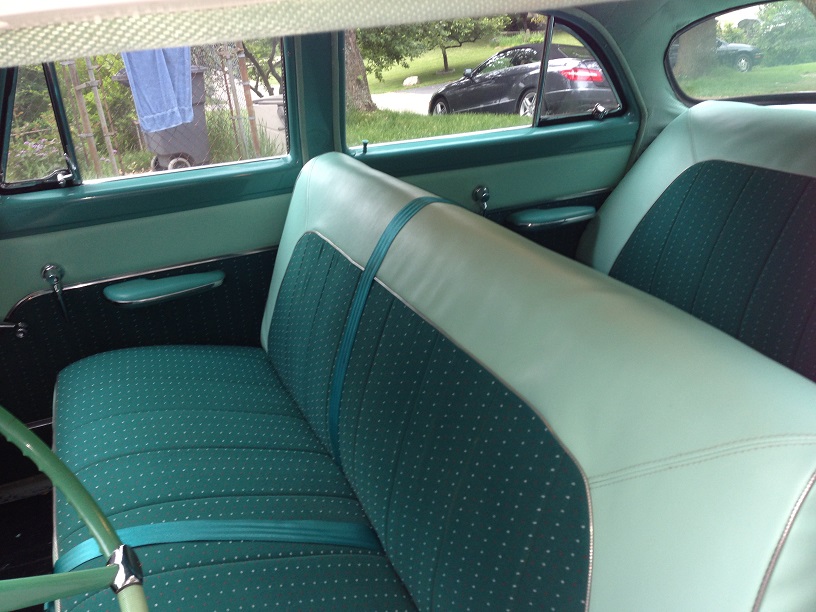
Location: Michigan | Got the interior Friday at 4pm.
Got it all in the car. Seats, Carpet, door panels, window trim in about 16 hours.
Also got the front end fully assembled on Saturday while I had my father and son to help with the hood.
I is tired....
 (IMG_1052.JPG) (IMG_1052.JPG)
 (IMG_1056.JPG) (IMG_1056.JPG)
 (IMG_1058.JPG) (IMG_1058.JPG)
 (IMG_1059.JPG) (IMG_1059.JPG)
 (IMG_1060.JPG) (IMG_1060.JPG)
 (IMG_1061.JPG) (IMG_1061.JPG)
Attachments
----------------
IMG_1052.JPG (213KB - 252 downloads)
IMG_1056.JPG (120KB - 244 downloads)
IMG_1058.JPG (200KB - 257 downloads)
IMG_1059.JPG (162KB - 248 downloads)
IMG_1060.JPG (188KB - 255 downloads)
IMG_1061.JPG (174KB - 332 downloads)
|
|
| |
|
Expert
Posts: 1730
Location: Michigan | And the head liner still needs work...argh. |
|
| |
|
Expert 5K+
Posts: 8443
Location: Perth Australia | It looks great
Is the headliner still stretching?
I still have mine sitting in a box and was thinking that pre stretching might be needed?
|
|
| |
|
Exner Expert 19,174 posts. Neil passed away 18 Sep 2015. You will be missed, Neil!
Posts: 19146
Location: bishop, ca | Looks great, Mark!
You sewed up the upholstery and installed it, yourself?
|
|
| |
|
Expert
Posts: 1730
Location: Michigan | Yes the head liner is still flexible. One of my bows came out as well. WTF... I have no idea how that happened. I have to carefully pull it down again and see what is going on.
I had John Pinkerton do the sewing of the seats and the door panels. The fabric and vinyl is SMS. I did the installation of course. |
|
| |
|
Expert
Posts: 2633
Location: Minor Hill, TN | Its getting there how much more you got to do? |
|
| |
|
Expert
Posts: 2788
Location: USA - KY |
Looking sooo beautiful, Beltran! That interior is a lovely colour.
Good luck with the headliner - it will get there with some persistence. I'm working on getting rid of some slack in my car's headliner too. It seems like a never-ending process. 
|
|
| |
|
Expert
Posts: 1730
Location: Michigan | Speaking of PITA Headliners... I laid there on my new seats staring up at my headliner thinking about what was wrong with it. Then I started pulling down the drivers side again to examine the bows. I realized that as the headliner progressed forward in the car the seams became off center of the bow mount points. This got progressively worse until the front bow (last of 7) is actually laying sideways and not supporting the headliner in a vertical fashion at all. I ... was vexed.
So pulled out the old one (I had not thrown it away) and measured the distance between seams. Although the SMS headliner is not exact it's close. I then measured the distance between the back window and the first seam. Ouch. The original was 5 inches from the window. The new one is currently 7 inches. /sigh. So now I have to hope that I have enough fabric at the front of the headliner to move it back at least an inch. Or... I must deal again with the dreaded SMS and purchase another headliner. Shoot me now please.... |
|
| |
|
Expert
Posts: 1730
Location: Michigan | Once I get the headliner sorted the interior is done. The horn ring went on tonight after I straighten out the steering wheel. Those 6volt horns are REALLY powerful with the 12 volt system.. wow! I think I could rank in a truck horn blowing contest.
I have an appointment at the custom exhaust shop Wednesday morning. Crossing my fingers that it goes well. worried about the conflict of my headers in relation to my turning radius...
Once I get it back from the exhaust shop the new rims will go on it and I have to sort out this little issue with my charging system. I have a powerful battery with one of those little health lights on it. They are supposed to be green but my turned orange and then went out completely. The battery still works and holds a good charge but the light is no longer working. (it did go back to green once after I let the car sit for a few weeks without using the engine or battery.) It doesn't seem to like my generator. Don't feel comfortable driving the car around for extended time periods without knowing what is going on there.
Then it's engine break in time and some more adventurous trips out and about town. So far the farthest I have been away from the house is 5 miles or so... to the hardware store. OH and that reminds me. I have to change the speedo gear in the new trans. It LIES! I am not doing 70 in a 45mph zone. Traffic would not all be going that fast. :P Then... I think I am ready for cruzing season.... less some small additions to the trunk I have to put in.. that stuff from Gary Goers that's been sitting in the loft for 6 months... but then.. then I will be ready... maybe. /ponders... |
|
| |
|
Expert
Posts: 2788
Location: USA - KY | Beltran - 2013-06-03 11:29 PM
...Shoot me now please....
I think we can all relate!  I've almost entirely lost the will to live during some of my attempts to get things "just right". I've almost entirely lost the will to live during some of my attempts to get things "just right".
But hang in there, Beltran!
As Ringo once said, "I've got blisters on me fingers.", but the music made it all worth while, just as your completed car will make it all soooooooooo worth while. 
|
|
| |
|
Expert
Posts: 1730
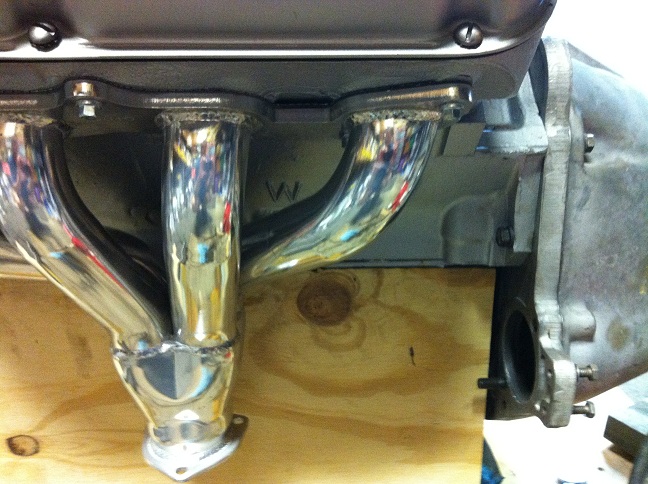
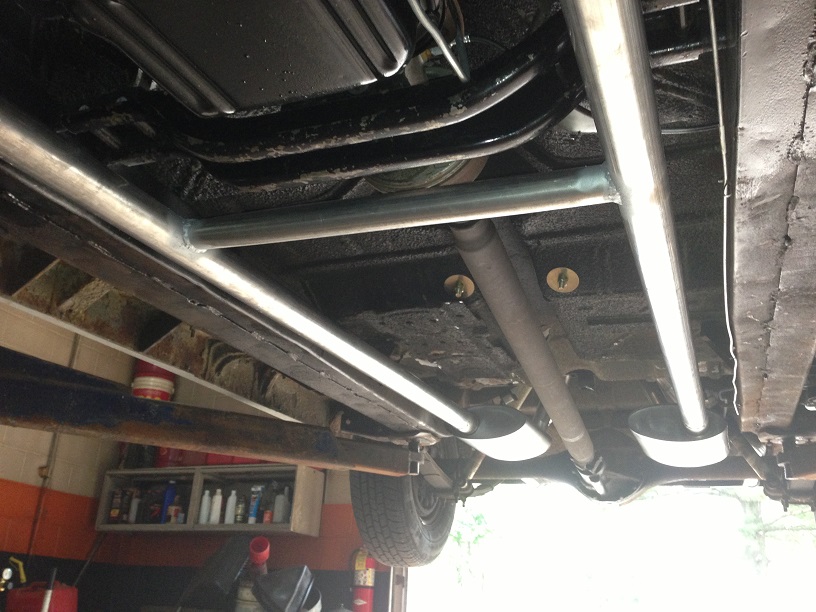
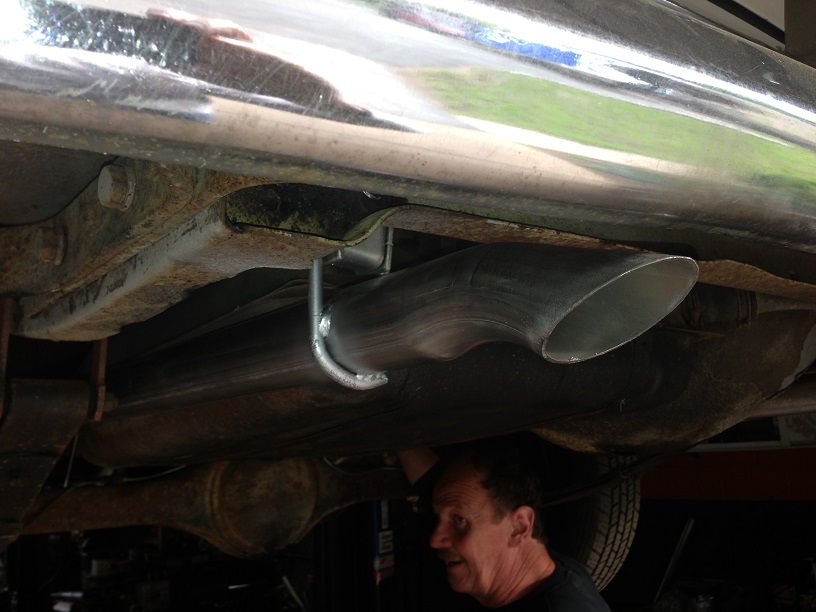
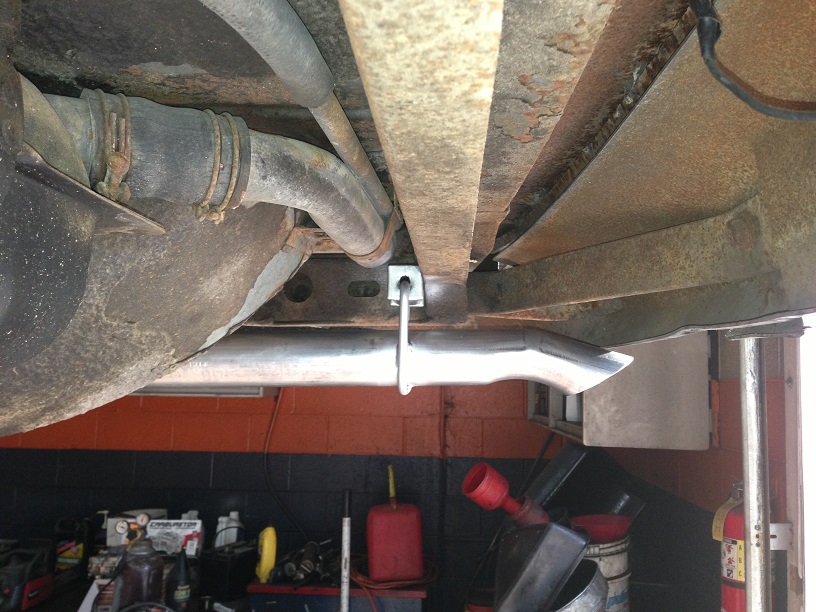
Location: Michigan | Penance is back in the garage. New exhaust is in! Barry of Barry's Ace Maintenance, Waterford, MI did a GREAT job. She sounds sweet with the Borla's on there and no more exhaust smell in the car!
The steering linkage binds a bit on the headers though. Not sure if I can adjust that in any way with an special Pitman Arm setup... anyone ever seen that done?
Edited by Beltran 2013-06-06 10:03 PM
 (IMG_1062.JPG) (IMG_1062.JPG)
 (IMG_1063.JPG) (IMG_1063.JPG)
 (IMG_1064.JPG) (IMG_1064.JPG)
 (IMG_1065.JPG) (IMG_1065.JPG)
 (IMG_1066.JPG) (IMG_1066.JPG)
 (IMG_1067.JPG) (IMG_1067.JPG)
Attachments
----------------
IMG_1062.JPG (182KB - 253 downloads)
IMG_1063.JPG (144KB - 243 downloads)
IMG_1064.JPG (169KB - 337 downloads)
IMG_1065.JPG (196KB - 252 downloads)
IMG_1066.JPG (127KB - 259 downloads)
IMG_1067.JPG (194KB - 245 downloads)
|
|
| |
|
Expert
Posts: 1730
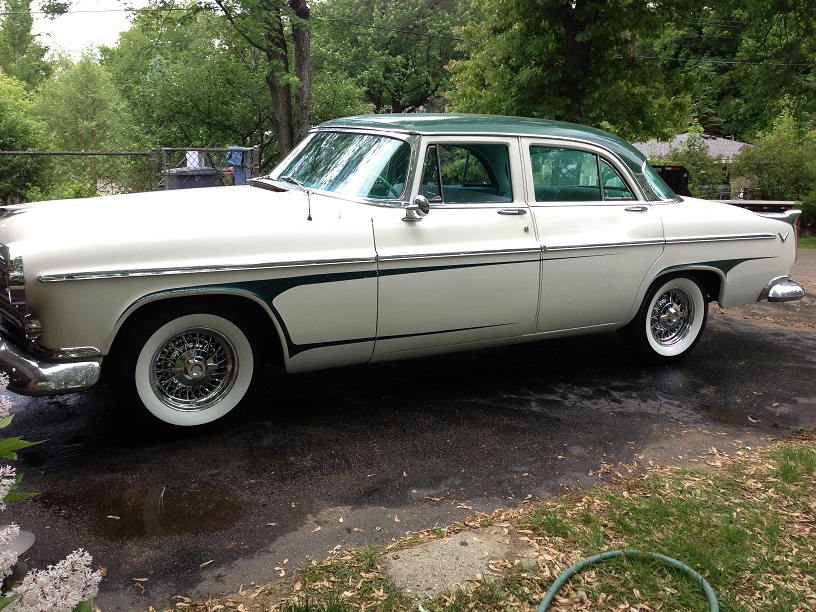
Location: Michigan | Well. Today was a fabulous day. I got the new tires and rims on Penance (after stripping a lug nut, really?? Why can't everything go right just once? ) and we went out for a little ride around town doing errands and lookin mighty fine. People were stopping and turning around to come and look at her while I was parked at one of my stops.
She's running well, starting kinda slow sometimes but always starting at least. Got to adjust the kickdown band? Really goes into second too quickly and then will not kick down at ANY speed into first. (I have a grandpa tranny... "you must save gas my child, you don't need that first gear"...BS!)
Here are some pics with the new treads. I am glad I spent the cash on those rims. Would not have been happy in the long run, if I had got something else.
Exhaust note recorded >>> http://www.youtube.com/watch?v=je7VoEMqAIs&feature=youtu.be
Edited by Beltran 2013-06-08 9:54 PM
 (IMG_1081a.jpg) (IMG_1081a.jpg)
 (IMG_1082a.jpg) (IMG_1082a.jpg)
 (IMG_1084a.jpg) (IMG_1084a.jpg)
 (IMG_1085a.jpg) (IMG_1085a.jpg)
 (IMG_1086a.jpg) (IMG_1086a.jpg)
Attachments
----------------
IMG_1081a.jpg (264KB - 245 downloads)
IMG_1082a.jpg (253KB - 242 downloads)
IMG_1084a.jpg (251KB - 249 downloads)
IMG_1085a.jpg (203KB - 242 downloads)
IMG_1086a.jpg (219KB - 251 downloads)
|
|
| |
|
Elite Veteran
Posts: 1120
Location: Brisbane, Australia | love it!!  |
|
| |
|
Location: North Australia | That looks sweet. Very nicely customised 55. Let us know how she runs out on the highway.
Steve. |
|
| |
|
Expert
Posts: 1730
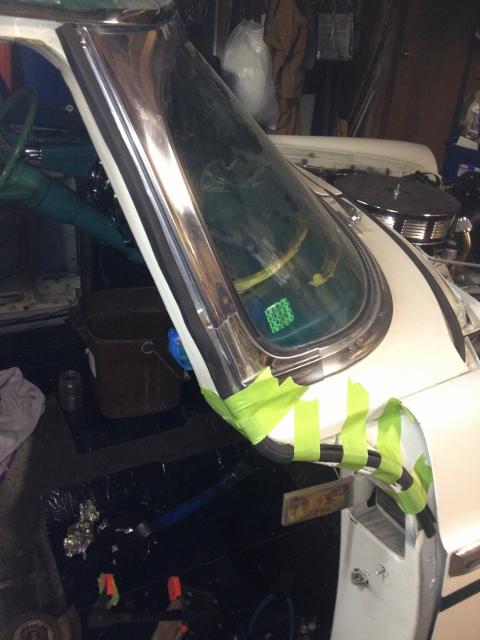
Location: Michigan | Well I have been enjoying the car a bit and taking her out for drives with the spouse. I am working on it a bit. I have a new windshield (windscreen which ever you prefer) coming. Will have Clarkston Glass install it for me. It was not easy to find this glass so I really hope it fits right. I also have SMS making me a new headliner. It seems the headliner pattern was off. The seams don't align with the bows. I pointed this out to the owner and well he shocked me. He offered to make me a new one and paid for the shipping to send my original to them so they could correct their pattern.
I was frankly.... pleased with SMS. I know, shocking isn't it. I mean, I got real customer service, I mean I was just blown away, no argument, no delay tactics and paid postage! I think my jaw darn near hit my desk. So I just got the email message from UPS that it's on its way across this great United States of America via ground and with no charge. /pause to read what I just wrote. Jaw darn near hit the desk again.
Oh please let it be right and fit the car this time. I would love to say something nice about SMS. I could get it in time to have a very late night headliner replacement party in the middle of Woodward Cruise week! I can DO THIS!!! I digress.
I sent the radio off to RPM to have it rebuilt for 12v and modern AM / FM / AUX inputs. Although I won't have it back for the cruise it will be a fall project to get the sound system in.
Oh I almost forgot to mention I got the 3sp trans from Mike. It still has issues to resolve but I won the 1 month battle with UPS to only pay $188 bucks for Ground shipping instead of $540 for Freight shipping. Driver screw up and no authorization for the change means UPS has to eat it. This darn trans is expensive... and if I am not careful it's going to rival the cost of my engine rebuild... |
|
| |
|
Expert
Posts: 1730
Location: Michigan | Update. The headliner arrived from SMS and I have to find some time to take down the bad one and put up this new one. I hope it was corrected. Going to be a lot more careful with this and make sure it is in alignment from back to front before cutting anything.
The glass got to the shop and today's appointment didn't go well. Have to get a new gasket. Gary Goers to the rescue. Should be here by end of week. Next week we try again.
RPM has the radio and they are rebuilding it.
Got the 3sp trans pump to stop binding when tightened down and got the rear drum setup and parts for the cable control on the way. Short of a torque converter and a good cleaning I think I have what I need.
|
|
| |
|

Expert
Posts: 3393
Location: Chestertown, NY ( near Lake George) | Boy all that looks familiar!! Regarding the trans issue, you can adjust the band but the shifting issue is a throttle linkage adjustment for the early shift and no kickdown, let me know if you need advice on this. |
|
| |
|
Expert
Posts: 1730
Location: Michigan | I got it working ok for now. If I want to run it out in first gear I just use the push button to hold it in 1st until I want it to shift. Not all that often I do that anyway. |
|
| |
|
Expert
Posts: 1730
Location: Michigan | My parts came in from Australia (thanks Bob). Got some work left to do there but all winter to noodle it.
List for the winter :
- Axle goes into the shop for rework to a 2.94. Wednesday.
- Take out the headliner (again) and work with the wife to get it sewed up properly so it doesn't wrinkle.
- Get the door panels out and have the front two reworked to fit properly.
- Take off exterior chrome and get it to Muskegon to get reworked in February.
- Get the radio back this winter and take apart the dash to get it back in.
- Drop the trans by moving engine forward enough to get the bell housing detached. Not looking forward to this job.
- Get the new trans / torque converter in
- put the new rear axle in
- measure the drive shaft and get it rebuilt
- connect up the new 5 button trans interface and figure out how to get the control & bezel attached and have it look good at the same time.
- oh and install the speakers and amplifier inconspicuously in the car.
Just a small list...
- I almost forgot! Prep the exterior for PAINT. hmm. maybe 2015 before it sees the road again...
Edited by Beltran 2013-11-25 8:32 PM
|
|
| |
|
Expert
Posts: 1730
Location: Michigan | The Trans is finished and in the garage. The Axle gets rebuilt and gets picked up tomorrow. Need to get some spring perch's for it so I can move them to align with the springs and weld in place. |
|
| |
|
Expert
Posts: 1730
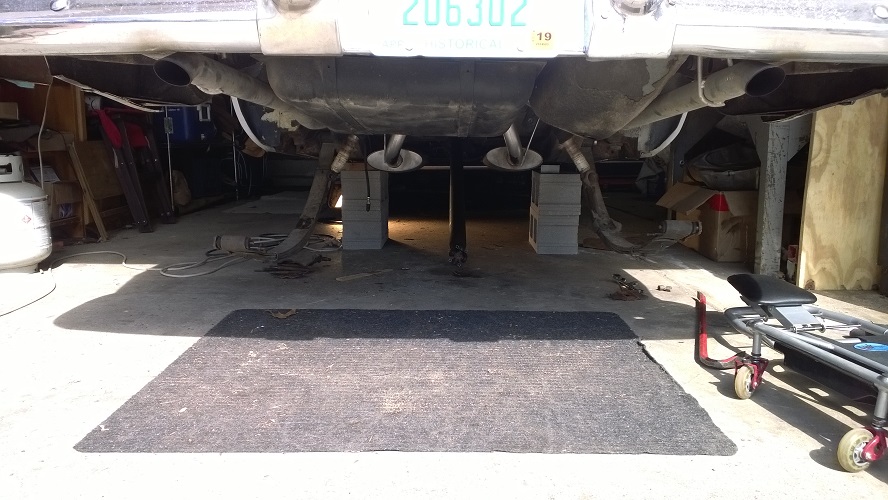
Location: Michigan | So the axle is back in the garage. but it's too freakin cold to work out there right now.
I do have a nice picture to post. This is of my daughter and I in Bayfield Canada last October on the way back from a show. We got stopped by an impromptu picture taking class that was being held out doors, in the rain. Anyway we got to play subjects for the class and I got some of the pictures that were taken.
 (2013 Bayfield impromtu shot 2b.jpg) (2013 Bayfield impromtu shot 2b.jpg)
Attachments
----------------
2013 Bayfield impromtu shot 2b.jpg (108KB - 274 downloads)
|
|
| |
|
Expert
Posts: 1730
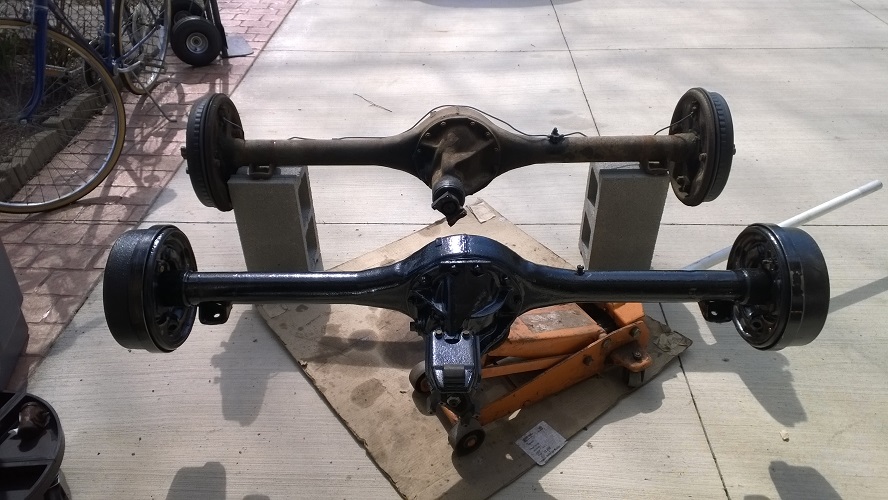
Location: Michigan | So I finally got started on this years project, updating the drivetrain.
Tasks.
1) update the rear axle to a 69 Plymouth Posi with 2.94 gears.
2) update the trans with a 3sp Castiron Torqueflite
3) covert the 4 button dash to a 5 button for the 3sp.
 (WP_20140510_002.jpg) (WP_20140510_002.jpg)
 (WP_20140510_001.jpg) (WP_20140510_001.jpg)
 (WP_20140510_003.jpg) (WP_20140510_003.jpg)
Attachments
----------------
WP_20140510_002.jpg (189KB - 271 downloads)
WP_20140510_001.jpg (195KB - 253 downloads)
WP_20140510_003.jpg (184KB - 273 downloads)
|
|
| |
|
Expert 5K+
Posts: 8443
Location: Perth Australia | With those drums on. is the rear wider or is it a trick on the eye?
|
|
| |
|
Expert
Posts: 1730
Location: Michigan | Trick on the eye. I thought that as well when I looked at the picture. |
|
| |
|
Expert
Posts: 1730
Location: Michigan | Got the 2sp out last night and put the 3spd in. Took about 3 hours. Not bad for the first time.
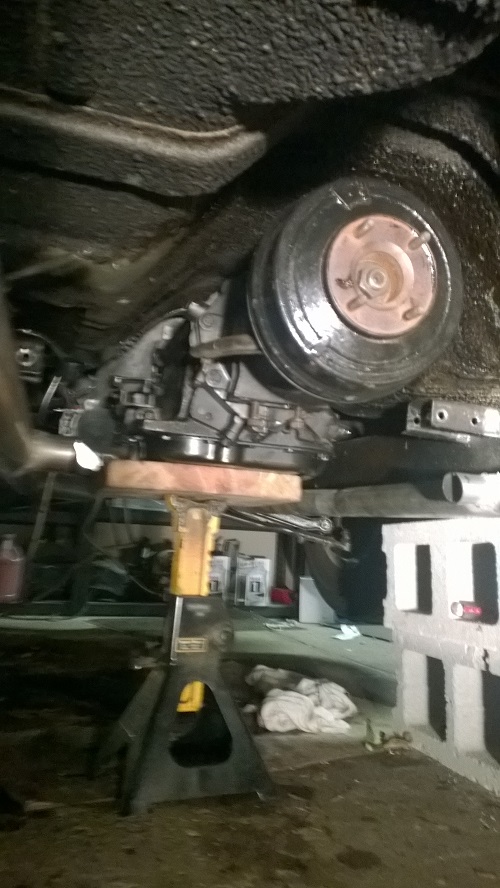 (WP_20140513_001.jpg) (WP_20140513_001.jpg)
Attachments
----------------
WP_20140513_001.jpg (175KB - 273 downloads)
|
|
| |
|
Expert
Posts: 1730
Location: Michigan | The new mount is in. Now working on connecting up the transmission.
 (WP_20140607_039.jpg) (WP_20140607_039.jpg)
Attachments
----------------
WP_20140607_039.jpg (264KB - 239 downloads)
|
|
| |
|

Expert
Posts: 1384
Location: Ocala, Florida | Nice work and nice car! |
|
| |
|
Veteran
Posts: 279
Location: Klein, TX | Great car and workmanship on your part. |
|
| |
|
Elite Veteran
Posts: 1120
Location: Brisbane, Australia | HI MARK I HAVE BEEN MEANING TO ASK HOW DID YOU GO GRAFTING THE 3 SPEED BUTTON ASSEMBLY INTO THE DASH
 (IMG_0811.JPG) (IMG_0811.JPG)
Attachments
----------------
IMG_0811.JPG (148KB - 272 downloads)
|
|
| |
|
Expert
Posts: 1730
Location: Michigan | I am not quite there yet Bob. It's in the box you sent and I am going to have to sit down and sort it out in the next week or so. It's one of those jobs I don't look forward too. I tend to save those for last as I have time to figure out how I am going to do it (waiting for divine inspiration...) while I move farther on the other things I have a plan for. Once I get those done then I am faced only with the job that I really didn't look forward too. But I will have come to far to back out so it will get done.
The things you have to do to challenge yourself as you get older... |
|
| |
|
Expert
Posts: 1730
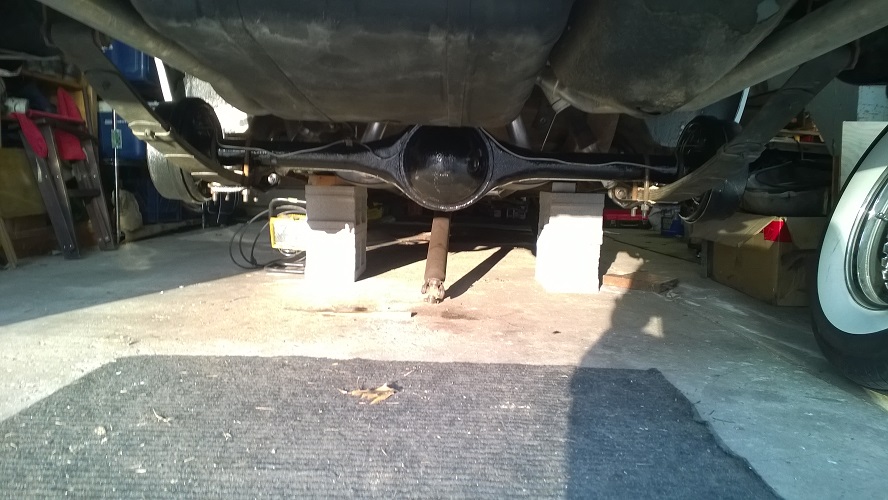
Location: Michigan | Tonight was draining the engine of coolant and fixing the header leaks. The silicone didn't hold up on some of the bolts so I cleaned them up and used PTFE this time. Tired of leaks!
I also got all my drive shaft measurements and will get that ordered tomorrow. (err today actually... it's late) . |
|
| |
|

Expert 5K+
Posts: 8947
Location: WHEELING,WV.>>>HOME OF WWVA | Marko , you keep usin cinder blocks like that , you might not be around long enough to finish that fine ride ----------------------------------------------later |
|
| |
|
Expert 5K+
Posts: 8443
Location: Perth Australia | Funny you say that Chuck, was going to surgest the same thing
Rotate them like they would be in a wall, they have absolutly no side streanth
|
|
| |
|
Expert
Posts: 2633
Location: Minor Hill, TN | very nice |
|
| |
|
Expert
Posts: 1730
Location: Michigan | Thanks for the tip. That isn't something I realized would be an issue. I am using a piece of wood between the car to spread the load and not scratch the frame. I figured these would be better than the jack stands they make these days that have about 3 inches of surface area in contact with the frame. I am always worried that the car could slide off the stand. |
|
| |
|
Elite Veteran
Posts: 1120
Location: Brisbane, Australia | GOOD ADVICE FROM cHUCK AND MICK
(hard to remember your original reason for draining the swamp when you"re up to your ass in alogators) |
|
| |
|
Expert
Posts: 1730
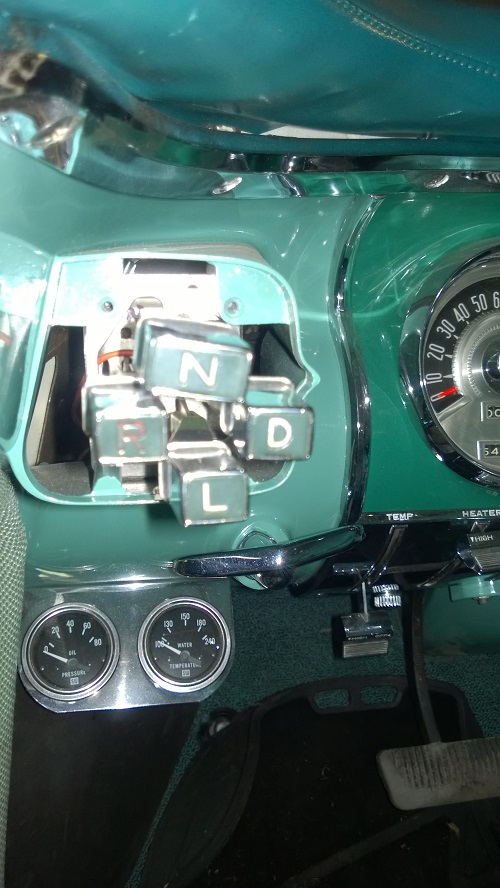
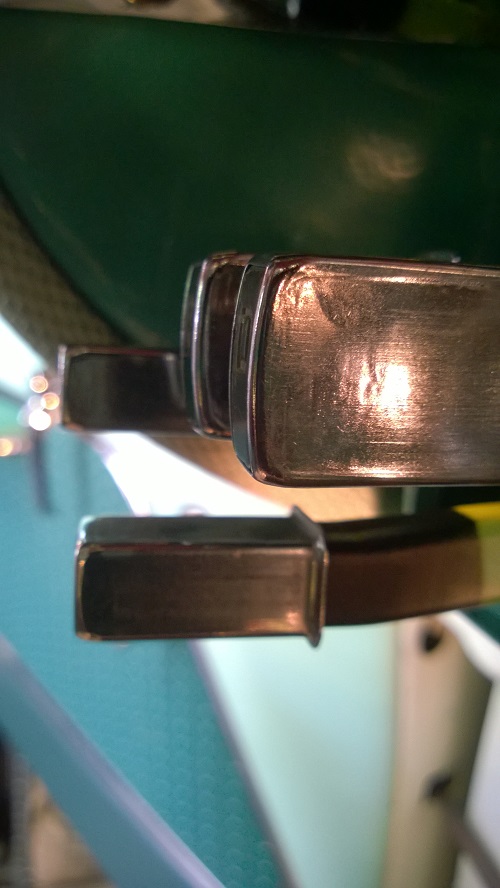
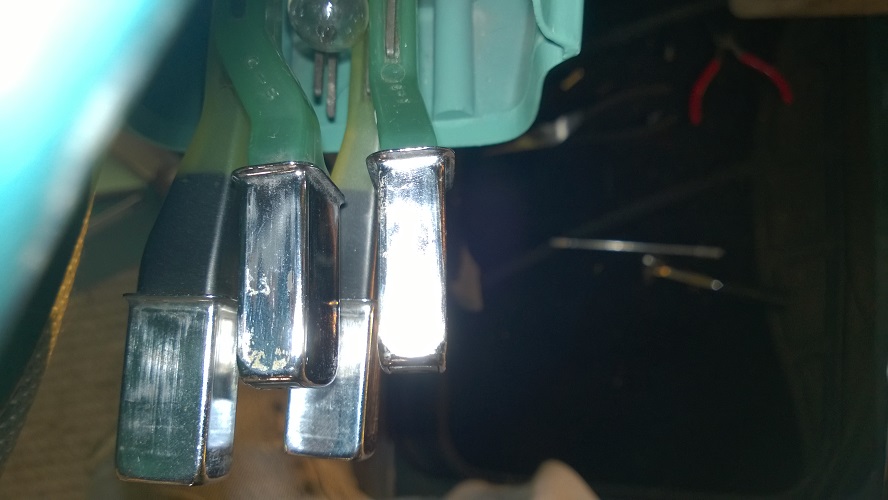
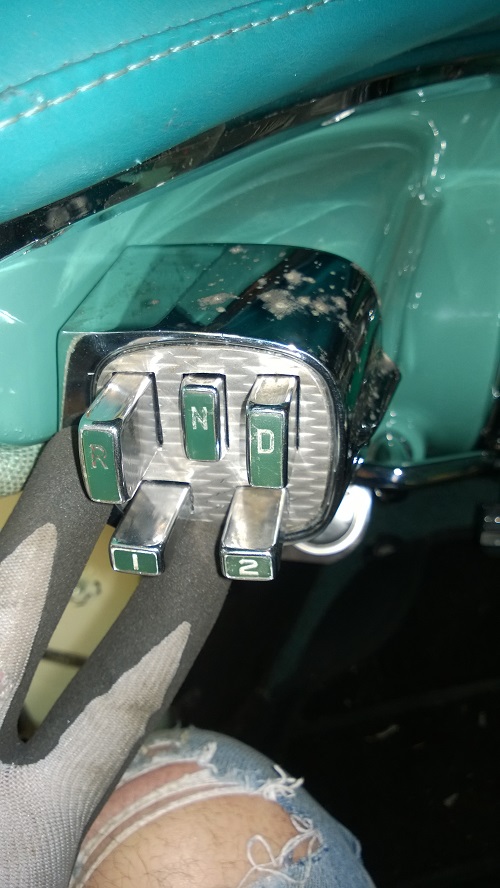
Location: Michigan | So I completed the shifter change this weekend. Had to be creative but It will work.
So the first pic is of the existing 4 position shifter without the cover on it.
I then realized that the 5 position unit in combination with the buttons came up a little short with the bezel in place... about 1/2 an inch.
So I came up with the idea to use flattened 5/16" steel tubing to extend the button arms.
 (WP_20140614_002.jpg) (WP_20140614_002.jpg)
 (WP_20140614_003.jpg) (WP_20140614_003.jpg)
 (WP_20140614_005.jpg) (WP_20140614_005.jpg)
 (WP_20140614_006.jpg) (WP_20140614_006.jpg)
 (WP_20140614_007.jpg) (WP_20140614_007.jpg)
 (WP_20140614_009.jpg) (WP_20140614_009.jpg)
Attachments
----------------
WP_20140614_002.jpg (169KB - 303 downloads)
WP_20140614_003.jpg (155KB - 226 downloads)
WP_20140614_005.jpg (130KB - 240 downloads)
WP_20140614_006.jpg (122KB - 254 downloads)
WP_20140614_007.jpg (148KB - 228 downloads)
WP_20140614_009.jpg (138KB - 299 downloads)
|
|
| |
|
Expert
Posts: 1730
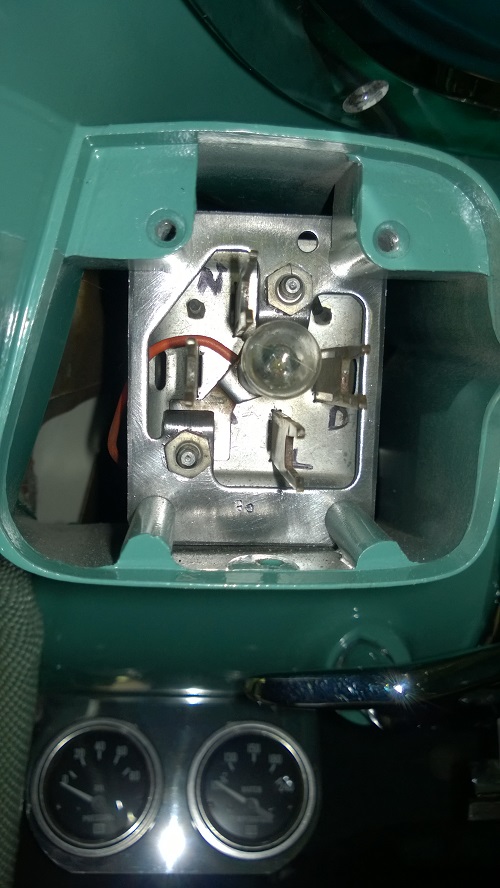
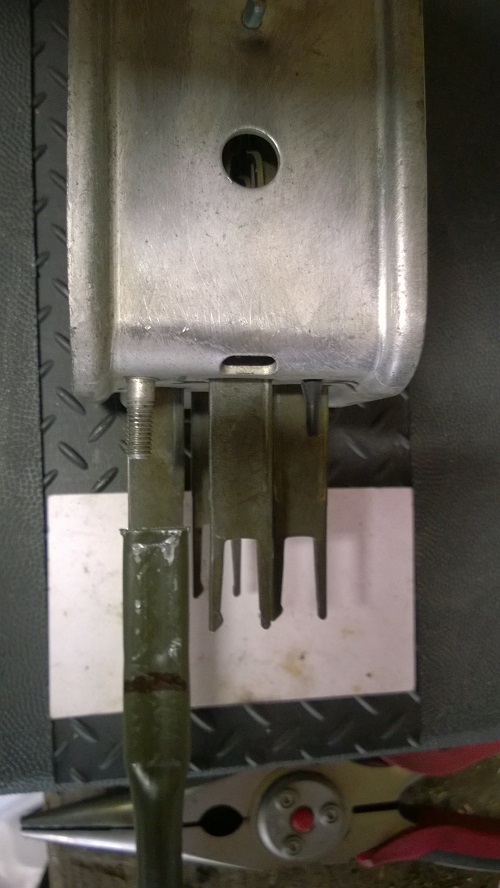
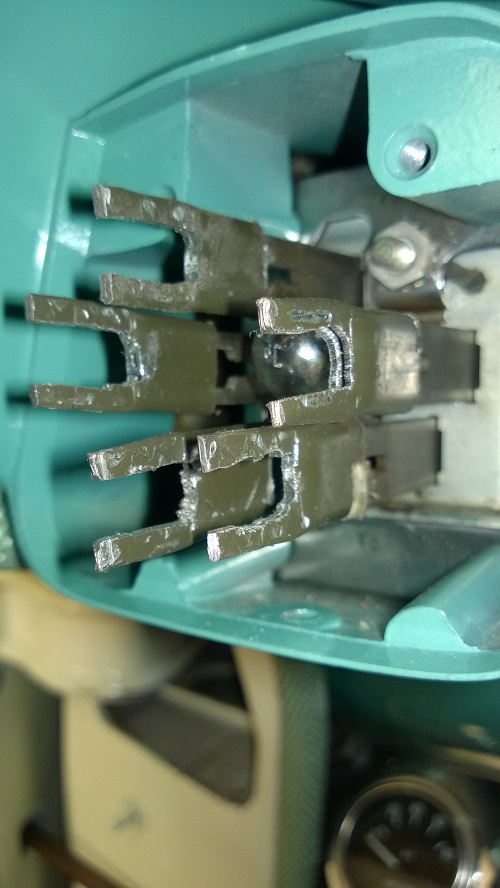
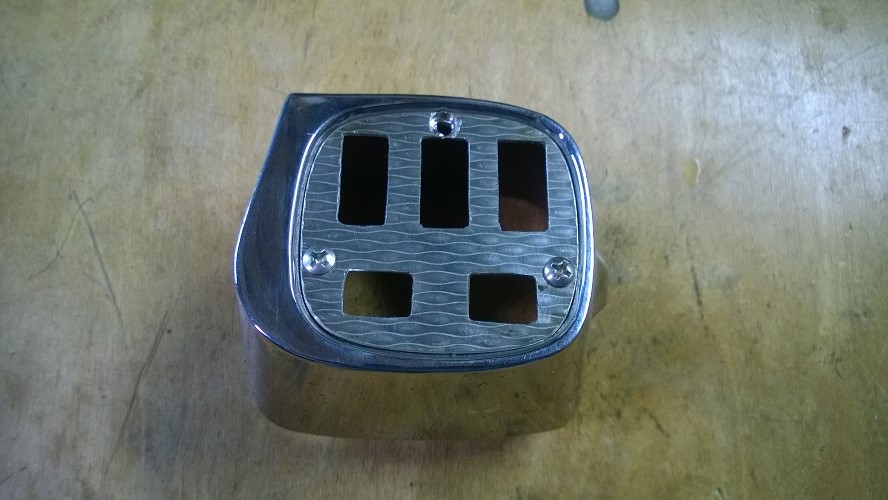
Location: Michigan | I thought it was interesting that the 57 3sp bolted right into the dash. The same plate from the 4 button fit with the 5 button. No modification needed. Talk about Forward Looking Engineering! That made it so much easier!
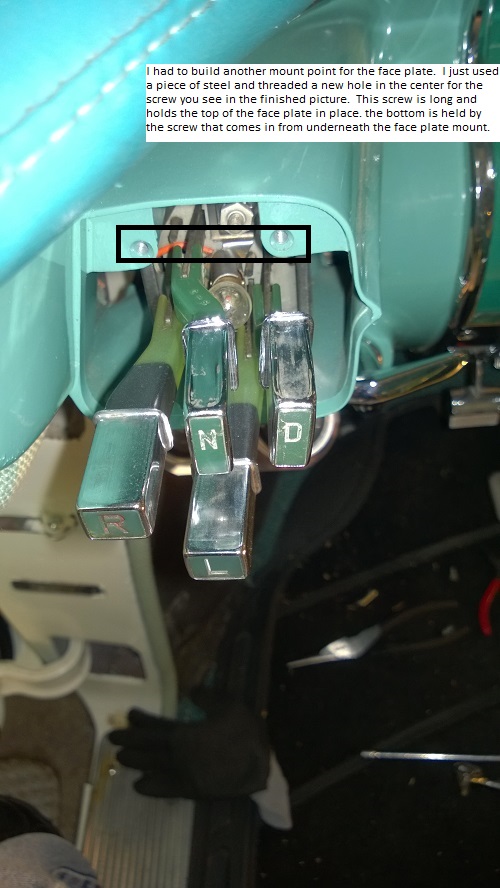
Once I got the buttons extended to the right length I was able to work on the face plate mount. This is where Earleebob's guys came in last year, modifying a face plate for me to use for this purpose.
I had to create a center mount point under the face plate to give it strength.
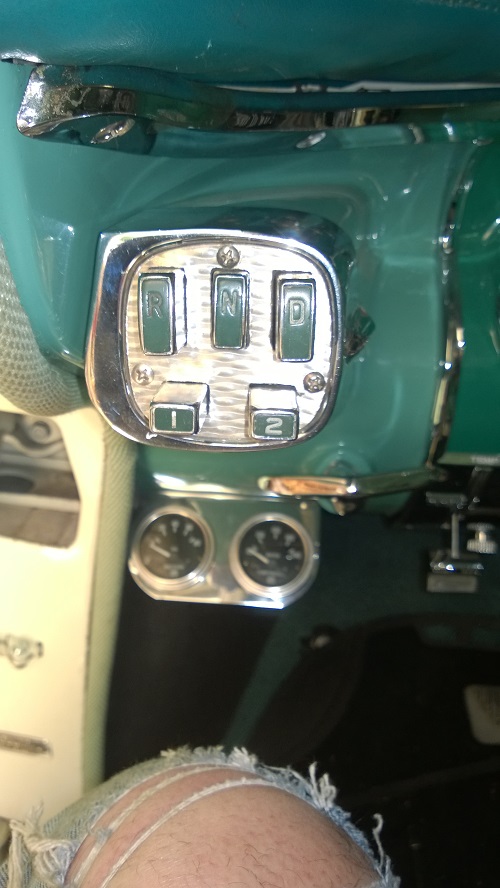
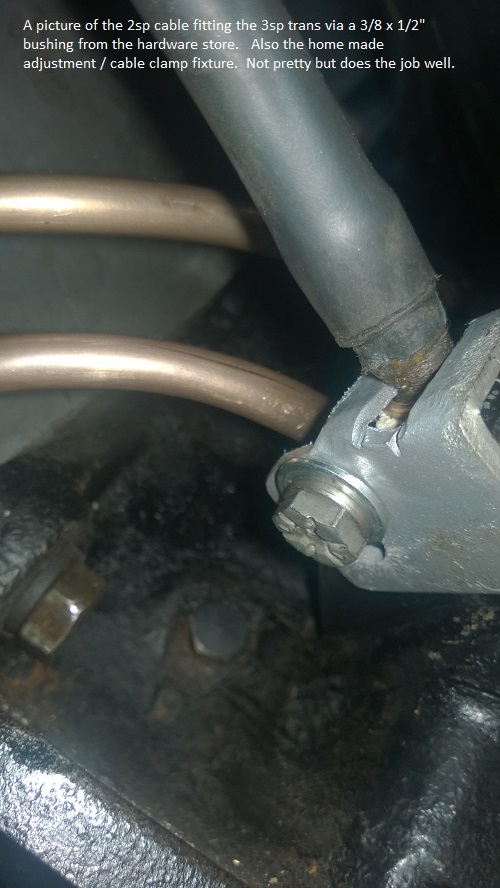
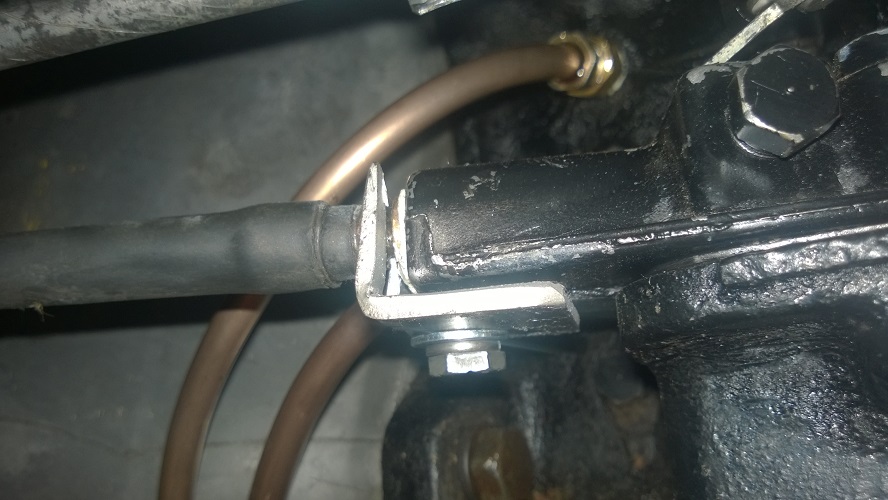
I also learned that my 3sp cable was too short! But I had another epiphany sorting out the other challenges... why not use a bushing to adapt the 2sp cable. Sure enough, the hardware store had a nice 1/2 x 3/8 x 1" bushing that was perfect for the job. The only difference between the two was the length, the input connector being larger on the 3sp and technically the length of the cable was 1/16 in longer on the 3sp. I could fix two of the three... hopefully that 16th of an inch isn't significant in the function of the trans.
But here are the results. A fully adjusted 3sp trans sitting in a 55 Chrysler. Waiting for a driveshaft to be completed!
 (WP_20140614_011.jpg) (WP_20140614_011.jpg)
 (WP_20140615_001.jpg) (WP_20140615_001.jpg)
 (WP_20140615_002.jpg) (WP_20140615_002.jpg)
Attachments
----------------
WP_20140614_011.jpg (158KB - 247 downloads)
WP_20140615_001.jpg (138KB - 255 downloads)
WP_20140615_002.jpg (144KB - 256 downloads)
|
|
| |
|
Elite Veteran
Posts: 692
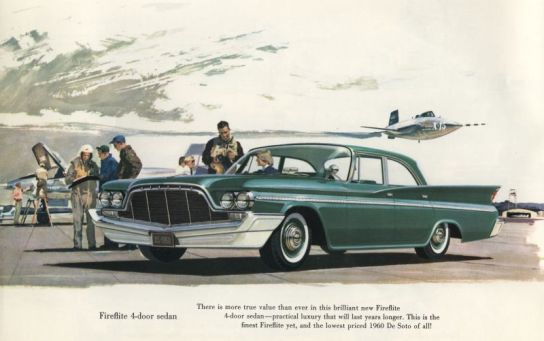
Location: Los Angeles, California | I thought on the latter part of '56 Imperials could be optioned with the 3 speed torqueflite. I guess the rarity of them is why you adapted this one? http://www.imperialclub.com/Yr/1956/SpottersGuide/Interior/PushButt... |
|
| |
|
Expert
Posts: 1730
Location: Michigan | Yes I had heard it was done but this is the first photo I have ever seen! I wish I could have found that setup.
Heck it's even the right color dash!
Edited by Beltran 2014-06-15 9:15 PM
|
|
| |
|
Expert
Posts: 1730
Location: Michigan | Well I have good news and bad news.
I am trying to fill up the transmission but it seems like the breather is plugged because I had the darnedest time getting the fluid in there without it backing up the tube and running out onto the floor. I had to pour very slowly and about a pint at a time. I even had the engine running.
The breather, if not plugged, should be allowing the air to escape and the fluid to easily go into the trans, correct?
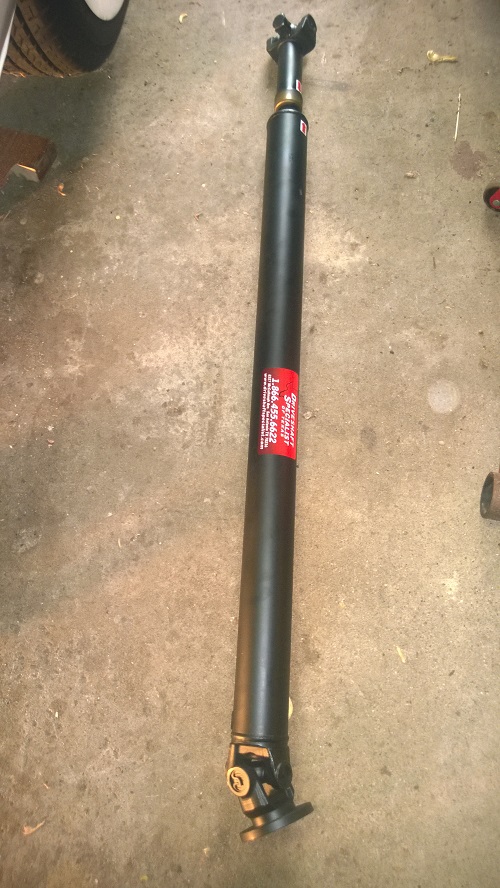
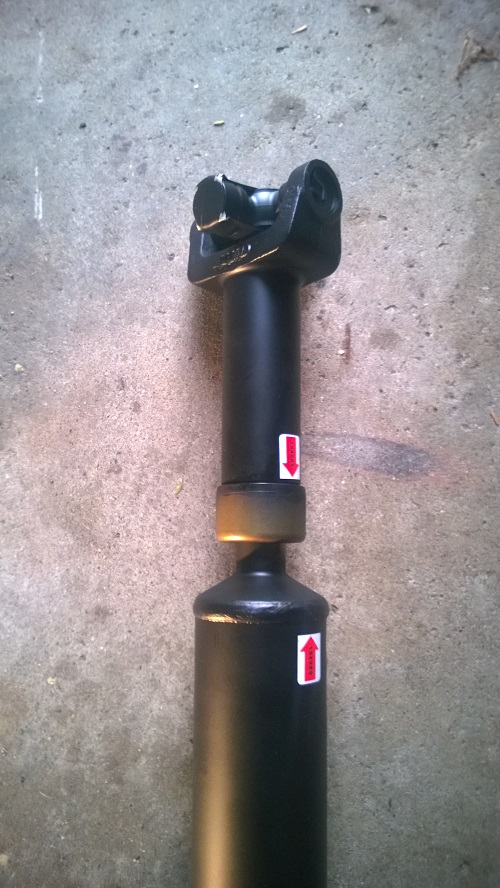
and the good news is, I got gears!!!! Drive and Reverse work!! The drive shaft shipped today, one day turn around on the order from Drive Shaft Specialists of TX. Should be here next tuesday.
Edited by Beltran 2014-06-19 11:23 PM
|
|
| |
|
Expert
Posts: 1730
Location: Michigan | So the drive shaft came today and it bolted right in! No issues. I bled the brakes and took her for a little cruise around 11pm... everything works! No vibrations any longer either. Still some little stuff to do but I couldn't be happier. Nice to know I can cruise a bit this summer. |
|
| |
|
Expert
Posts: 1730
Location: Michigan | Some pictures of the progress.
 (WP_20140624_007.jpg) (WP_20140624_007.jpg)
 (WP_20140624_008.jpg) (WP_20140624_008.jpg)
 (WP_20140624_001.jpg) (WP_20140624_001.jpg)
 (WP_20140624_002.jpg) (WP_20140624_002.jpg)
Attachments
----------------
WP_20140624_007.jpg (152KB - 244 downloads)
WP_20140624_008.jpg (157KB - 251 downloads)
WP_20140624_001.jpg (206KB - 253 downloads)
WP_20140624_002.jpg (194KB - 227 downloads)
|
|
| |
|
Expert
Posts: 1730
Location: Michigan | Oh and I cleaned out the trans breather while it was IN the car... It would have been much easier outside of the car. After all that trans work, nobody bothered to check it. It was rusty and very plugged up. |
|
| |
|
Expert 5K+
Posts: 8443
Location: Perth Australia | Good work
Take it easy for a bit and re build confidence in the car
|
|
| |
|
Expert
Posts: 1730
Location: Michigan | Indeed.. that is what I plan for the rest of the summer here. Cruising time. |
|
| |
|
Expert 5K+
Posts: 5139
Location: cornpatch county, Southwest IOA | Beltran - 2014-05-14 6:34 PM
Got the 2sp out last night and put the 3spd in. Took about 3 hours. Not bad for the first time.
Any difficulties other than making SURE the front pump tangs and the coupler-torque converter was engaged correctly? I will be doing this sometime. I have R&R my powerflite so am familiar with it......................MO |
|
| |
|
Expert 5K+
Posts: 5139
Location: cornpatch county, Southwest IOA | Beltran - 2014-06-08 8:40 PM
The new mount is in. Now working on connecting up the transmission. Why did you have to change the mount and what did you have to do?................MO |
|
| |
|
Expert
Posts: 1730
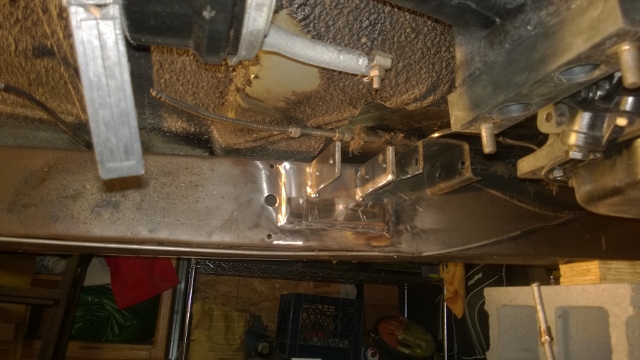
Location: Michigan | Ah.. the trans mount? Well its the same kind of mount except the brackets are welded farther forward for the 2sp than the 3sp. So I left the old mount points in place and welded in new ones. Its nothing more than vertical pieces of steel or if you want, a U channel. I attached the mount and cross beam to the trans and then held it in place with a jack while a neighbor and I tack welded in place the U channel we made. Then took it apart and completed the welding, cleaning and painting of the new mount point. Be sure to get your trans mounted high enough to ensure the proper drive shaft angle. If you have the old mount still in place its very easy to ensure this.
As far as the torque converter coupler goes, I have a couple of them and they look identical except for the type of seal ring in place. One was a metal ring and another was a rubber ring. They bolted up identically. I did use a rebuilt 3sp torque converter although I could have used the 2sp as well I think. It had a higher stall and I often wonder what it would have done for my launch characteristics. I chose not to because that was a first year TC and I figured they had made improvements in the newer version 3sp. So I used the 3sp.
Note that your 2sp cable can be made to work with the 3sp trans, no need to get another one. I got the bushing from my local Ace Hardware which has a massive Dorman (I think? that's the name) collection of pieces parts for just about anything. My rebuild of this car could not have gone nearly as well without that store.
Edited by Beltran 2015-01-17 12:05 PM
|
|
| |
|
Expert
Posts: 1730
Location: Michigan | A couple of other pics that may help.
 (WP_20140614_004.jpg) (WP_20140614_004.jpg)
 (WP_20140605_001 (640x360).jpg) (WP_20140605_001 (640x360).jpg)
Attachments
----------------
WP_20140614_004.jpg (155KB - 266 downloads)
WP_20140605_001 (640x360).jpg (173KB - 233 downloads)
|
|
| |
|
Expert
Posts: 1730
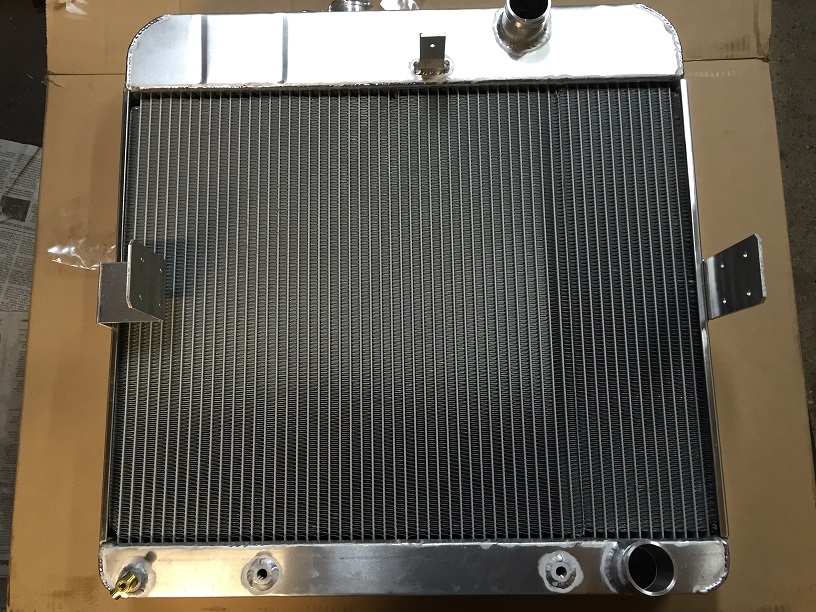
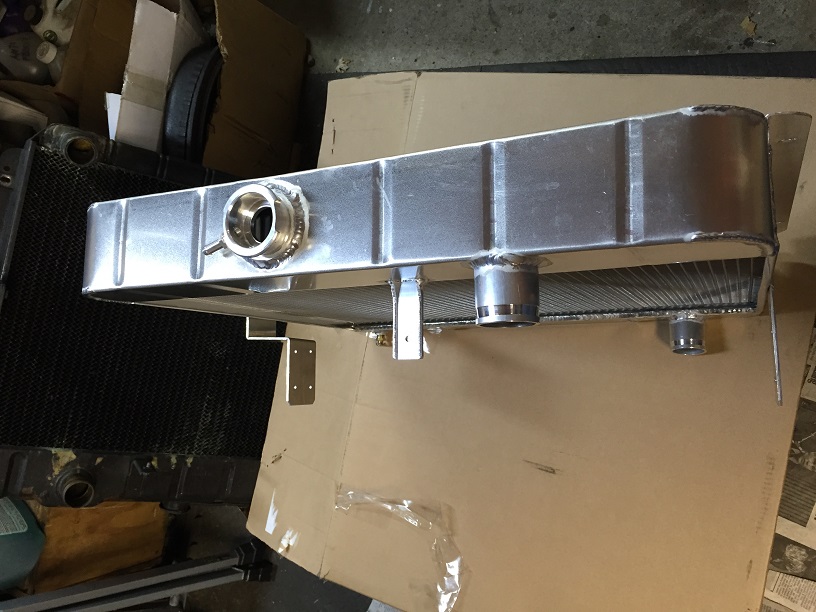
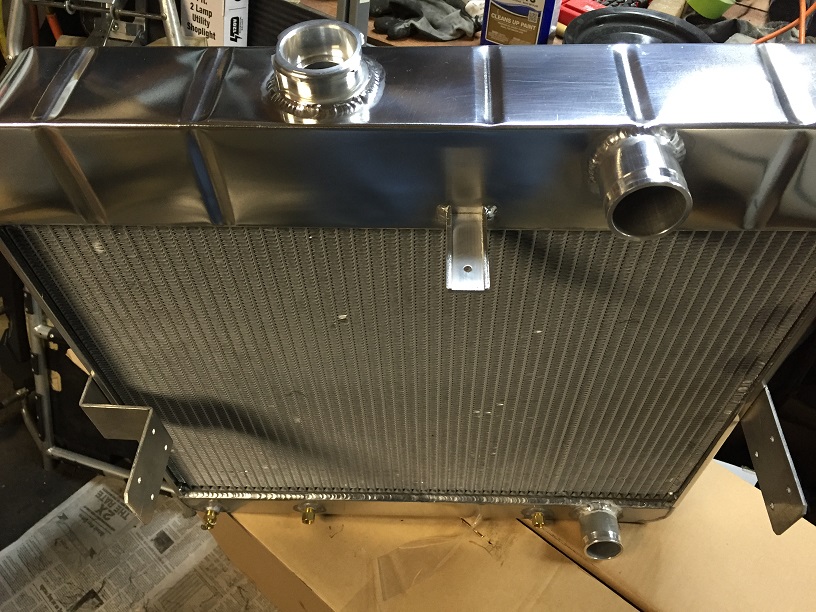
Location: Michigan | Well Penance has a new Radiator. I think I like the polished look over the painted look.
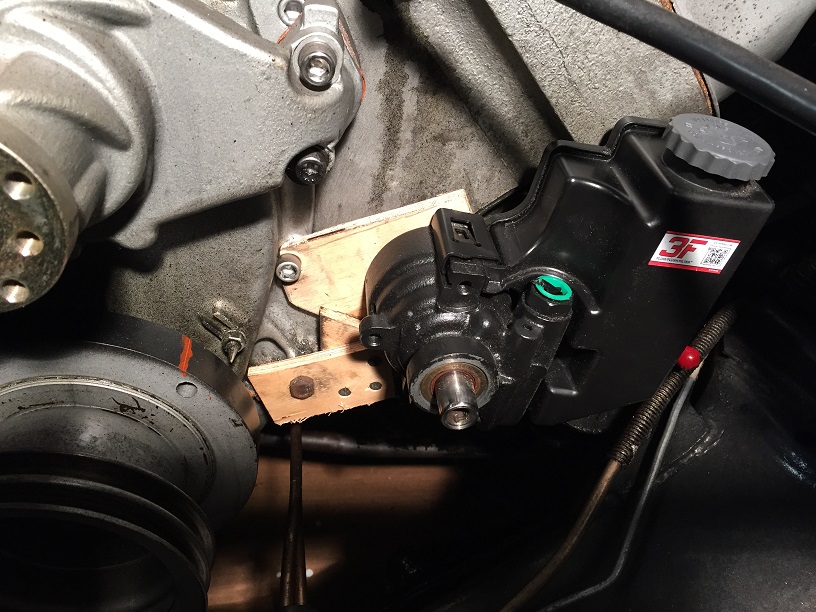
I also got to mocking up the bracket for the powersteering pump. Tomorrow hopefully we will be working it in steel.
 (IMG_0105.JPG) (IMG_0105.JPG)
 (IMG_0106.JPG) (IMG_0106.JPG)
 (IMG_0108.JPG) (IMG_0108.JPG)
 (IMG_0107.JPG) (IMG_0107.JPG)
Attachments
----------------
IMG_0105.JPG (239KB - 270 downloads)
IMG_0106.JPG (154KB - 269 downloads)
IMG_0108.JPG (211KB - 235 downloads)
IMG_0107.JPG (192KB - 234 downloads)
|
|
| |
|
Expert 5K+
Posts: 5139
Location: cornpatch county, Southwest IOA | Beltran, thanks much for the info and the pics, that is going to help me a lot when I get ready to do mine
What is your power steering pump from? quite a different set up than I used...............................MO |
|
| |
|
Elite Veteran
Posts: 827
Location: tailFinland | Thats a good idea to make vaneer mock-up for brackets and so. How come this has not come to mind
I have always made steel versions 1, 2, 3... |
|
| |
|
Expert
Posts: 2905
Location: little rock, AR | We are all waiting for a you tube video to see this Hemi with all of its mods motoring down the road. Great thread!!! |
|
| |
|
Expert
Posts: 1730
Location: Michigan | I think its a small pump with the reservoir out of a Chevy S10 truck for like a decade. Napa #81-52085. I also got the double pulley to go with it. I got the idea from the Hotheads site but they don't have a mount for my timing chain cover. Hence the fabbing of something custom. That has been the story for this build. Everything on the front has been custom due to the water jacket holes in the old marine blocks.
Edited by Beltran 2015-01-25 2:26 PM
|
|
| |
|
Expert
Posts: 1730
Location: Michigan | Oh Dorsey it's been motoring every year. I just always have to fix / tinker with something new each winter. This winter I got tasked with the radiator and well while it's out of the way, the electrical and power steering mods are getting tackled. I have been avoiding them long enough...
I got to have it rock solid to drive the 9 hours to Carlisle this year. Lots of motivation.
Edited by Beltran 2015-01-25 2:29 PM
|
|
| |
|
Expert
Posts: 2905
Location: little rock, AR | I have a 1054 miles = 16+ hrs to Carlisle. John aka Big M has a whole lot more than me.
|
|
| |
|
Expert
Posts: 1730
Location: Michigan | Latest work on converting the Generator and PS pump to separate units. Had to make a PS pump bracket and adjust my Gen bracket to work with the new alternator. Still have to sort out the wiring.
Also can see the upgraded dual power brake booster attached to the new MC. The first pic was an attempt using questionable parts that had set on a shelf for years. MC was bad and booster was a single stage 7 inch. Inadequate for the job. Second pic is the new MC with a 9 inch dual stage booster.
Ignore the oil... still have to clean up the block a bit.
Edited by Beltran 2015-02-04 9:26 PM
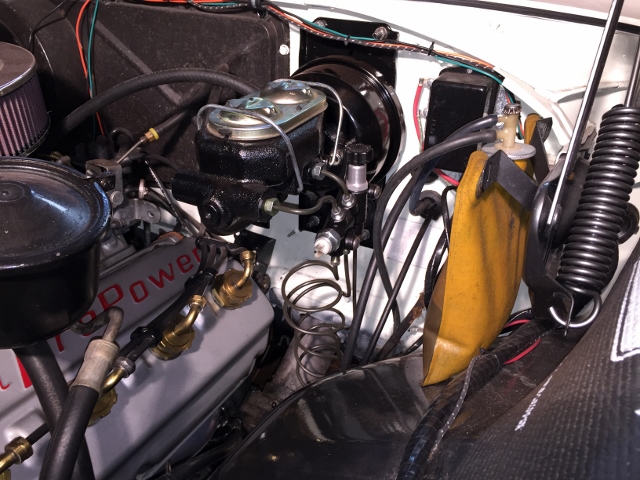 (IMG_0029 (640x480).jpg) (IMG_0029 (640x480).jpg)
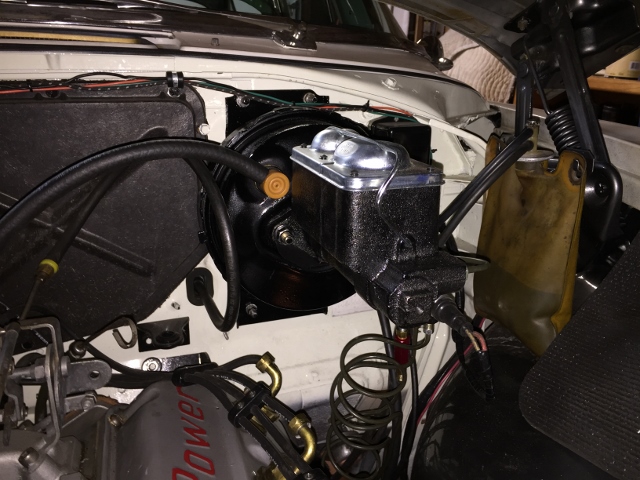 (IMG_0122 (640x480).jpg) (IMG_0122 (640x480).jpg)
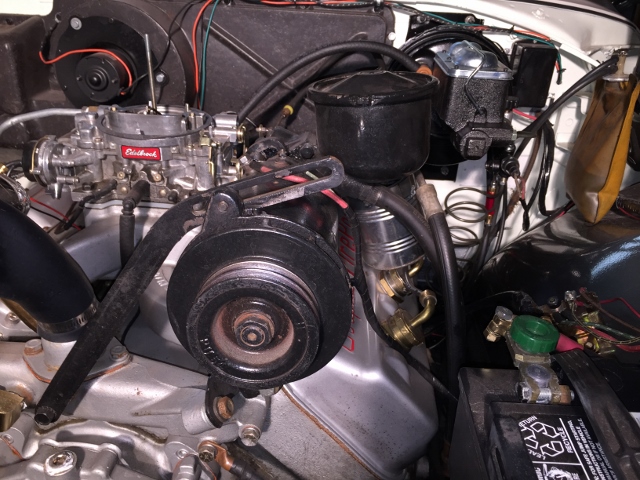 (IMG_0118 (640x480).jpg) (IMG_0118 (640x480).jpg)
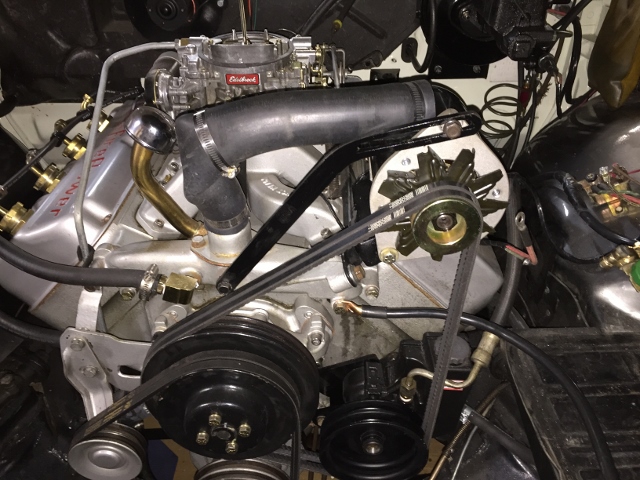 (IMG_0126 (640x480).jpg) (IMG_0126 (640x480).jpg)
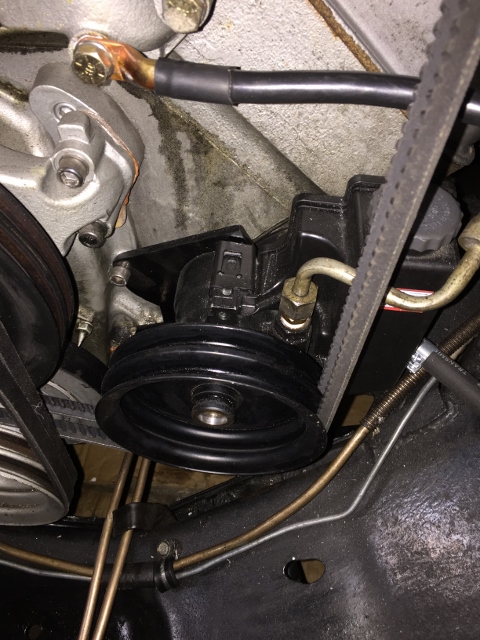 (IMG_0127 (480x640).jpg) (IMG_0127 (480x640).jpg)
Attachments
----------------
IMG_0029 (640x480).jpg (215KB - 251 downloads)
IMG_0122 (640x480).jpg (198KB - 258 downloads)
IMG_0118 (640x480).jpg (222KB - 254 downloads)
IMG_0126 (640x480).jpg (214KB - 256 downloads)
IMG_0127 (480x640).jpg (214KB - 250 downloads)
|
|
| |
|
Expert
Posts: 1730
Location: Michigan | The Rad is in... it as 10 degrees F outside tonight but I managed to work in the garage to get it assembled and connected. I might be able to start it tomorrow / Saturday. |
|
| |
|
Expert 5K+
Posts: 5139
Location: cornpatch county, Southwest IOA | Mark, you do nice work. I hadn't kept up on your project. It takes a little "engineering" to put a later modle PS pump on. Keep up the good work--Spring will get here sooner or later...........................MO |
|
| |
|
Expert
Posts: 1730
Location: Michigan | I'm glad you guys appreciate it and say something. No one else in my family seems to get it. They all just scratch their heads and say, and you did this why? How much is it costing you? Shouldn't you just sell that?
So it's good to have encouraging words... it's February and it was 10 degrees F outside last night... I put in 2 hours on the car and couldn't take anymore. Swear I didn't warm up in bed until about 2am. |
|
| |
|
Expert
Posts: 2905
Location: little rock, AR | We all understand. At least we all are saving FL cars that have so much more styling that set us apart from the rest!!! |
|
| |
|
Expert 5K+
Posts: 5139
Location: cornpatch county, Southwest IOA | Beltran - 2015-02-06 4:46 PM
I'm glad you guys appreciate it and say something. No one else in my family seems to get it. They all just scratch their heads and say, and you did this why? How much is it costing you? Shouldn't you just sell that?
So it's good to have encouraging words... it's February and it was 10 degrees F outside last night... I put in 2 hours on the car and couldn't take anymore. Swear I didn't warm up in bed until about 2am. Mark, get one of those small" tube" type portable propane heaters ( like Queen Bee) Farm stores and Sears have them. Be sure to get one that has a fan in it to blow out hot air. Use propane from a BBQ grill tank. Put couple of layers of cardboard on the cement floor . That works as insulation. Hopefully the bitter cold is behind us............................MO |
|
| |
|
Expert
Posts: 1730
Location: Michigan | I have one Steve, but the garage floor and the metal of the tools and the car were so cold. I didn't have time to heat the garage for a few hours before I got in there. Working on it during the week is difficult. On the weekends I can preheat enough that it's decent. Looks like the we have another cold blast coming for next weekend though. |
|
| |
|
Expert 5K+
Posts: 5139
Location: cornpatch county, Southwest IOA | Beltran - 2015-02-08 11:08 AM
I have one Steve, but the garage floor and the metal of the tools and the car were so cold. I didn't have time to heat the garage for a few hours before I got in there. Working on it during the week is difficult. On the weekends I can preheat enough that it's decent. Looks like the we have another cold blast coming for next weekend though. Oh Yes, I remember the cold floor and cold hand tools!. A few years ago, I insulated my old barn shop ceiling and walls, hung up heavy tarps over the inside of garage doors, and installed a used small hanging shop heater. Last year I put up new insulated garage doors. I keep the shop heated at 45 degree all winter. Just having the floors and all metal at that temp enables every thing to warm up to 60 degree quickly. My shop is about 30X30 I have a 100 gal propane tank and 200-250 gallon is about what I use for the Winter. Just a FYI...........................MO |
|
| |
|
Expert
Posts: 1730
Location: Michigan | I couldn't be more EXCITED!!! IT ALL WORKS! On the FIRST TRY! for once.
-New aluminum radiator with built in trans cooler.
-Rerouted heater hose due to no heat condition.
-Rebuilt the control valve because I had it all apart anyway.
-Pulled all the leaky header bolts and fixed them with Permatex Thread sealant. (pure suggestions from the boards, TY Guys!)
-Removed the Generator / PS Pump combo
-Replaced it with a Jeep PS Pump mounted low, and a custom mount I fabricated
-Mounted a Powermaster Alternator and removed the regulator but maintained the original wiring.
-maintained the dual belt look all around.
Just prior to all this I did the brakes:
-upgrade the brakes with a 9 inch booster and dual MC supporting front discs
-upgraded the front drums to AAJ disk brakes.
This is so awesome!
The alternator worked as planned.
The power steering pump worked as planned.
The cooling system worked as planned.
The heat is fixed.
The nine inch booster fixed the weak brake issue.
I must be getting much better at fabbing stuff or something. It's only February and well, I can now install the stereo. I might get it all the changes done by Carlisle!
Note: the last picture is showing the Altimeter charging! This is at idle with the brights on, the heater and defroster motors running (oooooh the heat was nice in the 20 degree garage) and the cooling fan running! Mission Accomplished!
Edited by Beltran 2015-02-11 10:10 PM
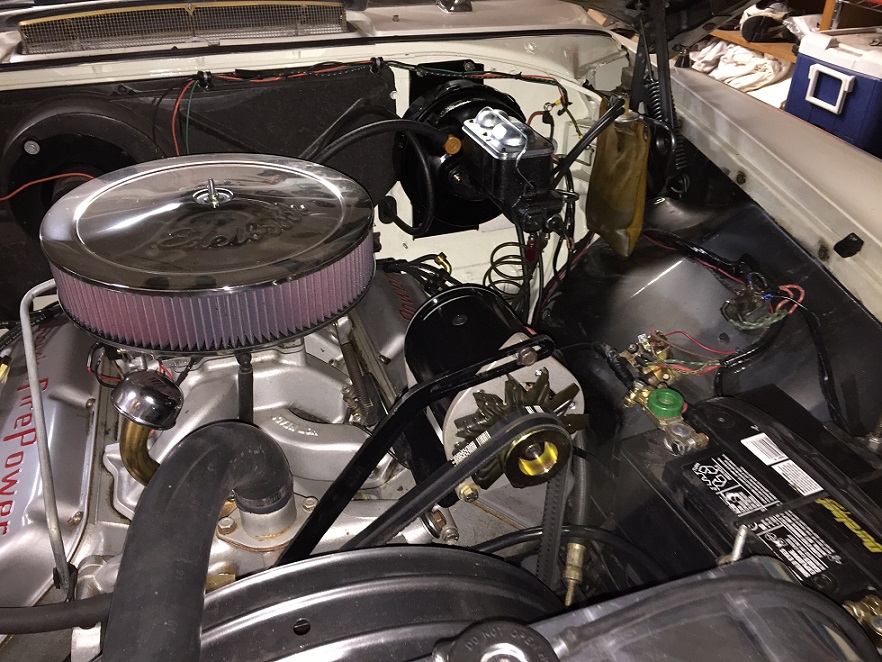 (IMG_0132.JPG) (IMG_0132.JPG)
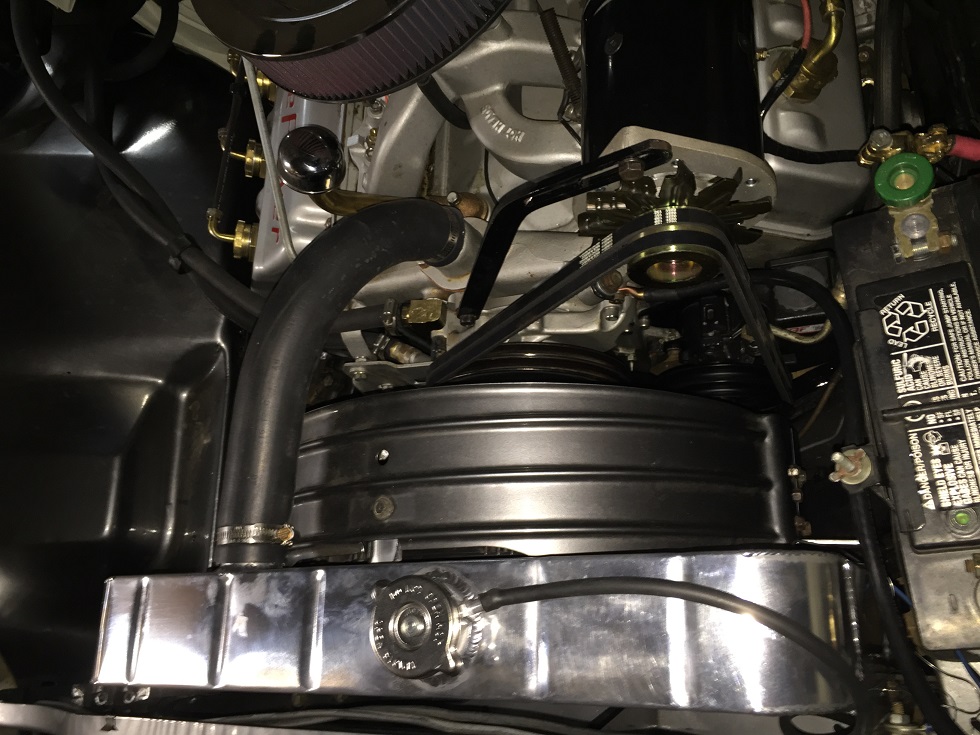 (IMG_0133.JPG) (IMG_0133.JPG)
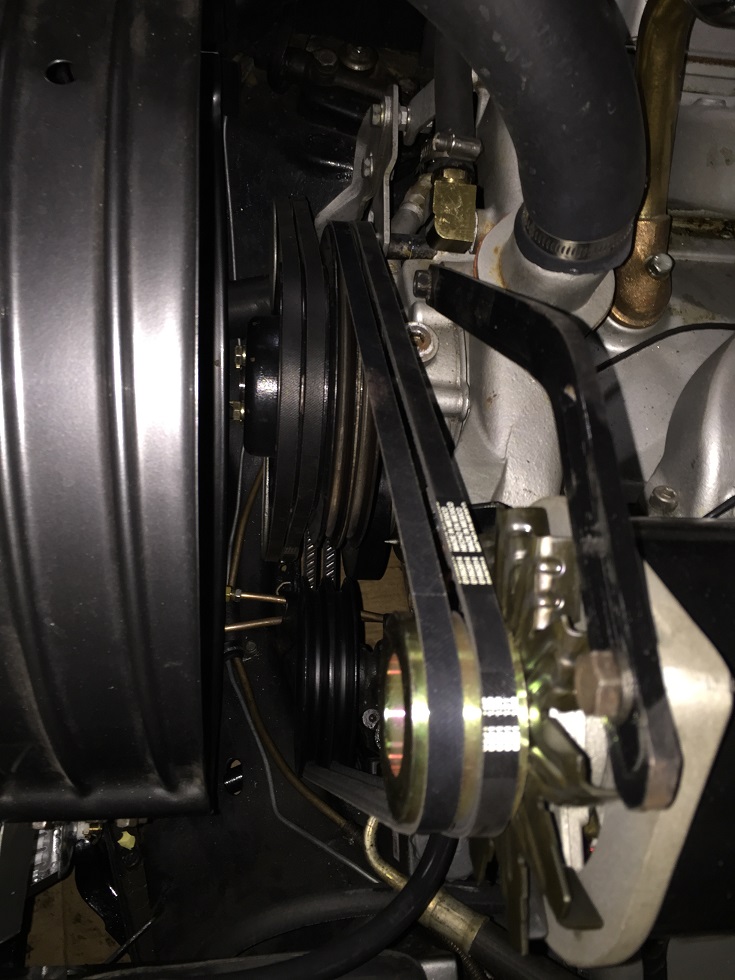 (IMG_0134.JPG) (IMG_0134.JPG)
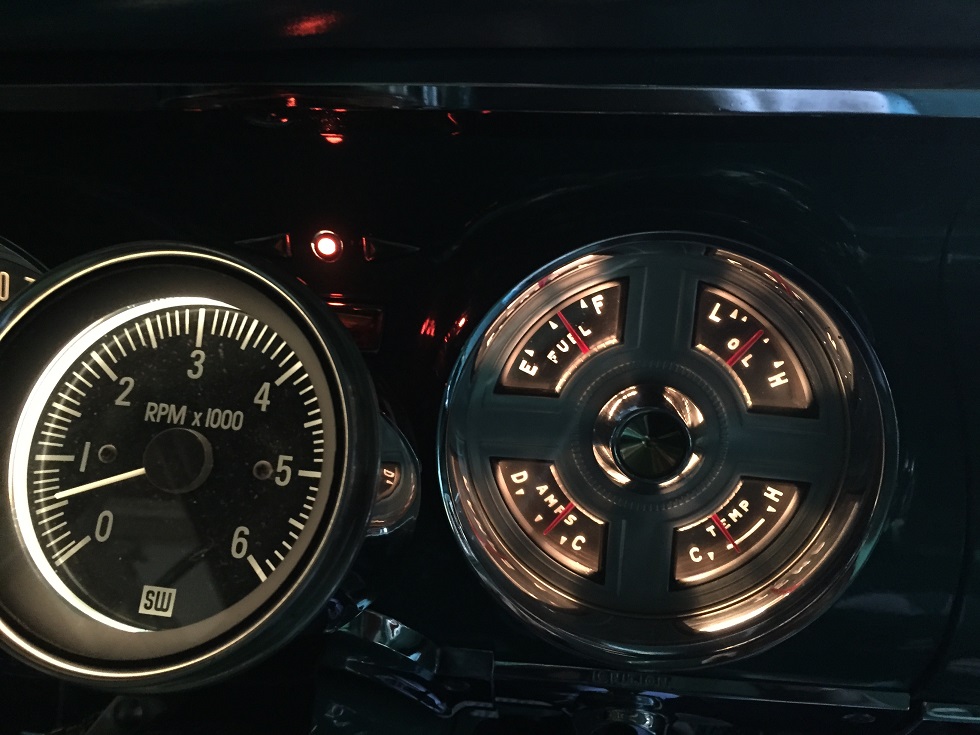 (IMG_0129.JPG) (IMG_0129.JPG)
Attachments
----------------
IMG_0132.JPG (258KB - 244 downloads)
IMG_0133.JPG (230KB - 224 downloads)
IMG_0134.JPG (183KB - 228 downloads)
IMG_0129.JPG (191KB - 253 downloads)
|
|
| |
|
Expert 5K+
Posts: 5139
Location: cornpatch county, Southwest IOA | Mark, congratulations! You have every right to be proud and excited. How did you get your instrument lights so bright? I need to do something with my dim ones. Have you been able to test drive the new driveline? Keep having fun.........................................MO |
|
| |
|
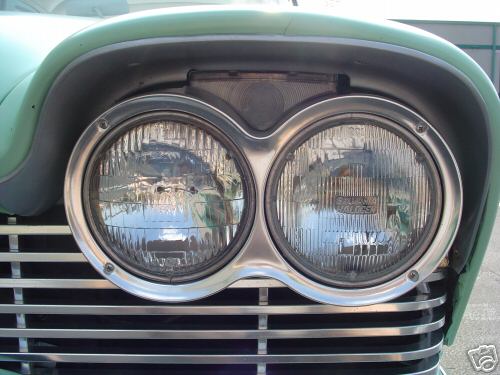
Elite Veteran
Posts: 1172
Location: Georgia | Very nice, Mark! You obviously underestimate your abilities, she looks fantastic.
I'm looking forward to seeing her in July.
Pete |
|
| |
|
Expert
Posts: 1730
Location: Michigan | 13.5 volts from the Alternator maybe? Hopefully I am not going to be changing them often...
Oh and I did completely dismantle the gauges and clean them up. Repainted my needles.. ect.
Edited by Beltran 2015-02-12 7:57 PM
|
|
| |
|
Expert
Posts: 1730
Location: Michigan | I couldn't take it any more. I took Penance out in the snow... sort of. There was some on our street but the rest of the roads were dry. Had a nice little 45 min cruise. New brakes are more sensitive than my modern cars now. Heat works great power steering is just like it was before, can't tell the difference. All in all I think it's going to work out just fine. |
|
| |
|
Expert
Posts: 1730
Location: Michigan | I like to get new tools every once in awhile. This year I wanted to do something with the paint on Penance since I really don't want to do the whole paint job thing this year. I also have this Carlisle trip coming up where god and country (related to FL, of course) will be there and I just have to have her looking her best! Right!
So I got one of these. http://www.amazon.com/Cyclo-80-012-C-PG-Dual-Head-Polisher/dp/B00C0...
After doing a bit of reading and experimenting I figured out how to restore the paint job on Penance. Wow did it make a difference.
I started with a 1500 grit wet sand of the rough spots of the car and then used the polisher with a cleaner and then a very nice Carnauba wax.
Here are the before and after shots of the effort.
Edited by Beltran 2015-04-19 8:57 PM
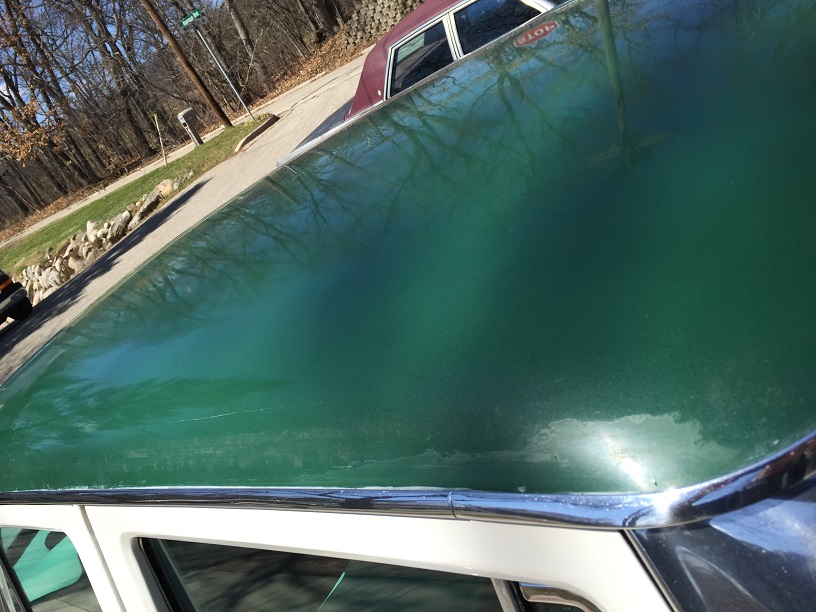 (IMG_0407a.jpg) (IMG_0407a.jpg)
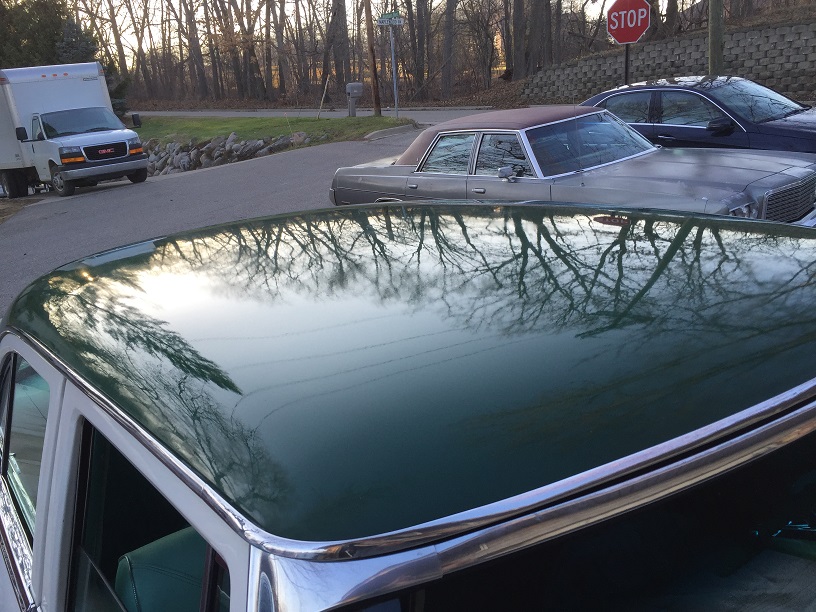 (IMG_0411a.jpg) (IMG_0411a.jpg)
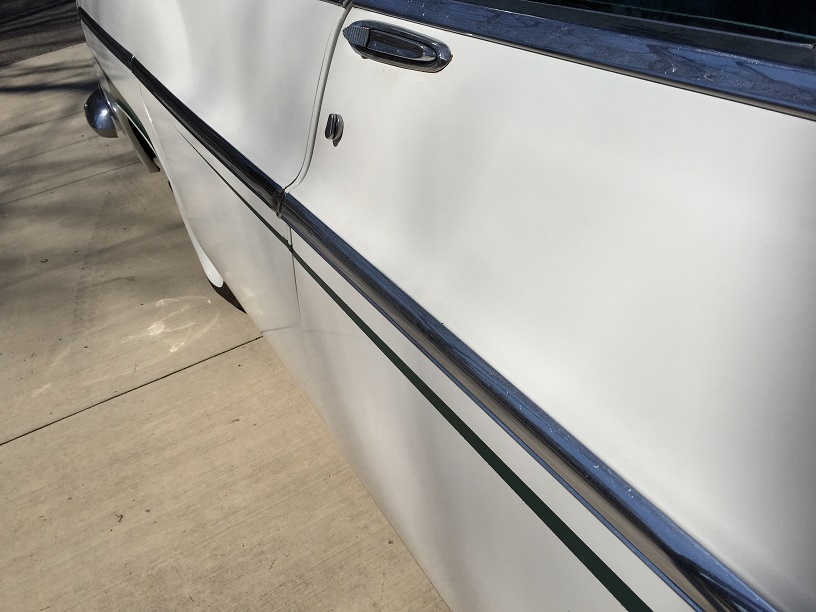 (IMG_0408a.jpg) (IMG_0408a.jpg)
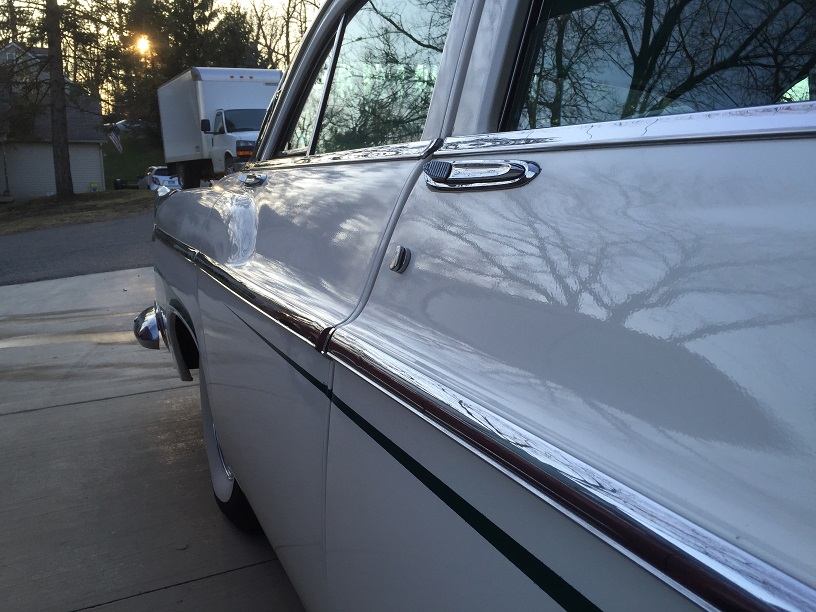 (IMG_0412a.jpg) (IMG_0412a.jpg)
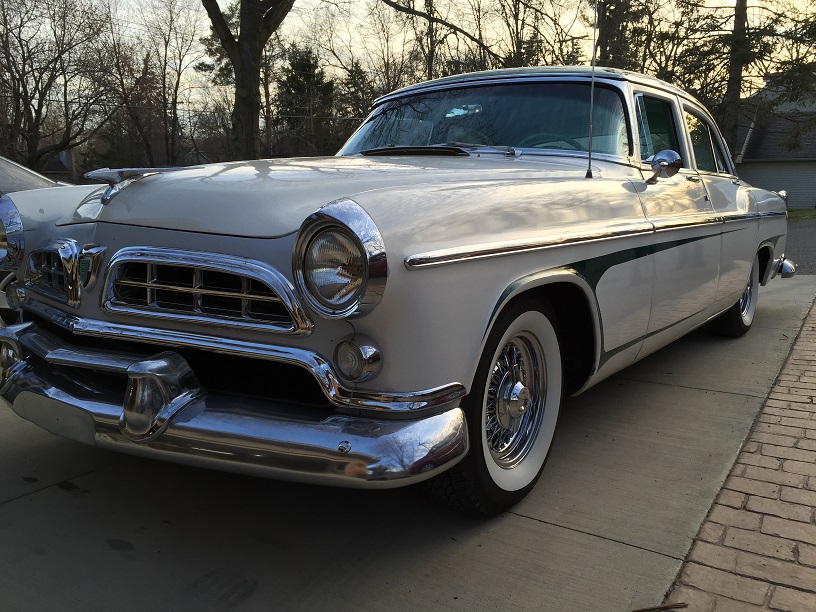 (IMG_0418a.jpg) (IMG_0418a.jpg)
Attachments
----------------
IMG_0407a.jpg (170KB - 302 downloads)
IMG_0411a.jpg (213KB - 307 downloads)
IMG_0408a.jpg (130KB - 321 downloads)
IMG_0412a.jpg (181KB - 319 downloads)
IMG_0418a.jpg (223KB - 317 downloads)
|
|
| |
|
Expert
Posts: 2788
Location: USA - KY |
Wow, Beltran, that is one shiny car! It puts the newer cars to shame.
Good job! Penance will look great at Carlisle!
|
|
| |
|
Expert
Posts: 1730
Location: Michigan | I got to take Penny out this weekend for a drive up north to my parents place on Houghton Lake. 150 miles each way and some cruising around town. Got 17 miles / gallon at 75mph highway speed. I can live with that.
Although driving in the wind is a bit challenging. Had to really be alert while driving. Blink and your half way into the next lane. May have to look into beefing up the sway bar in front and adding one to the rear. |
|
| |
|
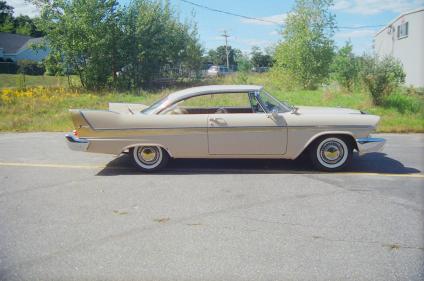
Expert
Posts: 1740
Location: Alaska | Are you running bias or radial tires? Do you have a lot of looseness in the steering? I would think it should track a little better. I remember years ago when I put my first set of radials on my Fury, what a difference in handling but some purists believe you have to run the old bias ply tires on your FL. I prefer the better handling. |
|
| |
|
Expert 5K+
Posts: 9650
Location: So. Cal | Yes, swaybars won't have any effect on wandering. They are good for high-speed cornering. What causes wandering is loose steering, bias ply tires to some extent, and/or lack of caster in the alignment.
On that note, does anyone know if additional caster can be added to a '55-'56 car? |
|
| |
|
Expert
Posts: 1730
Location: Michigan | Actually I just tightened up my steering and got the play out of it. It was very windy here over the last weekend. 20-30mph gusts and I wasn't the only one getting pushed around out there. But I will have that caster checked again. I am running modern radials.
Thanks for the tips, I will look into this. |
|
| |
|
Expert 5K+
Posts: 5139
Location: cornpatch county, Southwest IOA | Powerflite - 2015-05-26 1:15 PM
Yes, swaybars won't have any effect on wandering. They are good for high-speed cornering. What causes wandering is loose steering, bias ply tires to some extent, and/or lack of caster in the alignment.
On that note, does anyone know if additional caster can be added to a '55-'56 car? Yes additional caster can be done. You have to use shims and know where to put them. I bought shims for that purpose off e-bay, but never have tried to install them. ...................................MO |
|
| |
|
Expert
Posts: 1730
Location: Michigan | Penance at CEMA yesterday. A place of prominence at the foot of the WPC Museum. Next to her is an all original 300 with less than 30k miles on it, owned by the President of the Chrysler Archives. Over 700 cars were on display I believe.
Edited by Beltran 2015-06-07 11:25 AM
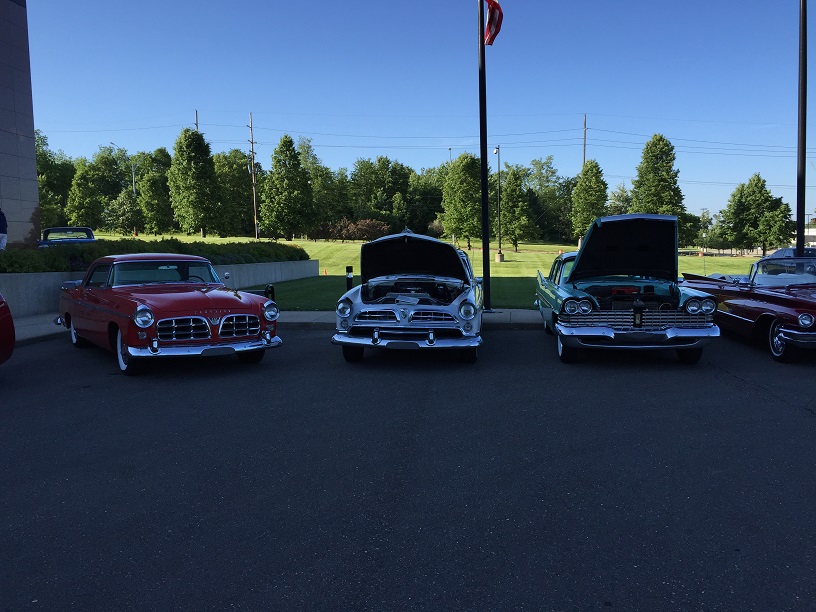 (IMG_0541a.jpg) (IMG_0541a.jpg)
 (IMG_0699a.jpg) (IMG_0699a.jpg)
 (IMG_0701a.jpg) (IMG_0701a.jpg)
Attachments
----------------
IMG_0541a.jpg (181KB - 305 downloads)
IMG_0699a.jpg (234KB - 298 downloads)
IMG_0701a.jpg (240KB - 280 downloads)
|
|
| |
|
Expert
Posts: 1730
Location: Michigan | Bump.. so I don't lose it. Penny is doing very well this year. btw. |
|
| |
|
Location: North Australia | Hey Mark, good to hear the car is going well. She's a special car for sure. Steve. |
|
| |