|
|
Veteran
Posts: 241
 
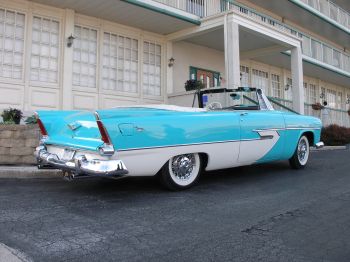
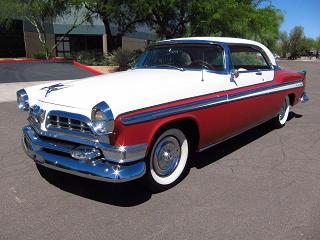
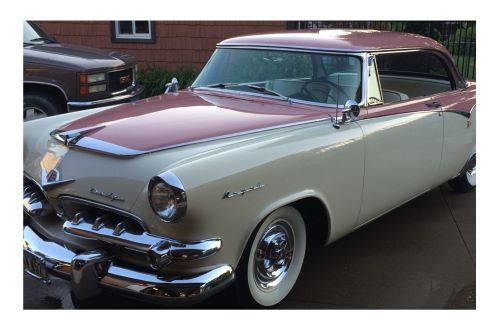
Location: Southern CA | Well after months and months of searching I finally got my first FL car. I had mentally prepared myself to replace at least some sheet metal when I found one, but I'm happy to say that this car still has all it's original metal and none of it has any holes or spots that are too thin. Before I bought it I checked all the painted metal with a weak refer magnet and it stuck everywhere I checked. I have to thank Forward Look for assisting me in finding the car as I bought it from another member who responded to a "want to buy" thread that was authored by a member who didn't want this car after all.
The member I bought it from received it from a friend who inherited it from his Father Leonard who had owned it for many-many years. The car has been in dry storage from about 1980 until 2011. Leonard really took care of and pampered this car, evidenced by the solid body, file full of receipts for repairs and maintenance, duel oil filters, and there is even a spin-on cartridge filter for the coolant. To make sure he would always have spare parts, Leonard also parted out a Saratoga many years ago and saved tons (gobs & gobs) of parts for his car. I bought all the parts as part of the car purchase. The mint spare speedometer reads 23,000 miles, and based on the condition of the spare parts I believe it to be correct.
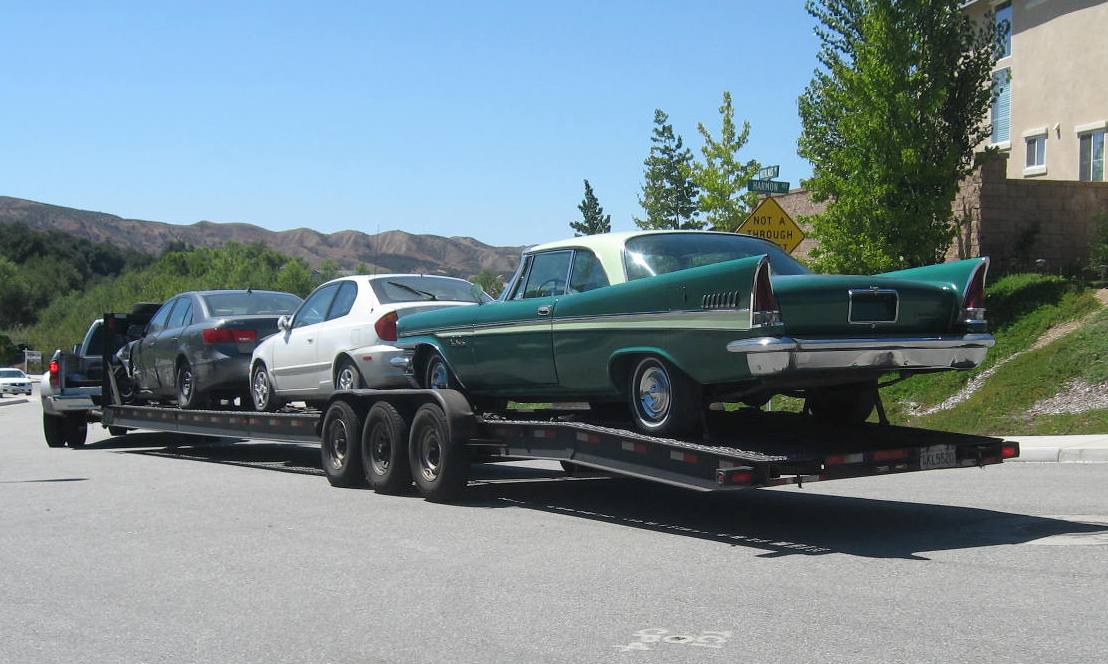
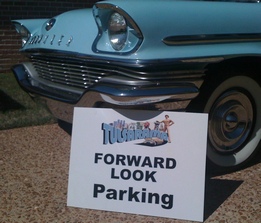
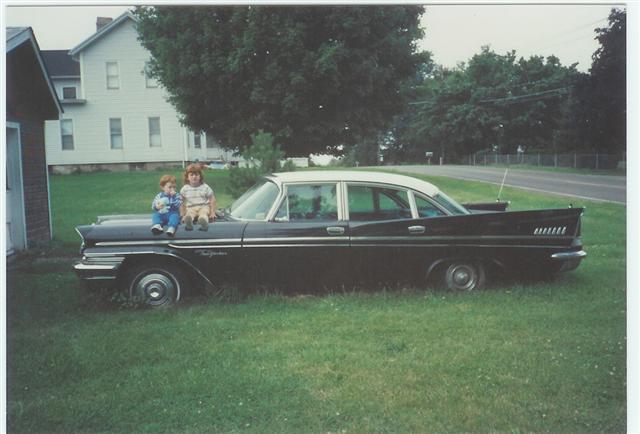
I bought the car last Saturday in Montana and it arrived at my house today, I've been working on it since the moment it arrived and I'm thinking about sleeping in the backseat tonight, lol. The first photo below is from the previous owner, the rest I took today.
I'm really glad to be a member of this site and hope to make some new friends who share the same passion as me for these shiny pieces of American history. More to come...
Edited by Leadfoot1000 2012-09-02 1:36 AM
 (atthefarm-1.jpg) (atthefarm-1.jpg)
 (My 57 Chrysler 001.JPG) (My 57 Chrysler 001.JPG)
 (My 57 Chrysler 006.JPG) (My 57 Chrysler 006.JPG)
 (My 57 Chrysler 007.JPG) (My 57 Chrysler 007.JPG)
 (My 57 Chrysler 023.JPG) (My 57 Chrysler 023.JPG)
 (My 57 Chrysler 038.JPG) (My 57 Chrysler 038.JPG)
 (My 57 Chrysler 039.JPG) (My 57 Chrysler 039.JPG)
 (My 57 Chrysler 043.JPG) (My 57 Chrysler 043.JPG)
 (My 57 Chrysler 050.JPG) (My 57 Chrysler 050.JPG)
 (My 57 Chrysler 052.JPG) (My 57 Chrysler 052.JPG)
Attachments
----------------
 atthefarm-1.jpg (71KB - 285 downloads) atthefarm-1.jpg (71KB - 285 downloads)
My 57 Chrysler 001.JPG (107KB - 292 downloads)
My 57 Chrysler 006.JPG (115KB - 284 downloads)
My 57 Chrysler 007.JPG (106KB - 290 downloads)
My 57 Chrysler 023.JPG (88KB - 280 downloads)
My 57 Chrysler 038.JPG (263KB - 286 downloads)
My 57 Chrysler 039.JPG (262KB - 293 downloads)
My 57 Chrysler 043.JPG (48KB - 273 downloads)
My 57 Chrysler 050.JPG (50KB - 290 downloads)
My 57 Chrysler 052.JPG (50KB - 309 downloads)
|
|
| |
|
Exner Expert 19,174 posts. Neil passed away 18 Sep 2015. You will be missed, Neil!
Posts: 19146
 
Location: bishop, ca | Bummer that you've got one small cut/tear in the seat beading; otherwise, your upholstery shop could easily blind-stitch-in
new upholstery inserts into the seats, at little cost.
For having only 23,000 miles, the power brake pedal has a considerable amount of wear on it, which
indicates that the car incurred a lot of stop and go driving during its service life.
Edited by d500neil 2012-09-02 2:43 AM
|
|
| |
|
Veteran
Posts: 241
Location: Southern CA | The spare parts I got with the car included a speedo that reads 23,000, so the Saratoga that got parted was still a youngster. The car I bought has a lot more miles on it, I have a receipt for an engine rebuild in 1978, two years before it went into storage. It runs real smooth with no smoke, but the accelerator pump doesn't squirt, must have dried out from sitting so long, so I'll rebuild the carb next weekend. I pumped up the cooling system and it held good except for the heater core. I'm still debating what to do with the interior, the headliner is very good, the seats are so so, but the door panels have had it...
 (My 57 Chrysler 010.JPG) (My 57 Chrysler 010.JPG)
Attachments
----------------
My 57 Chrysler 010.JPG (125KB - 279 downloads)
|
|
| |
|
Veteran
Posts: 241
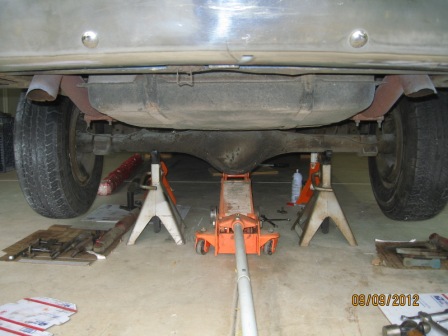
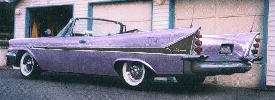
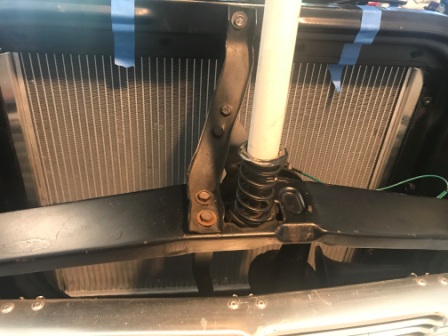
Location: Southern CA | Hey Neil, I mean't the previous post to be a reply to you but I clicked the wrong button. I'm sure you noticed the raised rear-end, that's the first thing I want to fix. level the car and get rid of the stinkbug look. I think I figured it out but would like some confirmation before I pull the springs off. There is evidence of a trailer hitch and I see one spring in the pack that looks out of place, like it was added to compensate for the trailer weight. It's the second spring from the top. Hopefully somebody with a New Yorker can check their car and confirm that spring doesn't belong there. It looks like it was cut with a torch. Check out the photos...
Edited by Leadfoot1000 2012-09-02 3:42 AM
 (My 57 Chrysler 022.JPG) (My 57 Chrysler 022.JPG)
 (My 57 Chrysler 013.JPG) (My 57 Chrysler 013.JPG)
Attachments
----------------
My 57 Chrysler 022.JPG (87KB - 293 downloads)
My 57 Chrysler 013.JPG (38KB - 281 downloads)
|
|
| |
|

Expert
Posts: 2519

Location: central Illinois | Looks like a great starting point. Having something solid to work with is half the battle. I don't have the NYer to reference your spring pack but believe your diagnosis is correct. Looks like the one spring was added. Take that out and maybe she'll even out. That'd be a cheap and easy fix. |
|
| |
|
Expert 5K+
Posts: 7207
Location: Victoria, BC, on Vancouver Island, Canada | Very nice looking car, and a solid one at that. You couldn't ask for a nicer car to start some work on! The cloth seat inserts look to be non-original type cloth - probably have been redone once in its life. There were 2 different cloth types that were used in 57 NYers, but this doesn't look to be one of them. |
|
| |
|
Veteran
Posts: 241
Location: Southern CA | imopar380 - 2012-09-02 8:55 AM
Very nice looking car, and a solid one at that. You couldn't ask for a nicer car to start some work on! The cloth seat inserts look to be non-original type cloth - probably have been redone once in its life. There were 2 different cloth types that were used in 57 NYers, but this doesn't look to be one of them.
Thanks Ian, the tuck & roll vinyl in the center of the seats doesn't match the vinyl in the seating areas either. The vinyl and cloth of the seating areas must have been redone at some point. |
|
| |
|
Regular
Posts: 70
| Glad to see that car in the hands of someone who appreciates it! I'm sure you'll do it justice. I didnt even consider that another leaf was added to the springs.. I'll bet thats why the rear is tails up. It was great meeting you and working out a deal that was fair for us both. Keep posting your progress . I'm gonna follow this one! |
|
| |
|
Exner Expert 19,174 posts. Neil passed away 18 Sep 2015. You will be missed, Neil!
Posts: 19146
Location: bishop, ca | I'm not a Chrysler-guy, but that center section looks to me to be an OEM feature.
In addition to the added-leaf spring, it appears that the leaf inter-liners have been removed.
Those inserts make the leaf springs' operation quiet, and also soften the overall ride quality,
since the leafs are not in contact with each other, and they do not tend to produce a mutual "lever-
bar" effect, as they do, when they are clamped down together....as they are, in drag racing applications.
The two clamps (one of which looks to have been 'custom'-fitted) are OK; the 300's have three of them, IIRC,
to stiffen up the rear end.
The NY'ers have 6 1/2 leafs, IIRC---yours looks like its shortest/stiffest leaf (which will tend to raise it up)
is a full-length leaf, and it definitely does not look like an OEM stock-type leaf.
Edited by d500neil 2012-09-02 8:09 PM
|
|
| |
|
Veteran
Posts: 241
Location: Southern CA | d500neil - 2012-09-02 5:03 PM
I'm not a Chrysler-guy, but that center section looks to me to be an OEM feature.
In addition to the added-leaf spring, it appears that the leaf inter-liners have been removed.
Those inserts make the leaf springs' operation quiet, and also soften the overall ride quality,
since the leafs are not in contact with each other, and they do not tend to produce a mutual "lever-
bar" effect, as they do, when they are clamped down together....as they are, in drag racing applications.
The two clamps (one of which looks to have been 'custom'-fitted) are OK; the 300's have three of them, IIRC,
to stiffen up the rear end.
The NY'ers have 6 1/2 leafs, IIRC---yours looks like its shortest/stiffest leaf (which will tend to raise it up)
is a full-length leaf, and it definitely does not look like an OEM stock-type leaf.
Good observations Neil, the right side pack's's shortest leaf is solid and thick, like a home-made one. While the left side's shortest leaf has the same center channel as the other leafs in the pack. I need to buy one stock leaf pack & use the pieces from my two packs to build one stock one, or buy two and keep mine for spare parts. Time to PM Big M for parts. I have a 58 shop manual which states that the inter-liners are new for the 58 model year, but they would make a nice addition if I can locate some. I'll change all the bushings also while I have it apart. |
|
| |
|

Expert 5K+
Posts: 7806
Location: Williams California | Looks like you found an excellent car in your search.
Congratulations!!
---John |
|
| |
|
Elite Veteran
Posts: 612
Location: Kingston Springs , TN | Congrats!
Mike |
|
| |
|
Expert
Posts: 1508

Location: new york | Sweet Car! Nice Find! 57 New yorkers are so rare and to find a rust free one your very lucky. All the best and HAPPY MOTORING! Victor. |
|
| |
|
Veteran
Posts: 269
Location: Chesterfield, Virginia | Good for you!  |
|
| |
|
Veteran
Posts: 241
Location: Southern CA | My57Saratoga - 2012-09-03 10:30 AM
Congrats!
Mike
Thanks a lot John, Mike, Victor and Ron for your congratulations! For about a year I've been searching the internet daily for leads & I only saw one other NY 2dr hdtp that was running, but it was really rusted out & had tons of bondo trying to hide it, & newer paint over that. I've wanted a 50's car for a long time & just kept looking at photos & going to car shows trying to decide which one I liked the best. I almost bought a 55 Buick Century about a year ago and then changed my mind at the last minute. When I finally decided that the 57 Chrysler was the coolest of all (IMO) I had no idea how difficult it would be to find one, and it was double the price of the Buick in the same condition. But it was worth every penny and I'm really happy to have it. I've been wrenching on it all weekend....oops I better go say hi to my wife... |
|
| |
|

Expert
Posts: 1493
Location: Jamaica Plain, MA | What a great car. I've been scrounging around for a year to find all the little things to make my car complete. Starting with such a nice one is probably a better long-term strategy. It looks so straight and solid. I seem to remember one like that on here. Is the paint new? |
|
| |
|

Expert
Posts: 1295
Location: Nasco , SWEDEN | Welcome aboard on FL-site Steve! Congrats to a very good choice of wehicle. Hope to see how it turns out..............keep us posted! Morgan |
|
| |
|
Veteran
Posts: 241
Location: Southern CA | JT Vincent - 2012-09-04 3:54 PM
What a great car. I've been scrounging around for a year to find all the little things to make my car complete. Starting with such a nice one is probably a better long-term strategy. It looks so straight and solid. I seem to remember one like that on here. Is the paint new?
Hi Jon, thanks. It was painted within the past year. That's the car I which had inquired about the bumper guards about 3-4 weeks ago. Turns out that the owner had installed Saratoga bumpers on it because the chrome was a lot better. I bought the original bumpers with the car along with a bunch of other parts from the Saratoga that the owner before him had parted. They include the bumper guards, which I'll be installing soon. I'm still deciding if I should rechrome the original bumpers or just use the ones on it and drill them, the chrome is good quality for a driver. I just got really lucky finding the car, and both me and the seller feel like the deal was fair...as it should be. |
|
| |
|
Veteran
Posts: 241
Location: Southern CA | mogge65 - 2012-09-04 5:37 PM
Welcome aboard on FL-site Steve! Congrats to a very good choice of wehicle. Hope to see how it turns out..............keep us posted! Morgan
Thanks Morgan, I'll keep posting to this thread as it progresses. After I get all the mechanical bugs worked out of it and lower the rear I plan to get WWW tires and then just keep making improvements and detailing it little by little. |
|
| |
|
Veteran
Posts: 241
Location: Southern CA | When I drove my car 1 block from the delivery trailer to my house it had a vibration coming from the rear when I hit the gas pedal, I figured that the u-joints were dry from being in storage for so many years or just sloppy from wear. So I read some info on the ball and trunion and pulled the drive shaft out. Sure enough the rear u-joint was dry and binding and the ball and trunion has a little side to side slop in it. Back to the computer to look for parts. While looking I found that the new trunion is available but did not locate a rear u-joint. About that time it started raining and I remembered my crate of spare parts still sitting in the back of my truck (when the spare parts were delivered I had them loaded directly into the back of my truck & have been so busy working on the car that I didn't store them yet).
Anyways, I hurried to the truck to cover the parts with plastic so the spindles, generator etc. would not get wet. While unloading the long parts, bumpers etc in the rain I noticed a long skinny "package" standing in the corner of the crate wrapped in a Christmas table cloth. I thought what the heck is that? As soon as I grabbed it I thought "no way" could it be a complete drive shaft, the very parts I was moments earlier searching for were here the whole time. Yes it is and it's apparently from the same low mileage parts car the rest of the parts came from because the trunion has no slop at all. I'll disassemble it and the u-joint, clean all the pieces, grease em assemble em hope that solves the problem...
Edited by Leadfoot1000 2012-09-11 12:12 AM
 (57 Chrysler Repairs 022.JPG) (57 Chrysler Repairs 022.JPG)
 (57 Chrysler Repairs 023.JPG) (57 Chrysler Repairs 023.JPG)
 (57 Chrysler Repairs 025.JPG) (57 Chrysler Repairs 025.JPG)
 (57 Chrysler Repairs 011.JPG) (57 Chrysler Repairs 011.JPG)
Attachments
----------------
57 Chrysler Repairs 022.JPG (172KB - 329 downloads)
57 Chrysler Repairs 023.JPG (101KB - 280 downloads)
57 Chrysler Repairs 025.JPG (49KB - 294 downloads)
57 Chrysler Repairs 011.JPG (99KB - 271 downloads)
|
|
| |
|
Regular
Posts: 70
| Next time I see you I'll tell you the story on that driveshaft and why it was wrapped up like that. |
|
| |
|
Veteran
Posts: 241
Location: Southern CA | Chaz - 2012-09-11 4:06 PM
Next time I see you I'll tell you the story on that driveshaft and why it was wrapped up like that.
I'm sure it's a good one, I'll probably see you in Vegas sometime at a car show. |
|
| |
|
Veteran
Posts: 241
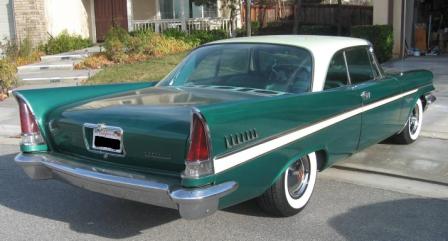
Location: Southern CA | I finally got my car back out of my garage today and took it for a spin. The rear helper spring leafs are gone and the ride height is a lot better now, although still higher in the rear than I like (see pics below), maybe a lowering block will be needed. The rear frame to ground measurement is exactly the same on each side, so that's a big plus. The WCFB carb rebuild came out good, I had a problem with a stuck needle under the accelerator pump cluster that I didn't catch on the first assembly. It didn't come out on dis-assembly nor was it shown in the kit's exploded view so I didn't know it was there. I figured it out when my shop manual arrived with a more car specific view and ended up drilling the needle with a tiny drill bit to pull it out.
I've also changed the diff fluid & oil & filter and serviced the Ball & Trunion u-joint & replaced the boot.
The engine runs great, but there is a very bad vibration/chadder on acceleration at any speed and/or when it shifts. There is also an "eeek" noise when it shifts. I tried some Trans-X, but no change. I'll try changing all the trans fluid next weekend (I shudda done that in the first place!).
As you can see, the car is begging for some wide whites, I ordered some from Diamondback and they should be here next week.
I put that Oregon plate on the back (with the sticker that expired in 1984, the year this car was put in storage) just in case I passed by "the Fuzz" while on my test drive.
Edited by Leadfoot1000 2012-09-24 8:43 AM
 (005.JPG) (005.JPG)
 (006.JPG) (006.JPG)
Attachments
----------------
005.JPG (130KB - 269 downloads)
006.JPG (134KB - 282 downloads)
|
|
| |
|
Veteran
Posts: 126
Location: Castlemaine Victoria Australia | love the metallic green makes the ol girl look longer. |
|
| |
|
Veteran
Posts: 241
Location: Southern CA | Good thing she's not any longer or it wouldn't fit in the garage. |
|
| |
|
Expert
Posts: 2905
Location: little rock, AR | I have a saw zall. I need a new COUCH!!! |
|
| |
|
Location: Parts Unknown | I like your thinking for landing on the car you wanted most FIRST, and then going after it. It makes the beast so much more personal
and an extension of the owner's personality and commitment. It seems to me that very few people get into their cars this way. They just
buy what they stumble across and move forward from there, often with a much more willy-nilly approach to the car and the specific "science"
of that given car. 
The 57 NY'er is the flagship of the fleet, in my opinion. It stands as the grandest and most elegant of all the non-Imperial cars, Imperial
being so different it hardly compares.
I am real happy for you and enjoying this thread as you put the details together. Keep it coming.
|
|
| |
|
Veteran
Posts: 241
Location: Southern CA | Thanks Doctor. I always try to study things in detail before I make a decision and move forward. It helps avoid disappointment and anger at oneself when we make a bad decision or mistake. This one worked out great as I have zero buyers remorse and I'm enjoying working through each problem with the car. I'll keep updating this post as long as I know people are enjoying it and retaining interest.
While in my garage a few days ago working on the car I hear a child's voice say "wow, that's my dream car" so I look outside and there's an 8 yo Asian kid and his sister walking by. I said "you want to see it closer? he ran to the garage to get a closer look at the finned beast. After a few moments he said "you should consider getting some wide whitewall tires for it, they will really improve the looks". I was pleasantly shocked and assured him that www tires would be installed soon. His sister asked a question about the car and he answered it before I had a chance. Upon leaving he asked if he could see it again and I told him anytime.
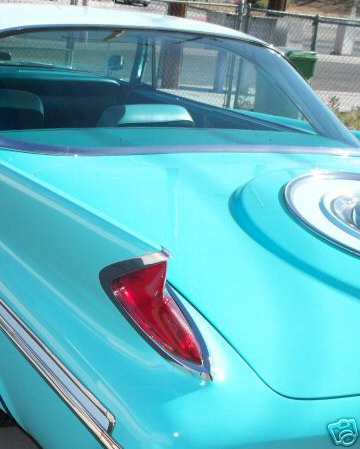
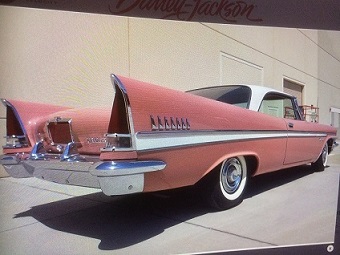
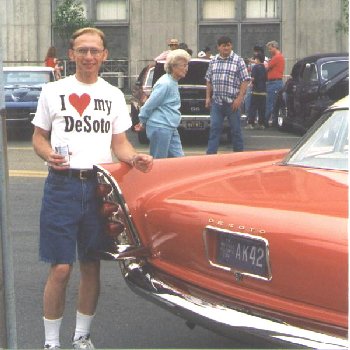
By the way, I'm already thinking about an additional car someday in the future (when I have a big garage) and plan to drive a Desoto before I decide...I love those Desoto taillights... |
|
| |
|
Veteran
Posts: 126
Location: Castlemaine Victoria Australia | funny you should say that...i measured the shed the other day and my 55 WONT FIT by 10in....not happy jan! |
|
| |
|
Expert
Posts: 3575
Location: Netherlands | Nice progress!
As for the vibration in the car, you might want to check the engine and transmission mounts for being soft and wornout perhaps, and also check the engine sparkplug wires and sparkplugs for misfiring. This can cause vibration-like issues in a car aswell.
|
|
| |
|
Veteran
Posts: 241
Location: Southern CA | craigt - 2012-09-24 11:34 PM
funny you should say that...i measured the shed the other day and my 55 WONT FIT by 10in....not happy jan!
Sounds like time to do a "pop-out" of the end wall by installing a header (beam) within the wall to support the weight of the wall section you will remove & re-framing the wall section a few feet out. It can be done in a manner to look as though it was part of the original shed plan. Or you could get a Smart Car & store in your pocket
Edited by Leadfoot1000 2012-09-25 8:49 AM
|
|
| |
|
Veteran
Posts: 241
Location: Southern CA | BigBlockMopar - 2012-09-25 1:15 AM
Nice progress!
As for the vibration in the car, you might want to check the engine and transmission mounts for being soft and wornout perhaps, and also check the engine sparkplug wires and sparkplugs for misfiring. This can cause vibration-like issues in a car aswell.
Thanks Herman, I'll check those mounts as the are likely worn-out from age. The fact that it occurs when shifting also is leading me to the transmission. However, I'm now thinking I need to drive it again and get it into drive gear, maybe 40 mph, then accelerate and see if it occurs. If it occurs at that speed it seems it would not be the transmission because the trans gears would already be locked? Although I used to be a mechanic in my young years, I know virtually nothing about automatic transmissions. As for the engine, it's smooth as silk, even with a simulated load by applying the brake and pressing the throttle...Steve |
|
| |
|

Expert
Posts: 3967
Location: DFW, TX | Chaz did a great job painting that car. Very nice score!!
From one '57 NYer owner to another, enjoy it!  |
|
| |
|
Location: Parts Unknown | Leadfoot1000 - 2012-09-25 9:02 PM
Thanks Doctor. I always try to study things in detail before I make a decision and move forward. It helps avoid disappointment and
anger at oneself when we make a bad decision or mistake. This one worked out great as I have zero buyers remorse and I'm enjoying
working through each problem with the car. I'll keep updating this post as long as I know people are enjoying it and retaining interest.
While in my garage a few days ago working on the car I hear a child's voice say "wow, that's my dream car" so I look outside and
there's an 8 yo Asian kid and his sister walking by. I said "you want to see it closer? he ran to the garage to get a closer look at the
finned beast. After a few moments he said "you should consider getting some wide whitewall tires for it, they will really improve the
looks". I was pleasantly shocked and assured him that www tires would be installed soon. His sister asked a question about the car
and he answered it before I had a chance. Upon leaving he asked if he could see it again and I told him anytime.
By the way, I'm already thinking about an additional car someday in the future (when I have a big garage) and plan to drive a Desoto
before I decide...I love those Desoto taillights...
XXXXXXXXXXXXXXXXXXXXXXXXXXXXXXXXXXXXXXXXXXXX
Wow. That poor kid is #@!ed up ! Wonder what led him astray at such a young age ?
If you've followed my story, ... my first FL car was an LA-built 57 NY'er coupe, painted Champagne and Charcoal.
I loved the car, but came to love the DeSotos even more. But I still think the NY'er is the final word in elegant for
the non-Imperial cars.
When you decide to build that bigger garage, allow enough room for a Dodge and Plymouth too, as you will likely
catch that disease too.
|
|
| |
|
Veteran
Posts: 241
Location: Southern CA | Hey Doc, how do I find your story on this site? My car was built in LA also. In my garage I plan to have an area for a few cars in progress and a separate area for a finished car or two to keep them away from the flying metal and primer. The Desotos will be stored outside and only used for parts
Edited by Leadfoot1000 2012-09-27 12:51 AM
|
|
| |
|
Veteran
Posts: 241
Location: Southern CA | 57burb - 2012-09-25 11:35 AM
Chaz did a great job painting that car. Very nice score!!
From one '57 NYer owner to another, enjoy it! ;)
Thanks Danny, I'm having a great time with it. I was really excited when I found this car and Chaz said he would hold it for me until I could fly to Montana to see it in person. I checked the car thoroughly and found that Chaz had been honest about the condition. As a normal procedure, I offered him about 15% less than his asking price (we had already determined that all the spare parts would be included). When he said no and gave me his bottom line price I thought to myself "your either going to own a 57 NYer or your not" "this is it and it's not going to get any better than this" a few seconds later I accepted his price and we shook hands and the deal was done.
He did do a great paint job. I've done a few garage paint jobs myself and none came out as good as this one. There are so many things that can go wrong, too much or not enough reducer, bugs, temperature, moisture in the compressed air, gun issues......
BTW, where can I view photos of your car? |
|
| |
|
Regular
Posts: 70
| Did you get those wide whites on there yet? Pictures? |
|
| |
|
Veteran
Posts: 241
Location: Southern CA | I had the transmission rebuilt a few weeks ago by a great mechanic, it's really dialed in now, shifts great. The power brake booster started leaking on the way back from the trans shop, so since I had to remove the master cylinder to get the booster off, I'm switching to a dual reservoir master from a 67 Chrysler while I have it apart and changing the rear wheel cylinders. The wheels and tires are waiting to be installed. A couple more weekends and I'll be able to get it out of the garage and drive it again and I'll take some photos then. |
|
| |
|
Location: Parts Unknown | Leadfoot1000 - 2012-09-27 9:33 PM
Hey Doc, how do I find your story on this site? My car was built in LA also. In my garage I plan to have an area for a few cars in progress and a separate area for a finished car or two to keep them away from the flying metal and primer. The Desotos will be stored outside and only used for parts :)
%%%%%%%%%%%%%%%%%%%%%%%%%%%%%%%%%%%%%%%%%%
The NY'er story is not posted anywhere in particular. I've just discussed it here and there as it relates to
other threads.
I heard directly from the 300 guys ... my NY'er and DeSoto were pretty much just good for parts, seein's
how they weren't 300's.
So, ... I mean, .. what are we gonna do ? We're stuck driving parts cars ! 
|
|
| |
|
Veteran
Posts: 241
Location: Southern CA | I have installed the new wheels and tires, but can't get the car out of the garage until I finish the brake work. I have some trim rings also, but decided to drive it without them first since the wheels will be scratched as soon as they are installed, then there is no changing back. I also have a pair of 1950 new yorker (15") wheel covers that I plan to try on the back with bullets on the front. That's the beauty of wheel covers, you can easily change them and change the look of a car.
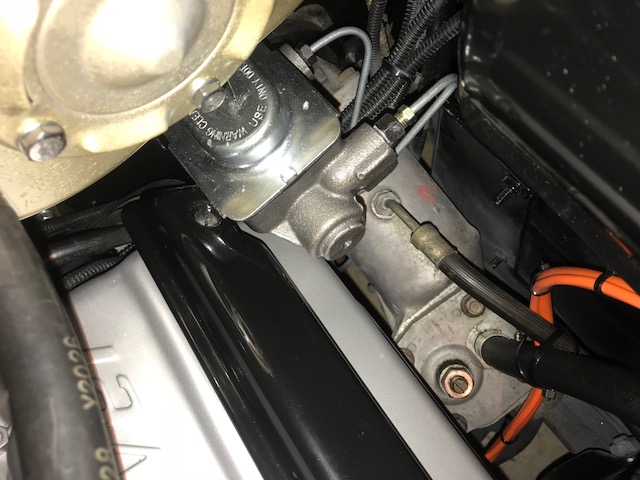
Since my car is in somewhat original condition, I plan to make an effort to keep it that way with just a few exceptions, tires/wheels being one of them, and a duel reservoir master cylinder being another. Here is the new master temporarily in place while I fit everything up. I'll keep the original wheels and wheel covers with the car in case I decide (or a future owner) to restore it to original style someday.
Steve
Edited by Leadfoot1000 2012-11-12 10:26 PM
 (009.JPG) (009.JPG)
 (002.JPG) (002.JPG)
Attachments
----------------
009.JPG (84KB - 268 downloads)
002.JPG (135KB - 262 downloads)
|
|
| |
|
Regular
Posts: 70
| I really like the wide white walls. The wheels - not so much.... But thats what owning a classic is all about. You get to do it up YOUR way. The brakes look like a nice conversion. You can actually access the reservoir! That old accordion looks good gone.
Edited by Chaz 2012-11-14 10:01 AM
|
|
| |
|
Veteran
Posts: 241
Location: Southern CA | I'll take some more pics when I get the hubcaps on, that cap is too small without a trim ring. I don't care for the look either, I should remove the photo. The pic above with the new master cyl. in place is just temporary while I'm fitting the brake lines and wiring without the booster in place, better access. "That old accordion" (the spare one that came with the car) is going right back in place as soon as I paint the firewall. I only changed the master for safety reasons (safety of me and the car's cherry grill), I have no plans to alter anything else. Better photos coming soon without the fugly wheel look... |
|
| |
|

Member
Posts: 41
| Great car great color. Yes the 57 NY is also my favourite of the Forward cars. I like the front end better than the 300. Only I like the trim better on the 300. I used to have one, but it was too much work so I sold it to sweden, they have more time to fix cars
http://up.picr.de/12703906kt.jpg
Try some Chrome Reverse wheels without hubcabs for a late 50's mild Custom look. Might work fine.
Edited by THREE HUNDRED 2012-12-06 2:28 AM
|
|
| |
|

Member
Posts: 32
| Beautiful New Yorker!! 57 Chryslers are one of my favorite finned mopars!! |
|
| |
|
Veteran
Posts: 241
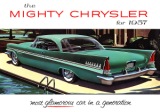
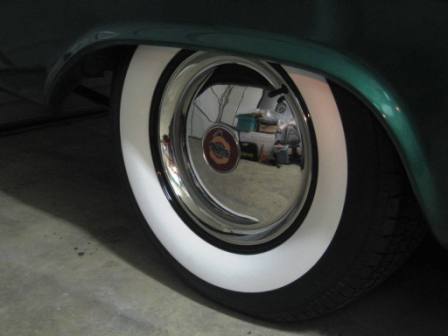
Location: Southern CA | I just finished setting the ride height (lowered the rear 2 inches, now it sits more like the green 57 in my avatar, from an early sales brochure) and putting some new hubcaps on my car. The caps are from a 1950 New Yorker, I really like their smooth aerodynamic looks, the wheels are powder coated 15x8 smoothies, the wide whites are from Diamondback. On the front right now I have the bullet center & "hot rod" trim ring, but also have two more of the matching 1950 hubcaps that I can interchange. Well, I know it's not original but I think my car looks pretty cool now, anybody else?....Steve
Edited by Leadfoot1000 2013-01-28 8:46 PM
 (014_3.jpg) (014_3.jpg)
 (020.JPG) (020.JPG)
Attachments
----------------
014_3.jpg (25KB - 254 downloads)
020.JPG (17KB - 250 downloads)
|
|
| |
|
Expert
Posts: 1295
Location: Nasco , SWEDEN | I´d go with the set up you have up front, "bullet center & "hot rod" trim ring" all around. First choice when cruising to your local hamburger inn etc etc.. These 1950 Hubcaps is beautyful and suits well on Sundaydrive to the Church......
I think it´s great to have two or even three diffrent set ups to change from time to time. only thing you´ll need now is a Wirewheel set up to cruise on the boulewards........ Love the car  
Edited by mogge65 2013-01-28 9:10 PM
|
|
| |
|
Exner Expert 19,174 posts. Neil passed away 18 Sep 2015. You will be missed, Neil!
Posts: 19146
Location: bishop, ca | Steve, love the look, and, the wheel covers (and 15" wheels).
Your speedo/odo will now register slower times and mileages.
How did you lower the rear end?
What is the official size of your tires, as imprinted on their backsides?
If they're DB's, you should love how they ride.
Edited by d500neil 2013-01-29 1:32 AM
|
|
| |
|
Veteran
Posts: 241
Location: Southern CA | mogge65 - 2013-01-28 6:09 PM
I´d go with the set up you have up front, "bullet center & "hot rod" trim ring" all around. First choice when cruising to your local hamburger inn etc etc.. These 1950 Hubcaps is beautyful and suits well on Sundaydrive to the Church......
I think it´s great to have two or even three diffrent set ups to change from time to time. only thing you´ll need now is a Wirewheel set up to cruise on the boulewards........ Love the car :dollar:
Thanks Morgan, I love the car too...I use it to go to the local hamburger joint on Sunday afternoons, so I guess the current set-up is perfect..lol I always keep an eye out for some other stylish hubcaps & will try another set someday when I find some...Steve
 (010.JPG) (010.JPG)
 (017.JPG) (017.JPG)
Attachments
----------------
010.JPG (83KB - 256 downloads)
017.JPG (20KB - 259 downloads)
|
|
| |
|
Veteran
Posts: 241
Location: Southern CA | d500neil - 2013-01-28 10:30 PM
Steve, love the look, and, the wheel covers (and 15" wheels).
Your speedo/odo will now register slower times and mileages.
How did you lower the rear end?
What is the official size of your tires, as imprinted on their backsides?
If they're DB's, you should love how they ride.
Thanks Neil, the tires are BF Goodrich TA Radials from DB. I'm very pleased with the ride and handling they provide. The rears are 255/70-15 w/ 3" WW on 15x8 wheels with a 4-3/4" backspace. The fronts are 235/70-15 w/ 2-3/4" WW on 15x7 wheels with a 4" backspace.
I lowered the rear with 2" lowering blocks placed between the spring and spring perch. I didn't want to try lowering it by removing leafs from the spring pack because it could (would) allow more rear end wind-up on heavy acceleration. Also, as you know the springs on these cars have a reputation for breaking, removing individual leafs places more stress on the leafs remaining in the pack...Steve
Edited by Leadfoot1000 2013-01-31 8:20 AM
|
|
| |
|
Exner Expert 19,174 posts. Neil passed away 18 Sep 2015. You will be missed, Neil!
Posts: 19146
Location: bishop, ca | Actually, I am not aware of any (significant; never-say-never) OEM rear leaf spring failures on the FWDLK cars.
The FRONT torsion bars, when OEM, where known to break, but that/those failures were reportedly occasioned when
the cars were relatively brand new---and may have occurred from bad metallurgy and/or from a mis-located
left/right side bar having been installed.
The OEM bars either broke, quickly, or are still in daily service, .5Century later.
Edited by d500neil 2013-01-31 2:54 PM
|
|
| |
|
Regular
Posts: 70
| Those beauty rings make all the difference! Looks great! Especially the front .
Didja come out OK on the hood? I've still got that paint here. |
|
| |
|
Location: Parts Unknown | Never liked the Windsor-Saratoga hubcaps for 57, but the NY'er caps are very well matched to the car.
A NY'er was an EXPENSIVE car, and likely not a teeny-bopper, go-to-the-burger-joint ride (unless borrowed
from banker/lawyer Dad. More likely seen out front of The Canlis during a two martini business lunch.
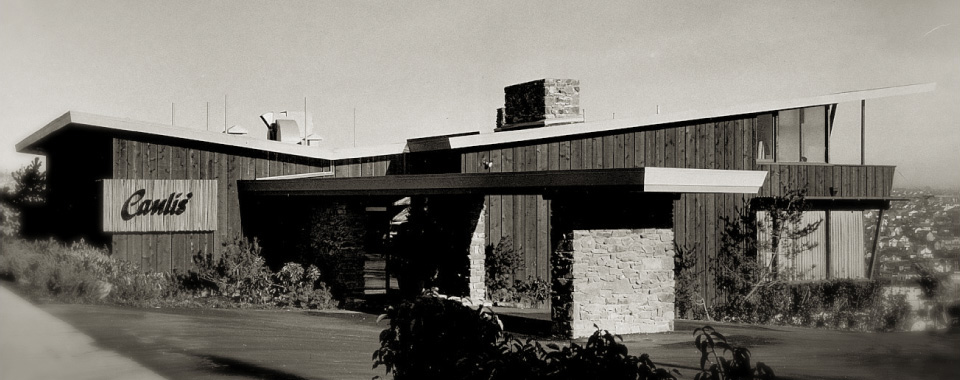 (Canlis 1.jpg) (Canlis 1.jpg)
Attachments
----------------
Canlis 1.jpg (131KB - 311 downloads)
|
|
| |
|
Veteran
Posts: 241
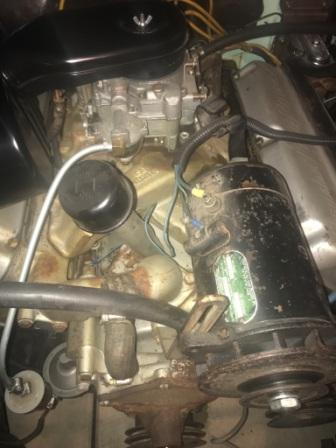
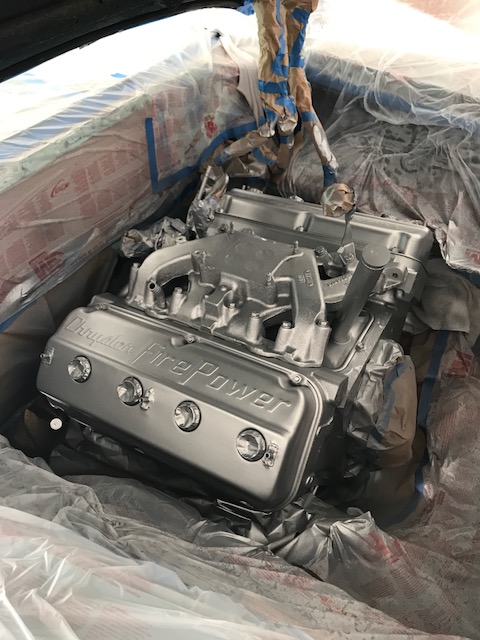
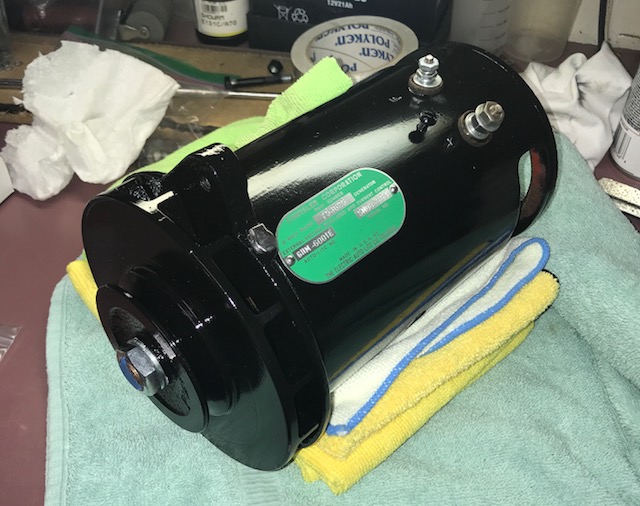
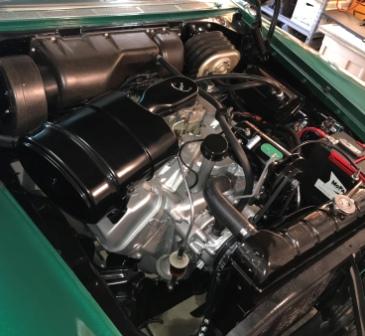
Location: Southern CA | Hey Guys, it's been a while since I updated this thread. Back in January, what started as a harmonic damper replacement ended up being a (badly needed) detailing of the engine compartment, I believe it's called the snowball effect. Here's some photos of the progress.
 (IMG_2536.JPG) (IMG_2536.JPG)
 (IMG_7257.JPG) (IMG_7257.JPG)
 (IMG_3253.JPG) (IMG_3253.JPG)
 (IMG_3256.JPG) (IMG_3256.JPG)
 (IMG_2763.jpg) (IMG_2763.jpg)
 (IMG_3293.JPG) (IMG_3293.JPG)
 (IMG_E3679-2.JPG) (IMG_E3679-2.JPG)
Attachments
----------------
IMG_2536.JPG (28KB - 262 downloads)
IMG_7257.JPG (107KB - 274 downloads)
IMG_3253.JPG (119KB - 292 downloads)
IMG_3256.JPG (101KB - 275 downloads)
IMG_2763.jpg (102KB - 265 downloads)
IMG_3293.JPG (121KB - 262 downloads)
IMG_E3679-2.JPG (26KB - 260 downloads)
|
|
| |
|
Expert 5K+
Posts: 5006
| Get er done! your way ahead of mine...
Trying to get it painted before winter... uhg |
|
| |
|

Expert 5K+
Posts: 9666
Location: So. Cal | Looks nice! |
|
| |
|
Location: North Australia | Leadfoot1000 - 2018-09-24 9:43 AM
Hey Guys, it's been a while since I updated this thread. Back in January, what started as a harmonic damper replacement ended up being a (badly needed) detailing of the engine compartment, I believe it's called the snowball effect. Here's some photos of the progress.
5 years and 5 months between updates on here! Cool you are still chugging away. More pics please, and nice work on the engine bay. Steve. |
|
| |
|
Expert
Posts: 3967
Location: DFW, TX | Very nice looking work! I'm glad you're still enjoying that car. I remember when Chaz found it (thread is on the Hamb) and the burning jealousy I had!!
Keep us posted with your progress. Every five years is just not often enough. |
|
| |
|
Extreme Veteran
Posts: 395
Location: upstate new york | I'm jealous....Engine compartment came out really nice...great work...I'm way behind... |
|
| |
|
Veteran
Posts: 241
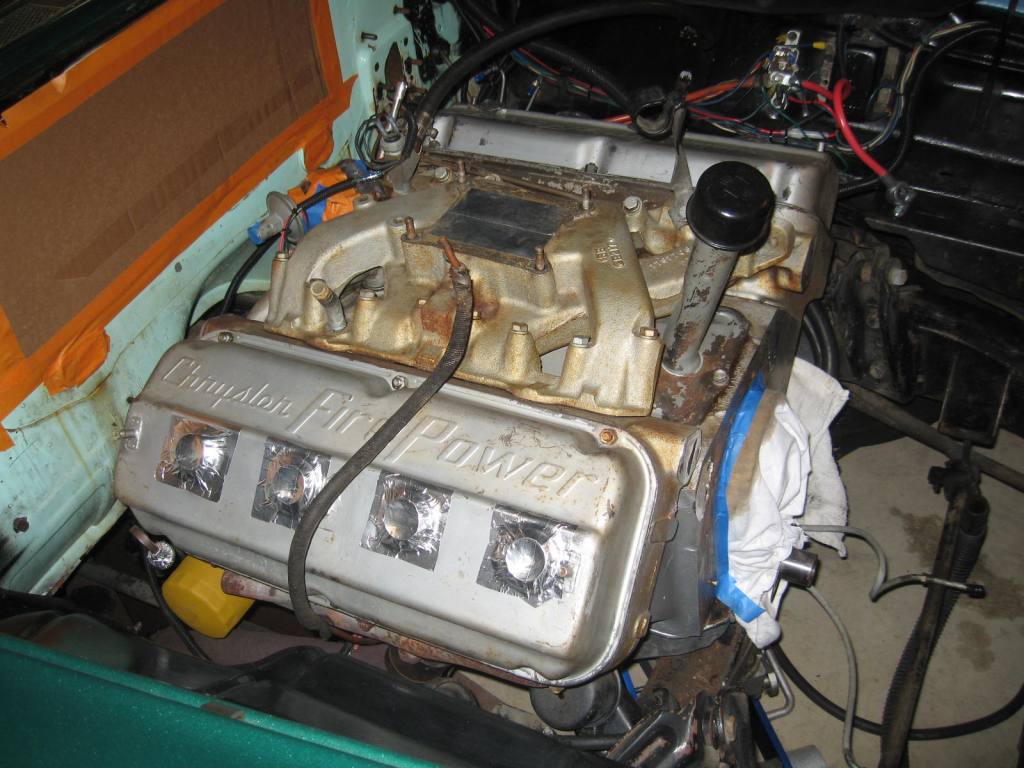
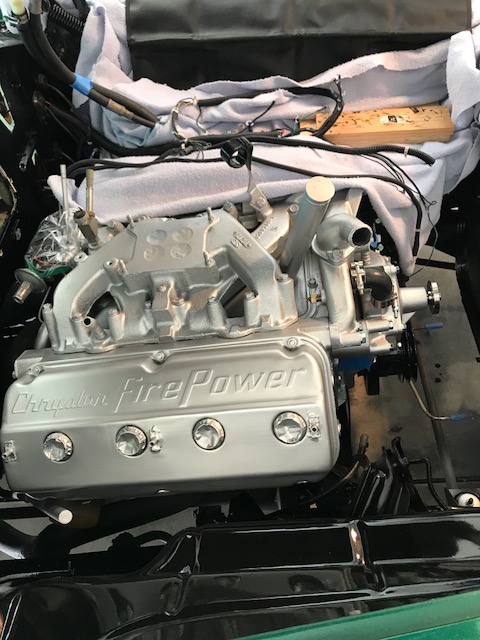
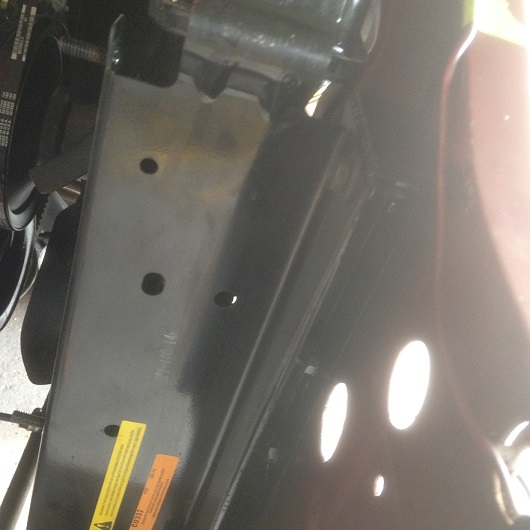
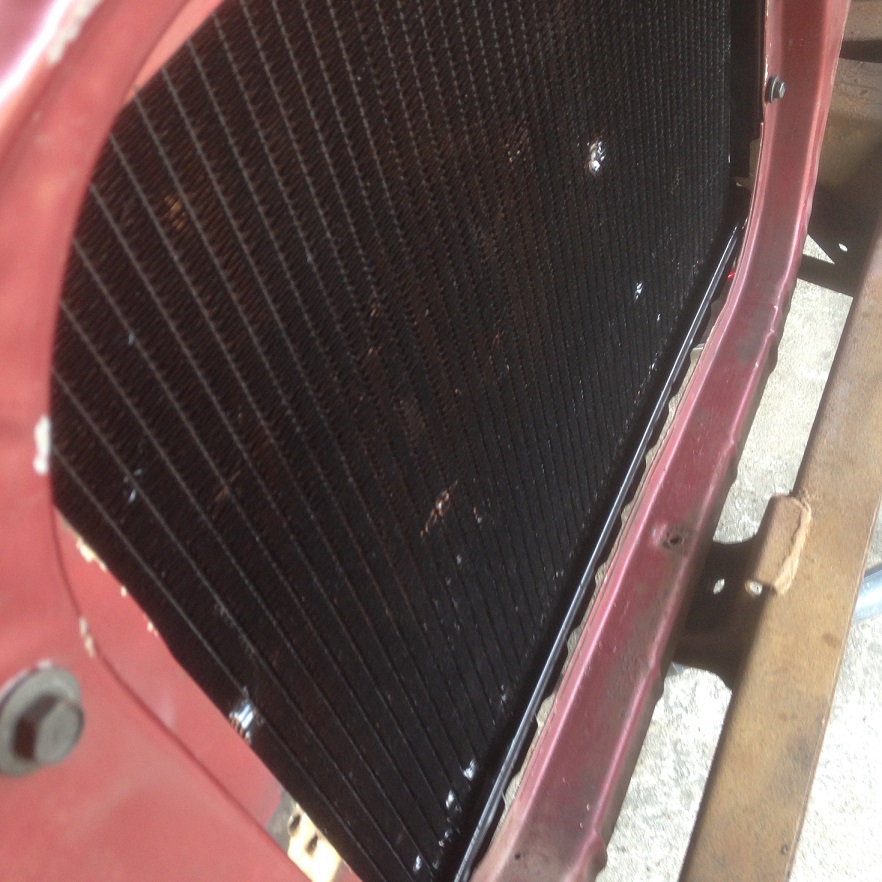
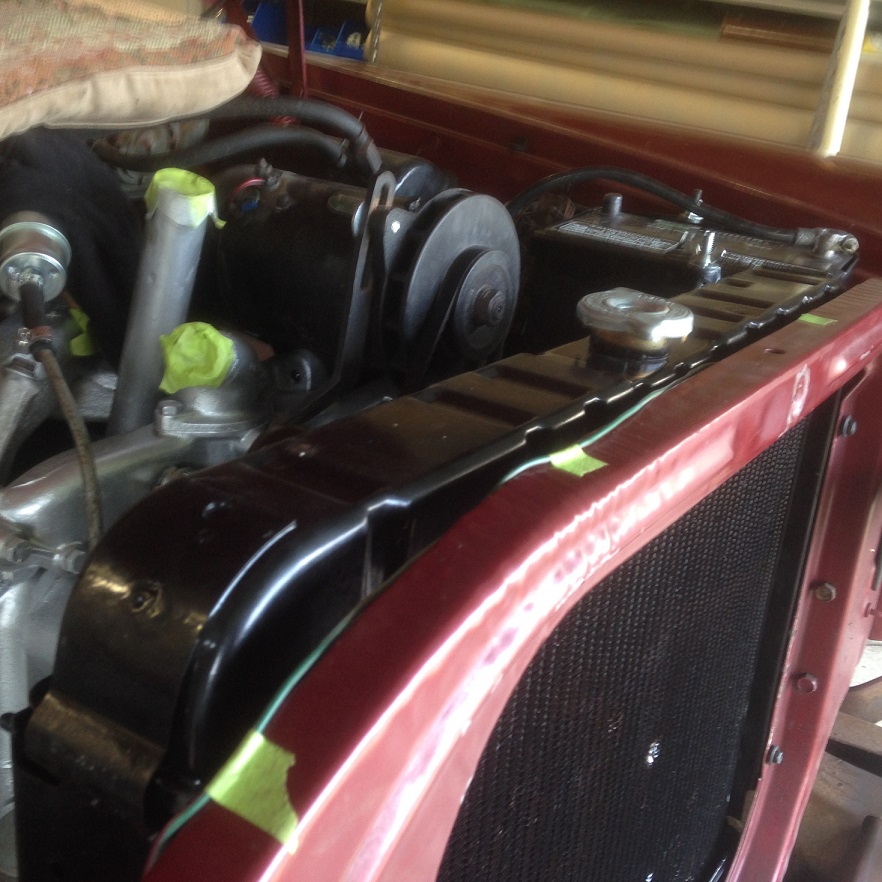
Location: Southern CA | Thanks for the replies guys. Prior to doing this latest round of work the car was running hot, 3/4 to 7/8 towards the hot side of the gauge when driven on 90 degree + days. So during this phase I had the radiator rodded out (30% plugged according to repairman), replaced the six blade fan with a seven blade fan, added a fan shroud (from a 64 NYer, bolt on), added a fan clutch, new high flow 180 degree thermostat, new water pump, and new belts and hoses. I test drove it a few days ago in 90 degree weather, it runs great, plenty of power, no pinging, but it still runs hot, seems to be just as hot as before I started working on it, very frustrating. I don't think it's a false gauge reading because the radiator overflow spits out coolant when I shut it off, but just in case I'm going to get a temp gauge and see what the actual temp is. Next step will be to try to find a heavy duty radiator core to replace mine. I just can't think of anything else that could be causing the problem. Anybody know of a source for high efficiency radiator cores that fit these cars?
Here's a few more engine photos, including the notch I made in the spark plug wire cover to clear the master cylinder. Even with the notch I was still able to fit 8mm wires within the covers. These are the larger size covers.
Edited by Leadfoot1000 2018-10-03 2:59 PM
 (IMG_3687.jpg) (IMG_3687.jpg)
 (IMG_3688.jpg) (IMG_3688.jpg)
 (IMG_3698.jpg) (IMG_3698.jpg)
Attachments
----------------
IMG_3687.jpg (95KB - 281 downloads)
IMG_3688.jpg (119KB - 280 downloads)
IMG_3698.jpg (88KB - 260 downloads)
|
|
| |
|
Expert 5K+
Posts: 9666
Location: So. Cal | You should try advancing the timing. Retarded ignition will cause the motor to run hotter. I usually advance it to the point just before where it will start to ping going up hills at low rpm. As a point of reference, I usually end up at around 10 degrees BTDC with the vacuum advance disconnected. But try out different settings to see how it reacts.
That '64 New Yorker fan shroud is a great idea!
Edited by Powerflite 2018-10-03 7:12 PM
|
|
| |
|
Veteran
Posts: 241
Location: Southern CA | Hey Nathan, the timing is currently advanced 5 degrees with the vacuum advance disconnected and 15 with it connected. I set it using the ping method, then backed it off for no ping, although the car was very warm when I set it, which adds to the pinging problem. I’ve ordered a radiator cap with a built in temp gauge, and an infrared sensor to check to inlet and outlet temperatures at the radiator. I also spoke to US Radiator and they said they could build a high efficiency radiator using my tanks, so that’s probably the course I’ll take. |
|
| |
|
Veteran
Posts: 241
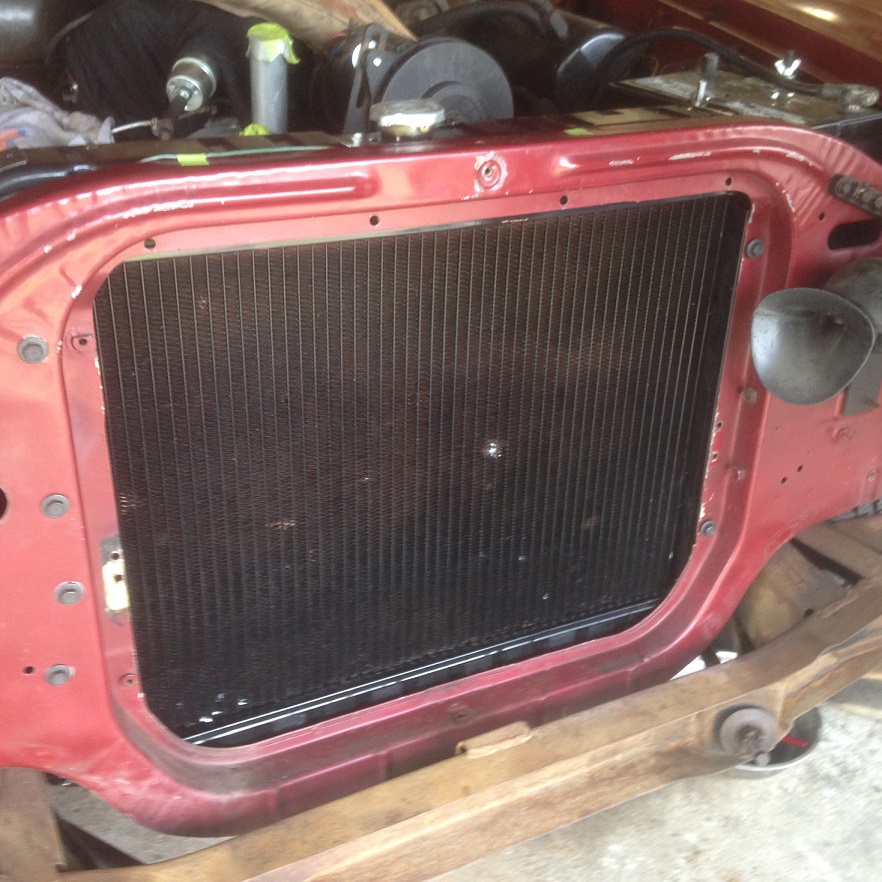
Location: Southern CA | I did some testing of the cooling system with an IR meter and with the gauge at the halfway point between hot and cold the meter showed 220 degrees at the crossover/thermostat pipe and 212 degrees at the bottom outlet of the radiator. It’s a relatively cool day today, about 70 degrees ambient. Based on this, I think the gauge is accurate (enough) and the problem is the radiator. I’ve read that a good radiator should lower the temp across it by at least 30 degrees. I contacted US Radiator and they said they can recore mine with a four row for $500-$600, existing one is a three row. With a 180 thermostat I would think a normal operating temperature would be no more than about 190-200 degrees. Does that sound about right? |
|
| |
|
Expert
Posts: 3967
Location: DFW, TX | Man, I had a huge response typed and it got lost. Bummer.
What does the IR meter say the temps are of the upper versus lower radiator outlets? The lower hose should show a significant heat loss.
|
|
| |
|
Expert 5K+
Posts: 9666
Location: So. Cal | Yes, 190F is about where you want it to be, assuming that your thermostat is working properly and set to around 180-190F.
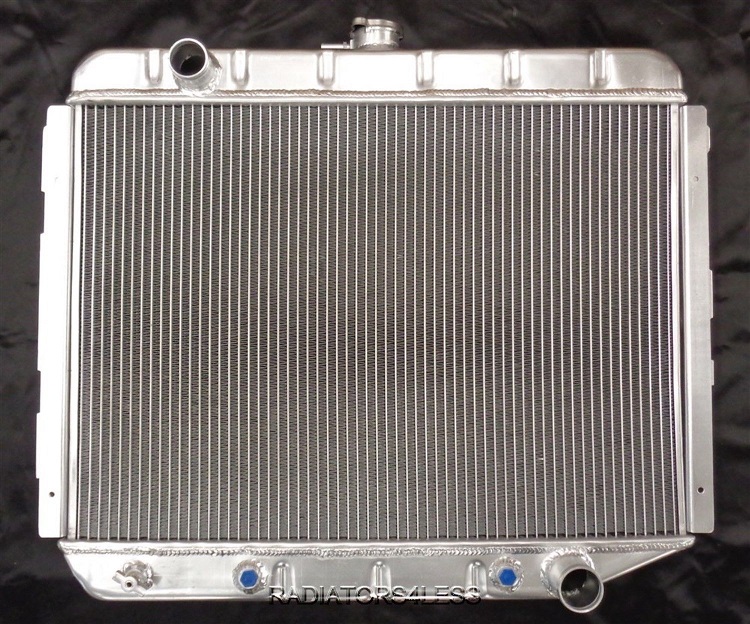
Aluminum radiators are cheap, like around $130-$200, and will outperform a high efficiency brass radiator. I don't like the look of them, but they have recently come out with top & bottom tanks that look more like the original brass versions. If you paint it black & drill holes in it to match your core support mount, it may look surprisingly like the original brass. Also, when I have gone the re-core route with the sole purpose of retaining my original top tank, I ended up with a non-original tank because they claimed they couldn't use it. So it wasn't really worth the extra expense in the end. You can also fill the frontal area with a larger core that will help you out much more than going with a thicker one. When I had overheating issues with other cars in the past, the aluminum radiators just eliminated the problem entirely.
 (26inch aluminum.jpg) (26inch aluminum.jpg)
Attachments
----------------
26inch aluminum.jpg (222KB - 262 downloads)
|
|
| |
|
Elite Veteran,, James Passed away March 2021, He will be Missed
Posts: 1028
Location: Melbourne, Australia | That's a great looking Radiator Nathan , u checked their ebay store and they done list 50s Mopar radiators , do you give them your specs and they build it , or do you have a listing for the correct radiator on ebay etc.. ?
Thanks In advance. |
|
| |
|
Veteran
Posts: 241
Location: Southern CA | 57burb - 2018-10-15 3:20 PM
Man, I had a huge response typed and it got lost. Bummer.
What does the IR meter say the temps are of the upper versus lower radiator outlets? The lower hose should show a significant heat loss.
The temp is only dropping about 10-15 degrees from the inlet to the outlet of the radiator. Should be a lot more than that. |
|
| |
|
Expert 5K+
Posts: 9666
Location: So. Cal | The Adventurer - 2018-10-15 5:45 PM
That's a great looking Radiator Nathan , u checked their ebay store and they done list 50s Mopar radiators , do you give them your specs and they build it , or do you have a listing for the correct radiator on ebay etc.. ?
Thanks In advance.
Just measure out the opening in your core support & the mounting hole positions to see what size core will fit. Most larger cars will take the 26" core used on later B-bodies, but you really need to measure everything out for yourself and compare it. I haven't done it yet because I haven't needed to yet. Ebay is the best place to get them and most sellers will give you the dimensions you need.
One thing for the '57 Chrysler, is you would probably need a later version than this where they swapped the positions of the inlet and outlet.
Edited by Powerflite 2018-10-15 10:29 PM
|
|
| |
|
Elite Veteran,, James Passed away March 2021, He will be Missed
Posts: 1028
Location: Melbourne, Australia | Thanks Nathan , much appreciated . |
|
| |
|
Veteran
Posts: 241
Location: Southern CA | Powerflite - 2018-10-15 4:09 PM
Yes, 190F is about where you want it to be, assuming that your thermostat is working properly and set to around 180-190F.
Aluminum radiators are cheap, like around $130-$200, and will outperform a high efficiency brass radiator. I don't like the look of them, but they have recently come out with top & bottom tanks that look more like the original brass versions. If you paint it black & drill holes in it to match your core support mount, it may look surprisingly like the original brass. Also, when I have gone the re-core route with the sole purpose of retaining my original top tank, I ended up with a non-original tank because they claimed they couldn't use it. So it wasn't really worth the extra expense in the end. You can also fill the frontal area with a larger core that will help you out much more than going with a thicker one. When I had overheating issues with other cars in the past, the aluminum radiators just eliminated the problem entirely.
I’m not opposed to an aluminum radiator if the top tank looks similar to the original, the one in your photo looks pretty good and passable as an antique. The core support opening width is 23-1/4” so no way a 26” wide core will fit. My existing original core is 21-3/4” so an extra width of 1.5” is all that can be accommodated. I’m not sure why you think there is extra width space available to fill. If I can keep the car cool and retain an original top tank and trans cooler I don’t have any problem spending the extra bucks.
Edited by Leadfoot1000 2018-10-16 12:00 PM
|
|
| |
|
Expert 5K+
Posts: 9666
Location: So. Cal | I just measured the core size on my New Yorker and it is 22" wide x 18" tall. That's much narrower than I expected. The opening is 23" wide x 19" tall, and can take up to about 25 or 26" tall total height, including the cap. The A-body and small block B-body radiators use a 22" core, but the height is typically much shorter. The best fit that I have found would be from a '62-'65 B-body. Unfortunately, the aluminum radiators I found for those didn't have good looking ribs on them, but the top tank was at least rounded instead of having the typical sharp corners. There may be other sellers that make them with better looking tanks, so a good search might find something.
https://www.ebay.com/itm/KKS-MOTORSPORTS-3-ROW-ALUMINUM-RADIATOR-62-...
A '56 Ford truck is very close to these dimensions, except maybe up to 1" overall taller. And they sell them with better looking ribs in the top and sides of the tank. The annoying thing about them though is the centrally located inlet. The '56 Chrysler used a center spout on the water pump, so you could use that to make it work, but it won't look the same.
|
|
| |
|
Expert
Posts: 3967
Location: DFW, TX | Leadfoot1000 - 2018-10-15 8:22 PM
The temp is only dropping about 10-15 degrees from the inlet to the outlet of the radiator. Should be a lot more than that.
You had it recored, right? Are there bent fins or excessive paint on them?
The fan should be pulling a huge amount of air through the radiator with a 7-blade fan plus shroud. Is it? |
|
| |
|
Veteran
Posts: 241
Location: Southern CA | Nathan, that radiator you linked is a very good fit, practically a bolt in. Tough decision, because I’m trying to keep original appearances and I like the looks of the original radiator. When I had mine rodded out I had the tech remove the top tank, then I bought it home and spent several hours fixing the dents in it. I spent most of the day today looking for a replacement and the one you recommended is the best fit. I wonder what they use inside for the trans cooler, a finned tube or just a tube. The f100 rad that you referenced does look better, I wonder how it would work to relocate the inlet then patch the hole?
Danny, I had my original radiator rodded out, not recored. The fins all look good and it only has one coat of paint. The fan is moving a lot of air, but the engine is running hot even on the freeway, so I don’t think airflow is the issue.
Edited by Leadfoot1000 2018-10-17 12:09 AM
|
|
| |
|
Expert
Posts: 1488
Location: New Castle PA | You can also add a "wetting agent" to the coolant. Several companies make it, including Royal Purple, which is what I use. Theirs is called Purple Ice. Won't solve a serious problem but it does help pull temps down just a bit. |
|
| |
|
Elite Veteran,, James Passed away March 2021, He will be Missed
Posts: 1028
Location: Melbourne, Australia | If it helps I adapted/ fitted a $250 1966 C Body 26 inch Chrysler Brand new Brass radiator from spectra that I bought on ebay .
https://www.ebay.com/itm/Spectra-CU332-Complete-Radiator/36245611760...
With a mounting box bracket and some bending of the lower edge of the rad support and re drill holes in the radiator on the Left side it fitted tight but perfect and all the hoses lines up perfect . I couldn't believe it .
The top tank doesn't look right obviously , but its bigger and the car ran perfect temp even in the heat . I will try and uploap some pics.
No holes had to be drilled in the rad support at all , I sed the existing holes to munt the dual L bracket , was easy to make .
Edited by The Adventurer 2018-10-17 6:33 AM
|
|
| |
|
Elite Veteran,, James Passed away March 2021, He will be Missed
Posts: 1028
Location: Melbourne, Australia | Some Pics .
 (080.JPG) (080.JPG)
 (081.JPG) (081.JPG)
 (082.JPG) (082.JPG)
 (083.JPG) (083.JPG)
 (084.JPG) (084.JPG)
 (085.JPG) (085.JPG)
 (086.JPG) (086.JPG)
Attachments
----------------
080.JPG (171KB - 282 downloads)
081.JPG (92KB - 267 downloads)
082.JPG (223KB - 260 downloads)
083.JPG (270KB - 254 downloads)
084.JPG (211KB - 255 downloads)
085.JPG (239KB - 248 downloads)
086.JPG (231KB - 260 downloads)
|
|
| |
|
Veteran
Posts: 241
Location: Southern CA | Hey Edward, I’ve looked into the wetting additives, but as you stated they will not correct a serious heating issue. Are you running an original radiator in your Adventurer? If yes, did you have it recored with a more efficient type of core? Thanks
Hey James, thanks for posting those photos. The radiator looks like a good fit there and maintains an old school look. I found one on Summit for $202 and free (US) shipping. I noticed there are mounting bolts on it for a shroud, are you using a shroud on it? Tomorrow I’ll do some measurements and decide which one is the best option.
Edited by Leadfoot1000 2018-10-18 12:23 AM
|
|
| |
|
Elite Veteran,, James Passed away March 2021, He will be Missed
Posts: 1028
Location: Melbourne, Australia | No I did not use the shroud , but as these are standard on all 65-73 c body mopars with air con they do have the mountings as you say and do run a shroud and they have no reproed them I believe . not sure if it will fit the 57 , but it might .
Good luck either way . |
|
| |
|
Expert
Posts: 1488
Location: New Castle PA | Leadfoot1000, my Adventurer radiator has the top and bottoms from the original, but a new core. Some NDC members may remember me in Canada a few years ago at the national convention, when the rad failed big time. I literally was bucketing water out of the lake and trying to keep it from running straight through. I ended up using a couple tubes of JB Waterweld and just packing it all into the core, essentially sealing off that entire area. I drove 6 hours back home without a radiator cap, but made it just fine. My car's motor has been overbored and there's less metal left in the block to act as a heat sink, I'm told.
In any case, I do use the Purple Ice, plus I installed a 6-blade fan instead of the standard 4. On real hot days, I slip a portable junkyard electric fan between the radiator and the front cross-strut (it's a "pusher" fan, not a "puller") and just snap it into the wiring around the voltage regulator. If I'm going to a car show, I slip it right back out. |
|
| |
|
Veteran
Posts: 241
Location: Southern CA | Edward, thanks for your detailed reply, it convinced me to get the aluminum radiator that Nathan recommended. I live in an area with very hot summers. As much as I want to maintain original appearances under the hood, keeping the engine cool is infinitely more important. If I drop $600 on a recore and still run hot I’m afraid I would be inconsolable. I ordered the aluminum one for $190 and I also bought a fan shroud https://www.speedwaymotors.com/Walker-WS55A-Radiator-Fan-Shroud-Styl... that should be a great fit with that radiator. I’ll post some photos of the installation. |
|
| |
|
Veteran
Posts: 241
Location: Southern CA | Doctor DeSoto - 2013-02-05 6:40 PM
Never liked the Windsor-Saratoga hubcaps for 57, but the NY'er caps are very well matched to the car.
A NY'er was an EXPENSIVE car, and likely not a teeny-bopper, go-to-the-burger-joint ride (unless borrowed
from banker/lawyer Dad. More likely seen out front of The Canlis during a two martini business lunch.
Hey Doc, it's been a while, but better late than never, right? I agree with you on the hubcaps and I sold the Saratoga caps that came with my car and bought one new yorker hubcap to experiment with. I've been planning for quite a while to modify the new yorker hubcap by adding a 15" outer ring to it to fit my wheels. I had bought a mint condition 56 new yorker cap so I could use the center emblem for my hood script. I tried to sell the remaining cap but nobody wanted to buy it so it became a donor for the outer ring. I have it fitted up and ready to "weld." I think I can solder it on there with a propane torch and some tin/silver solder and acid flux. I'll try practicing on the scrap piece left over from the donor. Here's a pic of the progress.
 (IMG_3768.JPG) (IMG_3768.JPG)
Attachments
----------------
IMG_3768.JPG (65KB - 243 downloads)
|
|
| |
|
Veteran
Posts: 241
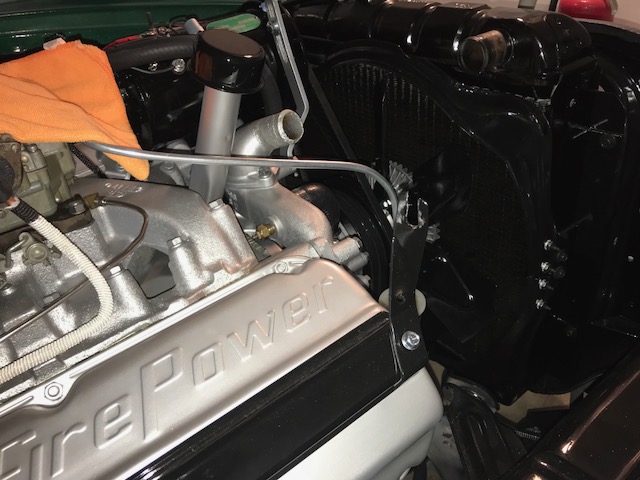
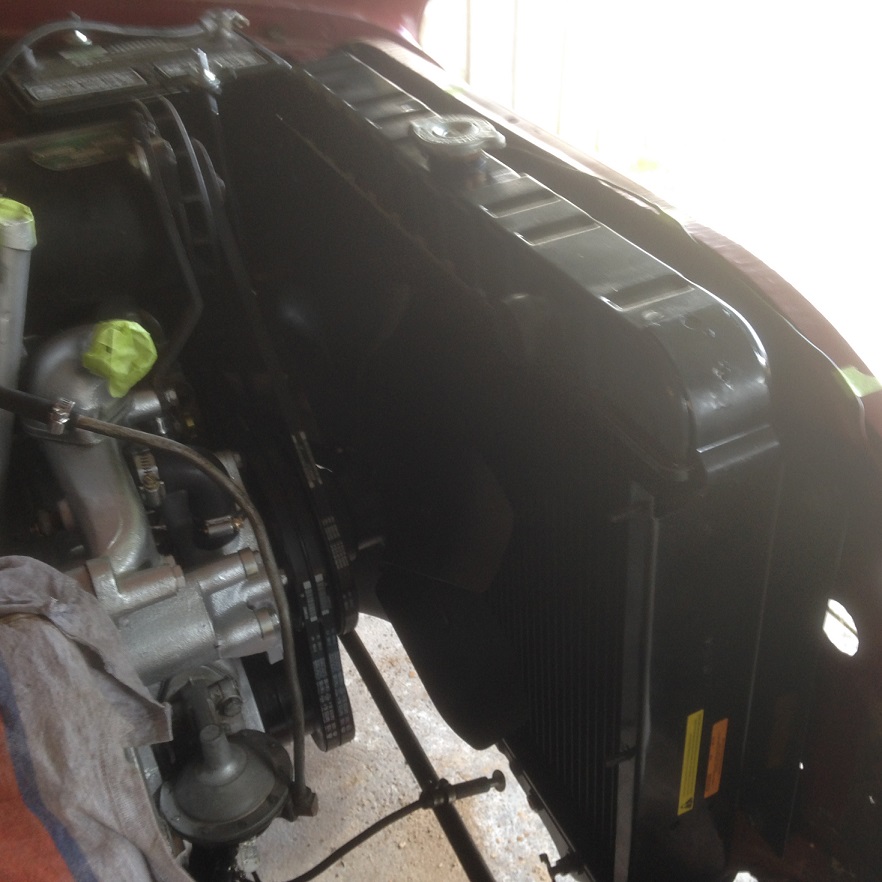
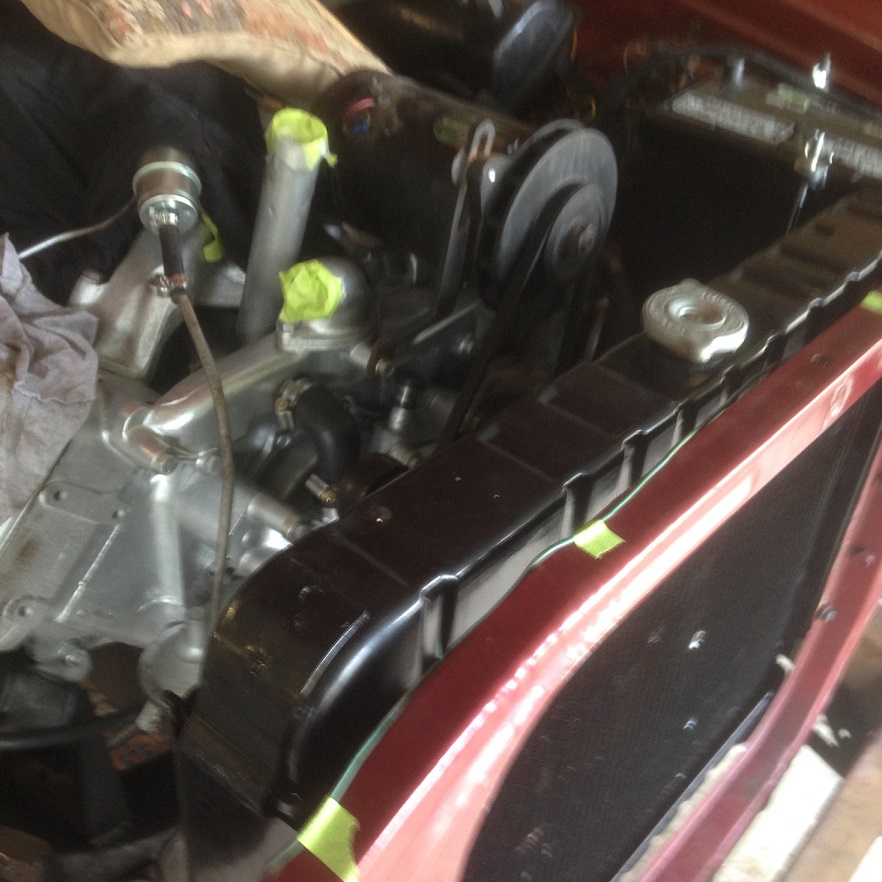
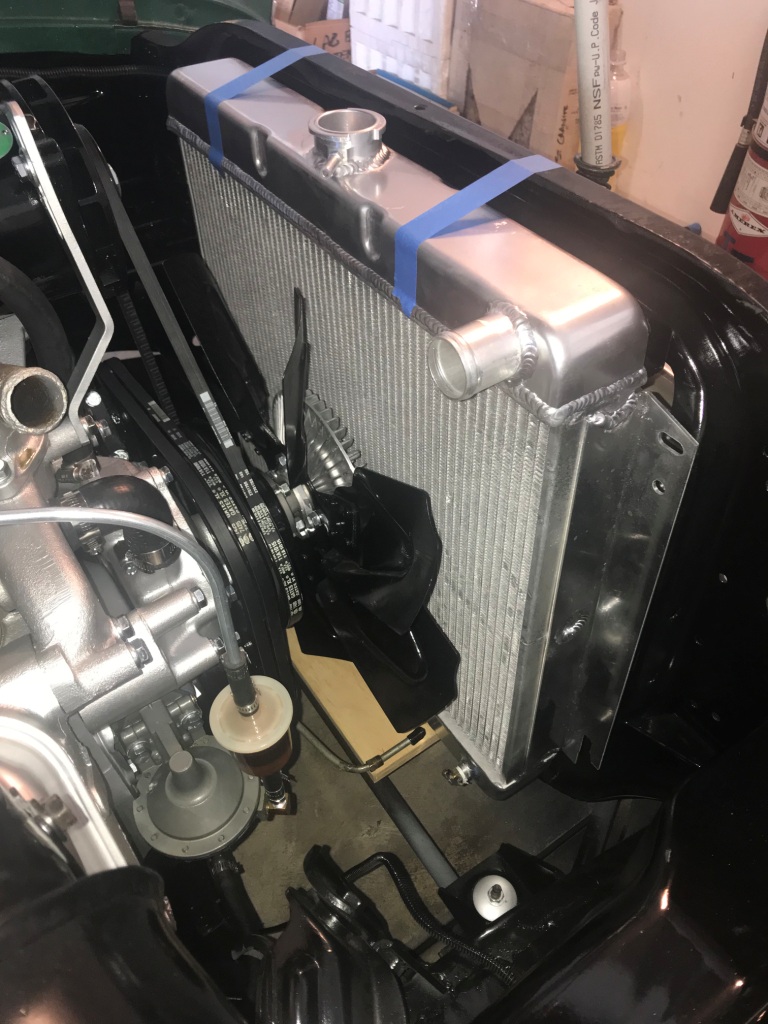
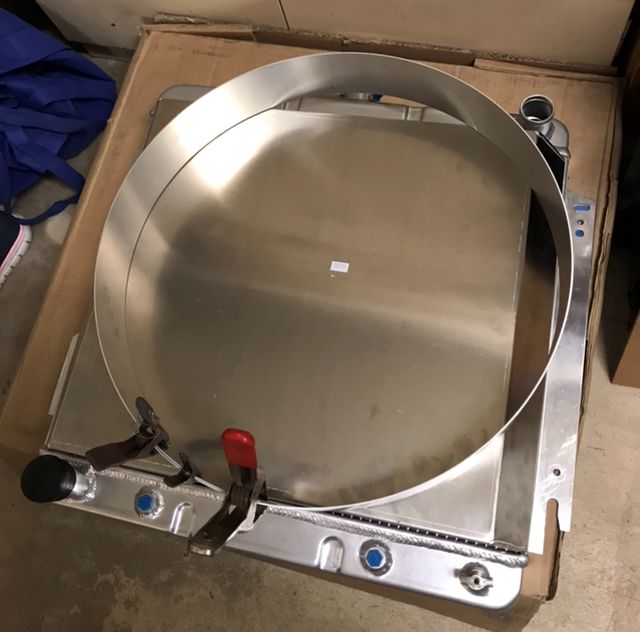
Location: Southern CA | So I ordered the radiator on Friday morning and was surprised to find it sitting on the porch Saturday afternoon. It really fits well. The outside measurement flange to flange matches the original and vertically the core fills up the opening in the core support. The two stamped indention's at the bottom tank are in en exact location to give clearance to the two center clips that attach an angled air deflector to to the core support, what are the odds of that? Thank's Nathan for recommending this one, it looks pretty good in there and will look better after I ultimately paint it. I'm going to put it all together and test it first, before removal and painting. There is a small interference issue at the bottom corners of the core support and I'll have to shim the radiator away from the core with a couple of washers at the two bottom bolts to get clearance. I also added a coolant recovery tank in a perfect spot next to the radiator, i had it custom configured to utilize two existing holes in the core support.
 (KKS Motorsports 6265 Radiator-3.JPG) (KKS Motorsports 6265 Radiator-3.JPG)
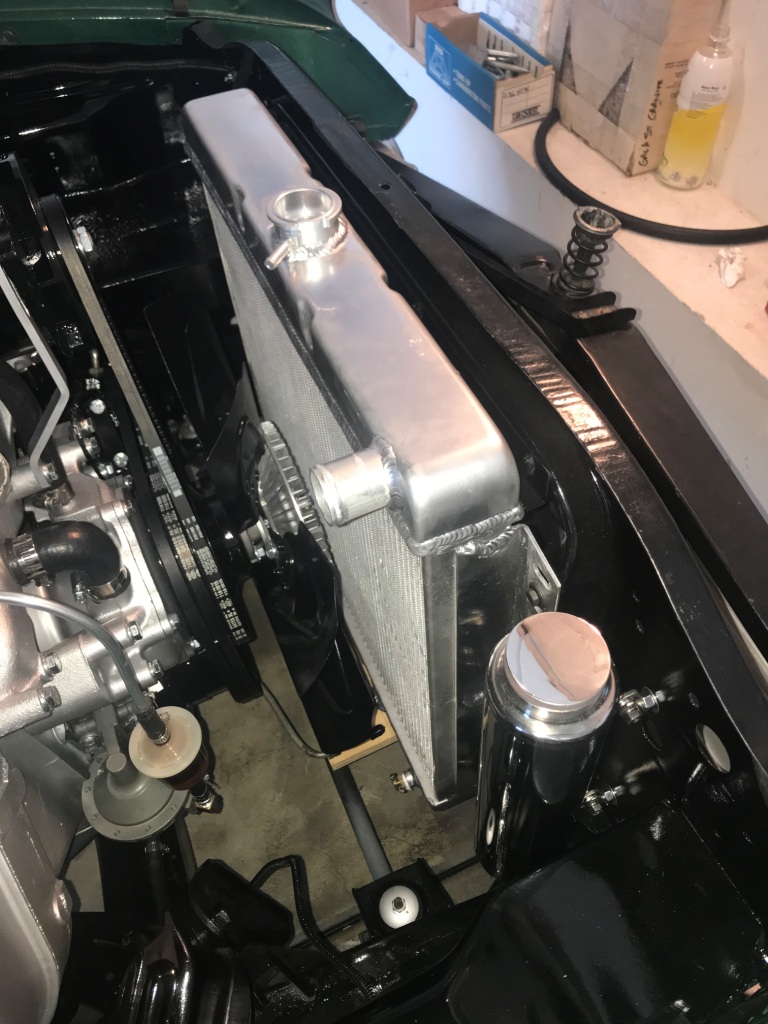 (KKS Motorsports 6265 Radiator.JPG) (KKS Motorsports 6265 Radiator.JPG)
 (KKS Motorsports 6265 Radiator-2.JPG) (KKS Motorsports 6265 Radiator-2.JPG)
 (IMG_3788.JPG) (IMG_3788.JPG)
 (Radiator Clearance at bottom.JPG) (Radiator Clearance at bottom.JPG)
Attachments
----------------
KKS Motorsports 6265 Radiator-3.JPG (235KB - 262 downloads)
KKS Motorsports 6265 Radiator.JPG (230KB - 251 downloads)
KKS Motorsports 6265 Radiator-2.JPG (177KB - 253 downloads)
IMG_3788.JPG (52KB - 242 downloads)
Radiator Clearance at bottom.JPG (39KB - 254 downloads)
|
|
| |
|
Location: Parts Unknown | Leadfoot1000 - 2018-10-20 9:39 PM
Doctor DeSoto - 2013-02-05 6:40 PM
Never liked the Windsor-Saratoga hubcaps for 57, but the NY'er caps are very well matched to the car.
A NY'er was an EXPENSIVE car, and likely not a teeny-bopper, go-to-the-burger-joint ride (unless borrowed
from banker/lawyer Dad. More likely seen out front of The Canlis during a two martini business lunch.
Hey Doc, it's been a while, but better late than never, right? I agree with you on the hubcaps and I sold the Saratoga caps that came with my car and bought one new yorker hubcap to experiment with. I've been planning for quite a while to modify the new yorker hubcap by adding a 15" outer ring to it to fit my wheels. I had bought a mint condition 56 new yorker cap so I could use the center emblem for my hood script. I tried to sell the remaining cap but nobody wanted to buy it so it became a donor for the outer ring. I have it fitted up and ready to "weld." I think I can solder it on there with a propane torch and some tin/silver solder and acid flux. I'll try practicing on the scrap piece left over from the donor. Here's a pic of the progress.
===================================
Interesting idea. I have plexed about this problem for years as wire
wheels have gone from being an exotic period option to a contrived
"standard equipment" item on every #@! Forward Look convertible and
hardtop. Wires were always my favorite wheel, with the deep dish face,
15" stance, and formal look, but with reproductions, they are common
as dirt today, ... I want something less predictable. I toyed with how
make the set of 14" Adventurer caps work, but sold them to Mike, fo r
his Adventurer. I will probably sell the car too. But your idea seems
like a great one.
|
|
| |
|
Expert 5K+
Posts: 9666
Location: So. Cal | That radiator looks pretty good in there. I may end up doing the same thing if mine gives me trouble once I start to drive it.
One problem with your plan on the hubcaps is that you will have to move the hole for the valve too, which will make it look odd. If you cover up the old hole from the backside with another piece, and cut the new hole cleanly, it could work though. |
|
| |
|
Veteran
Posts: 241
Location: Southern CA | Nathan, I did find some angled valve stems that are available that could have an additional bend added to create an offset to fit the custom sized hubcap. Of course then you could ONLY use 14" conversion caps. So maybe it will end up as a cool garage wall decoration, we'll see.
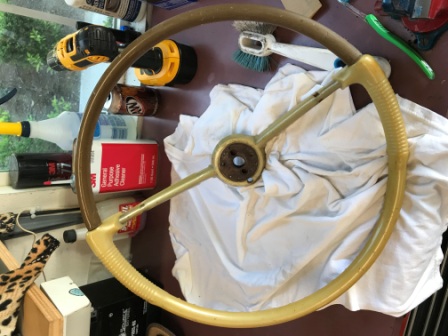
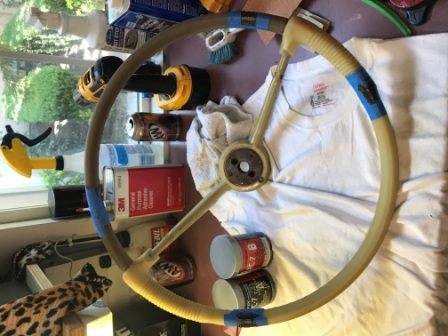
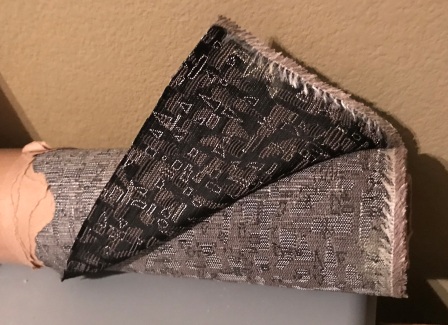
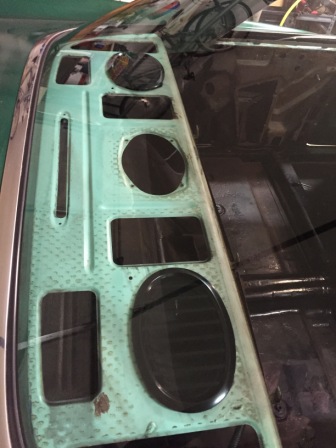
The fan shroud I referenced ordering above is too small, so I sent it back and ordered a different one. While I'm waiting on that I started working on a very nice condition steering wheel I got a few months back. I cleaned, sanded and patched a couple of small dings in it. My car's interior was originally light green with dark green cloth seat inserts and dark green/light green vinyl door panel inserts. My plan is to replace all the light green with dark green and replace all the dark green with black, cloth and vinyl. Here's a photo of original cloth I'll be using. I plan to paint the lower half of this steering wheel black and the top half metallic green like the exterior. I previously removed the dark green, dilapidated, dash pad and painted the upper dash black, i'm going the leave the lower dash with the original light green paint to at least have one original surface in the car. It has a few chips but is still pretty decent looking. I had planned to put in a black dash pad, but I like the black paint so I'll skip the pad.
 (IMG_3831.JPG) (IMG_3831.JPG)
 (IMG_3832.JPG) (IMG_3832.JPG)
 (57 Chrysler Original Cloth.JPG) (57 Chrysler Original Cloth.JPG)
 (IMG_3838.JPG) (IMG_3838.JPG)
Attachments
----------------
IMG_3831.JPG (62KB - 255 downloads)
IMG_3832.JPG (64KB - 255 downloads)
57 Chrysler Original Cloth.JPG (64KB - 255 downloads)
IMG_3838.JPG (46KB - 263 downloads)
|
|
| |
|
Veteran
Posts: 241
Location: Southern CA | 60 Imp - 2018-09-24 3:06 AM
Leadfoot1000 - 2018-09-24 9:43 AM
Hey Guys, it's been a while since I updated this thread. Back in January, what started as a harmonic damper replacement ended up being a (badly needed) detailing of the engine compartment, I believe it's called the snowball effect. Here's some photos of the progress.
5 years and 5 months between updates on here! Cool you are still chugging away. More pics please, and nice work on the engine bay. Steve.
Thanks Steven, I'll try to update more often, I did do a lot of work to the car during the past several years, but often get sidetracked by more demanding projects.
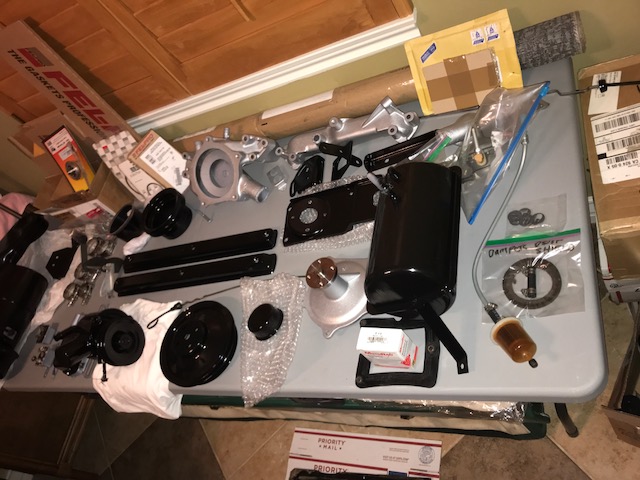
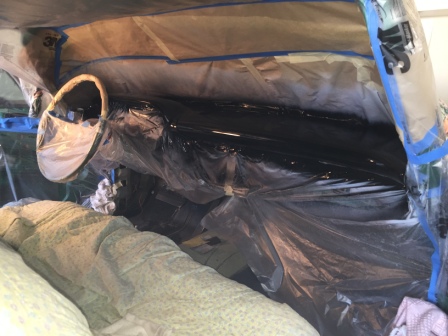
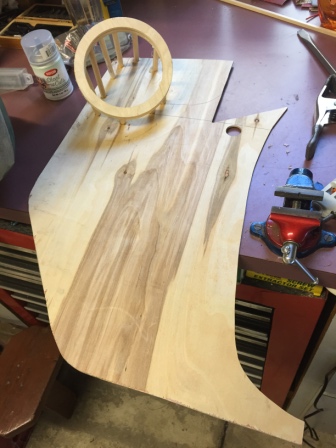
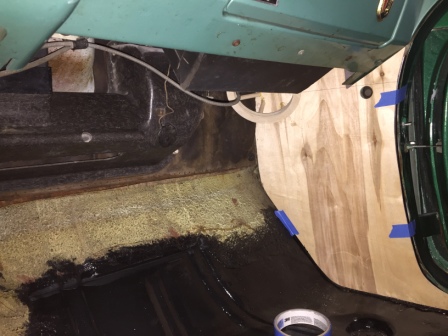
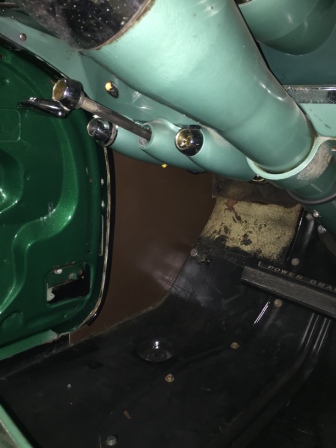
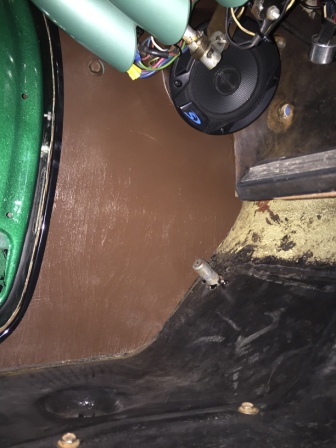
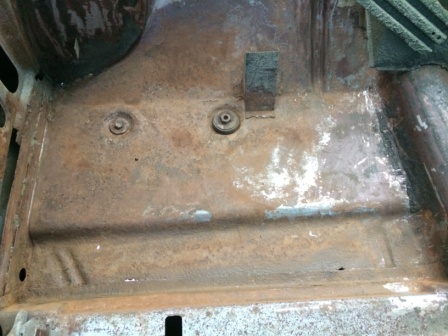
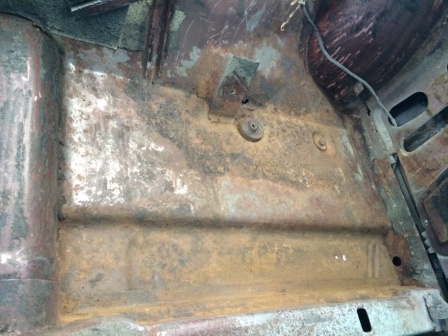
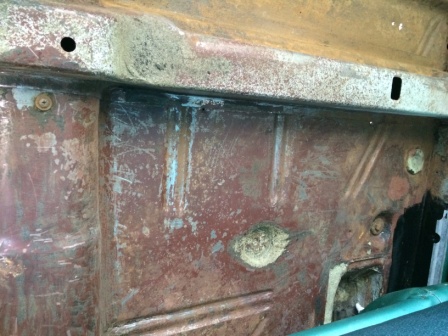
I scraped sanded prepped and painted all the floors, trunk, even up inside of the fins. Removed the rear side windows and painted all inside those areas, replaced a couple of the roller wheels, cleaned and lubed, reassembled. I prepped almost all the interior parts that get polished, chromed or painted. I had the radio updated to FM, USB, connection, and blue tooth and a digital display, but retains original buttons (reassigned) and original looks. I mounted a small (12 amp power max) amplifier under the dash in place of the original speaker, added two 6x9 speakers in the package tray with original grills and made custom kick panels to hide 5.5" speakers on each side, under the dash. The photos show the framing, then I used fiberglass to strengthen and finish them. The front speakers are pretty well hidden from normal view. The kick panels will be covered with black vinyl, their painted brown now because I just finished up some left over cans of brown paint to seal the wood. The stereo system has a very deep, rich tone and sounds great, but I’ve noticed that I turn it off most of the time so I can listen to the deeper, richer tone of the Hemi. I’m rying to get everything related to the interior in working order, then I'll take it to the upholstery shop. Her's some pics oof the floor after i scraped the undercoating off. I left the under coating alone on any vertical surfaces where it’s still doing it's job.
Edited by Leadfoot1000 2018-10-27 1:48 AM
 (IMG_2143.JPG) (IMG_2143.JPG)
 (IMG_0015.JPG) (IMG_0015.JPG)
 (IMG_2225.JPG) (IMG_2225.JPG)
 (IMG_2229.JPG) (IMG_2229.JPG)
 (IMG_0009.JPG) (IMG_0009.JPG)
 (IMG_0008.JPG) (IMG_0008.JPG)
 (IMG_1590.JPG) (IMG_1590.JPG)
 (IMG_1591.JPG) (IMG_1591.JPG)
 (IMG_1592.JPG) (IMG_1592.JPG)
Attachments
----------------
IMG_2143.JPG (68KB - 266 downloads)
IMG_0015.JPG (48KB - 259 downloads)
IMG_2225.JPG (81KB - 247 downloads)
IMG_2229.JPG (64KB - 253 downloads)
IMG_0009.JPG (52KB - 254 downloads)
IMG_0008.JPG (65KB - 245 downloads)
IMG_1590.JPG (64KB - 246 downloads)
IMG_1591.JPG (69KB - 262 downloads)
IMG_1592.JPG (72KB - 238 downloads)
|
|
| |
|
Member
Posts: 30
Location: Iowa | That is a great car! Congrats man! |
|
| |
|

Board Moderator & Exner Expert 10K+
Posts: 13049
Location: Southern Sweden - Sturkö island | Keep up the good work! Compliments to your front speaker panels - creative thinking! |
|
| |
|
Veteran
Posts: 241
Location: Southern CA | Thanks Trent and Sven for the reply, really the main part of our hobby is restoring parts. over time, the restored parts start outnumbering the un-restored ones and the car starts taking shape. I enjoy restoring parts and making the car more and more reliable, safe, and of course, cool.
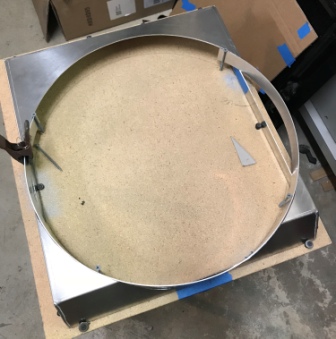
I've been fitting up an aluminum fan shroud the last few days. Considering the relatively few options available to get a highly efficient and decent looking shroud I think this one was the best choice. I've about finished fitting it. mocked up on a board to keep everything square and aligned while I take it to get tig welded.
 (IMG_00152.jpg) (IMG_00152.jpg)
 (IMG_E0014.JPG) (IMG_E0014.JPG)
 (IMG_E0013.JPG) (IMG_E0013.JPG)
Attachments
----------------
IMG_00152.jpg (48KB - 234 downloads)
IMG_E0014.JPG (132KB - 231 downloads)
IMG_E0013.JPG (50KB - 228 downloads)
|
|
| |
|
Veteran
Posts: 241
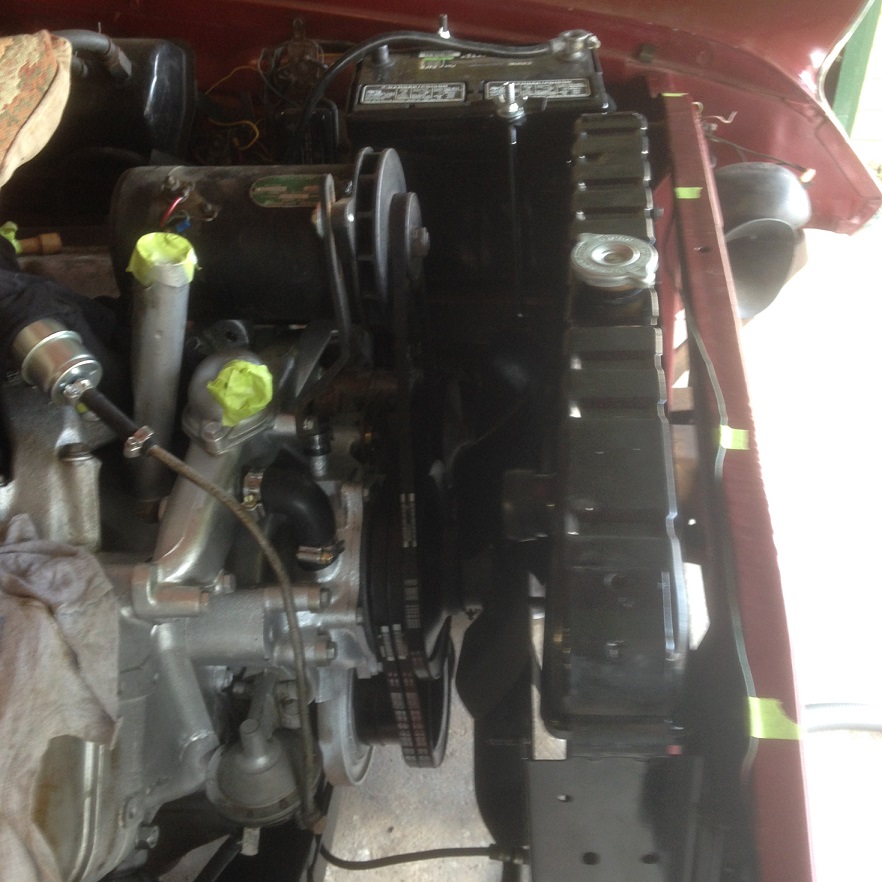
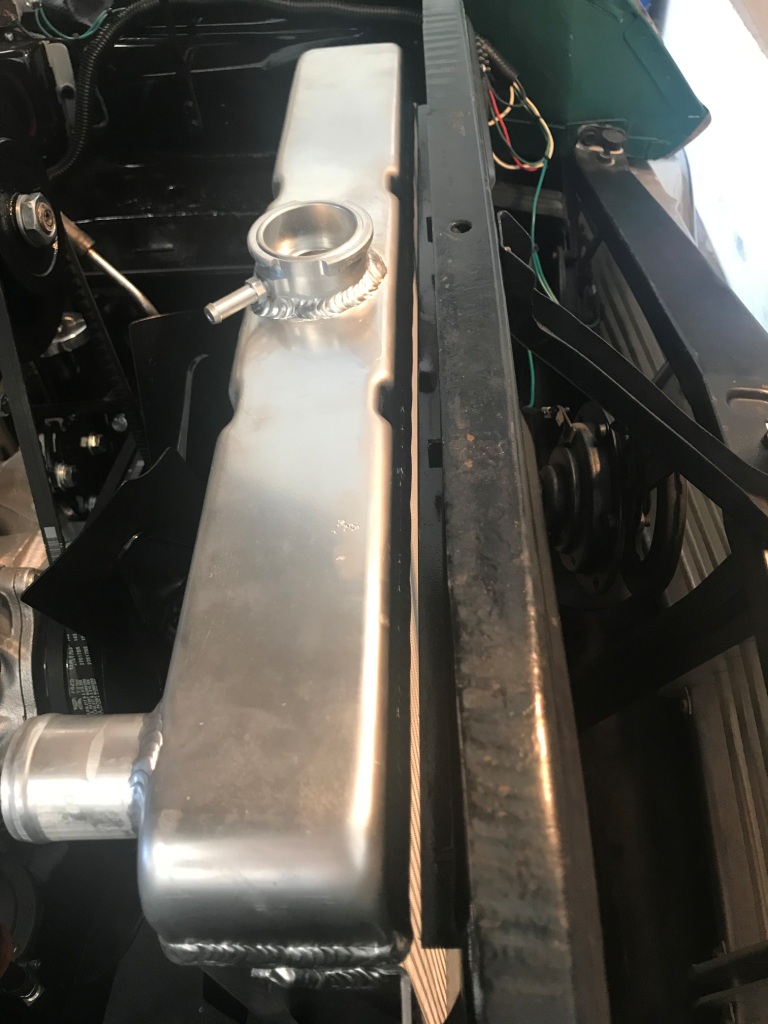
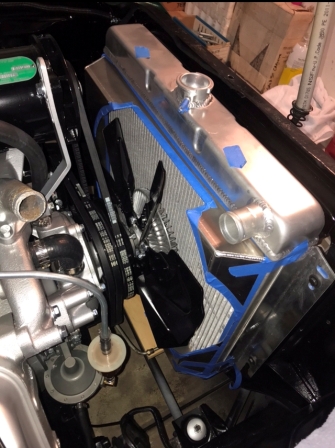
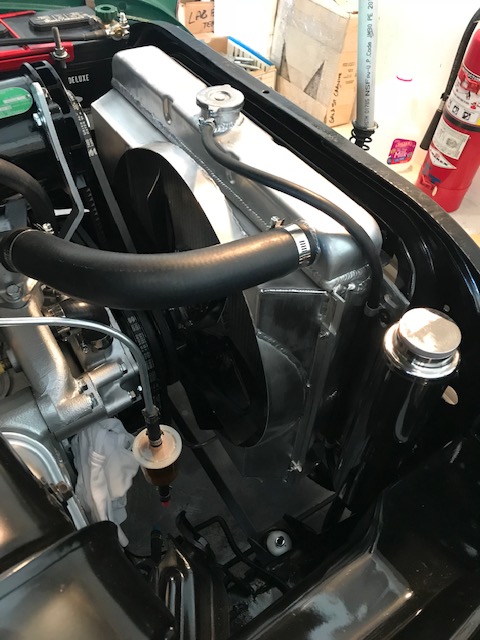
Location: Southern CA | I finished up the shroud a few weeks ago, its a good fit and should get the job done. I took it for a drive and it ran right in the low part of the operating range of the gauge, so far so good, but the weather is (relatively) cold now. so I wont know for sure if this fixed it until next spring or summer, 100 degrees ambient would be a good test. After that I'll probably take out the radiator and shroud and paint them black. But the aluminum color doesn't look bad IMO, it matches the aluminum painted engine pretty good. I typically don't drive this car in very hot weather, but I want the limiting factor to be me, rather than the car's cooling system.
My short test drive revealed a fuel pump leak, so i'm working on that now.
 (IMG_0102.jpg) (IMG_0102.jpg)
Attachments
----------------
IMG_0102.jpg (110KB - 232 downloads)
|
|
| |
|
Expert 5K+
Posts: 9666
Location: So. Cal | You did a great job on that shroud; looks really nice! I agree that the aluminum doesn't look as glaringly out of place as you might think. Not having the sharp corners on the top tank helps a lot for how it looks. Now you can drive it around more and not worry about the temps. Sweet, hope to see you at spring fling!
|
|
| |
|
Veteran
Posts: 241
Location: Southern CA | Hey Nathan, thanks for the reply. Yea I feel like I’ve addressed most (coughs, knocks on wood, rubs lucky rabbit’s foot) of the mechanical items on the car that typically break down, so I’ll be venturing further from home & try to make it to the spring fling. |
|
| |