|
|
Elite Veteran
Posts: 827
  
Location: tailFinland |
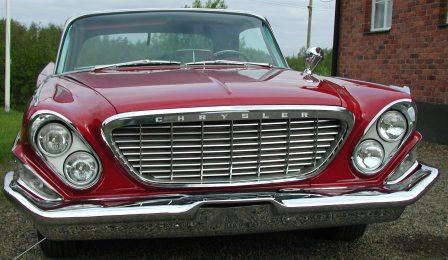
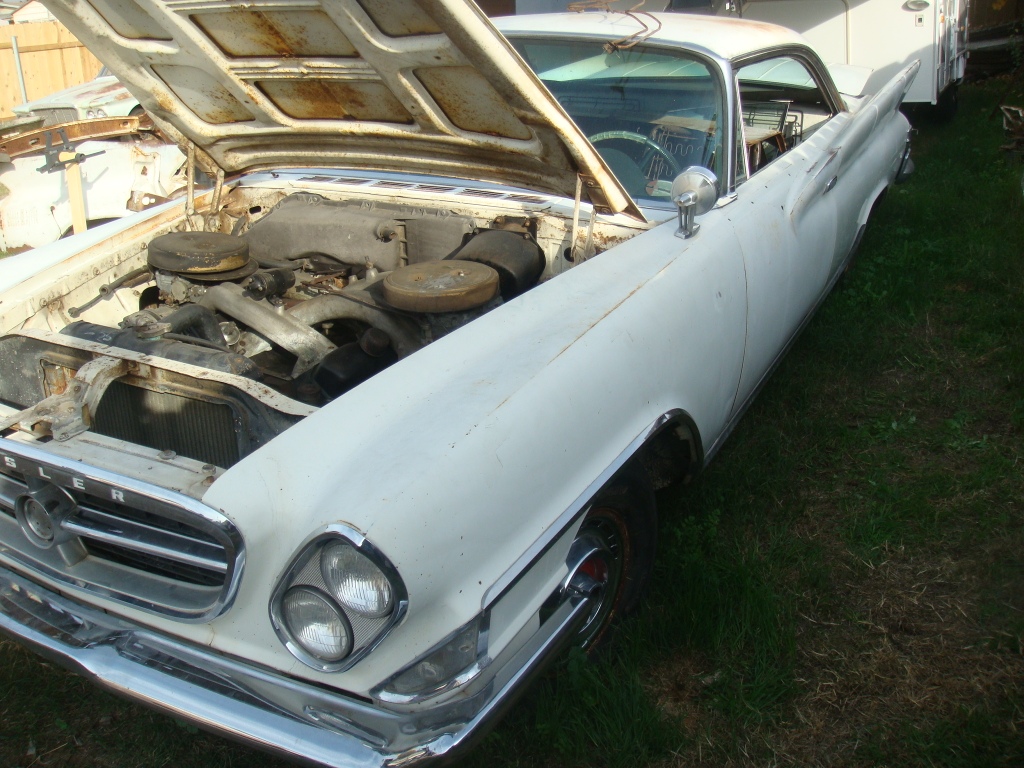
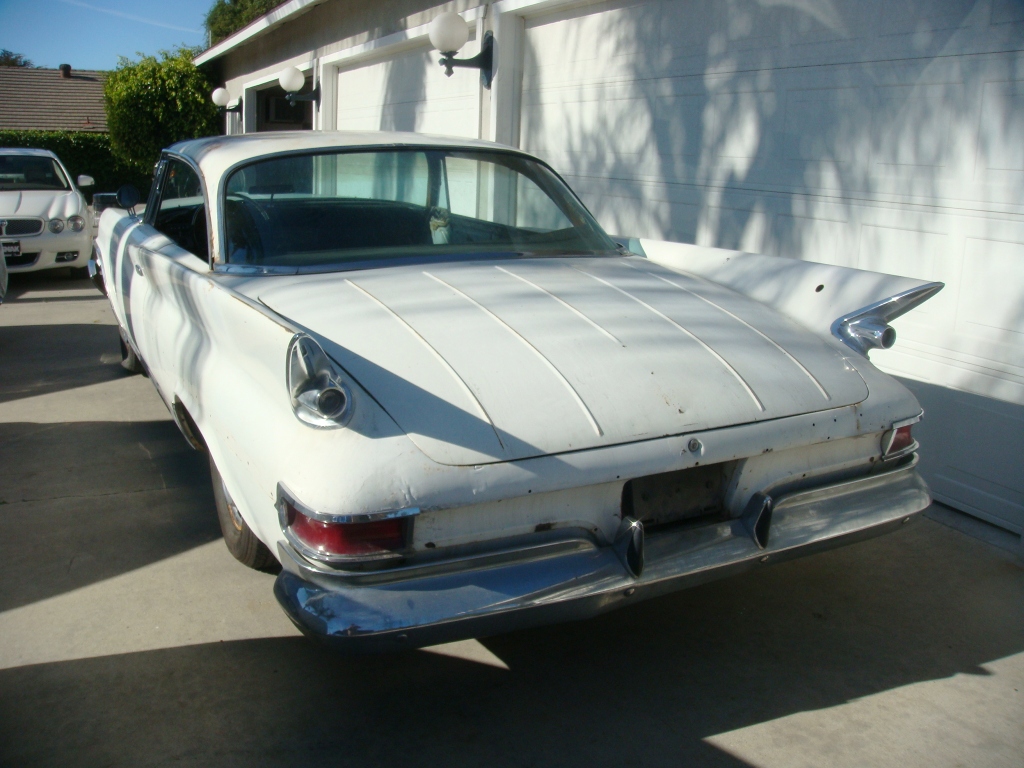
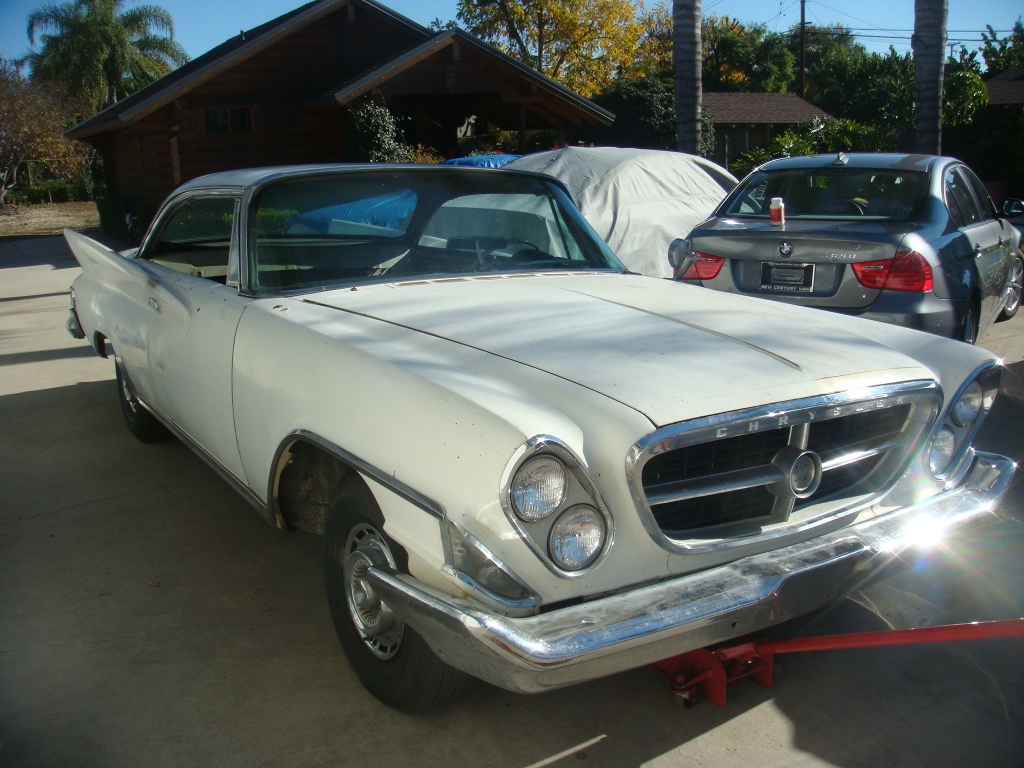
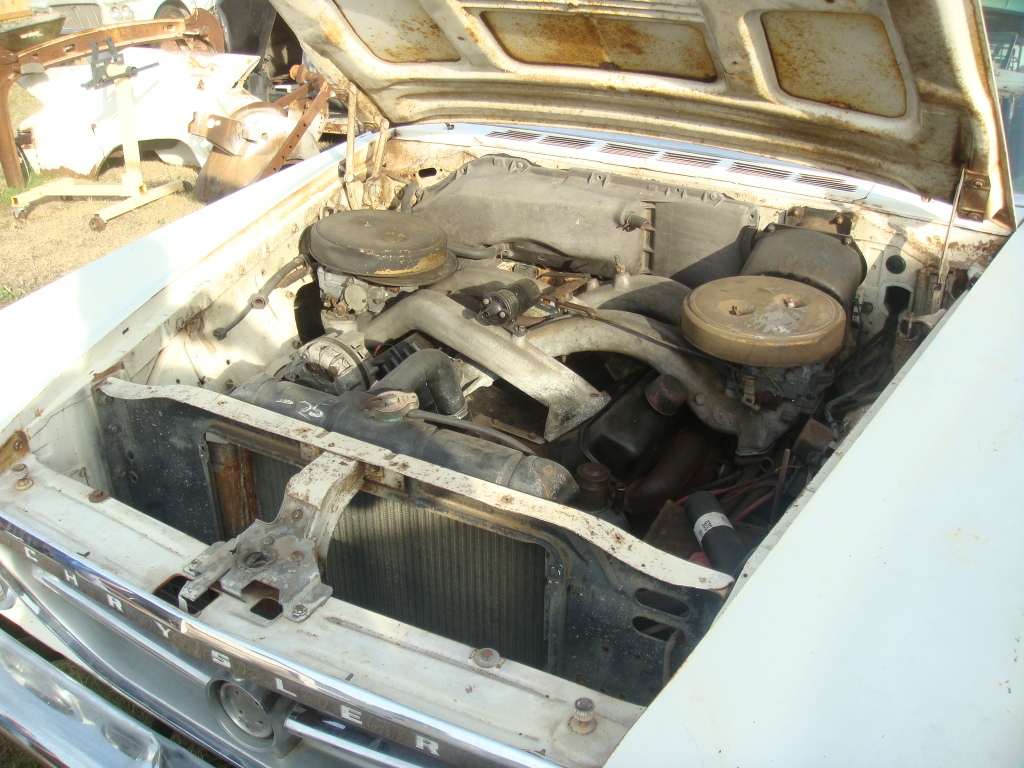
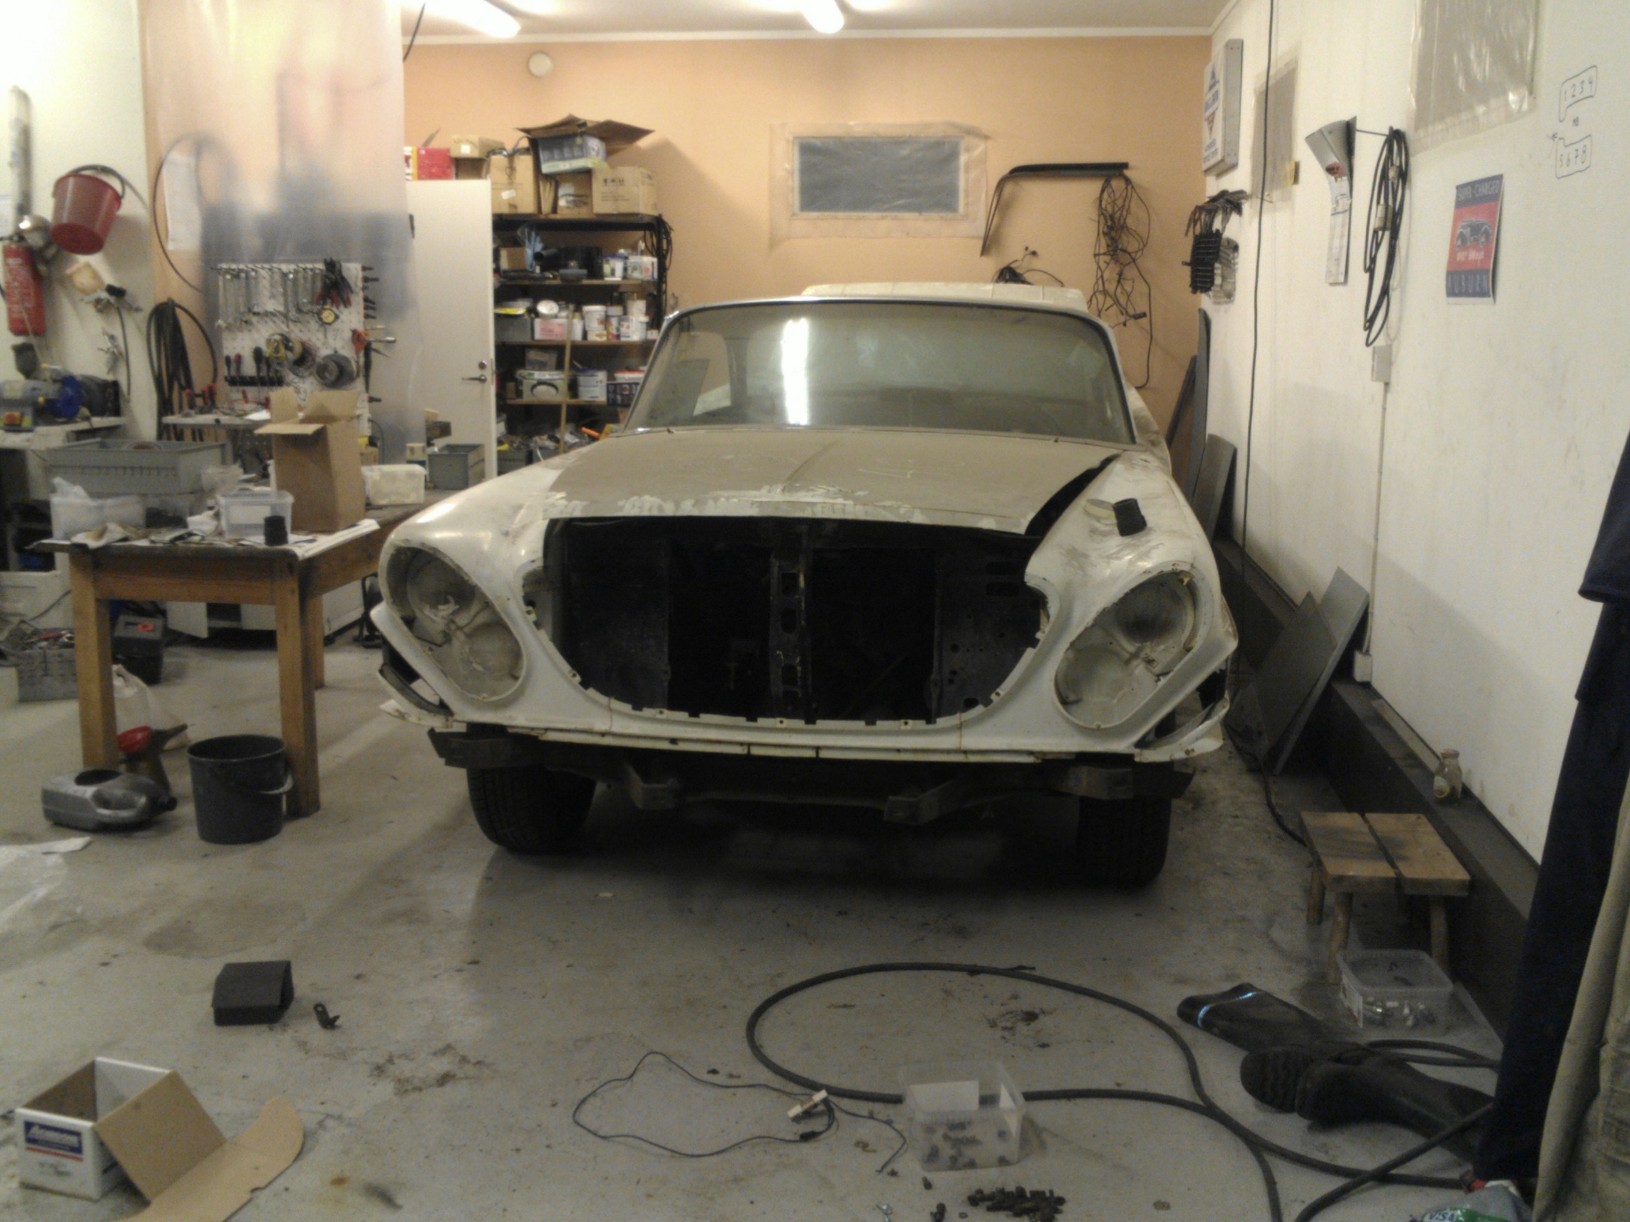
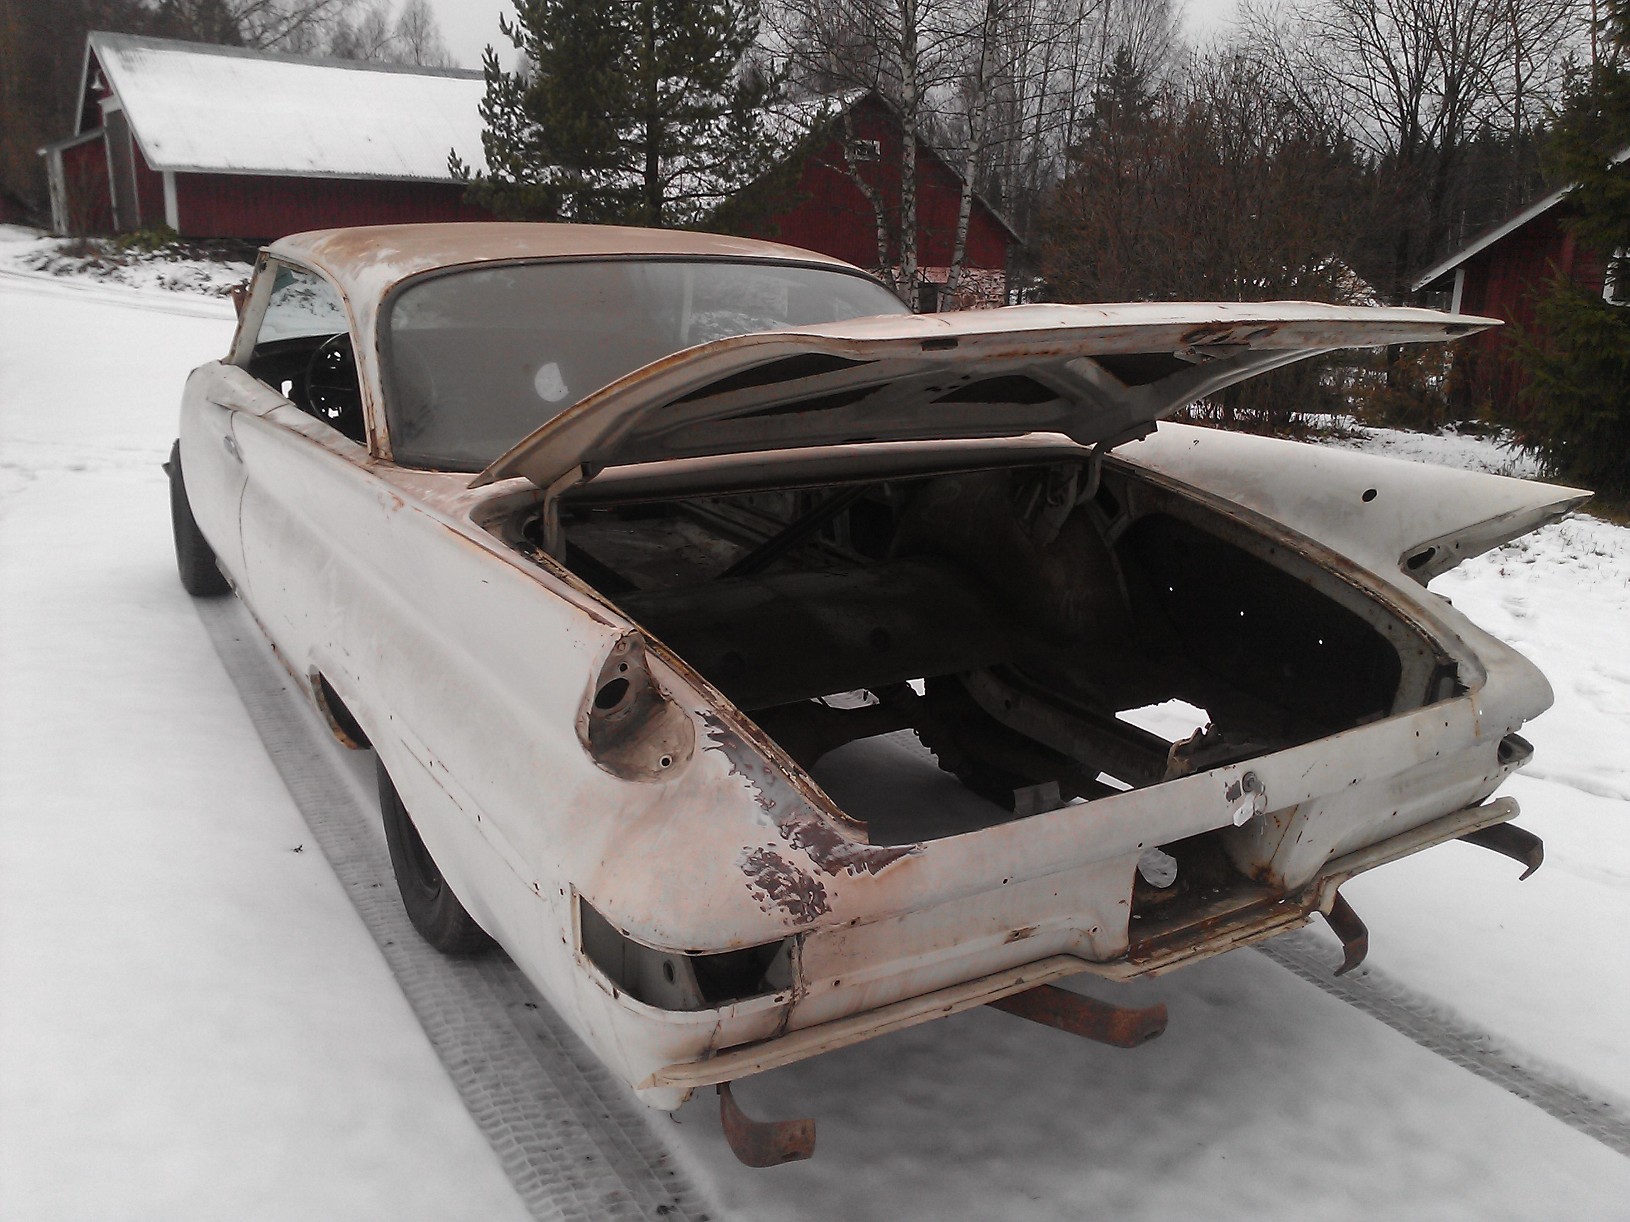
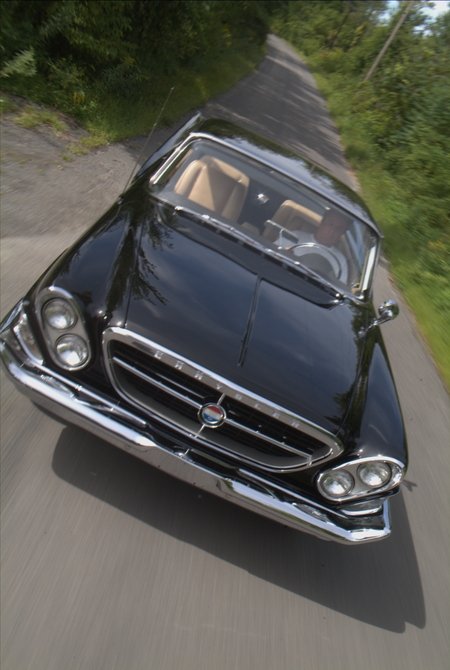
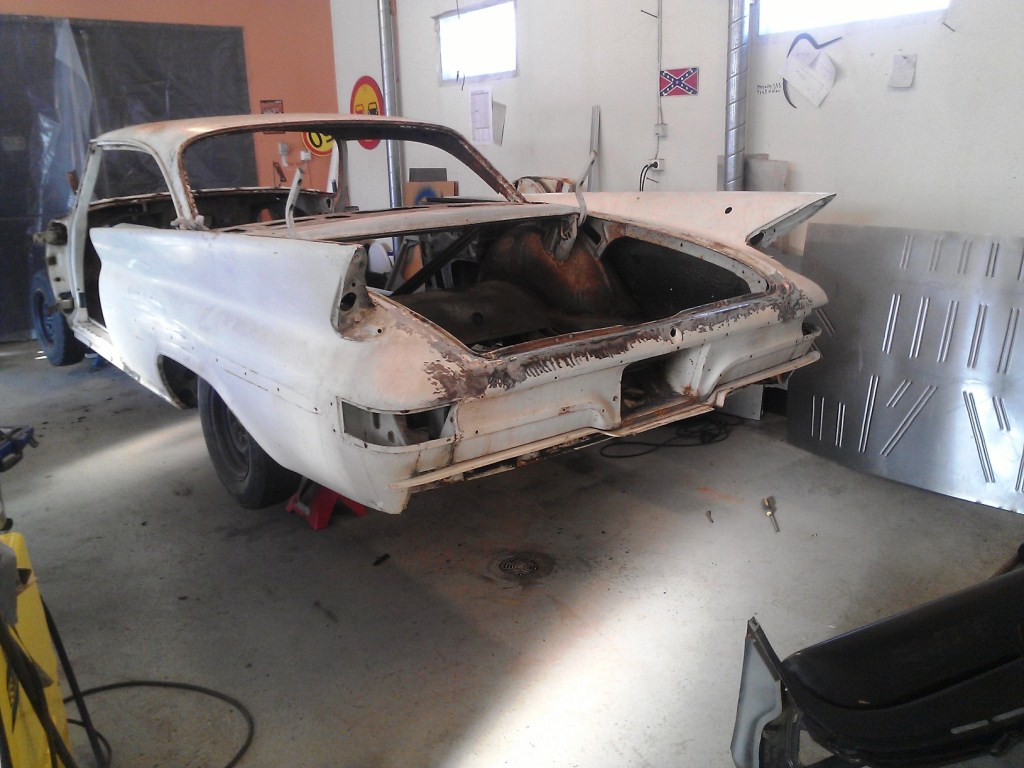
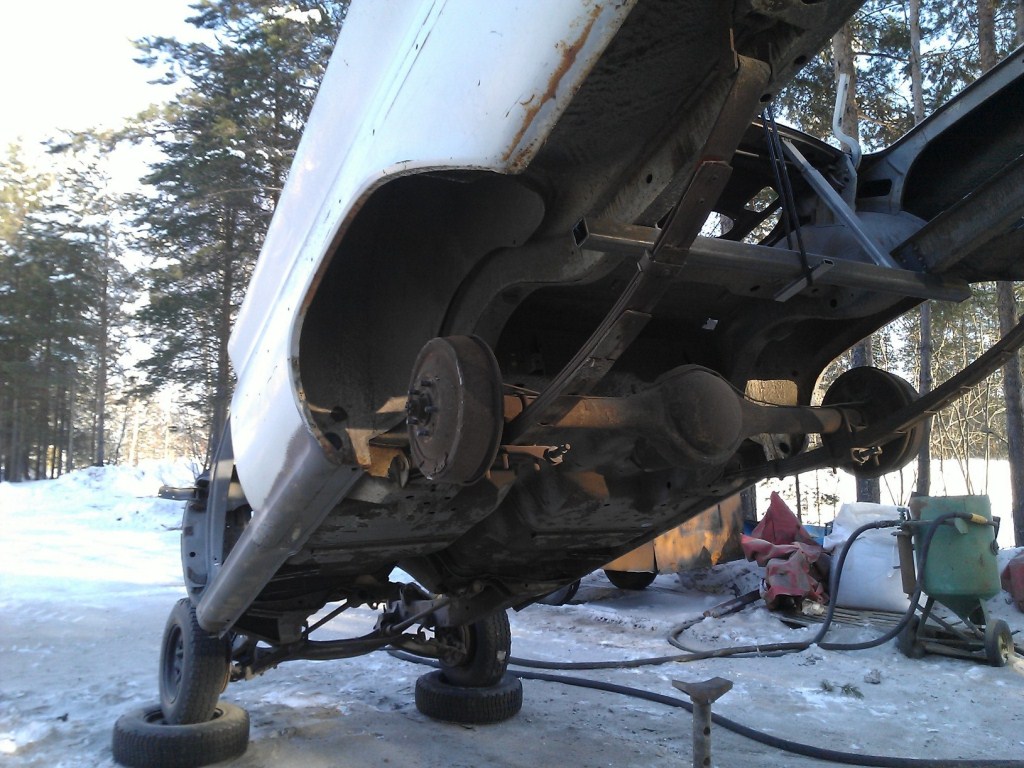
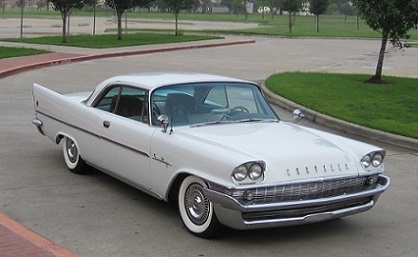
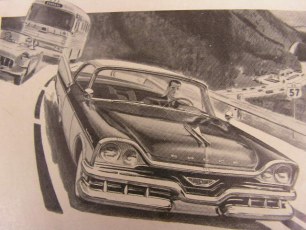
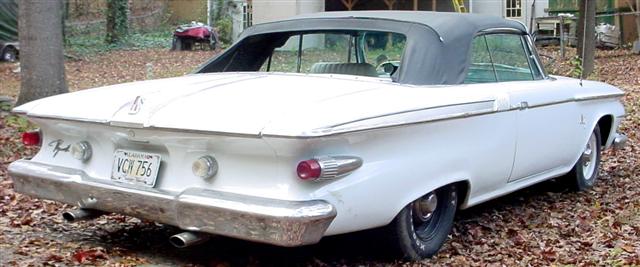
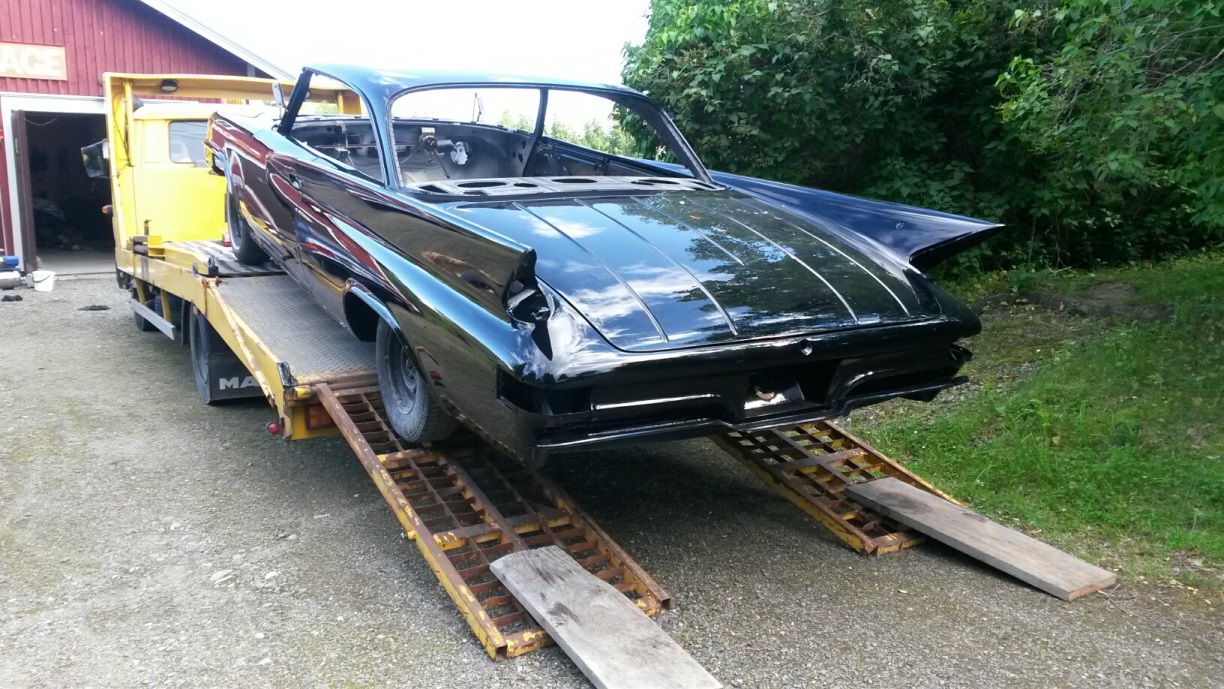
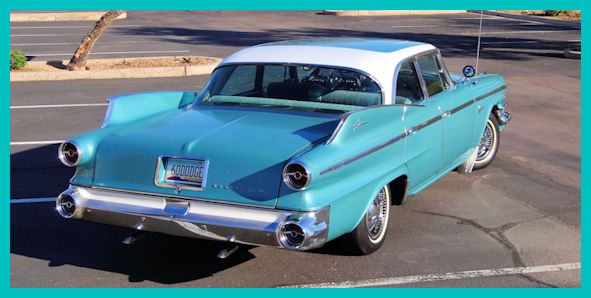
Found my 300 G under a palm tree in Southern California 2 years ago. It is a project car with lots of missing parts.
We do not have palm trees or climate for out door storage here in Finland so it was resting in the corner of my carage for couble of years.
No finally took it under the resto.
 (DSC01103.JPG) (DSC01103.JPG)
 (DSC01206.JPG) (DSC01206.JPG)
 (DSC01104.JPG) (DSC01104.JPG)
 (DSC01214.JPG) (DSC01214.JPG)
 (DSC01102.JPG) (DSC01102.JPG)
Attachments
----------------
 DSC01103.JPG (354KB - 621 downloads) DSC01103.JPG (354KB - 621 downloads)
DSC01206.JPG (351KB - 607 downloads)
DSC01104.JPG (305KB - 628 downloads)
DSC01214.JPG (315KB - 599 downloads)
DSC01102.JPG (358KB - 594 downloads)
|
|
| |
|
Elite Veteran
Posts: 827
Location: tailFinland | Pics at home carage
 (WP_000092.jpg) (WP_000092.jpg)
 (WP_000123.jpg) (WP_000123.jpg)
 (WP_000174.jpg) (WP_000174.jpg)
Attachments
----------------
WP_000092.jpg (357KB - 631 downloads)
WP_000123.jpg (447KB - 595 downloads)
WP_000174.jpg (367KB - 612 downloads)
|
|
| |
|
Elite Veteran
Posts: 827
Location: tailFinland | Pics
 (WP_000176.jpg) (WP_000176.jpg)
 (WP_000086.jpg) (WP_000086.jpg)
 (WP_000153.jpg) (WP_000153.jpg)
Attachments
----------------
WP_000176.jpg (455KB - 578 downloads)
WP_000086.jpg (425KB - 592 downloads)
WP_000153.jpg (422KB - 606 downloads)
|
|
| |
|

Board Moderator & Exner Expert 10K+
Posts: 13045
  
Location: Southern Sweden - Sturkö island | Very inetersting Jari - looks like a good project - very suitable car for FinLand - keep us posted |
|
| |
|
Elite Veteran
Posts: 827
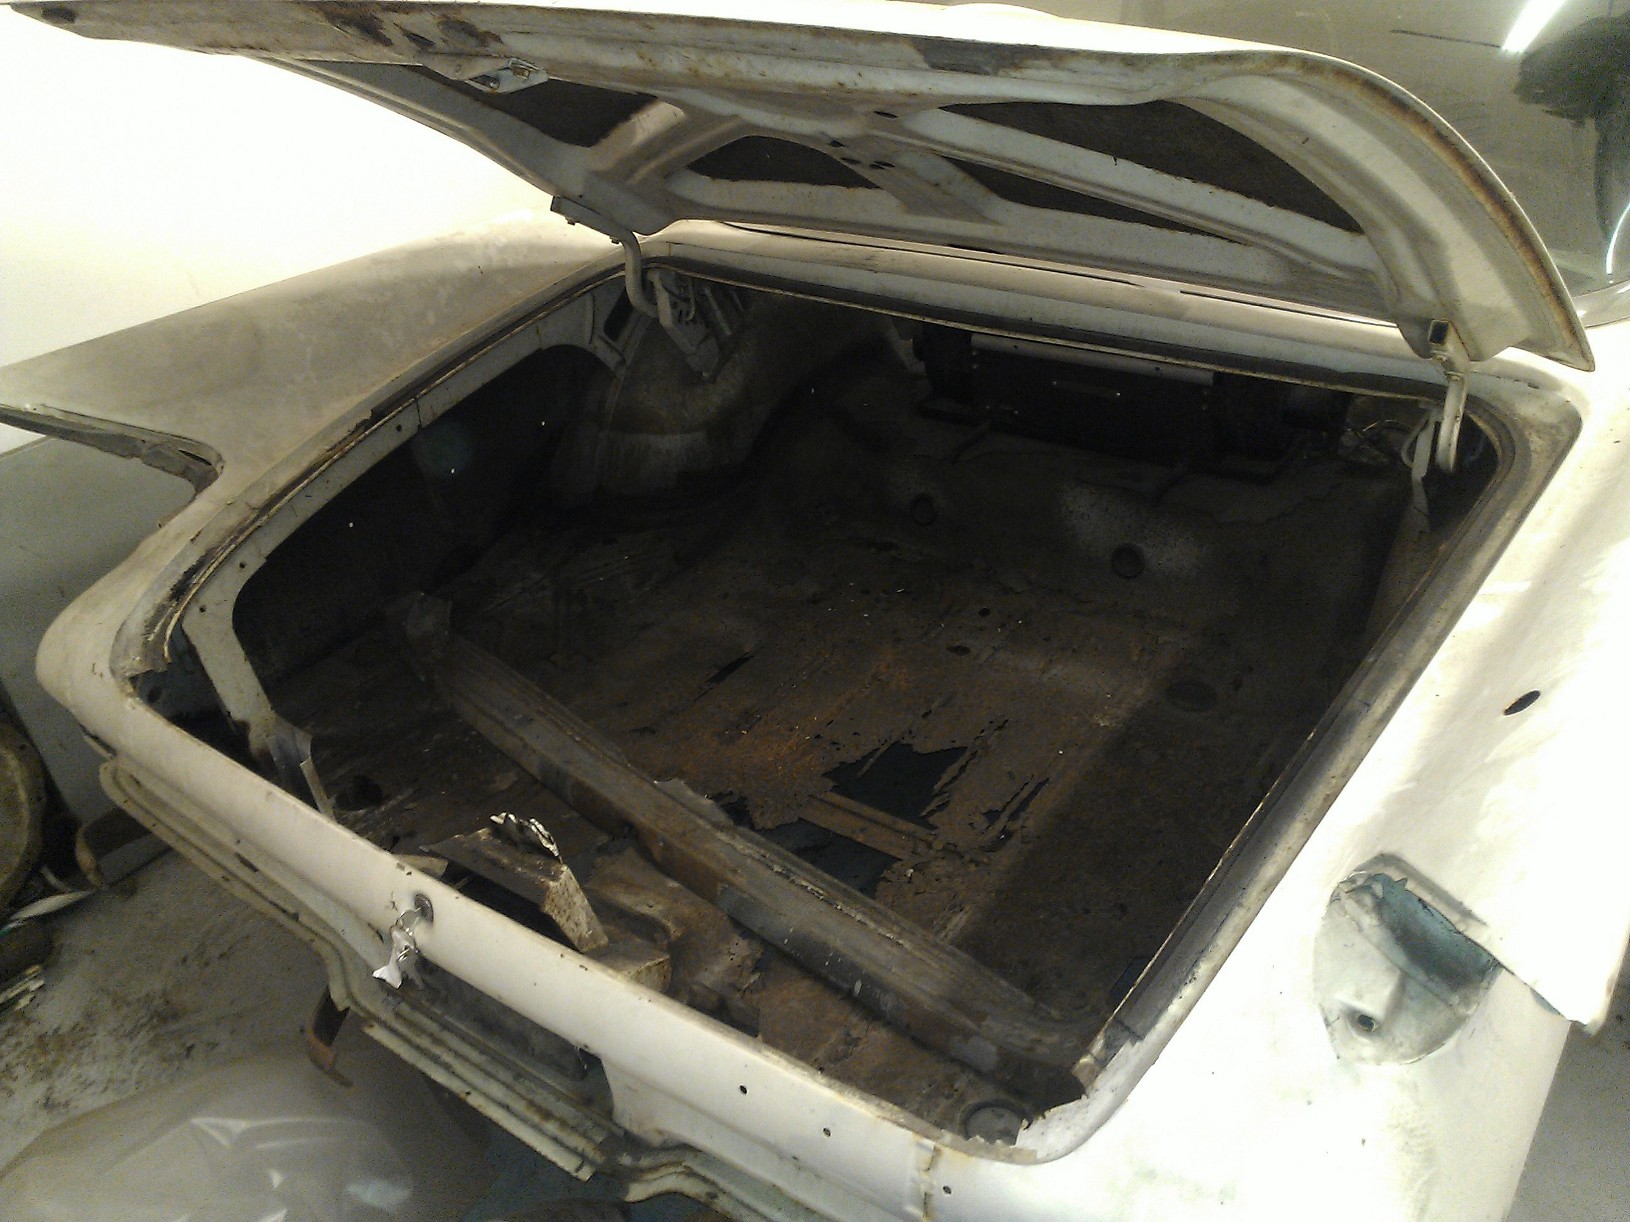
Location: tailFinland | Yes Wizard, I've seen worse. Rust issues are not so bad at all and mostly done exept trunk floor. Now waiting for the colder and drier weather to get it to sand blaster. I'll try to take pictures everytime when I can and remember. |
|
| |
|
Extreme Veteran
Posts: 314
| Looking forward to watching the progress on your G. Keeping her white? |
|
| |
|
Expert
Posts: 3575
Location: Netherlands | Why not use a snowblaster instead? 
Nice project!
|
|
| |
|
Elite Veteran
Posts: 827
Location: tailFinland | BigBlockMopar - 2013-01-02 7:05 AM
Why not use a snowblaster instead?
Nice project!
When somebody makes that invention to get rid of paint and rust we surely have lot of material 
Global warming, it's been raining last couble of days and everything is a mess:angry: |
|
| |
|
Elite Veteran
Posts: 827
Location: tailFinland | db300 - 2013-01-02 5:20 AM
Looking forward to watching the progress on your G. Keeping her white?
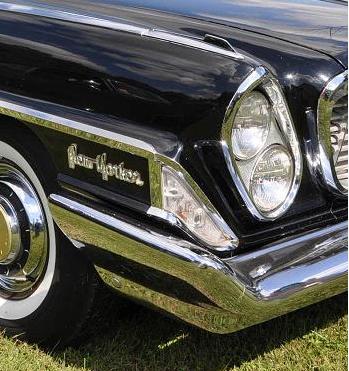
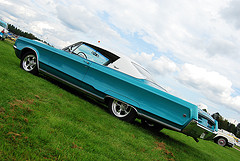
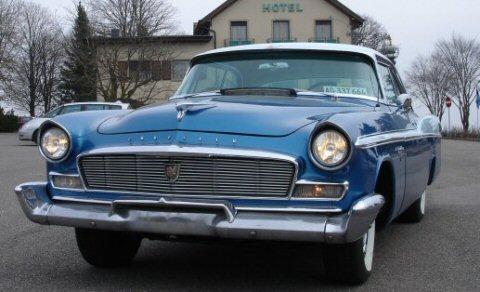
No, she's gonna be black whith HOT red interior
 (61_300G_0020.jpg) (61_300G_0020.jpg)
Attachments
----------------
61_300G_0020.jpg (215KB - 577 downloads)
|
|
| |
|
Board Moderator & Exner Expert 10K+
Posts: 13045
Location: Southern Sweden - Sturkö island | Aahh - the Finnish Batmobile then! Nice to see a 300 with another interior colour than tan |
|
| |
|

| I've bought over forty 1955-56 Plymouths and restored a few. The cheapest ones were the ones where the "restoration had been started." They were rapidly and completely disassembled during this "restoration" and all the parts scattered and how they assembled were lost. The big pieces stayed outside in the snow and rotted away. Then, of course, the Restorer lost interest, quipping lack of time, lack of money, lack of space, etc. They were almost universally young with lots of energy and little skill.
But, best wishes and success in your 300G. |
|
| |
|
Extreme Veteran
Posts: 314
| Great classy combo! |
|
| |
|
Elite Veteran
Posts: 827
Location: tailFinland | rbmain - 2013-01-02 1:21 PM
I've bought over forty 1955-56 Plymouths and restored a few. The cheapest ones were the ones where the "restoration had been started." They were rapidly and completely disassembled during this "restoration" and all the parts scattered and how they assembled were lost. The big pieces stayed outside in the snow and rotted away. Then, of course, the Restorer lost interest, quipping lack of time, lack of money, lack of space, etc. They were almost universally young with lots of energy and little skill.
But, best wishes and success in your 300G.
Well I surely know that. I also have 61 covertible that was mostly empty body shell and rest of it in the boxes and buckets when I bought it over 10 years ago. But I got it restored in about 3 years.
Somebody started this G, put it in the pieces very amateur way, lost interest, sold it, then couble of middlemans stole parts from it, somebody tried to screw some parts back again to get it sold etc. Very typical stroy. Southern Californias dry climate saved this G from more serious rot, even it has it still enough. |
|
| |
|
Expert
Posts: 3887
Location: Northen Virginia | Good you saving this car, even that 300 parts are scarce and expensive the project seems ok but it all depends of the size of your wallet, especially if you are going for a 300G. |
|
| |
|
Elite Veteran
Posts: 827
Location: tailFinland | hemidenis - 2013-01-03 6:44 PM
Good you saving this car, even that 300 parts are scarce and expensive the project seems ok but it all depends of the size of your wallet, especially if you are going for a 300G.
I know that for sure. I had to sell my nice Adventurer to finance this project.
For instance I´m gonna renew each and every glass, dash and steering wheel. Good thing is that I can get them reproduced close, just need €€€€
Chrome and seats were already done in CA.
No idea yet what engine and tranny needs, disk brakes are the must.
I'll do bodyworks and all mechanical things my self as much as I can, even do some painting but I have few skillfull friends whose have autopaintshops. Showpaint is my plan but perhaps I do not need to pay top dollars for that, we'll see.
I am not in a hurry with G. I have all the time to wait to get the part what i want. If I get bored I have other projects to do
I know that I might not get my investement ever back if I sold the car, but I do not care. I'll build this just for my self not for sale. I'll enjoy it, drive to cruisings and burn some rubber |
|
| |
|
Veteran
Posts: 143
Location: Malmberget, Sweden | It´s great to hear that you will use the car for rubber burning and cruising.
|
|
| |
|
Elite Veteran
Posts: 827
Location: tailFinland | In Västerås Power Meet in 2015 maybe |
|
| |
|
Extreme Veteran
Posts: 314
| As the owner of a F project,yes, I've also heard all the "you know it's going to cost X to restore that"....I have to agree with your attitude...deal with it, and look forward to burning rubber! |
|
| |
|
Elite Veteran
Posts: 827
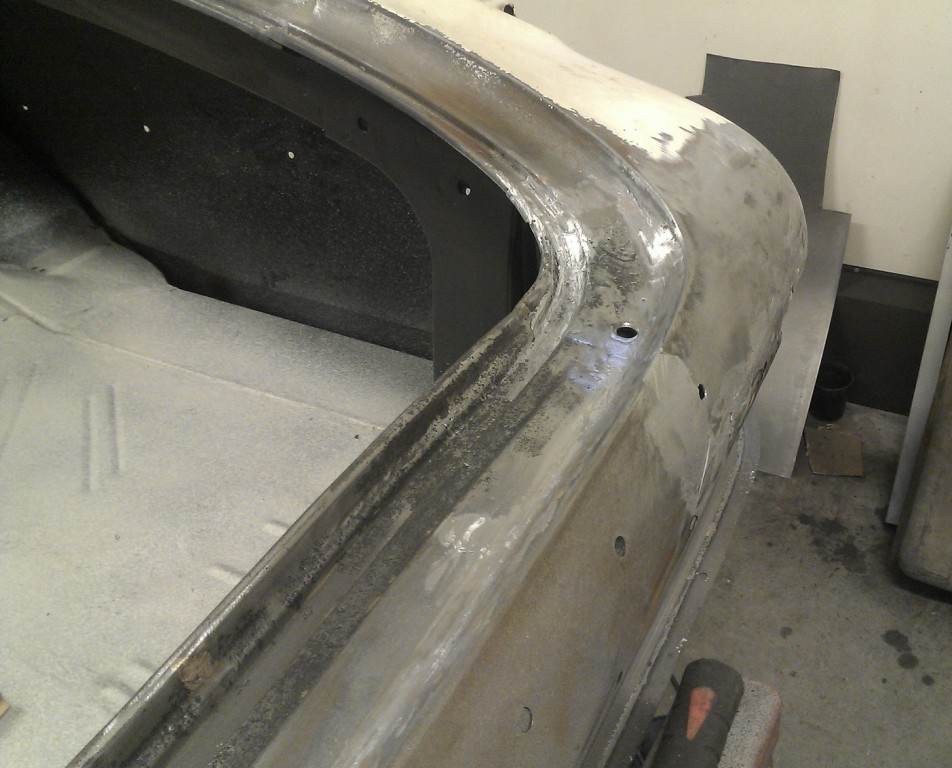
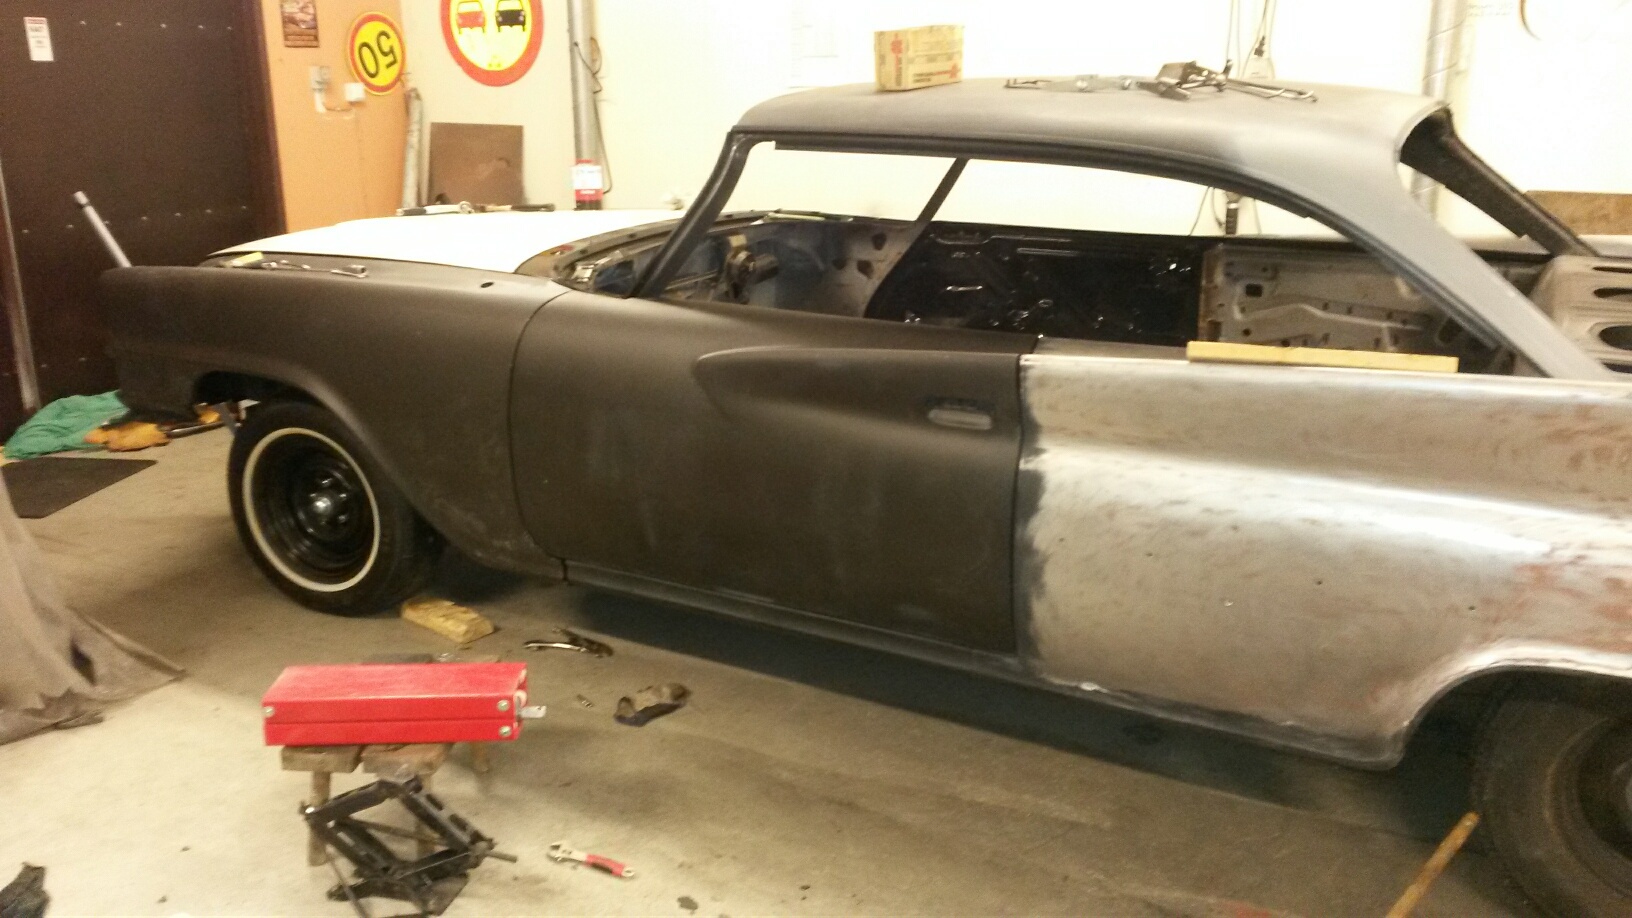
Location: tailFinland | Well, I also think that is it 300 or newport, there are same certaing things you have to do, like chrome, bodywoks, paint etc. regardless the model.
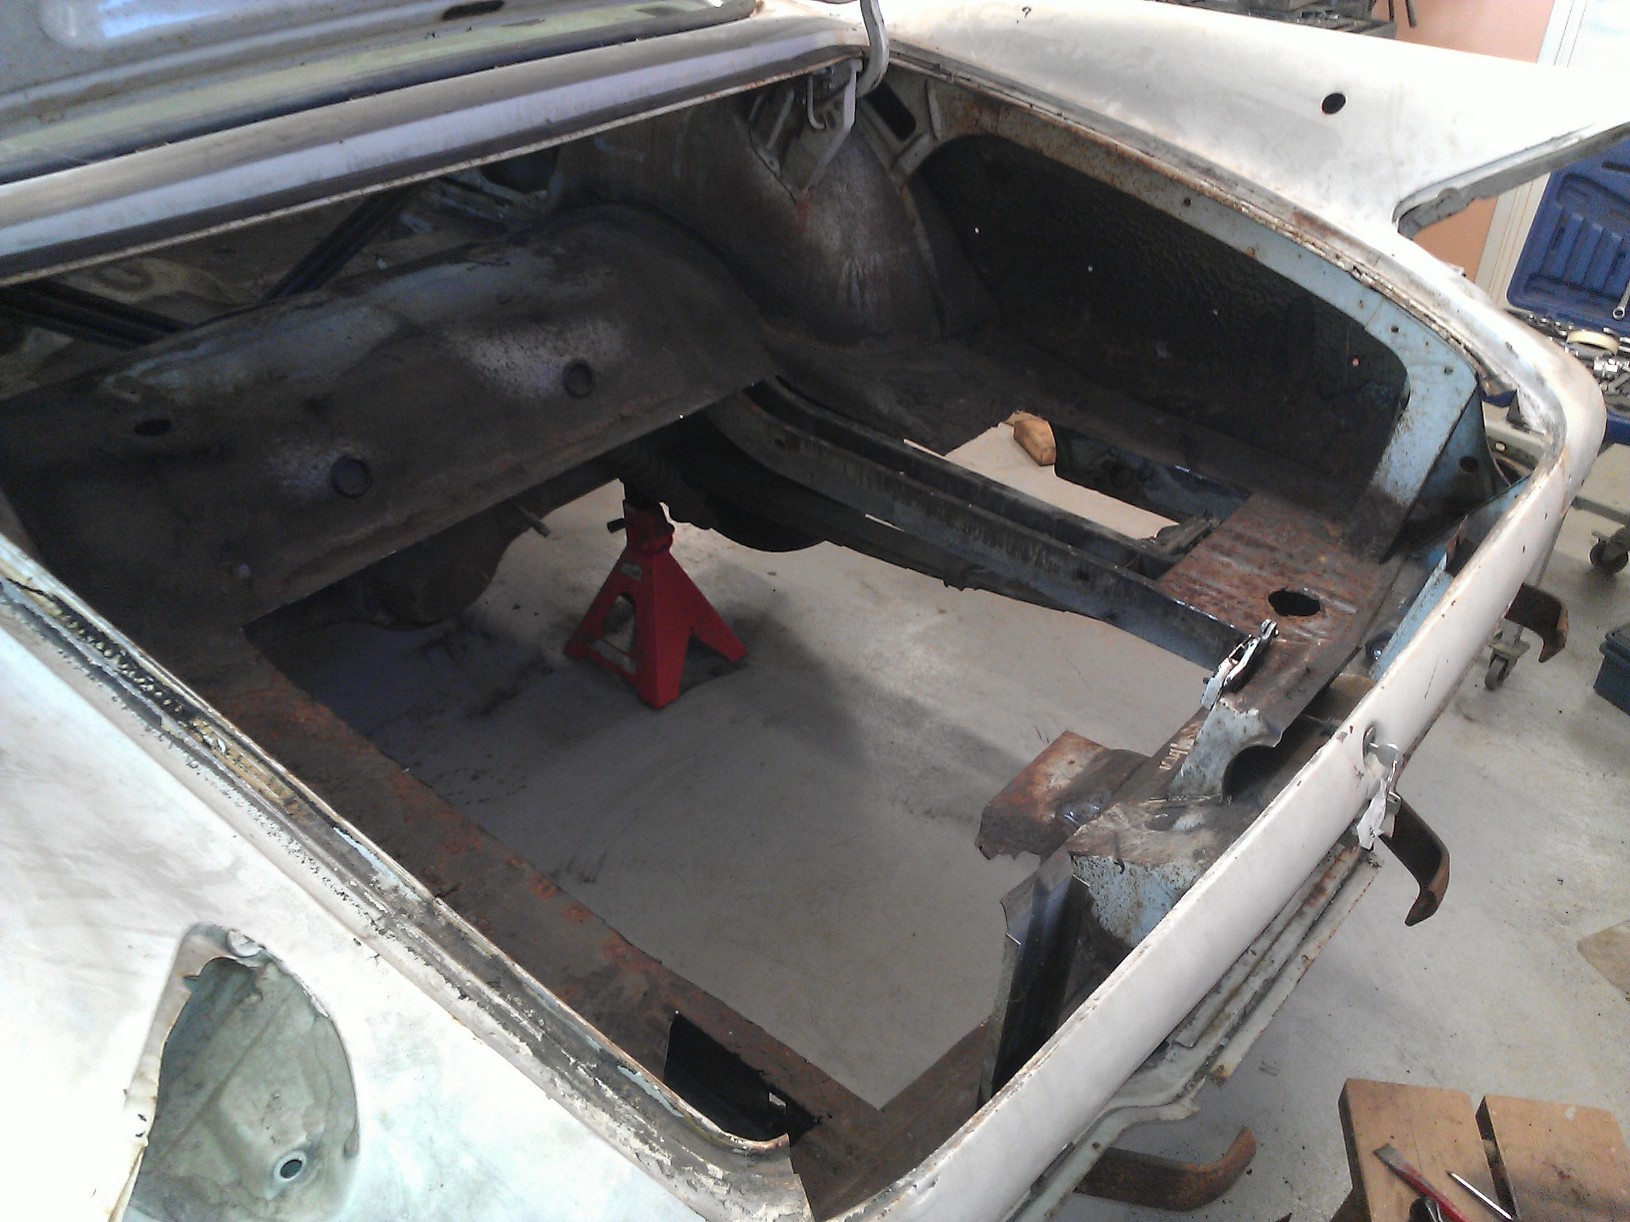
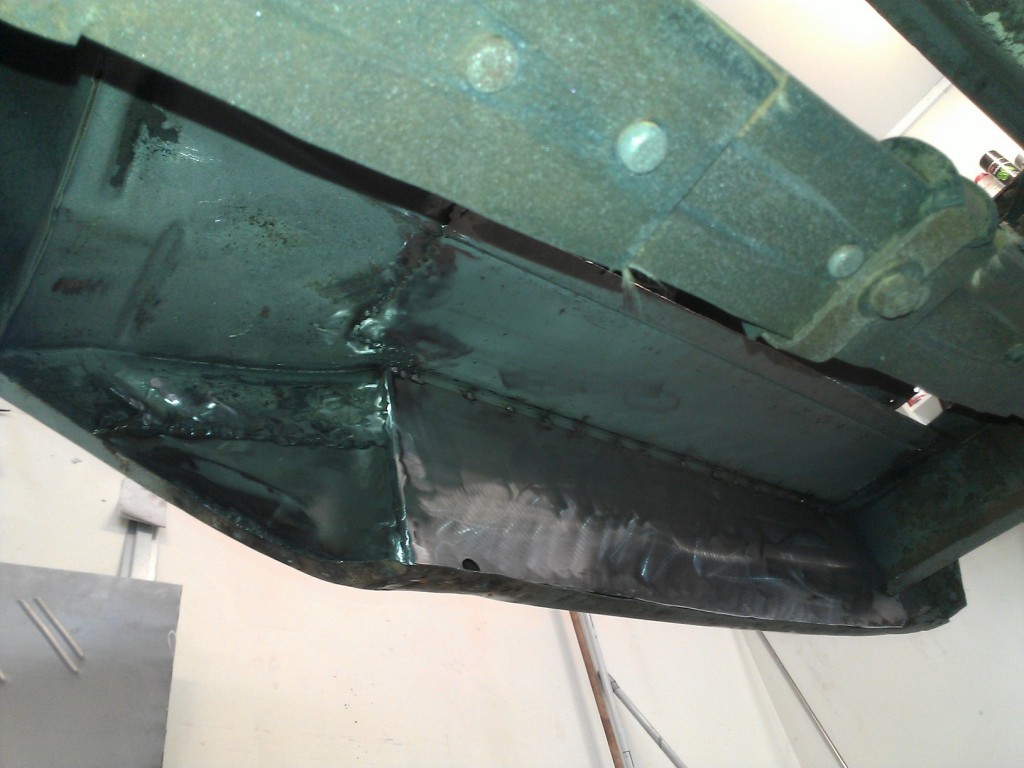
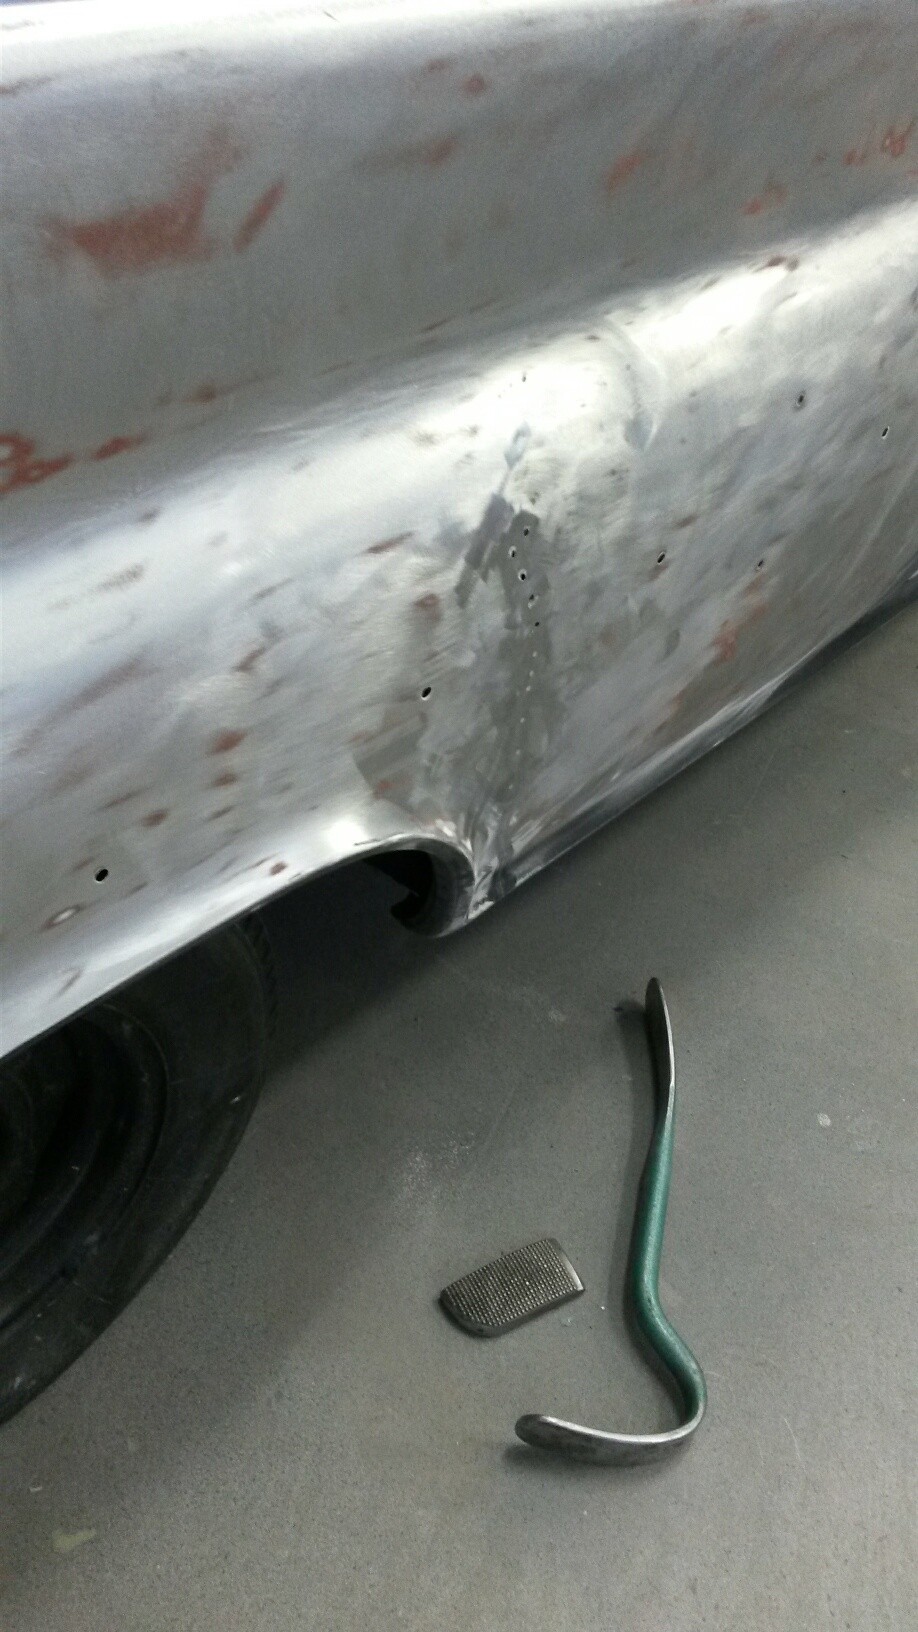
Here is first modfigation that I just had to do. Some of the previous owners had already cut rotted edge away, while working with replacement I did drain pipes for both sides, so in the future, water can leak freely away.
Edited by Adventurer 60 2013-01-04 11:55 AM
 (drain pipe.jpg) (drain pipe.jpg)
Attachments
----------------
drain pipe.jpg (269KB - 572 downloads)
|
|
| |
|
Elite Veteran
Posts: 827
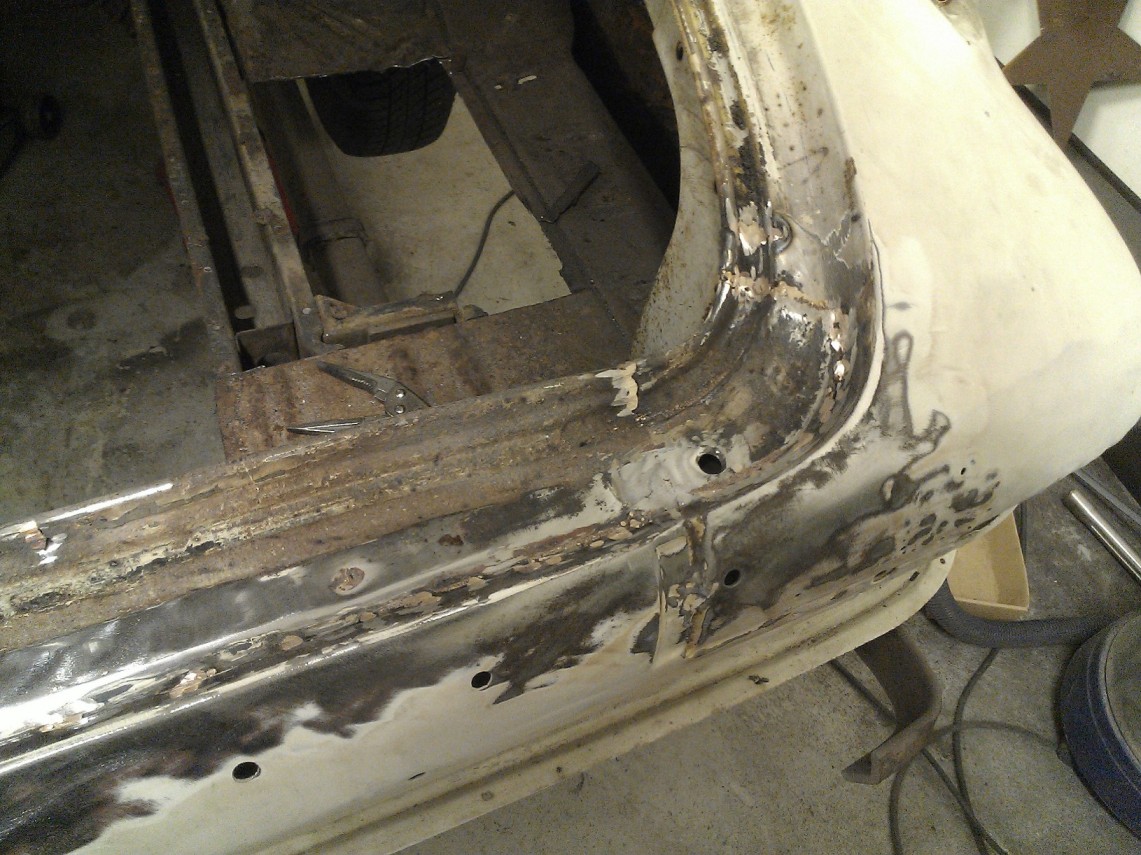
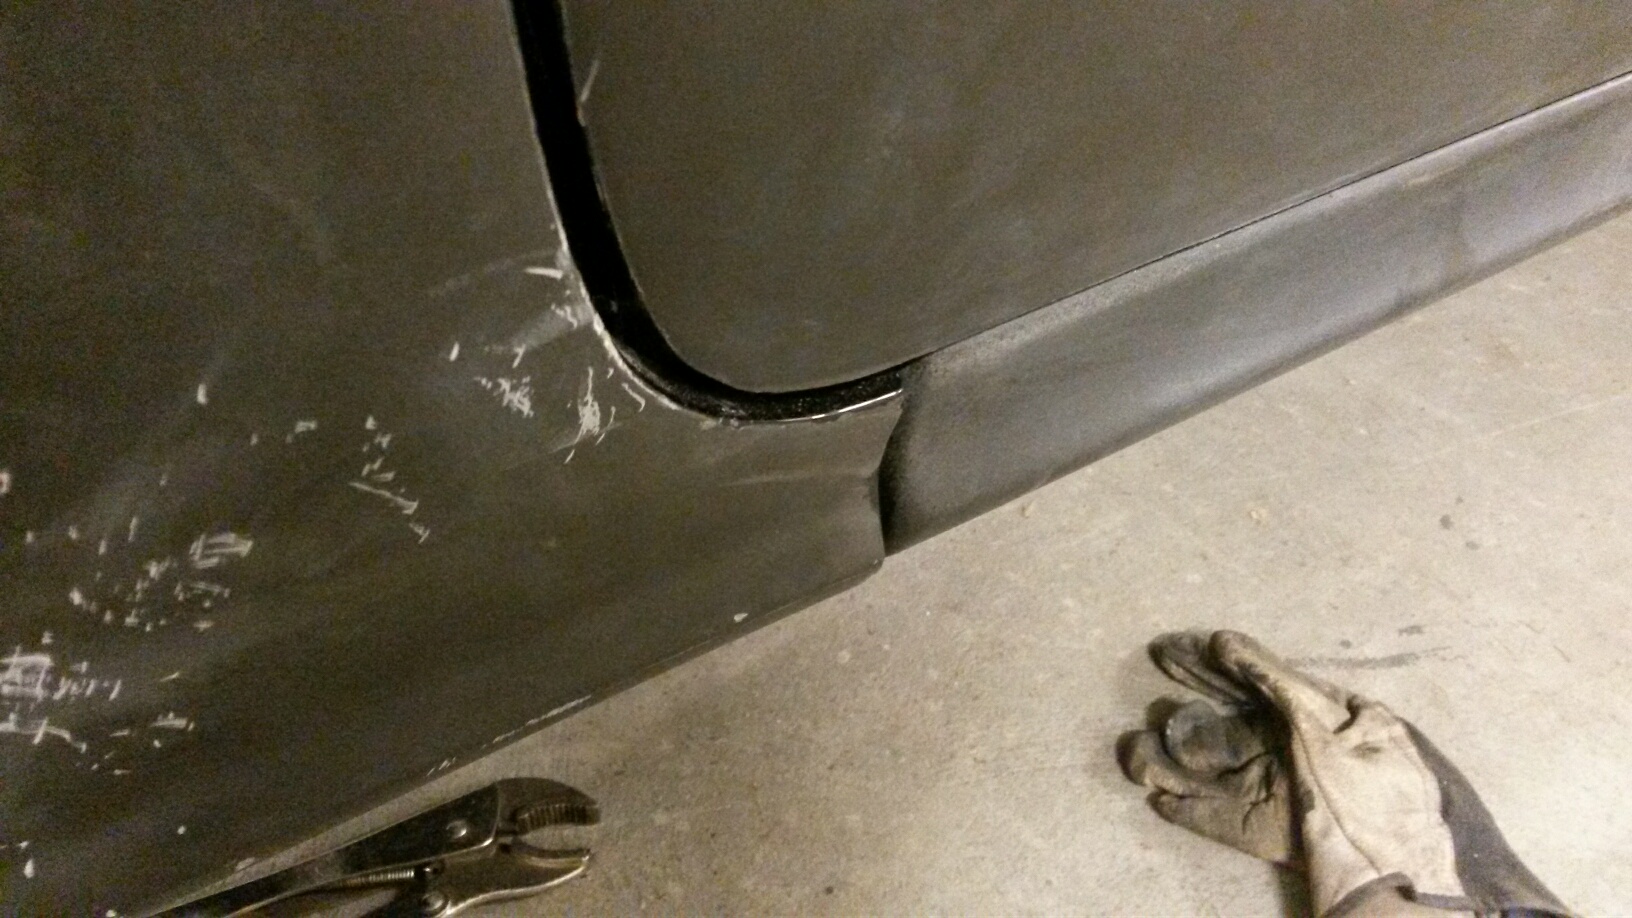
Location: tailFinland | For some reason trunk lid did not match to opening at all, i had to cut a slice.
I used copper sinc wire in my mic/mac welder, (you can see copper like welds)it is nice to work with. Flexible and sticky, you can fill small holes, hammer it etc. expensive but good.
Edited by Adventurer 60 2013-01-04 12:07 PM
 (WP_000202.jpg) (WP_000202.jpg)
Attachments
----------------
WP_000202.jpg (148KB - 562 downloads)
|
|
| |
|
Board Moderator & Exner Expert 10K+
Posts: 13045
Location: Southern Sweden - Sturkö island | Interesting - do you have a link to the copper wire? Aaah, the panel fit wasn't good even back then there was actually tolerances of +- 1/16" with a stack-up uf up to 3/8" - no wonder that your trunk lid doesn't fit
I would have fixed it, just as you do now if I were to go through a full restauration. Some won't do it because they consider it "over-kill", but I would have done it still................... |
|
| |
|
Elite Veteran
Posts: 827
Location: tailFinland | I got the coppersinc wire from the friend of mine who did his F:s weldings with it. It costs 6 snts/gram. It should be available in toolstores. You should not breethe the welding fumes, if you do you'll get a sincfever (that I got)
I know your point, I've seen lots of "över restaurerad" cars in Sveden. becouse of this G going to be black and final surface buffed and polished, I´ll try to all the panels, edges etc littlebit better. I would'nt mind if its gonna be white. |
|
| |
|
Elite Veteran
Posts: 827
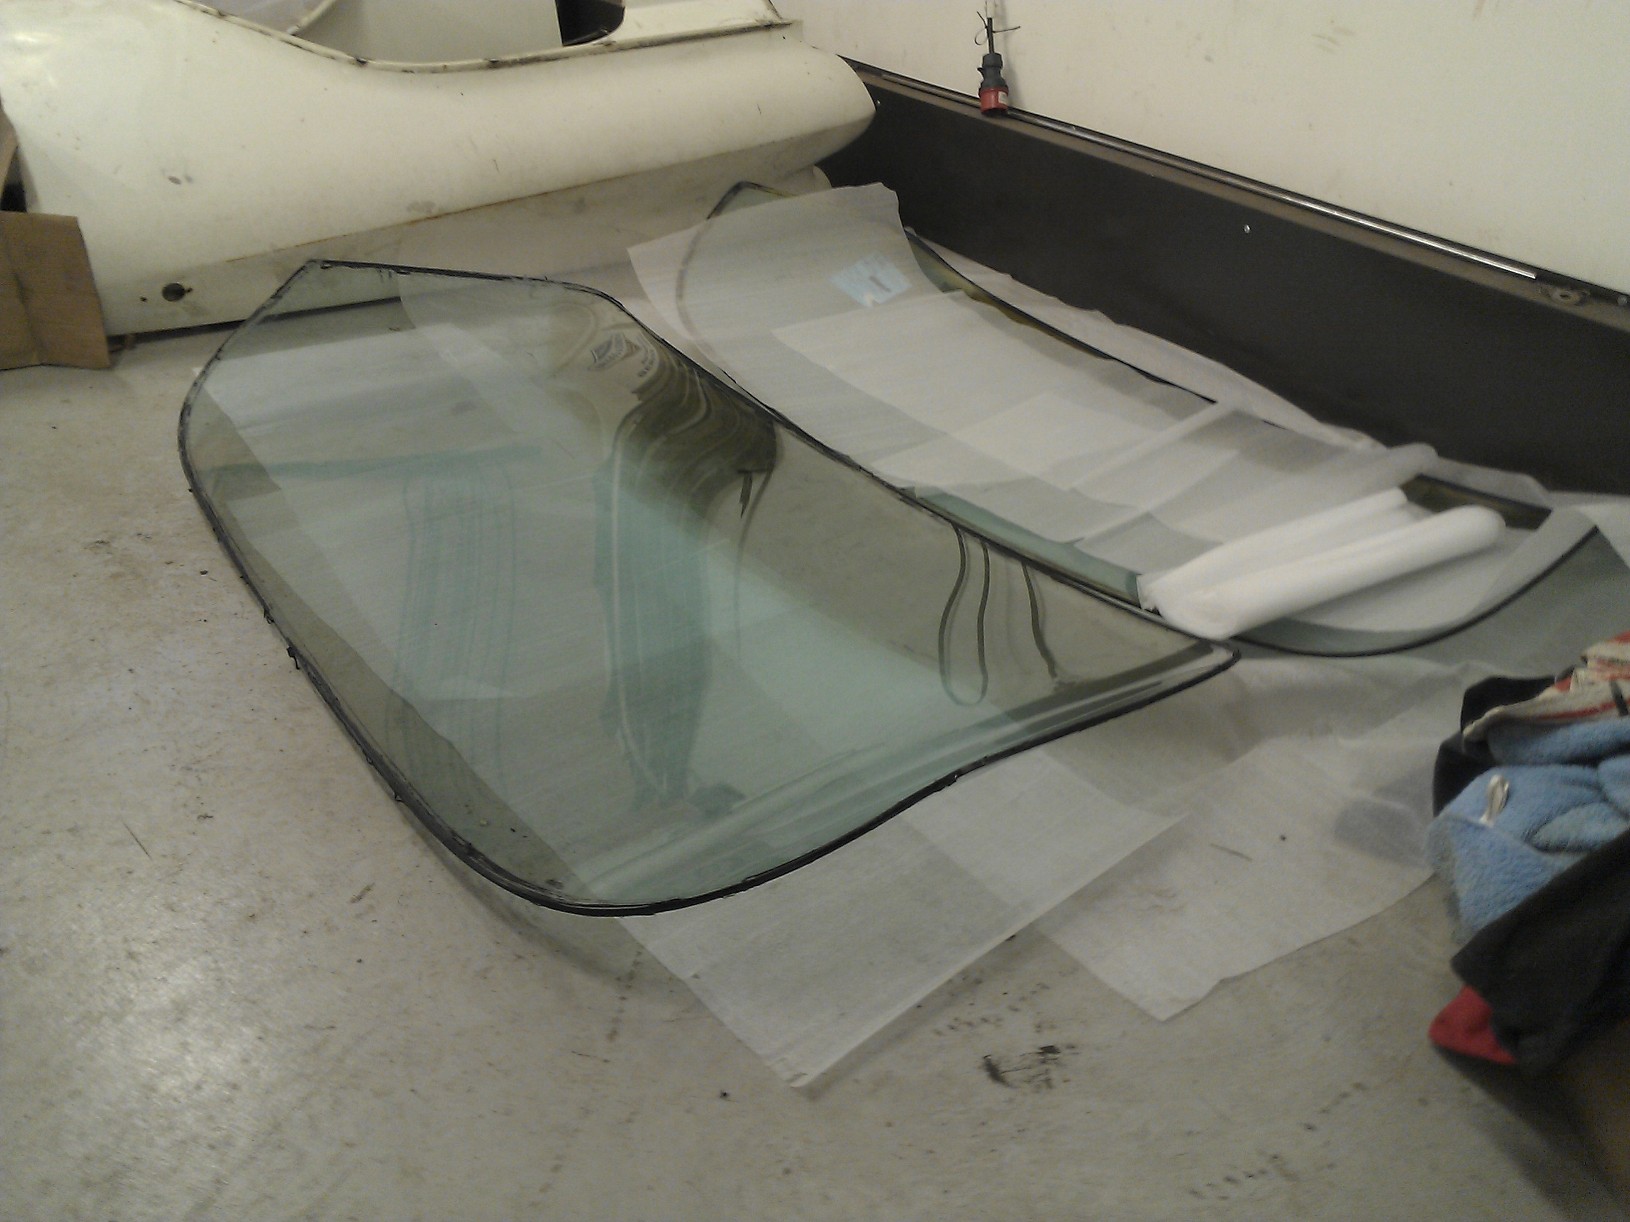
Location: tailFinland | Ordered new tinted (blue) colour (green) bubble windshield and rearglass today, these are the old ones and for sale if someone would like to use old ones or for spare.
Rear glass is huge.
Originally they did not use the same tinting at rear than for the windshiled. It polishes off, anyone know what it is? some sort of lacquer??
 (glass.jpg) (glass.jpg)
Attachments
----------------
glass.jpg (319KB - 564 downloads)
|
|
| |
|
Elite Veteran
Posts: 827
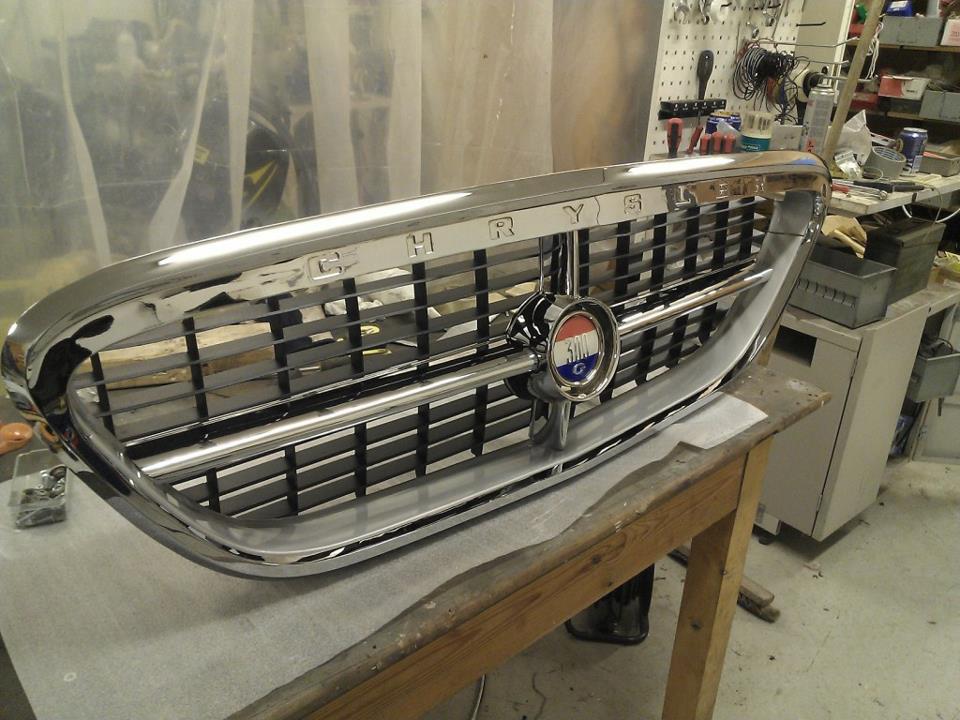
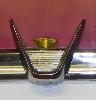
Location: tailFinland | First restored componet, like piece of art, I'm gonna hang it on the wall in the hous to keep me motivated.
I thought not to paint the letters just leave them like that. would it look good to you too?
Edited by Adventurer 60 2013-02-04 1:25 PM
 (maski.jpg) (maski.jpg)
Attachments
----------------
maski.jpg (102KB - 589 downloads)
|
|
| |
|
Extreme Veteran
Posts: 314
| Gorgeous! |
|
| |
|
Board Moderator & Exner Expert 10K+
Posts: 13045
Location: Southern Sweden - Sturkö island | That's really a nice mantlepiece! I would paint the letters - it makes the name "stand out" more. |
|
| |
|

Expert
Posts: 2596
Location: Upplands Väsby, Sweden | Hi Jari
Great that you have started with the renovation, nice 300 Project. Hope you show us the renovaiting.
You have to find the right insprationen, knows himself has just started with my other car LeSabre 60
More than 2 years since I bought it. |
|
| |
|
Elite Veteran
Posts: 827
Location: tailFinland | I'll post pics when the project steps forward. Right now nothing happens much. Still waiting for my sandblaster who is on holiday in Vietnam.
I wish you could post pics of your Le sabre project here |
|
| |
|
Board Moderator & Exner Expert 10K+
Posts: 13045
Location: Southern Sweden - Sturkö island | Actually, he can post the pictures, but down in the sewer then.......... |
|
| |
|
Expert
Posts: 2596
Location: Upplands Väsby, Sweden | Buick renovation is nothing to show. Will probably be a light renovation.
Would like to have it inspected and later put in a modern drivetrain.
We shall see and More exciting FL cars
Edited by Windsor59 2013-02-05 3:39 PM
|
|
| |
|
Elite Veteran
Posts: 827
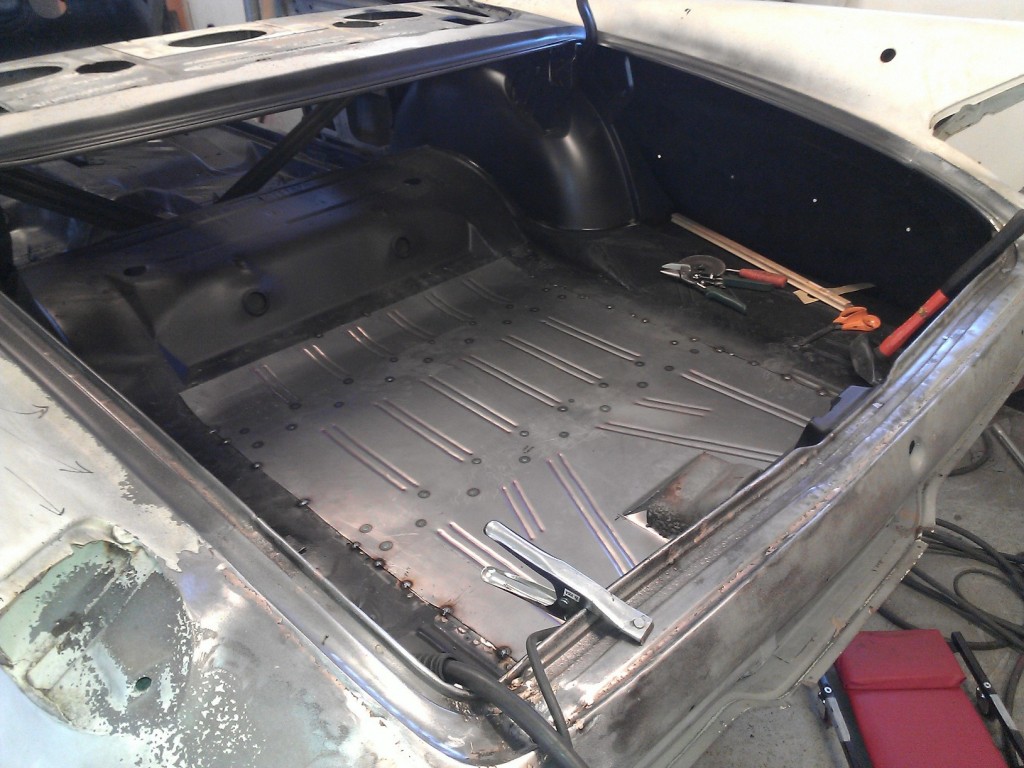
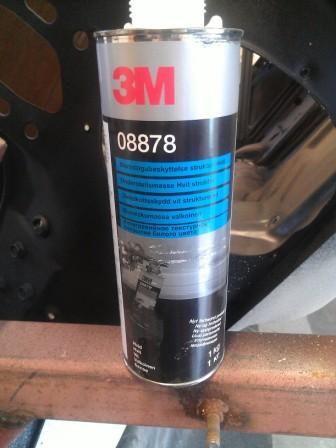
Location: tailFinland | I made a new floorpan-sheet for the trunk. I Used BULLMAX for the very first time but still I'm quite satisfied with the result.
 (WP_000304.jpg) (WP_000304.jpg)
Attachments
----------------
WP_000304.jpg (153KB - 552 downloads)
|
|
| |
|
Board Moderator & Exner Expert 10K+
Posts: 13045
Location: Southern Sweden - Sturkö island | Looks nice - please keep us posted with the progress! |
|
| |
|

Expert
Posts: 1730
Location: Michigan | Aye please do... projects like this give us all hope. |
|
| |
|
Expert
Posts: 2633
Location: Minor Hill, TN | Good luck with the project. Please keep us posted and post photos during the restoration. Is the engine under the hood a 413?
|
|
| |
|
Elite Veteran
Posts: 827
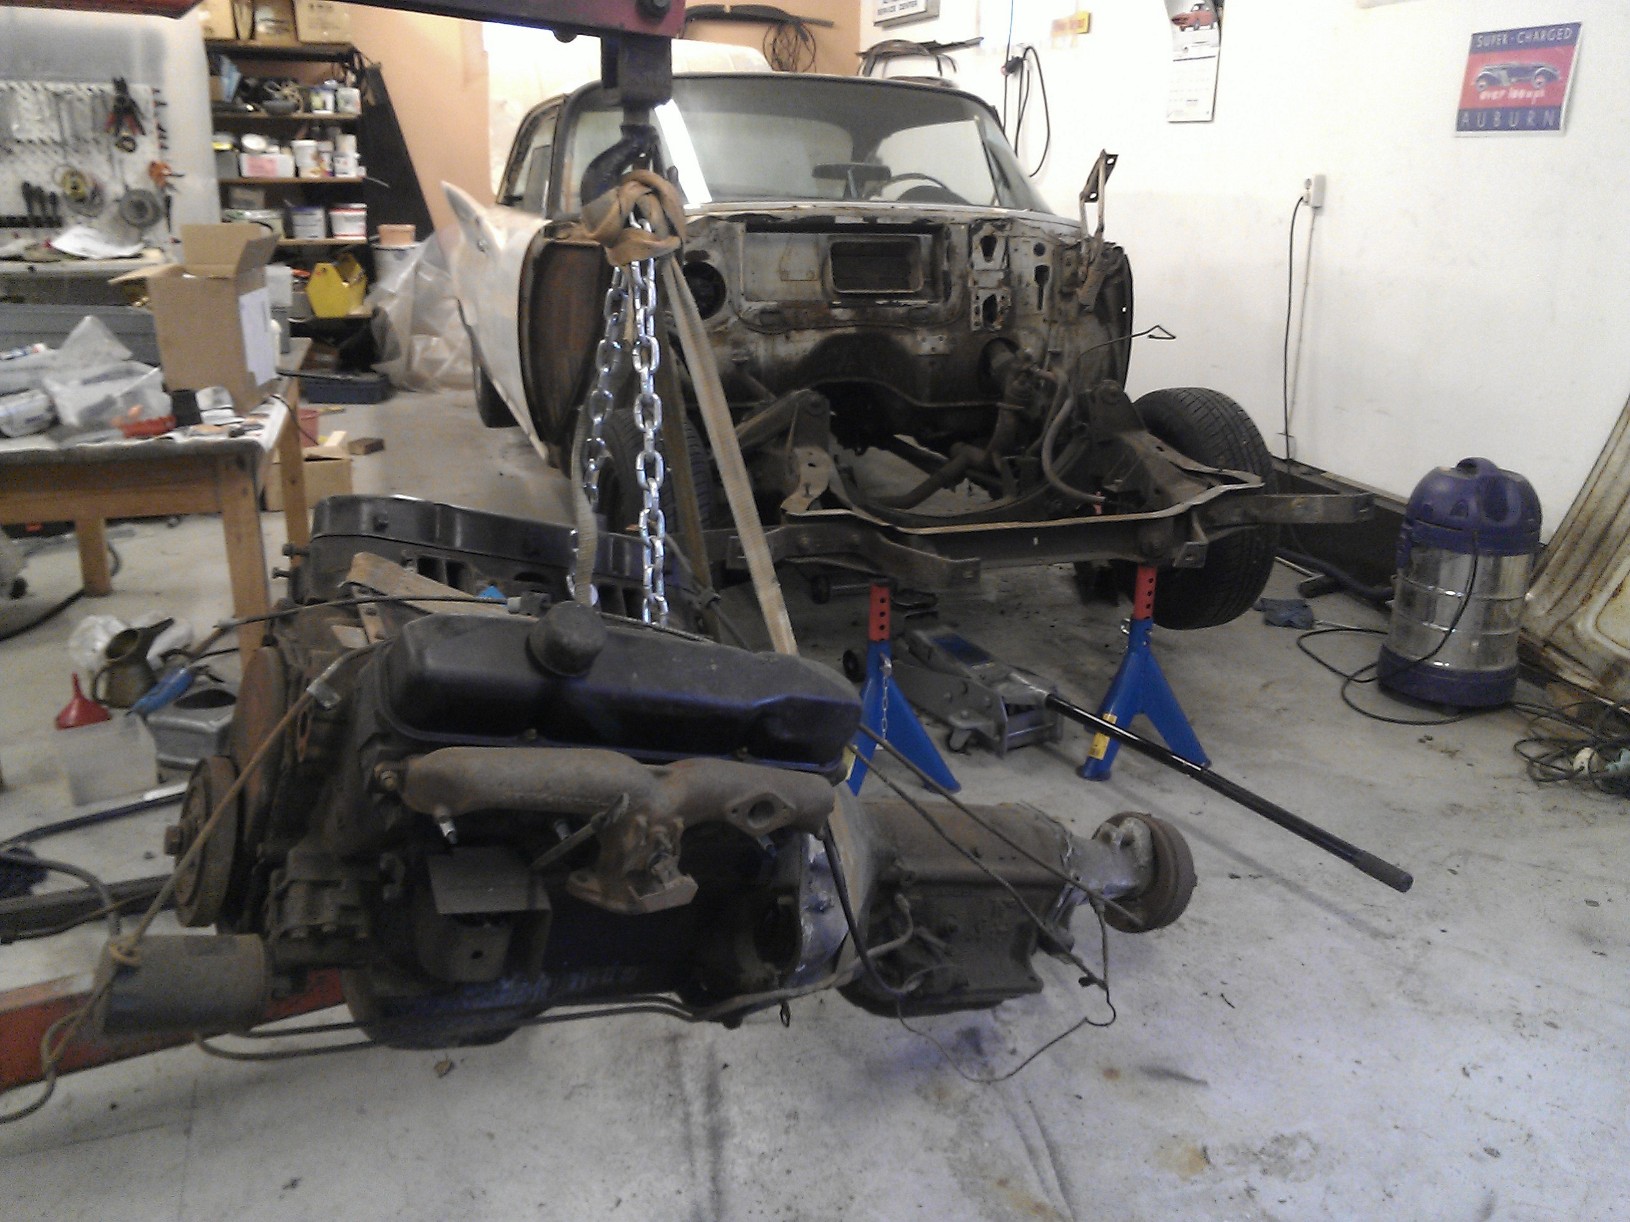
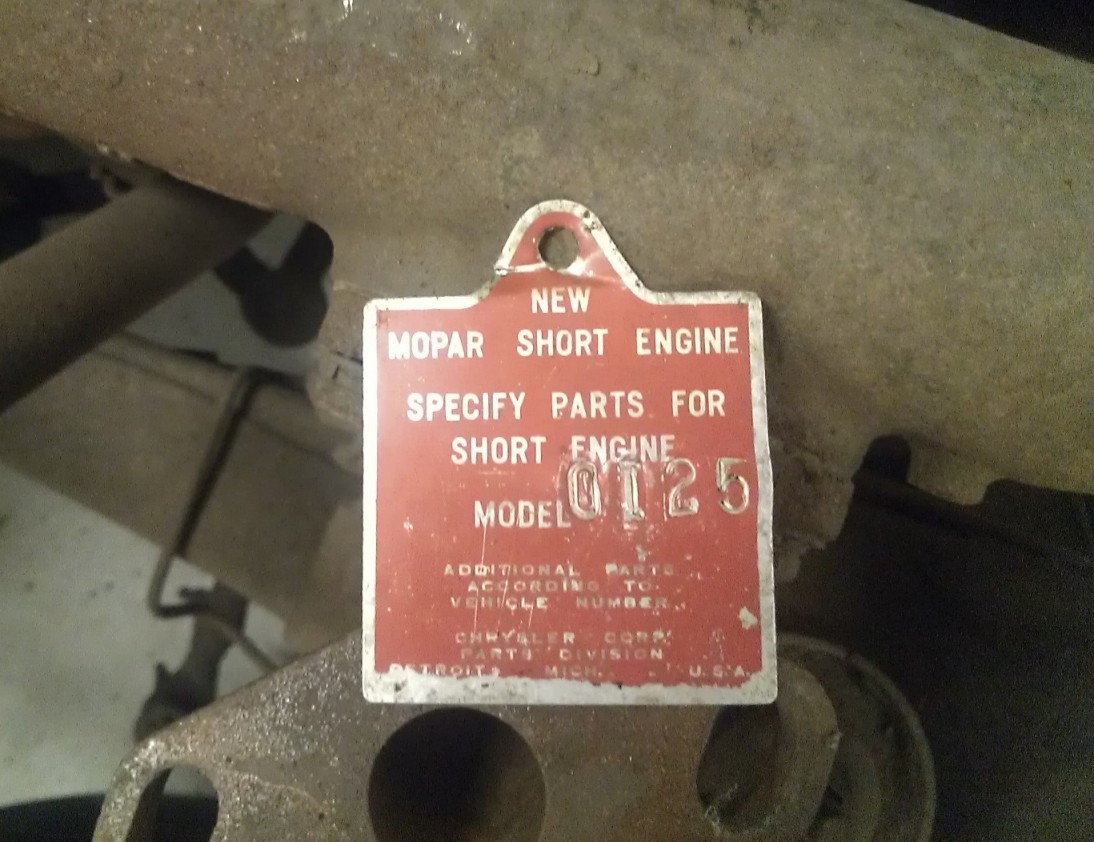
Location: tailFinland | Yes Steph, G:s only engine was 413 with 2x4 and rams.
For some reason, original short block was replaced when she was new,
stamped again with cars original date but casting date was 6 months newer.
somebody really punished her 
Edited by Adventurer 60 2013-03-03 5:02 PM
 (tagi.jpg) (tagi.jpg)
Attachments
----------------
tagi.jpg (190KB - 570 downloads)
|
|
| |
|
Elite Veteran
Posts: 827
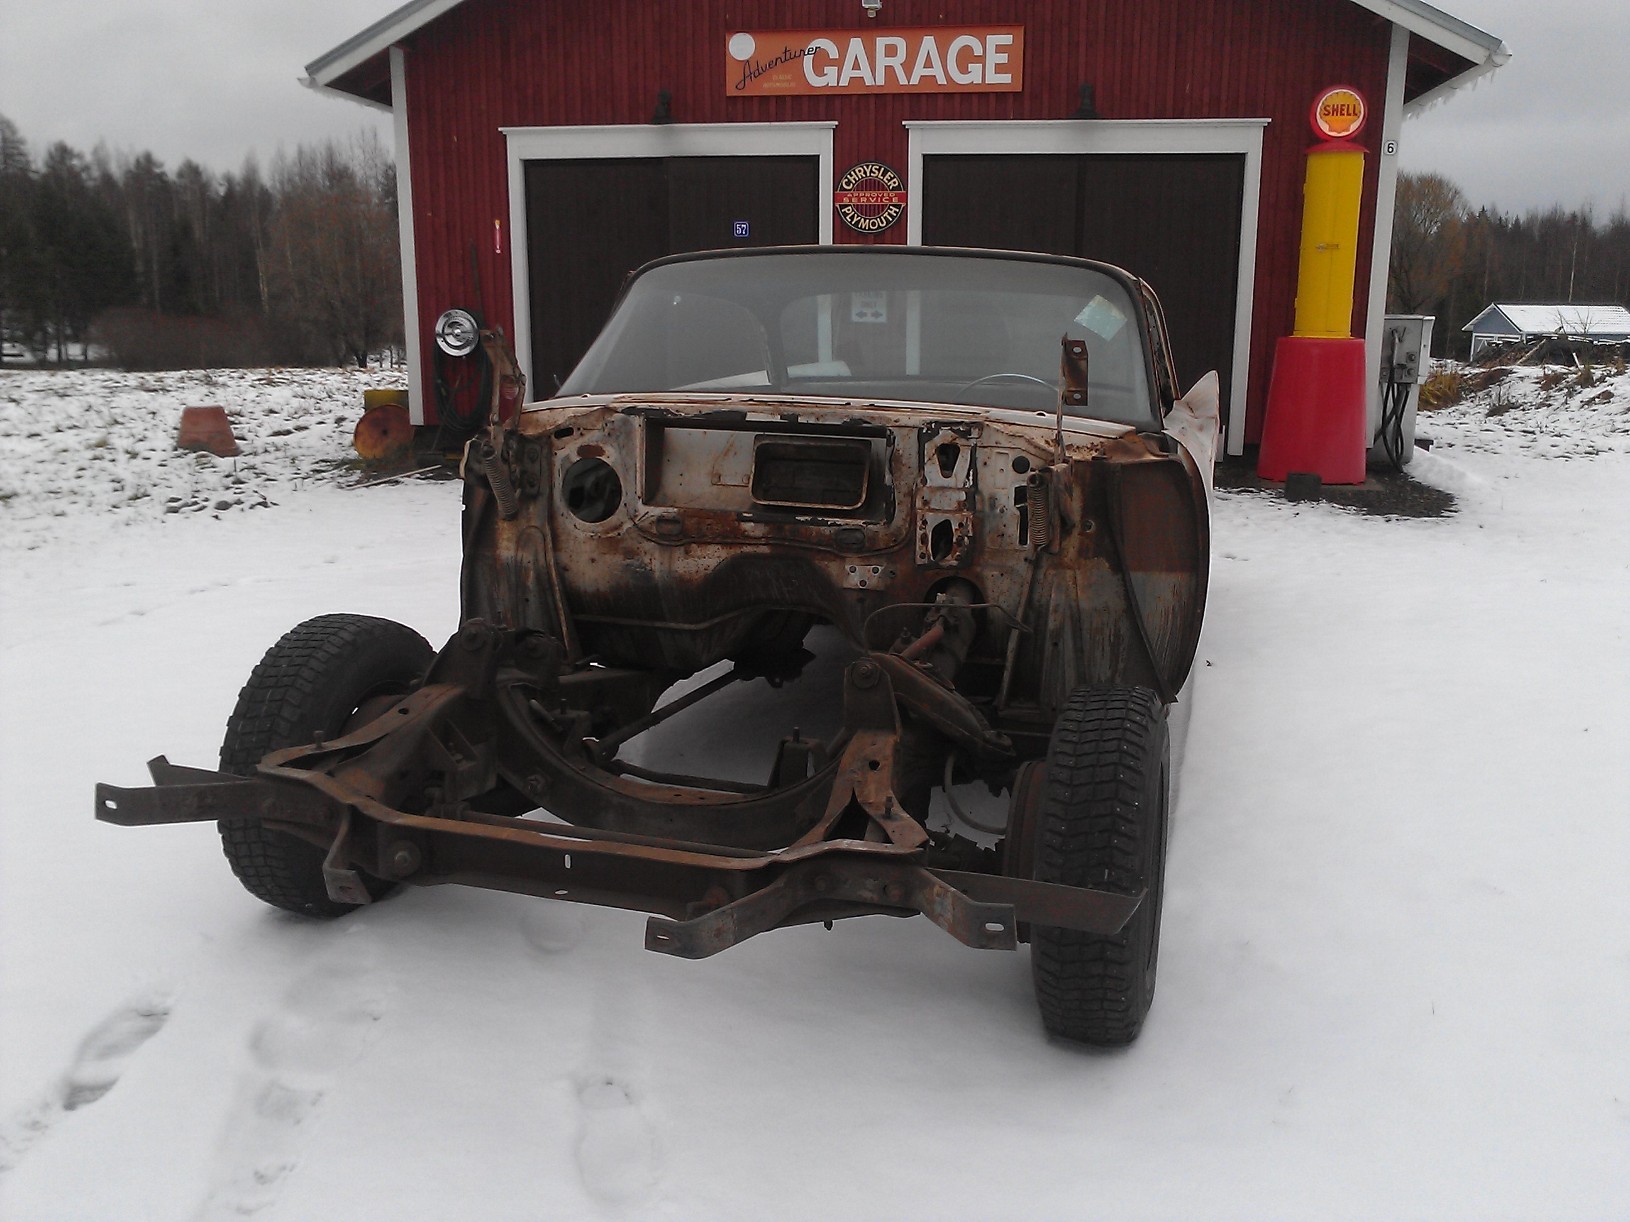
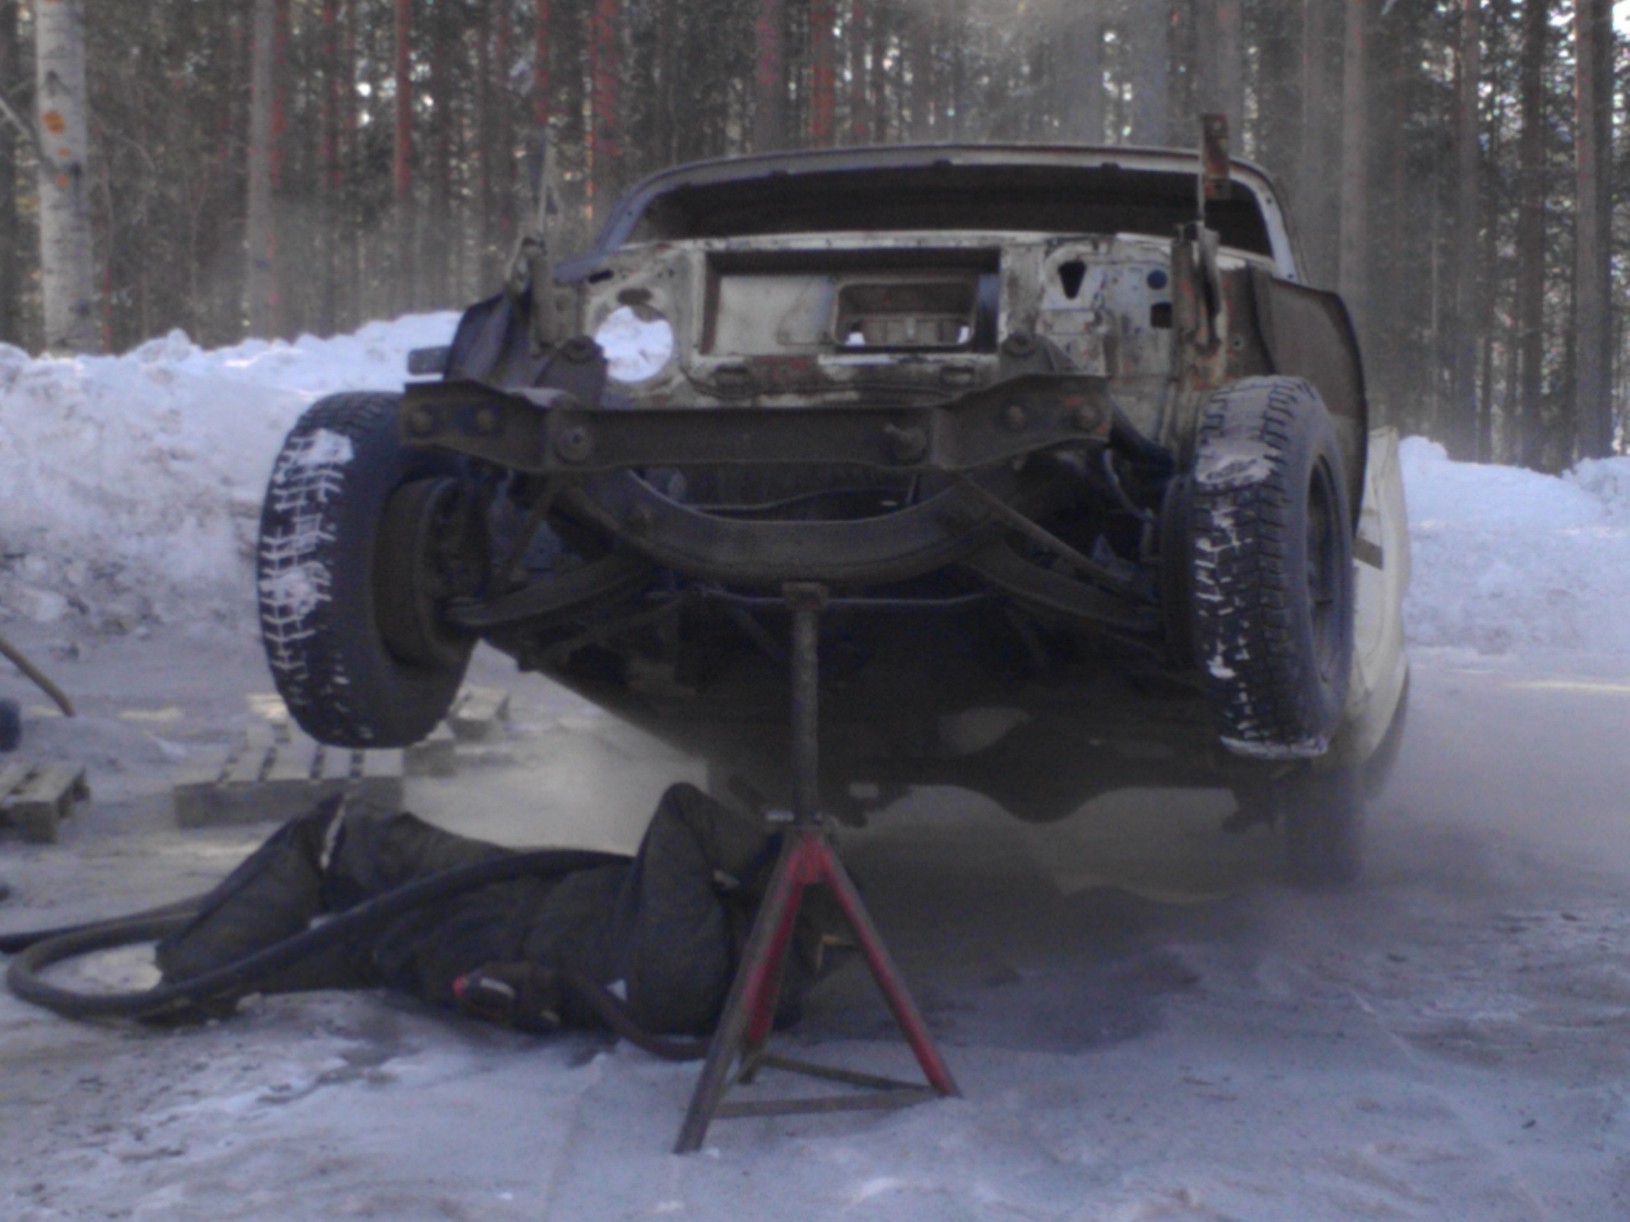
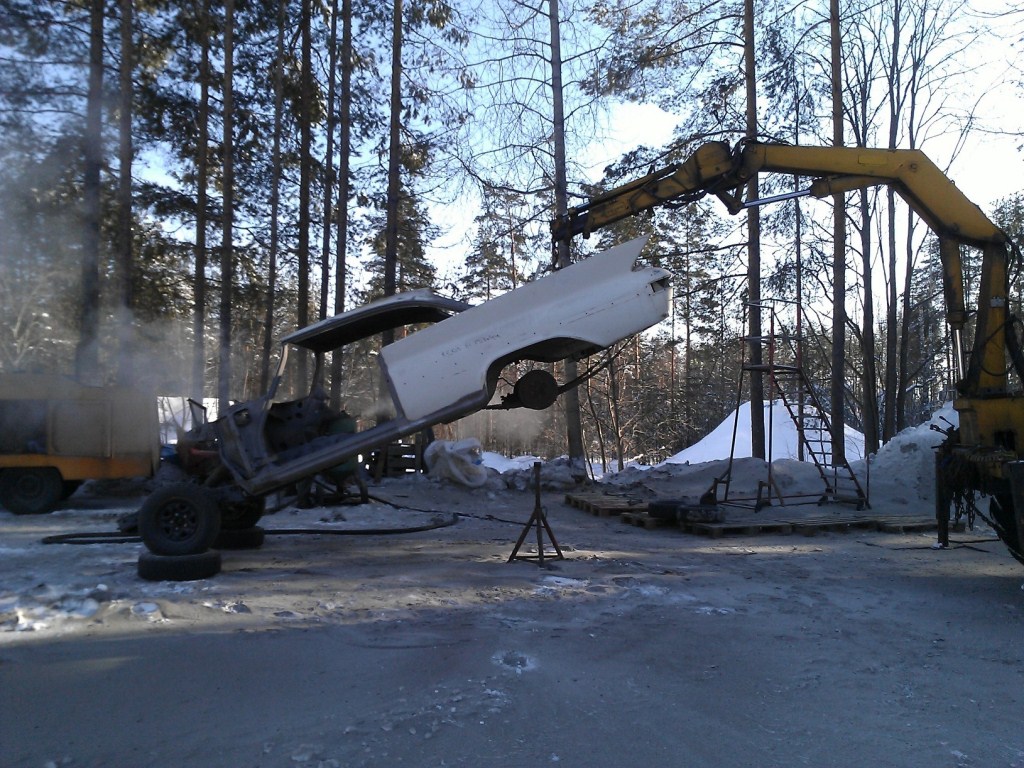
Location: tailFinland | Morning after the coldest night this winter. It was time to give some sandstorm to G
 (WP_000311o.jpg) (WP_000311o.jpg)
 (WP_000323 (2).jpg) (WP_000323 (2).jpg)
Attachments
----------------
WP_000311o.jpg (266KB - 542 downloads)
WP_000323 (2).jpg (160KB - 589 downloads)
|
|
| |
|
Elite Veteran
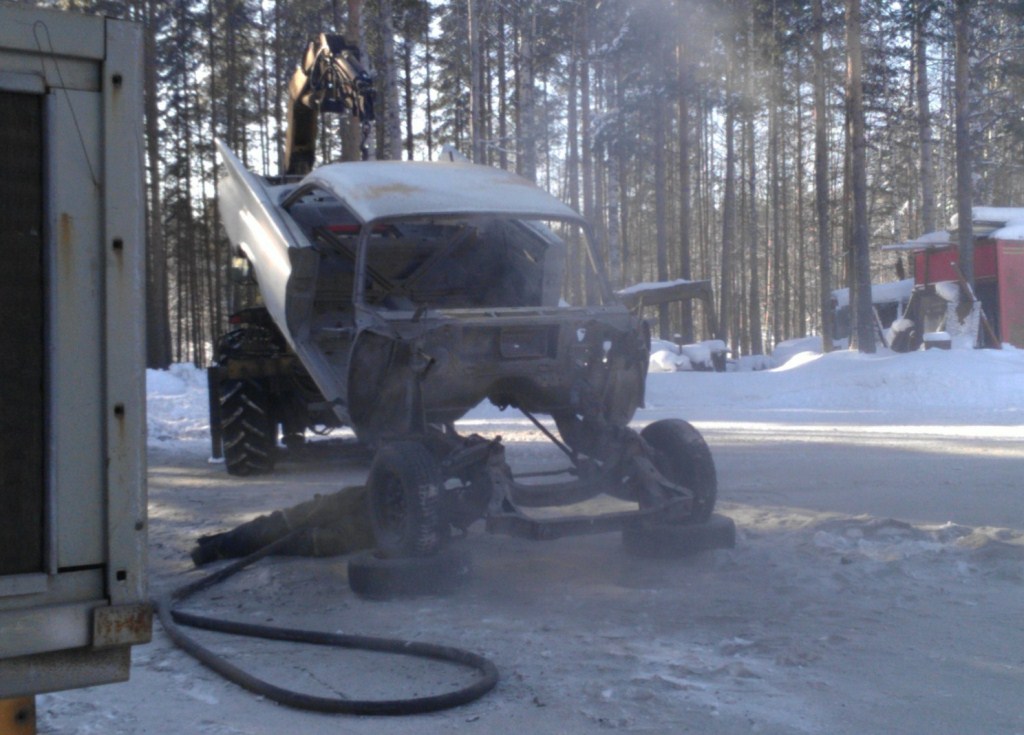
Posts: 827
Location: tailFinland | This looks really finno-ugric project, yea I like to lay down on the snow for 5 hours at -20 and do sand blasting
 (WP_000326 (3).jpg) (WP_000326 (3).jpg)
 (WP_000333 (3)o.jpg) (WP_000333 (3)o.jpg)
 (WP_000334 (2).jpg) (WP_000334 (2).jpg)
 (WP_000331 (3)o.jpg) (WP_000331 (3)o.jpg)
Attachments
----------------
WP_000326 (3).jpg (282KB - 570 downloads)
WP_000333 (3)o.jpg (270KB - 582 downloads)
WP_000334 (2).jpg (153KB - 554 downloads)
WP_000331 (3)o.jpg (207KB - 559 downloads)
|
|
| |
|

Expert 5K+
Posts: 6203
Location: Big pimpin' | Excellent work!!! |
|
| |
|
Board Moderator & Exner Expert 10K+
Posts: 13045
Location: Southern Sweden - Sturkö island | There is a Finnish word "SISU" - if you sandblast your car in minus 20 degrees celcius, then you have it for sure |
|
| |
|
Location: North Australia | Yep, he has got the disease bad. From the pictures I would say there is no hope for salvation for Jarie. Keep up the good work, Jarie.
You will soon be smoking them rear tyres.
Steve. |
|
| |
|
Elite Veteran
Posts: 827
Location: tailFinland | Well, I gotta reveal, it was not me who did the job, dont want to take a credit from these guys who do this as their profession, but I was also there most of the time and it makes me tough guy too
|
|
| |
|
Elite Veteran
Posts: 1157
Location: D-70199 Heslach | That's why I like the skandinavian's |
|
| |
|
Elite Veteran
Posts: 827
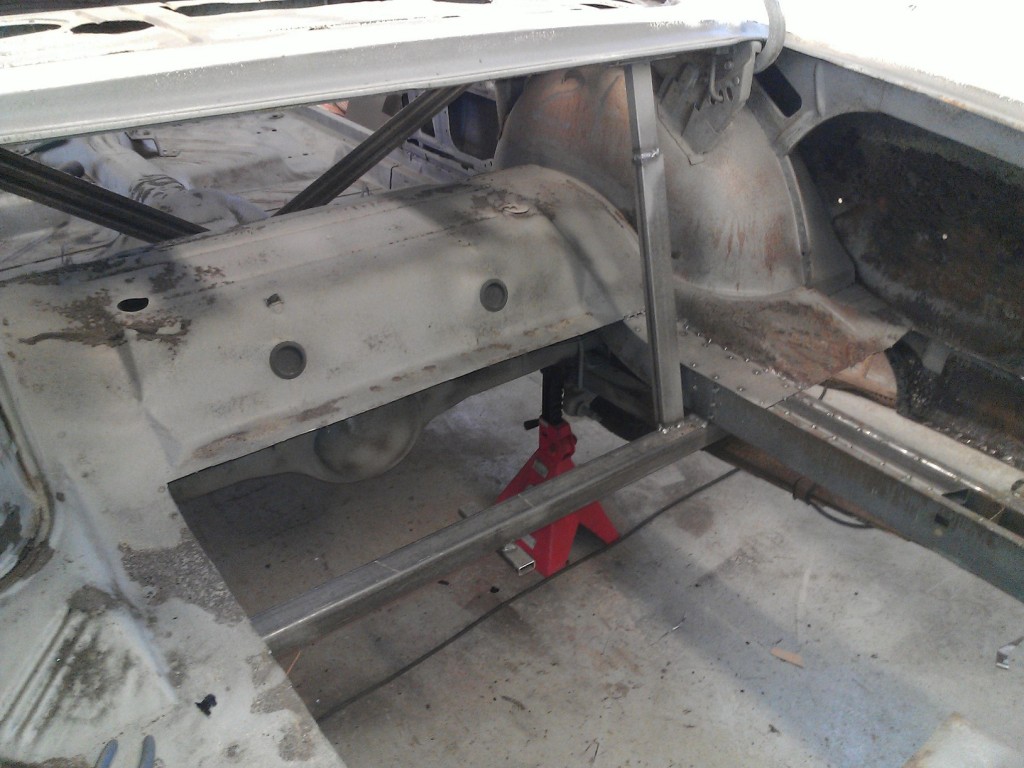
Location: tailFinland | Trunk after sand plasting. You can see my lift bar and safety features there We raised up rear end from that beam
 (WP_000355.jpg) (WP_000355.jpg)
Attachments
----------------
WP_000355.jpg (163KB - 557 downloads)
|
|
| |
|
Elite Veteran
Posts: 827
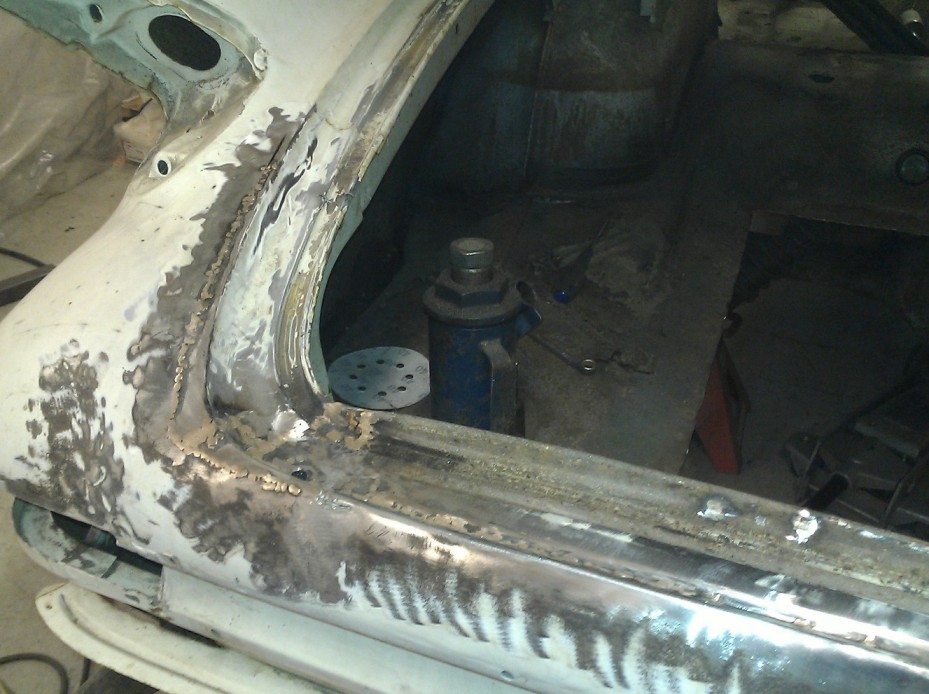
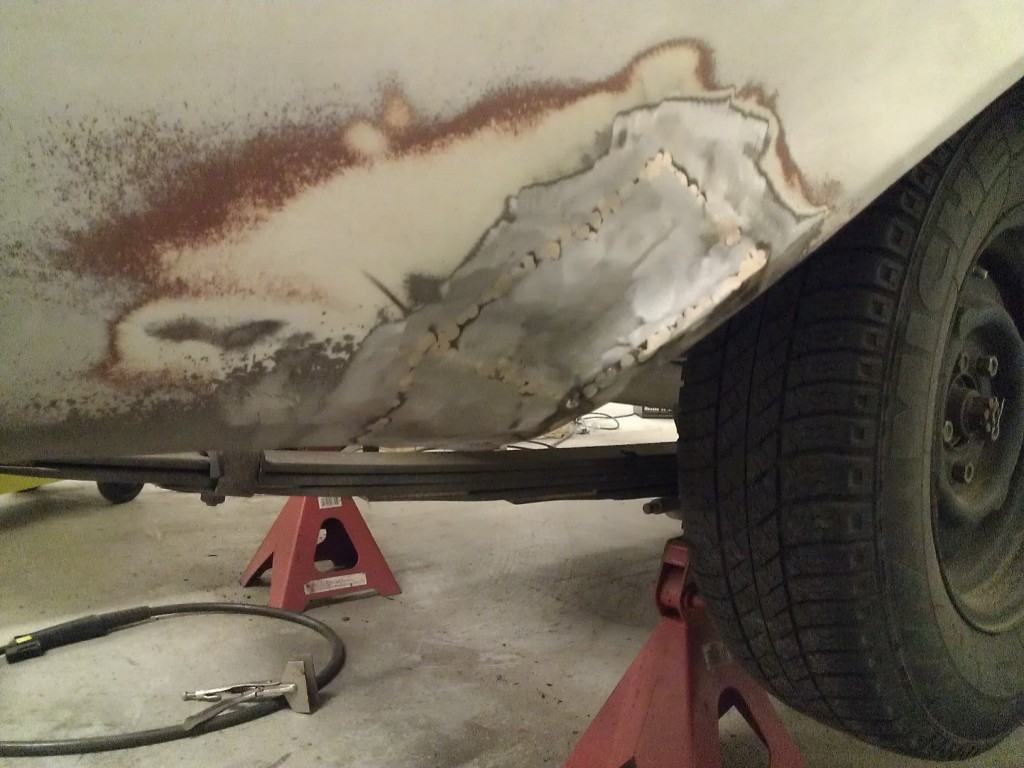
Location: tailFinland | Right rear quarter done.
I did not want a huge 1 3/4" hole and blug there. Now there is just 1/2" hole that can be open or blugged
Edited by Adventurer 60 2013-03-18 6:53 PM
 (WP_000368a.jpg) (WP_000368a.jpg)
 (WP_000377.jpg) (WP_000377.jpg)
Attachments
----------------
WP_000368a.jpg (165KB - 571 downloads)
WP_000377.jpg (138KB - 550 downloads)
|
|
| |
|
Elite Veteran
Posts: 827
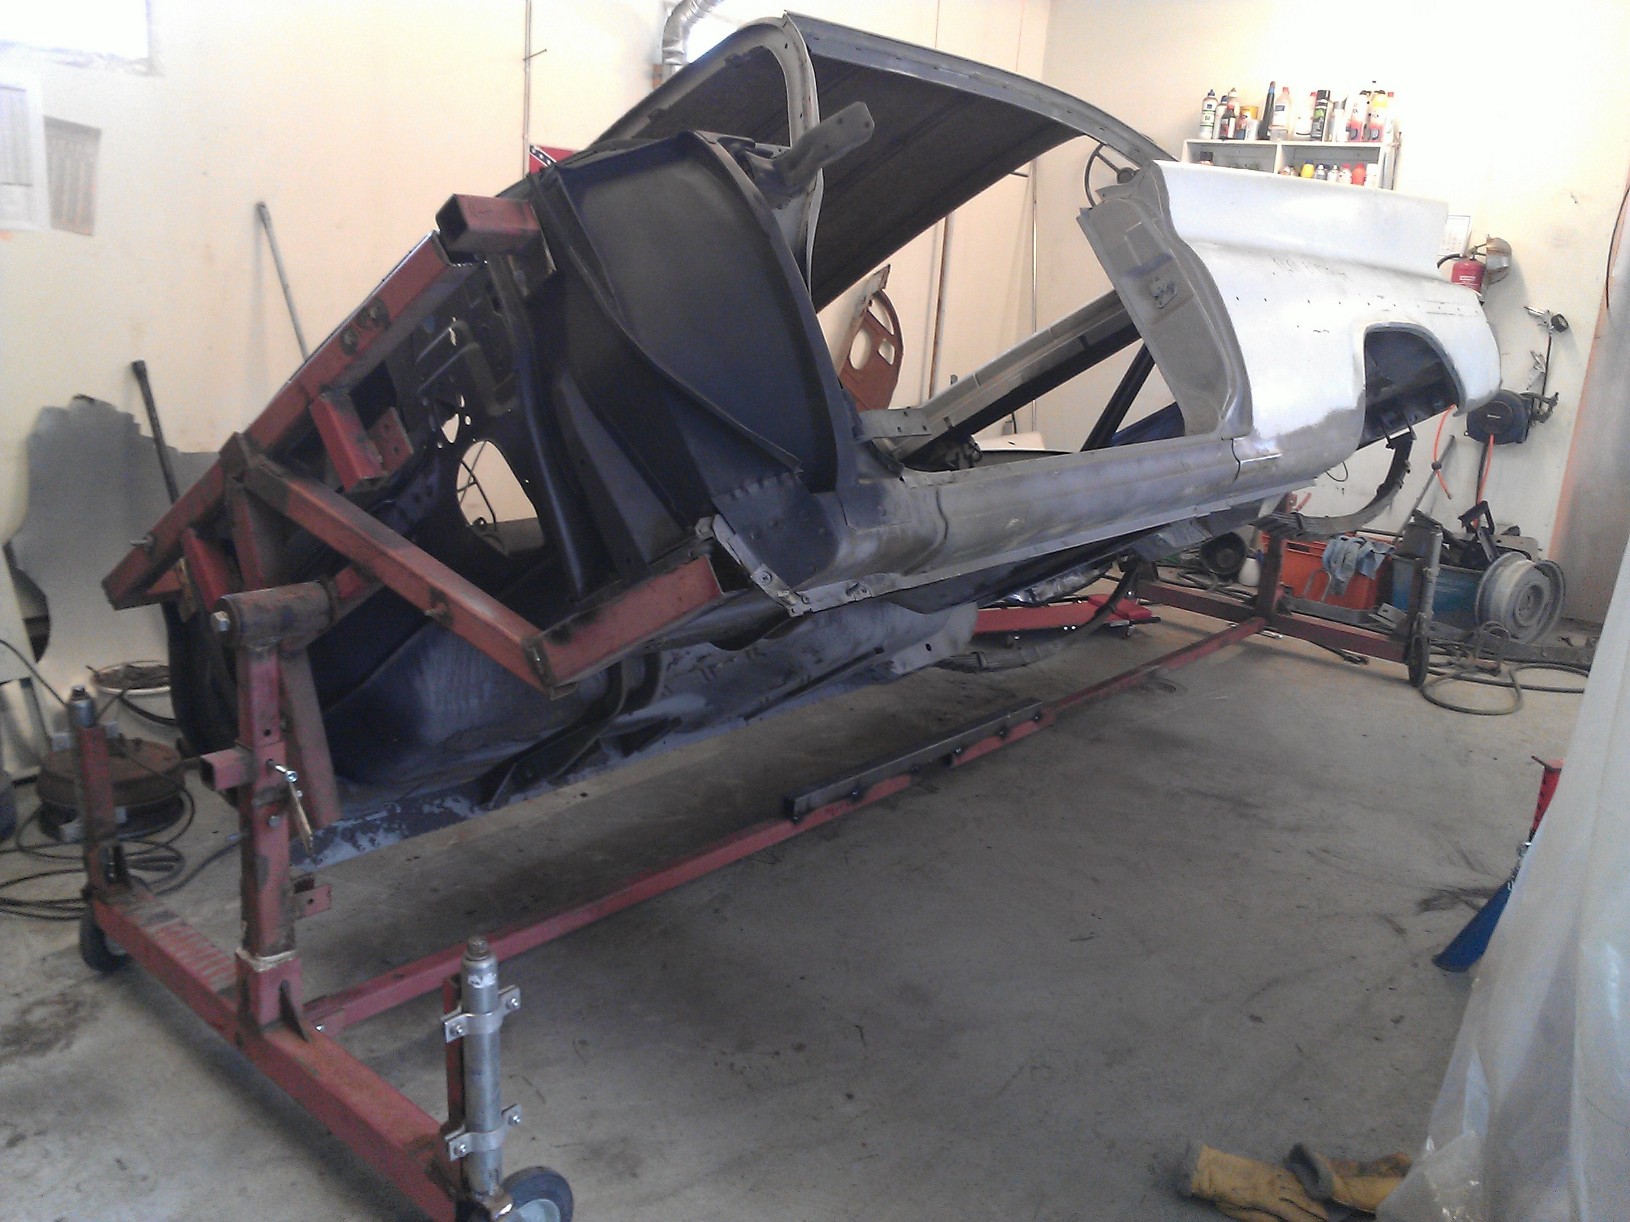
Location: tailFinland | I spent easter sunday doing trunk floor. Most of the sheetmetal work is done, lots of seam finishing and grinding still left. Borrowed a rotisseur from a friend of mine and now it is ready for it. My back is not so good anymore so it is a must
 (WP_000422.jpg) (WP_000422.jpg)
Attachments
----------------
WP_000422.jpg (187KB - 561 downloads)
|
|
| |
|
Board Moderator & Exner Expert 10K+
Posts: 13045
Location: Southern Sweden - Sturkö island | Looks like a good work Jari - yes, we're not getting any younger that's for sure - the rotisserie will make it a lot easier. |
|
| |
|
Elite Veteran
Posts: 827
Location: tailFinland | BBQ-season just started, how about grilled steel horse
 (grillisssÃ.jpg) (grillisssÃ.jpg)
Attachments
----------------
grillisssÃ.jpg (389KB - 566 downloads)
|
|
| |
|
Elite Veteran
Posts: 827
Location: tailFinland | Spent saturday fabricating the new funnel for gas filling pipe
 (WP_000459.jpg) (WP_000459.jpg)
Attachments
----------------
WP_000459.jpg (29KB - 570 downloads)
|
|
| |
|

Expert
Posts: 2788
Location: USA - KY | 
Another ambitious resto that is going to be amazing when it's done!
I like your plans for the black paint and red interior, Jan!
It's going to be one mean machine!
Thanks for the updates!
|
|
| |
|
Elite Veteran
Posts: 827
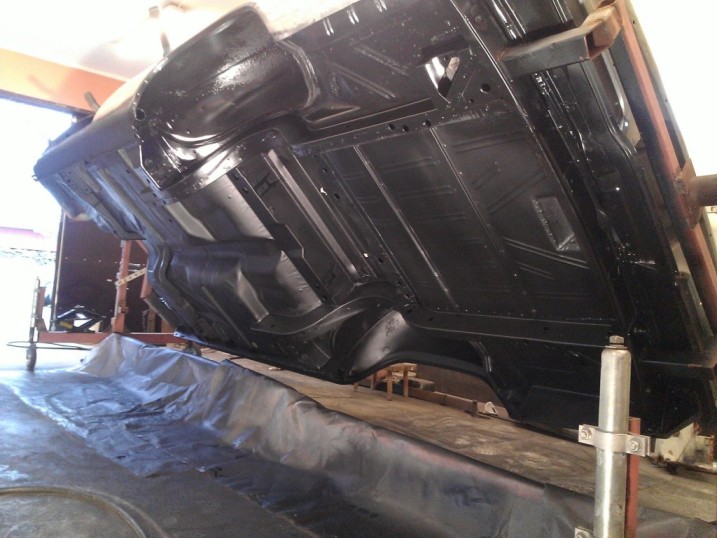
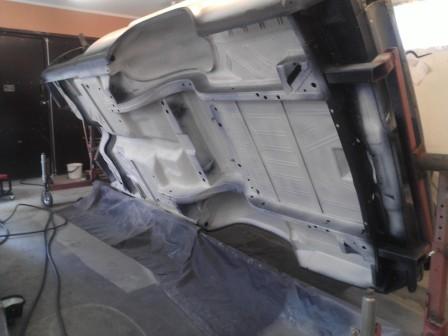
Location: tailFinland | I have been busy elsewhere but carage few weeks. Now at the holiday I got a chance to paint the bottom of the body with epoxy primer
 (WP_000486.jpg) (WP_000486.jpg)
 (WP_000487.jpg) (WP_000487.jpg)
Attachments
----------------
WP_000486.jpg (99KB - 533 downloads)
WP_000487.jpg (90KB - 549 downloads)
|
|
| |
|
Regular
Posts: 92
Location: montevallo, alabama | just when i get tired and broke you guys inspire me to keep going, my little pit bull pioneer was rough but coming togther nicely . Its gonna be my classy little hot rod and I hope to enjoy lots of cruise ins and local car shows. just recently went to an all day show and only 4 mopars were there vs about 150 chevys. but the young lady from n.c got a lot of attention in her 61 plymouth |
|
| |
|
Elite Veteran
Posts: 827
Location: tailFinland | Perfect summerday to do some painting.
 (WP_000533.jpg) (WP_000533.jpg)
 (WP_000539.jpg) (WP_000539.jpg)
Attachments
----------------
WP_000533.jpg (25KB - 401 downloads)
WP_000539.jpg (27KB - 402 downloads)
|
|
| |
|
Elite Veteran
Posts: 827
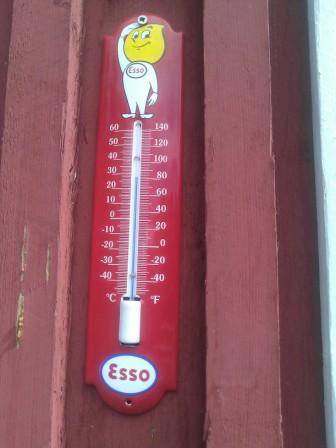
Location: tailFinland | Actually it is rubbery under coat layer before the paint. Used almost 4 kilos of this stuff.
Now just waiting till the evening to get it dried and the paint
 (WP_000534.jpg) (WP_000534.jpg)
Attachments
----------------
WP_000534.jpg (26KB - 390 downloads)
|
|
| |
|
Elite Veteran
Posts: 827
Location: tailFinland | My outdoor paint shop warm still summer evening it just perfect to paint miscellaneus parts
 (maalaamo.jpg) (maalaamo.jpg)
Attachments
----------------
maalaamo.jpg (233KB - 410 downloads)
|
|
| |
|
Elite Veteran
Posts: 827
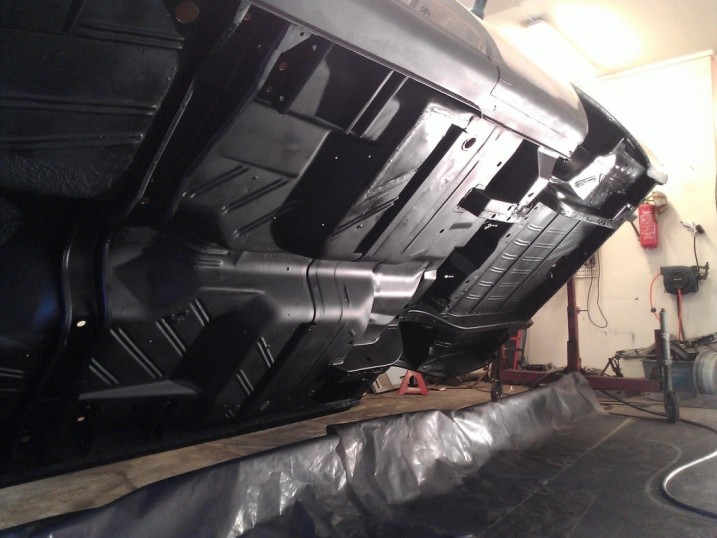
Location: tailFinland | This gotta be a turning point. First part assembled back to the body.
Bottom of the car looks good.
Now I am going to get it back on its wheels so it could be trailered to a paint shop.
Edited by Adventurer 60 2013-07-10 5:08 PM
 (WP_000634.jpg) (WP_000634.jpg)
Attachments
----------------
WP_000634.jpg (157KB - 401 downloads)
|
|
| |
|
Elite Veteran
Posts: 827
Location: tailFinland | Started to make some tin-work. I attend to use bondo as little as possible. Tempereture in my barn varies from -30 to over 100 F. Also I want that no one needs to do this job again for this car. Doing it right is not that hard it just takes more time than doing it with plastic fillers etc.
 (tinattu2.jpg) (tinattu2.jpg)
 (takakontt1.jpg) (takakontt1.jpg)
Attachments
----------------
tinattu2.jpg (151KB - 380 downloads)
takakontt1.jpg (144KB - 393 downloads)
|
|
| |
|
Elite Veteran
Posts: 827
Location: tailFinland | rear quarter
 (tinattu.jpg) (tinattu.jpg)
Attachments
----------------
tinattu.jpg (127KB - 380 downloads)
|
|
| |
|
Board Moderator & Exner Expert 10K+
Posts: 13045
Location: Southern Sweden - Sturkö island | Jari, any updates of your work progress? |
|
| |
|
Elite Veteran
Posts: 827
Location: tailFinland | Well, not so much progress during the summer. I have mostly enjoyed summer by fixing the roof (wich was leaking)and sealings of my summerhouse by the lake.
At the garage I have fixed, sandplasted and painted loose parts and so on, even got exhaust headers welded and blasted - very little. But now when the fall comes, I think I will spent more time indoors (means garage).
Last weekend I took a trip with my New Yorker and drove to country side to several paint job guys to ask an offer of painting my 300 and I was kinda lucky. One of them was really anxious to take it with really reasonable price. And I know this guy is very skillfull and done several show quality cars.
In my city all kind of fender benders and small collisions occur for cars and mopedcars that all car paint shops in town do only those. They charge 500-1000 euros for fixing small dent and cratch. (perhaps a ½day job) Easy money for them 
I do not mind trailering my car 70 kms to the paint job.
So My target is to get it on its wheels rolling before the winter comes and get it to paintshop. Then I start to rebuild engine and tranny, dashboard and so on and car can just sit and dry
Edited by Adventurer 60 2013-09-04 8:12 AM
|
|
| |
|
Elite Veteran
Posts: 827
Location: tailFinland | Not much progress lately but got leaf springs and rear axle restored and installed. I am missing the bumper with a bracket that is bolted on the center of the rear axle? anyone got extra? let me know.
 (rear axle.jpg) (rear axle.jpg)
Attachments
----------------
rear axle.jpg (187KB - 372 downloads)
|
|
| |
|
Elite Veteran
Posts: 827
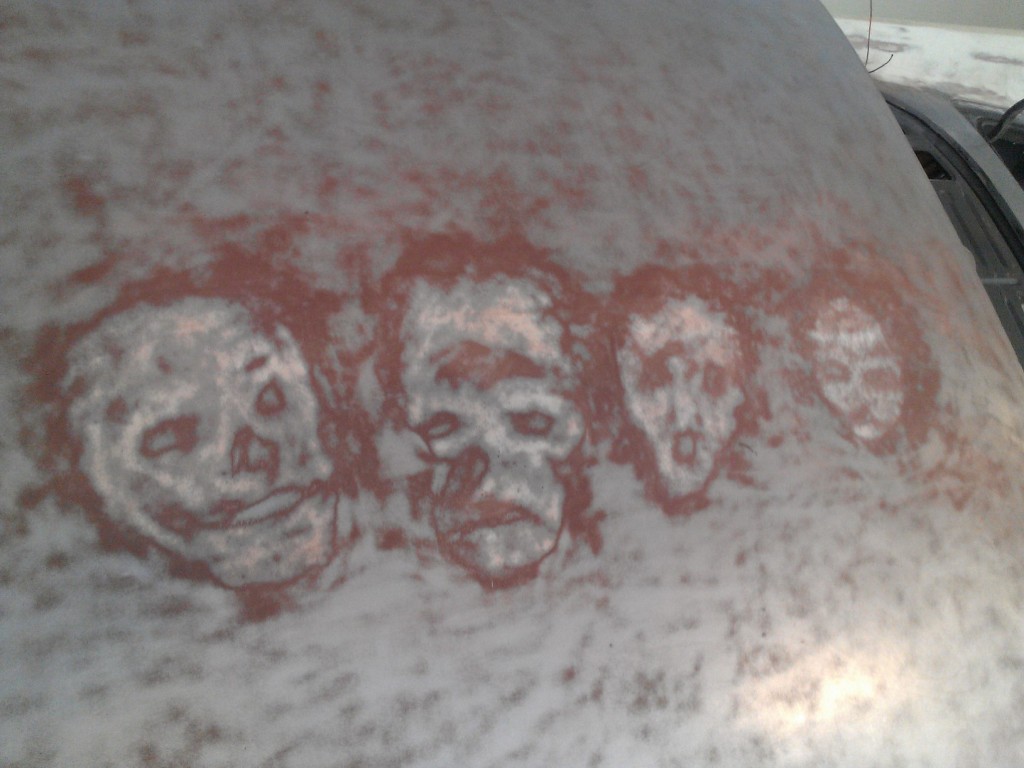
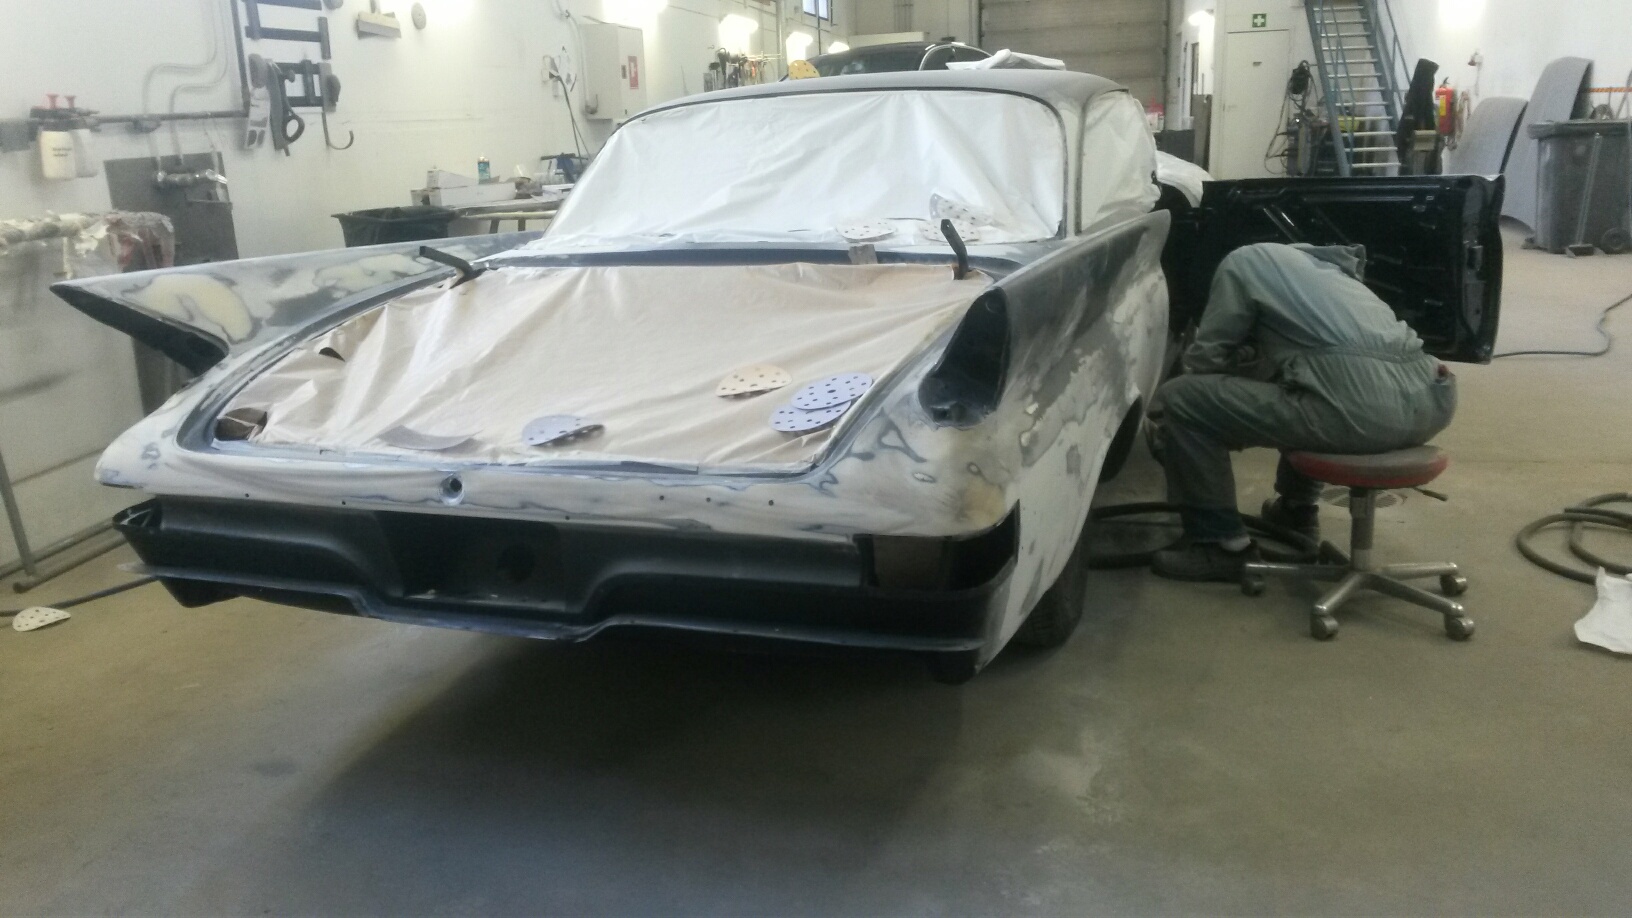
Location: tailFinland | This is a spooky story.
Last friday night I was working at the carage. It was dark dark windy night, occasionally full moon showed up between the clouds.
I was drinking few beers and grining paint off of my G:s roof. Anyone who has done that knows that paint doest not get off smoothly when you use power grinders. at the beginnig surface looks pretty spotty becouse of multible paint layers, some spots buff off easier than othres. It is also boring time consuming job
Edited by Adventurer 60 2013-10-20 7:34 AM
 (katon hiontaa.jpg) (katon hiontaa.jpg)
Attachments
----------------
katon hiontaa.jpg (135KB - 377 downloads)
|
|
| |
|
Elite Veteran
Posts: 827
Location: tailFinland | Here is the spooky part, more I buffed, more I saw four figures like skulls or heads. Paint just did not want to get off from certain spots.
Finally I was able to see four heads, like a family, Dad, mother, boy child and a baby.
Dad is laughing, mon crying, child is like in in Edward Muncs painting "scream", baby is sleeping...
I went back to house but I was not able to sleep. I was thinging who the hell they are. Did family died in this car or was killed by this car...
Next mornig I went back to carage and... they were gone.
 (spooky1.jpg) (spooky1.jpg)
Attachments
----------------
spooky1.jpg (133KB - 386 downloads)
|
|
| |
|
Expert
Posts: 2788
Location: USA - KY | 
What the...?
Are ya sure that you didn't just have too many beers and got artistic? LOL
Spooooooooooky.
Halloween will soon be here, so it's a fitting time of year.
Meanwhile, the resto seems to be going well!
|
|
| |
|
Veteran
Posts: 143
Location: Malmberget, Sweden | Thats spookey |
|
| |
|
Board Moderator & Exner Expert 10K+
Posts: 13045
Location: Southern Sweden - Sturkö island | The twilight zone........................... |
|
| |
|
Elite Veteran
Posts: 827
Location: tailFinland | FIN ME - 2013-10-20 10:30 AM
What the...?
Are ya sure that you didn't just have too many beers and got artistic? LOL
Spooooooooooky.
Halloween will soon be here, so it's a fitting time of year.
Meanwhile, the resto seems to be going well!
: )
I took just a beer or two - but I found out that my Jägermeister bottl,e that I keep there, was empty next morning |
|
| |
|
Expert 5K+
Posts: 8443
Location: Perth Australia | Well if you just had a beer or 2, then the skulls drank you other stuff then
I guess this car has to be a rat rod now, flat black with skulls all over it
|
|
| |
|
Elite Veteran
Posts: 827
Location: tailFinland | G as a rat rod - mmm. Not so good idea even I like rat rods as well as restored or show cars. I managed to buff them all off but what if..
If they'll some day, I mean night, show up again and want to step in, on the lonely road dozens of miles from the nearest house
|
|
| |
|
Expert 5K+
Posts: 8443
Location: Perth Australia | Might not have any choice in wether the skuls are there or not
They may be slight indentations on the roof that show in the paint when you look at it just right
Plenty of high fill primmer on the roof to keep them buried
|
|
| |
|
Elite Veteran
Posts: 827
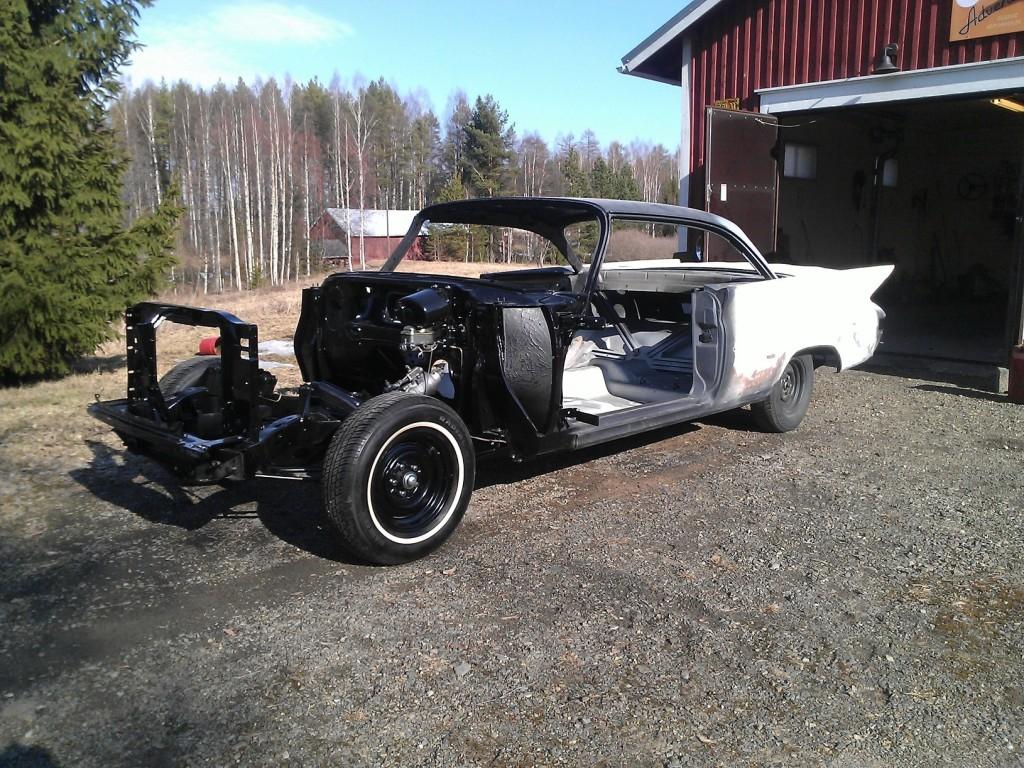
Location: tailFinland | It is on its wheels, Yeeeah.
Actually those are not its own wheels, they are chevy winter wheels with spacers.
Anyway its rolling now and ready to move anywhere.
I have forced to make some compromises with body and paint work. (in order to save money and time) I do my self all I can and wich can be done at my own paint booth of my carage. So I finish bottom of the body, frame, axles etc components. Also firewall, luggage compartment, innerside of lids and doors. I remove the old paint and spray epoxy primer. Rest, wich means those surfaces wich are critical and where top quality is needed are done in better facilities by a very best professional.
It means lots of tapeing and covering already painted areas but I think it will be worth of it.
Edited by Adventurer 60 2013-11-03 6:47 AM
 (rolling.jpg) (rolling.jpg)
Attachments
----------------
rolling.jpg (125KB - 370 downloads)
|
|
| |
|
Expert
Posts: 1730
Location: Michigan | Looking good Jari, keep us informed. I like watching this part. Now I need the incentive. I have to take mine apart again. |
|
| |
|
Board Moderator & Exner Expert 10K+
Posts: 13045
Location: Southern Sweden - Sturkö island | Nice work Jari, slowly but surely - that's the way to do it - keep us posted! |
|
| |
|
Expert
Posts: 2596
Location: Upplands Väsby, Sweden | Hi Jari
Fun to see your 300G going well (great work);-)
and it go fast.
|
|
| |
|
Elite Veteran
Posts: 827
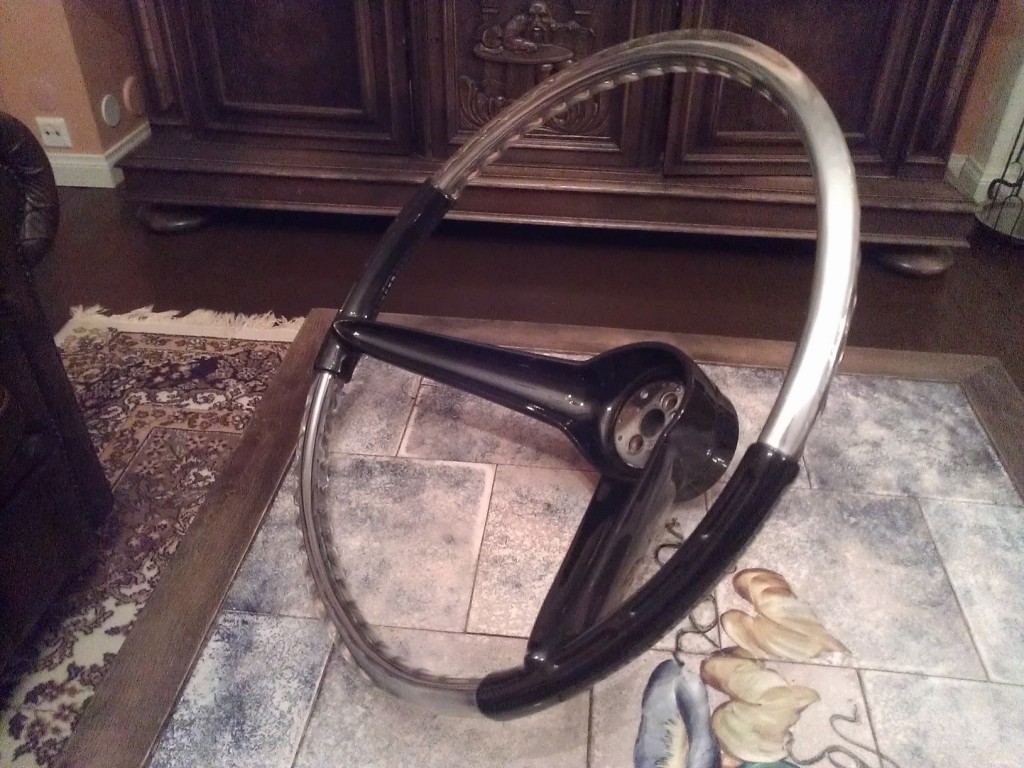
Location: tailFinland | I got a shipment from Magnus in Svealand. Wow. this is a most beautiful steering wheel I have ever held in my hands, really a masterpiece of craftsmanship. And it is going to be in my G.
Tack Magnus! Tack Tack Tack!
 (ratt.jpg) (ratt.jpg)
Attachments
----------------
ratt.jpg (213KB - 367 downloads)
|
|
| |
|
Expert
Posts: 2596
Location: Upplands Väsby, Sweden | Wow super nice steering wheels
I must do same at my car |
|
| |
|
Board Moderator & Exner Expert 10K+
Posts: 13045
Location: Southern Sweden - Sturkö island | I know the feeling Jari - Magnus is a craftsman and a gentleman |
|
| |
|
Veteran
Posts: 143
Location: Malmberget, Sweden | Great work. |
|
| |
|

Expert 5K+
Posts: 9654
Location: So. Cal | Adventurer 60 - 2013-11-14 10:43 AM
I got a shipment from Magnus in Svealand. Wow. this is a most beautiful steering wheel I have ever held in my hands, really a masterpiece of craftsmanship. And it is going to be in my G.
Tack Magnus! Tack Tack Tack!
Great looking wheel, but what does Tack mean? |
|
| |
|
Board Moderator & Exner Expert 10K+
Posts: 13045
Location: Southern Sweden - Sturkö island | It means thanks' in Swedish |
|
| |
|
Elite Veteran
Posts: 827
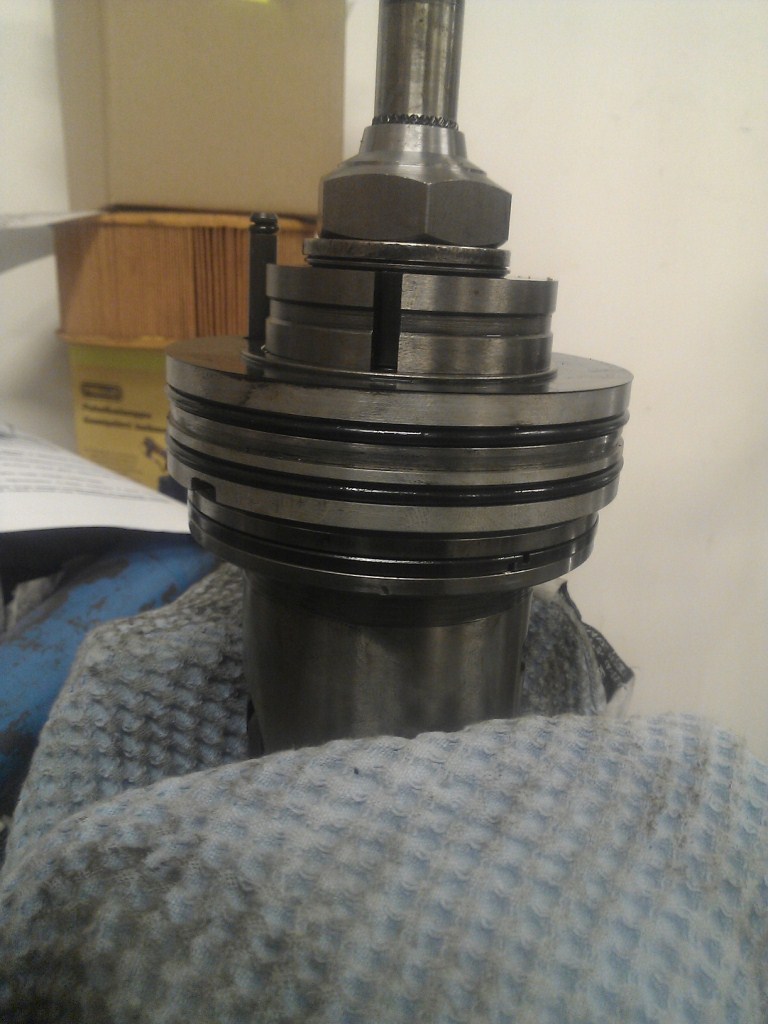
Location: tailFinland | I started to restore steering box. Very simple Actually its about 10 years when I last touched Mopar steering box and
learned everything from them - and forgot :).
On thing is very frustrating in these boxes, when you pull out sector saft, next thing you usually see
are bearing pins all around table or floor. It happened this time too. Oil washes vaseline out off the bearings and the pins are
guite loose and drop when teher is no axle to keep them on their place.
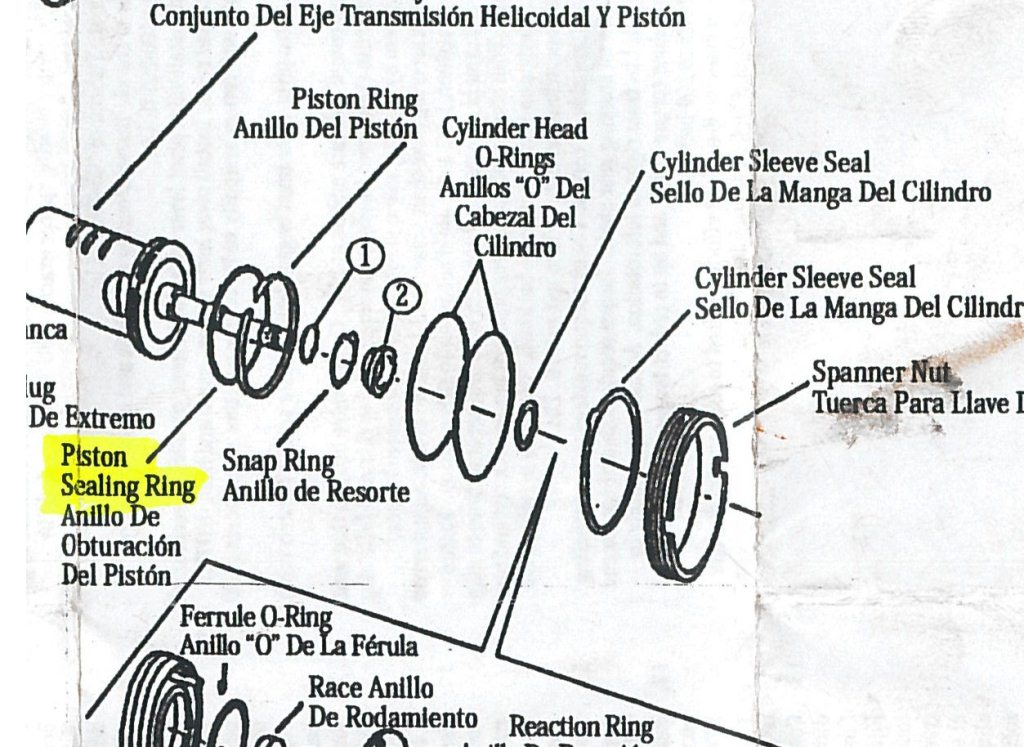
Then one thing raised a guestion. In the repair kit instructions I have, it has piston sealing ring. WTF:n piston sealing ring.
There is only piston ring??
Anyone knows what this is? Am I mistaken??
Edited by Adventurer 60 2013-11-20 10:17 AM
 (steering gear.jpg) (steering gear.jpg)
 (piston 2.jpg) (piston 2.jpg)
 (piston.jpg) (piston.jpg)
Attachments
----------------
steering gear.jpg (159KB - 368 downloads)
piston 2.jpg (135KB - 357 downloads)
piston.jpg (164KB - 357 downloads)
|
|
| |
|
Elite Veteran
Posts: 827
Location: tailFinland | Should there be any seal between piston and cylinderhead what you see in (piston2.jpg) There was'nt but there are wear marks between them... so I figured if...
This box was not virgin |
|
| |
|
Extreme Veteran
Posts: 531
Location: Park Hills, KY | Can Magnus do a wheel for me here in the US? How much? |
|
| |
|
Board Moderator & Exner Expert 10K+
Posts: 13045
Location: Southern Sweden - Sturkö island | Last I spoke with Magnus he said that he had done some steering wheels for US guys, so I guess that it's a yes on the first question. As I see it, the shipping will be the problem, because you must send a core over to Sweden and then pay for the return shipment. If you would like to contact Magnus, you could send him a mail at stade.b@telia.com
|
|
| |
|
Elite Veteran
Posts: 673
Location: Malung, SWEDEN | Good work Adventurer 60! Your car will be great when completed. |
|
| |
|
Elite Veteran
Posts: 827
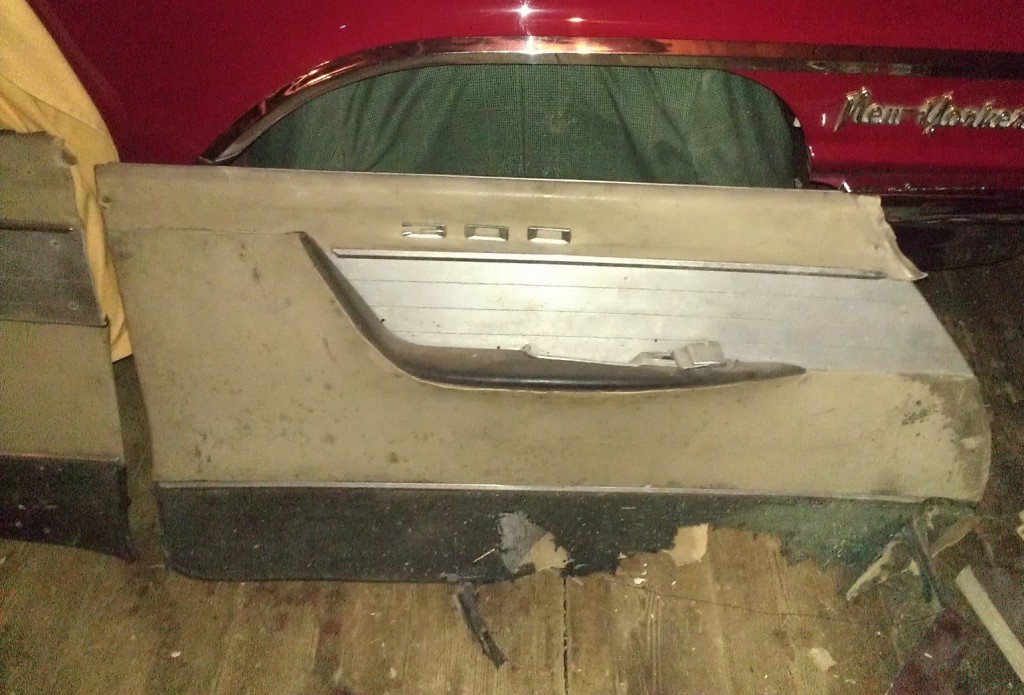
Location: tailFinland | Time to do some interior work. Door panels are really beaten. Aluminum panels turned out not so good in closer inspection, expecially at the drivers door. rears are not so bad.
I have seen repros for sale in Power Meet. Whos doing them? Swedes please let me know.
 (WP_000189.jpg) (WP_000189.jpg)
 (WP_000212.jpg) (WP_000212.jpg)
 (WP_000213.jpg) (WP_000213.jpg)
Attachments
----------------
WP_000189.jpg (179KB - 439 downloads)
WP_000212.jpg (164KB - 350 downloads)
WP_000213.jpg (122KB - 365 downloads)
|
|
| |
|
Elite Veteran
Posts: 827
Location: tailFinland |
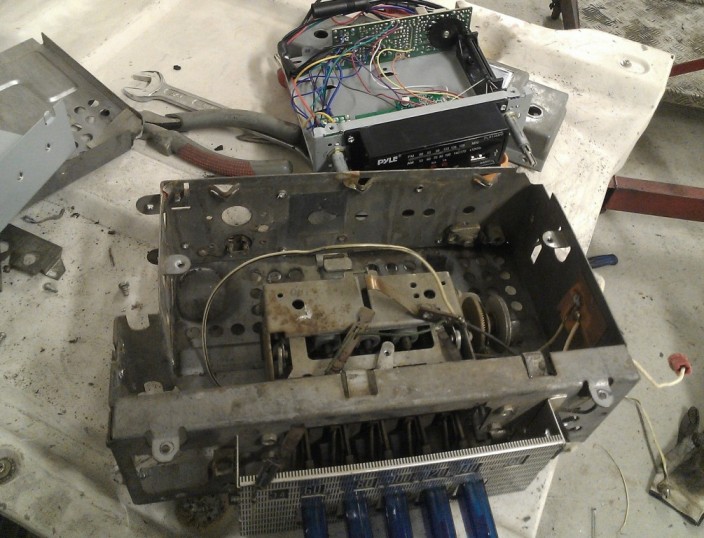
Bought a chinese made radio to make FM conversion to original AM Golden Touch radio.
It was more time consuming than I frist thought.
Both are with knobs, size and weight difference is huge
 (WP_000258.jpg) (WP_000258.jpg)
Attachments
----------------
WP_000258.jpg (146KB - 350 downloads)
|
|
| |
|
Elite Veteran
Posts: 827
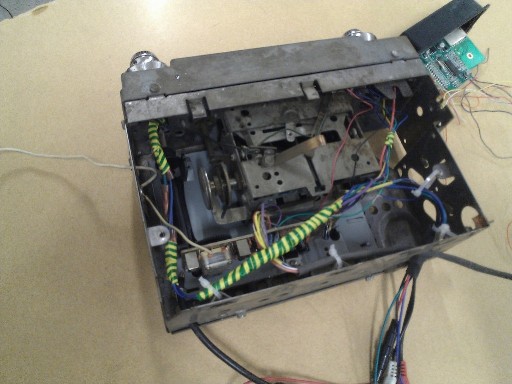
Location: tailFinland | I took away all the stuff out of original radio exept bush putton mechanism.
I had to lenghten the wires of new radio, make a new axle for tuner.
 (WP_000263.jpg) (WP_000263.jpg)
 (WP_000271.jpg) (WP_000271.jpg)
 (WP_000273.jpg) (WP_000273.jpg)
Attachments
----------------
WP_000263.jpg (112KB - 345 downloads)
WP_000271.jpg (42KB - 347 downloads)
WP_000273.jpg (59KB - 355 downloads)
|
|
| |
|
Elite Veteran
Posts: 827
Location: tailFinland | Now it is almost ready to be installed. Front unit of the new radio where mode button, card and USB readers are will be mounted somewhere ??? ashtray of center console???
 (WP_000272.jpg) (WP_000272.jpg)
Attachments
----------------
WP_000272.jpg (124KB - 364 downloads)
|
|
| |
|
Elite Veteran
Posts: 827
Location: tailFinland | Buy the way, I tested it and it works, all knobs works. I was un able to test how to electroluminence lights work becouse I did not have working powerpack (oscillator). That darn thing was broken
There is no CD player but USB is a cool thing. Small front dispaly is easy to hide anywhere and still be handy to use. I'll fabricate a cover box for it later. Cable is about 1 meter in lenght now but will cut it to lenght needed when I know the place for the display. |
|
| |
|

Member
Posts: 37
Location: Vale, OR | I'm sorry.....but I'd have to sell the car after your discovery of the faces. WAY too creepy for me!! |
|
| |
|
Expert
Posts: 2633
Location: Minor Hill, TN | Good luck with the restoration please post photos during and after the restoration. |
|
| |
|
Expert 5K+
Posts: 9654
Location: So. Cal | That's a neat idea to convert the radio. So did you use the new tuning shafts and adapt them to the old knobs? I assume that is how you did it to match up the inputs properly. I guess Pyle isn't a pyle of crap after all.
Edit: Also, could you elaborate on why you needed to make a new tuner shaft?
Edited by Powerflite 2013-12-30 2:50 PM
|
|
| |
|
Elite Veteran
Posts: 827
Location: tailFinland | Yes, thats what I did. Both tuning shafts are form Pyle. I Had to extend sation tuning shaft inside the box about 3/4 inches. You can hardly see it in the picture. I fabricated it from brake lining material.
On/off knob was mostly bolt on and glued spacers.
Pyle says it has 2 x 80W in power. Anyway its much better than AM radio wich has no use at all. I appreciate USB and memorycard, I can carry tons of music very easily, I Do not miss DC's at all. I actually hate them lying around the seats, dash and clove compartment. |
|
| |
|
Elite Veteran
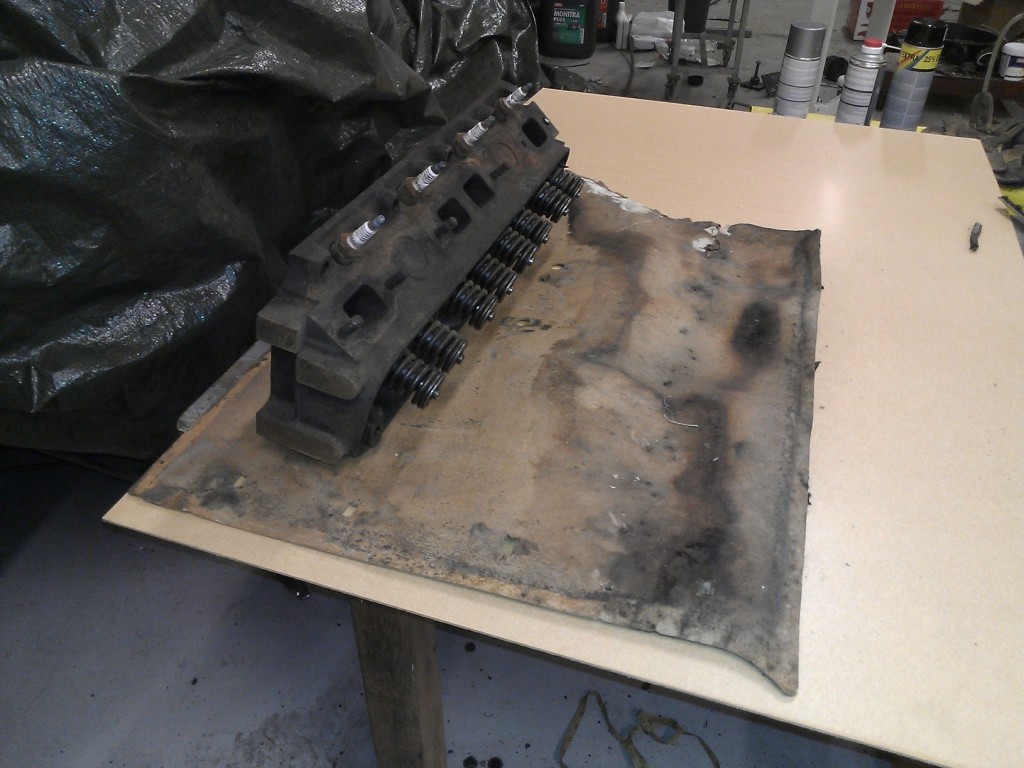
Posts: 827
Location: tailFinland | I got a call from the machine shop last week. Engine block needs to be bored and about everything done I examined heads, few valves did not want to come off some were really loose. heads also need to be machined and everything new. Camsaft was also worn... Thats gonna take XXXX€:s. Should I buy aftermarket heads? Might be much cheaper than fix the old ones.
Edited by Adventurer 60 2013-12-31 4:22 AM
|
|
| |
|
Elite Veteran
Posts: 673
Location: Malung, SWEDEN | Go with the real thing! Happy new year to ya! |
|
| |
|
Elite Veteran
Posts: 827
Location: tailFinland | Visited my friends garage yesterday, bought some left over F/G-stuff from him.
His F is almost complete now.
I just cannot discribe it is Great!
Sorry fo bad photo quality.
Edited by Adventurer 60 2014-01-13 8:02 AM
 (WP_000333 (2).jpg) (WP_000333 (2).jpg)
 (WP_000323 (2).jpg) (WP_000323 (2).jpg)
 (WP_000325 (2).jpg) (WP_000325 (2).jpg)
Attachments
----------------
WP_000333 (2).jpg (478KB - 337 downloads)
WP_000323 (2).jpg (205KB - 365 downloads)
WP_000325 (2).jpg (218KB - 355 downloads)
|
|
| |
|
Elite Veteran
Posts: 827
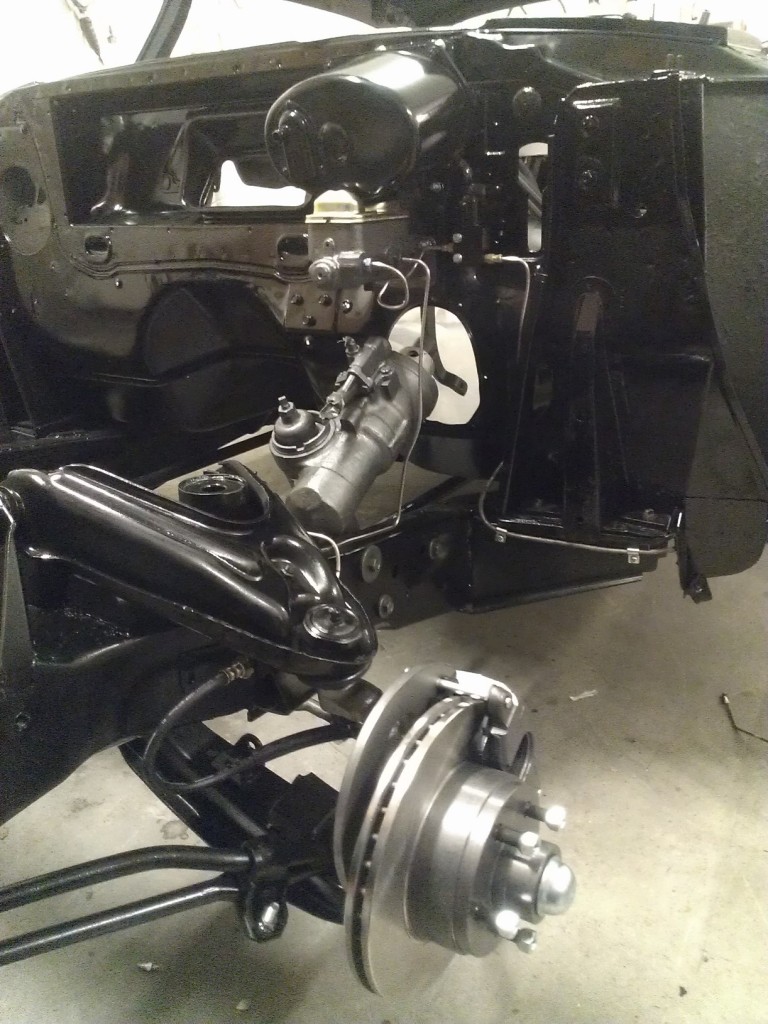
Location: tailFinland | Disk brakes are super nice. Investing them could be smart idea. Blueprinted engine will have better heads, camsaft, igniton... meaning more power, more burning rubber
 (jarrulevy2.jpg) (jarrulevy2.jpg)
Attachments
----------------
jarrulevy2.jpg (174KB - 381 downloads)
|
|
| |
|
Expert
Posts: 2524
Location: Houston | Very nice work you are doing but I have to laugh.....you are doing things like a full rotisserie cleanup, new floors, new steering wheel....then you are sad that you will need a new cam! Around here, no one would reuse an old cam anyway, plus they are cheap and easy to replace. I'll tell you what - you come over and redo my floors and I will buy you a cam!
|
|
| |
|
Elite Veteran
Posts: 827
Location: tailFinland | GregCon - 2014-01-26 12:17 PM
Very nice work you are doing but I have to laugh.....you are doing things like a full rotisserie cleanup, new floors, new steering wheel....then you are sad that you will need a new cam! Around here, no one would reuse an old cam anyway, plus they are cheap and easy to replace. I'll tell you what - you come over and redo my floors and I will buy you a cam!
Well, purist must act a part New cam is alreay in the engine with other new parts. I think I will be very satisfied with it someday. Replacing a cam to ram engine is not that simple becouse of ram induction. Wrong timing or cam separation could couse power loss, torque/rpm change, too high cylinder pressure... problems.
I found only one cam with more lift and duration wich was close to original specs (timing wise) when retarded.
I might visit Texas next spring or fall, if a plan of the roundtrip from west to east with my eldest son comes true. We drive from city to city, He s gonna teach breakdance at danceschools - I might repair floors while that |
|
| |
|
Extreme Veteran
Posts: 314
| What cam did you choose to run? |
|
| |
|
Elite Veteran
Posts: 827
Location: tailFinland | db300 - 2014-02-01 11:16 PM
What cam did you choose to run?
Mopar 4286677
retarded 4 degrees |
|
| |
|
Elite Veteran
Posts: 827
Location: tailFinland | Spent some time at the garage this week end and got all the brake lines done and components preassembled. Now every single thing is new and updated. Only original parts are the front and rear separation blocks and rear drums becouse they looked so good.
Edited by Adventurer 60 2014-02-16 5:32 PM
|
|
| |
|
Elite Veteran
Posts: 827
Location: tailFinland | By the way, thumbs up for the AAJ brakes! great products! I highly recommend! |
|
| |
|
Elite Veteran
Posts: 827
Location: tailFinland | Here some pics of the brake update
Edited by Adventurer 60 2014-02-18 3:21 PM
 (Jarru4.jpg) (Jarru4.jpg)
 (Jarru3.jpg) (Jarru3.jpg)
 (Jarru1.jpg) (Jarru1.jpg)
Attachments
----------------
Jarru4.jpg (193KB - 349 downloads)
Jarru3.jpg (219KB - 390 downloads)
Jarru1.jpg (212KB - 348 downloads)
|
|
| |
|
Elite Veteran
Posts: 827
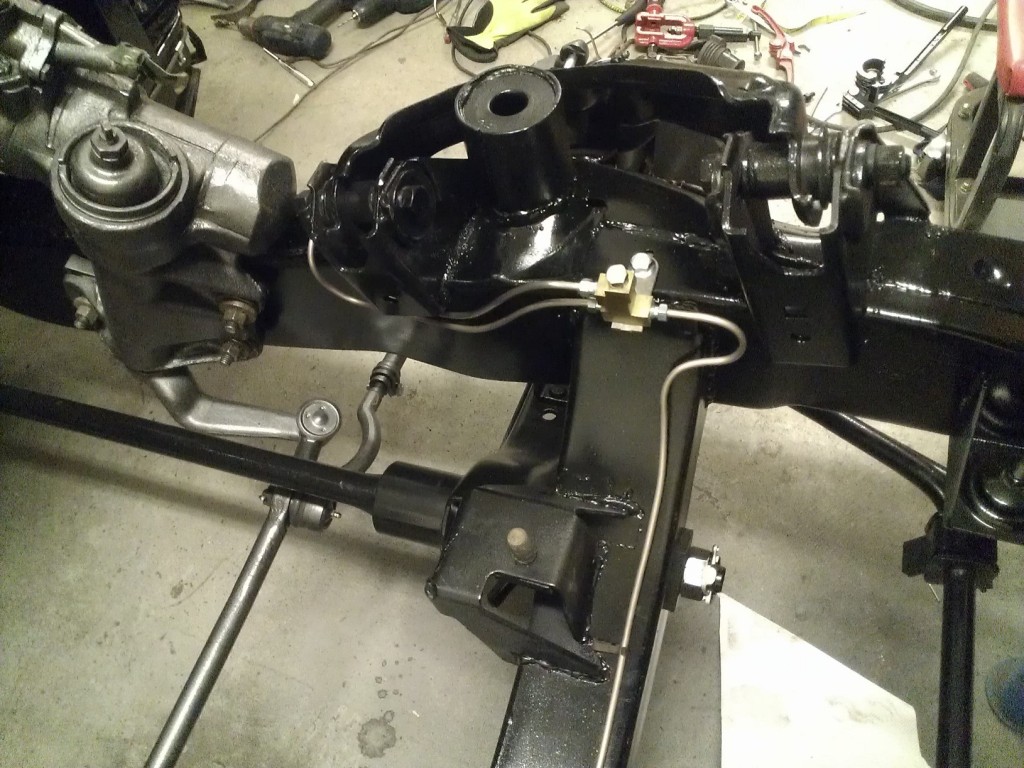
Location: tailFinland | I located adjusting valve for the rear brakes handy to reach when needed.
I really do like to burn some rubber sometimes
 (jarru2.jpg) (jarru2.jpg)
Attachments
----------------
jarru2.jpg (185KB - 375 downloads)
|
|
| |
|
Expert 5K+
Posts: 9654
Location: So. Cal | If your purpose is just to burn rubber, it would be better to use a line-lock on the front line instead. That way, you don't have to re-adjust your rear valve afterward and you still have full braking capability in the meantime without shutting off your rear line. |
|
| |
|
Expert
Posts: 2596
Location: Upplands Väsby, Sweden | Super nice work and it go fast |
|
| |
|
Elite Veteran
Posts: 827
Location: tailFinland | Powerflite - 2014-02-18 3:49 PM
If your purpose is just to burn rubber, it would be better to use a line-lock on the front line instead. That way, you don't have to re-adjust your rear valve afterward and you still have full braking capability in the meantime without shutting off your rear line.
That (line lock) is totally illegal in this country, vehicle wont pass the inspection and I do not want cheat them by hiding it somewhere.
Besides it wont happen too often. I think I can count the rounds to return it back.
By the way have you heard about drifting? |
|
| |
|
Board Moderator & Exner Expert 10K+
Posts: 13045
Location: Southern Sweden - Sturkö island | Jari, make a distance in a lath, just like a steel ring, with the proper height (once found out the reduction set). Cut it open like a "U" and mount it on the reduction valve shaft - tighten until fixed. For "playtime", just open the valve, remove the U-shaped ring and close the valve completely. |
|
| |
|
Elite Veteran
Posts: 827
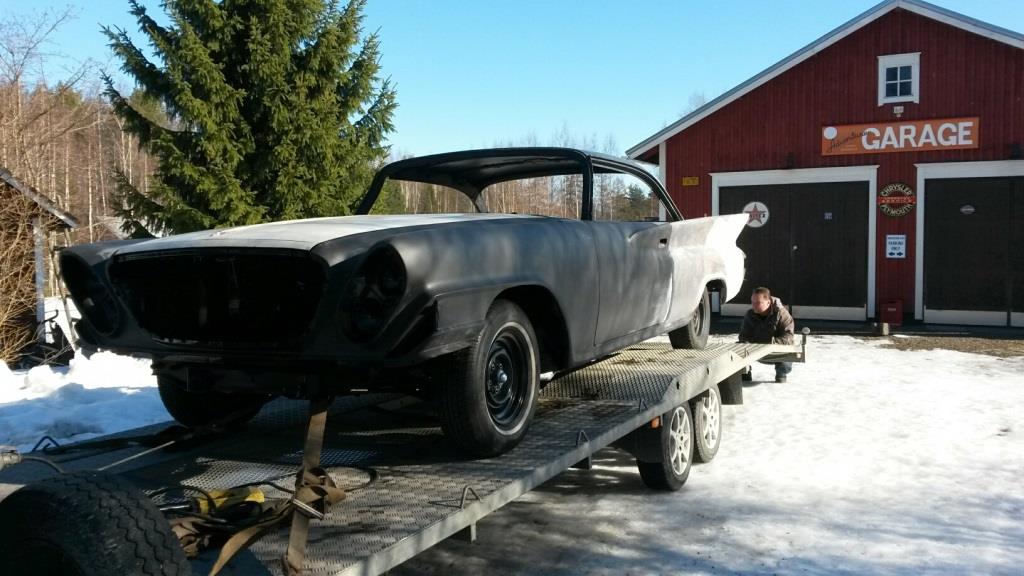
Location: tailFinland | WINTER IS OVER! Day time temperatures rise up to 50's (F) even there is still some frost at nite.
Days are long and gettin longer and longer till there is no nite at all
Hopefully winter is not making a back stroke -it still could.
I was so exited of spring today and made a total clean up of the garage. Throwed lot of stuff to garbage and recyling pin. sweeped and vacuumed floors
I had pull her out to take sun bath.
Project has not gone like I expected. She should painted by now but my paint/body guy has been busy.
 (WP_000548.jpg) (WP_000548.jpg)
Attachments
----------------
WP_000548.jpg (185KB - 386 downloads)
|
|
| |
|
Expert
Posts: 2788
Location: USA - KY |
Good to see your car enjoying the sunshine! My car hasn't seen the light of day since last June.
Hope spring "sticks" in you part of the world; I'm hoping the same thing for around here!
|
|
| |
|
Elite Veteran
Posts: 827
Location: tailFinland |
Not much has happened to 300G project since last spring.
I have worked with my other cars and my Harley but this week I started assembling the engine.
Engine was literally crap, full of insects andsome sort of mice crap, bended heads and worn out cylinders and cam.
Now it is completely re builded and blueprinted. Bored to 0.30 over size. Camsaft has little bit more degrees and lift than original.
retarded to match timing of original ram engine cam. Would be interesting to see results at dyno when the time comes.
Heads are also completely done with new valves, quides, springs
 (motti1.jpg) (motti1.jpg)
 (motti.jpg) (motti.jpg)
Attachments
----------------
motti1.jpg (74KB - 363 downloads)
motti.jpg (68KB - 371 downloads)
|
|
| |
|
Expert
Posts: 2905
Location: little rock, AR | Orange Filter is a No No!!! In all of my searches I haven't even found a 300 tail pipe to sniff. However, I can live my dreams through your 300. I'm not complaining as I have a few special cars that give me that "Warm and Fuzzy" feeling!!! Your 300 is looking good. |
|
| |
|
Exner Expert 19,174 posts. Neil passed away 18 Sep 2015. You will be missed, Neil!
Posts: 19146
Location: bishop, ca | Frams have not enjoyed good reputations for internal construction quality in the past few years. |
|
| |
|
Elite Veteran
Posts: 827
Location: tailFinland | Guys! That filter is going to be changed (with the oil) right after engine has started, warmed up and cam shaft has ran in.
It'll be workin about half an hour. Besides I have nothing against Fram or any other brand. it is just a oil filter. What colour it shoud have then?
|
|
| |
|
Elite Veteran
Posts: 827
Location: tailFinland | I finally got front sheet metal assembled back into the car. Caps are quite ok now but bumped against some old quality issues of Chrysler craftsmanship.
 (rysss4.jpg) (rysss4.jpg)
Attachments
----------------
rysss4.jpg (430KB - 322 downloads)
|
|
| |
|
Elite Veteran
Posts: 827
Location: tailFinland | This is right side rear fender and door gap. Door is sitting nicely at the front, gap is nice too but asy you can see, at rear it ok, level with rear fender, but at the edge of the fin door is agout 4-5 millimiters lower!
Drivers side has same issue.
Edited by Adventurer 60 2015-02-15 4:57 PM
 (rysss3.jpg) (rysss3.jpg)
Attachments
----------------
rysss3.jpg (380KB - 359 downloads)
|
|
| |
|
Elite Veteran
Posts: 827
Location: tailFinland | Driver side front fender, door and gaps between them looks good, but then again rear quarter of the front fender where it joints to rockers look like crap.
Now I understand why this car had New Yorkers rocker trims assebled by the dealer
Edited by Adventurer 60 2015-02-15 5:04 PM
 (rysss2.jpg) (rysss2.jpg)
Attachments
----------------
rysss2.jpg (465KB - 313 downloads)
|
|
| |
|
Elite Veteran
Posts: 827
Location: tailFinland | This is worst nightmare The hood makes a curve at the passenger side making the gap between right fender and hood look awful. Otherwice hood sits nice, even at the back. I cant live with this. Should I cut/hammer/weld fender or hood?
 (rysss.jpg) (rysss.jpg)
Attachments
----------------
rysss.jpg (313KB - 327 downloads)
|
|
| |
|
Elite Veteran
Posts: 827
Location: tailFinland | At rear I rechaped (about year ago) trunk hole to fit with the trunk lid. Well gaps are now mostly ok but the front side corners of the lid are about 5 mm too high when all other edges are level with the body.
|
|
| |
|
Expert 5K+
Posts: 8443
Location: Perth Australia | It looks like the skin on the hood was not folded over correctly, so, its the hood that you need to fix
I have an issue with my dodge hood that I didnt notice until after I painted it (it wasnt assembled on the car until it was finished), the hood has been sprung.
When its closed, it sits up about 1 cm above the edge of the fender about 1/4 the way along from the cowl and I cant get it to bend back
I have another hood that I will have to paint ect
Fixing those door edge height problems you have there could be a major problem, it looks like they were never the right size to start with?
Just had another look, I think you need to raise the front of the doors and then bring the fenders up to match?
It looks like have almost zero door gap along the sills and the bottom of the fender is to low, by raising the whole door, it should lessen the differences you have at the rear panel to door and allow the frond fender (or the entire front clip) to be raised to bring the bottom of the fender inline.
Hard bit is if you go to high, the top edge of the fender will end up higher than the cowl vent panel
I gave up on gaps on my dodge, didnt matter which way I went, it would always be messed up somewhere
|
|
| |
|
Elite Veteran
Posts: 827
Location: tailFinland | Yes, hood has not folded correctly, I might grind the edge (2-3 mm off) and then weld it to hold - but welding the hood might couse other issues to it
Doors, hood and trunk lid never have been the right size.
I cant rise the fender anymore, top edge would end up much higer than cowl vent panel and front lower corner of the door will hit the fender corner (or minimize the gap)
Cant rise the door or one side of the door, doors sits good in their places now, all gaps are good around the whole door. Door just does´nt have the same vertical shape with the rear fender edge.
I am also in same situation, what ever move I make I am messed up in the other spot.
But I am not giving up yet I want those gaps look even
I think adjustingis over, its time for the power tools
Edited by Adventurer 60 2015-02-16 2:14 AM
|
|
| |
|
Expert 5K+
Posts: 8443
Location: Perth Australia | I dont want to keep talking in Jans thread
With the twisted door, there was a thread I saw on here quite a while ago about body line up problems and there was a tool to twist doors that were wrong, I think it was basically a long pole that had clamps on it so you could twist it how you wanted it
It looked absolutely barbaric
There is a set of mopar reference books that shows how to do it that I have, but I think it came from the 300 club web site?
If I find the link to them, I will let you know
|
|
| |
|
Elite Veteran
Posts: 827
Location: tailFinland | Thanks Mick, I'll search for that info. It sounds to be much better than fabricating front fender. For door to rear fender lineup issue I will do what Jan said, drill the spot welds off of the rear fender and adjust it to match with the door. |
|
| |
|
Elite Veteran
Posts: 827
Location: tailFinland | Looks much better now after adjusting the rear fender
 (ovi.jpg) (ovi.jpg)
Attachments
----------------
ovi.jpg (235KB - 362 downloads)
|
|
| |
|
Board Moderator & Exner Expert 10K+
Posts: 13045
Location: Southern Sweden - Sturkö island | That looks really good Jari, better than factory |
|
| |
|
Elite Veteran
Posts: 827
Location: tailFinland | Did some work with drivers door yesterday.
This what it was before
 (ovi ennen.jpg) (ovi ennen.jpg)
Attachments
----------------
ovi ennen.jpg (123KB - 348 downloads)
|
|
| |
|
Elite Veteran
Posts: 827
Location: tailFinland | This is how it was when I left the carage. Not finished yet.
 (ovi jjjlkeen.jpg) (ovi jjjlkeen.jpg)
Attachments
----------------
ovi jjjlkeen.jpg (125KB - 314 downloads)
|
|
| |
|
Elite Veteran
Posts: 827
Location: tailFinland | Hood edge is also now straighter
 (konep.jpg) (konep.jpg)
Attachments
----------------
konep.jpg (68KB - 358 downloads)
|
|
| |
|
Veteran
Posts: 143
Location: Malmberget, Sweden | Nice work. |
|
| |
|
Elite Veteran
Posts: 827
Location: tailFinland | Paint shop day
 (maalarille1.jpg) (maalarille1.jpg)
 (maalarille 2.jpg) (maalarille 2.jpg)
Attachments
----------------
maalarille1.jpg (91KB - 342 downloads)
maalarille 2.jpg (61KB - 372 downloads)
|
|
| |
|
Board Moderator & Exner Expert 10K+
Posts: 13045
Location: Southern Sweden - Sturkö island | Great Jari - that's an important step and soon you'll have only "the decoration" left. |
|
| |
|
Elite Veteran
Posts: 827
Location: tailFinland | Yes Wizard, the most intresting part of the restoration ahead. Where can I find all missing parts
In this case I go the hard way. I let it dry during the assembly - few months. It will have a second paint job after that, redo if there is something, sand the whole car again and spray the clear coat.
We'll see. |
|
| |
|
Elite Veteran
Posts: 827
Location: tailFinland | Now whent the body is in paintshop its good time restore all kind of nuts and bolts. Friday I got parts back from the sinkplater,
ashtrays, ram linkages, carburetor parts... plating cost only 30 euros!
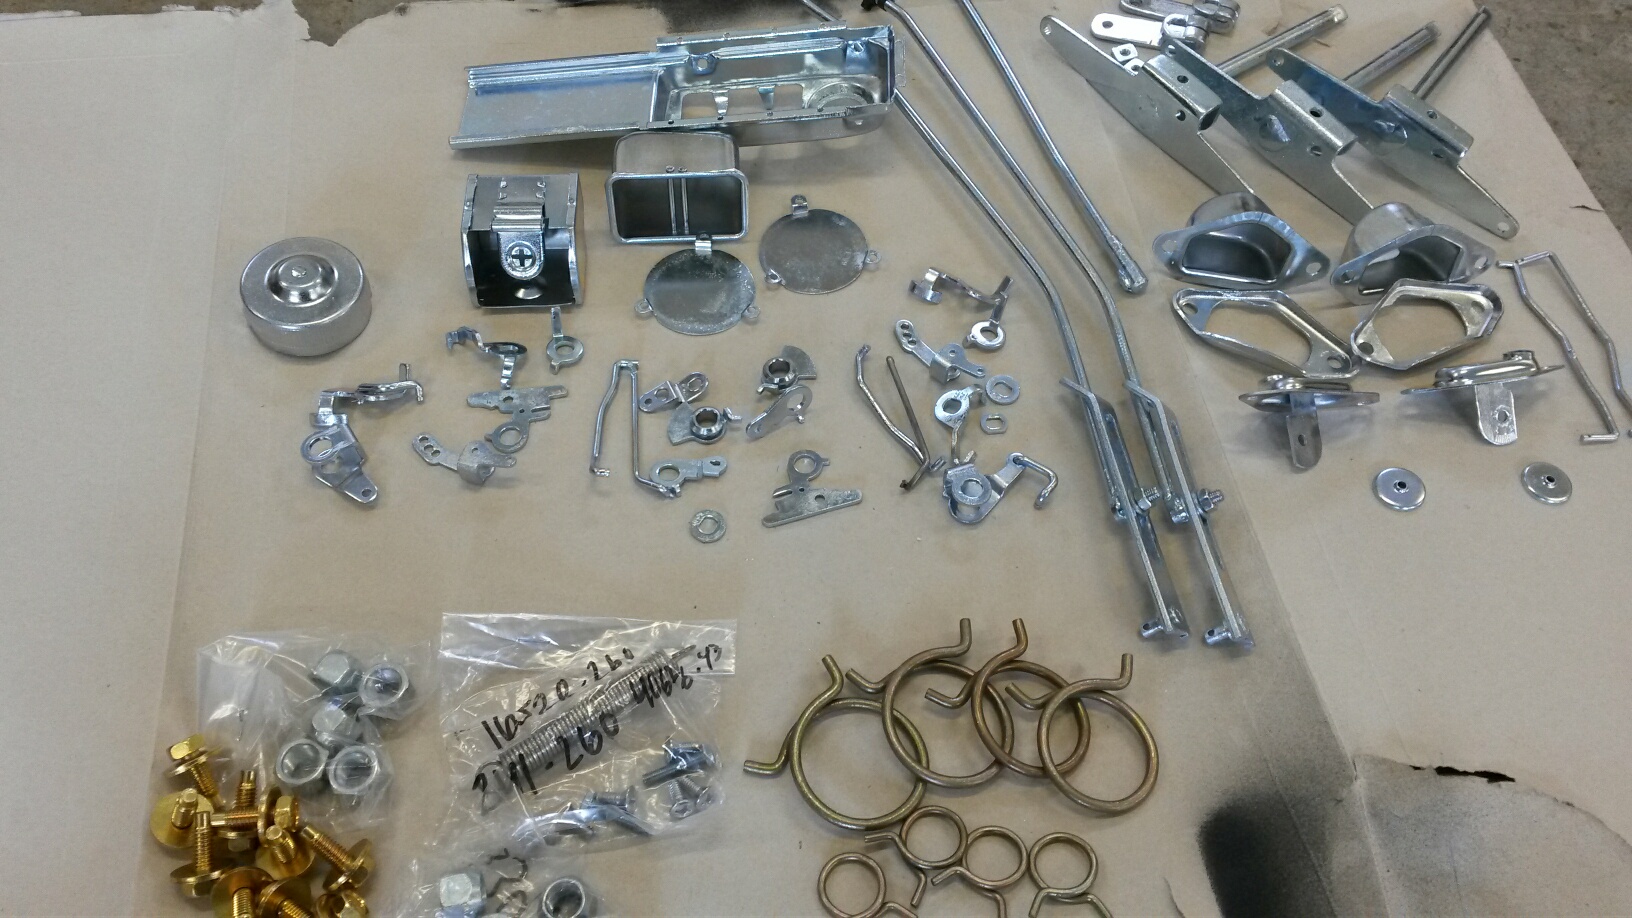 (20150321_125523_resized.jpg) (20150321_125523_resized.jpg)
Attachments
----------------
20150321_125523_resized.jpg (485KB - 319 downloads)
|
|
| |
|
Elite Veteran
Posts: 827
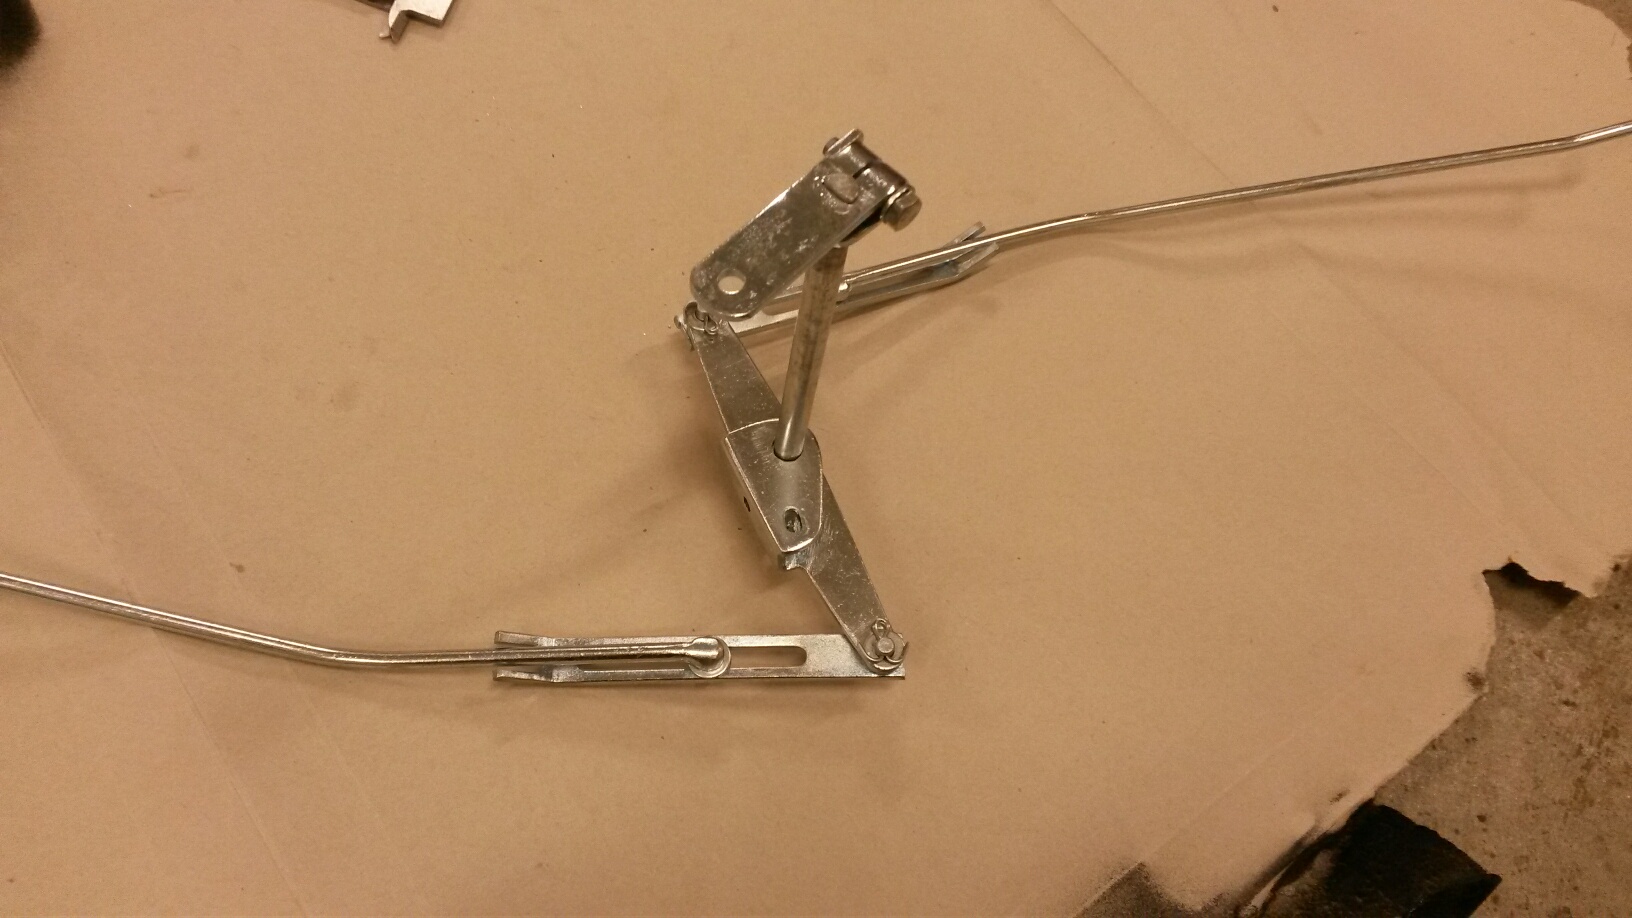
Location: tailFinland | This bellcrank assy for the carb linkages is self made and now plated
 (20150321_192927_resized.jpg) (20150321_192927_resized.jpg)
Attachments
----------------
20150321_192927_resized.jpg (375KB - 350 downloads)
|
|
| |
|
Elite Veteran
Posts: 827
Location: tailFinland | work at the paint job goes on slowly (as I wishded and planned)
They let it dry in peace after every paint layer before the next step
 (20150325_155837_resized.jpg) (20150325_155837_resized.jpg)
 (20150325_155856_resized.jpg) (20150325_155856_resized.jpg)
 (20150410_113143_resized.jpg) (20150410_113143_resized.jpg)
 (20150410_113209_resized.jpg) (20150410_113209_resized.jpg)
Attachments
----------------
20150325_155837_resized.jpg (389KB - 324 downloads)
20150325_155856_resized.jpg (420KB - 313 downloads)
20150410_113143_resized.jpg (415KB - 321 downloads)
20150410_113209_resized.jpg (356KB - 306 downloads)
|
|
| |
|
Board Moderator & Exner Expert 10K+
Posts: 13045
Location: Southern Sweden - Sturkö island | Good progress Jari - looks like the batmobile somewhat in the flat black |
|
| |
|
Elite Veteran
Posts: 873
Location: ALABAMA, HEART OF DIXIE | Adventurer 60 - 2014-12-07 4:15 PM Guys! That filter is going to be changed (with the oil ) right after engine has started, warmed up and cam shaft has ran in. It'll be workin about half an hour. Besides I have nothing against Fram or any other brand. it is just a oil filter. What colour it shoud have then?
No problem using fram filters. I've used them for 40 years, racers use them. I've experience failures with Wix, motorcraft, purolators, but never had a fram fail. The filters were on the engine when it was painted at the engine plant, In your case it would have been black. |
|
| |
|
Board Moderator & Exner Expert 10K+
Posts: 13045
Location: Southern Sweden - Sturkö island | Next time you change your filter, use a hacksaw and open it - that will reveal a lot as for quality, no matter which brand.
Oh by the way, I was trying to get an answer from Purolator for 3 months abouth the full capacity in their Purolator Classic L30001- dead silence... I filled the old one to the brim and made several drain holes carefully.
Then I informed Purolator of the capacity is 6 deciliters in a Purolator Classic L30001 - dead silence......... |
|
| |
|
Elite Veteran
Posts: 827
Location: tailFinland | Some update photos
 (20150423_153017_resized.jpg) (20150423_153017_resized.jpg)
 (20150423_153030_resized.jpg) (20150423_153030_resized.jpg)
 (20150423_153040_resized.jpg) (20150423_153040_resized.jpg)
Attachments
----------------
20150423_153017_resized.jpg (388KB - 343 downloads)
20150423_153030_resized.jpg (356KB - 333 downloads)
20150423_153040_resized.jpg (376KB - 356 downloads)
|
|
| |
|
Elite Veteran
Posts: 827
Location: tailFinland | Another layer of primer
 (20150511_155142_resized.jpg) (20150511_155142_resized.jpg)
 (20150511_155206_resized.jpg) (20150511_155206_resized.jpg)
Attachments
----------------
20150511_155142_resized.jpg (456KB - 341 downloads)
20150511_155206_resized.jpg (372KB - 327 downloads)
|
|
| |
|
Expert
Posts: 1530
Location: ZH, Switzerland | Wow Jari
It look wonderful now with the second layer of primer. Keep on going. I'm interested with the progress you're doing as well. What I do not see are the grooves at the rear panel near the corners of the deck lid opening. My 60 Letter has these grooves to drain (or at least to try to) the weatherstrip perimeter around the trunk lid opening. As far as I remember Sven (Wizard) mentioned these groove in one thread. Happy Motoring! Dieter |
|
| |
|
Elite Veteran
Posts: 827
Location: tailFinland | Dieter, all there is stock as bossible, you can see a pic at 2nd bage of this topic when it was just done. I just added the drain tubes in order to guide water under the car. You can see the holes in the corners. There is a tube and a hose, not just a hole there.
The gray primer is guite thick, its been dried couble of weeks now. it is going to be sanded very carefully again in order to make the body laser straight and possibly gonna need more that stuff to few spots.
Actual paint is going to be sprayed at the end of this month. (wich is not the final surface)
|
|
| |
|
Expert
Posts: 1530
Location: ZH, Switzerland | Thanks Jari I noticed the holes as well and thought they could be the drainage. I wish good luck with your project. It looks fantastic. And thank you for sharing your progress. Happy Motoring! Dieter |
|
| |
|
Expert
Posts: 1886
| Awesome! |
|
| |
|
Elite Veteran
Posts: 827
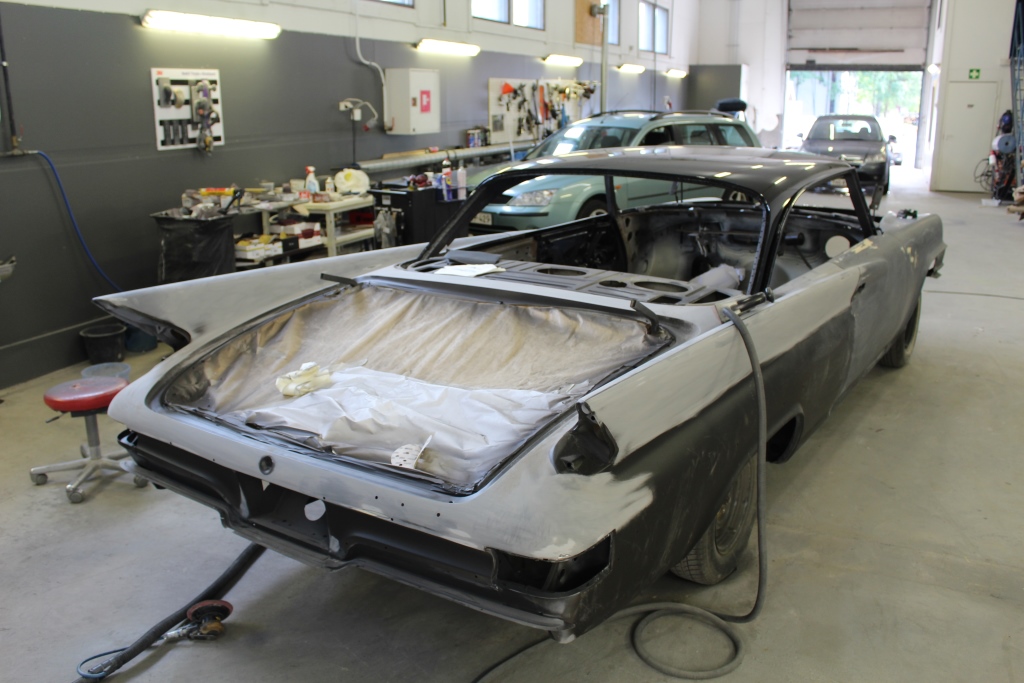
Location: tailFinland | My 300 G Project has been on a Holiday for many many weeks but now something happens again.
These are the pictures from this monday. few more layers has been sprayed and sanded down. |
|
| |
|
Elite Veteran
Posts: 827
Location: tailFinland | My 300 G Project has been on a Holiday for many many weeks but now something happens again.
These are the pictures from this monday. few more layers has been sprayed and sanded down.
Edited by Adventurer 60 2015-07-29 5:23 PM
|
|
| |
|
Elite Veteran
Posts: 827
Location: tailFinland |
The page cannot be displayed
Explanation: There is a problem with the page you are trying to reach and it cannot be displayed.
Try the following:
•Refresh page: Search for the page again by clicking the Refresh button. The timeout may have occurred due to Internet congestion.
•Check spelling: Check that you typed the Web page address correctly. The address may have been mistyped.
•Access from a link: If there is a link to the page you are looking for, try accessing the page from that link.
Technical Information (for support personnel)
•Error Code: 408. The operation timed out. The remote server did not respond within the set time allowed. The server might be unavailable at this time. Try again later or contact the server administrator. (12002)
|
|
| |
|
Elite Veteran
Posts: 827
Location: tailFinland | s**t happens. I try to post pics later. |
|
| |
|
Elite Veteran
Posts: 827
Location: tailFinland | pics |
|
| |
|
Elite Veteran
Posts: 827
Location: tailFinland | Does anyone else has problems with posting pictures?
I do it same way as always, deleted cookies, used other prowser... No.
Edited by Adventurer 60 2015-07-30 2:05 PM
|
|
| |
|
Board Moderator & Exner Expert 10K+
Posts: 13045
Location: Southern Sweden - Sturkö island | Jari, the server is somewhat limping after the last intreruption - more or less all have this problems - wait until Dave has been able to catch up and fix the problems...... |
|
| |
|
Elite Veteran
Posts: 827
Location: tailFinland | pics from last monday. Hood and trunk lid has their first acrylic layer. Body has been sparyed several times and sanded straight between them.
Edited by Adventurer 60 2015-08-02 2:13 PM
 (IMG_0694.jpg) (IMG_0694.jpg)
 (IMG_0702.jpg) (IMG_0702.jpg)
 (IMG_0718.jpg) (IMG_0718.jpg)
 (IMG_0704.jpg) (IMG_0704.jpg)
Attachments
----------------
IMG_0694.jpg (300KB - 436 downloads)
IMG_0702.jpg (278KB - 432 downloads)
IMG_0718.jpg (286KB - 423 downloads)
IMG_0704.jpg (259KB - 429 downloads)
|
|
| |
|
Elite Veteran
Posts: 827
Location: tailFinland | Wednesday. Body has been sparyed once with acrylic, few spots fixed and whole car sanded again
 (IMG_0727.jpg) (IMG_0727.jpg)
 (IMG_0728.jpg) (IMG_0728.jpg)
 (IMG_0735.jpg) (IMG_0735.jpg)
Attachments
----------------
IMG_0727.jpg (287KB - 435 downloads)
IMG_0728.jpg (267KB - 421 downloads)
IMG_0735.jpg (269KB - 433 downloads)
|
|
| |
|
Elite Veteran
Posts: 827
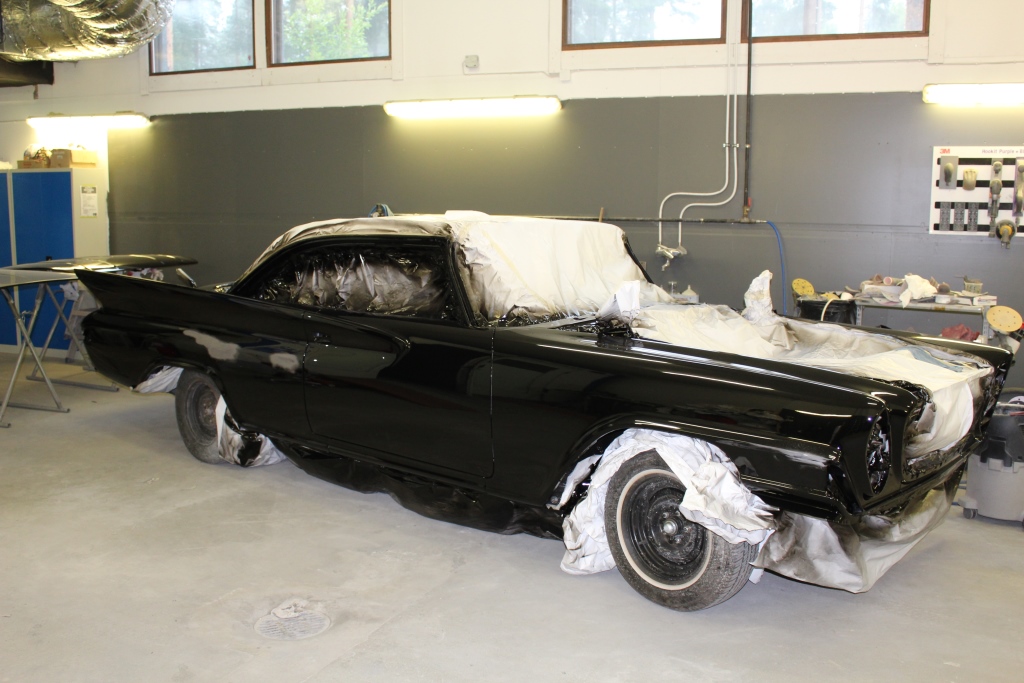
Location: tailFinland | In this stage we were after laser stright body or can I say after perfection. Whole car was now painted 3 times with black acrylic laquer.
There are now stuff to shrink and dry.
I'll be picking her up to my home garage next week.
This paint job is going to be renewed next year with coat of clear laquer when paint has totally settled and dried. |
|
| |
|
Board Moderator & Exner Expert 10K+
Posts: 13045
Location: Southern Sweden - Sturkö island | Great Jari, we'll follow the progress - this will be a fantastic car! |
|
| |
|
Expert 5K+
Posts: 8443
Location: Perth Australia | Your going to store the car under wraps for that long?
The longer you wait until the clear goes on, the more damage and dust contamination you risk
I would give it a day or 2 then clear it to seal it all up
|
|
| |
|
Elite Veteran
Posts: 827
Location: tailFinland | ttotired - 2015-08-02 5:00 PM
Your going to store the car under wraps for that long?
The longer you wait until the clear goes on, the more damage and dust contamination you risk
I would give it a day or 2 then clear it to seal it all up
No, I'll start almost immidiately with assembling engine and drivetrain, headliner, windshield and glasses and so on.
Actually everything exept exterior trim.
This paint surface is actually ok. it would need nothing right now, it looks perfect, it may look perfect next year too.
But I have restored several cars during my life and know the fact that fillers, primers and paints continue drying and shrinking several weeks to months after the paint job has done.
I have been in a situation where I had a perfect paint job in my car but after couble of months you were able to see sanding marks and filler edges here and there around the car.
I have seen similar paintjobs in recently painted cars in car shows.
Thats why I want the last surface done this (hard)way. This car is black wich is the most difficult colour in this sense (it shows all imperfections) and as you can see, it has several different layers of epoxies, primers and fillers so there is a minimal risk.
|
|
| |
|
Expert 5K+
Posts: 8443
Location: Perth Australia | I do know about filler shrinkage, l/r door on the dodge is a great example
Just thought that its better not to put anything on/in until the paints fully finished, so you dont get masking lines
|
|
| |
|
Elite Veteran
Posts: 827
Location: tailFinland | ttotired - 2015-08-03 6:17 PM
I do know about filler shrinkage, l/r door on the dodge is a great example
Just thought that its better not to put anything on/in until the paints fully finished, so you dont get masking lines
Naah. Thats not a problem. It had to be masked anyway even it was a empty shell. There will be no trim on until its totally finished, and it will be sanded and buffed after the clear coat so final finish is not from the spray gun.
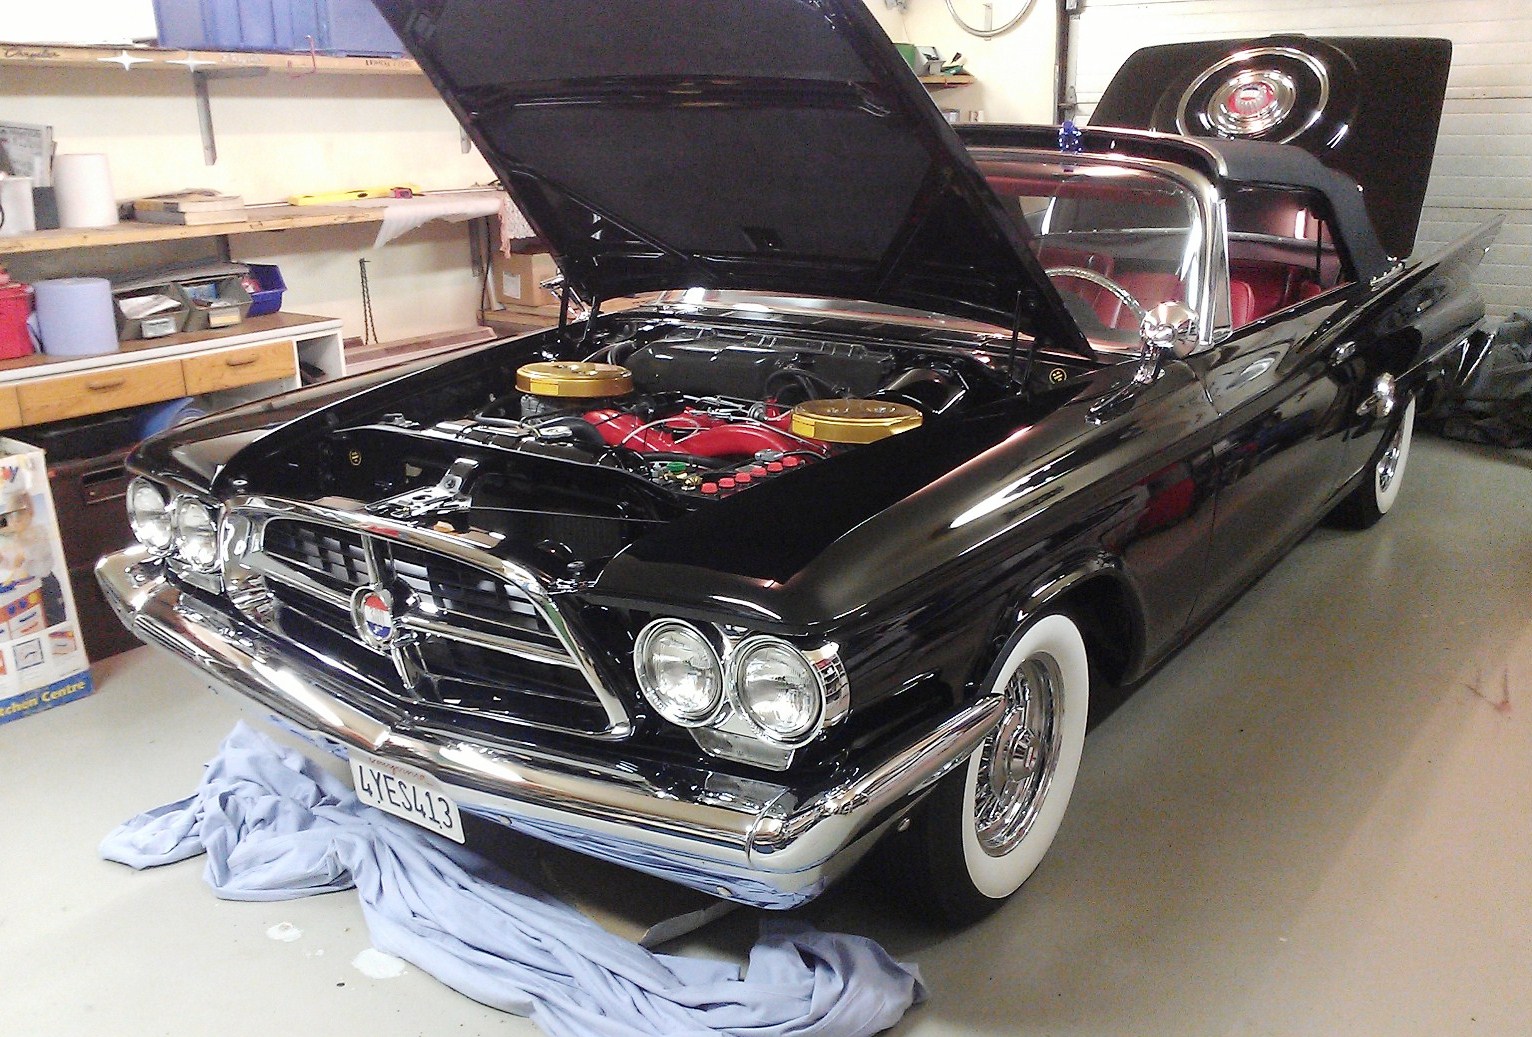
The batmobile has landed home.
 (20150803_164609_resized.jpg) (20150803_164609_resized.jpg)
Attachments
----------------
20150803_164609_resized.jpg (364KB - 444 downloads)
|
|
| |
|
Expert
Posts: 2788
Location: USA - KY |
Wow - gotta love that Black Beauty!
It's going to look incredible.
Can't wait to see it when it's all done and soooooo spiffy!
|
|
| |
|
Elite Veteran
Posts: 827
Location: tailFinland | After years of disassembling this so rewarding, putting restored components back to their places. Engine and trans is now about ready to go
 (20150813_203733_resized.jpg) (20150813_203733_resized.jpg)
Attachments
----------------
20150813_203733_resized.jpg (96KB - 442 downloads)
|
|
| |
|
Elite Veteran
Posts: 827
Location: tailFinland | It is in there
 (WP_001273a.jpg) (WP_001273a.jpg)
 (WP_001274b.jpg) (WP_001274b.jpg)
Attachments
----------------
WP_001273a.jpg (197KB - 408 downloads)
WP_001274b.jpg (200KB - 459 downloads)
|
|
| |
|
Expert
Posts: 2996
Location: Sept. 1958 | Nice work Jari. Coming along very nicely. |
|
| |
|
Elite Veteran
Posts: 827
Location: tailFinland | heater unit is assembled. I am missing a vacuum pot that opens the door in cowl. Anyone got one with brackets and stuff? help me out so I can go on.
 (ac door.jpg) (ac door.jpg)
Attachments
----------------
ac door.jpg (86KB - 390 downloads)
|
|
| |
|
Expert 5K+
Posts: 7206
Location: Victoria, BC, on Vancouver Island, Canada | Adventurer 60 - 2015-10-09 3:41 AM
heater unit is assembled. I am missing a vacuum pot that opens the door in cowl. Anyone got one with brackets and stuff? help me out so I can go on.
I have several of the vacuum actuators at home in a box taken from a 1960 Windsor about 25 years ago. Not sure about brackets until I look tonight.
|
|
| |
|
Extreme Veteran
Posts: 480
Location: The Great Northwest | Assuming this is a non A/C car and uses the same vacuum pot as a 61 NYer, I have a very nice one sitting on the bench. |
|
| |
|
Elite Veteran
Posts: 827
Location: tailFinland | My NYer has A/C and G is non A/C. Are the pots and brackets exactly similar? |
|
| |
|
Extreme Veteran
Posts: 480
Location: The Great Northwest | No - the brackets and arms are different. The A/C version uses a fairly short vertical arm connected to the trap door and it is mounted to the firewall at the lower passenger side of the opening. The NON A/C version uses a longer horizontal arm connected to the trap door and it is mounted on the driver's side of the opening. At least that's how it is on a 61 NYer................ |
|
| |
|
Elite Veteran
Posts: 827
Location: tailFinland | So there is no help to copy bracket from my own NYr. You have just a pot but not bracket Arland? |
|
| |
|
Extreme Veteran
Posts: 480
Location: The Great Northwest | Jari,
I have the original spare NON A/C vacuum pot with the bracket and arm from my 61 NYer that you could use for a NON A/C car. I don't have a spare A/C pot, bracket, or
arm but I believe my buddy has a complete assembly if you are interested. Let's see what Ian can come up with in his box of parts and then let me know what you would
like to do about the two vacuum pot assemblies. When I get the chance, I'll post a picture of the two different assemblies to show the physical differences.
Arland |
|
| |
|
Extreme Veteran
Posts: 480
Location: The Great Northwest | Jari,
Here are three different views of the two different vacuum pots used to control the trap door in the firewall. The images on the left side of the pictures are of the NON A/C version mounted on the driver's side of the opening using the control arm in a horizontal position. The images on the right side of the pictures show the A/C version that gets mounted on the lower passenger side area of the opening and uses the control arm in a vertical position. Hope this helps,
Arland
 (AC Pot1R.jpg) (AC Pot1R.jpg)
 (AC Pot2R.jpg) (AC Pot2R.jpg)
 (AC Pot3R.jpg) (AC Pot3R.jpg)
Attachments
----------------
AC Pot1R.jpg (171KB - 397 downloads)
AC Pot2R.jpg (175KB - 392 downloads)
AC Pot3R.jpg (167KB - 412 downloads)
|
|
| |
|
Elite Veteran
Posts: 827
Location: tailFinland | Thanks Arland that helped a lot. |
|
| |
|
Elite Veteran
Posts: 827
Location: tailFinland | Thanks Qunyangyongying, that helped a lot too. |
|
| |
|
Expert 5K+
Posts: 9654
Location: So. Cal | |
|
| |
|
Elite Veteran
Posts: 827
Location: tailFinland | Yes warter. I cant agree with you more. Paris really sucks. |
|
| |
|
Elite Veteran
Posts: 827
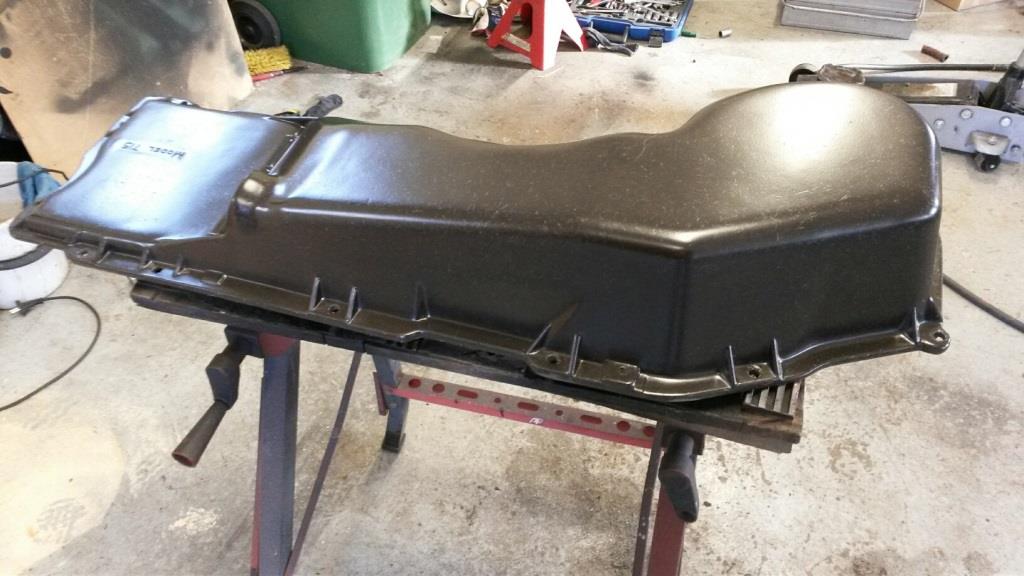
Location: tailFinland | Heater cover restored
 (heater cover2.jpg) (heater cover2.jpg)
Attachments
----------------
heater cover2.jpg (80KB - 406 downloads)
|
|
| |
|
Elite Veteran
Posts: 827
Location: tailFinland | Anyone need a good Mopar truck in Finland or Sweden? Just registered, storng 440 and 3 on tree, modern 8 1/4 rear, very driveable even the front drum brakes are a joke.
Gotta get rid of this before winter. Nice patina.
 (dodge truck.jpg) (dodge truck.jpg)
Attachments
----------------
dodge truck.jpg (109KB - 421 downloads)
|
|
| |
|
Elite Veteran
Posts: 827
Location: tailFinland | Checked out all my wiring harnesses this week end. Even restored the set that goes to tail lights. I got about 2½ main harnesses
so I'll be able to make one very good one.
My biggest concern is that I found out that harness for the power windows is not for the letter car (switches in center console)
Well I got good terminals in it and I could quite easilly make a set for the G but I got a New Yorker too missing a same set.
So there is no way that I would sacrafice that harmess set wich is in very good condition.
So anyone who have extra pw harness set for F,G or H let me know. I have interst only for the terminals too
 (WP_001295.jpg) (WP_001295.jpg)
Attachments
----------------
WP_001295.jpg (406KB - 412 downloads)
|
|
| |
|
Elite Veteran
Posts: 827
Location: tailFinland | Well I just bought a 300F pw harness set from friend of mine. Problem solved. |
|
| |
|
Elite Veteran
Posts: 827
Location: tailFinland | Assembeld finally the rams, elbows, carbs and lingages this weekend. Made new fuel lines for the carbs out of steel tube. I was not able to find 8 mm copper nickel tube anymore. I do not know wich one is better for modern gasoline. Well I got both now
 (WP_001300.jpg) (WP_001300.jpg)
Attachments
----------------
WP_001300.jpg (362KB - 403 downloads)
|
|
| |
|
Elite Veteran
Posts: 827
Location: tailFinland | There is no place in the "61 ram for carb lever return spring. It should have some sort of rod under the carb nut where the other end of the spring is connected. I need to fabricate those, Anyone got a picture of it?
Edited by Adventurer 60 2015-11-15 4:18 PM
|
|
| |
|
Elite Veteran
Posts: 827
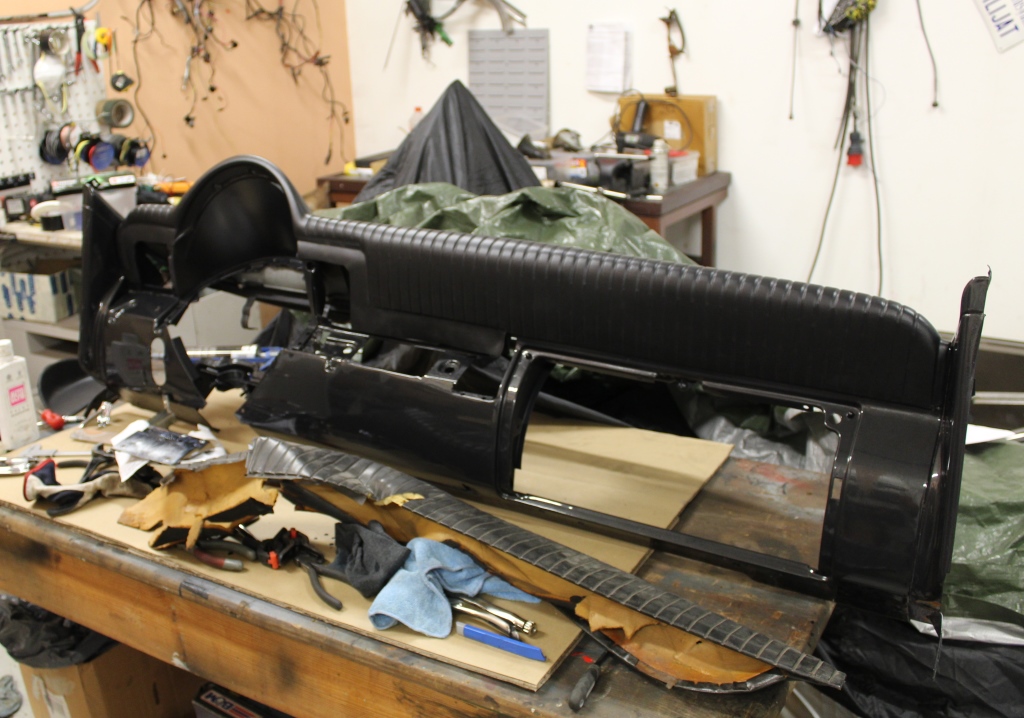
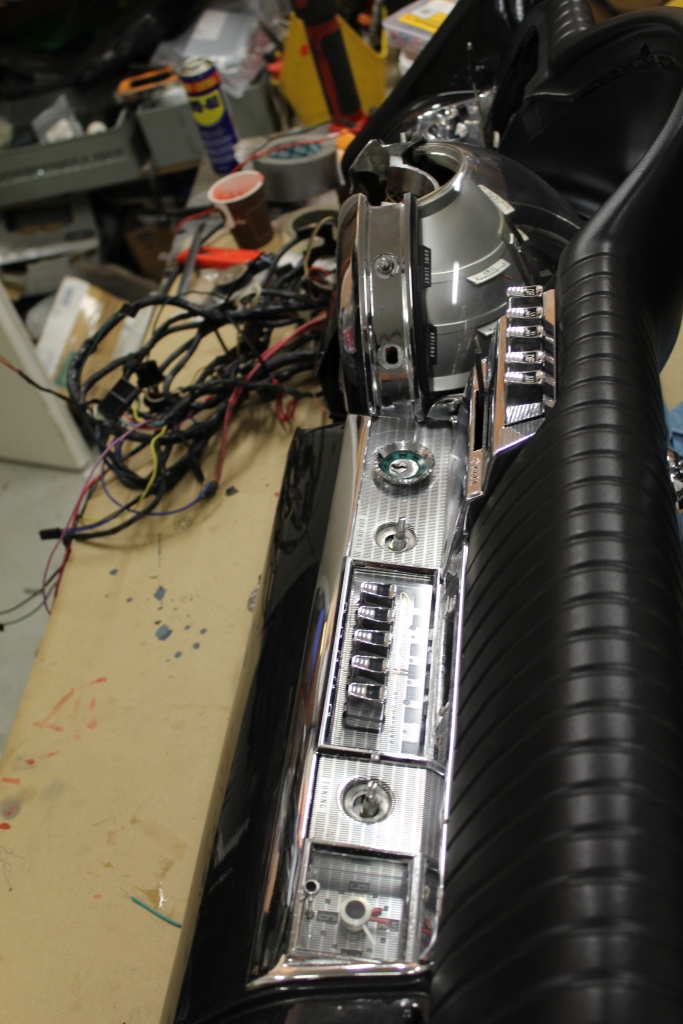
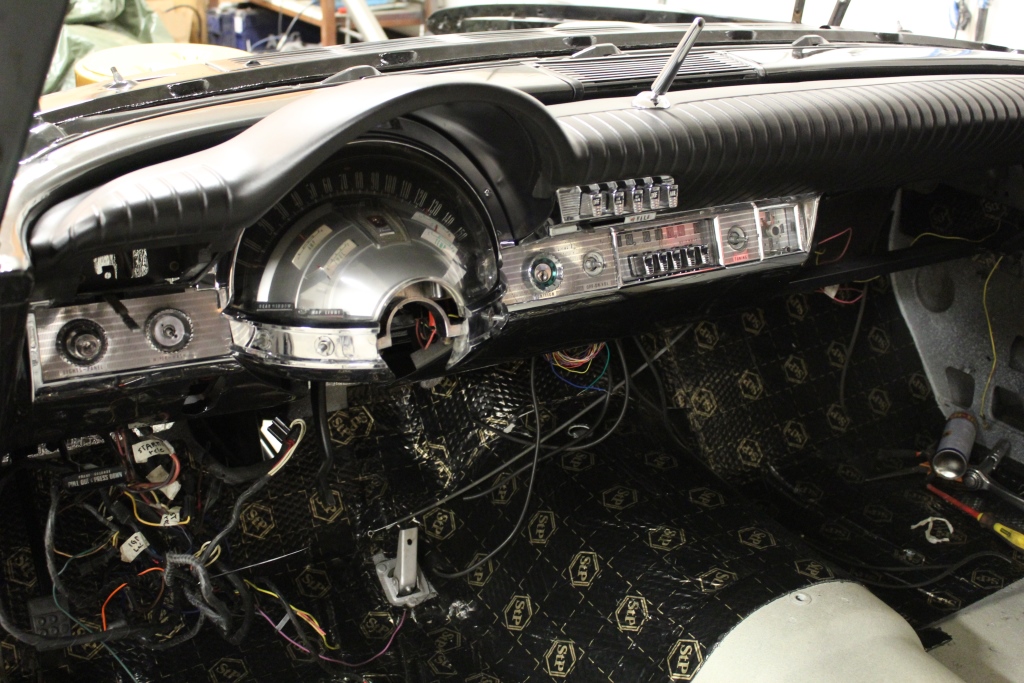
Location: tailFinland | I have spent hours and hours with dash restotation but now all gauges in the astradome works, radio konverted to FM and clock works too.
With new paint and new dash pad it looks awesome!
 (IMG_1378.JPG) (IMG_1378.JPG)
 (IMG_1382 (2).jpg) (IMG_1382 (2).jpg)
 (IMG_1385 (2).jpg) (IMG_1385 (2).jpg)
Attachments
----------------
IMG_1378.JPG (295KB - 394 downloads)
IMG_1382 (2).jpg (260KB - 390 downloads)
IMG_1385 (2).jpg (358KB - 392 downloads)
|
|
| |
|
Expert
Posts: 2788
Location: USA - KY | 
VERY awesome, indeed!
There is something Darth Vader-ish about that dash...and I mean that in a really GOOD way!
And the cross rams are a work of art. This car is going to be SOOOOOOOO cool.
Great job.
|
|
| |
|
Expert
Posts: 2596
Location: Upplands Väsby, Sweden | You Jari do a a Great Work, like to see tou pics from serios renovations |
|
| |
|
Board Moderator & Exner Expert 10K+
Posts: 13045
Location: Southern Sweden - Sturkö island | Great going Jari - keep it up and keep us posted - you're up to summer Cruises in FinLand 2016!!! |
|
| |
|
Expert
Posts: 2312
Location: Arizona | May the floors be with you.... |
|
| |
|
Elite Veteran
Posts: 827
Location: tailFinland | I fabricated custom brackets for carb springs today. I was missing all original parts, bracets, springs, linkages. Now all linkages work perfectly. Ingniton system needs rebuild and gas tank assembled then its about ready to start up. Not gonna do it before the summer though
 (WP_001373.jpg) (WP_001373.jpg)
 (WP_001367.jpg) (WP_001367.jpg)
 (WP_001371.jpg) (WP_001371.jpg)
Attachments
----------------
WP_001373.jpg (437KB - 389 downloads)
WP_001367.jpg (411KB - 415 downloads)
WP_001371.jpg (360KB - 390 downloads)
|
|
| |
|
Expert
Posts: 2596
Location: Upplands Väsby, Sweden | Hi Jari
You are doing a fantastic renovation and it goes pretty fast. Glad you post images |
|
| |
|
Elite Veteran
Posts: 827
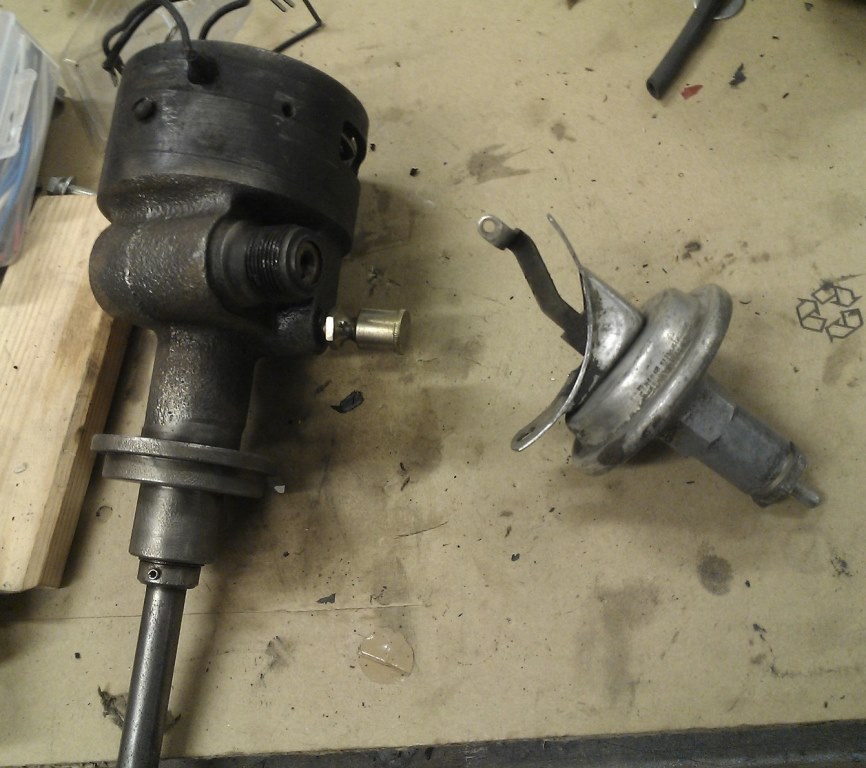
Location: tailFinland | Yes Joakim, some components get assembled into car pretty fast becouse they are alrady rebuilded or restored or new.
I got some issues with distributor resto to day. Vacuum advance pot is busted. You cant open it and fix it.
Where am I gonna get new advance pot? This is dual point distributor and I think one out form regular distributor wont work.
Also where am I gonna get a vacuum check valve to brake booster hose?
 (jakaja.jpg) (jakaja.jpg)
Attachments
----------------
jakaja.jpg (124KB - 382 downloads)
|
|
| |
|
Board Moderator & Exner Expert 10K+
Posts: 13045
Location: Southern Sweden - Sturkö island | Hi Jari, I repaired my one several years ago with Epoxy (making a mold out of a bottle cap in plastic). Even if this repair still holds on, I just got a spare after MANY years of searching. PM sent
 (IMG_4033_res.jpg) (IMG_4033_res.jpg)
 (IMG_1114_res.jpg) (IMG_1114_res.jpg)
Attachments
----------------
IMG_4033_res.jpg (54KB - 394 downloads)
IMG_1114_res.jpg (94KB - 380 downloads)
|
|
| |
|
Elite Veteran
Posts: 827
Location: tailFinland |
Hey it is Christmas again!
Picked up some goodies last week end while visting Helsinki.
Lasse Vänttinen at Prima made Super nice doorpanels and arm rests.
Aluminium inserts are made By Jan Friberg
 (WP_001381.jpg) (WP_001381.jpg)
 (WP_001384.jpg) (WP_001384.jpg)
 (WP_001385.jpg) (WP_001385.jpg)
Attachments
----------------
WP_001381.jpg (208KB - 371 downloads)
WP_001384.jpg (184KB - 381 downloads)
WP_001385.jpg (172KB - 360 downloads)
|
|
| |
|
Board Moderator & Exner Expert 10K+
Posts: 13045
Location: Southern Sweden - Sturkö island | Well, Merry Christmas Jari  the door panel looks really nice, another step forward............... the door panel looks really nice, another step forward............... |
|
| |
|
Elite Veteran
Posts: 1141
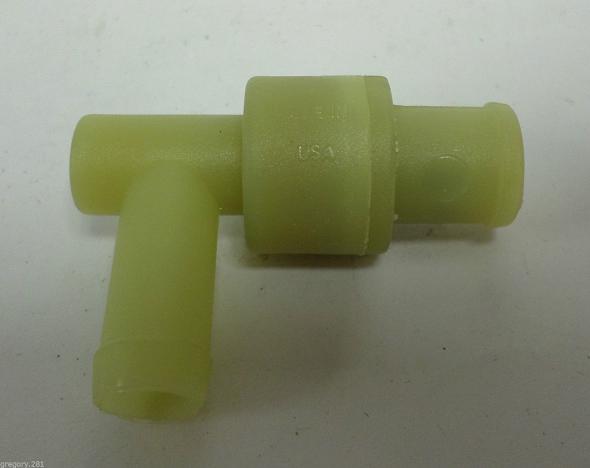
Location: Blackpool, United Kingdom. | This valve may do until you find original?
http://www.ebay.co.uk/itm/131100934380?_trksid=p2055119.m1438.l2649...
 (valve.JPG) (valve.JPG)
Attachments
----------------
valve.JPG (14KB - 378 downloads)
|
|
| |
|
Elite Veteran
Posts: 827
Location: tailFinland | I found a good quality check valve made of brass at the local tractor supplies shop. I think its better than 55 years old plastic one (that I was unable to find right know)
Bougth some curved hoses and by meter. I do not usually trust Biltemas gasoline hoses but I guess as a vacuum hoses they should work fine
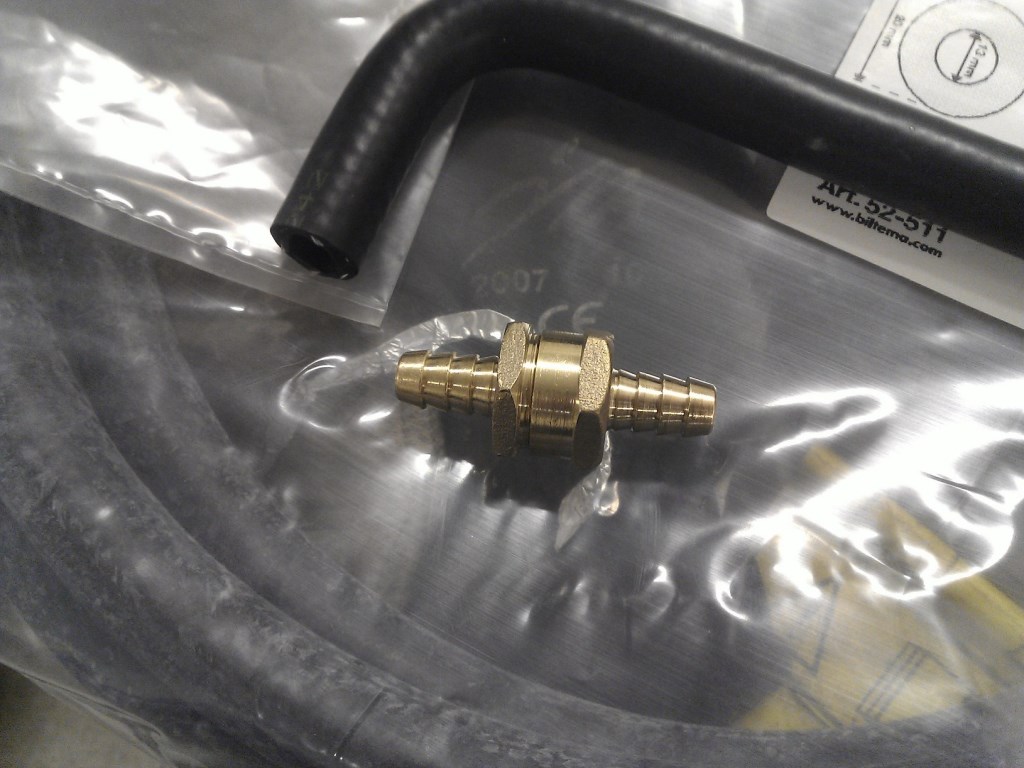 (WP_001396.jpg) (WP_001396.jpg)
Attachments
----------------
WP_001396.jpg (136KB - 362 downloads)
|
|
| |
|
Elite Veteran
Posts: 827
Location: tailFinland | I am going to put lambda sensors to new exhaust. It is only about 60 € investment and will help to collect data of air/fuel mixture while test driving.
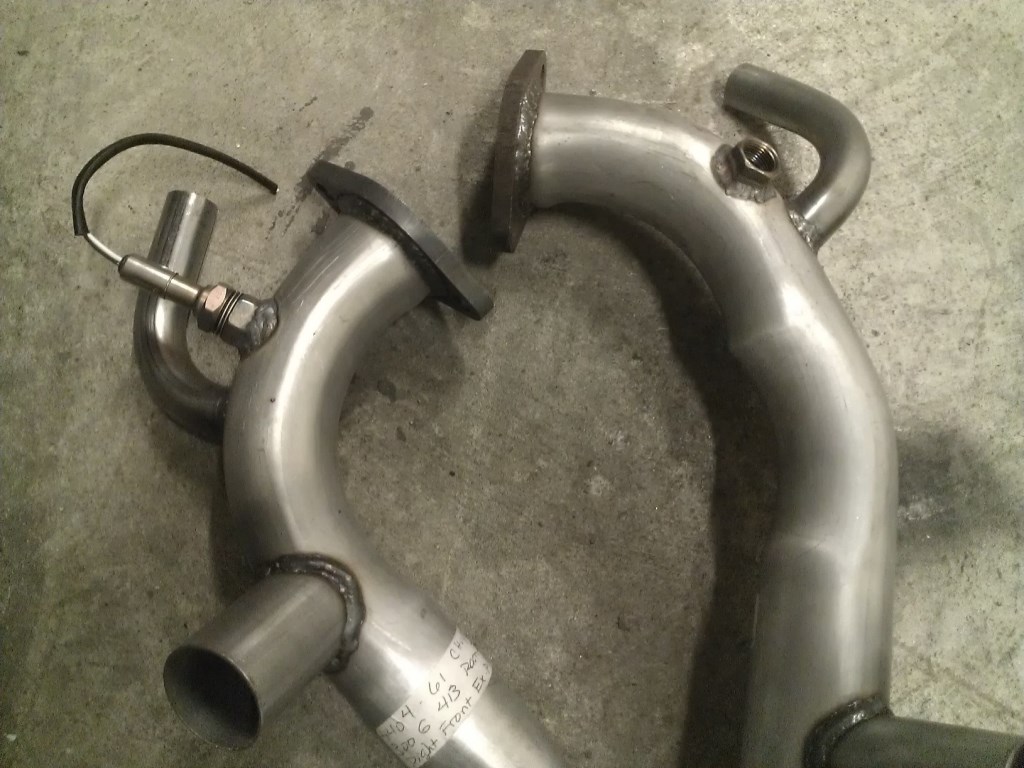 (lambada.jpg) (lambada.jpg)
Attachments
----------------
lambada.jpg (160KB - 362 downloads)
|
|
| |
|
Elite Veteran
Posts: 1157
Location: D-70199 Heslach | Jari, nice work on exhaust, do you weld with WIG?
The stickers on exhaust tubes tells me, that the system comes from waldron... |
|
| |
|
Location: North Australia | Awesome series of photos of this restoration. This is going to be a ripper car when finished.
Jari, keep an eye on US ebay, I have seen the distributor vacuum pots on there often.
Well done, and thankyou for taking the time to share your restoration experience on here.
Steve.
|
|
| |
|

Expert 5K+
Posts: 8947
Location: WHEELING,WV.>>>HOME OF WWVA | some of the rams used a pin on the side of the tube for the return spring-------------------------------------------------------later
Edited by 60 dart 2016-02-04 4:29 AM
 (413crossram.jpg) (413crossram.jpg)
Attachments
----------------
413crossram.jpg (245KB - 370 downloads)
|
|
| |
|
Elite Veteran
Posts: 827
Location: tailFinland | Yes, early F's had a pin. It is in wrong spot (too low) and some times caused a stuck at the full throttle - very dangerous |
|
| |
|
Elite Veteran
Posts: 827
Location: tailFinland | ToMopar - 2016-02-04 3:15 AM
Jari, nice work on exhaust, do you weld with WIG?
The stickers on exhaust tubes tells me, that the system comes from waldron...
Yes they are from Waldon. I have had them couble of years in a barn so they have collected little bit surface rust.
This time i did not take a chance. Nut is stainless and I did not have that big drill for the hole, usually nut also bends little bit while welding...
I took them to my friend, he has a metal (welding) shop and he usually helps me with demanding metal works. It's nice to have that kinda friends, Thanks MatsoMix.
I guess he (or his employee) used TIG welding |
|
| |
|
Elite Veteran
Posts: 827
Location: tailFinland | I've done some work with Waldons exhaust, wich almost assembled. Just need to change sinc plated clamps, Waldons were not.
I am going to need more and better clips for windshiled and rear glass trim.
Help is wanted to locate even new ones.
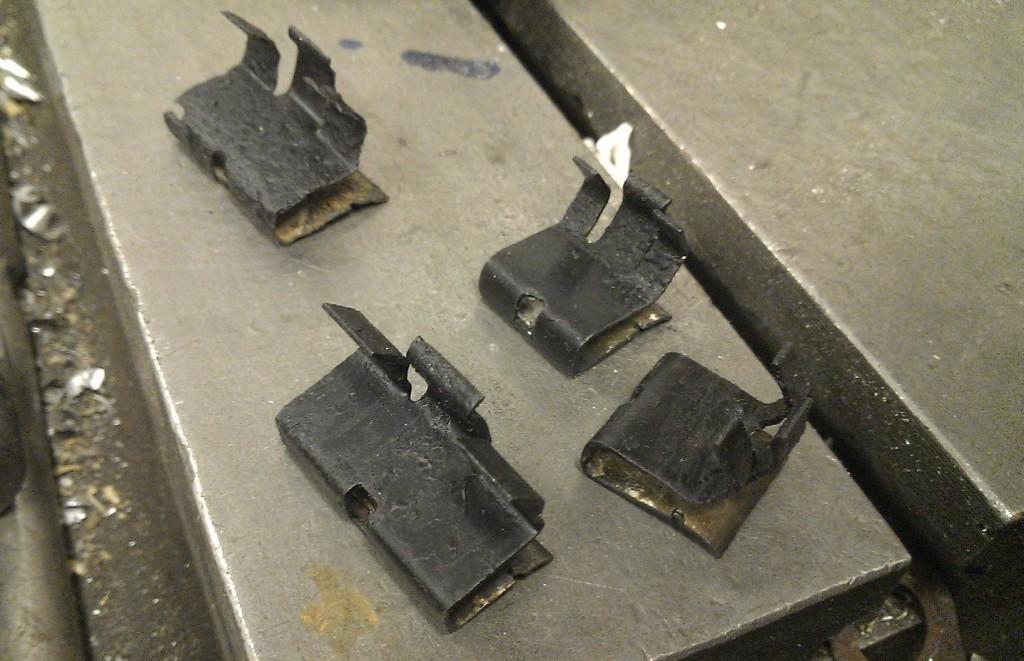 (clips.jpg) (clips.jpg)
Attachments
----------------
clips.jpg (91KB - 480 downloads)
|
|
| |
|
Expert 5K+
Posts: 8443
Location: Perth Australia | Interesting to see if you find them, I didnt
Mind you, I worked out that I needed them after I put the back window in (forgot all anout them), then had to remove it again, so I was in a rush and didnt look really hard
Ended up using what I could scrounge up from my used stuff
|
|
| |
|
Elite Veteran
Posts: 827
Location: tailFinland | Usually these clips go crusher with the car body. No one saves them.
I've been thinking to fabricate new ones by my own hands and a Dremel, but waisting hours and hours of labor to parts that are worth few dimes or dollars... not a good idea.
Windshield trim is going to be ensured with Sikaflex anyway. |
|
| |
|
Elite Veteran
Posts: 827
Location: tailFinland | Exhaust hangers from Waldron were cr... not so good. I desided to blast and restore original ones.
In this pic rear ones are already done. Gotta find rubbers for those large hangers
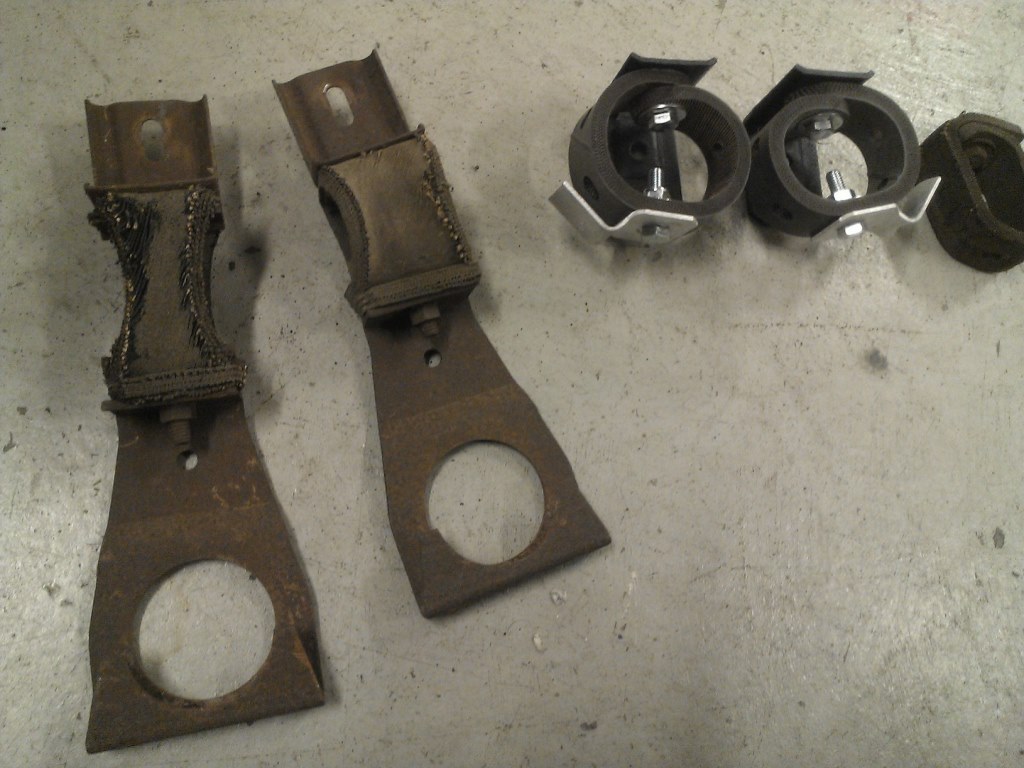 (WP_001446.jpg) (WP_001446.jpg)
Attachments
----------------
WP_001446.jpg (148KB - 477 downloads)
|
|
| |
|
Elite Veteran
Posts: 827
Location: tailFinland | All in
 (WP_001452.jpg) (WP_001452.jpg)
Attachments
----------------
WP_001452.jpg (166KB - 469 downloads)
|
|
| |
|

Expert
Posts: 1223
Location: Ramona, CA | Did you find new rubber? |
|
| |
|
Elite Veteran
Posts: 827
Location: tailFinland | NicksGarage - 2016-02-14 5:50 PM
Did you find new rubber?
There is a company in town who provides all kind of tecnical rubber for local industry and consumers.
They got almost everything to start with rubber and plastic.
I just hav'nt got time to get there yet. |
|
| |
|
Expert
Posts: 1223
Location: Ramona, CA | Adventurer 60 - 2016-02-15 6:20 AM
NicksGarage - 2016-02-14 5:50 PM
Did you find new rubber?
There is a company in town who provides all kind of tecnical rubber for local industry and consumers.
They got almost everything to start with rubber and plastic.
I just hav'nt got time to get there yet.
Thanks, I'm buying a 300F and it needs some exhaust work. I haven't looked that closely at the hangers but they're probably original. I figured I'd just cut some out of some old tires.
|
|
| |
|
Board Moderator & Exner Expert 10K+
Posts: 13045
Location: Southern Sweden - Sturkö island | I used Balata belts in my hangers - I used tire rubber before, but it became too brittle with the heat....
http://www.forwardlook.net/forums/forums/thread-view.asp?tid=60075&... to get the hang of it&highlightmode=1#M498750
|
|
| |
|
Expert
Posts: 1223
Location: Ramona, CA |
Thanks, I'll check that out. Great work on those clamps by the way. |
|
| |
|
Elite Veteran
Posts: 827
Location: tailFinland | Assembeld headliner yesterday. It turned into a nightmare.
First of all it spent in a box for about year or so, it had sharp fold marks wich i tried to heat out and let the headliner spent couple of months hanging straight.
Material is like sheet metal, it does not stretch at all to one direction and very little to another exept it does not react to heat gun at all, does not shrink or stretch.
Bought this form Ebay seller. Beware these are not made of proper material.
Well I got it assembled but I am not satisfied of wringles that I'm un able to strech away. I don't know if they straighten up during time being.
Then I noticed, I am missing a cirtical piece of interor trim. Small pieces on the top of A-window both sides
Anyone can help me?
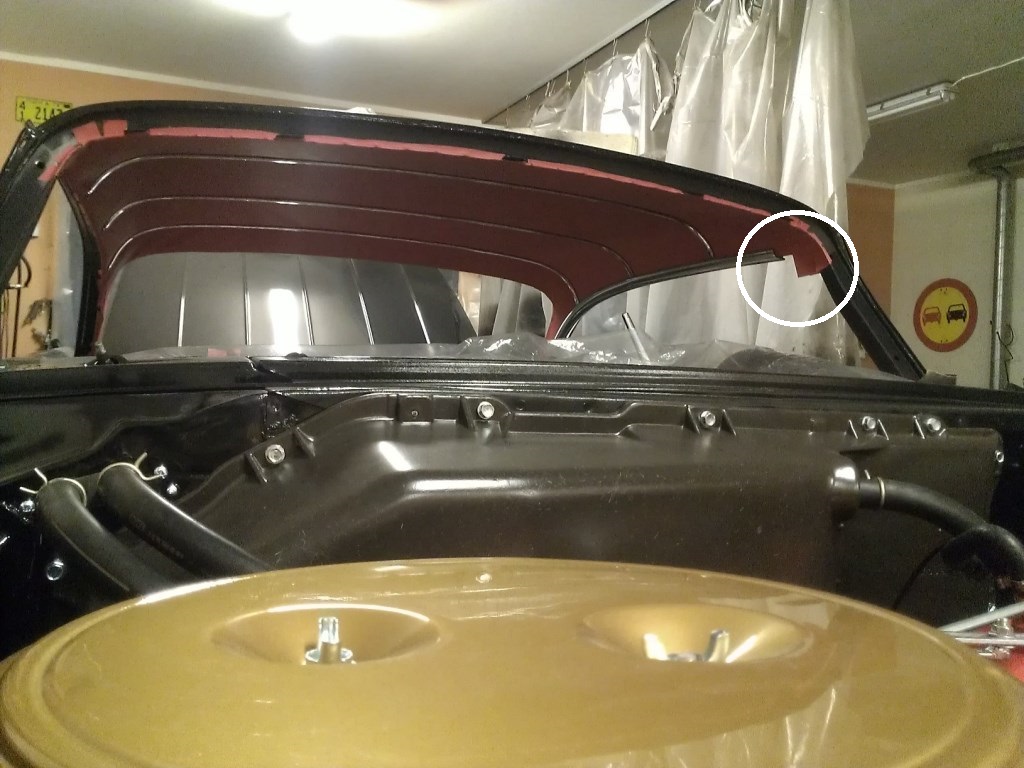 (sissskatto2.jpg) (sissskatto2.jpg)
Attachments
----------------
sissskatto2.jpg (202KB - 476 downloads)
|
|
| |
|
Elite Veteran
Posts: 827
Location: tailFinland | These are the pieces I need
Edited by Adventurer 60 2016-02-28 4:31 AM
 (interior.jpg) (interior.jpg)
Attachments
----------------
interior.jpg (97KB - 476 downloads)
|
|
| |
|
Board Moderator & Exner Expert 10K+
Posts: 13045
Location: Southern Sweden - Sturkö island | Jari, I have fixed some wrinkles on vinyl seats with an el cheapo steam generator that normally is used for cleaning home and bathroom.
The hot steam will smoothen out the fold creases and shrink the material somewhat. Work with the steamer and a soft cloth and I Think you will get a good result.
Secondly, I have those garnishes in my attic - but they're from my Saratoga so they are painted green. That means that you must chrome them.
Let me know if you are interested.........
|
|
| |
|
Elite Veteran
Posts: 827
Location: tailFinland | Thanks for the tip Wizard. havent used that yet couse I dont own one.
I'll try to locagte stainless or chromed ones first. I'm not sure are they chromed or stainless originally.
You know chroming is a extra task. |
|
| |
|
Board Moderator & Exner Expert 10K+
Posts: 13045
Location: Southern Sweden - Sturkö island | Those garnishes are always normal sheet metal Jari - it's the long bows that are made of stainless.
Just take your time and check for a chromed pair, but, normally they are always rusty any which way
For to be sure that they are the same ones for 2 dht and 4dht, please take an estimated lenght and let me know - I can then measure my ones for to confirm. |
|
| |
|
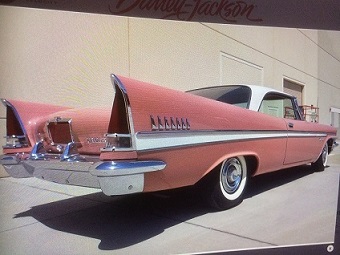
Elite Veteran,, James Passed away March 2021, He will be Missed
Posts: 1028
Location: Melbourne, Australia | Here is what I used for the exhaust hangers , very similar
http://www.ebay.com/itm/Mopar-66-67-68-69-70-71-Coronet-Road-Runner... |
|
| |
|
Elite Veteran,, James Passed away March 2021, He will be Missed
Posts: 1028
Location: Melbourne, Australia | It took a few years for the sun to get rid of the wrinkles in the centre of our headliner from being folded up in a box for ages
It was made by "Go Liners" on ebay . Never again , I don't recommend them , they use cheap material as you say that doesn't work well .
Edited by The Adventurer 2016-02-28 7:27 AM
|
|
| |
|
Expert
Posts: 1223
Location: Ramona, CA | This picture shows the piece you need better. I'm going to be ordering a headliner from Gary Goers but I'm not going to be installing it right away. I guess I should try rolling it up instead of keeping it folded if that's how he ships it.
 (8403150442_020.jpg) (8403150442_020.jpg)
Attachments
----------------
8403150442_020.jpg (90KB - 477 downloads)
|
|
| |
|
Expert
Posts: 1223
Location: Ramona, CA | Here is a picture of those headliner trim pieces from my 300F.
 (headliner_side_molding_ends.jpg) (headliner_side_molding_ends.jpg)
Attachments
----------------
headliner_side_molding_ends.jpg (157KB - 476 downloads)
|
|
| |
|
Board Moderator & Exner Expert 10K+
Posts: 13045
Location: Southern Sweden - Sturkö island | Thanks' for the photo Nick - now I can confirm if the trim is the same for 2dht and 4dht |
|
| |
|
Location: North Australia | Hey Jari, great progress on the car.
Soon you will need to start a thread "My 300 G restoration just finished"!
4 years in the making!
I enjoy your updates and I am looking forward to seeing the finished car.
Steve.
|
|
| |
|
Board Moderator & Exner Expert 10K+
Posts: 13045
Location: Southern Sweden - Sturkö island | Jari, thanks' to Nicks photo I can confirm that the moldings are the same for 2 dht and 4 dht.
This mean that you have a wider span for your serch; the New Yorkers 2 dht and 4 dht had the chromed ones, as well as the 300 F & G, the Saratogas and Windsors had painted ones with the exception of Canadian Saratogas which also had chromed mooldings. |
|
| |
|
Elite Veteran
Posts: 827
Location: tailFinland | Thanks for the info guys! |
|
| |
|
Elite Veteran
Posts: 827
Location: tailFinland | Checked my phone and found a number of another fwl-mopar guy, bought some parts from him almost 15 years ago. He got those trim parts, (stainless he said) and we made a deal. Then we talked about his very very extremely rare forward-look export model 2D wagon! |
|
| |
|
Elite Veteran
Posts: 827
Location: tailFinland | It was time to restore window channels. I found just right material from the local "K-mart". It is called hook and loop tape Well I just used loop tapes wich are just perfect fot this purpose. Lots of careful michroscopic gluing thou.
 (WP_001478.jpg) (WP_001478.jpg)
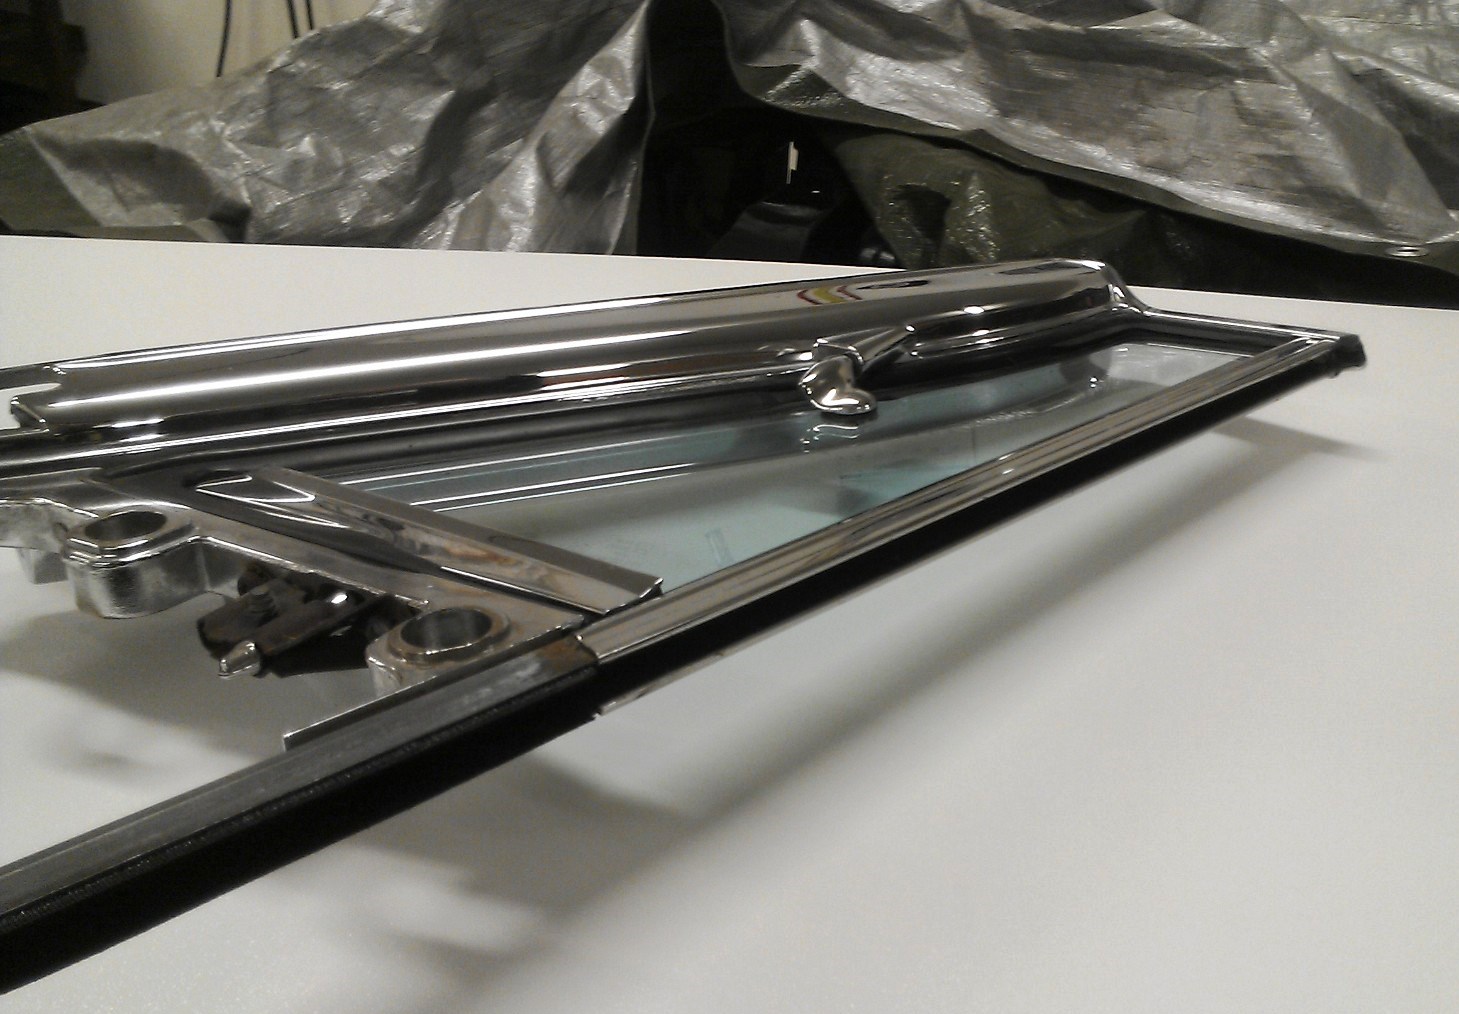 (WP_001483.jpg) (WP_001483.jpg)
 (WP_001498.jpg) (WP_001498.jpg)
Attachments
----------------
WP_001478.jpg (181KB - 473 downloads)
WP_001483.jpg (253KB - 465 downloads)
WP_001498.jpg (129KB - 460 downloads)
|
|
| |
|
Elite Veteran
Posts: 827
Location: tailFinland |
For rear door window channels I used thicker mohair fabric that is designed for this purpose.
Edited by Adventurer 60 2016-03-06 6:42 AM
 (WP_001495.jpg) (WP_001495.jpg)
 (WP_001497.jpg) (WP_001497.jpg)
Attachments
----------------
WP_001495.jpg (155KB - 466 downloads)
WP_001497.jpg (148KB - 459 downloads)
|
|
| |
|
Elite Veteran
Posts: 827
Location: tailFinland | Something went wrong?
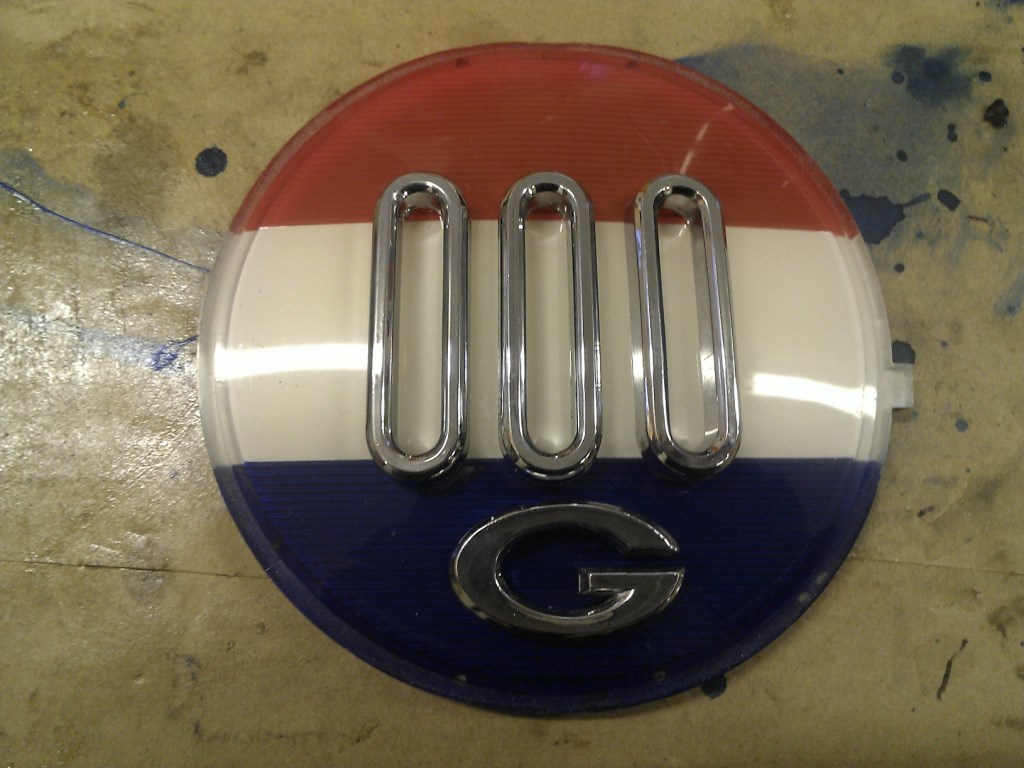 (WP_001546.jpg) (WP_001546.jpg)
Attachments
----------------
WP_001546.jpg (144KB - 464 downloads)
|
|
| |
|
Expert
Posts: 1223
Location: Ramona, CA | Adventurer 60 - 2016-03-13 1:30 PM
Something went wrong? :)
Does the other side say 330 G? |
|
| |
|
Elite Veteran
Posts: 827
Location: tailFinland | I made a silicone mold couple years ago to cast trunk lid emblems. First polyester clear resin produced very clear but fragile emblems wich were impossile to polish.
Friend of mine gave me a little bottle of another type resin, so I tested it. Well see when its totally dried.
Did'nt find any windshield trim clips, so I tried to make one my self. Actually it took only about 10 to 15 minutes to make the first one and it seems working.
So I'll get some better sheet metal (stainless) and bend and dremel all of them
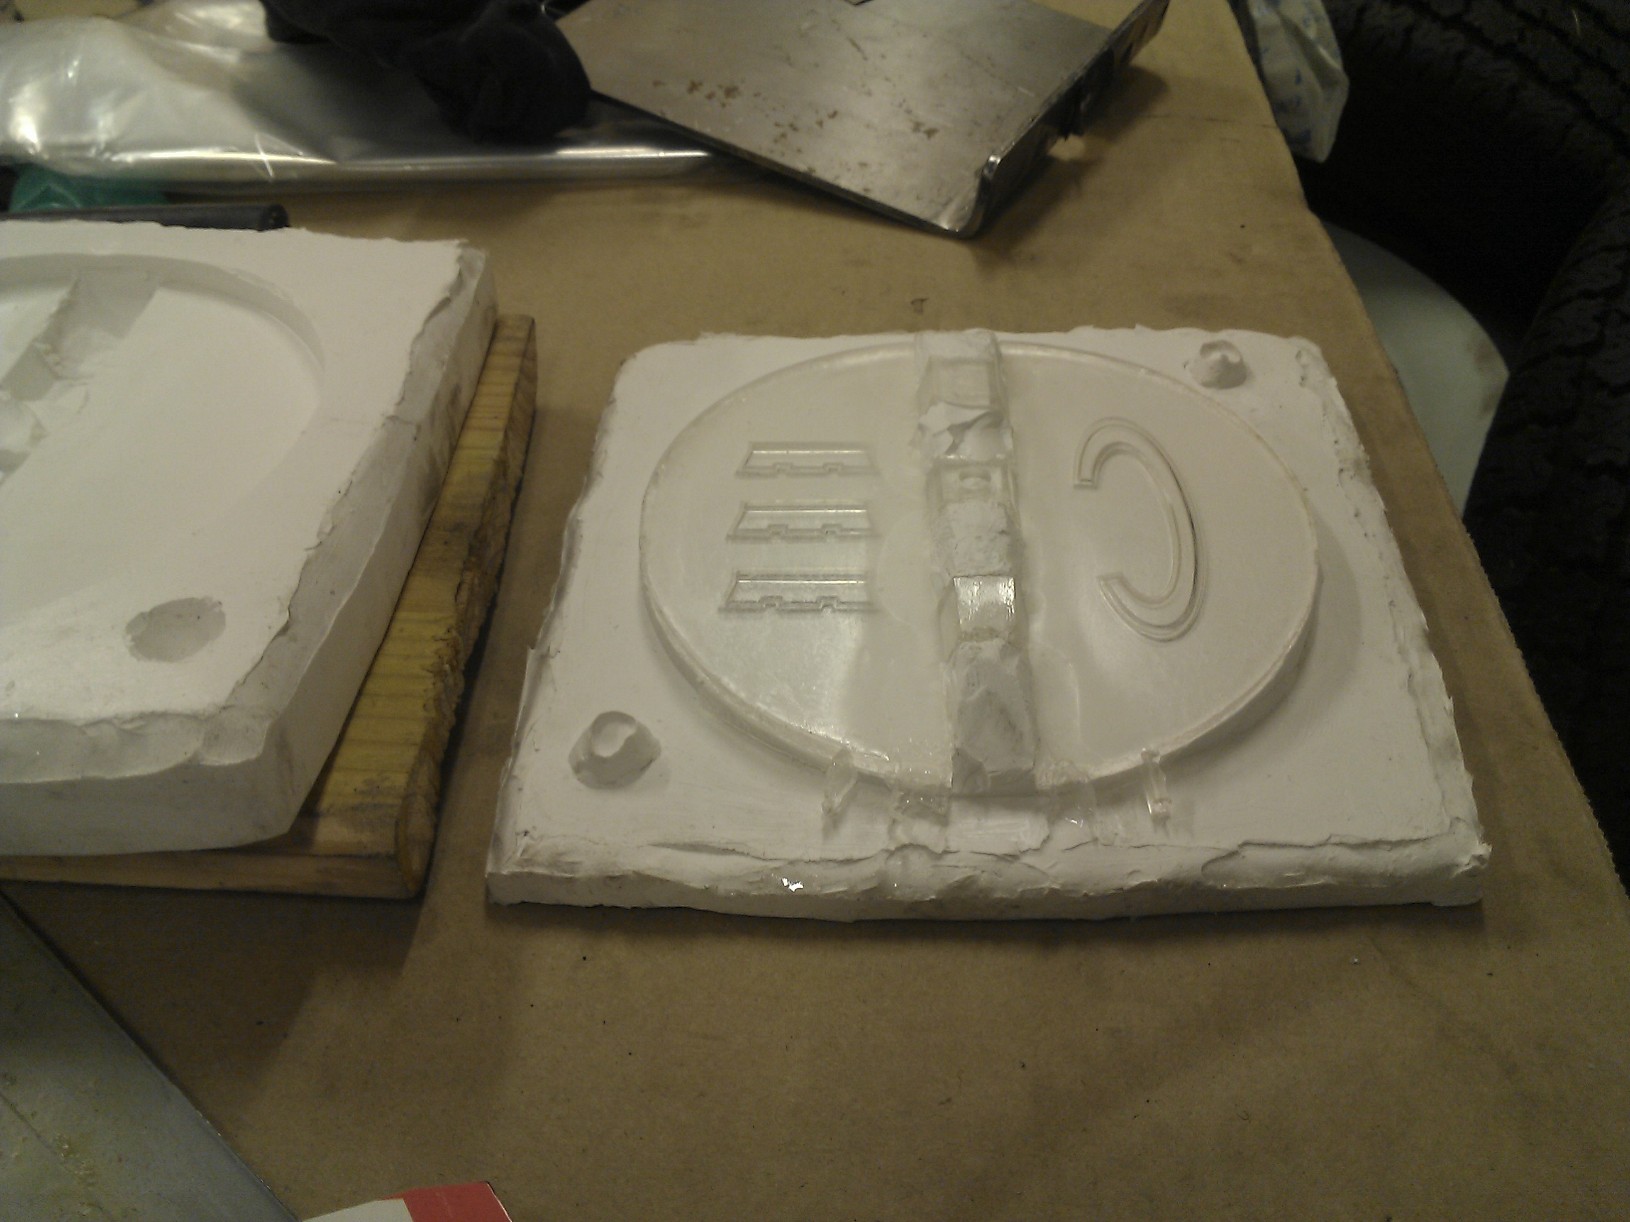 (WP_001548.jpg) (WP_001548.jpg)
 (WP_001550.jpg) (WP_001550.jpg)
 (WP_001549.jpg) (WP_001549.jpg)
Attachments
----------------
WP_001548.jpg (295KB - 454 downloads)
WP_001550.jpg (444KB - 448 downloads)
WP_001549.jpg (403KB - 455 downloads)
|
|
| |
|
Expert 5K+
Posts: 9654
Location: So. Cal | That would be a great solution to make those clips out of stainless. Nice.
Edit: I think you would need to make them from a hardenable stainless so that they will be springy after heat treating them.
Edited by Powerflite 2016-03-15 10:08 AM
|
|
| |
|
Board Moderator & Exner Expert 10K+
Posts: 13045
Location: Southern Sweden - Sturkö island | Great Jari - those clips are difficult to find and when found they're rusted in different degrees. Stainless will most probably work just fine. |
|
| |
|
Elite Veteran
Posts: 827
Location: tailFinland | Good news! I found the clips for windshield trim from this treasure shop
http://www.nippelit.fi/1st/html/default.asp?id=675&p_id=672&editmod...
Bad news. I bought them all what they had in stock
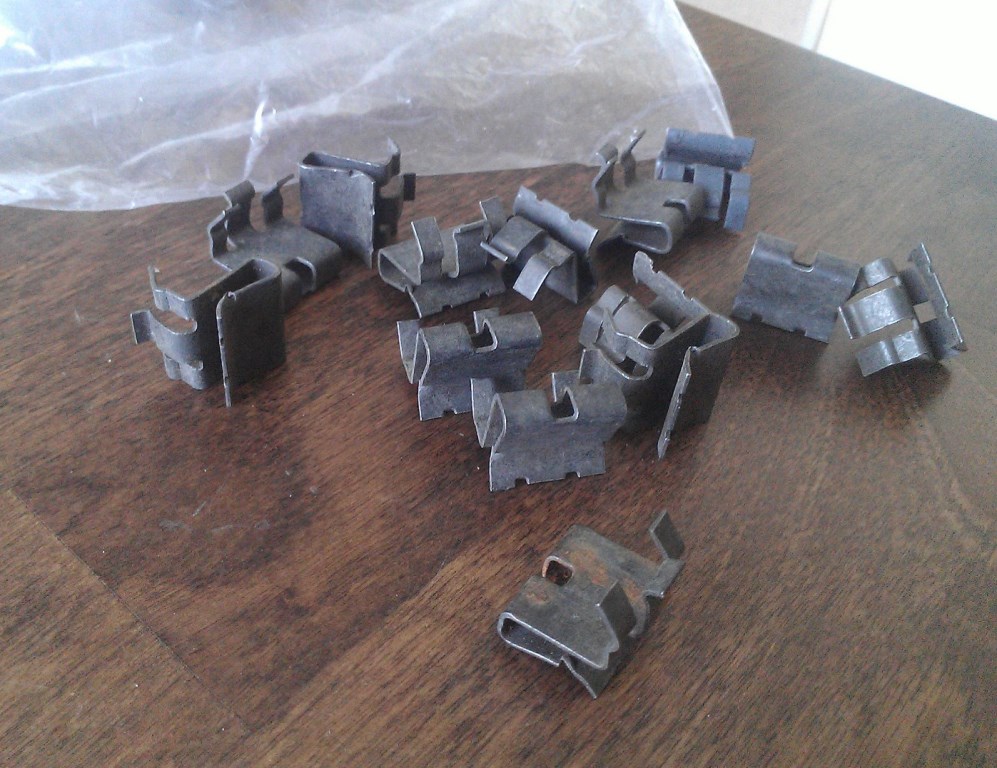 (klipsi.jpg) (klipsi.jpg)
Attachments
----------------
klipsi.jpg (185KB - 489 downloads)
|
|
| |
|
Expert
Posts: 1223
Location: Ramona, CA | Very good find. |
|
| |
|
Elite Veteran
Posts: 827
Location: tailFinland |
Well I got something done during Eastern time. Cleaned up power seat system, lubed all gears and theet, painted a whole thing. Motor was shot, moved only forwards, thank god I got one working motor for spare. one solenoid in transmission was broken, I was able to fix it. One lower rack was totally rotten, Had one for the spare. Switch was totally shot, I had one ruined for the spare missing one contact. Now I have 4 way seat insted of 6 way and my other PS is incomplete parts lot Gotta find one switch more.
I also covered floors with sound deadner.
Drilled holes for drain tube hoses in trunk compartmet. Now water will never leak to tunk floor and rust it.
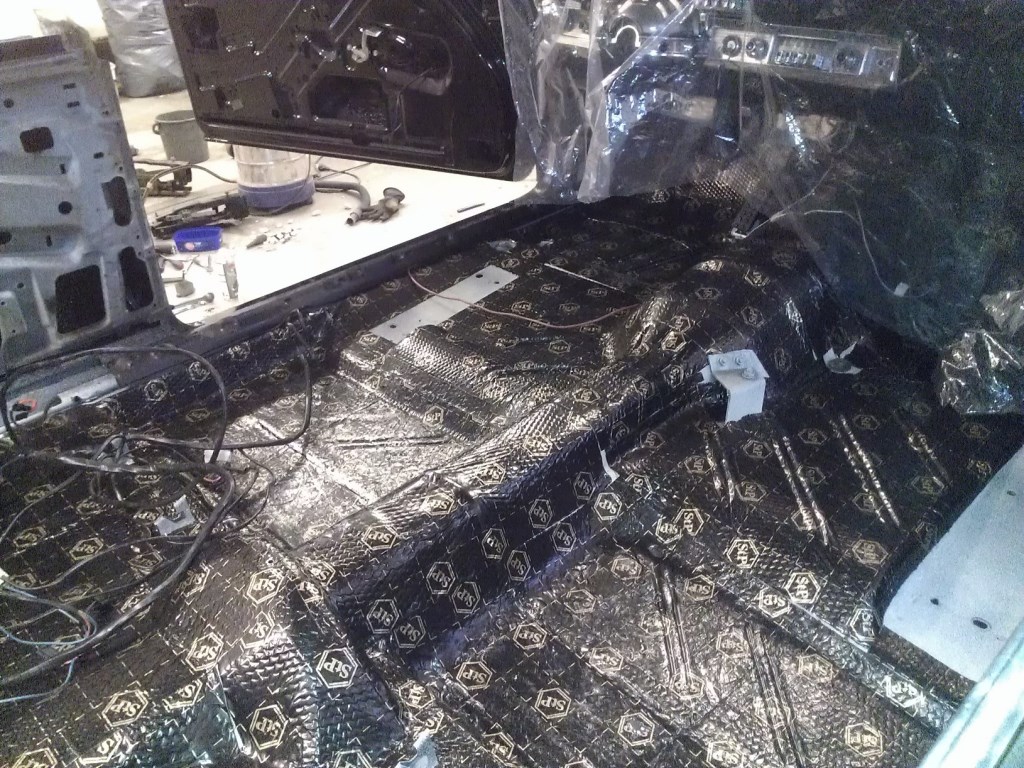 (WP_001594.jpg) (WP_001594.jpg)
 (WP_001587.jpg) (WP_001587.jpg)
 (WP_001586.jpg) (WP_001586.jpg)
Attachments
----------------
WP_001594.jpg (294KB - 436 downloads)
WP_001587.jpg (178KB - 460 downloads)
WP_001586.jpg (217KB - 439 downloads)
|
|
| |
|
Elite Veteran
Posts: 827
Location: tailFinland |
This is what was left of rear panel behind the rear seats.
I can hardly use it as a template.
Hat shelf is from some other car maybe from sedan, and I do not have a glue how these panels joint together.
You F and G coupe owners, would you post me a close up photos of hat shelf and how it joints to this panel?
Edited by Adventurer 60 2016-03-29 4:52 PM
 (WP_001589.jpg) (WP_001589.jpg)
Attachments
----------------
WP_001589.jpg (180KB - 440 downloads)
|
|
| |
|
Expert
Posts: 1223
Location: Ramona, CA | If nobody else does it, I'll take some pictures on Friday and post them. I don't think the two are joined together. |
|
| |
|
Elite Veteran
Posts: 827
Location: tailFinland | Yeah, thas what I want to know. I have to make new hardboards and make them look like originals. It seems like something has been ripped of from the rear panel.
Thanks Nick, your help will be appreciated |
|
| |
|
Expert
Posts: 1223
Location: Ramona, CA | Here you go. The package shelf material wraps over the rear deck and then the carpeted panel just seems to lay on top of it. I have another rear carpeted panel in storage from my old car. I can get it and take some pictures of it if needed. Also it looks like the trim pieces at the base of the roof have had the screw holes broken out on the side and the put new ones in pointing down. I'll have to dig up my other ones and see what they look like.
 (package_shelf1.jpg) (package_shelf1.jpg)
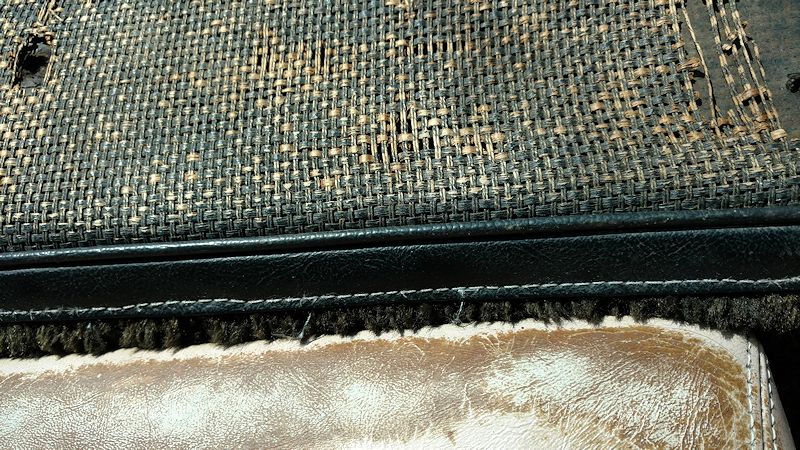 (package_shelf2.jpg) (package_shelf2.jpg)
 (package_shelf3.jpg) (package_shelf3.jpg)
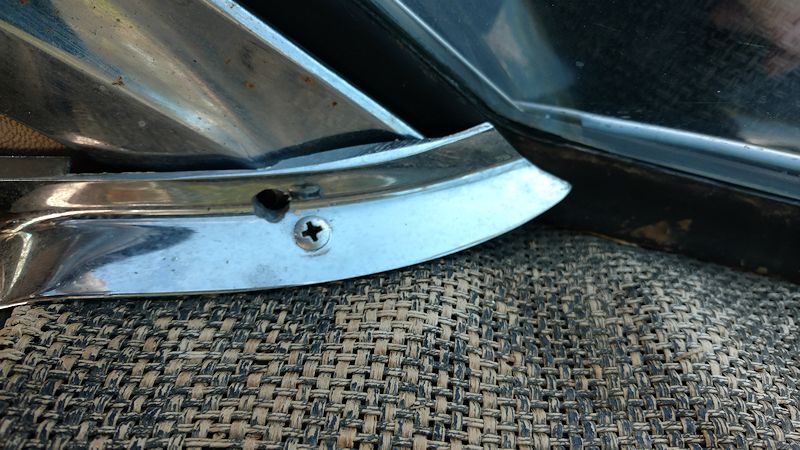 (package_shelf4.jpg) (package_shelf4.jpg)
Attachments
----------------
package_shelf1.jpg (147KB - 447 downloads)
package_shelf2.jpg (169KB - 456 downloads)
package_shelf3.jpg (160KB - 447 downloads)
package_shelf4.jpg (109KB - 467 downloads)
|
|
| |
|
Expert
Posts: 1223
Location: Ramona, CA | Also, what's ripped from the middle of your panel is the 300 gear emblem.
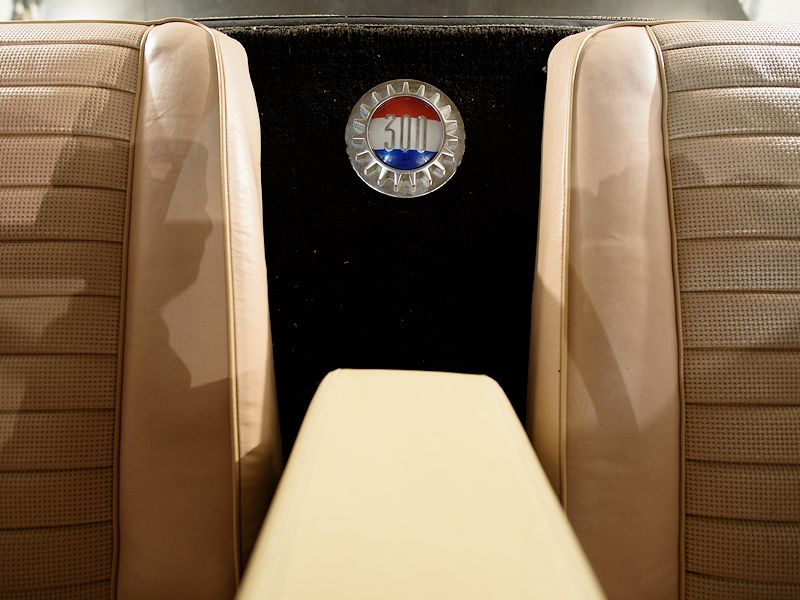 (150442_027.jpg) (150442_027.jpg)
Attachments
----------------
150442_027.jpg (99KB - 448 downloads)
|
|
| |
|
Expert
Posts: 1530
Location: ZH, Switzerland | I just checked at my 300F the rear panel with the 300 emblem. I can confirm that it's like the carpet at the floor, cut not loops. The hight is about 1/5 inch or 5 mm (estimated, not measured).The seam is at the carpet covering the rear panel, at the top and at the lower end around the tunnel of the propeller shaft. The lower end of the carpet is about 5 to 6 cm longer than the panel and folded. This end was under the floor carpet in my 300F. Thanks to the pictures of Nick I found two parts I sorted out for to sell. These are the chromed mouldings at the side of the C pillar at the parcel shelf. The parcel shelf material at my 300F is black at the top and shows the same color at the rear side (like tan). But it's rotten and falls in pieces. Good luck with your restoration Jari! Dieter
Edited by di_ch_NY56 2016-04-02 3:14 PM
|
|
| |
|
Expert
Posts: 1223
Location: Ramona, CA | My floor carpet was replaced by a previous owner. The rear panel carpet is original. They got the carpet from the 300 club back in the 1990s. These are the carpet panels for the console that came from the club.
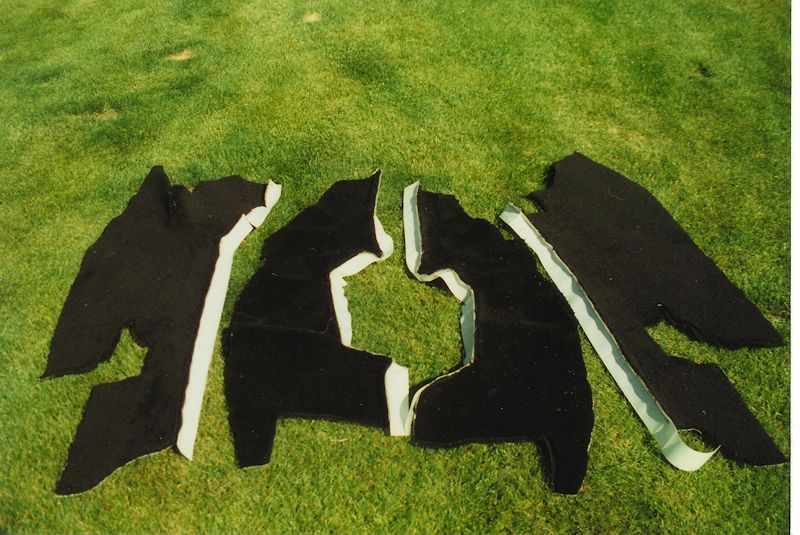 (Image13a.jpg) (Image13a.jpg)
Attachments
----------------
Image13a.jpg (117KB - 478 downloads)
|
|
| |
|
Elite Veteran
Posts: 827
Location: tailFinland | Thanks for the pics guys. So it its basket wave material that covers the shelf. Where I'm gonna get that?
Is it also similar in G than F?
Nick, the emblem in the middle is different in G. It is like a hub cap center piece only pot metal piece is little pit flatter. I am missing it too |
|
| |
|
Elite Veteran
Posts: 827
Location: tailFinland | I was able to find this kind of fabric, made of cotton and polyester. Its not totally black but hey, I can spray satin black paint on it. It might work nice. But they have about 4 week delivery time and lenght WISE I gotta order 3 times more than I need.
Sold my 59 Dodge pick up truck yesterday, got some cash and started planning little US-trip immediately.
Pomona swap 17th april, Carlisle next week from that...
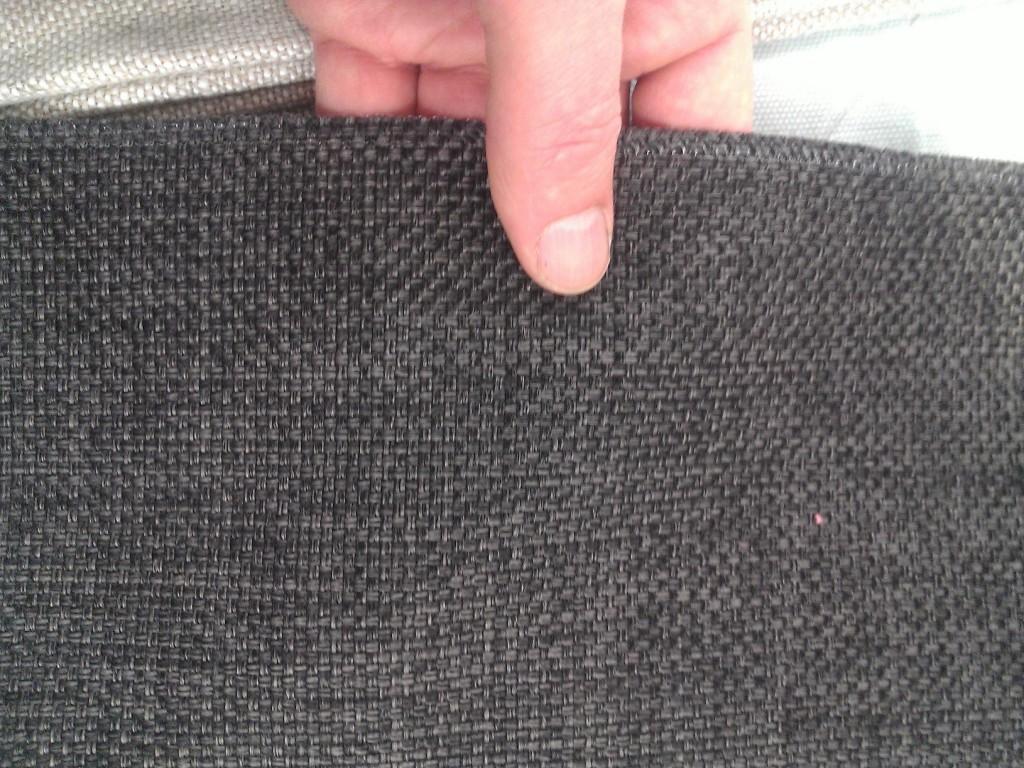 (WP_001610.jpg) (WP_001610.jpg)
Attachments
----------------
WP_001610.jpg (152KB - 445 downloads)
|
|
| |
|
Board Moderator & Exner Expert 10K+
Posts: 13045
Location: Southern Sweden - Sturkö island | I bet there's some guys here that might be interested of that material Jari |
|
| |
|
Elite Veteran
Posts: 827
Location: tailFinland | I have left my 300 G Project resting for few weeks. Been busy with all kind of stuff and extra work. I sold my 59 Dodge truck and got some cash, Next friday I am going to leave for California. Visit Pomona swap, and my friends there. Next week to Carlisle spring swap.
We'll see if I found something.
|
|
| |
|
Expert
Posts: 1530
Location: ZH, Switzerland | wizard - 2016-04-03 7:45 PM I bet there's some guys here that might be interested of that material Jari ;) Yes. I am. Dieter |
|
| |
|
Elite Veteran
Posts: 827
Location: tailFinland | di_ch_NY56 - 2016-05-14 4:08 PM
wizard - 2016-04-03 7:45 PM I bet there's some guys here that might be interested of that material Jari ;) Yes. I am. Dieter
I will cut and paint material for two cars and if the result is fine i will let you know.
|
|
| |
|
Elite Veteran
Posts: 827
Location: tailFinland | I have done absolutely nothing for my project for almost 4 months exept found some parts.
Now I started a battle with windows and regulators to get them back on their places.
It took quite many hours to get driver door windows and regulator working but it works now smoothly.
I hope passenger door will be much easier.
Missing all stops for all windows. Anyone got extras? would´nt like to fabricate them from straight steel
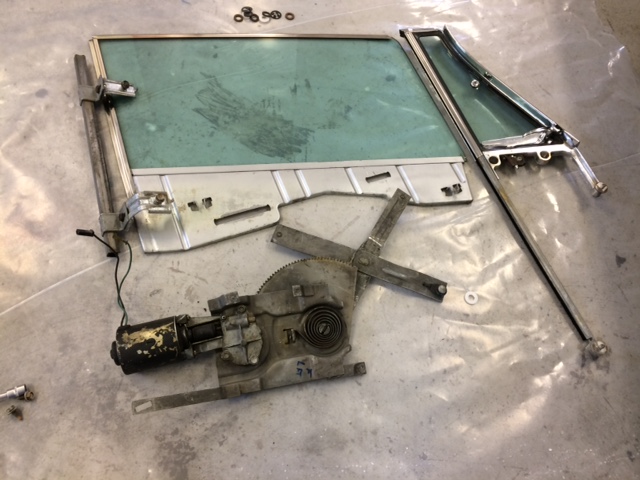 (IMG_0533.JPG) (IMG_0533.JPG)
 (IMG_0604.JPG) (IMG_0604.JPG)
Attachments
----------------
IMG_0533.JPG (109KB - 386 downloads)
IMG_0604.JPG (108KB - 380 downloads)
|
|
| |
|
Expert
Posts: 1530
Location: ZH, Switzerland | Adventurer 60 - 2016-07-28 5:50 PM di_ch_NY56 - 2016-05-14 4:08 PM wizard - 2016-04-03 7:45 PM I bet there's some guys here that might be interested of that material Jari ;) Yes. I am. Dieter I will cut and paint material for two cars and if the result is fine i will let you know. Thanks a lot |
|
| |
|
Elite Veteran
Posts: 827
Location: tailFinland | All side glass is now assembled. Next step windshiled and rear glass.
I also cut the carboard of hat shelf. I am going to hide rear speakers. I'm not gonna bolt them thru.
I might put the speaker/defoster frame to middle.
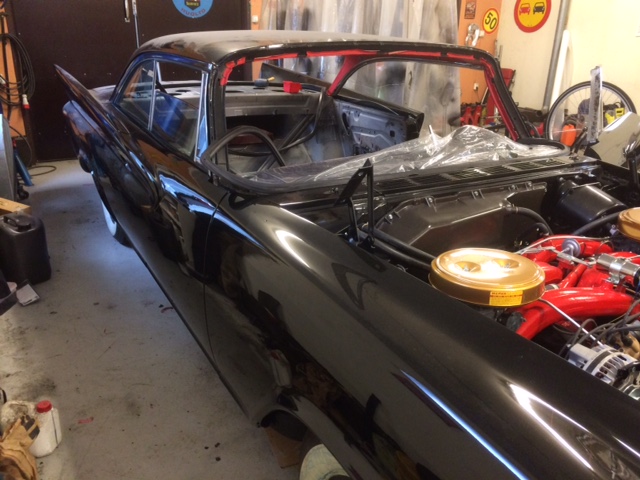 (IMG_0688.JPG) (IMG_0688.JPG)
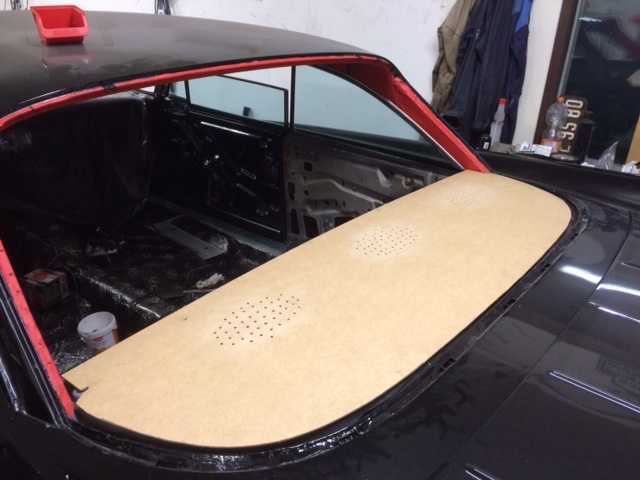 (IMG_0713.jpg) (IMG_0713.jpg)
Attachments
----------------
IMG_0688.JPG (121KB - 451 downloads)
IMG_0713.jpg (97KB - 446 downloads)
|
|
| |
|
Elite Veteran
Posts: 827
Location: tailFinland | This how to fabric looks like.
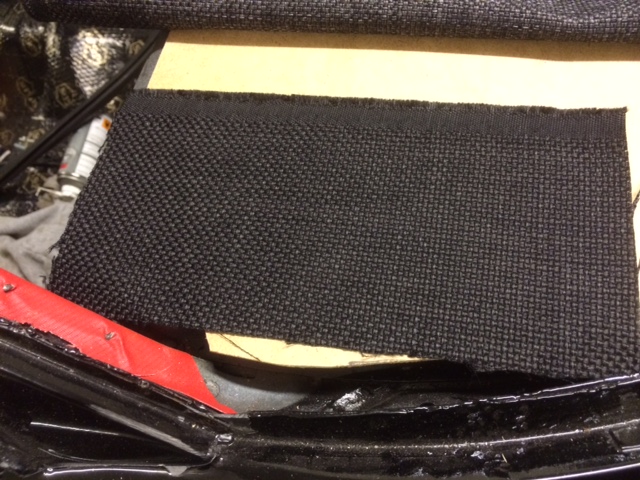 (IMG_0717.JPG) (IMG_0717.JPG)
Attachments
----------------
IMG_0717.JPG (148KB - 452 downloads)
|
|
| |
|
Elite Veteran
Posts: 827
Location: tailFinland | I have done some stainless resto every now and then. It is so time consuming job. Most of the pieces has deep cratches and dents. Car has been outside and barns dirty an dusty and stuff has been storaged on it. Windshield and rear glass trim are the worst.
After 9 or 10 step process pieces start to look good
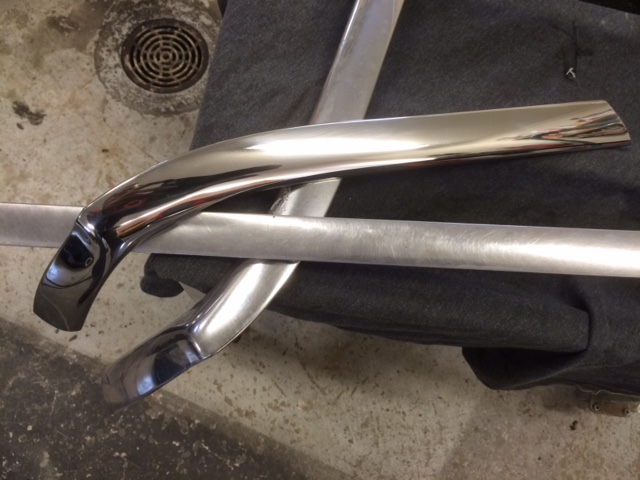 (IMG_0686.JPG) (IMG_0686.JPG)
Attachments
----------------
IMG_0686.JPG (102KB - 474 downloads)
|
|
| |
|
Elite Veteran
Posts: 827
Location: tailFinland | This is what I got done this week.
Hatshelf is done and looks good.
Friend of mine came to help me with the windshield and rear glass assemembly.
They are new Finnish made and fit perfectly
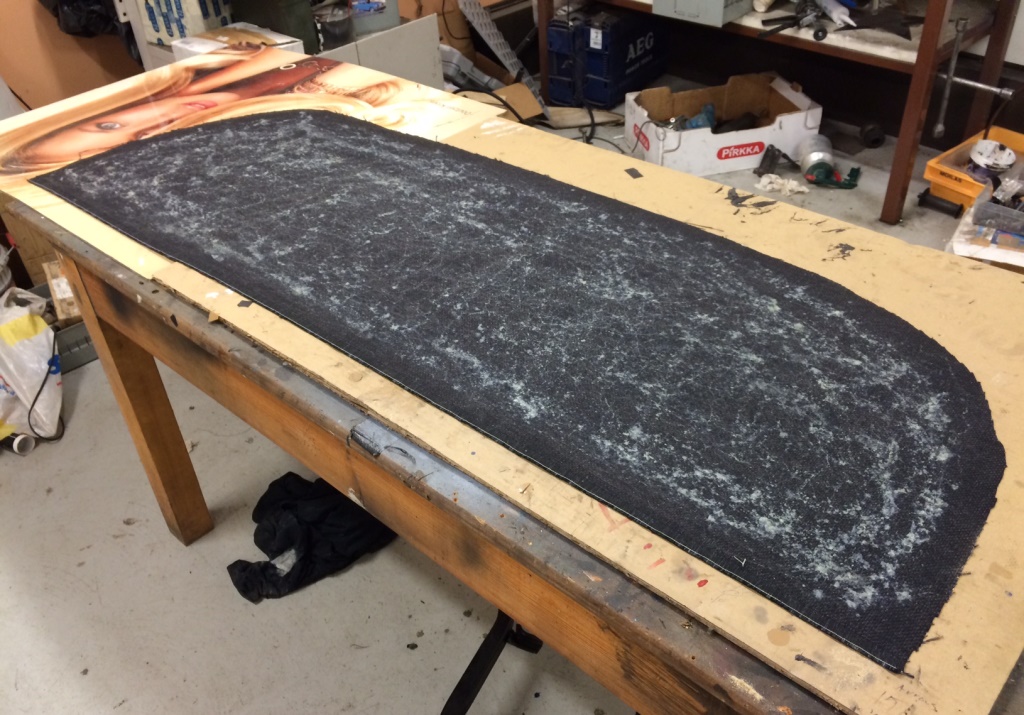 (IMG_0750.JPG) (IMG_0750.JPG)
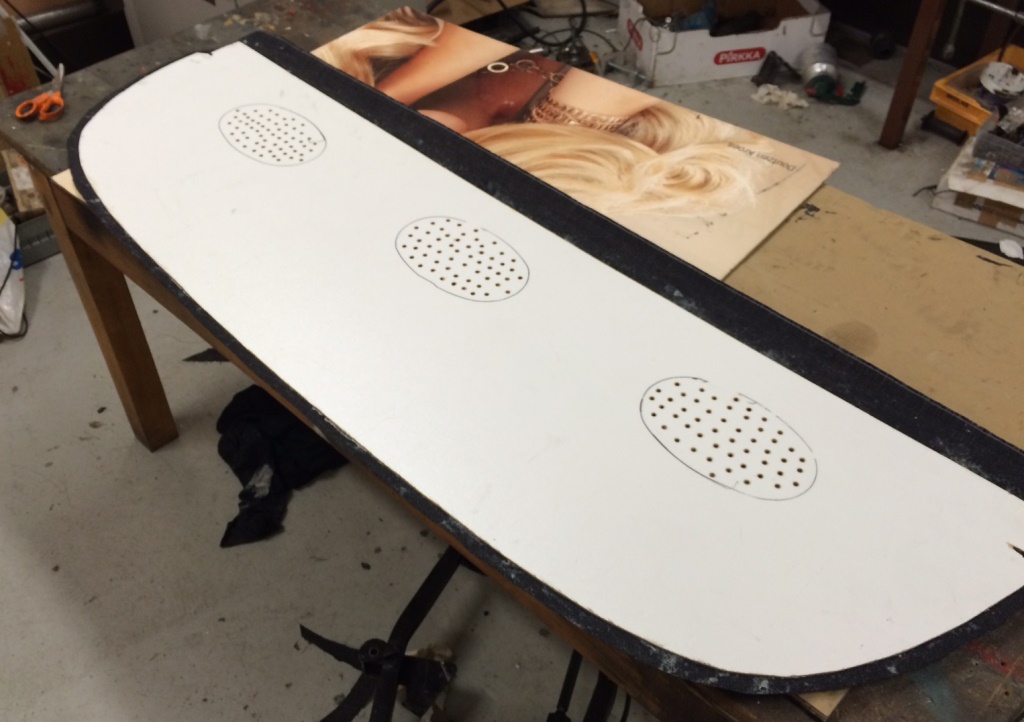 (IMG_0751.JPG) (IMG_0751.JPG)
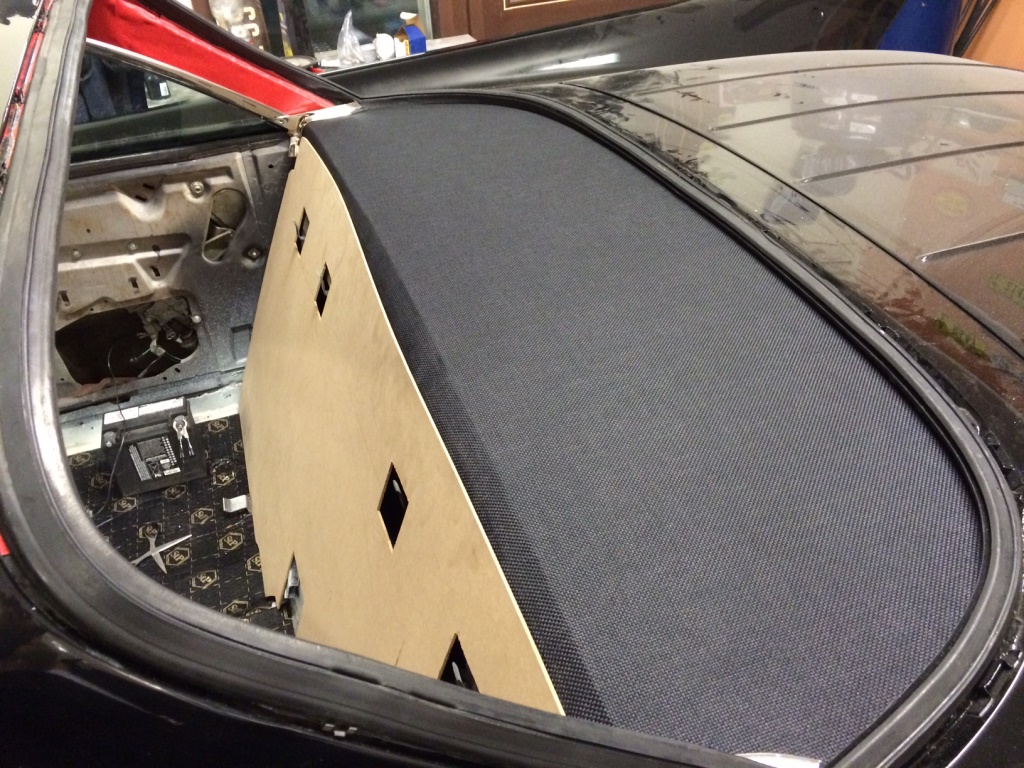 (IMG_0754.JPG) (IMG_0754.JPG)
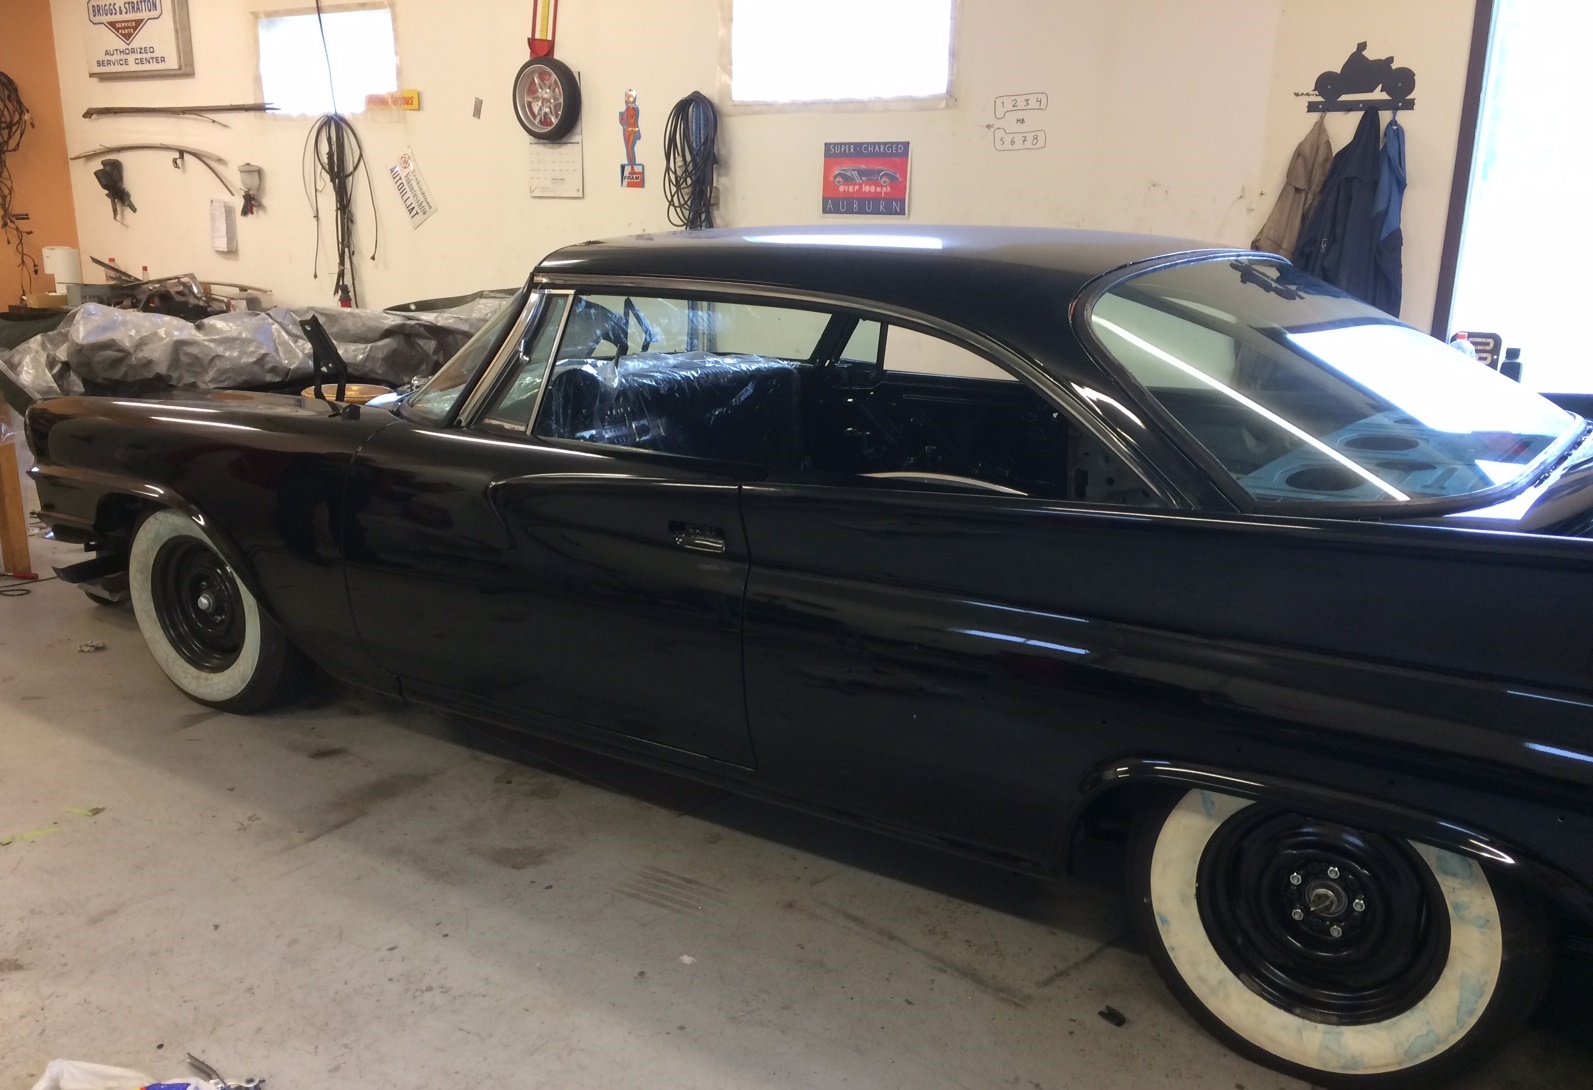 (IMG_0759.jpg) (IMG_0759.jpg)
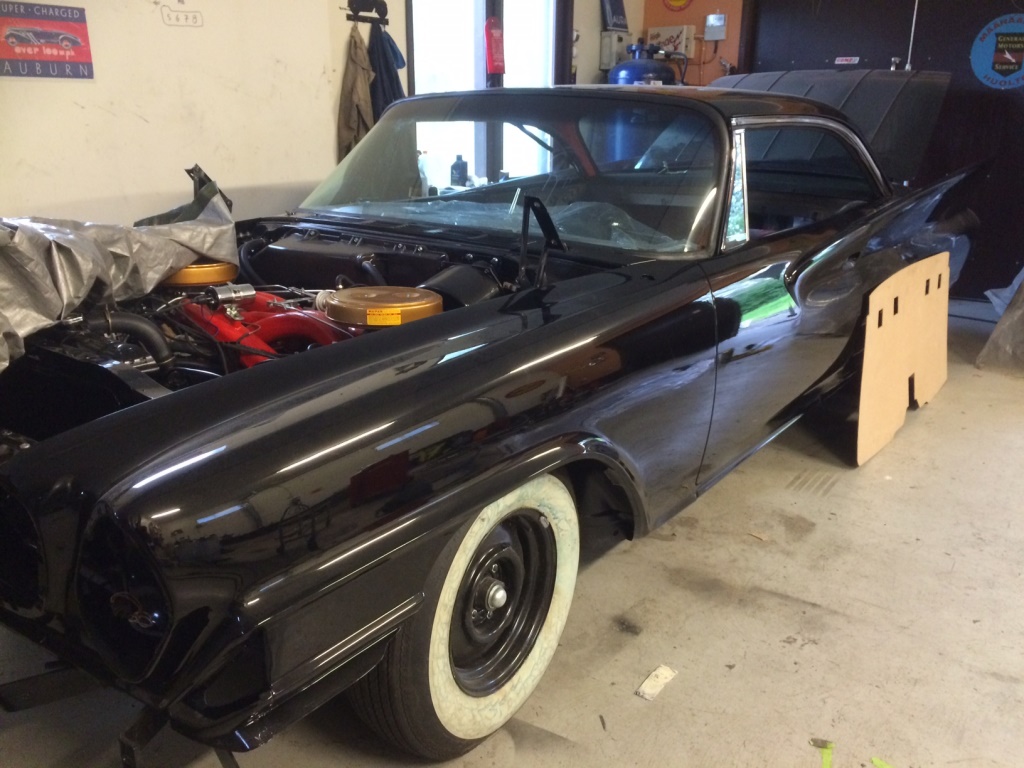 (IMG_0767.JPG) (IMG_0767.JPG)
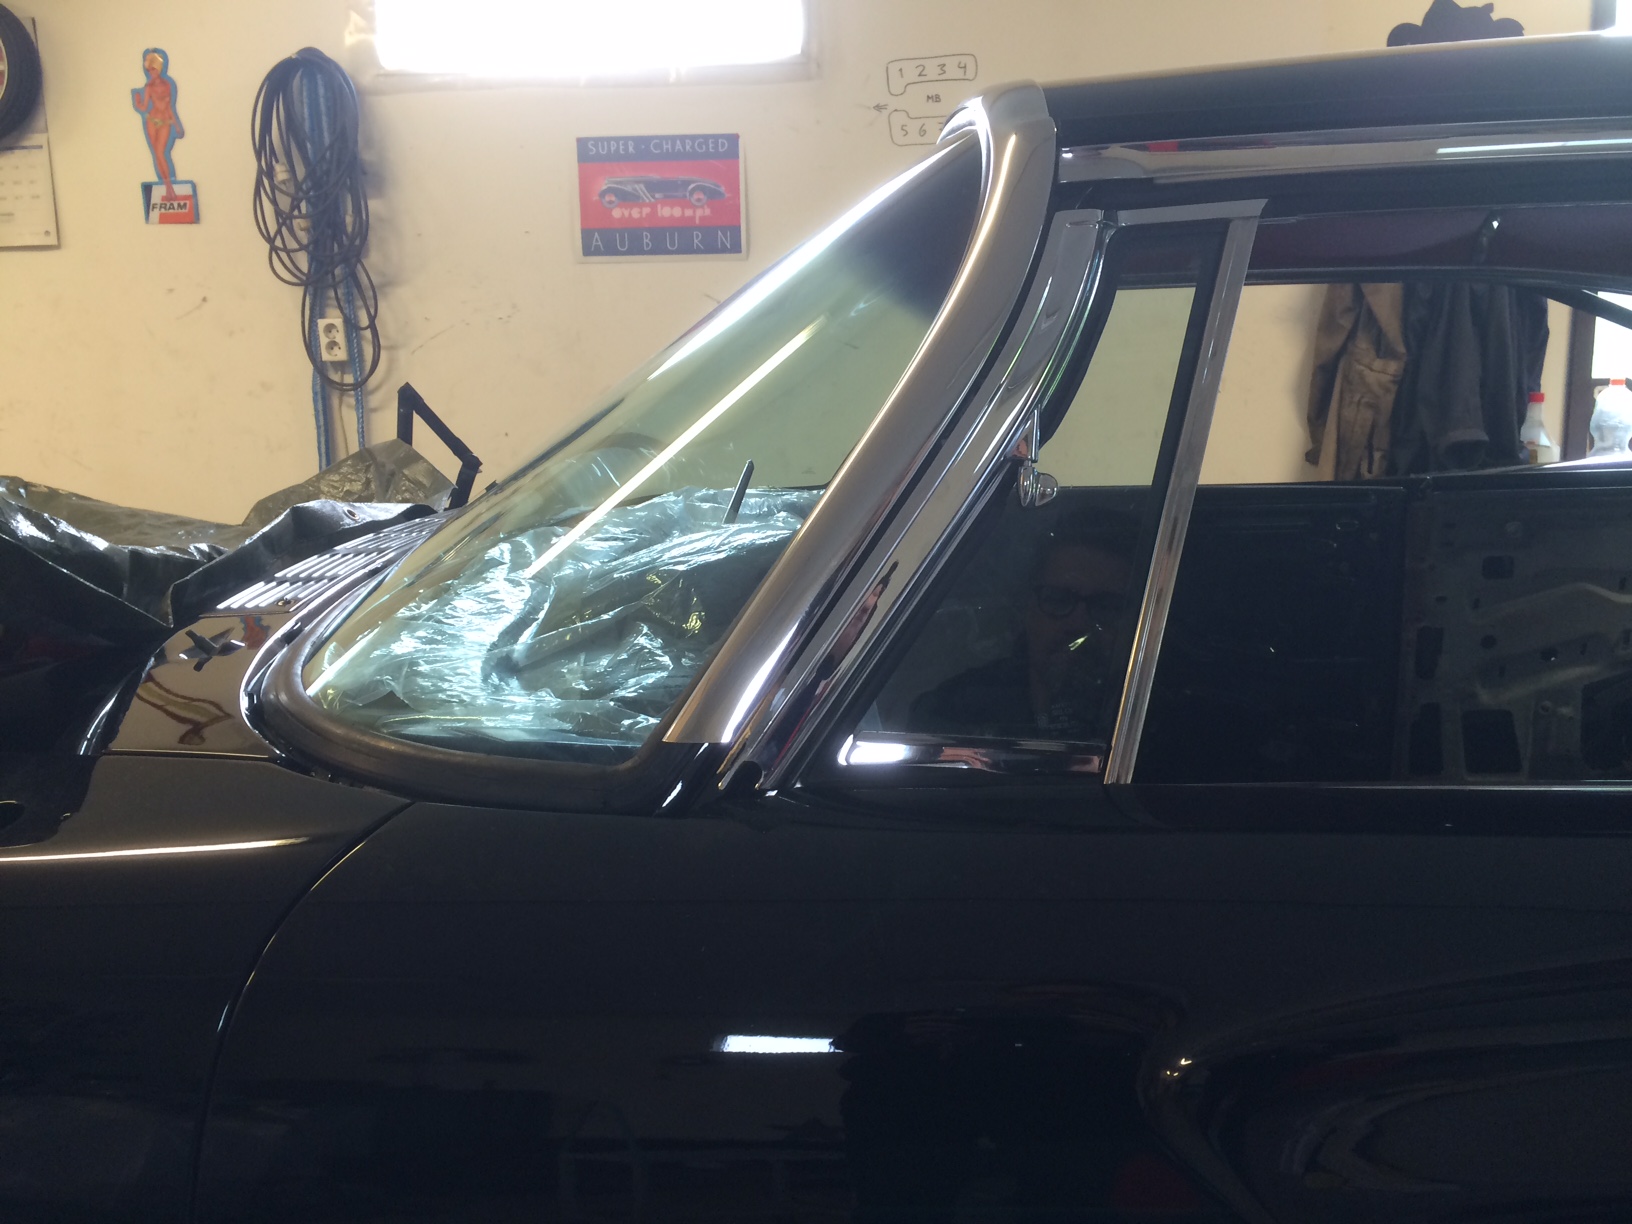 (IMG_0762.JPG) (IMG_0762.JPG)
Attachments
----------------
IMG_0750.JPG (286KB - 459 downloads)
IMG_0751.JPG (165KB - 455 downloads)
IMG_0754.JPG (325KB - 446 downloads)
IMG_0759.jpg (399KB - 442 downloads)
IMG_0767.JPG (232KB - 448 downloads)
IMG_0762.JPG (413KB - 439 downloads)
|
|
| |
|
Extreme Veteran
Posts: 531
Location: Park Hills, KY | What size and brand of tires are you running? |
|
| |
|
Elite Veteran
Posts: 827
Location: tailFinland | Cmangeot - 2016-09-11 9:18 PM
What size and brand of tires are you running?
Those are Coker and size G78-15 if I remember right. But I am not gonna use them for driving.
I got another American Classic www radial tyre set. |
|
| |
|
Elite Veteran
Posts: 827
Location: tailFinland | Test fitting rear seats and panels
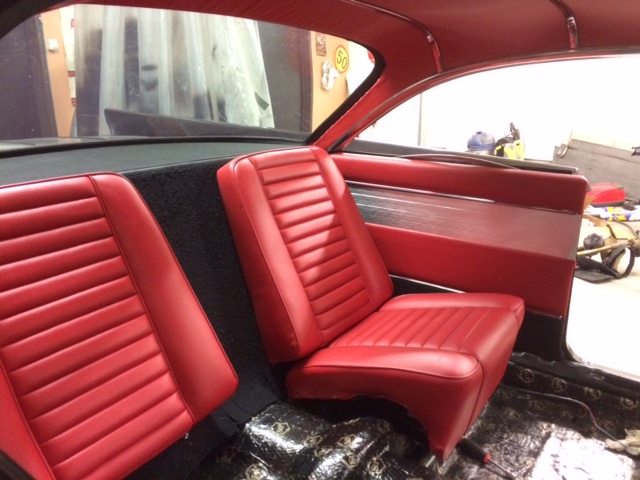 (IMG_0886.jpg) (IMG_0886.jpg)
Attachments
----------------
IMG_0886.jpg (108KB - 450 downloads)
|
|
| |
|
Elite Veteran
Posts: 827
Location: tailFinland | Little bit more progress. Black lady is ready for the paintshop again
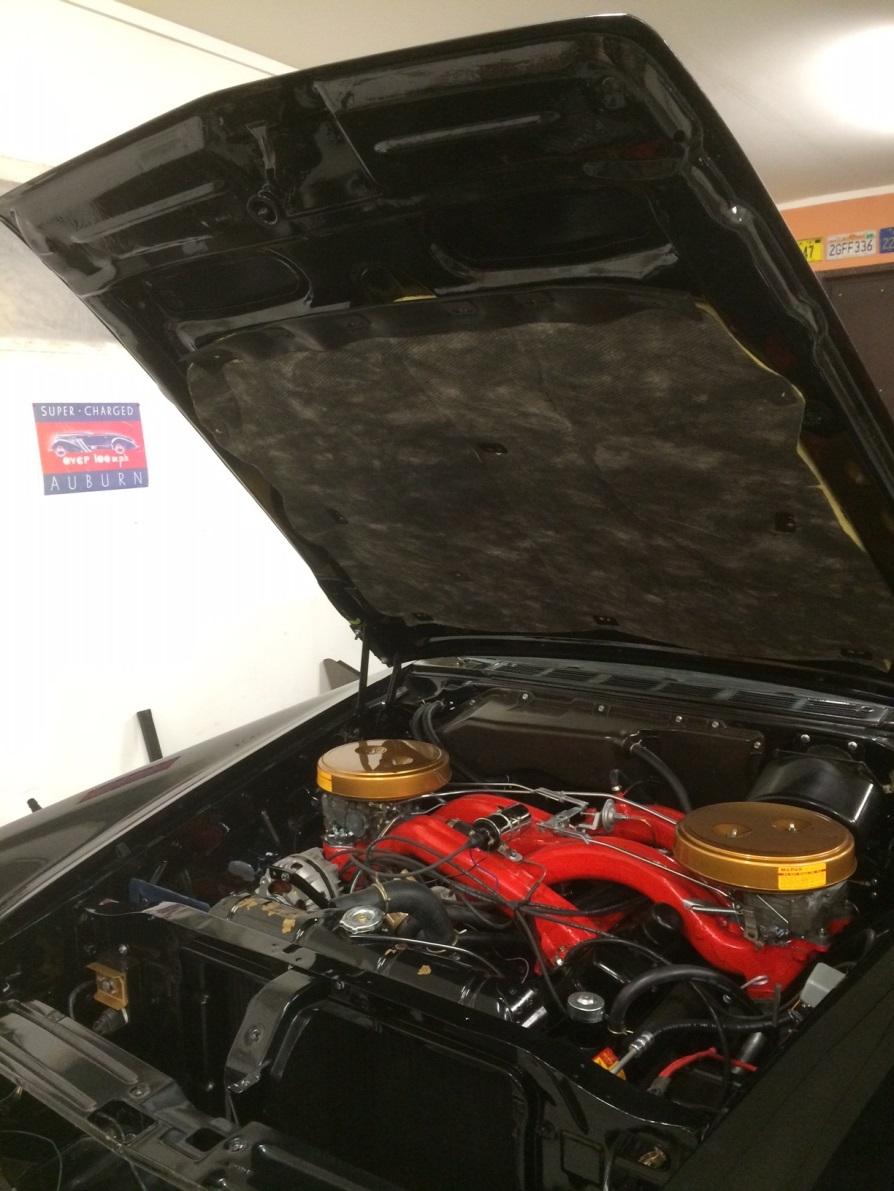 (IMG_0900.jpg) (IMG_0900.jpg)
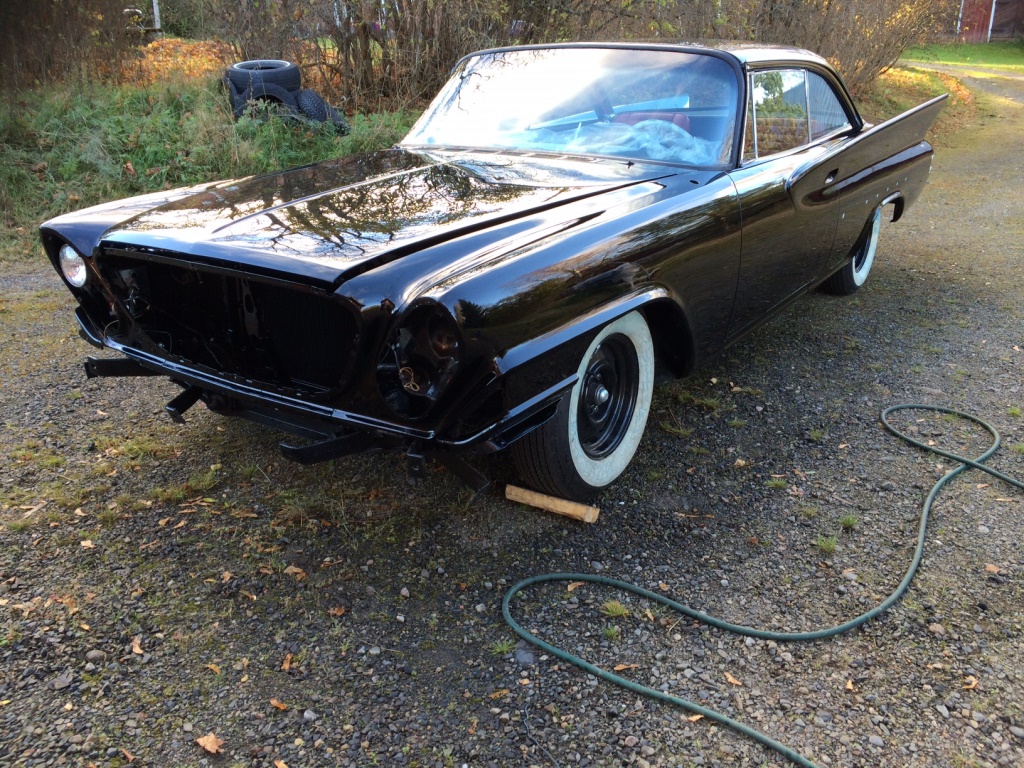 (IMG_0927.jpg) (IMG_0927.jpg)
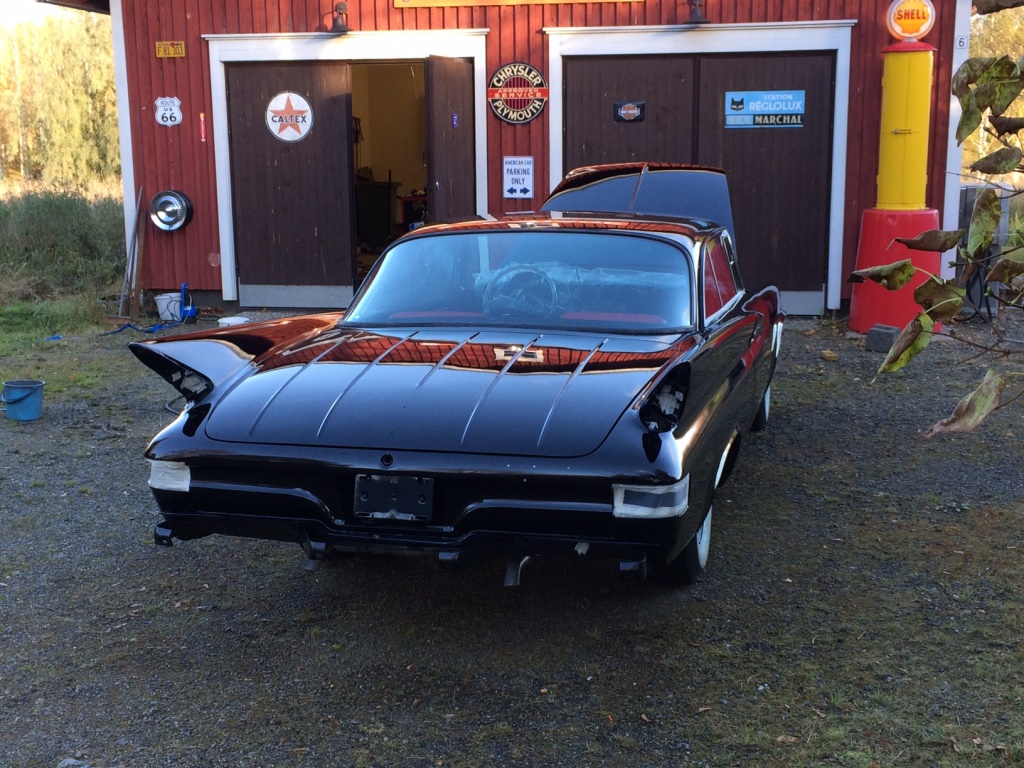 (IMG_0955.JPG) (IMG_0955.JPG)
Attachments
----------------
IMG_0900.jpg (258KB - 426 downloads)
IMG_0927.jpg (472KB - 422 downloads)
IMG_0955.JPG (349KB - 423 downloads)
|
|
| |
|
Location: North Australia | Coming along nicely. This is going to be a spectacular car when done.
Jari, what material did you use for the hat shelf?
I am guessing this car came originally with the cane basket weave material on the shelf? (as did my Imperial)
For the Aussies watching this build, there is a manufacturer here making a vinyl basket weave look type material, which is UV resistant (made for early Holden resto's I think) which is what I used and looks pretty good.
Steve. |
|
| |
|
Regular
Posts: 54
Location: Avondale, AZ | Where did you get you interior seat covers from? Was it gary? I have been waiting 2 months for a email back with a price |
|
| |
|
Expert
Posts: 1223
Location: Ramona, CA | plumfloored - 2016-10-08 10:36 PM
Where did you get you interior seat covers from? Was it gary? I have been waiting 2 months for a email back with a price
As Gary states on his site, he prefers communication through the mail. I know it's old-fashioned but he does communicate quickly through the mail. He even called me twice about my orders. I should have my 300F seat covers by the end of the year. |
|
| |
|
Elite Veteran
Posts: 827
Location: tailFinland | 60 Imp - 2016-10-08 6:31 PM
Coming along nicely. This is going to be a spectacular car when done.
Jari, what material did you use for the hat shelf?
I am guessing this car came originally with the cane basket weave material on the shelf? (as did my Imperial)
For the Aussies watching this build, there is a manufacturer here making a vinyl basket weave look type material, which is UV resistant (made for early Holden resto's I think) which is what I used and looks pretty good.
Steve.
Well I just walked in to local fabric store with a picture of original material. They ordered me the fabric wich was quite close. I sprayed 2 layers of matt black paint on it after it was glued on the panel |
|
| |
|
Elite Veteran
Posts: 827
Location: tailFinland | plumfloored - 2016-10-09 1:36 AM
Where did you get you interior seat covers from? Was it gary? I have been waiting 2 months for a email back with a price
No.I have not used any GG parts parts at all, exept few left over rubber parts from previous projects. I had serious communication problem. He did not response.
Seat covers were made in Southern California years ago when I bought the car. Actually they made complete resto to seat frames, blasted and powder coated them and made everything, ready to put them on.
I got them in half price what it might cost in Finland.
There was nothing left from the seats exept frames and springs. Orginally G:s seats were tan with embossing. Black and red interior were option and seats were plain without embossings. Looks stubid to my eye so I ended up to F:s and H:s style, horisontal tuck'n roll.
Upholstery shop made a great job. |
|
| |
|
Regular
Posts: 54
Location: Avondale, AZ | I love the interior choice. I would of done the same. The 61s seemed odd to me. Great car I wish my Windsor would grow into a G
|
|
| |
|
Elite Veteran
Posts: 827
Location: tailFinland | While Batmobile visits the paint guy its time to give TLC to other toys before the winter storage
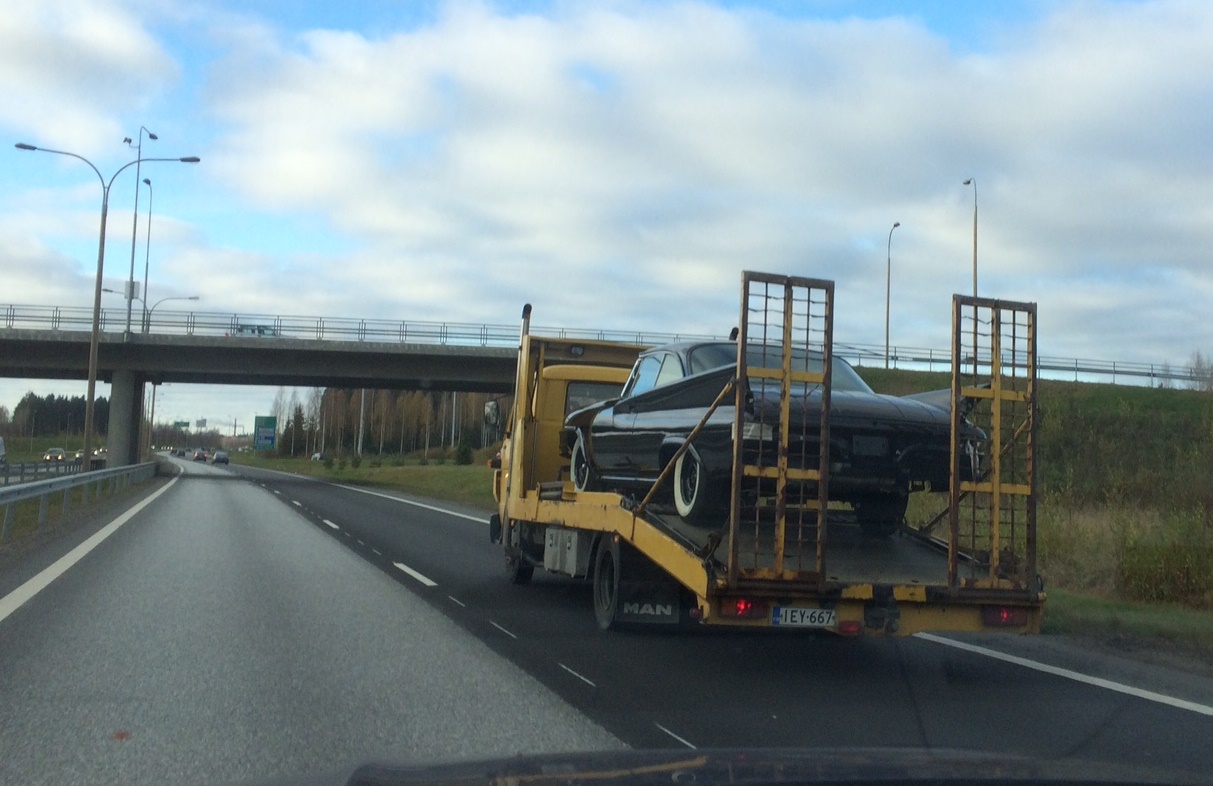 (batmobile.jpg) (batmobile.jpg)
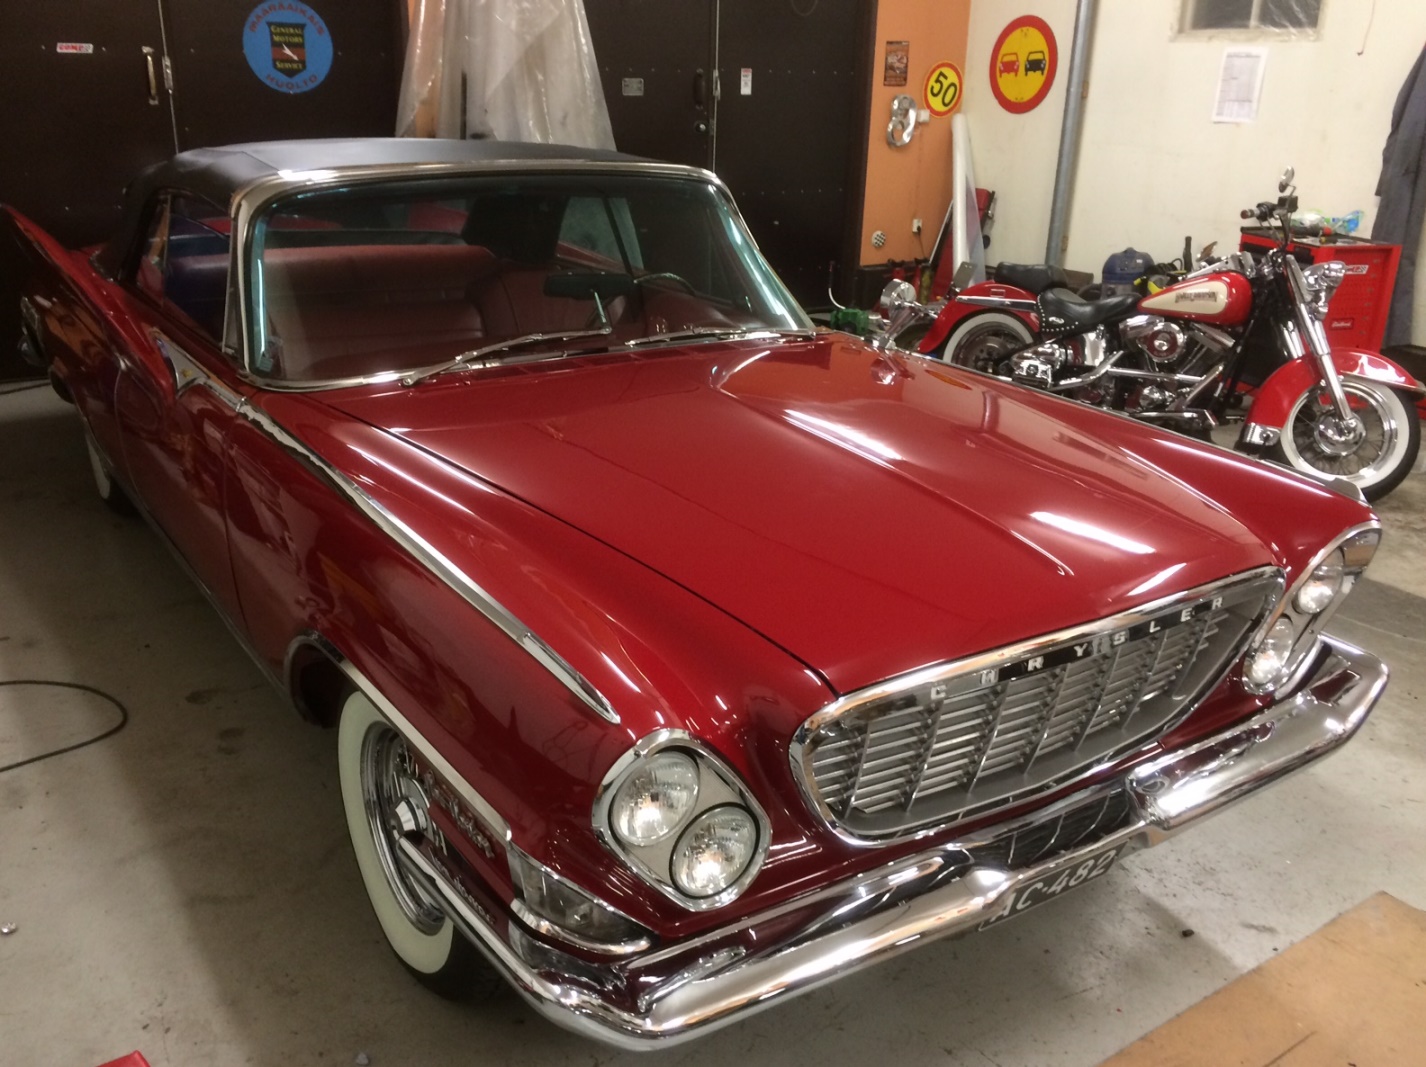 (IMG_0996.jpg) (IMG_0996.jpg)
Attachments
----------------
batmobile.jpg (247KB - 413 downloads)
IMG_0996.jpg (431KB - 428 downloads)
|
|
| |
|
Elite Veteran
Posts: 827
Location: tailFinland | G is still at the paint shop. We got some troubles with the hood. There was a small spot needing a fix but when it was sanded down it turned out to rust spot that game from underneath (hided inside the hoods strenghning structions). Fixing that took lots of work and phases to do it.
While waiting I have restored stainless parts. Ihave my own version of 9 step prosess to fix the stanless.
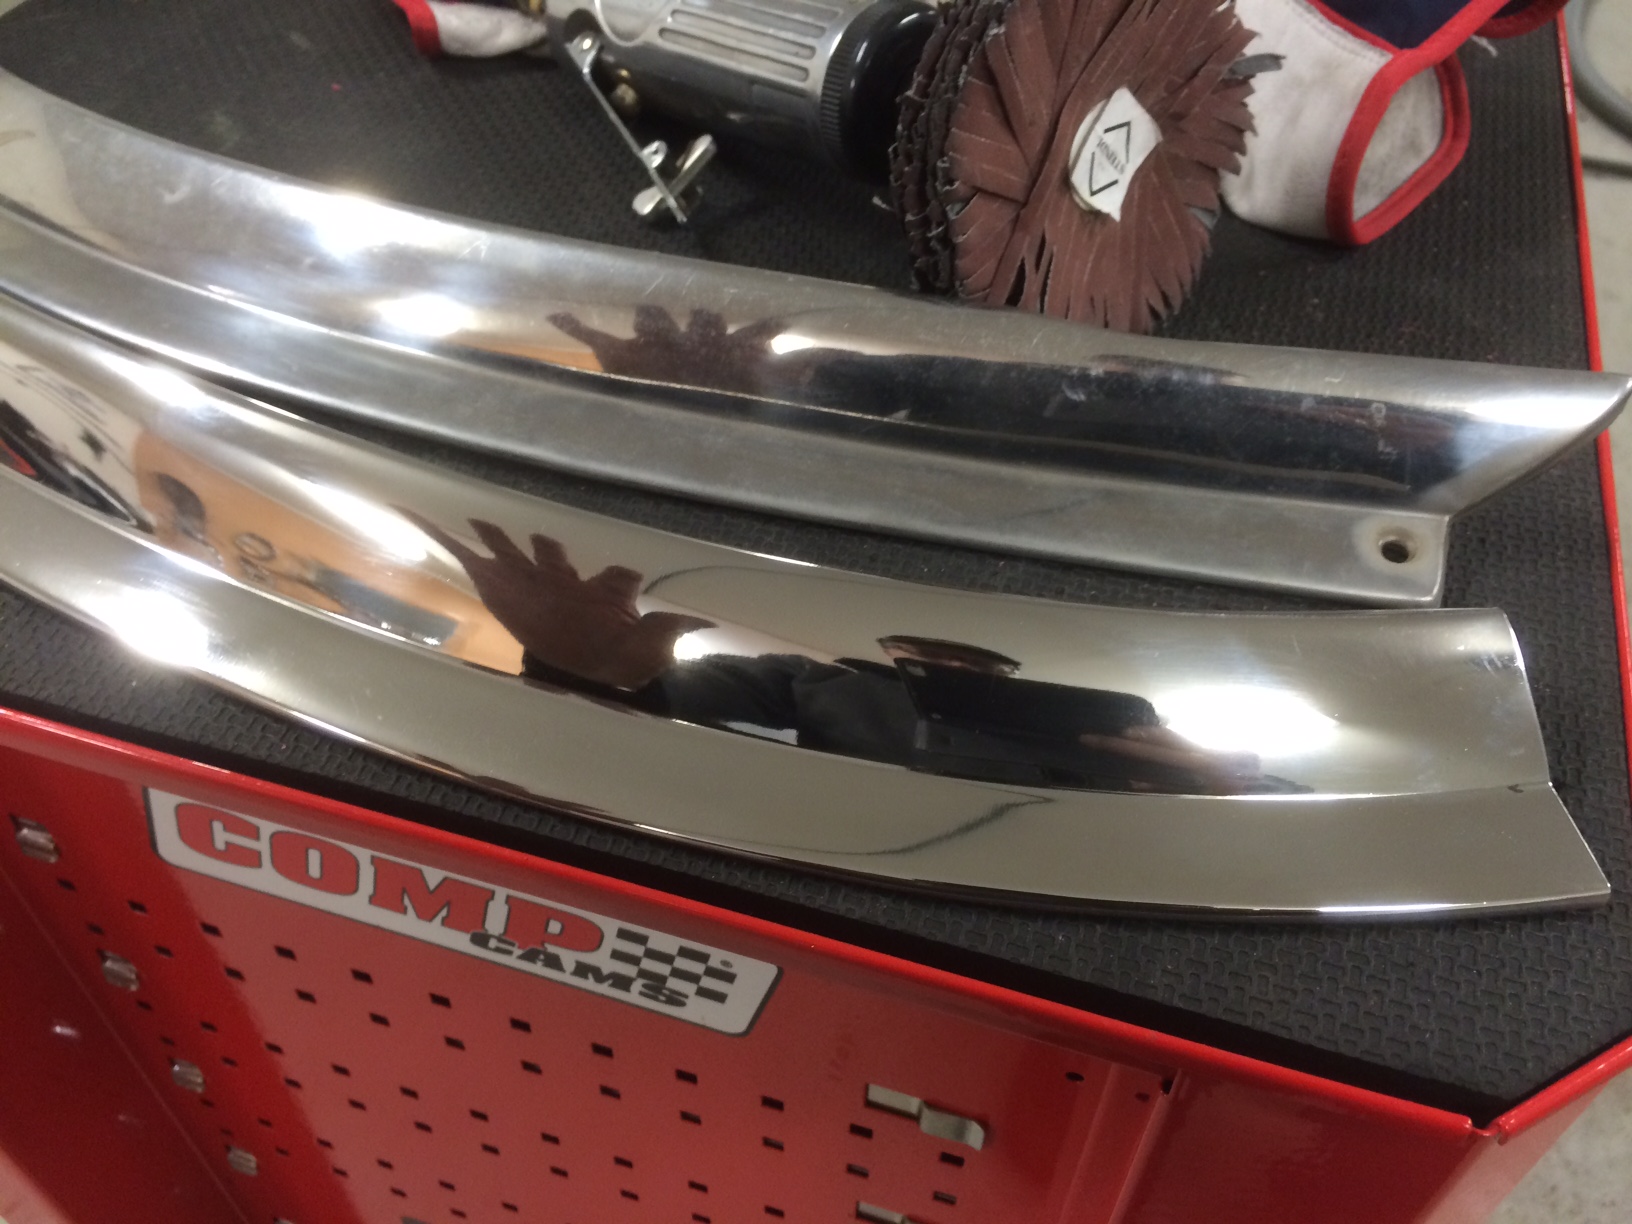 (IMG_1113.JPG) (IMG_1113.JPG)
Attachments
----------------
IMG_1113.JPG (454KB - 406 downloads)
|
|
| |
|
Elite Veteran
Posts: 673
Location: Malung, SWEDEN | Bra jobbat Jari! |
|
| |
|
Elite Veteran
Posts: 827
Location: tailFinland | This visit took 6 weeks. Picked up G from the paint shop today. It looks like this here today, snowy.
I was so anxious to see how the new chrome looks with new black surface, so I put few trims on.
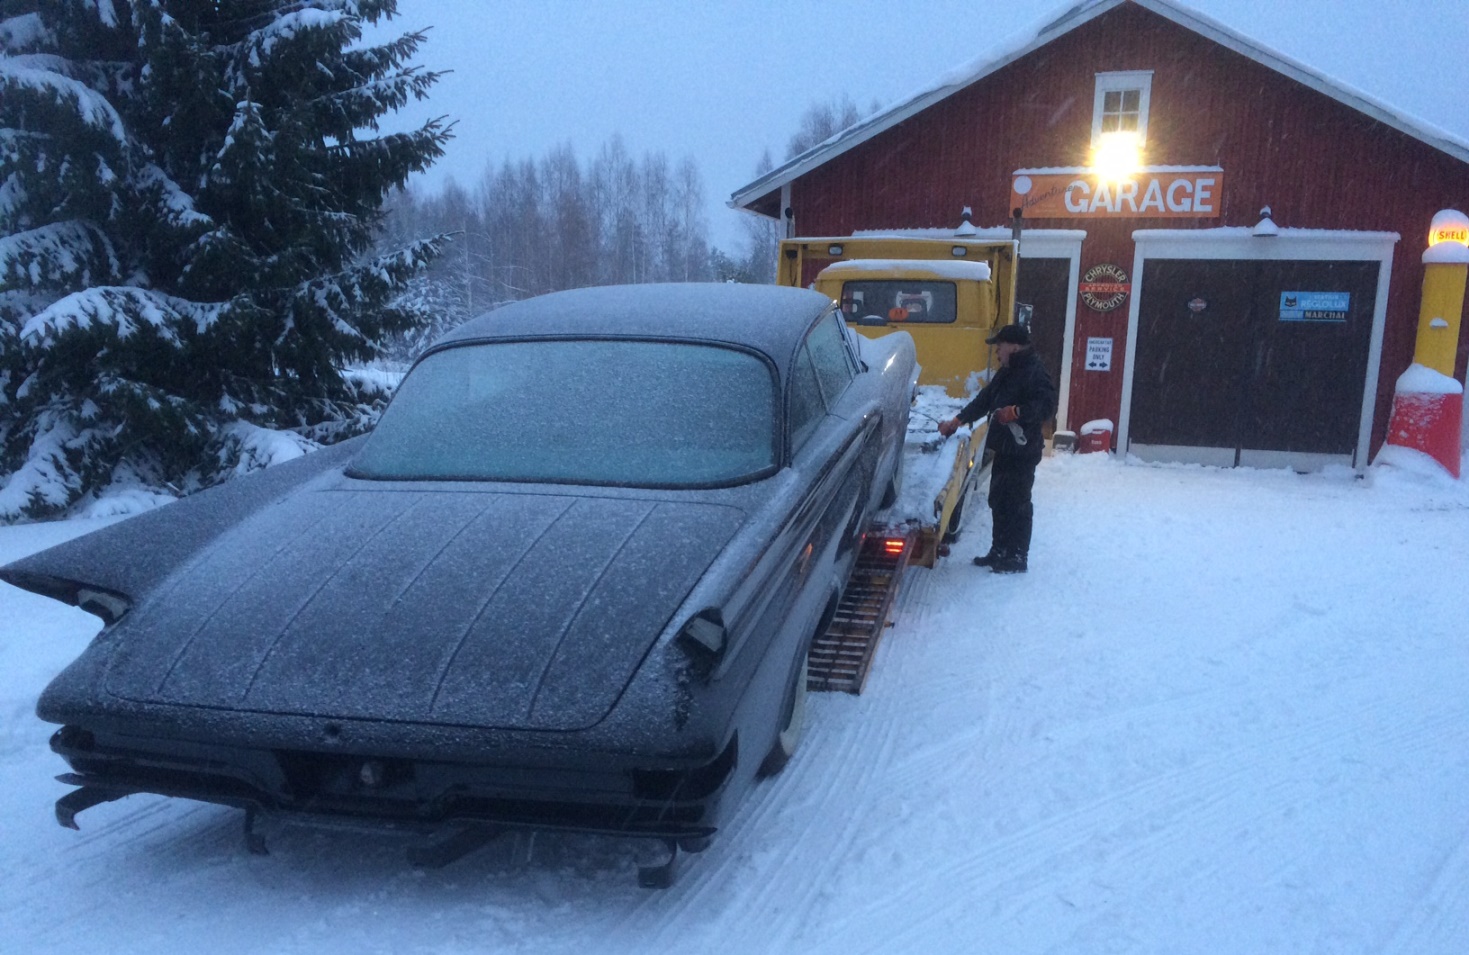 (IMG_1126.JPG) (IMG_1126.JPG)
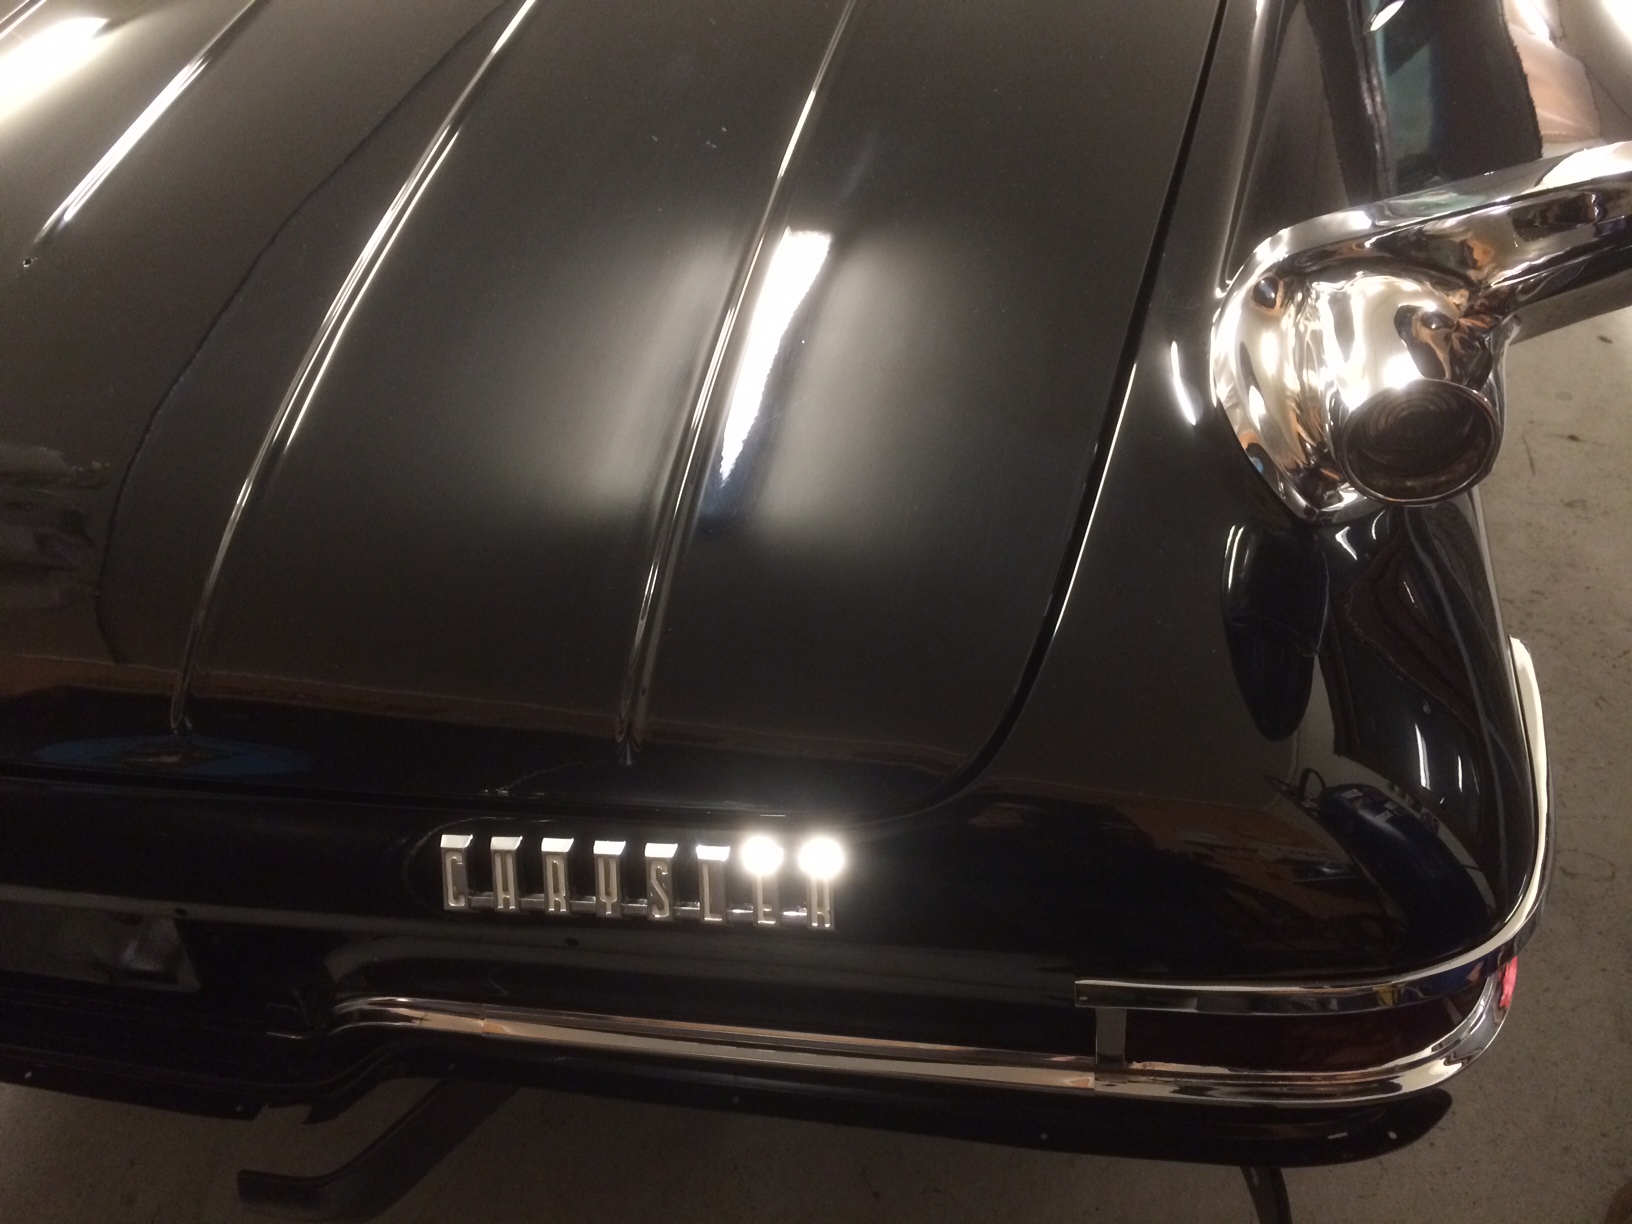 (IMG_1134.jpg) (IMG_1134.jpg)
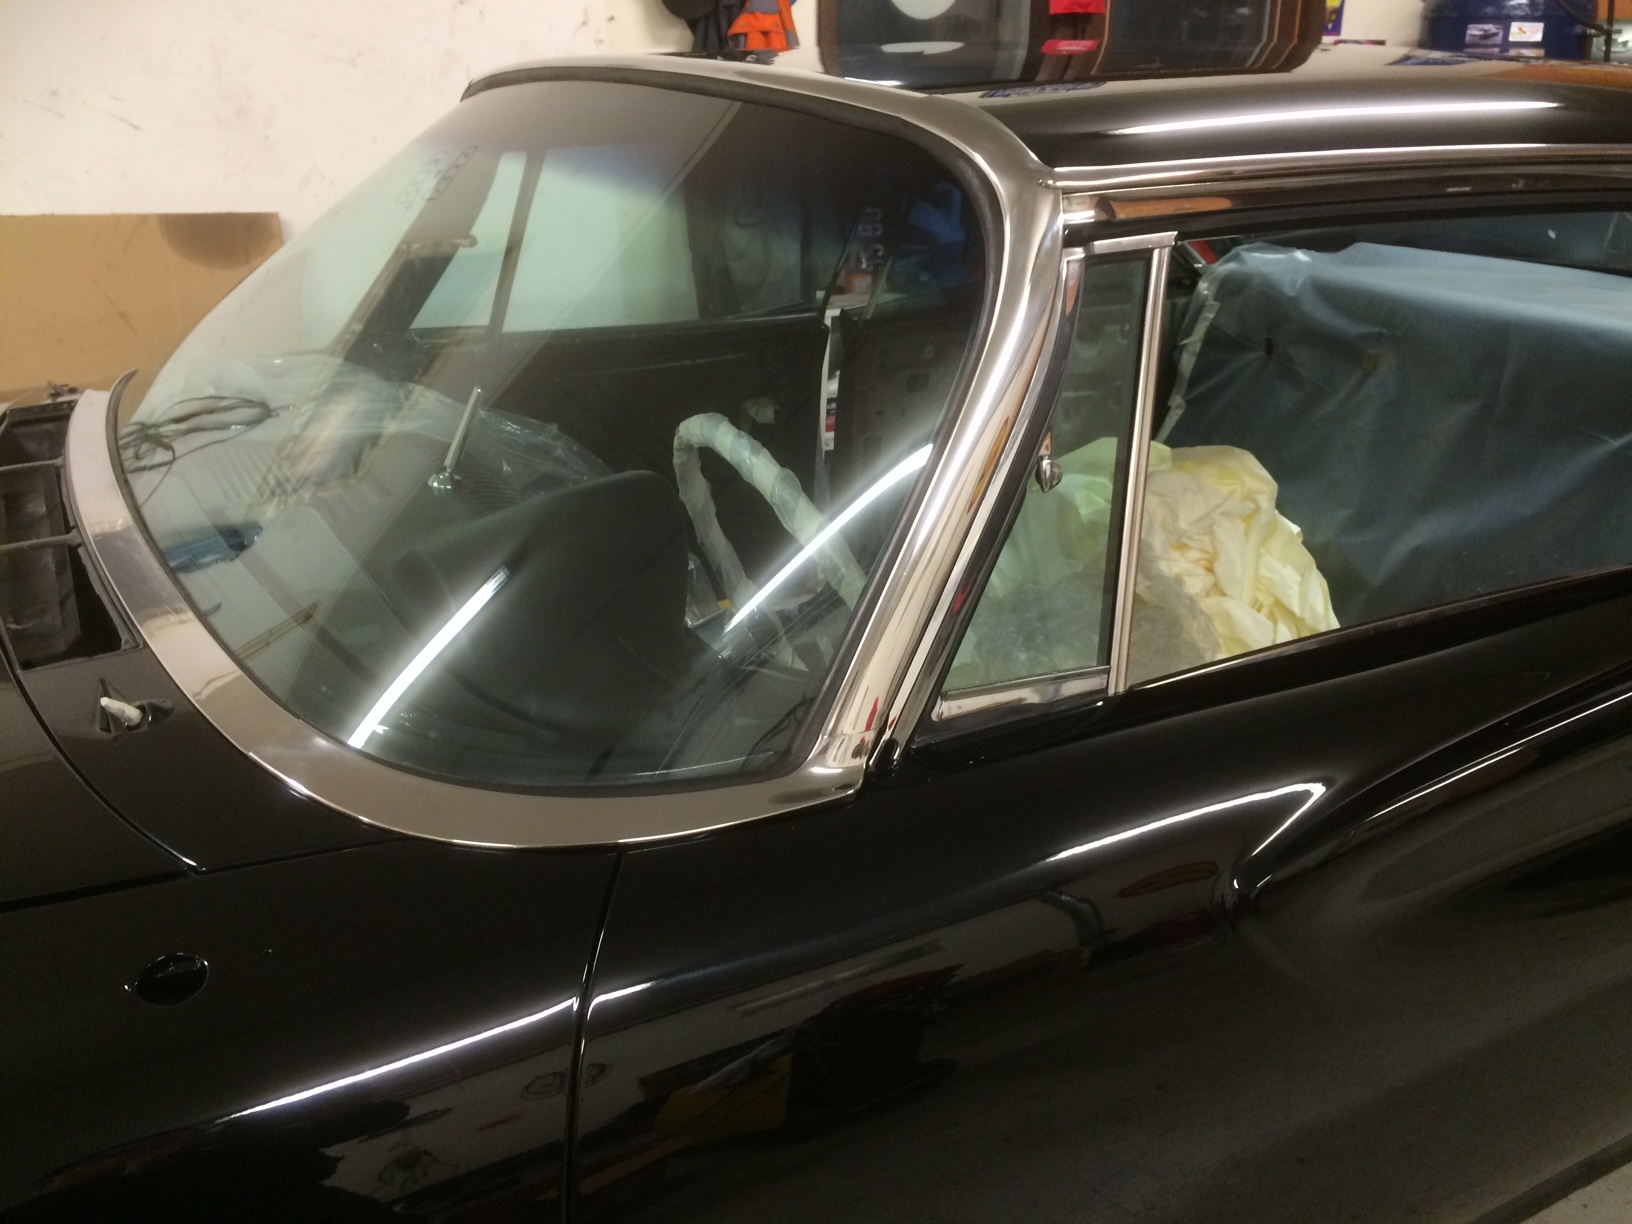 (IMG_1136.JPG) (IMG_1136.JPG)
Attachments
----------------
IMG_1126.JPG (429KB - 402 downloads)
IMG_1134.jpg (414KB - 392 downloads)
IMG_1136.JPG (439KB - 409 downloads)
|
|
| |
|
Expert 5K+
Posts: 5006
| nice sand and buffing job. hah need to paint 8 coats of clean and sand buff... |
|
| |
|
Elite Veteran
Posts: 827
Location: tailFinland | Happy days are here again. Man I feel so good to look that new chrome in the front end
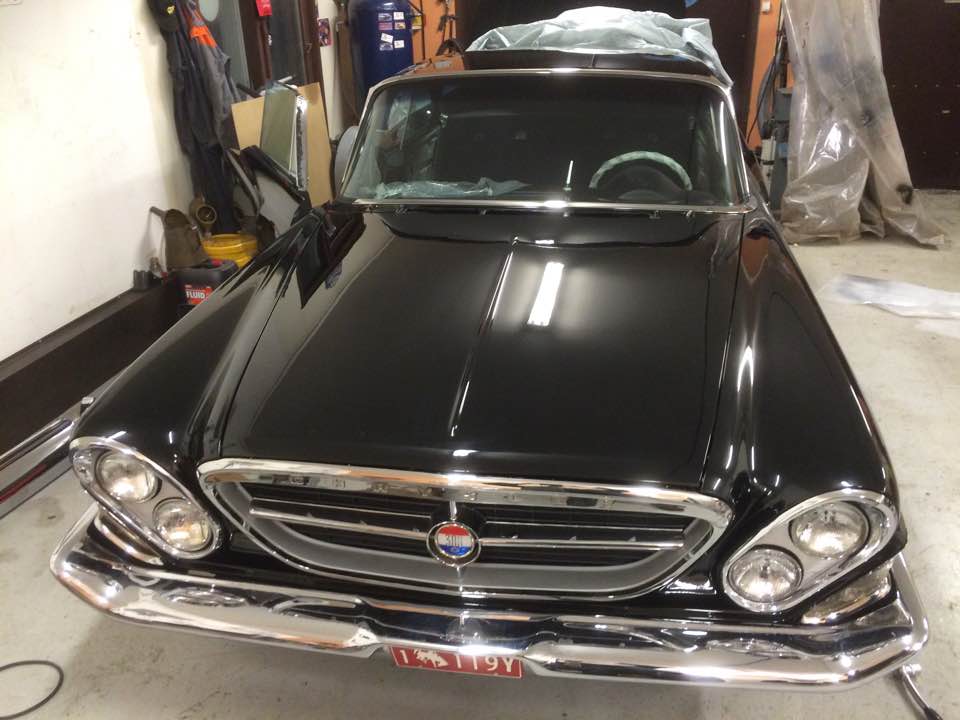 (15380455_10211536744842158_9052398639076101983_n.jpg) (15380455_10211536744842158_9052398639076101983_n.jpg)
Attachments
----------------
15380455_10211536744842158_9052398639076101983_n.jpg (67KB - 395 downloads)
|
|
| |
|
Elite Veteran
Posts: 827
Location: tailFinland | Would anyone help me with the pictures of 2 d ht roof seals above the windows.
I gotta get idea how they were originally, expecially the rubber that seals A-went window.
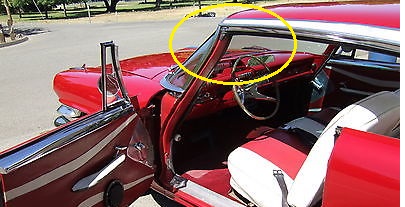 ($_1.JPG) ($_1.JPG)
Attachments
----------------
$_1.JPG (43KB - 394 downloads)
|
|
| |
|
Board Moderator & Exner Expert 10K+
Posts: 13045
Location: Southern Sweden - Sturkö island | Jari, first of all - your G looks really fantastic, congrats to a very special car!
The seal is called "Upper windshield post seal" Jari it's the same ones for all HT cars 60-64
KP has them, item # 69. The should have the weatherstrip over the windows as well, most probably item #W13
I was at KP's Place some years ago and the molded upper windshield post seals was very nice at that time. The pad was soft and flexible.
Hope this helps you out |
|
| |
|
Expert
Posts: 2788
Location: USA - KY |
Sparkly perfection!
Awesome looking car, Jari. That shiny black paint and chrome look great together.
Fabulous job!
|
|
| |
|
Elite Veteran
Posts: 827
Location: tailFinland | It is alive after couble of decades coma. Lights, blower, vipers, Windows... work
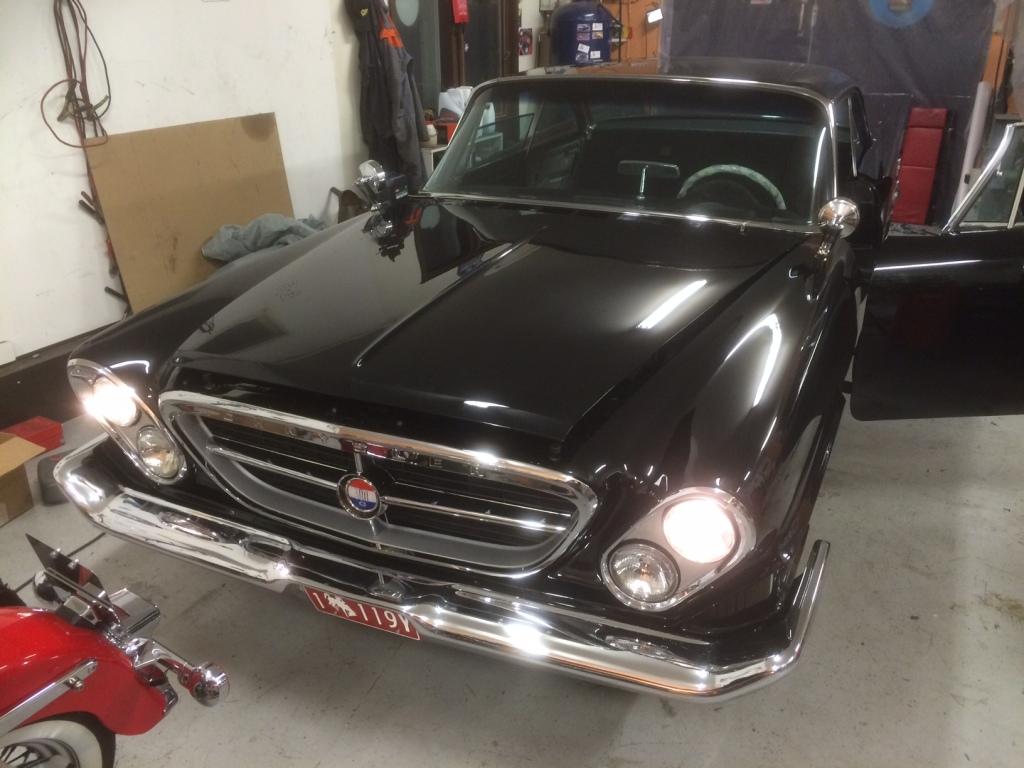 (300g2.JPG) (300g2.JPG)
 (300g1.JPG) (300g1.JPG)
Attachments
----------------
300g2.JPG (95KB - 381 downloads)
300g1.JPG (92KB - 379 downloads)
|
|
| |
|
Elite Veteran
Posts: 827
Location: tailFinland |
I am missing few parts, if you can help me out with these:
Clove box "Chrysler" script
Clovebox light/switch
Antenna switch
trunk lid emblem (or a sticker from 300 club)
sill plate extensions
better sill plates (they are not so good what I have)
wiper blades (trico etc) I got the arms
300-badge between the rear seat back rests
Horns and brackets (I can also fabricate the brackets if someone provides me dimensions and some kind of photo)
I also might be interested in windshiled and rear glass interior trim (to be chormed)
I got a shipping adress in USA as well in EU so no extra shipping hassle.
|
|
| |
|
Elite Veteran
Posts: 827
Location: tailFinland | Working with door panels and interior
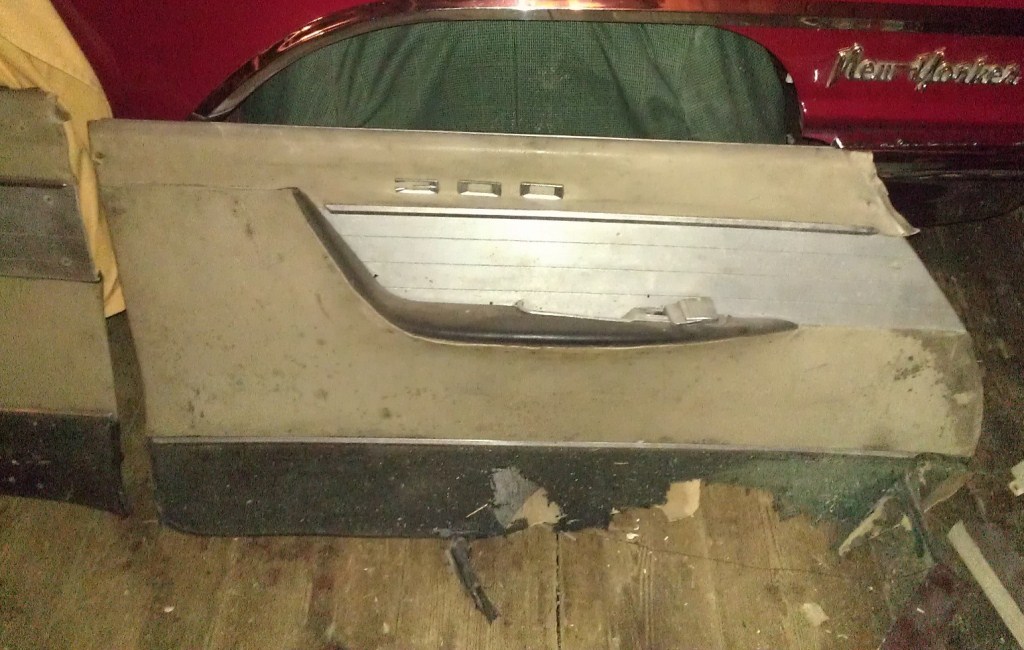 (ovipahvi.jpg) (ovipahvi.jpg)
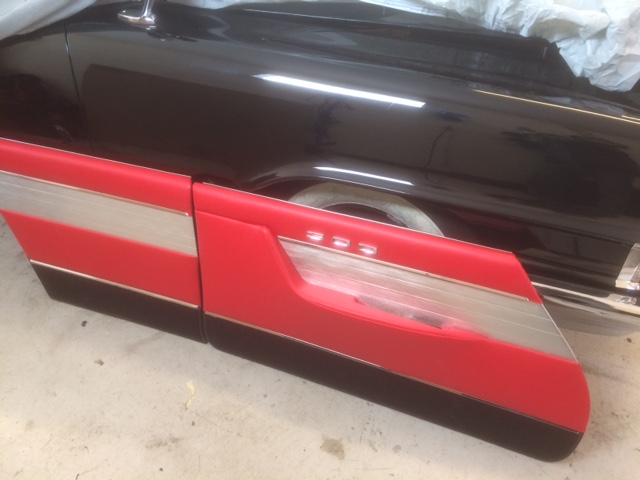 (IMG_1341.JPG) (IMG_1341.JPG)
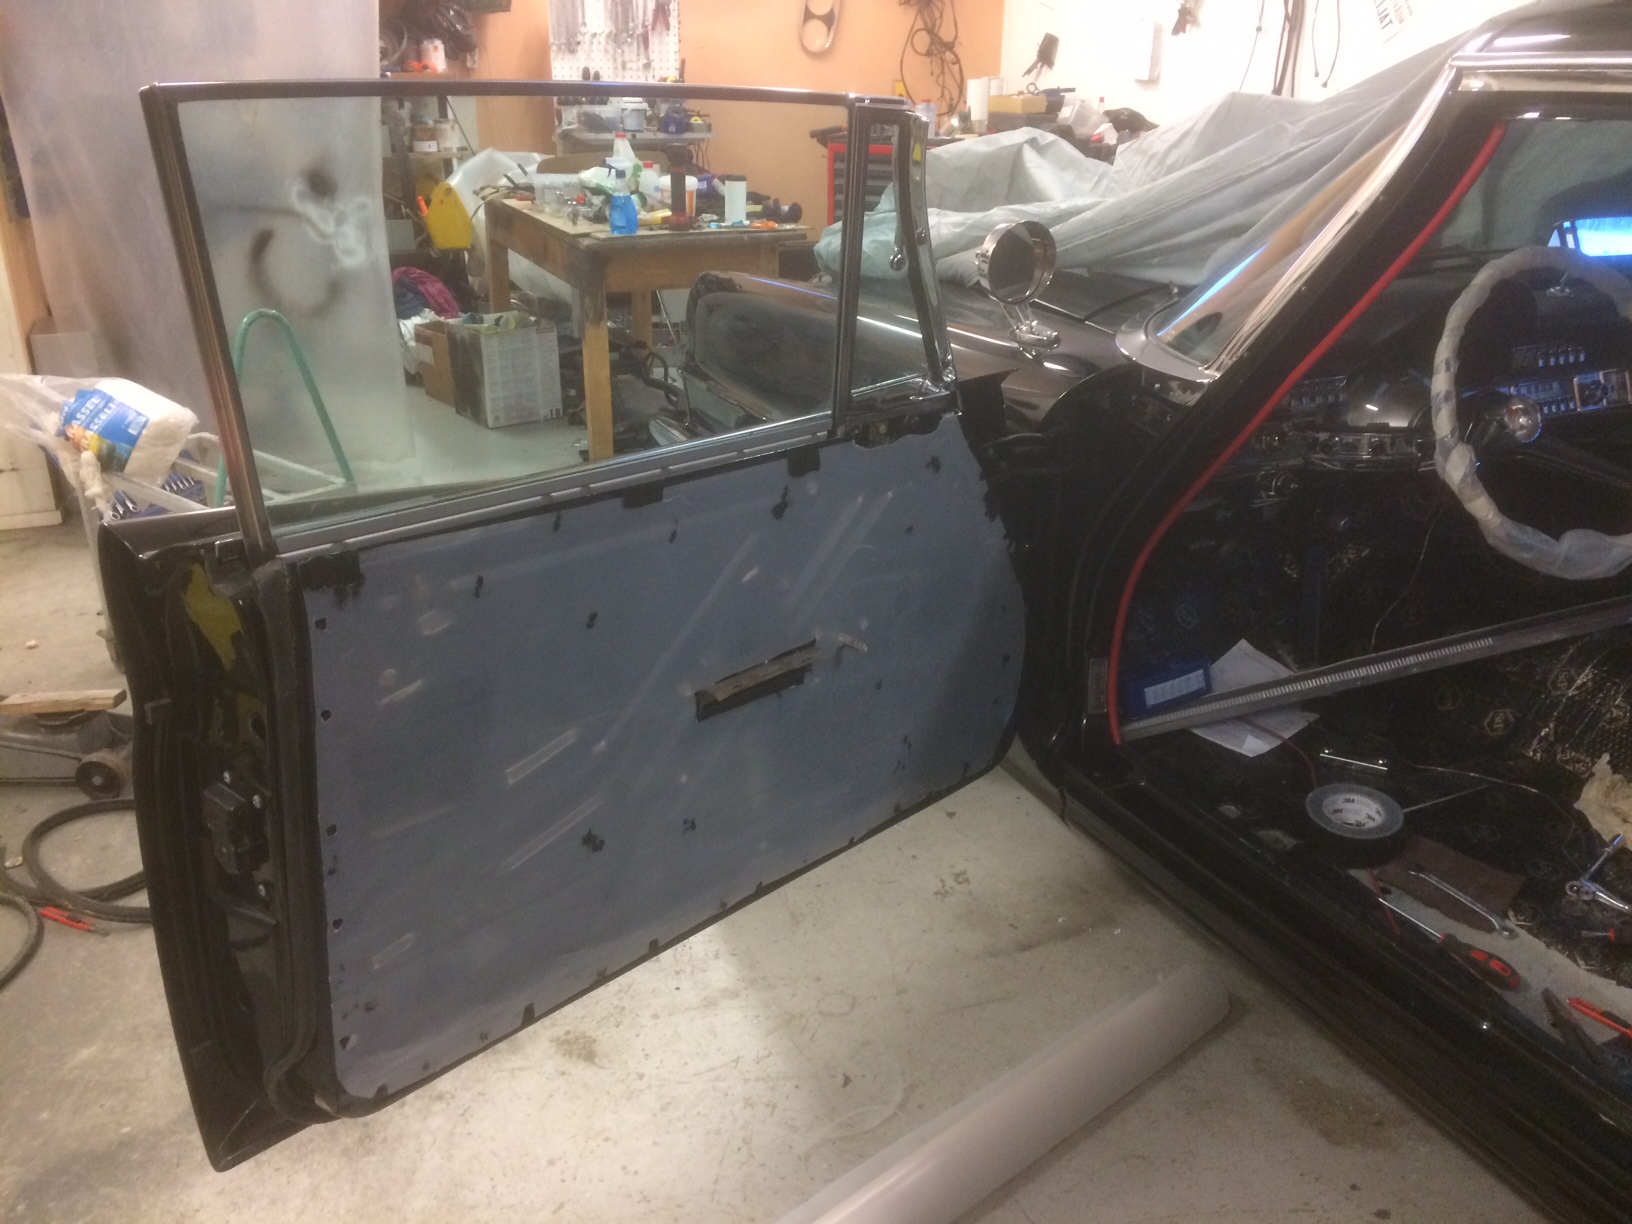 (IMG_1343.jpg) (IMG_1343.jpg)
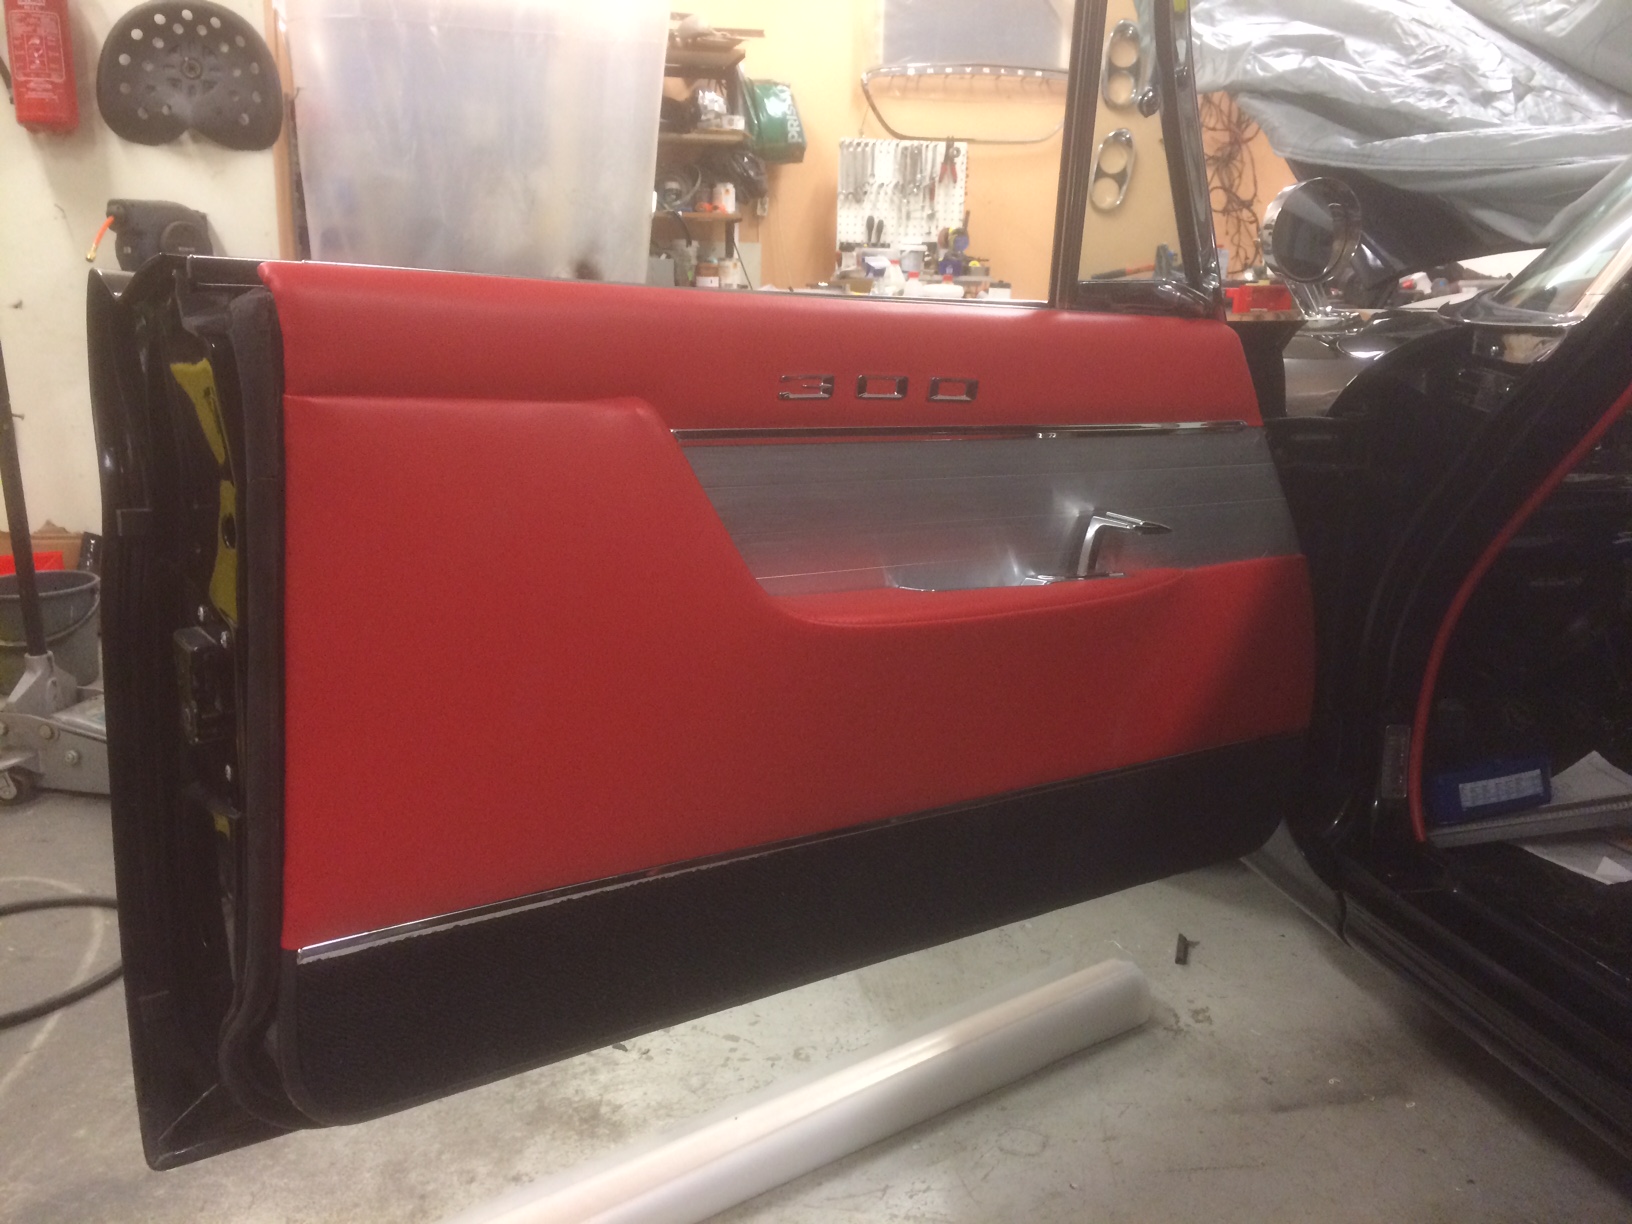 (IMG_1348.JPG) (IMG_1348.JPG)
Attachments
----------------
ovipahvi.jpg (163KB - 396 downloads)
IMG_1341.JPG (80KB - 382 downloads)
IMG_1343.jpg (482KB - 402 downloads)
IMG_1348.JPG (451KB - 380 downloads)
|
|
| |
|
Expert
Posts: 1530
Location: ZH, Switzerland | Your door and quarter trim panels are looking excellent. Congratulation Jari. Happy Restoring! Dieter |
|
| |
|
Elite Veteran
Posts: 827
Location: tailFinland | There has'nt been much progress in this project lately. I'm suffering minor jetlag, returned from the trip to west-southwest USA week ago.
Found few interior pieces in Arizona but other swap meets in Califorinia were dissapointment Mopar-wise.
Adjusting doors and glass in order to get all caps looking nice is really time consuming. No idea how these cars left the factory, perhaps they did'nt care about them back then.
I am missing the nuts for the rear arm rests, anyone know where to get couple of these?
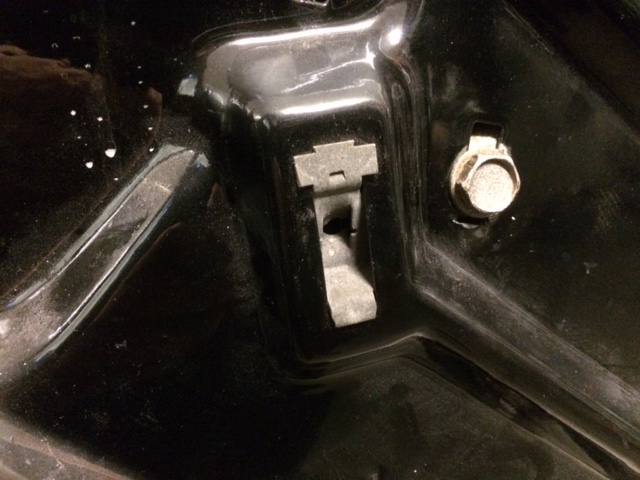 (Nut.jpg) (Nut.jpg)
Attachments
----------------
Nut.jpg (105KB - 364 downloads)
|
|
| |
|
Elite Veteran
Posts: 827
Location: tailFinland | I just received my center console side moldings from the guy who does spectra chrome, macic chrome ... or what ever it is called.
Those parts were really busted with deep scratches and pin holes. When I removed the anodization from them with natrium hydroxide, holes and scratces crew even bigger.
So I just had go to paint , fil, sand many times around. I spent hours and hours sanding fillin and painting with them before I sent them to paint shop.
But result is really awesome! They are just like chromed. They look even better than original anodized moldings wich are little bit rough in the corners.
Over doing but what can you do
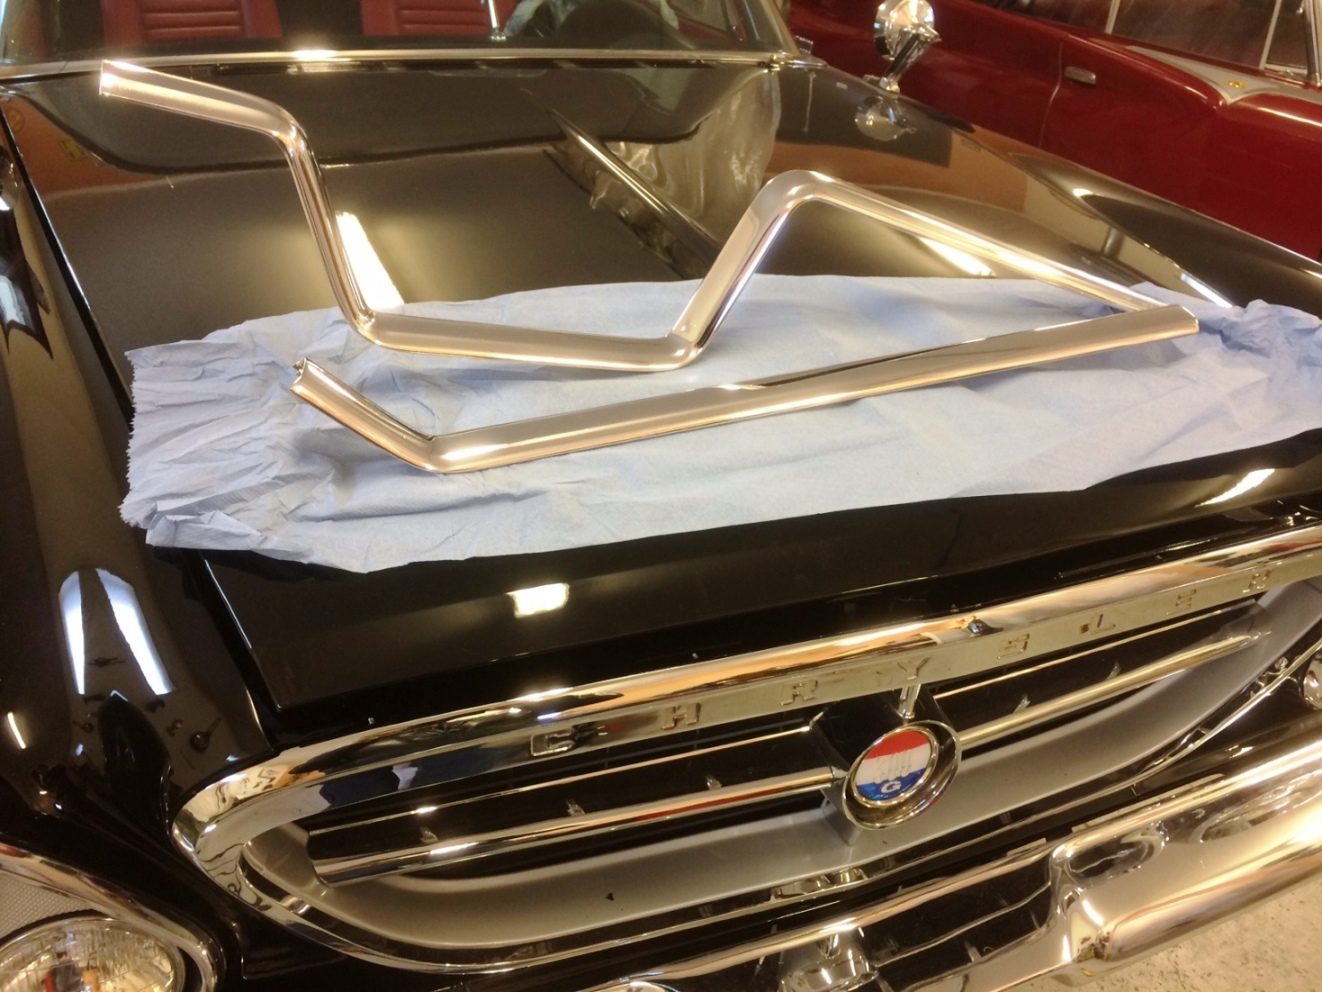 (IMG_2017.JPG) (IMG_2017.JPG)
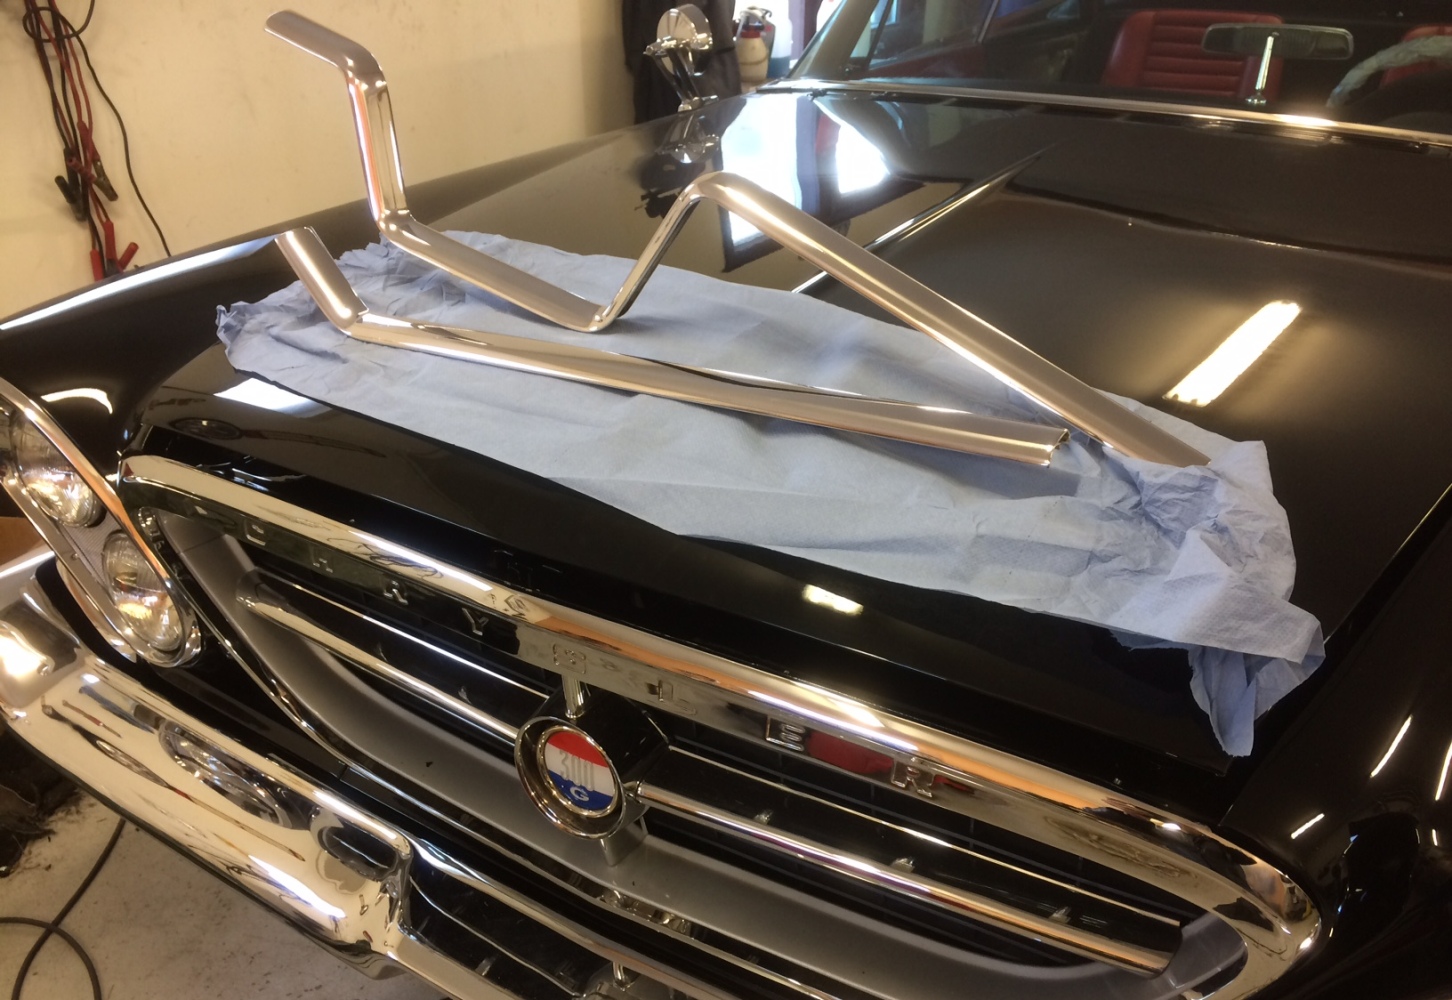 (IMG_2018.JPG) (IMG_2018.JPG)
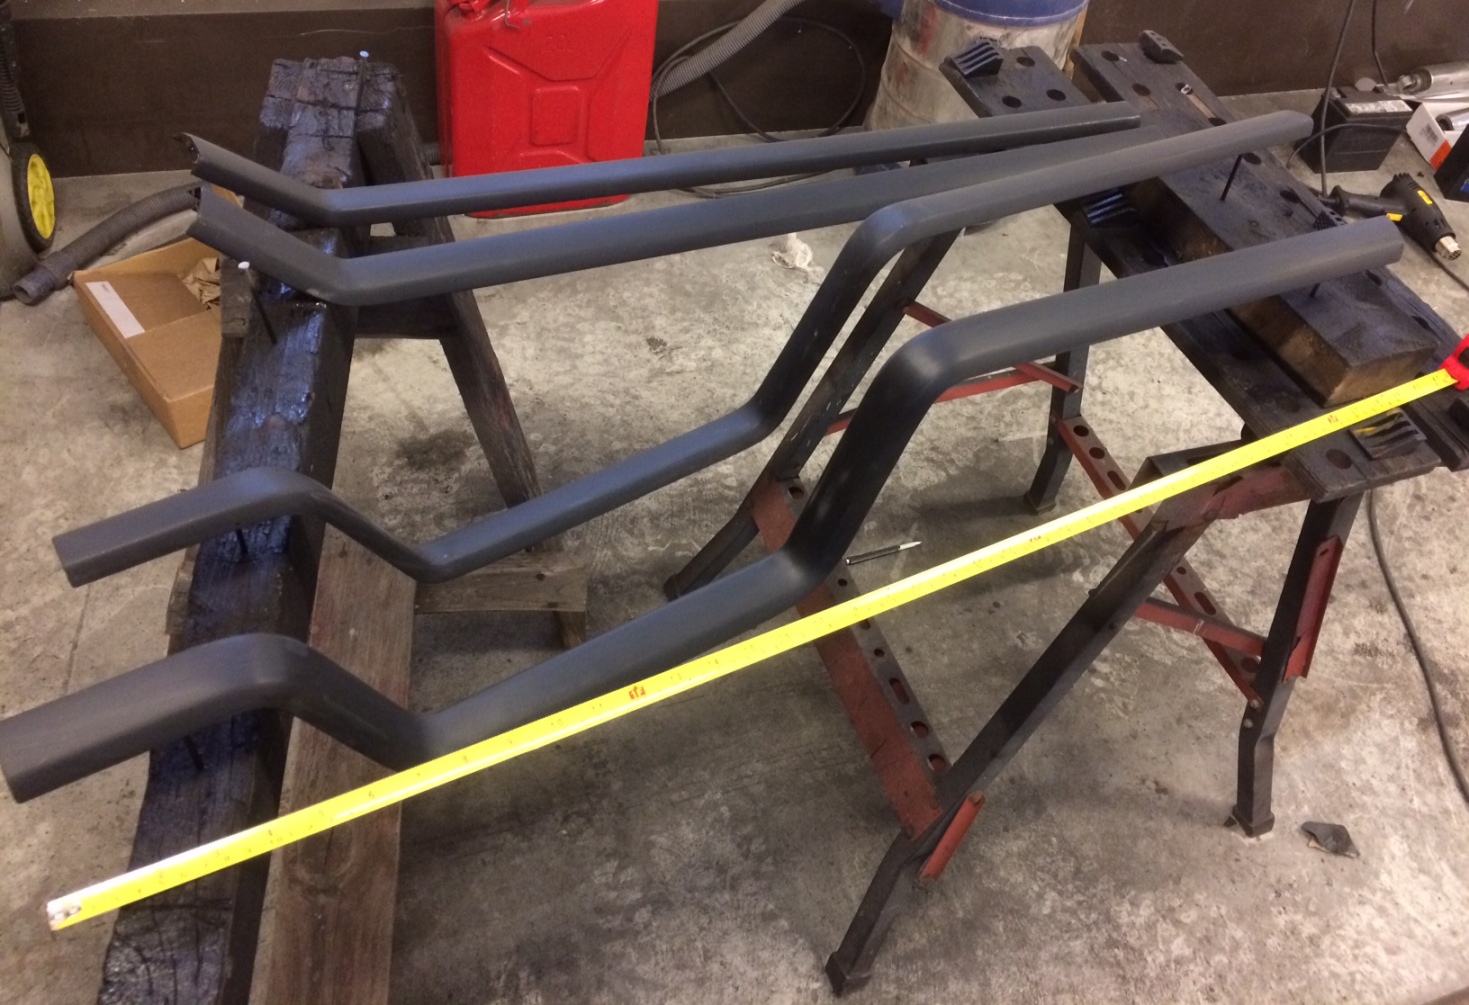 (IMG_1816.JPG) (IMG_1816.JPG)
Attachments
----------------
IMG_2017.JPG (432KB - 376 downloads)
IMG_2018.JPG (464KB - 381 downloads)
IMG_1816.JPG (496KB - 382 downloads)
|
|
| |
|
Elite Veteran
Posts: 673
Location: Malung, SWEDEN | It will be a great car Jari, well done! |
|
| |
|
Elite Veteran
Posts: 827
Location: tailFinland |
I have been doing carpeting lately. I got no original carpets left except some rags from center consoleI got from a friend of mine.
Years ago I got few rolls of tan showroom carpet that I used now to make templates for final versions.
I did first templates on plastic, then on tan carpet and when they were ok, I cut final versions out of black carpet
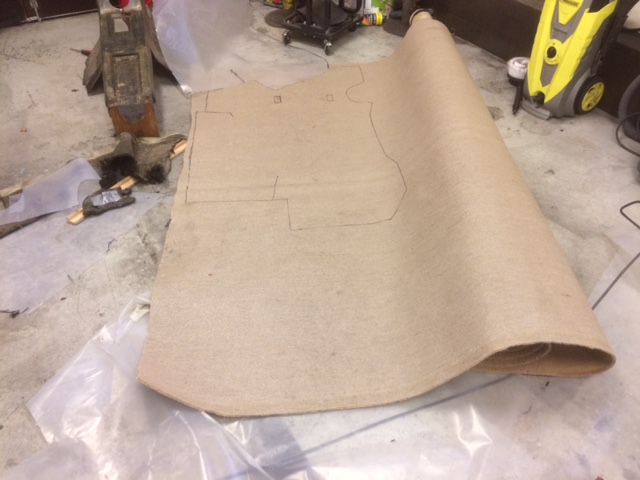 (IMG_2061.JPG) (IMG_2061.JPG)
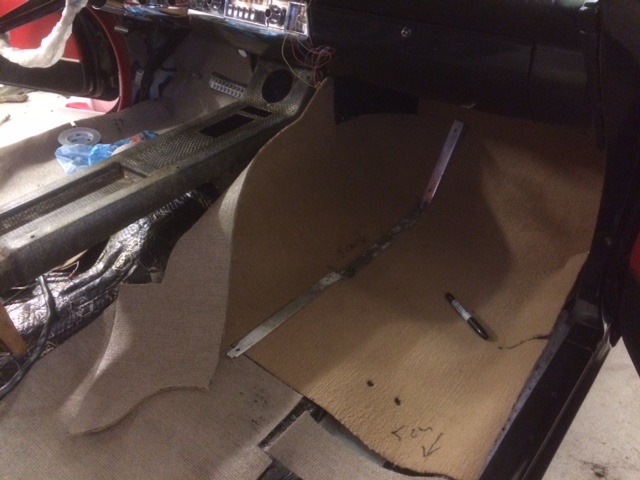 (IMG_2064.JPG) (IMG_2064.JPG)
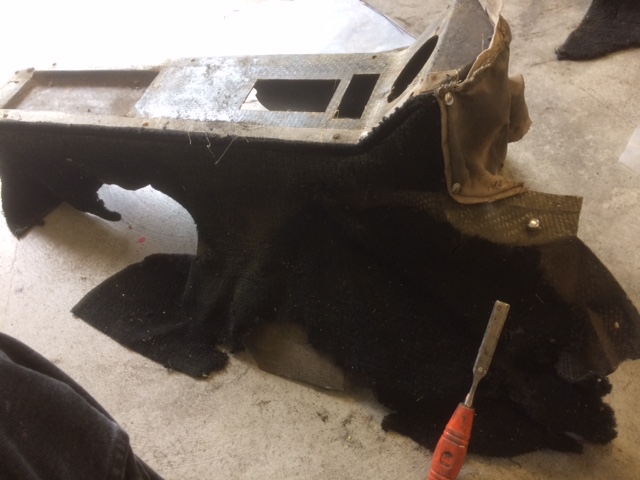 (IMG_2043.JPG) (IMG_2043.JPG)
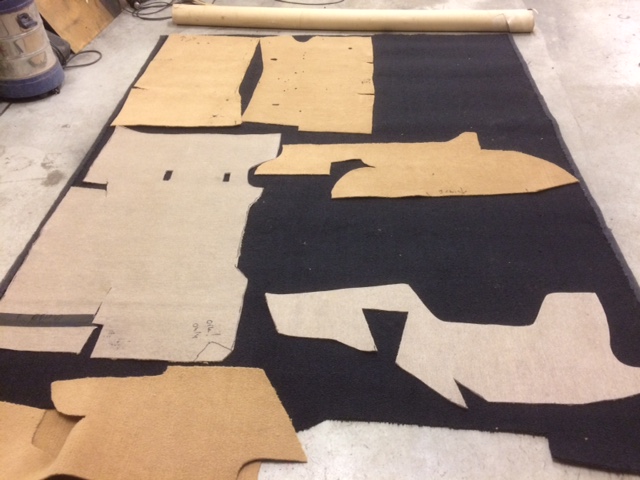 (IMG_2066.JPG) (IMG_2066.JPG)
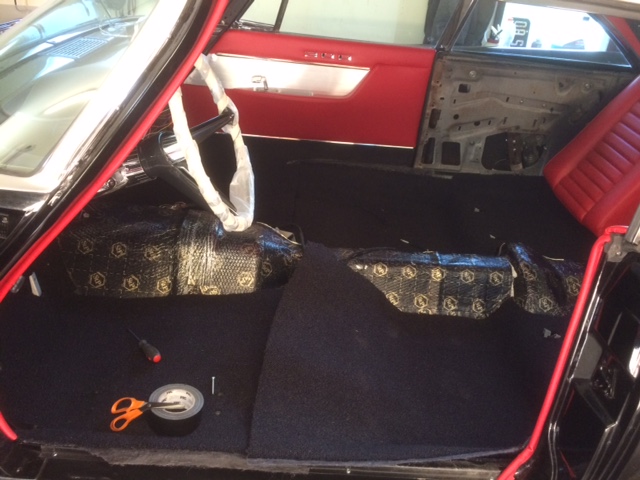 (IMG_2108.JPG) (IMG_2108.JPG)
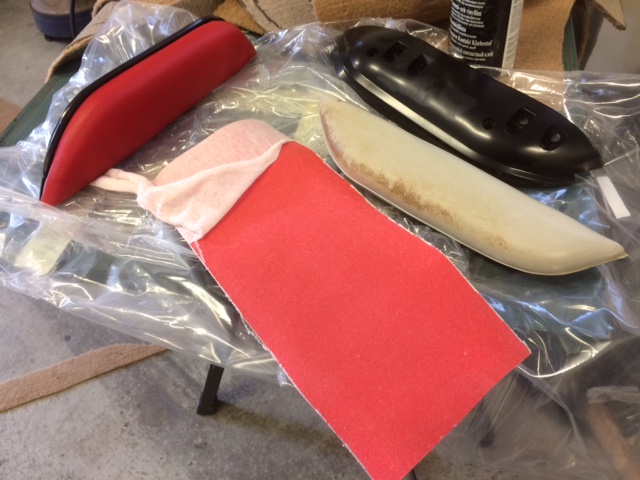 (IMG_2102.JPG) (IMG_2102.JPG)
Attachments
----------------
IMG_2061.JPG (91KB - 362 downloads)
IMG_2064.JPG (95KB - 344 downloads)
IMG_2043.JPG (91KB - 363 downloads)
IMG_2066.JPG (98KB - 352 downloads)
IMG_2108.JPG (107KB - 350 downloads)
IMG_2102.JPG (113KB - 357 downloads)
|
|
| |
|
Elite Veteran
Posts: 827
Location: tailFinland | Carpets
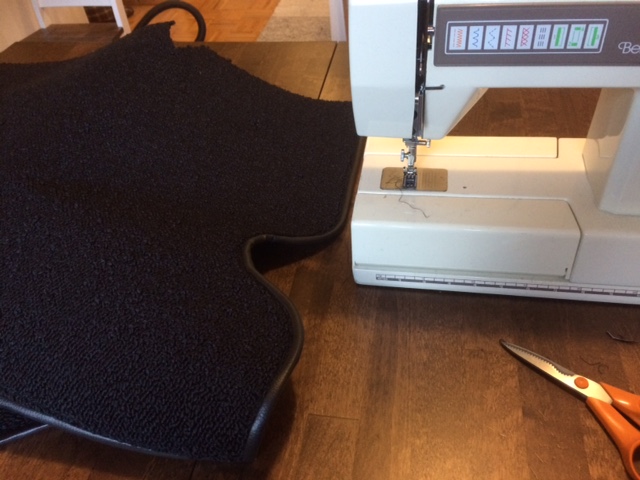 (IMG_2132.JPG) (IMG_2132.JPG)
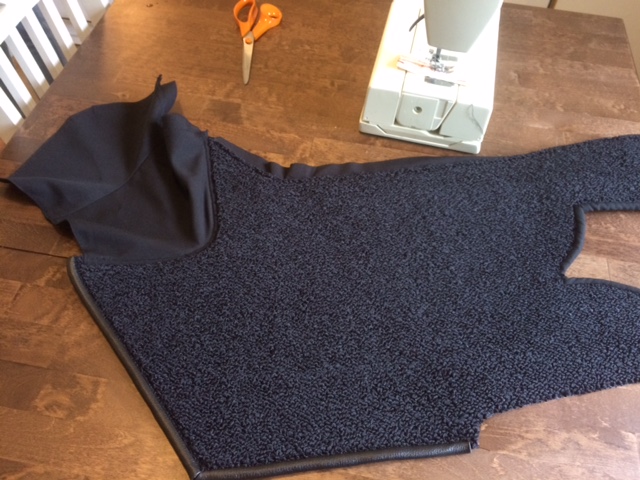 (IMG_2172.JPG) (IMG_2172.JPG)
Attachments
----------------
IMG_2132.JPG (100KB - 353 downloads)
IMG_2172.JPG (131KB - 363 downloads)
|
|
| |
|
Board Moderator & Exner Expert 10K+
Posts: 13045
Location: Southern Sweden - Sturkö island | Great work Jari! Will you be able to drive the G this season? |
|
| |
|
Elite Veteran
Posts: 827
Location: tailFinland | So so, it is so close now. Just bleeding the brakes, set the timing and get it running. Paint needs a buffing - but I do not want to hurry up now.
Besides I just received last friday a 69 coupe deville conv from Ca that i bought last winter. Its gonna be my pilsner bil for the summer but it needs registration and some TLC, just like my New Yorker does need some tuneup and almost every motorized vehicle I own. My summerhouse needs renovation too... |
|
| |
|
Elite Veteran
Posts: 827
Location: tailFinland | Little progress
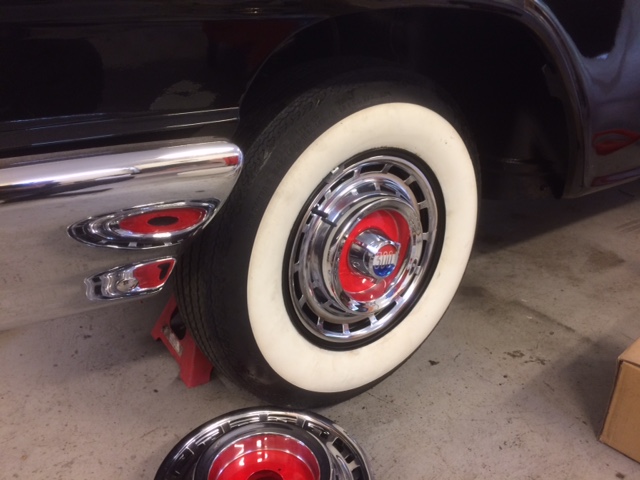 (IMG_2509.JPG) (IMG_2509.JPG)
 (IMG_2511.JPG) (IMG_2511.JPG)
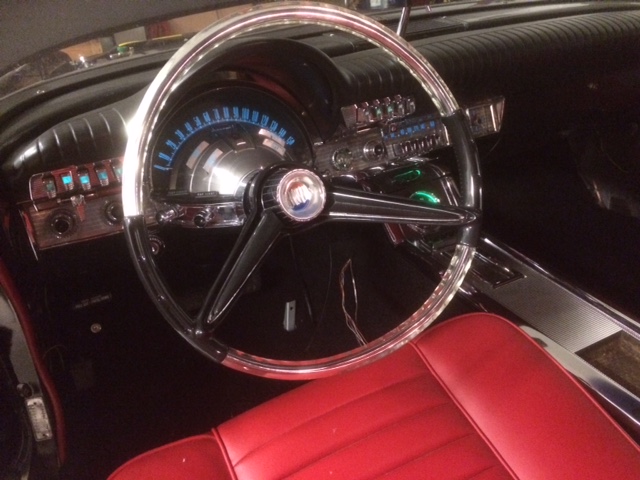 (IMG_2635.JPG) (IMG_2635.JPG)
Attachments
----------------
IMG_2509.JPG (93KB - 344 downloads)
IMG_2511.JPG (101KB - 340 downloads)
IMG_2635.JPG (110KB - 350 downloads)
|
|
| |
|
Elite Veteran
Posts: 827
Location: tailFinland |
Progress little by little
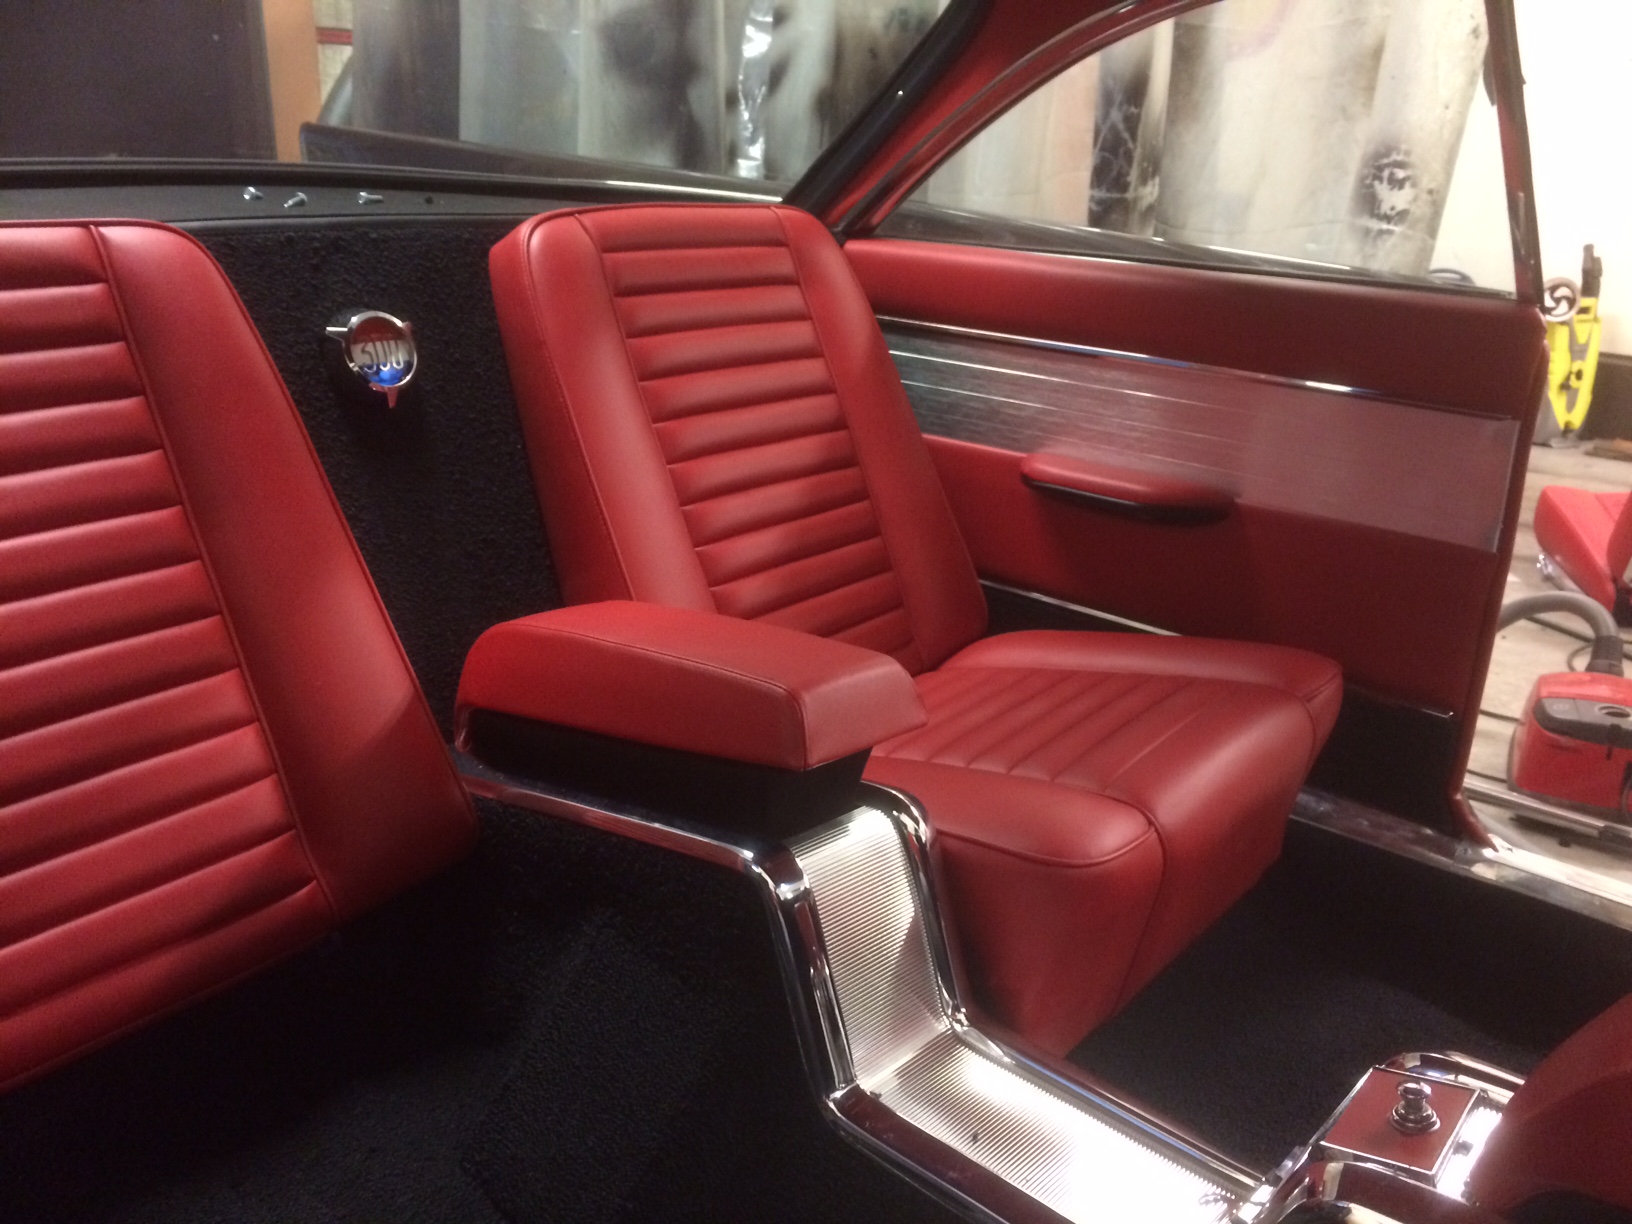 (IMG_2720.jpg) (IMG_2720.jpg)
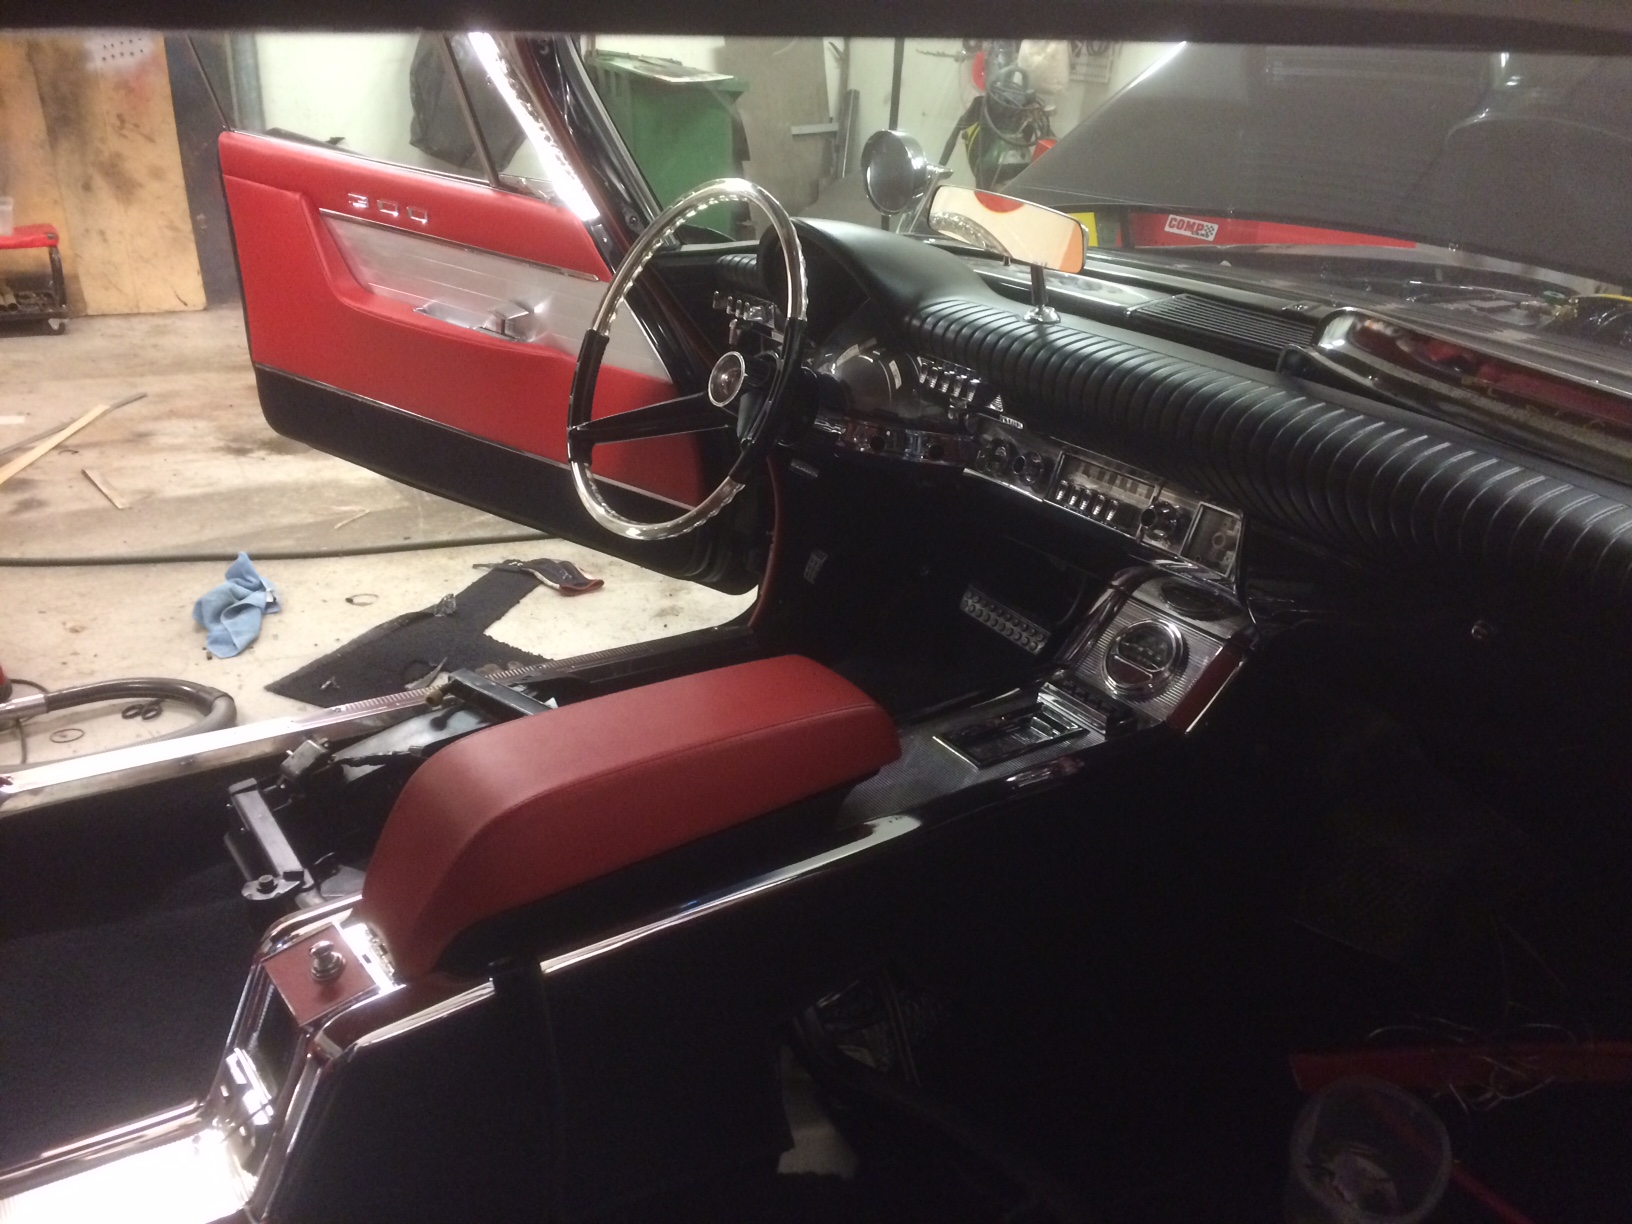 (IMG_2721.jpg) (IMG_2721.jpg)
Attachments
----------------
IMG_2720.jpg (486KB - 347 downloads)
IMG_2721.jpg (493KB - 353 downloads)
|
|
| |
|
Veteran
Posts: 143
Location: Malmberget, Sweden | Nice |
|
| |
|
Elite Veteran
Posts: 827
Location: tailFinland |
Interior is pretty much done now. Just sun visors need some pro stitches and assembly.
Next week I'm gonna start up the engine.
trunk will wait
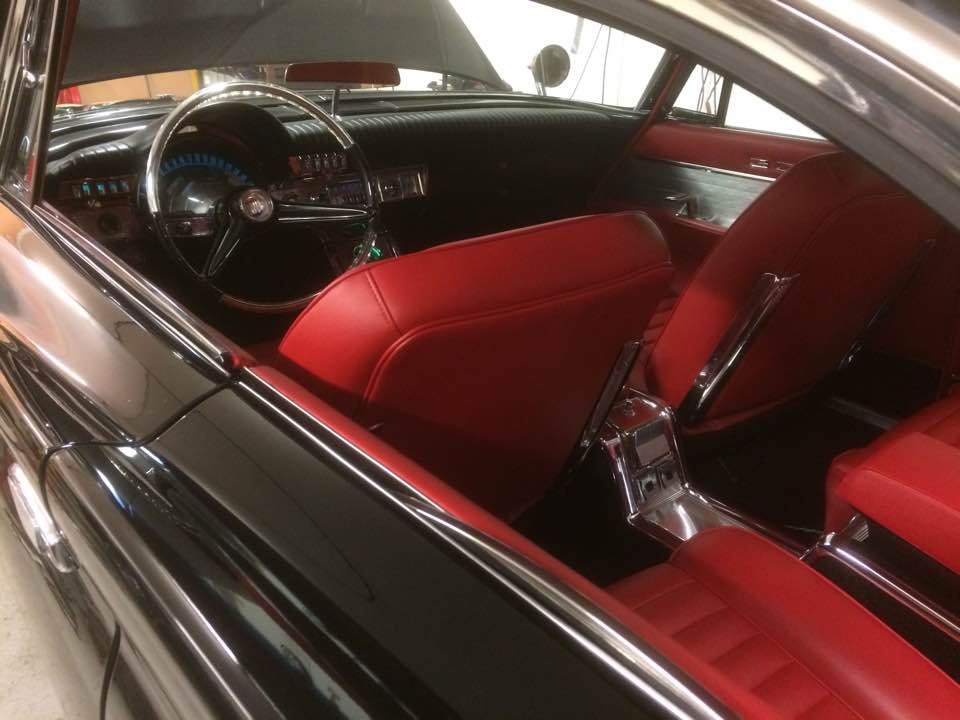 (21314813_10214367817257199_4367694055902501888_n.jpg) (21314813_10214367817257199_4367694055902501888_n.jpg)
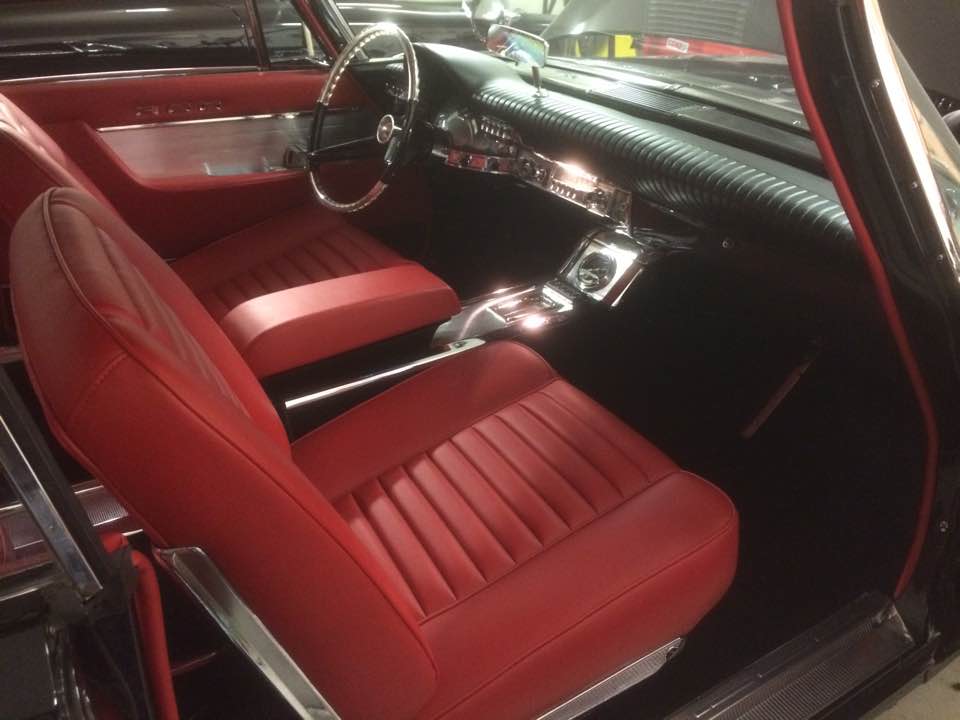 (21317682_10214367817457204_1488388756278998333_n.jpg) (21317682_10214367817457204_1488388756278998333_n.jpg)
Attachments
----------------
21314813_10214367817257199_4367694055902501888_n.jpg (59KB - 323 downloads)
21317682_10214367817457204_1488388756278998333_n.jpg (52KB - 344 downloads)
|
|
| |
|
Board Moderator & Exner Expert 10K+
Posts: 13045
Location: Southern Sweden - Sturkö island | Very nice Jari, good work!! |
|
| |
|
Elite Veteran
Posts: 827
Location: tailFinland | I made horn conversion this week end. Original horns were beyond restoraton. Used after market horns insted.
I fabricated new bracket sand used original cup, sand balsted and painted it. At first glance they loo just like originals,
Tone is little higher and stronger than original sound.
Edited by Adventurer 60 2017-10-01 3:17 PM
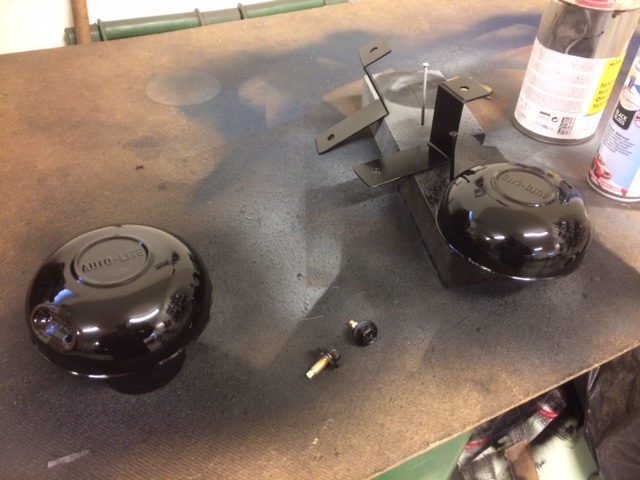 (IMG_2880.JPG) (IMG_2880.JPG)
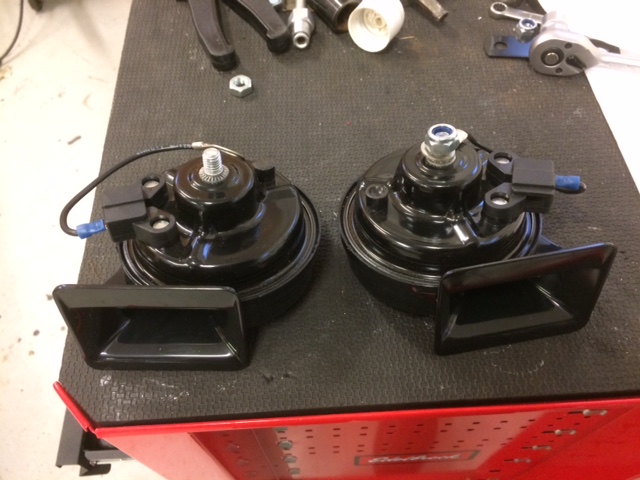 (IMG_2881.JPG) (IMG_2881.JPG)
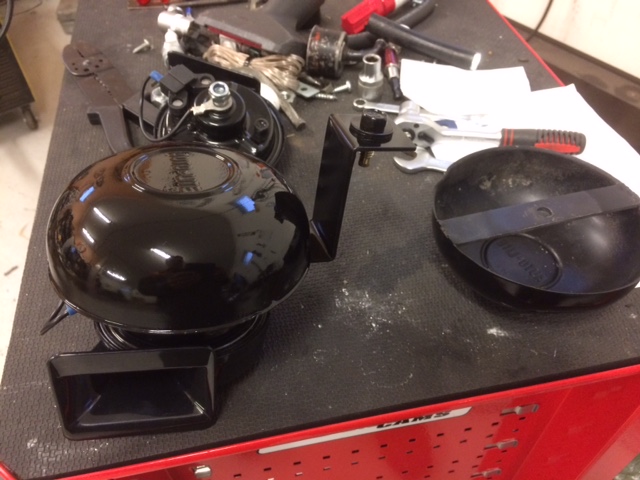 (IMG_2883.JPG) (IMG_2883.JPG)
 (IMG_2885.JPG) (IMG_2885.JPG)
Attachments
----------------
IMG_2880.JPG (110KB - 331 downloads)
IMG_2881.JPG (106KB - 328 downloads)
IMG_2883.JPG (105KB - 333 downloads)
IMG_2885.JPG (115KB - 327 downloads)
|
|
| |
|
Expert
Posts: 1886
| Your car looks amazing |
|
| |
|
Elite Veteran
Posts: 827
Location: tailFinland | Thanks Mike. I have tried to do it good, but it turns to amazing |
|
| |
|
Elite Veteran
Posts: 827
Location: tailFinland |
First starts with the engine got several things to happen.
Starter was weak but it was able to start it ten or fifteen times.
all exhaust gaskets shrunk and nuts got loose
carbs and ingnition worked fine
then old started totally melted, ordered a new modern one from Sweden (Thanks Magnus) it arrived in a week.
New starter really gave more boost for starting
Next time i drove engine warm noticed oli in the radiator!
WTF oil in coolant!
Thank God and mr. Murphy it was less expensive fail, It was transmission oil in the radiator and coolant in transmission.
Did not drive trans much, hopefully new oil is all I have to invest.
Proportion valve that came with AAJ brake kit, did not work, did not let enoug fluid to pass thru. Took it away and now brakepedal goes really down, so it wont work without eighter.
There is a tv-show in Finland called Strömsö. In Strömsö they do all kind of things very successfully, food, handcrafts, fixin furniture... what ever
When things go like they should not go or not go like they should, there is a say "did not go like in Strömsö"
This did not go like in Störmsö!
|
|
| |
|
Elite Veteran
Posts: 827
Location: tailFinland |
Few things has happened since I opened last time at this forum.
I got another radiator recored, now it has 100% more draws than original. It was really expensive but what can you do.
Changed trans oils.
Trans did not had reverse. I drowe on jack stands over 5 miles, adjusted reverse band, no help. Finally even cable did'nt want click to reverse.
Opened the oil pan and there it was. Little particles on oil filter from the broken clutch or band.
Everything in this car is rebuilded or repaired exept those I just cecked they were ok; starter, radiator, transmission, radiator. Now 3 of 4 of those has been blown.
It is frustrating to start reassemple almost finished car. I wish I could go back in time and get than transmission done when it was stored on garage floor
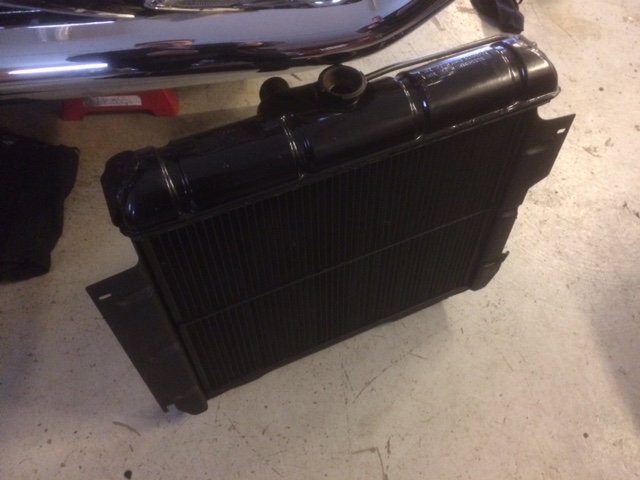 (syylari.JPG) (syylari.JPG)
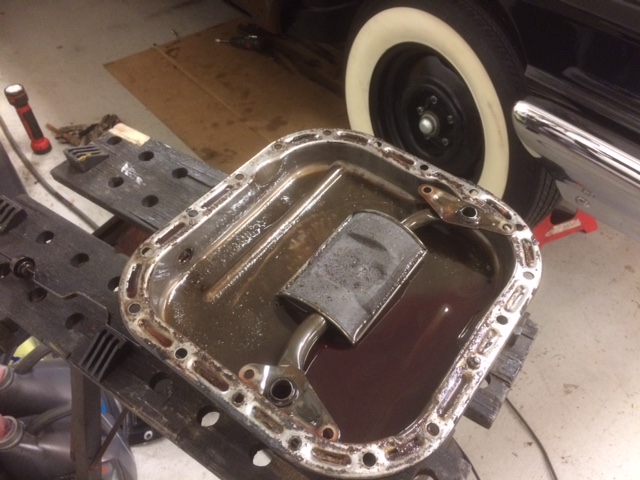 (trans.jpg) (trans.jpg)
Attachments
----------------
syylari.JPG (86KB - 299 downloads)
trans.jpg (114KB - 304 downloads)
|
|
| |
|
Elite Veteran
Posts: 827
Location: tailFinland | Now I need some sort of rebuild kit for the trans. I you know where to find one nicely, let me know, it would be appreciated |
|
| |
|
Board Moderator & Exner Expert 10K+
Posts: 13045
Location: Southern Sweden - Sturkö island | Sure Jari, here
http://nwtparts.com/
https://www.fatsco.net/?gclid=EAIaIQobChMIrdffttzu1wIVVIGyCh0NXwVyEA...
For rare parts and kits in Sweden
http://www.mrmechanic.se/
Björn has a huge stock of parts and I recently bought some parts from him - he's one of the good guys.....
|
|
| |
|
Elite Veteran
Posts: 827
Location: tailFinland | Thanks Sven!
Called couble transimission specialists. One of them estimated price for rebuild 2500-3000 and other 2100 - 2500 Euros with parts.
Thats quite a lot comparing to GM TH700 R4 boxes, about 3 times more
|
|
| |
|
Board Moderator & Exner Expert 10K+
Posts: 13045
Location: Southern Sweden - Sturkö island | Mind that with "parts", they do not intend any hardware for the transmission - just the renovation kit.
I could do it for much less, but then there's the transport COSTs......... that will perhaps ruin a deal |
|
| |
|
Elite Veteran
Posts: 827
Location: tailFinland | Yep, I noticed |
|
| |
|
Elite Veteran
Posts: 827
Location: tailFinland | I got transmisson rebuild kit from US in January and took tranny out of the car. Wich was quite a task, had to take off left, carb, exhaust, stater, torsion bars and and...
Delivered tranny to a nearest specialist with rebuild kit and stuff.
He called me last week. It had a broken front clutch assy, actually the hub is broken and you cant fix that securely.
In December i bought project 61 New Yorker wich was not driven for about 10 years but it works and drives, do no know how long and how good
Anyway I do not want sacrafice its tranny for a one hub.
If you know who has cast iron Torqueflite for the spare parts, please let me know
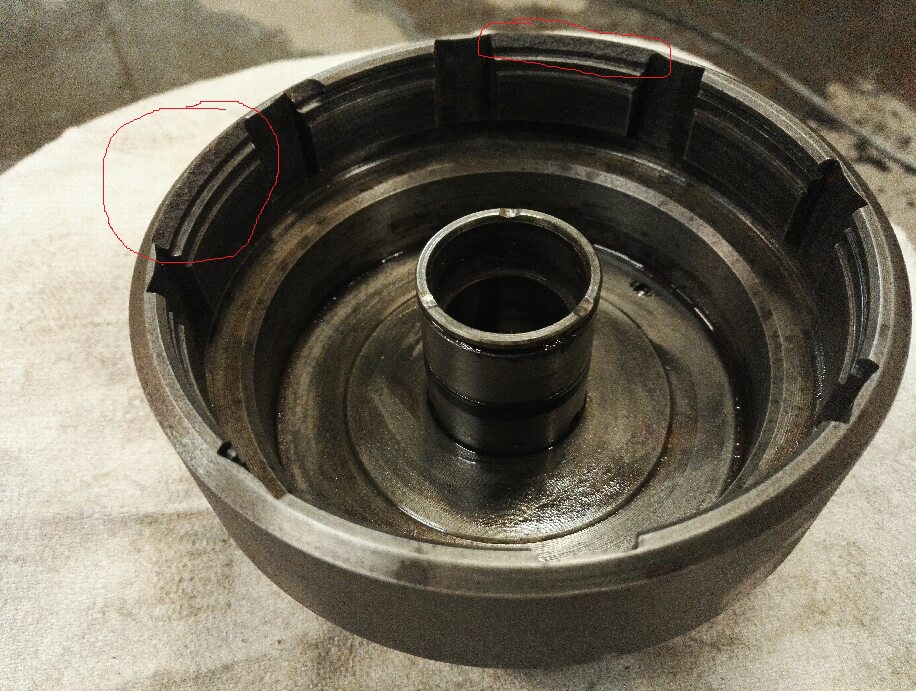 (clutch hub.jpg) (clutch hub.jpg)
Attachments
----------------
clutch hub.jpg (267KB - 287 downloads)
clutch hub2.jpeg (270KB - 286 downloads)
|
|
| |
|
Elite Veteran
Posts: 827
Location: tailFinland |
It moves and ready to drive.
https://youtu.be/7fvjgF22zMo
|
|
| |
|
Board Moderator & Exner Expert 10K+
Posts: 13045
Location: Southern Sweden - Sturkö island | Congrats Jari, the car is amazing now after all your work!
That would be the shortest test drive ever
Whats with the red license plates? |
|
| |
|
Location: North Australia | That engine sound good! Make more video please.
Steve. |
|
| |
|
Expert 5K+
Posts: 9654
Location: So. Cal | Yes, nice rumble on there. I wouldn't be able to just go back into the garage at that point! |
|
| |
|
Elite Veteran
Posts: 827
Location: tailFinland | Well, idle and mixtures are not adjusted yet precisely, throttle linkages also need some attention. It will smoothen the rouhg idle little I think.
It has 274 degree (six pack) cam. little bit more lift too than original ram induction cam.
I am very satisfied with the sound Just what I wanted.
I am eager to know what that motor is capable to perform, when original motor made 375 hp and 495 ftlb of torque |
|
| |
|
Elite Veteran
Posts: 827
Location: tailFinland | wizard - 2018-05-21 5:09 AM
Congrats Jari, the car is amazing now after all your work!
That would be the shortest test drive ever
Whats with the red license plates?
Thanks Wizard! Those are 1961 Wyoming plates (never used back then). They just fit so great with red hub cap inserts, front, rear and side emblems and red interior
|
|
| |
|
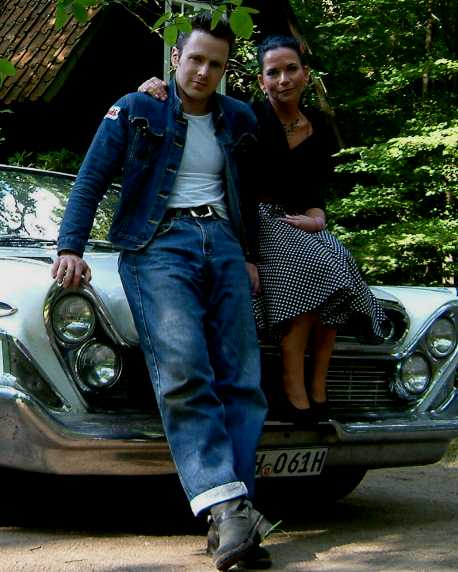
Expert 5K+
Posts: 7395
Location: northern germany | Adventurer 60 - 2018-03-24 4:40 AM
It had a broken front clutch assy, actually the hub is broken and you cant fix that securely.
Perfect example of front clutch ring land breakage from the groove to the beveled edge that i mentioned before. Without that beveled edge (that is completely unnecessary btw) it would have lasted forever. I can't remember how many CI Tflites I saw with that damage, including my own.
|
|
| |
|
Expert 5K+
Posts: 9654
Location: So. Cal | What are the symptoms that the trans makes when those edges are broken off? |
|
| |
|
Elite Veteran
Posts: 827
Location: tailFinland | It is nice summer here already, I drove the G out and did some test driving at my own yard.
adjusted ignition and carbs.
I was un able to put timing to 5 degrees, I had to it by ear (wich i usually do anyway) becouse the strobo shows out of scale
somewhere around 30 degrees advance.
I think the damber (that is old) its rubber has moved or something. Gotta find a new balancer.
I got lambda sensors in both pipes, they show normal values around 0,900 when idling
but on 3000 rpm the right lambda (left carb and second in line) goes very very lean under 0,100 when the other stays around between 0,700 to 0,900
Engine sounds normal though.
Here are the reasons i have heard so far from my pals
-fuel pump is not efficient enouhg (no preassure left for the carb behind)
-carb float level is not correct and goes lean
-leak in exhaust manifold or gasket and it shows as a wrong result
-lambda is broken (pasic aftermark one for volvo)
-this is not reliable method to measure rich/lean. I should do it on the road or test bench
-I should have wide band sensor, not simple two wire sensor
So I'll check the floats first, then switch lambdas...
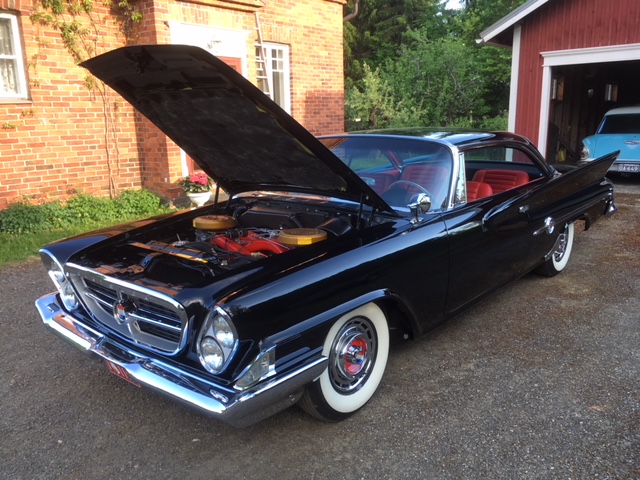 (IMG_0644.JPG) (IMG_0644.JPG)
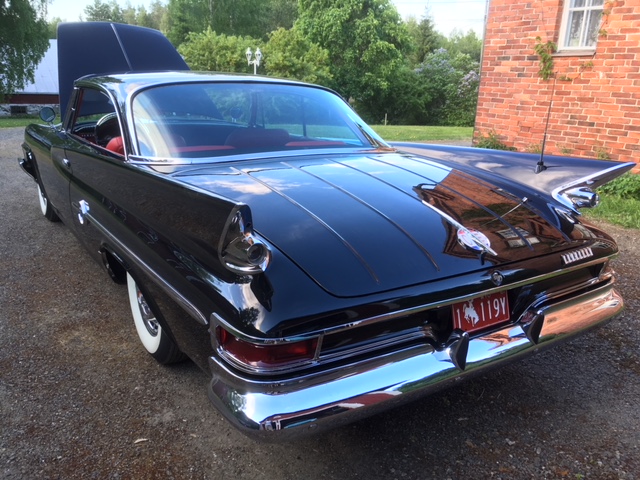 (IMG_0649.JPG) (IMG_0649.JPG)
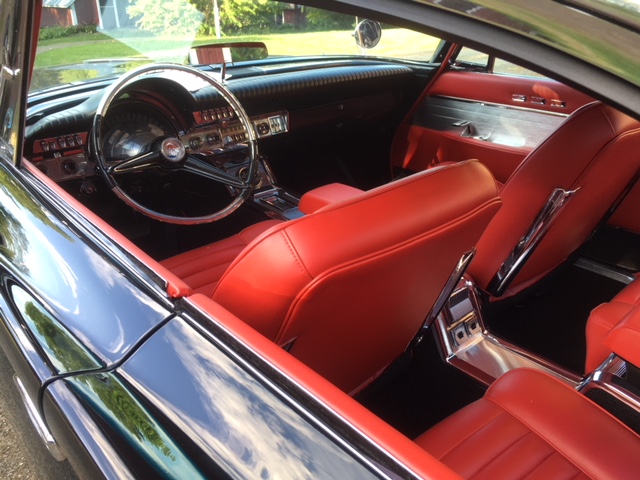 (IMG_0652.JPG) (IMG_0652.JPG)
Attachments
----------------
IMG_0644.JPG (165KB - 440 downloads)
IMG_0649.JPG (163KB - 466 downloads)
IMG_0652.JPG (134KB - 452 downloads)
|
|
| |
|
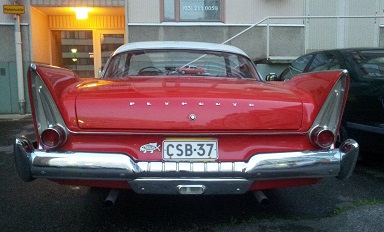
Regular
Posts: 95
Location: Espoo, Finland | Looks awesome! Hienoa työtä! |
|
| |
|
Expert 5K+
Posts: 9654
Location: So. Cal | If your harmonic dampener is stable (not moving), you can find top dead center through the #1 spark plug hole and then make a new mark on it. Then you will be able to time it like normal without buying a new dampener....yet.
Your friend is right. You must use a wide band O2 sensor to check carburetor settings. The others don't give you enough of a range to give adequate information. Very, very lean on an EFI car is only slightly lean on a carbureted car. EFI O2 sensors are like on/off switches. If you are slightly off, they just say off. But it does tell you that you are at least a little lean for some reason, but don't try to gauge how much lean from that info. Manufacturers use these extremely sensitive O2 sensors to position the setting very accurately to get max fuel efficiency, and don't care about any information that is a ways off. But carbureted engines will typically run through a whole range of too rich & too lean conditions throughout the different weather & throttle settings so you need to test it with something with a wider range on it. |
|
| |
|
Elite Veteran
Posts: 827
Location: tailFinland | Thanks Nathan, that confirmed what my friend told me. I'm not so worried anymore
|
|
| |
|
Expert 5K+
Posts: 9654
Location: So. Cal | Sure. That said, it is always best to be a little rich rather than a little lean, so it would still be good to figure out how to richen it up a little. |
|
| |
|
Elite Veteran
Posts: 827
Location: tailFinland | I re adjusted the floats, made sure automatic choke works. Now when the engine is warm it runs nice. I even drove little bit on street
and it runs super nice and follows the pedal. This car is not insured nor registered so it was really short test.
Now lambdas give same values.
|
|
| |
|
Elite Veteran
Posts: 827
Location: tailFinland | I got a tax bill from the coverment on friday on line, paid it and was able to register it to Finnish DMV register and got old style Finnish plates. (not wide EU-plates)
picked them up right away.
Whole process (verdict about the car tax) took about 2 months and cost me 21,87 euros (what a waiste of recources)
It is in antique vehicle registery and I am allowed to drive 30 days a year with in expensive incurance. About 35 euros a year. Not too bad.
Earlier in August i attended local car show only about 1,5 miles from my garage.
300 works and drives very nice now, its a best FWLcar I've driven so far. I got slight problems with vacuum when the engine is hot, Its been quite hot summer here too.
Engine stalls easily when using brake and sifting from N to D or vice versa after slow traffic. In hi-way use no prolem.
I am thinking to block exhaust elbow to intake couse I'm never gonna drive in winter time.
So I quess I is time to put on end to this thread. Restoration done.
I am going to attend to car show in Lahti in late september and few other in next spring and summer.
I got a 59 Royal Lancer waiting for my attention next winter but it'll another story.
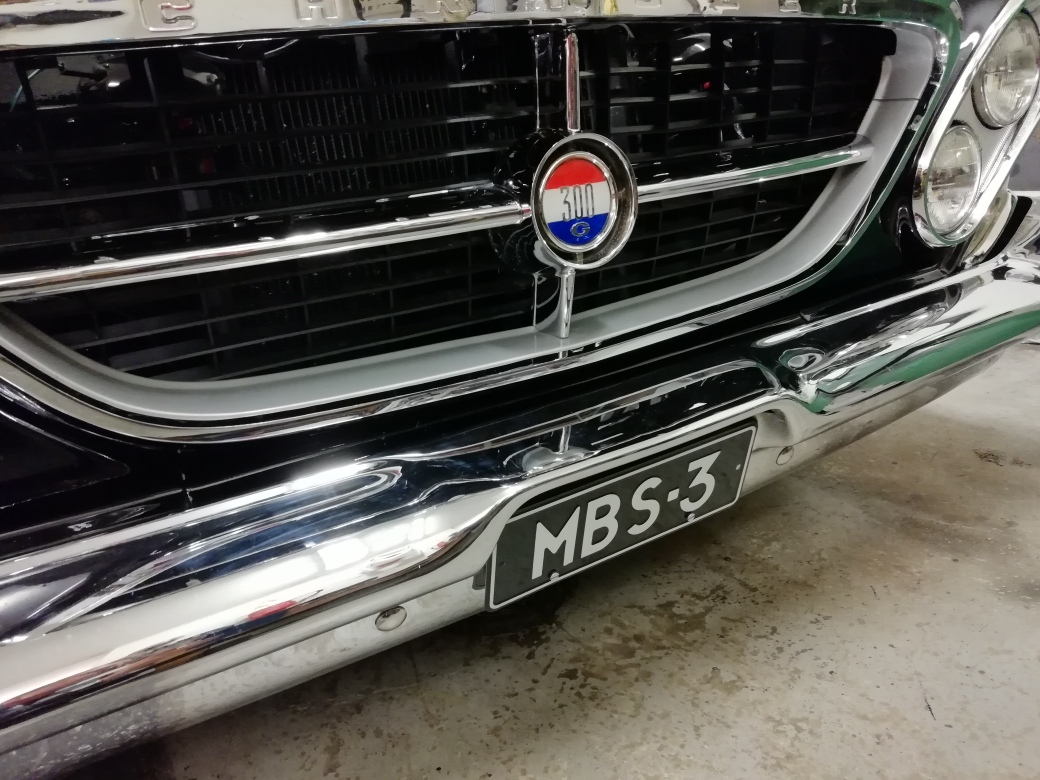 (IMG_20180901_213011_resized_20180901_110741671.jpg) (IMG_20180901_213011_resized_20180901_110741671.jpg)
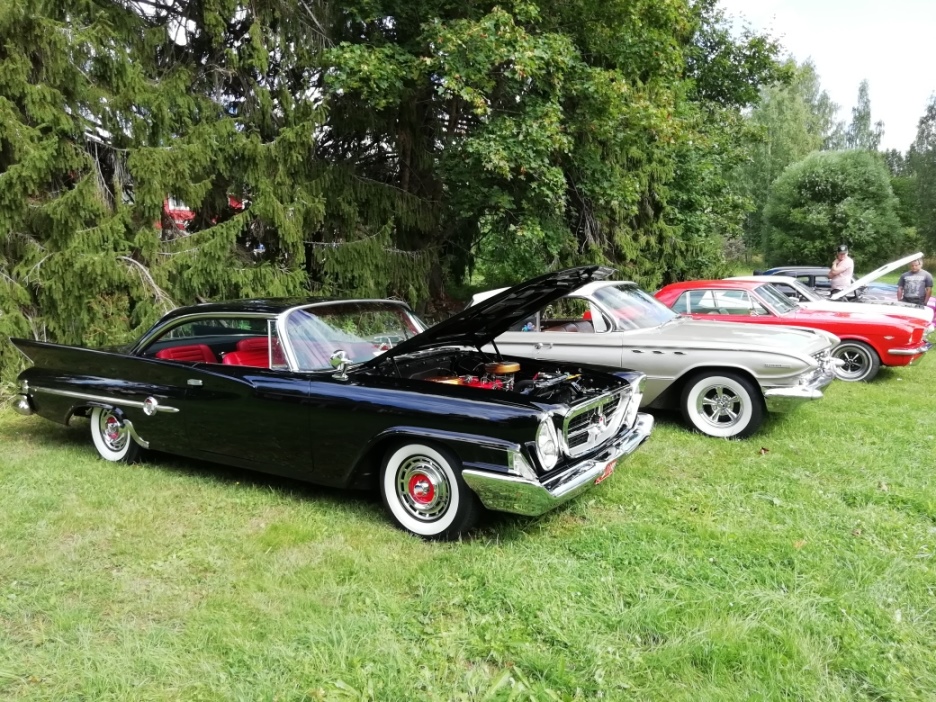 (IMG_20180805_123925_resized_20180901_110741147.jpg) (IMG_20180805_123925_resized_20180901_110741147.jpg)
Attachments
----------------
IMG_20180901_213011_resized_20180901_110741671.jpg (306KB - 443 downloads)
IMG_20180805_123925_resized_20180901_110741147.jpg (397KB - 440 downloads)
|
|
| |
|
Elite Veteran
Posts: 827
Location: tailFinland | First show for the G
at TOP show in Finland
https://www.jenkkiautonayttely.fi/
First prize, first at Vintage category
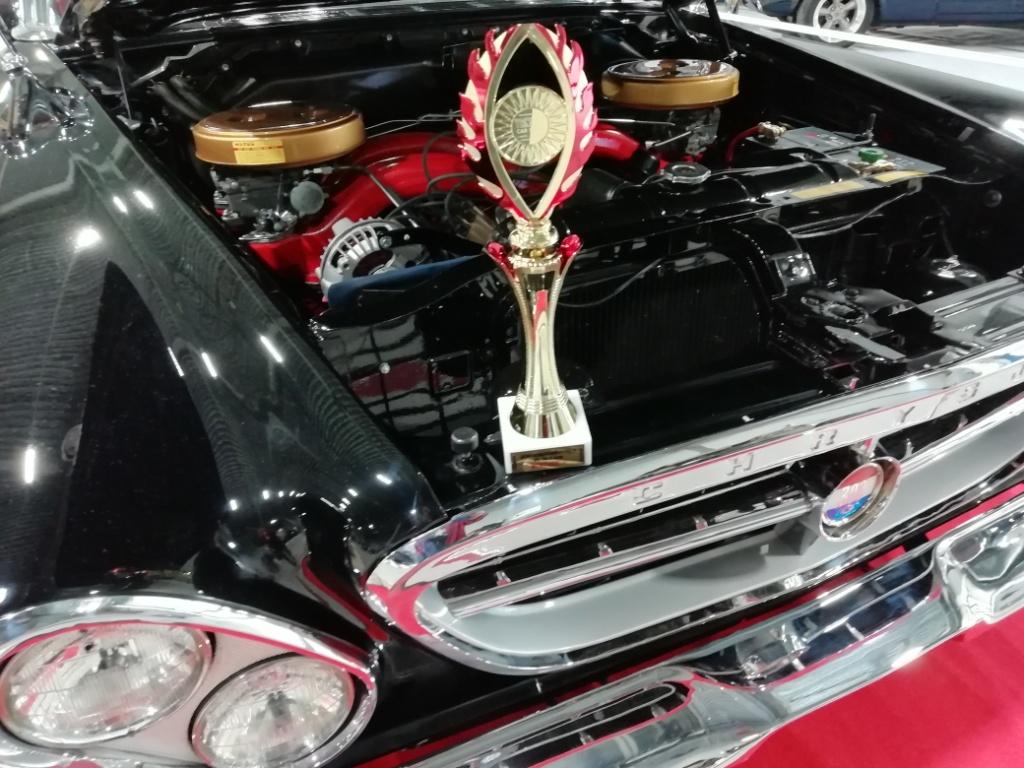 (IMG_20180930_152816_resized_20181001_013846601.jpg) (IMG_20180930_152816_resized_20181001_013846601.jpg)
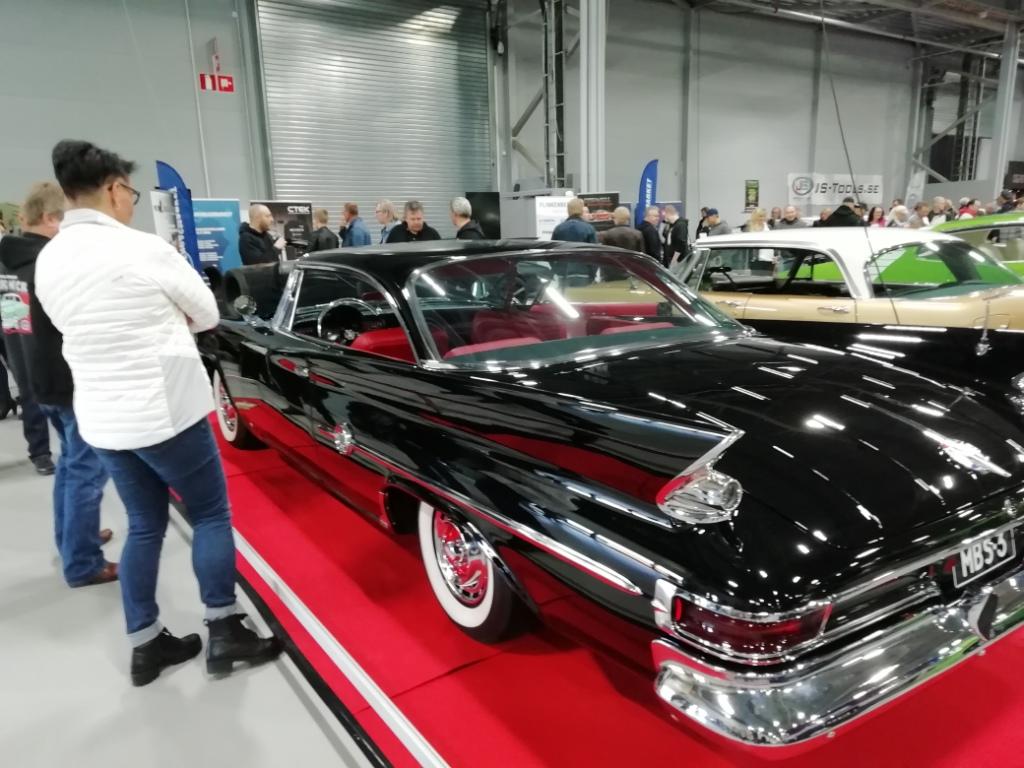 (IMG_20180929_122630_resized_20181001_013753599.jpg) (IMG_20180929_122630_resized_20181001_013753599.jpg)
Attachments
----------------
IMG_20180930_152816_resized_20181001_013846601.jpg (120KB - 450 downloads)
IMG_20180929_122630_resized_20181001_013753599.jpg (109KB - 426 downloads)
|
|
| |
|
Board Moderator & Exner Expert 10K+
Posts: 13045
Location: Southern Sweden - Sturkö island | Great news Jari, you deserved the prize - all the effort, blood, sweat, tears and a pile of money you've throwed into this Beautiful restauration.
Congratulations, now enjoy the car during next season. |
|
| |
|
Elite Veteran
Posts: 827
Location: tailFinland | Well, new season started with car shows.
Attended to American car show in Helsinki wich is biggest classic car show in Scandinavia I quess, hundreds of cars.
Got into TOP 10 in Helsinki.
Last weekend Intermational Hot Rod & Rock Show in Tampere. I think It was most high quality show I've seen ever.
Show cars from Sweden and Norway too.
First of all F, G and H in a same square, all three were black and two of them with red interior! Where can yo see that exept 300 Club meeting.
Won special award from Tampere
Edited by Adventurer 60 2019-04-29 4:36 AM
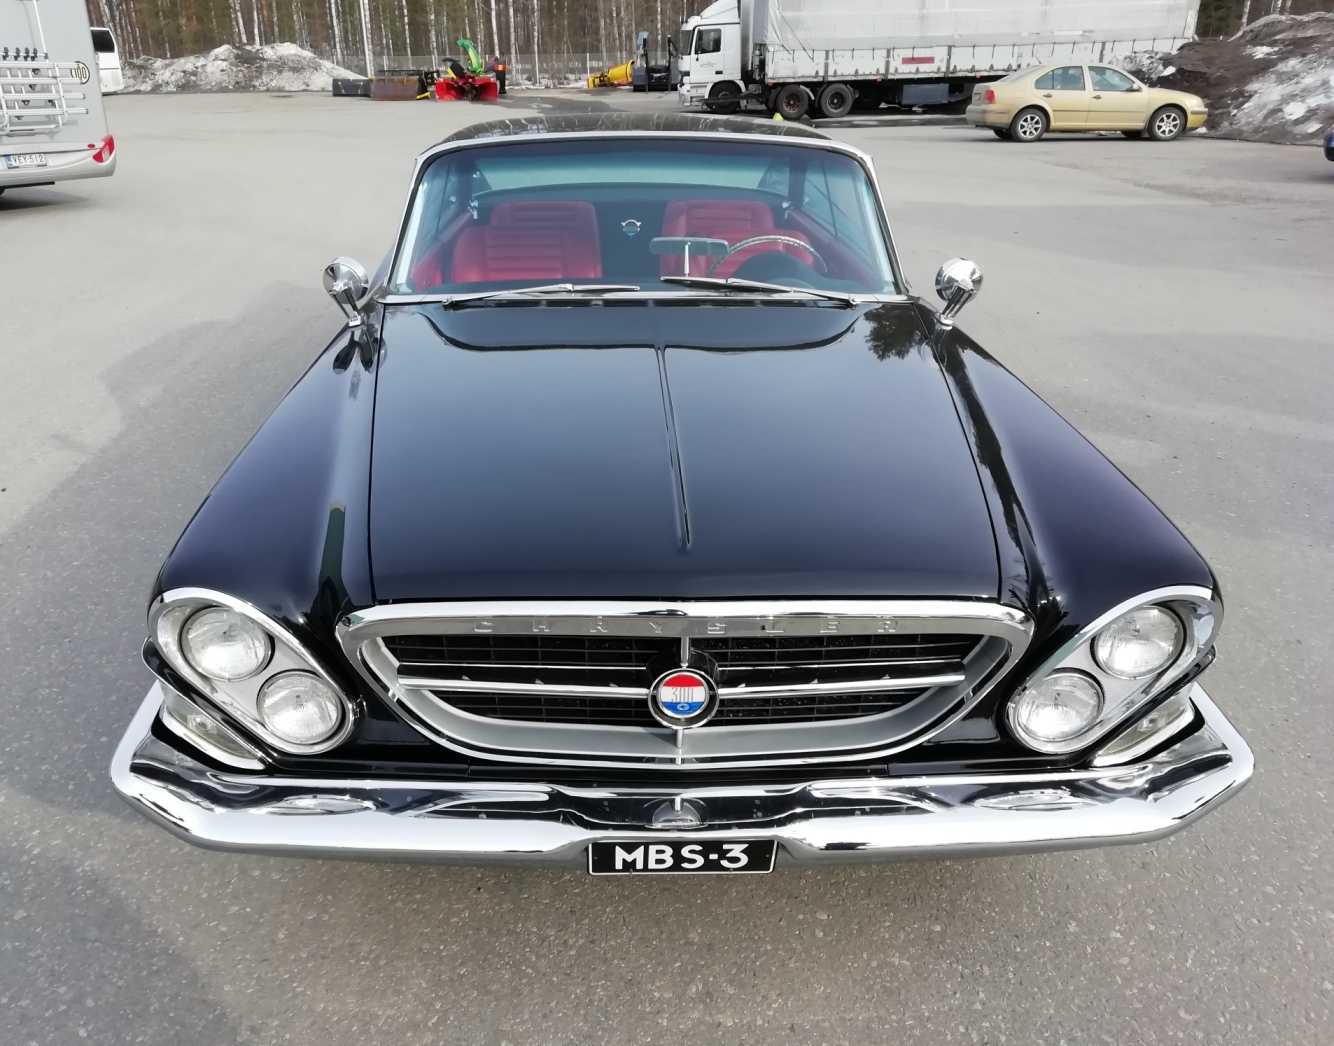 (IMG_20190417_170236_resized_20190429_090843649.jpg) (IMG_20190417_170236_resized_20190429_090843649.jpg)
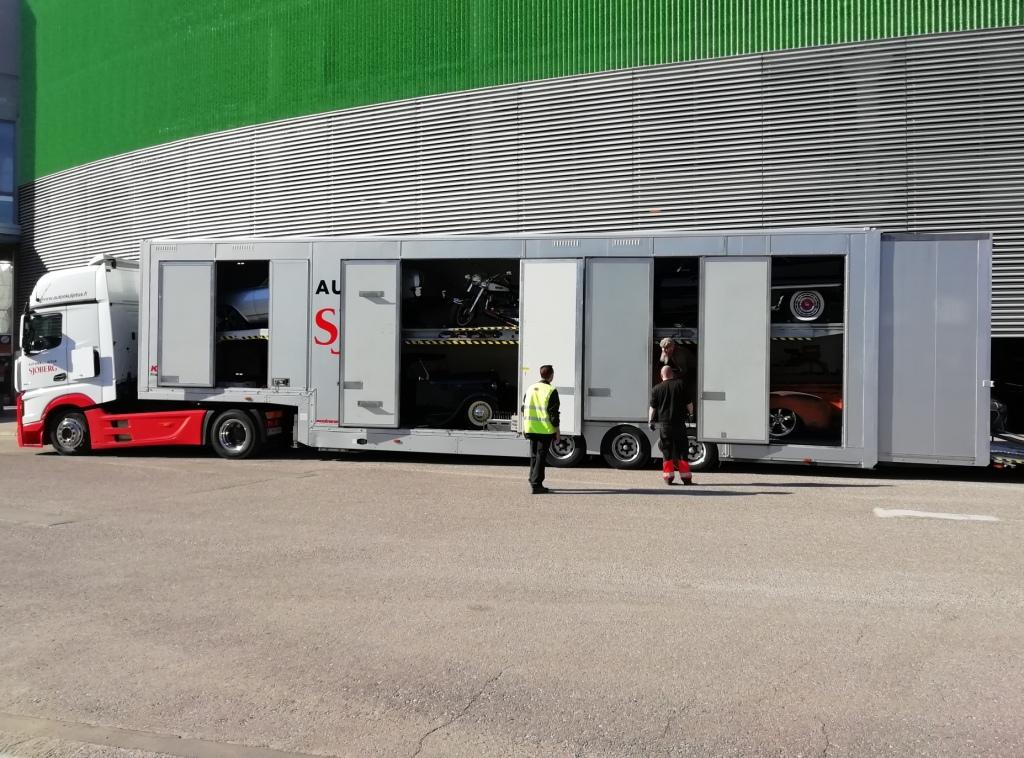 (IMG_20190418_164414_resized_20190429_090842964.jpg) (IMG_20190418_164414_resized_20190429_090842964.jpg)
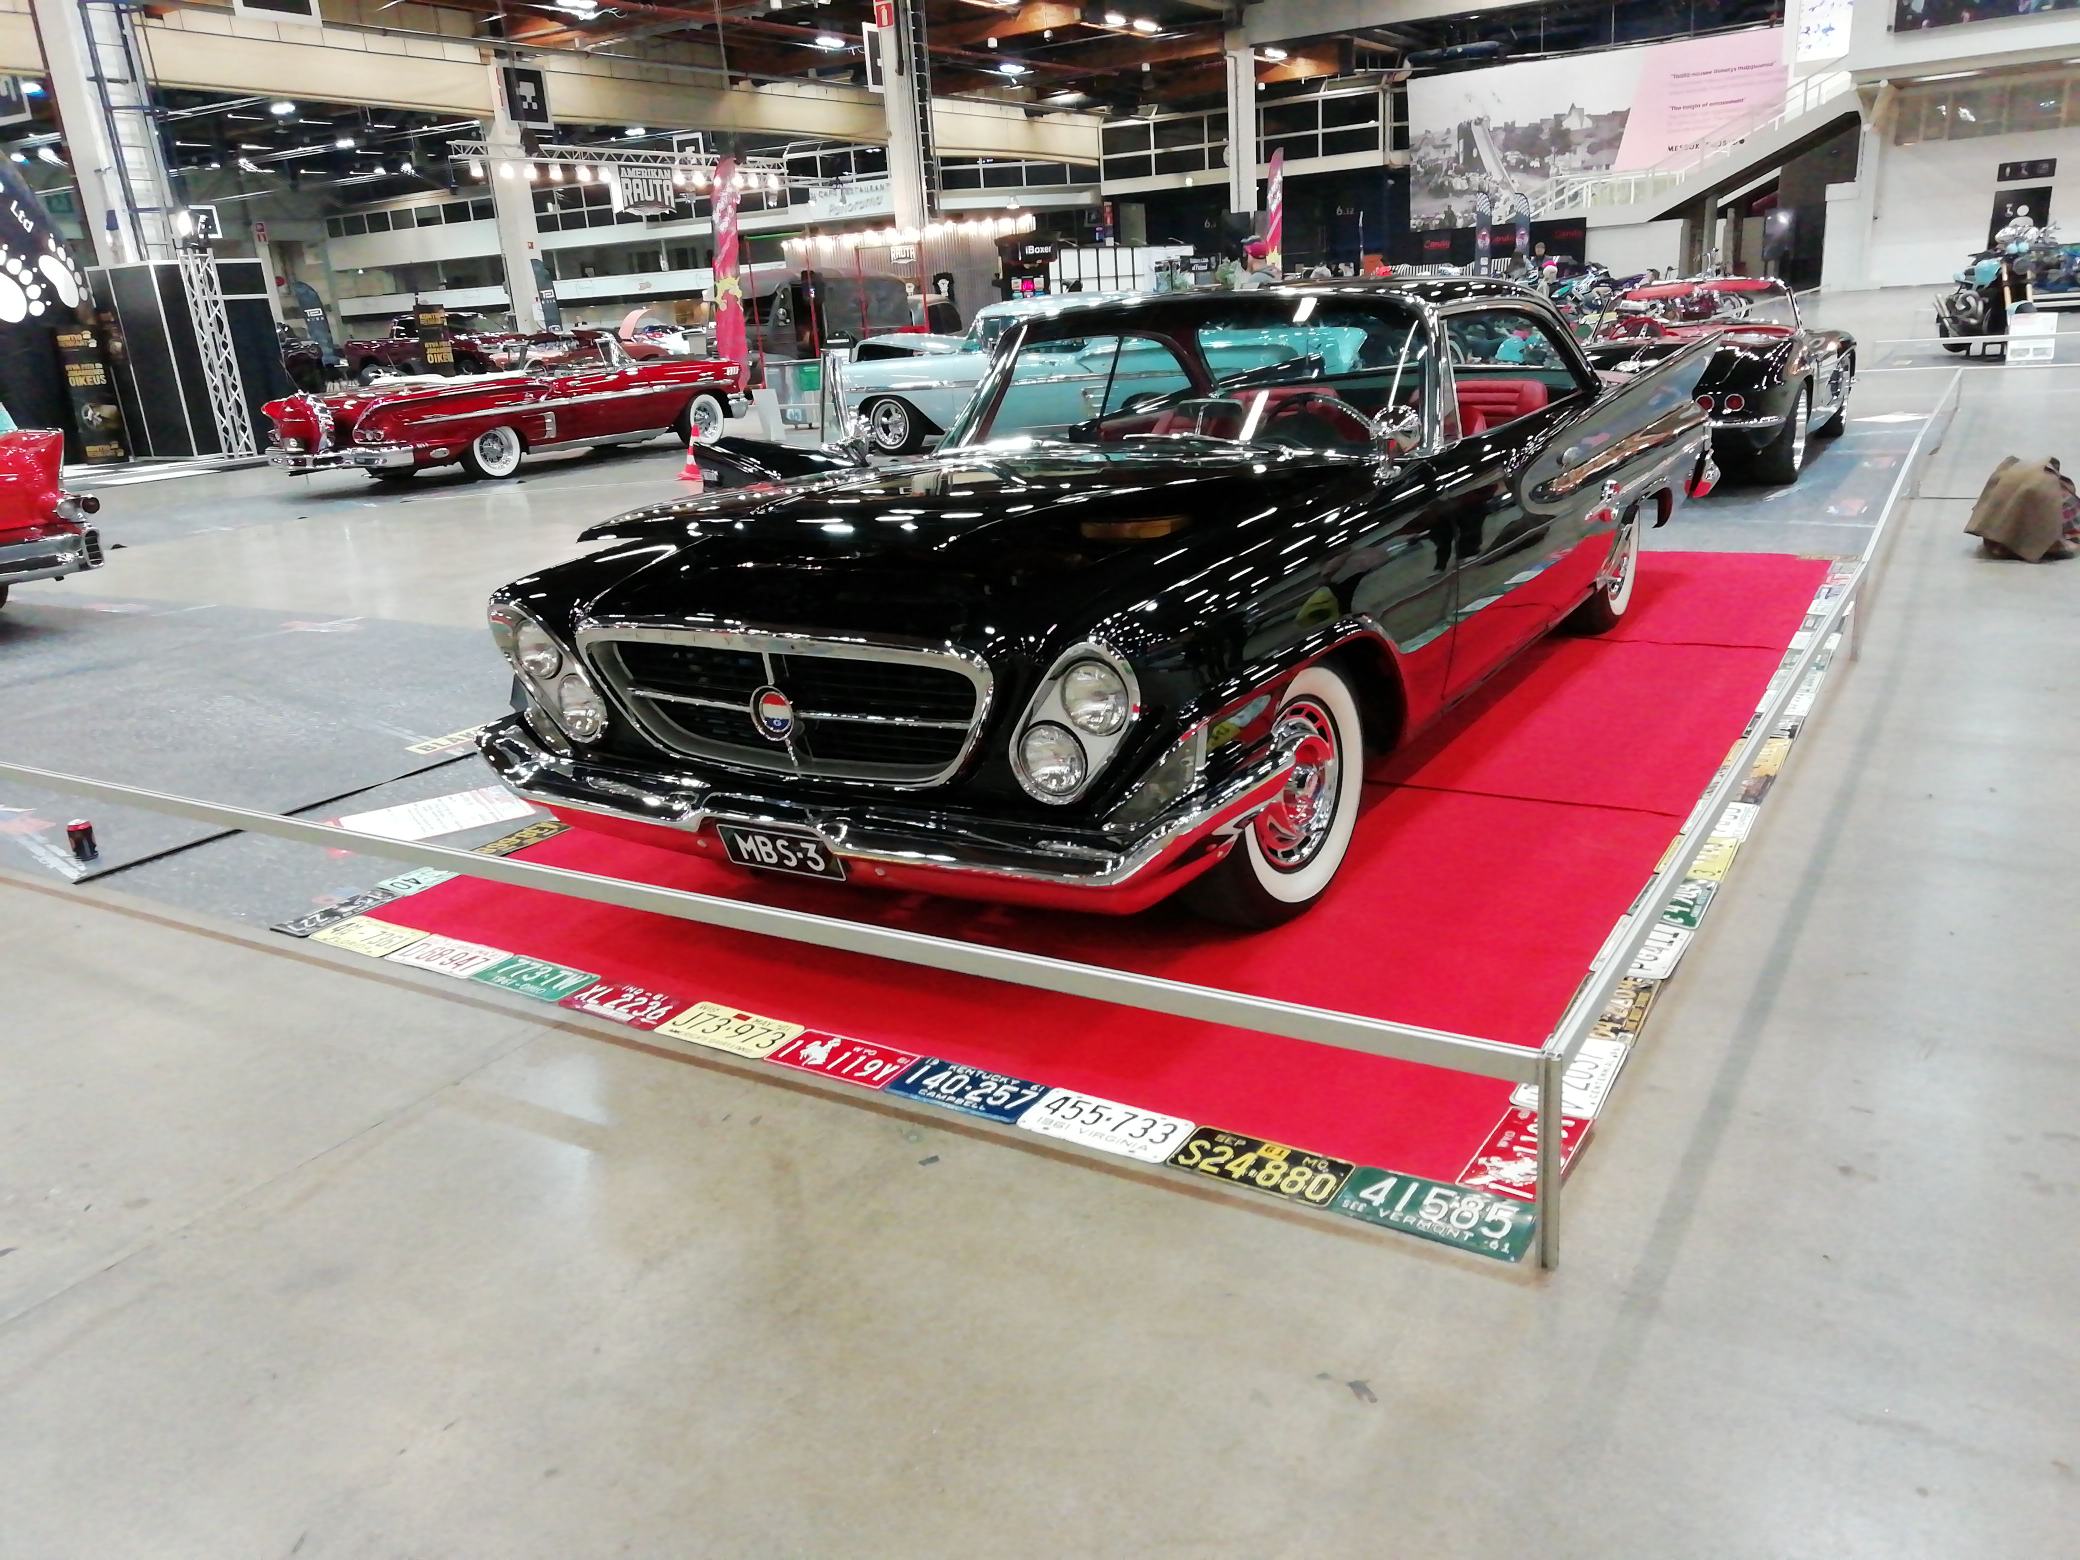 (IMG_20190418_213746_BURST001_COVER_resized_20190429_090841131.jpg) (IMG_20190418_213746_BURST001_COVER_resized_20190429_090841131.jpg)
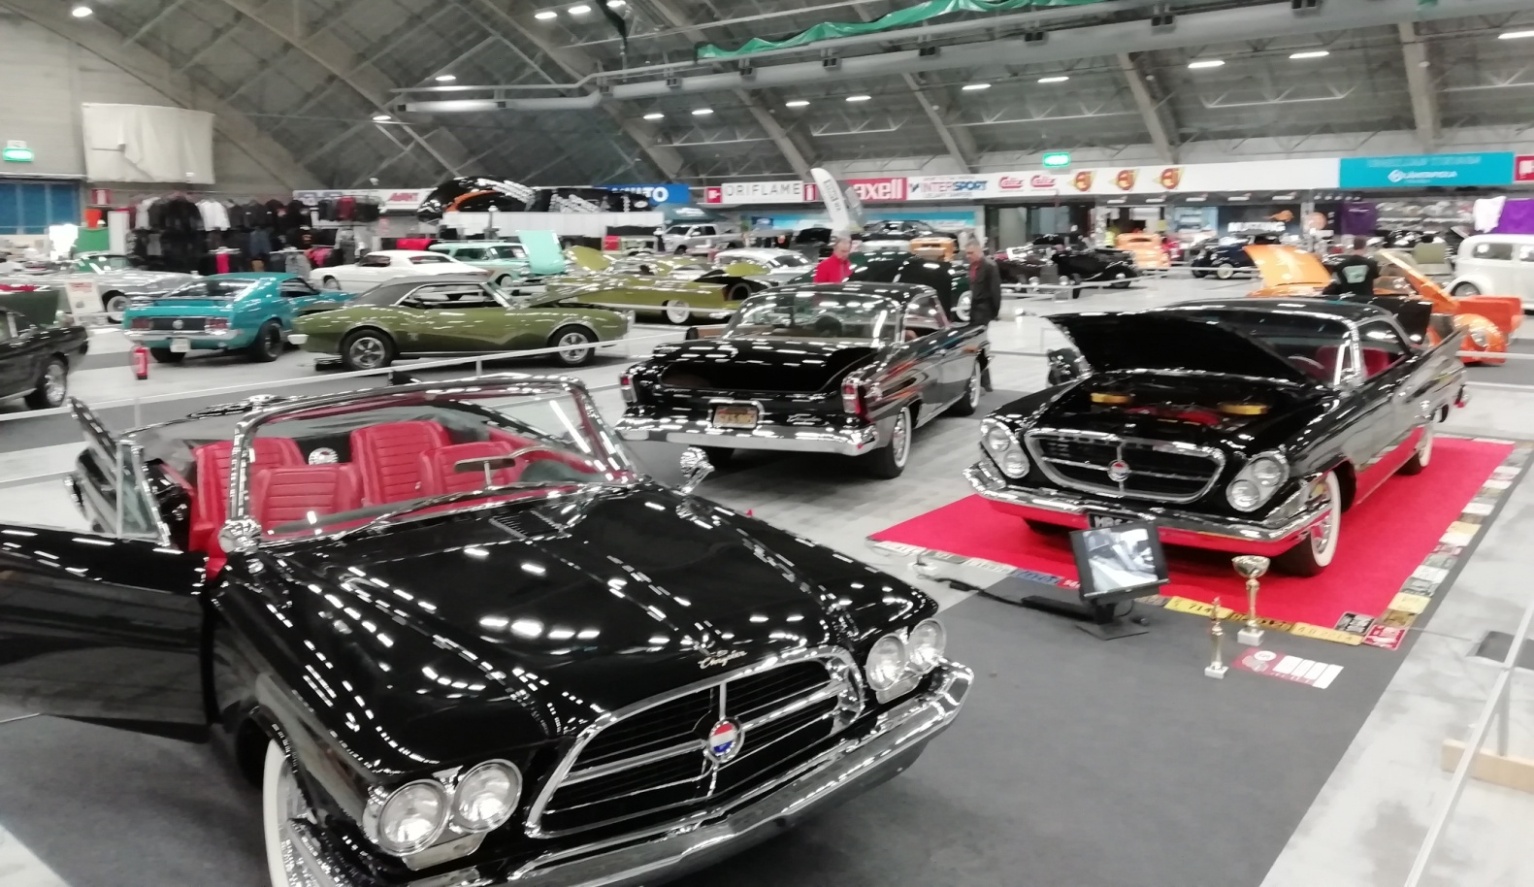 (IMG_20190427_182103_resized_20190429_090550586.jpg) (IMG_20190427_182103_resized_20190429_090550586.jpg)
Attachments
----------------
IMG_20190417_170236_resized_20190429_090843649.jpg (493KB - 377 downloads)
IMG_20190418_164414_resized_20190429_090842964.jpg (137KB - 378 downloads)
IMG_20190418_213746_BURST001_COVER_resized_20190429_090841131.jpg (422KB - 374 downloads)
IMG_20190427_182103_resized_20190429_090550586.jpg (444KB - 394 downloads)
|
|
| |
|
Location: North Australia | Good job Jari, nice to be recognized for excellent work.
Now where is the 59 dodge you talked about?
Steve.
|
|
| |
|
Board Moderator & Exner Expert 10K+
Posts: 13045
Location: Southern Sweden - Sturkö island | Very nice photos Jari! Congrats to your awards. Now it's time to ooze down the Finnish roads and enjoy the fruits of your good work! |
|
| |
|
Expert 5K+
Posts: 5006
| I guess it got first place great looking. |
|
| |
|
Elite Veteran
Posts: 827
Location: tailFinland | 60 Imp - 2019-04-29 7:54 AM
Good job Jari, nice to be recognized for excellent work.
Now where is the 59 dodge you talked about?
Steve.
there is another topic:
http://www.forwardlook.net/forums/forums/thread-view.asp?tid=68681&...
|
|
| |
|
Veteran
Posts: 143
Location: Malmberget, Sweden | Jari. in the pic there is a peace thats not covered in plastic. I wonder where should that peace be? I found 2 of them in my car.
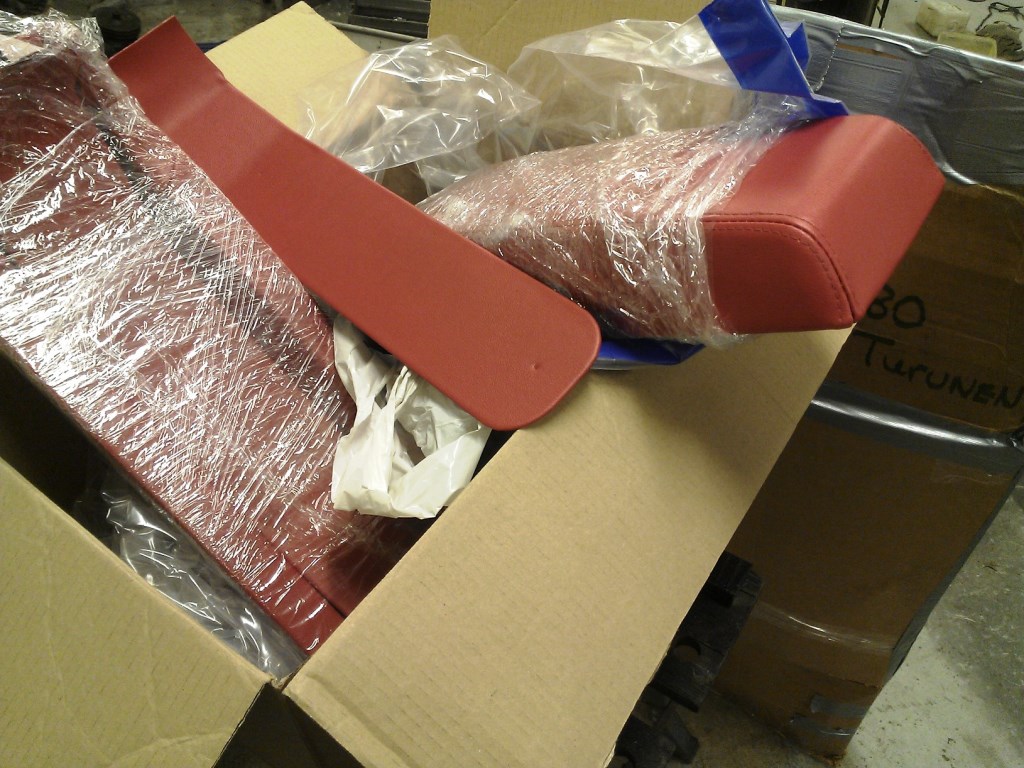 (WP_001381.jpg) (WP_001381.jpg)
Attachments
----------------
WP_001381.jpg (208KB - 323 downloads)
|
|
| |
|
Elite Veteran
Posts: 827
Location: tailFinland | It belongs inside into those center console armrests/lids |
|
| |