|
|
Expert
Posts: 2634
   
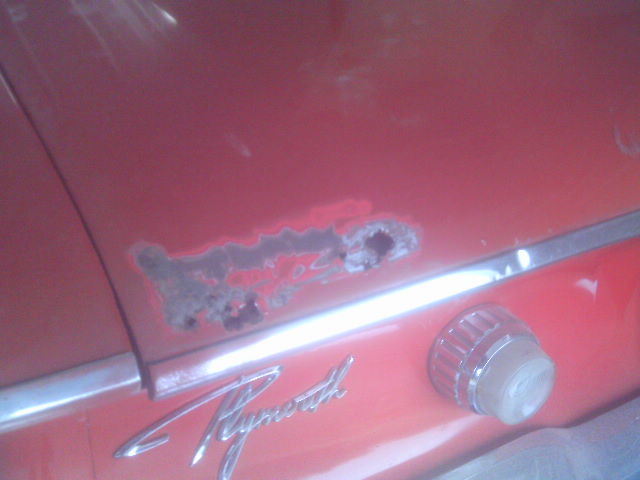
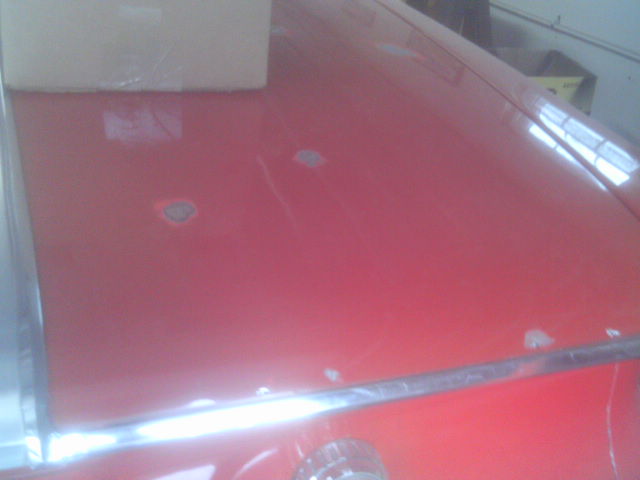
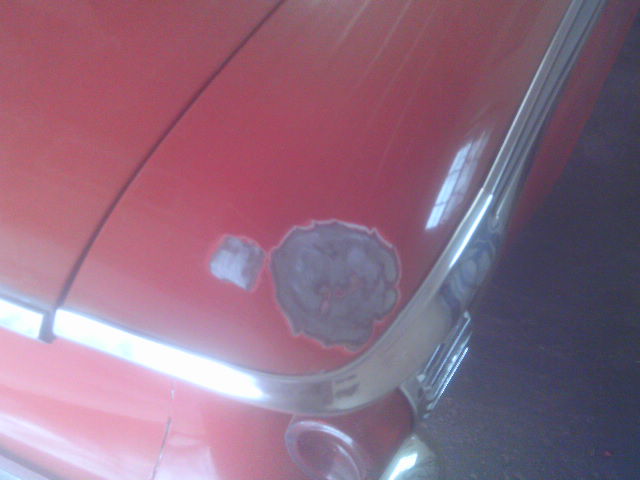
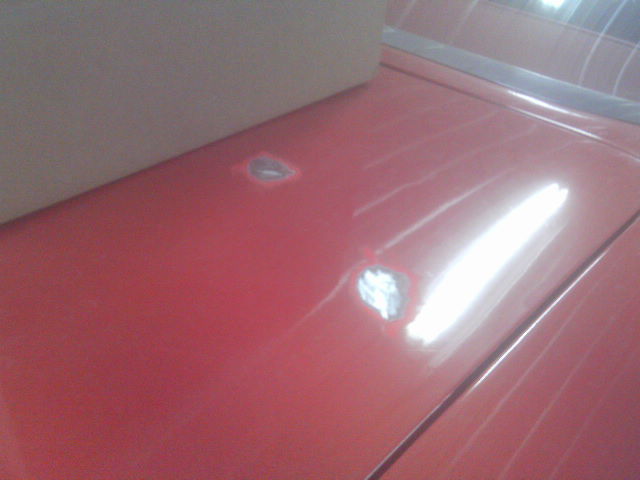
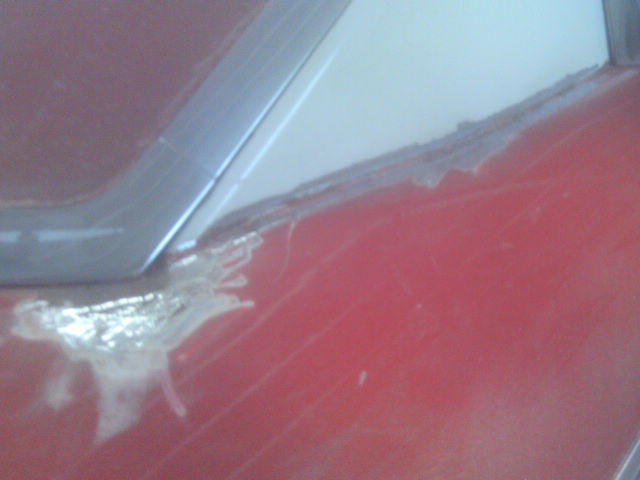
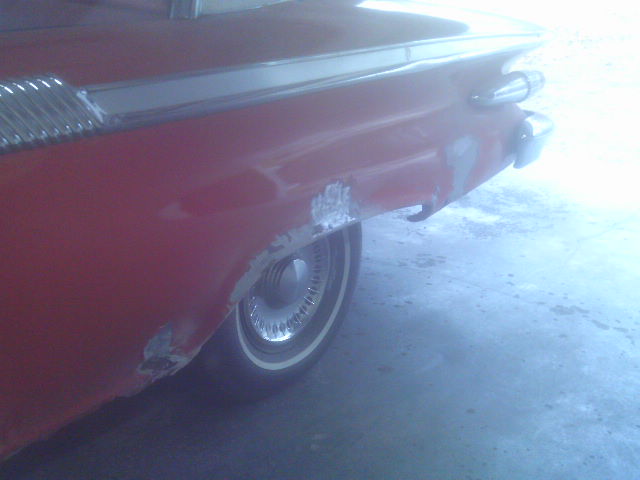
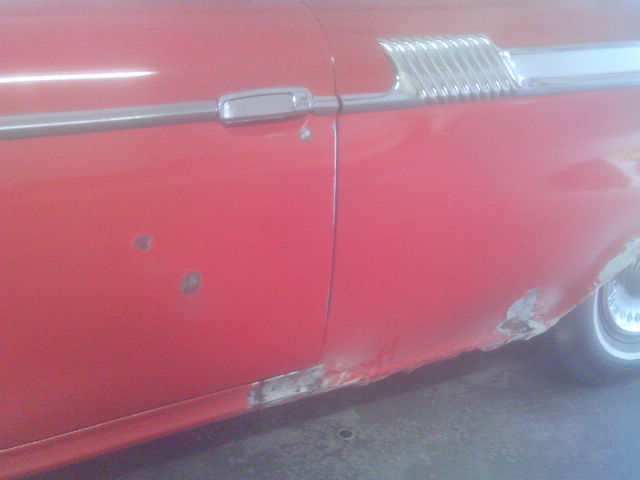
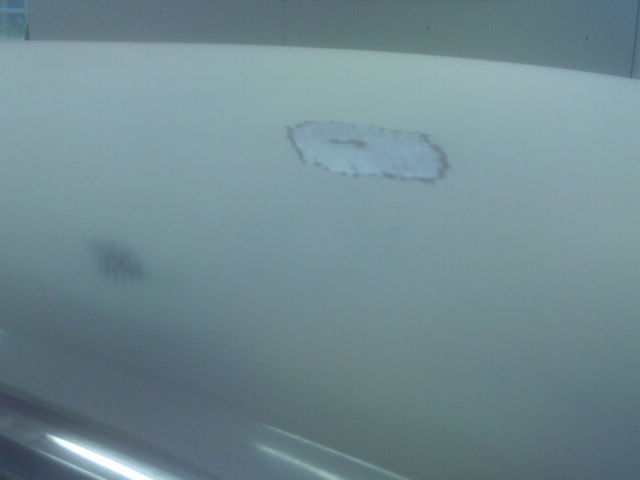
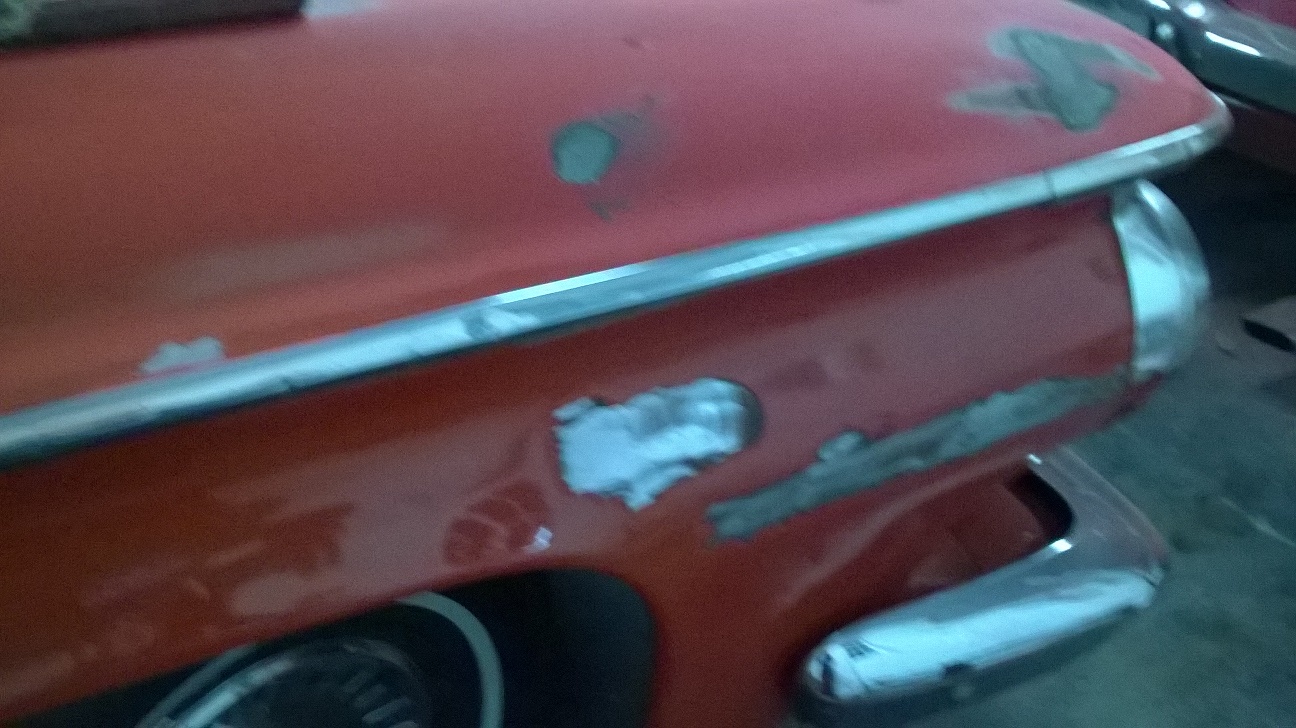
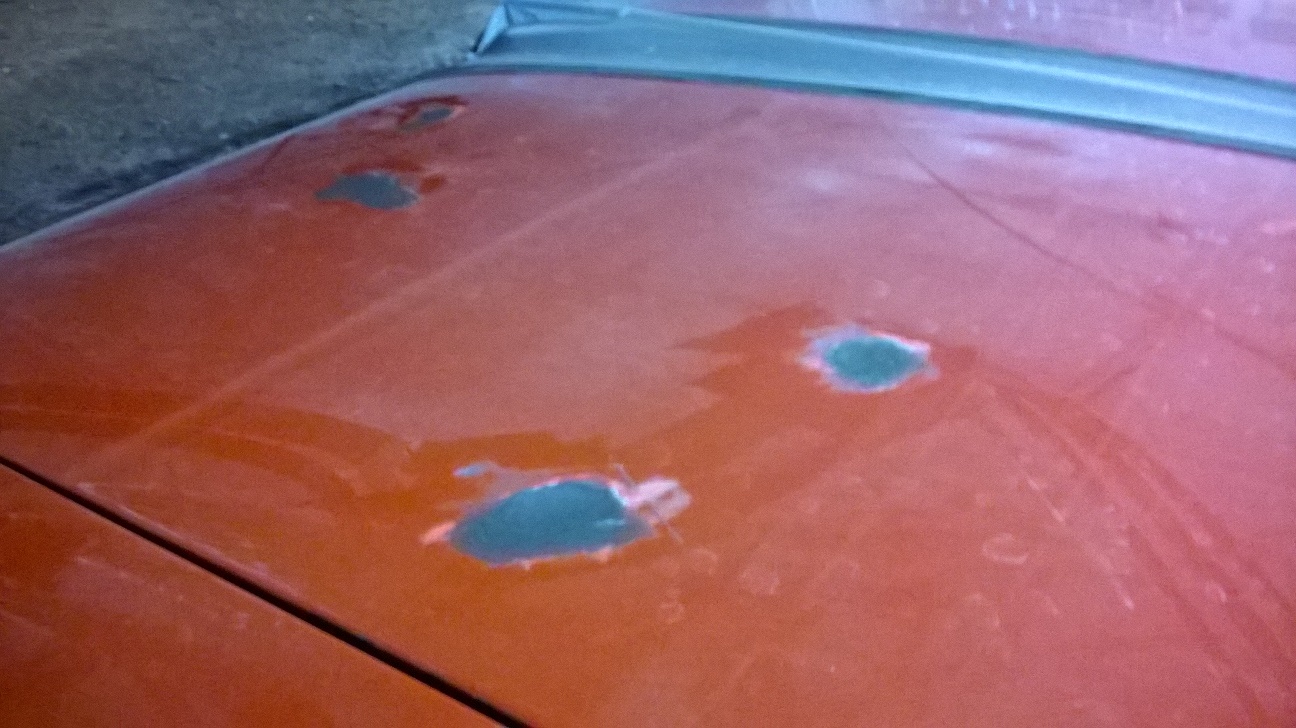
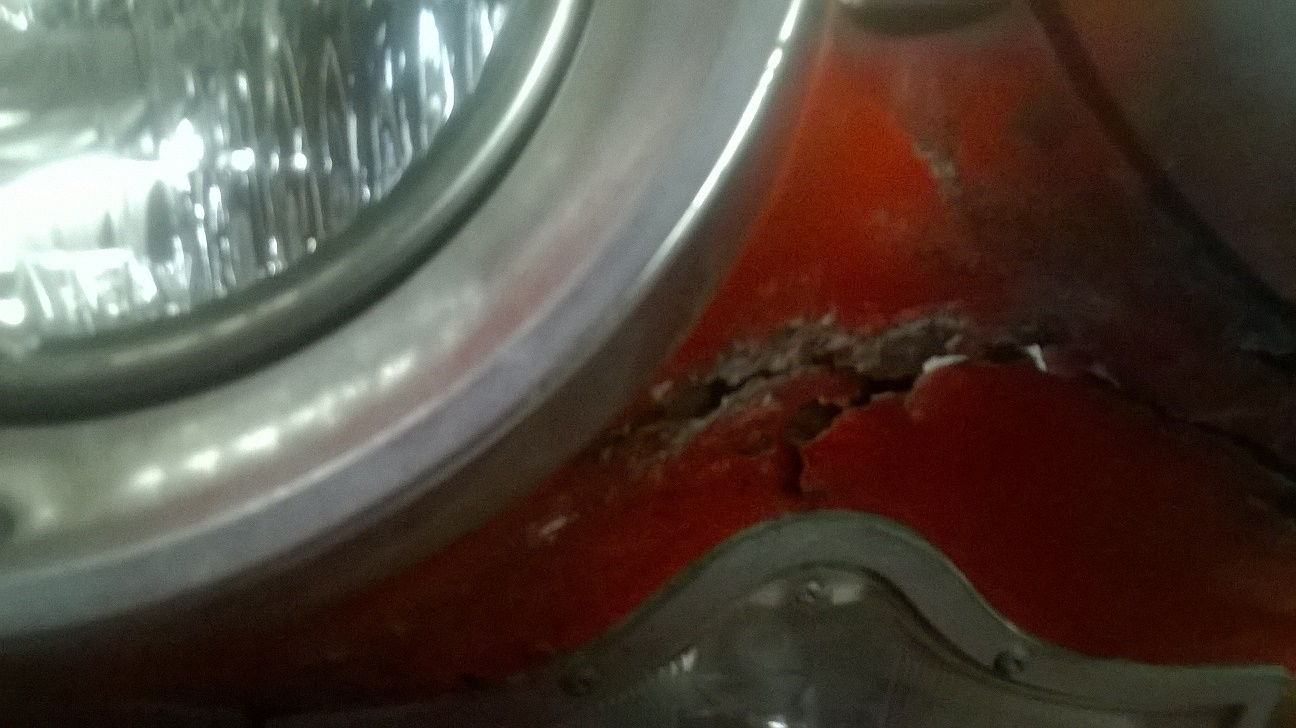
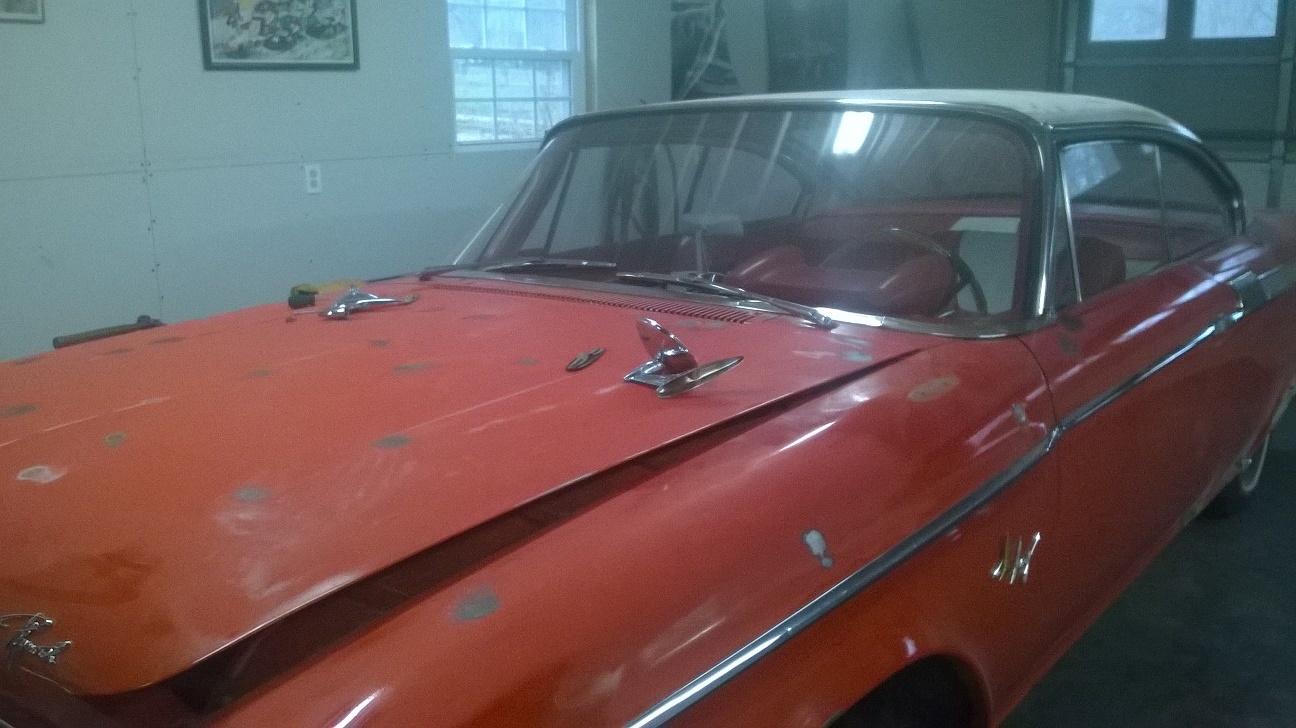
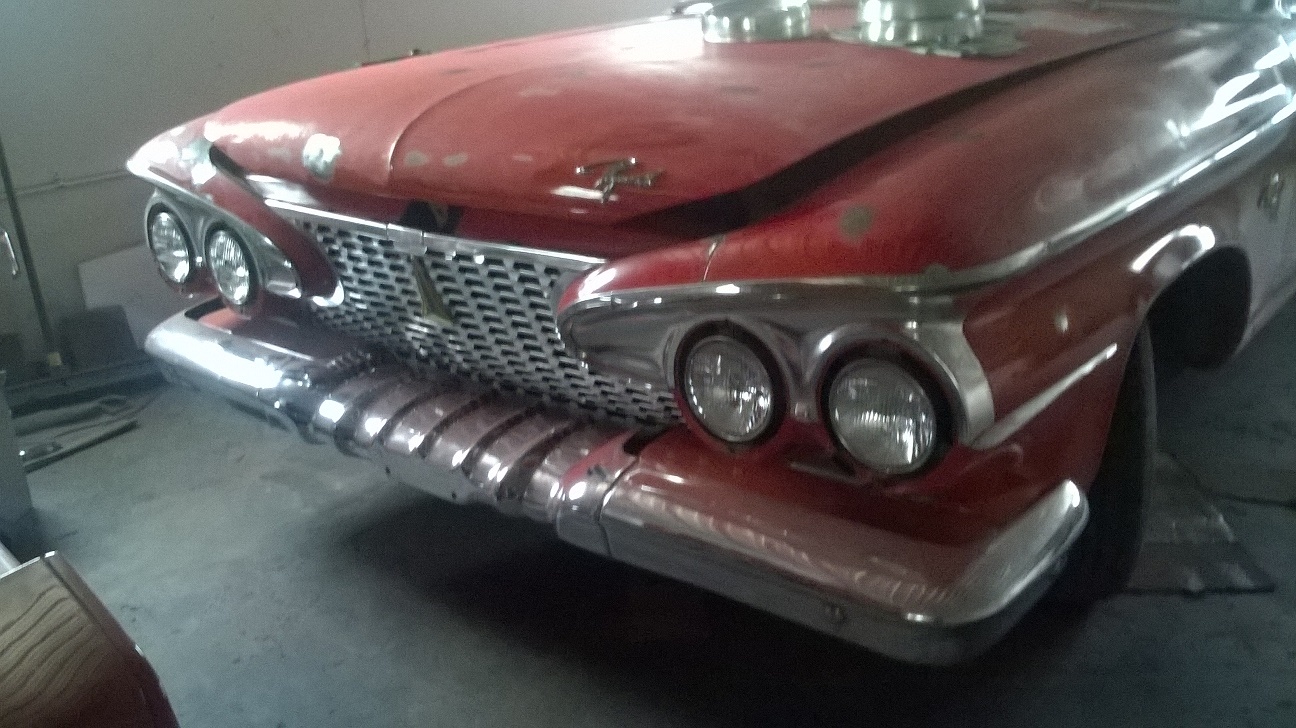
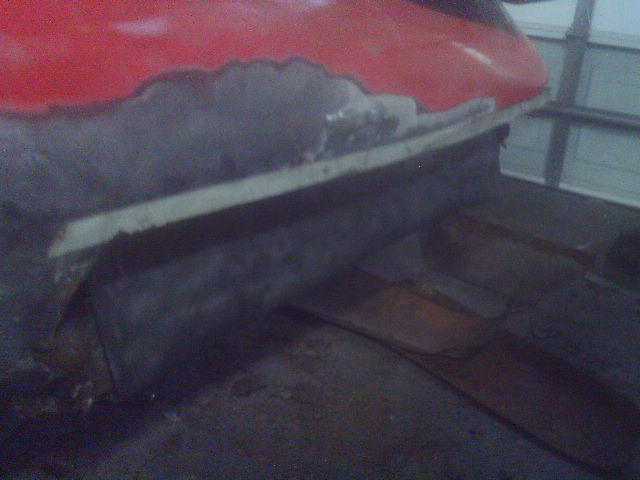
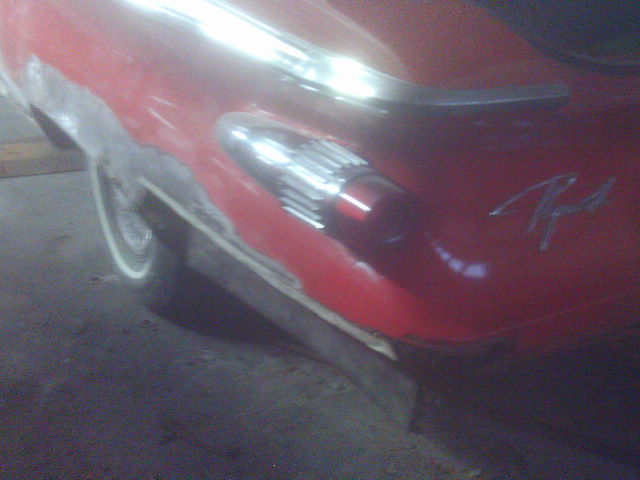
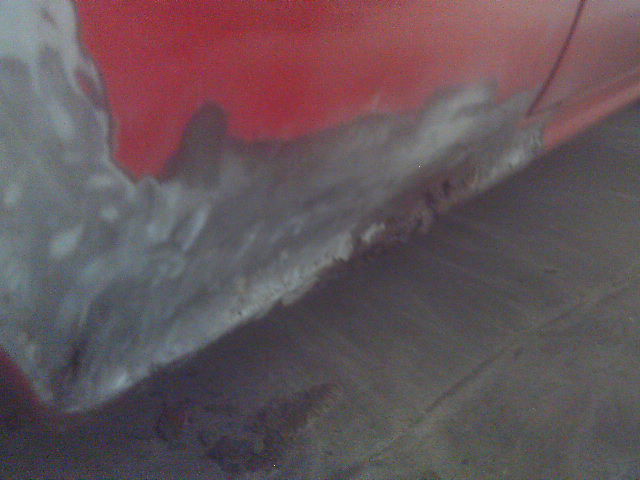
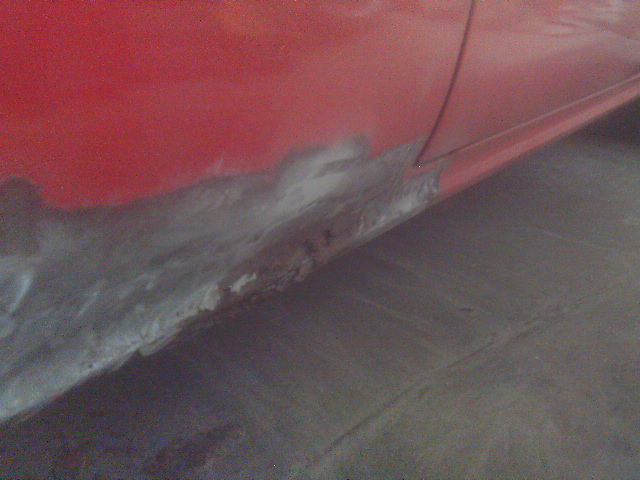
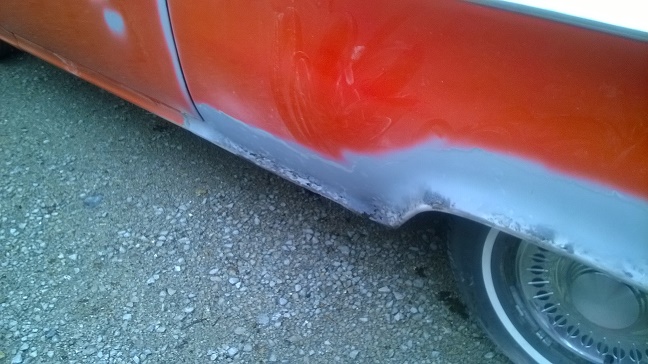
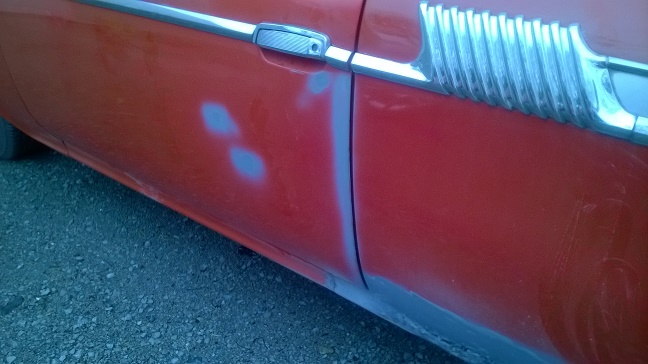
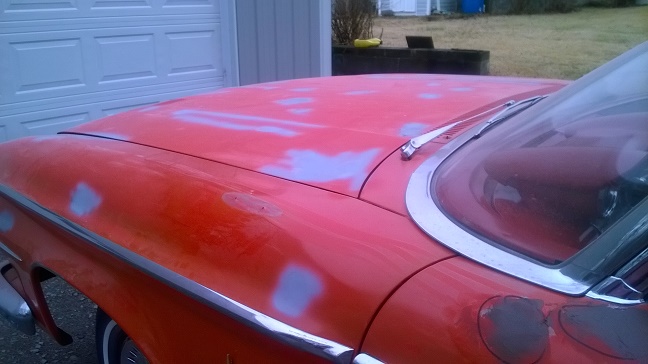
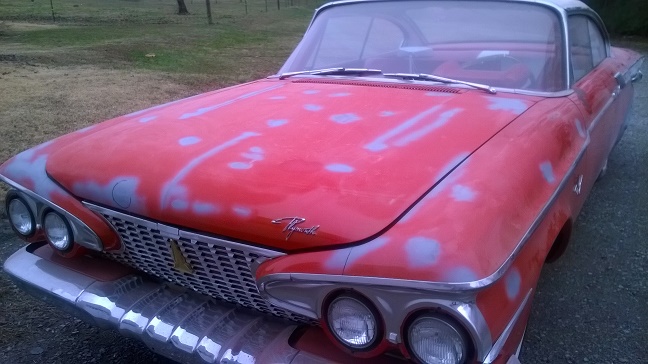
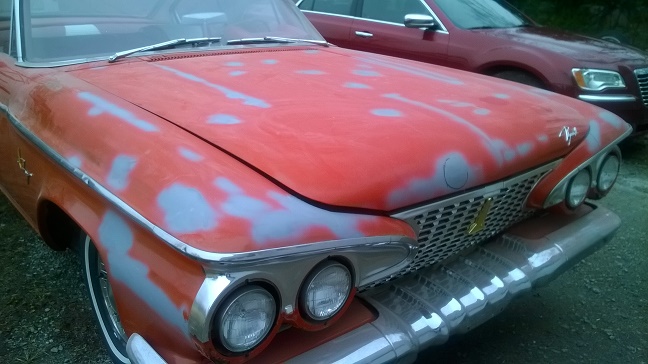
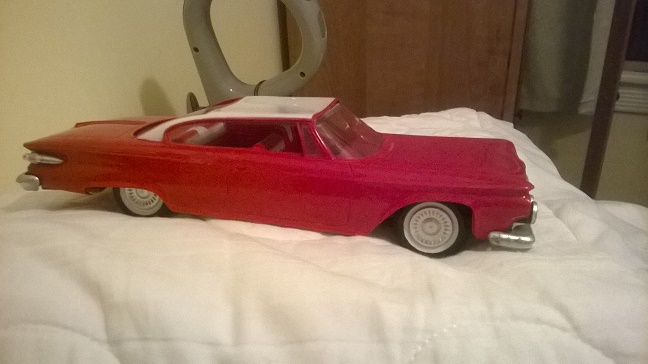
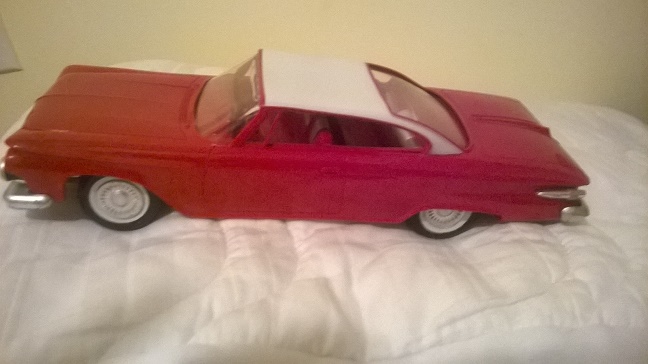
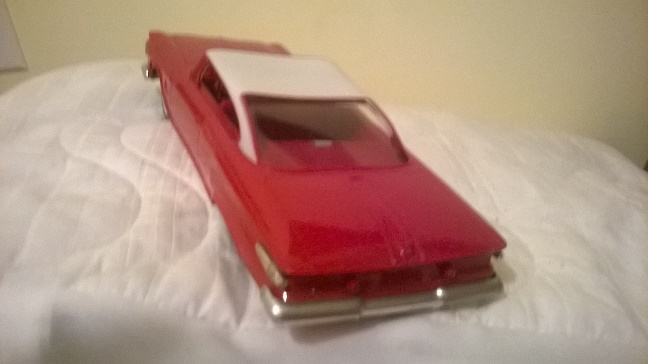
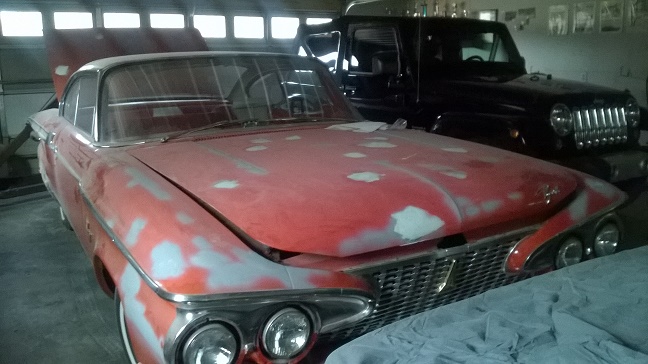
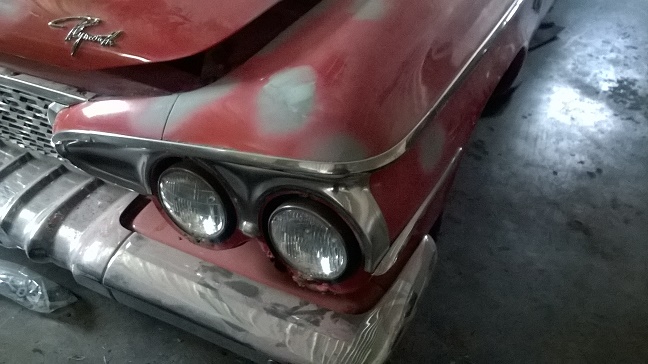
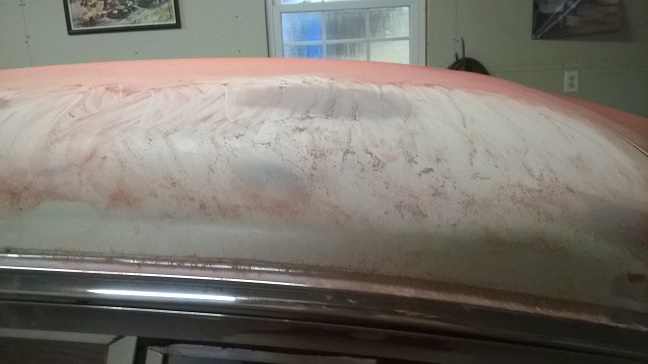
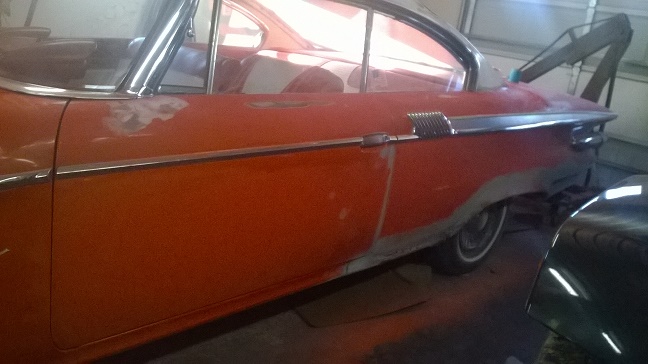
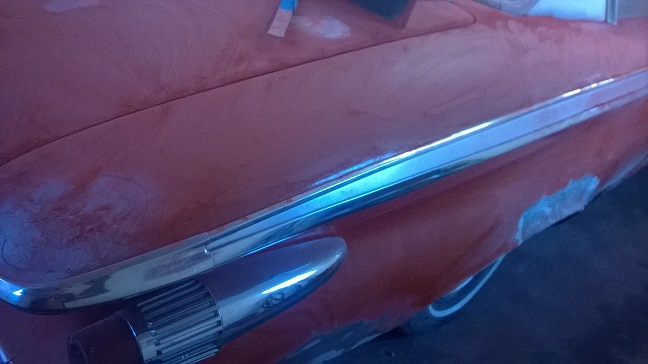
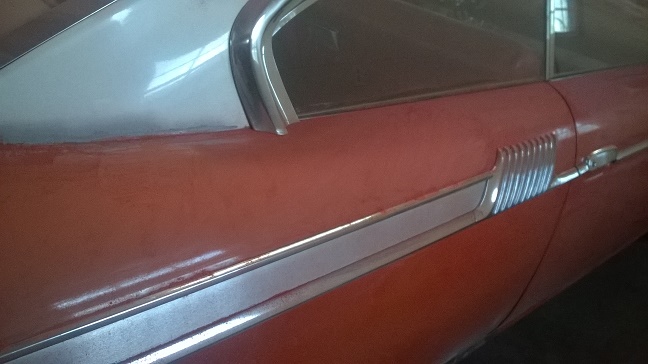
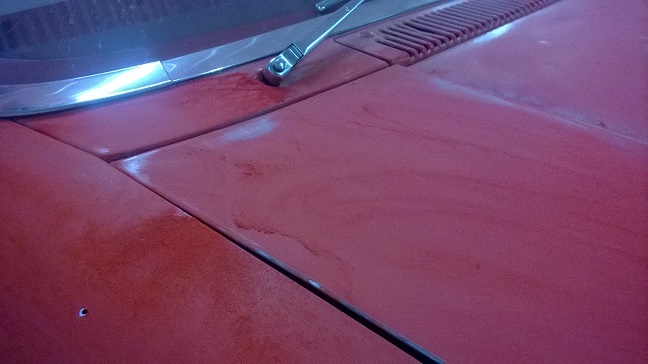
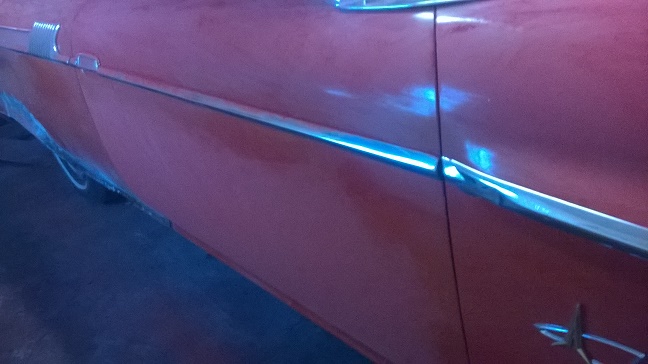
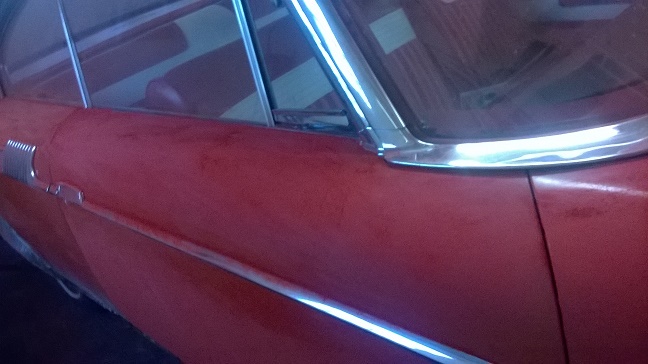
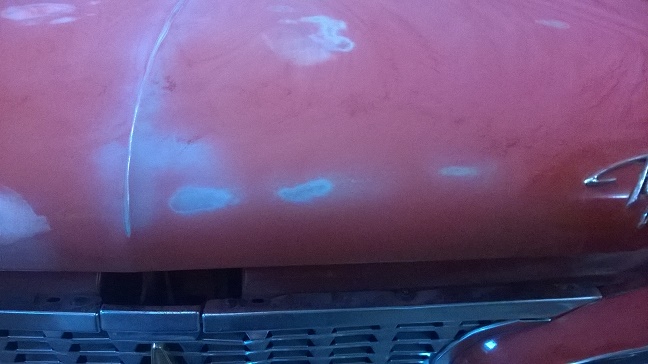
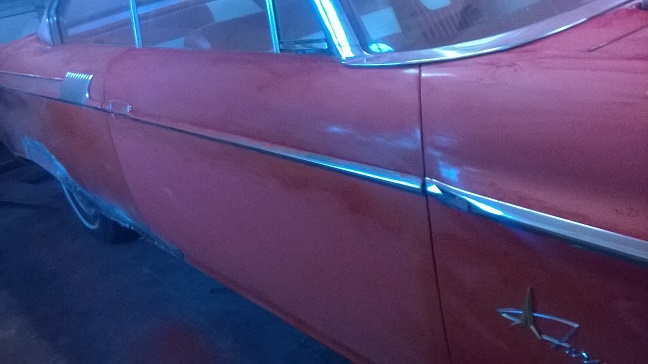
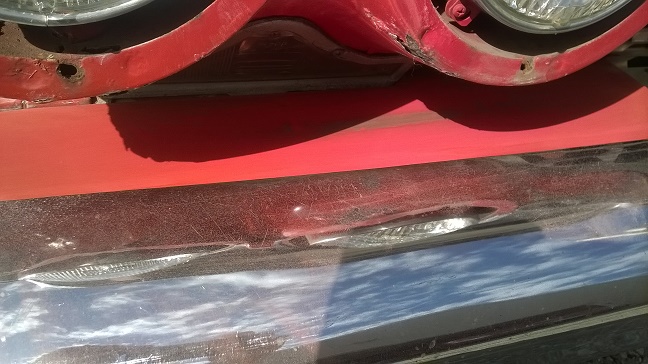
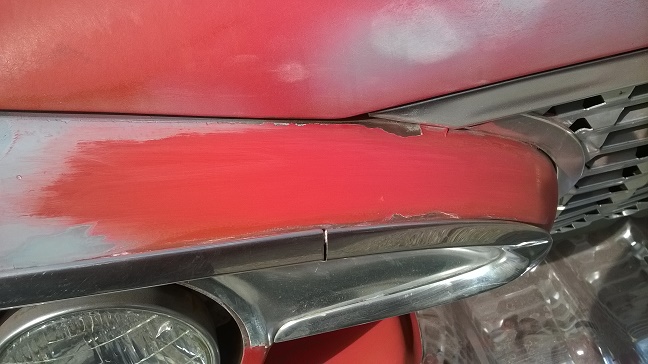
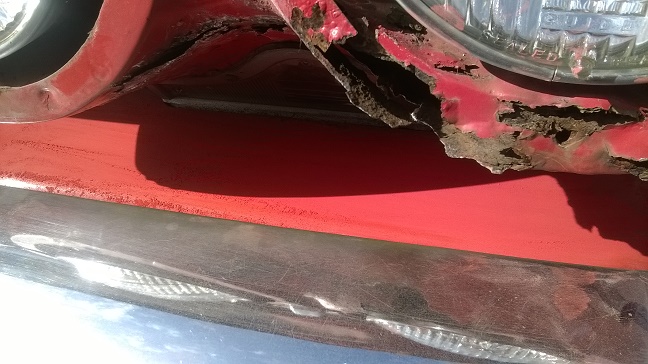
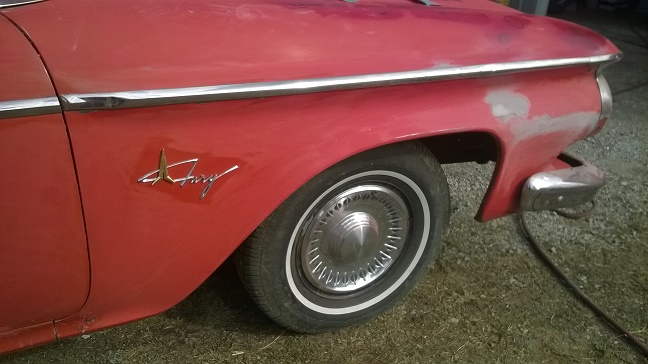
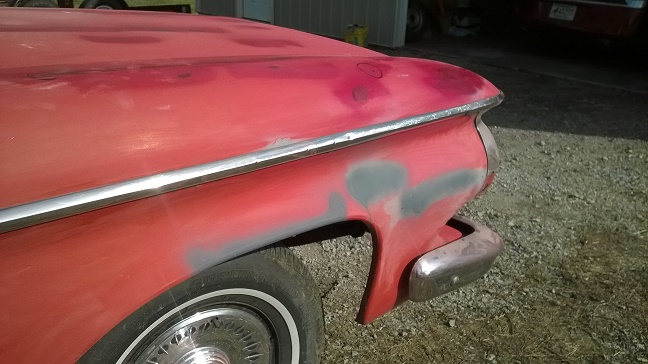
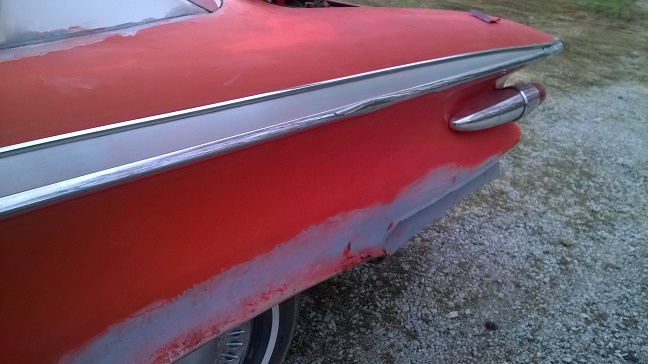
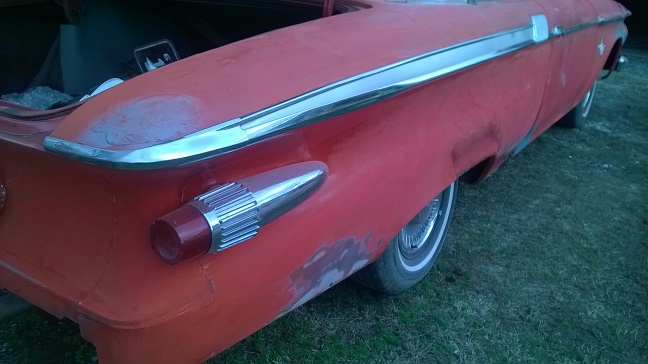
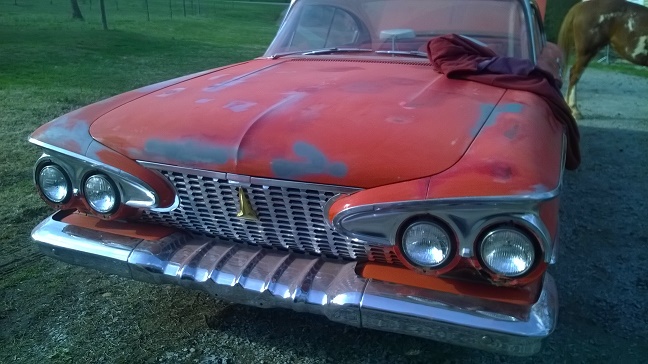
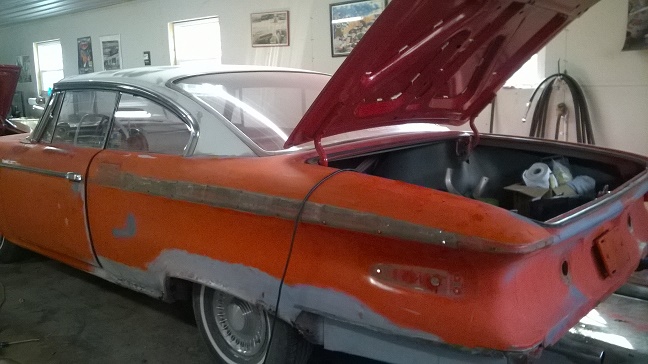
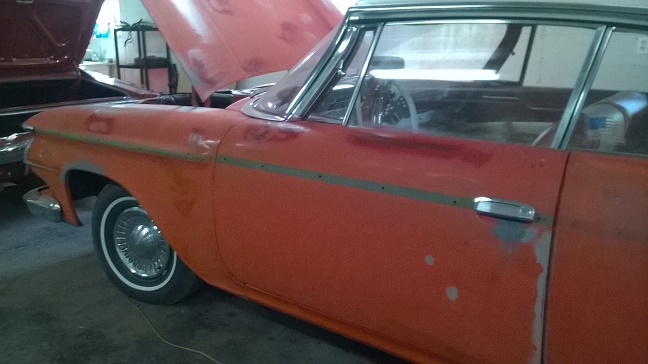
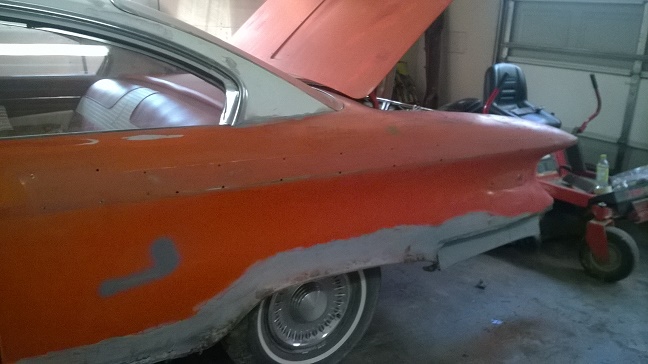
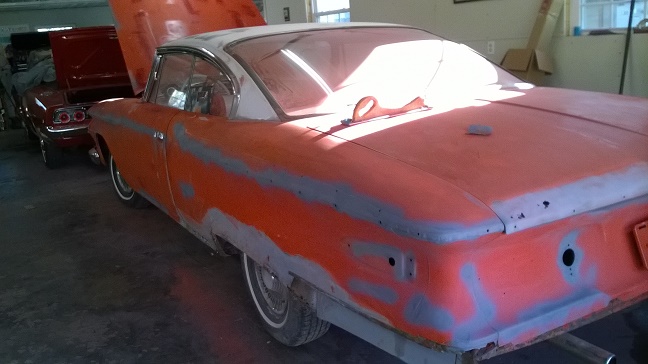
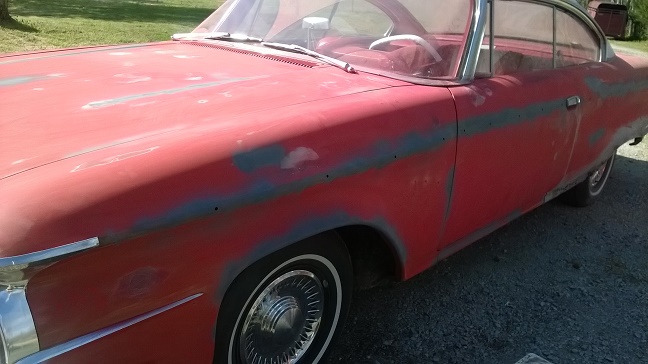
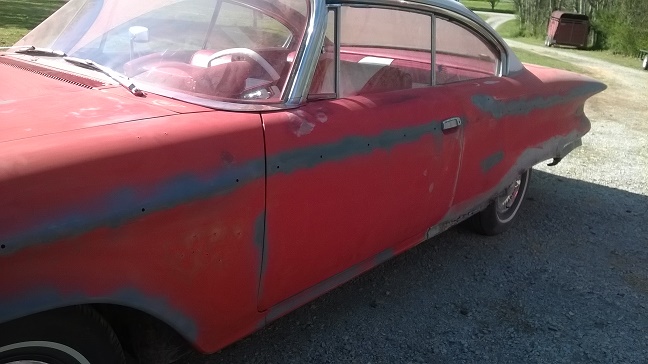
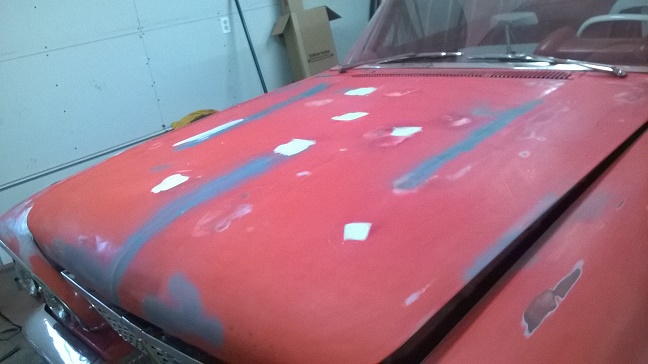
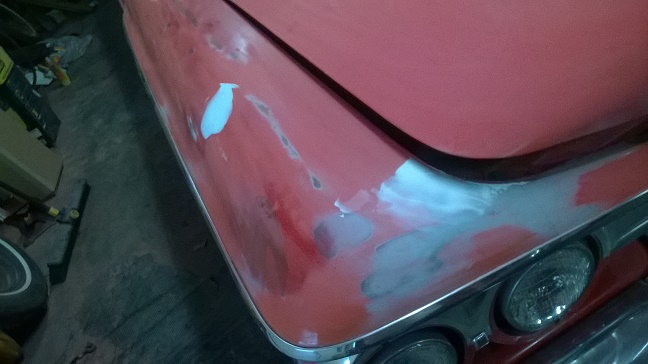
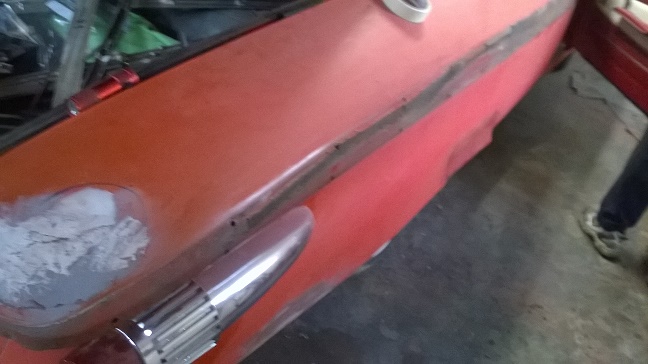
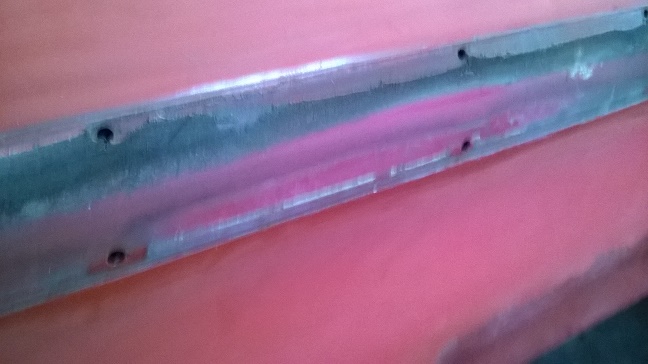
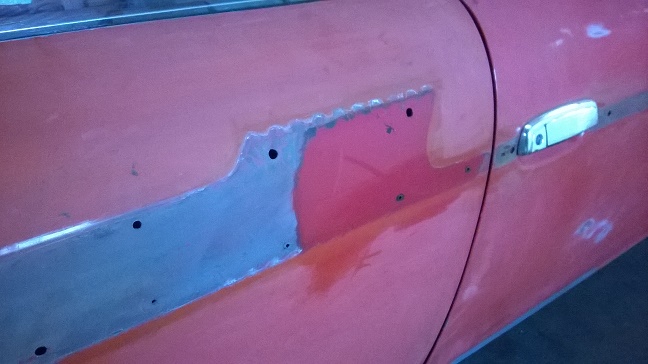
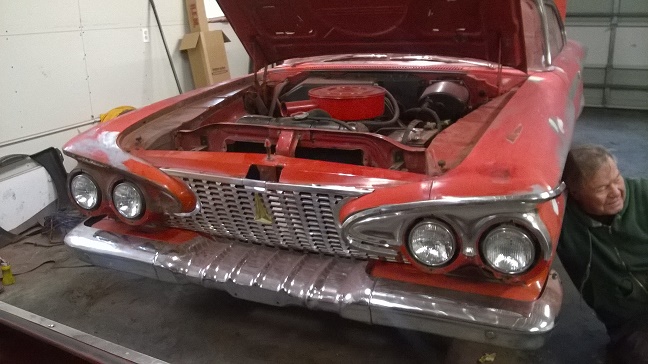
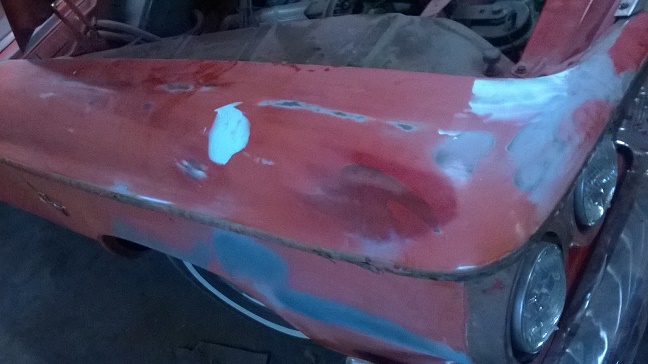
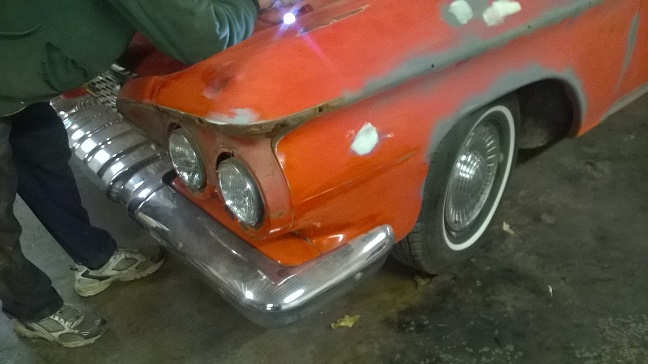
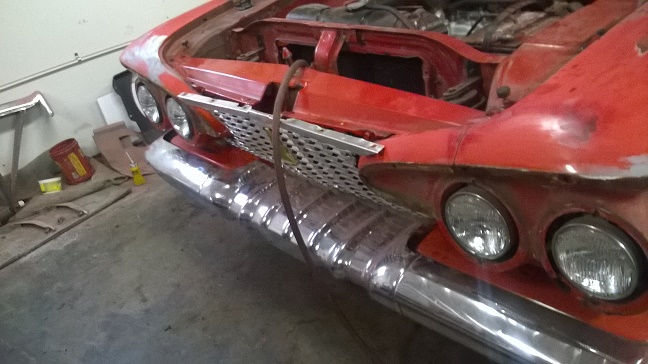
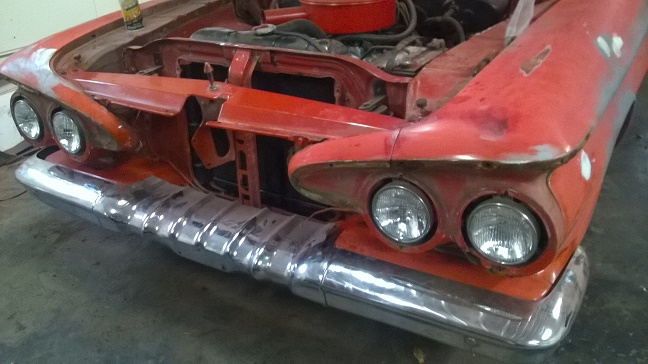
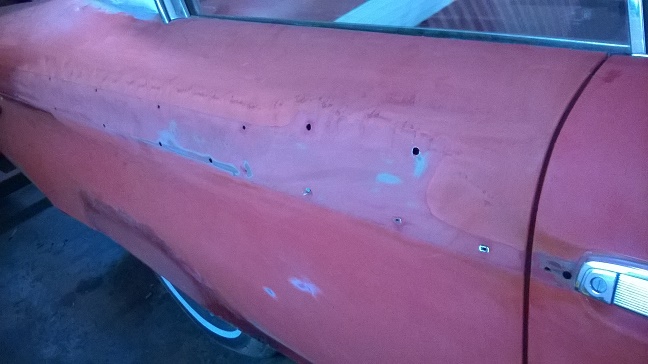
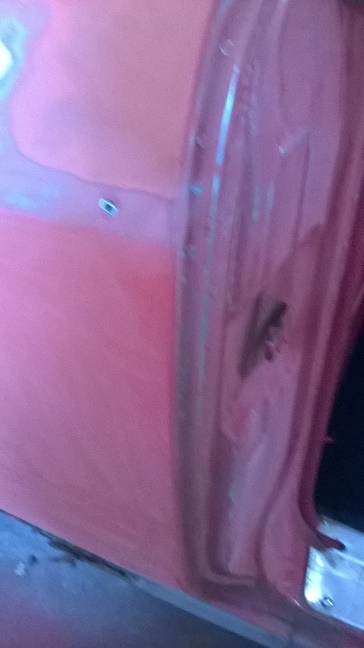
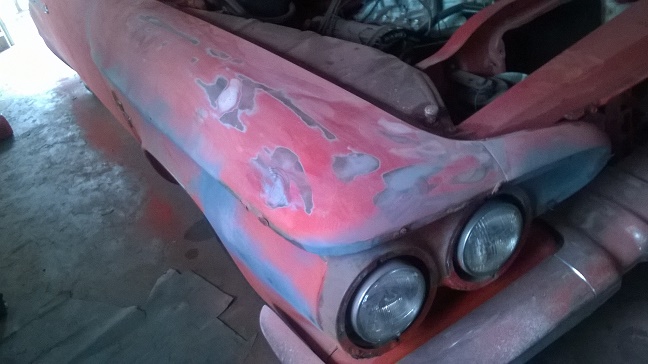
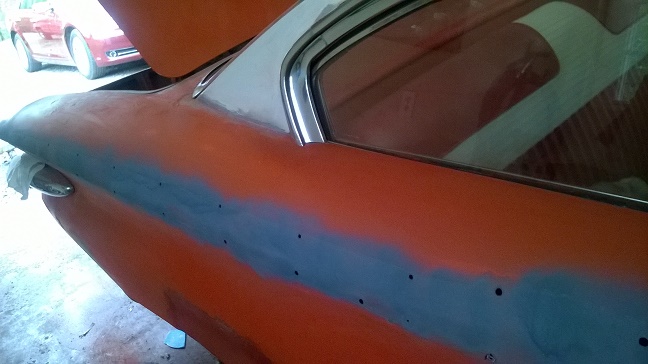
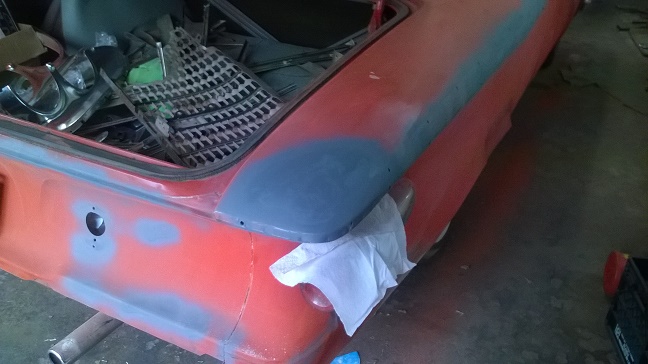
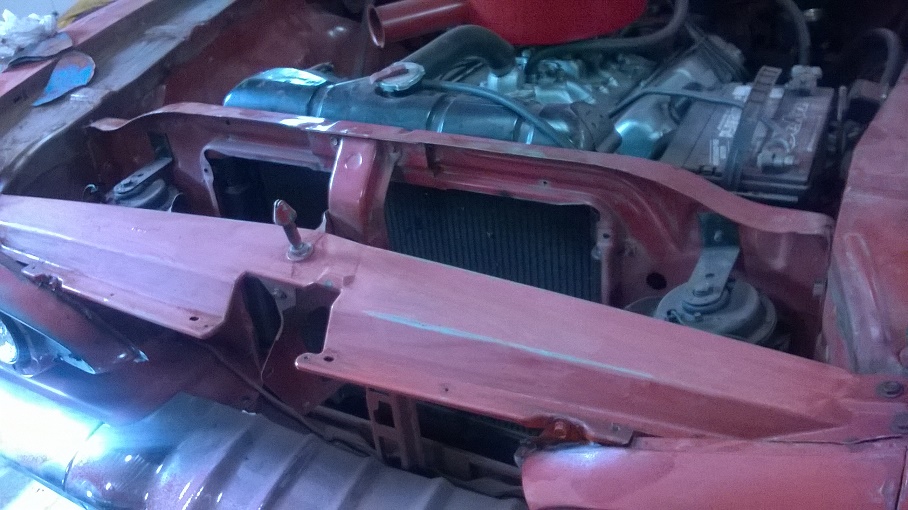
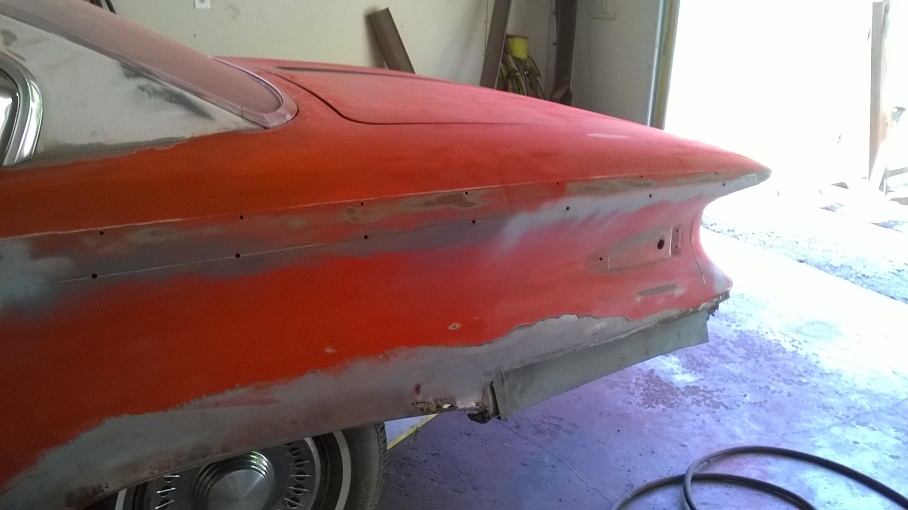
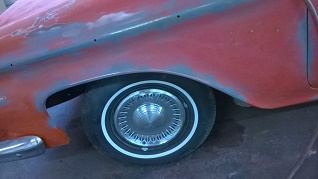
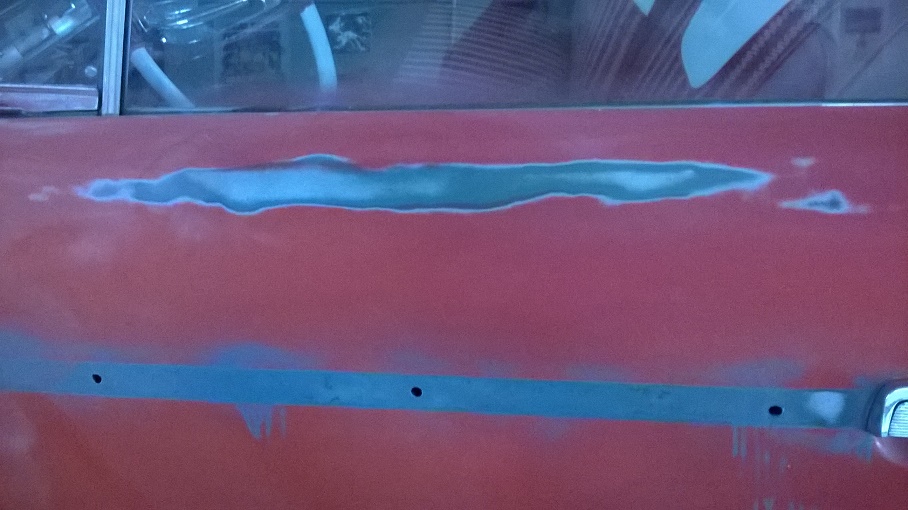
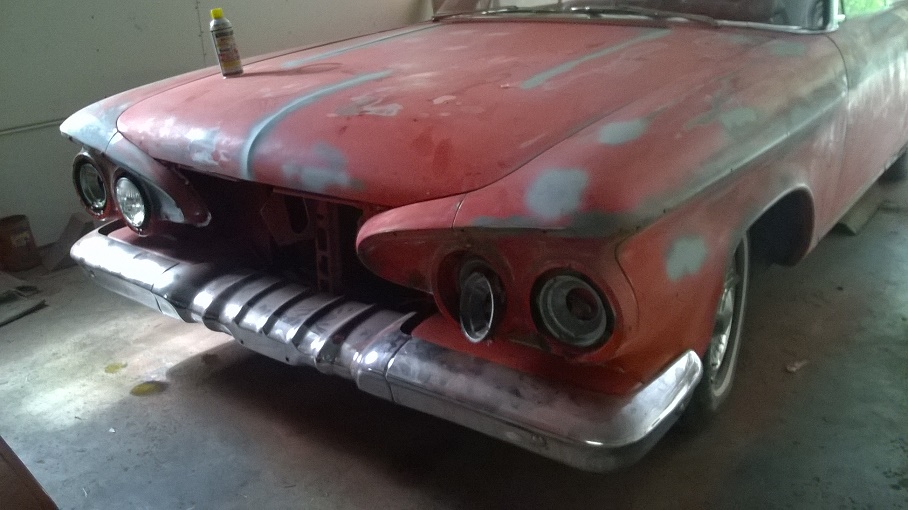
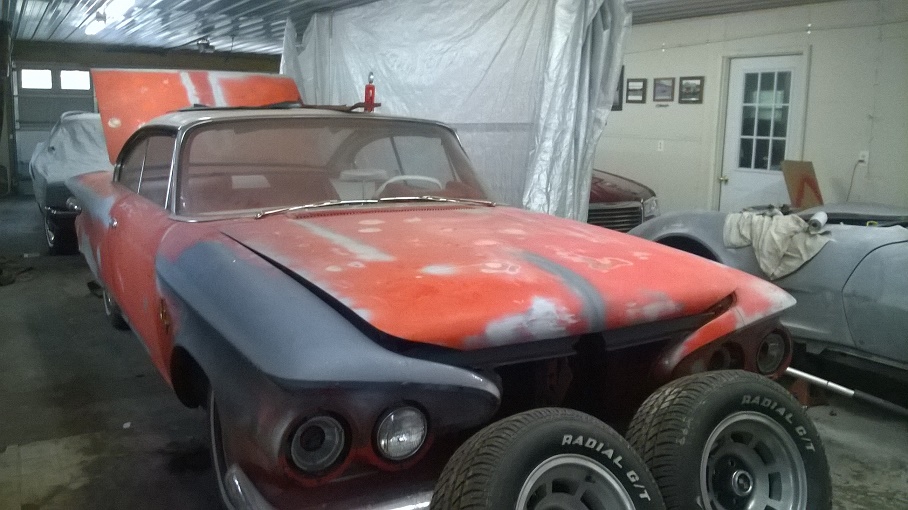
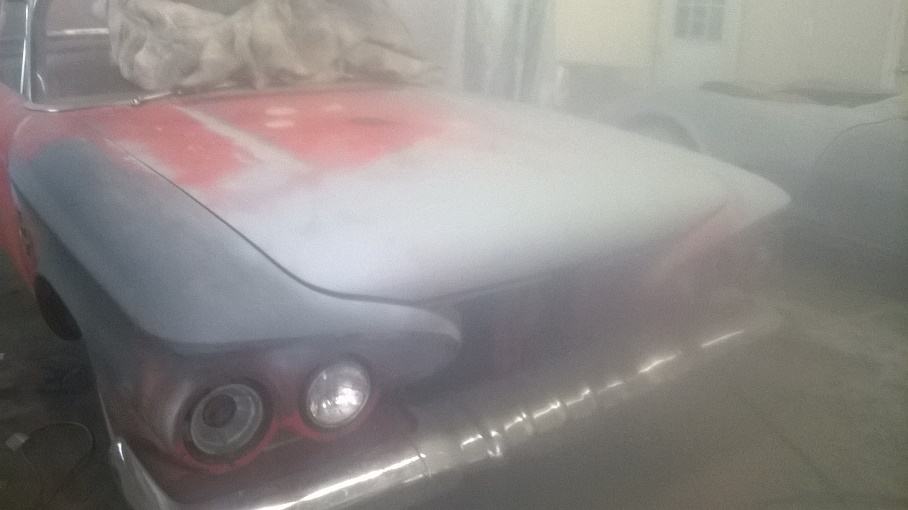
Location: Minor Hill, TN | Well the restoration of my '61 fury has started. My dad has sanded some spots of the body down to the metal . I have photos of this . I know there is more to do and its not an over night job. I also know it will look good when it gets done. I will also post more photos when more work on the car is being worked on. The body was sanded and some parts sanded down to the metal .
Edited by 1961plymouthfury 2014-12-14 10:42 PM
 (2010-03-25 20.46.50.jpg) (2010-03-25 20.46.50.jpg)
 (2010-03-25 20.47.00.jpg) (2010-03-25 20.47.00.jpg)
 (2010-03-25 20.47.06.jpg) (2010-03-25 20.47.06.jpg)
 (2010-03-25 20.47.11.jpg) (2010-03-25 20.47.11.jpg)
 (2010-03-25 20.47.19.jpg) (2010-03-25 20.47.19.jpg)
 (2010-03-25 20.47.36.jpg) (2010-03-25 20.47.36.jpg)
 (2010-03-25 20.47.44.jpg) (2010-03-25 20.47.44.jpg)
 (2010-03-25 20.47.52.jpg) (2010-03-25 20.47.52.jpg)
 (2010-03-25 20.48.09.jpg) (2010-03-25 20.48.09.jpg)
 (2010-03-25 20.48.18.jpg) (2010-03-25 20.48.18.jpg)
 (2010-03-25 20.48.25.jpg) (2010-03-25 20.48.25.jpg)
 (2010-03-25 20.48.44.jpg) (2010-03-25 20.48.44.jpg)
 (2010-03-25 20.48.49.jpg) (2010-03-25 20.48.49.jpg)
 (2010-03-25 20.49.09.jpg) (2010-03-25 20.49.09.jpg)
Attachments
----------------
 2010-03-25 20.46.50.jpg (67KB - 255 downloads) 2010-03-25 20.46.50.jpg (67KB - 255 downloads)
2010-03-25 20.47.00.jpg (55KB - 250 downloads)
2010-03-25 20.47.06.jpg (65KB - 234 downloads)
2010-03-25 20.47.11.jpg (62KB - 236 downloads)
2010-03-25 20.47.19.jpg (59KB - 290 downloads)
2010-03-25 20.47.36.jpg (73KB - 249 downloads)
2010-03-25 20.47.44.jpg (62KB - 228 downloads)
2010-03-25 20.47.52.jpg (61KB - 238 downloads)
2010-03-25 20.48.09.jpg (74KB - 246 downloads)
2010-03-25 20.48.18.jpg (63KB - 227 downloads)
2010-03-25 20.48.25.jpg (66KB - 246 downloads)
2010-03-25 20.48.44.jpg (40KB - 242 downloads)
2010-03-25 20.48.49.jpg (46KB - 234 downloads)
2010-03-25 20.49.09.jpg (75KB - 246 downloads)
|
|
| |
|
Expert
Posts: 2634
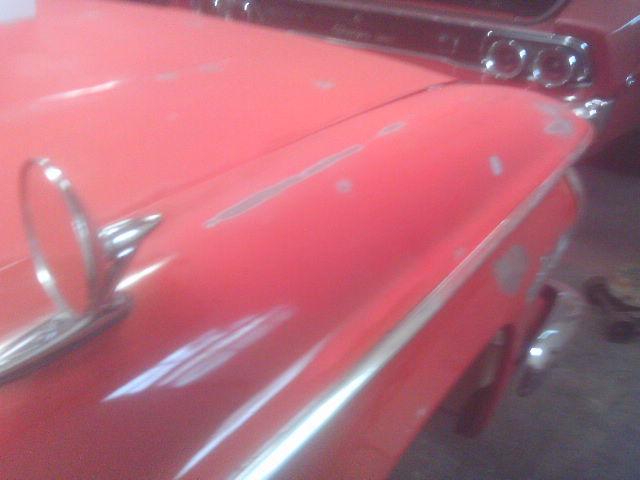
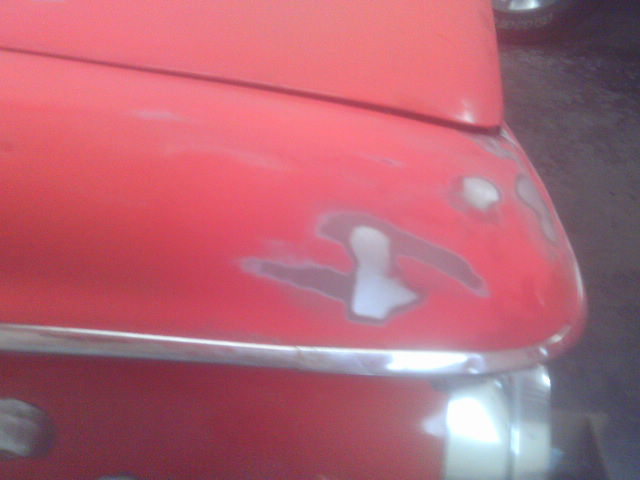
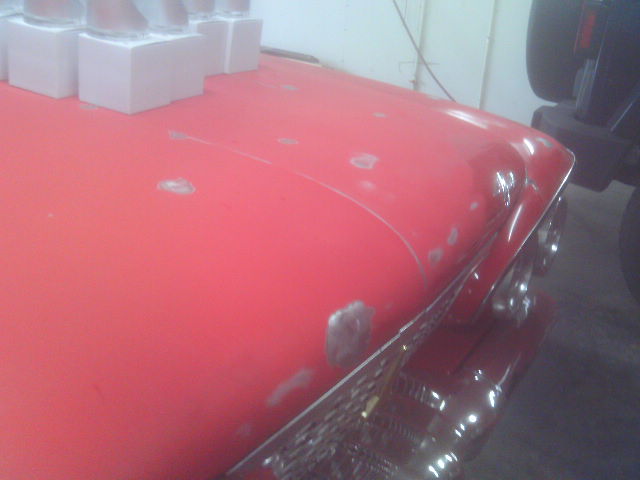
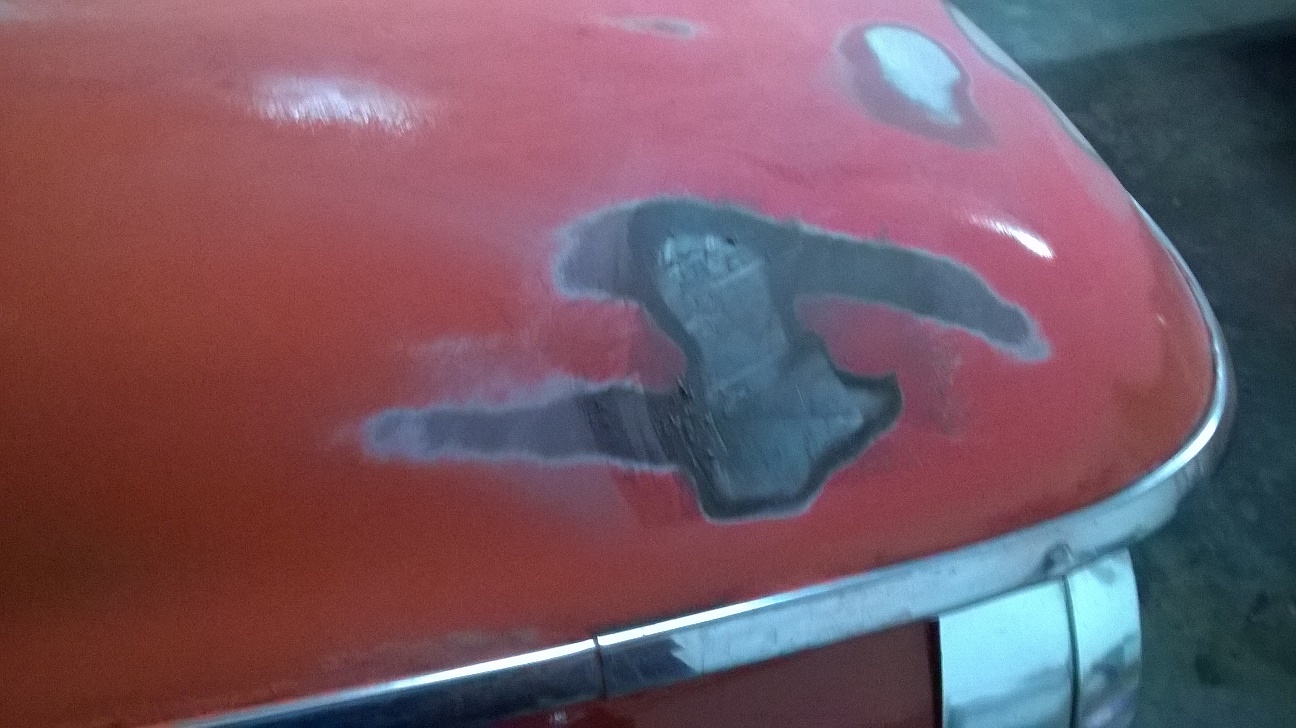
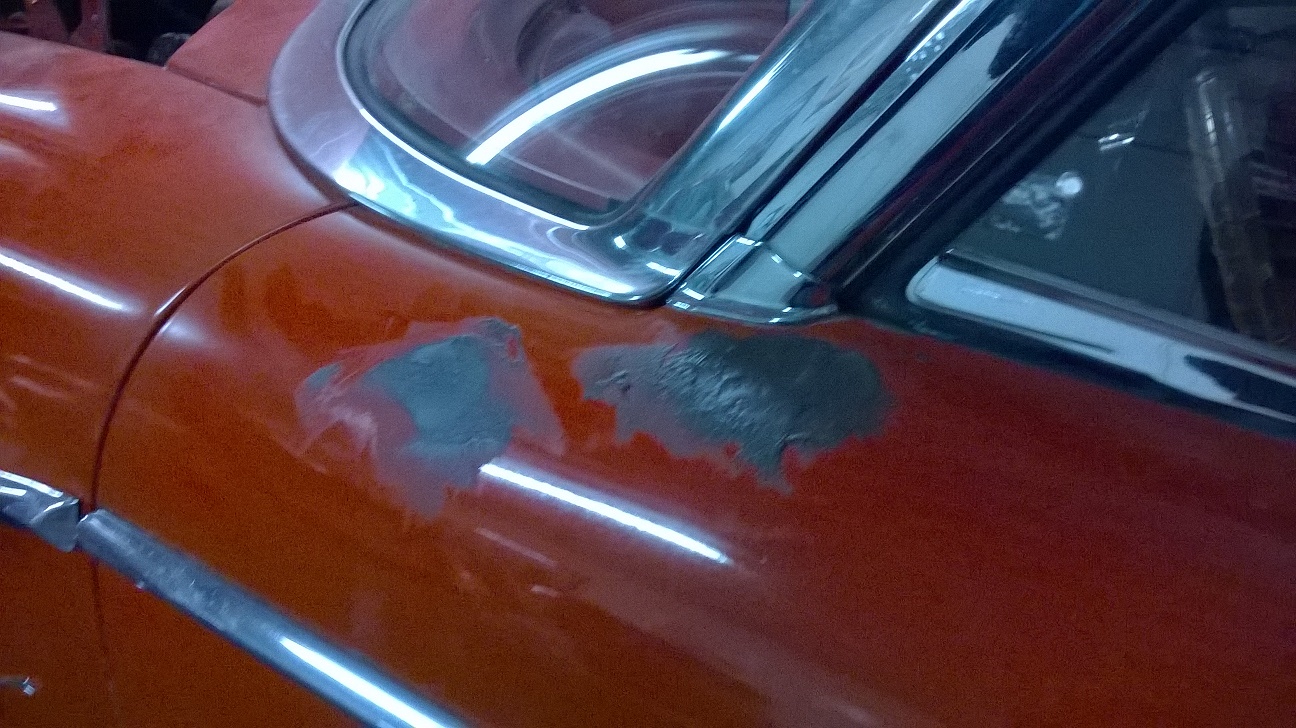
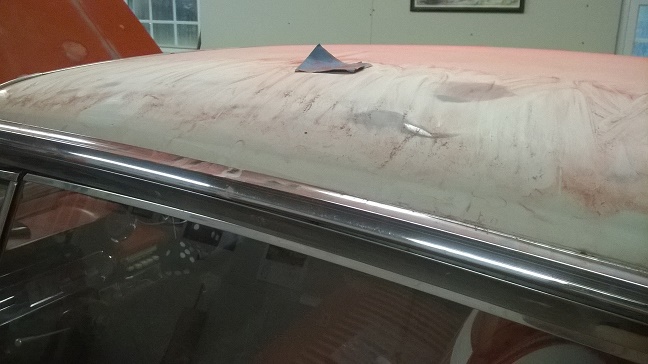
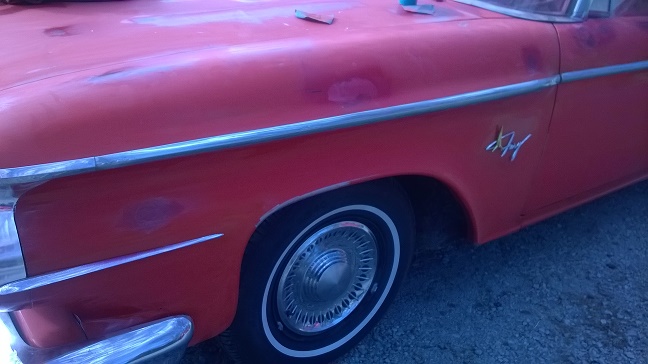
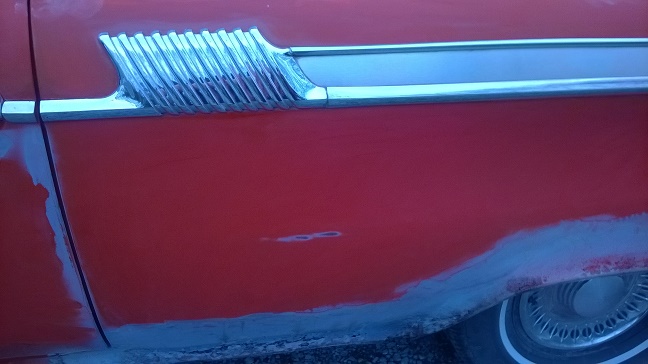
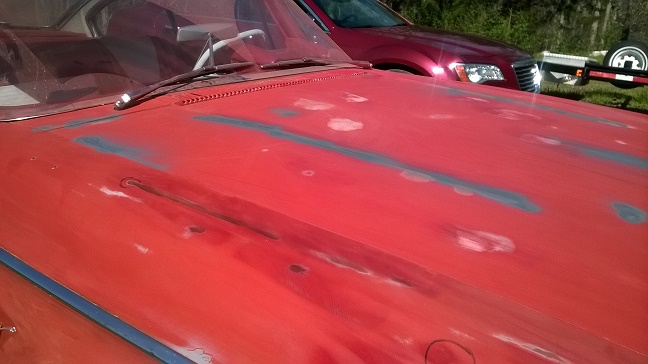
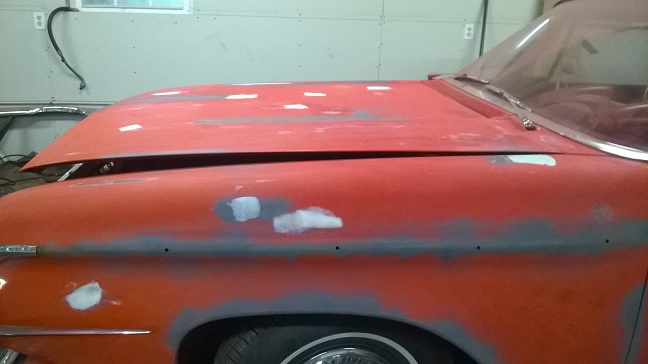
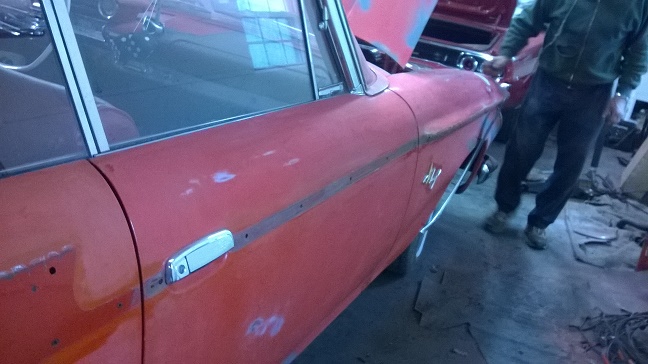
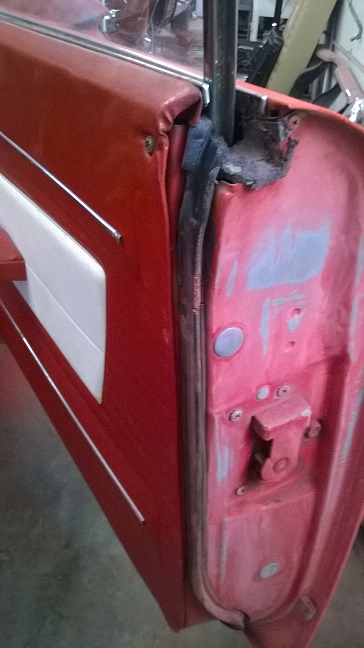
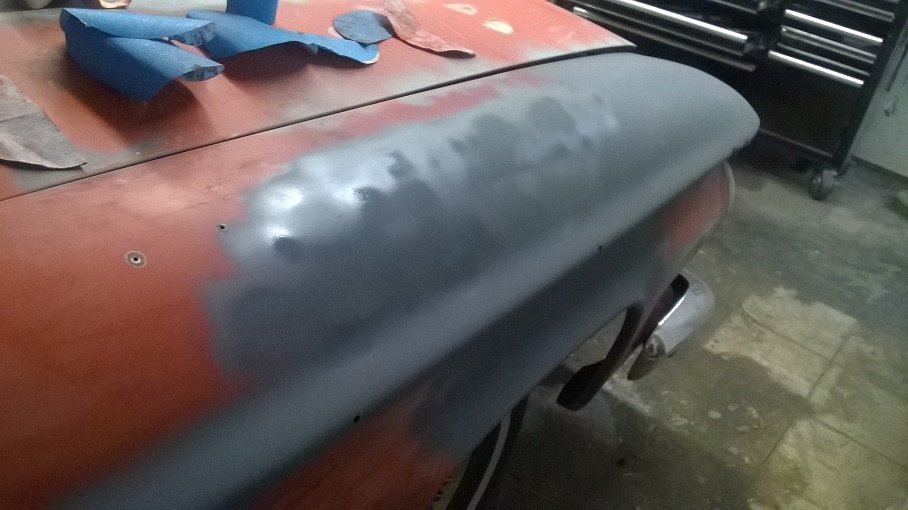
Location: Minor Hill, TN | There was more work done the dents were filled and more sanding was done on the car
 (2014-12-15 17.08.21.jpg) (2014-12-15 17.08.21.jpg)
 (2014-12-15 17.08.28.jpg) (2014-12-15 17.08.28.jpg)
 (2014-12-15 17.08.41.jpg) (2014-12-15 17.08.41.jpg)
 (2014-12-15 17.08.45.jpg) (2014-12-15 17.08.45.jpg)
 (2014-12-15 17.08.53.jpg) (2014-12-15 17.08.53.jpg)
 (2014-12-15 17.08.59.jpg) (2014-12-15 17.08.59.jpg)
 (2014-12-15 17.09.03.jpg) (2014-12-15 17.09.03.jpg)
 (2014-12-15 17.09.42.jpg) (2014-12-15 17.09.42.jpg)
 (2014-12-15 17.09.27.jpg) (2014-12-15 17.09.27.jpg)
 (2014-12-15 17.09.33.jpg) (2014-12-15 17.09.33.jpg)
Attachments
----------------
2014-12-15 17.08.21.jpg (434KB - 254 downloads)
2014-12-15 17.08.28.jpg (405KB - 256 downloads)
2014-12-15 17.08.41.jpg (392KB - 228 downloads)
2014-12-15 17.08.45.jpg (381KB - 247 downloads)
2014-12-15 17.08.53.jpg (426KB - 261 downloads)
2014-12-15 17.08.59.jpg (429KB - 254 downloads)
2014-12-15 17.09.03.jpg (381KB - 249 downloads)
2014-12-15 17.09.42.jpg (442KB - 249 downloads)
2014-12-15 17.09.27.jpg (391KB - 246 downloads)
2014-12-15 17.09.33.jpg (412KB - 251 downloads)
|
|
| |
|
Expert 5K+
Posts: 8443
 
Location: Perth Australia | You still need a better camera, so your dads work can be seen better
|
|
| |
|

Expert
Posts: 2264
Location: McComb, Mississippi | Just curious, but why not sand down the whole car? Looking forward to the restoration. |
|
| |
|
Expert
Posts: 2634
Location: Minor Hill, TN | My dad is sanding down the car and also fixing the rust spots and repairing and filling the dents. I took some of these photos from my Iphone . I had to resize the photos so I can upload them here. |
|
| |
|
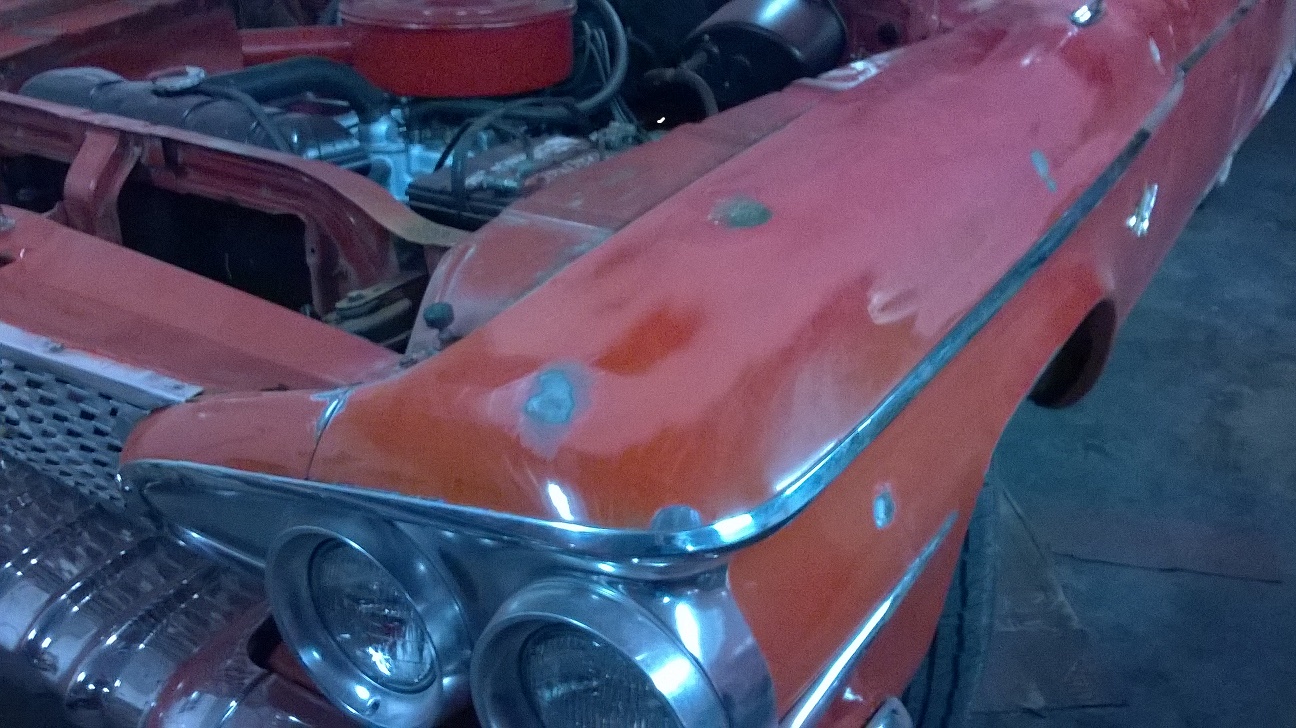
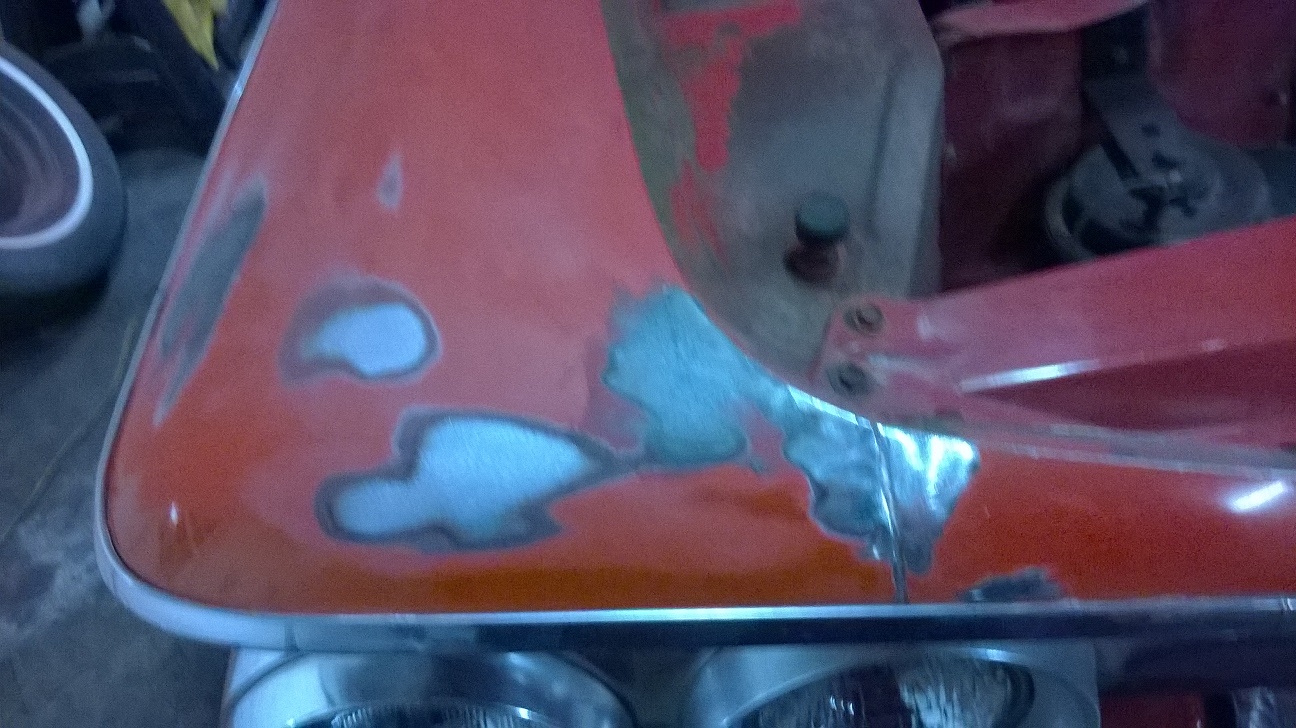
Expert
Posts: 2634
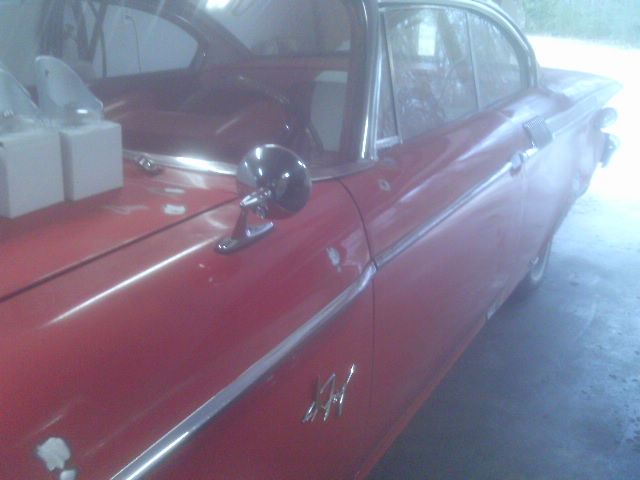
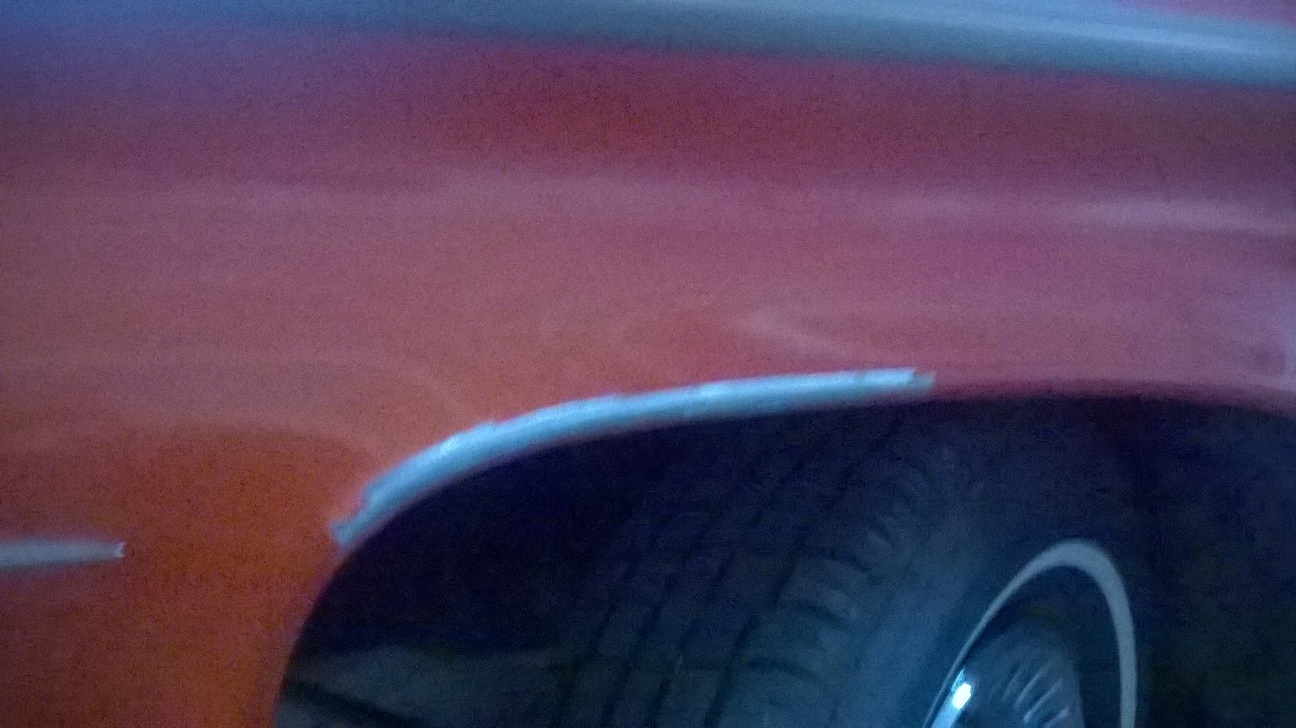
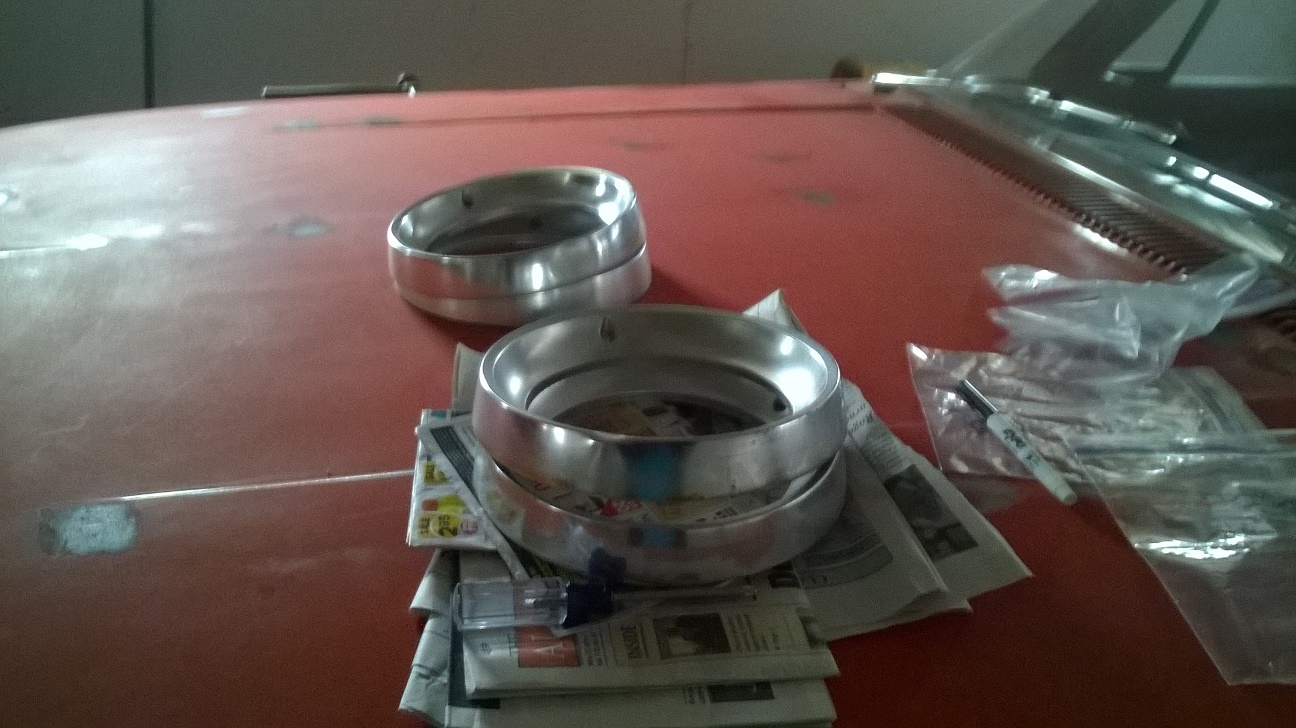
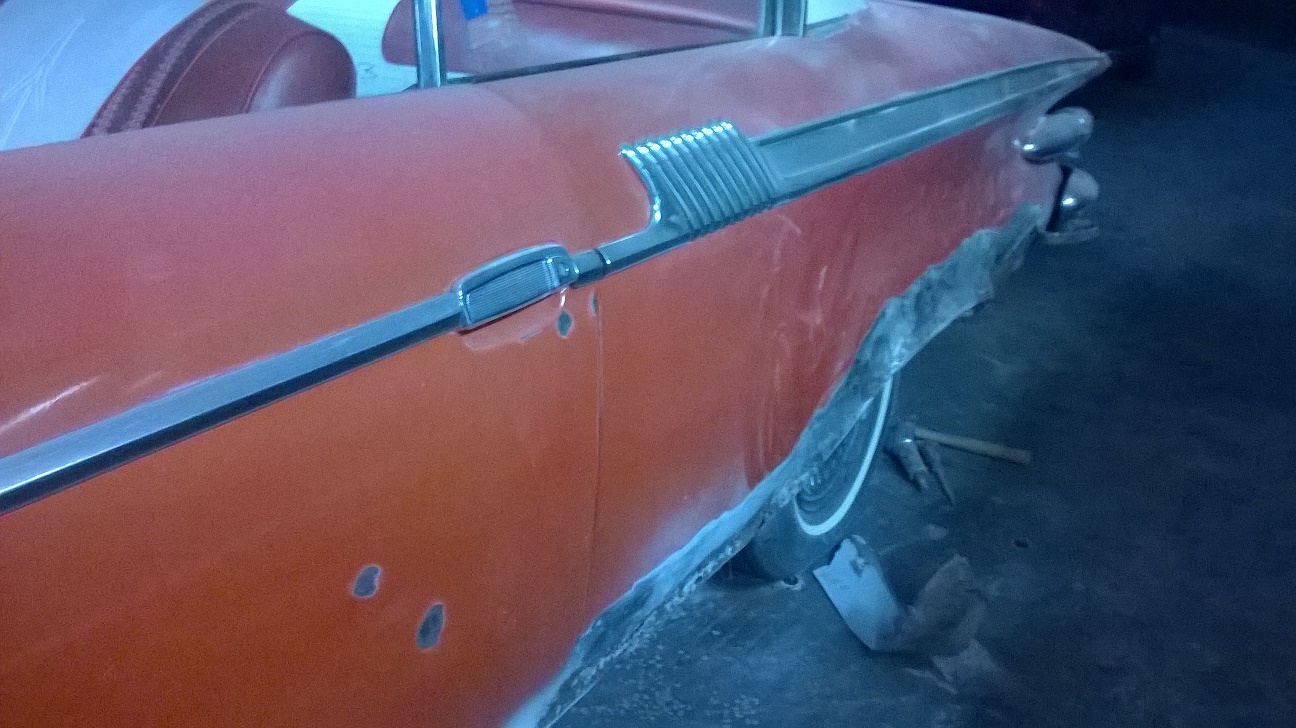
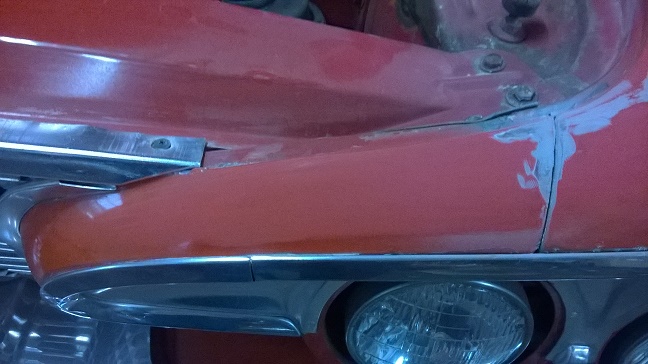
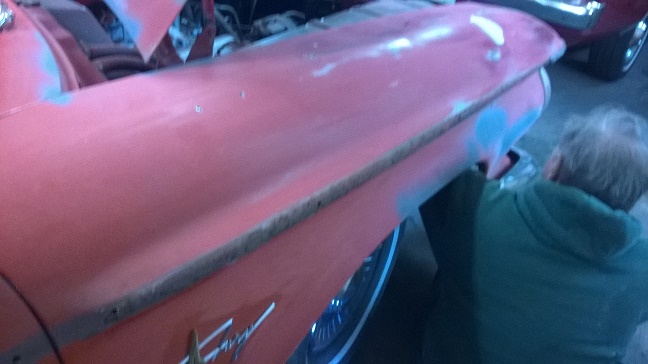
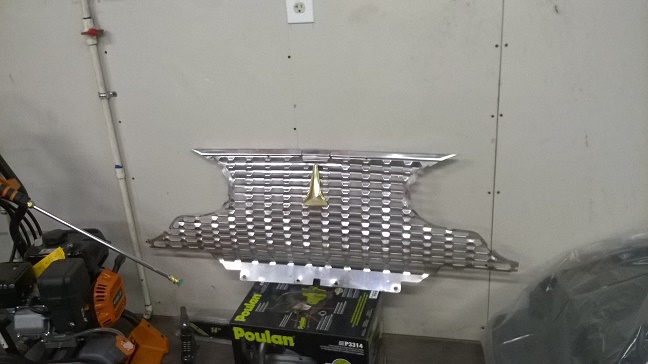
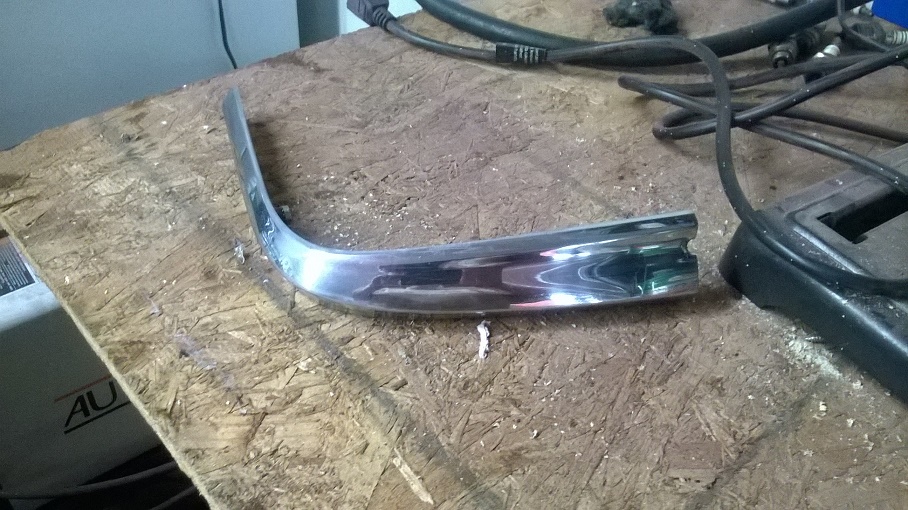
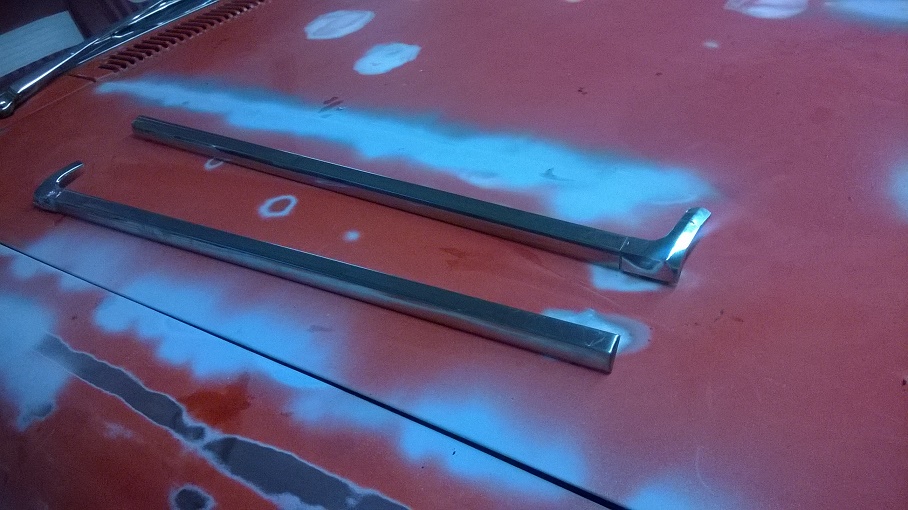
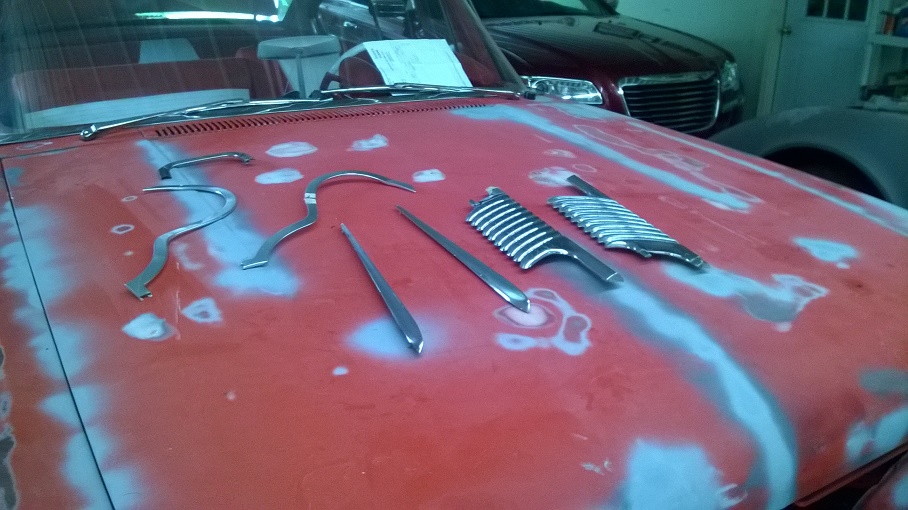
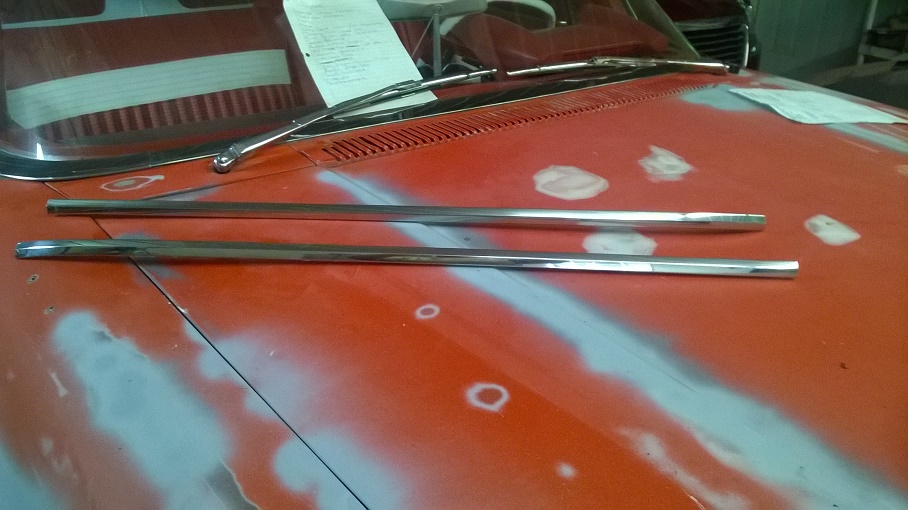
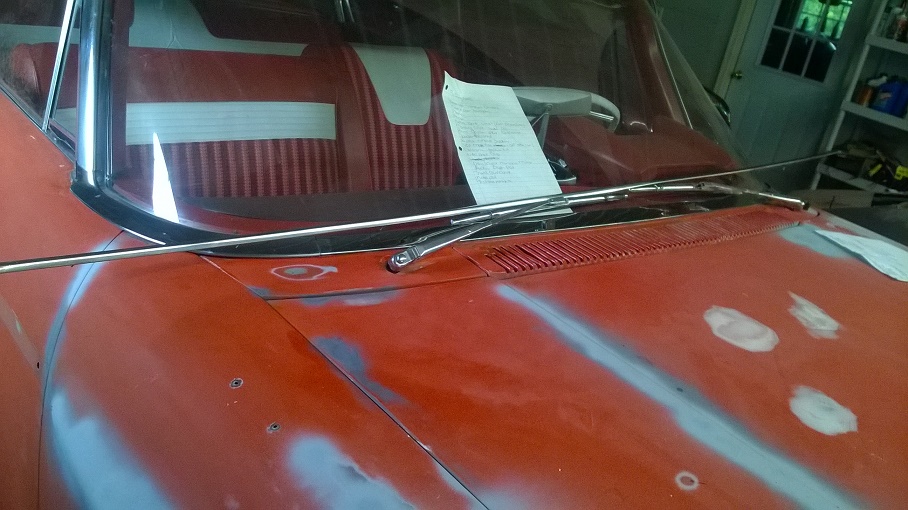
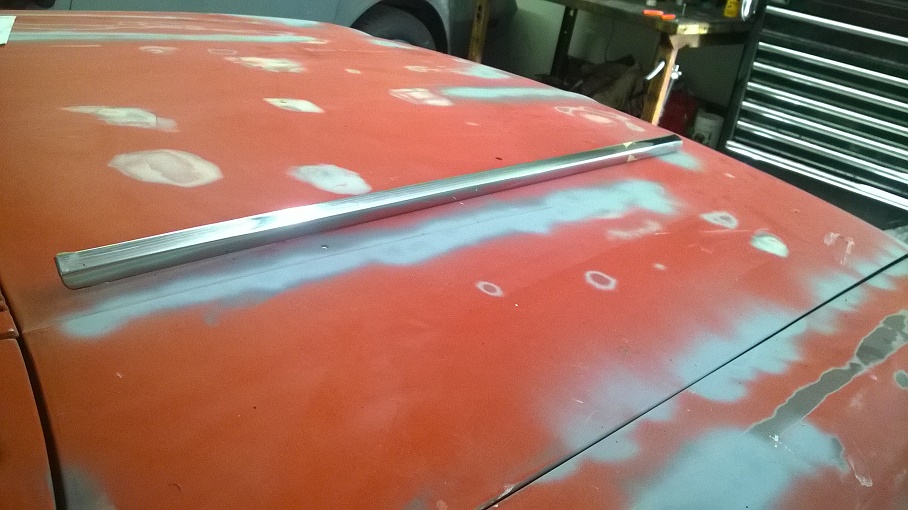
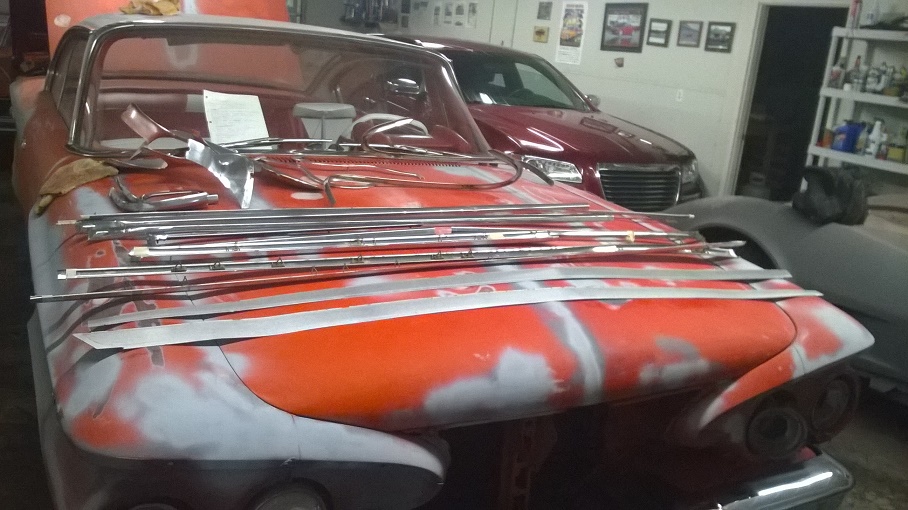
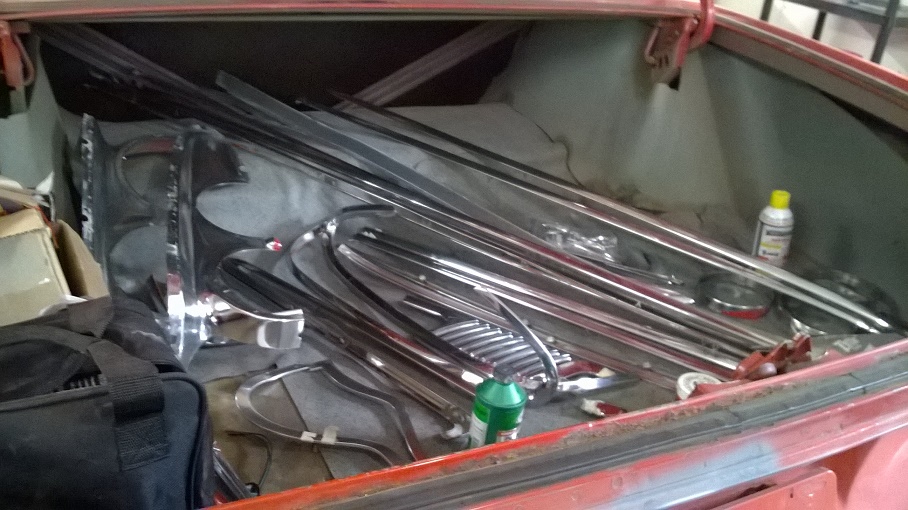
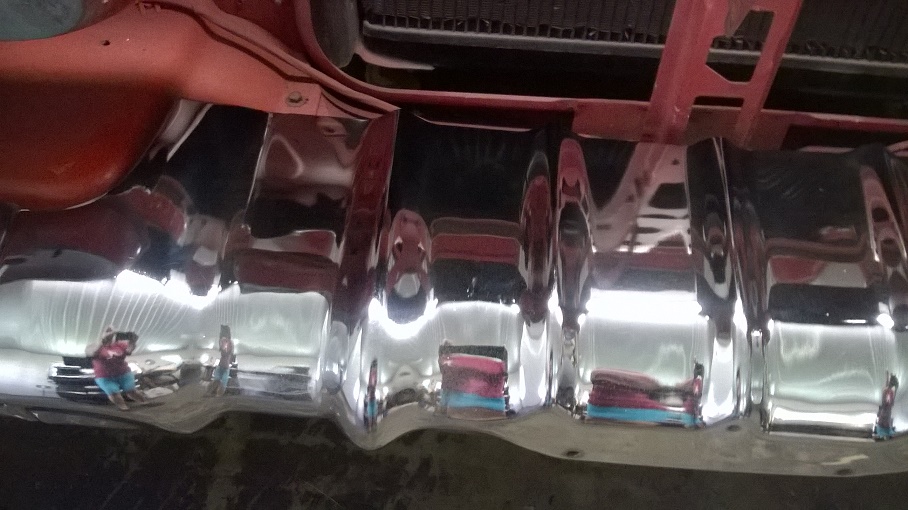
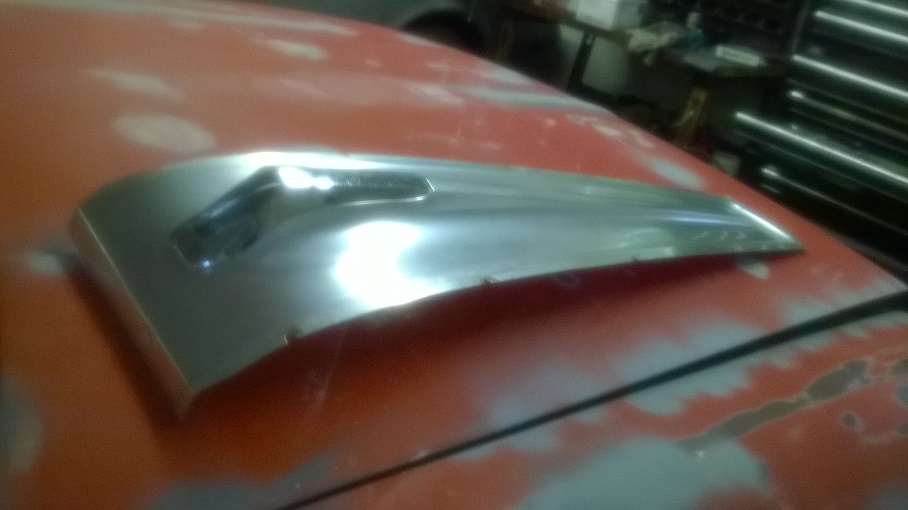
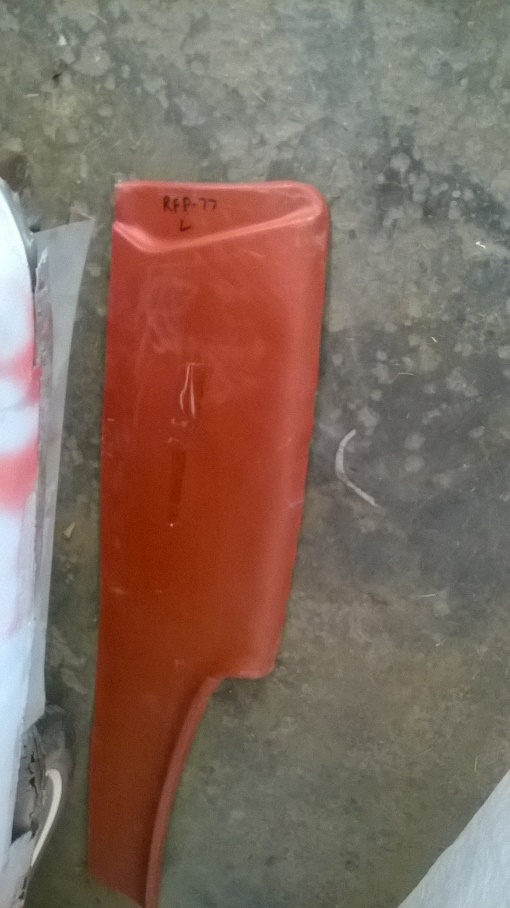
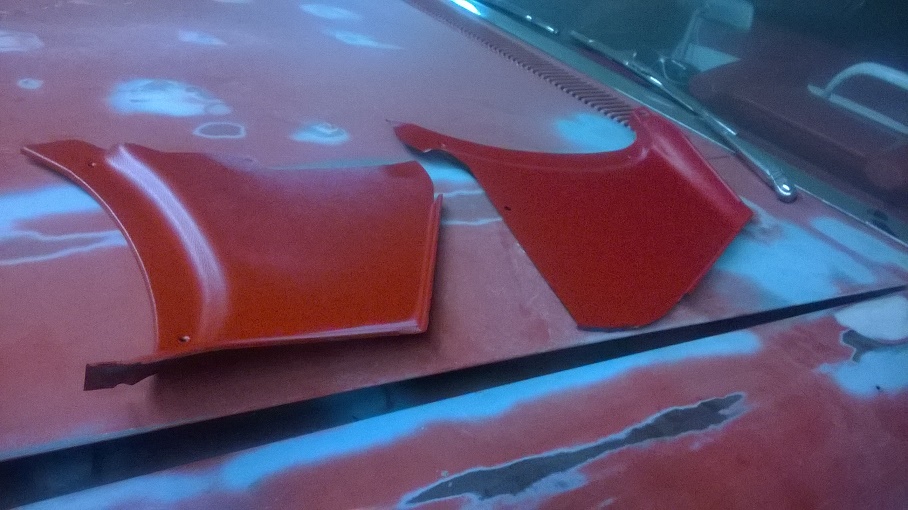
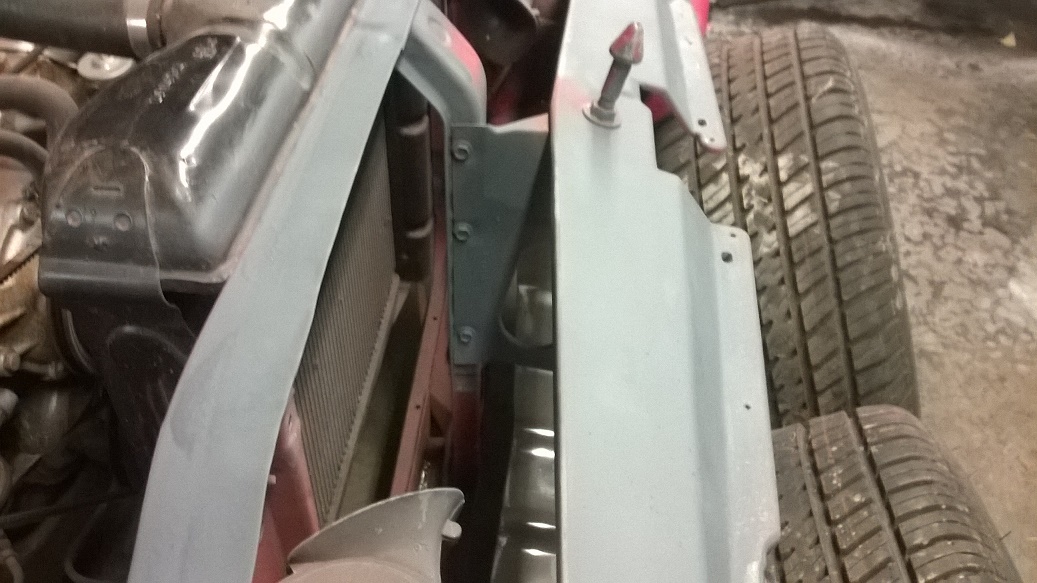
Location: Minor Hill, TN | Here is more photos I took off the front fender mirrors and put them in 2 seperate plastic bags and labeled them , The chrome will be removed labeled and put up . I am going to try to save the front fenders . Right now the grinding and filling the dents is being done. When the 60 grit sand paper arrives then more sanding will be done
Edited by 1961plymouthfury 2014-12-17 11:24 AM
 (2014-12-16 15.10.44.jpg) (2014-12-16 15.10.44.jpg)
 (2014-12-16 09.32.42.jpg) (2014-12-16 09.32.42.jpg)
 (2014-12-16 15.12.30.jpg) (2014-12-16 15.12.30.jpg)
 (2014-12-16 15.12.35.jpg) (2014-12-16 15.12.35.jpg)
 (2014-12-16 15.14.01.jpg) (2014-12-16 15.14.01.jpg)
 (2014-12-16 15.14.09.jpg) (2014-12-16 15.14.09.jpg)
 (2014-12-16 15.26.44.jpg) (2014-12-16 15.26.44.jpg)
Attachments
----------------
2014-12-16 15.10.44.jpg (390KB - 257 downloads)
2014-12-16 09.32.42.jpg (393KB - 251 downloads)
2014-12-16 15.12.30.jpg (355KB - 227 downloads)
2014-12-16 15.12.35.jpg (364KB - 244 downloads)
2014-12-16 15.14.01.jpg (369KB - 228 downloads)
2014-12-16 15.14.09.jpg (416KB - 261 downloads)
2014-12-16 15.26.44.jpg (382KB - 235 downloads)
|
|
| |
|
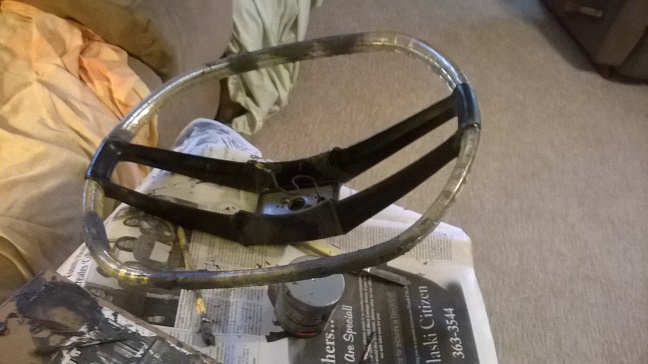
Expert
Posts: 2634
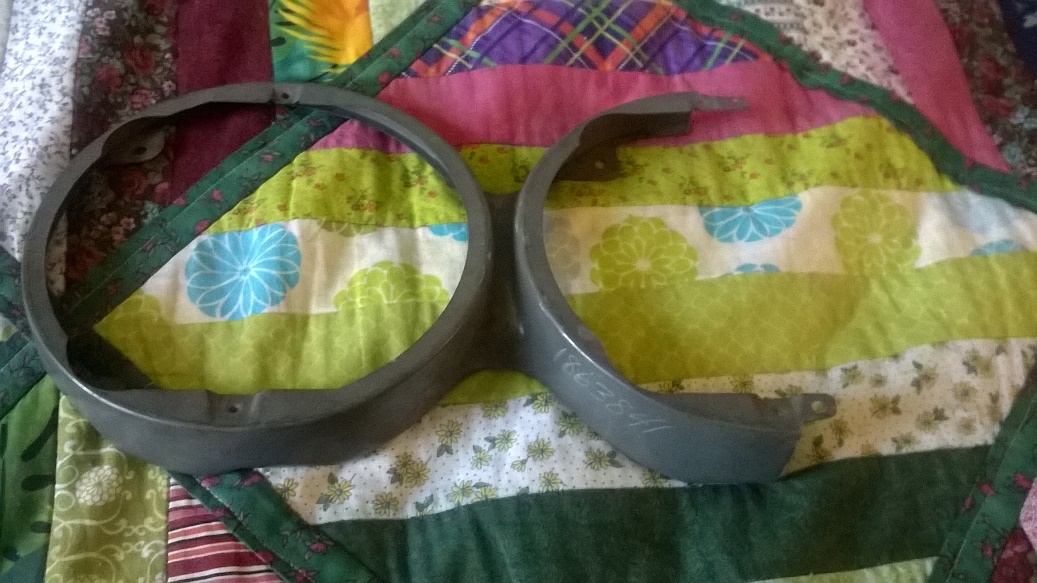
Location: Minor Hill, TN | Today I removed the head light bezels cleaned them then wrapped them in news paper put the screws on a plastic bag and taped the bag to the wrapped bezeld
 (2014-12-17 12.23.45.jpg) (2014-12-17 12.23.45.jpg)
 (2014-12-17 12.23.51.jpg) (2014-12-17 12.23.51.jpg)
Attachments
----------------
2014-12-17 12.23.45.jpg (411KB - 243 downloads)
2014-12-17 12.23.51.jpg (383KB - 227 downloads)
|
|
| |
|
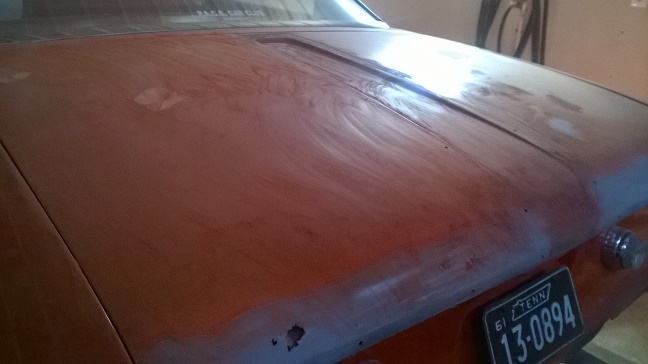
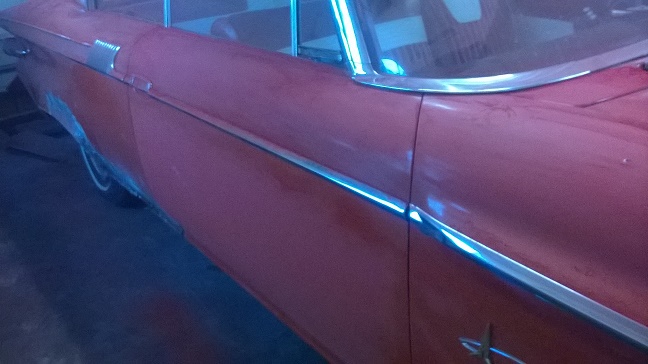
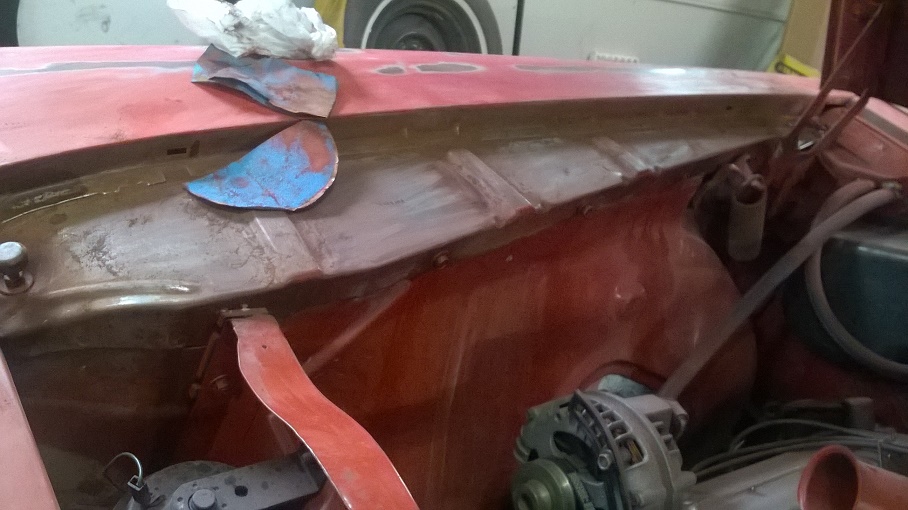
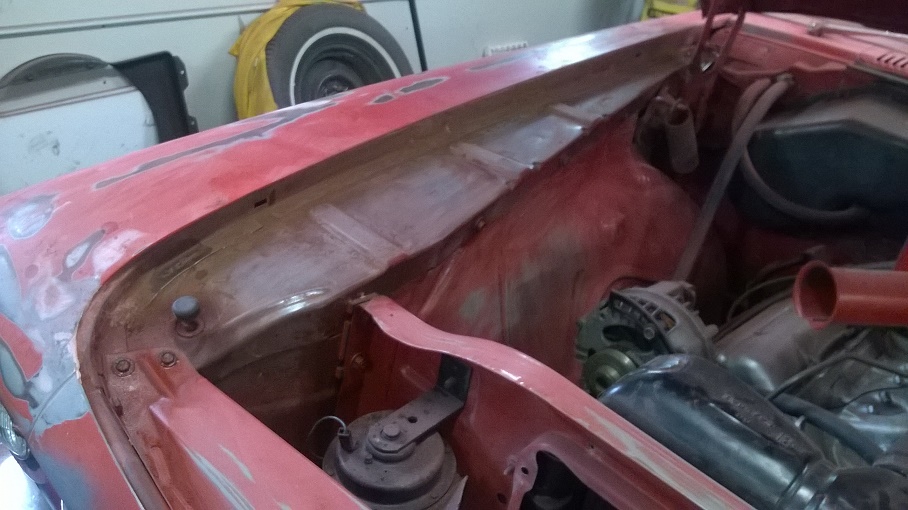
Expert
Posts: 2634
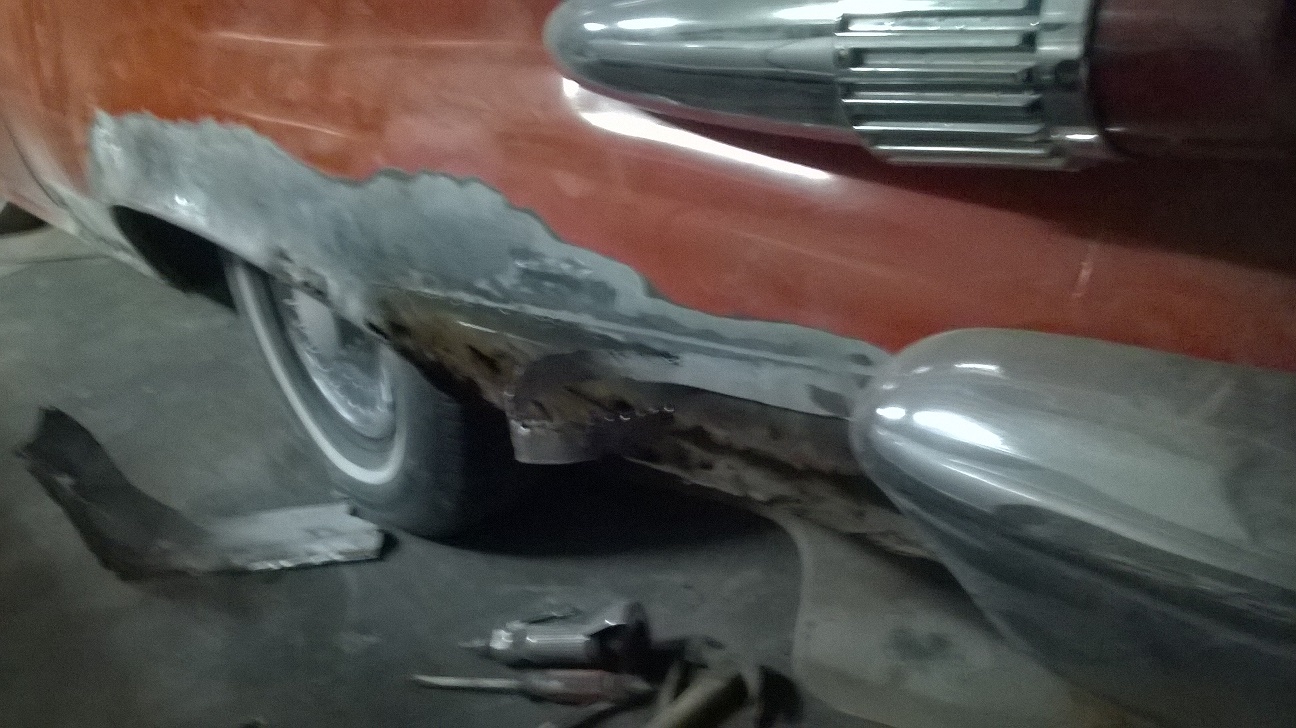
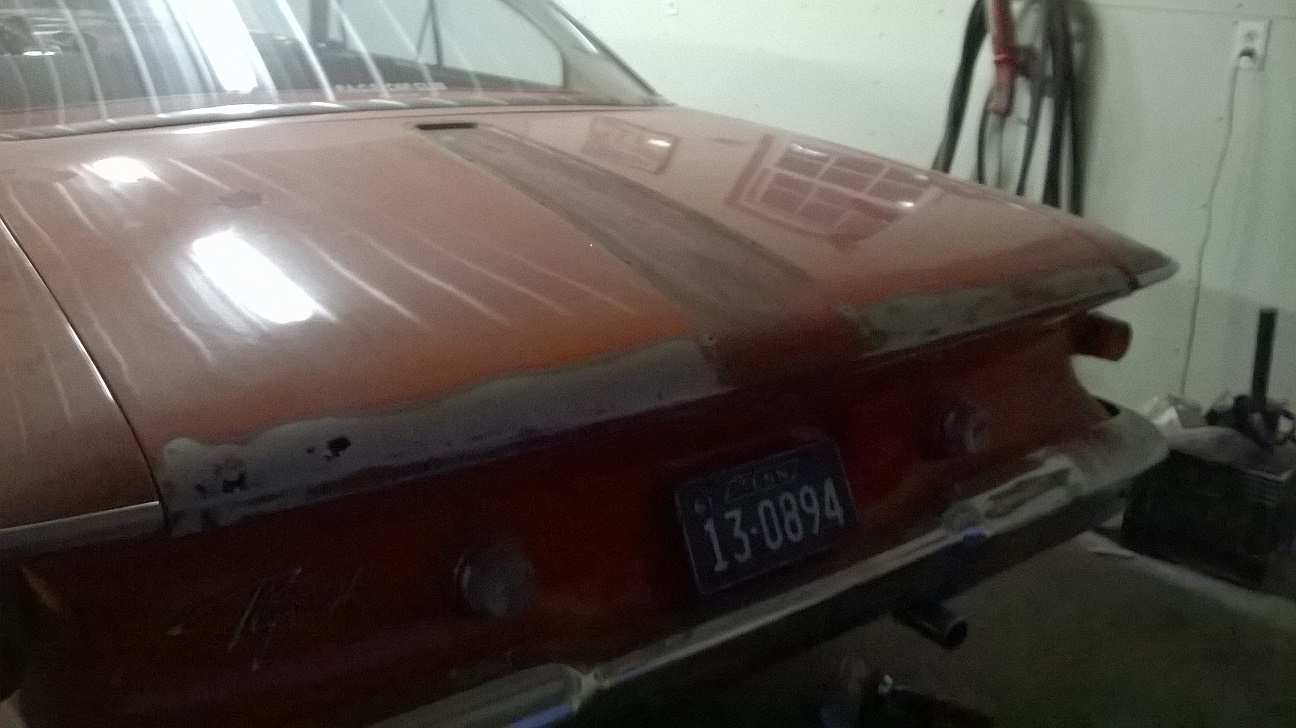
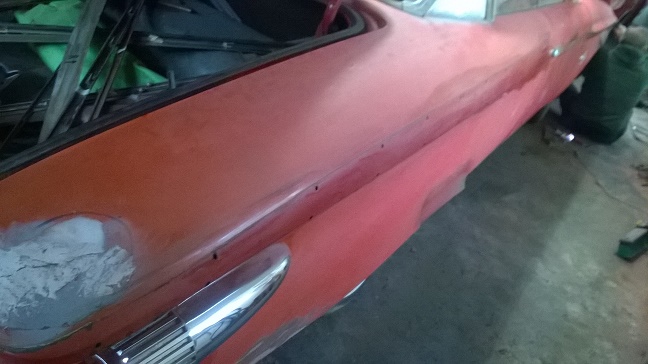
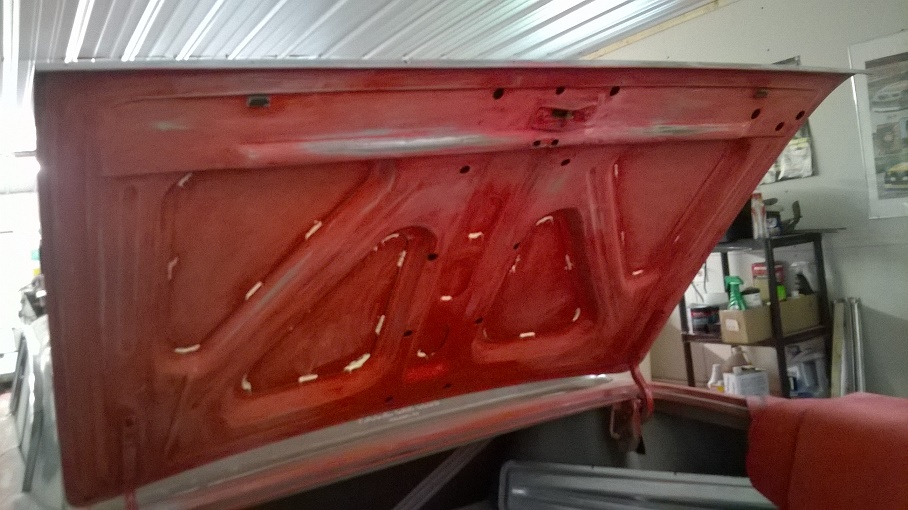
Location: Minor Hill, TN | Today more sanding was done the trunk Chrome and the center piece was removed then a quarter was cut on the driver side . The passenger side was worked on also . The fury was worked on alot today I will take more photos later. It takes time and patience
 (2014-12-19 16.57.49.jpg) (2014-12-19 16.57.49.jpg)
 (2014-12-19 16.58.07.jpg) (2014-12-19 16.58.07.jpg)
 (2014-12-19 16.58.15.jpg) (2014-12-19 16.58.15.jpg)
 (2014-12-19 16.58.25.jpg) (2014-12-19 16.58.25.jpg)
 (2014-12-19 16.58.30.jpg) (2014-12-19 16.58.30.jpg)
 (2014-12-19 16.59.16.jpg) (2014-12-19 16.59.16.jpg)
Attachments
----------------
2014-12-19 16.57.49.jpg (379KB - 233 downloads)
2014-12-19 16.58.07.jpg (385KB - 218 downloads)
2014-12-19 16.58.15.jpg (372KB - 230 downloads)
2014-12-19 16.58.25.jpg (365KB - 221 downloads)
2014-12-19 16.58.30.jpg (369KB - 210 downloads)
2014-12-19 16.59.16.jpg (408KB - 243 downloads)
|
|
| |
|
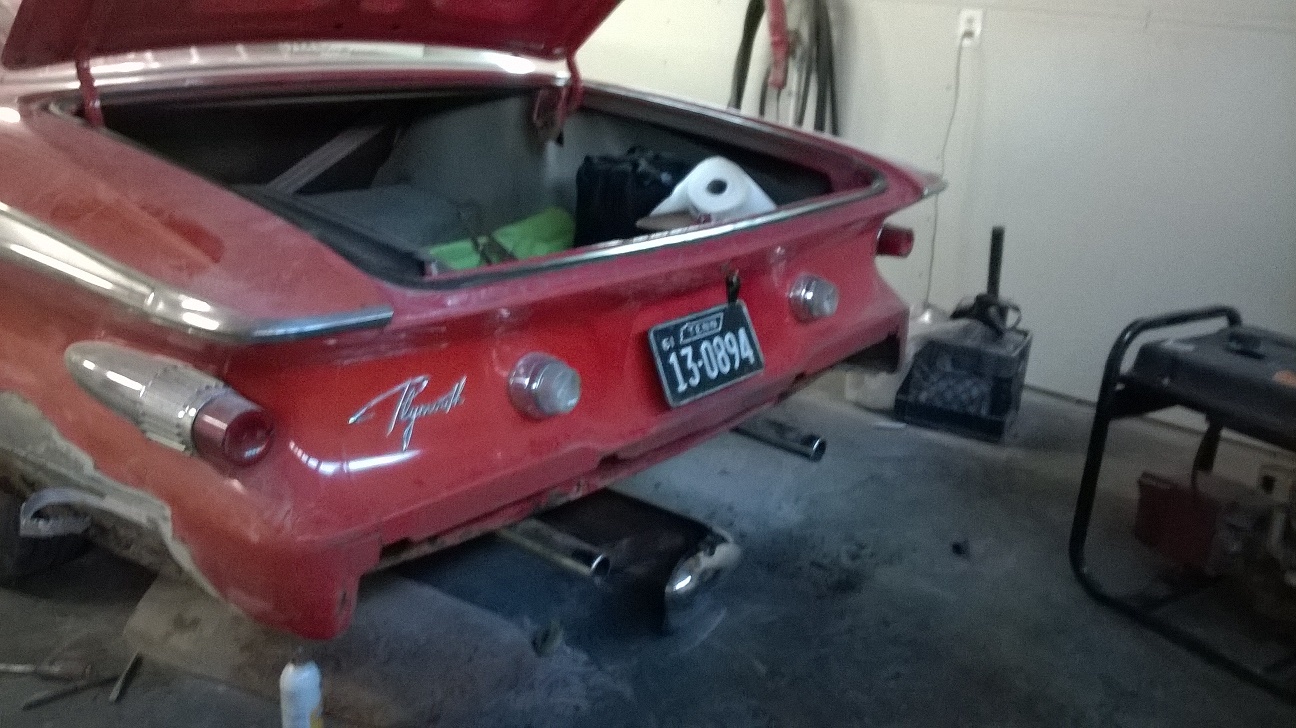
Expert
Posts: 2634
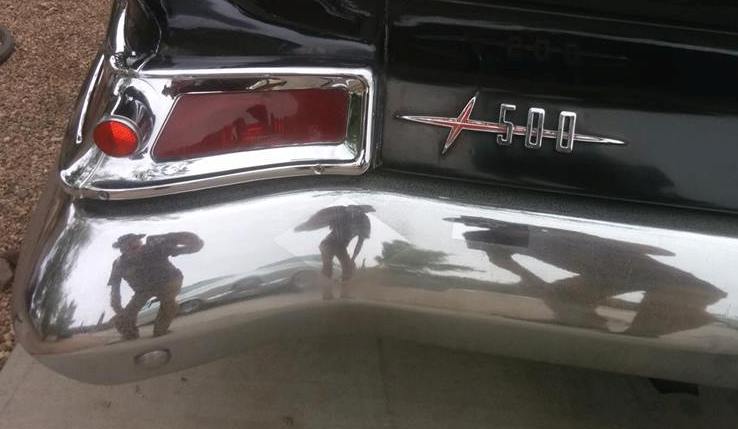
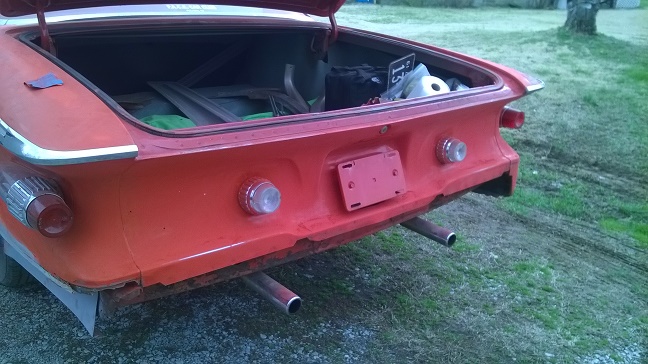
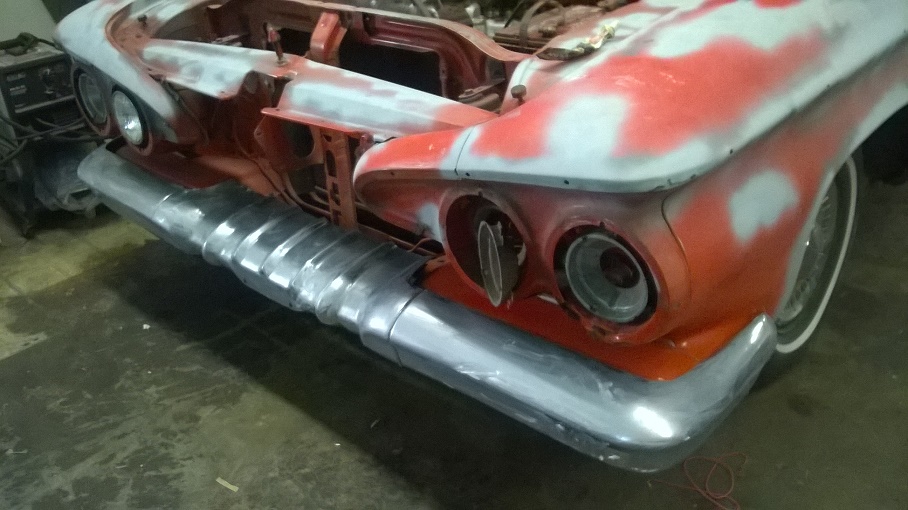
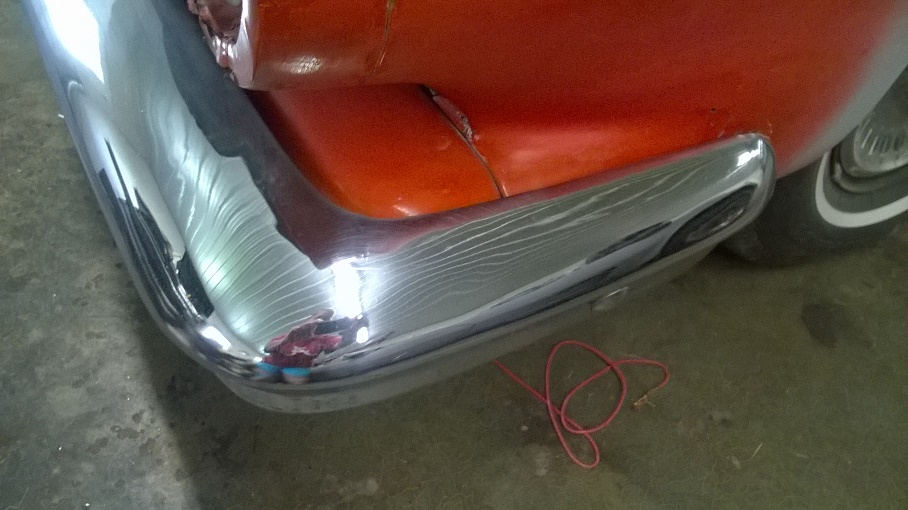
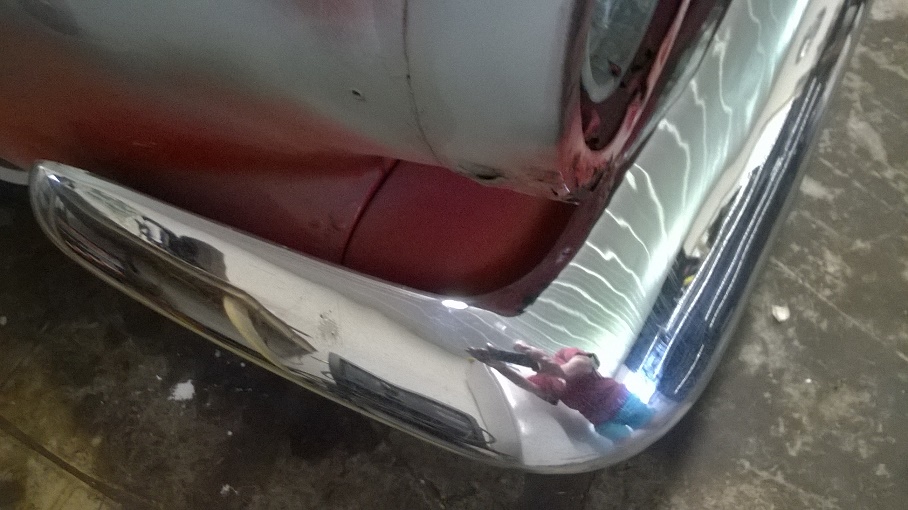
Location: Minor Hill, TN | Yesterday the rear bumper was removesd so was the chrome on the trunk and the center piece of the chrome was also removed
 (WP_20141220_001.jpg) (WP_20141220_001.jpg)
 (WP_20141220_002.jpg) (WP_20141220_002.jpg)
Attachments
----------------
WP_20141220_001.jpg (399KB - 224 downloads)
WP_20141220_002.jpg (377KB - 266 downloads)
|
|
| |
|
Expert
Posts: 1730
Location: Michigan | turn the flash on when you take the pictures. They will come out better. I use Paint to reduce mine. Resize it to 25% and then save it. |
|
| |
|
Expert
Posts: 2634
Location: Minor Hill, TN | I am using an iphone not a camera there is no flash on it. Thank you for the advice
Edited by 1961plymouthfury 2014-12-22 4:57 AM
|
|
| |
|
Expert 5K+
Posts: 8443
Location: Perth Australia | Stef
Those headlight ring (especially in good condition) are very hard to find
When you put them away, make sure other stuff doesnt get put on top of them
The other thing is to not try and polish them, they are anodised and you will damage the anodise if you use an abrasive type of cleaner on them
Please buy a camera for yourself for Chrismas, we all would love to see good pictures as your Dad restores your car 
|
|
| |
|
Expert
Posts: 2634
Location: Minor Hill, TN | I do have a camera but I am using an Iphone I got to change the batteries in the camera I have it on Florenese. If I get a good bonus I will buy a camera |
|
| |
|
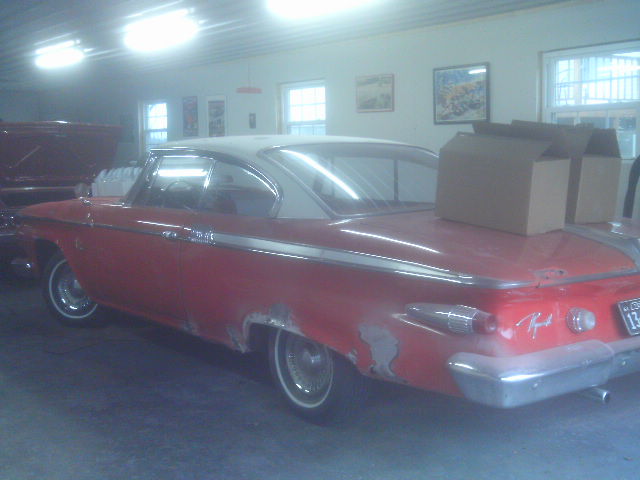
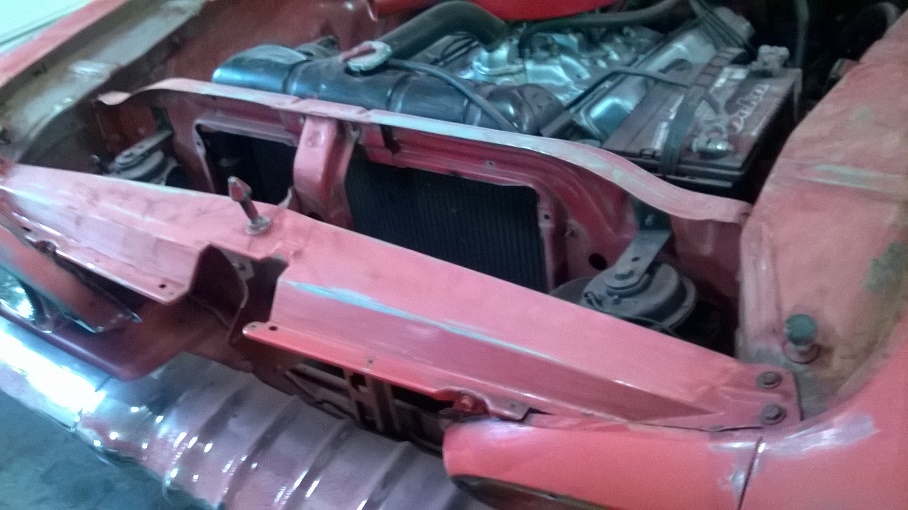
Expert
Posts: 2634
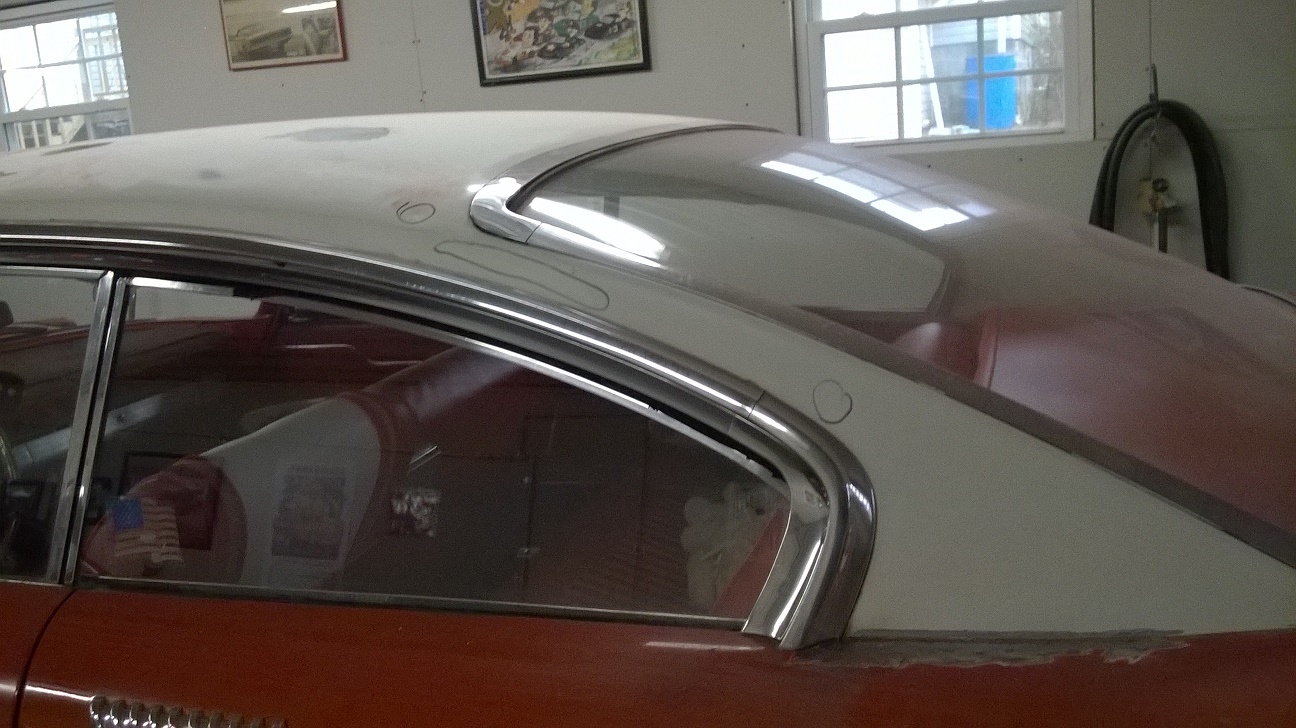
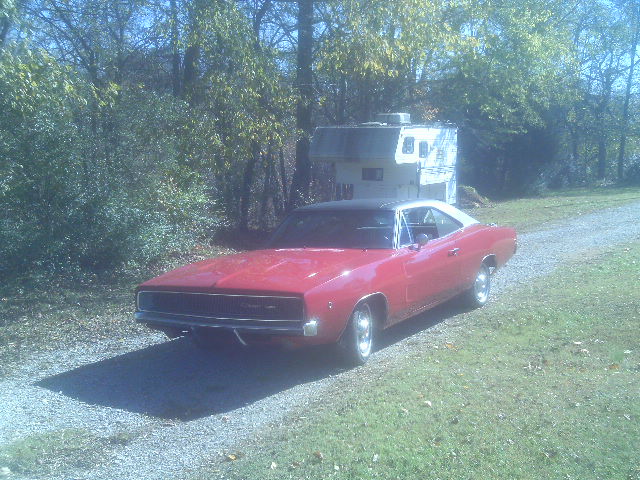
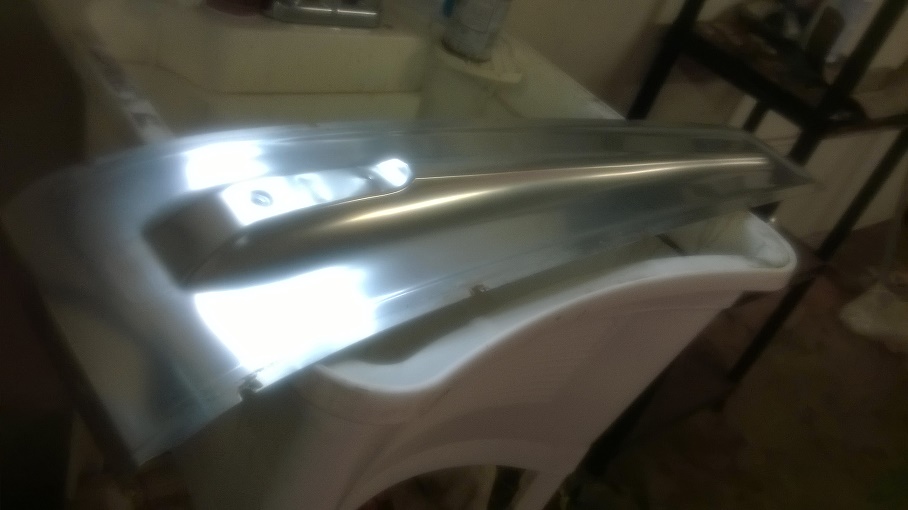
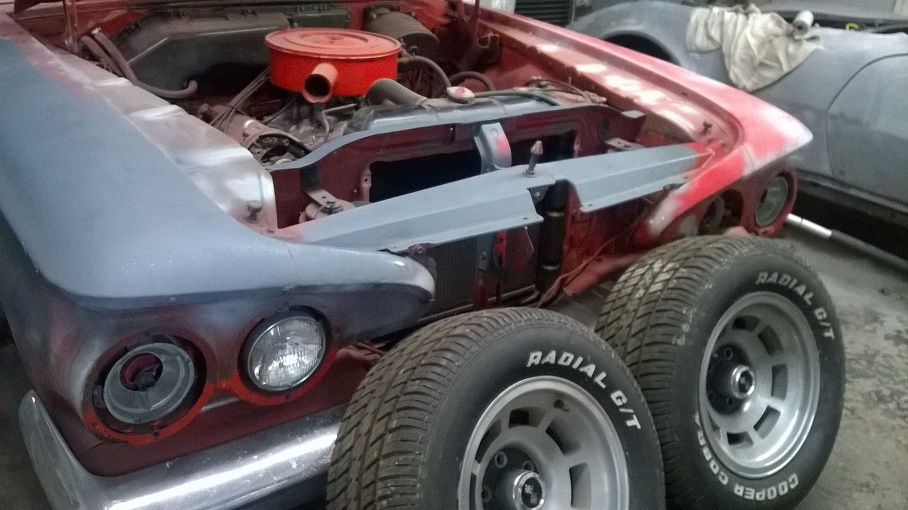
Location: Minor Hill, TN | The drivers rear panel was cut and the inner panel fitted. The rear passenger quarter was worked on also. I am not going to rush this at all I have a substitute car to take to cruise ins and shows while the face lift is being done on this fowardlook. My dad's `1968 charger
Edited by 1961plymouthfury 2014-12-24 6:25 PM
 (2010-04-05 05.08.23.jpg) (2010-04-05 05.08.23.jpg)
 (2010-04-05 05.08.49.jpg) (2010-04-05 05.08.49.jpg)
 (2010-04-05 05.09.18.jpg) (2010-04-05 05.09.18.jpg)
 (2010-04-05 05.09.31.jpg) (2010-04-05 05.09.31.jpg)
Attachments
----------------
2010-04-05 05.08.23.jpg (86KB - 224 downloads)
2010-04-05 05.08.49.jpg (88KB - 234 downloads)
2010-04-05 05.09.18.jpg (85KB - 223 downloads)
2010-04-05 05.09.31.jpg (85KB - 215 downloads)
|
|
| |
|
Expert
Posts: 2634
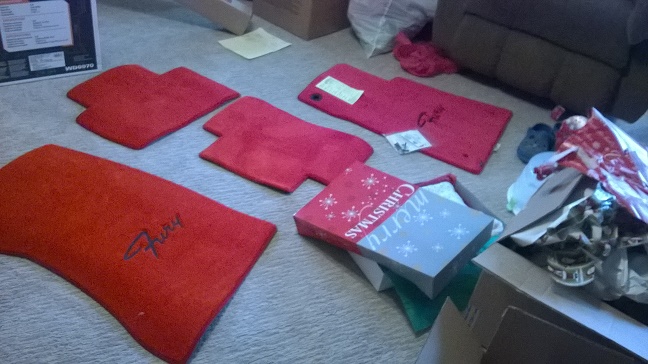
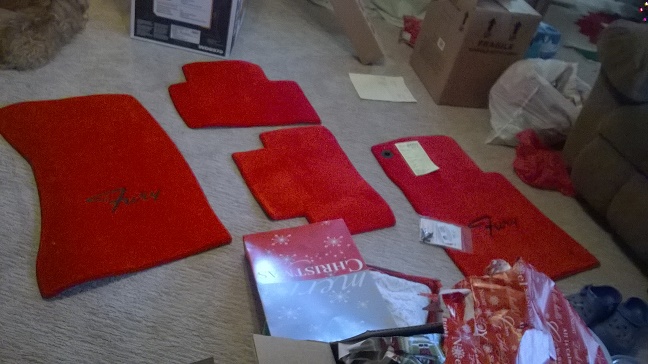
Location: Minor Hill, TN | I got floor mats for the car they are red my carpet is black but the mats will match the seats
 (2014-12-25 08.50.27.jpg) (2014-12-25 08.50.27.jpg)
 (2014-12-25 08.50.51.jpg) (2014-12-25 08.50.51.jpg)
Attachments
----------------
2014-12-25 08.50.27.jpg (139KB - 282 downloads)
2014-12-25 08.50.51.jpg (133KB - 234 downloads)
|
|
| |
|
Expert
Posts: 2634
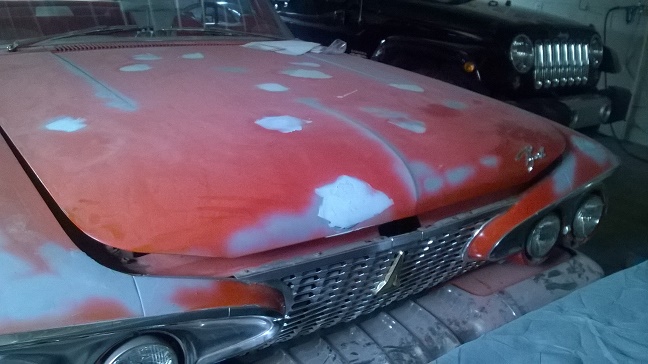
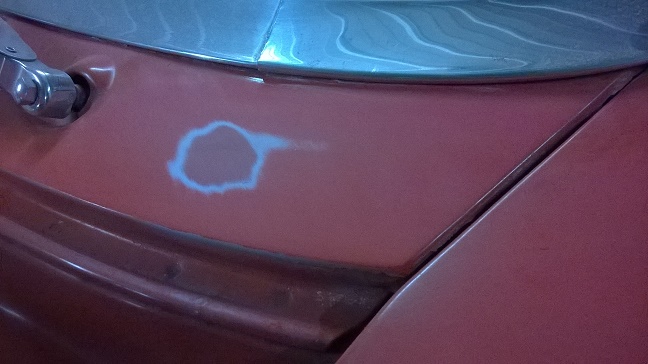
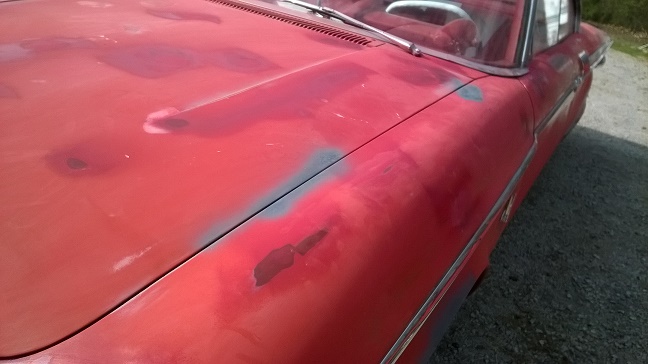
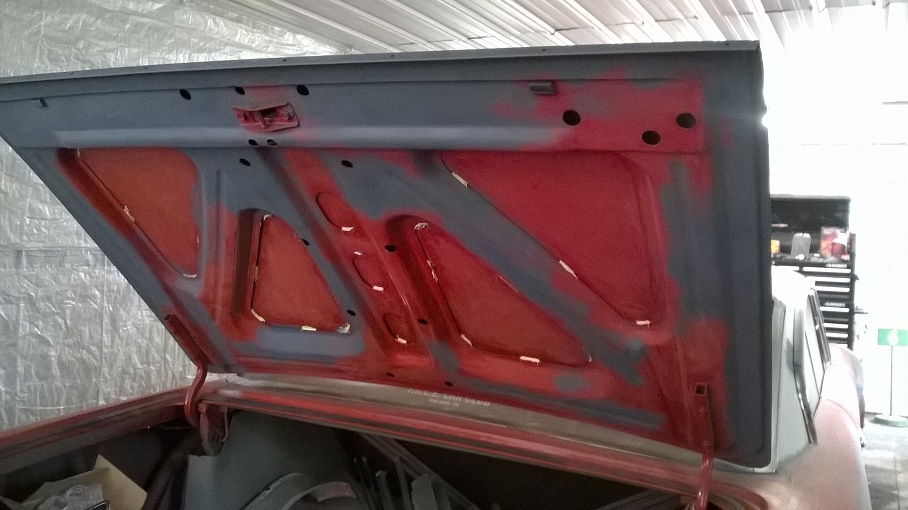
Location: Minor Hill, TN | There has been more work done on the car some spots were filled and primered
 (WP_20141229_001.jpg) (WP_20141229_001.jpg)
 (WP_20141229_002.jpg) (WP_20141229_002.jpg)
 (WP_20141229_003.jpg) (WP_20141229_003.jpg)
 (WP_20141229_004.jpg) (WP_20141229_004.jpg)
 (WP_20141229_005.jpg) (WP_20141229_005.jpg)
 (WP_20141229_007.jpg) (WP_20141229_007.jpg)
 (WP_20141229_006.jpg) (WP_20141229_006.jpg)
 (WP_20141229_009.jpg) (WP_20141229_009.jpg)
 (WP_20141229_010.jpg) (WP_20141229_010.jpg)
 (WP_20141229_011.jpg) (WP_20141229_011.jpg)
 (WP_20141229_008.jpg) (WP_20141229_008.jpg)
Attachments
----------------
WP_20141229_001.jpg (120KB - 229 downloads)
WP_20141229_002.jpg (129KB - 246 downloads)
WP_20141229_003.jpg (136KB - 237 downloads)
WP_20141229_004.jpg (122KB - 250 downloads)
WP_20141229_005.jpg (112KB - 215 downloads)
WP_20141229_007.jpg (131KB - 233 downloads)
WP_20141229_006.jpg (105KB - 236 downloads)
WP_20141229_009.jpg (142KB - 217 downloads)
WP_20141229_010.jpg (103KB - 213 downloads)
WP_20141229_011.jpg (125KB - 218 downloads)
WP_20141229_008.jpg (128KB - 231 downloads)
|
|
| |
|
Expert
Posts: 2264
Location: McComb, Mississippi | Why not sand the whole car down at one time ? |
|
| |
|
Expert
Posts: 2634
Location: Minor Hill, TN | There are some spots that need to be repaired and filled . My dad has his own way of doing body work and paint jobs. He even restored a 1970 cuda that was in alot worse shape than this |
|
| |
|
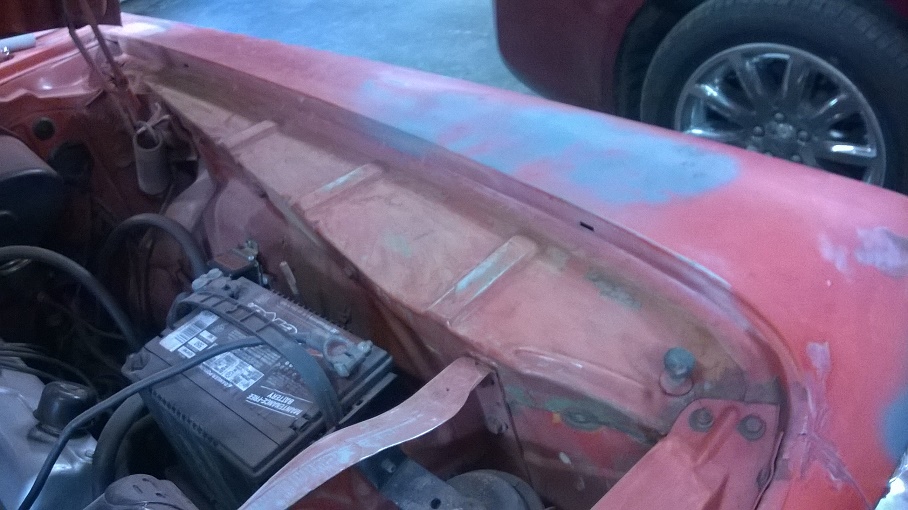
Expert
Posts: 2634
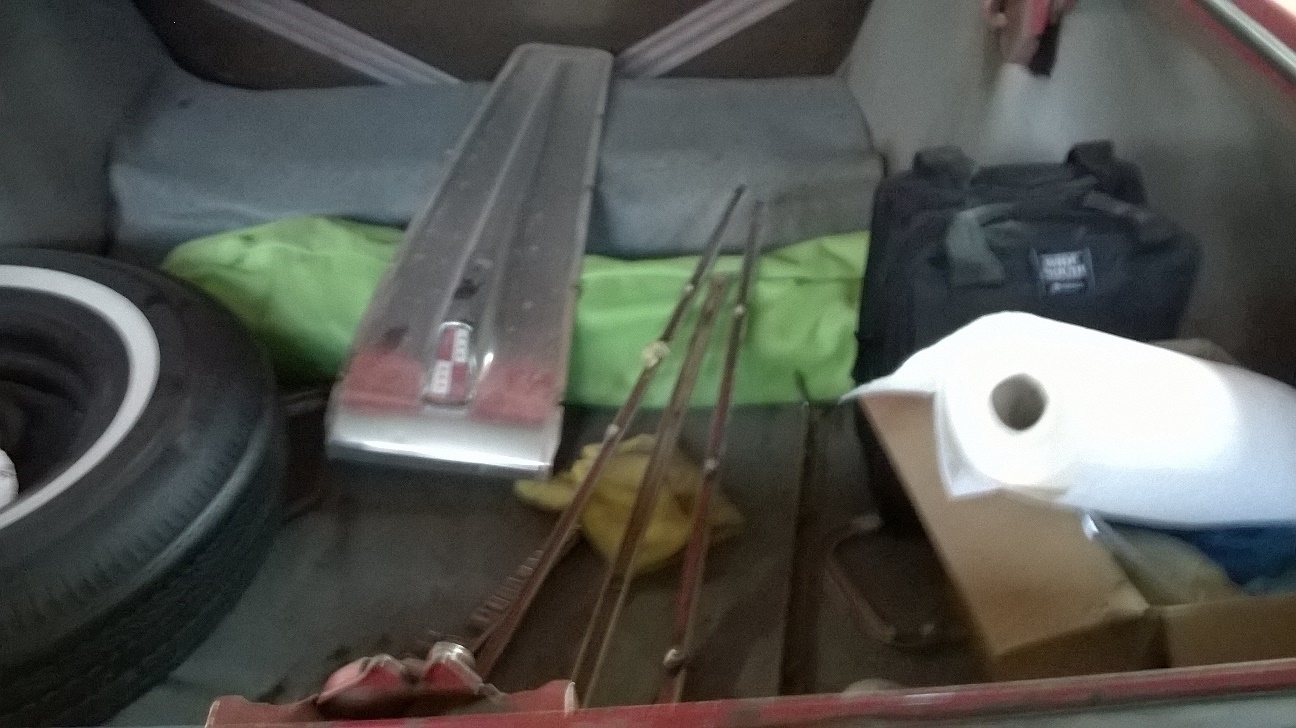
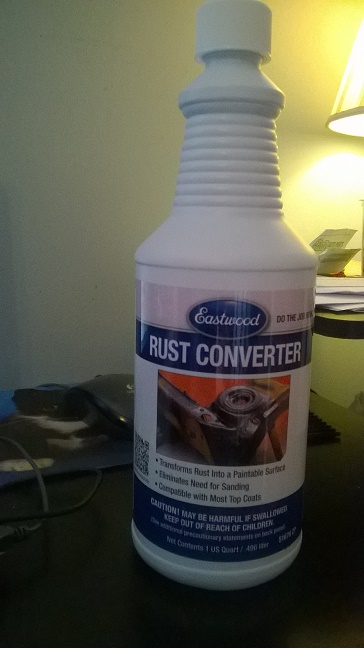
Location: Minor Hill, TN | I had some seam sealer put in the trunk and the hood I need to a quart of rust converter so the metal can be a paintable surface. I even found a promo car that matches this and a metal car too. The metal car is in my cart but when I get the funds I will hit buy now and grab it I am also finding spare parts and putting them on my watch list.
Edited by 1961plymouthfury 2015-01-06 5:41 PM
 (2015-01-06 13.19.08.jpg) (2015-01-06 13.19.08.jpg)
 (2015-01-06 13.19.36.jpg) (2015-01-06 13.19.36.jpg)
Attachments
----------------
2015-01-06 13.19.08.jpg (132KB - 224 downloads)
2015-01-06 13.19.36.jpg (133KB - 226 downloads)
|
|
| |
|
Expert
Posts: 2634
Location: Minor Hill, TN | I even got a promo car to match the big '61 . I also got my center link for the car and its waiting to be installed. The promo car is a friction and all the wheels turn I am selling my green and white '61fury promo car on ebay but I am keeping the black promo car as a tribute to my black '61 and the red and white 1 as a display when I go to shows and cruise ins with the red and white car. This year there will be no shows or cruise ins this year because of the restoration.
Edited by 1961plymouthfury 2015-01-10 8:02 PM
 (2015-01-10 18.46.50.jpg) (2015-01-10 18.46.50.jpg)
 (2015-01-10 18.46.44.jpg) (2015-01-10 18.46.44.jpg)
 (2015-01-10 18.46.55.jpg) (2015-01-10 18.46.55.jpg)
 (2015-01-10 18.46.59.jpg) (2015-01-10 18.46.59.jpg)
Attachments
----------------
2015-01-10 18.46.50.jpg (107KB - 239 downloads)
2015-01-10 18.46.44.jpg (110KB - 238 downloads)
2015-01-10 18.46.55.jpg (105KB - 223 downloads)
2015-01-10 18.46.59.jpg (101KB - 233 downloads)
|
|
| |
|
Expert
Posts: 2634
Location: Minor Hill, TN | I got my center link for the car and its waiting to be installed. I had some play in the steering . My dad had me turn the wheel back and forth that is how I found out I needed to replace it. Mine is for a '62-64 dodge - chrysler but I looked up the compatable cars and my '61 is on that list.
 (2015-01-14 19.39.02.jpg) (2015-01-14 19.39.02.jpg)
Attachments
----------------
2015-01-14 19.39.02.jpg (110KB - 257 downloads)
|
|
| |
|
Elite Veteran
Posts: 827
Location: tailFinland | plymouth - 2014-12-15 7:05 PM
Just curious, but why not sand down the whole car? Looking forward to the restoration.
If you Steph accept my tip too, remove bumpers and all trim. Blast and cut rusted spots away, weld patch panels and sand down the whole car and primer and paint the whole car. Use professional help if needed.
Idea is to do restoration right if you are not seeking some kind of rat rod style. And doing it right you have to do it only once. |
|
| |
|
Expert
Posts: 2634
Location: Minor Hill, TN | My dad is doing the restoration on the car . I also need to get rust converter for the car I believe he has primer and the clear coat . I need to get paint and other items for the car too. About moving the trim I am leaving that to my dad . He restored the black '61 fury I had and that took him about 2 years to do. I have photos of that car in my album here on this site.
I went down to see if more work has been done on the car but I did not see any more at this time. I will take more photos when I see more work and post them here |
|
| |
|

Expert
Posts: 1384
Location: Ocala, Florida | Just a tip for resizing iPhone photos. Take a screen shot then they are then effect size to post. You will have no problem uploading them. |
|
| |
|
Expert
Posts: 2634
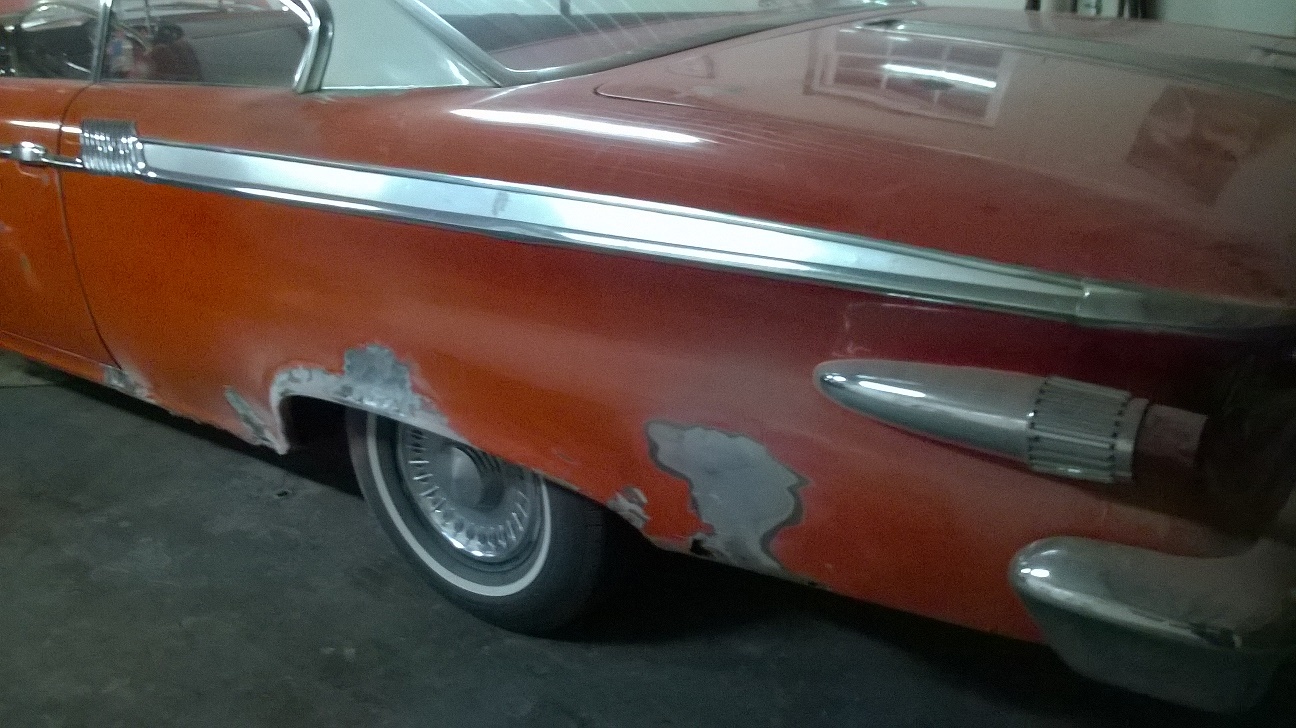
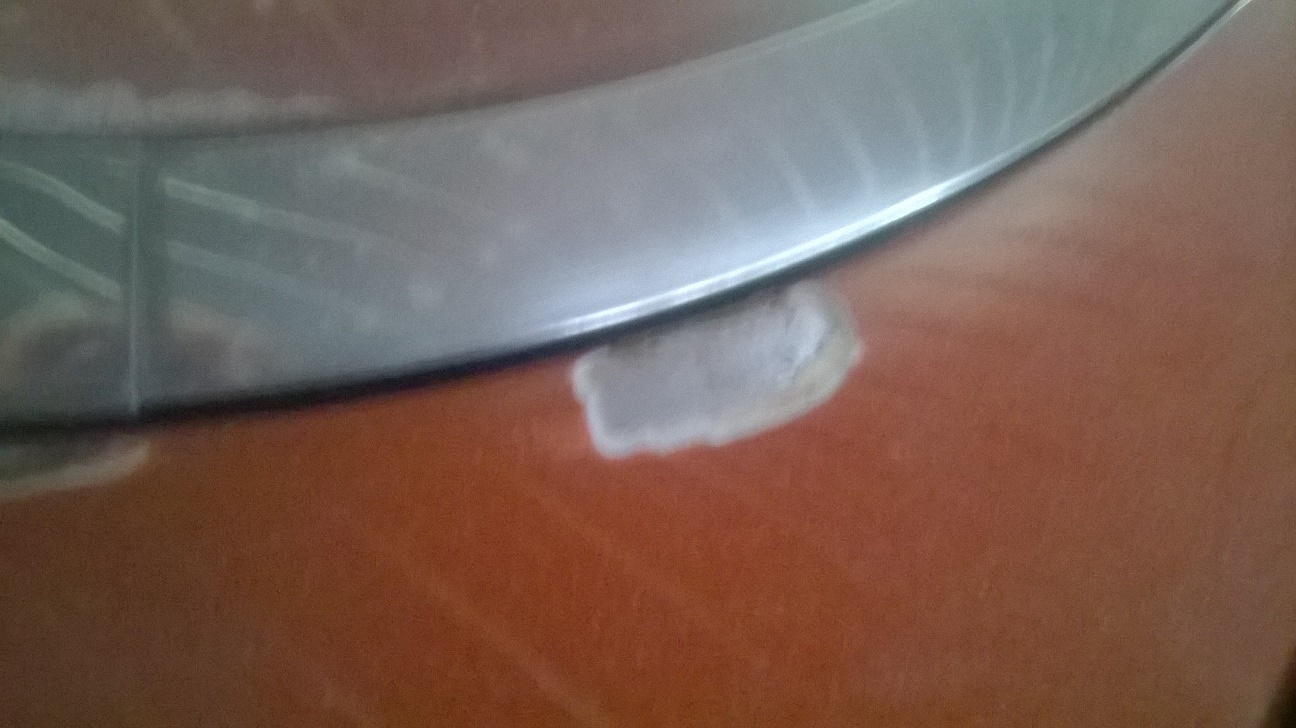
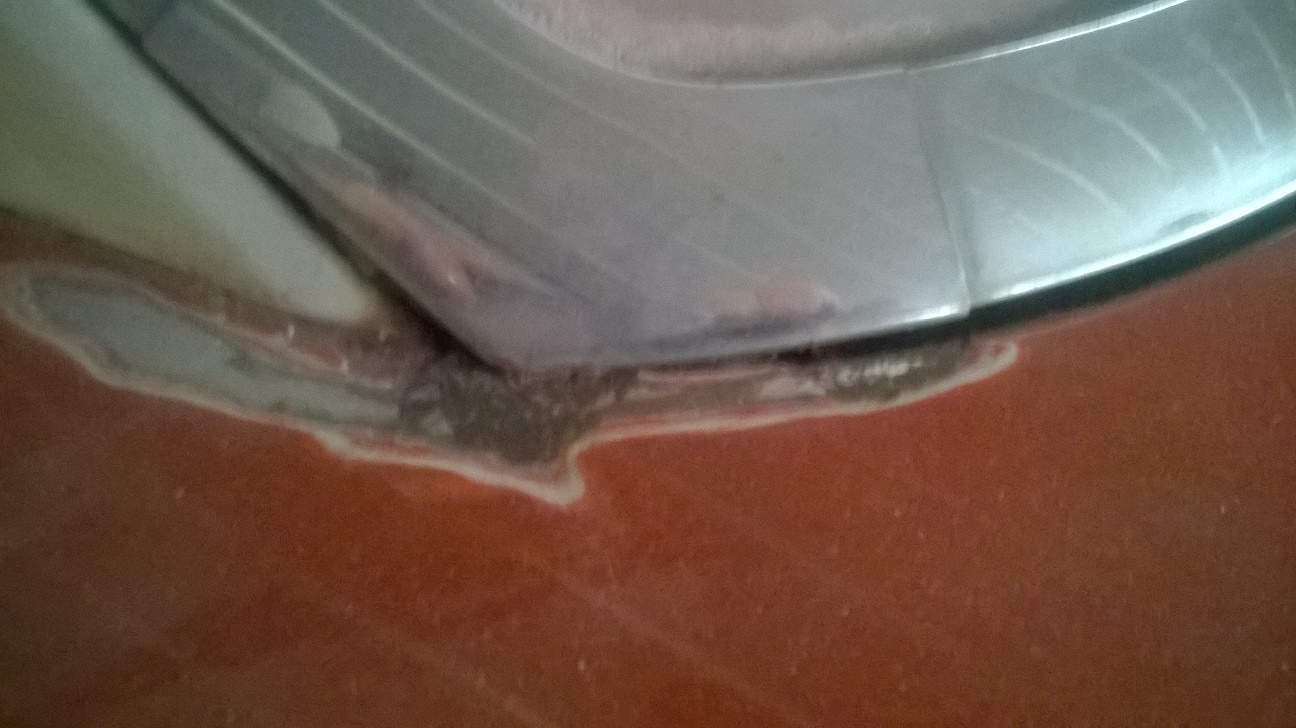
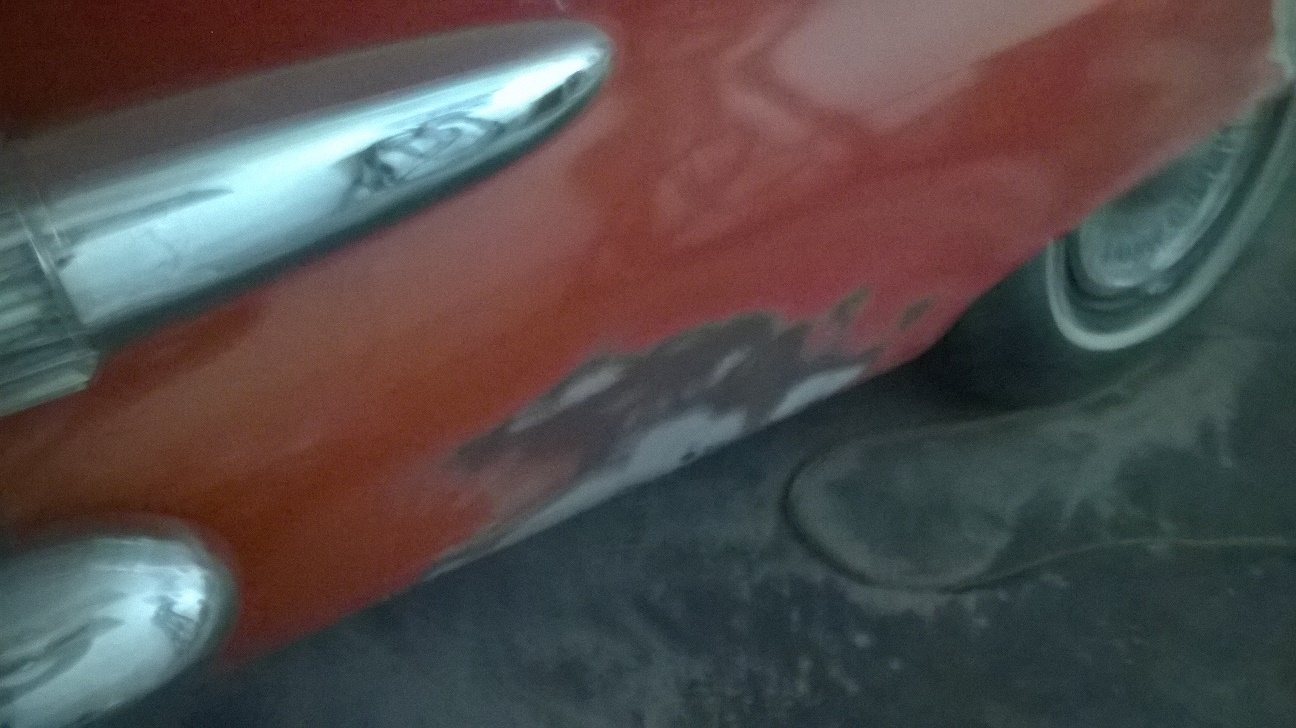
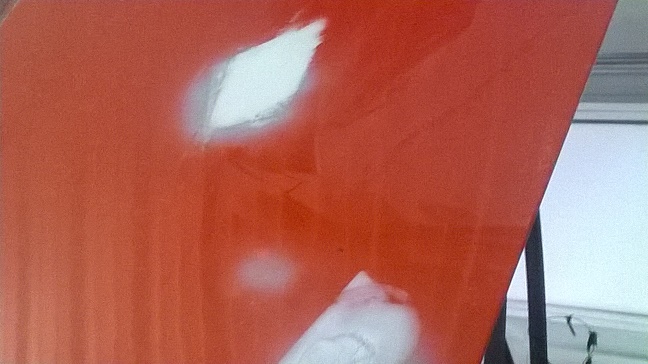
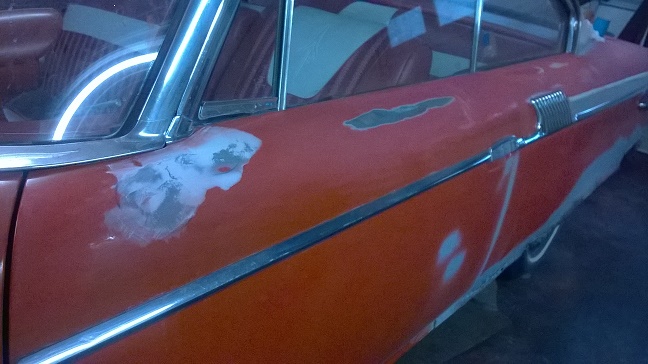
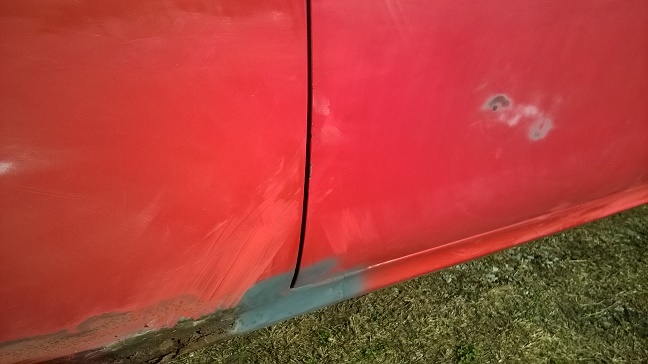
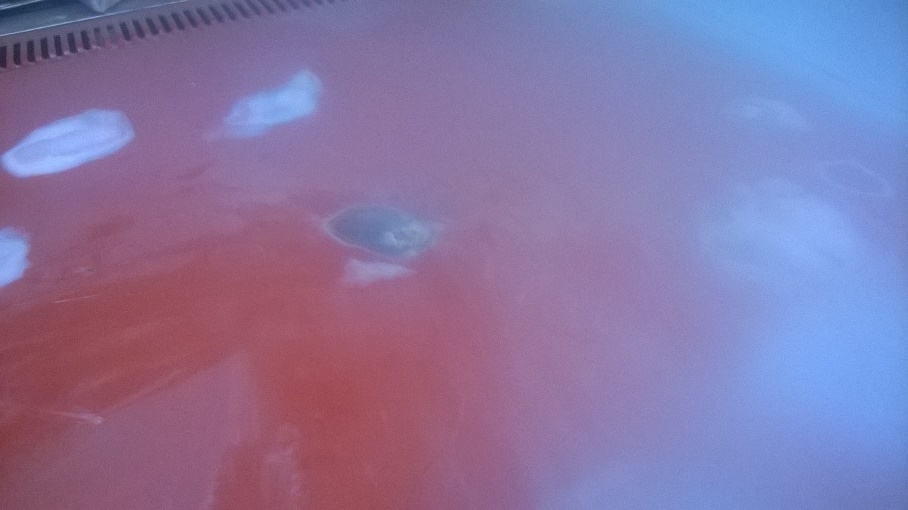
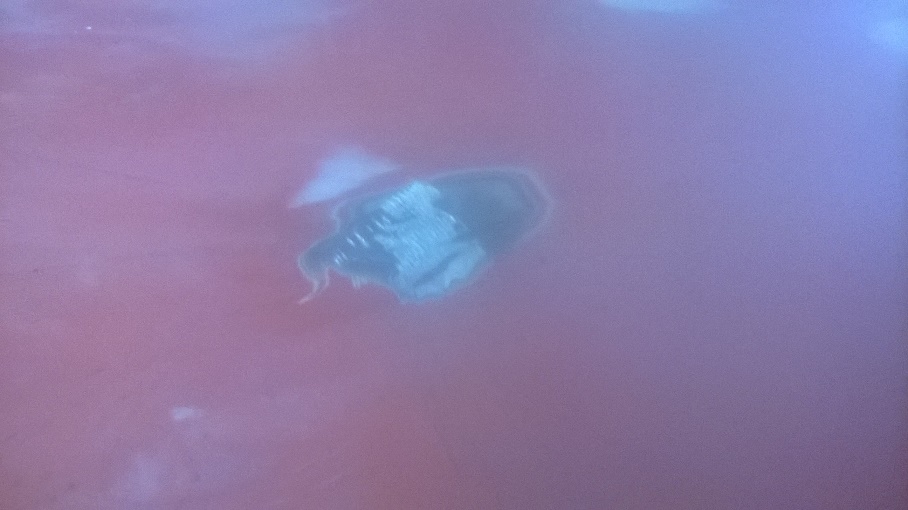
Location: Minor Hill, TN | Here is some more work done some spots have bondo
 (2015-01-18 14.09.51.jpg) (2015-01-18 14.09.51.jpg)
 (2015-01-18 14.09.53.jpg) (2015-01-18 14.09.53.jpg)
 (2015-01-18 14.09.58.jpg) (2015-01-18 14.09.58.jpg)
 (2015-01-18 14.10.11.jpg) (2015-01-18 14.10.11.jpg)
Attachments
----------------
2015-01-18 14.09.51.jpg (121KB - 230 downloads)
2015-01-18 14.09.53.jpg (130KB - 246 downloads)
2015-01-18 14.09.58.jpg (129KB - 223 downloads)
2015-01-18 14.10.11.jpg (122KB - 221 downloads)
|
|
| |
|
Expert 5K+
Posts: 8443
Location: Perth Australia | Dont worry about the bondo Stef
It is an extremely talented body man that can work all the dips and creases out of a 50+ y/o car without using some form of filler and that includes the factory (they used lead on the seams)
Your Dads doing great and I hope your getting in there and helping with the sanding (its hard work to do by yourself)
|
|
| |
|
Expert
Posts: 2634
Location: Minor Hill, TN | My dad is the only 1 doing the work right now. When he gets more into it I will be doing sanding on the body. He has a way of doing body work on a car . I l also learned the car has a lot of bondo but I do not know how much. I plan to use rust converter , rust protectant , primer and sealant before the car gets painted. I want this done right the 1st time. I know it had a paint job a while back but I do not know how old the last paint job is. I am also having the car done at home to save money on the labor rates |
|
| |
|
Expert
Posts: 1476
Location: Pacific Northwest | FYI. There is no such thing as rust converter. It's all marketing. The products you are referring to are in reality rust encapsulators. If you do not want to do this again you will need to remove the rusted sections and splice in new metal. My 2cents. Carry on.
Nice car by the way. I will be following the progress and thanks for the photos.
Drue |
|
| |
|
Expert
Posts: 2634
Location: Minor Hill, TN | My dad bought some a couple of years back what it does is turn the rust to a paintable surface. Eastwood carries this stuff.
Edited by 1961plymouthfury 2015-01-20 3:32 PM
|
|
| |
|
Expert
Posts: 2634
Location: Minor Hill, TN | Here is proof there is rust converter I ordered this from eastwood
 (WP_20150131_001.jpg) (WP_20150131_001.jpg)
Attachments
----------------
WP_20150131_001.jpg (104KB - 251 downloads)
|
|
| |
|

Board Moderator & Exner Expert 10K+
Posts: 13050
Location: Southern Sweden - Sturkö island | Then there's Santa Claus as well................:) |
|
| |
|
Expert
Posts: 2634
Location: Minor Hill, TN | Yes there is. here is more photos of some of the progress. There has not been much lately my dad wants to paint the engine compartment of his '68 charger and put the motor back in . That is going to sub for the '61 while its getting its face lift.
 (2015-01-25 12.09.04.jpg) (2015-01-25 12.09.04.jpg)
 (2015-01-25 12.09.17.jpg) (2015-01-25 12.09.17.jpg)
 (2015-01-25 12.10.05.jpg) (2015-01-25 12.10.05.jpg)
 (2015-02-09 16.22.29.jpg) (2015-02-09 16.22.29.jpg)
 (red 1961 fury restoration 2.jpg) (red 1961 fury restoration 2.jpg)
Attachments
----------------
2015-01-25 12.09.04.jpg (127KB - 241 downloads)
2015-01-25 12.09.17.jpg (131KB - 246 downloads)
2015-01-25 12.10.05.jpg (132KB - 236 downloads)
2015-02-09 16.22.29.jpg (120KB - 266 downloads)
red 1961 fury restoration 2.jpg (2KB - 227 downloads)
|
|
| |
|
Expert 5K+
Posts: 5139
Location: cornpatch county, Southwest IOA | You can save yourself some money by going to a paint store or hardware store to get your " rust converter" I think it is called "OS Phos" I can't remember exactly what it is --I think Phosphoric acid. It will take care of surface rust, but not rust through. It does change the rust to a black paintable coating. but leaves a rough finish. ...........................MO |
|
| |
|
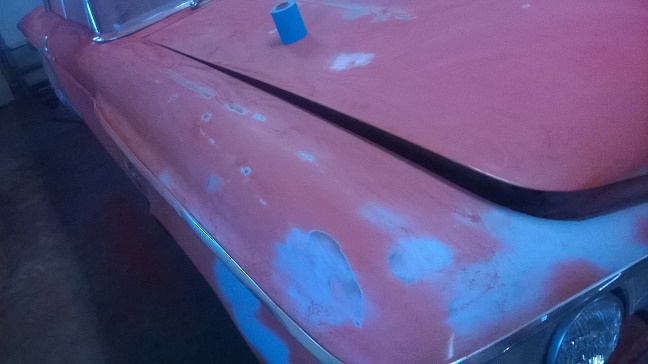
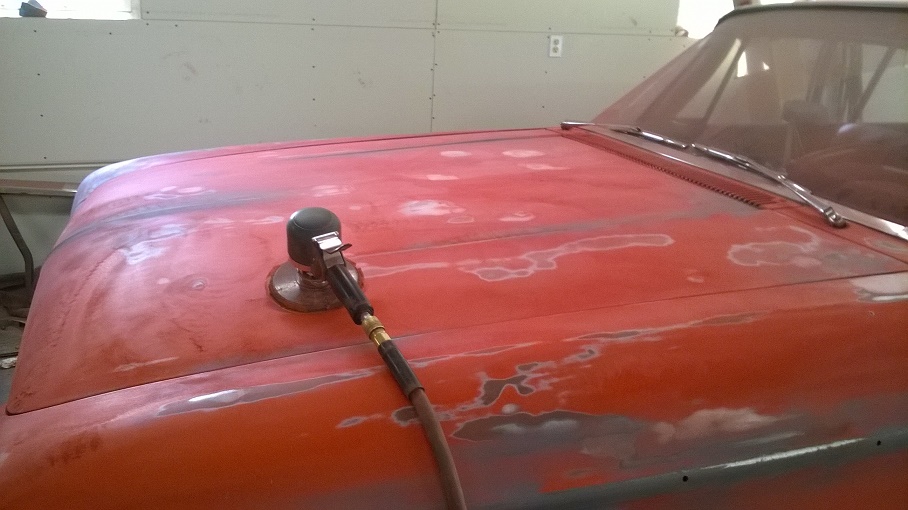
Expert
Posts: 2634
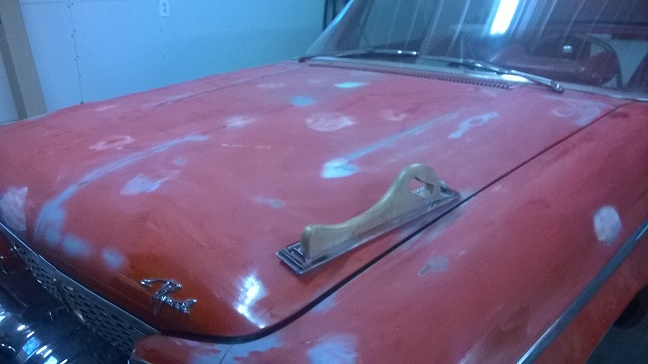
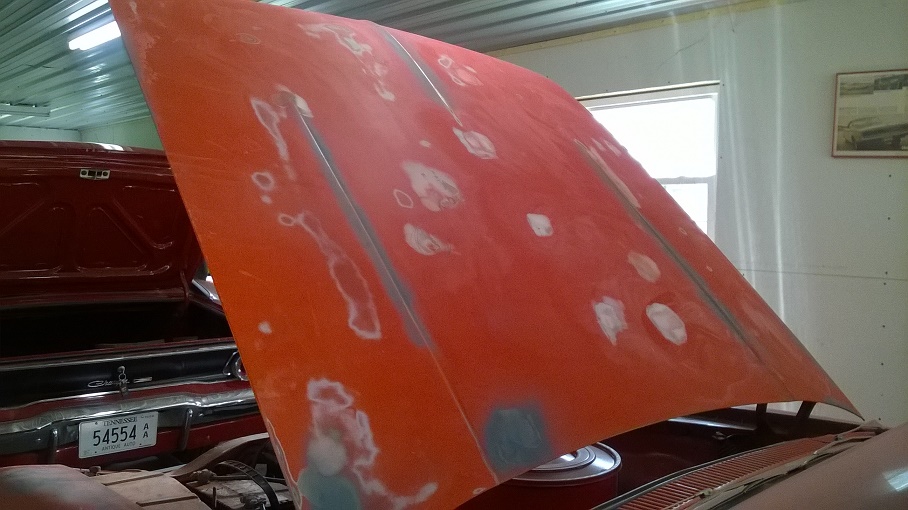
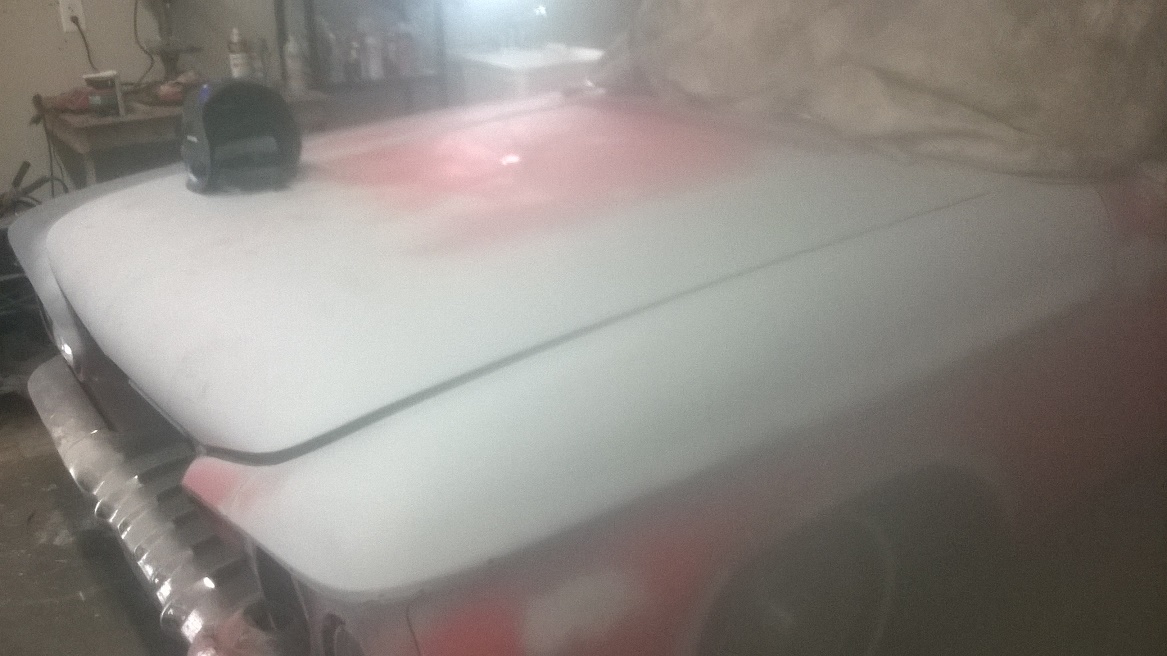
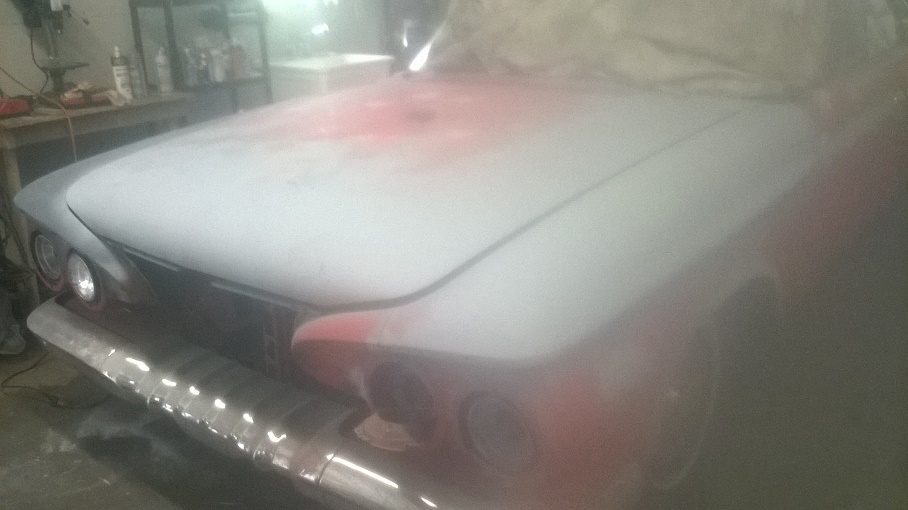
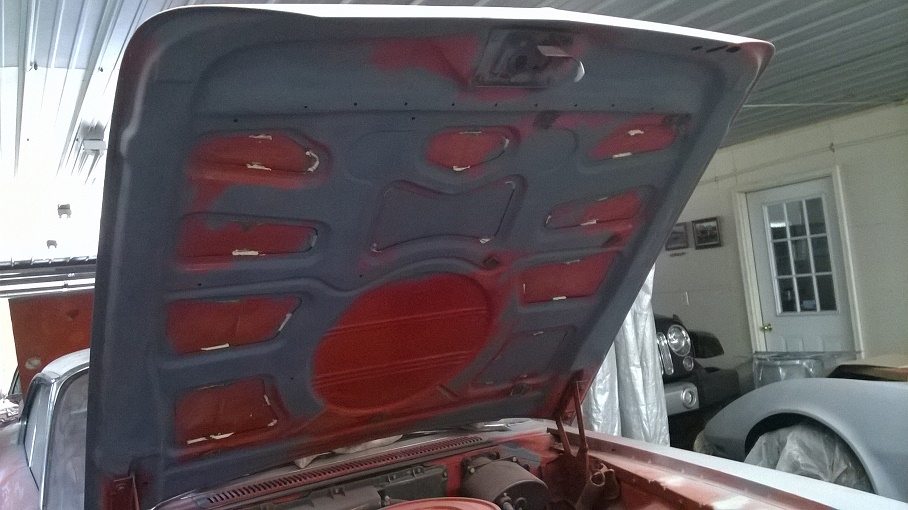
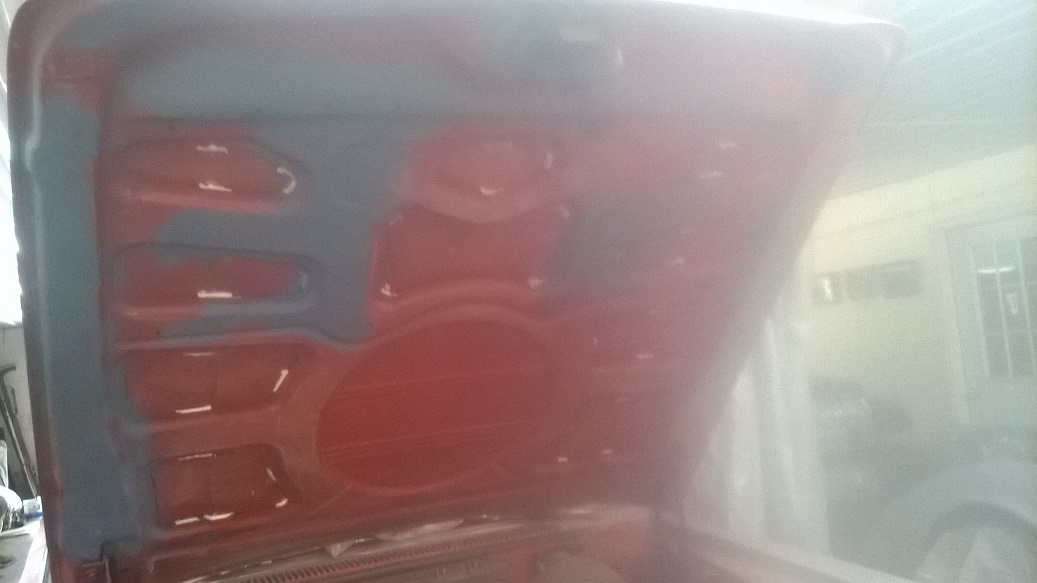
Location: Minor Hill, TN | I did some more sanding on the hood and I also did the trunk.
 (2015-02-10 14.20.03.jpg) (2015-02-10 14.20.03.jpg)
 (2015-02-10 14.29.20.jpg) (2015-02-10 14.29.20.jpg)
 (2015-02-10 15.13.11.jpg) (2015-02-10 15.13.11.jpg)
 (2015-02-10 15.13.20.jpg) (2015-02-10 15.13.20.jpg)
 (2015-02-10 14.29.30.jpg) (2015-02-10 14.29.30.jpg)
 (IMAG0475.JPG) (IMAG0475.JPG)
Attachments
----------------
2015-02-10 14.20.03.jpg (106KB - 218 downloads)
2015-02-10 14.29.20.jpg (104KB - 216 downloads)
2015-02-10 15.13.11.jpg (100KB - 214 downloads)
2015-02-10 15.13.20.jpg (93KB - 227 downloads)
2015-02-10 14.29.30.jpg (112KB - 232 downloads)
IMAG0475.JPG (148KB - 244 downloads)
|
|
| |
|
Expert
Posts: 2634
Location: Minor Hill, TN | Yesterday my dad installed my center link he also took the aero wheel off to see why my turn signal was not cancelling . I will also have the aero wheel repaired at home to save some money. I will take photos later and upload them here |
|
| |
|
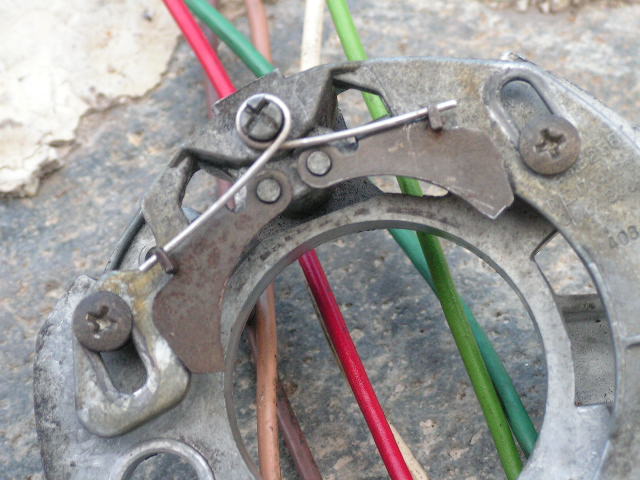
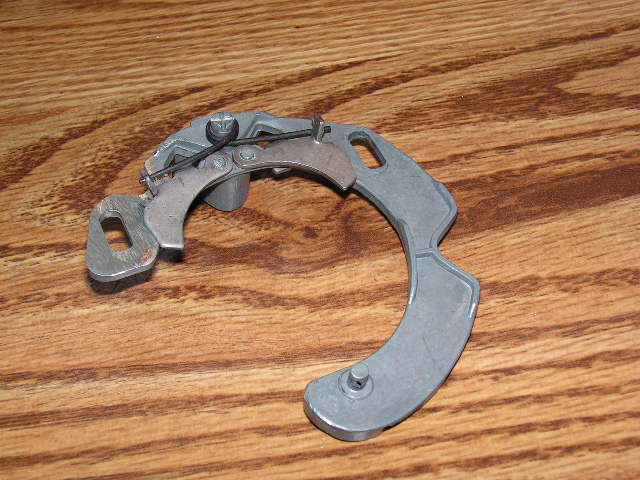
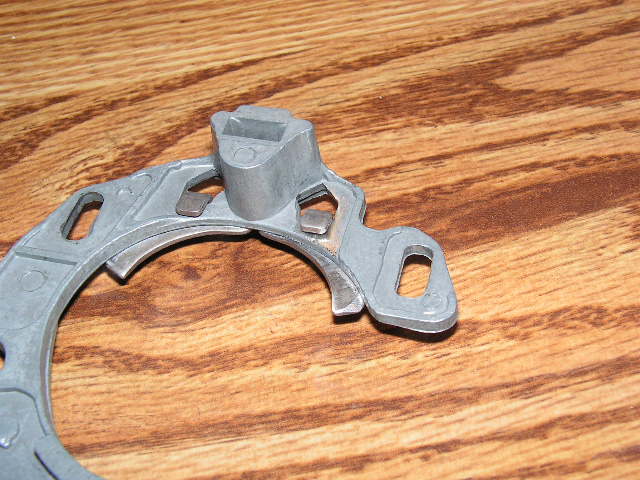
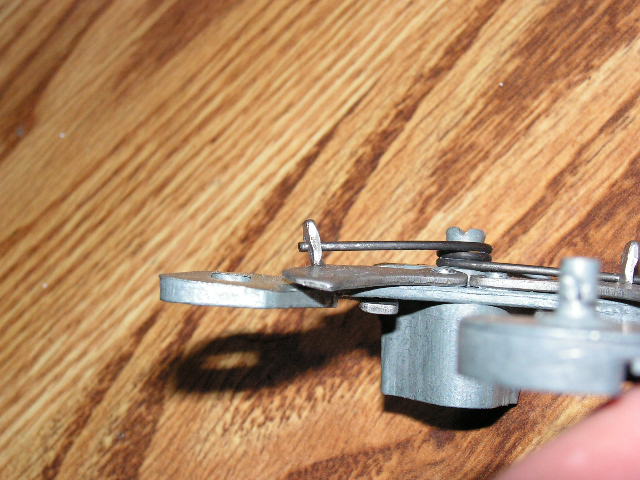
Exner Expert 19,174 posts. Neil passed away 18 Sep 2015. You will be missed, Neil!
Posts: 19146
Location: bishop, ca | Here's a (soon to be lost/mis-placed, here, on this thread)....tutorial about
how a turn signal switch's operation can be repaired and adjusted, to
allow the signal lever-arm to move freely and/or to return itself 'off' at the end
of a turn.
You'll see that the signal's body 'mounting arm(s)' may need to be ground-down, slightly, because
its steel adjusters' slide-arms may be contacting/binding against its body, which inhibits the
free motion of those steel adjuster-stops.
The slide-arms can be bent-outward slightly, to create pass-by clearance, to eliminate the adjusters'
binding against the turn signal's body.
But, the body mechanism arm(s) may well-need to be ground down, to eliminate any other (and, they ARE there..)
wear-points/burrs on their moving-mating surfaces.
And, then, the shebang should be cleaned and liberally greased.
And ALMOST forgot this 'point(s)'.....
A close inspection of the steel adjusters may reveal that their curved contact surface-points are
slightly worn down, which will inhibit their turn signal's return-operation.
You can grind-down (-increase) the "point" on the contact area of the curved surface of the adjusters, but,
I've had better luck with merely replacing the steel adjusters, from another good-donor turn signal switch.
The first pic shows contact corrosion on a turn signal switch.
Next two photos show physical wear on the steel adjuster's contact point-surface.
Next photo shows a NOS switch, with sharply pointed steel adjusters, BUT: its
adjuster arm has been thinned/ground-down, to create movement clearance for its adjuster,
which was found to be binding against the turn signal's body.
The third-from-bottom pic shows a binding steel adjuster arm, against the turn signal body.
The 4th, 6th and 7th pics show a ground-down (thinned-) switch arm, to create free movement-clearance between its lever mating surfaces.
Edited by d500neil 2015-02-25 4:42 AM
 (PICT0072.JPG) (PICT0072.JPG)
 (PICT0022.JPG) (PICT0022.JPG)
 (PICT0025.JPG) (PICT0025.JPG)
 (PICT4460.JPG) (PICT4460.JPG)
 (PICT4461.JPG) (PICT4461.JPG)
 (PICT4463.JPG) (PICT4463.JPG)
 (PICT4464.JPG) (PICT4464.JPG)
Attachments
----------------
PICT0072.JPG (105KB - 224 downloads)
PICT0022.JPG (108KB - 221 downloads)
PICT0025.JPG (108KB - 220 downloads)
PICT4460.JPG (109KB - 228 downloads)
PICT4461.JPG (110KB - 246 downloads)
PICT4463.JPG (109KB - 213 downloads)
PICT4464.JPG (107KB - 212 downloads)
|
|
| |
|

Expert
Posts: 2788
Location: USA - KY |
Thanks, Neil, for the info!
Your car is coming along well, Steph!
 |
|
| |
|
Expert
Posts: 2634
Location: Minor Hill, TN | I have not done much lately it has been cold out .My father cannot handle the cold but I am being patient about this but I have done the sanding on the hood and the trunk of the car. I am waiting for my dad to take the trimmings off I will leave that up to him The only items I took off was the fender mirrors and the headlight bezels. I would like to get a pair of fender mirrors like I had on the black '61. |
|
| |
|
Expert 5K+
Posts: 7402
Location: northern germany | d500neil - 2015-02-24 2:16 PM
Here's a (soon to be lost/mis-placed, here, on this thread)....tutorial about
how a turn signal switch's operation can be repaired and adjusted, to
allow the signal lever-arm to move freely and/or to return itself 'off' at the end
of a turn.....
iirc the 60+ system is different. |
|
| |
|
Elite Veteran
Posts: 873
Location: ALABAMA, HEART OF DIXIE | 1961plymouthfury - 2014-12-24 6:20 PM The drivers rear panel was cut and the inner panel fitted. The rear passenger quarter was worked on also. I am not going to rush this at all I have a substitute car to take to cruise ins and shows while the face lift is being done on this fowardlook. My dad's `1968 charger
Your living dangerously sanding and grinding that close to the trim......... Sorry, just not the correct way to do it. 
|
|
| |
|
Expert
Posts: 1384
Location: Ocala, Florida | Are you painting it with the trim on the car and just taping it off? |
|
| |
|
Expert
Posts: 2634
Location: Minor Hill, TN | My dad did were the trimming is with a grlnder I did not do this.
Edited by 1961plymouthfury 2015-02-26 12:17 AM
|
|
| |
|
Elite Veteran
Posts: 827
Location: tailFinland | Steph this your car isnt it? Even it is your dad who is doing the job, it is still you car and possibly you can ask him to do things certain way.
It is also your duty to study things out, to do home some work about how to restore a car, not just rely blind on your dad (becouse its your car)
Many people are giving you a good tips about how to do and how not to do from their experience, and I think you should listen a little bit, not just ignore it.
I know it is a son and dad situation, I do not mean that you have start judging his skills and make him feel bad, nor you cant rely on your dad, but you could ask why he has'nt taken the trim at the beginning, ask him should'nt it taken off anyway. Tell him that your pals strip the whole car and sand and paint the whole car and tehy say its better that way... Tell him that professional restores do not use rust converters...
Edited by Adventurer 60 2015-02-26 3:27 AM
|
|
| |
|
Elite Veteran
Posts: 873
Location: ALABAMA, HEART OF DIXIE | The Chrysler Kid - 2015-02-25 8:21 PM Are you painting it with the trim on the car and just taping it off?
This is not a FL car but was recently refinished. EVERY piece of trim was removed before any sanding or grinding was done. By removing the trim you will have time to buff and polish it while the car body is being attended to. You don't want dingy or damaged trim to go back on once painted, do you...? I'm sure your dad is a very capable fellow, but as one who has done many restorations I have to question his procedures. Take the trim off....... then sand the car.
 (first blocking (Large).JPG) (first blocking (Large).JPG)
Attachments
----------------
first blocking (Large).JPG (247KB - 220 downloads)
|
|
| |
|
Expert
Posts: 2634
Location: Minor Hill, TN | I told him that I was not going to do any more sanding until the trimming was removed. All I did was the trunk and the hood but I did not go near the trimming |
|
| |
|
Expert
Posts: 2634
Location: Minor Hill, TN | There is a dent in the passenger side trimming but my dad is going to repair that , The other 1 had dents in the trimming ( black car) and that was before the restoration of that 1. |
|
| |
|
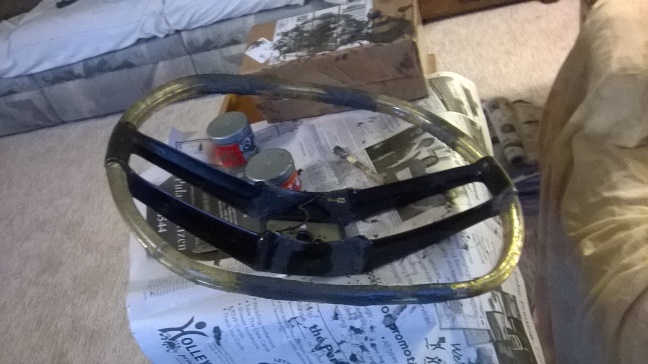
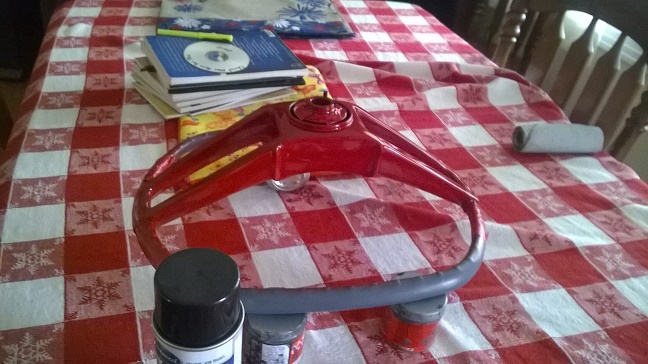
Expert
Posts: 2634
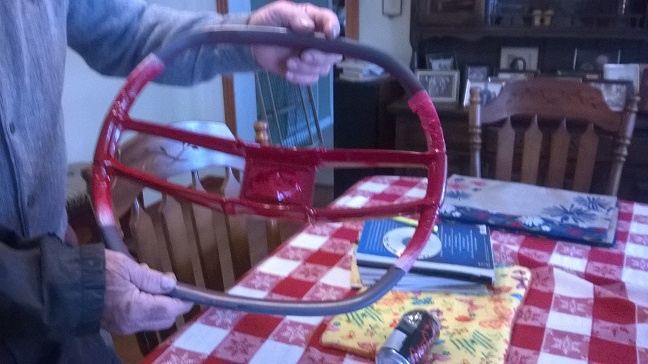
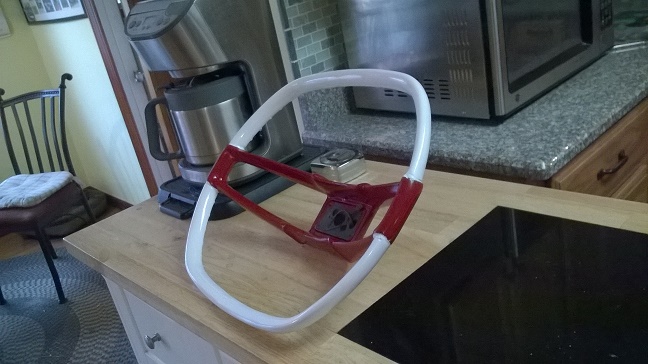
Location: Minor Hill, TN | I am also restoring my Aero Wheel at home instead of sending it out. I am looking for a paint so I can get the wheel painted I am looking for a crimson color with a pearl in the paint
 (WP_20150228_004.jpg) (WP_20150228_004.jpg)
 (WP_20150228_003.jpg) (WP_20150228_003.jpg)
Attachments
----------------
WP_20150228_004.jpg (133KB - 205 downloads)
WP_20150228_003.jpg (129KB - 234 downloads)
|
|
| |
|
Expert
Posts: 2634
Location: Minor Hill, TN | I also did another video of the car. I am having alot of this done at home to save money on the labor costs, I am also looking at red with a pearl in it and white with a pearl in it too. http://youtu.be/b7AfYSB9aiM |
|
| |
|
Expert
Posts: 2634
Location: Minor Hill, TN | I did some more sanding but I had the sand paper in my hand here is more of my work. I also need to ask a question when painting a steering wheel what kind of paint should I use I am looking at painting my aero wheel red with a pearl in it. The marked spots were done with sand paper in hand not using a tool . Now I got to get back to work on the car
Edited by 1961plymouthfury 2015-03-04 2:44 PM
 (WP_20150304_002.jpg) (WP_20150304_002.jpg)
 (WP_20150304_003.jpg) (WP_20150304_003.jpg)
 (WP_20150304_004.jpg) (WP_20150304_004.jpg)
 (WP_20150304_005.jpg) (WP_20150304_005.jpg)
Attachments
----------------
WP_20150304_002.jpg (99KB - 241 downloads)
WP_20150304_003.jpg (114KB - 219 downloads)
WP_20150304_004.jpg (116KB - 219 downloads)
WP_20150304_005.jpg (123KB - 221 downloads)
|
|
| |
|
Expert
Posts: 2264
Location: McComb, Mississippi | Why not just sand the car down completely all at once or use a paint stripper ? It'd be a lot easier . |
|
| |
|
Expert
Posts: 2634
Location: Minor Hill, TN | There is more to that and this is not an over night job. There is grinding,sand blasting , filling dents , cutting and replacing rusted panels . Primer and then paint
Edited by 1961plymouthfury 2015-03-04 4:46 PM
|
|
| |
|
Expert
Posts: 2264
Location: McComb, Mississippi | I am aware of that, but why not sand the car completely down at once besides doing a little here and a little there ? This is your project. I was merely trying to help you save a little time. |
|
| |
|
Expert
Posts: 2634
Location: Minor Hill, TN | I am going to have my dad remove the trim I do not feel comfortable doing that myself. I am taking my time on this car because I want it done right the 1st time. There are also panels that need to be cut and replaced. The car was repainted 1 time but I do not know who painted the car last but it was not a good job
Edited by 1961plymouthfury 2015-03-05 6:03 AM
 (WP_20150304_006.jpg) (WP_20150304_006.jpg)
 (WP_20150304_007.jpg) (WP_20150304_007.jpg)
 (WP_20150304_008.jpg) (WP_20150304_008.jpg)
 (WP_20150304_010.jpg) (WP_20150304_010.jpg)
 (WP_20150304_011.jpg) (WP_20150304_011.jpg)
 (WP_20150304_012.jpg) (WP_20150304_012.jpg)
 (WP_20150304_013.jpg) (WP_20150304_013.jpg)
 (WP_20150304_014.jpg) (WP_20150304_014.jpg)
Attachments
----------------
WP_20150304_006.jpg (126KB - 277 downloads)
WP_20150304_007.jpg (114KB - 258 downloads)
WP_20150304_008.jpg (129KB - 219 downloads)
WP_20150304_010.jpg (115KB - 275 downloads)
WP_20150304_011.jpg (109KB - 256 downloads)
WP_20150304_012.jpg (116KB - 218 downloads)
WP_20150304_013.jpg (110KB - 255 downloads)
WP_20150304_014.jpg (129KB - 263 downloads)
|
|
| |
|
Elite Veteran
Posts: 827
Location: tailFinland | Steph.
-you gotta take interior panels and rear seat off to get an access to side trim clips (take them off first)
-window clips are snap on type, takes about 5 minutes to take them off with a flat screw driver
-Take front seat and sill panels and carpet off too, you have to if you weld the rockers, it is a fire danger and you have to be able to extinguish it if nessesary.
-get those rusted areas done with new patch panels first before you do any sanding and spraying.
-I think you have to sand whole car to bare metal. Thats gonna be costly but if you get new acrylic paint sparyed on those red-white-red spots, even fith spraycan primer between, those edeges will boil through the new paint. Insulating base layer should be sprayed and sand it again - but then you would have at least 2 new layers of paint on those 4-5 old paint layers (no one can tell what they are and how they react with the new paint)
Good paintjob is not sprayning the finishing surface it is all what is under the paint. |
|
| |
|
Expert
Posts: 2634
Location: Minor Hill, TN | I am going to let my dad do this for me I do not feel comfortable doing this myself. I even did some more block sanding on the car some spots were done with sand paper in hand .
Edited by 1961plymouthfury 2015-03-07 7:00 PM
 (WP_20150307_005.jpg) (WP_20150307_005.jpg)
 (WP_20150307_006.jpg) (WP_20150307_006.jpg)
 (WP_20150307_007.jpg) (WP_20150307_007.jpg)
 (WP_20150307_008.jpg) (WP_20150307_008.jpg)
 (WP_20150307_009.jpg) (WP_20150307_009.jpg)
 (WP_20150307_010.jpg) (WP_20150307_010.jpg)
 (WP_20150307_011.jpg) (WP_20150307_011.jpg)
 (WP_20150307_012.jpg) (WP_20150307_012.jpg)
 (WP_20150307_013.jpg) (WP_20150307_013.jpg)
 (WP_20150307_014.jpg) (WP_20150307_014.jpg)
Attachments
----------------
WP_20150307_005.jpg (116KB - 222 downloads)
WP_20150307_006.jpg (116KB - 266 downloads)
WP_20150307_007.jpg (109KB - 234 downloads)
WP_20150307_008.jpg (123KB - 260 downloads)
WP_20150307_009.jpg (111KB - 269 downloads)
WP_20150307_010.jpg (111KB - 235 downloads)
WP_20150307_011.jpg (106KB - 242 downloads)
WP_20150307_012.jpg (119KB - 255 downloads)
WP_20150307_013.jpg (115KB - 245 downloads)
WP_20150307_014.jpg (112KB - 267 downloads)
|
|
| |
|
Expert
Posts: 2264
Location: McComb, Mississippi | It's not difficult to remove the trim... |
|
| |
|

Expert
Posts: 3577
Location: Blythewood, SC | Are you sanding this whole car down by hand? That's going to take years. If you plan to paint it, you should go ahead and get a compressor and a DA sander now. It will shave a lot of time off and give a better result.
Also, all that dust will settle behind the trim. You will have a tough time getting it all out. Any dust that is trapped will blow out when you paint the car, and get dust in your final paint. That's the reason everyone says to pull the trim. |
|
| |
|
Expert
Posts: 2634
Location: Minor Hill, TN | I am doing some spots by hand but I am block sanding when it comes to the compressor and the DA sander I have not learned how to use 1 but I am willing to learn . I have a blower were I can blow it off. The trimming will be removed but Iam leaving that up to some one who knows what they are doing. My dad restored the black '61 he removed the trim and repaired the dents on it.
 (WP_20150309_001.jpg) (WP_20150309_001.jpg)
 (WP_20150309_002.jpg) (WP_20150309_002.jpg)
 (WP_20150309_003.jpg) (WP_20150309_003.jpg)
Attachments
----------------
WP_20150309_001.jpg (152KB - 264 downloads)
WP_20150309_002.jpg (146KB - 256 downloads)
WP_20150309_003.jpg (140KB - 225 downloads)
|
|
| |
|
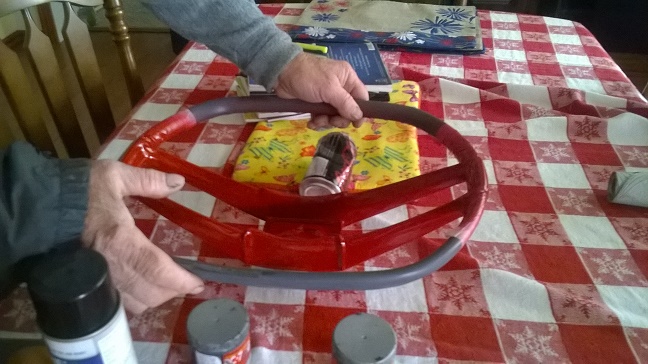
Expert
Posts: 2634
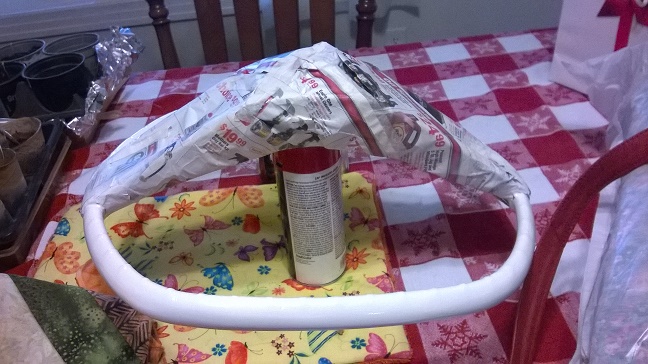
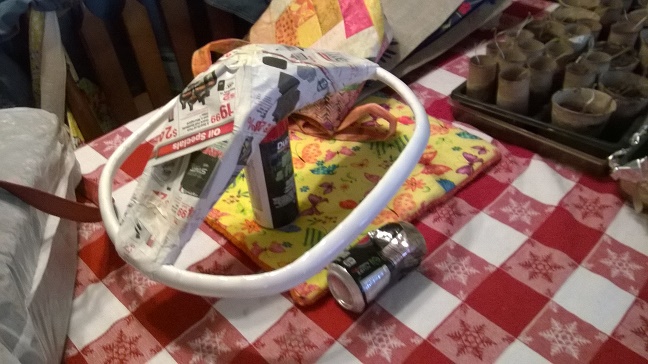
Location: Minor Hill, TN | Here is part 2 of the Aero wheel restoration done at home.
 (WP_20150311_001.jpg) (WP_20150311_001.jpg)
 (WP_20150311_002.jpg) (WP_20150311_002.jpg)
 (WP_20150311_003.jpg) (WP_20150311_003.jpg)
 (WP_20150311_007.jpg) (WP_20150311_007.jpg)
Attachments
----------------
WP_20150311_001.jpg (155KB - 231 downloads)
WP_20150311_002.jpg (143KB - 210 downloads)
WP_20150311_003.jpg (147KB - 238 downloads)
WP_20150311_007.jpg (130KB - 271 downloads)
|
|
| |
|
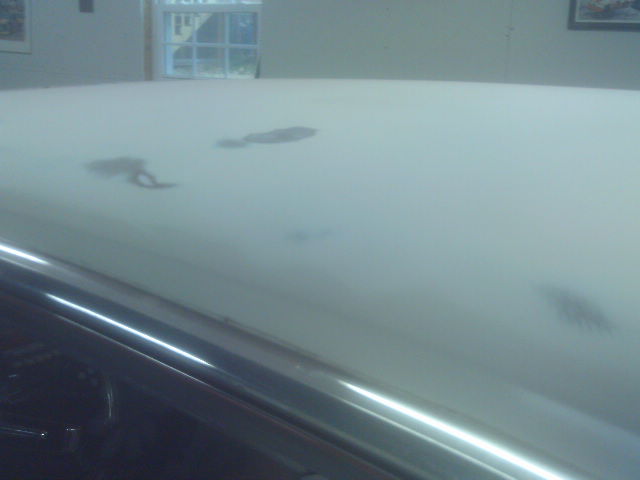
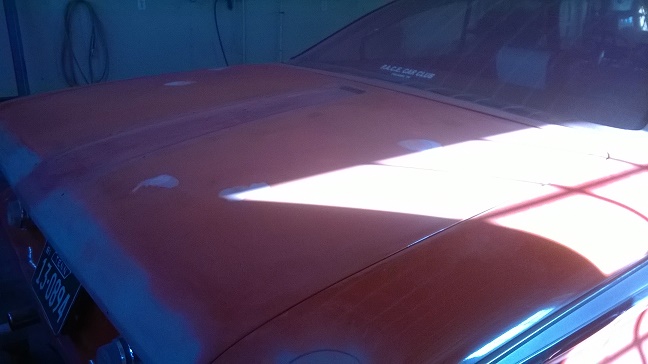
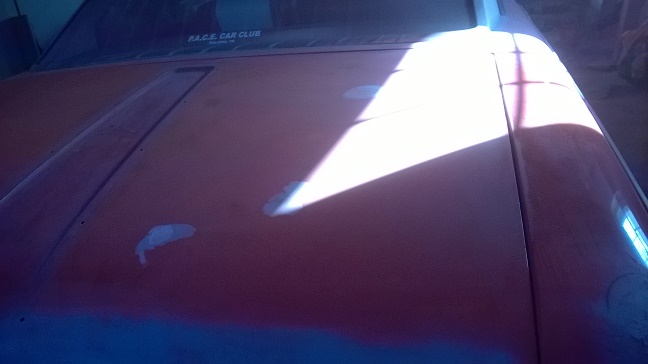
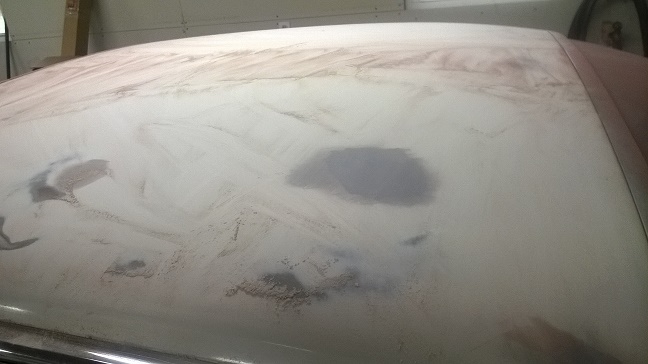
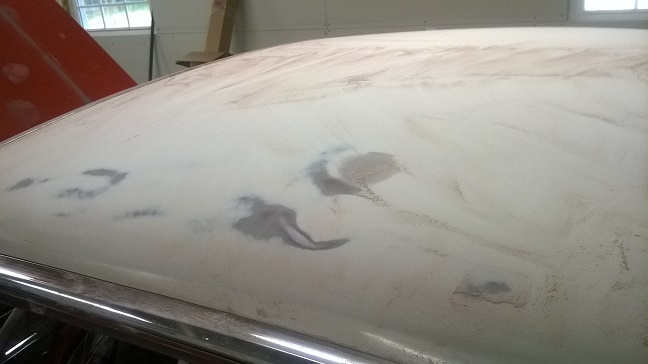
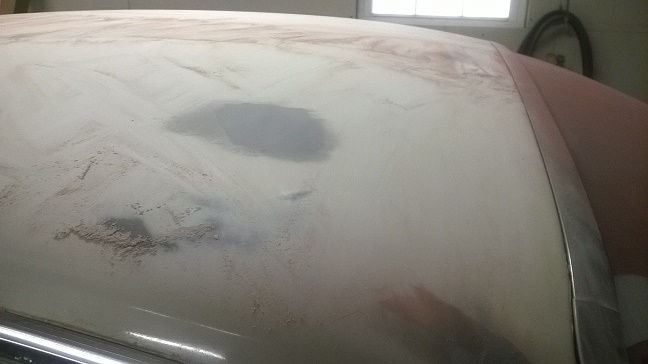
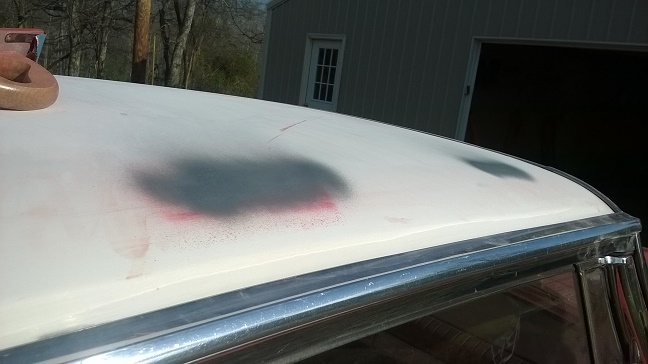
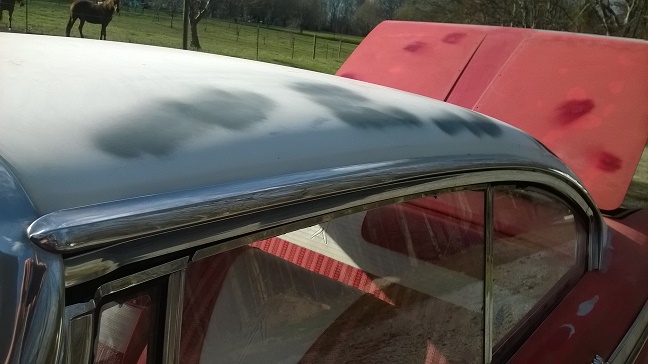
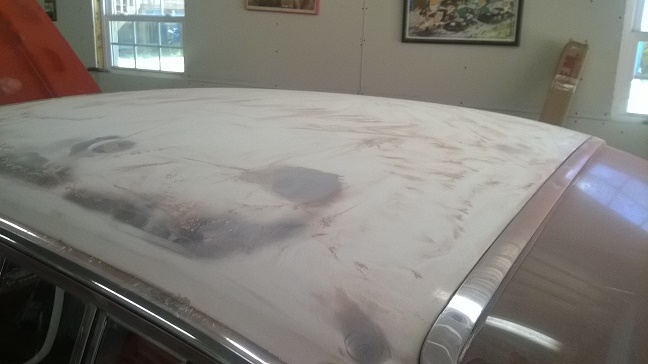
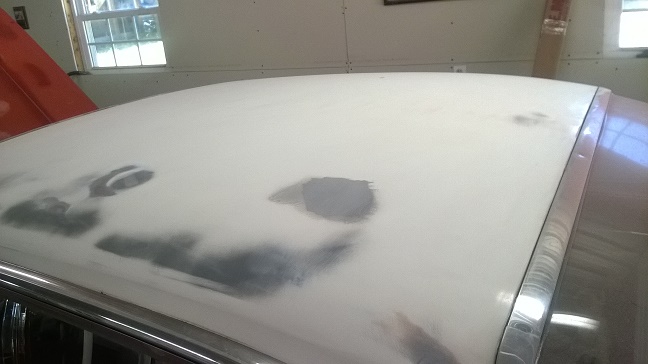
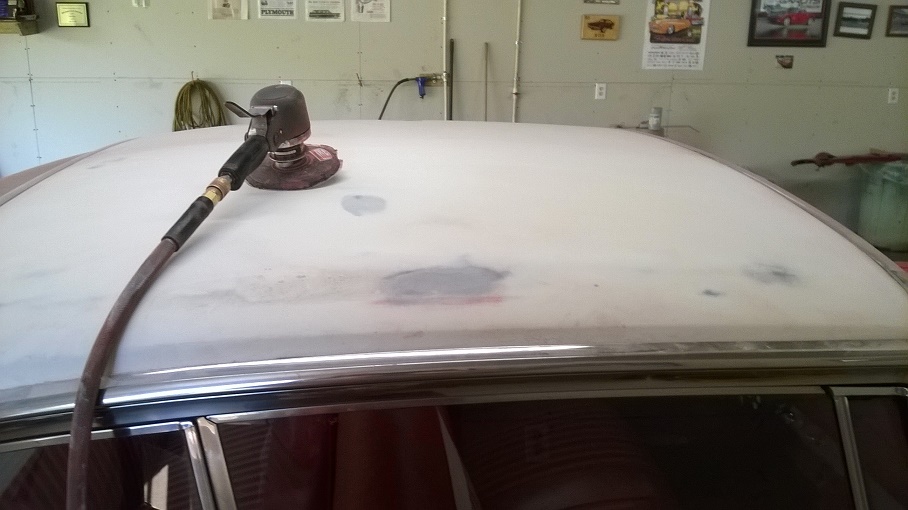
Expert
Posts: 2634
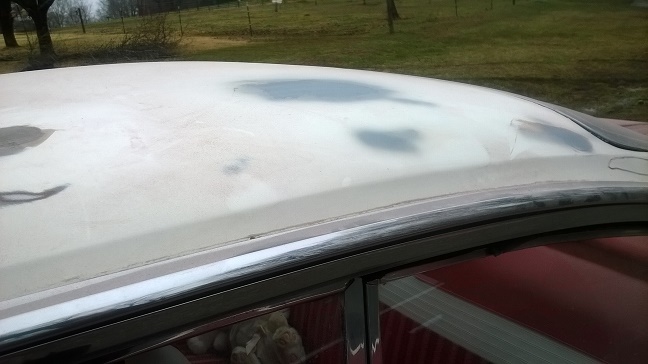
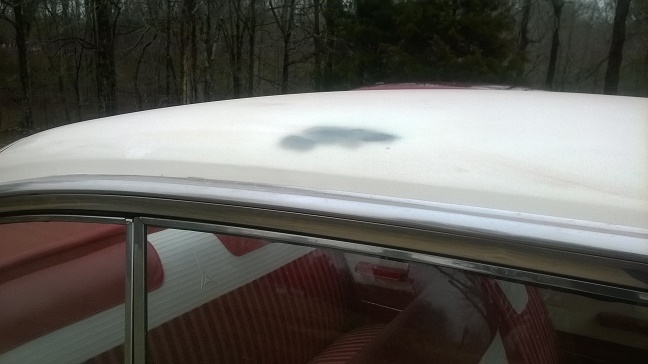
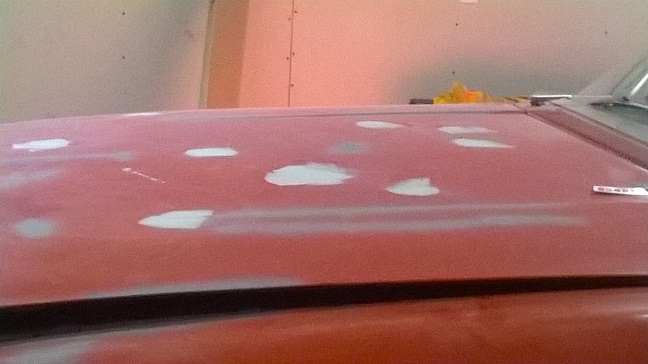
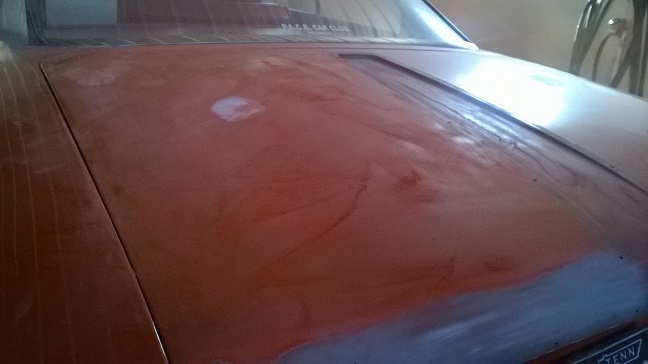
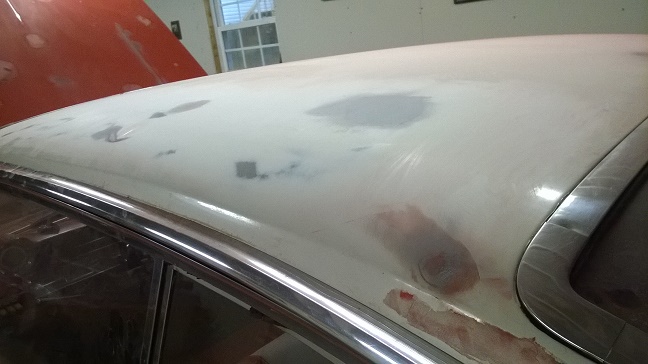
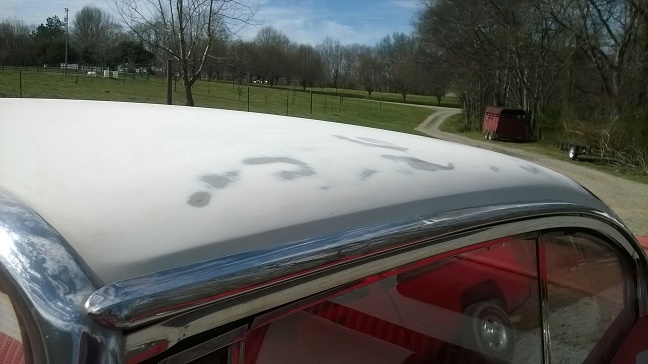
Location: Minor Hill, TN | I did some sanding on the roof today . There will be no more sanding for a while
 (WP_20150313_010.jpg) (WP_20150313_010.jpg)
 (WP_20150313_011.jpg) (WP_20150313_011.jpg)
 (WP_20150313_012.jpg) (WP_20150313_012.jpg)
Attachments
----------------
WP_20150313_010.jpg (100KB - 226 downloads)
WP_20150313_011.jpg (103KB - 241 downloads)
WP_20150313_012.jpg (99KB - 211 downloads)
|
|
| |
|
Expert
Posts: 2634
Location: Minor Hill, TN | The test drive .
I took the car out for a short test drive after the new center link was installed here is a short video of it and some more photos of my work
https://youtu.be/dAZoMGsaRM0
 (WP_20150318_005.jpg) (WP_20150318_005.jpg)
 (WP_20150318_004.jpg) (WP_20150318_004.jpg)
 (WP_20150318_006.jpg) (WP_20150318_006.jpg)
 (WP_20150318_007.jpg) (WP_20150318_007.jpg)
 (WP_20150318_008.jpg) (WP_20150318_008.jpg)
 (WP_20150318_010.jpg) (WP_20150318_010.jpg)
 (WP_20150318_011.jpg) (WP_20150318_011.jpg)
 (WP_20150318_014.jpg) (WP_20150318_014.jpg)
 (WP_20150318_015.jpg) (WP_20150318_015.jpg)
 (WP_20150318_016.jpg) (WP_20150318_016.jpg)
 (WP_20150318_017.jpg) (WP_20150318_017.jpg)
Attachments
----------------
WP_20150318_005.jpg (120KB - 251 downloads)
WP_20150318_004.jpg (136KB - 240 downloads)
WP_20150318_006.jpg (126KB - 254 downloads)
WP_20150318_007.jpg (120KB - 238 downloads)
WP_20150318_008.jpg (135KB - 251 downloads)
WP_20150318_010.jpg (124KB - 228 downloads)
WP_20150318_011.jpg (111KB - 229 downloads)
WP_20150318_014.jpg (106KB - 252 downloads)
WP_20150318_015.jpg (114KB - 224 downloads)
WP_20150318_016.jpg (110KB - 224 downloads)
WP_20150318_017.jpg (126KB - 203 downloads)
|
|
| |
|
Board Moderator & Exner Expert 10K+
Posts: 13050
Location: Southern Sweden - Sturkö island | I'm puzzled here Steph, you should pull those front fenders and make a proper rust repair and as adviced by many; pull the chrome, stainless and bezels so that you can sand down the surface evenly without damaging the "jewelery".
Always nice to see some action videos, thanks' for sharing |
|
| |
|
Expert 5K+
Posts: 8443
Location: Perth Australia | Not much point in offering advice to someone who will consistently ignore it
I am sure it will be a great 20 footer when its done
|
|
| |
|
Expert
Posts: 2634
Location: Minor Hill, TN | My dad going to pull the fenders off I will leave that part up to him. I did the sanding by hand I did not go near the chrome. The only time I used the tool when I was no were near the stainless steel. I am not ignoring any advice I am doing it the way my dad is teaching me. Alot of folks have their way of doing body work. I am just learning this .
This might be the last posting until the car is done . I will take photos of the progress but they will not be posted here these are the last photos of the progress .
Edited by 1961plymouthfury 2015-03-19 8:52 PM
 (WP_20150319_001.jpg) (WP_20150319_001.jpg)
 (WP_20150319_002.jpg) (WP_20150319_002.jpg)
 (WP_20150319_003.jpg) (WP_20150319_003.jpg)
 (WP_20150319_004.jpg) (WP_20150319_004.jpg)
 (WP_20150319_006.jpg) (WP_20150319_006.jpg)
 (WP_20150319_007.jpg) (WP_20150319_007.jpg)
 (WP_20150319_009.jpg) (WP_20150319_009.jpg)
 (WP_20150319_010.jpg) (WP_20150319_010.jpg)
 (WP_20150319_011.jpg) (WP_20150319_011.jpg)
Attachments
----------------
WP_20150319_001.jpg (126KB - 246 downloads)
WP_20150319_002.jpg (105KB - 205 downloads)
WP_20150319_003.jpg (140KB - 259 downloads)
WP_20150319_004.jpg (121KB - 223 downloads)
WP_20150319_006.jpg (138KB - 255 downloads)
WP_20150319_007.jpg (122KB - 250 downloads)
WP_20150319_009.jpg (155KB - 203 downloads)
WP_20150319_010.jpg (102KB - 248 downloads)
WP_20150319_011.jpg (116KB - 214 downloads)
|
|
| |
|
Expert
Posts: 2634
Location: Minor Hill, TN | I am not ignoring any advice I am doing this the way my dad is teaching me. He will be removing the trim and the front fenders. I am not using the body file when I am around the trim . My dad told me its not chrome its Stainless steel. People have their way of doing body work . I am not going to rush on this project I am taking my time because I want it done right the 1st time. I will post photos when the car is done |
|
| |
|
Elite Veteran
Posts: 827
Location: tailFinland | 1961plymouthfury - 2015-03-22 4:02 PM
My dad told me its not chrome its Stainless steel.
 Your dad is right Your dad is right
|
|
| |
|
Expert
Posts: 2634
Location: Minor Hill, TN | I did some more block sanding but there will be no photos of my work |
|
| |
|
Expert
Posts: 2634
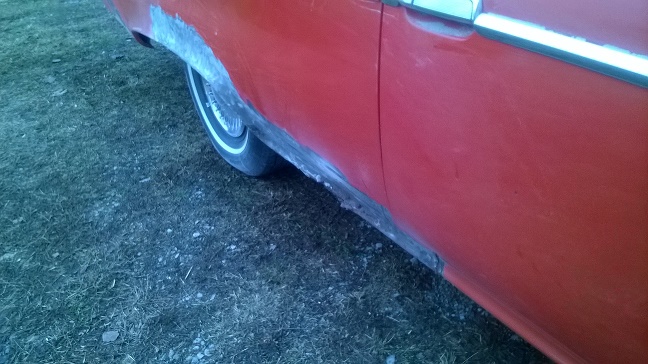
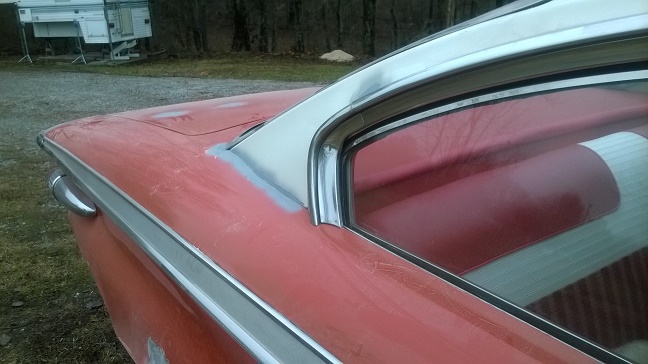
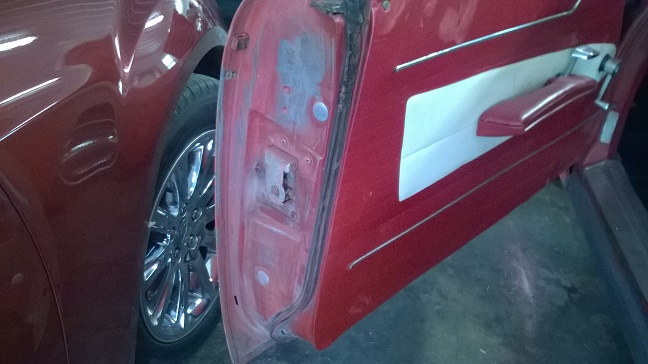
Location: Minor Hill, TN | Today the back up lenses and tail light lens and the driver's side trimming was removed and I sanded in those areas today . I blocked sanded in the area were the trimming was removed but the rocker panel was done by hand. I will be posting more photos when more work was done I did not remove the trimming my dad did this part . He wants to remove it himself. I also discovered it has the original paint under the trimming. When my dad was removing the script fury off the right fender it was accidently broken . He am sure he will try to fix it or I might need to look for another 1
Edited by 1961plymouthfury 2015-03-28 10:50 AM
 (WP_20150327_002.jpg) (WP_20150327_002.jpg)
 (WP_20150327_003.jpg) (WP_20150327_003.jpg)
 (WP_20150327_004.jpg) (WP_20150327_004.jpg)
 (WP_20150327_005.jpg) (WP_20150327_005.jpg)
 (WP_20150327_006.jpg) (WP_20150327_006.jpg)
 (WP_20150327_007.jpg) (WP_20150327_007.jpg)
Attachments
----------------
WP_20150327_002.jpg (126KB - 256 downloads)
WP_20150327_003.jpg (130KB - 248 downloads)
WP_20150327_004.jpg (123KB - 226 downloads)
WP_20150327_005.jpg (118KB - 229 downloads)
WP_20150327_006.jpg (115KB - 213 downloads)
WP_20150327_007.jpg (118KB - 252 downloads)
|
|
| |
|
Expert
Posts: 2788
Location: USA - KY |
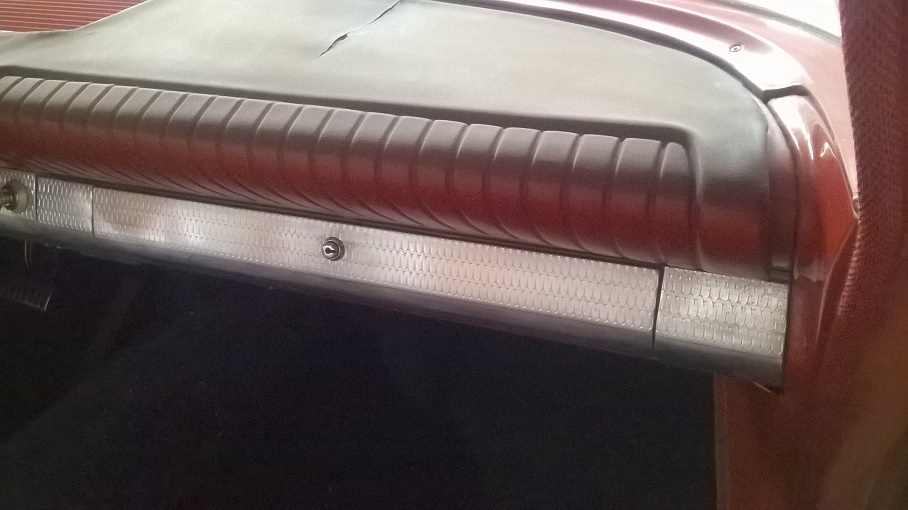
More progress - thank you for the photos, Steph.
Your car's door sills look to be in good shape? Wish I could ay the same for my car.
 |
|
| |
|
Expert
Posts: 2634
Location: Minor Hill, TN | I am not sure if your sill plate can be repaired or not . The Sanding by the sill plate was done by hand. I also have an album here on the restoration on this car. I am signing out for a couple of days but I will be back |
|
| |
|
Expert
Posts: 2634
Location: Minor Hill, TN | I also got a pair of NOS back up lenses it never hurts to have spare parts for your fowardlook I am also looking at getting spare taillight lenses also |
|
| |
|
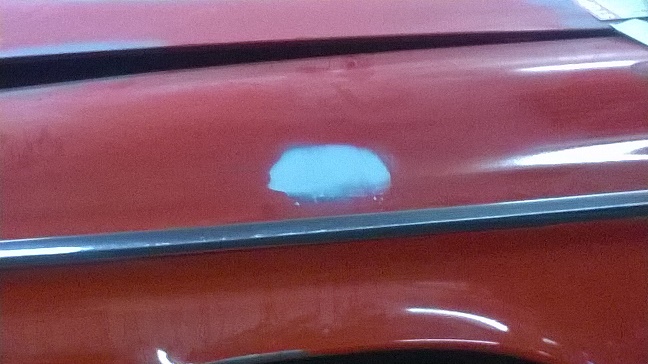
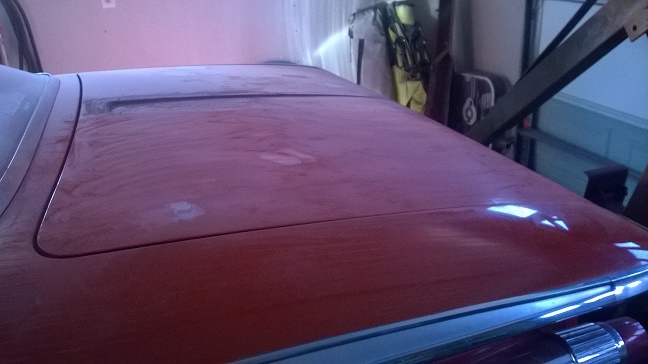
Expert
Posts: 2634
Location: Minor Hill, TN | More sand done today were I got to the bare metal it was primered
 (WP_20150330_003.jpg) (WP_20150330_003.jpg)
 (WP_20150330_001.jpg) (WP_20150330_001.jpg)
 (WP_20150330_004.jpg) (WP_20150330_004.jpg)
 (WP_20150330_011.jpg) (WP_20150330_011.jpg)
Attachments
----------------
WP_20150330_003.jpg (106KB - 240 downloads)
WP_20150330_001.jpg (102KB - 245 downloads)
WP_20150330_004.jpg (99KB - 189 downloads)
WP_20150330_011.jpg (116KB - 199 downloads)
|
|
| |
|
Expert
Posts: 2634
Location: Minor Hill, TN | Here are some more photos of my work I sanded on the driver side but did not do the passenger because the trimming is still there. I also bought an extra pair of tail light lenses and a right back up llight housing. I also plan to buy more spare parts because it never hurts to have them around incase you need them
Edited by 1961plymouthfury 2015-04-02 4:45 AM
 (WP_20150401_001.jpg) (WP_20150401_001.jpg)
 (WP_20150401_002.jpg) (WP_20150401_002.jpg)
 (WP_20150401_003.jpg) (WP_20150401_003.jpg)
 (WP_20150401_004.jpg) (WP_20150401_004.jpg)
Attachments
----------------
WP_20150401_001.jpg (140KB - 239 downloads)
WP_20150401_002.jpg (117KB - 235 downloads)
WP_20150401_003.jpg (112KB - 213 downloads)
WP_20150401_004.jpg (108KB - 214 downloads)
|
|
| |
|
Expert
Posts: 2634
Location: Minor Hill, TN | There will not be any more sanding on the car until the rest of the trimming has been removed. if there is more done it will be were there is no trimming. I am also buying what I need for the car and also plan to have spare parts because you never know when you will need them |
|
| |
|
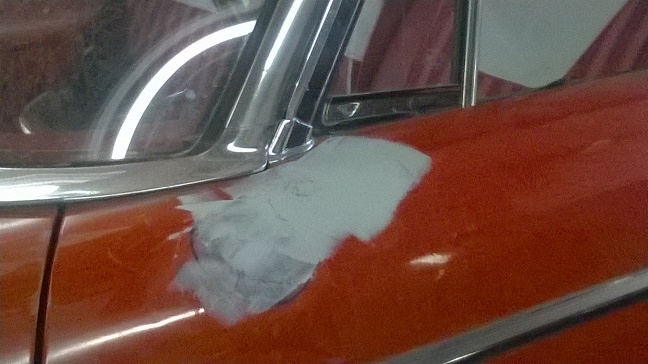
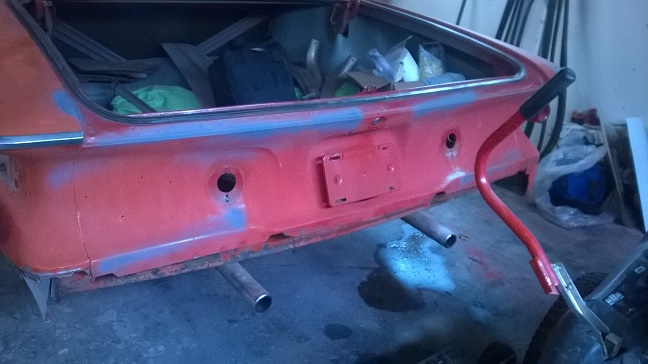
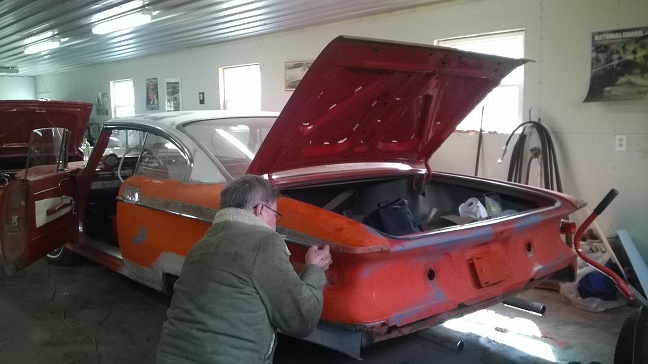
Expert
Posts: 2634
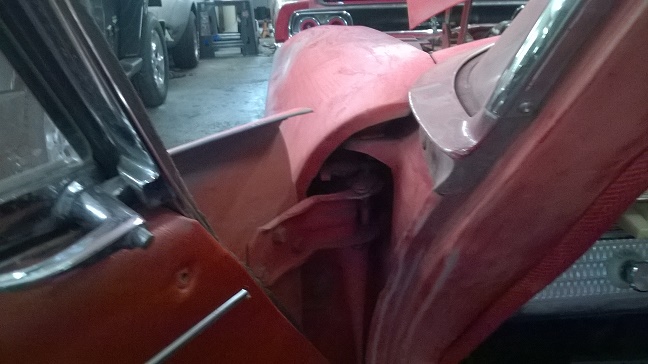
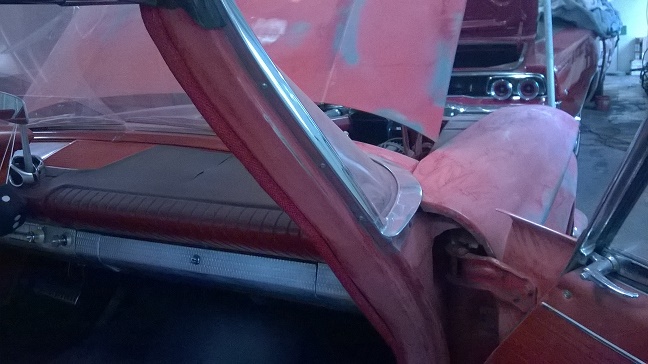
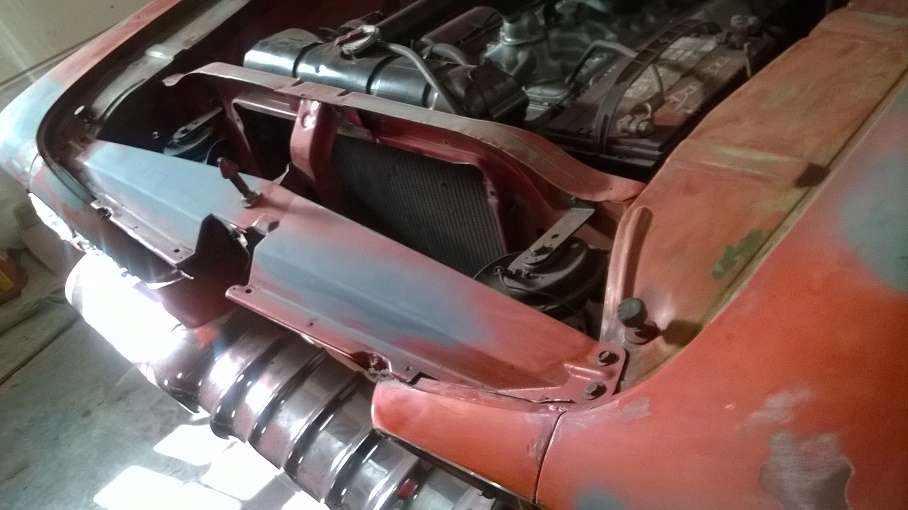
Location: Minor Hill, TN | More progress the rest of the trimming was removed and the mascaras, the front grill and the drivers fender spear. I even discovered original paint under the passenger trimming. I did alittle block sanding then stopped because my dad just painted a radiator for his '68 charger and I had no problems with that at all. If it did not rain I would of done the sanding out side
Edited by 1961plymouthfury 2015-04-06 6:22 PM
 (WP_20150406_001.jpg) (WP_20150406_001.jpg)
 (WP_20150406_002.jpg) (WP_20150406_002.jpg)
 (WP_20150406_003.jpg) (WP_20150406_003.jpg)
 (WP_20150406_004.jpg) (WP_20150406_004.jpg)
 (WP_20150406_005.jpg) (WP_20150406_005.jpg)
 (WP_20150406_006.jpg) (WP_20150406_006.jpg)
 (WP_20150406_007.jpg) (WP_20150406_007.jpg)
 (WP_20150406_008.jpg) (WP_20150406_008.jpg)
 (WP_20150406_009.jpg) (WP_20150406_009.jpg)
 (WP_20150406_010.jpg) (WP_20150406_010.jpg)
 (WP_20150406_012.jpg) (WP_20150406_012.jpg)
 (WP_20150406_013.jpg) (WP_20150406_013.jpg)
 (WP_20150406_014.jpg) (WP_20150406_014.jpg)
 (WP_20150406_015.jpg) (WP_20150406_015.jpg)
 (WP_20150406_016.jpg) (WP_20150406_016.jpg)
 (WP_20150406_017.jpg) (WP_20150406_017.jpg)
 (WP_20150406_018.jpg) (WP_20150406_018.jpg)
Attachments
----------------
WP_20150406_001.jpg (111KB - 251 downloads)
WP_20150406_002.jpg (120KB - 226 downloads)
WP_20150406_003.jpg (115KB - 236 downloads)
WP_20150406_004.jpg (112KB - 238 downloads)
WP_20150406_005.jpg (113KB - 219 downloads)
WP_20150406_006.jpg (99KB - 244 downloads)
WP_20150406_007.jpg (112KB - 246 downloads)
WP_20150406_008.jpg (126KB - 195 downloads)
WP_20150406_009.jpg (116KB - 240 downloads)
WP_20150406_010.jpg (113KB - 231 downloads)
WP_20150406_012.jpg (138KB - 193 downloads)
WP_20150406_013.jpg (122KB - 207 downloads)
WP_20150406_014.jpg (121KB - 204 downloads)
WP_20150406_015.jpg (134KB - 232 downloads)
WP_20150406_016.jpg (133KB - 234 downloads)
WP_20150406_017.jpg (115KB - 219 downloads)
WP_20150406_018.jpg (113KB - 239 downloads)
|
|
| |
|
Expert
Posts: 2634
Location: Minor Hill, TN | Iam just about done with the block sanding then it will be time to attack the cancer |
|
| |
|
Expert
Posts: 3155
Location: NY & VT | Lots of hard work there. Nice that you can spend time with Dad on your project, something you'll remember long after the car is done. |
|
| |
|
Expert
Posts: 2634
Location: Minor Hill, TN | I appreicate it but I want to take my time on this project . |
|
| |
|
Expert
Posts: 2634
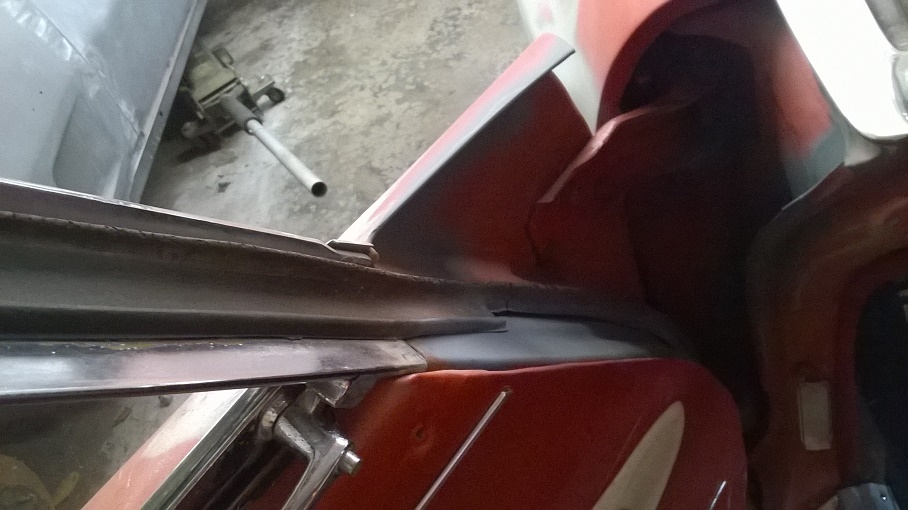
Location: Minor Hill, TN | Oh yes . He will be cutting out the rusted panels and welding on new panels. He will not be removing the trimming off the back windows . On my other '61 a part of the rear window trimming would come lose and he does not want to take any chances so it will be masked off instead of removed the same with the front windows trimming.
There are times I am down in that garage alone sanding on this but at least I got some of this out of the way for him
Edited by 1961plymouthfury 2015-04-10 9:42 PM
|
|
| |
|
Expert
Posts: 2634
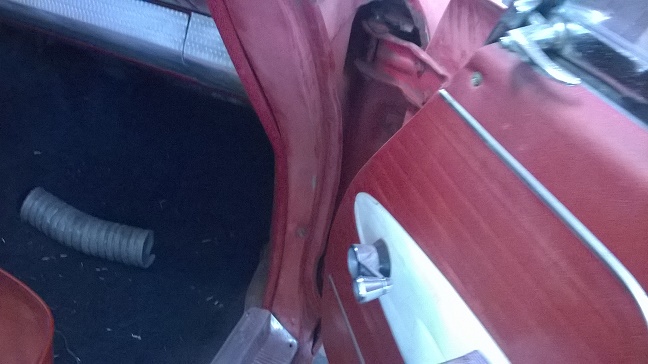
Location: Minor Hill, TN | Sanding inside the doors .
 (WP_20150411_005.jpg) (WP_20150411_005.jpg)
 (WP_20150411_006.jpg) (WP_20150411_006.jpg)
 (WP_20150411_007.jpg) (WP_20150411_007.jpg)
 (WP_20150411_009.jpg) (WP_20150411_009.jpg)
 (WP_20150411_010.jpg) (WP_20150411_010.jpg)
 (WP_20150411_011.jpg) (WP_20150411_011.jpg)
 (WP_20150411_012.jpg) (WP_20150411_012.jpg)
Attachments
----------------
WP_20150411_005.jpg (127KB - 242 downloads)
WP_20150411_006.jpg (119KB - 252 downloads)
WP_20150411_007.jpg (120KB - 239 downloads)
WP_20150411_009.jpg (127KB - 198 downloads)
WP_20150411_010.jpg (121KB - 241 downloads)
WP_20150411_011.jpg (105KB - 236 downloads)
WP_20150411_012.jpg (126KB - 237 downloads)
|
|
| |
|
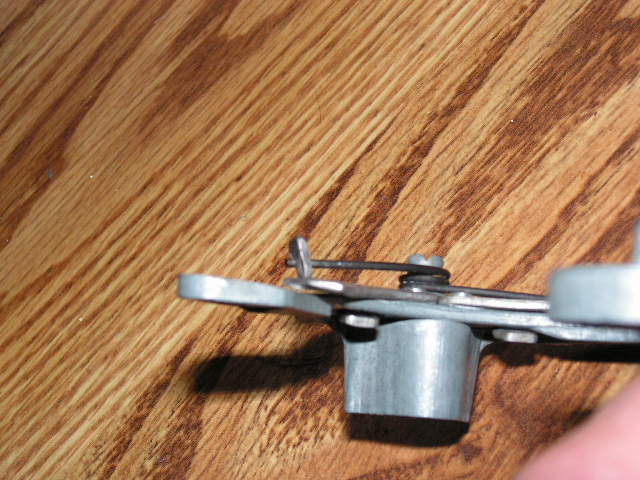
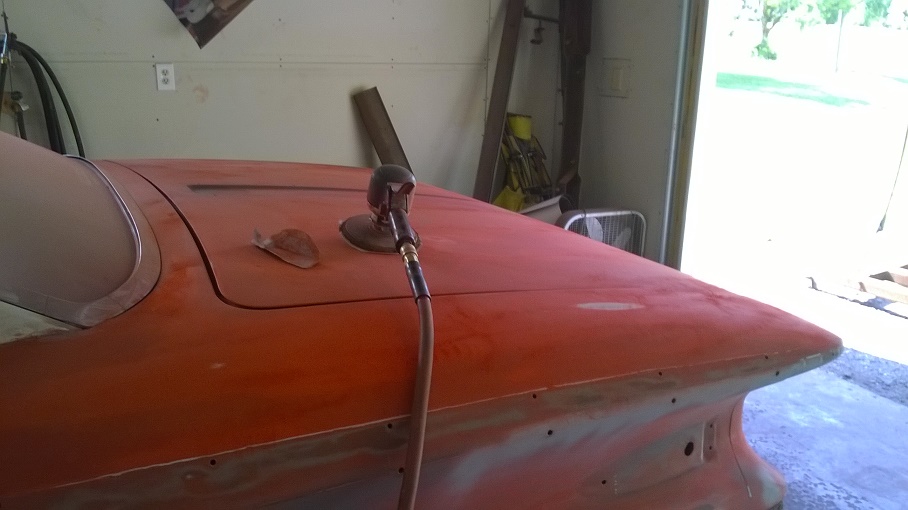
Expert
Posts: 2634
Location: Minor Hill, TN | The air sanding started today. I am sure some day I will be taught to use 1 but until I am I am not touching it.
Here are some photos of the air sanding
 (WP_20150413_002.jpg) (WP_20150413_002.jpg)
 (WP_20150413_003.jpg) (WP_20150413_003.jpg)
 (WP_20150413_005.jpg) (WP_20150413_005.jpg)
 (WP_20150413_004.jpg) (WP_20150413_004.jpg)
 (WP_20150413_006.jpg) (WP_20150413_006.jpg)
 (WP_20150413_007.jpg) (WP_20150413_007.jpg)
Attachments
----------------
WP_20150413_002.jpg (118KB - 241 downloads)
WP_20150413_003.jpg (126KB - 223 downloads)
WP_20150413_005.jpg (114KB - 236 downloads)
WP_20150413_004.jpg (119KB - 216 downloads)
WP_20150413_006.jpg (115KB - 254 downloads)
WP_20150413_007.jpg (117KB - 193 downloads)
|
|
| |
|

Expert
Posts: 1493
Location: Jamaica Plain, MA | Those rear quarters are going to be a pain unless you have some donor sheet metal. |
|
| |
|
Expert
Posts: 2634
Location: Minor Hill, TN | I was imformed that body panels can be made |
|
| |
|
Expert
Posts: 2634
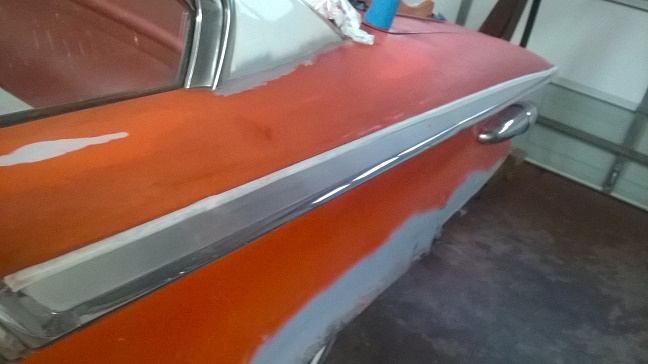
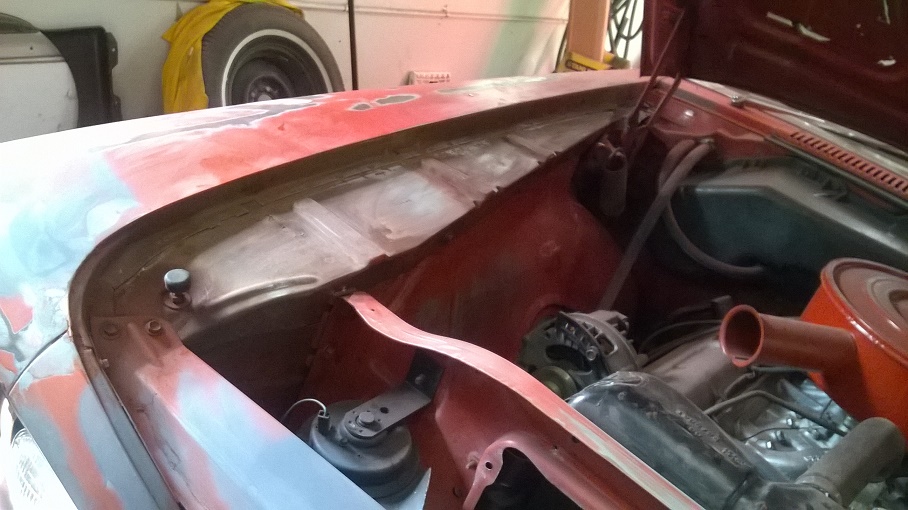
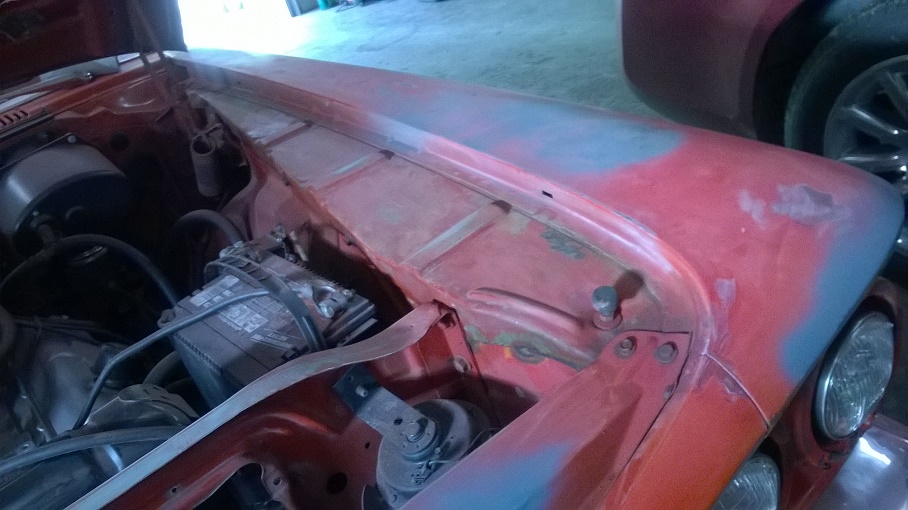
Location: Minor Hill, TN | I did some sand inside the engine compartment but only on the passenger side and the front and the top of the drivers inner fender. My dad is going to teach me how to use the air sander .
 (WP_20150416_002.jpg) (WP_20150416_002.jpg)
 (WP_20150416_003.jpg) (WP_20150416_003.jpg)
 (WP_20150416_004.jpg) (WP_20150416_004.jpg)
 (WP_20150416_005.jpg) (WP_20150416_005.jpg)
 (WP_20150416_006.jpg) (WP_20150416_006.jpg)
Attachments
----------------
WP_20150416_002.jpg (218KB - 236 downloads)
WP_20150416_003.jpg (196KB - 225 downloads)
WP_20150416_004.jpg (212KB - 196 downloads)
WP_20150416_005.jpg (205KB - 233 downloads)
WP_20150416_006.jpg (201KB - 196 downloads)
|
|
| |
|
Elite Veteran
Posts: 827
Location: tailFinland | I gotta ask this again, why dont anyone first do those bodyworks to rockers, rear quarters, trunk lid, fenders... They have not been done for several months and you are already sanding doors and engine comapartmet for the paint.
Why seals, sillplates and door panels are not removed if you gonna get them painted?
Usually sanding is made just before spraying the paint and before that you gotta ensure that there is no any silicone or grease in the surfaces. Old cars has been waxed thosands of times (wax contains silicone) rubber treatments are pure silicone, engine fumes are greasy... those had to washed away with silicone remover before sanding.
If there is silicone residues it will ruin the new paint in those spots. New paint will pop off from the surfaces wich are not totally clean and proberly sanded.
Now sanded surfaces almost suck residues, dirt and crease if you let them be for several months. Welding and cutting means smoke and dirt.
|
|
| |
|
Veteran
Posts: 112
Location: Brisbane Australia | From some of the comments posted here I guess this is why more people don't post pics of their restorations. |
|
| |
|
Expert
Posts: 3577
Location: Blythewood, SC | Looks like you are making progress! Using a DA will speed you up. I doubt you need any training, just grab it and go to town. |
|
| |
|
Expert 5K+
Posts: 5006
| its getting there, its a different technique but its working and with patience it will work. We have zero patience on the internets... those headlight base metal might need welded though?
|
|
| |
|
Elite Veteran
Posts: 827
Location: tailFinland | TerryM - 2015-04-18 5:59 AM
From some of the comments posted here I guess this is why more people don't post pics of their restorations.
If you post your project pictures and stories to discussion forum you might end up to situation that you are receiving adviceses or helpful tips by the people who may know something about auto restoration.
Sure you should ignore them if you are a maestro yourself. |
|
| |
|
Expert
Posts: 2634
Location: Minor Hill, TN | There is a air compresser I use to blow off the dust but when some one has their car in there and the dust gets on they fuss about it. I am like what ever. I am sanding on the car to help my dad . I will be taking the sill plates off . When the trimming was removed I discovered original paint and bottom door were it shuts . My dad will be doing the welding on the car . He is going to train me to use the air sander. My answer to you question is people have their way of doing body work. If I had the funds I would take it to a body shop but I do not. In my other '61 my dad drilled small holes in the rear quarter so the water could drain out. He will be doing the same with my current '61 .
I will be using mequires wax on this car when it gets done |
|
| |
|
Expert
Posts: 2634
Location: Minor Hill, TN | Yes it is getting there my dad has a '79 vette that needs to be painted. It belonged to my late Uncle . My dad will be doing the welding on the car . Its also really sad there are not many fowardlooks around |
|
| |
|
Expert
Posts: 2634
Location: Minor Hill, TN | I blew off the dust with the air hose and primered the bare metal. There are times I thought about saving my money and taking it to a body shop but by having this done at home I am saving money on the labor
Edited by 1961plymouthfury 2015-04-20 8:43 PM
 (WP_20150420_001.jpg) (WP_20150420_001.jpg)
 (WP_20150420_002.jpg) (WP_20150420_002.jpg)
 (WP_20150420_003.jpg) (WP_20150420_003.jpg)
 (WP_20150420_004.jpg) (WP_20150420_004.jpg)
Attachments
----------------
WP_20150420_001.jpg (204KB - 215 downloads)
WP_20150420_002.jpg (209KB - 253 downloads)
WP_20150420_003.jpg (209KB - 234 downloads)
WP_20150420_004.jpg (205KB - 207 downloads)
|
|
| |
|
Expert
Posts: 2634
Location: Minor Hill, TN | The bottom rear fender panels to a '61 dodge would work also . I noticed they are the same |
|
| |
|
Expert
Posts: 2634
Location: Minor Hill, TN | The bottom rear fender panels to a '61 dodge would work also . I noticed they are the same |
|
| |
|
Expert
Posts: 2634
Location: Minor Hill, TN | Today I was trained to use an air sander . Here are some photos of my air sanding. My dad said enough sanding has been done on the car for now .
 (WP_20150506_002.jpg) (WP_20150506_002.jpg)
 (WP_20150506_007.jpg) (WP_20150506_007.jpg)
 (WP_20150506_016.jpg) (WP_20150506_016.jpg)
 (WP_20150506_003.jpg) (WP_20150506_003.jpg)
 (WP_20150506_008.jpg) (WP_20150506_008.jpg)
 (WP_20150506_010.jpg) (WP_20150506_010.jpg)
 (WP_20150506_019.jpg) (WP_20150506_019.jpg)
Attachments
----------------
WP_20150506_002.jpg (169KB - 219 downloads)
WP_20150506_007.jpg (188KB - 213 downloads)
WP_20150506_016.jpg (156KB - 239 downloads)
WP_20150506_003.jpg (213KB - 231 downloads)
WP_20150506_008.jpg (177KB - 243 downloads)
WP_20150506_010.jpg (58KB - 196 downloads)
WP_20150506_019.jpg (192KB - 236 downloads)
|
|
| |
|
Expert
Posts: 2634
Location: Minor Hill, TN | Today I cleaned and polished the grille but there is more to do on the grill. I also removed the headlights but 1 . I had to put some blaster on the screws to losen them. Its getting there . I am told the sanding is done on the car for now its time to attack that cancer. The blaster is like wd40 .
I will admit I still miss the other car . I will also admit when the other car burned I almost lost my temper.
Edited by 1961plymouthfury 2015-05-09 6:50 PM
 (WP_20150509_008.jpg) (WP_20150509_008.jpg)
 (WP_20150509_015.jpg) (WP_20150509_015.jpg)
Attachments
----------------
WP_20150509_008.jpg (238KB - 209 downloads)
WP_20150509_015.jpg (193KB - 245 downloads)
|
|
| |
|
Expert 5K+
Posts: 5139
Location: cornpatch county, Southwest IOA | Steph, stick with it . I understand why you are doing these things out of the "normal" order. It may not sound like it, but most advice given here is given with good intent. When someone in our FL group is putting in as much work as you, we just want you to be pleased with it when you are done................Co-member of the FL site named Plymouth started out young, almost no experience, and no one to help him hands-on.. Look at him now--giving good advice to others and a car to be proud of.........................................MO |
|
| |
|
Expert
Posts: 2634
Location: Minor Hill, TN | I am sticking with this but if the screw is too tight I ask for help or I keep trying if I get frustrated I walk away for a while then try again or ask for help. I got to take a nap I get to work 3rd shift tonight . |
|
| |
|
Expert
Posts: 2634
Location: Minor Hill, TN | There will be no more work done for a while I got to get some rear fender panels .
I believe the bottom rear fender panels to a1960 Plymouth would work |
|
| |
|
Expert
Posts: 2634
Location: Minor Hill, TN | There will be no more work done for a while I got to get some rear fender panels .
I believe the bottom rear fender panels to a 1960 Plymouth would work and the bottom of a 1961 dodge would work too . I will keep hunting until I find them. I know of a pair but I was advised not to trust metal after its been in one hot fire. I am taking that advice.
Edited by 1961plymouthfury 2015-05-14 5:54 PM
|
|
| |
|
Expert
Posts: 2634
Location: Minor Hill, TN | I got my window felt kit, I also cleaned and polished some of the stainless steel. I will do more on 1 of my off days off of work. I wanted something to do so I chose this. I got more to do so this is a start .My dad will repair the dents on the trim . He did on my other '61.
About a week ago I took it out for a short drive down the street I live on but now there is no more drives the charger is blocking it in. Here is a video of the drive
https://youtu.be/wXwpOwtuav8
Edited by 1961plymouthfury 2015-05-18 11:36 PM
 (WP_20150518_006.jpg) (WP_20150518_006.jpg)
 (WP_20150518_004.jpg) (WP_20150518_004.jpg)
 (WP_20150518_008.jpg) (WP_20150518_008.jpg)
 (WP_20150518_009.jpg) (WP_20150518_009.jpg)
 (WP_20150518_007.jpg) (WP_20150518_007.jpg)
Attachments
----------------
WP_20150518_006.jpg (201KB - 274 downloads)
WP_20150518_004.jpg (192KB - 280 downloads)
WP_20150518_008.jpg (191KB - 248 downloads)
WP_20150518_009.jpg (266KB - 273 downloads)
WP_20150518_007.jpg (211KB - 263 downloads)
|
|
| |
|
Expert
Posts: 2634
Location: Minor Hill, TN | I cleaned and polished more stainless steel . I got more to do and I will post them later. I know there are dents but they will be repaired
Edited by 1961plymouthfury 2015-05-19 9:12 PM
 (WP_20150519_001.jpg) (WP_20150519_001.jpg)
 (WP_20150519_002.jpg) (WP_20150519_002.jpg)
 (WP_20150519_003.jpg) (WP_20150519_003.jpg)
 (WP_20150519_004.jpg) (WP_20150519_004.jpg)
 (WP_20150519_005.jpg) (WP_20150519_005.jpg)
Attachments
----------------
WP_20150519_001.jpg (215KB - 270 downloads)
WP_20150519_002.jpg (222KB - 253 downloads)
WP_20150519_003.jpg (205KB - 274 downloads)
WP_20150519_004.jpg (217KB - 274 downloads)
WP_20150519_005.jpg (215KB - 273 downloads)
|
|
| |
|
Expert
Posts: 2634
Location: Minor Hill, TN | I just ordered a gallon of epoxy primer from east wood. No photos today |
|
| |
|
Expert 5K+
Posts: 5006
| is the window felt good good quality? good fit? |
|
| |
|
Expert
Posts: 2634
Location: Minor Hill, TN | I have not installed it yet but I will let you know when it gets installed |
|
| |
|
Expert
Posts: 2634
Location: Minor Hill, TN | I polished more of the stainless steel but there is a few more items that need to get done
 (WP_20150526_001.jpg) (WP_20150526_001.jpg)
Attachments
----------------
WP_20150526_001.jpg (223KB - 278 downloads)
|
|
| |
|
Expert
Posts: 1384
Location: Ocala, Florida | Who did you go through for the window felt kit? |
|
| |
|
Expert
Posts: 2634
Location: Minor Hill, TN | Restoration specialties I had to have these made for my car. My dad measured were the cat whiskers went and sent the measure ments to the company they start with 1962 models Their # is 814-467-9842 |
|
| |
|
Expert
Posts: 2634
Location: Minor Hill, TN | I polished and cleaned more of the stainless steel, I also did the grille here are some more photos. I also accidently broke the Fury script for the driver side does any body have a spare? If you do please let me know the price plus shipping. I also have a pair on my watch list on ebay. I also bidded on them if I do not win I will holler, but maybe it can be fixed.
Edited by 1961plymouthfury 2015-05-28 5:21 PM
 (WP_20150528_006.jpg) (WP_20150528_006.jpg)
 (WP_20150528_007.jpg) (WP_20150528_007.jpg)
Attachments
----------------
WP_20150528_006.jpg (230KB - 254 downloads)
WP_20150528_007.jpg (188KB - 284 downloads)
|
|
| |
|
Expert
Posts: 2634
Location: Minor Hill, TN | I got my gallon of erathane primer I got to get some metal so I can start attacking the cancer on the car . |
|
| |
|
Expert
Posts: 2634
Location: Minor Hill, TN | If you have a sample of the cat whiskers on your car to send they can have this made for you . My dad did that with my other '61 . It never hurts to try. |
|
| |
|
Expert
Posts: 2634
Location: Minor Hill, TN | I got to get some moulding clippings for my '61 I am going to try either Gary Goers, ebay or swap meets . I need so sand a couple of more spots do some more polishing on the trimming then get the metal welded on I will post more photos when there is more work done. I got my wiper blade refill for the car but the new blades will not be installed until the restoration is complete.
Edited by 1961plymouthfury 2015-06-04 11:45 PM
|
|
| |
|
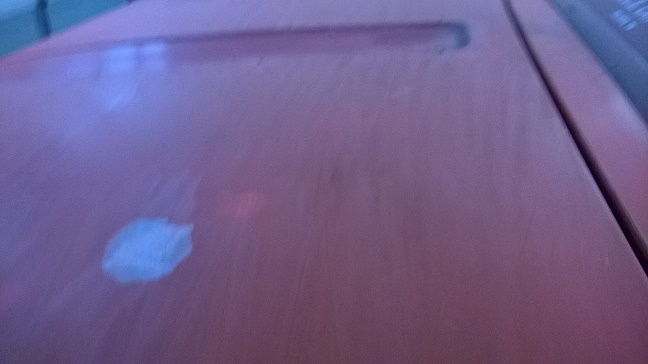
Expert
Posts: 2634
Location: Minor Hill, TN | Today I did a test on my front bumper I tried metal polish in it. This is a test I wanted to see how this works. Yes I am wearing an Alabama T shirt ROLL TIDE ROLL
Edited by 1961plymouthfury 2015-06-06 11:00 PM
 (WP_20150606_001.jpg) (WP_20150606_001.jpg)
 (WP_20150606_002.jpg) (WP_20150606_002.jpg)
 (WP_20150606_003.jpg) (WP_20150606_003.jpg)
 (WP_20150606_004.jpg) (WP_20150606_004.jpg)
 (WP_20150606_005.jpg) (WP_20150606_005.jpg)
 (WP_20150606_007.jpg) (WP_20150606_007.jpg)
Attachments
----------------
WP_20150606_001.jpg (203KB - 254 downloads)
WP_20150606_002.jpg (203KB - 273 downloads)
WP_20150606_003.jpg (208KB - 249 downloads)
WP_20150606_004.jpg (204KB - 235 downloads)
WP_20150606_005.jpg (208KB - 256 downloads)
WP_20150606_007.jpg (203KB - 250 downloads)
|
|
| |
|
Expert
Posts: 2634
Location: Minor Hill, TN | I know there has not been that much progress lately. I have been looking for things to do on the car. A friend of my dad has his metal cutter as soon as he gets it back the rust will be cut and the new metal will be welded on. I did some cleaning on the center piece that goes on the trunk if you notice the piece that is missing off the middle it came lose so my dad removed it and its in the glove box of my'61 I put it there for the time being
 (WP_20150612_001.jpg) (WP_20150612_001.jpg)
 (WP_20150612_002.jpg) (WP_20150612_002.jpg)
 (WP_20150612_003.jpg) (WP_20150612_003.jpg)
Attachments
----------------
WP_20150612_001.jpg (186KB - 234 downloads)
WP_20150612_002.jpg (131KB - 264 downloads)
WP_20150612_003.jpg (172KB - 264 downloads)
|
|
| |
|
Expert
Posts: 2634
Location: Minor Hill, TN | I am sorry there has not been much done on the car lately. A friend of my dad borrowed his metal cutter. My mom will be visiting her sister and bring it back some time in July then more progress will be done, I need to ask a question :
Will a bottom rear quarter panel to a 1960 plymouth fit my car with no problems . I would like to find a parts exchange book for these forwardlooks. I believe I had 1 but it got burned up in the fire . I noticed the rear fender design is the same but I want to be sure if this will work.
I am also trying to find more things to do on the car . |
|
| |
|
Expert
Posts: 2634
Location: Minor Hill, TN | I know some folks here will try to talk me out of this but the decision has been made. In stead of repainting my current '61 red and white ( I even did the math) I found out if would cost less to repaint it 1 color only. I chose black. I am doing this as a tribute to the black '61 fury I lost in the fire back in 2014.
I hope someday to find a front bumper guard for the car. Please do not try to talk me out of this my mind is made up |
|
| |
|
Exner Expert 19,174 posts. Neil passed away 18 Sep 2015. You will be missed, Neil!
Posts: 19146
Location: bishop, ca | Not talking you out of anything, Steph, but you are fortunate to have garaging available to you, and that you
do not live in the hot, sunny (-brutal) Southwestern US.....where your opinion about the relative merits of living
with a black car might be different from those who live in the Central-Eastern US.
Black IS the most dramatic 'color', of all....if a person can afford to 'live' with that hue in their life.
|
|
| |
|
Expert
Posts: 2634
Location: Minor Hill, TN | It gets hot here in TN too . |
|
| |
|
Expert
Posts: 2634
Location: Minor Hill, TN | I just ordered my left rear fender panel and my dad got his metal cutter so soon there might be more photos |
|
| |
|
Expert
Posts: 2788
Location: USA - KY |
I think that your car will look fantastic in black - very classy.
Looking forward to seeing your car in its new outfit!
Edited by FIN ME 2015-08-05 8:50 PM
|
|
| |
|
Expert
Posts: 2634
Location: Minor Hill, TN | Yes it will I am also doing this to pay tribute to the other 1 that got burned. I will also admit the other car was very special to me. It will take a while but it will get there , Lots of work ahead but it will get there . I still do my monthly start ups and let it run 5-10 minuites |
|
| |
|
Expert
Posts: 2634
Location: Minor Hill, TN | Here is another progress. I got a left rear fender panel for the car . I will take more photos when there is more work done.
 (WP_20150812_001.jpg) (WP_20150812_001.jpg)
Attachments
----------------
WP_20150812_001.jpg (184KB - 254 downloads)
|
|
| |
|
Expert
Posts: 2634
Location: Minor Hill, TN | That was not my work when I will not touch a grinder until I am taught to use 1 |
|
| |
|
Expert
Posts: 2634
Location: Minor Hill, TN | I found and bought this on ebay the part # is 1863841 . It said it was for a 1961 plymouth
 (WP_20150914_001.jpg) (WP_20150914_001.jpg)
Attachments
----------------
WP_20150914_001.jpg (285KB - 269 downloads)
|
|
| |
|
Expert 5K+
Posts: 5006
| That car looks pretty good in black and the bumper guard is on the way...
Go Buckeyes! |
|
| |
|
Expert
Posts: 2634
Location: Minor Hill, TN | Thank you . ROLL TIDE ROLL |
|
| |
|
Expert
Posts: 2634
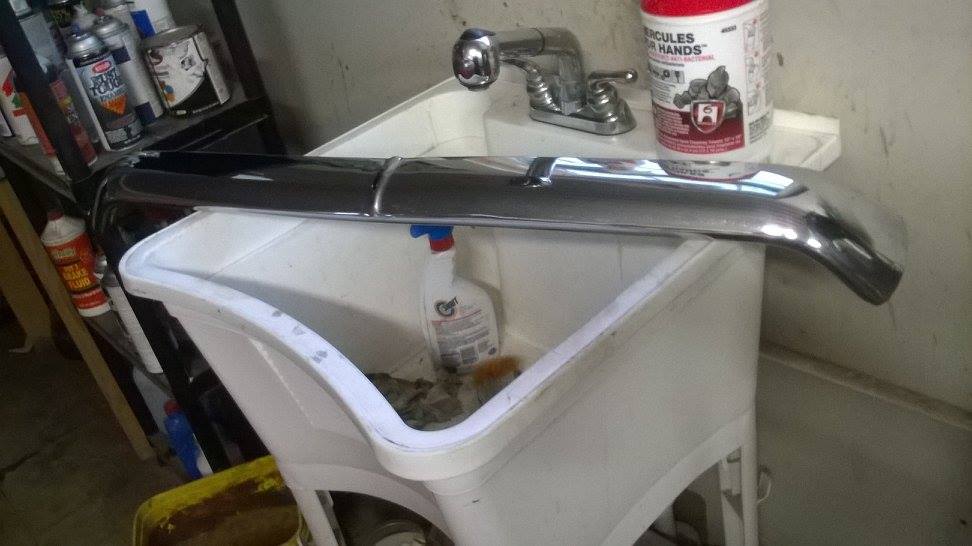
Location: Minor Hill, TN | Here is my bumper bar and it waiting to be put on
 (1961 plymouth bumper bar.jpg) (1961 plymouth bumper bar.jpg)
Attachments
----------------
1961 plymouth bumper bar.jpg (61KB - 254 downloads)
|
|
| |
|
Expert 5K+
Posts: 5006
| That thing is pretty much nos. Guy had it advertised as a 58 Dodge bar |
|
| |
|
Expert
Posts: 2634
Location: Minor Hill, TN | I just polished it . I have not installed it yet. It will go on after the restoration is complete . My very last resort will be a paint and body restoration shop. I will have them fix the rust and primer the car and I will have my dad paint the car. I have my own primer. |
|
| |
|
Expert
Posts: 2634
Location: Minor Hill, TN | I just got these for my '61 I paid $5.00 plus shipping which is a total of $15.00
 (WP_20150923_001.jpg) (WP_20150923_001.jpg)
Attachments
----------------
WP_20150923_001.jpg (204KB - 246 downloads)
|
|
| |
|
Expert
Posts: 2634
Location: Minor Hill, TN | Well Fellow Forward lookers I got board yesterday and decided to do some sanding inside the trunk and primer some bare metal. I also did some sanding inside the drivers door
 (WP_20150928_002.jpg) (WP_20150928_002.jpg)
 (WP_20150928_009.jpg) (WP_20150928_009.jpg)
 (WP_20150928_010.jpg) (WP_20150928_010.jpg)
 (WP_20150928_005.jpg) (WP_20150928_005.jpg)
 (WP_20150929_008.jpg) (WP_20150929_008.jpg)
Attachments
----------------
WP_20150928_002.jpg (189KB - 259 downloads)
WP_20150928_009.jpg (206KB - 247 downloads)
WP_20150928_010.jpg (202KB - 263 downloads)
WP_20150928_005.jpg (190KB - 219 downloads)
WP_20150929_008.jpg (186KB - 262 downloads)
|
|
| |
|
Expert
Posts: 2634
Location: Minor Hill, TN | I primered some more bare metal. I was bored so I wanted something to do. I decided to do some work on the '61. The 3rd photo is my facebook profile photo. I am also on twitter user name is sb61fury. I am also on myspace too.
ROLL TIDE ROLL
Edited by 1961plymouthfury 2015-10-04 8:04 PM
 (WP_20151003_002.jpg) (WP_20151003_002.jpg)
 (WP_20151003_001.jpg) (WP_20151003_001.jpg)
 (WP_20151003_006.jpg) (WP_20151003_006.jpg)
Attachments
----------------
WP_20151003_002.jpg (251KB - 242 downloads)
WP_20151003_001.jpg (226KB - 249 downloads)
WP_20151003_006.jpg (209KB - 243 downloads)
|
|
| |
|
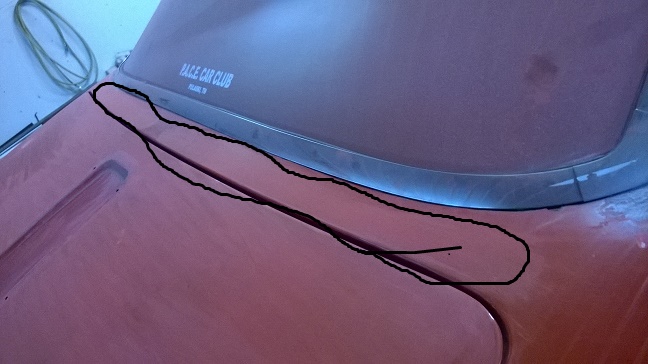
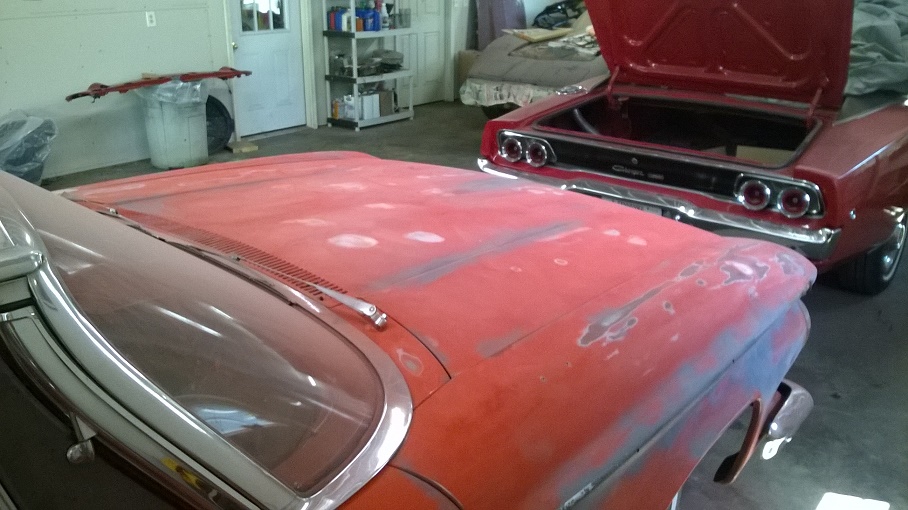
Expert
Posts: 2634
Location: Minor Hill, TN | There has been more progress. My dad did some sanding on a spot on the hood took the grinder to get the rid of the cancer and repaired the small hole filled it with the glass bondo . He took epoxy primer to the corvette and then took the rest of it to the front part of the hood on my forwardlook. I am posting some photos sorry if they are not that good . these were taken from a smart phone
 (WP_20151009_001.jpg) (WP_20151009_001.jpg)
 (WP_20151009_002.jpg) (WP_20151009_002.jpg)
 (WP_20151009_003.jpg) (WP_20151009_003.jpg)
 (WP_20151009_004.jpg) (WP_20151009_004.jpg)
 (WP_20151009_005.jpg) (WP_20151009_005.jpg)
Attachments
----------------
WP_20151009_001.jpg (258KB - 247 downloads)
WP_20151009_002.jpg (161KB - 244 downloads)
WP_20151009_003.jpg (159KB - 258 downloads)
WP_20151009_004.jpg (168KB - 265 downloads)
WP_20151009_005.jpg (164KB - 252 downloads)
|
|
| |
|
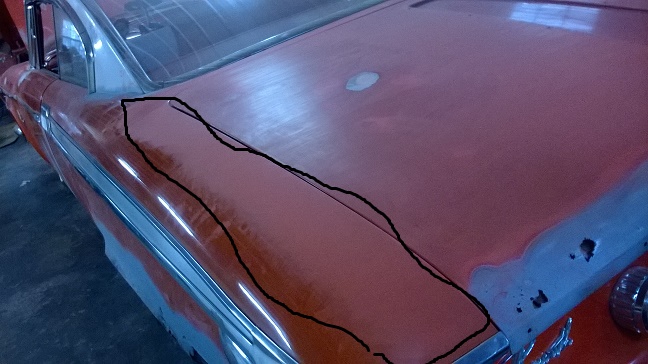
Expert
Posts: 2634
Location: Minor Hill, TN | I did some sanding inside the hood. I could only get what I can reach I am going to see if I can ask my dad to remove the hood place it on a couple of saw horses and I can sand on it more there then primer and paint it black. I am sorry about the glare in the 2nd photo
Edited by 1961plymouthfury 2015-10-13 10:10 PM
 (WP_20151012_002.jpg) (WP_20151012_002.jpg)
 (WP_20151012_001.jpg) (WP_20151012_001.jpg)
Attachments
----------------
WP_20151012_002.jpg (204KB - 254 downloads)
WP_20151012_001.jpg (209KB - 233 downloads)
|
|
| |
|
User has resigned from board
| nice lady can u tell me where u bought the lower rear quarter patch panel, I also have a 61, |
|
| |
|
Expert 5K+
Posts: 7402
Location: northern germany | 196061SAVOY - 2015-10-15 6:06 PM
nice lady can u tell me where u bought the lower rear quarter patch panel, I also have a 61,
that panel in the picture is a 60 quarter panel and its different, not just the rear end, also the wheel opening lip.
Edited by 1960fury 2015-10-15 8:44 PM
|
|
| |
|
Expert
Posts: 2634
Location: Minor Hill, TN | Black auto they do have a web site I grabbed the last panel they had, Its to a '60 but the rear wheel arches to the '60 and '61 plymouth are identical.
http://www.blackcar-llc.com/mopar.htm They only have panels to a '60 but it sure would be nice if rear fender panels were made for a'61
Edited by 1961plymouthfury 2015-10-15 9:30 PM
|
|
| |
|
Expert
Posts: 2634
Location: Minor Hill, TN | I compared the wheel arched on both years and they are the same. I would of used my other 1 as a parts car but its already been crushed by the crusher 
Edited by 1961plymouthfury 2015-10-15 9:35 PM
|
|
| |
|
Expert 5K+
Posts: 7402
Location: northern germany | 1961plymouthfury - 2015-10-15 9:28 PM
Black auto they do have a web site I grabbed the last panel they had, Its to a '60 but the rear wheel arches to the '60 and '61 plymouth are identical.
http://www.blackcar-llc.com/mopar.htm They only have panels to a '60 but it sure would be nice if rear fender panels were made for a'61
i own 61 plymouth and 60 plymouth coupes. the lip (flared edge) is different. the 60 is squared the 61 is round. |
|
| |
|
Expert
Posts: 2634
Location: Minor Hill, TN | My dad and I will make it work but it would be nice if rear quarter panels were made for '61 plymouths . I mean to say reproduced.
Edited by 1961plymouthfury 2015-10-16 9:08 PM
|
|
| |
|
Expert
Posts: 2634
Location: Minor Hill, TN | My late Uncles Corvette was painted today . Tomorrow the clear coat will be applied. Then the interior and soon more work on my '61. |
|
| |
|
Expert
Posts: 2634
Location: Minor Hill, TN | Sorry still no more work has been done on the '61 my dad is still working on the vette. I did lay away a pioneer am/fm cd player for the car. This will be the last resort if I decide its to expensive to convert my original radio. If I decide to convert my original radio I will sell the cd player on ebay. |
|
| |
|
User has resigned from board
| u should contact oldwood, I think he has a couple 61 Plymouths, hes a salvage yard dog , he might be able to find u some stuff for your 61 Plymouth he might sell u some patch metal |
|
| |
|
Expert
Posts: 2634
Location: Minor Hill, TN | I got some metal my dad and I are using the bodypanels to a 1955 plymouth he was planning to restore but he ended up scrapping the car. It was too far gone the people who had the car last left it out side with the windows down and it ruined the interior
|
|
| |
|
Expert
Posts: 2634
Location: Minor Hill, TN | I removed the trimming from my trunk into the parts room . I also sanded and primered the trim pieces that goes in front of the dash and the sides. I do not have the part that goes to the top. I have these items as spare parts.I do have the other part of the bottom but its residing on the roof of my car
Edited by 1961plymouthfury 2015-11-12 7:11 PM
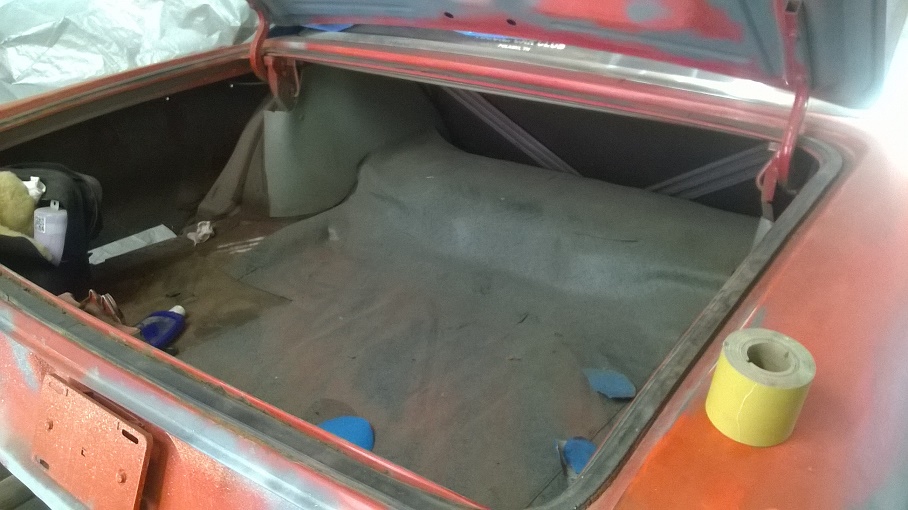 (WP_20151111_002.jpg) (WP_20151111_002.jpg)
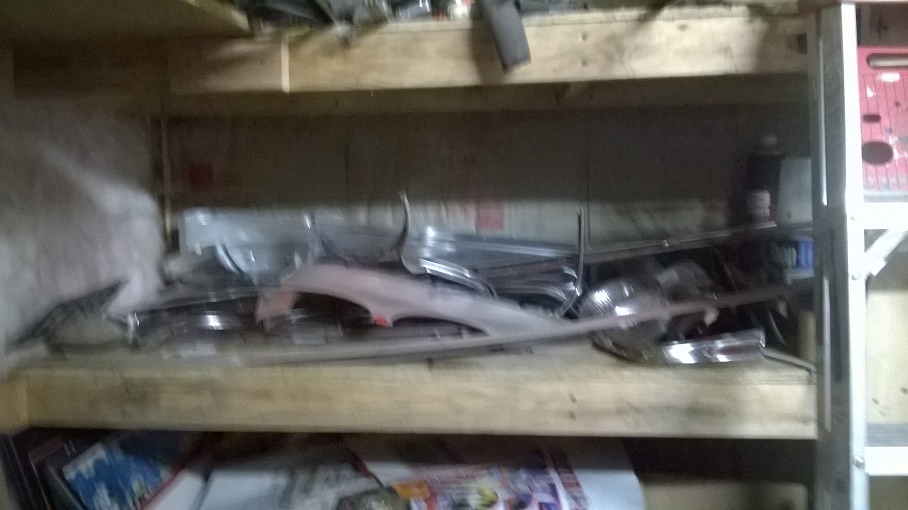 (WP_20151111_005.jpg) (WP_20151111_005.jpg)
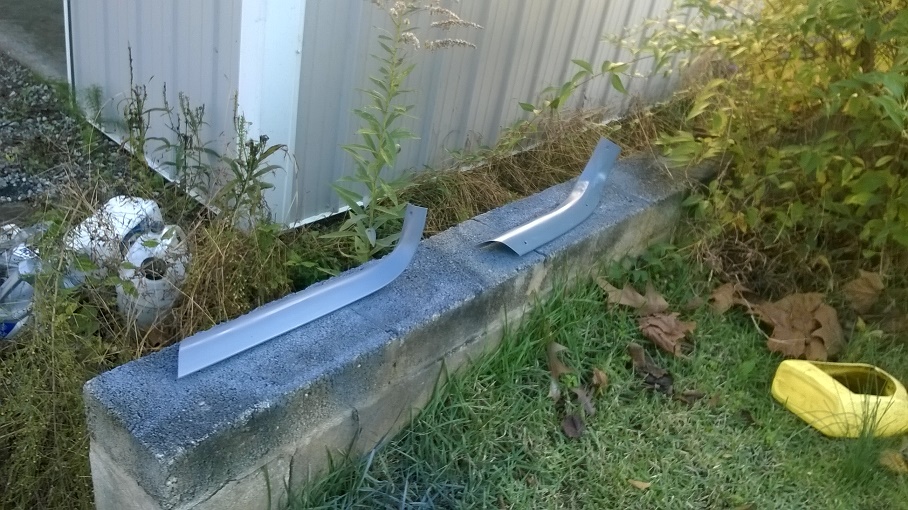 (WP_20151111_007.jpg) (WP_20151111_007.jpg)
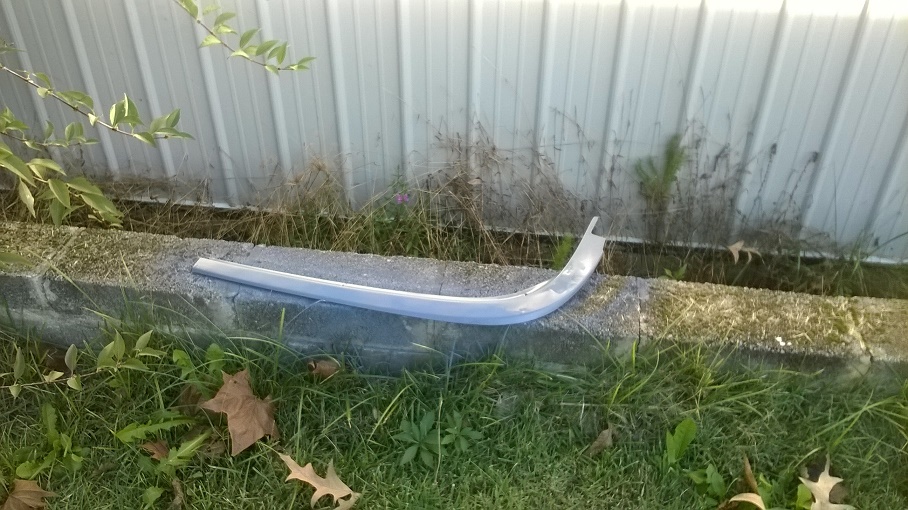 (WP_20151111_008.jpg) (WP_20151111_008.jpg)
Attachments
----------------
WP_20151111_002.jpg (198KB - 251 downloads)
WP_20151111_005.jpg (185KB - 258 downloads)
WP_20151111_007.jpg (271KB - 228 downloads)
WP_20151111_008.jpg (250KB - 255 downloads)
|
|
| |
|
Expert 5K+
Posts: 5006
| way more motivated than me... but its getting nippy in Ohio...
OH!! IO!!!
|
|
| |
|
Expert
Posts: 2634
Location: Minor Hill, TN | Oh yes I just purchased trunk panel extensions for this car. I got these off ebay I went to the site to see what other panels the seller has for my car |
|
| |
|
Expert
Posts: 2634
Location: Minor Hill, TN | My trunk panel waiting to be welded on. I got these off ebay for $80.99 a pair and shipping was free.
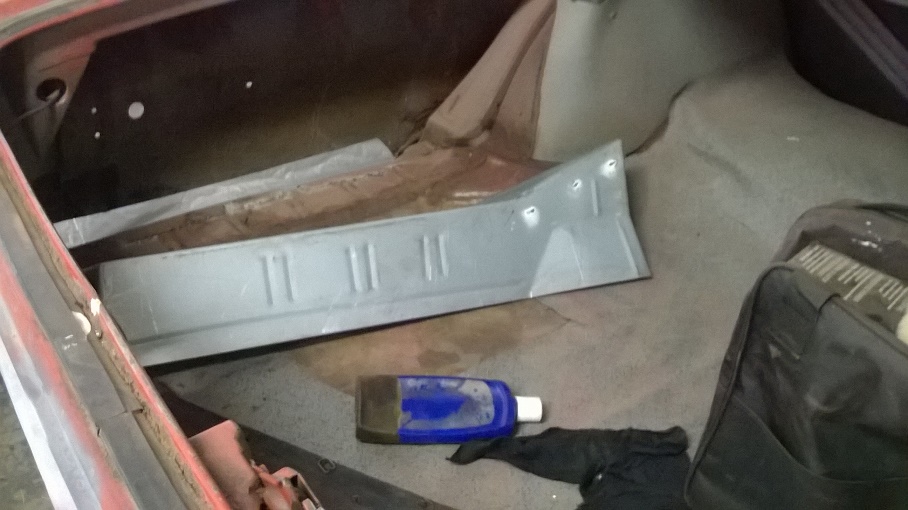 (WP_20151119_004.jpg) (WP_20151119_004.jpg)
Attachments
----------------
WP_20151119_004.jpg (184KB - 255 downloads)
|
|
| |
|
Expert
Posts: 2634
Location: Minor Hill, TN | More progress. but not much.I need to get a gallon of shop line black paint. I have enough to do inside the doors, hood, trunk and engine compartment maybe a little more. I am going to try to match this 1 to the other car as close as possible. I am not putting headers on it .
Edited by 1961plymouthfury 2015-11-26 11:06 PM
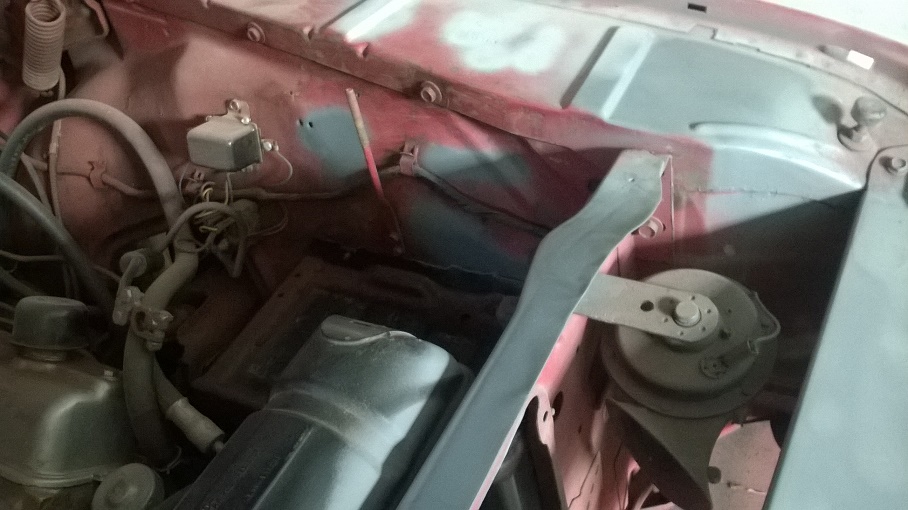 (WP_20151125_001.jpg) (WP_20151125_001.jpg)
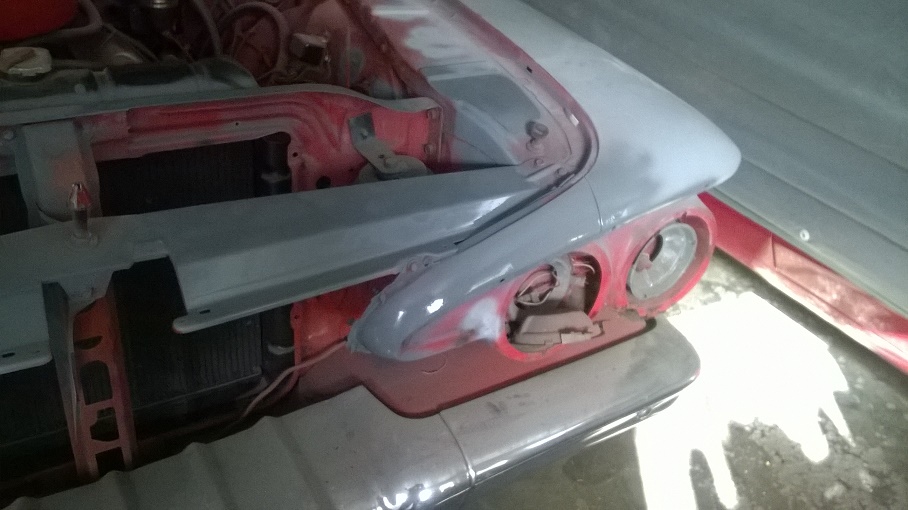 (WP_20151125_002.jpg) (WP_20151125_002.jpg)
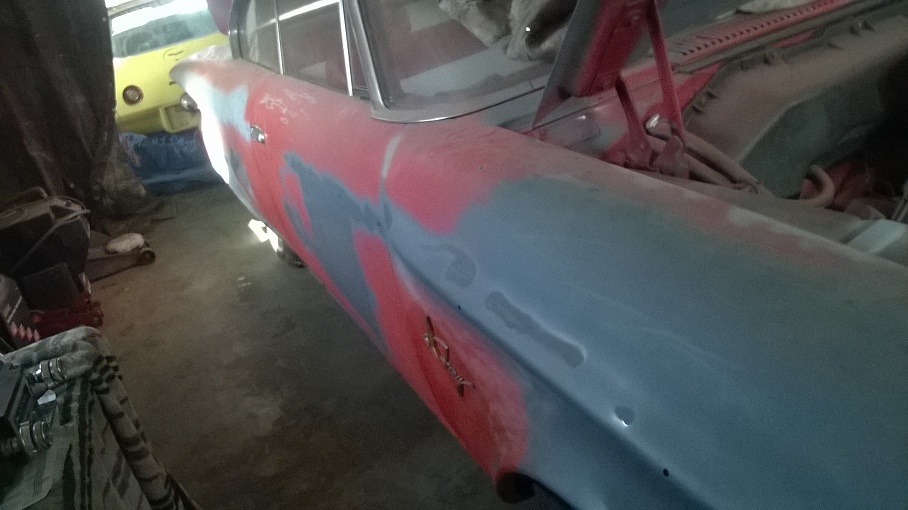 (WP_20151125_003.jpg) (WP_20151125_003.jpg)
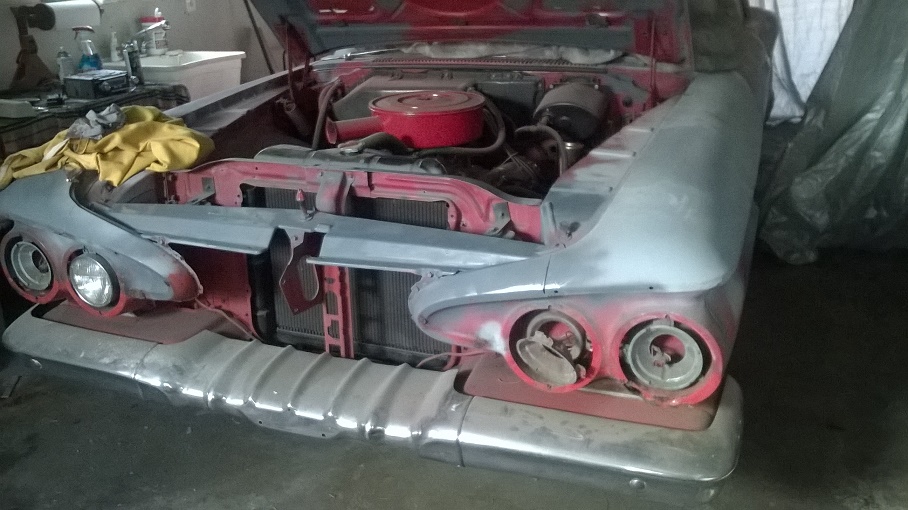 (WP_20151125_004.jpg) (WP_20151125_004.jpg)
 (WP_20151125_007.jpg) (WP_20151125_007.jpg)
 (WP_20151125_005.jpg) (WP_20151125_005.jpg)
Attachments
----------------
WP_20151125_001.jpg (194KB - 234 downloads)
WP_20151125_002.jpg (182KB - 244 downloads)
WP_20151125_003.jpg (188KB - 238 downloads)
WP_20151125_004.jpg (217KB - 245 downloads)
WP_20151125_007.jpg (196KB - 241 downloads)
WP_20151125_005.jpg (191KB - 252 downloads)
|
|
| |
|
Expert
Posts: 2312
Location: Arizona | I'm looking forward to seeing it finished. |
|
| |
|
Expert
Posts: 2634
Location: Minor Hill, TN | I was not going to post any more photos of the progress I was going to wait until the car is finished. |
|
| |
|
Expert
Posts: 2634
Location: Minor Hill, TN | I know I said I would have my radio converted in my '61 but if its too expensive this is my last resort but if I do convert my radio I might put this on ebay. If I have it installed it will go in the glove box
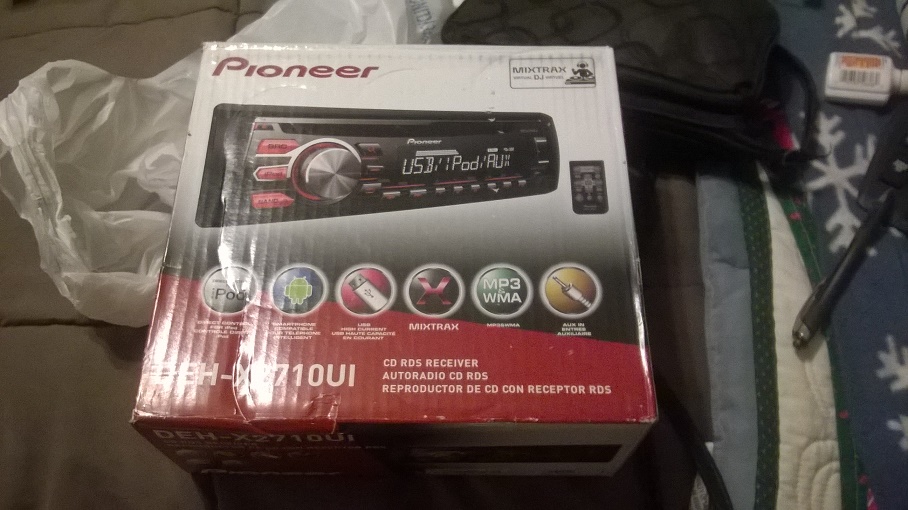 (WP_20151201_002.jpg) (WP_20151201_002.jpg)
Attachments
----------------
WP_20151201_002.jpg (204KB - 198 downloads)
|
|
| |
|
Expert
Posts: 2634
Location: Minor Hill, TN | I ordered the door snubs from Gary Goers. I am not sure when they will be here but The package will be kept in the car so I know were its located. Next will be the correct brake pedal and the door w/s. I have been getting parts but I am buying a little at a time.
The corvette is complete so by January face- lift will begin. I even found a NOS rear quarter panel but the person wants $1500.00 for it I believe you need to be a body shop owner to purchase it. It asks for a tax ID # . If actually means my Social security # there is no way in Hell I am going to give that out . |
|
| |
|
Expert 5K+
Posts: 5006
| yeah its setup for a "body shop" to purchase. you should be able to still get it.
How did you order from Garys? with a fax? |
|
| |
|
Expert
Posts: 2634
Location: Minor Hill, TN | I printed out order forms and mailed a check I am going to keep 1blank and make copies
Edited by 1961plymouthfury 2015-12-04 10:52 PM
|
|
| |
|
Expert
Posts: 2634
Location: Minor Hill, TN | I was wondering after my '61 is restored. I have a back up in case the radio is too expensive to convert I have a pioneer am/fm/cd player for the car. I do plan to install it in the glove box . I was wondering has any one had 1 of these installed in the glove box. I will have the surface mount speakers but they will be under the seats . |
|
| |
|
Expert 5K+
Posts: 5006
|
It can't be cheap to have one converted? Have you seen prices.?
Mounting in the glovebox can't be hard, build a bracket of some sort, bolt it in. The map area is closer to the front also.
You can get almost "hidden" radios now that you can control through your phone or with a remote nowdays also? |
|
| |
|
Member
Posts: 41
Location: South Central PA | I borrowed an idea from Wizard and got a marine radio which I mounted in the trunk. The nice thing about it is that it has a 25' remote which I keep tucked under the seat and I ran extensions for the usb/aux under the glovebox. I had the original mopar radio converted in my 77 by a fellow outside of Hershey (Retro Radio) and he charged $400 to change the board out and put in an aux jack, that took him 3 months to do, however it works great and I don't need more than an aux. |
|
| |
|
Expert
Posts: 2788
Location: USA - KY |
We just put a tiny MP3 player in the glove box - you pick the tunes...no ads, no static, and you can use it anywhere; not just in the car. Hook it up to your car's speaker(s). We put the controls in the ashtray. Just an idea.
|
|
| |
|
Expert
Posts: 2634
Location: Minor Hill, TN | I tested my spare radio and it works I plan to convert that 1 when I get the cash saved it is wrapped and in a box ready to be shipped to were ever I get this done .I might put the pioneer cd player on ebay.
Edited by 1961plymouthfury 2015-12-08 1:01 AM
|
|
| |
|
Expert
Posts: 2634
Location: Minor Hill, TN | I wish I can purchase it as a customer. Right now I do not have the extra $1500.00 for the quarter. This 1 is for the passenger side. My dad and I are going to try to save the passenger side quarter on my car.
I will admit it is very sad the forward looks that Virgil Exner designed and built ended up in the grave yard or crushed by the crusher.
I will keep looking until I locate and I will not give up.
It also sure would be nice if quarters were reproduced for my car but you never know maybe someday they will be
Merry Christmas.
Edited by 1961plymouthfury 2015-12-08 7:52 PM
|
|
| |
|
User has resigned from board
| <p>whos is this</p>
 (6158199715_fe2c2b2c82_z.jpg) (6158199715_fe2c2b2c82_z.jpg)
 (6158199715_fe2c2b2c82_z.jpg) (6158199715_fe2c2b2c82_z.jpg)
Attachments
----------------
6158199715_fe2c2b2c82_z.jpg (287KB - 204 downloads)
6158199715_fe2c2b2c82_z.jpg (287KB - 219 downloads)
|
|
| |
|
Expert
Posts: 2634
Location: Minor Hill, TN | Its not mine but it my other '61s twin. I hope some day to have mine parked next to that 1 at a car show. It will not matter to me which 1 gets 1st place because both cars wll get alot of attention. Do you know who that belongs to? What size engine is under the hood? I also noticed it has factory tinted windows.
My current '61 made the Pulaski Area Car Enthuast calander for 2016
The photo was taken before I started the restoration .
Edited by 1961plymouthfury 2015-12-08 11:16 PM
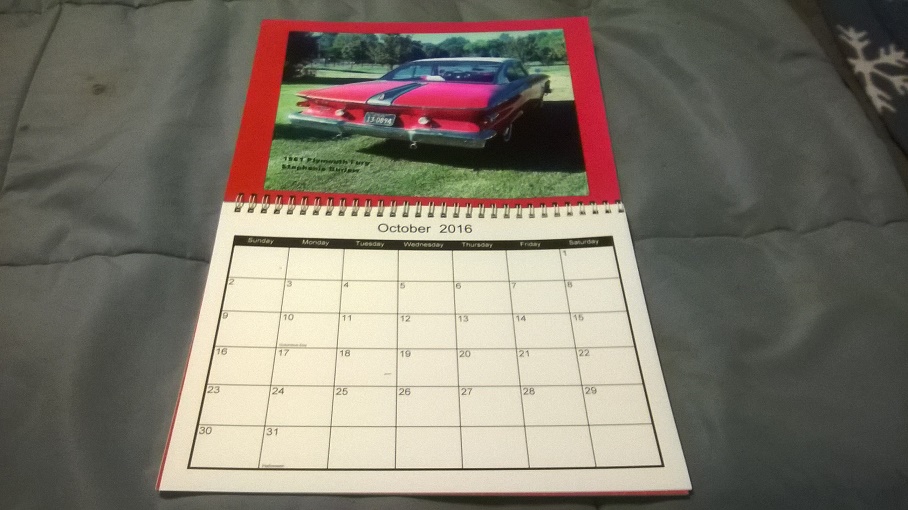 (WP_20151208_005.jpg) (WP_20151208_005.jpg)
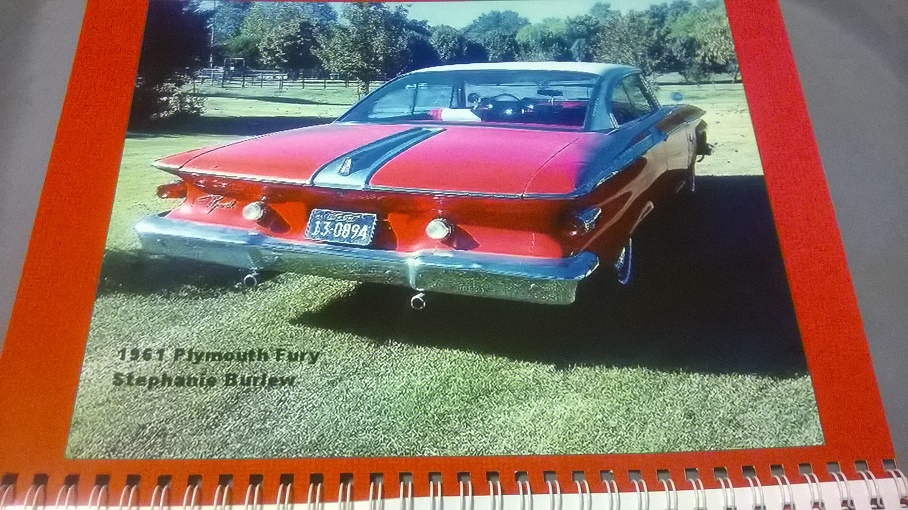 (WP_20151208_006.jpg) (WP_20151208_006.jpg)
Attachments
----------------
WP_20151208_005.jpg (194KB - 219 downloads)
WP_20151208_006.jpg (290KB - 204 downloads)
|
|
| |
|
User has resigned from board
| they should have taken a front picture, |
|
| |
|
Expert
Posts: 2634
Location: Minor Hill, TN | I emailed the president of the club some photos because the car is tied up right now. I guess that is the 1 he chose . I do not have a problem with it. I was the 1 who took the photo and it was way before the restoration started. |
|
| |
|
Expert
Posts: 2634
Location: Minor Hill, TN | I did some more work on the car I removed the trunk weather strip sanded the bottom of the doors . I also primered the bare metal I also sanded were the weather strip was and primered were the metal got bare.
I did take photos of my work but I am not uploading them until more work is done in the trunk weather stripping area. I might do a video instead and upload it on you tube then copy and paste it here.
Edited by 1961plymouthfury 2015-12-17 12:59 PM
|
|
| |
|
Expert
Posts: 2634
Location: Minor Hill, TN | I did some more work on the area were the weather stripping was. I am sorry I did not post the video I have been busy the past couple of days Here is the video
https://youtu.be/lPPObL_ujpY
Edited by 1961plymouthfury 2015-12-22 1:37 AM
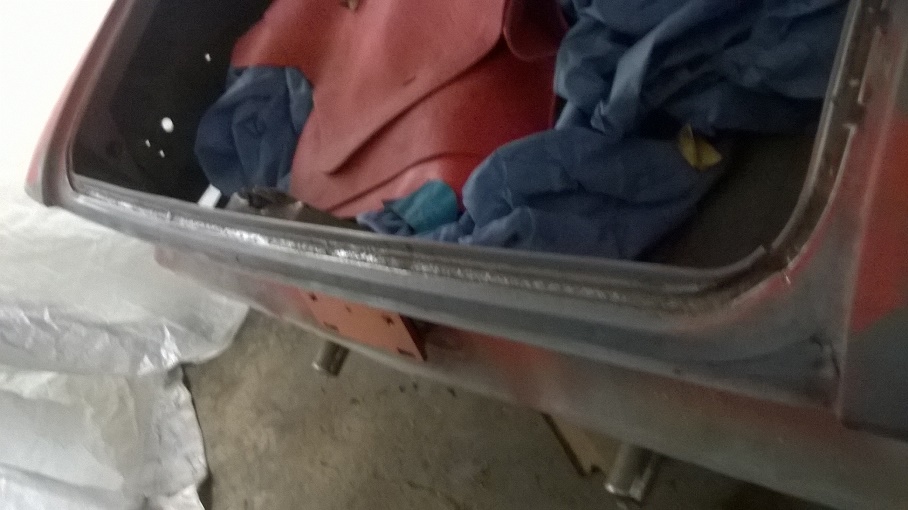 (WP_20151221_005.jpg) (WP_20151221_005.jpg)
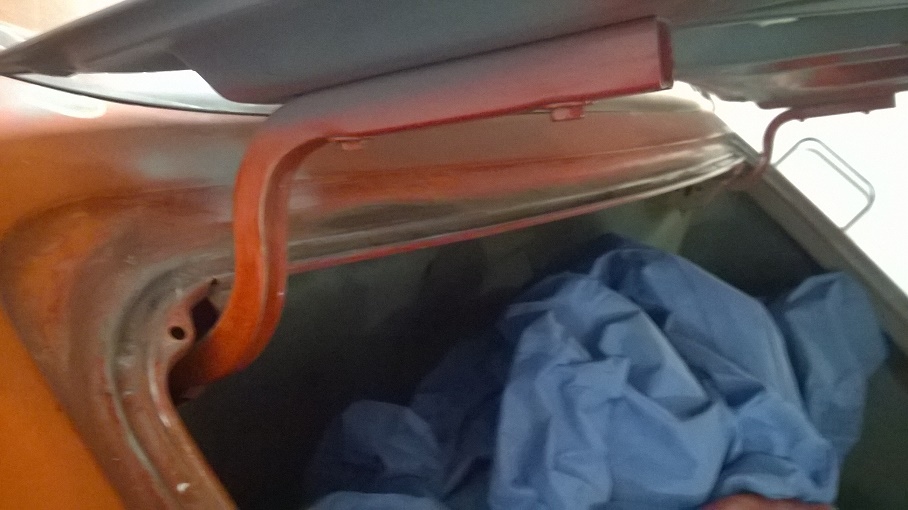 (WP_20151221_003.jpg) (WP_20151221_003.jpg)
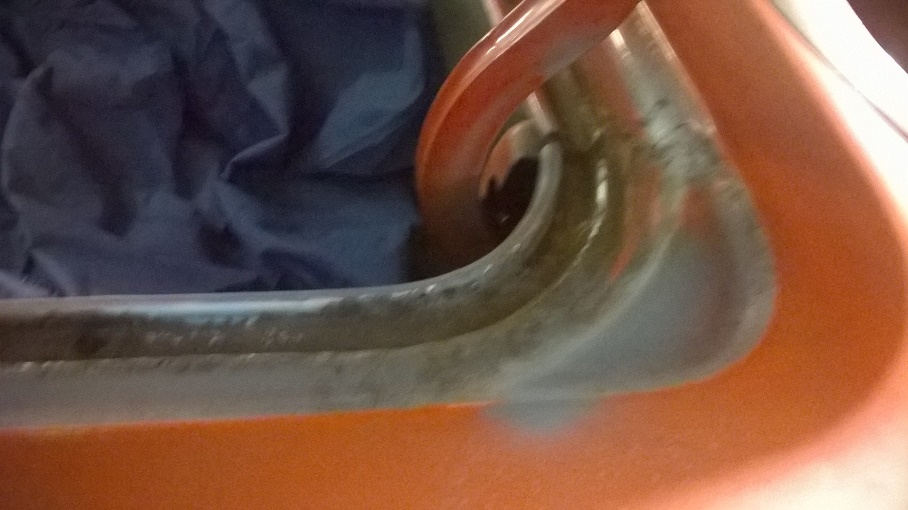 (WP_20151221_006.jpg) (WP_20151221_006.jpg)
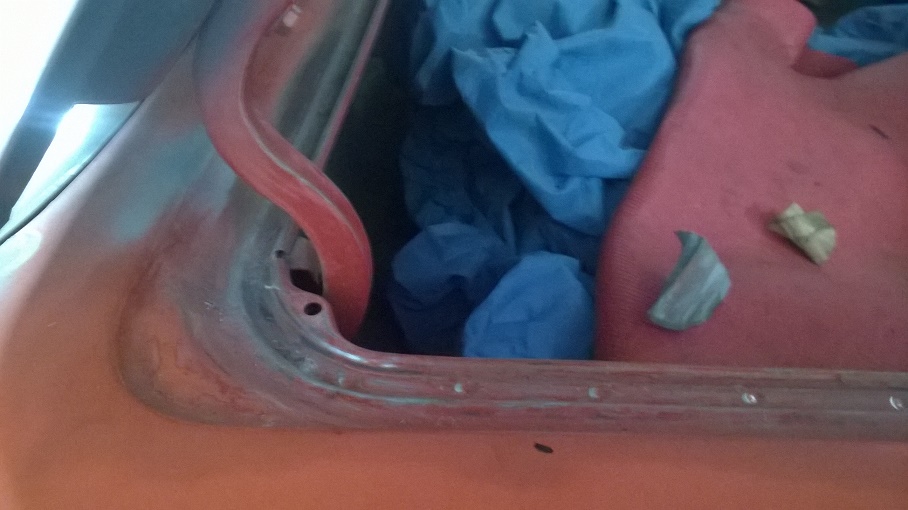 (WP_20151221_007.jpg) (WP_20151221_007.jpg)
Attachments
----------------
WP_20151221_005.jpg (176KB - 198 downloads)
WP_20151221_003.jpg (173KB - 234 downloads)
WP_20151221_006.jpg (183KB - 199 downloads)
WP_20151221_007.jpg (171KB - 220 downloads)
|
|
| |
|
Expert
Posts: 2634
Location: Minor Hill, TN | I did some more work on the area were the trunk W/S was at . 1 of my customers who owns a body shop gave me some supplies for Christmas .
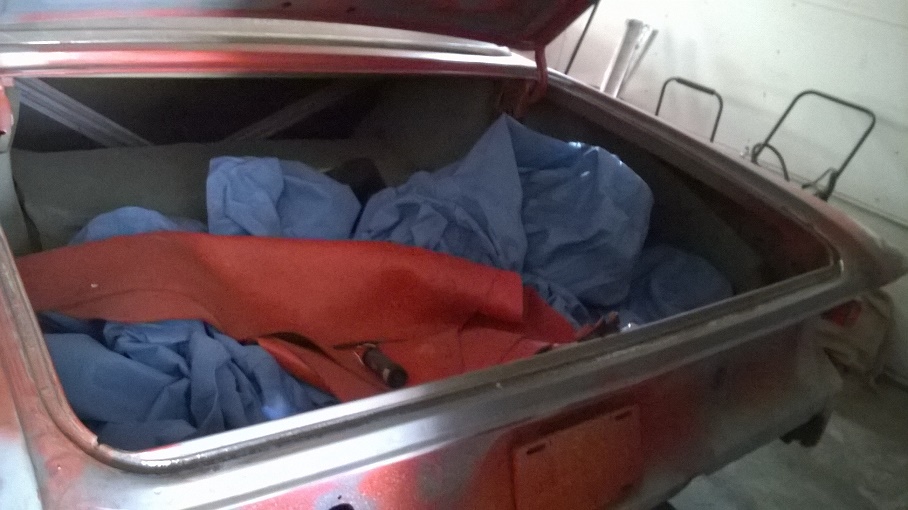 (WP_20151224_001.jpg) (WP_20151224_001.jpg)
 (WP_20151225_014.jpg) (WP_20151225_014.jpg)
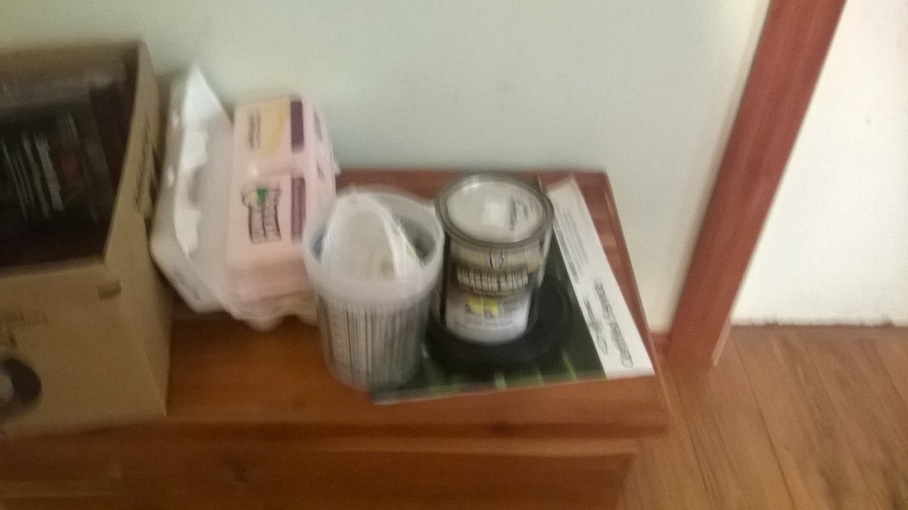 (WP_20151225_015.jpg) (WP_20151225_015.jpg)
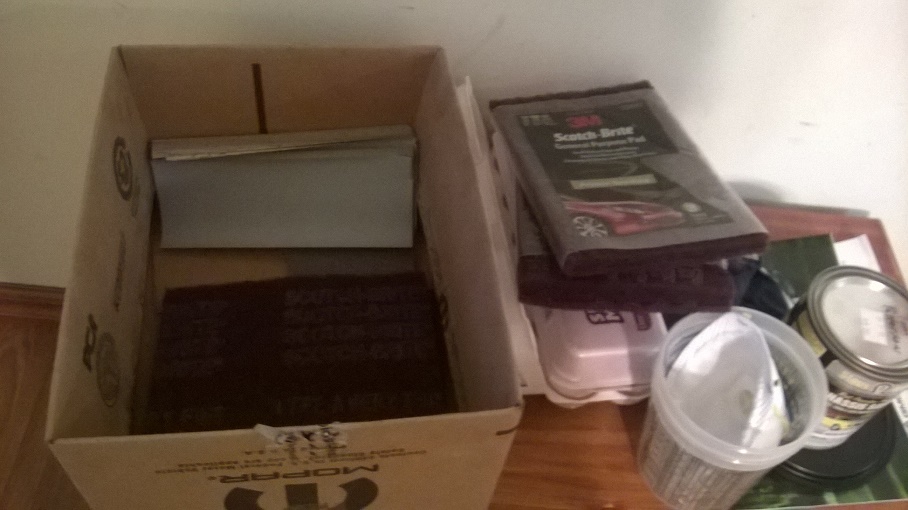 (WP_20151225_016.jpg) (WP_20151225_016.jpg)
Attachments
----------------
WP_20151224_001.jpg (186KB - 190 downloads)
WP_20151225_014.jpg (190KB - 199 downloads)
WP_20151225_015.jpg (165KB - 203 downloads)
WP_20151225_016.jpg (168KB - 177 downloads)
|
|
| |
|
Elite Veteran
Posts: 827
Location: tailFinland | 1961plymouthfury - 2015-11-27 12:49 AM
I was not going to post any more photos of the progress I was going to wait until the car is finished.
??? is it finished now? |
|
| |
|
Expert
Posts: 2634
Location: Minor Hill, TN | Not yet but a person can change their mind and post photos of their projects. I got a better camera now for Christmas.When its finished I will title the folder the big surprise. |
|
| |
|
Expert
Posts: 2634
Location: Minor Hill, TN | My dad told me no more sanding on the car, he is going to start the body work. To all you forward lookers in Michigan Roll Tide Roll go Bama |
|
| |
|
Expert
Posts: 2634
Location: Minor Hill, TN | I was sanding on the area were the trunk weather strip was my dad says its got to be sand blasted. I got an amazon fire tablet for Christmas and it takes nice photos. I will share a couple. I know its not the brake pedal that came with the car but I am trying to locate 1 that belongs on the car and says "power brakes" I tried to order 1 from Andy Bernbaum but he does not have any more. I got my day night mirror off ebay
Edited by 1961plymouthfury 2016-01-02 1:14 AM
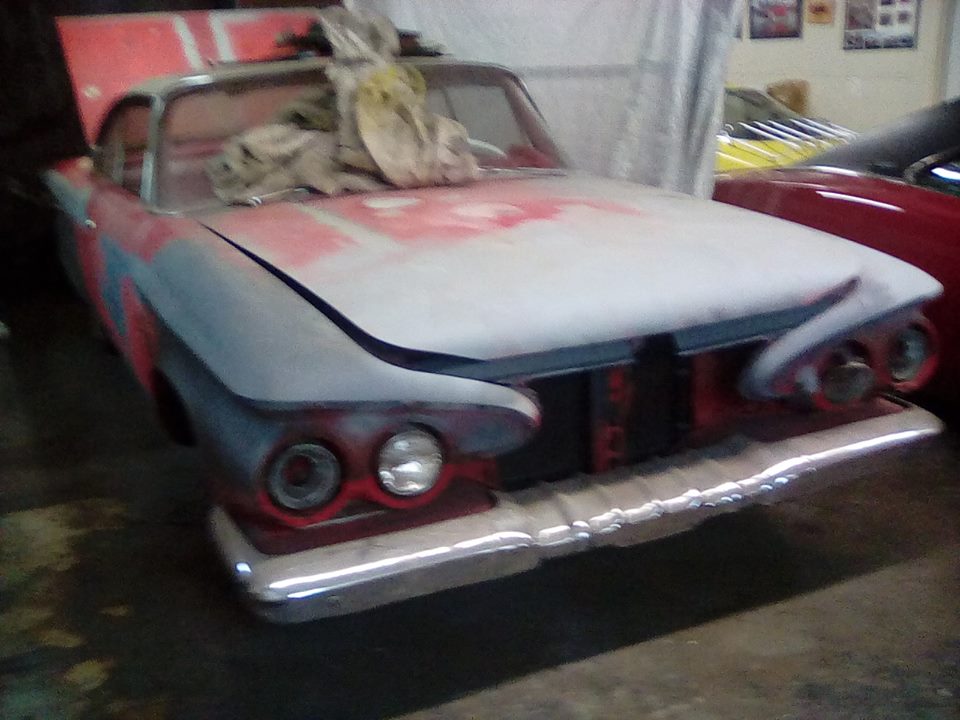 (1961 fury under restoration.jpg) (1961 fury under restoration.jpg)
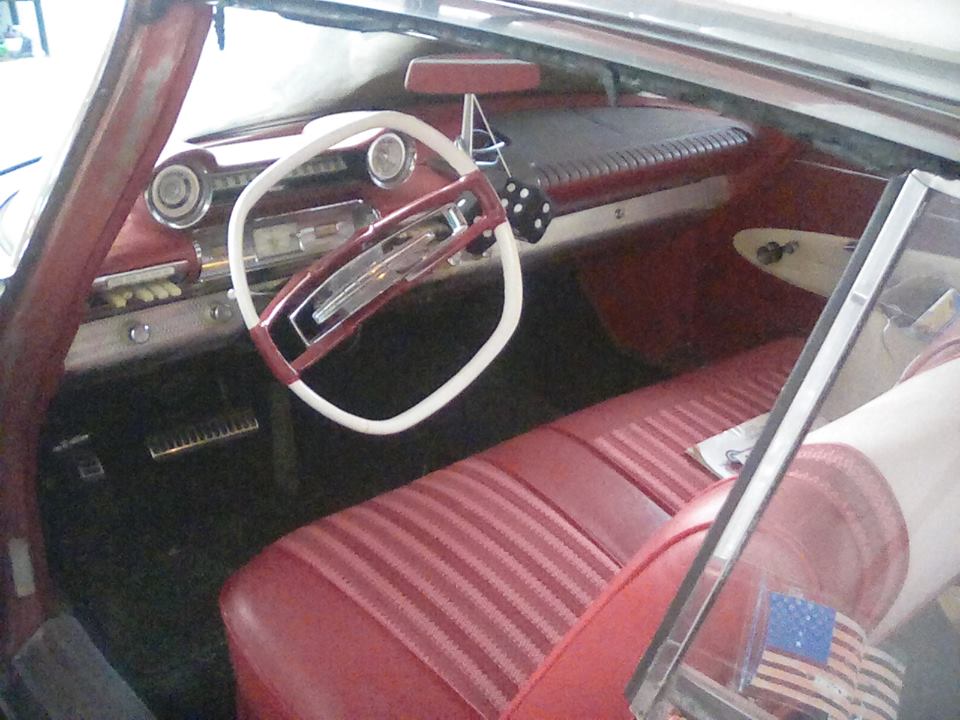 (red and white aero wheel.jpg) (red and white aero wheel.jpg)
Attachments
----------------
1961 fury under restoration.jpg (88KB - 209 downloads)
red and white aero wheel.jpg (96KB - 204 downloads)
|
|
| |
|
User has resigned from board
| you should paint it pink, like oldwoods daily driver , I think it would look good, ud never see another pink 61 fury, that's for sure,
 (th.jpg) (th.jpg)
 (59Cad2Dr03.jpg) (59Cad2Dr03.jpg)
Attachments
----------------
th.jpg (9KB - 195 downloads)
59Cad2Dr03.jpg (41KB - 183 downloads)
|
|
| |
|
Expert
Posts: 2634
Location: Minor Hill, TN | true . I never seen a pink '61 fury but I am sticking with black Rocker arm said in C bodies only by painting this 1 black should give me some closure on the other car. I am in the process of buying what I need for the car. |
|
| |
|
Expert
Posts: 2634
Location: Minor Hill, TN | I just sent my forms out to get the history on my '61. I sent it PM with a tracking #
|
|
| |
|
Expert
Posts: 2634
Location: Minor Hill, TN | Here is some more progress . The fitting of the trunk extensions. Its not welded on yet but its a start.
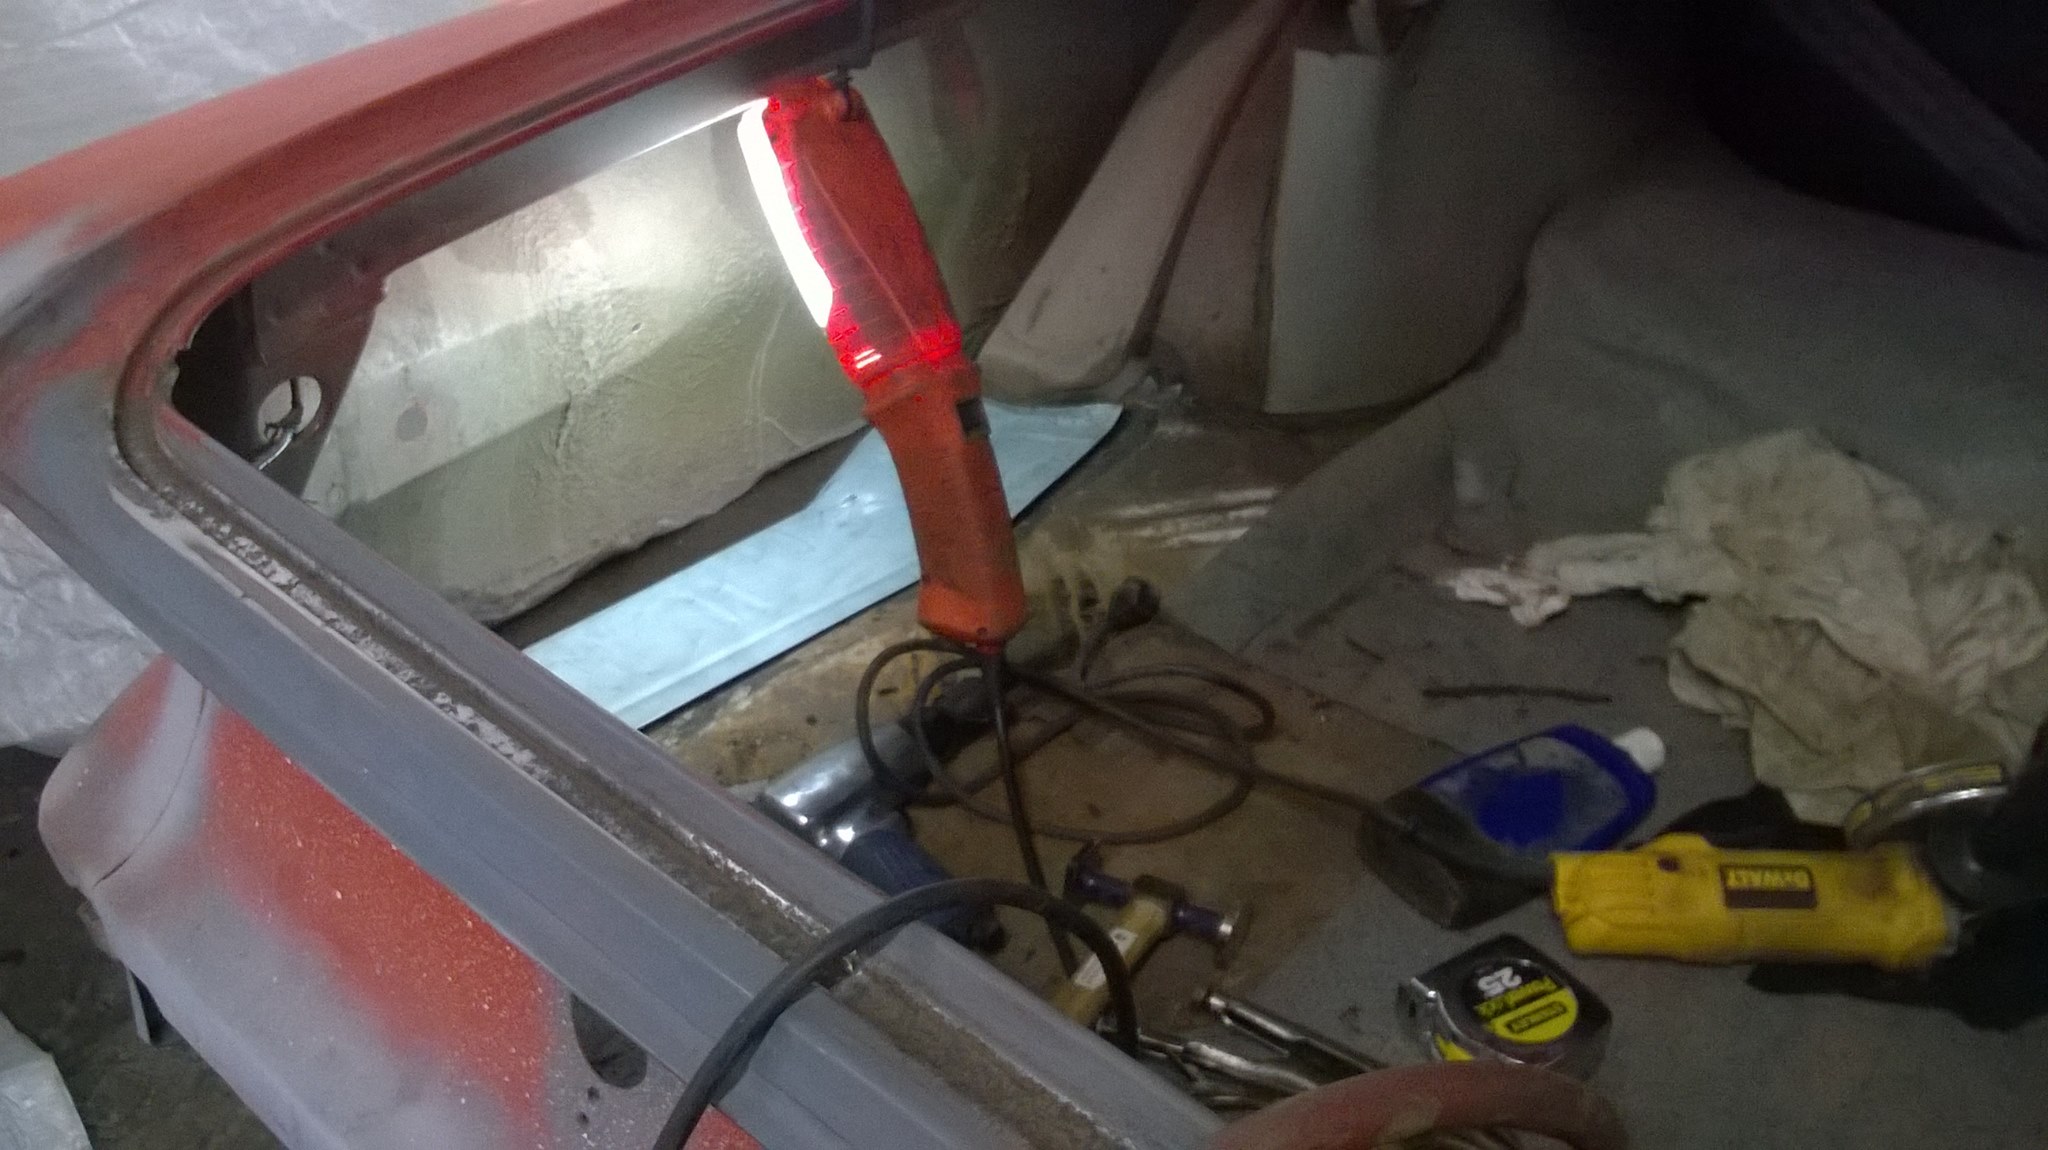 (fitting trunk extensions.jpg) (fitting trunk extensions.jpg)
Attachments
----------------
fitting trunk extensions.jpg (364KB - 188 downloads)
|
|
| |
|
Expert
Posts: 2634
Location: Minor Hill, TN | I am so sorry the photo is so big on the last post. I cannot do any more work on the car. My dad needs to weld panels on the car and do sand blasting. I am still buying the parts for the car. I got valve cover , timing chain cover and oil pan gaskets I also got freeze plugs and a torque converter seal . |
|
| |
|
Expert
Posts: 2634
Location: Minor Hill, TN | My dad will be doing the metal work, sand blasting ect. I am not going to do any work on the car for a while some how I pulled a muscle on my lower back. I do not know how I did but I am taking IB profin and putting icy hot on it. I will not take prescription medication unless I need to
Edited by 1961plymouthfury 2016-01-22 1:27 AM
|
|
| |
|
User has resigned from board
| radio? my 60 is radio delete, my 61 has an am, my 65 also has an am, all i get on them is that famous Arkansas poker music , so i listen to the motor instead |
|
| |
|
Expert
Posts: 2634
Location: Minor Hill, TN | I have 2 am radios for my '61 the 1 in the car does not work but the 1 that is not in the car does work. My dad tested it . That 1 will be converted to fm and have jacks put on so I can listen to an ipod or mp3. I sold the pioneer CD player on ebay. |
|
| |
|
User has resigned from board
| <p>try going with out a radio, try it, u may like it ,I never listen to the radio in my old car rides, but then again, I don't own a phone, or a wrist watch , so, im proud to say im not a slave. freedom!!</p>
Edited by 196061SAVOY 2016-01-22 9:13 PM
 (Sheriff Bill.jpg) (Sheriff Bill.jpg)
Attachments
----------------
Sheriff Bill.jpg (31KB - 187 downloads)
|
|
| |
|
Expert
Posts: 2634
Location: Minor Hill, TN | When I took my other '61 out to a show, cruise in or pleasure drive I always had a cell phone with me in case I had a problem and it never hurts to have 1 with you. I did try that with my current '61 and said the hell with this I need some tunes that is why the radio is being converted I do not want just AM. I got to get some sleep good night fellow forward lookers
Edited by 1961plymouthfury 2016-01-23 3:25 AM
|
|
| |
|
Expert
Posts: 2634
Location: Minor Hill, TN | I noticed 1 panel welded on I will take photos tomorrow |
|
| |
|
Expert
Posts: 2634
Location: Minor Hill, TN | Sorry there has not been that much progress .I am alittle under the weather. I caught the flu but I am fighting it by taking a lot of vitamin C.I need to gei flu shot I am not going to let this stop me .
Edited by 1961plymouthfury 2016-02-10 10:19 AM
|
|
| |
|
Expert
Posts: 2634
Location: Minor Hill, TN | I got the history on my car
This is what it says 1st digit )car line) 3 plymouth 8 cylinder
2nd digit( model series) Fury
3rd digit (model year) 1961
4th digit ( assembly plant) St Louis, MO
106420
Region#51 = Chicago , IL
Dealer code# 39634 = Burlington, IA
Thomas Motor Company
Body type 332= 2 door hardtop
color wp2 top Alpine White Body Carnival red
trim=525=red
Options
Heater5=hot water with defrost
Radio Pushbutton -deluxe
tires=32=7.50x14 4 ply whitewall rayon
Steering wheeel7=deluxe
transmission3=torqueflite-eight-automatic 3 speed
power equipment 1= steering
headlight trimplate1=yes
instrumenp panel1=safety padded
wheel covers 1=yes
undercoating 8=includes underhood pad
Ship date was August 31, 1960.
I believe the power brakes were added on later |
|
| |
|
Expert
Posts: 2634
Location: Minor Hill, TN | Today my dad measured the trunk .I pl!an to put carpet in the trunk instead of a mat |
|
| |
|
Board Moderator & Exner Expert 10K+
Posts: 13050
Location: Southern Sweden - Sturkö island | Good idea - the rubber mats were pure rust supportive! Get a nice carpet that can breathe so that eventual moist or water doesn't stay trapped.
I bought a carpet that actually are used for homebuilt loadspeaker boxes - easy to work with, cut and sew. |
|
| |
|
Expert
Posts: 2634
Location: Minor Hill, TN | Thank you for the advice.I know someone who does interior work on the side and will pass the into on to him . |
|
| |
|
Expert
Posts: 2634
Location: Minor Hill, TN | I tried to up load another photo of the fitting but no luck I will try again later
Edited by 1961plymouthfury 2016-02-19 12:41 PM
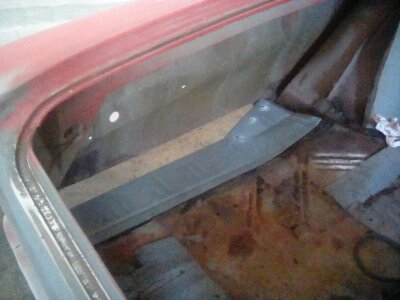 (2016-02-19 11.24.47.jpg) (2016-02-19 11.24.47.jpg)
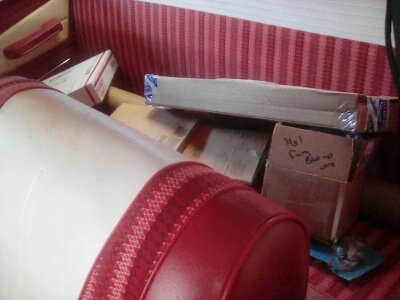 (2016-02-19 11.26.22.jpg) (2016-02-19 11.26.22.jpg)
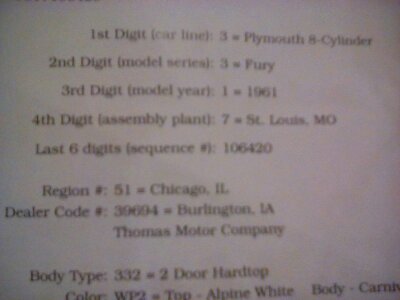 (2016-02-14 01.08.57.jpg) (2016-02-14 01.08.57.jpg)
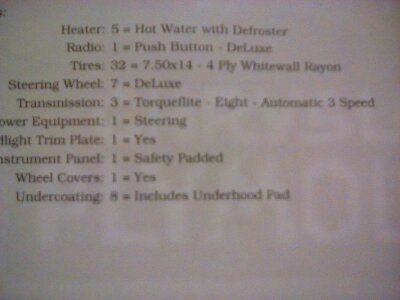 (2016-02-14 01.09.11.jpg) (2016-02-14 01.09.11.jpg)
Attachments
----------------
2016-02-19 11.24.47.jpg (22KB - 222 downloads)
2016-02-19 11.26.22.jpg (22KB - 182 downloads)
2016-02-14 01.08.57.jpg (14KB - 223 downloads)
2016-02-14 01.09.11.jpg (15KB - 171 downloads)
|
|
| |
|
Expert
Posts: 2634
Location: Minor Hill, TN | I found my fender script. I got it off ebay and I was the only bidder |
|
| |
|
Expert
Posts: 2634
Location: Minor Hill, TN | I am waiting for the hood pad and clips. I need to buy a gallon of black paint and paint reducer the electronic conversion kit. Send the radio in to have it converted my speaker repaired. I am sorry there has not been that much done on the car but I guess my dad is going to wait until it gets warmer then the welding of the metal and the sand blasting will be done outside. I also got to get my trunk card board kit . Then after that I plan to purchase spare parts for the car. I would have spare parts in case they are needed. |
|
| |
|
Expert
Posts: 2634
Location: Minor Hill, TN | I remember when I was living in FL I was driving my 1957 plymouth in Melbourme, FL I seen a 1959 Cadilac go down the street the oposite direction. I said my '57 is a hell of a lot smaller than that 1.
I remember the comment my dad said about the '59 caddy put a can and a gun on it and it will be a tank |
|
| |
|
Expert
Posts: 2634
Location: Minor Hill, TN | I did some more progress I polished the headlight bezels . I did the best I could
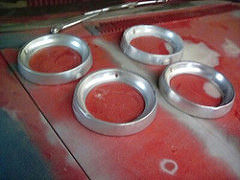 (25305796442_da8941eb7c_m.jpg) (25305796442_da8941eb7c_m.jpg)
Attachments
----------------
25305796442_da8941eb7c_m.jpg (15KB - 185 downloads)
|
|
| |
|
Expert
Posts: 2634
Location: Minor Hill, TN | I just received my hood pad and clips. Its staying in the box for now. I would take a photo but I do not want to open the package and take any chances of ruining it. I need to save for my trunk card board kit. I will be buying from Gary Goers the same place were I got my hood pad and clips. I got to take the package to the garage and put it in the car with the other items I bought for the car that way I know were its at. |
|
| |
|
Expert
Posts: 2634
Location: Minor Hill, TN | I am taking a break from this for a while . I need to take care of some things. No I am not calling it quits I just need to walk away from the project for a little while then I will start on it again. I got to get my monte carlo ( my daily driver )paid off. Then I will start on it again. |
|
| |
|
Expert
Posts: 2634
Location: Minor Hill, TN | rust converter was painted on were the trunk w/s was removed . This is not my doing I am giving my dad the credit on this 1 . This converts rust to a paintable surface
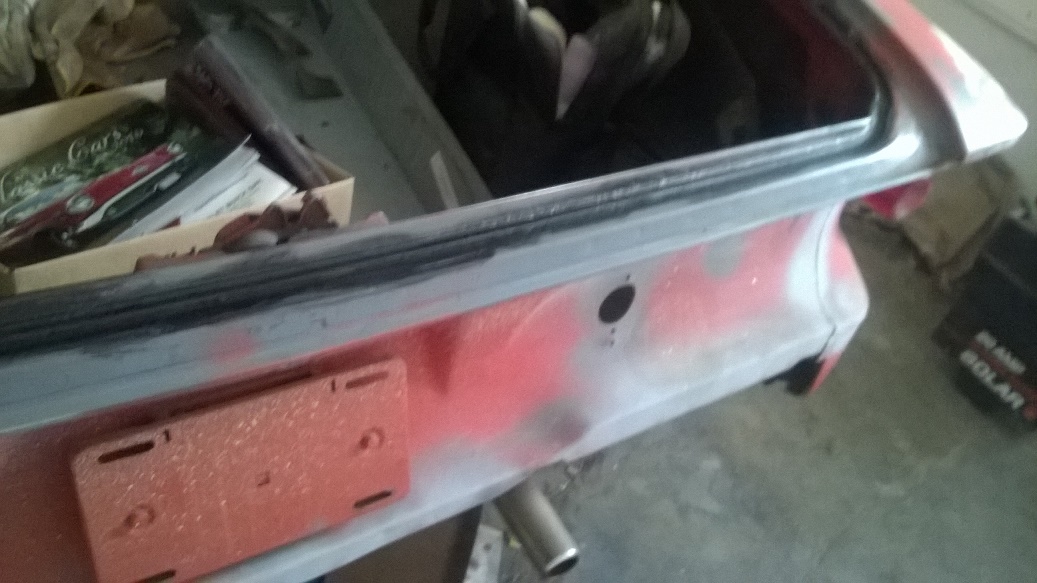 (WP_20160317_002.jpg) (WP_20160317_002.jpg)
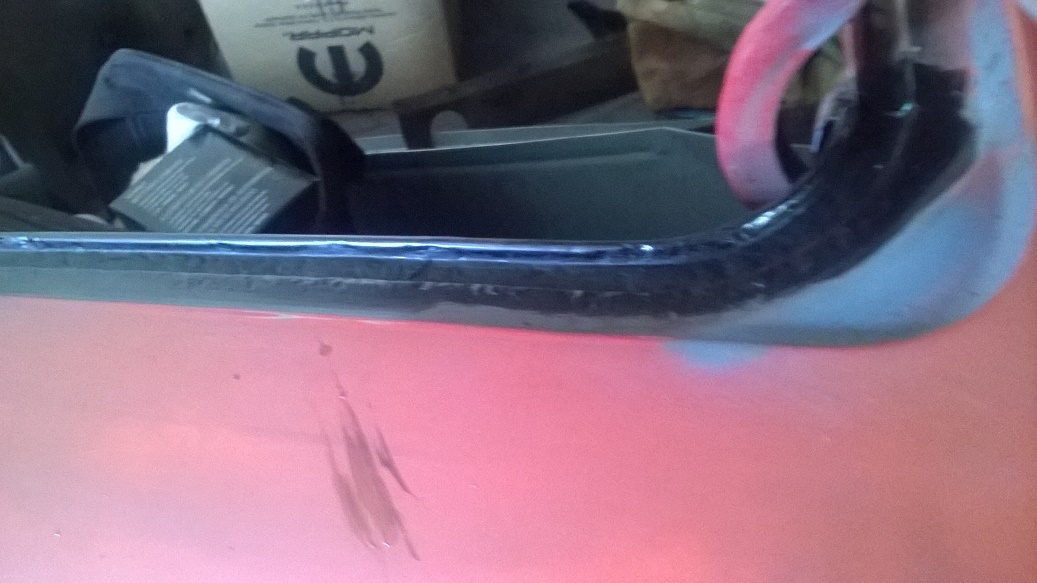 (WP_20160317_003.jpg) (WP_20160317_003.jpg)
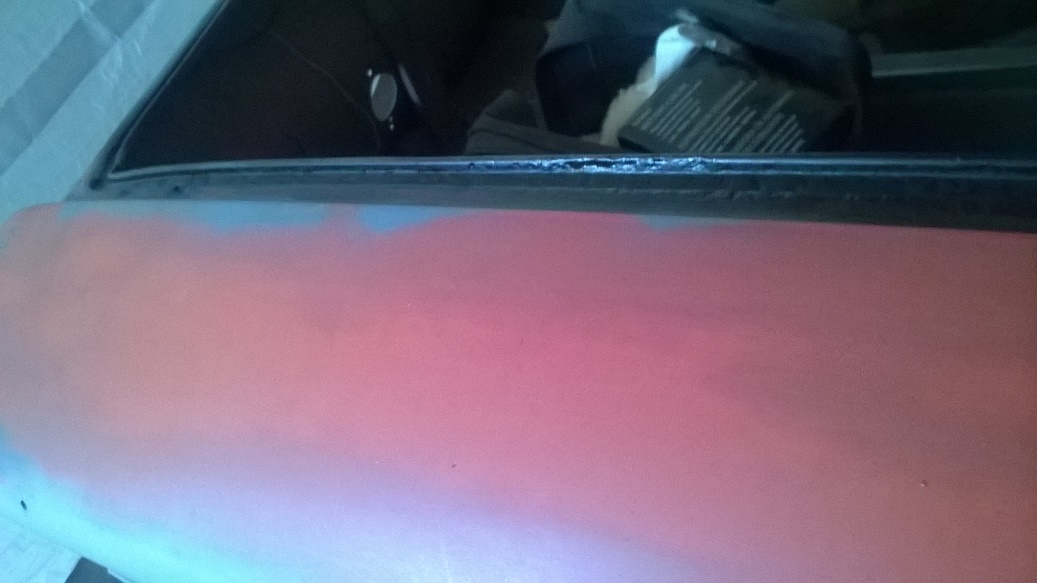 (WP_20160317_004.jpg) (WP_20160317_004.jpg)
Attachments
----------------
WP_20160317_002.jpg (234KB - 210 downloads)
WP_20160317_003.jpg (229KB - 214 downloads)
WP_20160317_004.jpg (210KB - 183 downloads)
|
|
| |
|
Expert
Posts: 2634
Location: Minor Hill, TN | I was wondeeing isThomas motor company still,in business?They are in Burlington IA |
|
| |
|
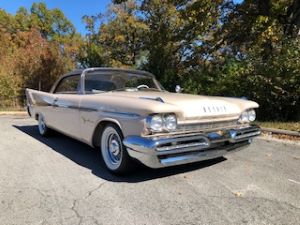
Expert
Posts: 2003
Location: Branson, MO | 1961plymouthfury - 2016-04-04 6:59 PM
I was wondeeing isThomas motor company still,in business?They are in Burlington IA
http://www.antiquesnavigator.com/d-915005/burlington-ia-thomas-moto...
This is all I could find on Thomas Motor Company in Burlington, IA. Probably not what you are looking for and it appears they are no longer in business. Says they were a Nash dealer from 1949 to 1952. Nothing after 1952 regarding any other automobile activity.
Edited by Viper Guy 2016-04-04 9:50 PM
|
|
| |
|
Expert
Posts: 2634
Location: Minor Hill, TN | Thank you but when I got the history on my '61 it sold brand new from this dealership . I do not think that is what I am looking for but thank you for trying to help. |
|
| |
|
Expert
Posts: 2634
Location: Minor Hill, TN | My dad is going to take some of my trimming that needs to be straightened to a mopar meeting and is going to teach fellow members how to do this . He is taking the trimming to my '61 |
|
| |
|
Expert
Posts: 2634
Location: Minor Hill, TN | I paid my auto insurance again for another year. I did raise the agreed value again . I learned I got to sand the trunk floor . I will have loop pile carpet in the trunk in stead of the mat. I see what the mats cost so I am doing this to save money. I am also doing surveys online for extra cash. I do share the 1 I do because they are legit. If they were not I would not share these . |
|
| |
|
Expert
Posts: 2634
Location: Minor Hill, TN | I was going to do sanding inside my trunk but my dad wants to remove the mat and draw a pattern. I will have a loop pile carpet installed in the trunk instead of a mat. I know the mat is original from the factory but I am trying to save money. I seen the price to the mats and they are expensive. A friend does interior work on the side and he is the same person who recovered my arm rests on my car. I got to get my trunk card board kit 1st. I will buy my trunk card board kit from Gary Goers |
|
| |
|
Expert
Posts: 2634
Location: Minor Hill, TN | Hello Fellow forward lookers. My dad removed the trunk mat out of my car and I did the sanding and grinding to get the rust removed. I know its been a while but here is some of what has been done so far I know there is more to do . Here are some photos of the progress. I got to go to C bodies only to share the progress
Edited by 1961plymouthfury 2016-05-03 6:15 PM
 (2016-05-03 15.12.54.jpg) (2016-05-03 15.12.54.jpg)
 (2016-05-03 15.13.04.jpg) (2016-05-03 15.13.04.jpg)
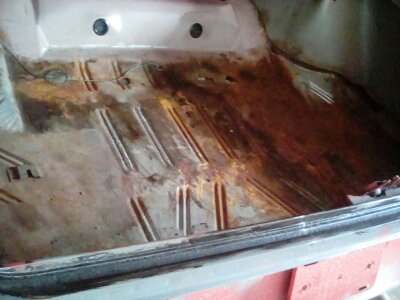 (2016-05-03 15.37.07.jpg) (2016-05-03 15.37.07.jpg)
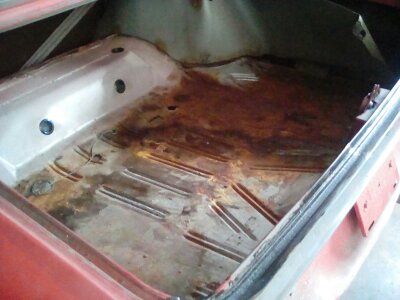 (2016-05-03 15.37.14.jpg) (2016-05-03 15.37.14.jpg)
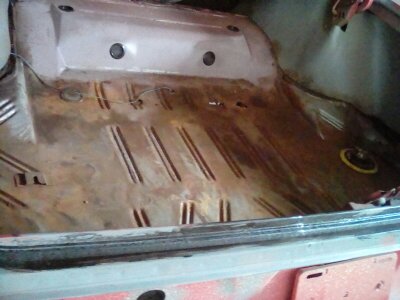 (2016-05-03 16.06.03.jpg) (2016-05-03 16.06.03.jpg)
 (2016-05-03 16.47.23.jpg) (2016-05-03 16.47.23.jpg)
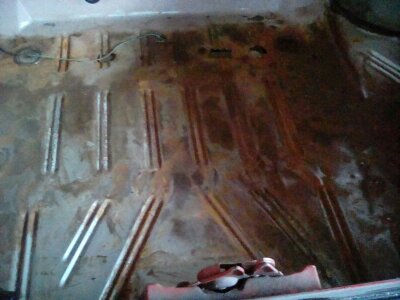 (2016-05-03 16.47.59.jpg) (2016-05-03 16.47.59.jpg)
Attachments
----------------
2016-05-03 15.12.54.jpg (28KB - 311 downloads)
2016-05-03 15.13.04.jpg (26KB - 286 downloads)
2016-05-03 15.37.07.jpg (25KB - 303 downloads)
2016-05-03 15.37.14.jpg (25KB - 316 downloads)
2016-05-03 16.06.03.jpg (24KB - 300 downloads)
2016-05-03 16.47.23.jpg (25KB - 310 downloads)
2016-05-03 16.47.59.jpg (24KB - 325 downloads)
|
|
| |
|
Expert
Posts: 2634
Location: Minor Hill, TN | I have the day off work I plan to go down to the garage and do more work on the trunk floor and get rid of the rust . I will also talk more photos of the progress and post then here after I down load them on the computer. I am only getting 1 day off for right now but when I get offered that OT I take it . |
|
| |
|
Expert 5K+
Posts: 5006
| wire brush? that's a lot of elbow grease.
Or a grinder and a wire wheel? |
|
| |
|
Expert
Posts: 2634
Location: Minor Hill, TN | It sure is hell is but by me doing some of this I am saving my dad some other work. Its also giving me something to do . I got to get to work on the car I am taking my tablet down so I can take the photos. I will be back in a few hours I might even do a video. Oh by the way if any of you tell me to get to work on this car you are more than welcome to come and help
Edited by 1961plymouthfury 2016-05-10 5:37 PM
 (2016-05-10 15.06.10.jpg) (2016-05-10 15.06.10.jpg)
 (2016-05-10 15.06.17.jpg) (2016-05-10 15.06.17.jpg)
 (2016-05-10 15.55.28.jpg) (2016-05-10 15.55.28.jpg)
 (2016-05-10 15.32.57.jpg) (2016-05-10 15.32.57.jpg)
 (2016-05-10 15.41.31.jpg) (2016-05-10 15.41.31.jpg)
 (2016-05-10 15.55.13.jpg) (2016-05-10 15.55.13.jpg)
 (2016-05-10 15.32.45.jpg) (2016-05-10 15.32.45.jpg)
Attachments
----------------
2016-05-10 15.06.10.jpg (23KB - 314 downloads)
2016-05-10 15.06.17.jpg (23KB - 300 downloads)
2016-05-10 15.55.28.jpg (20KB - 306 downloads)
2016-05-10 15.32.57.jpg (24KB - 311 downloads)
2016-05-10 15.41.31.jpg (24KB - 307 downloads)
2016-05-10 15.55.13.jpg (28KB - 314 downloads)
2016-05-10 15.32.45.jpg (25KB - 307 downloads)
|
|
| |
|
Expert
Posts: 2634
Location: Minor Hill, TN | To day I spent about an hour and a half probably more working on the trunk of my '61. I used 40 grit sand paper and a wire brush. I know there is more to do .
Here are some photos sorry about the condition I used my vivitar camera I did use the flash
 (2010-01-01 00.02.42.jpg) (2010-01-01 00.02.42.jpg)
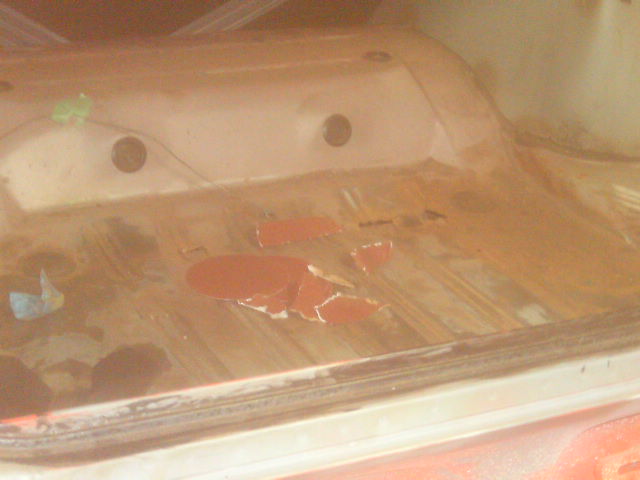 (2010-01-01 00.03.12.jpg) (2010-01-01 00.03.12.jpg)
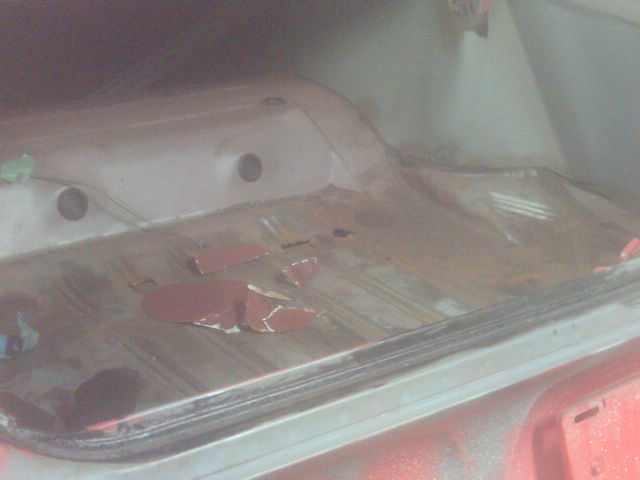 (2010-01-01 00.05.44.jpg) (2010-01-01 00.05.44.jpg)
Attachments
----------------
2010-01-01 00.02.42.jpg (69KB - 260 downloads)
2010-01-01 00.03.12.jpg (71KB - 281 downloads)
2010-01-01 00.05.44.jpg (70KB - 275 downloads)
|
|
| |
|
Expert
Posts: 2634
Location: Minor Hill, TN | I did not do any more sanding today .My dad marked were the trunk needs to be cut and patchedi. I also purchased a quart of pot 15 I am sorry the next photo if blurry I moved it ipad by mistake .
Edited by 1961plymouthfury 2016-05-19 6:04 PM
 (IMG_20160519_161707.jpg) (IMG_20160519_161707.jpg)
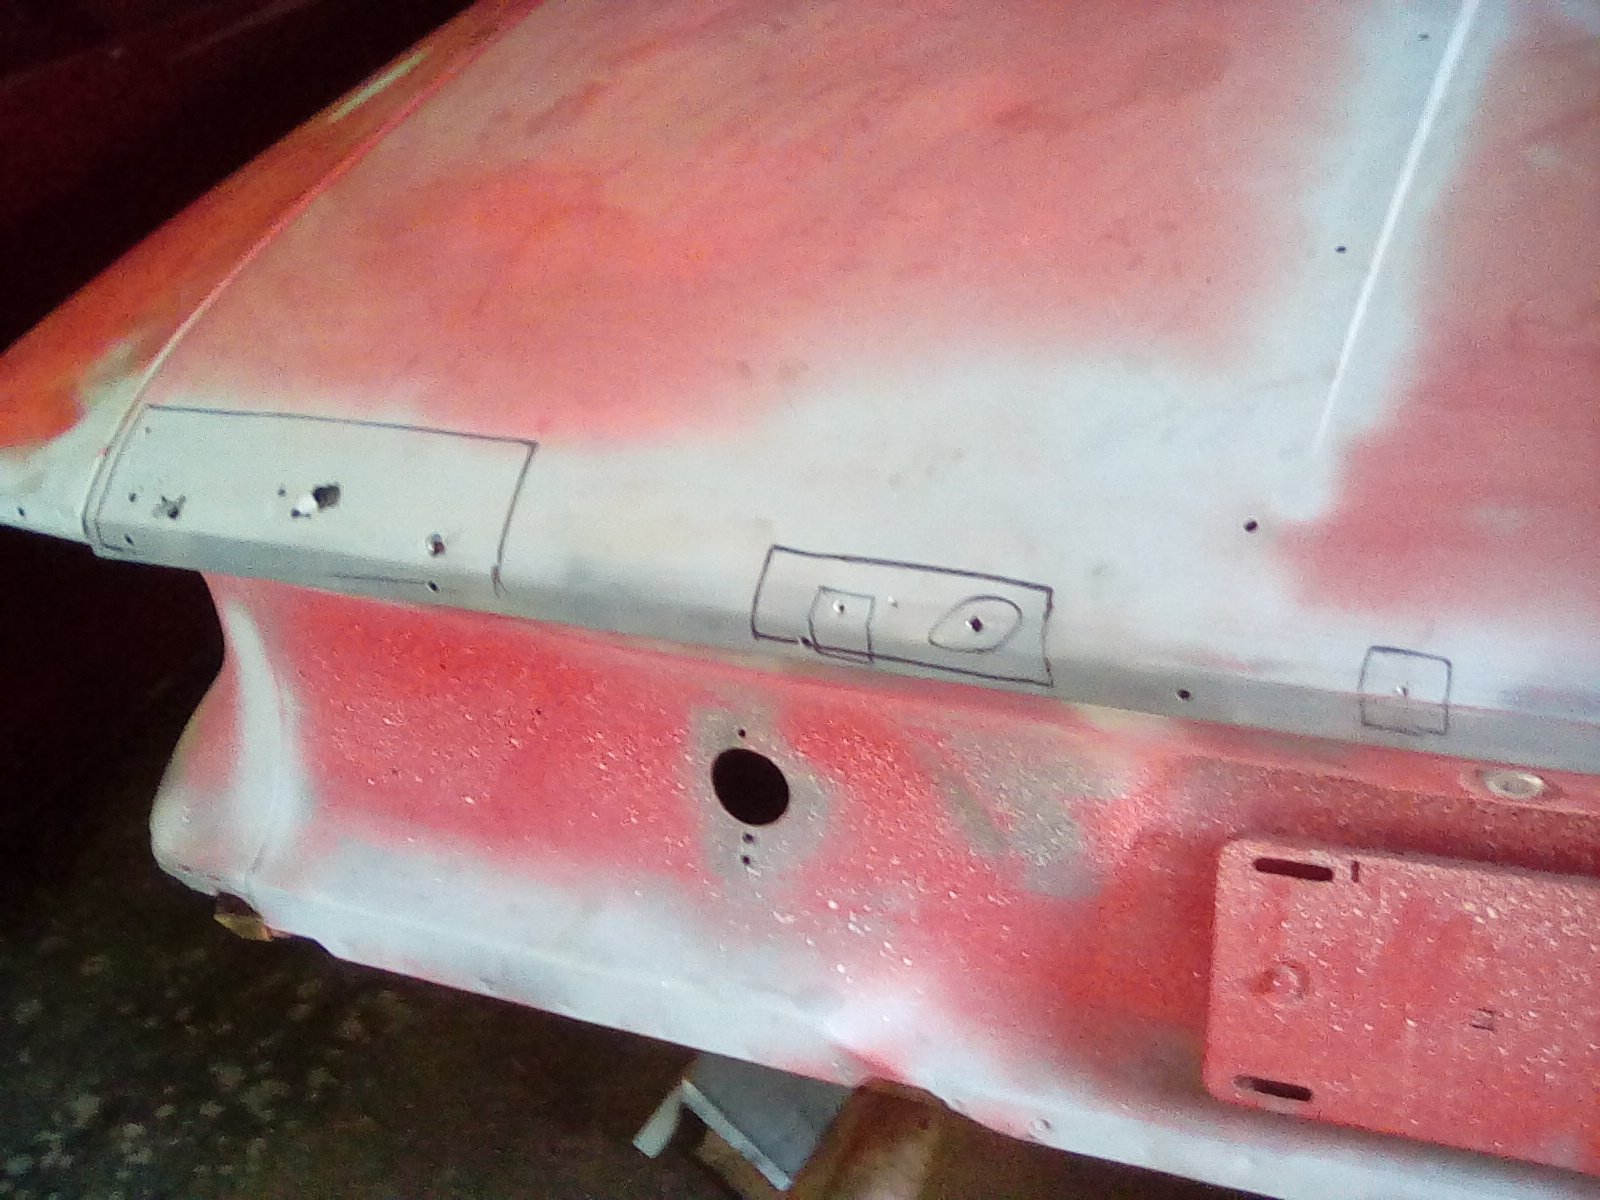 (IMG_20160519_161707.jpg) (IMG_20160519_161707.jpg)
 (IMG_20160519_161700.jpg) (IMG_20160519_161700.jpg)
Attachments
----------------
IMG_20160519_161707.jpg (278KB - 260 downloads)
IMG_20160519_161707.jpg (278KB - 267 downloads)
IMG_20160519_161700.jpg (214KB - 246 downloads)
|
|
| |
|
Expert
Posts: 2634
Location: Minor Hill, TN | I have more hard work down the road this car needs to be sand blasted also. My dad will be doing the cutting and welding of the metal like I said before in other posts it sure would be nice if Rear quarters were reproduced for this car. |
|
| |
|
Expert
Posts: 2634
Location: Minor Hill, TN | Hello again more progress the grinding of the rear fender Panel. The fitting of the left rear fender panel. I am sorry there are no photos yet .I did upload them on Facebook
Edited by 1961plymouthfury 2016-05-24 9:32 PM
|
|
| |
|
Expert
Posts: 2634
Location: Minor Hill, TN | My lap top is still down but the welding and fabrication has just started. I posted the photos on the face book page of the forward look.. I will Post the photos here unless some one does post them here which will be fine with me |
|
| |
|
Expert
Posts: 2634
Location: Minor Hill, TN | I apologize for not being able to post pictures of the latest progress. I found out the battery in my laptop died so I had to buy a new one.I tested it to see if it would come on without the battery and plugged in it did not.I tried to upload by using my tablet and no luck there. |
|
| |
|
Expert
Posts: 2634
Location: Minor Hill, TN | My new battery for my laptop is out for delivery so when I get the battery installed I will download the photos of the progress and post them here.
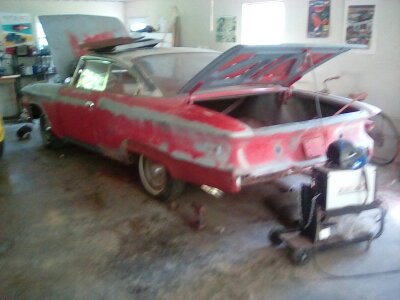 (2016-05-24 15.40.09.jpg) (2016-05-24 15.40.09.jpg)
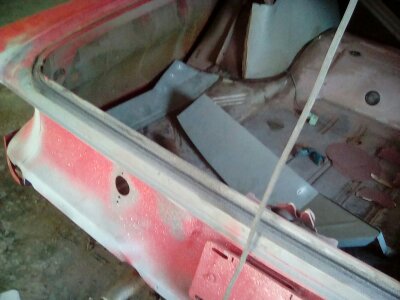 (2016-05-24 15.41.11.jpg) (2016-05-24 15.41.11.jpg)
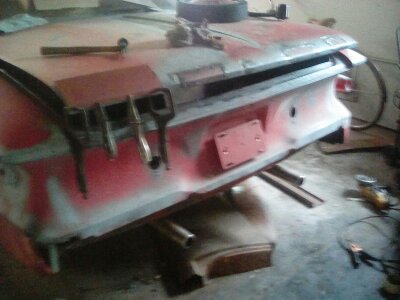 (2016-06-04 10.05.54.jpg) (2016-06-04 10.05.54.jpg)
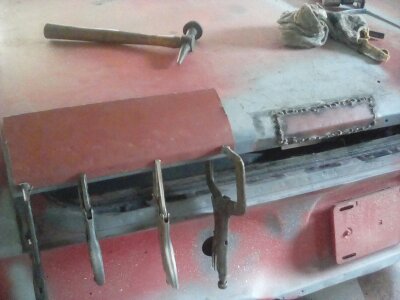 (2016-06-04 10.06.02.jpg) (2016-06-04 10.06.02.jpg)
 (2016-06-04 10.06.10.jpg) (2016-06-04 10.06.10.jpg)
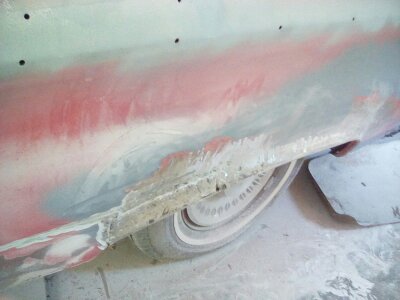 (2016-05-24 14.11.57.jpg) (2016-05-24 14.11.57.jpg)
Attachments
----------------
2016-05-24 15.40.09.jpg (23KB - 247 downloads)
2016-05-24 15.41.11.jpg (24KB - 224 downloads)
2016-06-04 10.05.54.jpg (23KB - 229 downloads)
2016-06-04 10.06.02.jpg (22KB - 230 downloads)
2016-06-04 10.06.10.jpg (25KB - 224 downloads)
2016-05-24 14.11.57.jpg (18KB - 225 downloads)
|
|
| |
|
Expert
Posts: 2634
Location: Minor Hill, TN | I did some grinding before the welding and the fabrication started , I was told were I working on will need to be sand blasted. I was trying to find were I can do some work on the car. I will go down to the garage to see if any more welding and fabrication has been done if so I will take photos of the progress and post them later on. I am not allowed near the car while the welding is being done . My dad is using a Mig welder. I took a couple of more photos but they have not up loaded on the computer yet I will check back later and try to upload them. Please do not worry I was not in the garage when the welding was being done I was at work at the time
Edited by 1961plymouthfury 2016-06-14 11:07 AM
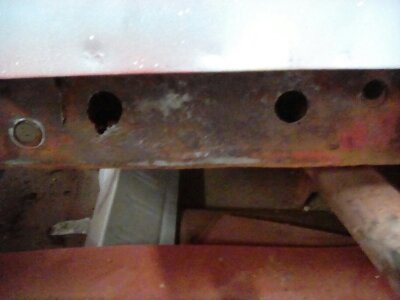 (2016-05-18 17.21.03.jpg) (2016-05-18 17.21.03.jpg)
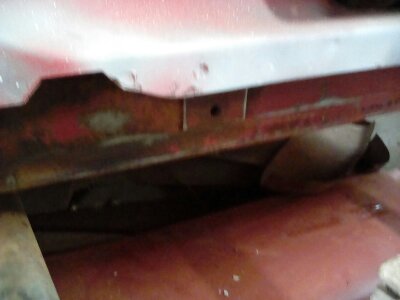 (2016-05-18 17.21.10.jpg) (2016-05-18 17.21.10.jpg)
 (2016-05-18 17.21.17.jpg) (2016-05-18 17.21.17.jpg)
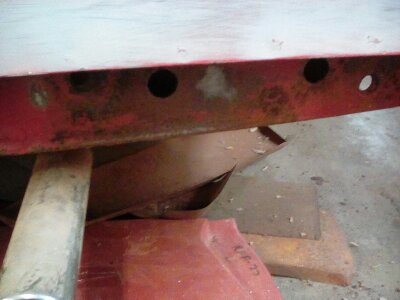 (2016-05-18 17.21.34.jpg) (2016-05-18 17.21.34.jpg)
Attachments
----------------
2016-05-18 17.21.03.jpg (16KB - 209 downloads)
2016-05-18 17.21.10.jpg (15KB - 204 downloads)
2016-05-18 17.21.17.jpg (19KB - 208 downloads)
2016-05-18 17.21.34.jpg (19KB - 212 downloads)
|
|
| |
|
Expert
Posts: 2634
Location: Minor Hill, TN | Here is some more progress. IF there is any more work done on the car I will take the photos later and post them. POR 15 was poured in were the metal was cut to stop the rust and a new patch was welded on. I would take photos of the progress but my dad does not want me in the garage while he is using the welder.
 (2016-06-14 09.34.46.jpg) (2016-06-14 09.34.46.jpg)
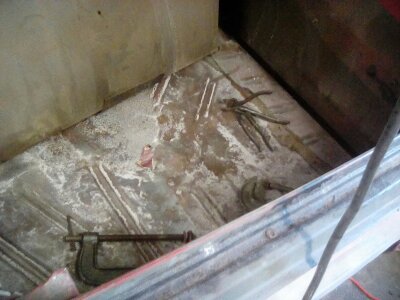 (2016-06-14 09.35.56.jpg) (2016-06-14 09.35.56.jpg)
Attachments
----------------
2016-06-14 09.34.46.jpg (18KB - 210 downloads)
2016-06-14 09.35.56.jpg (25KB - 201 downloads)
|
|
| |
|
Expert
Posts: 2634
Location: Minor Hill, TN | Hello again there is more progress but I went in the garage yesterday to see if I can see more but when I heard the welder being used I said it was time to get out . I went in today and I seen bondo were the patches were welded on. Things are really looking good and I hope 1 year to drive it to Carlisle for the Forward look event.
 (2016-06-21 10.29.03.jpg) (2016-06-21 10.29.03.jpg)
Attachments
----------------
2016-06-21 10.29.03.jpg (19KB - 205 downloads)
|
|
| |
|
Expert 5K+
Posts: 5006
| I hate rusted trunk lips... they are a pain |
|
| |
|
Expert
Posts: 2634
Location: Minor Hill, TN | Yes they are but I am not blaming the car. I believe what caused these cars to rust is insteading of using primer red dye was used before the paint was applied when the car was getting prepped for the paint while being assembled in the factory. This is the very last car my dad is going to restore for me. When this 1 is finished that is it |
|
| |
|
Expert
Posts: 2634
Location: Minor Hill, TN | My dad said my part of over its his turn now for the restoration of the car. I am going to feel bad I wont be able to help finish the restoration but I will take photos of the progress and post them here. He wants the body to be perfect before the black paint is applied and it will be a while before this takes place |
|
| |
|
Expert
Posts: 2634
Location: Minor Hill, TN | I bought a photo album. I will be taking and printing photos of the restoration of my '61. I will have a photo of the delivery, arrival at Stephens performace the buffing installing of the interior the events I did and the restoration, I figured it would not be a bad idea to show the restoration when I take the car to shows . I know there is more to do on the car but like I said I am going to feel bad I wont be able to help my dad any more. I wish there was more I can do to help.
 (2016-06-28 16.43.49.jpg) (2016-06-28 16.43.49.jpg)
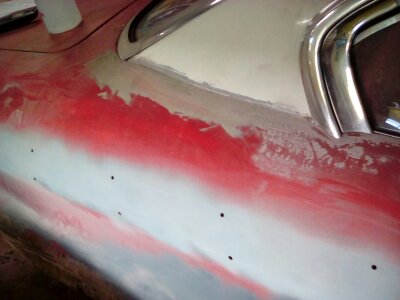 (2016-06-28 16.44.38.jpg) (2016-06-28 16.44.38.jpg)
Attachments
----------------
2016-06-28 16.43.49.jpg (26KB - 188 downloads)
2016-06-28 16.44.38.jpg (19KB - 192 downloads)
|
|
| |
|
Expert
Posts: 2634
Location: Minor Hill, TN | I have started putting a photo album together . I am starting with photos of the other '61 do not worry I am not putting photos of the other car after it burned up. I am only doing photos of the '61 at events and cruise ins and parades. The current 1 I am starting with the delivery , arrival, installation of the seats and carpet , the events I did before the restoration and photos of the restoration and after its finished but it will be a while before my dad and I are at the finish line.
I had some more progress done on the car here are some more photos. I will take more when there is more work done on the car . This is not my work my dad did this part in the photos I have taken. There will need to be more sanding done in these photos . I have seen at shows were other car owners took a photos and made a photo album of the restoration of their classic car
Edited by 1961plymouthfury 2016-07-01 11:44 AM
 (2016-07-01 09.59.24.jpg) (2016-07-01 09.59.24.jpg)
 (2016-07-01 10.00.04.jpg) (2016-07-01 10.00.04.jpg)
 (2016-07-01 10.00.47.jpg) (2016-07-01 10.00.47.jpg)
 (2016-07-01 10.02.36.jpg) (2016-07-01 10.02.36.jpg)
Attachments
----------------
2016-07-01 09.59.24.jpg (23KB - 183 downloads)
2016-07-01 10.00.04.jpg (18KB - 179 downloads)
2016-07-01 10.00.47.jpg (16KB - 181 downloads)
2016-07-01 10.02.36.jpg (24KB - 183 downloads)
|
|
| |
|
Expert
Posts: 2634
Location: Minor Hill, TN | My dad did some more sanding in the same spot. I took some photos of the progress after he worked on it. I did not want to get sand dust on me . I still feel bad that my part with the restoration is over. This would also give me something to do. Here are some more photos of the restoration
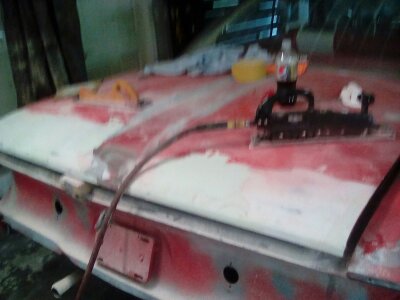 (2016-07-02 10.41.15.jpg) (2016-07-02 10.41.15.jpg)
 (2016-07-02 10.41.55.jpg) (2016-07-02 10.41.55.jpg)
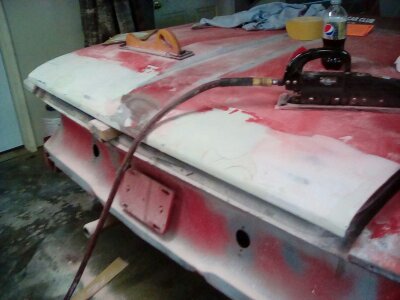 (2016-07-02 10.42.16.jpg) (2016-07-02 10.42.16.jpg)
Attachments
----------------
2016-07-02 10.41.15.jpg (20KB - 179 downloads)
2016-07-02 10.41.55.jpg (18KB - 186 downloads)
2016-07-02 10.42.16.jpg (24KB - 187 downloads)
|
|
| |
|
Expert
Posts: 2634
Location: Minor Hill, TN | I took some more photos of the progress. I did not want to use alot of bondo but some one I know who owns a body shop advised me not to be afraid of bondo. When I said I feel bad not being able to help anymore I was told let my dad finish the car., I said OK but I will take the photos of the progress when there is more done. When the car is done I will have a photo album in the trunk for people to look at when I am at a mopar or an open car show.
Edited by 1961plymouthfury 2016-07-09 12:46 PM
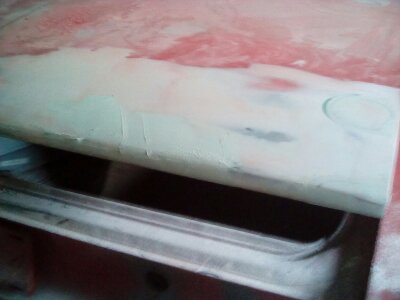 (2016-07-09 11.11.50.jpg) (2016-07-09 11.11.50.jpg)
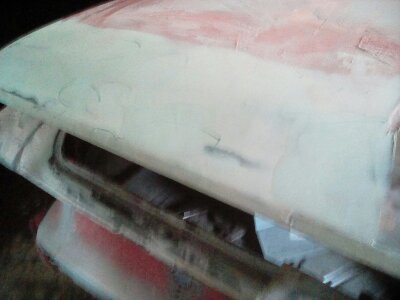 (2016-07-09 11.12.05.jpg) (2016-07-09 11.12.05.jpg)
 (2016-07-09 11.12.22.jpg) (2016-07-09 11.12.22.jpg)
Attachments
----------------
2016-07-09 11.11.50.jpg (16KB - 181 downloads)
2016-07-09 11.12.05.jpg (17KB - 184 downloads)
2016-07-09 11.12.22.jpg (19KB - 176 downloads)
|
|
| |
|
Expert
Posts: 2634
Location: Minor Hill, TN | Well I went down the garage and took a peek there was more work done on my car. My dad did some more sanding and primered the area were the trunk is being worked on . I took photos of the progress with my tablet.
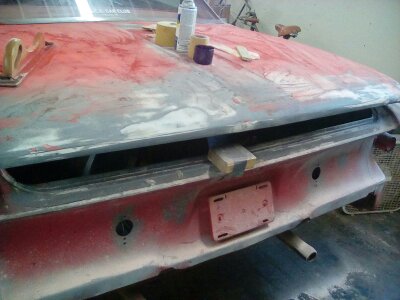 (2016-07-12 09.29.34.jpg) (2016-07-12 09.29.34.jpg)
 (2016-07-12 09.30.13.jpg) (2016-07-12 09.30.13.jpg)
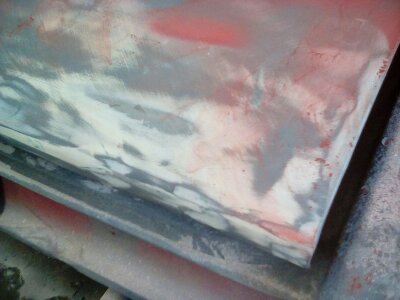 (2016-07-12 09.30.20.jpg) (2016-07-12 09.30.20.jpg)
 (2016-07-12 09.30.44.jpg) (2016-07-12 09.30.44.jpg)
 (2016-07-12 09.30.58.jpg) (2016-07-12 09.30.58.jpg)
Attachments
----------------
2016-07-12 09.29.34.jpg (24KB - 182 downloads)
2016-07-12 09.30.13.jpg (32KB - 187 downloads)
2016-07-12 09.30.20.jpg (21KB - 191 downloads)
2016-07-12 09.30.44.jpg (23KB - 178 downloads)
2016-07-12 09.30.58.jpg (21KB - 177 downloads)
|
|
| |
|
Expert
Posts: 2634
Location: Minor Hill, TN | How do I change the title of this folder from the restoration has started to the Restoration of a 1961 Plymouth fury?
|
|
| |
|
Expert 5K+
Posts: 5006
| don't think you can. |
|
| |
|
Expert
Posts: 2634
Location: Minor Hill, TN | OK thanks for answering but I wanted to change the title but if I cannot oh well but it never hurts to ask
Edited by 1961plymouthfury 2016-07-29 10:53 AM
|
|
| |
|
Expert
Posts: 2003
Location: Branson, MO | You can start a new thread with a different title.
|
|
| |
|
Expert
Posts: 2634
Location: Minor Hill, TN | Thank you for telling me |
|
| |
|
Expert
Posts: 2634
Location: Minor Hill, TN | Thank you for the suggestion on starting a new folder . I might as well keep going with the title I started with. My dad is trying v figure out how to fabricate the metal on the rest of the drivers rear fender panel and some of the passenger side. I will be honest if I had the cash I would take it to a restoration shop. There is 1 close to my place of employment in Athens, AL. I hear the owner is expensive but good at what he does. |
|
| |
|
Expert
Posts: 2634
Location: Minor Hill, TN | I am going to see if more progress has started if there is I will take photos and post them if not . I will say no more progress yet. I checked there is none. |
|
| |
|
Expert
Posts: 2634
Location: Minor Hill, TN | I have thought about calling it quits on the car but decided not to because I have come along way on it but it can be stressful at times. It sure as hell would be nice if more body panels were reproduced especially the rear fender panels. I remember hearing a fellow pace car club member telling my dad if you need help fabricating the metal you let me know. My dad helped him out on 1 of his cars a while back I believe the car was a 1946 plymouth. |
|
| |
|
Expert 5K+
Posts: 5006
| most of these cars are too rare to make body panels for. |
|
| |
|
Expert
Posts: 2634
Location: Minor Hill, TN | That is so true but it never hurts to suggest it.
|
|
| |
|
Expert
Posts: 2634
Location: Minor Hill, TN | the folder has continued on the restoration of a 1961 plymouth part 2 |
|
| |