|
|
Expert
Posts: 1530
  
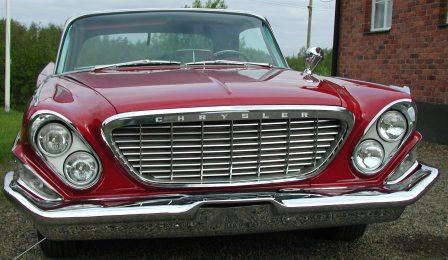
Location: ZH, Switzerland | Now it's mine. I know - there will be truck loads of work to rebuild it to the state this car deserves. Happy Motoring! Dieter http://www.ebay.com/itm/301508105713 |
|
| |
|
  
Location: The Mile High City | That will be a nice F! Congratulations, Dieter. |
|
| |
|
Expert 5K+
Posts: 7393
Location: northern germany | congratulations! looks like a nice car.
i do not know if it matters to you but if the car was build in january and the engine january 22 its probably not the original engine. usually the so date and engine date are about 30 days apart.
at least on regular 60/61 fl's. |
|
| |
|
Elite Veteran
Posts: 982
Location: Upper Hunter NSW Australia | ...........
Here's the click and go link
http://www.ebay.com/itm/1960-Chrysler-300-034-F-034-Letter-Car-Barn...
............ |
|
| |
|

Expert
Posts: 1730
Location: Michigan | Congrats D! |
|
| |
|

Board Moderator & Exner Expert 10K+
Posts: 13045
Location: Southern Sweden - Sturkö island | What a great surprise Dieter! Congrats to the "new" F car - the top of the 300's |
|
| |
|
Elite Veteran
Posts: 1172
Location: Georgia | Congrats Dieter! I lusted over that auction as well, and I'm glad she's going to a good home.
Keep us updated with your progress.
Pete |
|
| |
|
Location: North Australia | You lucky Dog Deiter! Now you have a car from both ends of the FL era 
Well done, great score.
Steve. |
|
| |
|

Expert 5K+
Posts: 7806
Location: Williams California | Congratulations, Dieter, Looks like a good car to work with!!! |
|
| |
|
Expert
Posts: 1530
Location: ZH, Switzerland | Hola all Thank you very much for all your coments and congratulations. I appreciate it very much. Today I contacted the seller with my wish to get a picture of the license plate at the a pillar and the engine number at the boss above the water pump. As a 12 to 13 year old I was more than one time passenger in my 25 yo neighbors his wonderful red '67 Plymouth Fury III 2d hardtop (383 Super Commando engine w/ dual exhaust). It was that impressive to me that I'm addicted in Mopars, now especially FLK mopars. Happy Motoring! Dieter |
|
| |
|
Expert
Posts: 1530
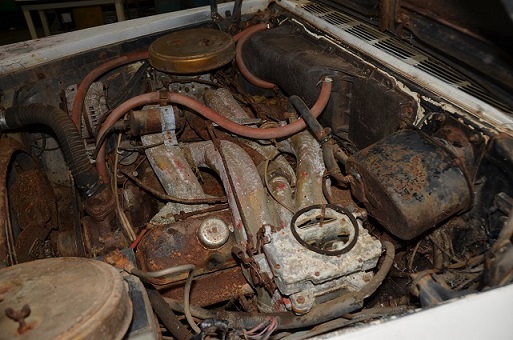
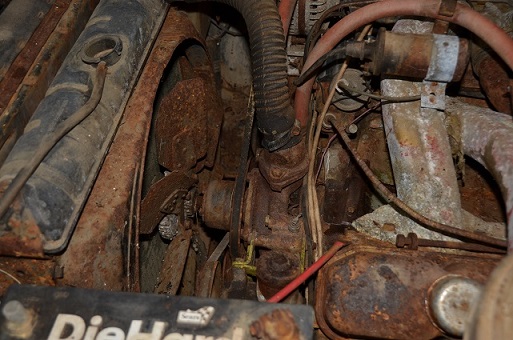
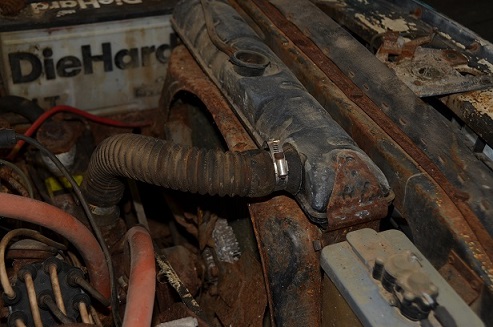
Location: ZH, Switzerland | Early this morning I got the link to the photobucket basket with about 140 pictures. From what I can on the parts desk and the pictures of the eninge bay it's almost for sure that the engine is frozen. The complete engine and carburettors are corroded. The hand brake drum has been removed as well as the lower cover of the torque converter and the starter motor with burnt wires. it needs a full restoration for sure. Happy Motoring! Dieter |
|
| |
|
Expert
Posts: 1530
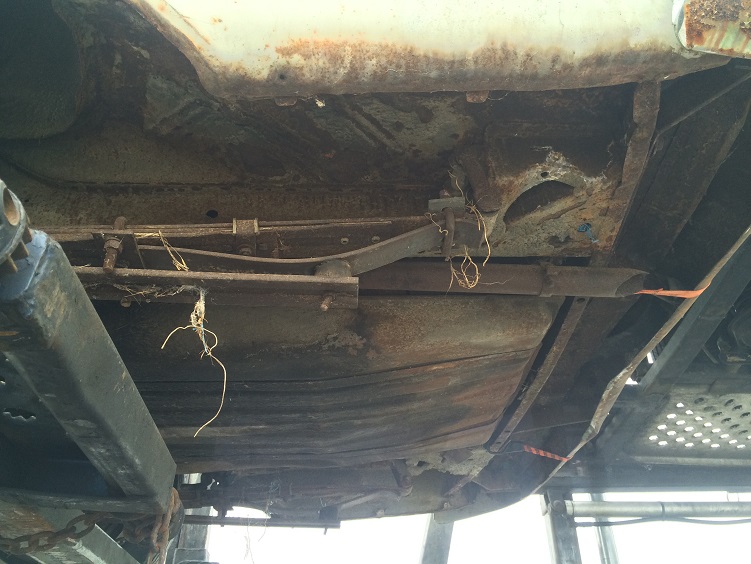
Location: ZH, Switzerland | 1960fury - 2015-02-04 12:47 AM congratulations! looks like a nice car. i do not know if it matters to you but if the car was build in january and the engine january 22 its probably not the original engine. usually the so date and engine date are about 30 days apart. at least on regular 60/61 fl's. You might be right. From the pictures I got I assume the engine was stored under clear sky with no protection. The seller confirmed that the engine doesn't turn over. Happy Motoring! Dieter
 (080_zps7bf8c6a6.jpg) (080_zps7bf8c6a6.jpg)
 (082_zps0b080826.jpg) (082_zps0b080826.jpg)
 (084_zpsf5cc940f.jpg) (084_zpsf5cc940f.jpg)
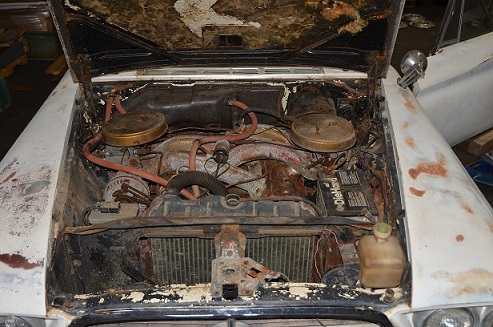 (086_zpsd959f6c3.jpg) (086_zpsd959f6c3.jpg)
Attachments
----------------
 080_zps7bf8c6a6.jpg (132KB - 953 downloads) 080_zps7bf8c6a6.jpg (132KB - 953 downloads)
082_zps0b080826.jpg (128KB - 862 downloads)
084_zpsf5cc940f.jpg (114KB - 871 downloads)
086_zpsd959f6c3.jpg (132KB - 881 downloads)
|
|
| |
|
Member
Posts: 43
Location: Småland Sweden | Congrat´s to a great car at a great price! Even if it needs some tune up  I am also a lucky owner of a 300 F. I am also a lucky owner of a 300 F.
Jan in Sweden (friend to Sven) |
|
| |
|
Expert 5K+
Posts: 7206
Location: Victoria, BC, on Vancouver Island, Canada | Great find, at a good price for a restorable 300-F.
For what it's worth, the Chrysler 300 Club has a free download of the 1960 Chrysler and Imperial Ross Roy Data Book, but for some reason it doesn't cover the 300.
The link is here http://chrysler300clubinc.com/1960rossroy.pdf |
|
| |
|
Exner Expert 19,174 posts. Neil passed away 18 Sep 2015. You will be missed, Neil!
Posts: 19146
Location: bishop, ca | Dieter, on your 67 Plymouth, did it have the rounded 'Sports 'top, or did it have the angled Pagoda-type roof?
Those were nice, well built automobiles!!
Do you have any photos of it? |
|
| |
|
Expert
Posts: 1530
Location: ZH, Switzerland | d500neil - 2015-02-06 9:54 PM Dieter, on your 67 Plymouth, did it have the rounded 'Sports 'top, or did it have the angled Pagoda-type roof? Those were nice, well built automobiles!! Do you have any photos of it? Hi Neil I'm afraid I do not have a picture. At that time I was a boy and the neighbor was a young adult. It was his car. Yes the roof was like every MoPar (Ply/Do) in 1967 had. Even the 1967 Dodge Coronet had the same roofline. I just could have a look at e.g. classic car trader to see if I'll find a similar car. Happy Motoring Dieter
Edited by di_ch_NY56 2015-02-08 4:43 AM
|
|
| |
|
Expert
Posts: 1530
Location: ZH, Switzerland | imopar380 - 2015-02-06 7:41 PM Great find, at a good price for a restorable 300-F. For what it's worth, the Chrysler 300 Club has a free download of the 1960 Chrysler and Imperial Ross Roy Data Book, but for some reason it doesn't cover the 300. The link is here http://chrysler300clubinc.com/1960rossroy.pdfHello Ian Thank you very much for your information (Ross Roy Data Book). It's very helpful. I assume it's possible that it doesn't cover the 300 F because the 300 F was IMHO not available from the very beginning of the model year. I was keeping an eye to your Saratoga as well for a certain time. The trigger to wake up my interest on a 1960 Chrysler woke up when I had the opportunity to drive Sven's Saratoga behind the steering wheel. When I was a boy decades back I was passing a 1961 or 1962 Chrysler everey Wednesday during school time while walking to my Grand Mam's to get lunch. Long time at youtube I was watching 1961 and 1961 hardtops. For me it was sunny clear to get a hardtop again. As time was passing by the front end of the 1960 became more and more attractive. Finally the F became my dream car. I don't know when exactly, but not many weeks ago I told my friend (Sven) that I know I'll get a 300 F within a time span of 10 years. How I got the F I could write PM if you're interested. Kind regards Dieter |
|
| |
|
Expert
Posts: 1530
Location: ZH, Switzerland | 60Mopars - 2015-02-06 3:34 PM Congrat´s to a great car at a great price! Even if it needs some tune up I am also a lucky owner of a 300 F. Jan in Sweden (friend to Sven ) Hello Jan Thank you very much for your message. I assume it's your's F (Looking for information about a white F conv. from Texas)? During the last call we had (Sven and I) whe were eloberating the way how to get my Letter back to the road. At this time he told me about his project and within this he mentioned you as an owner of an F as well. I'm more than very impressed about the work of Jan Fridberg. There is not that much rust preset as on convertibles of the same model year. I assume the trunk floor needs to be replaced as well as the area of the floor very close to the rockers. Who knows if there would be an opportunity to meet you. Kind regards Dieter |
|
| |
|
Expert
Posts: 1530
Location: ZH, Switzerland | Hola friends I reduced the size of some more pictures. What I got out as well is that my Letter was owned by a Doctor in 1974. The title was belonging to a guy in Pachevo and issued in 2008. The actual seller bought it May 2014. Happy Motoring! Dieter
 (022_zps73f96fe7.jpg) (022_zps73f96fe7.jpg)
 (025_zps585b9272.jpg) (025_zps585b9272.jpg)
 (027_zps39dacefc.jpg) (027_zps39dacefc.jpg)
 (038_zps46d6b956.jpg) (038_zps46d6b956.jpg)
 (040_zpse8b741dd.jpg) (040_zpse8b741dd.jpg)
 (047_zpsf725c086.jpg) (047_zpsf725c086.jpg)
 (048_zps0cdf0b8d.jpg) (048_zps0cdf0b8d.jpg)
 (053_zpsc45f036f.jpg) (053_zpsc45f036f.jpg)
Attachments
----------------
022_zps73f96fe7.jpg (147KB - 919 downloads)
025_zps585b9272.jpg (149KB - 890 downloads)
027_zps39dacefc.jpg (112KB - 845 downloads)
038_zps46d6b956.jpg (127KB - 851 downloads)
040_zpse8b741dd.jpg (149KB - 825 downloads)
047_zpsf725c086.jpg (142KB - 860 downloads)
048_zps0cdf0b8d.jpg (129KB - 849 downloads)
053_zpsc45f036f.jpg (141KB - 813 downloads)
|
|
| |
|
Expert
Posts: 1530
Location: ZH, Switzerland | Finally it's completely mine. Today I got the confirmation of the bank wire transfer. The transportation I ordered. Now it's just a matter of time until my Letter will be at me. Happy Motoring! Dieter |
|
| |
|
Expert 5K+
Posts: 7206
Location: Victoria, BC, on Vancouver Island, Canada | di_ch_NY56 - 2015-02-08 12:44 AM
imopar380 - 2015-02-06 7:41 PM Great find, at a good price for a restorable 300-F. For what it's worth, the Chrysler 300 Club has a free download of the 1960 Chrysler and Imperial Ross Roy Data Book, but for some reason it doesn't cover the 300. The link is here http://chrysler300clubinc.com/1960rossroy.pdfHello Ian Thank you very much for your information (Ross Roy Data Book). It's very helpful. I assume it's possible that it doesn't cover the 300 F because the 300 F was IMHO not available from the very beginning of the model year. I was keeping an eye to your Saratoga as well for a certain time. The trigger to wake up my interest on a 1960 Chrysler woke up when I had the opportunity to drive Sven's Saratoga behind the steering wheel. When I was a boy decades back I was passing a 1961 or 1962 Chrysler everey Wednesday during school time while walking to my Grand Mam's to get lunch. Long time at youtube I was watching 1961 and 1961 hardtops. For me it was sunny clear to get a hardtop again. As time was passing by the front end of the 1960 became more and more attractive. Finally the F became my dream car. I don't know when exactly, but not many weeks ago I told my friend (Sven) that I know I'll get a 300 F within a time span of 10 years. How I got the F I could write PM if you're interested. Kind regards Dieter
I always wanted a 300-F as well, but I am very happy with the Saratoga, and was not ready to do a complete restoration of a car, and nice 300-Fs was out of my price range. SO as it turned out, the Saratoga fit my purposes, with some minor and medium issues to deal with, but no body work or upholstery needed. It's still a work in progress but I enjoy driving it , and have put 22,000 miles on it since 2008. We'll be taking it on another road trip this summer to a WPC Meet in Oregon, in the US. about a day's drive from here. |
|
| |
|
Expert
Posts: 1530
Location: ZH, Switzerland | Hello Ian Thank you very much for your answer. Always good luck with your Saratoga - I know it's very similar to the 300 F (with the exception of the trim, interior and the engine). Dieter |
|
| |
|
Expert
Posts: 1530
Location: ZH, Switzerland | I'm asking for a drive shaft for my Letter car. Thre is a drive shaft for the 1960 Windsor, Saratoga and New Yorker with the parts number 1856 933 that doesn't fit. For PP2, PD4 /w 85 manual trans, /w high performance, Sub., PP2, PD4, /w 3-spd Auto. Trans. Sub., PCH-300, All 1856 931. This drive shaft fits to my Letter car and Plymouth, DOdge with Sonoramic intake system. I wish to get a drive shaft with the 1856 933 number. Thank you. Dieter
 (1960 parts catalog 16-02-1 drive shaft.jpg) (1960 parts catalog 16-02-1 drive shaft.jpg)
Attachments
----------------
1960 parts catalog 16-02-1 drive shaft.jpg (19KB - 892 downloads)
|
|
| |
|
Expert
Posts: 1530
Location: ZH, Switzerland | I'm still seeking a drive shaft for my Letter. It's really awful - nobody answered. For the drive shaft I got some more information regarding the cars used at.
- 1960 Dodge D500 (/w 383 and ram induction)
- 1960 Plymouth with the Sonoramic commando (383 /w ram induction)
- 1960 Chrysler 300 F
- 1961 Plymouth /w 318 and Torque Flite or heavy duty 3 speed manual transmission - but beware there are to different sizes of B/T (I guess) used under the same parts number (2 3/4" and 3
1/4"). The 1961 Plymouth /w Power Flite used the standard 1960 drive shaft (1856 933 instead of 1856 931 like the 3 speed auto and 3 speed heavy duty manual).
I think there must be some cars lying around...
BTW the u-joint is the same on all 1960 cars from ChryCo. I assume the difference is the diameter of the drive shaft or the thickness of the wall of the drive shaft. I assume the 1960 Chrysler
used the 3 1/4" B/T. Kind regards Dieter |
|
| |
|
Expert
Posts: 1530
Location: ZH, Switzerland | The drive shaft I'm seeking (1856 931) was used in 1959 as well. Following cars with this configuration were equipped with the same drive shaft. MP2 Plymouth with V8 engines (Belvedere, Savoy), MP2 Sub (Belvedere, Savoy Suburban) with V8 and Torqueflite MD2 Dodge Coronet with V8 and Torqueflite MD3 Dodge Royal, Custom Royal all or with Powerflite MS1 De Soto Firesweep with V8 and Powerflite All in all I assume there were few thousends of this drive shaft with the 3 1/4" b/t produced. I'm rather sure some of these cars are lying around in junk jards, e.g. with no engine and eventually no transmission but with the drive shaft still in the car. Kind regards Dieter
Edited by di_ch_NY56 2015-03-02 3:19 PM
 (1959 parts catalog 16-02-1 drive shaft.jpg) (1959 parts catalog 16-02-1 drive shaft.jpg)
 (1961 parts cataloig 16-02-1 drive shaft.jpg) (1961 parts cataloig 16-02-1 drive shaft.jpg)
Attachments
----------------
1959 parts catalog 16-02-1 drive shaft.jpg (15KB - 840 downloads)
1961 parts cataloig 16-02-1 drive shaft.jpg (29KB - 892 downloads)
|
|
| |
|
Expert
Posts: 2905
Location: little rock, AR | I have a '61 4dr sedan 318/PF car. Will this car have the shaft your looking for??? |
|
| |
|
Expert
Posts: 1530
Location: ZH, Switzerland | oldwood - 2015-03-01 9:50 PM I have a '61 4dr sedan 318/PF car. Will this car have the shaft your looking for??? Hi Thank you for your response and answer. I'm afraid no, the '61 318/PF (Powerflite car) had a different drive shaft (1856 963) with the smaller ball/trunion. Kind regards Dieter
 (1961 parts cataloig 16-02-1 drive shaft big.jpg) (1961 parts cataloig 16-02-1 drive shaft big.jpg)
Attachments
----------------
1961 parts cataloig 16-02-1 drive shaft big.jpg (85KB - 913 downloads)
|
|
| |
|
Expert
Posts: 1530
Location: ZH, Switzerland | Since yesterday (March, Tuesday, 10th, 2015) 4:53 p.m. PST my Letter is on the way to NYC. Happy Motoring! Dieter |
|
| |
|
Board Moderator & Exner Expert 10K+
Posts: 13045
Location: Southern Sweden - Sturkö island | Great news Dieter, keep us updated |
|
| |
|
Expert
Posts: 1530
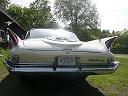
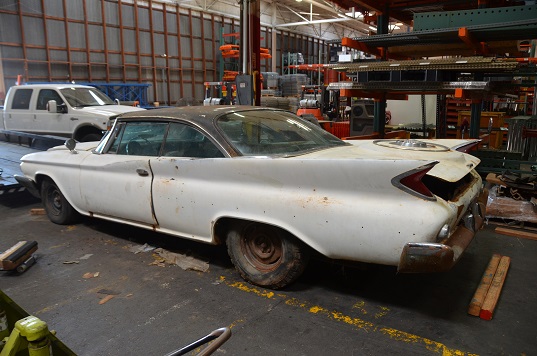
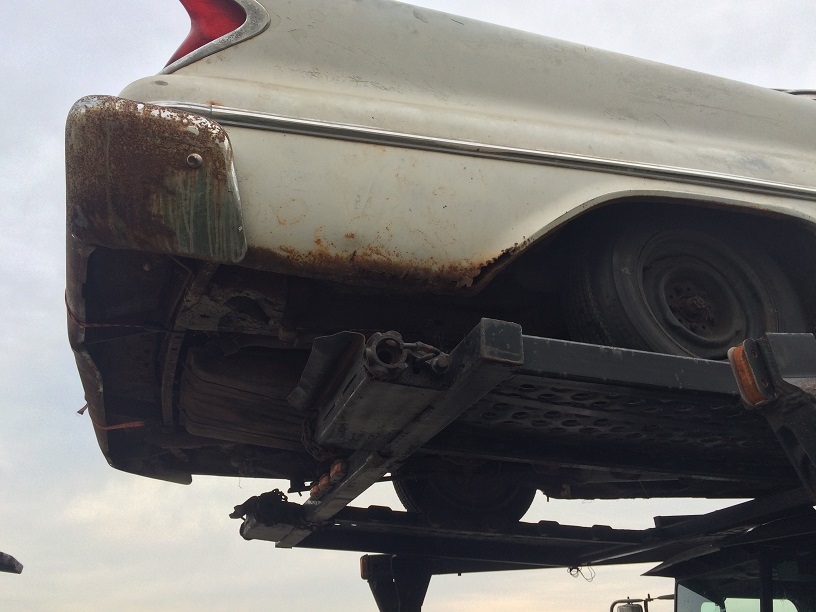
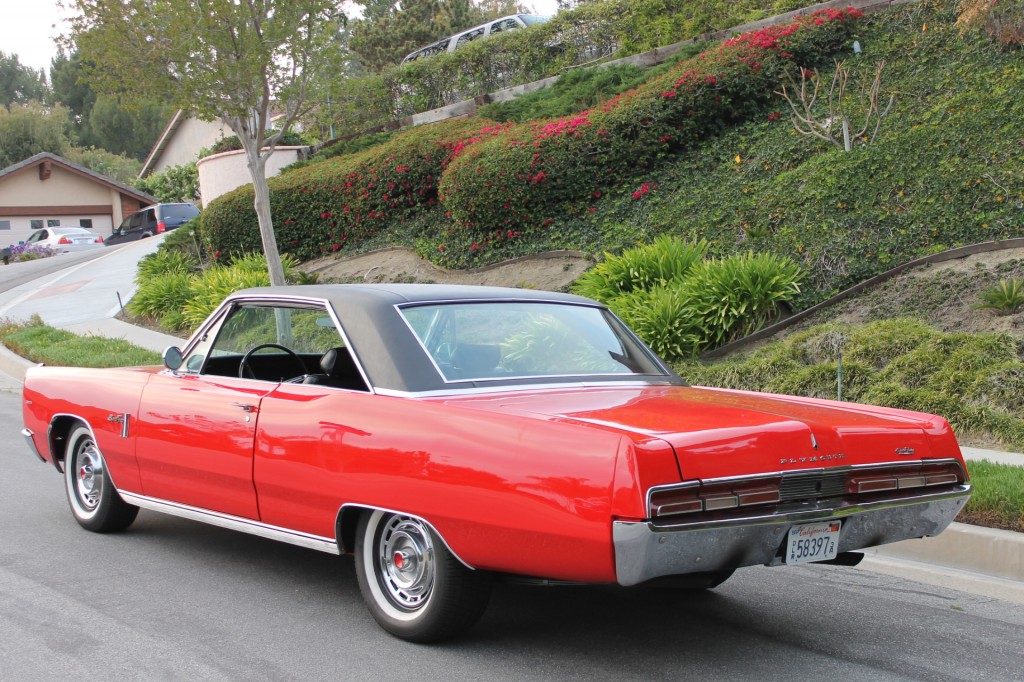
Location: ZH, Switzerland | I just had a phone call with a member of our forum. He was the meaning I purchased a convertible. It's not, it's a Coupe. I like the two door hardtop very much. I know it will be a long way to bring it back to close to concours state. But it's worth to do it. Happy Motoring! Dieter BTW: at the picture you could recognise 15 inch wheels at the rear axle. Big thank you to the seller who noticed it and replaced the wheels with the wheels of a 1965 L parts car with better tires.
Edited by di_ch_NY56 2015-03-11 4:13 PM
 (092_zpsd6175750.jpg) (092_zpsd6175750.jpg)
Attachments
----------------
092_zpsd6175750.jpg (132KB - 884 downloads)
|
|
| |
|
Expert
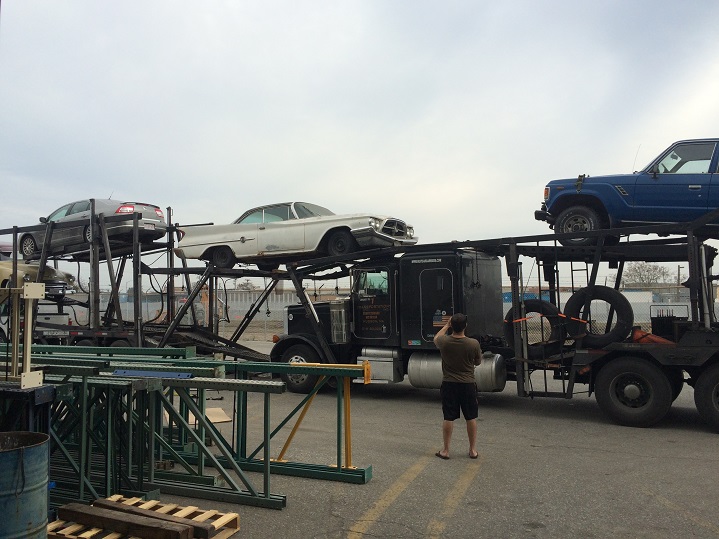
Posts: 1530
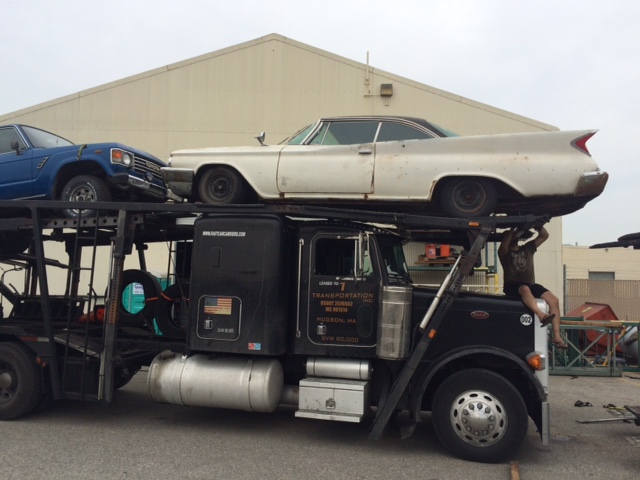
Location: ZH, Switzerland | I assume the car hauler follows mostly or directly the Interstate 80 from San Francisco to Newark/New York City. At the loading point my Letter was on the roof rack (top front position) if anybody would spot the car hauler. Any picture of car hauler or car spotters are highly appreciated. Thank you! Dieter
Edited by di_ch_NY56 2015-03-14 6:30 AM
|
|
| |
|
Expert
Posts: 1530
Location: ZH, Switzerland | This morning I got the message from the shipping company, that my Letter has arriven in NYC and is already loaded into a container. I'm waiting for pictures they promised. The departure of the vessel is scheduled for March, 25th --- this year . Happy Motoring! Dieter
 (image1.JPG) (image1.JPG)
Attachments
----------------
image1.JPG (98KB - 911 downloads)
|
|
| |
|
Expert 5K+
Posts: 8443
Location: Perth Australia | Must be very exciting for you
I might go down this road myself one day, but only if after the car purchase, I survive
My wife would not be happy
Wives arnt rare 
Good luck
|
|
| |
|
Expert
Posts: 1530
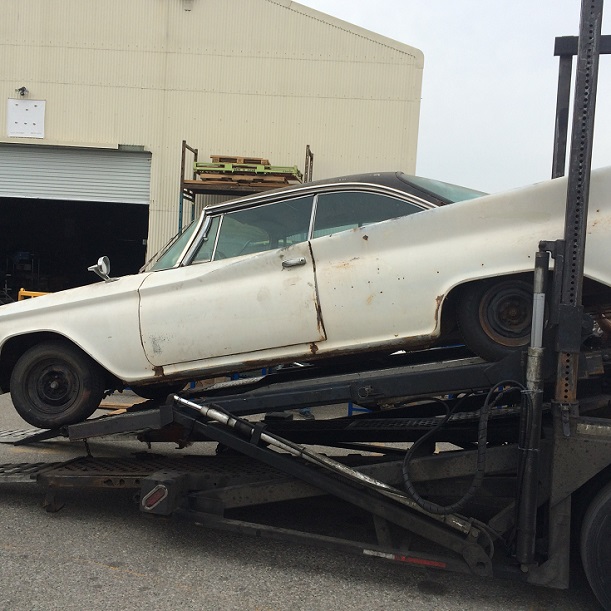
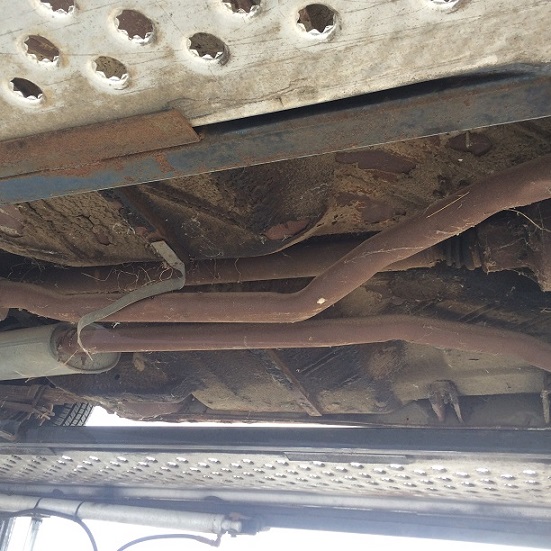
Location: ZH, Switzerland | Thank you Mike Today I got the link from the seller with the picture collection at photo bucket. From there I took some and resized it. I'm so happy I get it with a drive shaft. I looks like it's the stock drive shaft. Please enjoy the pictures Take care, Dieter
 (IMG_1102_zps2uux55b0.jpg) (IMG_1102_zps2uux55b0.jpg)
 (IMG_1106_zpseieaucw3.jpg) (IMG_1106_zpseieaucw3.jpg)
 (IMG_1110_zpsgfksfag3.jpg) (IMG_1110_zpsgfksfag3.jpg)
 (IMG_1114_zps1ns6wtdl.jpg) (IMG_1114_zps1ns6wtdl.jpg)
 (IMG_1119_zpsk0rghpyd.jpg) (IMG_1119_zpsk0rghpyd.jpg)
 (IMG_1122_zpsdeymt0h7.jpg) (IMG_1122_zpsdeymt0h7.jpg)
Attachments
----------------
IMG_1102_zps2uux55b0.jpg (127KB - 883 downloads)
IMG_1106_zpseieaucw3.jpg (128KB - 776 downloads)
IMG_1110_zpsgfksfag3.jpg (147KB - 817 downloads)
IMG_1114_zps1ns6wtdl.jpg (146KB - 820 downloads)
IMG_1119_zpsk0rghpyd.jpg (139KB - 852 downloads)
IMG_1122_zpsdeymt0h7.jpg (128KB - 815 downloads)
|
|
| |
|
Expert
Posts: 1530
Location: ZH, Switzerland | My Letter is on the vessel now since March 28th. The vessel heads to Bremerhaven in Germany where it should arrive at the end of calendar week 15. In Switzerland the manager of the shipping company (sea fright) expects it at the end of calender week 16 or beginning of calender week 17. Calendar week 17 is exactyl the week I planned to pick up my Beast (Chrysli) at Wizard's.... I hope I'll have a save ride back home (1500 km/ 932 mi within two days). From calendar week 23 on I got space in a storage location for both of my FLK cars. During my season holiday I plan to start with the disassemblage of the small parts like lights, bumpers, grille, radiator and so on... Happy Motoring! Dieter |
|
| |
|
Board Moderator & Exner Expert 10K+
Posts: 13045
Location: Southern Sweden - Sturkö island | Great news Dieter - I really look forward to see that car! |
|
| |
|

Expert
Posts: 2596
Location: Upplands Väsby, Sweden | Nice project 300F, ho you bought. Hope to see more pics when it comes home. |
|
| |
|
Expert
Posts: 1530
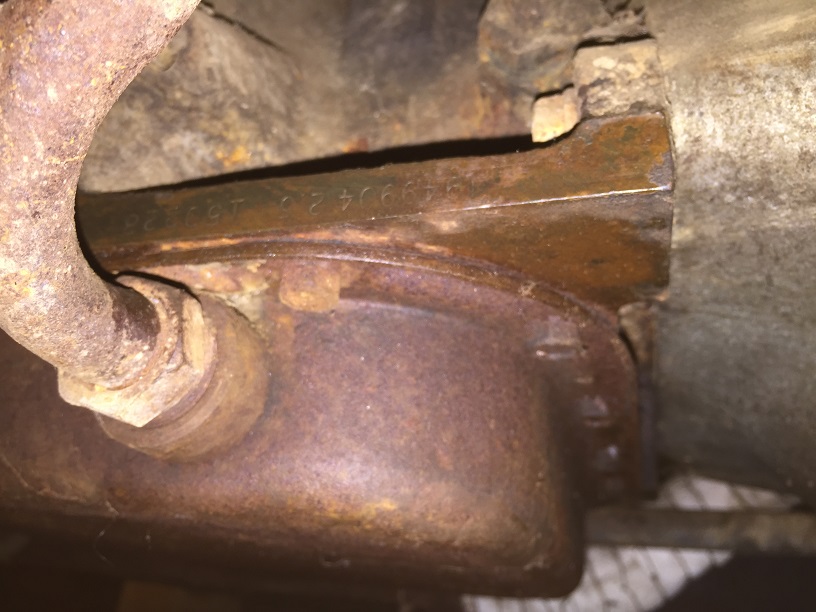
Location: ZH, Switzerland | Thank you very much to my friends in Sweden. Today - few minutes ago - I got the confirmation that my Letter would ride inside the container until it's in Basel. Even though the container will be unloaded from the vessel in Bremerhaven, Germany. Happy Easter Season! Dieter BTW: from the original sized pictures (e.g. 1110) I could recognise that even the starter motor is still attached to the bellhouse and that both exhaust pipes are looking more like cut than broken after the bandage. Nice to see are the lines of the transmission cooler forth and back to the transmission and - I've never saw a reinforced rear suspension on a 300 F like my Letter shows. The reinforcement looks more like from an Imperial or a station wagon with special order. I don't know if there was a special option available like that for a 300 F/G. I try to keep it like it is, but refreshed, freed from rust and recolored.
Edited by di_ch_NY56 2015-04-03 1:55 PM
|
|
| |
|
Member
Posts: 43
Location: Småland Sweden | I bet you are counting the days until you can pick it up. My F also has something similar on the rear springs. Don´t know if it´s some aftermarket stuff or not. Maybe you can take a look at my F when you´re going to Sven to pick up your 56? I live about an hour or so from Sven. My F is a coupé partially restored to a nice driver 25 years ago.
Happy Easter!
Jan |
|
| |
|
Expert
Posts: 2312
Location: Arizona | Part of that extra stuff is aftermarket helper springs.
http://www.amazon.com/Superior-11-1020-Helper-Spring-Capacity/dp/B0... |
|
| |
|
Expert
Posts: 1530
Location: ZH, Switzerland | 60Mopars - 2015-04-02 8:59 PM I bet you are counting the days until you can pick it up. My F also has something similar on the rear springs. Don´t know if it´s some aftermarket stuff or not. Maybe you can take a look at my F when you´re going to Sven to pick up your 56? I live about an hour or so from Sven. My F is a coupé partially restored to a nice driver 25 years ago. Happy Easter! Jan Hi Jan Thank you very much. I was discussing with Sven about a visit to yours. I'm interested so see your F as well. I don't know if the picture I got from Sven few weeks ago with his JoseFin, a white 57 or 58 Plymouth convertible, a white F and a red or brown 60 or 61 Plymouth station wagon in front of his home - the F is yours? The picture was taken back in May 2010. Actually the most difficult part to find or get are new or NOS brake return springs for 3 platform 12" brakes for all four corners. ----> but I found a source.... Kanter. I ordered a set and I'll see if they would fit... Happy Easter to you as well! Dieter
Edited by di_ch_NY56 2015-04-06 2:51 PM
|
|
| |
|
Expert
Posts: 1530
Location: ZH, Switzerland | jimntempe - 2015-04-03 1:16 AM Part of that extra stuff is aftermarket helper springs. http://www.amazon.com/Superior-11-1020-Helper-Spring-Capacity/dp/B0...Thanks a lot. Yes these helper springs are looking quite similar. I don't know why there are helper springs installed. Might be that one owner wanted to get a firmer ride. But in my opinion it doesn't make sense without reinforcing the front suspension (e.g. thicker torsion bars and / or stronger sway bar). Happy Easter! Dieter |
|
| |
|
Expert
Posts: 1530
Location: ZH, Switzerland | Actually the vessel it at Rotterdam since April 7th, 23:15h UTC. The draught from New York to Amsterdam was 9.6 meter. From Amsterdam to Rotterdam 10.6 meter. Actually the labor workers at Rotterdam port apparently are unloading some containers. The current draught is 10.1 meter. Planned is that the container containing my Letter will be unloaded from the vessel in Bremerhaven and the container is expected in Switzerland between April 17th and April 21th. It's exactly the day I'll take the airplane to Kobenhagen to enter the train to visit Wizard. I think I'm going to ask if the shipping company will keep my Letter until I'm back in Switzerland (around April 24th or 25th). Happy Motoring! Dieter |
|
| |
|
Expert
Posts: 1530
Location: ZH, Switzerland | Finally the vessel has arriven Bremerhaven. Now the employees are unloading the containers from the vessel. I hope with no damage because IMHO the employees are very experienced. I'm very eager to see my Letter. But I got a time conflict with my journey to Sven. I hope I could visit the shipping company prior or after the journey to be at the company when they are unloading my Letter. Take care my friends, Dieter
Edited by di_ch_NY56 2015-04-09 5:40 PM
|
|
| |
|
Expert
Posts: 1530
Location: ZH, Switzerland | A wonderful movie about my Letter - Bob Rodger, Chef Engineer is introducing the 300 F. https://www.youtube.com/watch?v=q9rHA-1BiCQ Happy Motoring! Dieter |
|
| |
|
Expert
Posts: 1530
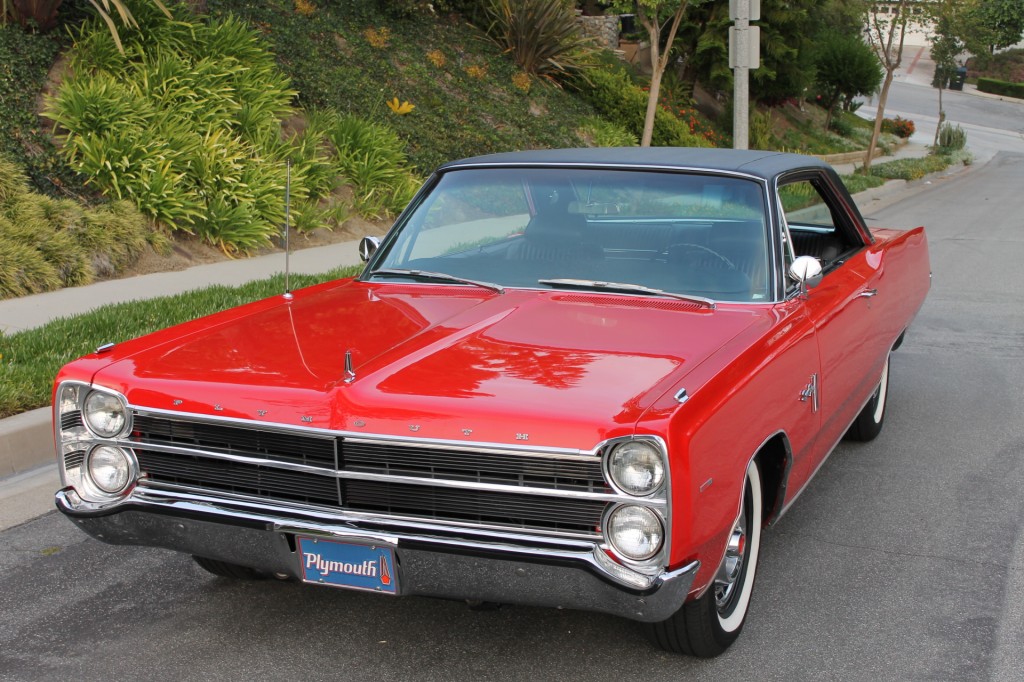
Location: ZH, Switzerland | d500neil - 2015-02-06 9:54 PM Dieter, on your 67 Plymouth, did it have the rounded 'Sports 'top, or did it have the angled Pagoda-type roof? Those were nice, well built automobiles!! Do you have any photos of it? Hi Neil Specially for you I searched for 1967 Plymouth Fury III. Instead I got pictures of a 1967 Sport Fury (floor mounted shifter instead of a steering column mounted shifter of the TorqueFlite). But IMHO the body is the same from what I'm remembering. Happy Motoring! Dieter
 (67PlymouthFury-050-1024x682.jpg) (67PlymouthFury-050-1024x682.jpg)
 (67PlymouthFury-057-1024x682.jpg) (67PlymouthFury-057-1024x682.jpg)
 (67PlymouthFury-0141-1024x682.jpg) (67PlymouthFury-0141-1024x682.jpg)
Attachments
----------------
67PlymouthFury-050-1024x682.jpg (249KB - 793 downloads)
67PlymouthFury-057-1024x682.jpg (238KB - 820 downloads)
67PlymouthFury-0141-1024x682.jpg (218KB - 872 downloads)
|
|
| |
|
Expert
Posts: 1530
Location: ZH, Switzerland | My Letter is now in Switzerland. This morning I got the original title and the message from the shipping company, that my Letter is available to pick up at any time (during business hours I assume). It's just a matter of time until the road assistance company (where my former neighbor is employed at) will find time to transport it to me. Happy Motoring, Dieter
Edited by di_ch_NY56 2015-04-27 6:10 AM
|
|
| |
|
Expert 5K+
Posts: 8443
Location: Perth Australia | Your like an expectant father
I hope it all turns out excellent for you
I was the same waiting for my dodge to turn up
Edited by ttotired 2015-04-27 6:24 AM
|
|
| |
|
Expert
Posts: 1737
Location: Hay Lakes, Alberta, Canada | Dieter,
Congratulations!
Are any of the parts from a '62 regular 300 hardtop shared with yours? I am parting out one, so if you need anything, let me know. |
|
| |
|
Expert
Posts: 1530
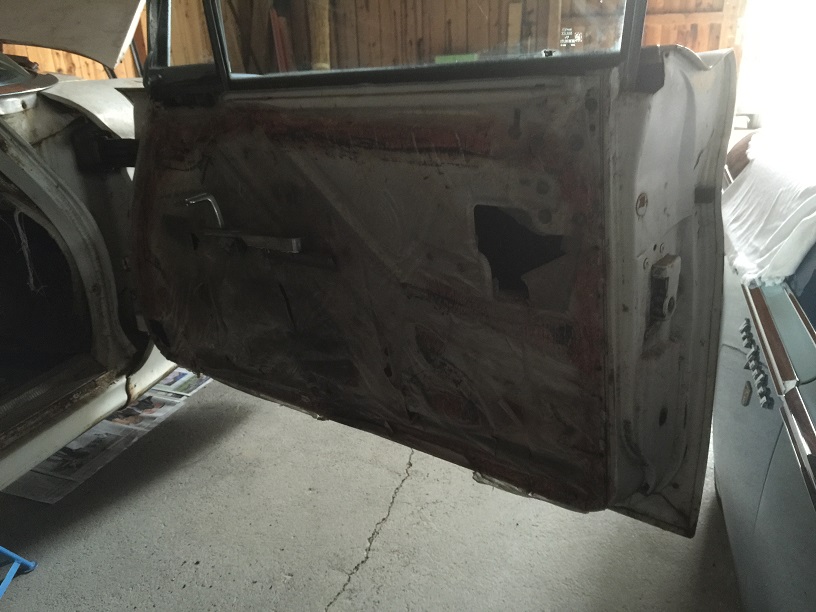
Location: ZH, Switzerland | Thank you Brad for your offer. I'll see what is common and what I need starting at June 2015. Do you have time to wait a little bit? Today I met my Letter. It is packed in plastic to protect it. Through the plastic I noticed that the drivers door window is closed and at the trunk lid the medaillon is missing. It was present at the time of the loading in San Jose. Because it is packed in plastic and one (most probabely the upper one) door hinge is missing at the drivers door I couldn't get access to the passenger compartment to look after it. I give a very low chance that the medaillon is in the car... but it could be that it got lost during the transport on the car hauler (low chance). The fuel neck door at the back works better than in my Beast (no squeezing). The metal sheet under the door looks like new. From the seller I got the message that one door hinge was bent. He removed it and didn't get a replacement in the right time. But he could get it either and will send it to me. Happy Motoring! Dieter BTW: Stealing people (thieves) are no friends at all
Edited by di_ch_NY56 2015-04-28 5:50 PM
 (trunk medaillon.jpg) (trunk medaillon.jpg)
Attachments
----------------
trunk medaillon.jpg (40KB - 908 downloads)
|
|
| |
|
Expert
Posts: 1530
Location: ZH, Switzerland | Hi Brad I was just walking through your photo album you linked to your message. Thank you very much. For the engine I expect the same for my Letter as you did for your 57 Windsor. I'll start over with the checking of the electric functions, the levels (oil, transmission, brake main cylinder and p/s pump) and after that I'll start with the engine. First I'll try a 50% mixture out of acetone and transmission fluid (synthetic) into all cylinders and let it sit for e.g. a week. Then I'll try if I can break it loose and turn it over with a wrench and socket after I removed all belts and - at least - the fan with the thermo coupling. I don't think that I could start the engine judging from the pictures of the carbs. I assume these would not work either. Happy Motoring! Dieter BTW: If it would run I assume it would be a oil sucking monster... with cylinder walls like these in the engine shown in your album. |
|
| |
|
Expert
Posts: 1530
Location: ZH, Switzerland | Right now I think I'm condemned with that car. The transport for example goes slower than honey poured through a funnel than 50 grade engine oil. I'm judging if I'll keep it or should get rid of it. Happy Motoring Dieter |
|
| |
|
Expert
Posts: 1530
Location: ZH, Switzerland | Today the transport from the shipper to a temporary storage (under a big roof) is going on. I'm rather excited. I'll check some things and take some pictures to post here. Sometimes happens anything unexpected and most times it turns out to be a fortune. Happy Motoring! Dieter |
|
| |
|
Expert
Posts: 1208
Location: SWITZERLAND | "Sometimes happens anything unexpected and most times it turns out to be a fortune . . . . . . . . Dieter, because you are a lucky men! - SERGE - |
|
| |
|
Expert
Posts: 1530
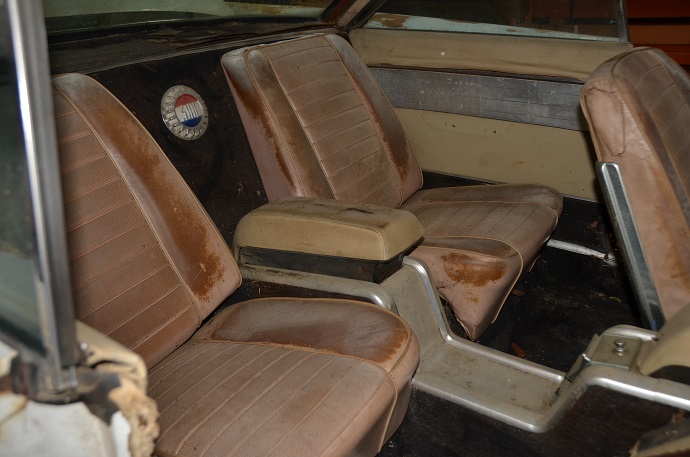
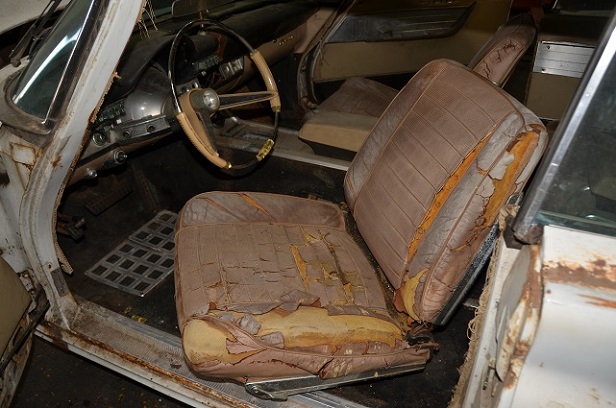
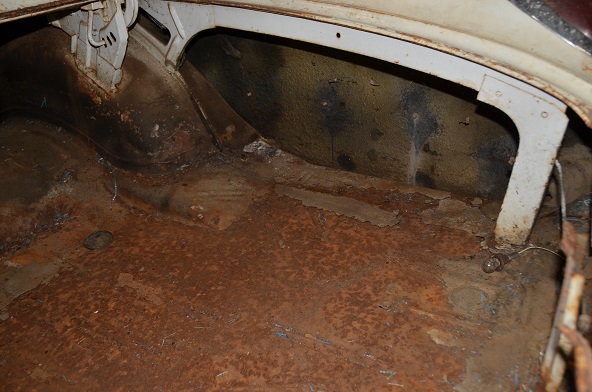
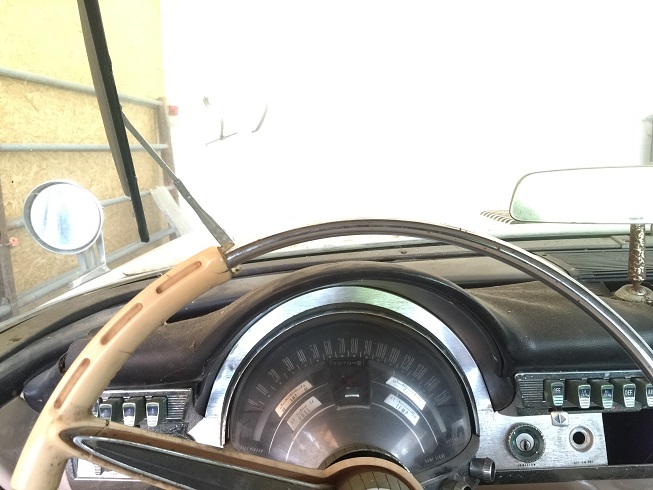
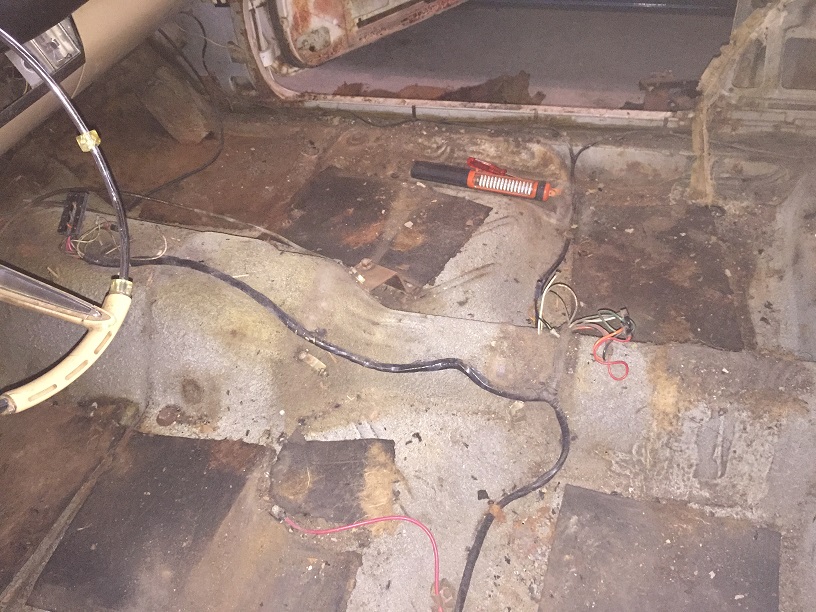
Location: ZH, Switzerland | Thanks sermey. Today I sat the first time in my Letter. Because there was almost no brake power I pulled stronger and fell through. My maximum power in my legs is about 320 lbs. I cleaned the tach (oil and grime on the glass) the glass of the astrodome. Then I collected the rest or residues of the rotten cover of the pre pre owner who stored the Letter outside for about six years. During this time, because this guy forgot about the Letter, he destroyed at least 15k to 25k of the value of the Letter. It's his bad luck. With some water of my mouth and a towel I cleaned two small areas of the cross ram intake. It seems it was not bright red but gold-red colored... The carb linkage is frozen as well. With my fingers I checked the inner rockers. There is no hole and the sheet metal feels solid - as well as the floor of the trunk. I didn't check the floor on the drivers side due to the limited place (temporary storage). About the trunk ornament. It is not in the car. From the condition of the trunk lid I could imagine that it got lost during the transport on the hauler. The back was in the wind. Both doors are hanging badly and needs to be lifted at the door lock escutcheon. Both door locks do not engage. For the keys I have to seek in the boxes the seller provided. Some surprises appeared when I opened the center console bin. The last driver of the Letter apparently was a smoker.... There are truck loads of work needed for this car. I've never ever bought a car in this conditon like my Letter. Happy Motoring! Dieter
 (IMG_1699_resized.JPG) (IMG_1699_resized.JPG)
 (IMG_1700_resized.JPG) (IMG_1700_resized.JPG)
 (IMG_1701_resized.JPG) (IMG_1701_resized.JPG)
 (IMG_1702_resized.JPG) (IMG_1702_resized.JPG)
 (IMG_1730_resized.JPG) (IMG_1730_resized.JPG)
 (IMG_1731_resized.JPG) (IMG_1731_resized.JPG)
 (IMG_1732_resized.JPG) (IMG_1732_resized.JPG)
Attachments
----------------
IMG_1699_resized.JPG (137KB - 519 downloads)
IMG_1700_resized.JPG (131KB - 535 downloads)
IMG_1701_resized.JPG (108KB - 496 downloads)
IMG_1702_resized.JPG (100KB - 529 downloads)
IMG_1730_resized.JPG (148KB - 518 downloads)
IMG_1731_resized.JPG (146KB - 505 downloads)
IMG_1732_resized.JPG (146KB - 493 downloads)
|
|
| |
|
Expert 5K+
Posts: 7206
Location: Victoria, BC, on Vancouver Island, Canada | Hi Dieter, you have some work ahead of you there for sure!! If you can't find the keys to this magnificent car, I can make them up if you send me the locks, if no one in Germany wants to do it!! |
|
| |
|
Expert
Posts: 1530
Location: ZH, Switzerland | Thank you very much Ian. I was just seeking through all six boxes the seller loaded. I took out the 7 button radion (Golden Tone), the LH kick panel and described the main content onto the box. With no key it's impossible to remove the ignition lock from the ignition switch and as far as I know (from my Beast) the ignition key fits the doors and the ignition lock while the smaller one is only for the trunk (eventually for the glove box as well). I appreciate your invitation to send the locks - or at least the ignition lock/switch combo to you as far as I'll start with disassembling. I assume it's later this year or at least later than 1st of June. My biggest project for the moment is or should be finding a new job... Happy Motoring! Dieter |
|
| |
|
Expert 5K+
Posts: 7206
Location: Victoria, BC, on Vancouver Island, Canada | Dieter, yes, the ignition and the door should be the same key, trunk and glove box are the secondary key. I can make the ignition key without having to remove the cylinder from the switch. The easiest way to get the switch out is remove the radio speaker grille ( 4 screws on top) and unplug the switch, and unscrew the ring from the front of the dash, and pull the switch out through the speaker hole. ....if it comes to the point where you can't find the keys! |
|
| |
|
Expert
Posts: 1530
Location: ZH, Switzerland | Thank you very much Ian. If it helps I could provide a picture with the soft case and all keys to your WPC address - or if you PM me your private mail address. The radio is out of the car and laying in my living room, because it was in one of six boxes the seller filled. I double checked the content of the boxes, but found all other tid bits (e.g. the chrome trim not mounted, a voltage device for the astra dome, ...) than the keys. There is no way to remove the igniton switch from the bottom like in a 1956 Chrysler? Kind regards Dieter |
|
| |
|
Expert
Posts: 1530
Location: ZH, Switzerland | I got the keys. The soft cover was in the car cover inside the Letter. The seller put the fabric car cover over the seats to hide the long stainless steel side trim inside the passenger room. I rolled it over back to the passenger back seat. Kind regards, Dieter BTW: there are four keys. Two of them (the smaller not original, aluminum aftermarket, the bigger with a Dodge D500 emblem on one side) were fitting the ignition lock and the glove box lock. The other two are apparently from another car. They show a different pattern. |
|
| |
|
Expert 5K+
Posts: 7393
Location: northern germany | di_ch_NY56 - 2015-05-13 1:16 PM
With no key it's impossible to remove the ignition lock from the ignition switch
okay you got the keys but its VERY easy to pick these ignition locks. takes seconds with a home made tool. my 61 and 59 had no keys either, i picked/pulled the locks and played around with the tumblers (using some spare locks for parts) to make them fit to some extra keys i had. less than an hour work. unfortunately that does not work with the glove/trunk locks. |
|
| |
|
Expert
Posts: 1530
Location: ZH, Switzerland | While I was at my Letter to find the keys I moved the fabric car cover out of the Letter to gain access to the rear seats. The rear seats are very convinient. The rear bin contains a really big amount of small screws, small washers and more partially rusted hardware. I just wonder where all these parts were coming from (belonging to the car or not). |
|
| |
|
Expert
Posts: 1530
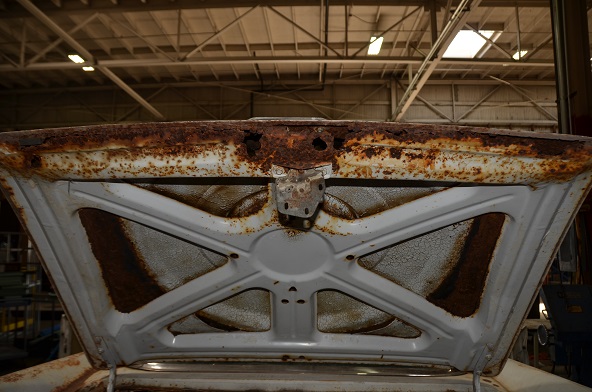
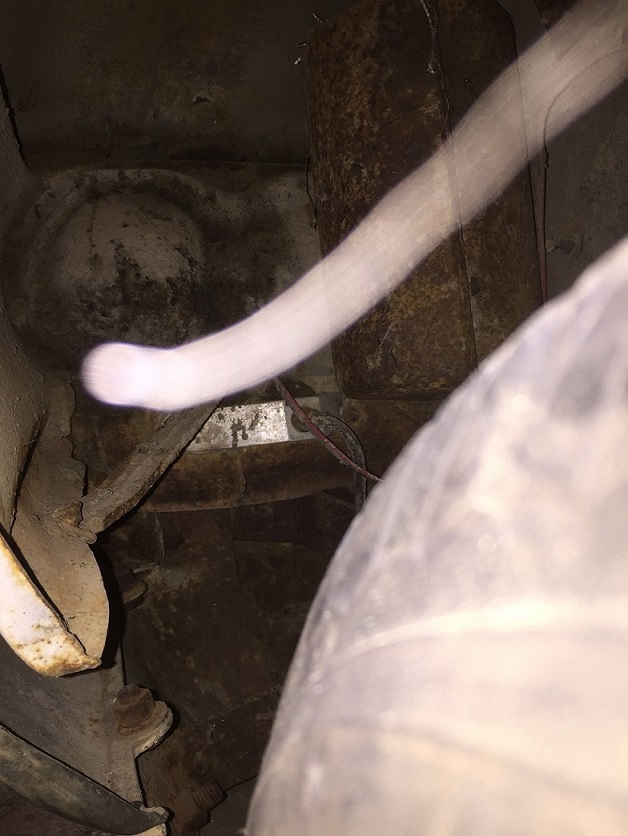
Location: ZH, Switzerland | Today I visited my Letter again. Still I couldn't open the cover of the p/s pump. IMHO it's frozen by rust. The oil level of the engine is little above high and smelling really rotten. It has a 50/50 milk/coffee color. The level of the iron hog is above full as well (no wonder it sat that long - the torque converter drained for sure). The color is light red like in my Beast, but smells slightly metallic, but not burnt. The upper part of the exhaust block of plate has eaten by rust at the drivers side. I couldn't get access to the plate at the passenger side. That means noise and exhaust gases in the motor bay if the engine would run... The carburettors are frozen as well. My target it to keep the thermo coil choke mechanism. So I'll take care not to brake off the lever from the thermo coil to the carb at the base in the coil case. IMO these mechanism are really difficult to get... The rubber covers (block off rubber) at the inner fenders are not present at all. The original color of the inner fender was the body color, but eaten by the environmental elements. The primer was possibly black or there the body color was the second layer above the primer and black. At the passenger side there are no more leafs of trees between the engine, iron hog and firewall. I front of the radiator (splash shield?) I got two empty wasps' nest. The vacuum lines are that old that the fall apart at the slightest touch. The lines apparently do not like sun rays. The vacuum tank below the battery tray is not present, but in one of the six boxes the seller provided. When the engine is under restoration I assume I need all the brackets for routing the spark wires, too. I saw an example at the Chrysler 300 Club tech page. Happy Motoring! Dieter |
|
| |
|
Expert 5K+
Posts: 7206
Location: Victoria, BC, on Vancouver Island, Canada | The vacuum reserve tank for the power brake on a 1960 Chrysler generally is mounted behind the driver's side headlight, inside the fender, not under the battery tray. At least that is where it is on mine from factory. |
|
| |
|
Expert
Posts: 1530
Location: ZH, Switzerland | Thank you very much Ian. At the place you addressed I didn't check. I just noticed that the vacuum hose is routed along the inner fender, but not loose at the end. The hose disappears near the radiator yoke. Edit: I grabbed with my hands below the battery tray. I just thought at that time that there it might be not enough space for a canister with the same size like in my Beast (56 NY). Happy Motoring! Dieter
Edited by di_ch_NY56 2015-05-14 1:31 PM
|
|
| |
|
Expert 5K+
Posts: 7206
Location: Victoria, BC, on Vancouver Island, Canada | It's a possibility that some were mounted under the battery tray. That's where it is on my ex- 1960 Polara. There were running production changes, and my Saratoga is very early production ( Oct 1959). |
|
| |
|
Expert
Posts: 1530
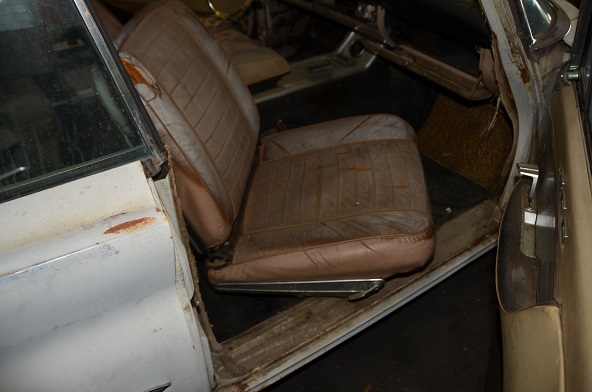
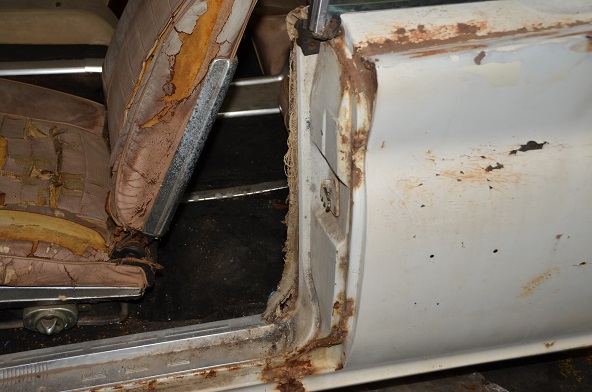
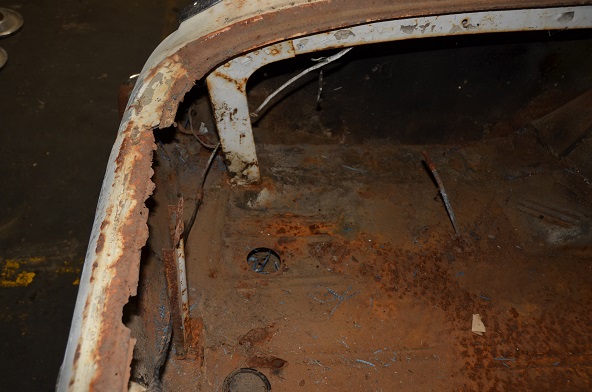
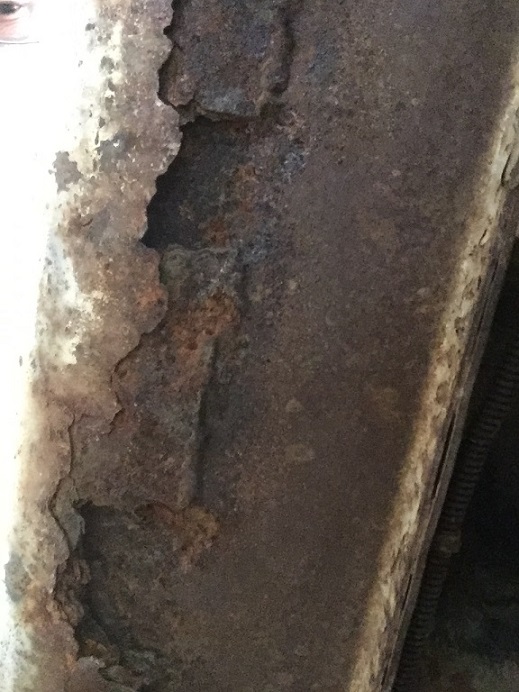
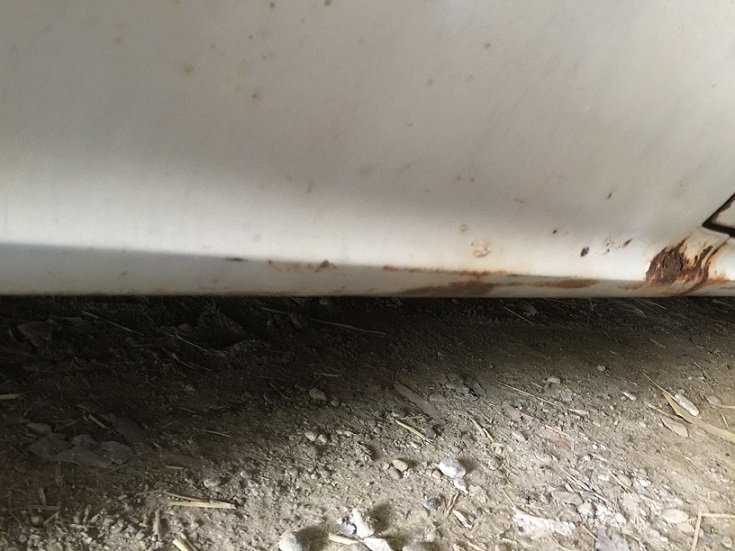
Location: ZH, Switzerland | Today I visited my Letter again. First I adjusted the drivers door. Because I couldn't open the door fully I did not have access to the screws at the A pillar (at least one screw is not mounted!). Instead I had to go almost beyond the limit to lift up the rear end of the door to fit the lock. Now the lock works again and keeps the door closed, but the front end is about 1/10" too low. The next work was to mount two hex nuts on both front wheels. Good luck I got some spare lug nuts (LH and RH). Now all five lug nuts are mounted. Then I emptied the rear and the front center console. All the hardware I put in empty jam glasses. The sun glass, the plasic forks, the matches I threw away. Next work was removing of the belts in the motor bay. The alternator and the p/s pump are turning by hand. The p/s pump has slight resistance, when cranking the clockwise rotation. That means there is fluid in the reservoir and the p/s pump starts to build pressure. At the Letter are three different sizes of tires mounted. Rear LH: 205/75R14, front LH: 205/75R14 front RH: 215/75R14 and rear RH: 195/75R14. Yes, the vaccum tank is in the drivers side fender, vertically mounted. I tested the body for rust and found some between the door and the wheel arch (quarter panel) at the conjuction of the body shell and the rocker at the drivers side. The passenger side quarter panels shows some bubbles in the paint layer... The floor of the trunk shows some spots (rusting through). Generally the floor panel is rather thin. In the front center console there were the knobs of the Golden Tone receiver - heavily pitted / corroded. Happy Motoring! Dieter
Edited by di_ch_NY56 2015-05-16 5:10 PM
 (IMG_1743_resized.JPG) (IMG_1743_resized.JPG)
 (IMG_1744_resized.JPG) (IMG_1744_resized.JPG)
 (IMG_1745_resized.JPG) (IMG_1745_resized.JPG)
 (IMG_1746_resized.JPG) (IMG_1746_resized.JPG)
 (IMG_1747_resized.JPG) (IMG_1747_resized.JPG)
 (IMG_1749_resized.JPG) (IMG_1749_resized.JPG)
 (IMG_1750_resized.JPG) (IMG_1750_resized.JPG)
 (IMG_1751_resized.JPG) (IMG_1751_resized.JPG)
 (IMG_1752_resized.JPG) (IMG_1752_resized.JPG)
Attachments
----------------
IMG_1743_resized.JPG (124KB - 515 downloads)
IMG_1744_resized.JPG (145KB - 506 downloads)
IMG_1745_resized.JPG (134KB - 524 downloads)
IMG_1746_resized.JPG (145KB - 501 downloads)
IMG_1747_resized.JPG (133KB - 499 downloads)
IMG_1749_resized.JPG (97KB - 475 downloads)
IMG_1750_resized.JPG (131KB - 500 downloads)
IMG_1751_resized.JPG (144KB - 527 downloads)
IMG_1752_resized.JPG (117KB - 498 downloads)
|
|
| |
|
Expert
Posts: 1530
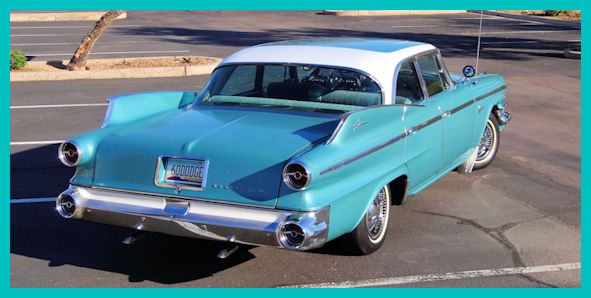
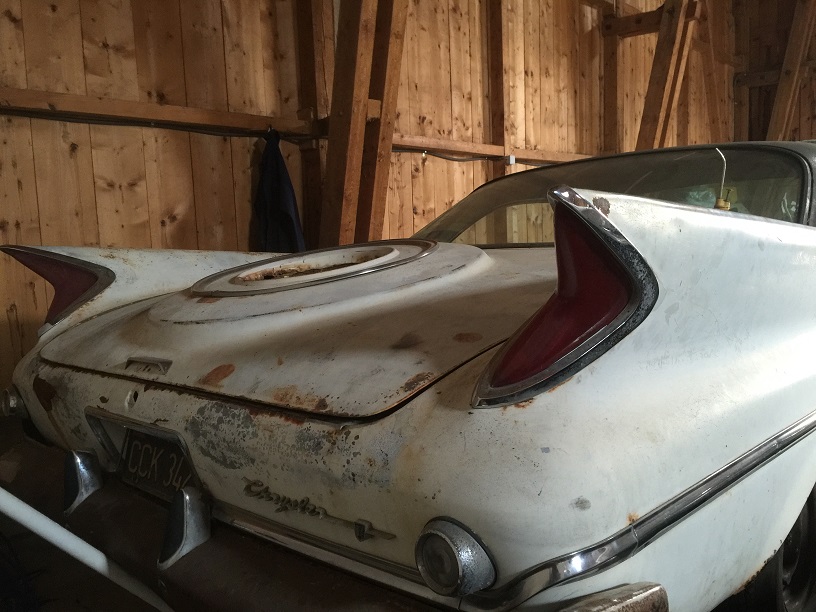
Location: ZH, Switzerland | The trunk lid insert or ornament pkg 2196 661 has gone during the transport on the car hauler between San Jose and NY harbor. I hope once I'll find a nice replacement for it. Any help is highly appreciated. Thank you [Edit:]The pictures show my Letter after the arrival at NY harbor. [Edit2:] On the roof there are some really small areas with the original white color. Happy Motoring! Dieter
Edited by di_ch_NY56 2015-05-18 1:40 PM
 (image001.jpg) (image001.jpg)
 (image002.jpg) (image002.jpg)
Attachments
----------------
image001.jpg (64KB - 492 downloads)
image002.jpg (123KB - 502 downloads)
|
|
| |
|
Expert
Posts: 1530
Location: ZH, Switzerland | Today I checked the electric wiring again. Good luck all head lights are working and the position lights as well. That the directional signal works partially. I only could recognse it at the ampere display of the laboratory power supply I adjusted to 14.4V and 15A. The current jumps up and down with a 0.5A peak to peak value with the clock of the direction signals. That could mean that the flasher relais is working, but the contacts in the direction switch have a very high transition resistance. When I turn the steering wheel I could also hear a click, but the direction switch doesn't go back to the neutral position (both sides). Now the radio button array of the heater switch is working a little bit better and now both speeds of the fan are working. Two of four switches for the power windows in the center console do not engage the down movement of the drivers door window and the passenger side quarter window. 15A limit is not enough to move the windows but enough to check the funtion. All switches are keeping the position - they are not jumping back when I release my finger. The power window switches need a full restoration as well. Only the primary side of the ignition resistor has voltage (about 13.8V from 14.4V at the battery cables). The secondary side of the resistor is at zero. I'll replace it... Happy Motoring! Dieter |
|
| |
|
Board Moderator & Exner Expert 10K+
Posts: 13045
Location: Southern Sweden - Sturkö island | The direction switch has a locking elecro magnet Dieter, probably the switch is binding due to dried out greas and old dust and dirt. Remove the cancel switch and keep it in a safe Place but leave the direction switch in Place until you/we remove the dashboard. |
|
| |
|
Expert
Posts: 1530
Location: ZH, Switzerland | wizard - 2015-05-22 8:56 PM The direction switch has a locking elecro magnet Dieter, probably the switch is binding due to dried out greas and old dust and dirt. Remove the cancel switch and keep it in a safe Place but leave the direction switch in Place until you/we remove the dashboard. Hi Wizard Am I correct that the cancel switch can only be removed when I prepare to remove the AstaDome (e.g steering wheel, all the covers until I get access to the lower screws of the AstraDome)? Happy Motoring! Dieter BTW: I noticed at the technical section that the cancel switch has two crab arms that could break very easy.... I'll take extra care |
|
| |
|
Expert
Posts: 2633
Location: Minor Hill, TN | After I wrecked my 1957 plymouth back in 1987 that was the 1st forward look car I looked but it was a green 2drht with a 383. I remember it has ps,pb and it was a local car. I wish I grabbed it when I had the chance but oh well some one else got it. This was when I was living in Palm Bay, FL . |
|
| |
|
Board Moderator & Exner Expert 10K+
Posts: 13045
Location: Southern Sweden - Sturkö island | Nope Dieter - the cancel switch is easily removed further down the steering column - look and you'll see it - mounted with one Phillips screw.
|
|
| |
|
Expert
Posts: 1530
Location: ZH, Switzerland | Yesterday I noticed that the chrome trim at the passenger side on the roof channel is missing. It was missing at the sellers place as well. It's the chrome trim at the water channel above the door and quarter window. So I'm seeking this piece, too. Happy Motoring! Dieter |
|
| |
|
Expert
Posts: 1530
Location: ZH, Switzerland | The last week over I managed to remove the spark plugs of the cylinders 1, 3, 2, 4. I was applying torque to the wrench very slow. The spark plugs came out like on a almost new car. The tips of the spark plugs were looking quite good. Only the spark plug of cylinder 1 had some debris around the insulator. Yesterday I mounted the spark plugs again and tightened it only by hand. That's enough to keep the holes closed.The boots of the spark plug wires are quite soft. That surprises me... Then I filled alomst an inch of transmission fluid into both carburettors. The only parts moving at the carburetors are the vacuum controlled valves in the secondary channel. I put some drops of transmission fluid to the threads of the mounting bolts of both carburettors as well as the connection of the throttle linkage at the carburetors. Happy Motoring! Dieter |
|
| |
|
Expert
Posts: 1530
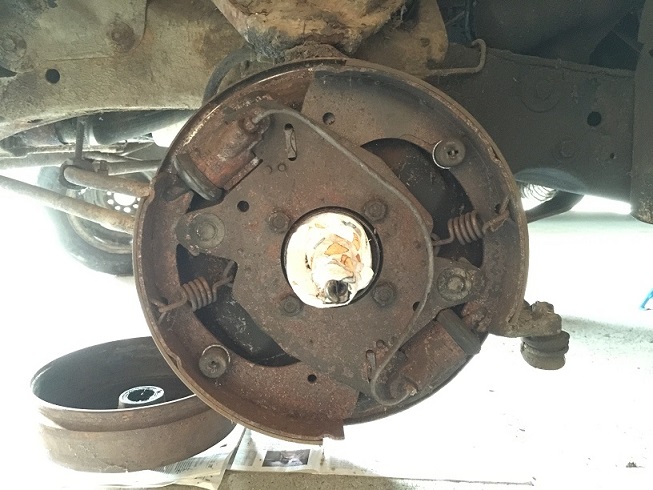
Location: ZH, Switzerland | Today I proceeded another test with my laboratory power supply. The instruments are lighting up as well depending on the rotation of the light switch. When rotating the knob from one stop to the other many times over a large sector the instruments are dark. Between they are lighting up. Over the last few weeks... I could also remove the resting four spark plugs to fill in an acetone/atf mixture. But the engine is still frozen. The front drums are off now, for the rear drum I purchased a set of metric machine hex sockets to drive the puller with a impact wrench. All the door and quarter panels are off now, At the passenger door there is still the water barrier mounted. The transmission is not the original transmission. It's a 1949 904 instead of a 1949 808. Happy Motoring! Dieter
 (IMG_1926.JPG) (IMG_1926.JPG)
 (IMG_1947.JPG) (IMG_1947.JPG)
 (IMG_1989.JPG) (IMG_1989.JPG)
 (IMG_1990.JPG) (IMG_1990.JPG)
 (IMG_1991.JPG) (IMG_1991.JPG)
 (IMG_1966.JPG) (IMG_1966.JPG)
 (IMG_1967.JPG) (IMG_1967.JPG)
Attachments
----------------
IMG_1926.JPG (143KB - 491 downloads)
IMG_1947.JPG (143KB - 515 downloads)
IMG_1989.JPG (115KB - 475 downloads)
IMG_1990.JPG (166KB - 470 downloads)
IMG_1991.JPG (158KB - 498 downloads)
IMG_1966.JPG (118KB - 482 downloads)
IMG_1967.JPG (139KB - 505 downloads)
|
|
| |
|
Expert
Posts: 1530
Location: ZH, Switzerland | I checked the electric functions again by night. After sweeping the brightness adjuster forth and back for many times it works now like new. The astro dome looks so wonderful by night. But only about half an hour. I assume it's the capacitor in the high voltage supply. Happy Motoring! Dieter |
|
| |
|
Expert
Posts: 1530
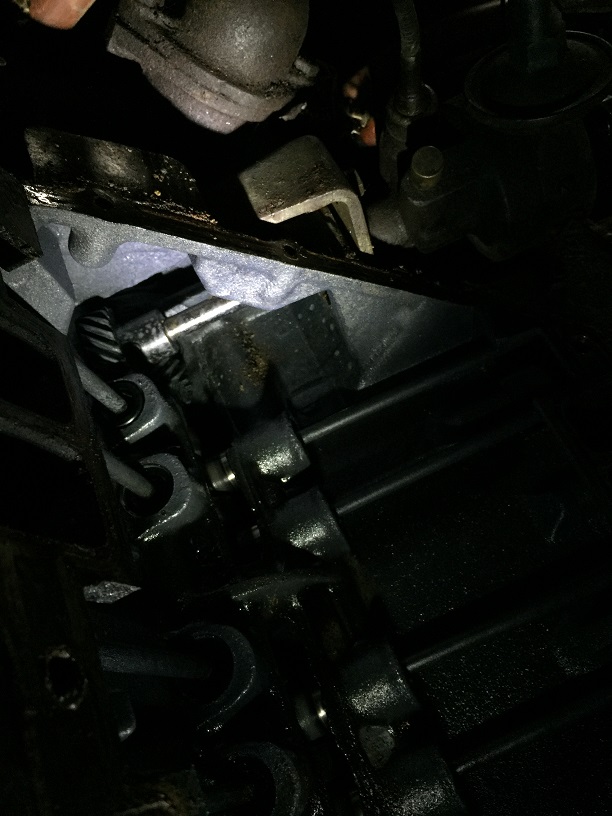
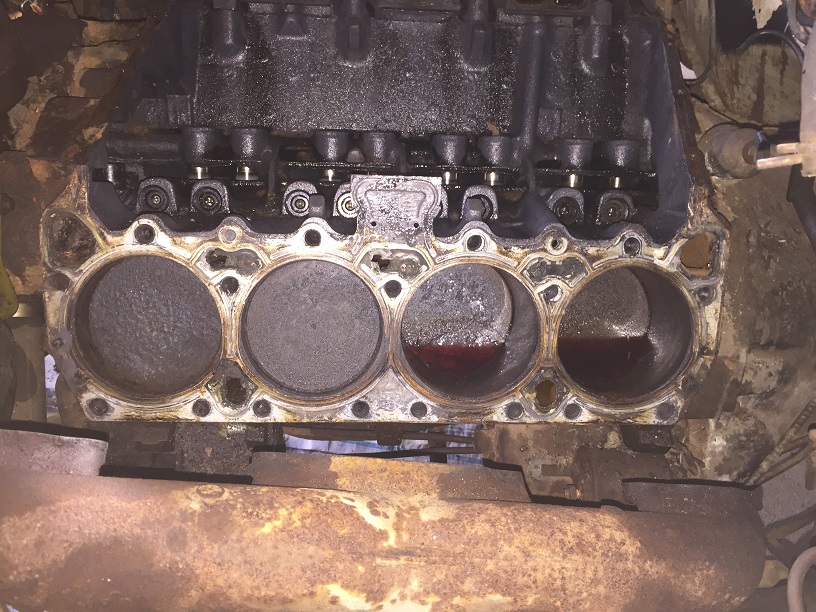
Location: ZH, Switzerland | Finally I removed both cylinder heads to inspect the walls of the cylinders. Several times I filled in a 50/50 mixture out of Dextron III and Acetone with the hope I could break free the frozen engine. Cylinder # 5 and # 7 are showing evidence of that action. From what I could see I assume the piston of the cylinder # 1 has sized due to a break of the lubrification layer. What surprises me is that the distributor gear still has rests of grease at the gears and distributor shaft. This engine nees a long block restoration. Happy Motoring! Dieter
 (IMG_2081.JPG) (IMG_2081.JPG)
 (IMG_2082.JPG) (IMG_2082.JPG)
 (IMG_2090.JPG) (IMG_2090.JPG)
 (IMG_2093.JPG) (IMG_2093.JPG)
 (IMG_2096.JPG) (IMG_2096.JPG)
Attachments
----------------
IMG_2081.JPG (238KB - 497 downloads)
IMG_2082.JPG (131KB - 470 downloads)
IMG_2090.JPG (187KB - 514 downloads)
IMG_2093.JPG (342KB - 475 downloads)
IMG_2096.JPG (241KB - 480 downloads)
|
|
| |
|
Expert
Posts: 2633
Location: Minor Hill, TN | Good luck with the restoration |
|
| |
|
Expert
Posts: 1530
Location: ZH, Switzerland | Thank you. Today I removed the outer and inner sill plates plus the rear seats and the rear center console. All four windows are down at the lower stop now. From my test of the eletric wiring at night a picture plus a picure of the missing parts. Happy Motoring! Dieter
 (100_missing_parts.jpg) (100_missing_parts.jpg)
 (IMG_2010.JPG) (IMG_2010.JPG)
Attachments
----------------
100_missing_parts.jpg (207KB - 485 downloads)
IMG_2010.JPG (30KB - 497 downloads)
|
|
| |
|
Board Moderator & Exner Expert 10K+
Posts: 13045
Location: Southern Sweden - Sturkö island | Great Dieter - keep the objective, this will be a nice car! |
|
| |
|
Expert
Posts: 1530
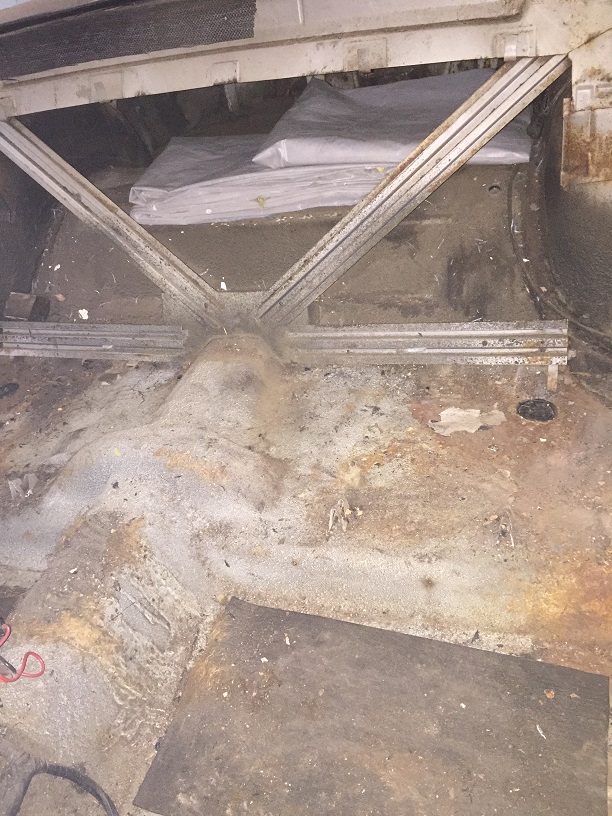
Location: ZH, Switzerland | In the mean time I removed the seats (including the front seat frame) Prior to remove the front seat frame I had to remove the center console (first the rear part, then the front part). To remove the carpet I had to remove several screws holding the isolation and the carpet in place. Under the aluminum rails at the floor is the seam of the carpet of the center console. Under the bitumen sheet at the front passenger side I found the broad cast sheet. Unfortunately iti's not in the condition I expected. Next work will be the removal of the dash board... Happy Motoring! Dieter
 (IMG_2179.JPG) (IMG_2179.JPG)
 (IMG_2180.JPG) (IMG_2180.JPG)
 (IMG_2182.JPG) (IMG_2182.JPG)
 (IMG_2186.JPG) (IMG_2186.JPG)
Attachments
----------------
IMG_2179.JPG (239KB - 497 downloads)
IMG_2180.JPG (228KB - 472 downloads)
IMG_2182.JPG (221KB - 463 downloads)
IMG_2186.JPG (238KB - 465 downloads)
|
|
| |
|
Extreme Veteran
Posts: 375
Location: milano, italy | Dieter,I think I have some extra parts that I can give you ....maybe they are in better shape...like radio knob and who knows what....
Love the lighted astradome.... |
|
| |
|
Expert
Posts: 1530
Location: ZH, Switzerland | Thank you Antonello. I think we will stay in contact. Do you agree? Unfortunately I cracked the drivers side exhaust manifold. I plan to send it to Germany to a specialist (cast iron welding company). From what I could read from the Chrysler 300 Club International forum, many members got mixed feelings about SMS. John L. and others and Ian (here) are proposing Gary Goers. The best way to get the order fullfilled (my experience) is sending a facsimile and send the amount via paypal. I'm using a free fax service at the States. Take care, Dieter
 (IMG_2101.JPG) (IMG_2101.JPG)
Attachments
----------------
IMG_2101.JPG (245KB - 495 downloads)
|
|
| |
|
Elite Veteran
Posts: 827
Location: tailFinland | Good luck with a Project Dieter! Looks pretty much similar with my G-project.
If you find correct materials for the interior, vinyl, leateher and basket wave material (Jan Friedberg in Sweden makes aluminium inserts) some good upholstery shop can make you an interior.
Design in F is not just that compilcated that you have to rely on Gary Goers or SMS and wait for the ages. Anyway someone had to make door panels.
I hope you still have them in Switzerland. I can only recommend those I've used in Finland but I have heard that there are many auto upholstery shops in the Baltic countiries who make good show quality with low prices.
|
|
| |
|
Expert
Posts: 1530
Location: ZH, Switzerland | Few weeks/months ago I removed the starter motor out of my Letter. Today I scratched all old color and dirt away from it to read the parts number. What I'm puzzled: it's a 1889 100. According the 1960 parts book it should be a 1889 200 starter motor. What's different between these two starter motors? - the power rating is the same - the count of teeth of the drive is the same So it could only be the distance of the drive pinion either of the axle distance to the crank shaft or the depth compared to the flange of the bellhouse. Any suggestions? The drive pinion looks good - no wonder, the engine is still frozen and I didn't try to crank it with the starter motor. Dieter |
|
| |
|
Extreme Veteran
Posts: 375
Location: milano, italy | Dieter, I placed an order for the seat covers with Doug at SMS...should be ready for end of january. I doubt very much about completion date...but will keep you updated. Goers never replied about price questions, as usual. |
|
| |
|
Expert
Posts: 1530
Location: ZH, Switzerland | antonellomopar - 2016-01-02 10:52 PM Dieter, I placed an order for the seat covers with Doug at SMS...should be ready for end of january. I doubt very much about completion date...but will keep you updated. Goers never replied about price questions, as usual. Thank you very much for your update Antonello. Happy New Year! Dieter |
|
| |
|
Expert
Posts: 1530
Location: ZH, Switzerland | Over the last few weeks I did only small things at my Letter. Like removing the Astrodome, mounting the rear brake pads, brake drums and wheels. I cleaned the cylinder wall (where the piston is not at TDC) with diesel. I plan to try to unlock the engine with diesel over the next few weeks. If I don't succeed I'll remove the oil pan and remove the caps of the connection rods to free each piston alone. Sometimes I think I'm overextended with my skills to do all the works necessary to bring my Letter back to the road alone. Happy Motoing! Dieter |
|
| |
|
Expert
Posts: 1530
Location: ZH, Switzerland | There are not many things missing but what I still searching and hope to find are... - trunk lid ornament (300F) - gutter rails LH and RH Other than these parts my junked 300F (the Letter) is complete. Any offers about parts above are always welcome. Happy Motoring! Dieter |
|
| |
|
Expert
Posts: 1530
Location: ZH, Switzerland | Today I removed the fan, the pulley and the water pump. It looks like a very powerful waterpump. In my opinion it's worth to restore, because the impeller is out of cast iron. The fan and the pulley are in an astonishing good condition as well. Happy Motoring! Dieter
 (IMG_2489resized.JPG) (IMG_2489resized.JPG)
Attachments
----------------
IMG_2489resized.JPG (248KB - 464 downloads)
|
|
| |
|
Expert
Posts: 1530
Location: ZH, Switzerland | Today I removed the water pump case and cleaned the charcoal like stuff out of the area between the impeller and the case of the water pump. Now it cranks again. What that black, charcoal like looking, stuff is - I don't know. It could either be rests of a coolant sealer or exhaust gas emitting from the cylinder #1 to the cooling circuit. The coolant temperature sender shows 47k Ohm at ambient and about 11 k Ohm at above 90 degree Celsius (195 C Fareheit). I cleaned the connector of the sender with sandpaper prior to measure. For my taste the readings of the resistance is ways too high. Happy Motoring! Dieter
 (IMG_2494_resized.JPG) (IMG_2494_resized.JPG)
 (IMG_2495_resized.JPG) (IMG_2495_resized.JPG)
 (IMG_2496_resized.JPG) (IMG_2496_resized.JPG)
 (IMG_2498_resized.JPG) (IMG_2498_resized.JPG)
Attachments
----------------
IMG_2494_resized.JPG (215KB - 438 downloads)
IMG_2495_resized.JPG (110KB - 453 downloads)
IMG_2496_resized.JPG (235KB - 436 downloads)
IMG_2498_resized.JPG (140KB - 437 downloads)
|
|
| |
|

Expert
Posts: 1223
Location: Ramona, CA | It's amazing that a car so great could be neglected for so long. It does look better than the rust bucket I had in 1989. In that case, the owner had the engine apart and laying out in his backyard including having the heads off and intakes and carbs laying about. My second one that I got last week is way better but still needs work but it's a driver and pretty complete. Hoping to get the dash lighting working this weekend and see if the fuel gauge is ruined from a previous owner hooking it up wrong.
Here is my old one. Not great pictures but all I have as the camera with the good pictures was stolen before I could get the film developed.
 (8403129501_02.jpg) (8403129501_02.jpg)
 (8403129501_01.jpg) (8403129501_01.jpg)
Attachments
----------------
8403129501_02.jpg (33KB - 437 downloads)
8403129501_01.jpg (33KB - 424 downloads)
|
|
| |
|
Expert
Posts: 1530
Location: ZH, Switzerland | Hi Nick
Thank you very much for your post. I was a frequent visitor at your site (nicksgarage) as well to check the histories of all 300F you found or got the information about it. When I purchased mine (at e-pain) I was not sure if you'll catch mine. But after you joined our forum with your history I know you got the right 300F for you. Personally i do not know if we ever could do a business. As far as I got out that you still have many parts of the first (white) 300F you bought years ago. It's because I recognised the parts mission at my Letter were present at your first purchase.
Of course I'm reading your thread as well. Actually I'm many steps away but I hope once I get it running again. From what I could see - and that's a really good sign - is how the structure of the body looks like (e.g. floor, quarter and door structure and more). As for the Astrodome power supply I purchased two capacitors according to a tip at the Chrysler 300 Internation forum at Yahoo. In the one in parts bin I got I with my Letter I replaced the capacitor and now the voltage is like new. Happy driving! Dieter |
|
| |
|
Expert
Posts: 1223
Location: Ramona, CA | I have information and photos of many 300Fs that have been for sale over the years including yours. I only show a few on my web site. The club has info on many more. Some of the cars I have in my collection I don't have the VINs for so I have to try and match them up when they come up for sale again. Frankly if some of you guys in Europe did not save some of these major project cars, they might never get saved. There are a couple more for sale right now that need so much work I just couldn't get involved with them. I really needed a driver quality car and I'm very happy with what I got.
Hopefully the dash lights and gauges will be a simple fix. A lot of the things on the car just didn't work from lack of use over the past 16 years.
Nick. |
|
| |
|
Expert
Posts: 1530
Location: ZH, Switzerland | About my Letter: I know from whom (living near San Jose, CA) I bought it and that he never went to the registry to apply for the 300F. He purchased it in the condition I got it. The title of my Letter shows a guy in Pacheco CA (issue date 2008). I assume the 300F was running at that time. I don't know what this guy did. But as a result the engine quit working (the engine sized because of detonation - the top of the piston #1 has melted and is now beyond any hope) and he stored it under a blue PVC plane for six years with open hood. The PVC plane rotted over the years.... There were loads of stuff in the center bins and under the front seat frame. So I found a receipt that in 1972 the spark plugs were replaced and in 1974 an owner was Mr. Schafer (insurance receipt). Ony owner was smoking filter less cigarettes... My seller thinks that I'm the third or fourth owner. The production date at the broadcast sheet (fragment only) shows 0114 (January 14th, 1960). That matches with the engine. My Letter was set in traffic in February 1960. I could imagine that my Letter originally was produced to display it in a show room (February 8th was the day the 300F was introduced into the market). So possibly a customer got my Letter out of the show room shortly after the appearance in the show room. Happy Motoring! Dieter |
|
| |
|
Expert
Posts: 1223
Location: Ramona, CA | What is the SO NUMBER on the body tag? Yours should be after 0201 going by the VIN. Still pretty early. My car is a 0509 car. It was originally bought by a William Shafer. Different spelling than yours. I got some old pictures from a previous owner yesterday and I heard back from the son of the original owner although he didn't have any pictures. I added some new pictures to my thread on the car. |
|
| |
|
Expert
Posts: 1530
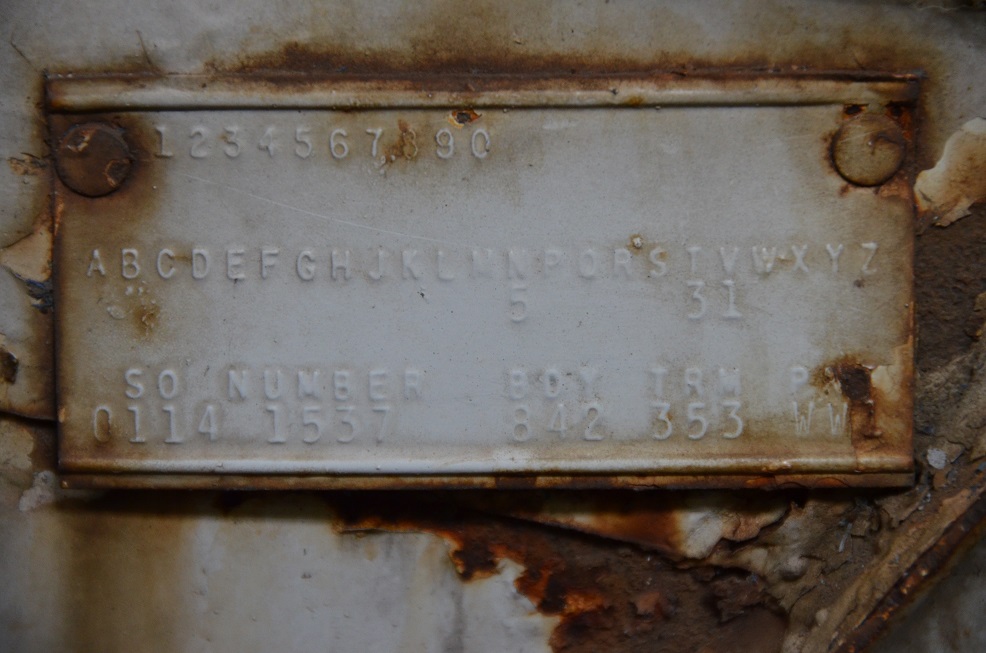
Location: ZH, Switzerland | The SO number at the body tag is 0114, the scheduled date at the broad cast sheet fragment I found under the sound deadener mat at the passenger side (virtually under the front seat frame) shows 0114 as well. The VIN of my Letter is 26310 (84031xxxxx). Happy Motoring! Dieter
Edited by di_ch_NY56 2016-03-26 3:50 AM
 (015_zpsd09dcb2f_reduced.jpg) (015_zpsd09dcb2f_reduced.jpg)
 (IMG_0441_zps2a7bebda_reduced.jpg) (IMG_0441_zps2a7bebda_reduced.jpg)
Attachments
----------------
015_zpsd09dcb2f_reduced.jpg (208KB - 432 downloads)
IMG_0441_zps2a7bebda_reduced.jpg (116KB - 442 downloads)
|
|
| |
|
Expert
Posts: 1530
Location: ZH, Switzerland | The drivers side exhaust manifold has been repaired (welded) by a professional cast iron welder in middle Germany. Both exhaust manifolds are sandblasted and the broken screws have been removed by a local machine shop for the amount of a dinner. The elbows nees a sandblasting job as well. I plan to color it with a heat resistent color cast iron bright. Actually I'm trying to unlock the frozen engine with loads of Dieseloil. Happy Motoring! Dieter |
|
| |
|
Expert
Posts: 1223
Location: Ramona, CA | Here are a couple VINS before yours with later SPD.
8403126206 - 0201
8403126221 - 0201
I just dug up the tags from my old car and it has the same SPD as yours.
8403129501 - 0114
Of course the SPD (Scheduled Production Date) doesn't always line up with the actual build date of the car and the cars didn't necessarily go down the line in sequence to the VIN. Always interesting looking into what Chrysler did.
Hope you can get your engine unfrozen. The one to my white car was left outside for several years with the heads off. I had to hammer all of the pistons out.
 (tags.jpg) (tags.jpg)
Attachments
----------------
tags.jpg (145KB - 420 downloads)
|
|
| |
|
Expert
Posts: 1530
Location: ZH, Switzerland | NicksGarage - 2016-03-25 2:54 AM Here are a couple VINS before yours with later SPD. 8403126206 - 0201 8403126221 - 0201 I just dug up the tags from my old car and it has the same SPD as yours. 8403129501 - 0114 Of course the SPD (Scheduled Production Date) doesn't always line up with the actual build date of the car and the cars didn't necessarily go down the line in sequence to the VIN. Always interesting looking into what Chrysler did. Hope you can get your engine unfrozen. The one to my white car was left outside for several years with the heads off. I had to hammer all of the pistons out. Thanks a lot for your informations. What I'm asking me is if the SPD is linked with the sequence number and if the VIN (normally a consecutive number) is in line with all cars produced at the Jefferson plant at that time. Or if the sequence number and VIN number is related to the order of the dealer at the factory. Actually I really don't have any clue when exactly my Letter has been assembled at the production line. Happy Motoring! Dieter |
|
| |
|
Board Moderator & Exner Expert 10K+
Posts: 13045
Location: Southern Sweden - Sturkö island | Dieter, the VIN (normally a consecutive number) was in line with all cars produced at the plant. That's the reason that the first 4 numbers are hand punched while the rest is stamped in.
There's a high possibility that the car in question was produced at the scheduled production date. |
|
| |
|
Expert
Posts: 1530
Location: ZH, Switzerland | Hi Sven Thanks a lot. This morning, when I applied torque to the center screw (3/4" screw) with my torque ratchet something unexpected happened when I applied the torque CCW. I could break loose the center screw. So I could only apply torque to he CW direction (saftey reason: adjusted to the nominal torque addressed in the 1960 service manual). I think I need a chain wrench now to apply torque to the double grooved pulley, e.g. http://www.reedmfgco.com/en/products/wrenches/chain-wrenches-heavy-... or http://www.rothenberger-usa.com/en/products/-/208-chain-pipe-wrench-heavy-duty-/ Happy Motoring! Dieter BTW: I have the imagination that the crankshaft moved a little bit - in one cylinder I could see a small band with a different color (more red) at the cylinder wall above the piston.
Edited by di_ch_NY56 2016-03-26 6:54 AM
|
|
| |
|
Board Moderator & Exner Expert 10K+
Posts: 13045
Location: Southern Sweden - Sturkö island | Yes Dieter, one VIN tag was picked for the actual car on the assembly line, could be one New Yorker before a 300F after a Saratoga etc...
Don't use those wrenches on the pulleys Dieter - you'll uin the pulley (best case) or destroy the harmonic damper (worst case)
Perhaps you could use a Crow bar through the drain access in the bottom of the bell housing. You'll need a thin one, eventually slightly bent sideways because the flywheel is to the Engine side in the opening. |
|
| |
|
Expert
Posts: 1530
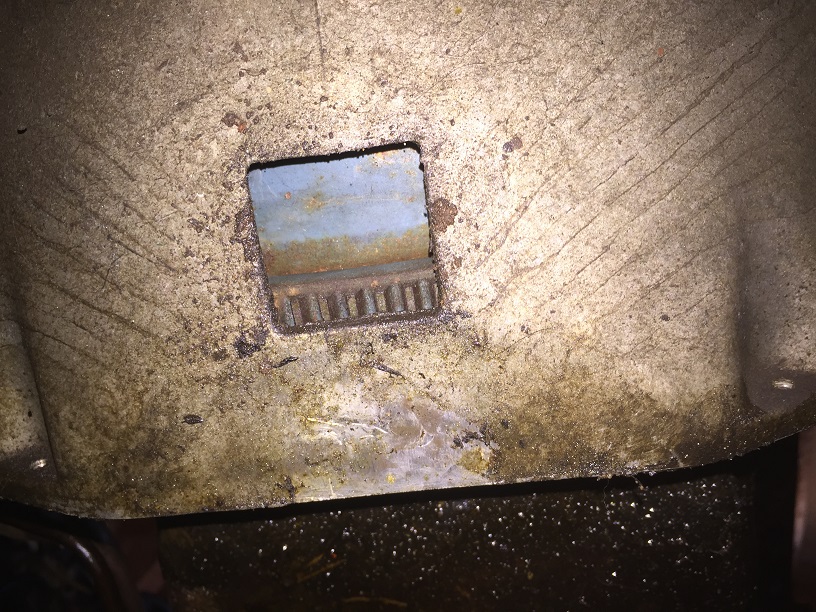
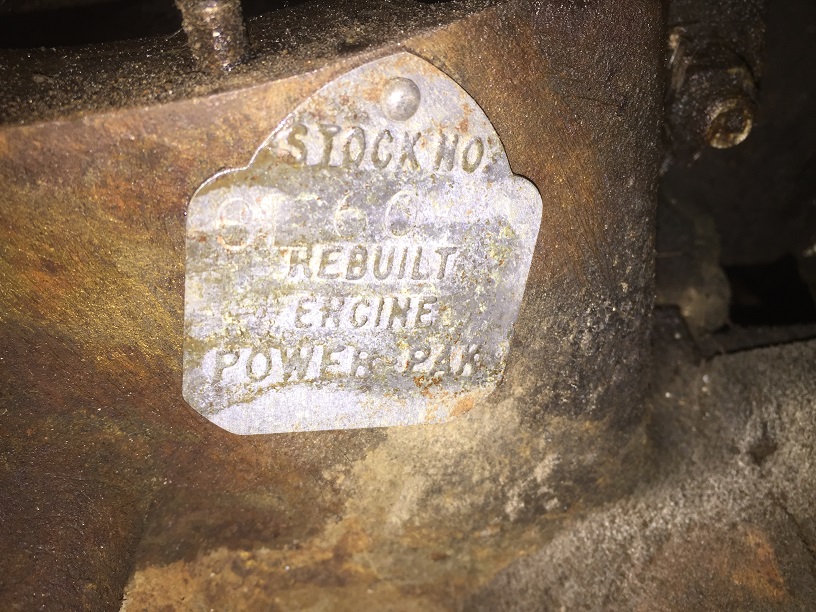
Location: ZH, Switzerland | I was working again at the Letter. To my disappointment the crankshaft didn't move even a thousands of an inch. I removed the cover plate at the bellhouse and noticed a tag at the front of the drivers side cylinder bank while I was seeking for a serial number at the engine block. That doesn't look very promissing. At my Beast the serial number is punched into the boss behind the water pump housing. The serial number of the engine of my former truck was punched into the front of the engine block (318 A engine). Dieter
Edited by di_ch_NY56 2016-03-26 4:53 PM
 (IMG_2505_resized.JPG) (IMG_2505_resized.JPG)
 (IMG_2508_resized.JPG) (IMG_2508_resized.JPG)
 (IMG_2511_resized.JPG) (IMG_2511_resized.JPG)
Attachments
----------------
IMG_2505_resized.JPG (264KB - 520 downloads)
IMG_2508_resized.JPG (158KB - 520 downloads)
IMG_2511_resized.JPG (255KB - 517 downloads)
|
|
| |
|
Expert
Posts: 1223
Location: Ramona, CA | They didn't put the car serial number on the engines until after the start of 1968. That year they are on the top left rear of the engine next to the bellhousing. 1969 and up it's on the pan rail at the bottom of the engine. |
|
| |
|
Expert
Posts: 1530
Location: ZH, Switzerland | Hi Nick thanks for your replay. Happy Motoring! Dieter |
|
| |
|
Expert
Posts: 1530
Location: ZH, Switzerland | Today I looked for what is to do for the preparation of the transmission removal. Then I looked at the trunk lid again and found some evidence that the ornament didn't walk away itself Somebody apparently used a screw driver and all four mounting bolts are still in place. Plus there was some sealant or glue used to fix the ornament in the trunk lid... personally I do not wonder when my ornament would appear at e-pain in a few years... Happy Motoring! Dieter
 (IMG_2512_resized.JPG) (IMG_2512_resized.JPG)
Attachments
----------------
IMG_2512_resized.JPG (174KB - 529 downloads)
|
|
| |
|
Expert
Posts: 1530
Location: ZH, Switzerland | Today I removed the propeller shaft. The u-joint looks okay, it's just a little bit sticky but no lash noticeable. First I removed the propeller shaft from the emergency brake and afterwards at the yoke at the differential. When I removed the drive shaft I vaguely remember that first I removed it at the yoke of the differential and afterwards at the emergency brake. No wonder the propeller shaft fell to my nose when removing it from the emergency brake first. Now it's a real pain to remove the cap nut to remove the speedometer cable. That's the next step to proceed to remove the Plymouth transmission. Happy Motoring! |
|
| |
|
Expert
Posts: 1530
Location: ZH, Switzerland | Yesterday I got a parcel from England, containg No 12 x 0.75 stainless steel machine screws (10 pieces). Three of them I used to mount the cleaned (ultra sonic bath) and lubed deck lid latch. Now I could close the deck lid like on a normal car and I do not need the clamping set anymore. To open I use a metric #4 blade screw driver. That fits perfect into the slot for the opener mechanism of the latch. Today I removed the non stock expansion container for the radiator. It seems somebody tried to cure the loss of coolant fluid (cylinder head gasket leak) with an external container... Happy Motoring! Dieter
 (IMG_2515_resized.JPG) (IMG_2515_resized.JPG)
 (IMG_2519_resized.JPG) (IMG_2519_resized.JPG)
 (IMG_2520_resized.JPG) (IMG_2520_resized.JPG)
Attachments
----------------
IMG_2515_resized.JPG (170KB - 512 downloads)
IMG_2519_resized.JPG (223KB - 516 downloads)
IMG_2520_resized.JPG (244KB - 506 downloads)
|
|
| |
|
Expert
Posts: 1223
Location: Ramona, CA | I need to replace my trunk latch, the spring that holds it open when you open the lid broke. I did replace the lock cylinder so I don't have to use a screwdriver anymore. |
|
| |
|
Expert
Posts: 1530
Location: ZH, Switzerland | Hi Nick Compared to your 300F I need a trunk lock. There was none in the parts stock I got from the seller. As for the trunk lock latch I would contact Big M. As far as I know it's a generic part used on many Mopar cars during that time period. Happy Motoring! Dieter |
|
| |
|
Expert
Posts: 1530
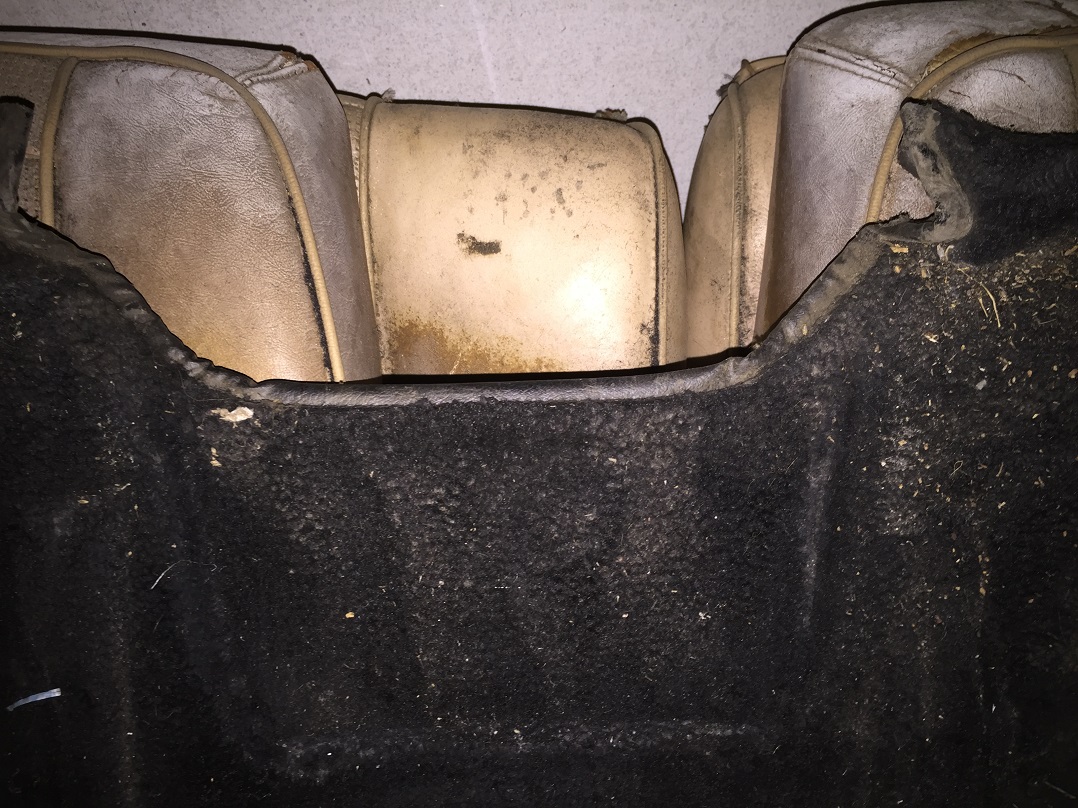
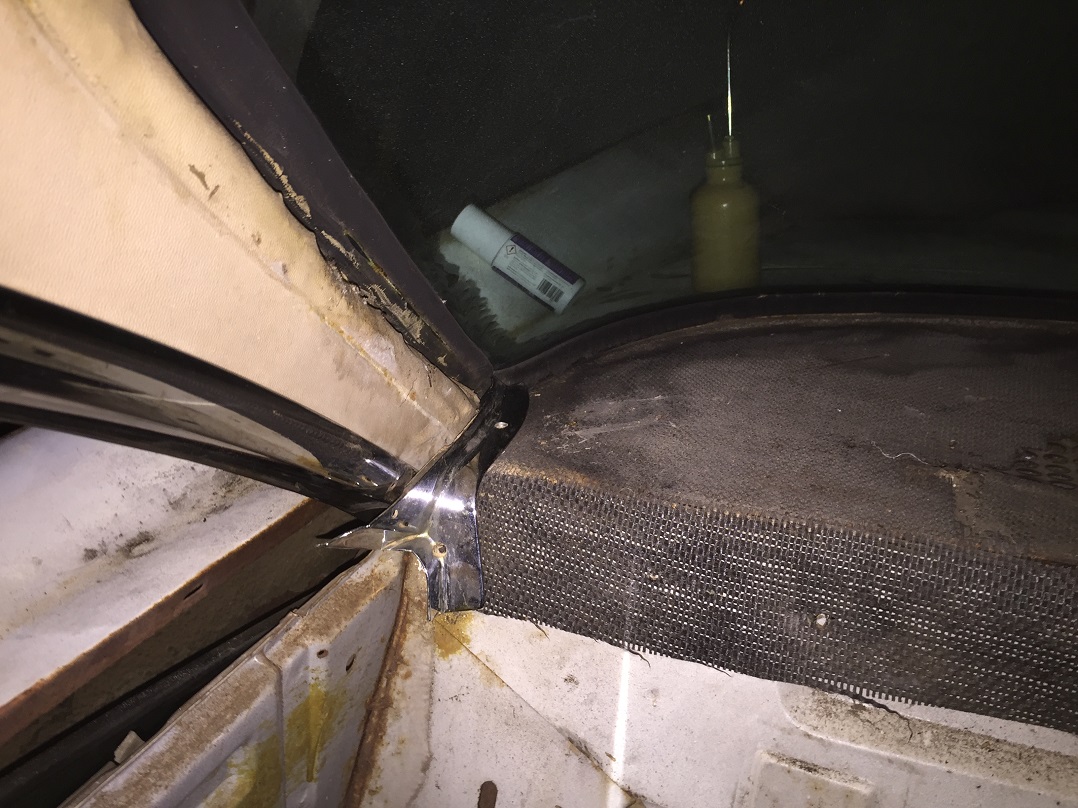
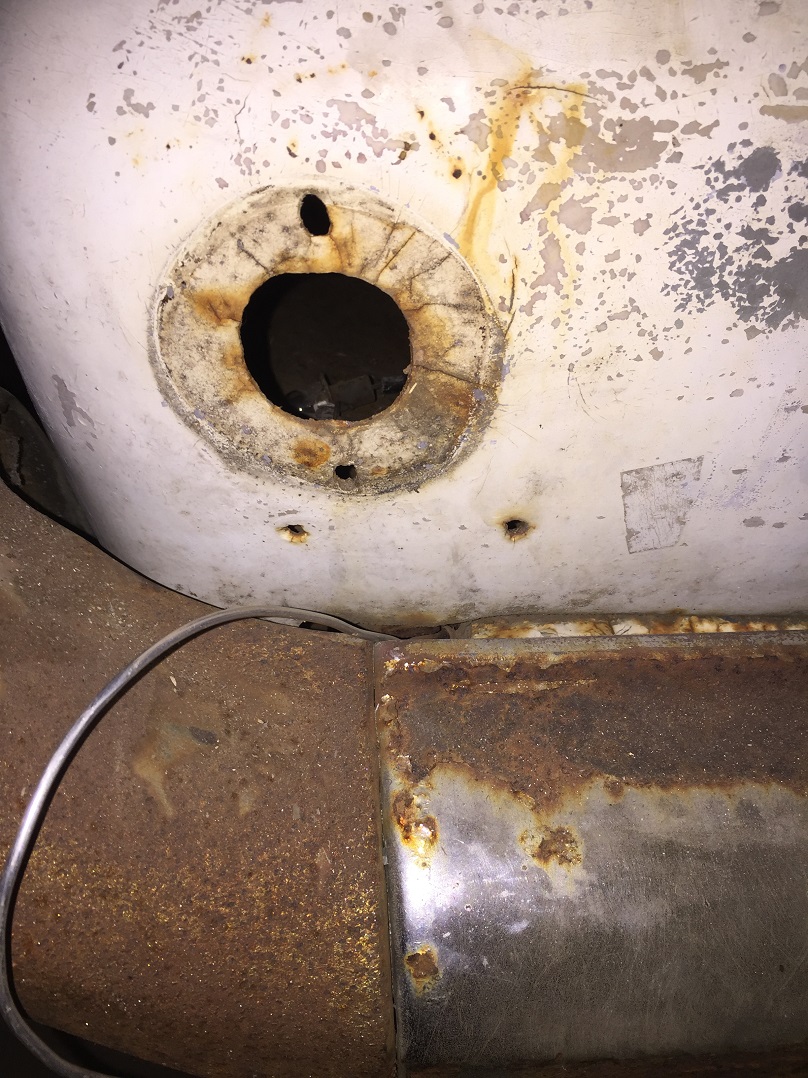
Location: ZH, Switzerland | Yesterday night I took pictures of the rear panel because there is a discussion at Jaris thread to help. At the picture collection are two pictures with the seam (top end and bottom end). Thanks to the pictures of Nick I found two pieces for the C pillar. As well documented with pictures. I found a tin can mounted below the stock washer water canister. It looks like a reservoir for the vacuum. Anybody has a similar tin can mounted below the canister? Happy Restoring! Dieter
 (IMG_2528-resized.JPG) (IMG_2528-resized.JPG)
 (IMG_2532_resized.JPG) (IMG_2532_resized.JPG)
 (IMG_2523_resized.JPG) (IMG_2523_resized.JPG)
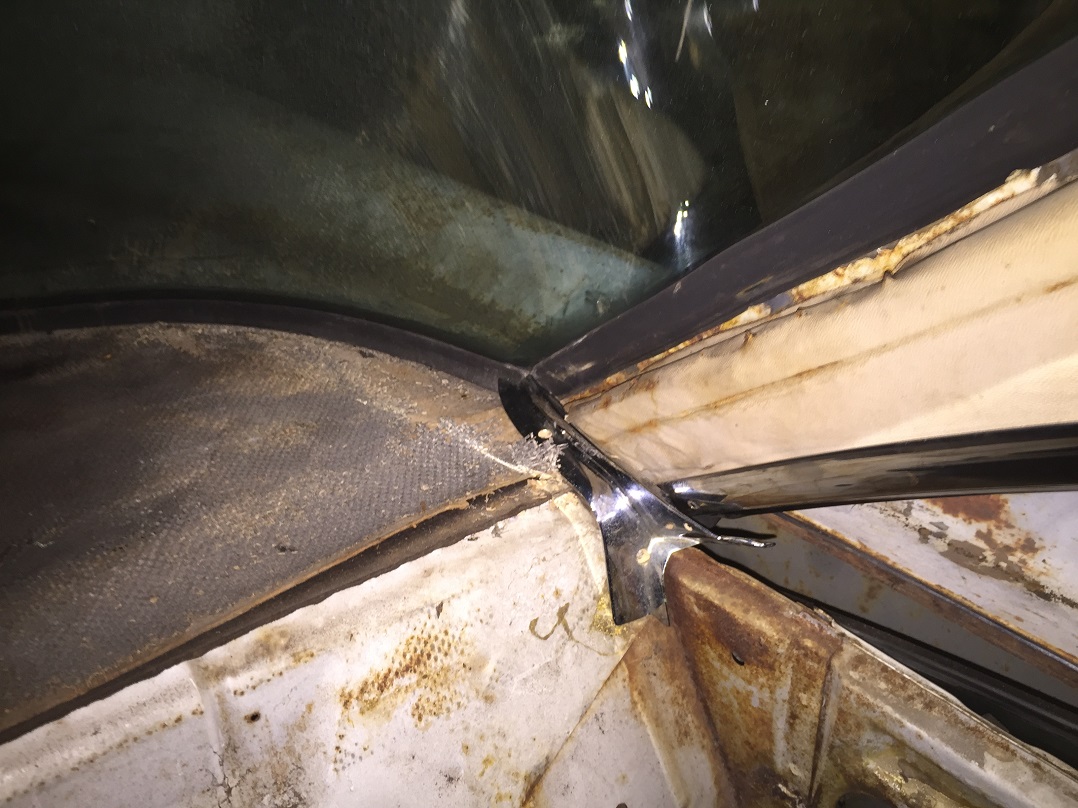 (IMG_2524_resized.JPG) (IMG_2524_resized.JPG)
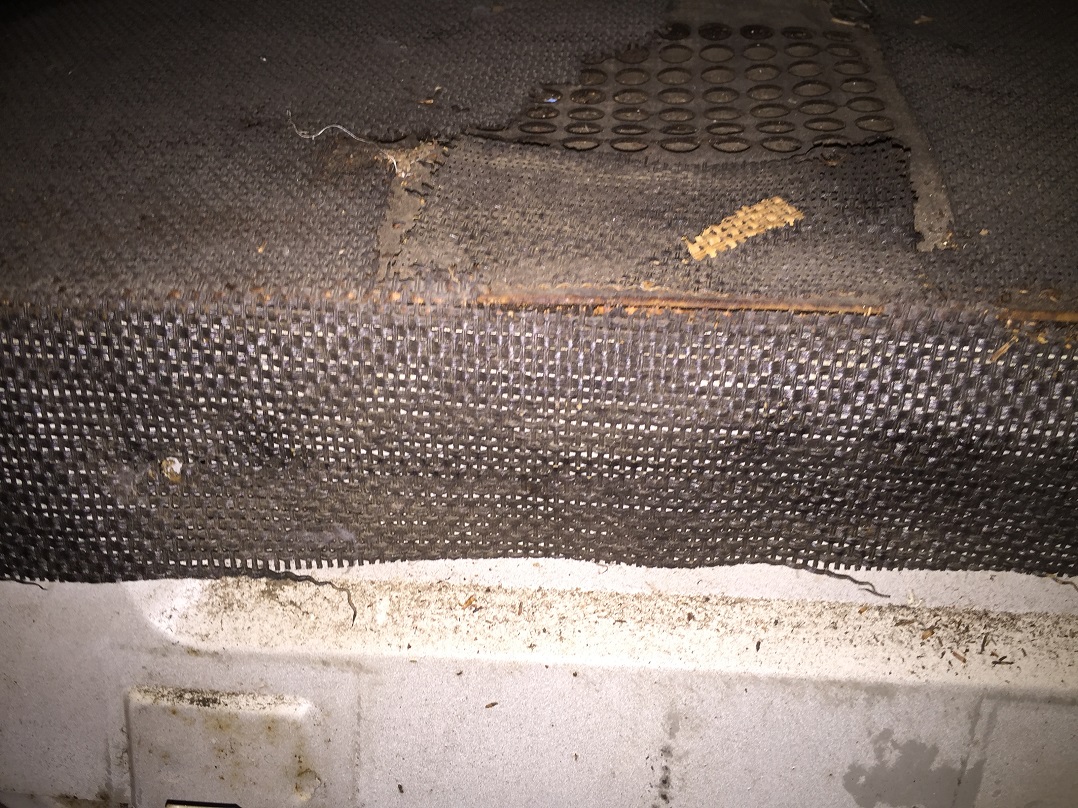 (IMG_2526_resized.JPG) (IMG_2526_resized.JPG)
 (IMG_2533_resized.JPG) (IMG_2533_resized.JPG)
Attachments
----------------
IMG_2528-resized.JPG (204KB - 507 downloads)
IMG_2532_resized.JPG (366KB - 521 downloads)
IMG_2523_resized.JPG (294KB - 510 downloads)
IMG_2524_resized.JPG (268KB - 504 downloads)
IMG_2526_resized.JPG (434KB - 510 downloads)
IMG_2533_resized.JPG (266KB - 511 downloads)
|
|
| |
|
Board Moderator & Exner Expert 10K+
Posts: 13045
Location: Southern Sweden - Sturkö island | The coffee tin is standard Equipment Dieter. It's a vacuum resovair tank for wiper washers and heater actuators |
|
| |
|
Expert
Posts: 1530
Location: ZH, Switzerland | Thanks Wizard. So I'm gonna to keep it. Happy Motoring! Dieter |
|
| |
|
Expert
Posts: 1223
Location: Ramona, CA | wizard - 2016-04-03 7:14 AM
The coffee tin is standard Equipment Dieter. It's a vacuum resovair tank for wiper washers and heater actuators
I'm missing this can on my 300F. Is it the same in '61-62? I know I can get a generic one.
 (vacuum_cannister.jpg) (vacuum_cannister.jpg)
Attachments
----------------
vacuum_cannister.jpg (266KB - 514 downloads)
|
|
| |
|
Expert 5K+
Posts: 7206
Location: Victoria, BC, on Vancouver Island, Canada | That system was only used in 1960 on Chrysler and DeSoto. In 61 I believe they went back to the Jiffy Jet system. This is the Trico Coordinated washer system, which was also used on Corvette and Cadillac in that era. As to the vacuum can, maybe John Fowlie has some ( BIG-M ).
Edited by imopar380 2016-04-04 7:36 PM
|
|
| |
|
Expert
Posts: 1223
Location: Ramona, CA | They may have had a smaller can for the heater controls in '61-62. The '68-69 Chargers used a similar can for the hidden headlights. It was mounted under the battery. In '70 they went to an electric motor. I may have the can from my old 300F. |
|
| |
|
Expert
Posts: 1530
Location: ZH, Switzerland | When I visited my Letter the first time at the yard of the shipping company in Switzerland I discovered that the trunk lid ornament was not on the trunk lid anymore, I informed a friend. His proposal was to use a plain deck lid like from a Windsor, Saratoga or New Yorker. His point was that the trunk lid is in a discutable state as well (almost beyond repair) and some 300F left the factory without the toilet seat. I resisted until today because my plan was to bring my Letter back to the state it left the factory. If I would use a plain deck lid anybody could get out (with the broadcast sheet) that my Letter isn't original anymore. As a consequence I'm not related to the broadcast sheet anymore so I could choose any color for the body in a range from gay rose to charcoal metallic and from viper green to blue, red, black or dark brown for the seat covers and door panels. Or let the original (and repaired) trunk lid with no ornament forever...
Happy restoring! Dieter BTW: my opinion: any body color except rose and black. Black is an absolutely no go for me.
Edited by di_ch_NY56 2016-04-24 5:31 AM
 (IMG_1090_zps8baakhdh_resized.jpg) (IMG_1090_zps8baakhdh_resized.jpg)
 (image002.jpg) (image002.jpg)
Attachments
----------------
IMG_1090_zps8baakhdh_resized.jpg (100KB - 510 downloads)
image002.jpg (123KB - 510 downloads)
|
|
| |
|
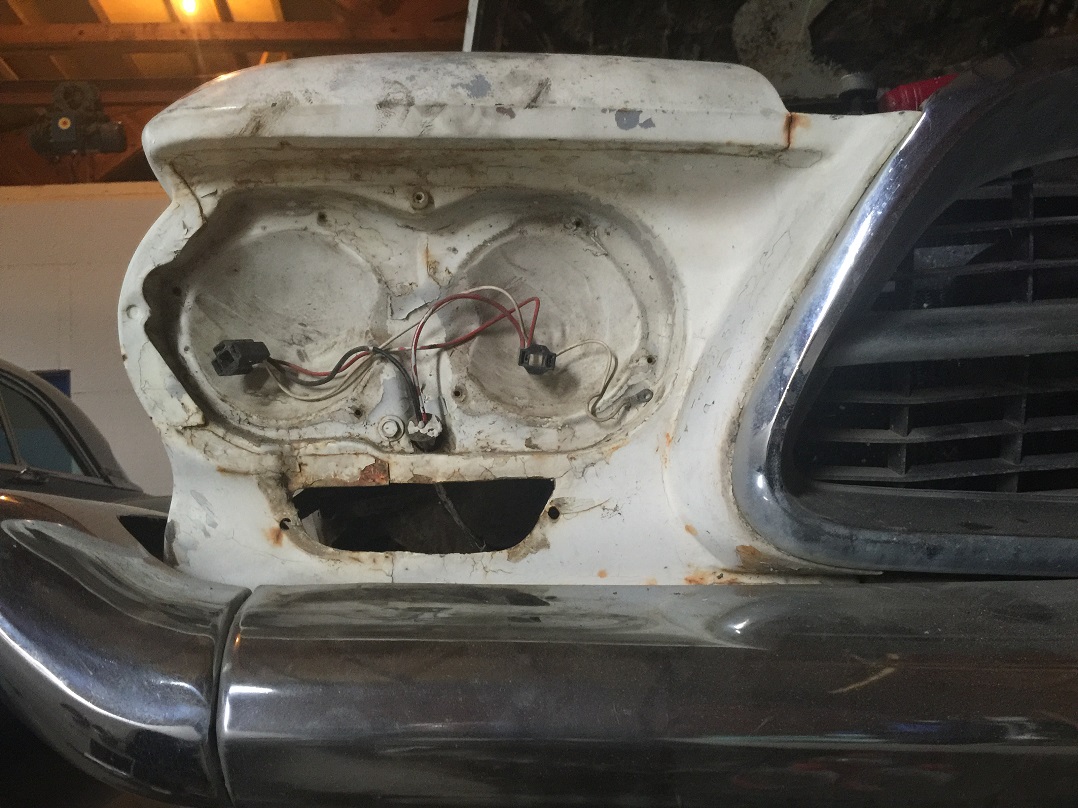
Expert
Posts: 1530
Location: ZH, Switzerland | Yesterday I removed all (except the license plate illumination) lights at the body of my Letter. There are clear evidence that my Letter once was repainted with a brighter white than the original eggshell like original color. What color I would choose I'll decide later on. As I wrote above if I'll change the trunk lid with a plain one then I could choose another color as well. My favorite is stardust blue metallic like I saw on a 300F convertible (picture from Sweden). That convertible looks very sharp with stardust blue metallic. Next steps are removing the bumpers, the resting chrome trime (passenger side only), the dashboard, the transmission, the engine, the side windows, the wiring harness and - when my Letter is on the floor again - the windshield and rear window. Happy Restoring! Dieter
 (IMG_2608_resized.JPG) (IMG_2608_resized.JPG)
 (IMG_2609_resized.JPG) (IMG_2609_resized.JPG)
 (IMG_2610_resized.JPG) (IMG_2610_resized.JPG)
 (IMG_2612_resized.JPG) (IMG_2612_resized.JPG)
 (IMG_2625_resized.JPG) (IMG_2625_resized.JPG)
 (IMG_2626_resized.JPG) (IMG_2626_resized.JPG)
 (IMG_2629_resized.JPG) (IMG_2629_resized.JPG)
 (IMG_2630_resized.JPG) (IMG_2630_resized.JPG)
 (IMG_2637_resized.JPG) (IMG_2637_resized.JPG)
Attachments
----------------
IMG_2608_resized.JPG (263KB - 496 downloads)
IMG_2609_resized.JPG (389KB - 505 downloads)
IMG_2610_resized.JPG (308KB - 491 downloads)
IMG_2612_resized.JPG (290KB - 470 downloads)
IMG_2625_resized.JPG (363KB - 484 downloads)
IMG_2626_resized.JPG (324KB - 489 downloads)
IMG_2629_resized.JPG (210KB - 488 downloads)
IMG_2630_resized.JPG (168KB - 481 downloads)
IMG_2637_resized.JPG (338KB - 493 downloads)
|
|
| |
|
Expert
Posts: 1223
Location: Ramona, CA | If you're going to go with a non-standard color have you considered doing two-tone? I really like this red car and thought it would be cool to see a 300F in two-tone like this. Maybe the blue you're thinking of with a darker blue roof. The contrast really makes the fins stand out even more.
 (Image3.jpg) (Image3.jpg)
Attachments
----------------
Image3.jpg (90KB - 486 downloads)
|
|
| |
|
Expert
Posts: 1530
Location: ZH, Switzerland | Thanks a lot for your proposal. This car looks really nice, especially with the wire wheels and the two tone color. I like red as well. But I assume I'll keep my Letter Alaskan White as it was when it left the factory. I can live with it even though it's not my favorite color. http://paintref.com/cgi-bin/colorcodedisplay.cgi?type=paint&paint=7003&ditzler=8218&syear=1960&smanuf=Chrysler&smodel=&sname=Alaskan%20White&rows=50 Furthermore I took some pictures of the grille after I removed it. It looks sad, the frame. Happy Restoring! Dieter
 (IMG_2638_resized.JPG) (IMG_2638_resized.JPG)
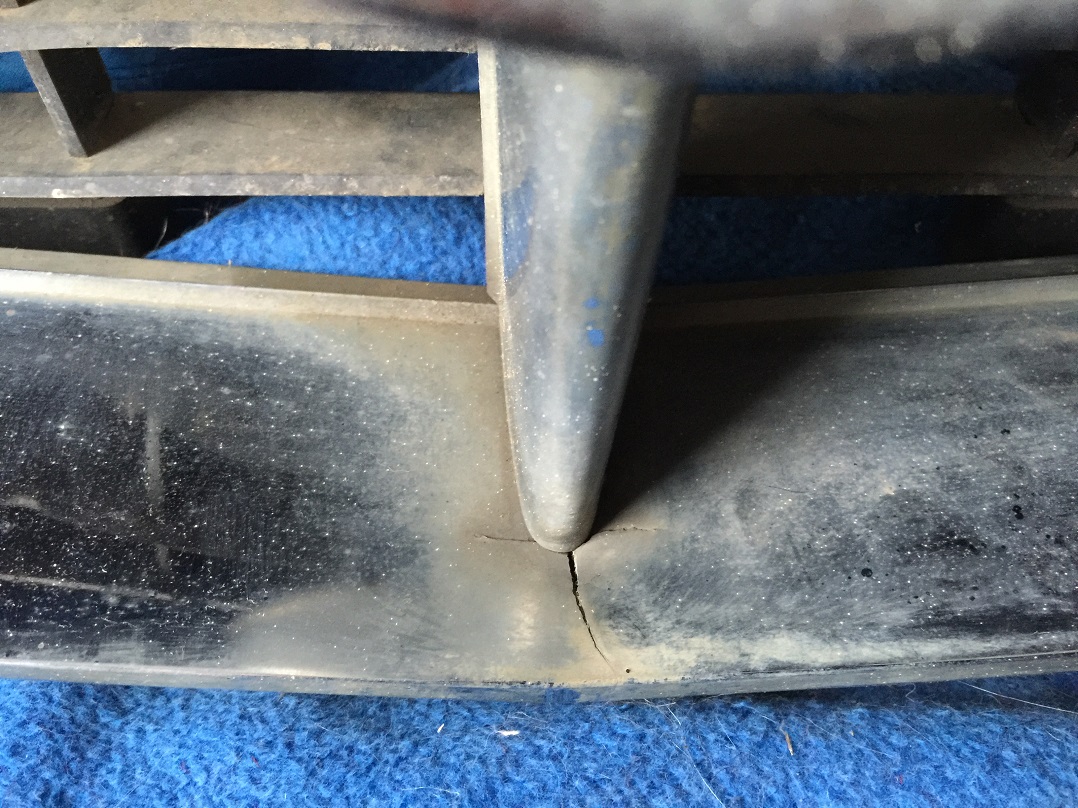 (IMG_2639_resized.JPG) (IMG_2639_resized.JPG)
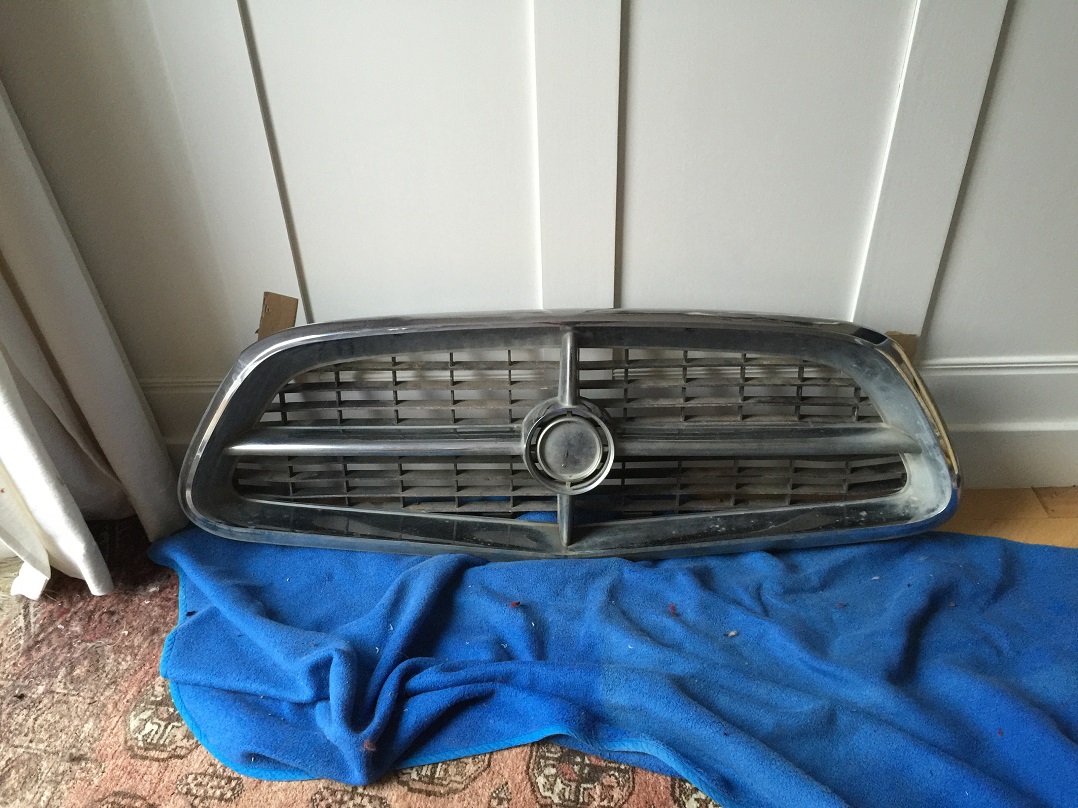 (IMG_2642_resized.JPG) (IMG_2642_resized.JPG)
Attachments
----------------
IMG_2638_resized.JPG (273KB - 489 downloads)
IMG_2639_resized.JPG (355KB - 479 downloads)
IMG_2642_resized.JPG (301KB - 488 downloads)
|
|
| |
|
Expert
Posts: 1223
Location: Ramona, CA | Can you use a New Yorker grill frame to replace that? |
|
| |
|
Expert 5K+
Posts: 7206
Location: Victoria, BC, on Vancouver Island, Canada | I am fairly sure you could use a New Yorker grille frame. Holes would need to be drilled for the bar mounts. |
|
| |
|
Board Moderator & Exner Expert 10K+
Posts: 13045
Location: Southern Sweden - Sturkö island | Yes, the outer grille frame is the same, if you look on the Picture of the inside, you can see that the bolt hole was drilled, not casted.
It would be wise to mount a reinforcement washer in the 4 mounting positions for cross. |
|
| |
|
Expert
Posts: 1530
Location: ZH, Switzerland | Big thank you for your comments and proposals. I hope I could find a nice NY grille frame. In the meantime I took two more pictures to show details of the frame and the grille from the back. What I don't know is if the vertical rails of the grille should be straight or slightly bent like on mine. I'll appreciate your answers very much. Thank you. Happy restoring! Dieter
 (IMG_2643_resized.JPG) (IMG_2643_resized.JPG)
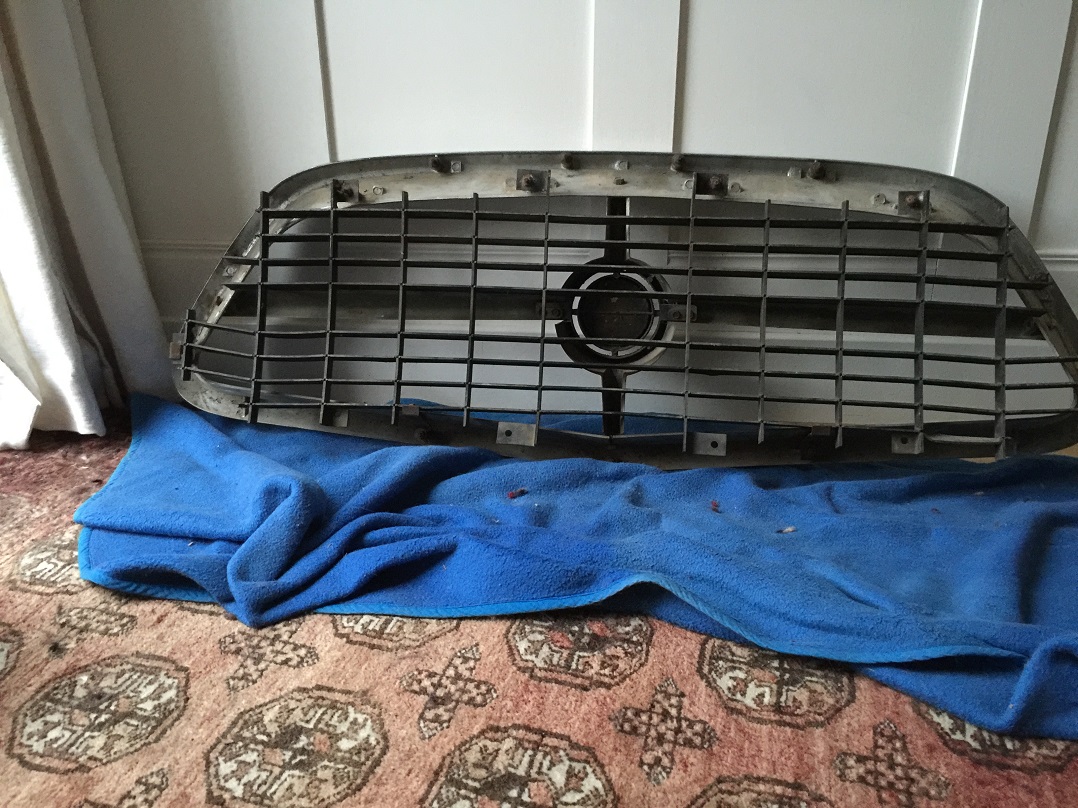 (IMG_2644_resized.JPG) (IMG_2644_resized.JPG)
Attachments
----------------
IMG_2643_resized.JPG (279KB - 540 downloads)
IMG_2644_resized.JPG (357KB - 491 downloads)
|
|
| |
|
Board Moderator & Exner Expert 10K+
Posts: 13045
Location: Southern Sweden - Sturkö island | It looks a little sloppy on the bolts Dieter, actually the spare part manual shows two different frames;
PC-3 1863 785
PC-300 1963 235
Could it be that the frame already is a NY one? At least it seems like the bolts from the side should have had something more, perhaps a slated washer.
Nick, can you check on your car and confirm? |
|
| |
|
Expert
Posts: 1223
Location: Ramona, CA | wizard - 2016-04-25 12:24 PM
It looks a little sloppy on the bolts Dieter, actually the spare part manual shows two different frames;
PC-3 1863 785
PC-300 1963 235
Could it be that the frame already is a NY one? At least it seems like the bolts from the side should have had something more, perhaps a slated washer.
Nick, can you check on your car and confirm?
I'll take a look at mine and see what it has there. It will be a couple days as my car is still at my friend's shop. |
|
| |
|
Expert
Posts: 1223
Location: Ramona, CA | NicksGarage - 2016-04-04 3:14 PM
wizard - 2016-04-03 7:14 AM
The coffee tin is standard Equipment Dieter. It's a vacuum resovair tank for wiper washers and heater actuators
I'm missing this can on my 300F. Is it the same in '61-62? I know I can get a generic one.
I talked to someone who has multiple 1960 Chrysler and they only had the can on one of them. I looked at my car and don't see any evidence that one was there before. |
|
| |
|
Board Moderator & Exner Expert 10K+
Posts: 13045
Location: Southern Sweden - Sturkö island | If the cars had the Trico coordinated wiper washer, then there must be a resovair tank. If the car had a Jiffy bag with Electric pump, then there's no need for a resovair tank.
Obviously, Power brakes Always needs a resovair tank, but that was mounted in the left front fender or under the battery tray |
|
| |
|
Expert
Posts: 1223
Location: Ramona, CA | wizard - 2016-04-25 10:31 PM
If the cars had the Trico coordinated wiper washer, then there must be a resovair tank. If the car had a Jiffy bag with Electric pump, then there's no need for a resovair tank.
Obviously, Power brakes Always needs a resovair tank, but that was mounted in the left front fender or under the battery tray
These were all 1960 cars with the vacuum washer like mine. |
|
| |
|
Extreme Veteran
Posts: 375
Location: milano, italy | Dieter, my F has no toilet seta from the factory, but on the build sheet it's clearly written "special order deck lid". I think there is a pic on my F page here on the forum. I would restore the car as is. You have to call Dan Petty for 300 parts, or hear someone in the 300 club. Also Jeff Carter has some old stuff avaible, but he is not easy to reach
|
|
| |
|
Board Moderator & Exner Expert 10K+
Posts: 13045
Location: Southern Sweden - Sturkö island | NicksGarage - 2016-04-26 8:10 AM
wizard - 2016-04-25 10:31 PM
If the cars had the Trico coordinated wiper washer, then there must be a resovair tank. If the car had a Jiffy bag with Electric pump, then there's no need for a resovair tank.
Obviously, Power brakes Always needs a resovair tank, but that was mounted in the left front fender or under the battery tray
These were all 1960 cars with the vacuum washer like mine.
Thats very strange Nick - where is the vaccum "feed" hose on the Trico connected to then? Power brake resovair or manifold? |
|
| |
|
Expert
Posts: 1223
Location: Ramona, CA | wizard - 2016-04-25 11:42 PM
NicksGarage - 2016-04-26 8:10 AM
wizard - 2016-04-25 10:31 PM
If the cars had the Trico coordinated wiper washer, then there must be a resovair tank. If the car had a Jiffy bag with Electric pump, then there's no need for a resovair tank.
Obviously, Power brakes Always needs a resovair tank, but that was mounted in the left front fender or under the battery tray
These were all 1960 cars with the vacuum washer like mine.
Thats very strange Nick - where is the vaccum "feed" hose on the Trico connected to then? Power brake resovair or manifold?
That's part of my problem, all the vacuum lines were disconnected and some were plugged with twigs. I'll take a picture of what's there. I hooked them back up based on the sizes.
I don't see the vacuum reservoir in the parts book but it might not be listed with the rest of the washer stuff. The vacuum tank for the brakes is listed in the brake section. They do list the washer hoses and the lengths.
3/16" OD 127"
9/32" OD 40"
13/32" OD 76"
13/32" OD 90" |
|
| |
|
Expert
Posts: 1223
Location: Ramona, CA | I looked at my spare grille and it's like Dieter's where the bolts go through the side. I'll look at the one in my car tomorrow.
 (a2016-04-26 19.00.14.jpg) (a2016-04-26 19.00.14.jpg)
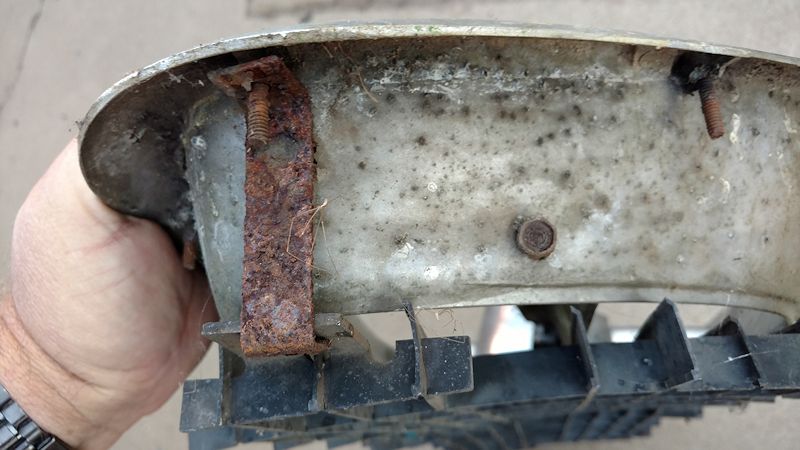 (a2016-04-26 19.00.43.jpg) (a2016-04-26 19.00.43.jpg)
Attachments
----------------
a2016-04-26 19.00.14.jpg (86KB - 492 downloads)
a2016-04-26 19.00.43.jpg (78KB - 515 downloads)
|
|
| |
|
Board Moderator & Exner Expert 10K+
Posts: 13045
Location: Southern Sweden - Sturkö island | Well, that IS a sloppy installation - now we can almost be sure that they used the New Yorker frame and drilled holes in it |
|
| |
|
Expert
Posts: 1530
Location: ZH, Switzerland | Thanks a lot for all of your comments. Personally I was wondering as well why Chrysler didn't use specialised washers to get a parallel surface to the hex head of the screw. The two different parts numbers for the frame could indicate just with (300F) or with no screw holes (NY) in the frame. Happy Restoring! Dieter
Edited by di_ch_NY56 2016-04-27 1:11 PM
|
|
| |
|
Expert
Posts: 1530
Location: ZH, Switzerland | antonellomopar - 2016-04-25 8:16 AM Dieter, my F has no toilet seta from the factory, but on the build sheet it's clearly written "special order deck lid". I think there is a pic on my F page here on the forum. I would restore the car as is. You have to call Dan Petty for 300 parts, or hear someone in the 300 club. Also Jeff Carter has some old stuff avaible, but he is not easy to reach Hi Antonello
Thanks a lot for your suggestions. The "toilet seat" is a surname of peoples in the States. In my broadcast sheet fragment there is the box under TRIM "Flitesweep Deck Lid". But there is no number in the check box like e.g. "radio/speeker" which has a 3 (423). Happy Restoring! Dieter |
|
| |
|
Expert
Posts: 1223
Location: Ramona, CA | di_ch_NY56 - 2016-04-27 10:10 AM
Thanks a lot for all of your comments. Personally I was wondering as well why Chrysler didn't use specialised washers to get a parallel surface to the hex head of the screw. The two different parts numbers for the frame could indicate just with (300F) or with no screw holes (NY) in the frame. Happy Restoring! Dieter
Maybe there was a spacer in there. I'll be out working on my car later today and I'll take a look. It wouldn't be that hard to make an angled spacer to go in there to use a New Yorker grille shell. |
|
| |
|
Extreme Veteran
Posts: 375
Location: milano, italy | If there is no number in the box, it means this option was not ordered. On the F the toilet seat trunk lid was standard, so it didn't show on the broadcast sheet. It would appear it's deletion, as on my car. |
|
| |
|
Extreme Veteran
Posts: 375
Location: milano, italy | 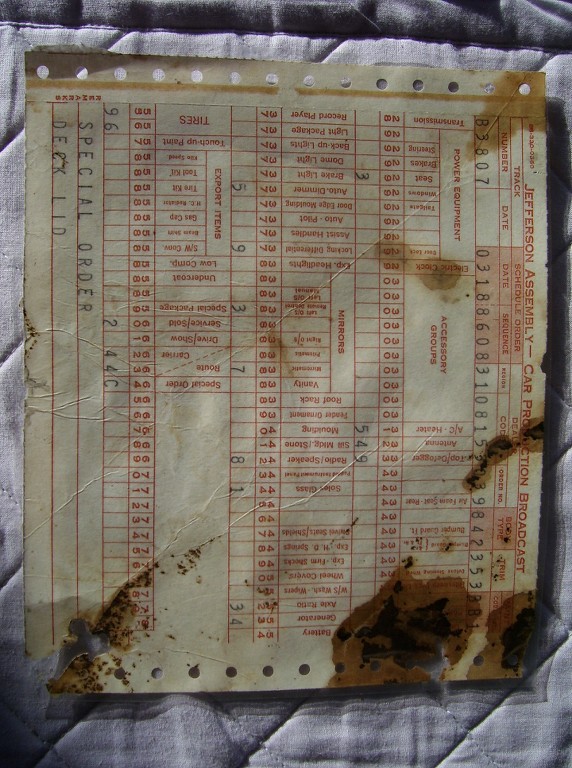 [/IMG] [/IMG] |
|
| |
|
Board Moderator & Exner Expert 10K+
Posts: 13045
Location: Southern Sweden - Sturkö island | antonellomopar - 2016-04-27 8:45 PM
If there is no number in the box, it means this option was not ordered. On the F the toilet seat trunk lid was standard, so it didn't show on the broadcast sheet. It would appear it's deletion, as on my car.
Yep Antonello, that's correct. |
|
| |
|
Expert
Posts: 1223
Location: Ramona, CA | Here is the spacer on my new 300F. Has one on each side. Looks to be made out of pot metal like the grille.
 (grille_bar_side_spacer.jpg) (grille_bar_side_spacer.jpg)
Attachments
----------------
grille_bar_side_spacer.jpg (59KB - 496 downloads)
|
|
| |
|
Board Moderator & Exner Expert 10K+
Posts: 13045
Location: Southern Sweden - Sturkö island | That's surely is better - that way the frame don't break or warps...
Thanks' Nick |
|
| |
|
Expert
Posts: 1223
Location: Ramona, CA | wizard - 2016-04-28 8:15 AM
That's surely is better - that way the frame don't break or warps...
Thanks' Nick
Yes, and easy to replicate with some aluminum rod. I wonder how often they break and fall out? My old car was a pile of rust everything outside was pretty rotten.
|
|
| |
|
Expert
Posts: 1530
Location: ZH, Switzerland | NicksGarage - 2016-04-27 4:11 PM Here is the spacer on my new 300F. Has one on each side. Looks to be made out of pot metal like the grille. It looks wonderful. I don't know if these spacers were from Chrysler. I didn't find them in the parts catalog. In the meantime I disassembled the grille. It's possible to miggy-weld the slot at the bottom of the frame. But then I would build an assisting frame to bend the original frame back to it's original shape. It's because front end of my Letter looks like it apparently was hitted once at the front, rh side. From JcParts it looks like I gonna get an ornament. More later on. Happy Restoring! Dieter |
|
| |
|
Expert
Posts: 1223
Location: Ramona, CA | Glad JC Auto was able to help you with the trunk lid ornament. Every time I called someone for parts I asked about it for you.
Unfortunately the parts book doesn't always show every part for the 300F since it was a late intro. I wonder if that spacer was a running change. Surprising that your car and my old one didn't have them. Maybe I'll post a question on the 300 mailing list to do a survey. |
|
| |
|
Expert
Posts: 1530
Location: ZH, Switzerland | I assume there was a change during the livecylce of the 300F production. I'm sure my Letter was an early bird at the production line. So it could be that the staff had to improvise some solutions. Today I was working at my Letter again for some hours. I tried to loosen the emergency cable at the handle mechanism. But the nut is frozen as well so I cleaned the thread with a steel wire brush and applied penetrating oil. When I looked upwards at the windshield I discovered a crack in the outer glass of the windshield compound. This crack is quite new and was not present few weeks ago. But at least I could destroy the windshield now to save the windshield weatherstrip. At that weatherstrip I discovered a lip inside at the A pillar near the corners routed down to the corners. I think no reproduction weatherstrip would carry this lip. I removed the front license plate and noticed that the year 63 is stamped in where the stickers were mounted at the rear license plate. At the rear license plate is a sticker of 1973 and at the other upper corner 1974. At least the rear sticker were applied when Mr. Fred Schafer was the owner of my Letter. I also applied penetrating oil to the push button mechanism. Now the push buttons are working with ease and don't stick anymore.
Edited by di_ch_NY56 2016-04-30 3:36 PM
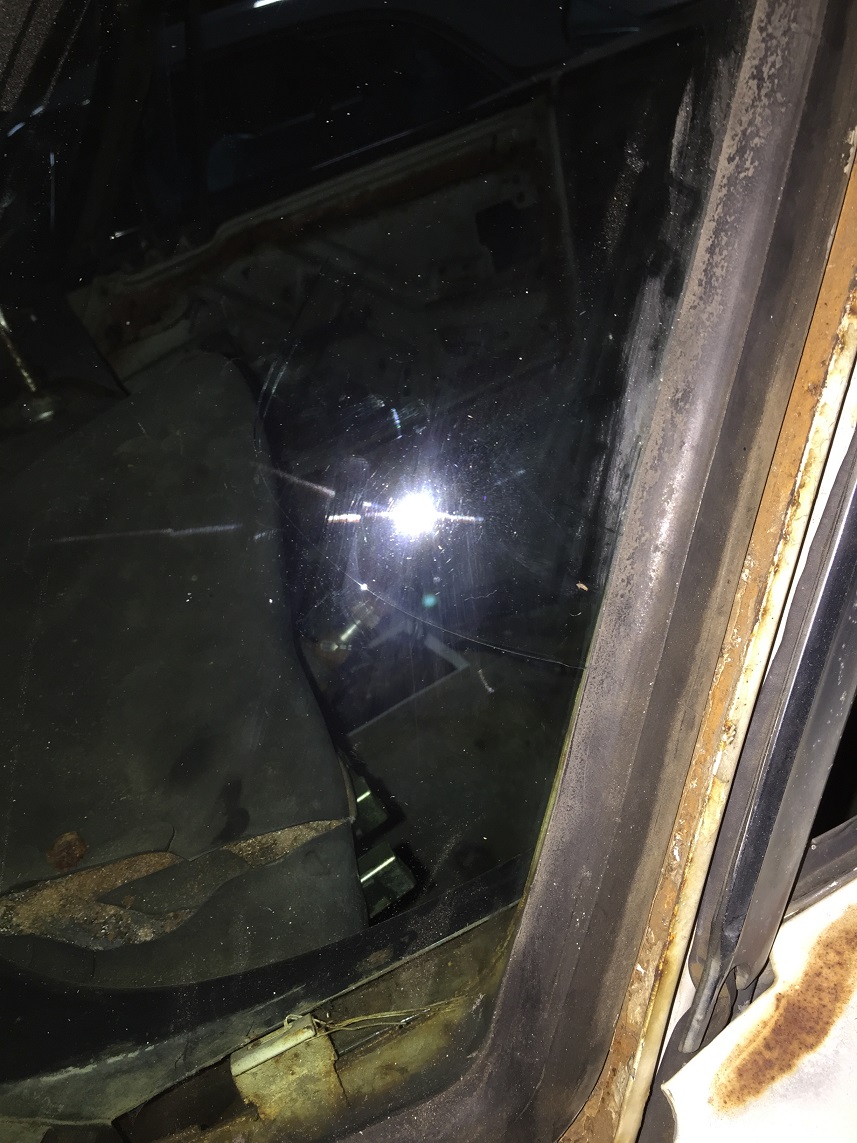 (IMG_2663_resized.JPG) (IMG_2663_resized.JPG)
Attachments
----------------
IMG_2663_resized.JPG (296KB - 477 downloads)
|
|
| |
|
Expert
Posts: 1223
Location: Ramona, CA | California made everyone change their license plates in 1963-64. That was the last year that the state made us change plates. They change during 1970 to the blue plate with yellow characters. The year sticker was supposed to be put on the rear only on the side with the 63 stamp but people did put them in the wrong place at times. Commercial trucks have them on the front plates now but don't know if they did that then. There is no 1963 sticker since it was stamped into the plate.
The state is offering the black plates again and that is what I have on my car. They would have had the correct yellow/black plates if they had gotten enough pre-orders but they didn't. Same with the later blue plates.
I posted the grille question on the 300 mailing list and so far one person came back and said they have the spacers.
https://groups.yahoo.com/neo/groups/Chrysler300/info
|
|
| |
|
Expert
Posts: 1530
Location: ZH, Switzerland | Thanks a lot for your explanation Nick. Today I worked a little at my Letter. I tried to remove the chromed frame around the license plate at the body. Unfortunatley the RH side is sticking because the vertical metal sheet is higher at the RH side than at the LH side of the opening (license plate and filler neck). I removed most of the RH chrome moulding. To remove the chrome trim around the opening I assume first I have to remove the rear bumper... Then I checked the lilfters. Two of 16 lifters were sized due to rust. I applied Diesel to try to free them. Today I noticed that one of the sized lifters is free now (:-). So I think it's just a matter of time until all lifters are free. Happy Restoring! Dieter BTW: I peeled off the broken layer of an unprofessional repair of a parking accident, last picture shows the state after the removal of the layer.
Edited by di_ch_NY56 2016-05-01 8:27 AM
 (IMG_2664_resized.JPG) (IMG_2664_resized.JPG)
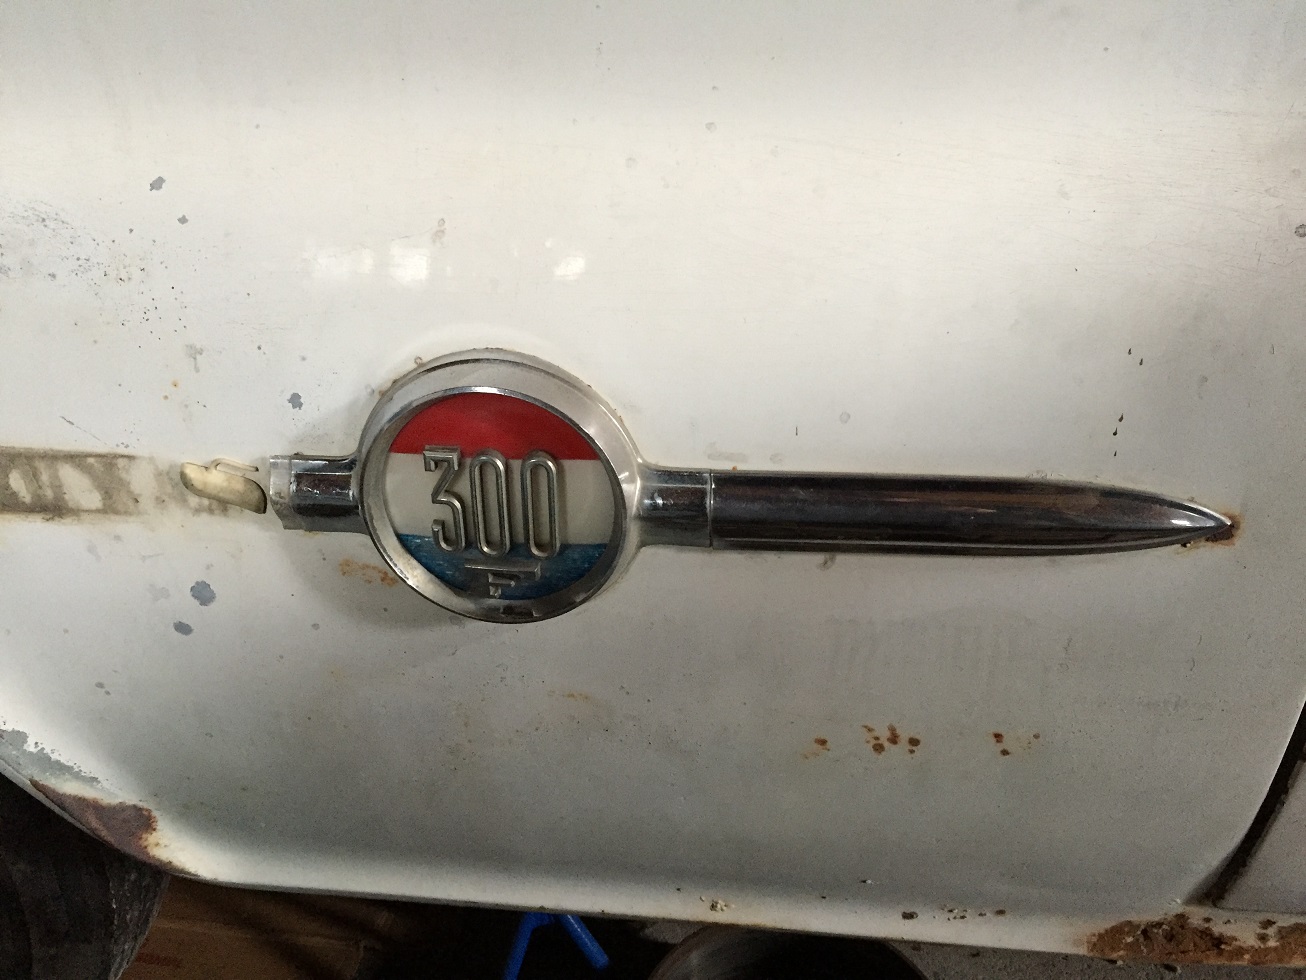 (IMG_2668_resized.JPG) (IMG_2668_resized.JPG)
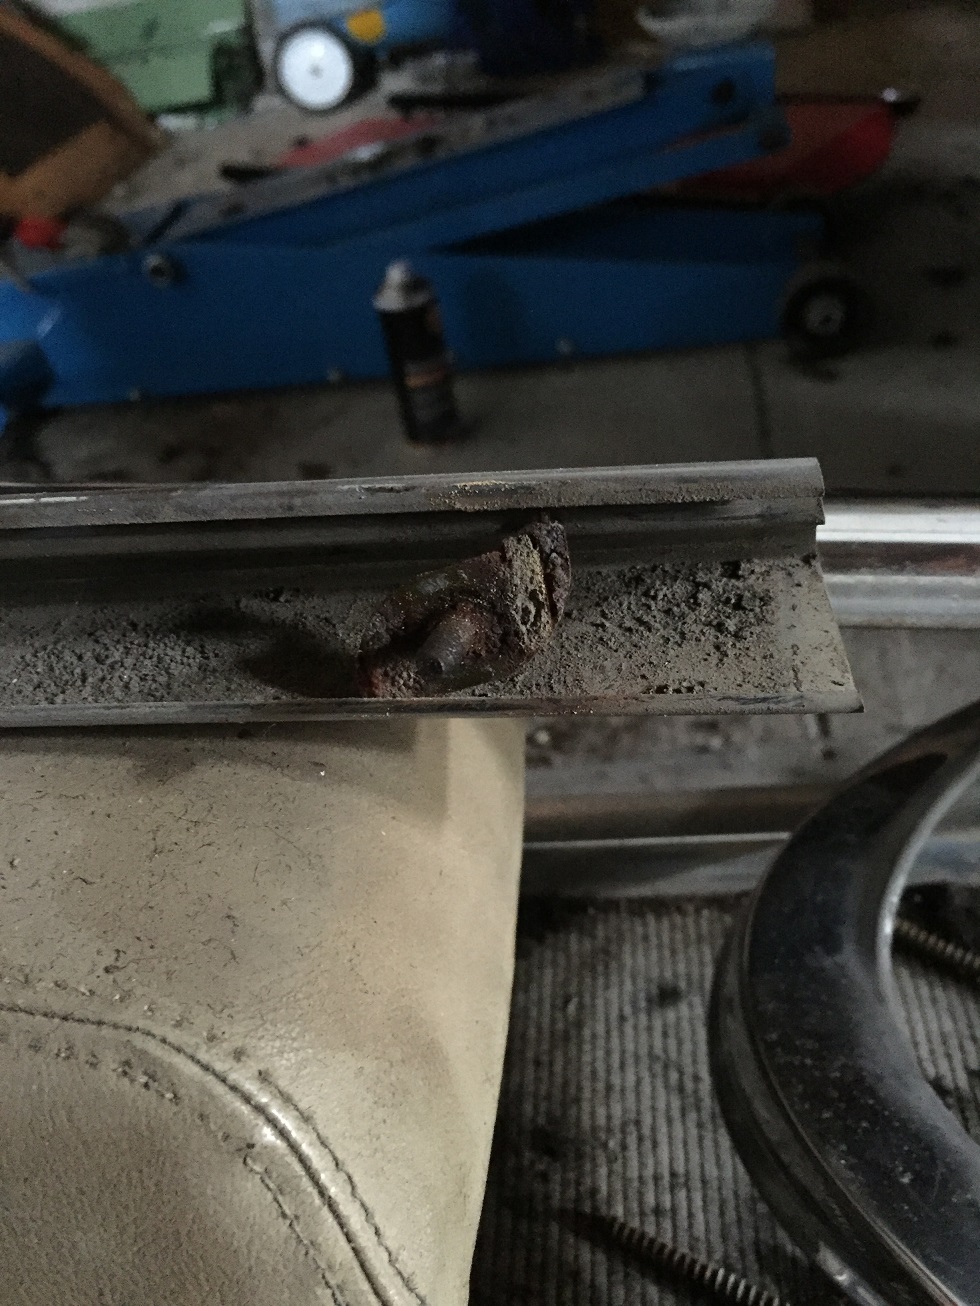 (IMG_2669_resized.JPG) (IMG_2669_resized.JPG)
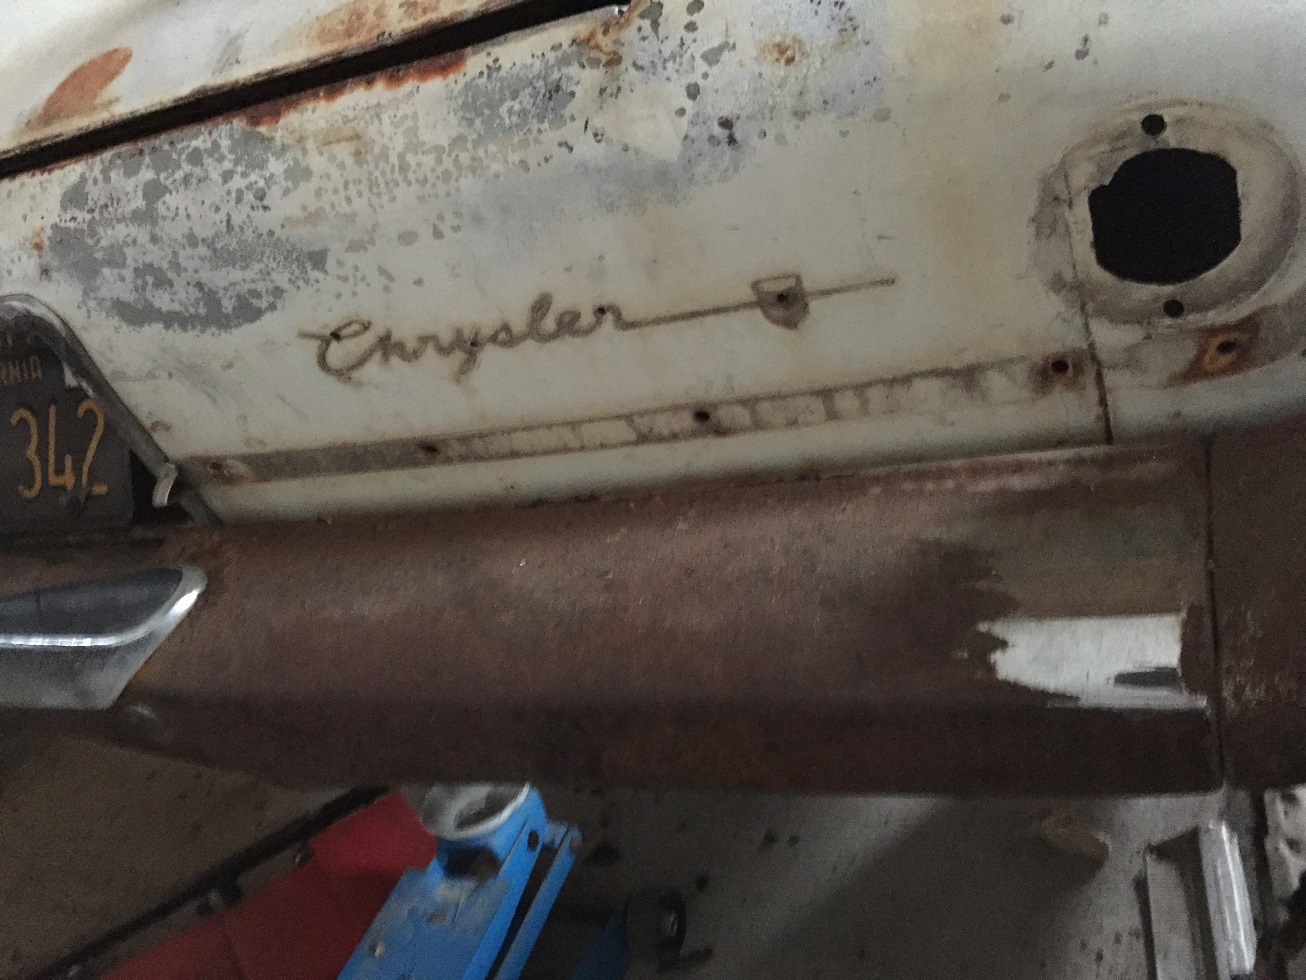 (IMG_2670_resized.JPG) (IMG_2670_resized.JPG)
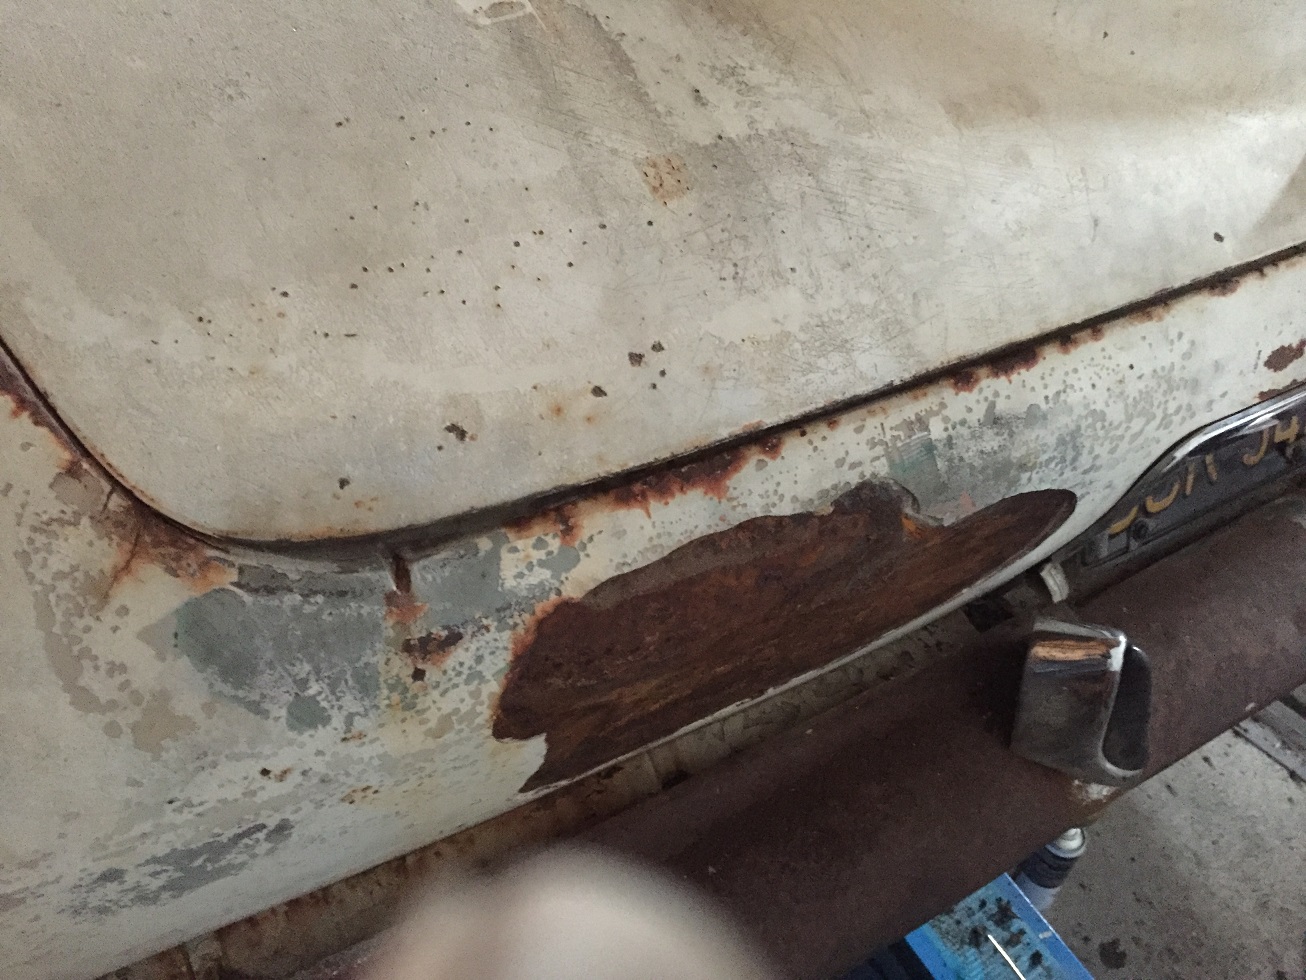 (IMG_2673_resized.JPG) (IMG_2673_resized.JPG)
Attachments
----------------
IMG_2664_resized.JPG (327KB - 479 downloads)
IMG_2668_resized.JPG (313KB - 478 downloads)
IMG_2669_resized.JPG (416KB - 491 downloads)
IMG_2670_resized.JPG (405KB - 483 downloads)
IMG_2673_resized.JPG (417KB - 480 downloads)
|
|
| |
|
Expert
Posts: 1530
Location: ZH, Switzerland | Today (assuncion) I removed all 16 lifters and put it into a frame. Then I removed the resting chrome trim at the RH side. I managed to get two holders of the side rail out of the holes /wo damage. I assume they were made out of phenolic resin. Partially I put the chrome trim together. I noticed at the emblems that the blue color almost separated completely. What type of color is it? It looks like light blue metallc (very fine powder). Happy Restoring! Dieter
 (IMG_2694_resized.JPG) (IMG_2694_resized.JPG)
 (IMG_2695_resized.JPG) (IMG_2695_resized.JPG)
 (IMG_2696_resized.JPG) (IMG_2696_resized.JPG)
 (IMG_2698_resized.JPG) (IMG_2698_resized.JPG)
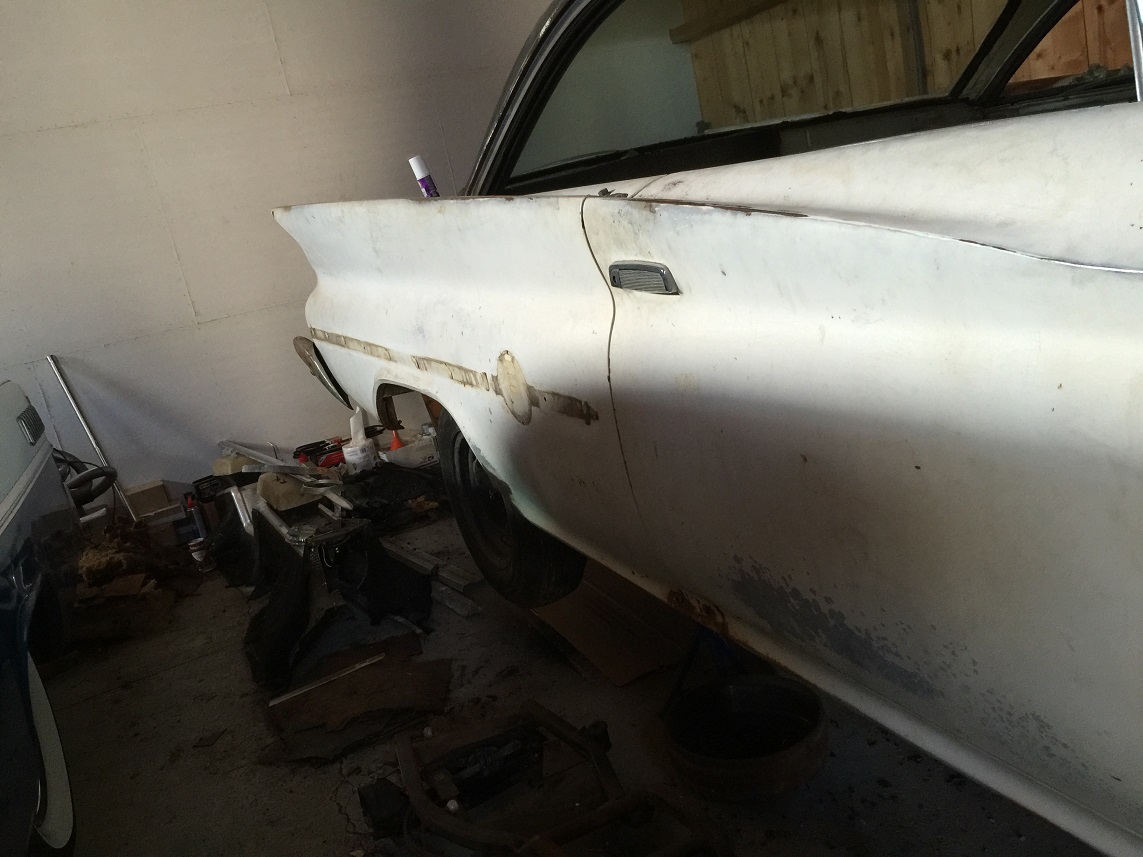 (IMG_2699_resized.JPG) (IMG_2699_resized.JPG)
 (IMG_2700_resized.JPG) (IMG_2700_resized.JPG)
Attachments
----------------
IMG_2694_resized.JPG (404KB - 571 downloads)
IMG_2695_resized.JPG (446KB - 578 downloads)
IMG_2696_resized.JPG (313KB - 599 downloads)
IMG_2698_resized.JPG (387KB - 552 downloads)
IMG_2699_resized.JPG (232KB - 558 downloads)
IMG_2700_resized.JPG (255KB - 553 downloads)
|
|
| |
|
Expert
Posts: 1223
Location: Ramona, CA | I'm not sure what color blue it is supposed to be but I would guess that it faded some. Here are the new emblems I got from the club and the emblems from the car I parted out and and original emblems from my new car.
 (club_emblems.jpg) (club_emblems.jpg)
 (8403150442_079.jpg) (8403150442_079.jpg)
 (8403150442_113.jpg) (8403150442_113.jpg)
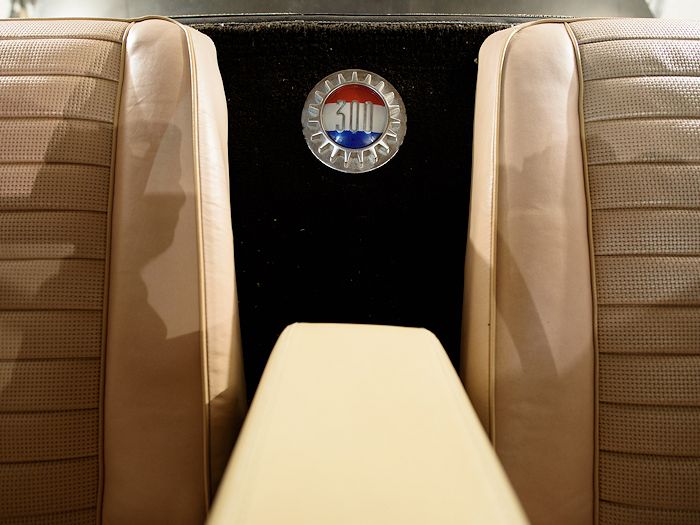 (8403150442_025.jpg) (8403150442_025.jpg)
Attachments
----------------
club_emblems.jpg (163KB - 543 downloads)
8403150442_079.jpg (64KB - 554 downloads)
8403150442_113.jpg (67KB - 564 downloads)
8403150442_025.jpg (85KB - 566 downloads)
|
|
| |
|
Expert
Posts: 1223
Location: Ramona, CA | Oops, forgot the ones from the car I parted.
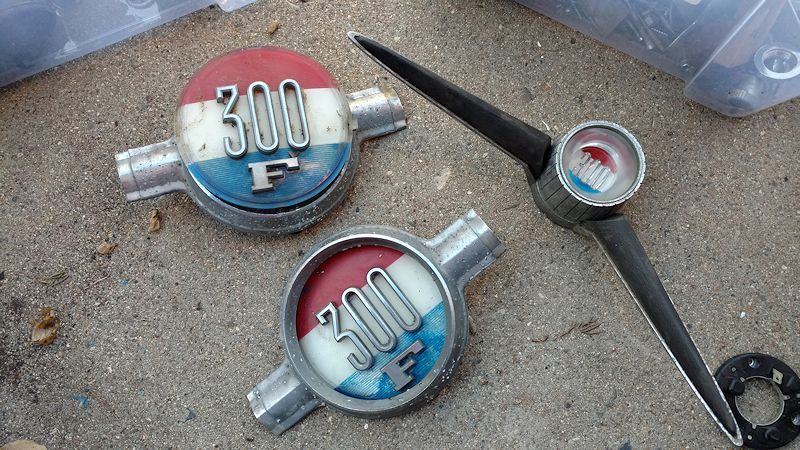 (emblems.jpg) (emblems.jpg)
Attachments
----------------
emblems.jpg (139KB - 567 downloads)
|
|
| |
|
Expert
Posts: 1530
Location: ZH, Switzerland | Thanks for your pictures. The emblem at the rear I removed as well. It looks very good like yours. The side emblems are looking like on your 300F (the running one). It seems that the blue color is not very light resistant or - because it peels off not as adhesive like the white and red color. The only thing that appeared in my head about that is that I could go to a body shop to ask if they could renovate the blue color (new, water based color not to damage the acrylic like carrier). Happy Restoring! Dieter |
|
| |
|
Expert
Posts: 1223
Location: Ramona, CA | Yes, it appears the blue is more prone to light damage than the other colors. A previous owner of my car replaced the grille emblem and the one on the trunk. The trunk one is faded again in the blue. You can see they put it on crooked as well. I guess if the car is going to be out in the sun a lot, it's going to fade. I would think there is some way to prevent it.
Edited by NicksGarage 2016-05-05 3:36 PM
 (8403150442_105.jpg) (8403150442_105.jpg)
 (8403150442_095.jpg) (8403150442_095.jpg)
Attachments
----------------
8403150442_105.jpg (70KB - 537 downloads)
8403150442_095.jpg (105KB - 553 downloads)
|
|
| |
|
Expert
Posts: 1530
Location: ZH, Switzerland | Today I removed the front windows and fiddled with the quarter windows (#@*&^%! #@*&^%! #@*&^%! #@*&^%!) up to the point that I didn't feel anything in my finger tips anymore. It's the worst pain to work at the quarter windows. Instead of driving with my Beast. It's a wonderful day here today. Happy Motoring! Dieter BTW: I slammed the drivers door that much that the lever of the outer door handle to the door lock separated.... and went away after I fixed the link; tomorrow is another day. Then I'll try the removal again with removing the allen screws at the pivot point/lever mechanism.
Edited by di_ch_NY56 2016-05-06 3:25 PM
|
|
| |
|
Expert
Posts: 1530
Location: ZH, Switzerland | Now the quarter window of the drivers side is out of the Letter. I had to remove really all screws. First of all the lifting mechanism fell down and then I had to wiggle the window up and down until the front and rear guides fell down. Finally I could route the window out of the channel between the outer and the inner shell of the quarter panel. But not with binding once more. I damaged the headliner as well, but I have to remove it anyway. The electric window lift is still inside. I couldn't remove it out of the service opening. Picture IMG_2708 shows a sheet metal screw. How do I remove it? it's the only one connection holding the electric lift mechanism in the drivers door. There are some pictures included showing a zinc plated channel inside the drivers side rocker, covering the wiring harness to the rear. How do I remove it? Should I let it stay or use a crowbar to force it out? Good news is that all the clips holding the passenger side section of the wiring harness in place (clips) are intact and rustfree. The big pug(body wiring harness plug) is open now. It's only the illumination of the rear license plate resisting the removal... During the removal of the quarter window I just thought I'll never ever mount these windows again. When I think about the mounting of these windows for me it's worse than the worst nightmare. Happy Motoring! Dieter
Edited by di_ch_NY56 2016-05-07 10:24 AM
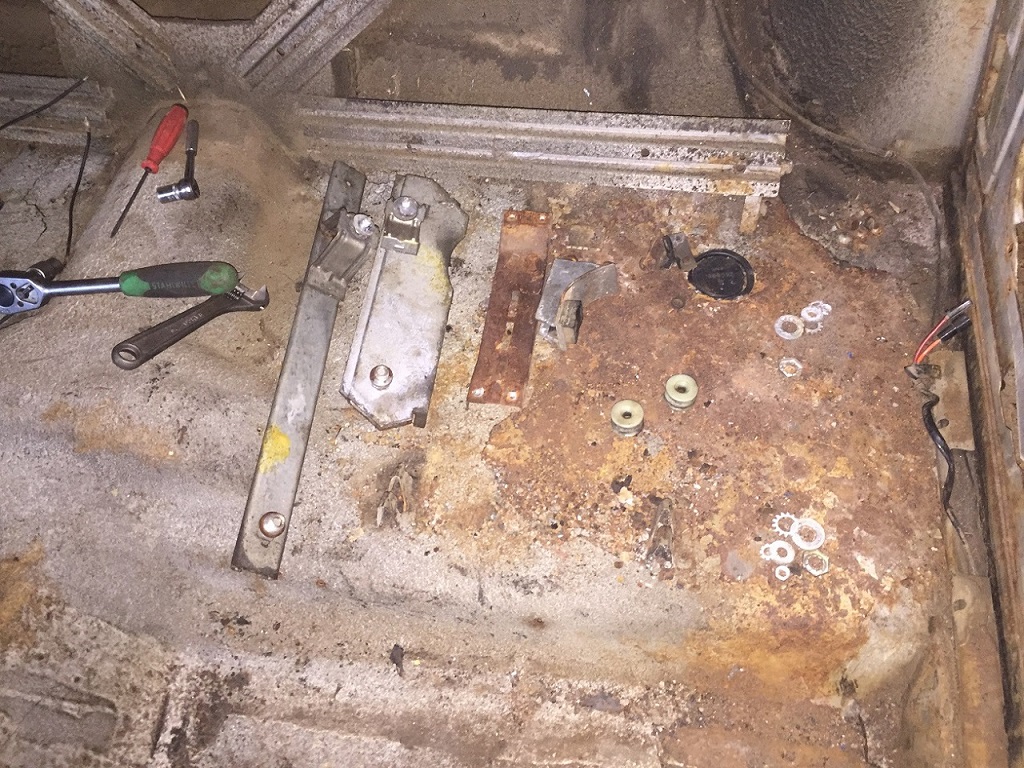 (IMG_2703_resized.JPG) (IMG_2703_resized.JPG)
 (IMG_2704_resized.JPG) (IMG_2704_resized.JPG)
 (IMG_2705_resized.JPG) (IMG_2705_resized.JPG)
 (IMG_2706_resized.JPG) (IMG_2706_resized.JPG)
 (IMG_2707_resized.JPG) (IMG_2707_resized.JPG)
 (IMG_2708_resized.JPG) (IMG_2708_resized.JPG)
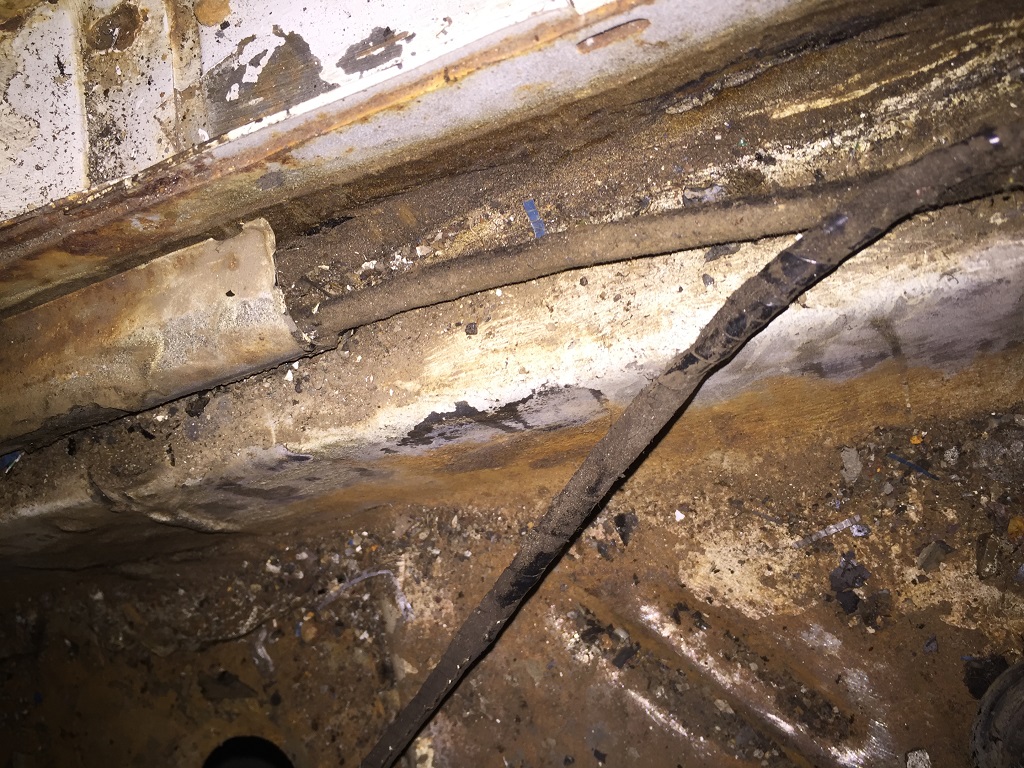 (IMG_2710_resized.JPG) (IMG_2710_resized.JPG)
Attachments
----------------
IMG_2703_resized.JPG (393KB - 551 downloads)
IMG_2704_resized.JPG (395KB - 570 downloads)
IMG_2705_resized.JPG (359KB - 554 downloads)
IMG_2706_resized.JPG (384KB - 550 downloads)
IMG_2707_resized.JPG (314KB - 554 downloads)
IMG_2708_resized.JPG (474KB - 544 downloads)
IMG_2710_resized.JPG (393KB - 544 downloads)
|
|
| |
|
Expert
Posts: 1530
Location: ZH, Switzerland | First I took a picture of my cat (Paulus du Tricolomtèreu) who likes the frame of the grille. I removed the pivot and lever as an assemble after moving it to the top down position, mechanism first out of the service hole. this afternoon I got the last securing washer out of the passenger side quarter window mechanism. I removed all screws at the lower stop and the pivot/lever mechanism. But without removing the guides (rear and front) and moving the lever mechansm to the top upper position I couldn't remove the quarter window. Bylaying pictures are showing the setting at the top bottom position with details. Happy restoring! Dieter BTW: I'm sure the mounting of a quarter window needs two persons. With one person (like me) it's at least one hand missing. Because all the parts (window, lifter mechanism, guides) have to be mounted through the service opening.
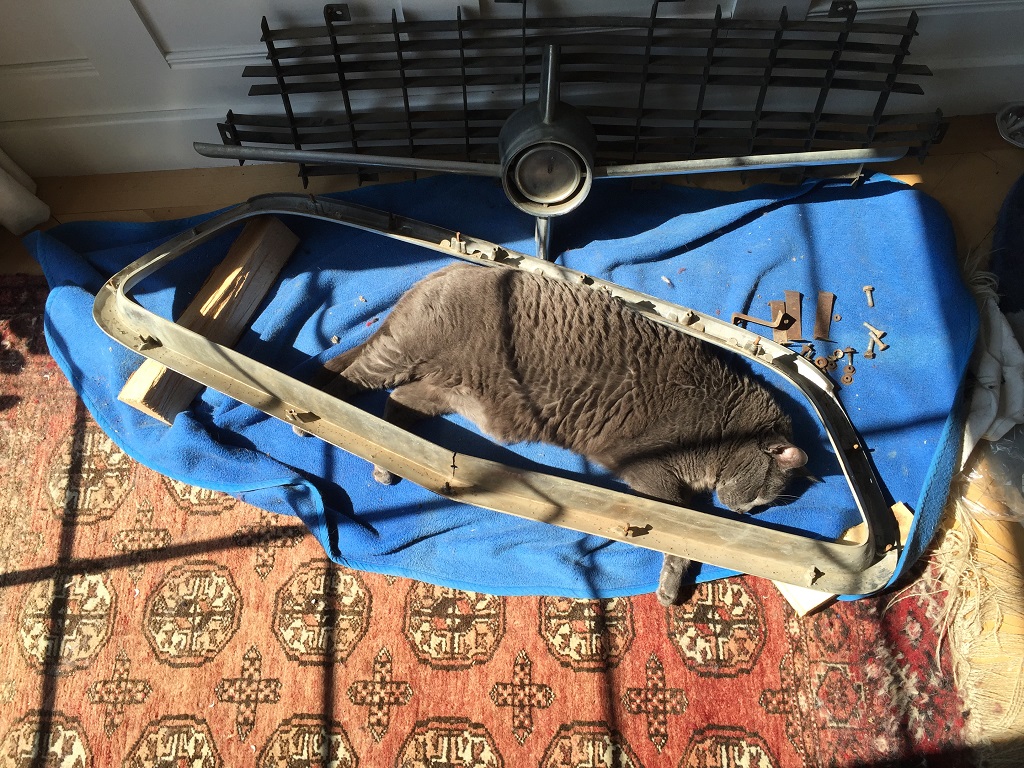 (IMG_2711_resized.JPG) (IMG_2711_resized.JPG)
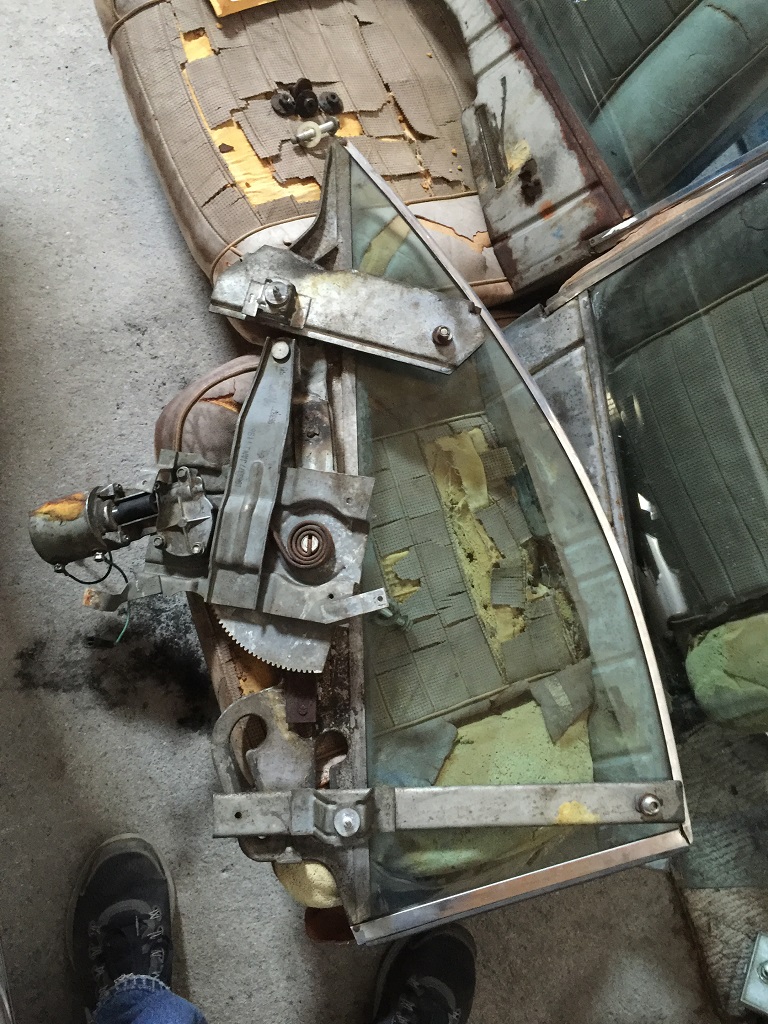 (IMG_2714_resized.JPG) (IMG_2714_resized.JPG)
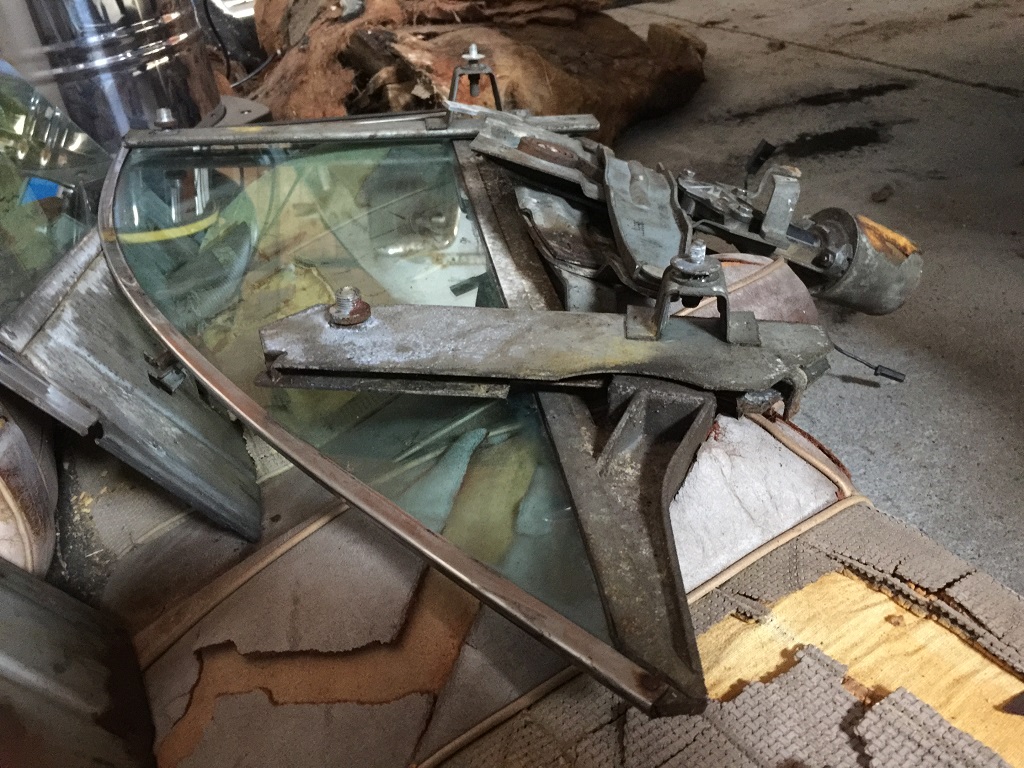 (IMG_2715_resized.JPG) (IMG_2715_resized.JPG)
 (IMG_2716_resized.JPG) (IMG_2716_resized.JPG)
Attachments
----------------
IMG_2711_resized.JPG (441KB - 534 downloads)
IMG_2714_resized.JPG (350KB - 517 downloads)
IMG_2715_resized.JPG (331KB - 518 downloads)
IMG_2716_resized.JPG (293KB - 514 downloads)
|
|
| |
|
Expert
Posts: 1223
Location: Ramona, CA | I'm pretty sure the quarter window glass comes out through the top. At least that's what the service manual implies. The car I parted out was so rusty I just pulled the sheetmetal out from the rocker and the window stuff fell out the bottom. |
|
| |
|
Expert
Posts: 1530
Location: ZH, Switzerland | NicksGarage - 2016-05-07 8:22 PM I'm pretty sure the quarter window glass comes out through the top. At least that's what the service manual implies. The car I parted out was so rusty I just pulled the sheetmetal out from the rocker and the window stuff fell out the bottom. Yes Nick, you're correct. The only way to get the quarter windows out of the body is digging it out of the slot between the inner structure and the outer body shell. Binding is the rear guide at the window holder. As you can see it's reinforced and three dimensional. The rear guide (btw) is open to the rear when installed. So it's necessary first to remove the rear guide to try to remove the quarter windows. The window lift mechanism shound be almost at the top to remove the window and at the bottom position to remove the lift mechanism... My meaning (btw) is, that it's almost impossible to mount the window, both guides and the lever mechanism together (only access through the service opening) and hold the window (that it doesn't fall down) is too much for only one man - at least one hand is missing... pls keep in mind (for some readers) it's a hardtop, not a convertible. Happy Restoring! Dieter Dieter |
|
| |
|
Expert
Posts: 1223
Location: Ramona, CA | I need to adjust one of my quarter windows because it binds with the front door glass. And my driver's door probably has a broken gear in the power window gearbox as the window goes most of the way up and then I have to pull on the glass to get it all the way up. It also falls backward so there may be a roller problem. This adds to the binding issue with the quarter window. Hopefully I have enough spare parts. |
|
| |
|
Elite Veteran
Posts: 827
Location: tailFinland | I also have all regulators, motors, Windows and stuff almost ready to assembly to my Project (at least I think so) so my nightmare is about coming. I did'nt take them off becouse my G was a basket case projeckt when I got it.
|
|
| |
|
Expert
Posts: 1530
Location: ZH, Switzerland | NicksGarage - 2016-05-09 9:47 PM I need to adjust one of my quarter windows because it binds with the front door glass. And my driver's door probably has a broken gear in the power window gearbox as the window goes most of the way up and then I have to pull on the glass to get it all the way up. It also falls backward so there may be a roller problem. This adds to the binding issue with the quarter window. Hopefully I have enough spare parts. From a nice guy I know that the weak point of the window lever mechanic (electric windows) is the nylon gear in the lever gear. That can break. A guy at the Chrysler 300 Club International offers a restoration with brass instead of nylon. I just argue if the weak point shifts to another corner. First of all I would determine if the quarter window is out of place or the window in the front door. Both could be adjusted. But I assume only one needs a readjustment. Personally I do not have many spare parts for the hole car. Happy Restoring! Dieter BTW: good luck Jari - I hope my documentation with pictures and description would help. I would not wonder if first you have to put the quarter window lever to the lowest point to put it into the body and then scroll up almost to the top to insert the small rollers into the carrier of the glass. Then install the rear and front guide and adjust the whole assembly. |
|
| |
|
Expert
Posts: 1223
Location: Ramona, CA | Dieter, it's both windows. The rear window is too far forward when rolled all the way up. I think a previous owner had it apart to fix the gear in that one.
I agree on the shifting of stress from the nylon gear to somewhere else. Part of the problem with these early electric windows is that they go so fast. It puts a lot of shock on the system. I've read that the early ones snap the housing off where the motor mounts. JC Auto fixes them. I haven't had the panels off to see what's going on yet. When I first got the car the windows didn't work at all and then from the front switch but then the fronts rolled down when I was playing with it but they wouldn't roll back up. That turned out to just be the switch. |
|
| |
|
Expert
Posts: 1530
Location: ZH, Switzerland | Today I picked up the parcel form Jeff Carter Company. Helluwa I got the Fleetsweep ornament. It looks great. Plus six ornaments in the size of the wheel covers/trunk lid ornament (basically a converted hub cap). So I need these parts... - grille frame (with a lot of my upper body weight I could close the gap, but it springs back when I release the force -> heavy bent) - straight rear bumper - both gutter rails (polished stainless steel) at the roof line. Happy Restoring! Dieter
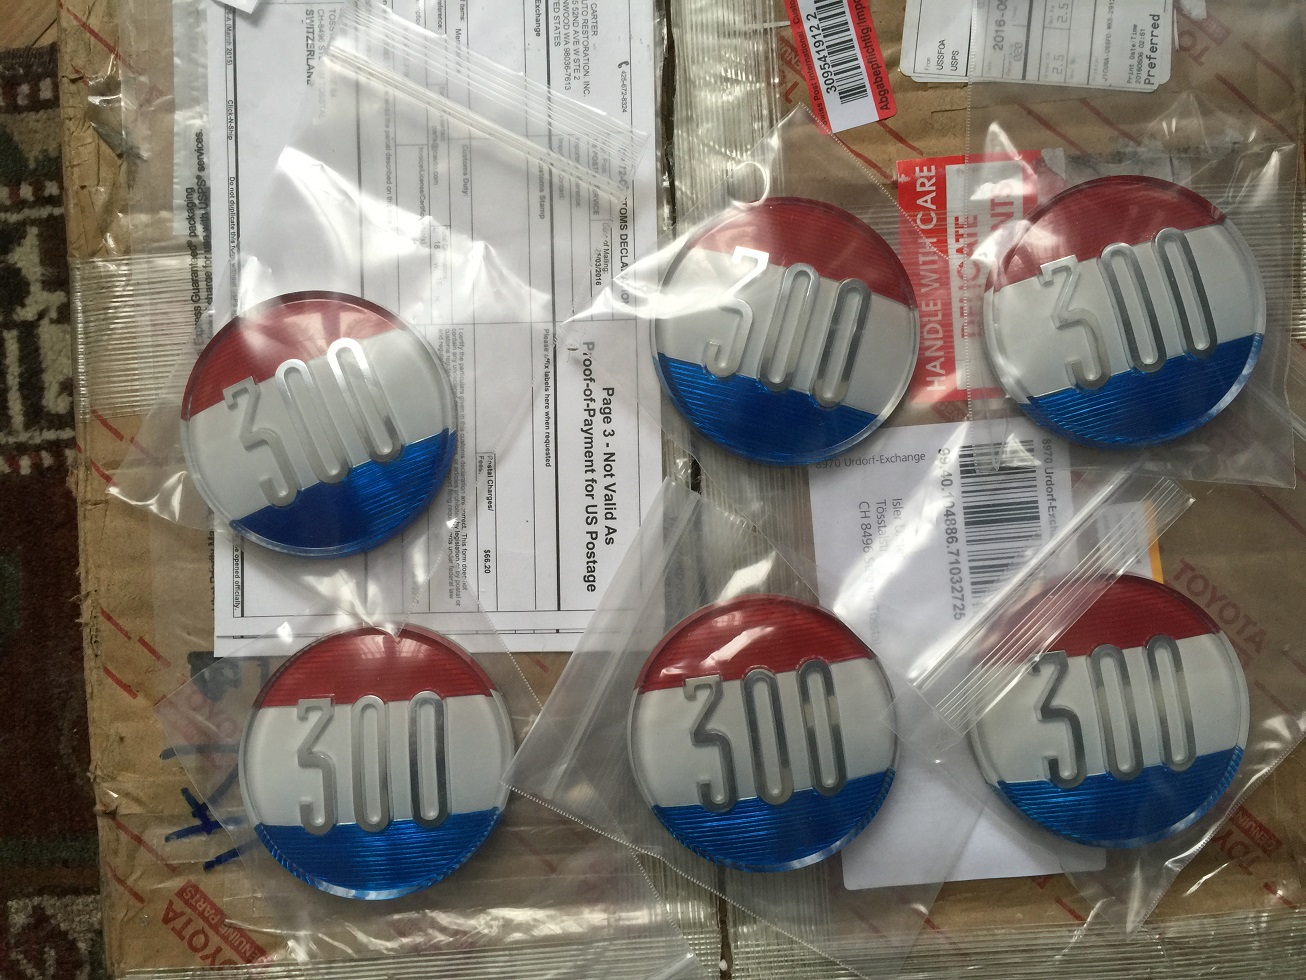 (IMG_2728_resized.JPG) (IMG_2728_resized.JPG)
 (IMG_2731_resized.JPG) (IMG_2731_resized.JPG)
Attachments
----------------
IMG_2728_resized.JPG (472KB - 539 downloads)
IMG_2731_resized.JPG (488KB - 535 downloads)
|
|
| |
|
Expert
Posts: 1223
Location: Ramona, CA | Congrats on getting the deck lid ornament. It does look great. And a lot cheaper than you were thinking it was going to cost. Now you can keep your toilet seat!
Did you get the emblems from Jeff as well? I got mine from the 300 club. |
|
| |
|
Expert
Posts: 1530
Location: ZH, Switzerland | Hi Nick
Yes all six ornaments I got from JCParts as well. Do you know - does the club sell the side ornaments? I only noticed the grille emblem. I'm very happy and released because I got the trunk ornament. State at my Letter this afternoon: All side windows are out of my Letter and I cleaned the bottom of the doors a little bit. All the guides are out of my Letter as well.
Next I'll start with removing the small parts (push button arrays, electric switches and so on) at the dashboard to finally remove the dashboard. Happy restoring! Dieter |
|
| |
|
Expert
Posts: 1223
Location: Ramona, CA | The club does not have the side emblems. George Laurie in Australia makes them but don't know if he has them in stock or how long it takes to get them if he has to make them. He wouldn't tell me how long it would take to get taillight lenses so I didn't order them. I only need the right one right now.
georgelaurie@bigpond.com
|
|
| |
|
Expert
Posts: 1530
Location: ZH, Switzerland | I think it's just necessary to replace the carrier with the french national flag colors. As far as I saw the character and the numbers are boltet on the carrier. Perhaps Jari (Adventurer 60) knows a source. Happy Restoring! Dieter |
|
| |
|
Expert
Posts: 1530
Location: ZH, Switzerland | Today I just removed small parts (sun visors and dome lights). I looked closer at the window lifts to free the drivers side quarter window lift a little bit more and noticed a damage at the drivers side door window lift. Three teeth are shaved off or bent. In my case it looks like the damaged area is at the bottom. Happy Restoring! Dieter BTW: the part numbers printed onto the electric window lifts: front doors: left: 1963 647 right: 1963 646 quarter window left: 1963 377 right: 1963 376 The 1960 parts manual shows 1964 numbers....
Edited by di_ch_NY56 2016-05-15 9:50 AM
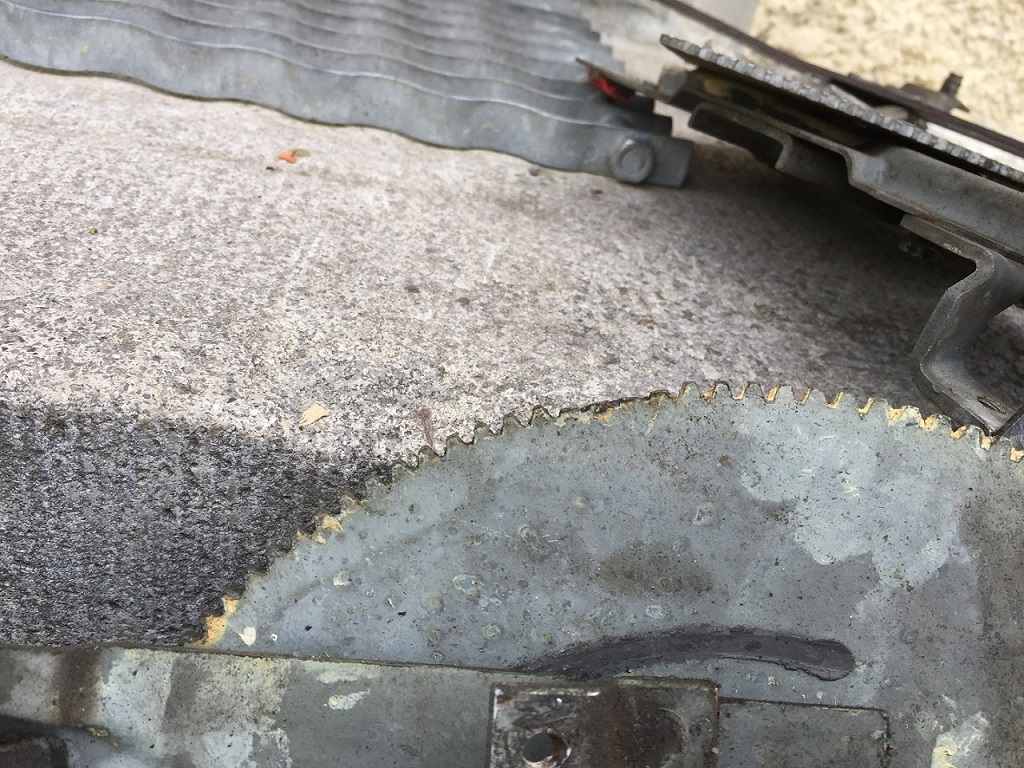 (IMG_2754_resized.JPG) (IMG_2754_resized.JPG)
Attachments
----------------
IMG_2754_resized.JPG (362KB - 519 downloads)
|
|
| |
|
Expert
Posts: 1223
Location: Ramona, CA | That may be my problem as I have to help the window up when it gets to a certain point. |
|
| |
|
Expert
Posts: 1223
Location: Ramona, CA | My parts book shows two different ones for front doors. One is listed as a "Dura type assembly"?
Interchange book shows the following applications.
Front:
Chrysler '60-64 2 Dr
Desoto '60-61 2 Dr
Dodge '60-61 2 Dr
Dodge '62-64 880 ser 2 Dr
Plymouth '60-61 2 Dr
My interchange book doesn't show the coupe quarter window regulators but it looks like it fits Chrysler '60-62, Dodge full size '60-64 and Plymouth '60-61. The '63-64 Chryslers changed body style and has a different part number for the quarter window regulator.
|
|
| |
|
Expert
Posts: 1530
Location: ZH, Switzerland | Today I removed the roof rail stainless steel. Happily I could dig the resting weatherstrip out of the channel to get access to the Philips screws (about every 10 cm one). I proceeded with the inner stainless steel trim and was astonished that on both sides at the front end piece there was only one screw. The second one was never ever mounted...
After removing the all of the roof line stainless steel trim I noticed that the bows (holding the headliner in place) are out of stainless steel as well and secured with a Philips screw at each side. I couldn't resist and removed all three bows as well. Finally I took out the headliner. It's imitation leather from the outside finish (texture like leather). There are leather stripes with the width of the inside of the stainless steel bows Happy Restoring! Dieter
 (IMG_2758_resized.JPG) (IMG_2758_resized.JPG)
 (IMG_2761_resized.JPG) (IMG_2761_resized.JPG)
 (IMG_2762_resized.JPG) (IMG_2762_resized.JPG)
 (IMG_2769_resized.JPG) (IMG_2769_resized.JPG)
 (IMG_2770_resized.JPG) (IMG_2770_resized.JPG)
 (IMG_2774_resized.JPG) (IMG_2774_resized.JPG)
 (IMG_2776_resized.JPG) (IMG_2776_resized.JPG)
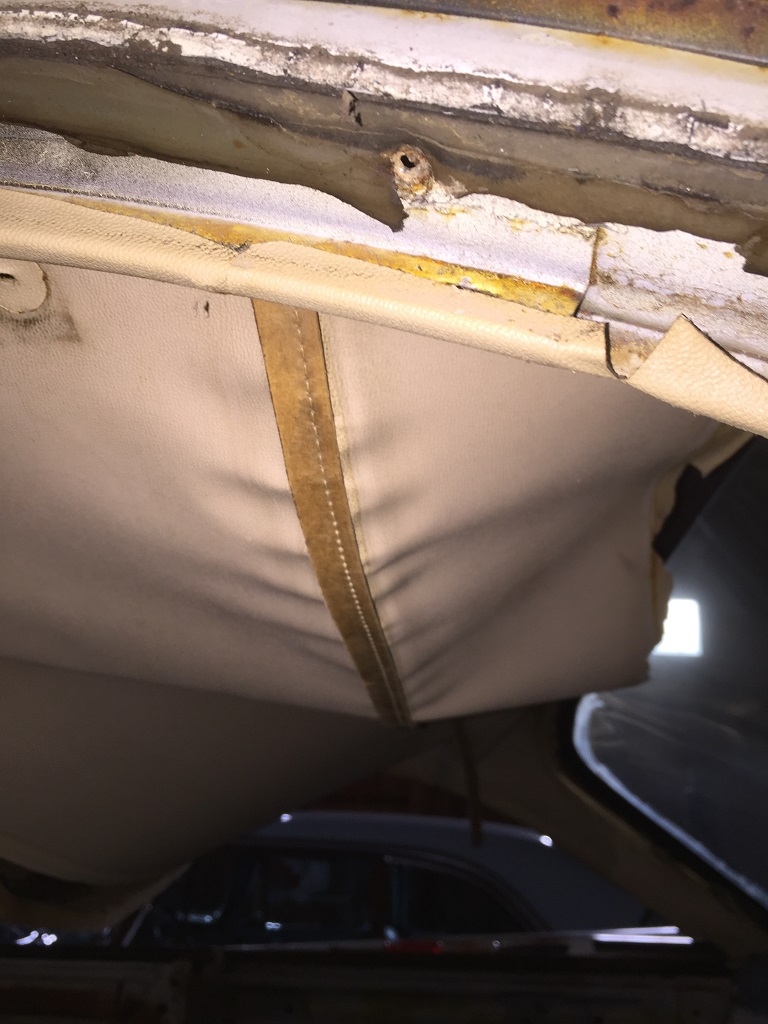 (IMG_2778_resized.JPG) (IMG_2778_resized.JPG)
 (IMG_2779_resized.JPG) (IMG_2779_resized.JPG)
Attachments
----------------
IMG_2758_resized.JPG (251KB - 511 downloads)
IMG_2761_resized.JPG (165KB - 518 downloads)
IMG_2762_resized.JPG (278KB - 504 downloads)
IMG_2769_resized.JPG (240KB - 530 downloads)
IMG_2770_resized.JPG (108KB - 521 downloads)
IMG_2774_resized.JPG (278KB - 515 downloads)
IMG_2776_resized.JPG (191KB - 518 downloads)
IMG_2778_resized.JPG (190KB - 513 downloads)
IMG_2779_resized.JPG (300KB - 499 downloads)
|
|
| |
|
Expert
Posts: 1223
Location: Ramona, CA | Yes, fortunately our Fs have stainless steel headliner bows instead of the chromed plastic people have to deal with on other cars. I have a hole in my headliner. Going to order a new one from Gary Goers. |
|
| |
|
Expert
Posts: 1530
Location: ZH, Switzerland | Today I reomved the rear bumper to get access to remove the license plate trim/ filler neck recession trim. There is a small bump at the drivers side, but I assume not visible when a straight bumper with horns is mounted. During the removal I had to get up several times to look around where the bumper could be attached to the body as well. Once I hit my head at the top corner of the drivers side rear lamp.... ouch Becaue I do not want to cut the emergency brake cable I mounted the holder once again. I plan to use two conter hex nuts to hold the thread while loosening the adjusting nut. It's UNF and the size of the adjuster screw is 1/2". I noticed rust at the passenger side door a) frame at the top near the vent frame b) shell front lower corner Finally I removed the package shelf. Top the fabric Nick and Jari described, below a cardpaper layer with three arrays of holes and the heater hose between the valve and the intake of the heater core. Happy Restoring! Dieter BTW: I think I'm on track to finish the disassembling early November 2016. Now the big parts could start (gas tank, transmission, engine, dashboard, heater system, brake system, windshield and rear window)
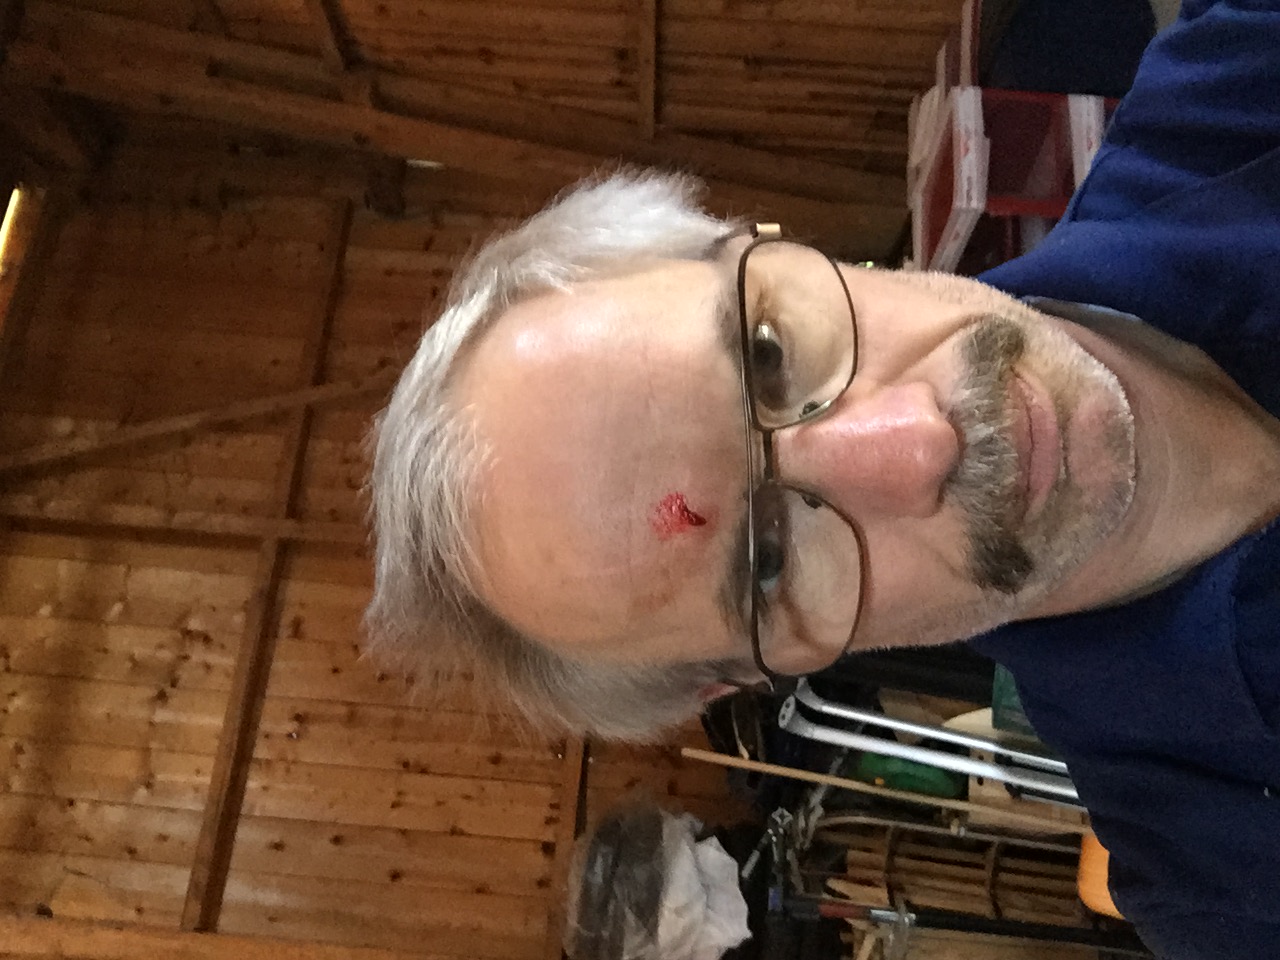 (IMG_2785.JPG) (IMG_2785.JPG)
 (IMG_2786_resized.JPG) (IMG_2786_resized.JPG)
 (IMG_2788_resized.JPG) (IMG_2788_resized.JPG)
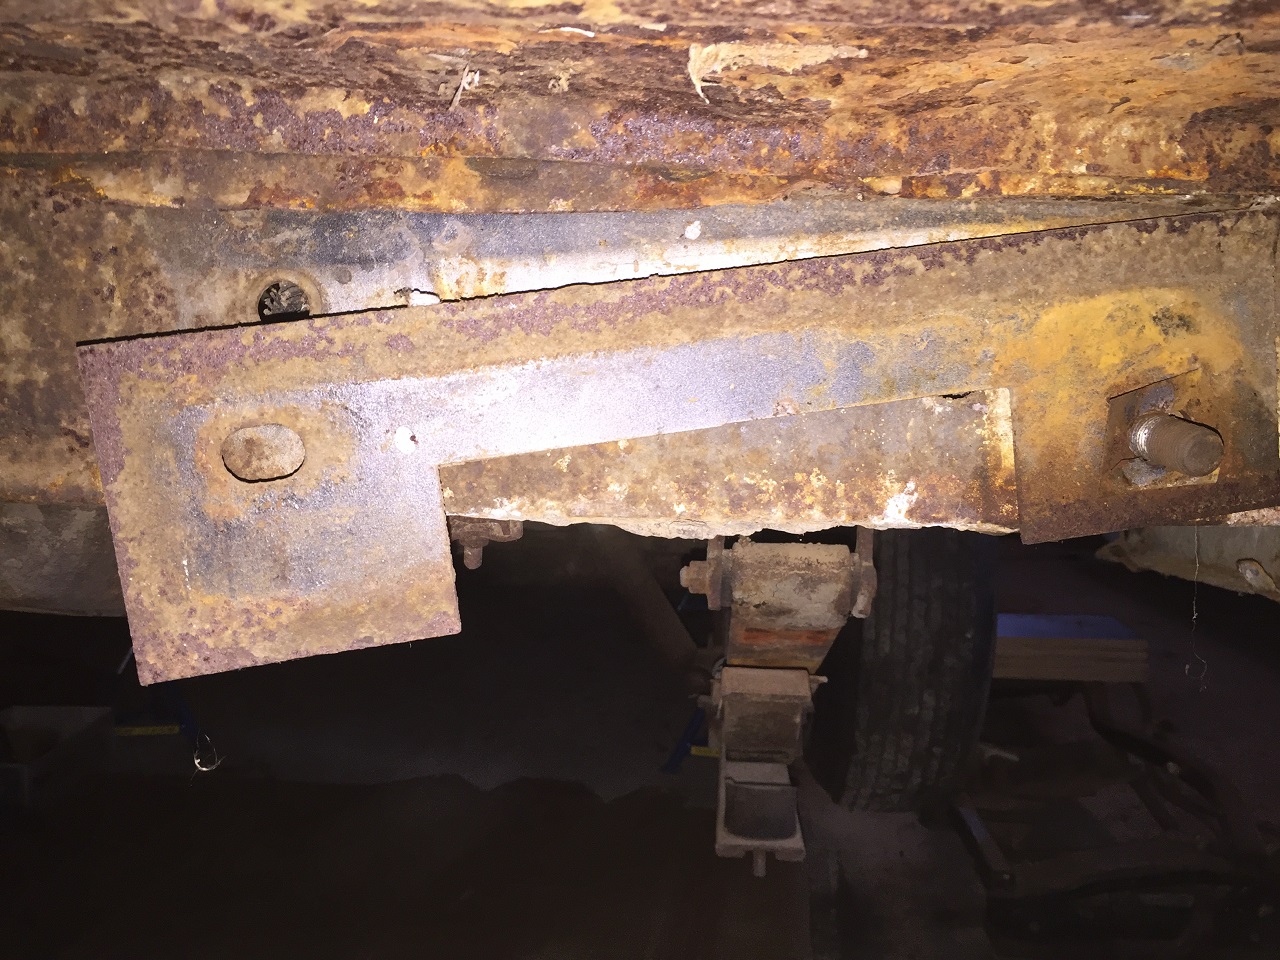 (IMG_2789_resized.JPG) (IMG_2789_resized.JPG)
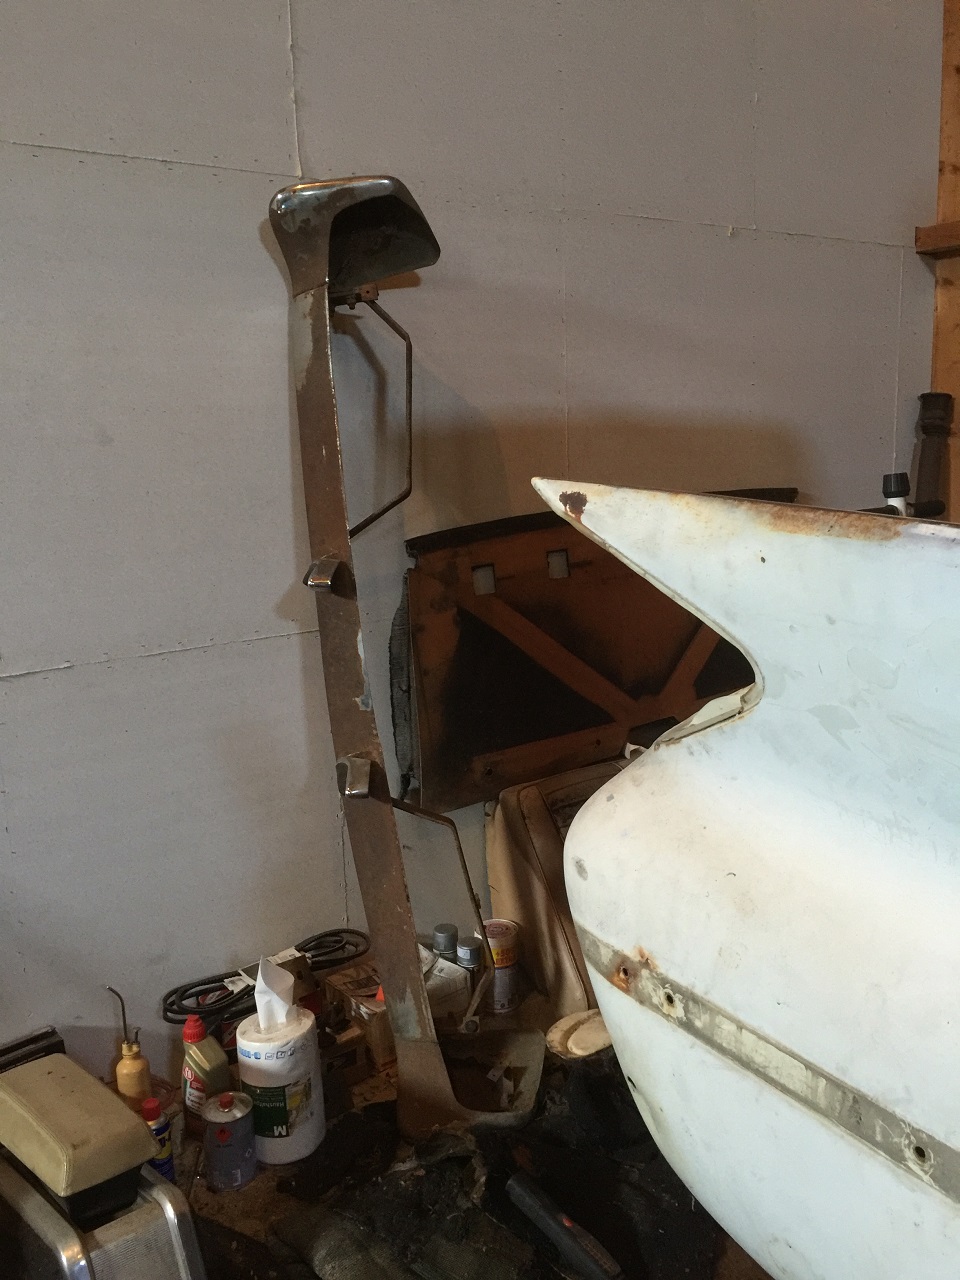 (IMG_2790_resized.JPG) (IMG_2790_resized.JPG)
 (IMG_2791_resized.JPG) (IMG_2791_resized.JPG)
 (IMG_2793_resized.JPG) (IMG_2793_resized.JPG)
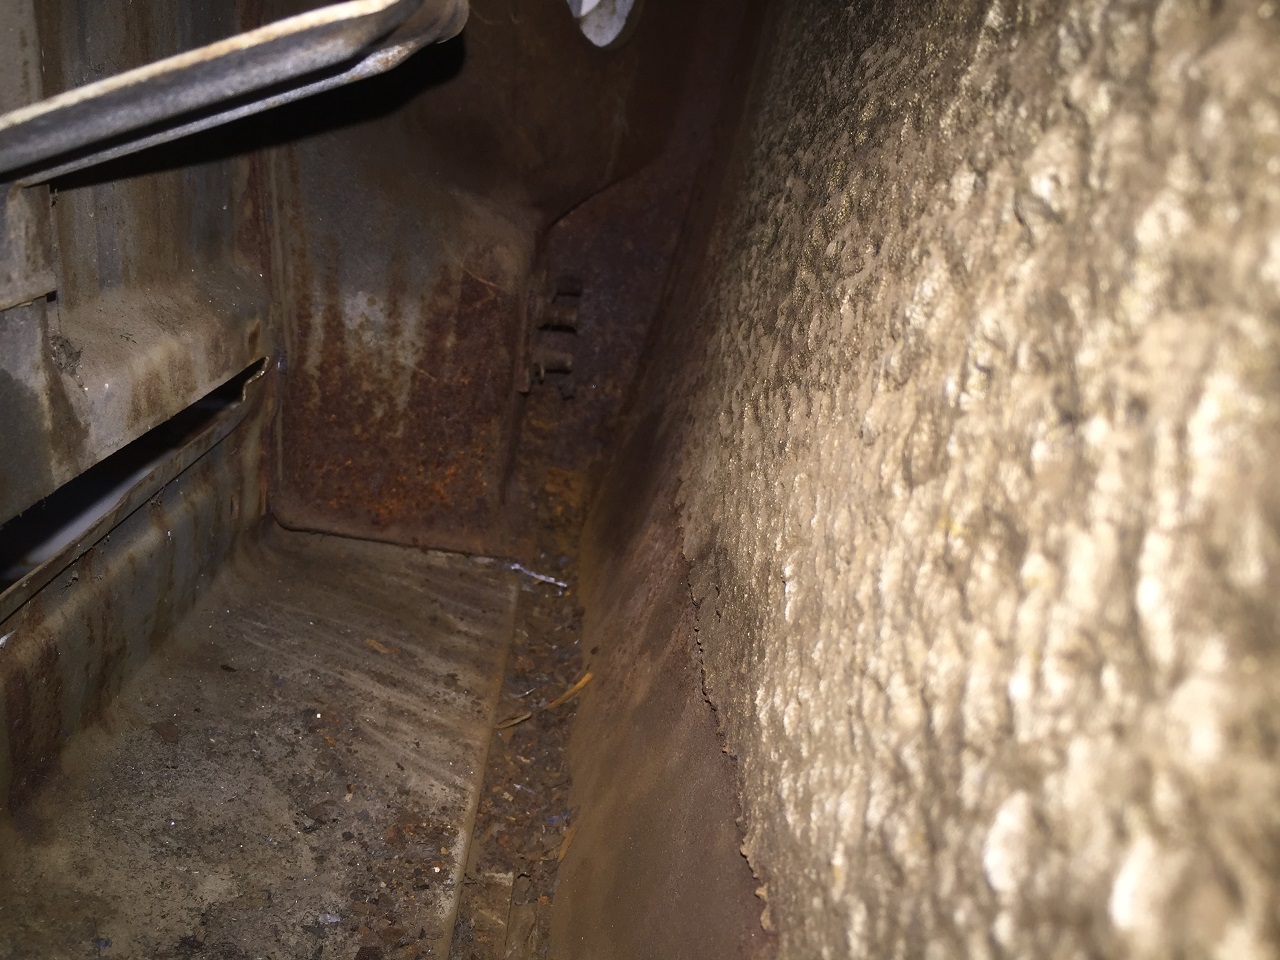 (IMG_2795_resized.JPG) (IMG_2795_resized.JPG)
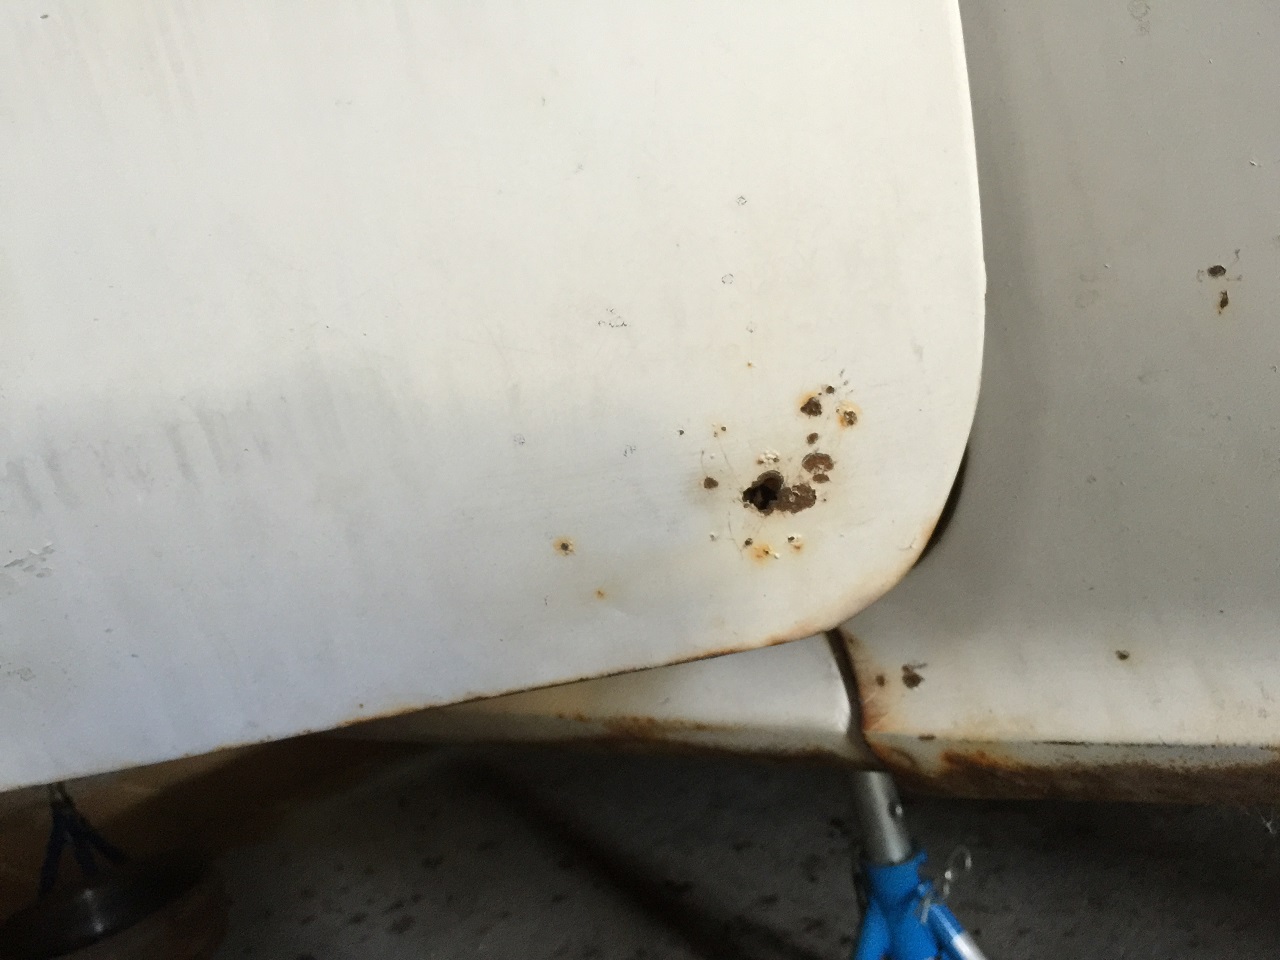 (IMG_2796_resized.JPG) (IMG_2796_resized.JPG)
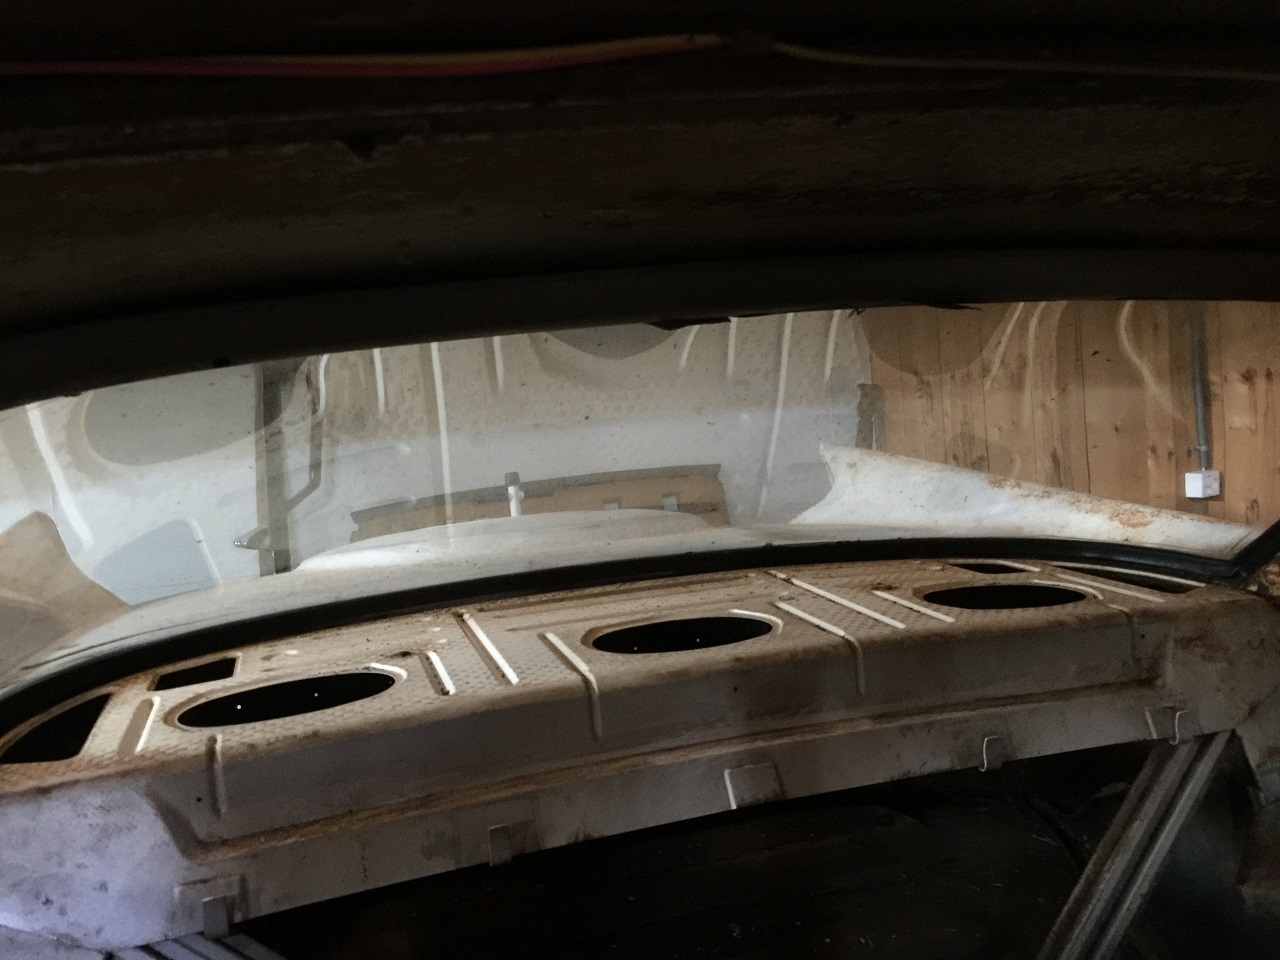 (IMG_2798_resized.JPG) (IMG_2798_resized.JPG)
Attachments
----------------
IMG_2785.JPG (271KB - 511 downloads)
IMG_2786_resized.JPG (366KB - 495 downloads)
IMG_2788_resized.JPG (389KB - 503 downloads)
IMG_2789_resized.JPG (460KB - 509 downloads)
IMG_2790_resized.JPG (326KB - 513 downloads)
IMG_2791_resized.JPG (396KB - 506 downloads)
IMG_2793_resized.JPG (342KB - 501 downloads)
IMG_2795_resized.JPG (380KB - 506 downloads)
IMG_2796_resized.JPG (233KB - 499 downloads)
IMG_2798_resized.JPG (311KB - 505 downloads)
|
|
| |
|
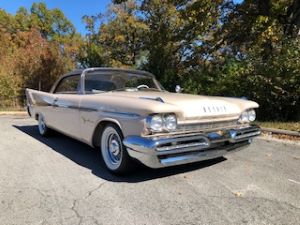
Expert
Posts: 2002
Location: Branson, MO | Ouch! Bump doesn't look too bad but like I always say: "It will feel a lot better when it quits hurtin'".
Keep us posted with your progress - always of interest.
|
|
| |
|
Expert
Posts: 1530
Location: ZH, Switzerland | Thanks a lot. Today I removed the horns and tested each at home. Both are working . I'm preparing for the removal of the dashboard and wanted to know where the coordinator switch is mounted. Today - more per coincidence I got it. It's located near the wiper motor at the passenger side. Just for documentation purposes I took some pictures (heater box with thermostat wire, vacuum actuators). I managed to free the wiring harness from the radiator yoke. Happy Restoring! Dieter
 (IMG_2799_resized.JPG) (IMG_2799_resized.JPG)
 (IMG_2801_resized.JPG) (IMG_2801_resized.JPG)
 (IMG_2803_resized.JPG) (IMG_2803_resized.JPG)
Attachments
----------------
IMG_2799_resized.JPG (323KB - 481 downloads)
IMG_2801_resized.JPG (249KB - 493 downloads)
IMG_2803_resized.JPG (364KB - 500 downloads)
|
|
| |
|
Expert
Posts: 1530
Location: ZH, Switzerland | Yesterday late evening I removed the emergency brake cable out of the drum. Today I removed the remote outside mirror at the drivers side. First I removed the adjuster from the dashboard and then the three wires from the adjuster. There was no plastic cover at the rear of the adjuster mechanism nor color markings at the three wires. So I used adhesive tape to mark each wire with the corresponding character (addressed from the back of the adjuster, Y, R, G). I looked closer at the roof and got very lucky. I always thought - ouch the roof is very rusty. But it isn't. It's a surface of a vinil - effect color once sprayed onto the original (alpine white) color. Underneath the roof shell is rustfree - except at the drivers side C pillar end. Personally I do not like a vinil roof - I'll stay with a roof with a factory color, in my case WW1 - like my Letter left from the factory. Happy Restoring! Dieter
Edited by di_ch_NY56 2016-05-28 10:55 AM
|
|
| |
|
Expert
Posts: 1223
Location: Ramona, CA | Good that your roof isn't rusty. Chrysler used to sell "vinyl top in a can" kits that included the textured coating and strips you would put on the roof first to look like seams. It was mostly popular on pickup trucks. |
|
| |
|
Expert
Posts: 1530
Location: ZH, Switzerland | Thanks Nick, I didn't know that. I assue it was aftermarket or dealer applied. Here are some pictures by the way. Happy Restoring! Dieter BTW: I was quite astonished about what I found under the remote outside mirror: a) apparently the original color (glossy like a mirror) and two screw holes at the rear...
Edited by di_ch_NY56 2016-05-28 1:01 PM
 (IMG_2819_resized.JPG) (IMG_2819_resized.JPG)
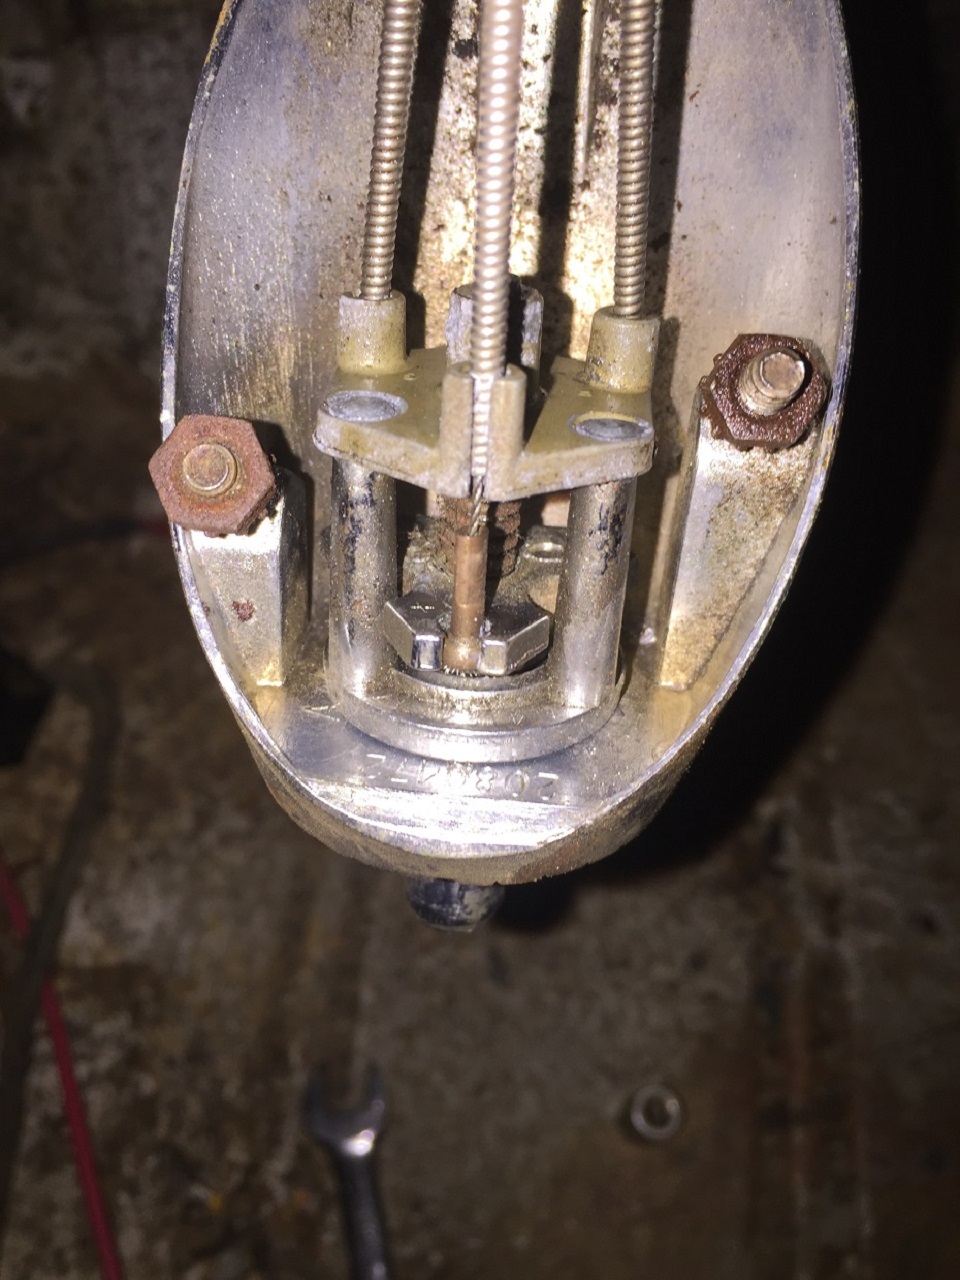 (IMG_2820_resized.JPG) (IMG_2820_resized.JPG)
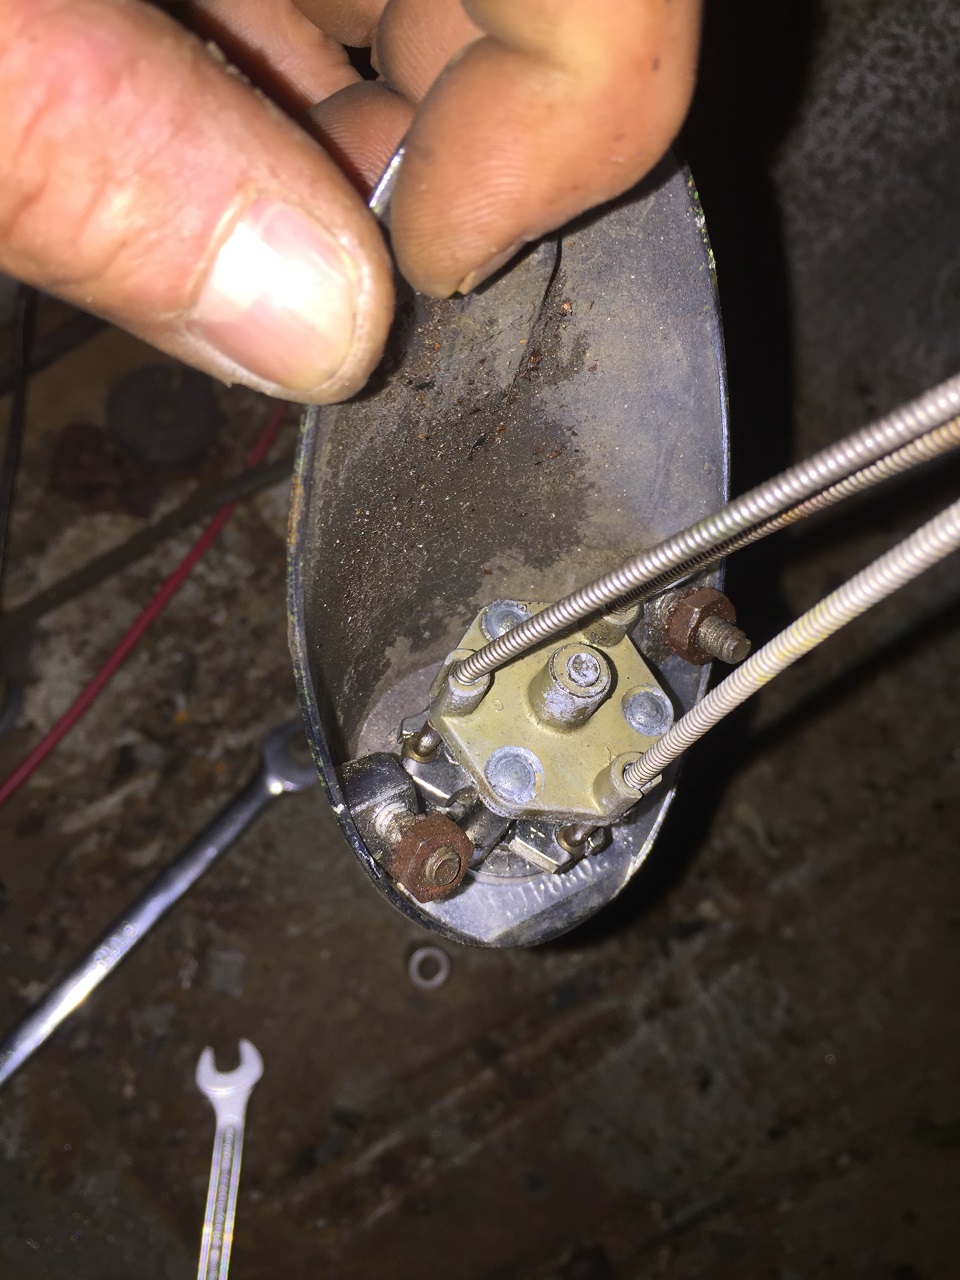 (IMG_2822_resized.JPG) (IMG_2822_resized.JPG)
 (IMG_2828_resized.JPG) (IMG_2828_resized.JPG)
Attachments
----------------
IMG_2819_resized.JPG (348KB - 483 downloads)
IMG_2820_resized.JPG (317KB - 481 downloads)
IMG_2822_resized.JPG (316KB - 500 downloads)
IMG_2828_resized.JPG (488KB - 476 downloads)
|
|
| |
|
Expert
Posts: 1223
Location: Ramona, CA | Looks like someone missed when mounting the mirror. Apparently my car did not come with mirrors when new and were added on. My mirror control is under the dash. But they are the correct '60 mirrors. And in nice shape too.
 (150442_008.jpg) (150442_008.jpg)
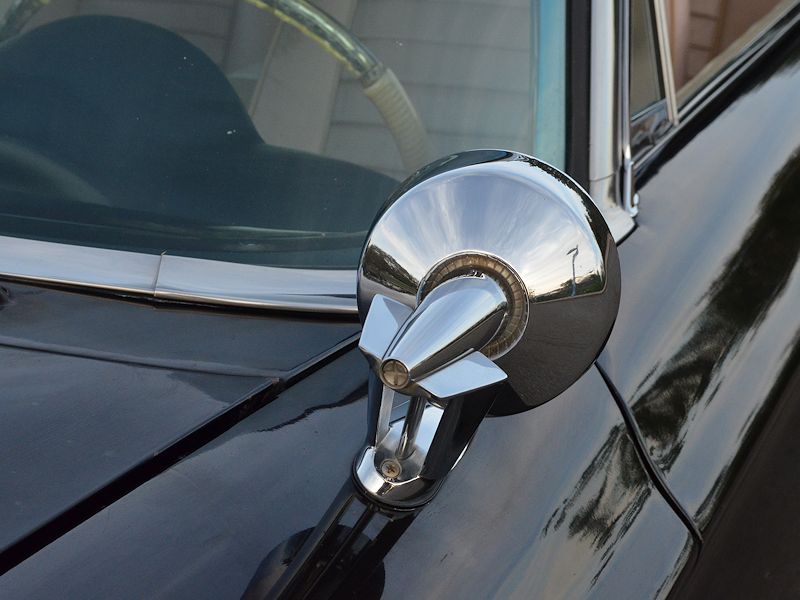 (150442_009.jpg) (150442_009.jpg)
 (mirror_control.jpg) (mirror_control.jpg)
Attachments
----------------
150442_008.jpg (74KB - 486 downloads)
150442_009.jpg (78KB - 490 downloads)
mirror_control.jpg (53KB - 496 downloads)
|
|
| |
|
Expert
Posts: 1530
Location: ZH, Switzerland | Hi Nick - I know that you have aftermarket remote mirror from your thread. But your mirrors are looking absolutely stunning. As set of two mirror with this condition costs at epain at least USD 600.- I was working on my Letter again for some hours. I removed the bezel of the transmission button array. The mechanism I gonna remove when I unhooked the cable at the iron hog. Also I removed the heater control array. First I thought you all my friends could call me the worst idiot walking on this planet. But after a quick visit at the Chrysler 300 Club Interntational page (heater control) I got out that it's normal that almost all nipples broke off during the removal of the plug. Apparently no relation to how much care you'll apply. Fortunately earlier on I purchased a heater control /w bezel and buttons at epain. At that one button is completely locked (electric contact bent). But all nipples are present at the back plate . Furthermore I removed the throttle pedal, the mechanism and the attaching point of the lever of the seat frame. Happy Restoring! Dieter BTW: at the control switch of my Letter both speeds of the fan are working - I checked it earlier on
Edited by di_ch_NY56 2016-05-29 9:25 AM
 (IMG_2831_resized.JPG) (IMG_2831_resized.JPG)
 (IMG_2836_resized.JPG) (IMG_2836_resized.JPG)
Attachments
----------------
IMG_2831_resized.JPG (282KB - 506 downloads)
IMG_2836_resized.JPG (298KB - 494 downloads)
|
|
| |
|
Expert
Posts: 1223
Location: Ramona, CA | Yes, I'm very lucky with the condition of most of the trim on my car. That's why I was willing to pay more for it than most people thought it was worth. Still need a few things though.
I haven't gotten my heater controls working or tried pulling it out. I've had many mopars over the years and those plastic heater controls are always hard not to break. There is a guy here in the states that rebuilds them though and can fix any problem with them. A friend had his done on his 1964 Chrysler last year and works perfectly now.
The documentation you're providing here is going to be very helpful for anyone restoring one of these cars. |
|
| |
|
Expert
Posts: 1530
Location: ZH, Switzerland | Thanks a lot for your flowers. I'm trying to do my best. It's a "try and error" method, because it's my very first project I'm processing. I'm taking loads of pictures, writing a documentation book and this thread for to know how to assemble my Letter once. Because I'm working as a truck driver I need time (spell years) to finish my project. Prior to remove the heater control I took a picture to elaborate the steps (plus many advices and kicks in my back from my friend Wizard). First I took a small blade screw driver to remove the clip from the bottom. Then I could slide out the o-ring of the wire of the temperature adjuster. Happy Restoring! Dieter
 (IMG_2830_resized.JPG) (IMG_2830_resized.JPG)
Attachments
----------------
IMG_2830_resized.JPG (359KB - 493 downloads)
|
|
| |
|
Expert
Posts: 1530
Location: ZH, Switzerland | At the roofrail weatherstrips (where the side windows go in when fully rised) I found a parts number: 1884 646 - 7 A EK. I didn't find that part number in the 1960 parts manual. The weatherstrips were slided in into the channel, apparently from the front to the back (base of the C pillar). So I could only dig it out with no damage. Only the first about 4 inches have gone during the time. The residues I removed were sticky like tar. Happy Restoring! Dieter |
|
| |
|
Expert
Posts: 1530
Location: ZH, Switzerland | This evening after n advice of a good friend I removed the speaker with the fiberglass holder. Bylaying are some pictures about how the dashpad was originally mounted. In my Letter it's falling apart so I need a replacement as well. I'll choose RD Autoline in Sweden because last year when I visited the PBM 2015 I met the guys at their booth. they had a 1960 and 1961 dashpad on display at the booth. I applied some (or a lot of) penetrating oil to free the vacuum motors. With no speaker mounted, the access to the wiper linkage and the vacuum motor for the open/close function of the 715 heater is ways better. As a result all three vacuum motors are moving again. The vacuum hoses under the dash are in a good shape as well (flexible like almost new). The hex nut of the inside mirror I couldn't open right now. It's a big pressed mild steel nut in my case. Happy Restoring! Dieter
 (IMG_2850_resized.JPG) (IMG_2850_resized.JPG)
 (IMG_2852_resized.JPG) (IMG_2852_resized.JPG)
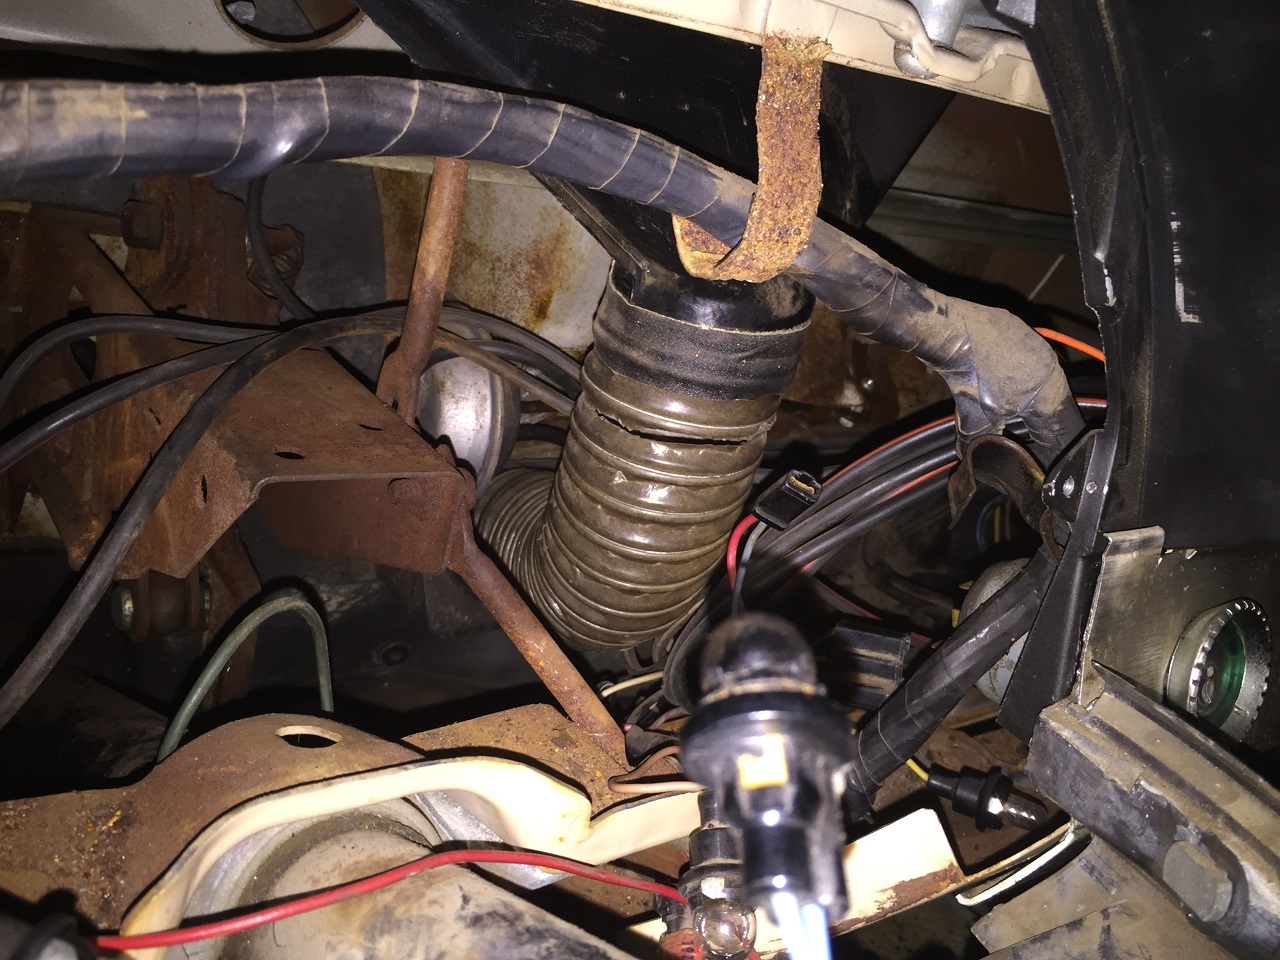 (IMG_2855_resized.JPG) (IMG_2855_resized.JPG)
 (IMG_2857_resized.JPG) (IMG_2857_resized.JPG)
Attachments
----------------
IMG_2850_resized.JPG (315KB - 457 downloads)
IMG_2852_resized.JPG (275KB - 505 downloads)
IMG_2855_resized.JPG (417KB - 479 downloads)
IMG_2857_resized.JPG (293KB - 496 downloads)
|
|
| |
|
Expert
Posts: 1530
Location: ZH, Switzerland | Today I removed the neutral switch to get access to the spring, holding the end of the mode/gear selector cable. finally I could dig out the gear selector cable. Then I removed the cooling lines at the transmission. I took some pictures of the front end, because I think it's misaligned due to an accident. In my opinion the front bumper is ways too high compared to other senior 1960 Chryslers. To loosen the nut at the filler tube to drain the transmission first I have to purchase a 1 1/16 hex wrench. The 1 1/8 I have is too big. Happy Restoring! Dieter
 (IMG_2861_resized.JPG) (IMG_2861_resized.JPG)
 (IMG_2863_resized.JPG) (IMG_2863_resized.JPG)
 (IMG_2864_resized.JPG) (IMG_2864_resized.JPG)
 (IMG_2865_resized.JPG) (IMG_2865_resized.JPG)
 (IMG_2867_resized.JPG) (IMG_2867_resized.JPG)
 (IMG_2868_resized.JPG) (IMG_2868_resized.JPG)
Attachments
----------------
IMG_2861_resized.JPG (388KB - 481 downloads)
IMG_2863_resized.JPG (367KB - 614 downloads)
IMG_2864_resized.JPG (419KB - 490 downloads)
IMG_2865_resized.JPG (436KB - 466 downloads)
IMG_2867_resized.JPG (408KB - 485 downloads)
IMG_2868_resized.JPG (370KB - 478 downloads)
|
|
| |
|
Board Moderator & Exner Expert 10K+
Posts: 13045
Location: Southern Sweden - Sturkö island | Great work Dieter, step by step!
Take some shrink-tube and close the cooling lines with and put some rubber plugs in the transmission - just for to keep out dirt or sand.
Clearly something happened to the front bumper in the history of the car - now is a good time to try to figure out if the mounting brackets are damaged or askew. The sub-frame looks ok. |
|
| |
|
Expert
Posts: 1530
Location: ZH, Switzerland | Thanks a lot Sven I'll do it next time.
This evening I went to my Letter again to remove the gear selector mechanism. First of all the bracket and the connector to the illumination lamp must be removed and disconnected. Then remove the hex nuts and slide the mechanism back and turn it 30 to 45 degree to the RH side. So you'll get access to the back up switch to unhook the socket. Without the AstroDome in place this work is ways easier. After I removed (or during) I discovered another orange colored item mounted at the side (covered by the gear selector mechanism). It looks like a circuit breaker (array?) or a voltage regulator. Now as far as I concern it's just the light switch, the wiper switch and the wiper motor/washer coordinator switch connected to the dashboard wiring harness. Actually I don't know if I have to remove the ducts to the windshield defroster channel prior to the removal of the dashboard as well. Happy Restoring! Dieter BTW: (IMG_2870_resized.JPG) at the bottom of the opening the threads of the attaching screws of the directional signal switch are visible. The heads of these two screws accept a Philips screw driver. I'll convert the mounting to the same configuration like the gear selector mechanism
Edited by di_ch_NY56 2016-06-05 1:46 PM
 (IMG_2870_resized.JPG) (IMG_2870_resized.JPG)
 (IMG_2871_resized.JPG) (IMG_2871_resized.JPG)
 (IMG_2875_resized.JPG) (IMG_2875_resized.JPG)
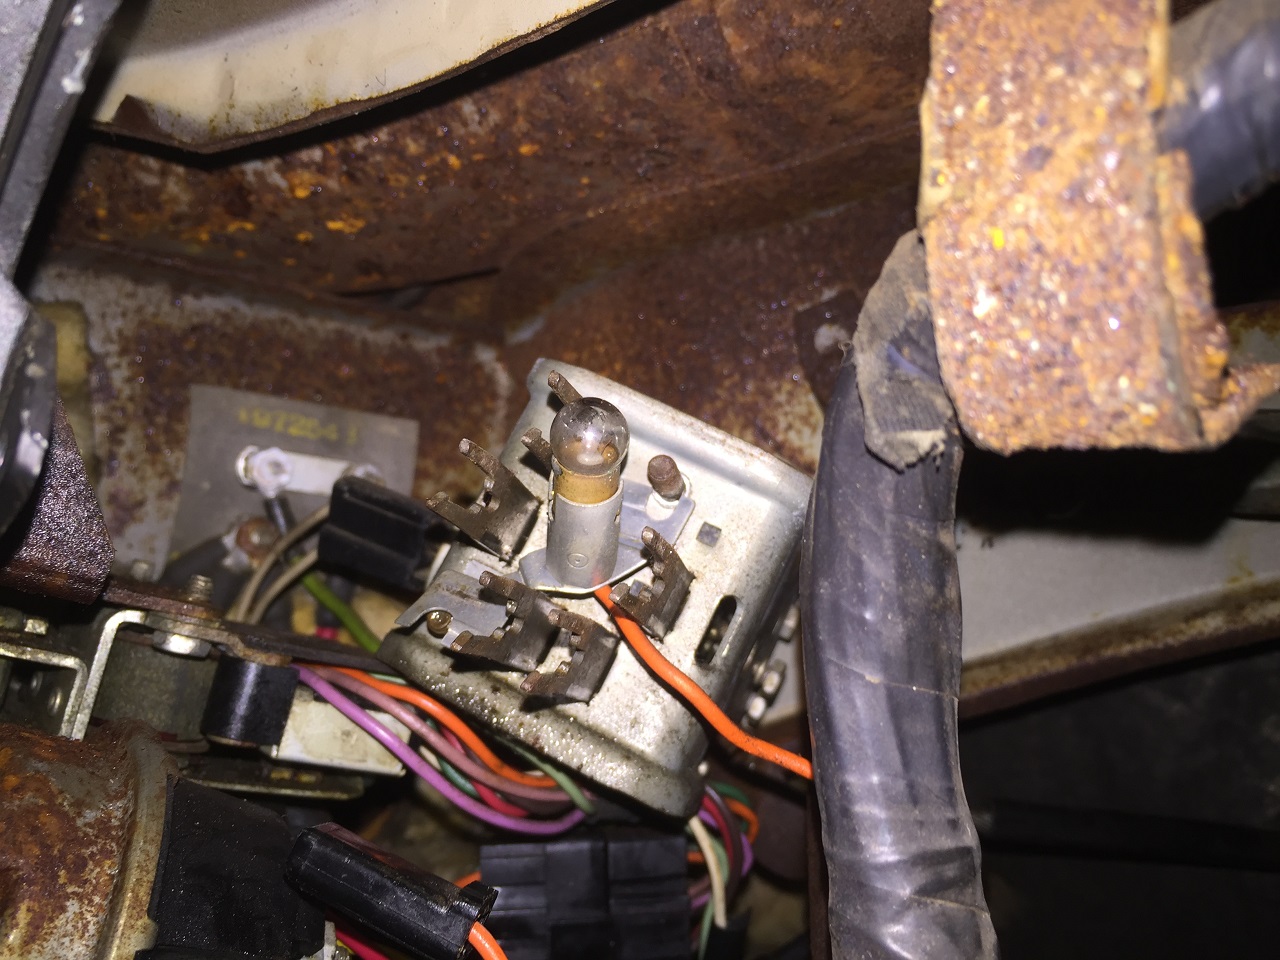 (IMG_2876_resized.JPG) (IMG_2876_resized.JPG)
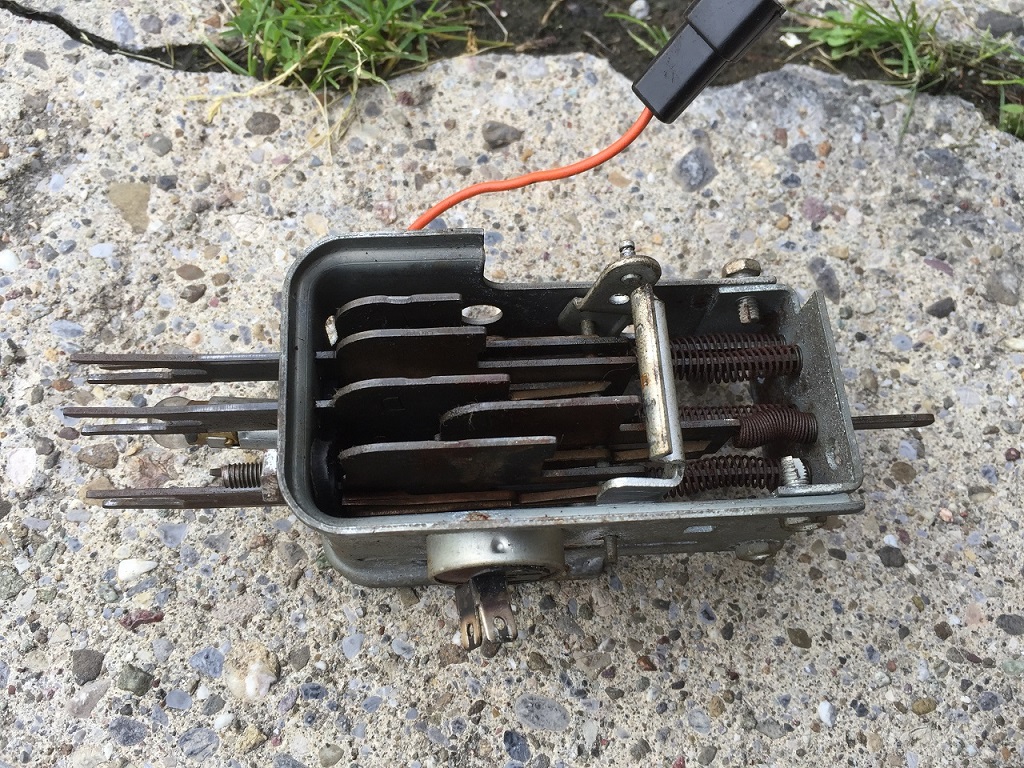 (IMG_2879_resized.JPG) (IMG_2879_resized.JPG)
 (IMG_2886_resized.JPG) (IMG_2886_resized.JPG)
Attachments
----------------
IMG_2870_resized.JPG (410KB - 489 downloads)
IMG_2871_resized.JPG (337KB - 467 downloads)
IMG_2875_resized.JPG (217KB - 473 downloads)
IMG_2876_resized.JPG (350KB - 481 downloads)
IMG_2879_resized.JPG (445KB - 488 downloads)
IMG_2886_resized.JPG (472KB - 485 downloads)
|
|
| |
|
Expert
Posts: 1530
Location: ZH, Switzerland | The box is brown or gray, but not orange. Only the characters are orange... I drained the transmission and received the (very expensive) vacuum heater control switch (NOS). I just wonder what type of plastic material it is made out of. It's a thermoplast and honey colored (I assume the natural color of the plastic). Happy Restoring! Dieter |
|
| |
|
Expert
Posts: 1530
Location: ZH, Switzerland | Today I removed the relays in the motor bay and the air ducts under the dashboard. Remaining are the directional switch, the light switch, the wiper switch and the clock to remove or at least to disconnect from the wiring harness. Because the glove box liner has to go through the opening (wiper motor partially and heater box between the firewall and the glove box liner) it's beyond any hope now. But good luck: Gary Goers offers new linings. I'm on track with the disassemblage... (time table) Happy Restoring! Dieter BTW: the first picture shows the voltage regulator. I assume it's an alternator regulator - an alternator was mounted at the engine when I purchased my Letter - most possibly dealer installed
Edited by di_ch_NY56 2016-06-12 1:50 PM
 (IMG_2909_resized.JPG) (IMG_2909_resized.JPG)
 (IMG_2911_resized.JPG) (IMG_2911_resized.JPG)
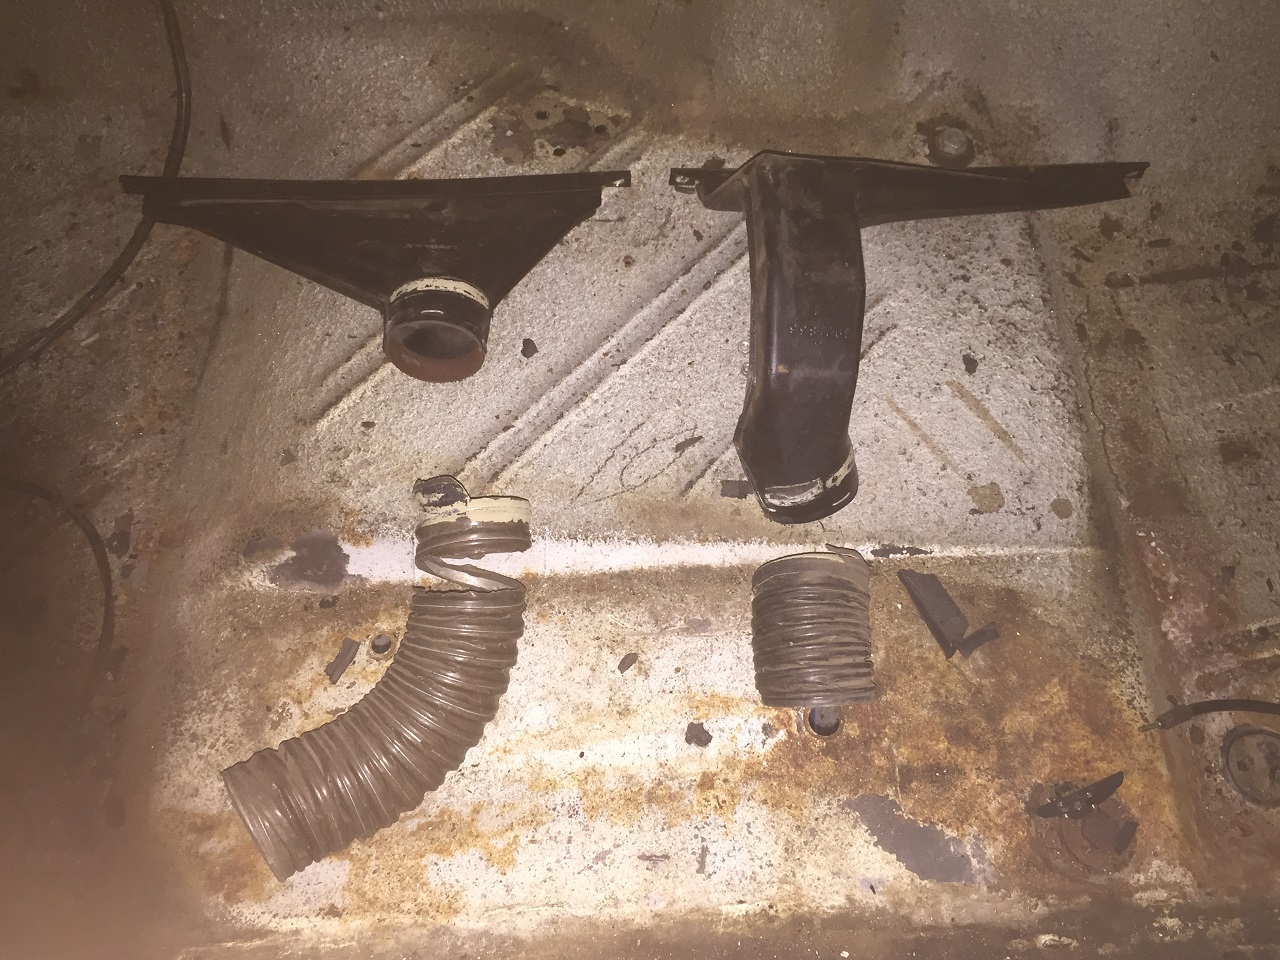 (IMG_2912_resized.JPG) (IMG_2912_resized.JPG)
Attachments
----------------
IMG_2909_resized.JPG (375KB - 463 downloads)
IMG_2911_resized.JPG (347KB - 469 downloads)
IMG_2912_resized.JPG (490KB - 469 downloads)
|
|
| |
|
Expert
Posts: 1223
Location: Ramona, CA | di_ch_NY56 - 2016-06-05 10:41 AM
I discovered another orange colored item mounted at the side (covered by the gear selector mechanism). It looks like a circuit breaker (array?) or a voltage regulator.
Is this what you're asking about? These are circuit breakers. They're mounted on a card that hooks onto the sheet metal. Slide it up to remove it. The circuit breakers are for things like a power antenna or the rear cigar lighter. The big green wire has an inline fuse further down. I had to replace this wire on my car.
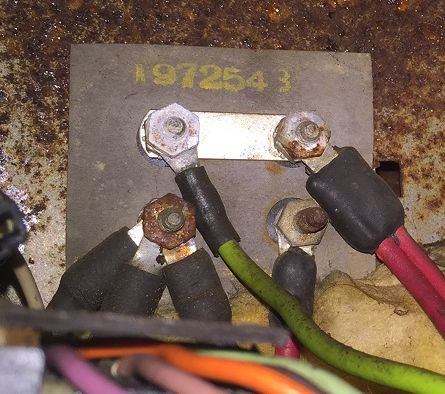 (Image22.jpg) (Image22.jpg)
Attachments
----------------
Image22.jpg (60KB - 457 downloads)
|
|
| |
|
Expert
Posts: 1530
Location: ZH, Switzerland | Thanks a lot Nick. It's what I was assuming according the electric drawings (wiring schematics). My Letter has a 6-way electric seat frame adjuster, power windows and the rear cigarette lighter. When I'm ready at the final assembling I assume I'll add the wire for the power antenna as well to the RH rear fender to later on add a power antenna. Happy Restoring! Dieter |
|
| |
|
Expert
Posts: 1223
Location: Ramona, CA | The factory wiring diagrams are incomplete and hard to read. I was trying to find out what the big green wire was and someone else told me it was for the rear lighter. It's not actually using a circuit breaker but is just tied in there to get power. My other F had a power antenna and it did hook into one of the circuit breakers there. I'll try to remember to take a picture of that part when I have the car at home again. The spare wiring harness is in the trunk. |
|
| |
|
Expert
Posts: 1530
Location: ZH, Switzerland | Today I removed - I couldn't believe it but now it's out - the dashboard. I had to remove the socket of the map lamp - the last remaining connection in the dashboard to the wiring harness. After the removal of the dashboard I removed the directional switch. It's now out for a service. The brown wire is broken off at the switch. Both front directional wires have below 0.5 Ohms to the flasher input wire when the lever is in the corresponding positon. I took the seat frame with me to my home. I conncted the laboratory power supply (adjusted to 14.4 V/ 30A). First I disconnected all solenoids (three of them) to check if the motor cranks forwards and backwards. It does. So I conncted the solenoids again. The basic functions forth / back and up / down are working. The movement is quite fast (/wo seats and guys sitting in both front seats). But to move it at the front or rear I have to disconnect the corresponding solenoid. I think the know is to narrow to the bezel to engage the diagonal connections (logical conclusion to move the lever diagonal to tilt the seat frame). Next steps (except the work under my Letter) are the removal of the wiper system, the heater system, the main brake cylinder and brake booster, the wiring harness and the windshield/rear window. Happy Restoring! Dieter
 (IMG_3043_resized.JPG) (IMG_3043_resized.JPG)
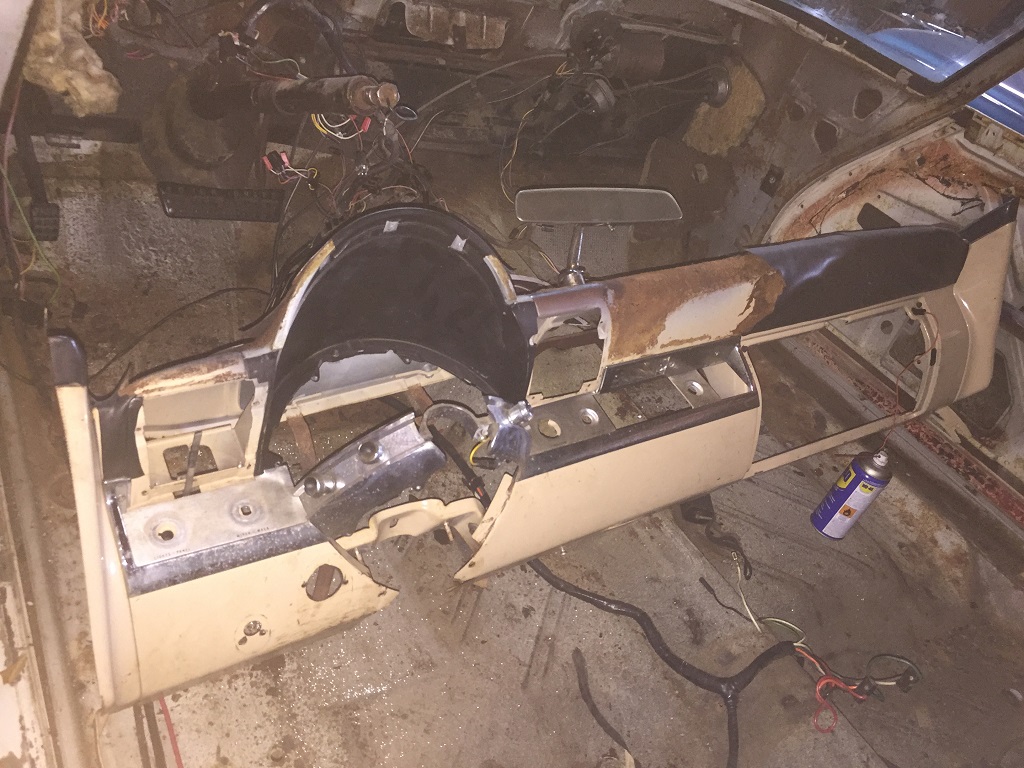 (IMG_3047_resized.JPG) (IMG_3047_resized.JPG)
 (IMG_3052_resized.JPG) (IMG_3052_resized.JPG)
Attachments
----------------
IMG_3043_resized.JPG (400KB - 383 downloads)
IMG_3047_resized.JPG (291KB - 376 downloads)
IMG_3052_resized.JPG (337KB - 378 downloads)
|
|
| |
|
Expert
Posts: 1530
Location: ZH, Switzerland | I just got an advice from a good friend. Twist the knob cw and ccw to tilt the seat. It works, my seat frame is moving like a gem . Happy Restoring! Dieter
Edited by di_ch_NY56 2016-07-24 1:13 PM
|
|
| |
|
Elite Veteran
Posts: 827
Location: tailFinland | Dieter, can you help me to find regulator attaching bolt holes?
No idea how it is bolted and a picture in the manual shows only manual regulator spots.
I also need stops for all windows cos they are lost.
 (IMG_0603.JPG) (IMG_0603.JPG)
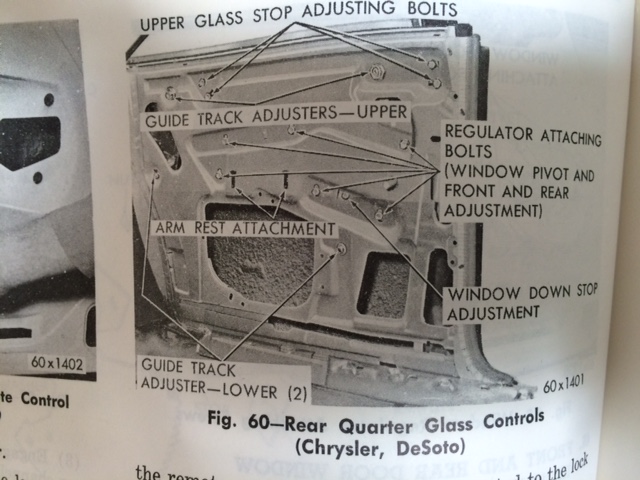 (IMG_0606.JPG) (IMG_0606.JPG)
Attachments
----------------
IMG_0603.JPG (124KB - 374 downloads)
IMG_0606.JPG (114KB - 378 downloads)
|
|
| |
|
Expert
Posts: 1530
Location: ZH, Switzerland | Hi Jari I just visited your thread as well after I read your question. In my opinion the stops are generic parts used in all ChryCo hardtop models (estimation without visiting the 1960 parts manual). to get an idea specially for you I took some pictures I attached to my answer. First of all I put all of the removed hardware seperately in boxes per window position (VR = front door passenger side (vorne rechts), HR quarter window passenger side (hinten rechts). In the boxes are the securing washers for the arms of the lifter mechanism as well as the stops I removed. By laying is the corresponding lower stop. At the lower stop of the quarter window is a recessed bar - when mounted correctly, the remaining mounting points of the electric window lift are in line with the screw holes of the recessed bar. To get the correct position I let the stop at the bar. Near the front door (pass side) box there is the corresponding lower stop of the pass side front door. For both upper stops I took a picture. There are two for the rear and the door window. It looks like the front door upper stops were dipped in melted rubber - I assume a shrinking hose would do the job as well... 1951 is the lower quarter panel (passenger side prior the removing of the electric lift and window glass). Good luck Jari Dieter
 (IMG_3064_resized.JPG) (IMG_3064_resized.JPG)
 (IMG_3065_resized.JPG) (IMG_3065_resized.JPG)
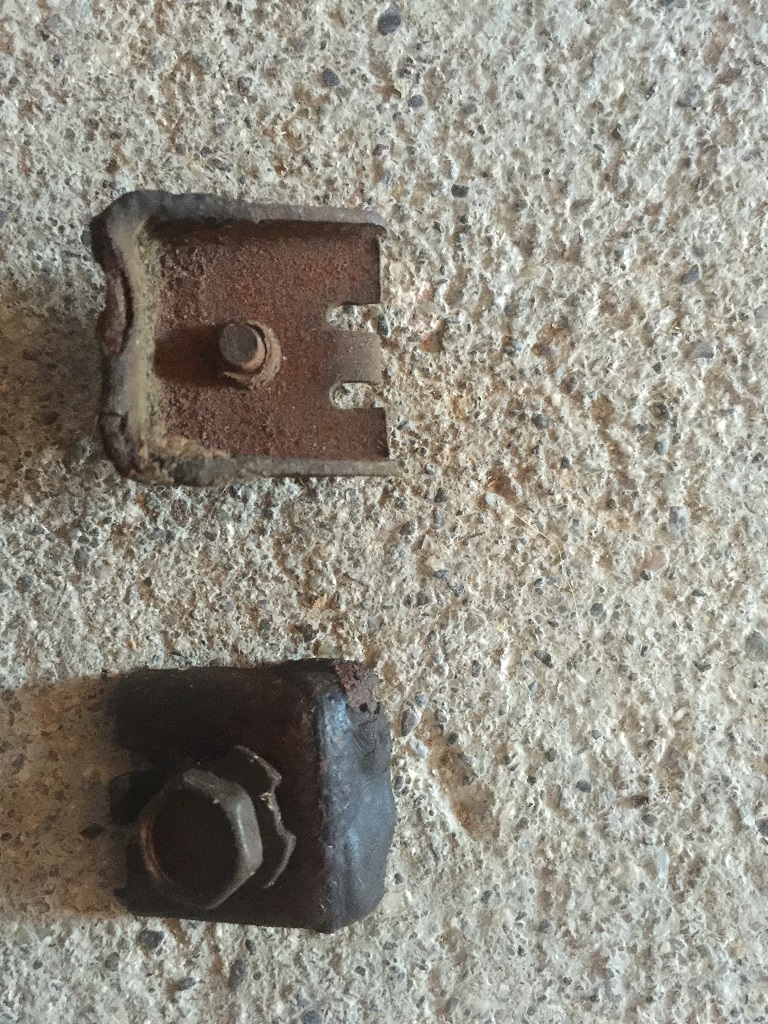 (IMG_3066_resized.JPG) (IMG_3066_resized.JPG)
 (IMG_3067_resized.JPG) (IMG_3067_resized.JPG)
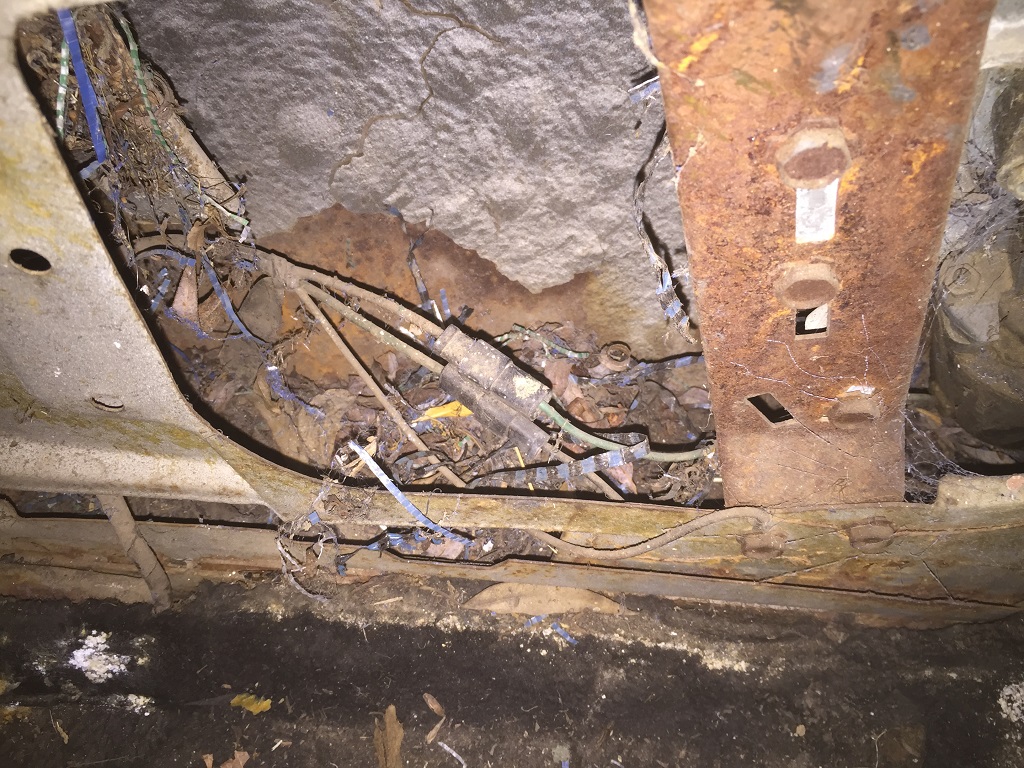 (IMG_1951_resized.JPG) (IMG_1951_resized.JPG)
Attachments
----------------
IMG_3064_resized.JPG (416KB - 380 downloads)
IMG_3065_resized.JPG (371KB - 385 downloads)
IMG_3066_resized.JPG (437KB - 371 downloads)
IMG_3067_resized.JPG (400KB - 381 downloads)
IMG_1951_resized.JPG (393KB - 377 downloads)
|
|
| |
|
Expert
Posts: 1530
Location: ZH, Switzerland | NicksGarage - 2016-06-11 11:14 PM di_ch_NY56 - 2016-06-05 10:41 AM I discovered another orange colored item mounted at the side (covered by the gear selector mechanism). It looks like a circuit breaker (array?) or a voltage regulator. Is this what you're asking about? These are circuit breakers. They're mounted on a card that hooks onto the sheet metal. Slide it up to remove it. The circuit breakers are for things like a power antenna or the rear cigar lighter. The big green wire has an inline fuse further down. I had to replace this wire on my car. Thanks a lot.
The green wire has indead an inline fuse in my wiring harness as well. The 10 gage red wire is the feed for the 6-way power front seat. The upper dual red wires are from the battery and going to the amm meter. I was just wondering: it seems my 300F has only two breakers and not three like addressed in the 1960 service manual. So the electric window lifts and the rear cigarette lighter are on the same breaker. Happy Restoring! Dieter |
|
| |
|
Expert
Posts: 1223
Location: Ramona, CA | di_ch_NY56 - 2016-07-30 11:46 AM
NicksGarage - 2016-06-11 11:14 PM di_ch_NY56 - 2016-06-05 10:41 AM I discovered another orange colored item mounted at the side (covered by the gear selector mechanism). It looks like a circuit breaker (array?) or a voltage regulator. Is this what you're asking about? These are circuit breakers. They're mounted on a card that hooks onto the sheet metal. Slide it up to remove it. The circuit breakers are for things like a power antenna or the rear cigar lighter. The big green wire has an inline fuse further down. I had to replace this wire on my car. Thanks a lot.
The green wire has indead an inline fuse in my wiring harness as well. The 10 gage red wire is the feed for the 6-way power front seat. The upper dual red wires are from the battery and going to the amm meter. I was just wondering: it seems my 300F has only two breakers and not three like addressed in the 1960 service manual. So the electric window lifts and the rear cigarette lighter are on the same breaker. Happy Restoring! Dieter
Both of mine only had two. My old car didn't have the power seat but it did have the power antenna, my current car has power seat but not antenna. Here is the one from my first car.
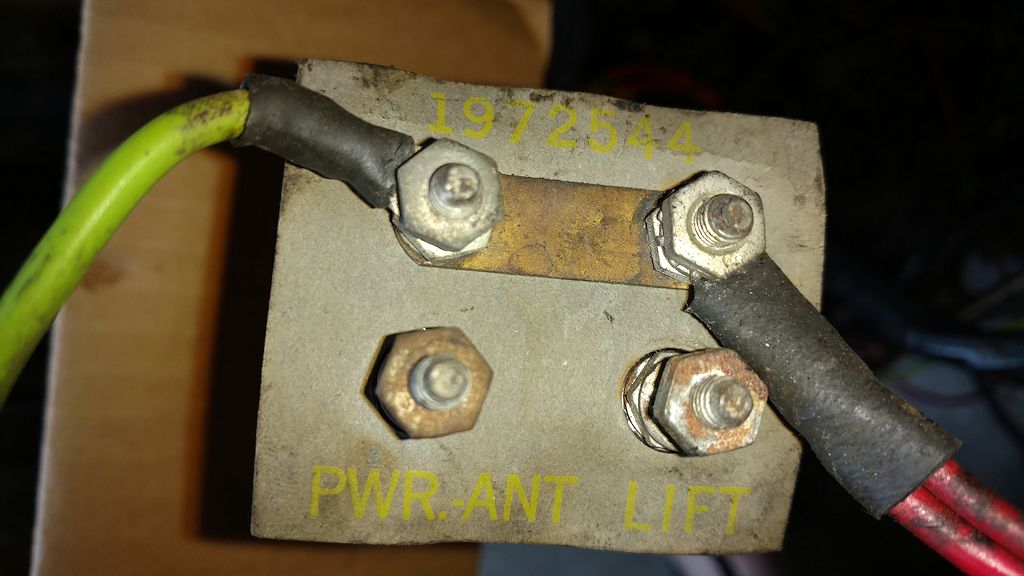 (circuit_breaker.jpg) (circuit_breaker.jpg)
Attachments
----------------
circuit_breaker.jpg (95KB - 383 downloads)
|
|
| |
|
Expert
Posts: 1530
Location: ZH, Switzerland | Today I removed the circuit breakers and the power supply for the Astro Dome. There are two circuit breakers installed. The LH one (nearer to the firewall) is rated 40A and used for the 6-way power seat, the rear one, rated 30A, is used only for the window lifts. The three wires are the feeding lines to each switch (4-way switch in the front, 2 2-way switches at the rear). The green wire with the inline fuse is the feeding line for the rear cigarette lighter only. The ground of the cigarette lighter is routed through the wiring harness to the passenger quarter window lift. It's the white wire bolted at the bottom of the recessed reinforcement bar (with the lower quarter window stop). The power supply was a pain to remove even though the dashboard is out. The screw heads are 5/16". The shape of the case is very different to the shape of later cars - even thogh the function and the rating (I assume) are similar. Happy Restoring! Dieter BTW at the LH side of the circuit breaker array there is the resting mounting slot for the third breaker switch visible...
Edited by di_ch_NY56 2016-08-01 1:27 PM
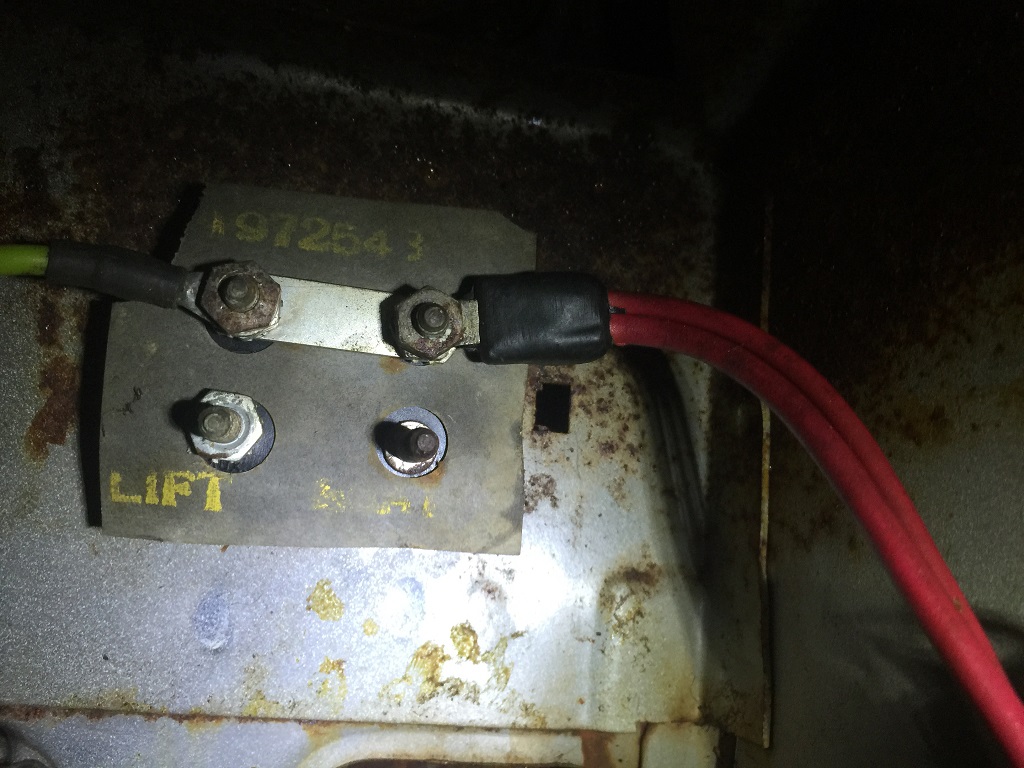 (IMG_3072_resized.JPG) (IMG_3072_resized.JPG)
Attachments
----------------
IMG_3072_resized.JPG (237KB - 504 downloads)
|
|
| |
|
Expert
Posts: 1530
Location: ZH, Switzerland | Yesterday I got the information from my friend, that he was discussing with Jan (Fridberg). The conclusion is that the master of wizards of body work has a super booked schedule for years now and no time for my car anymore. So I'm thinking about further steps of what and to whom. But no news anymore. Dieter |
|
| |
|
Expert
Posts: 1530
Location: ZH, Switzerland | I came to the conclusion to keep on with the restoration with the hope that the master of wizards of body work (Jan Fridberg) once has time to do the body work on my Letter. If not this winter I hope next winter or next winter over. There are many issues at the body from the front end to the rear wall. At least from what I could see (perimeter around the weatherstrips of the windshield and rear window) there is not much or no rust under the weatherstrips. Today I just scratched a part of the gasket between the outer roof rails and the roof away. I removed the upper four hex nuts at the reinforcement mounting plate of the brake booster. I realized that first I have to remove the main brake. I took a picture of the firewall near the opening of the heater fan wheel. The number embossed into the firewall is completely different than the VIN of my Letter... Dieter BTW: at the picture you could easily recognize that the firewall/engine bay originally was white... one owner used satin black and sprayed over everything, even the wires of the wiring harness. I could scratch off the black color to get the original color of the wire...
Edited by di_ch_NY56 2016-08-14 10:13 AM
 (IMG_3116_resized.JPG) (IMG_3116_resized.JPG)
Attachments
----------------
IMG_3116_resized.JPG (252KB - 485 downloads)
|
|
| |
|
Expert
Posts: 1223
Location: Ramona, CA | The numbers may match the build sequence number from your build sheet. |
|
| |
|
Expert
Posts: 1530
Location: ZH, Switzerland | NicksGarage - 2016-08-14 6:15 AM The numbers may match the build sequence number from your build sheet. Thanks Nick I'll check it. Dieter |
|
| |
|
Expert
Posts: 1530
Location: ZH, Switzerland | This is the state of the body of my Letter. The wiring harness is almost out. The dashboard and the heater box are out. Dieter BTW: these are the picture I sent to Jan (original size)
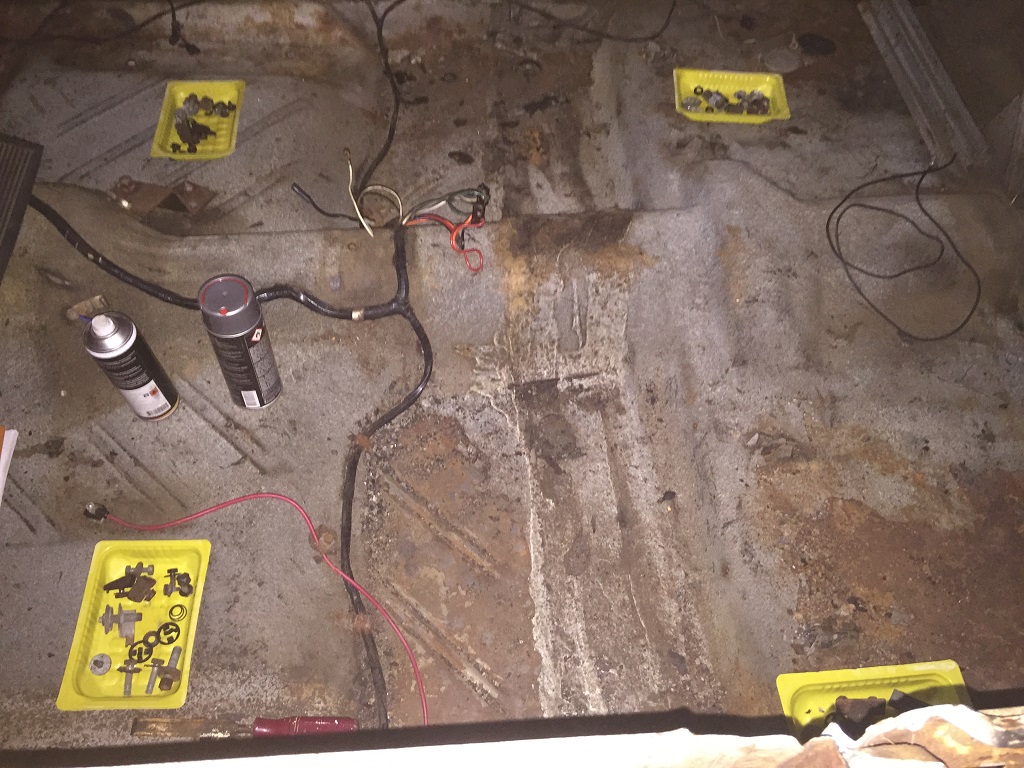 (IMG_2739_resized.JPG) (IMG_2739_resized.JPG)
 (IMG_2791_resized.JPG) (IMG_2791_resized.JPG)
 (IMG_2864_resized.JPG) (IMG_2864_resized.JPG)
 (IMG_3093_resized.JPG) (IMG_3093_resized.JPG)
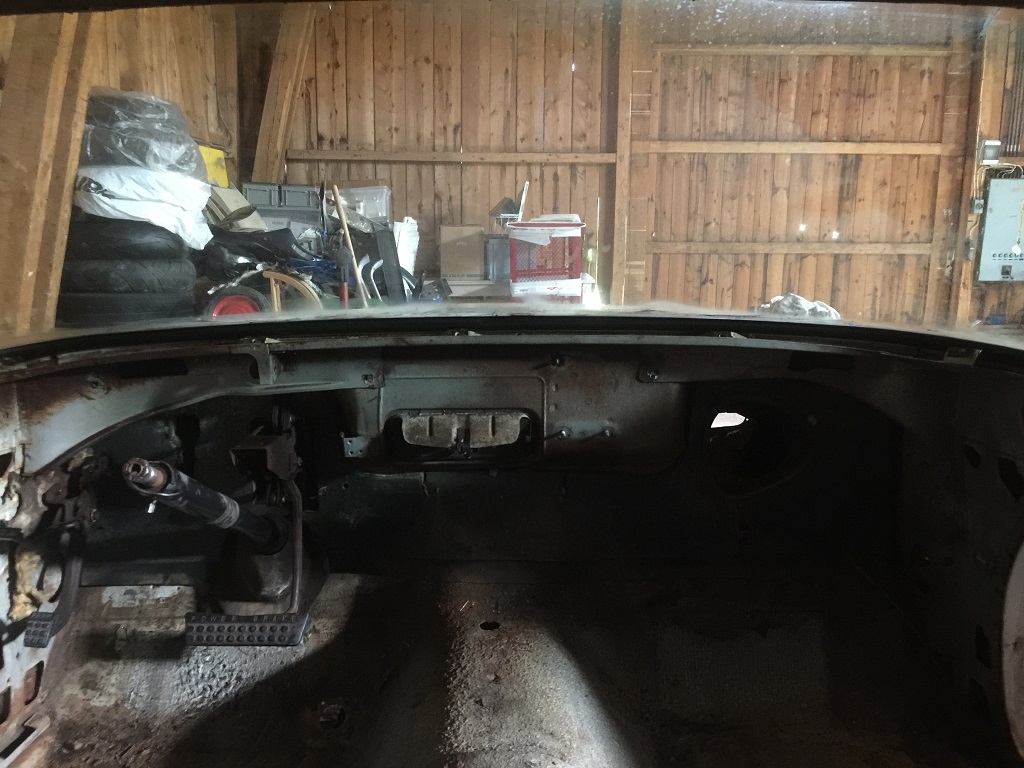 (IMG_3096_resized.JPG) (IMG_3096_resized.JPG)
Attachments
----------------
IMG_2739_resized.JPG (313KB - 515 downloads)
IMG_2791_resized.JPG (264KB - 494 downloads)
IMG_2864_resized.JPG (284KB - 483 downloads)
IMG_3093_resized.JPG (326KB - 522 downloads)
IMG_3096_resized.JPG (246KB - 497 downloads)
|
|
| |
|
Expert
Posts: 1530
Location: ZH, Switzerland | This evening I just removed one screw at the passgenger side of the holder of the front bumper. The target is to remove the front bumper as well. Then I removed the drain plug at the oil pan because I wondered how the content of the oil pan would look like. First of all clear water came out, I assume between half of and a galon of water. Finally a milk coffee colored cream came out... at the end with many popel like stuff (milk coffee brown as well). It's still rinsing... Good luck I took my big bricklayer pan to collect the stuff out of the oil pan. Dieter
 (IMG_3128_resized.JPG) (IMG_3128_resized.JPG)
 (IMG_3129_resized.JPG) (IMG_3129_resized.JPG)
Attachments
----------------
IMG_3128_resized.JPG (161KB - 486 downloads)
IMG_3129_resized.JPG (138KB - 505 downloads)
|
|
| |
|
Expert
Posts: 1530
Location: ZH, Switzerland | This evening I removed the front bumper. What I saw on the passenger side corner of the front subframe is not very nice, clear evidences of an accident. The pictures will follow tomorrow when iti's brighter. Dieter |
|
| |
|
Expert
Posts: 1530
Location: ZH, Switzerland | Today I checked the heater fan motor, still installed in the inside duct. The flow of air is very impressive at the high mode. While picking up the inner and outer ducts of the heater I took some pictures from the front end of the front frame. Here they are... Dieter
 (IMG_3135_resized.JPG) (IMG_3135_resized.JPG)
 (IMG_3136_resized.JPG) (IMG_3136_resized.JPG)
 (IMG_3137_resized.JPG) (IMG_3137_resized.JPG)
 (IMG_3138_resized.JPG) (IMG_3138_resized.JPG)
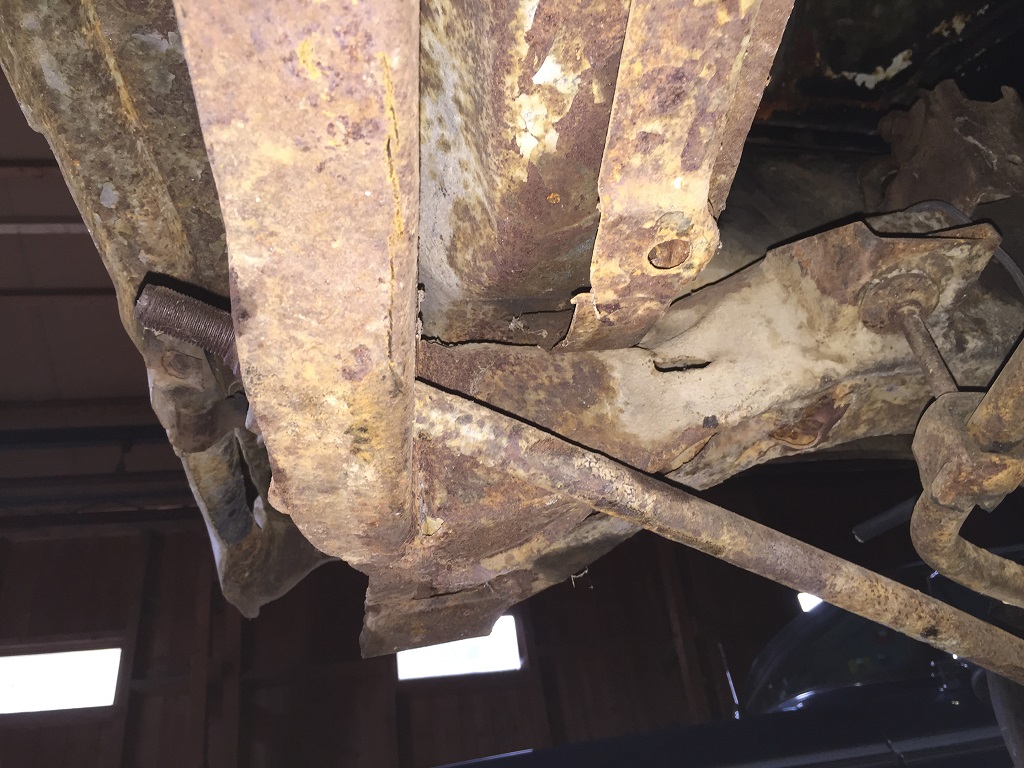 (IMG_3139_resized.JPG) (IMG_3139_resized.JPG)
Attachments
----------------
IMG_3135_resized.JPG (263KB - 511 downloads)
IMG_3136_resized.JPG (255KB - 506 downloads)
IMG_3137_resized.JPG (235KB - 463 downloads)
IMG_3138_resized.JPG (211KB - 497 downloads)
IMG_3139_resized.JPG (276KB - 490 downloads)
|
|
| |
|
Expert
Posts: 1530
Location: ZH, Switzerland | This afternoon it was very hot. So I just removed the vacuum canister of the brake system. To remove the brake hose to LH front brake I had to use the vise grip to fix the hex nut at the brake line. Finally I succeeded - years ago I had to use the same method at the passenger side front brake at my Beast. Happy Restoring! Dieter
Edited by di_ch_NY56 2016-08-27 11:59 AM
|
|
| |
|
Expert
Posts: 1530
Location: ZH, Switzerland | NicksGarage - 2016-08-14 6:15 AM The numbers may match the build sequence number from your build sheet. Yes Nick your correct. It's the sequence number, the scheduled data and some more. Happy Restoring! Dieter |
|
| |
|
Expert
Posts: 1530
Location: ZH, Switzerland | For all of my friends, I'm saving really hard to afford my hobby. Happy Restoring! Dieter |
|
| |
|
Expert
Posts: 1223
Location: Ramona, CA | di_ch_NY56 - 2016-08-30 11:35 AM
For all of my friends, I'm saving really hard to afford my hobby. Happy Restoring! Dieter
It's not easy for some of us. I was lucky to have a car that went up in value enough for me to sell it to get my F. Otherwise I'd still be a dreamer. Now I'm selling parts to afford stuff for the F. |
|
| |
|
Elite Veteran
Posts: 827
Location: tailFinland | By the way Nick, Do you much left over F-parts from your ex F? I need some interior pieces for my G |
|
| |
|
Expert
Posts: 1223
Location: Ramona, CA | Adventurer 60 - 2016-08-31 4:38 AM
By the way Nick, Do you much left over F-parts from your ex F? I need some interior pieces for my G
I have most of the parts from the car other than the body. The interior was pretty rotten from sitting around with no back window for years. I'm still figuring out what I need from it for my new one but I'm in the middle or working on my house to sell it and move so haven't been able to do much with it. Send me a private message. |
|
| |
|
Expert
Posts: 1530
Location: ZH, Switzerland | Today I got a big parcel from a city in California containing the grille frame. it's not cracked but the general condition is ways worse than the original grille frame (in the back ground at the LH side of the picture). The dome lenses are here, too. I got it from Murrieta, CA. Happy Restoring! Dieter
Edited by di_ch_NY56 2016-09-03 6:52 AM
 (IMG_3169_resized.JPG) (IMG_3169_resized.JPG)
Attachments
----------------
IMG_3169_resized.JPG (271KB - 495 downloads)
|
|
| |
|
Expert
Posts: 1530
Location: ZH, Switzerland | I just noticed that all of the card paper parts are that weak (age and dried out) that it even couldn't resist a pressure with the thumb without falling through. While I was removing the glove box liner I noticed that the card paper breaks instead of bending like a new card paper. E.g. the parts of the inner heater box (passenger room) pointing to the firewall are completely out of card paper and fixed to the synthetical material with staples and a kind of rivets. So I came to the conclusion that I have to replace really all card paper parts. Happy Restoring! Dieter |
|
| |
|

Expert
Posts: 2788
Location: USA - KY |
I know the feeling, Dieter.
I used the old glove box liner from my car as a template, and made a new one myself...it was pretty easy. The original glove box liners were flocked in some (if not all) of the F.L. cars, but I didn't bother with that. Flocking sprays are available, but you likely know that already.
Gary Goers has nice glove box liners for sale as well, and folks here seem to like them just fine.
Happy Restoring to you too!
 |
|
| |
|
Expert
Posts: 1530
Location: ZH, Switzerland | FIN ME - 2016-09-02 2:47 PM I know the feeling, Dieter. I used the old glove box liner from my car as a template, and made a new one myself...it was pretty easy. The original glove box liners were flocked in some (if not all ) of the F.L. cars, but I didn't bother with that. Flocking sprays are available, but you likely know that already. Gary Goers has nice glove box liners for sale as well, and folks here seem to like them just fine. Happy Restoring to you too! :cool: Hey thanks a lot. The GB liner in my 1956 NY is flocked and I got a replacement from Gary Goers, but it's not installed until today. The GB liner in a 1960 Chrysler, not only 300F, has a more complicated shape and from my experience and pictures - it's not flocked. What tortures me more is the internal heater box (the heater box 715 has two parts, the inner and the outer in the motor bay). First of all I have to find the correct card paper type and then carefully separate the existing card paper from the duct. It's a three dimension item with internal channels. Of course I would add some improvements, because the second "bearing" of the distributor flap (defrost/floor) is in the card paper area and I assume there are small air leaks at the upper junction between the card paper and the synthetic material - I think a small and long piece of aluminum or steel would improve the box. Happy Restoring to you as well. Dieter
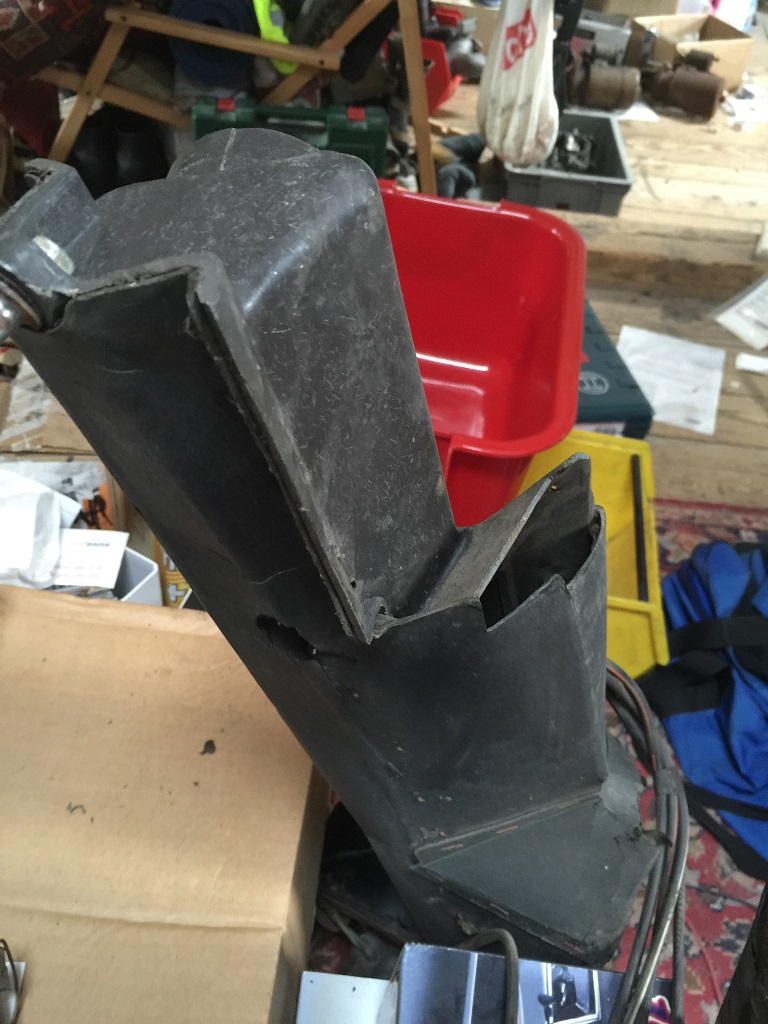 (IMG_3171_resized.JPG) (IMG_3171_resized.JPG)
 (IMG_3173_resized.JPG) (IMG_3173_resized.JPG)
Attachments
----------------
IMG_3171_resized.JPG (220KB - 476 downloads)
IMG_3173_resized.JPG (232KB - 480 downloads)
|
|
| |
|
Member
Posts: 41
Location: South Central PA | Gary Goers makes a replacement for the heater box too. It uses rivets instead of staples. I replaced mine and it fit really good |
|
| |
|
Expert
Posts: 1530
Location: ZH, Switzerland | 60 Windsor - 2016-09-03 4:47 AM Gary Goers makes a replacement for the heater box too. It uses rivets instead of staples. I replaced mine and it fit really good Thanks a lot for your hint. I appreciate your hint very much. As far as I noticed in the catalog 10 from Gary Goers it's the parts number 699 and I have to specify with no air condition. Furthermore I noticed at the same page that there is a replacement for the broken emergency brake release lever handle (702 or 703). Happy Restoring! Dieter |
|
| |
|
Expert
Posts: 1530
Location: ZH, Switzerland | Today I removed the gas tank. Even though it has many dents at the bottom it looks quite good. As well from what I could see the bottom of the trunk floor looks like new. I couldn't resist and took my multimeter to check the resistance between the sender wire and the cleaned area around the bajonet cover of the sender: 173 ohms. I assume I need many hours just to clean the outside of the gas tank... Happy Restoring! Dieter
 (IMG_3175_resized.JPG) (IMG_3175_resized.JPG)
 (IMG_3178_resized.JPG) (IMG_3178_resized.JPG)
 (IMG_3181_resized.JPG) (IMG_3181_resized.JPG)
Attachments
----------------
IMG_3175_resized.JPG (284KB - 492 downloads)
IMG_3178_resized.JPG (317KB - 459 downloads)
IMG_3181_resized.JPG (250KB - 484 downloads)
|
|
| |
|
Expert
Posts: 1530
Location: ZH, Switzerland | This evening I found the vent tube to the gas tank again and cleaned it inside. I assume it's a straight tube with no one way valve incorporated. Then I cleaned the gas tank at some patches. It looks like the surface has a zinc layer to protect the surface from rusting that is intact. I was able to remove the lock ring and finally dig out the sender unit. So I had a sight into the gas tank. From what I noticed the resting gas is red and the internal of the gas tank has a zinc layer as well. It could be that the gas tank was almost full when the piston #1 sized (judgeing from the surface of the cylinder wall and the condition of the surface of the top of the piston #1). Happy Restoring! I do not give up until my Letter is fully restored. Dieter |
|
| |
|
Expert
Posts: 1530
Location: ZH, Switzerland | Many weeks earlier I removed the upper passenger side bolt between the transmission and bellhouse to measure the thread size. It's 7/16" UNC. So I purchased two hex screws according the lenght addressed by Wizard to build two guides to remove the transmission without damaging the front pump sleeve. Today I removed the resting three hex screws, but not without a damage  ... For sure I need one 7/16" UNC Heli Coil as an insert for the lower thread in the bellhouse at the driver side... ... For sure I need one 7/16" UNC Heli Coil as an insert for the lower thread in the bellhouse at the driver side... Next step is to slide the bigger hydraulic jack sidewards to the rear to remove the transmission. Happy Restoring! Dieter
Edited by di_ch_NY56 2016-10-09 2:31 PM
 (IMG_3258_resized.JPG) (IMG_3258_resized.JPG)
 (IMG_3261_resized.JPG) (IMG_3261_resized.JPG)
Attachments
----------------
IMG_3258_resized.JPG (440KB - 502 downloads)
IMG_3261_resized.JPG (319KB - 490 downloads)
|
|
| |
|
Expert
Posts: 1530
Location: ZH, Switzerland | I hope I catched the transmission at the gravitation center. That's important, otherwise the trans could fell down. For that reason I used a quite decent load securing strap /w ratchet. Prioe to take the picture above I moved the trans/engine combo to a more horizontal position. So it should be easier to move the trans out without damaging the sleeve... Happy Restoring! Dieter
Edited by di_ch_NY56 2016-10-09 2:30 PM
|
|
| |
|
Expert 5K+
Posts: 8443
Location: Perth Australia | Turn your jack around Dieter
If it is unbalanced, it will fall like that, but the other thing is, you need the transmission to come back pretty much 12 inches.
You will find it much easier to slide the trans back with the jack parallel with the car, then lower the trans and push it out the front.
Only time I have taken a trans out the side is if it slipped off the jack or I wasnt using one.
Dont be tempted to not use one with a torqueflite, they are incredibly heavy
|
|
| |
|

Expert
Posts: 1316
Location: Belgium, 40 miles south of Brussels | di_ch_NY56 - 2016-10-09 5:27 PM
Many weeks earlier I removed the upper passenger side bolt between the transmission and bellhouse to measure the thread size. It's 7/16" UNC. So I purchased two hex screws according the lenght addressed by Wizard to build two guides to remove the transmission without damaging the front pump sleeve.
Dieter, can you tell me the screw length you bought ?
I have to do the same as you on my car ...
di_ch_NY56 - 2016-10-09 8:28 PM
I hope I catched the transmission at the gravitation center. That's important, otherwise the trans could fell down. For that reason I used a quite decent load securing strap /w ratchet.
I've been told that it's not very good to jack the transmission at the oil pan, as it might crush.
I think you have to support it on the sides, where the bolts are.
You might want to build a special cradle, that's what I did.
|
|
| |
|
Expert
Posts: 1530
Location: ZH, Switzerland | Hi Vincent Thanks a lot for your answers. Yes I was thinking of turning the hydraulic jack for 90 degrees. But in my house I have two truck load securing bands with ratchet. The other option is to route the securing bands around the rear axle, tighten it with the ratchet and use the ratchet to shorten the loop - so the jack would move slowly sidwards. I used according a hint 20 mm ply wood pieces to support the oil pan - the ply wood piece is bigger than the width of the oil pan so I would support the edges of the oil pan. Stud legnth, it's the original content of the mail I got. Strictly I followed that hint: Found the bloody thread – the studs shall be made out of 7/16" X 14 bolts with a length of 3” – just cut off the heads, grind them pointy and saw a screwdriver slot in the ends. Good luck and happy Restoring
Dieter I just purchased a 7/16 UNC helicoil thread repair set in England... |
|
| |
|
Board Moderator & Exner Expert 10K+
Posts: 13045
Location: Southern Sweden - Sturkö island | Looks like s good set-up for the demounting and lift-down Dieter. I have used this method on all transmissions and it's absolutely safe for the pan. |
|
| |
|
Expert
Posts: 1530
Location: ZH, Switzerland | After one hour of work (without preparation) the trans is finally off, but still laying on the jack until next weekend. Fortunately it didn't fell down, but ouch it's heavy. First of all I tried to move the hydraulic jack away. But suddenly I realized that the trans didn't separate from the bell house. So I used one load securing band to pull the trans and wiggled the engine up/trans down and reverse until the trans separated. There is not much space at the rear, because the trans is wider than the opening between the attaching points of the torsion bars. I was very surprised how much of trans fluid was still in the trans... so I imagine with no other movement than removing the filler pipe there is never a complete exchange of trans fluid while exchanging the trans fluid... Happy Restoring! Dieter
 (IMG_3273_resized.JPG) (IMG_3273_resized.JPG)
 (IMG_3274_resized.JPG) (IMG_3274_resized.JPG)
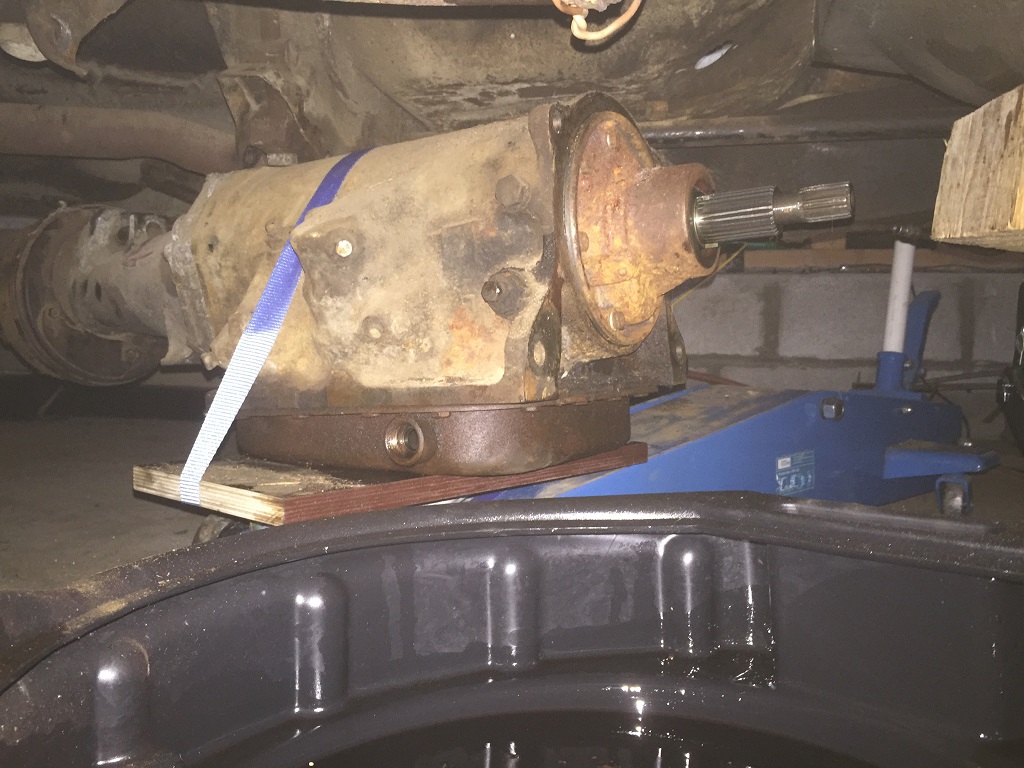 (IMG_3275_resized.JPG) (IMG_3275_resized.JPG)
Attachments
----------------
IMG_3273_resized.JPG (121KB - 499 downloads)
IMG_3274_resized.JPG (207KB - 434 downloads)
IMG_3275_resized.JPG (250KB - 483 downloads)
|
|
| |
|
Board Moderator & Exner Expert 10K+
Posts: 13045
Location: Southern Sweden - Sturkö island | Great work Dieter! I see that the studs worked just fine and that the front pump drive sleeve is still in position and not damaged in the process.
You can pull out the sleeve and check the status of the drive tabs - sometimes they are worn almost through and sometimes even sheered off.
This is an important part and expensive as well, so take care of it if it's in good shape.
Now you should put sturdy plastic bags over the splines of the shafts and pull tight with straps around the pump neck. Put some plugs in all holes and clean up the transmission outside as well as you can.
This will save some work for the guy that will renovate the transmission and you will save some money as well.
DONT TURN THE TRANSMISSION UPSIDE DOWN (All the eventual gunk in the pan will fall down on the valve body)
When the outside is cleaned, turn the transmission carefully on the side and remove the pan - Clean the pan inside and put it back.
After this you can turn the transmission upside down as you whish.
You can remove the parking brake drum and all the internal brake parts - this must be done any which way when the transmission will be renovated.
|
|
| |
|
Expert 5K+
Posts: 8443
Location: Perth Australia | As a repairer, I would say NOT to clean it internally if your giving it to someone else to repair.
The contents of the pan can be a good indication of what (if any) problems are happening to the trans
|
|
| |
|
Board Moderator & Exner Expert 10K+
Posts: 13045
Location: Southern Sweden - Sturkö island | Yes, that's a Point Mick, but it's easy to take a Picture of the gunk and even save it in a jar.
Any which way, there must be a total teardown of that trans. |
|
| |
|
Expert
Posts: 1530
Location: ZH, Switzerland | I couldn't resist - I went to my Letter again today. I was able to route the hydraulic jack between the RH stands and the trans between the attaching points of the torsion bars. Partially I cleaned the surface of the trans and a very interesting plate appeared. The sleeve - IMHO - doesn't show wear, but the counter part in the torque converter shows very small brow on edge driving the sleeve. From what I could see at the front pump, there are no brows visible - it looks like new... Thank you very much for your comments about the trans. I appreciate it very much. Happy Restoring! Dieter
 (IMG_3276_resized.JPG) (IMG_3276_resized.JPG)
 (IMG_3277_resized.JPG) (IMG_3277_resized.JPG)
 (IMG_3280_resized.JPG) (IMG_3280_resized.JPG)
 (IMG_3281_resized.JPG) (IMG_3281_resized.JPG)
 (IMG_3282_resized.JPG) (IMG_3282_resized.JPG)
Attachments
----------------
IMG_3276_resized.JPG (332KB - 470 downloads)
IMG_3277_resized.JPG (214KB - 449 downloads)
IMG_3280_resized.JPG (325KB - 475 downloads)
IMG_3281_resized.JPG (230KB - 476 downloads)
IMG_3282_resized.JPG (315KB - 478 downloads)
|
|
| |
|
Board Moderator & Exner Expert 10K+
Posts: 13045
Location: Southern Sweden - Sturkö island | The sleeve looks to be in an excellent shape Dieter.
When/if the front pump is binding, then the forces on the sleeve makes the tabs to wear down or sheere off even. The state of the sleeve makes me Think that the front pump is still in good shape.
That sign looks promising - never saw anything like it - I'm very curious to see the inside of the pan, perhaps the trans is not wrecked! |
|
| |
|
Expert
Posts: 1530
Location: ZH, Switzerland | Prior to remove the sleeve I turned the sleeve installed. I could feel some resistance, but IMHO it feels like there is still some trans fluid in the front pump. I could notice that the output shaft was cranking to the same direction like the input shaft... Actually the trans is at the plank. I wore working gloves and grabbed the brake drum combo and the front shaft to lift the trans from the jack to the plank. Either I'm quite strong or the trans is not that heavy... . Happy Restoring! Dieter BTW: I don't know if or when Macy Transmission moved over from Oakland CA to Martinez CA. Or if Macy Transmission Martinez CA is quite new in the business compared to the sign on my trans. Either way in Martinez CA apparently was the dealer who sold my Letter to the first customer. |
|
| |
|
Board Moderator & Exner Expert 10K+
Posts: 13045
Location: Southern Sweden - Sturkö island | Great Dieter!
Once you have cleaned the outside and the pan it's a good idea to bring it to an ambient that's not humid (long time storage without fluid might cause Surface rust in the valve body).
Clean the aluminum extension with degreaser and only soft rotating brushes, then the aluminum needs to be protected with a layer of clear coat. |
|
| |
|
Expert
Posts: 1530
Location: ZH, Switzerland | This afternoon I worked for more than one hour to clean the surface of the iron hog. I turned it to both sides to clean the side surfaces as good as possible. I discovered a trans fluid leak at the throttle lever shaft... After cleaning I turned the trans to the other side and removed the oil pan. Ouch, what a mess. I assume the pictures are showing evidence... Here are the pictures, please enjoy. Happy Restoring! Dieter BTW: the second picture of the internal of the oil pan I took after I cleaned it with house hold paper and my finger nail. I don't know if anybody used an additive or wrong trans fluid. But I assume the shiftings of the trans were not sactisfactory. The adjusting screw of the throttle lever linkage was loose and the adjusting part not in line as expected when I looked at the undercarriage the first time.
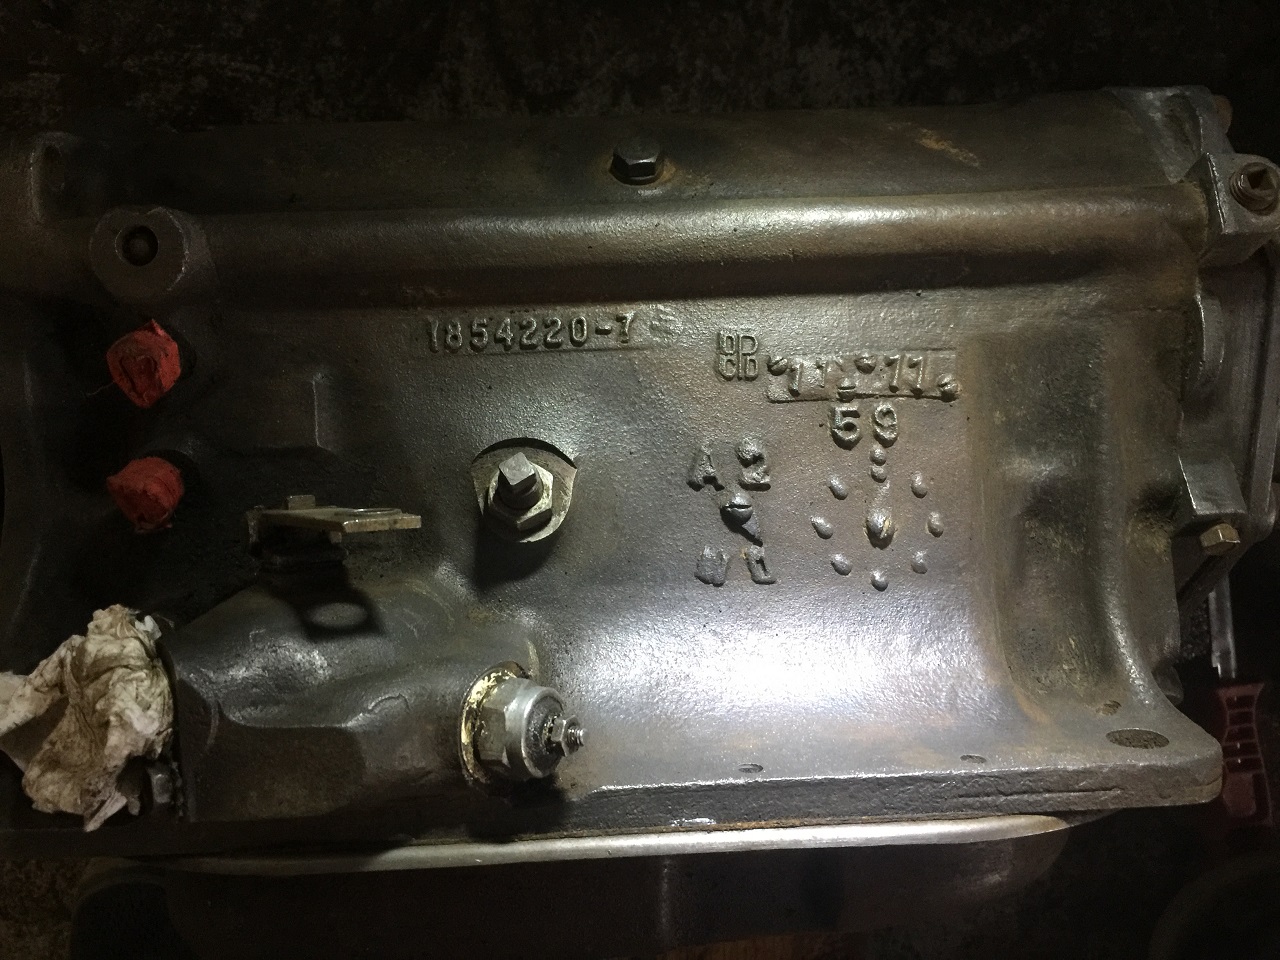 (IMG_3307_resized.JPG) (IMG_3307_resized.JPG)
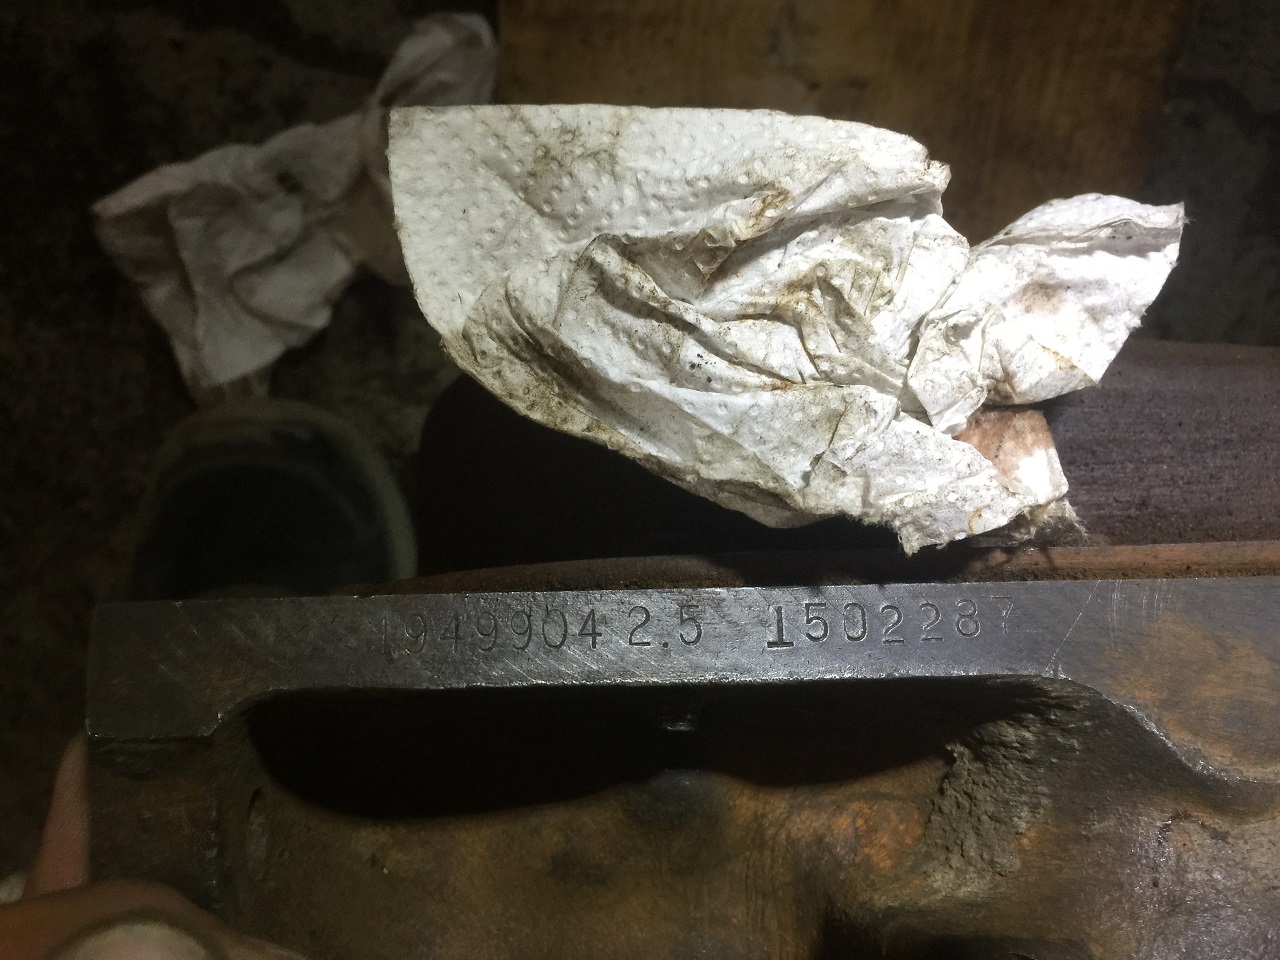 (IMG_3308_resized.JPG) (IMG_3308_resized.JPG)
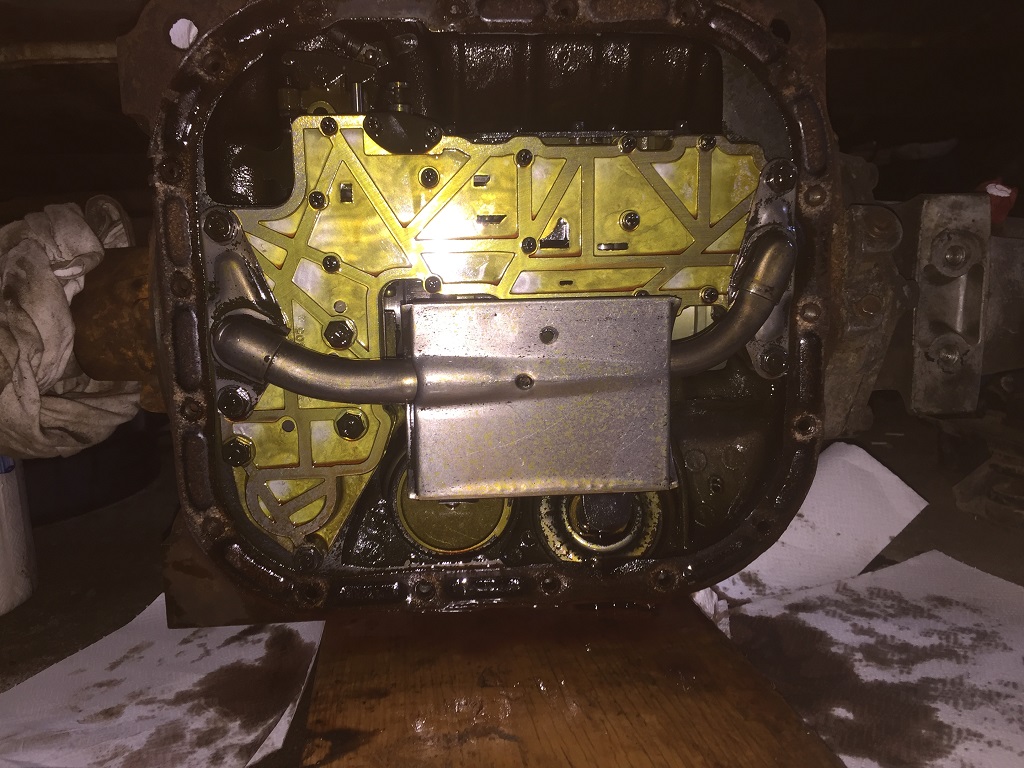 (IMG_3311_resized.JPG) (IMG_3311_resized.JPG)
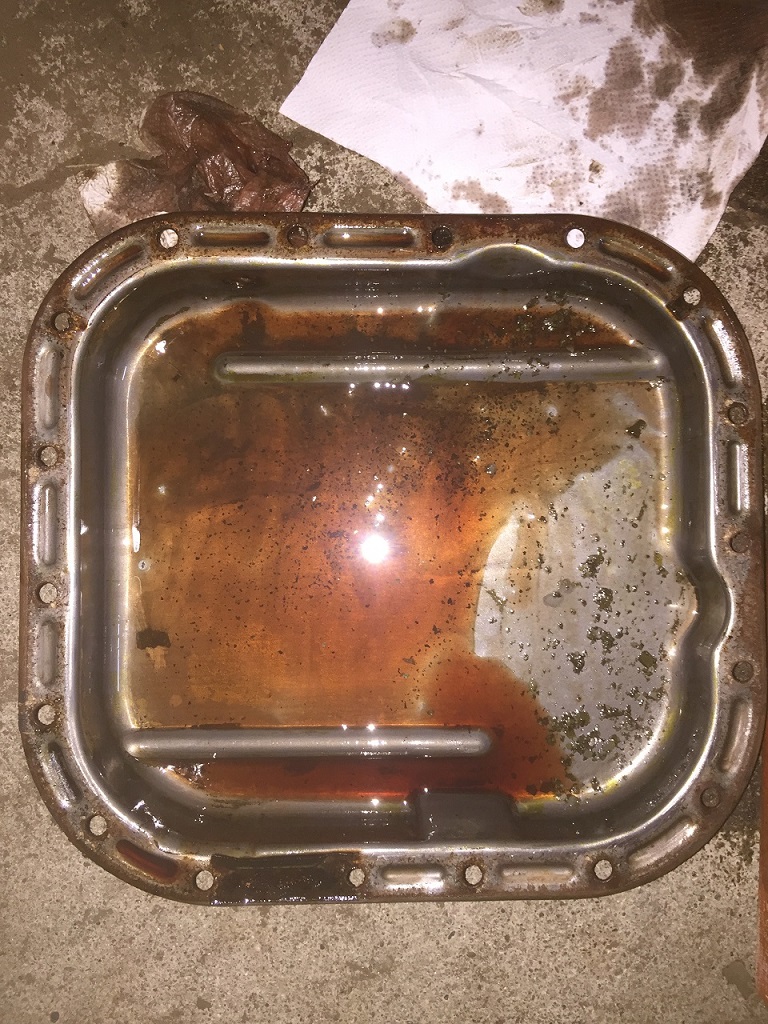 (IMG_3312_resized.JPG) (IMG_3312_resized.JPG)
 (IMG_3313_resized.JPG) (IMG_3313_resized.JPG)
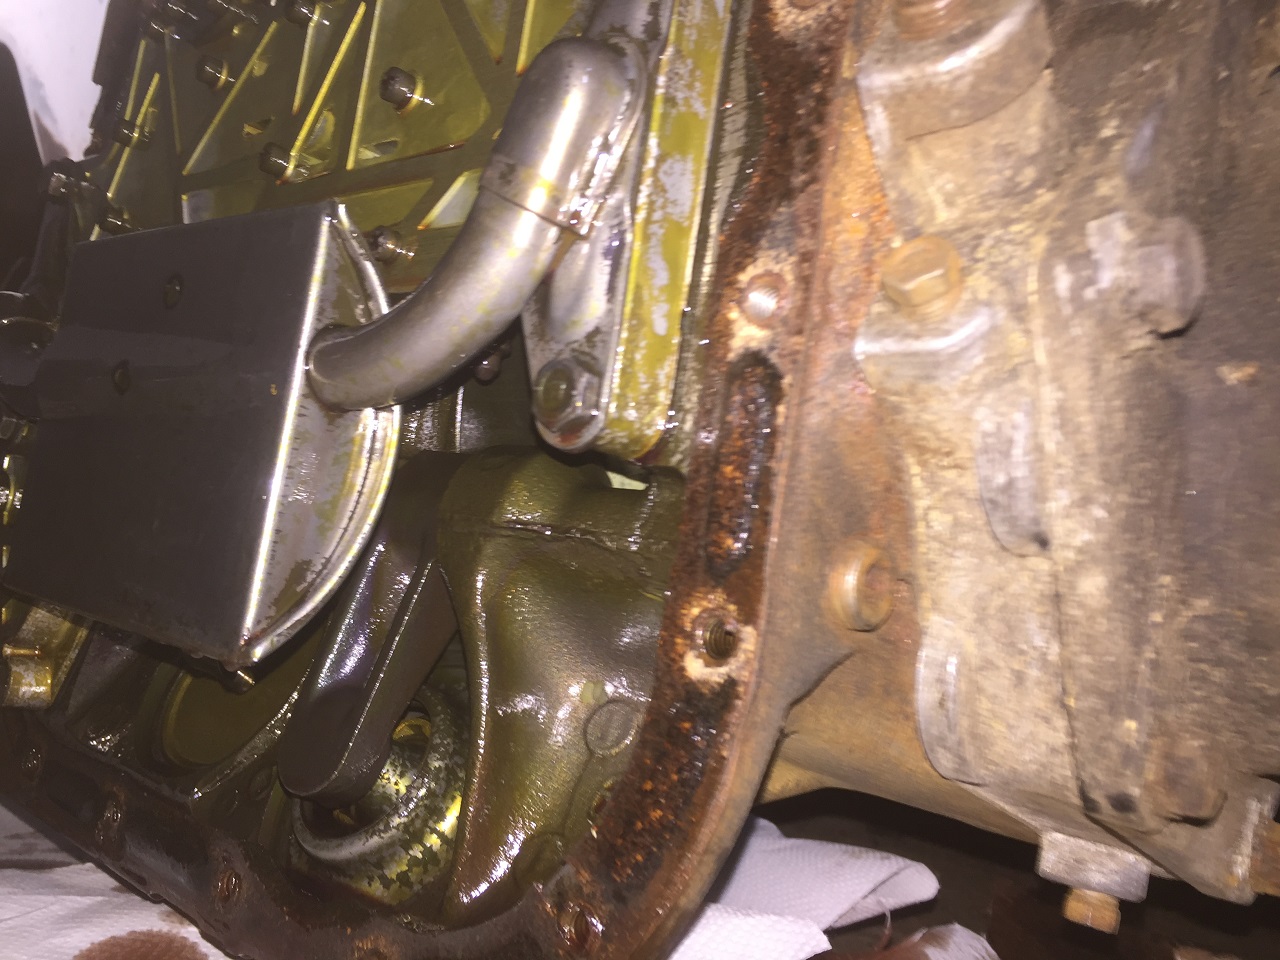 (IMG_3315_resized.JPG) (IMG_3315_resized.JPG)
 (IMG_3316_resized.JPG) (IMG_3316_resized.JPG)
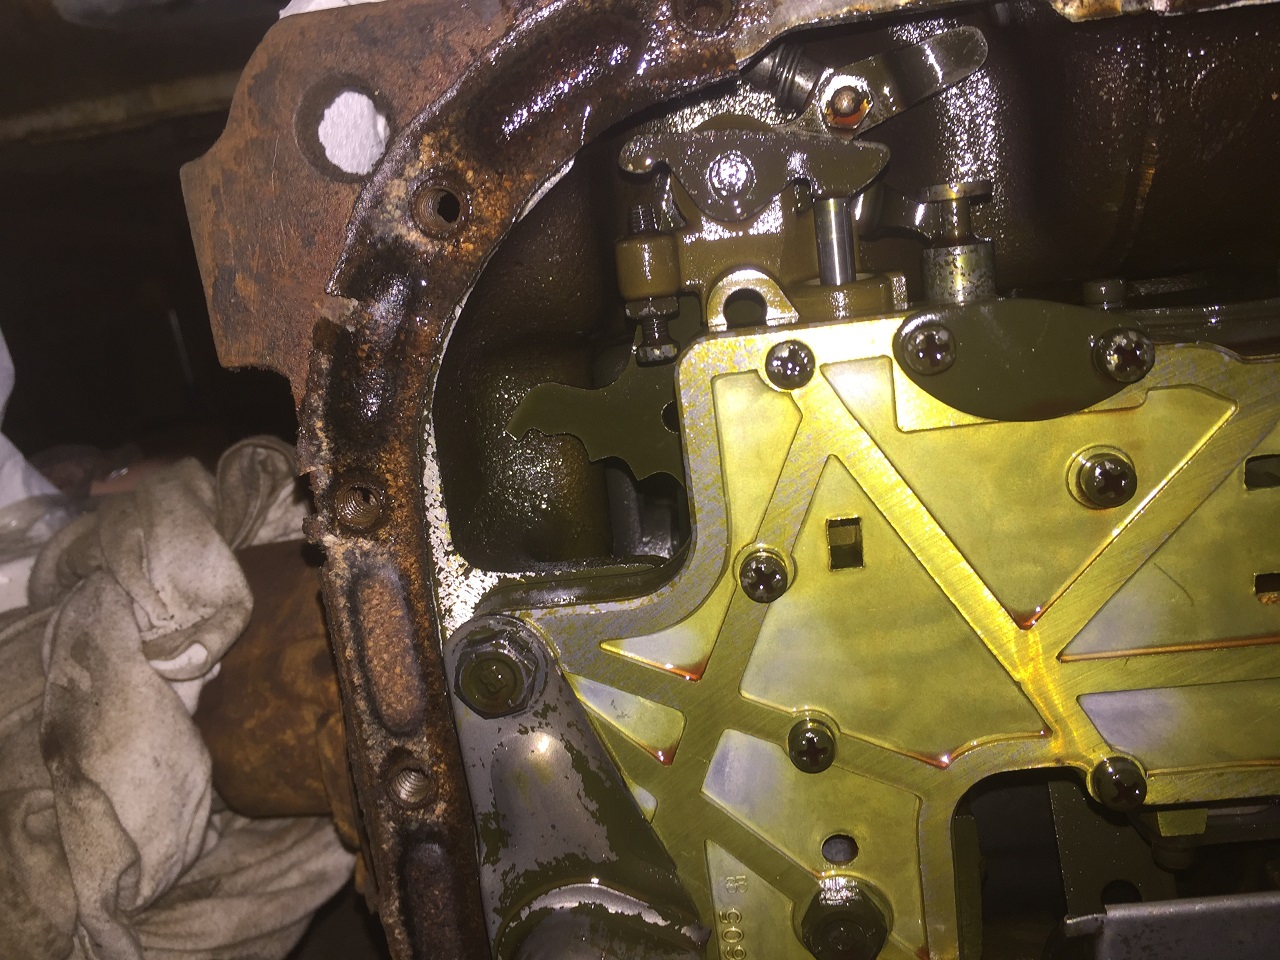 (IMG_3319_resized.JPG) (IMG_3319_resized.JPG)
Attachments
----------------
IMG_3307_resized.JPG (426KB - 469 downloads)
IMG_3308_resized.JPG (390KB - 467 downloads)
IMG_3311_resized.JPG (269KB - 473 downloads)
IMG_3312_resized.JPG (362KB - 455 downloads)
IMG_3313_resized.JPG (356KB - 471 downloads)
IMG_3315_resized.JPG (345KB - 439 downloads)
IMG_3316_resized.JPG (486KB - 480 downloads)
IMG_3319_resized.JPG (435KB - 479 downloads)
|
|
| |
|
Board Moderator & Exner Expert 10K+
Posts: 13045
Location: Southern Sweden - Sturkö island | Great Dieter! Another step forward!
From what I see, this transmission need to be totally demounted for a damage control and a rebuild.
The parts in the pan seems to be metal chips and residue.
Further, I think that there have been a coolant liquide leak sometimes before but this was most probably fixed because I see no water drops anywhere.
Actually, I have never seen that greenish yellow residue before in a transmission.
Hopefully someone will kick in here ......
|
|
| |
|
Expert
Posts: 1530
Location: ZH, Switzerland | Thanks a lot for your quotation about the iron hog of my Letter. While looking through my glasses I couldn't find some metallic residues. I don't know if these only are visible while my phone used the flash to take the picture. I assume this is the reason somebody installed a later generation radiator into my Letter. At Mr. Strubs I saw a disassembled iron hog on the work bench. The internals of the overrunning clutch where completely destroyed and all internal parts were rusty. Mr. Strub told me that this was caused by coolant in the transmission fluid at his station wagon. From the stamped numbers and numbers casted in at the other side I'm sure it's not the original transmission. But I have no clue where it is from. At this point I only could say better this transmission than none. The original transmission of my Letter I assume is still laying around on a back jard of a mechanic shop. I only hope it's not that transmisson sold about five years ago at epain for 5k. Happy Restoring! Dieter |
|
| |
|
Expert 5K+
Posts: 8443
Location: Perth Australia | The greenish stuff may be a fluorescent dye, I use it A/C systems as a leak tracer, but it works in most things that are oil lubricated
But yep, that needs a really good going through and I would make sure that the bands and clutch packs are replaced
The bands for mine were re bonded locally (brake places do it) and the clutch packs and seals ect came from fatsco
|
|
| |
|
Expert
Posts: 1530
Location: ZH, Switzerland | Thanks a lot Mik I just ordered a master kit from Fatsco for the A488 transmission of my Letter. I came to the conclusion to bring my A488 to Mr. Strub. He's not far from my home. Happy Restoring! Dieter
Edited by di_ch_NY56 2016-10-23 12:55 PM
|
|
| |
|
Board Moderator & Exner Expert 10K+
Posts: 13045
Location: Southern Sweden - Sturkö island | That's the best for you Dieter, it will save you a lot of Money for the transport.
Keep us posted as many are interested to follow the renovation and the eventual damages. |
|
| |
|
Expert
Posts: 1530
Location: ZH, Switzerland | From what I got out the 1949 904 A488 was the standard torqueflite for all senior Chrysler models (and Imperial) except for the 300F. I hope it's possible to modify it to meet the specification of the 1949 808 transsmission. Happy Restoring! Dieter |
|
| |
|
Expert
Posts: 1530
Location: ZH, Switzerland | Last weekend I removed the emergency brake at the iron hog. One more step forward was the repairing the broken tab at the switch ontop of the wiper gear. I used just instant glue and took care to mount the tab the same way it was. Furthermore I cut a piece of a very thin skin of a yogurth cup. I assume it's PE. The piece I mounted into the recession of the bottom case of the slider with contacts with two tabs. My idea was to lower the force to move the contacts out of the off position. My wiper motor parks now again. Because I connected both the wiper motor and the coordinator switch to my laboraroy power supply I used a vacuum pump to engage the vacuum switch at the coordinator switch. Results ON at 7 in.Hg vac OFF below 3 Hg vac Happy Restoring! Dieter BTW: the blue wire is only hot if the wiper switch is at the OFF position. It's the wire soldered to one side of the switch ontop of the wiper gear |
|
| |
|
Expert 5K+
Posts: 7806
Location: Williams California | wizard - 2016-10-22 11:23 AM
Great Dieter! Another step forward!
From what I see, this transmission need to be totally demounted for a damage control and a rebuild.
The parts in the pan seems to be metal chips and residue.
Further, I think that there have been a coolant liquide leak sometimes before but this was most probably fixed because I see no water drops anywhere.
Actually, I have never seen that greenish yellow residue before in a transmission.
Hopefully someone will kick in here ......
Wiz,
The greenish residue is from old ATF that is breaking down. Pretty common for a car that has been setting for years. |
|
| |
|
Expert
Posts: 1530
Location: ZH, Switzerland | Thanks Big M My Letter was under a rotting blue woven plane for six years until the seller discovered it. As the engine bay looks the hood was open for six years and no air cleaners were on top of the carbs. The engine sized (BTW) while that owner didn't recognise a massive air leak at the cross ram. First it caused a broken cylinder head gasket (between a coolant channel and the cylinder wall) and finally the top of the piston #1 melted and the piston sized gravely. I think the replacement engine didn't last long. Happy Restoring! Dieter |
|
| |
|
Expert
Posts: 1530
Location: ZH, Switzerland | Because I wear a plaster on my right hand underarm I couldn't do much at my Letter. So I decided over the last few days to work at the instruments. Good news is that the oscillator out of my Letter works for hours with no interruption. The output voltage is 274 VAC at 14.4 VDC at the input. I decided to use 14.4V because it's the voltage I expect when the engine is running and the generator or alternator charging. The instruments are very bright at the max. voltage and working until the input voltage drops below 5 VDC. The scale of the temp instruent is darker and stops glowing a little bit higher than all other instruments. It needs a further inverstigation. At the clock the second pointer is not glowing like the minute and hour pointers. My friend wrote me, that this is normal. At the tachometer the needle is not glowing. But when I wiggle the case I could hear something moving inside. I could imagine that it's the broken Lintz wire.... Either way to rechrome the ring, replace the lens or the rubber gasket, repair the electroluminescent parts or restore the mechanic it's necessary to remove the ring. The seam of the ring is folded like the door skin around the door frame. Some guys are addressing that the ring is not removable. But I assume if I'll slice the seam to the center of the case (like spokes on a bicycle) to get tabs of about 1/10 of an inch I could separate the front ring from the case. BTW, the tachometer is mounted from the back - so the screws a tighening the ring to the case... Happy Restoring! Dieter
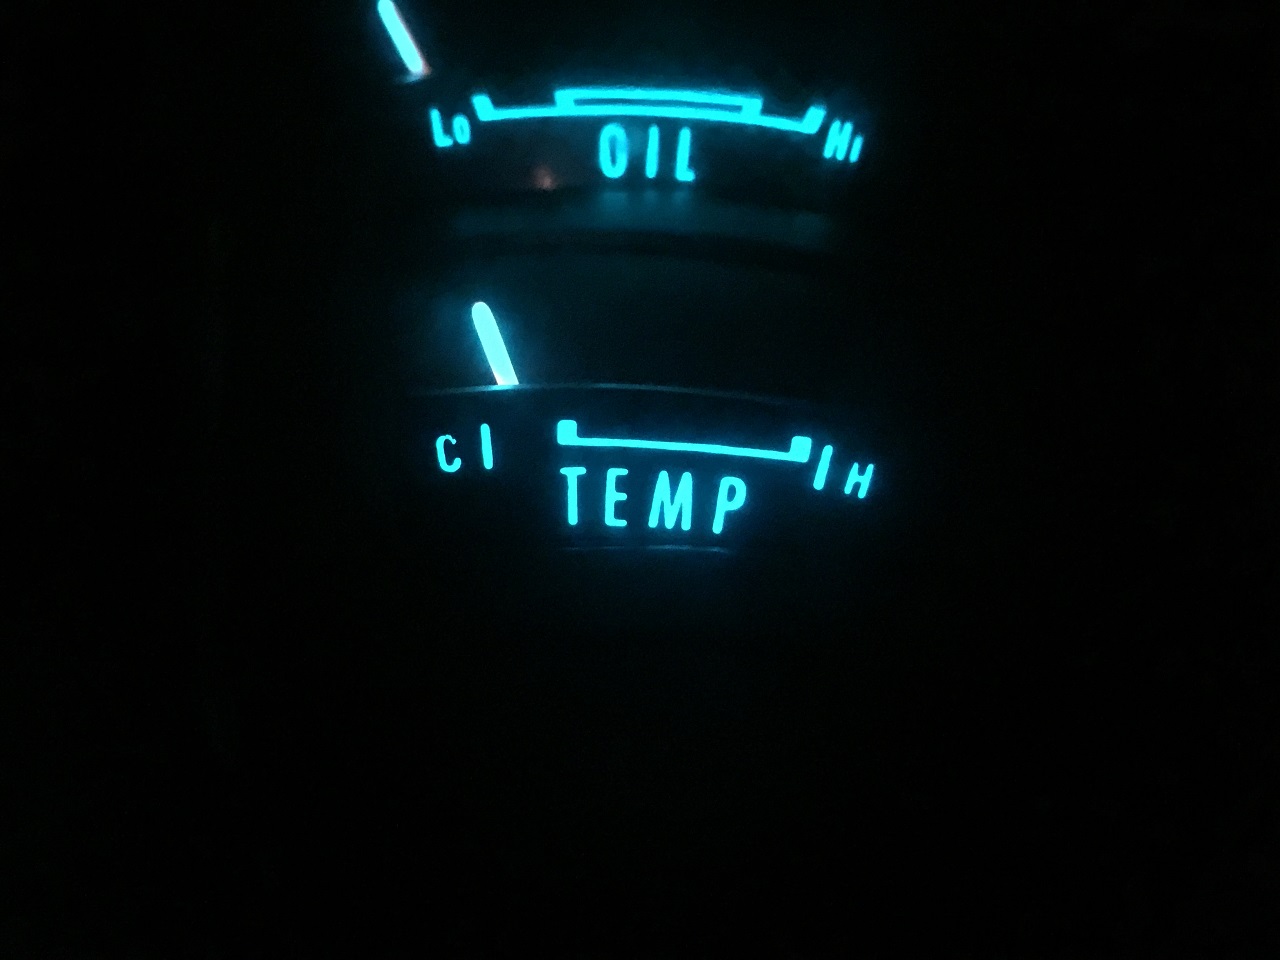 (IMG_3416_resized.JPG) (IMG_3416_resized.JPG)
 (IMG_3417_resized.JPG) (IMG_3417_resized.JPG)
 (IMG_3418_resized.JPG) (IMG_3418_resized.JPG)
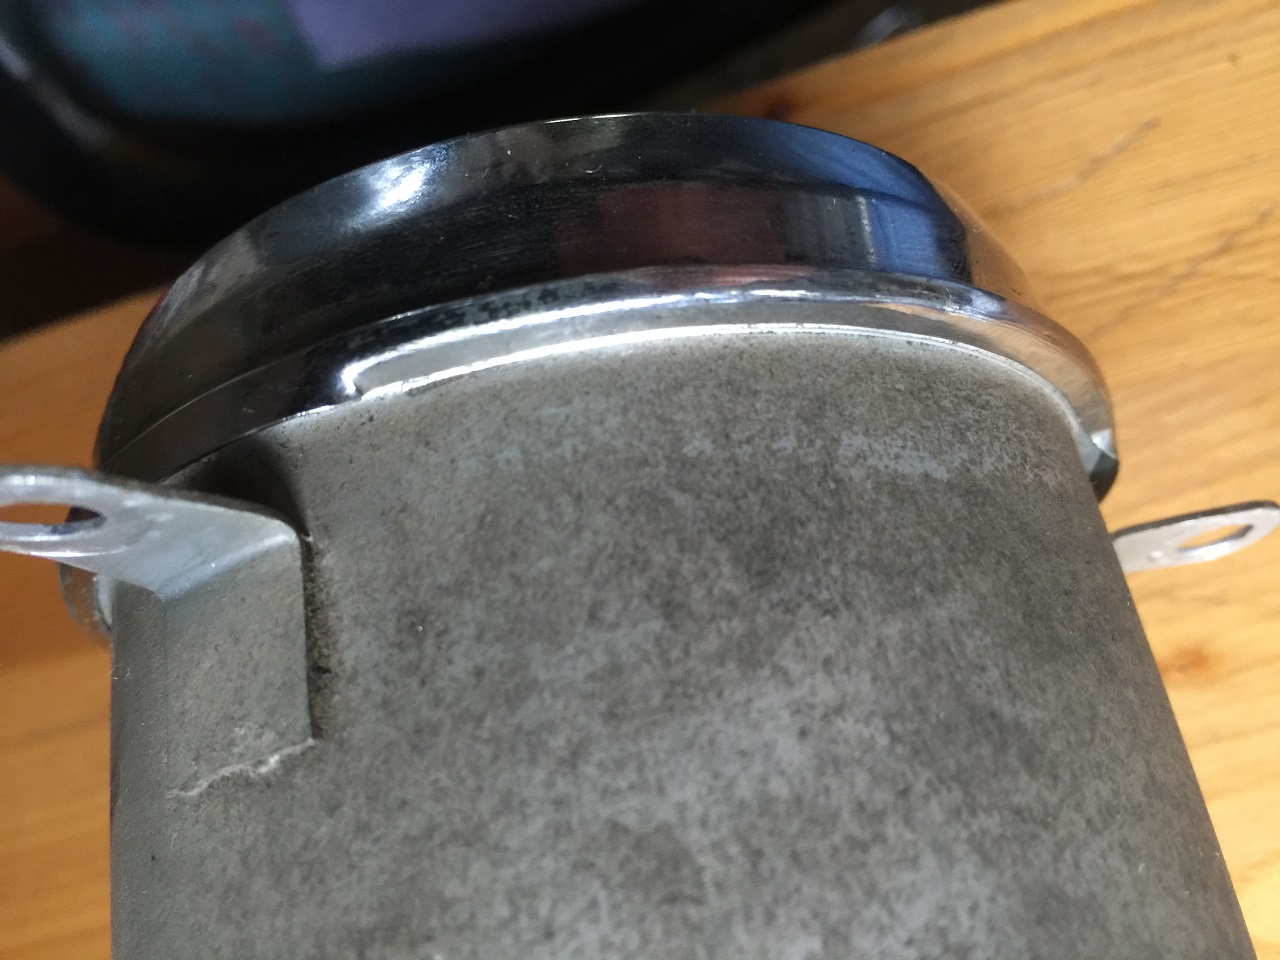 (IMG_3421_resized.JPG) (IMG_3421_resized.JPG)
Attachments
----------------
IMG_3416_resized.JPG (153KB - 411 downloads)
IMG_3417_resized.JPG (123KB - 399 downloads)
IMG_3418_resized.JPG (108KB - 402 downloads)
IMG_3421_resized.JPG (304KB - 421 downloads)
|
|
| |
|
Expert
Posts: 1530
Location: ZH, Switzerland | Last week I removed the main brake cylinder, the brake power booster and from the other side the pedal /w attaching plate. Happy Restoring! Dieter BTW: Many of you might notice, that I came to the decision to flip my project bottom up. Because it's not clear at this time where my body will go to restore - I put it on hold (Sweden, Switzerland or Serbia). So I'll let restore the trans, the engine, the chrome trim, all parts of the passenger compartment (seats, door panels, and so on) in the near future
 (IMG_3427_resized.JPG) (IMG_3427_resized.JPG)
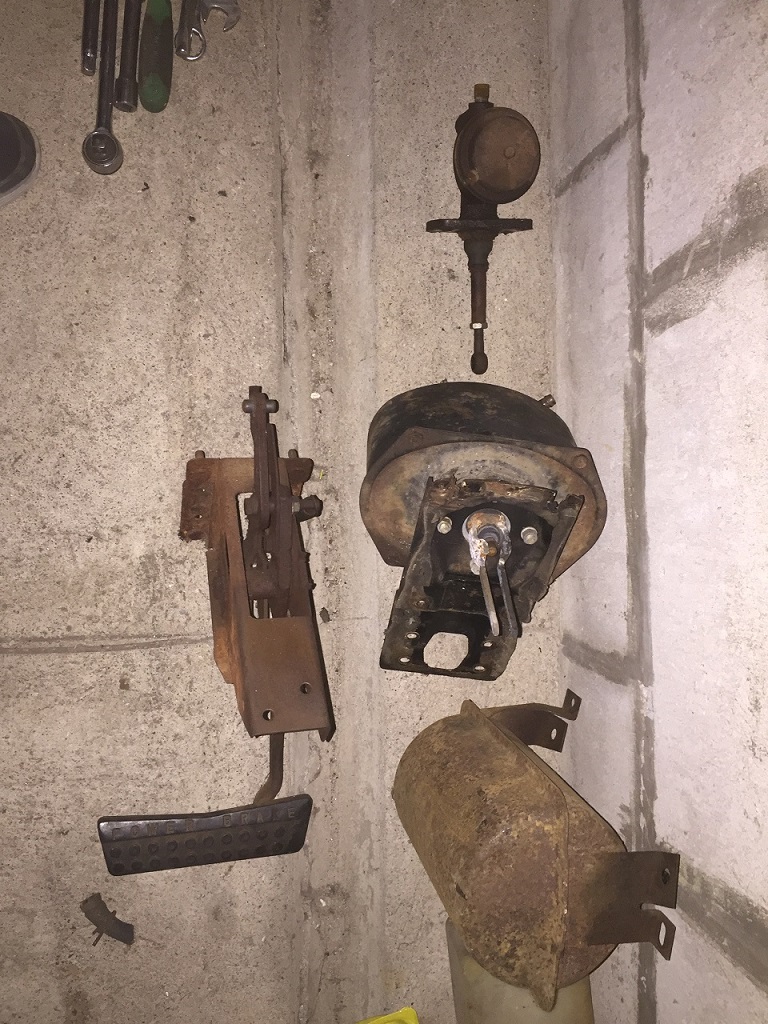 (IMG_3428_resized.JPG) (IMG_3428_resized.JPG)
Attachments
----------------
IMG_3427_resized.JPG (281KB - 416 downloads)
IMG_3428_resized.JPG (338KB - 411 downloads)
|
|
| |
|
Expert
Posts: 1530
Location: ZH, Switzerland | The bore diameters of my engine (a factory refurbished 413 HP engine) 1: 106.66 mm [4.199 in] 2: 106.80 mm [4.205 in] 3: 106.86 mm [4.207 in] 4: 106.86 mm [4.207 in] 5: 106.88 mm [4.208 in] 6: 106.78 mm [4.204 in] 7: 106.60 mm [4.197 in] 8: 106.78 mm [4.204 in] The nominal bore diameter of a 413 engine is 4.1875 (4.19 in), 106.13 mm. With the first oversize from the factory (0.02 in) the bore diameter increases to 4.2075 in, 106.8705 mm. It's clear that the cylinder #1 has a smaller diameter. It has surface rust (like plates) on top of the piston at the cylinder wall.
For to measure the diameter I used a sliding caliper with a resolution of 0.02 mm (0.0008 in). I only measured the top 10 mm (0.4 in) from the deck. So there is no statement possible about the whole length of the bore. All depends on the surface of the cylinder #1 if just honing is possible or if I'll have to use the next oversize (Egge: 0.03, 0.06, factory: 0.04). Happy Restoring! Dieter
Edited by di_ch_NY56 2016-12-06 8:59 AM
|
|
| |
|
Expert
Posts: 1530
Location: ZH, Switzerland | These are both windshield wiper pivots. I arranged it like it were mounted on the firewall of my Letter. The RH pivot has the parts number, but the LH one looks really peculiar. Anybody knows where it's from? The length of the crank is (almost) identical as the mounting flange is from the length and width of the mounting plate. Dieter
 (IMG_3457_resized.JPG) (IMG_3457_resized.JPG)
Attachments
----------------
IMG_3457_resized.JPG (410KB - 519 downloads)
|
|
| |
|
Expert
Posts: 1530
Location: ZH, Switzerland | To let the engine (413 HP?) restore at a professional restorer's (next year) I plan to purchase a low rise dual plane intake manifold plus a 600 to 750 cfm carb on it. It's because I would like to get a broken in engine (my wish). What do you think I could expect at the dyno /w the 300F camshaft and eventually matched intake and exhaust runners at the cylinder heads and eventually a stock 440 distributor? Happy Restoring! Dieter BTW: with this procedure I assume it's guaranteed that the engine would run /w the cross ram and the stock 2903s carbs mounted. Even though I have to retard the camshaft if not mounted like it was prior to the restoration.
Edited by di_ch_NY56 2016-12-18 2:41 AM
|
|
| |
|
Expert
Posts: 1530
Location: ZH, Switzerland | Today I removed the center link - not complete, but enough to move it away. Then I removed the oil pan. I'm sorry for the bad quality of the pictures. It was cold. Happy Restoring! Dieter
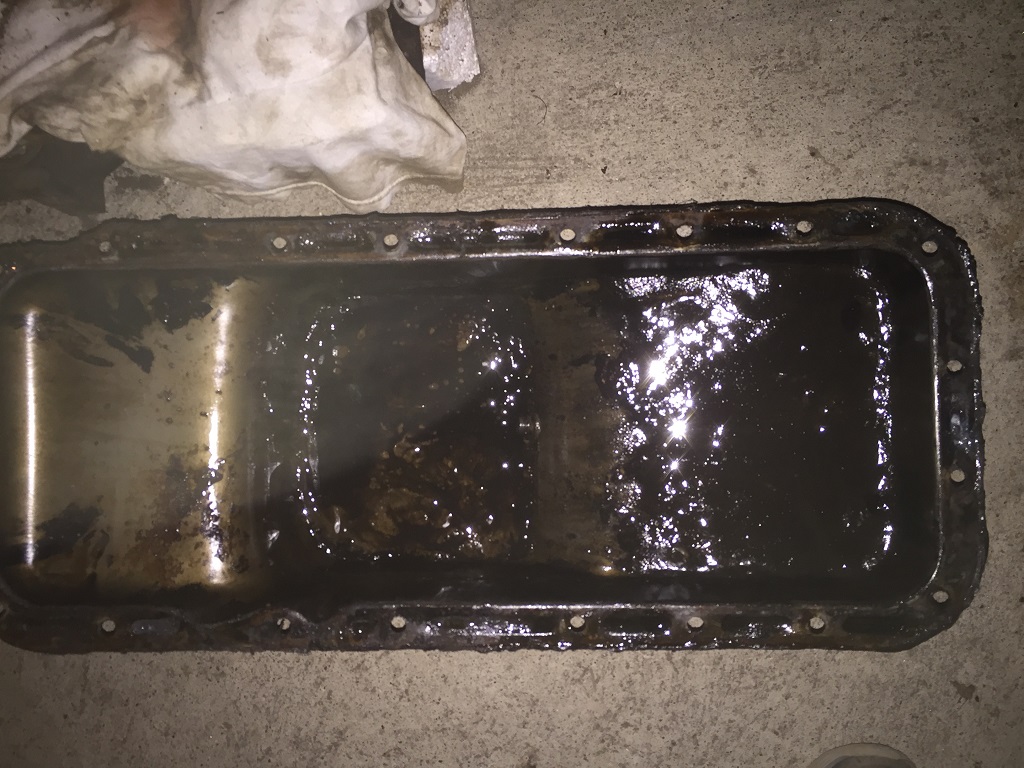 (IMG_3480_resized.JPG) (IMG_3480_resized.JPG)
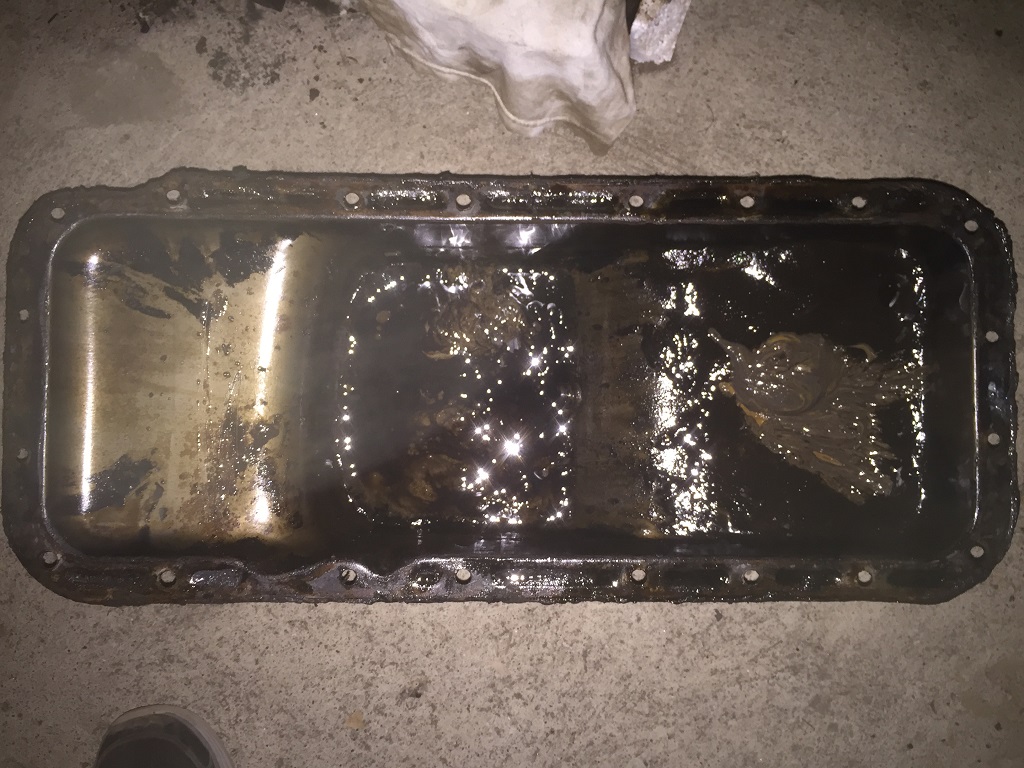 (IMG_3481_resized.JPG) (IMG_3481_resized.JPG)
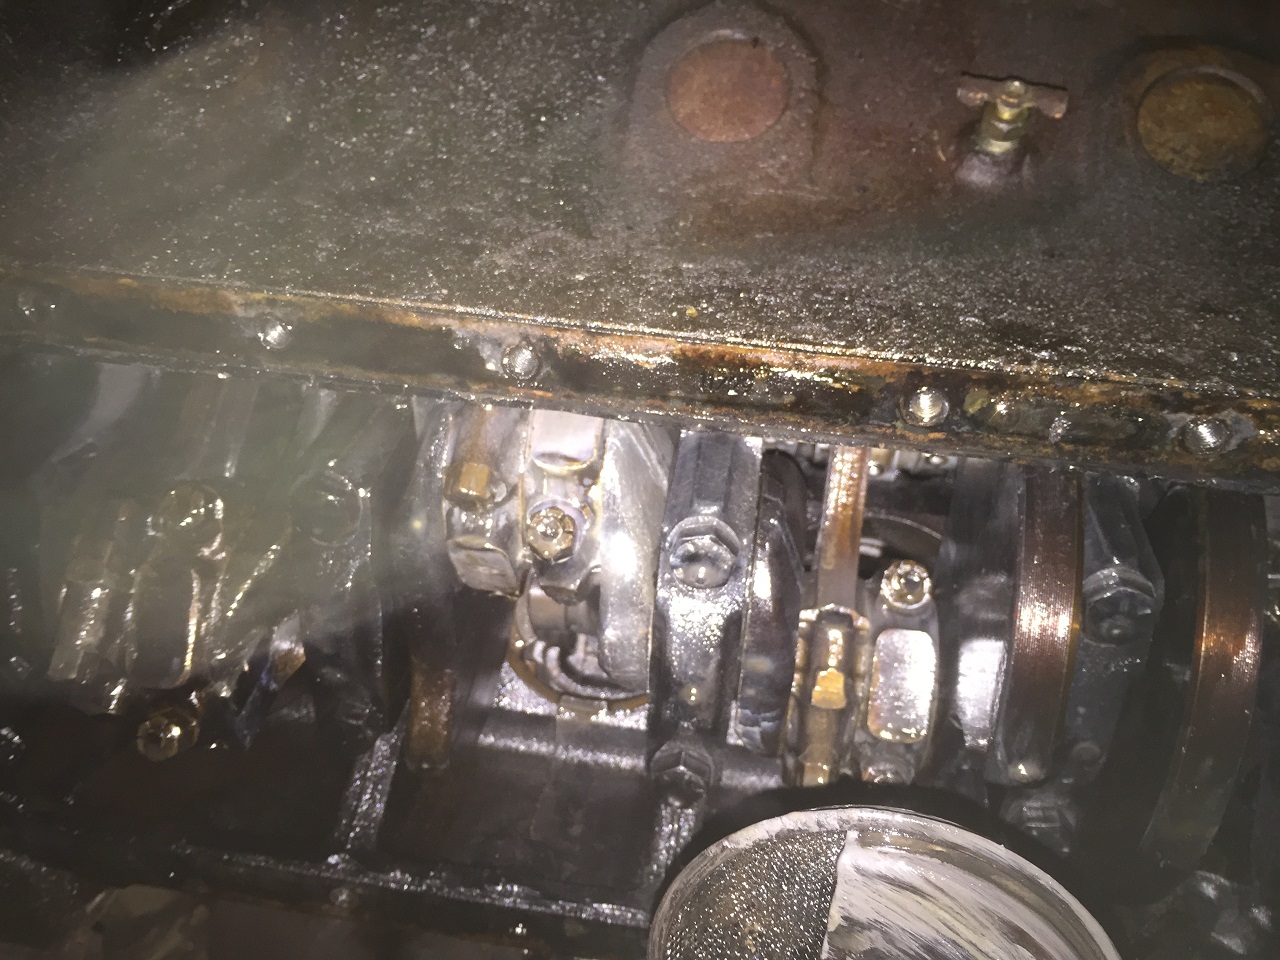 (IMG_3496_resized.JPG) (IMG_3496_resized.JPG)
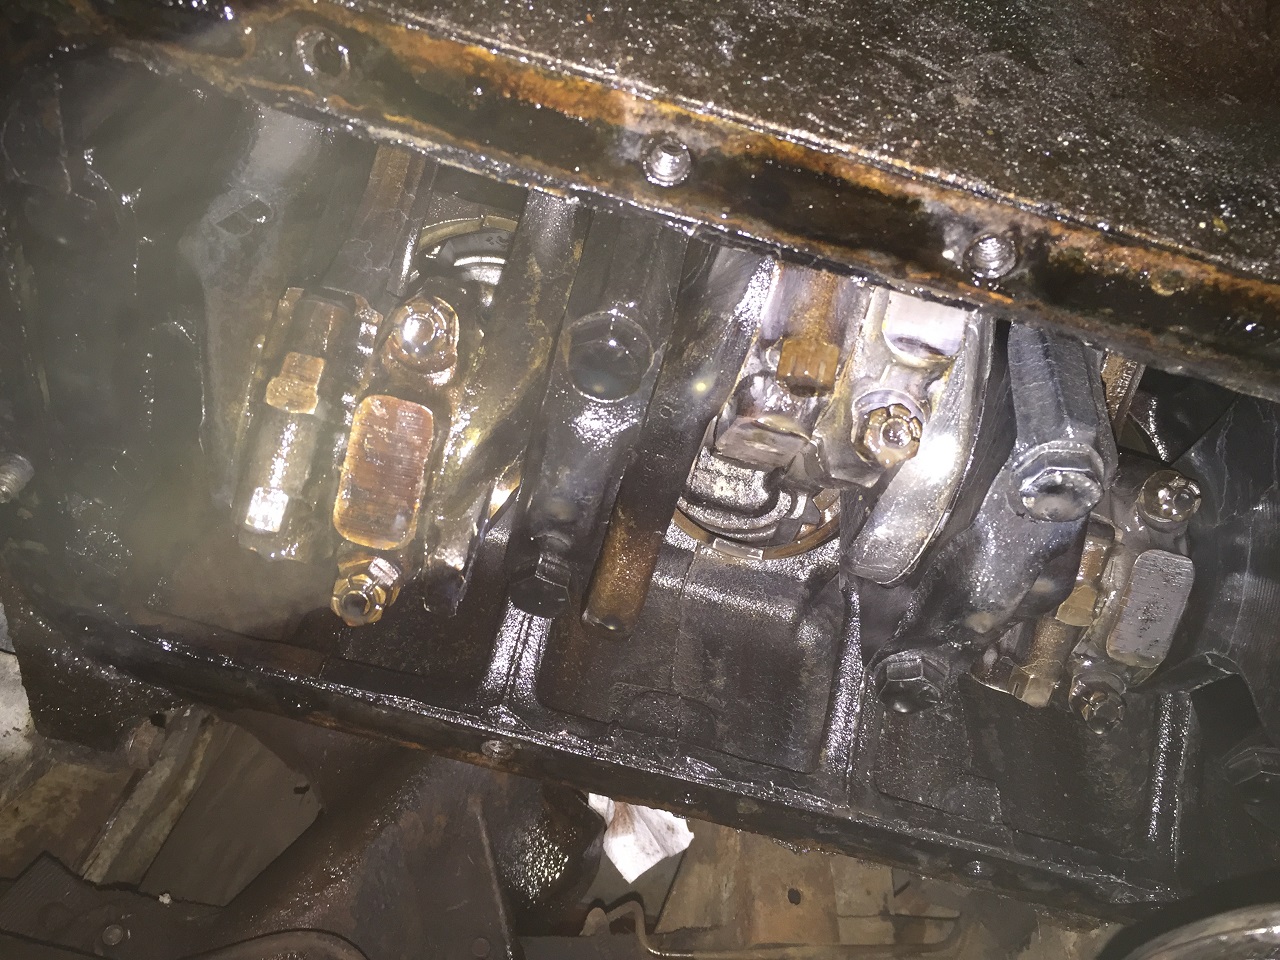 (IMG_3497_resized.JPG) (IMG_3497_resized.JPG)
Attachments
----------------
IMG_3480_resized.JPG (277KB - 516 downloads)
IMG_3481_resized.JPG (300KB - 502 downloads)
IMG_3496_resized.JPG (402KB - 511 downloads)
IMG_3497_resized.JPG (487KB - 519 downloads)
|
|
| |
|
Expert
Posts: 2905
Location: little rock, AR | This is what my '50 Buick oil pan looked like when I removed it. People don't realize what oil does after sitting for 30 years.
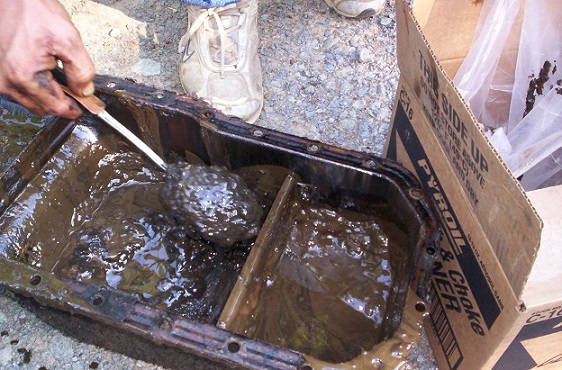 (100_0393-med.jpg) (100_0393-med.jpg)
Attachments
----------------
100_0393-med.jpg (123KB - 496 downloads)
|
|
| |
|
Expert
Posts: 1530
Location: ZH, Switzerland | Happy New Year to all my friends First work in this year was to remove the #2 main cap at the engine. It was not looking promising. Then, after cleaning it, I mounted it again, but not with full torque at the bolts. Because of what I saw I decided to remove the cap # as well. The result in the babbit bearing cap was even worse. The broken out chips were stored at about 60 degree CW. I cleaned the parts and mounted that cap too. Time to remove the engine now. From what I saw, the hex nuts of the cap #5 are not accessible with a hex socket... Happy Restoring! Dieter BTW: I just noticed for the cap #5 that first I have to remove the holder of the rear crankshaft seal...
Edited by di_ch_NY56 2017-01-03 1:23 PM
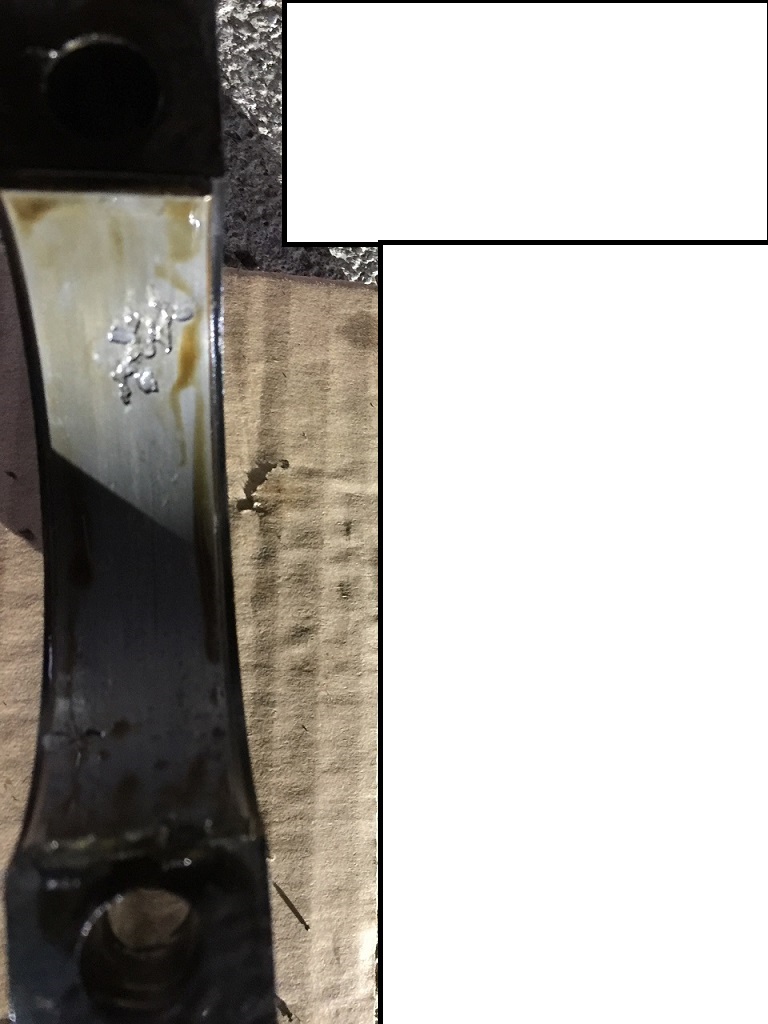 (IMG_3541_resized.JPG) (IMG_3541_resized.JPG)
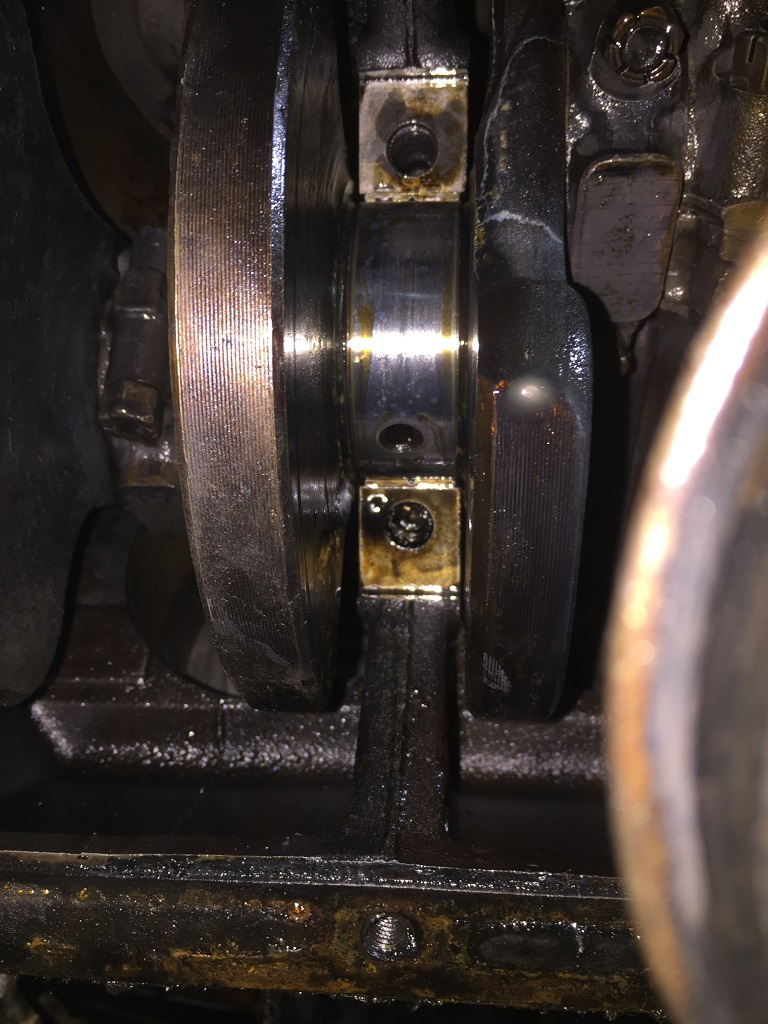 (IMG_3542_resized.JPG) (IMG_3542_resized.JPG)
Attachments
----------------
IMG_3541_resized.JPG (138KB - 501 downloads)
IMG_3542_resized.JPG (240KB - 506 downloads)
|
|
| |
|
Expert
Posts: 1530
Location: ZH, Switzerland | It could be that the bearings at the crankshaft were overheated most probabely due to the lack of lubrification. But now the engine is almost ready to remove. I'm organising two assistant people locally to remove the hood first. Happy Restoring! Dieter
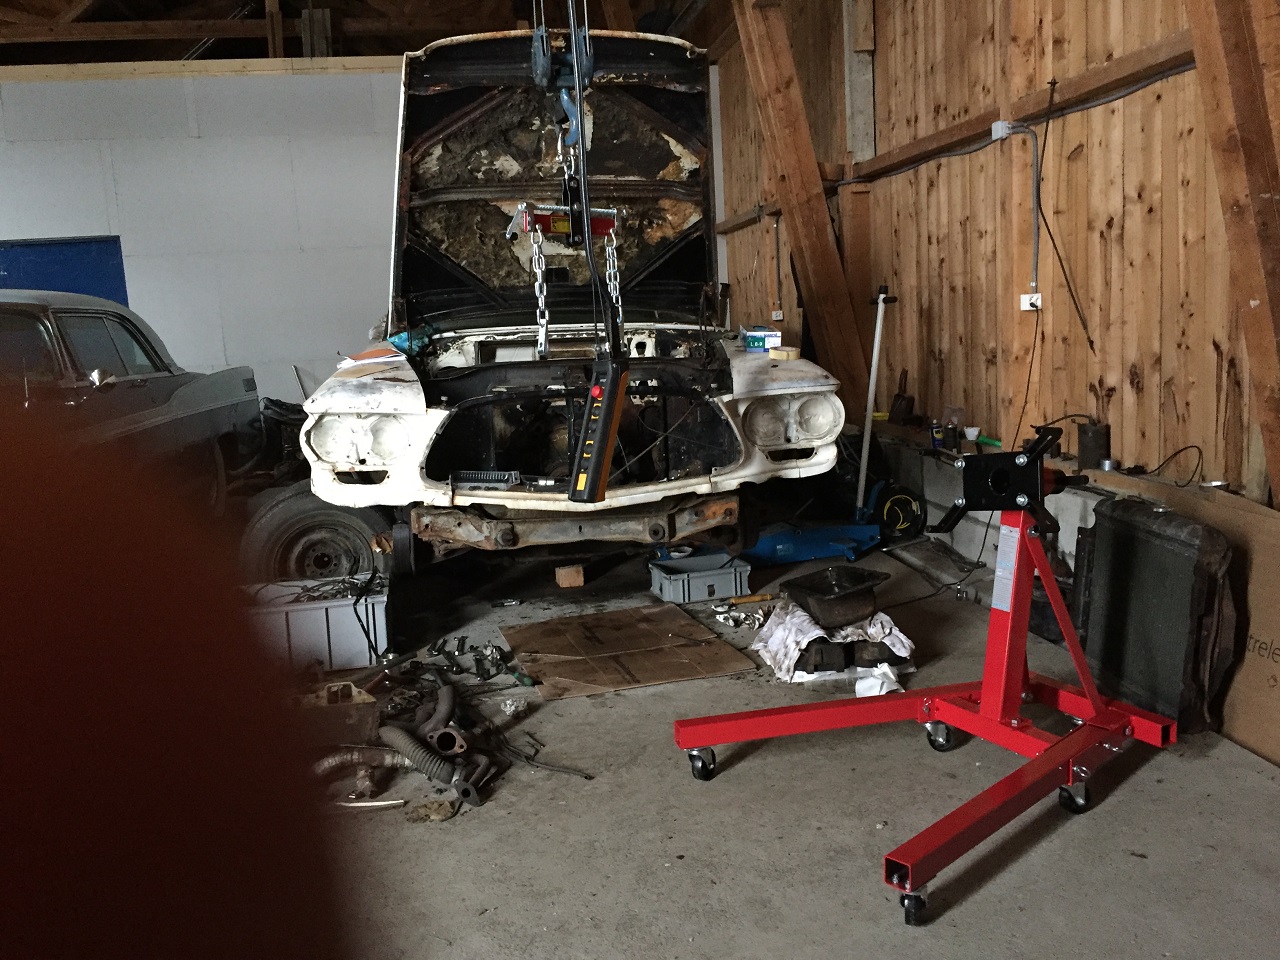 (IMG_3543_resized.JPG) (IMG_3543_resized.JPG)
Attachments
----------------
IMG_3543_resized.JPG (435KB - 501 downloads)
|
|
| |
|
Expert
Posts: 1530
Location: ZH, Switzerland | Today I removed the hood and finally the engine. The removal of the hood was not state of the art (truck driver should know what's wrong), but I was all alone. All bolts of the torque converter housing are removed, but the housing sticks. Happy Restoring! Dieter
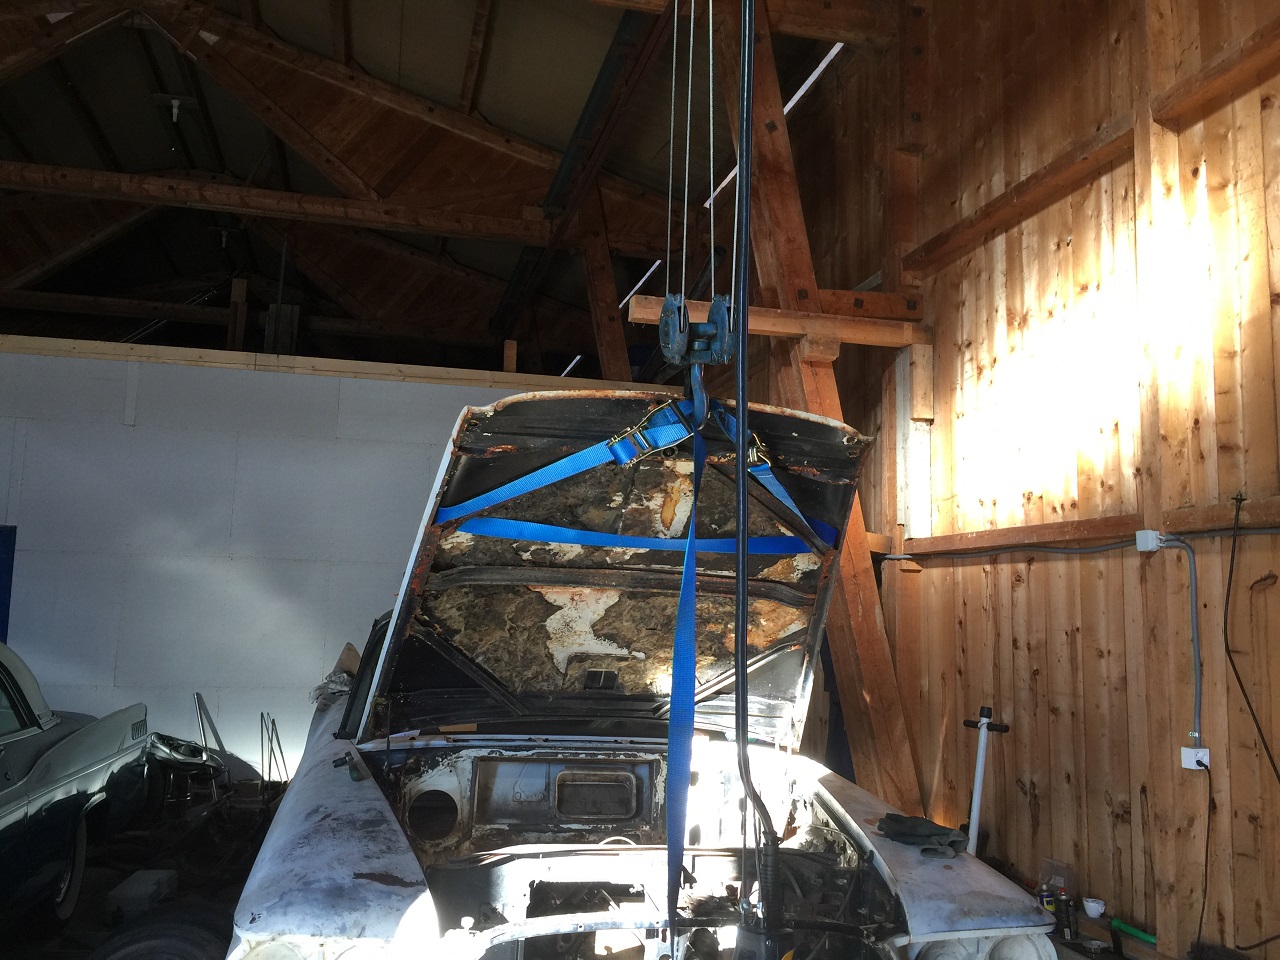 (IMG_3550_resized.JPG) (IMG_3550_resized.JPG)
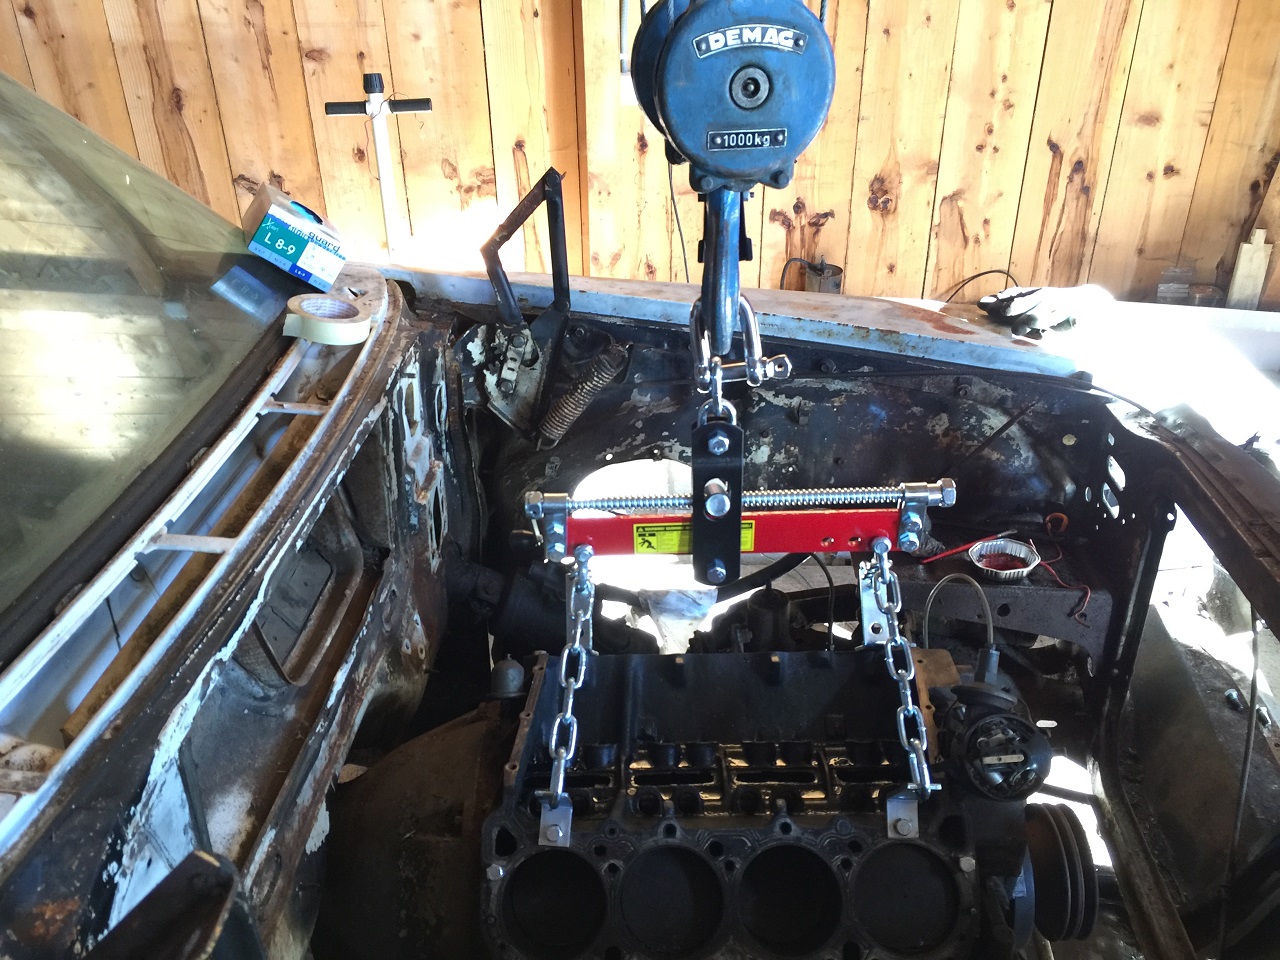 (IMG_3552_resized.JPG) (IMG_3552_resized.JPG)
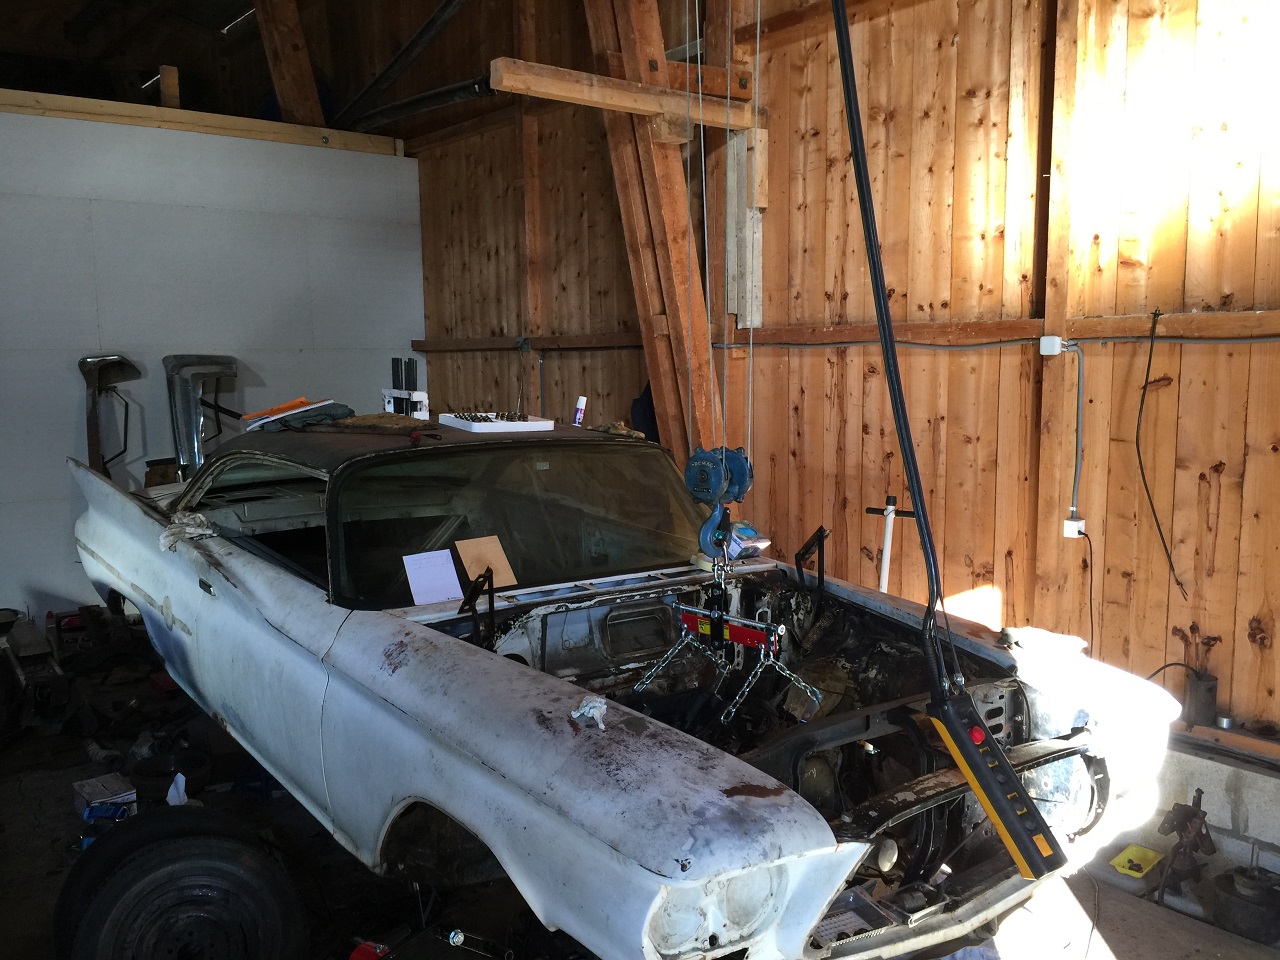 (IMG_3553_resized.JPG) (IMG_3553_resized.JPG)
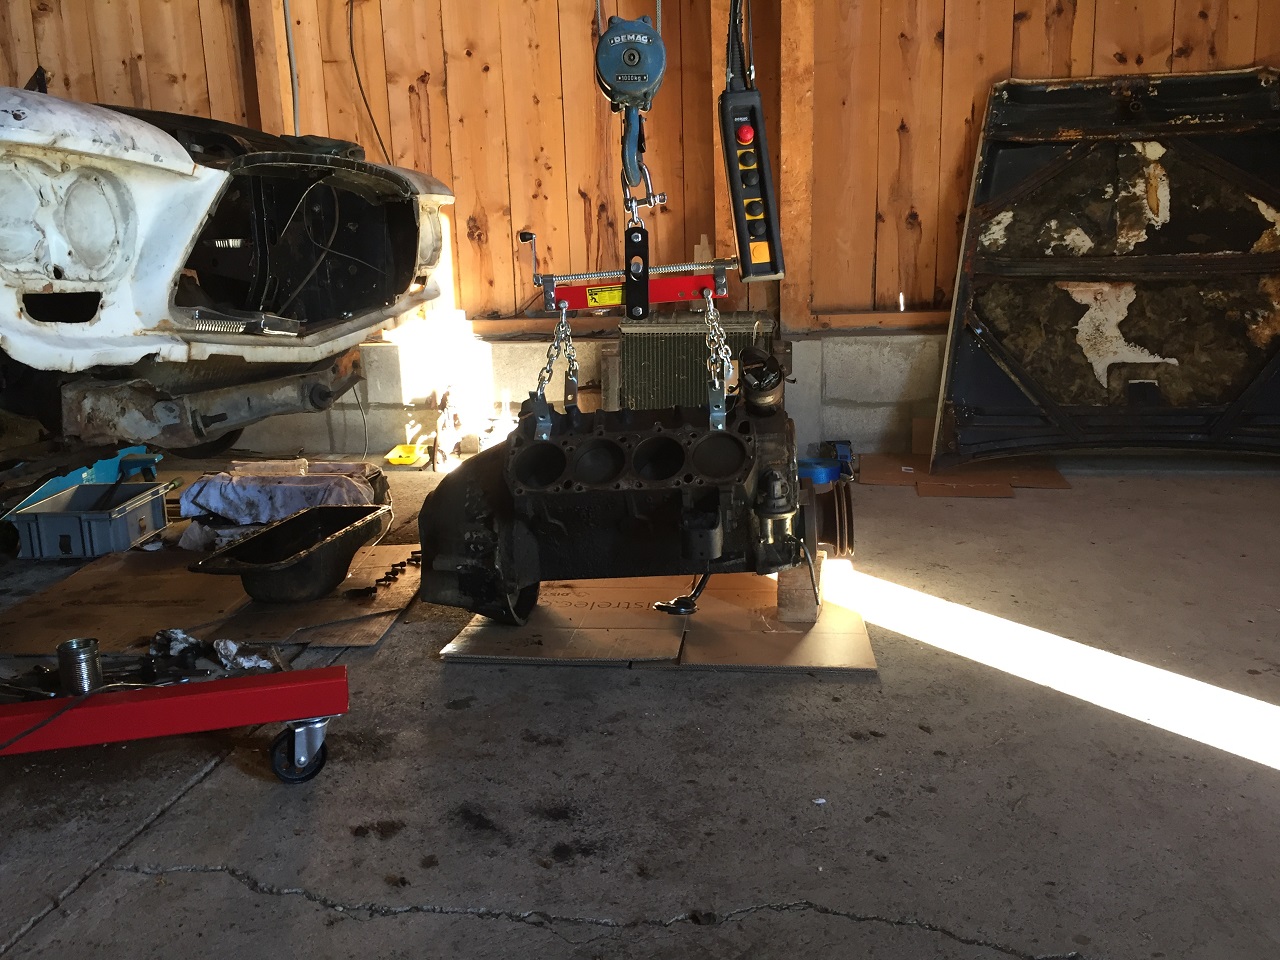 (IMG_3556_resized.JPG) (IMG_3556_resized.JPG)
Attachments
----------------
IMG_3550_resized.JPG (381KB - 503 downloads)
IMG_3552_resized.JPG (444KB - 525 downloads)
IMG_3553_resized.JPG (400KB - 505 downloads)
IMG_3556_resized.JPG (426KB - 520 downloads)
|
|
| |
|
Expert
Posts: 1530
Location: ZH, Switzerland | A little bit work over the last few days....
Dieter
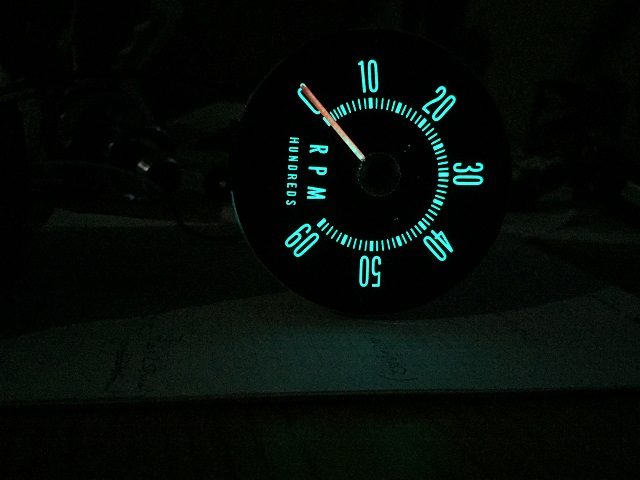 (IMG_3582_resized.JPG) (IMG_3582_resized.JPG)
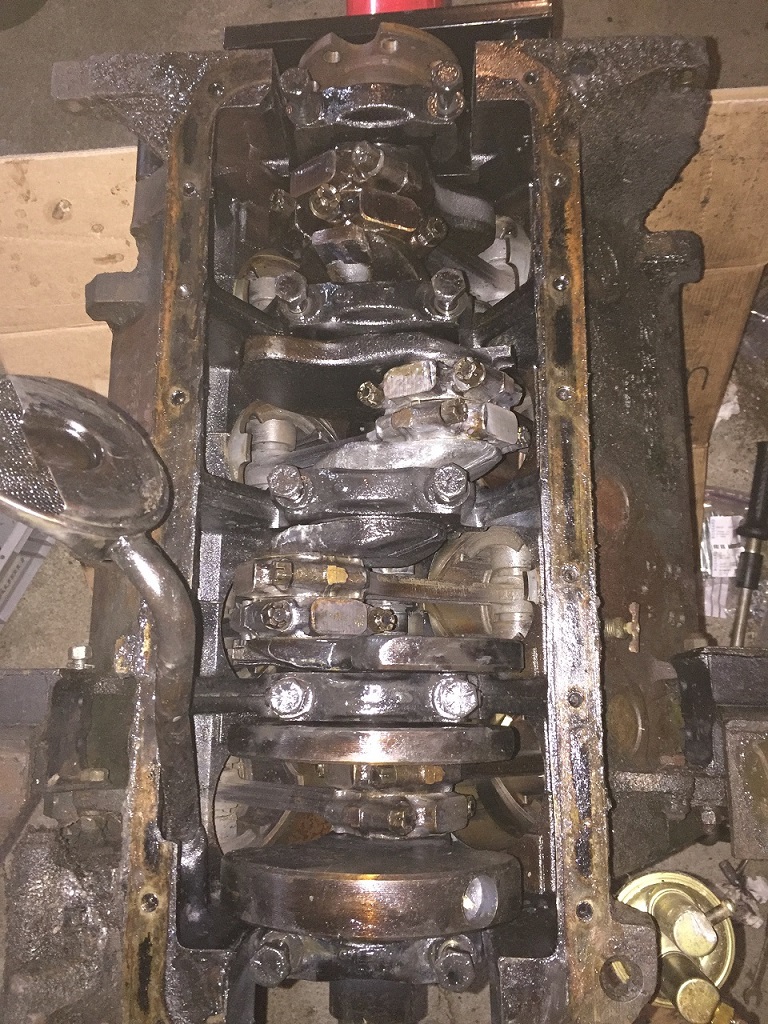 (IMG_3580_resized.JPG) (IMG_3580_resized.JPG)
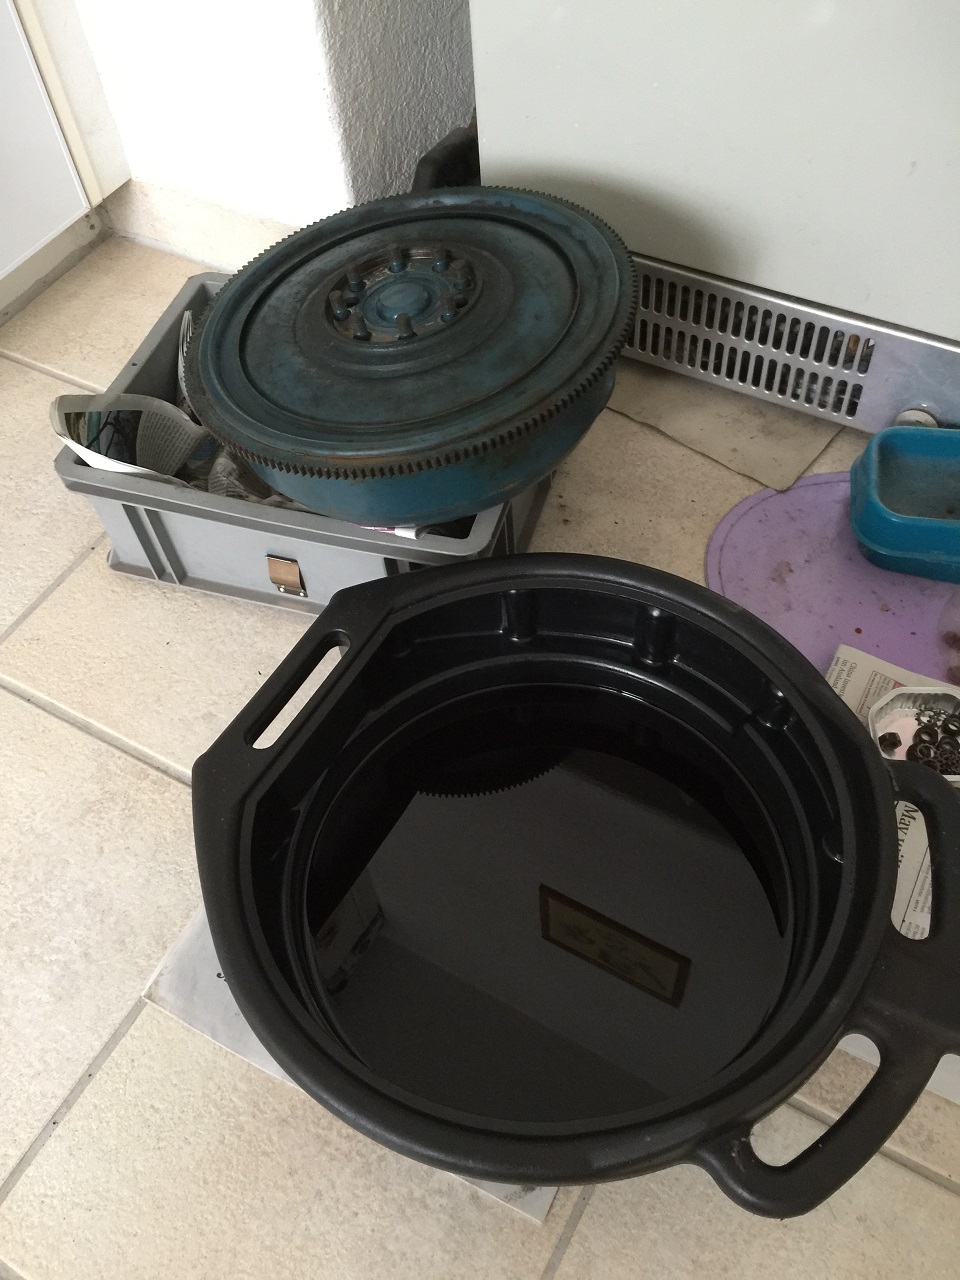 (IMG_3597_resized.JPG) (IMG_3597_resized.JPG)
Attachments
----------------
IMG_3582_resized.JPG (73KB - 506 downloads)
IMG_3580_resized.JPG (387KB - 491 downloads)
IMG_3597_resized.JPG (330KB - 499 downloads)
|
|
| |
|
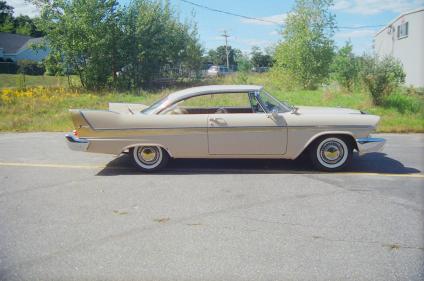
Expert
Posts: 1740
Location: Alaska | It is amazing how much better the detergents are in the newer oils, ( I assume). I have pulled newer engines apart with over 200,000 miles on them and they are so much cleaner. |
|
| |
|
Expert
Posts: 1530
Location: ZH, Switzerland | Rolland you're right, but for modern oils a flat bottom tappet engine needs ZDDP additive for sure. Today again I did a little bit of work. My project is moving slow, but steay like a slug Dieter
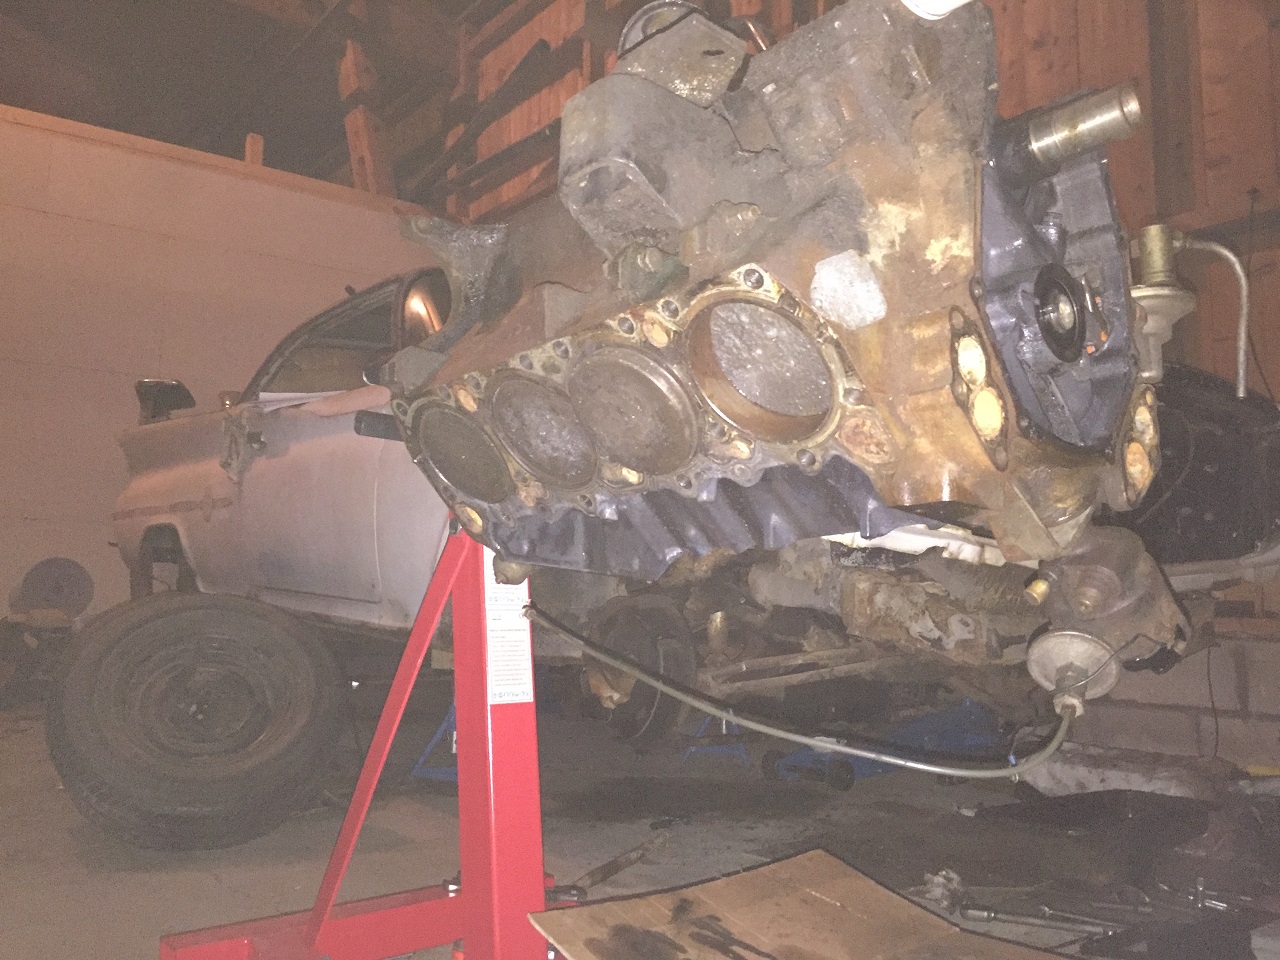 (IMG_3601_resized.JPG) (IMG_3601_resized.JPG)
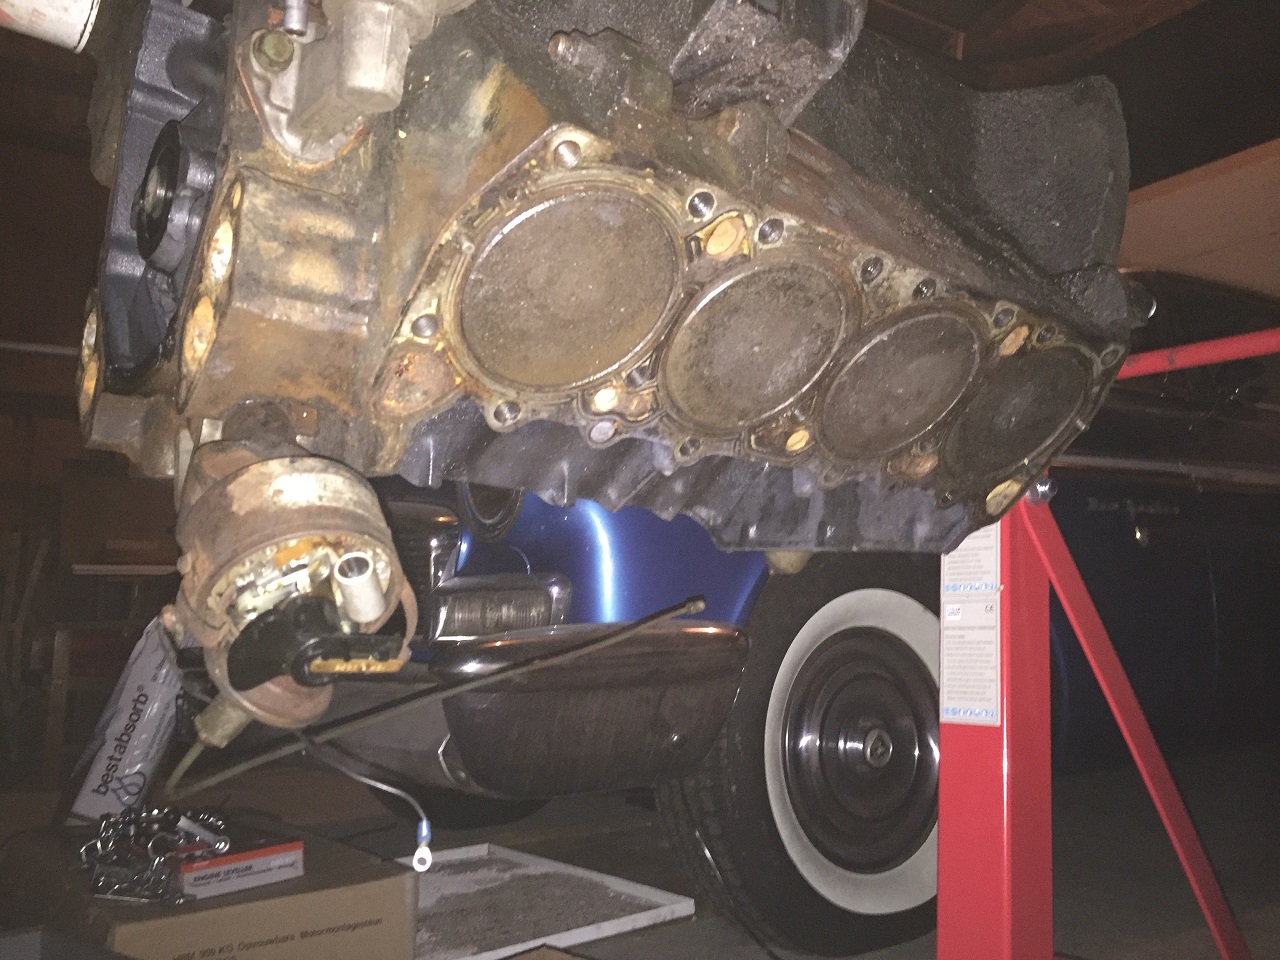 (IMG_3602_resized.JPG) (IMG_3602_resized.JPG)
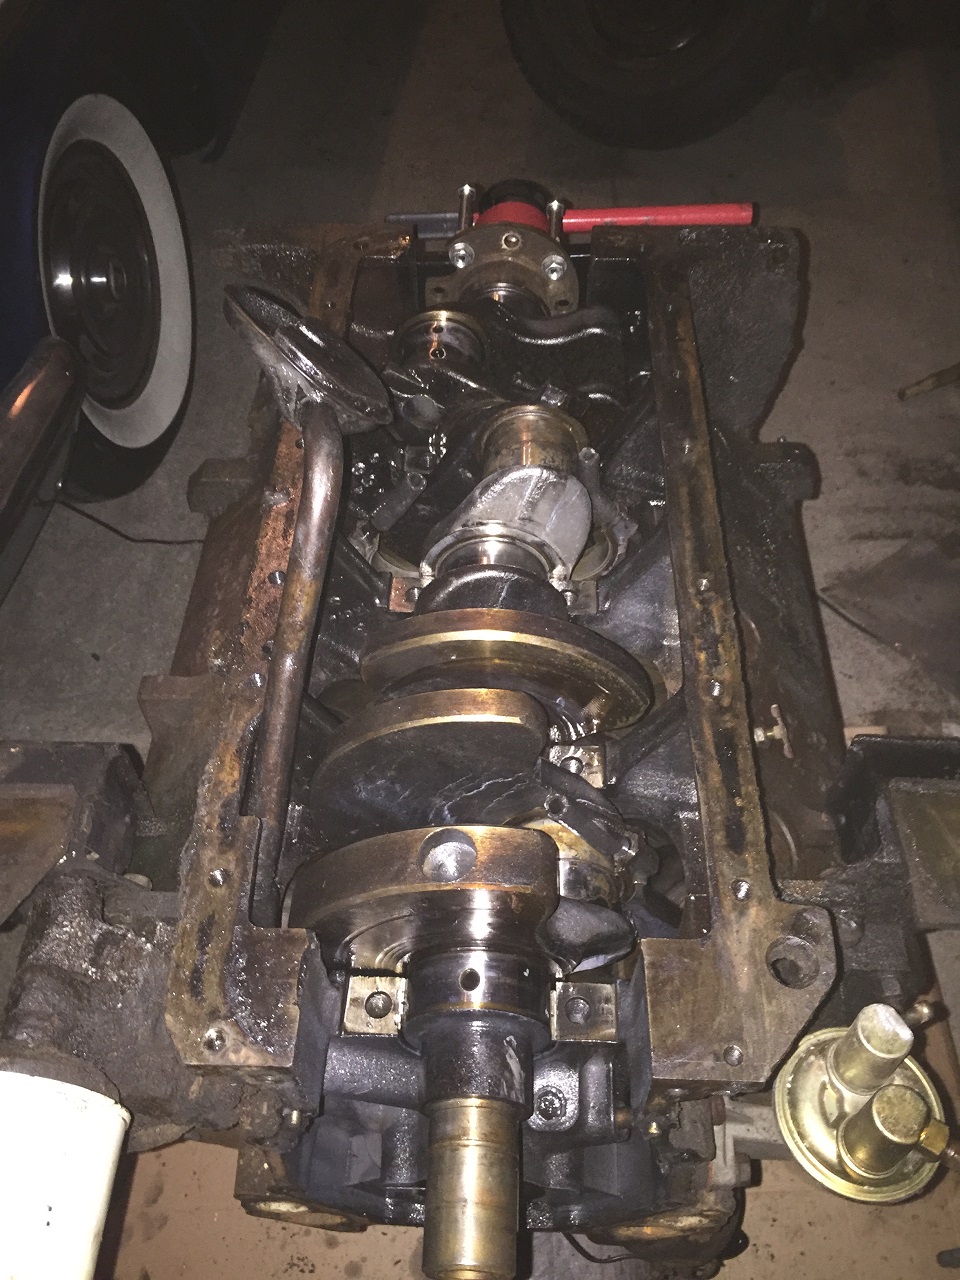 (IMG_3603_resized.JPG) (IMG_3603_resized.JPG)
Attachments
----------------
IMG_3601_resized.JPG (452KB - 501 downloads)
IMG_3602_resized.JPG (429KB - 515 downloads)
IMG_3603_resized.JPG (421KB - 497 downloads)
|
|
| |
|
Expert
Posts: 1530
Location: ZH, Switzerland | The crankshaft out of the engine of my Letter Dieter
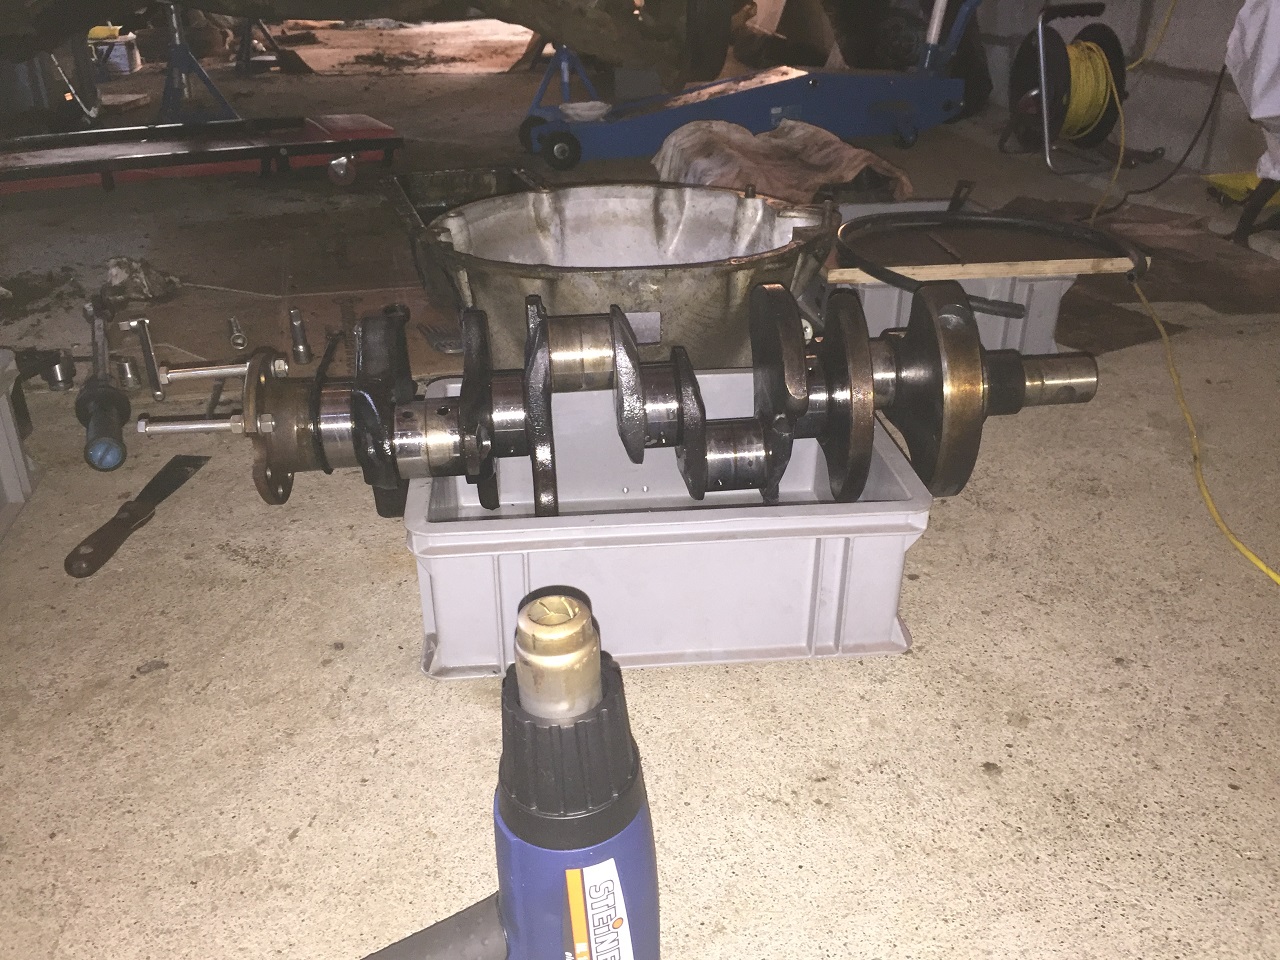 (IMG_3608_resized.JPG) (IMG_3608_resized.JPG)
Attachments
----------------
IMG_3608_resized.JPG (498KB - 483 downloads)
|
|
| |
|
Expert
Posts: 1530
Location: ZH, Switzerland | This afternoon two employees of an engine restoration company are coming to pick up my engine to restore. I'm happy! Happy Restoring Dieter |
|
| |
|
Expert
Posts: 1530
Location: ZH, Switzerland | Since late afternoon 01/22/2017 the engine of my Letter is at the engine restorer's. On 01/25/2017 I visited the company and had a sight of a very good company. My engine is again in a mounting stand and the drivers side cylinder bank is upright. There is special fluid on top of the piston #1. I told the boss that when the piston is out, I'll visit them again. Happy Restoring! Dieter |
|
| |
|
Expert 5K+
Posts: 5006
| that was quick! |
|
| |
|
Expert
Posts: 1530
Location: ZH, Switzerland | This afternoon I wanted to buy a spray can of Cummins Apex red to paint the cross rams. But I got a notification that the company cannot ship the can overseas. So I have to chase for another solution. Is there a color close to Cummens Apex red in the RAL chart? Happy Restoring Dieter |
|
| |
|
Expert
Posts: 1530
Location: ZH, Switzerland | mikes2nd - 2017-01-26 4:22 PM that was quick! Thanks Because this company is very good in modifying and calibrating engines I do not get angry when my engine comes back with more torque and horse power than addressed by the technical sheet of Chrysler. The boss showed and told me about Aston Martin engines, stroked and bored (4.3 to 5.0, and the old Aston Martin, 5.3 V8 (https://en.wikipedia.org/wiki/Aston_Martin_V8) with a block at least as big as the RB engine), a modified V12 Aston Martin engine (all aluminum with surface in the cylinder bores of Sulzer Metco), a 361 under restoration (pistons and camshaft already installed) and a finished 340 LA engine where they could organize a new 340 block (very rare block he said). Happy Restoring! Dieter BTW: the boss told me that the contemporary fuel has a faster burning velocity than the old leaded gas. So the engines need a modified ignition calibration. He recommended Swiss 98 Octane for my Beast as well. |
|
| |
|
Expert
Posts: 1530
Location: ZH, Switzerland | Yesterday afternoon, evening and this morning I was cleaning the complete throttle linkage from the throttle pedal to the carburetors. Now all screws and hex nuts are moving free like new ??. Happy Restoring! Dieter |
|
| |
|
Expert
Posts: 1530
Location: ZH, Switzerland | I just wonder... I want to remove the fresh air cut off plate of the allweather heater system in my Letter. Of course I do not want to destroy the plate. Anybody an idea how to remove it without destroying either the rubber (still in good, soft condition), the shaft or the body. Any suggestions are welcome. Thank you very much. Happy Restoring! Dieter
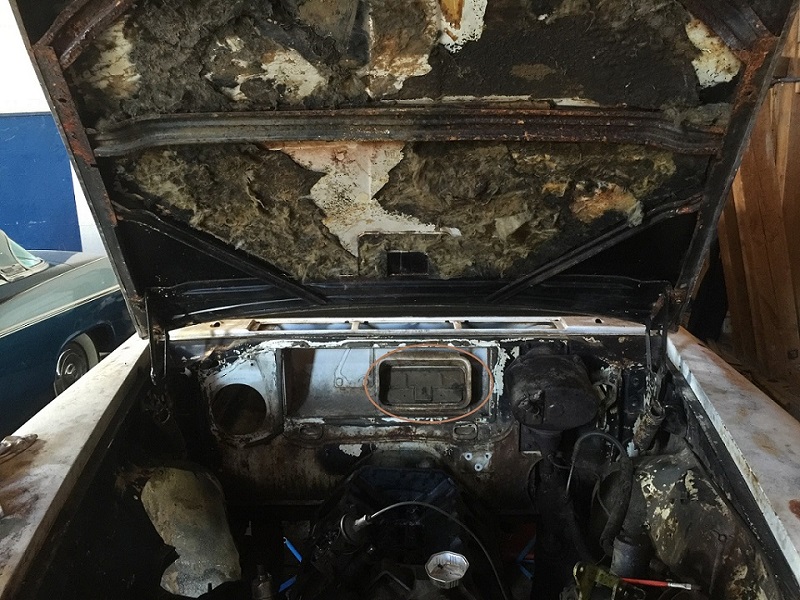 (IMG_3093_resized.JPG) (IMG_3093_resized.JPG)
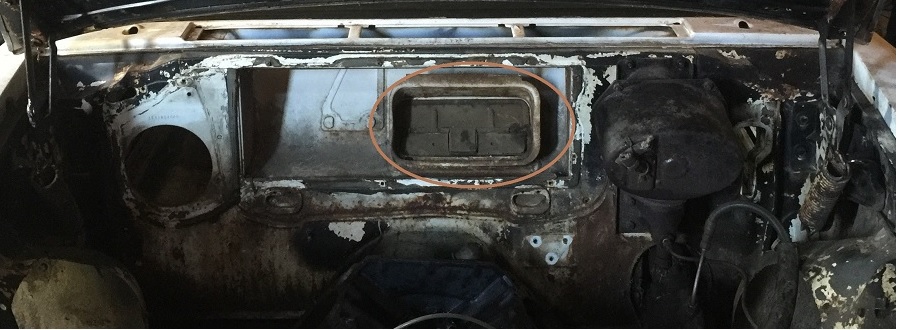 (fresh air cut off plate.jpg) (fresh air cut off plate.jpg)
Attachments
----------------
IMG_3093_resized.JPG (217KB - 492 downloads)
fresh air cut off plate.jpg (121KB - 482 downloads)
|
|
| |
|
Expert
Posts: 1530
Location: ZH, Switzerland | I noticed after a further investigation, that the pivot point is not a going through shaft from one holder (welded at the firewall) to the other one. But a pin, about the length of an inch. Happy Restoring! Dieter
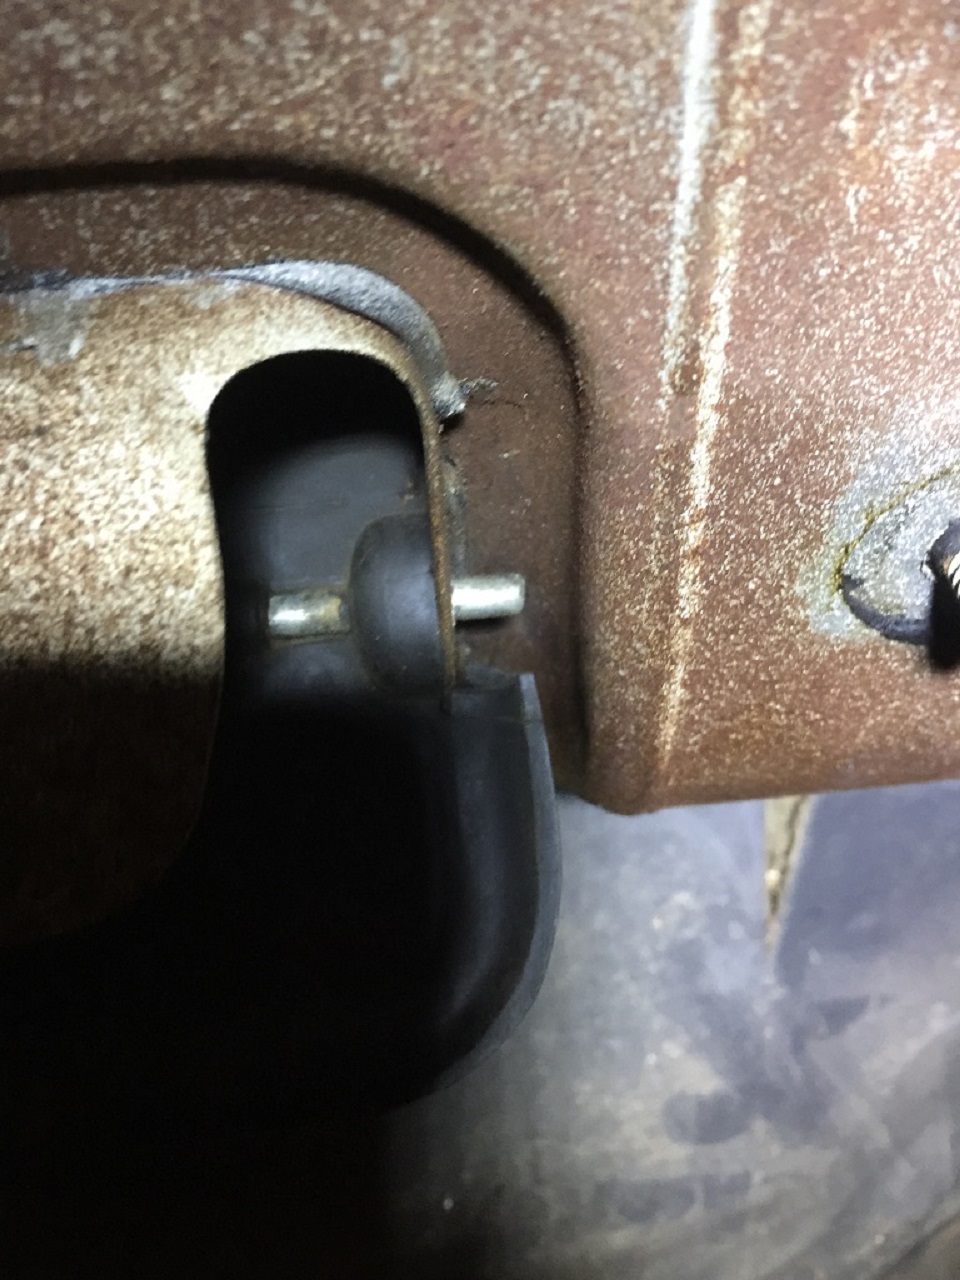 (IMG_3640_resized.JPG) (IMG_3640_resized.JPG)
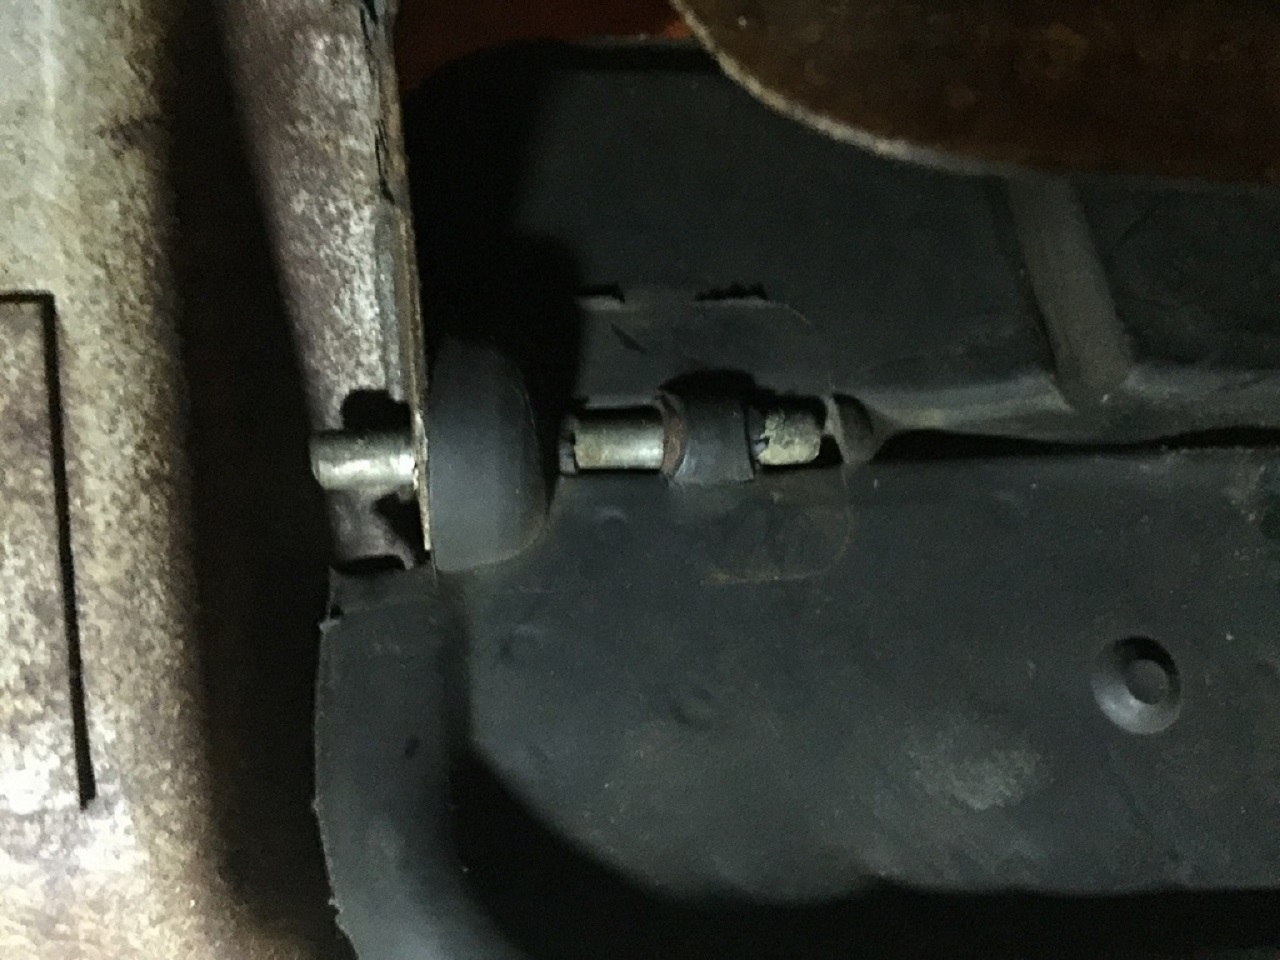 (IMG_3641_resized.JPG) (IMG_3641_resized.JPG)
Attachments
----------------
IMG_3640_resized.JPG (308KB - 501 downloads)
IMG_3641_resized.JPG (322KB - 489 downloads)
|
|
| |
|
Expert
Posts: 1530
Location: ZH, Switzerland | Look my friends, A big stone (rock size) will fall down from my heart when the body is straight and all rust issues have gone. All other subjects are - compared to the body - just peanuts for me. Happy Restoring! Dieter |
|
| |
|
Elite Veteran
Posts: 827
Location: tailFinland | If I remember right, he other pin goes in to cut of plate wehwn you bush it. You have to lubricae it first with WD40 or such aerosol oil.
Perhaps you have already noticed it by now |
|
| |
|
Expert
Posts: 1530
Location: ZH, Switzerland | Hi Jari Thanks a lot. The air shut off plate is already out of my Letter. I used a blade screw driver and drove the passenger side pin back. I noticed that on each side there's a felt washer to inhibit noises. Happy Restoring! Dieter |
|
| |
|
Expert
Posts: 1530
Location: ZH, Switzerland | At the moment the brake booster, canister type, is in my barn and I'm working on. I cleaned the canister outside and inside, all the rubber parts between the piston perimeter and the bottom of the canister are good. But after assembling (I didn't separate the piston rod and cover plate) I noticed that there is a slight leakage at the piston rod gasket around the piston rod... Happy Restoring! Dieter BTW: second trail: when I apply vacuum and the trigger Nylon button is pressed in, the vacuum is steady. At that time when I release the button, the fork moves out quite quick, but not for a long time - it moves back slowly. I assume this is normal, isn't it? When I apply the Nylon button again when the fork is out (brake assisting mode) the fork moves back quite fast. My careful consideration was, that when I release the brake pedal the Nylon button will be applied again.
Edited by di_ch_NY56 2017-04-17 1:08 PM
 (IMG_3857_resized.JPG) (IMG_3857_resized.JPG)
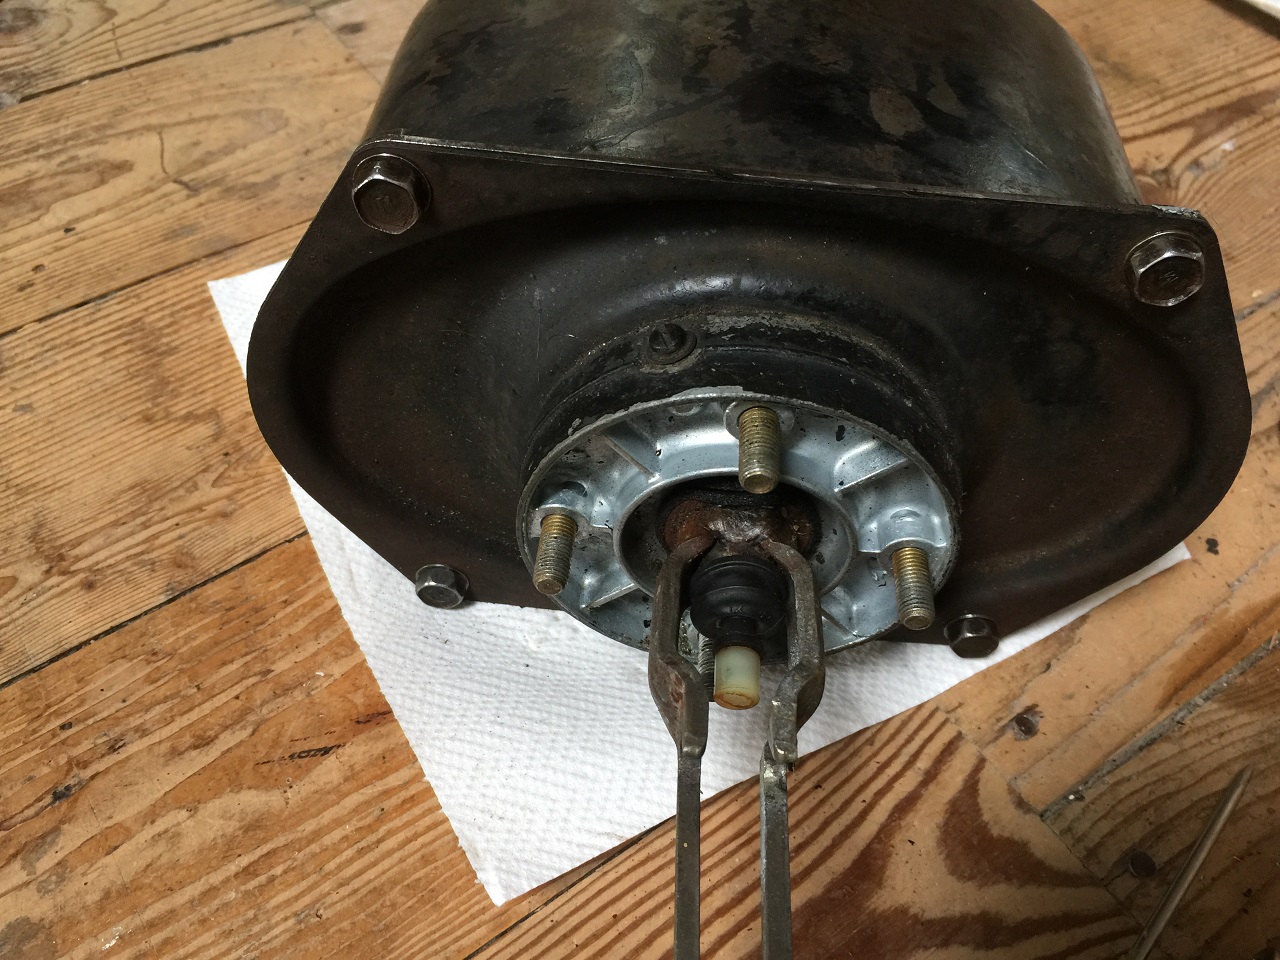 (IMG_3858_resized.JPG) (IMG_3858_resized.JPG)
Attachments
----------------
IMG_3857_resized.JPG (308KB - 464 downloads)
IMG_3858_resized.JPG (432KB - 472 downloads)
|
|
| |
|
Expert
Posts: 1530
Location: ZH, Switzerland | Yesterday night I performed a really small work. All alone I pressed out the windshield and the rear window. For that I layed with my back on the floor and used my feet to press at the top (alternating left side, right side) until the glass was out of the weatherstrip or the weatherstrip away from the surrounding body lip. Now resting is about one labor day of work: the fragments of the old exhaust system, the fuel line and the brake lines. Happy Restoring! Dieter
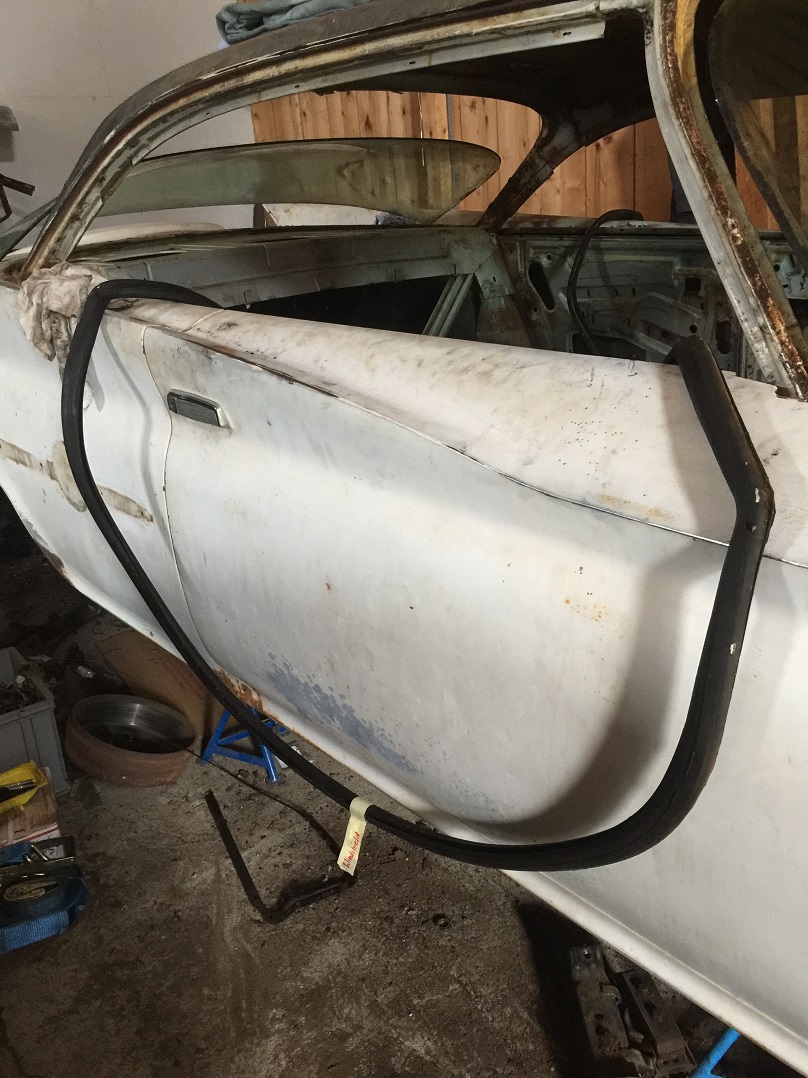 (IMG_3980_resized.JPG) (IMG_3980_resized.JPG)
Attachments
----------------
IMG_3980_resized.JPG (300KB - 457 downloads)
|
|
| |
|
Expert
Posts: 1530
Location: ZH, Switzerland | A really big rock will fall down from my heart, when the body is fully restored, painted and ready for the assembling process. I catched the most important areas (beside the rear wall of the trunk and partially the trunk floor) with pictures to show it to you and eventually getting a quote or an offer where to bring the body to. Happy Restoring! Dieter BTW: in my eyes it makes ways more sense first to restore the body and following the engine to mount it into the fully restored body at any time.
 (IMG_3983_c-pillar_LH_rear.JPG) (IMG_3983_c-pillar_LH_rear.JPG)
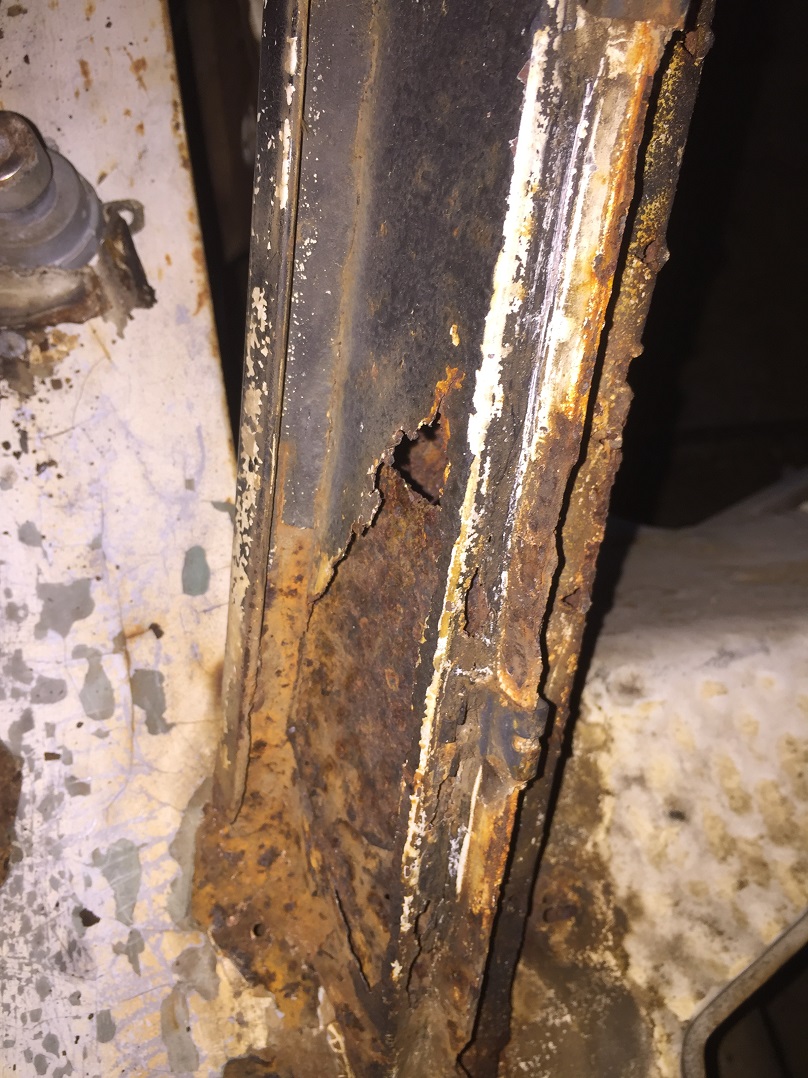 (IMG_3984_c-pillar_LH_from_outside_top.JPG) (IMG_3984_c-pillar_LH_from_outside_top.JPG)
 (IMG_3985-c-pillar_LH_from_LH_side.JPG) (IMG_3985-c-pillar_LH_from_LH_side.JPG)
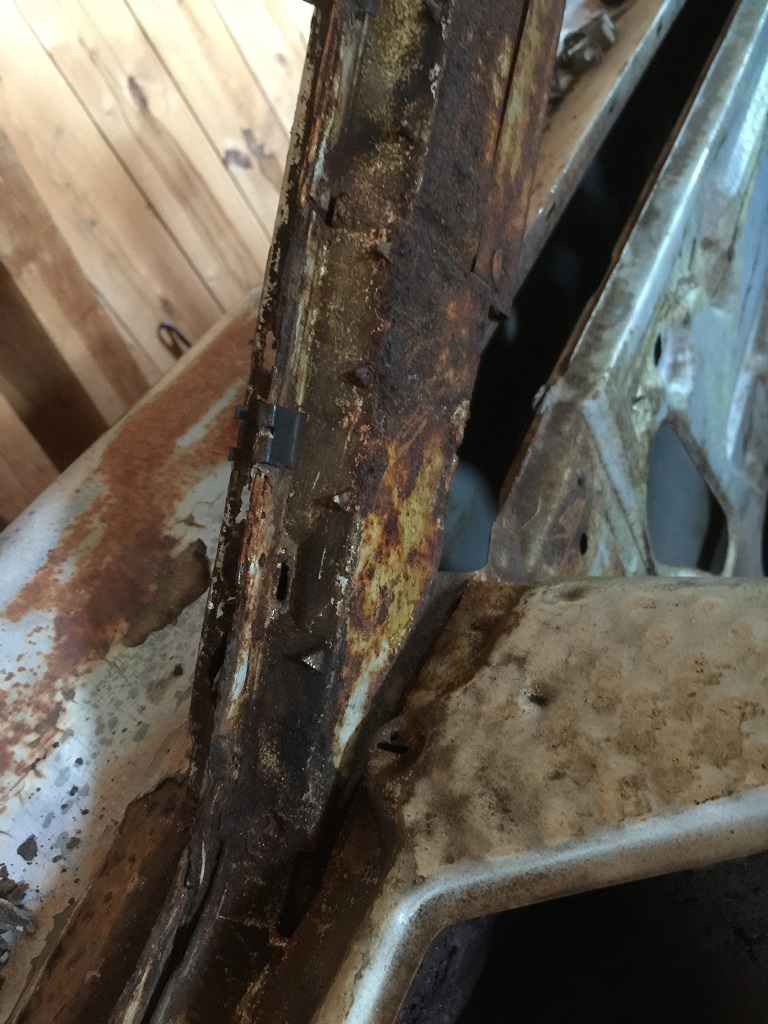 (IMG_3991_c-pillar_LH_inside_quite_ok.JPG) (IMG_3991_c-pillar_LH_inside_quite_ok.JPG)
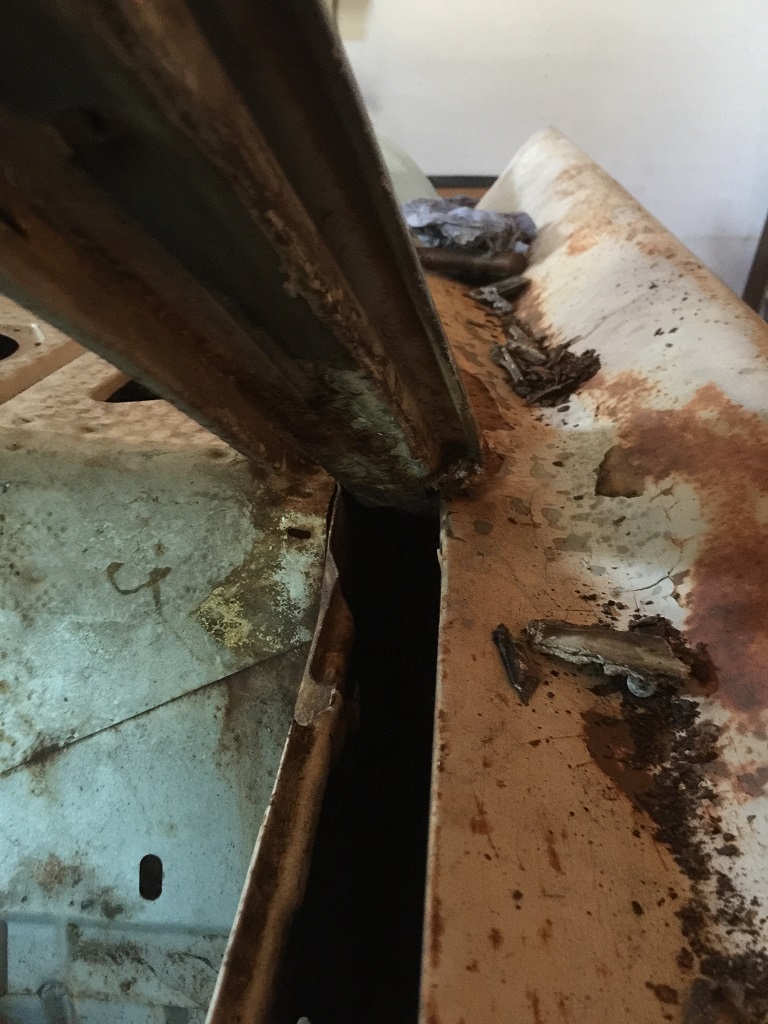 (IMG_3992_c-pillar_LH_inside_ok_from_quarter_window_sight.JPG) (IMG_3992_c-pillar_LH_inside_ok_from_quarter_window_sight.JPG)
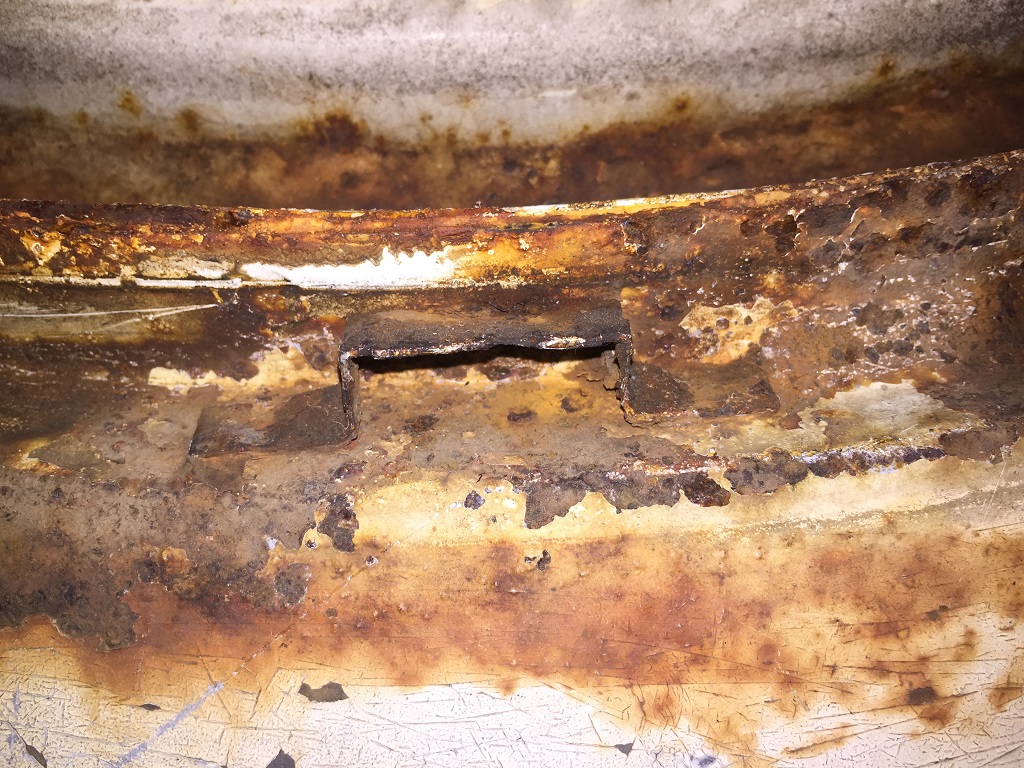 (IMG_3989_rear_window_frame_box_still_here_1_LH.JPG) (IMG_3989_rear_window_frame_box_still_here_1_LH.JPG)
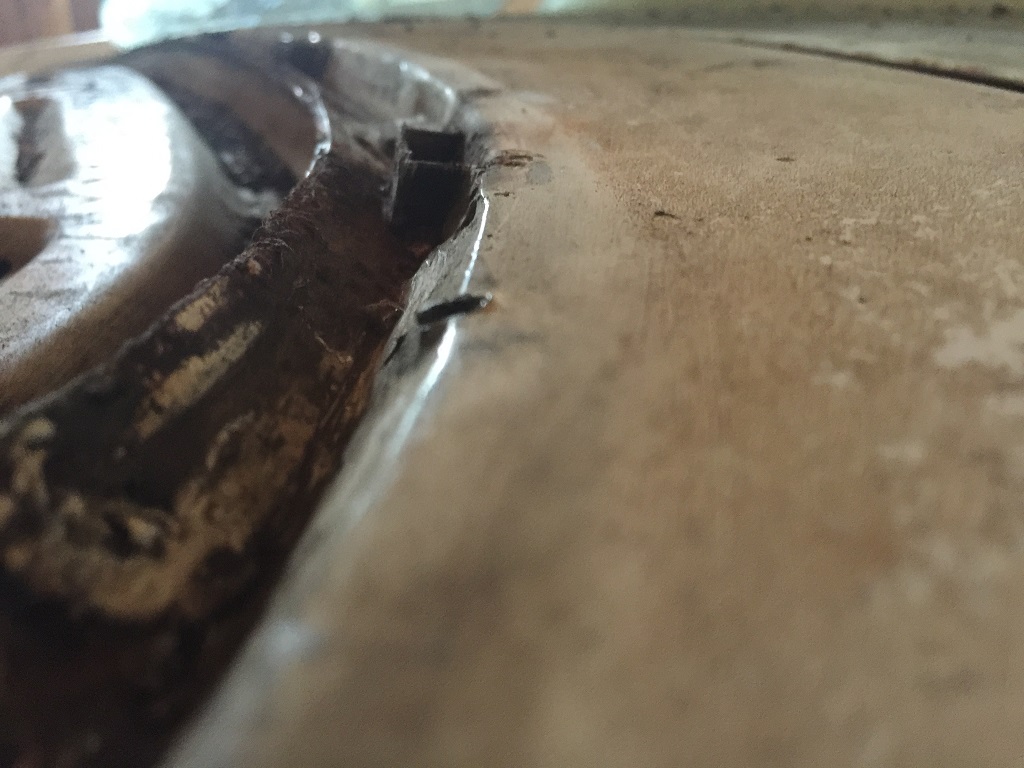 (IMG_3990_rear_window_frame_box_still_here_2_LH.JPG) (IMG_3990_rear_window_frame_box_still_here_2_LH.JPG)
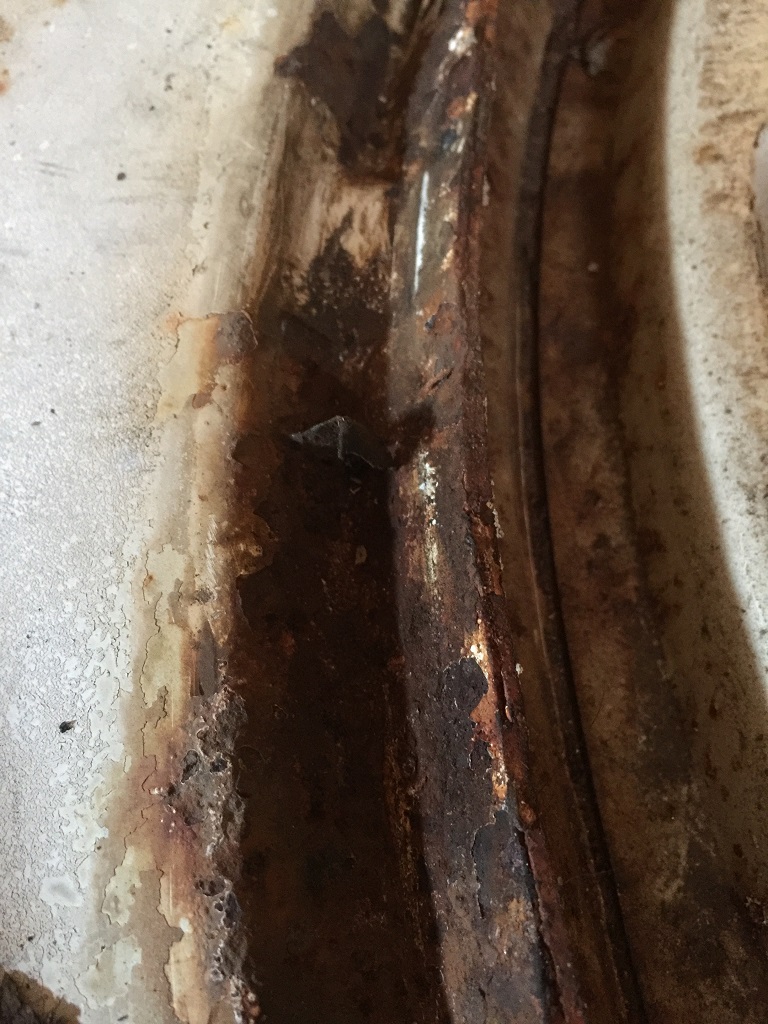 (IMG_3986_rear_window_frame_box_gone_1_RH.JPG) (IMG_3986_rear_window_frame_box_gone_1_RH.JPG)
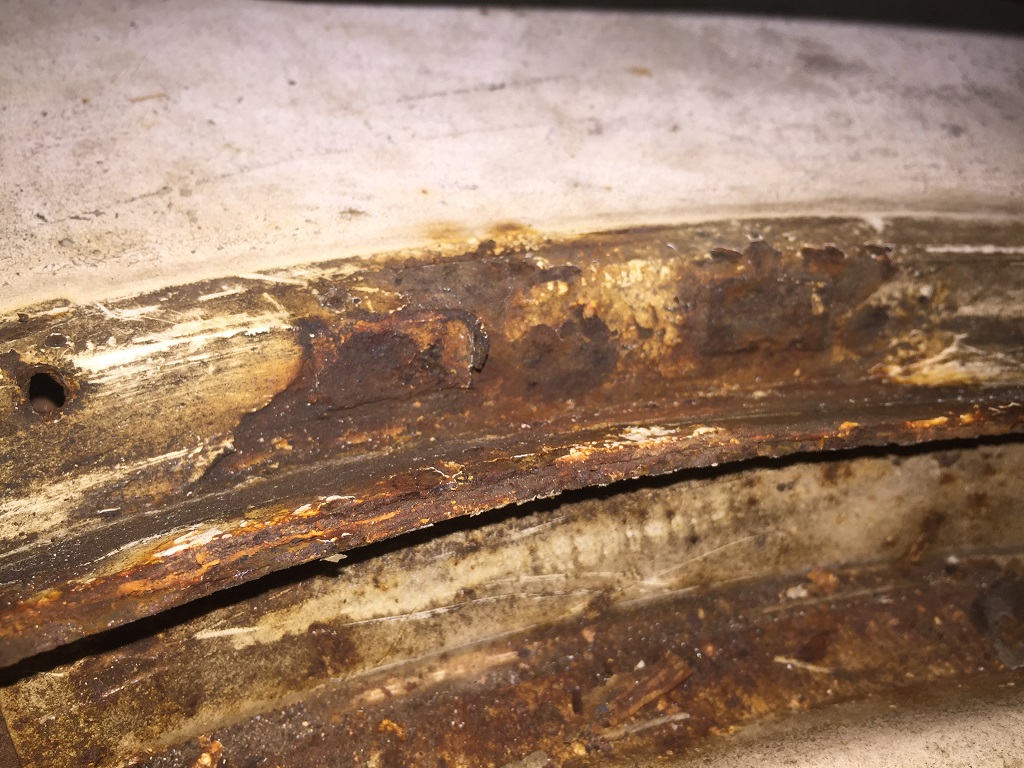 (IMG_3987_rear_window_frame_box_gone_2_RH.JPG) (IMG_3987_rear_window_frame_box_gone_2_RH.JPG)
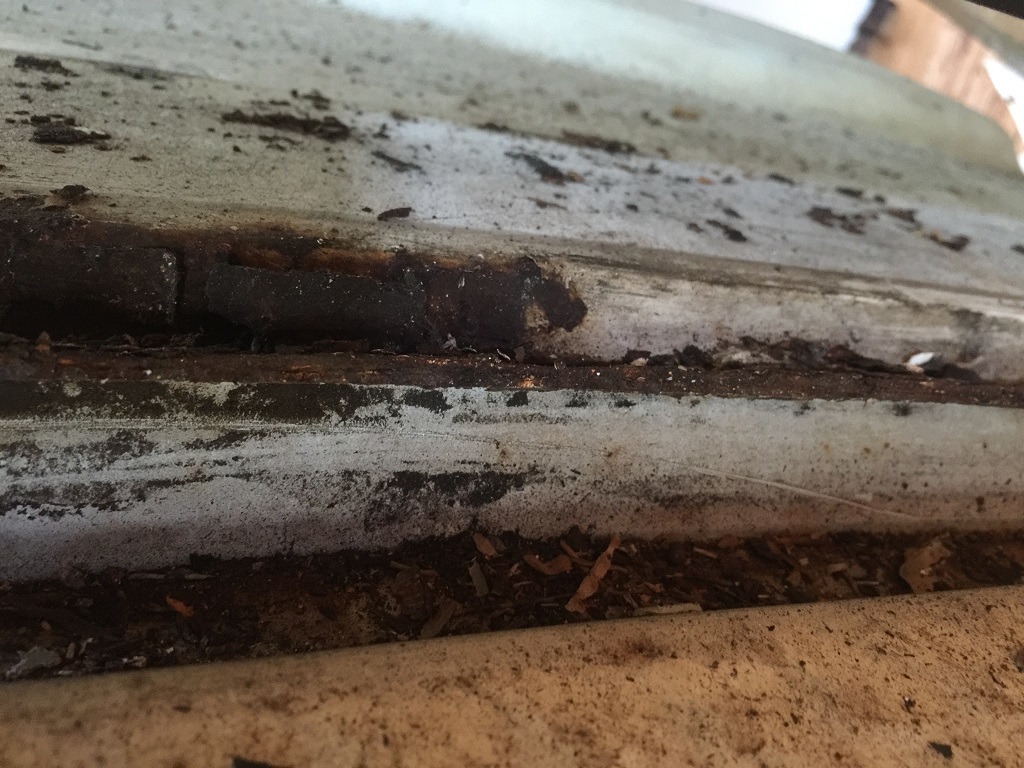 (IMG_3988_rear_window_frame_box_gone_3_RH.JPG) (IMG_3988_rear_window_frame_box_gone_3_RH.JPG)
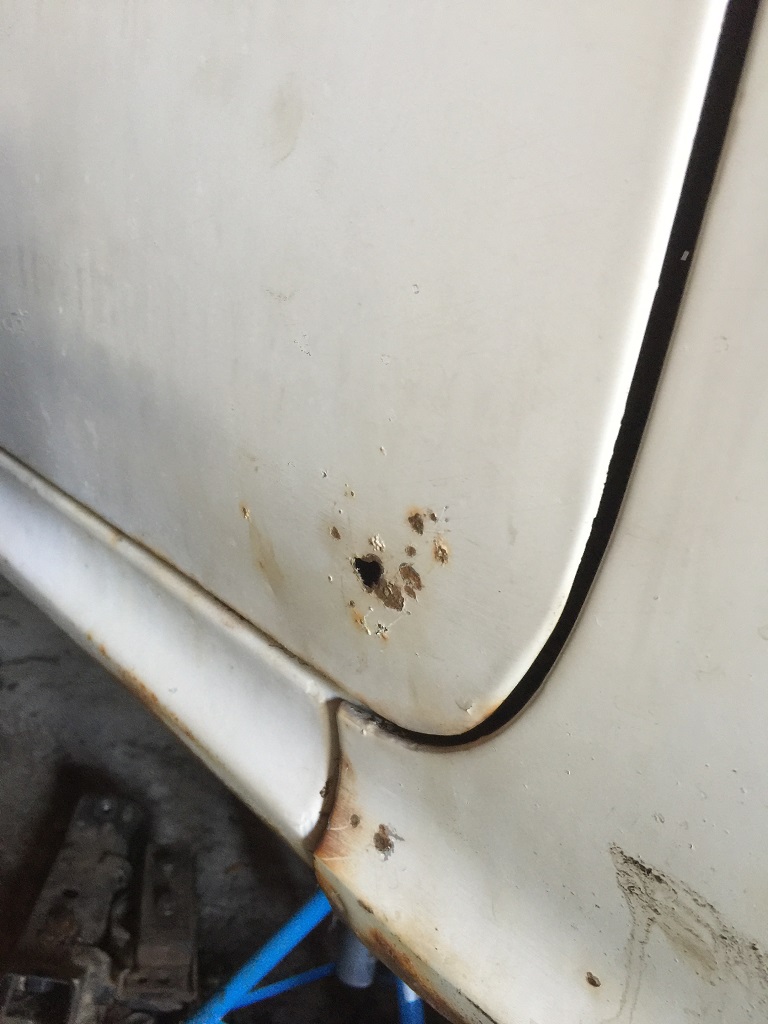 (IMG_3995_RH_door_rust_through_front_lower_corner.JPG) (IMG_3995_RH_door_rust_through_front_lower_corner.JPG)
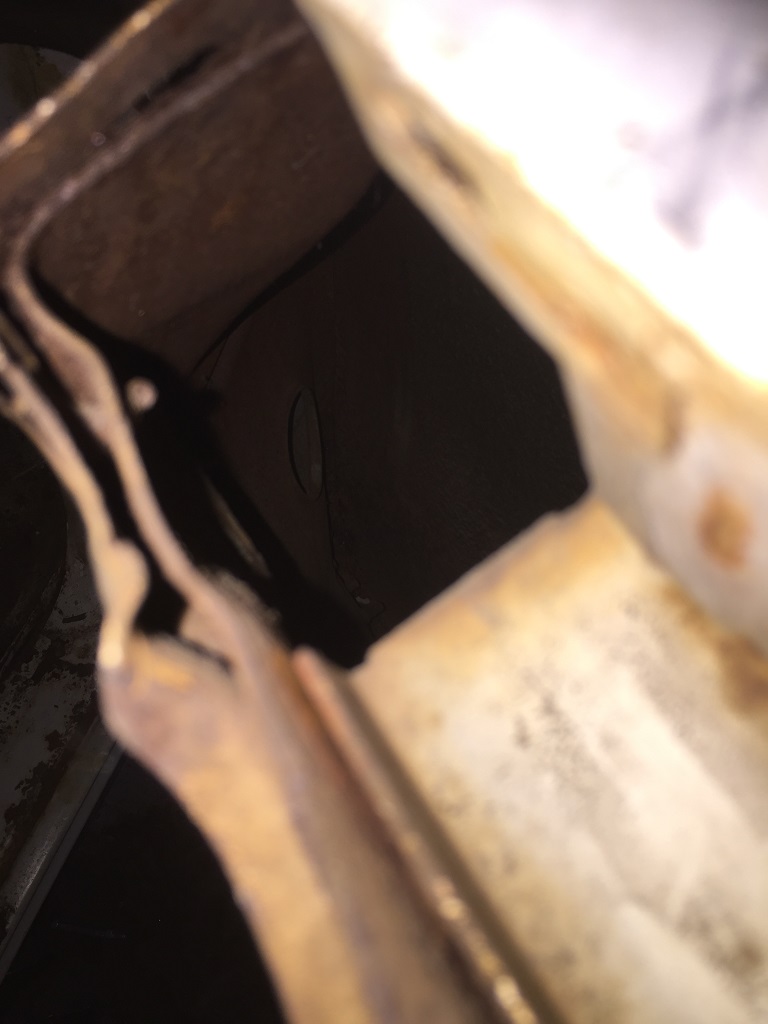 (IMG_3996_RH__door_front_structure_frame_rusting_through_from_rear.JPG) (IMG_3996_RH__door_front_structure_frame_rusting_through_from_rear.JPG)
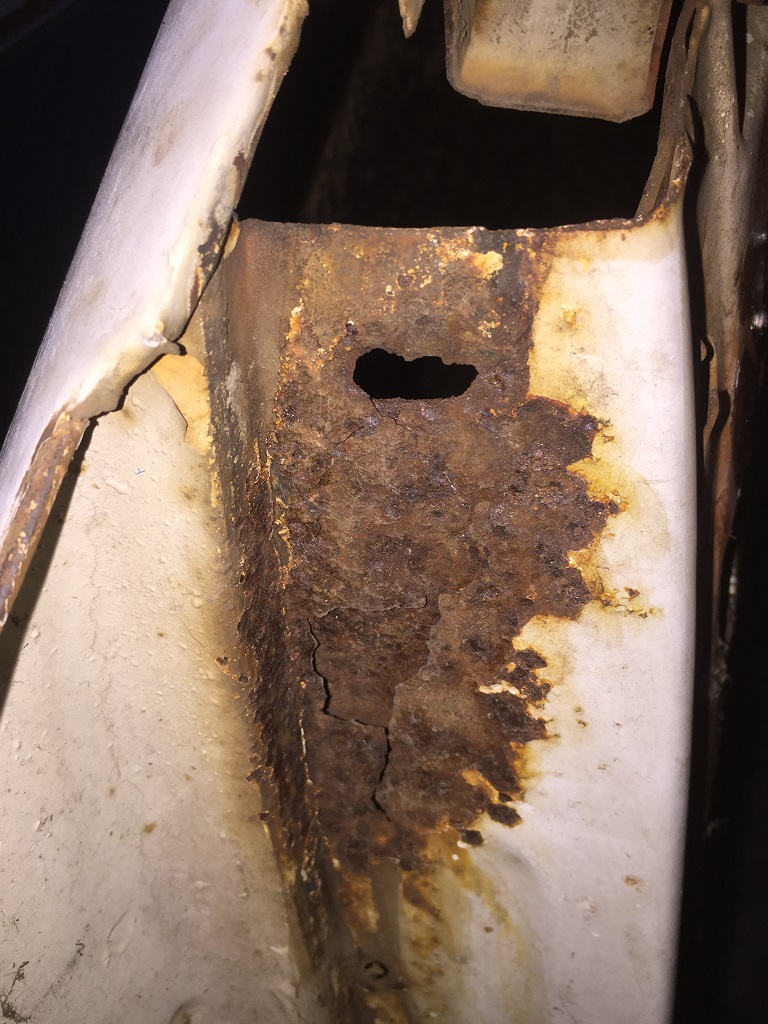 (IMG_3997_RH_door_front_structure_frame_rusting_through_front.JPG) (IMG_3997_RH_door_front_structure_frame_rusting_through_front.JPG)
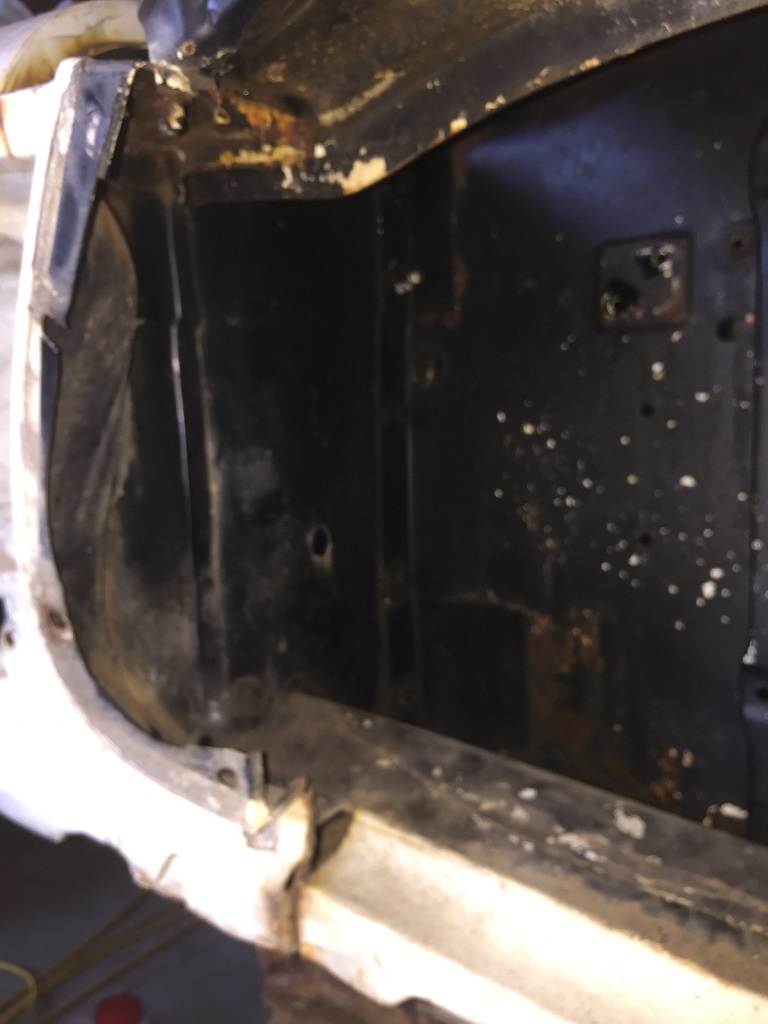 (IMG_3993_RH_front_accident_fender_bent_cowl_bent.JPG) (IMG_3993_RH_front_accident_fender_bent_cowl_bent.JPG)
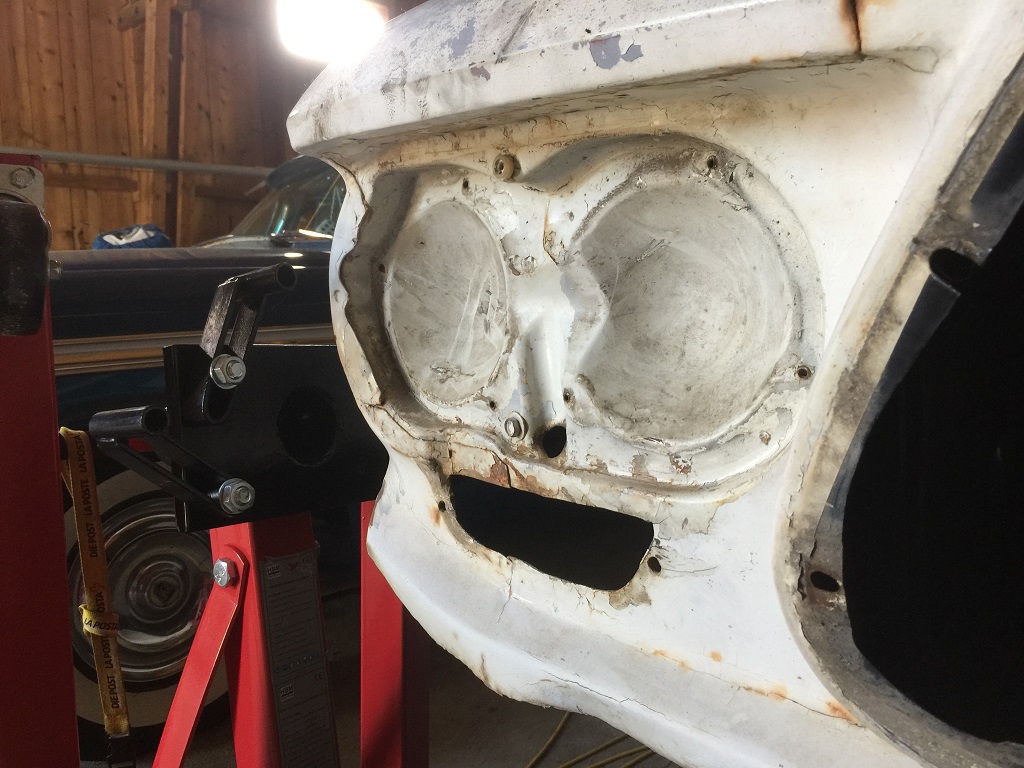 (IMG_3994_RH_front_accident_fender_bent_headlight_low_pointing_weird.JPG) (IMG_3994_RH_front_accident_fender_bent_headlight_low_pointing_weird.JPG)
Attachments
----------------
IMG_3983_c-pillar_LH_rear.JPG (314KB - 459 downloads)
IMG_3984_c-pillar_LH_from_outside_top.JPG (335KB - 470 downloads)
IMG_3985-c-pillar_LH_from_LH_side.JPG (391KB - 452 downloads)
IMG_3991_c-pillar_LH_inside_quite_ok.JPG (258KB - 452 downloads)
IMG_3992_c-pillar_LH_inside_ok_from_quarter_window_sight.JPG (253KB - 467 downloads)
IMG_3989_rear_window_frame_box_still_here_1_LH.JPG (388KB - 448 downloads)
IMG_3990_rear_window_frame_box_still_here_2_LH.JPG (209KB - 496 downloads)
IMG_3986_rear_window_frame_box_gone_1_RH.JPG (282KB - 456 downloads)
IMG_3987_rear_window_frame_box_gone_2_RH.JPG (305KB - 447 downloads)
IMG_3988_rear_window_frame_box_gone_3_RH.JPG (282KB - 458 downloads)
IMG_3995_RH_door_rust_through_front_lower_corner.JPG (167KB - 450 downloads)
IMG_3996_RH__door_front_structure_frame_rusting_through_from_rear.JPG (111KB - 455 downloads)
IMG_3997_RH_door_front_structure_frame_rusting_through_front.JPG (265KB - 458 downloads)
IMG_3993_RH_front_accident_fender_bent_cowl_bent.JPG (135KB - 442 downloads)
IMG_3994_RH_front_accident_fender_bent_headlight_low_pointing_weird.JPG (247KB - 456 downloads)
|
|
| |
|
Board Moderator & Exner Expert 10K+
Posts: 13045
Location: Southern Sweden - Sturkö island | Great going Dieter! I don't think that Jan Fridberg reads all posts here on the forum, try to send him a link - now he can see better the state and the worst damages. |
|
| |
|
Expert
Posts: 1530
Location: ZH, Switzerland | wizard - 2017-05-27 4:21 PM Great going Dieter! I don't think that Jan Fridberg reads all posts here on the forum, try to send him a link - now he can see better the state and the worst damages. Thanks dear friend, I assume it's sunny clear that I'm not keen to pay hourly wages of almost sFr. 100.- or more like here in the ridiculous expensiv Switzerland. Take care and Happy Restoring Dieter BTW: I'm earnestly thinking about leaving my home country for ever |
|
| |
|
Expert
Posts: 1530
Location: ZH, Switzerland | Today I removed the brake lines at the front sub frame, the junction block and the brake line to the rear axle. Happy Restoring! Dieter BTW: resting are - the brake line on the rear axle - the fragments of the exhaust system - the fuel line |
|
| |
|

Expert 5K+
Posts: 9650
Location: So. Cal | Congratulations Dieter. The rust looks relatively minor. You may want to purchase a mig welder and start practicing so you can fix most of that yourself. It is a great skill to have and doesn't require a lot of effort to become reasonably good at it. The large flat panels are the hardest to prevent from warping, so leave the outer door to a pro. But the small holes on the inner sheet metal are great places to get started on yourself. Unfortunately, California isn't much better than $100/hr. You are lucky to find a place that will work for $70/hr. and the quality isn't a guarantee. |
|
| |
|
Expert
Posts: 1530
Location: ZH, Switzerland | Look, I made two promisements to a) my mum not to run into depts because of the project and b) to the landlords to get the place in the barn, not to weld in the barn, mostly made out of wood.. So I have to leave ok for another option for the body. I beg your pardon. Happy Restoring! Dieter |
|
| |
|
Expert
Posts: 1530
Location: ZH, Switzerland | On Saturday I was able to catch the radio at the local post office. It works perfect with a cristal clear sound in he DAB mode. Big thank you to Hemidenis for his astonishing effort to bring my radio back to live. I know we both went through a nightmare many times during the long time we worked together. Finally the radio project went very successful. Big thank you again for Hemidenis. Happy Restoring! Dieter |
|
| |
|
Expert
Posts: 1530
Location: ZH, Switzerland | This afternoon I mounted the hood all alone (a very dangerous action all alone  ). After mounting I cleaned the perimeter (roof, A pillars and bottom) of the windshield opening. Neither the rear window opening nor the windshield opening (seam to mount the corresponding weatherstrip) are rusty. All around the color is nice at the seam... ). After mounting I cleaned the perimeter (roof, A pillars and bottom) of the windshield opening. Neither the rear window opening nor the windshield opening (seam to mount the corresponding weatherstrip) are rusty. All around the color is nice at the seam... So I just need to remove the gas line and the isolation mat inside (passenger compartment) at the firewall. Happy Restoring! Dieter
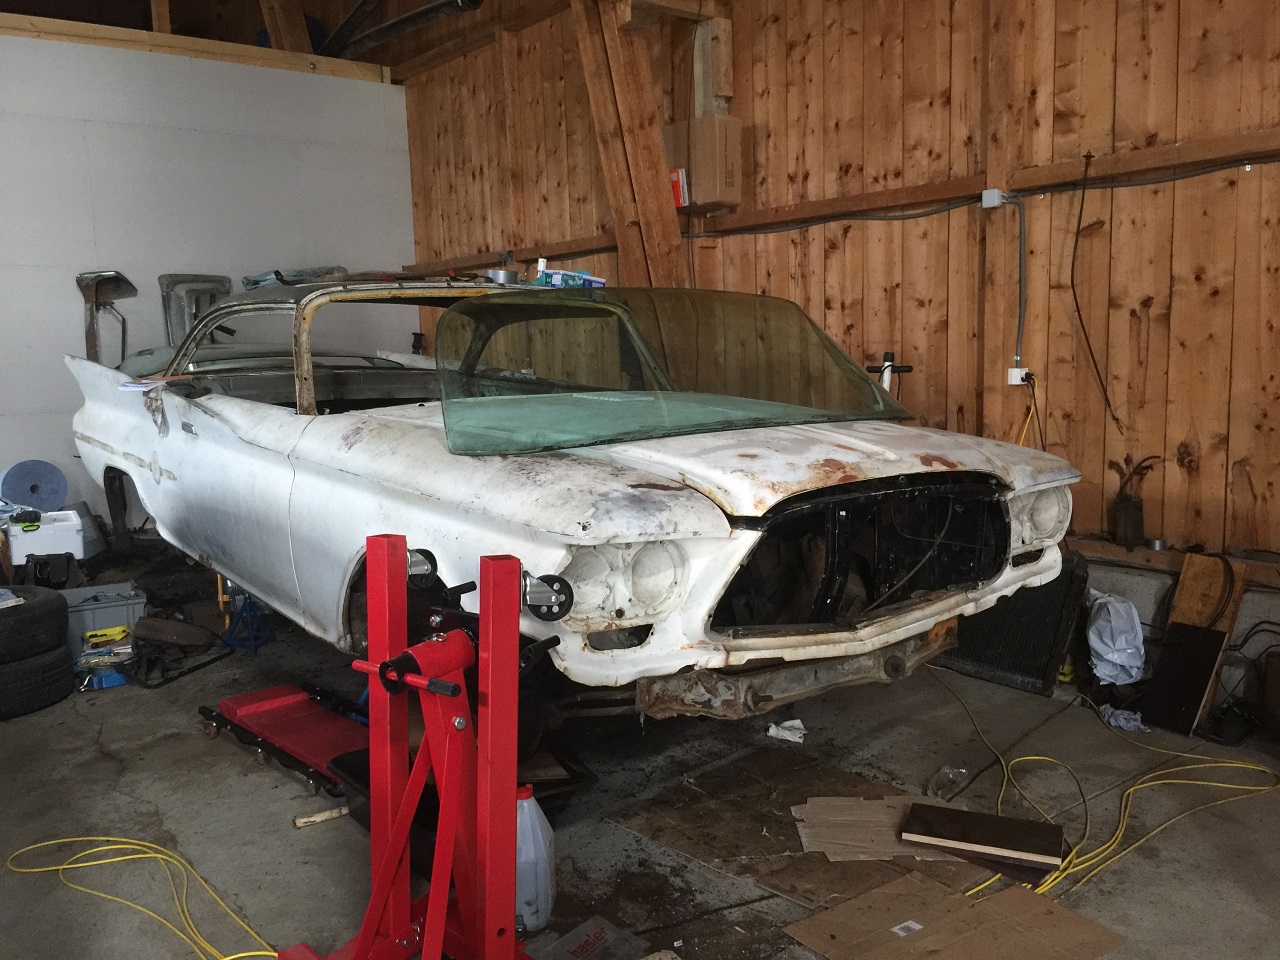 (IMG_4103_overwiew actual.JPG) (IMG_4103_overwiew actual.JPG)
Attachments
----------------
IMG_4103_overwiew actual.JPG (442KB - 432 downloads)
|
|
| |
|
Board Moderator & Exner Expert 10K+
Posts: 13045
Location: Southern Sweden - Sturkö island | You've done a lot now Dieter, soon time for to fix the rust issues. I would suggest a final check-up of all the documentation you've done so that all is ready for the mounting when that time comes.
I always think that I have enough photos and documentation, but then Murphy prooves me wrong |
|
| |
|
Expert
Posts: 1530
Location: ZH, Switzerland | Thank you very much Wizard for your encouraging words. In the mean time (to be precise, today ) I got a new contact at FB from Morgan Johansson, William Svensson living in Malung SWE as well as Jan Fridberg. William restored his 300G and Morgan proposed him to me as a master. So we discussed many things and I provided William some actual pictures. Actually we are discussing the transportation and who'll do the paint job. Except of the damage of the passenger rear wheel well and the windshield (I have to organise a new windshield myself, tinted (original color) with a smoke band at the top preferred) William got all these pictures plus some older ones as well. Happy Restoring! Dieter
Edited by di_ch_NY56 2017-07-09 10:31 AM
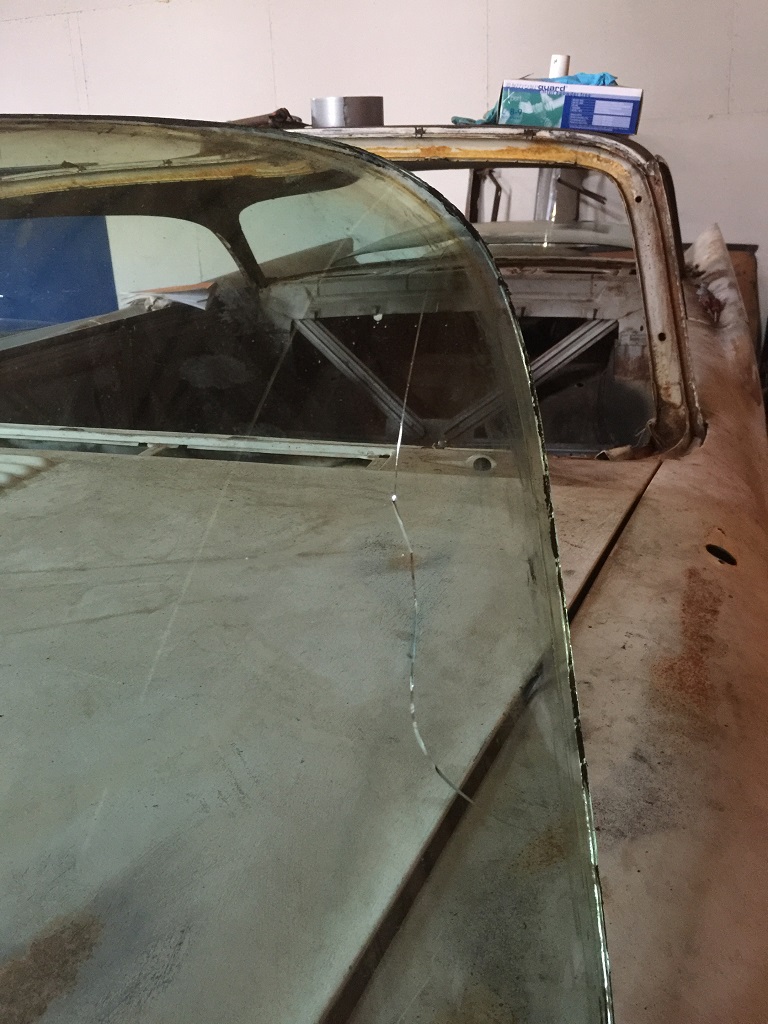 (IMG_4124_crack in the windshield got bigger.JPG) (IMG_4124_crack in the windshield got bigger.JPG)
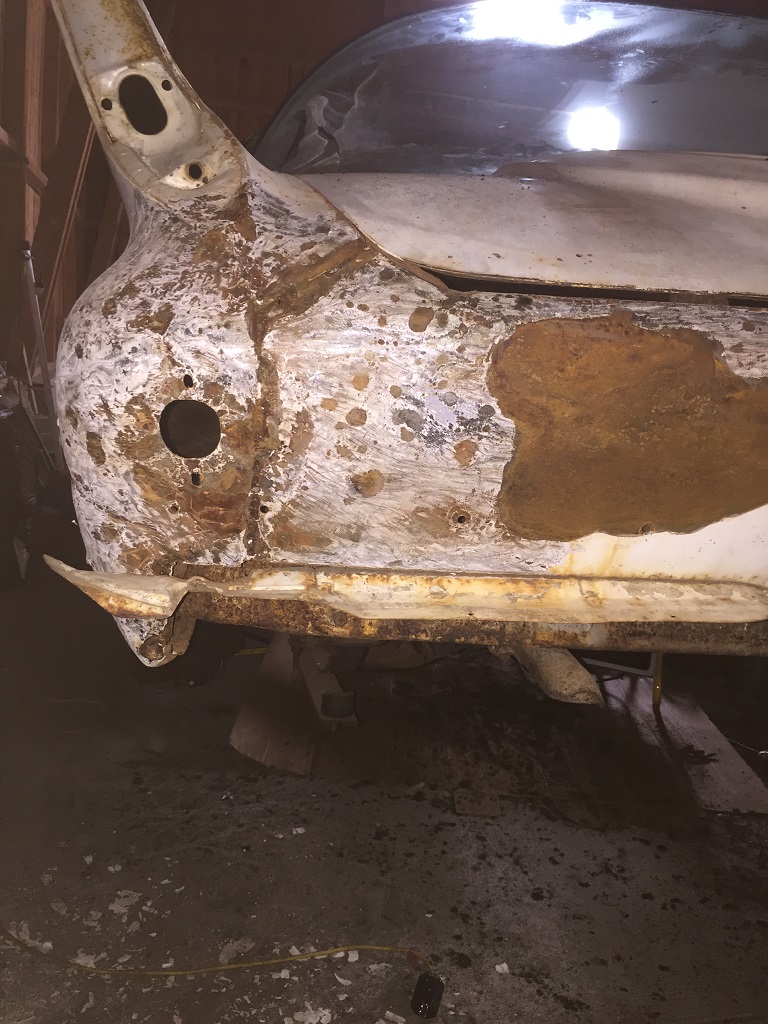 (IMG_4125_drivers side rear corner rear view.JPG) (IMG_4125_drivers side rear corner rear view.JPG)
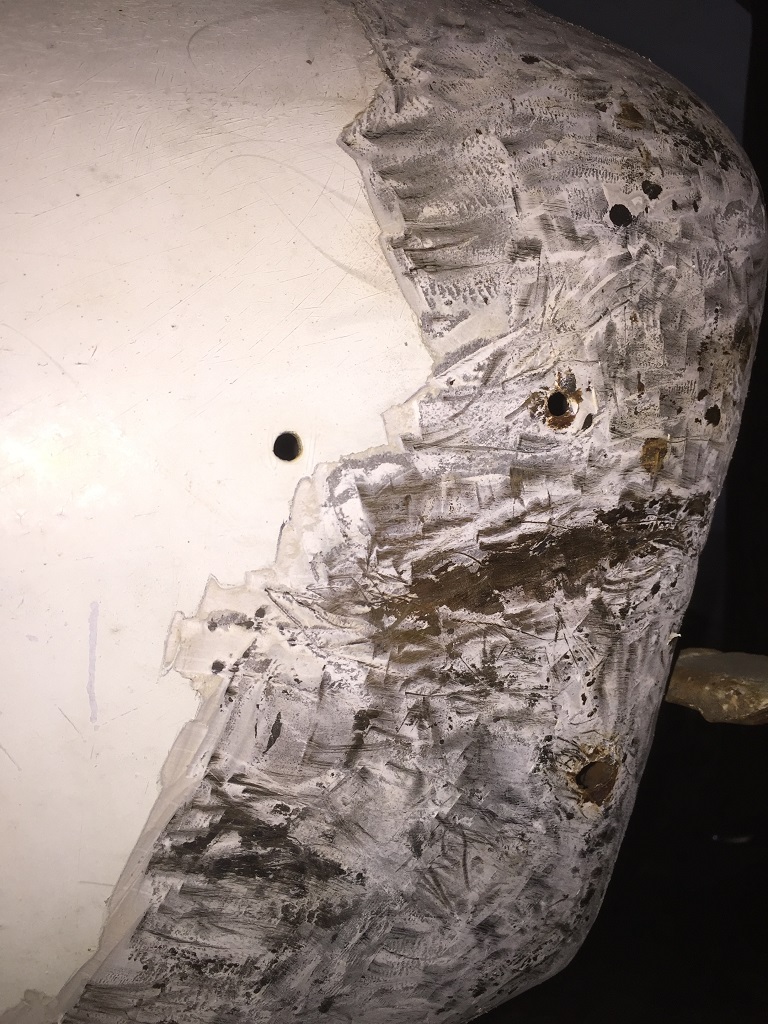 (IMG_4126_drivers side rear corner side view.JPG) (IMG_4126_drivers side rear corner side view.JPG)
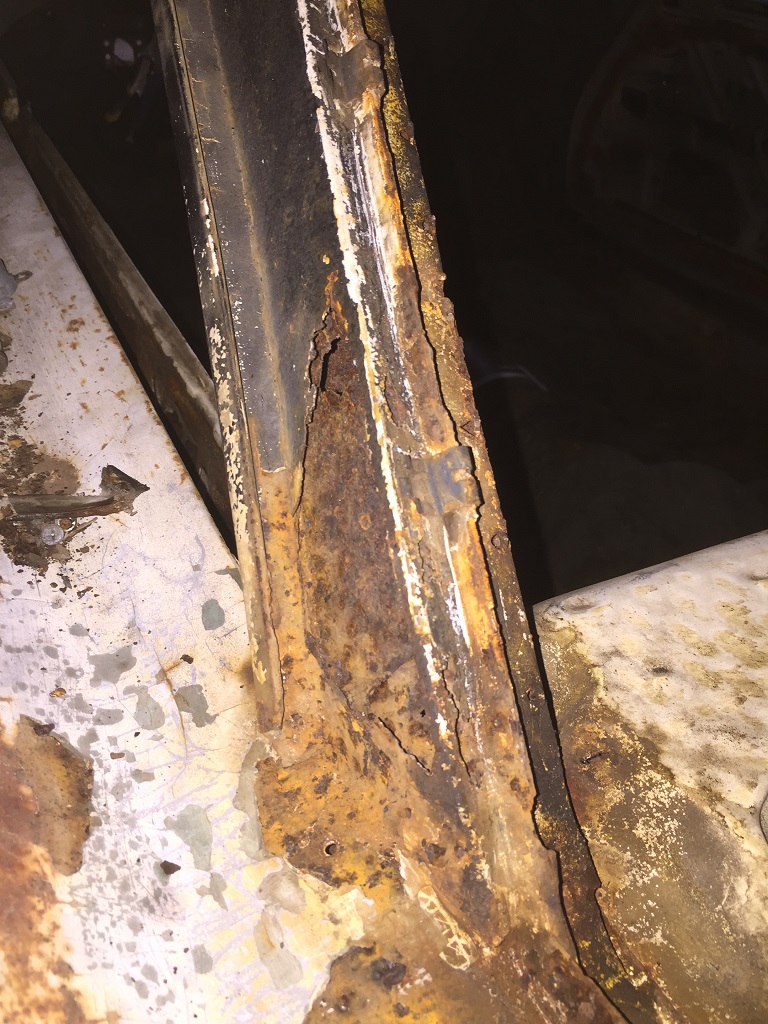 (IMG_4128_c pillar drivers side.JPG) (IMG_4128_c pillar drivers side.JPG)
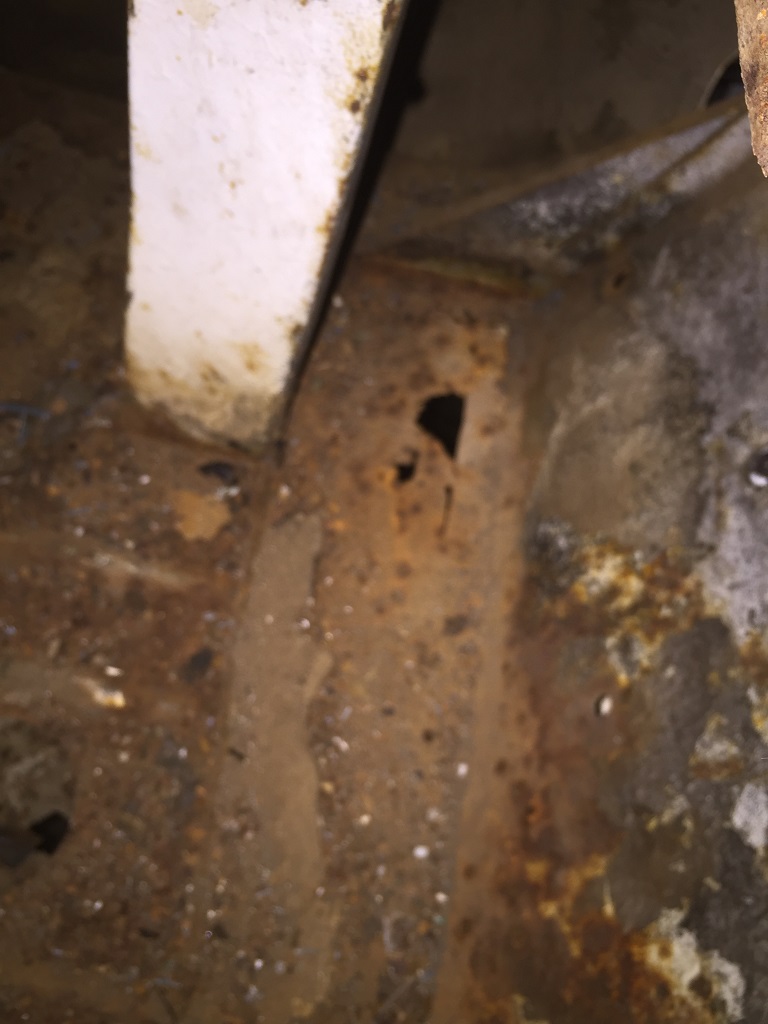 (IMG_4129_holes in the rear section of the trunk floor passenger side.JPG) (IMG_4129_holes in the rear section of the trunk floor passenger side.JPG)
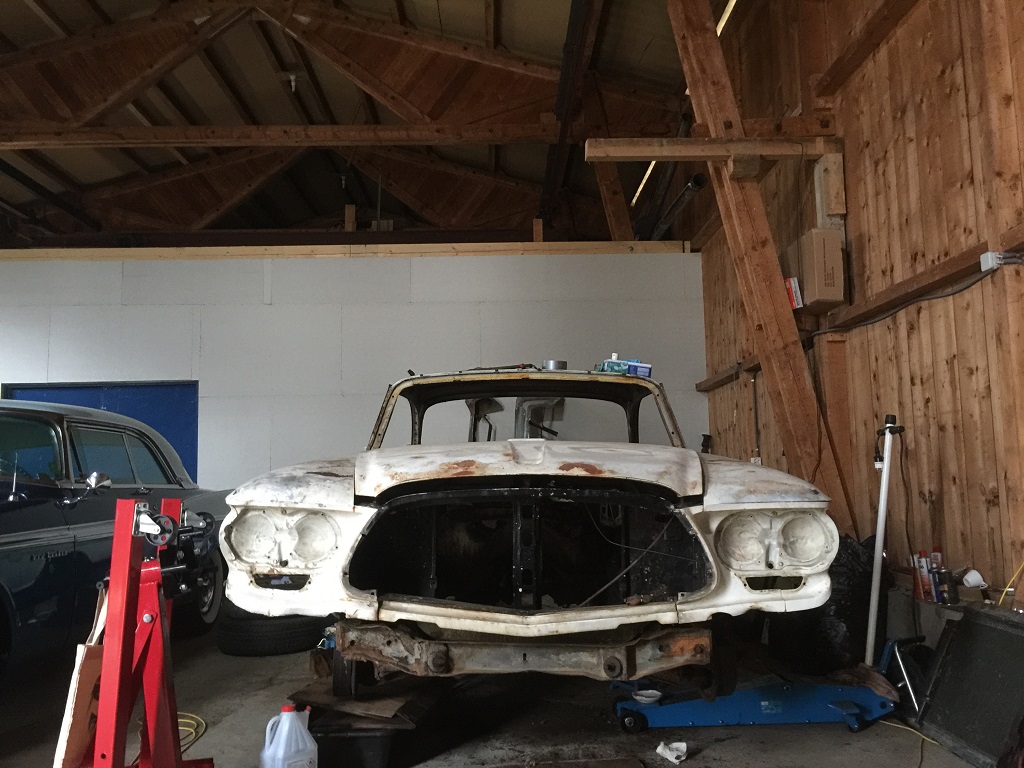 (IMG_4130_front view with damage at passenger side.JPG) (IMG_4130_front view with damage at passenger side.JPG)
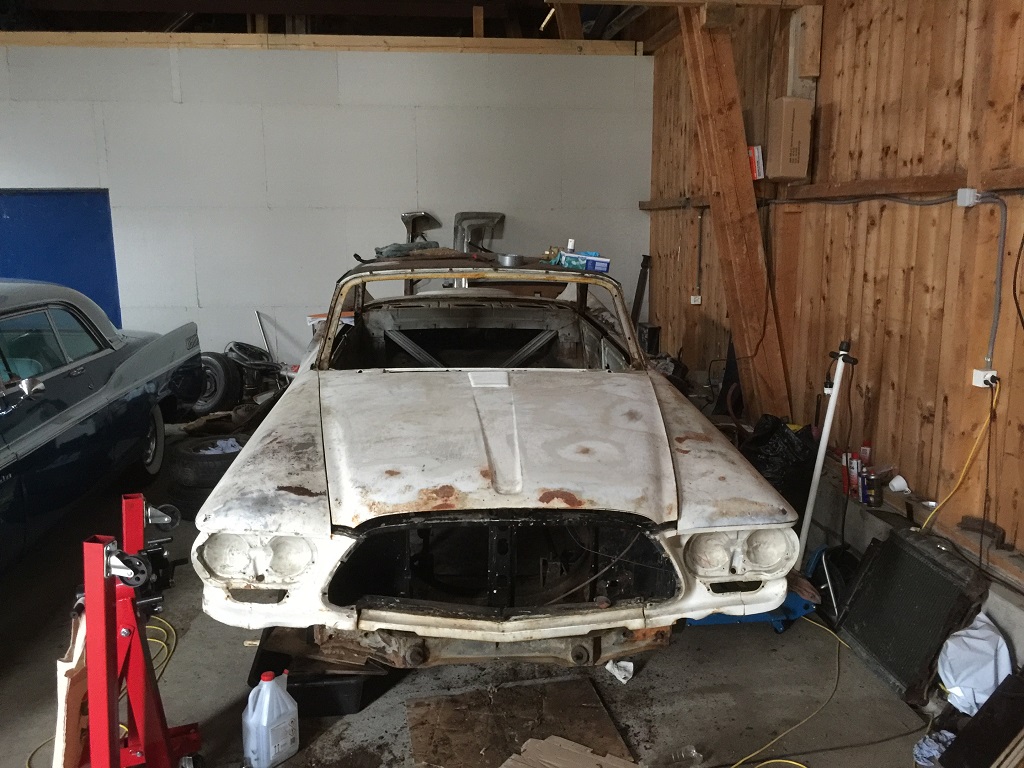 (IMG_4131_top view with glass removed.JPG) (IMG_4131_top view with glass removed.JPG)
Attachments
----------------
IMG_4124_crack in the windshield got bigger.JPG (245KB - 434 downloads)
IMG_4125_drivers side rear corner rear view.JPG (283KB - 432 downloads)
IMG_4126_drivers side rear corner side view.JPG (313KB - 442 downloads)
IMG_4128_c pillar drivers side.JPG (311KB - 429 downloads)
IMG_4129_holes in the rear section of the trunk floor passenger side.JPG (144KB - 437 downloads)
IMG_4130_front view with damage at passenger side.JPG (257KB - 431 downloads)
IMG_4131_top view with glass removed.JPG (278KB - 425 downloads)
|
|
| |
|
Expert
Posts: 1530
Location: ZH, Switzerland | I got the message from Magnus Stade, that my steering wheel of my Letter is restored. Happy Restoring! Dieter |
|
| |
|
Expert
Posts: 1530
Location: ZH, Switzerland | I got a wonderful message from my friend in Sweden. The steering wheel has arriven. As an evidence I got pictures. Big thank you to Magnus Stade who restored the steering wheel from my Letter. It looks so wonderful and an evidence of a superb craftmanship. I assume when my Letter is ready to do the first test ride, from then on I'll carry a terry towel in the footroom behind the drivers seat to cover the steering wheel and the dash pad (to purchase, on my wish list) when my Letter will be on a car meeting or a parking lot under free sky. Happy Restoring! Dieter BTW: very slow but steadily progress at my project.
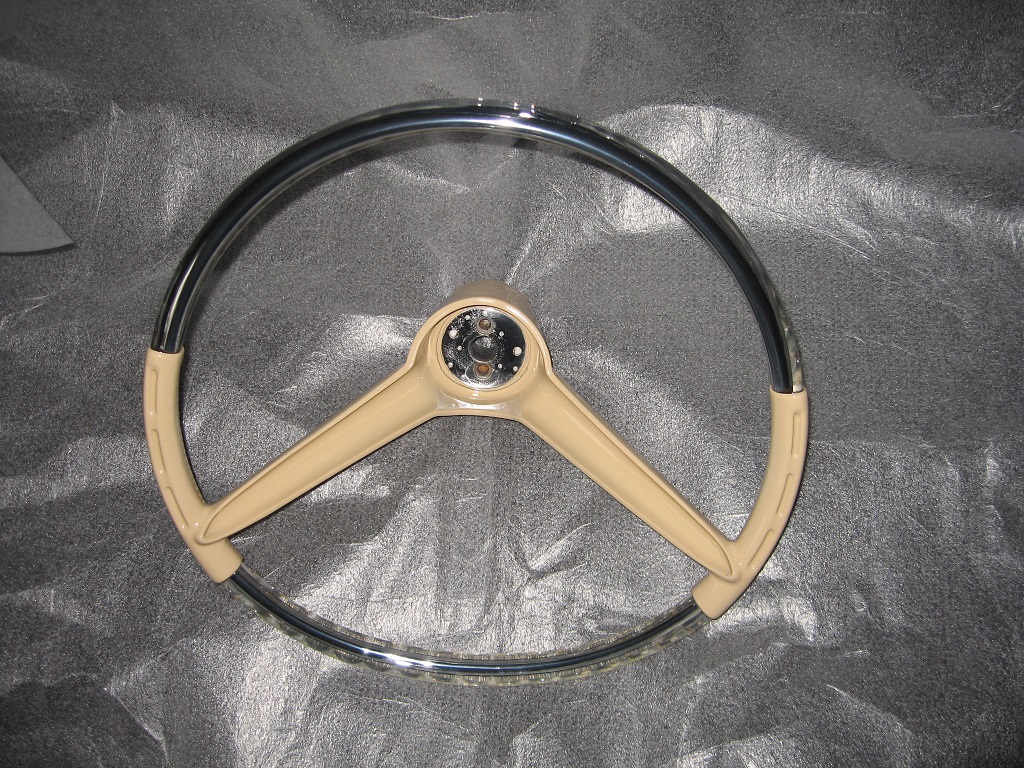 (IMG_2142_restored steering wheel.JPG) (IMG_2142_restored steering wheel.JPG)
Attachments
----------------
IMG_2142_restored steering wheel.JPG (447KB - 419 downloads)
|
|
| |
|
Expert
Posts: 1530
Location: ZH, Switzerland | This afternoon I removed the ornaments of the flite sweep decklid I got from Charlie (but not without a damage cause by a employee of Fedex). I used the vacuum cleaner to remove the baken dust and a thin welding wire (rust free) to free the drain tube. It was very humid between the deck lid recession and the hub cap like ornament. I think this area needs a special treatment of color type to resist the humid. Happy Restoring! Dieter
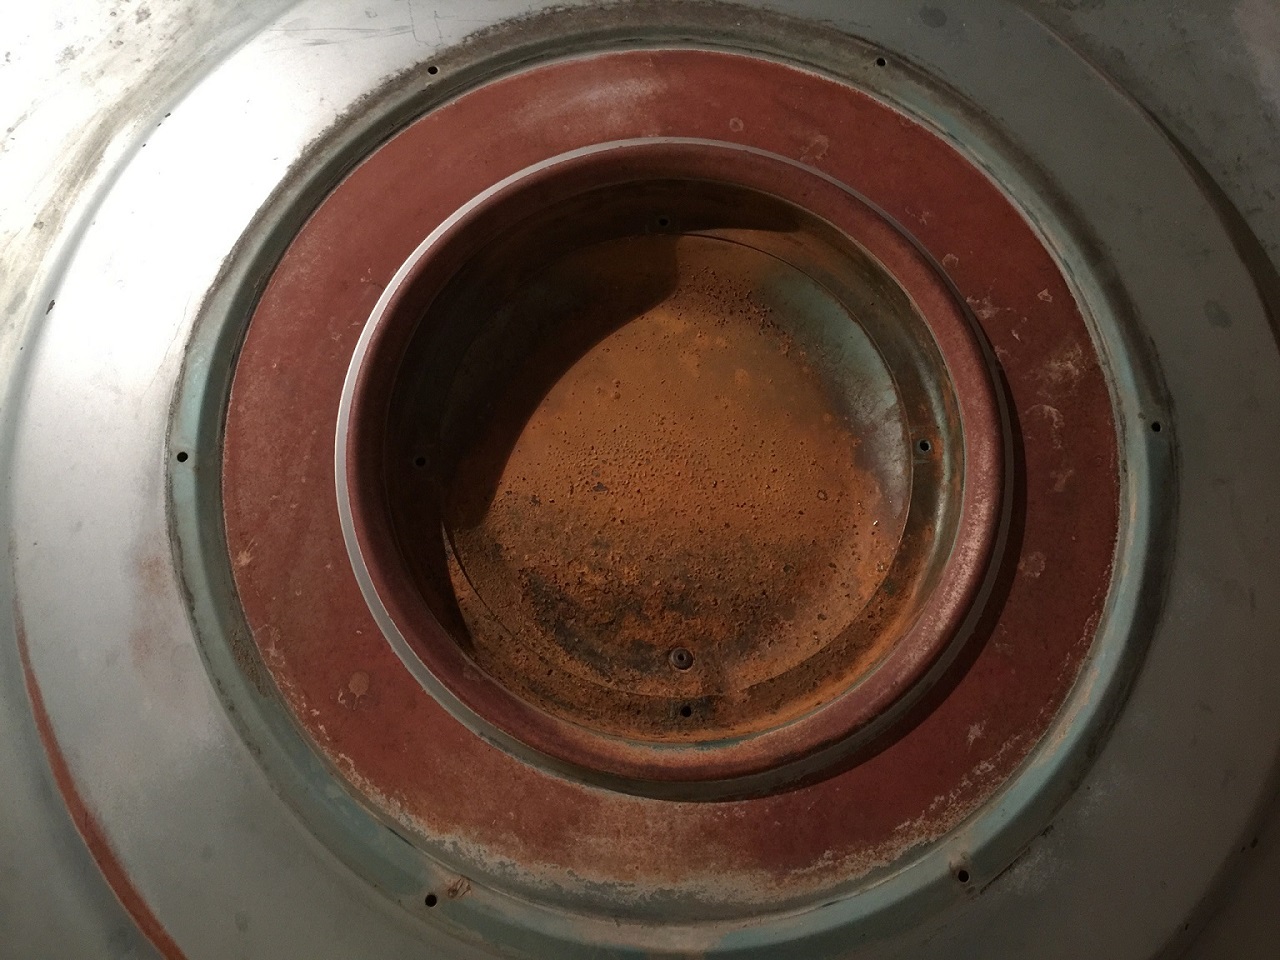 (IMG_4271_decklid from tailfin - ornaments removed.JPG) (IMG_4271_decklid from tailfin - ornaments removed.JPG)
Attachments
----------------
IMG_4271_decklid from tailfin - ornaments removed.JPG (375KB - 423 downloads)
|
|
| |
|
Expert
Posts: 1530
Location: ZH, Switzerland | The bowl of the ornament has one (!) pin hole. That's not much. I discussed with a well known MoPar guy in Switzerland the restoration of the body of my Letter. We agreed a price (/wo transports, sand blasting, painting). But he knows a good sand blaster and a perfect painter team (two brothers) who treats a customers car like it would be their own. At the facility there are two cars that have to leave, so I got the prospective that within about one month my Letter will go to the facility of this guy. A big stone is falling down from my heart. The piston of the first cylinder is still in the block. I payed the first down payment to allow the work of a cylinder grinding shop. We'll see what the result will be. Happy Restoring! Dieter BTW: the roof rail weatherstrip I'll need for my 1960 Chrysler Hardtop is either W13 or W15 weatherstrip profile in conjunction of a set of #69 front ends of the Gary Goers catalog, page 38 (document cat10B)?
Edited by di_ch_NY56 2017-09-17 10:46 AM
|
|
| |
|
Expert
Posts: 1530
Location: ZH, Switzerland | back on the wheels again, ready to transport my Letter to a restorer for the body work. Happy Restoring! Dieter BTW: the stuff in front of my Letter is from another family. I more than complete house hold...
Edited by di_ch_NY56 2017-10-14 7:10 AM
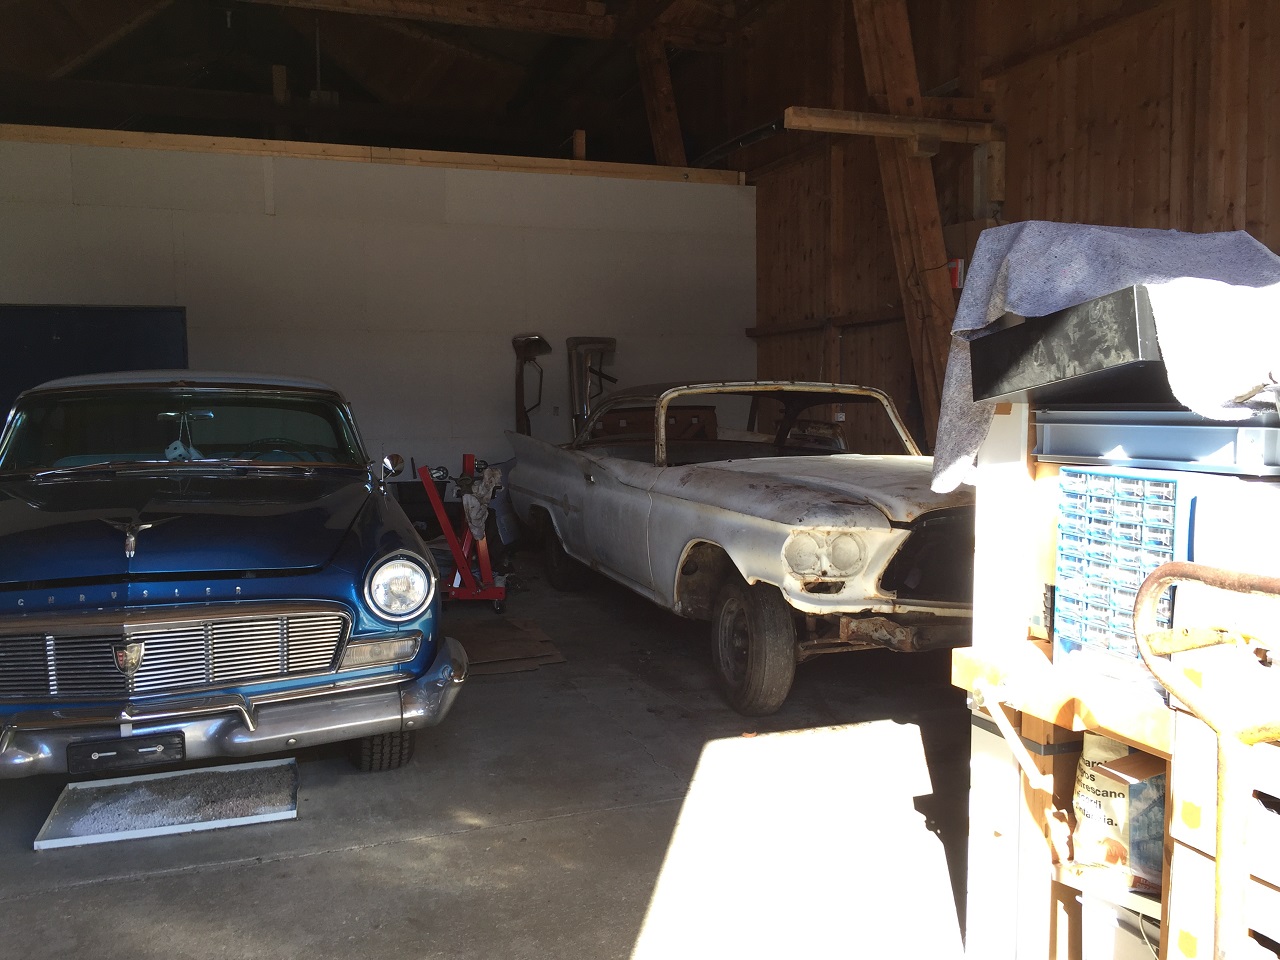 (IMG_4366_back on the wheels again.JPG) (IMG_4366_back on the wheels again.JPG)
Attachments
----------------
IMG_4366_back on the wheels again.JPG (320KB - 415 downloads)
|
|
| |
|
Expert 5K+
Posts: 5006
| going to be an amazing car when done. honestly it doesn't look that bad. |
|
| |
|
Board Moderator & Exner Expert 10K+
Posts: 13045
Location: Southern Sweden - Sturkö island | Great going Dieter! I bet you're very pleased that the car is ready for the rust repair works now! Think forward to the next stage of the works when you will start to mount all the Clean and renovated parts and units back in the car. |
|
| |
|
Expert
Posts: 1530
Location: ZH, Switzerland | Now finally my Letter is at the restorer shop for the body restoring. There is a load of work to perform to bring my Letter back to the original condition (body wise). Because the body restorer is quite close to me (about 40 min driving with a car) I'll visit him frequently to look at the progress and discuss issues (not detected until now). Happy Restoring! Dieter
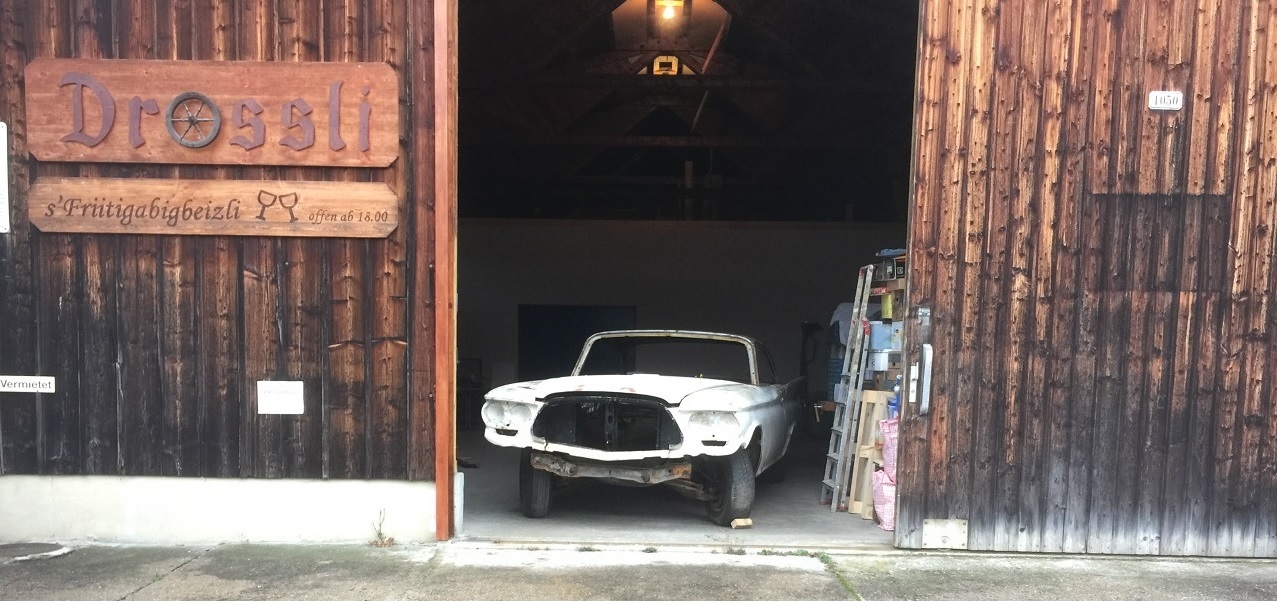 (IMG_4412_I'm waiting.JPG) (IMG_4412_I'm waiting.JPG)
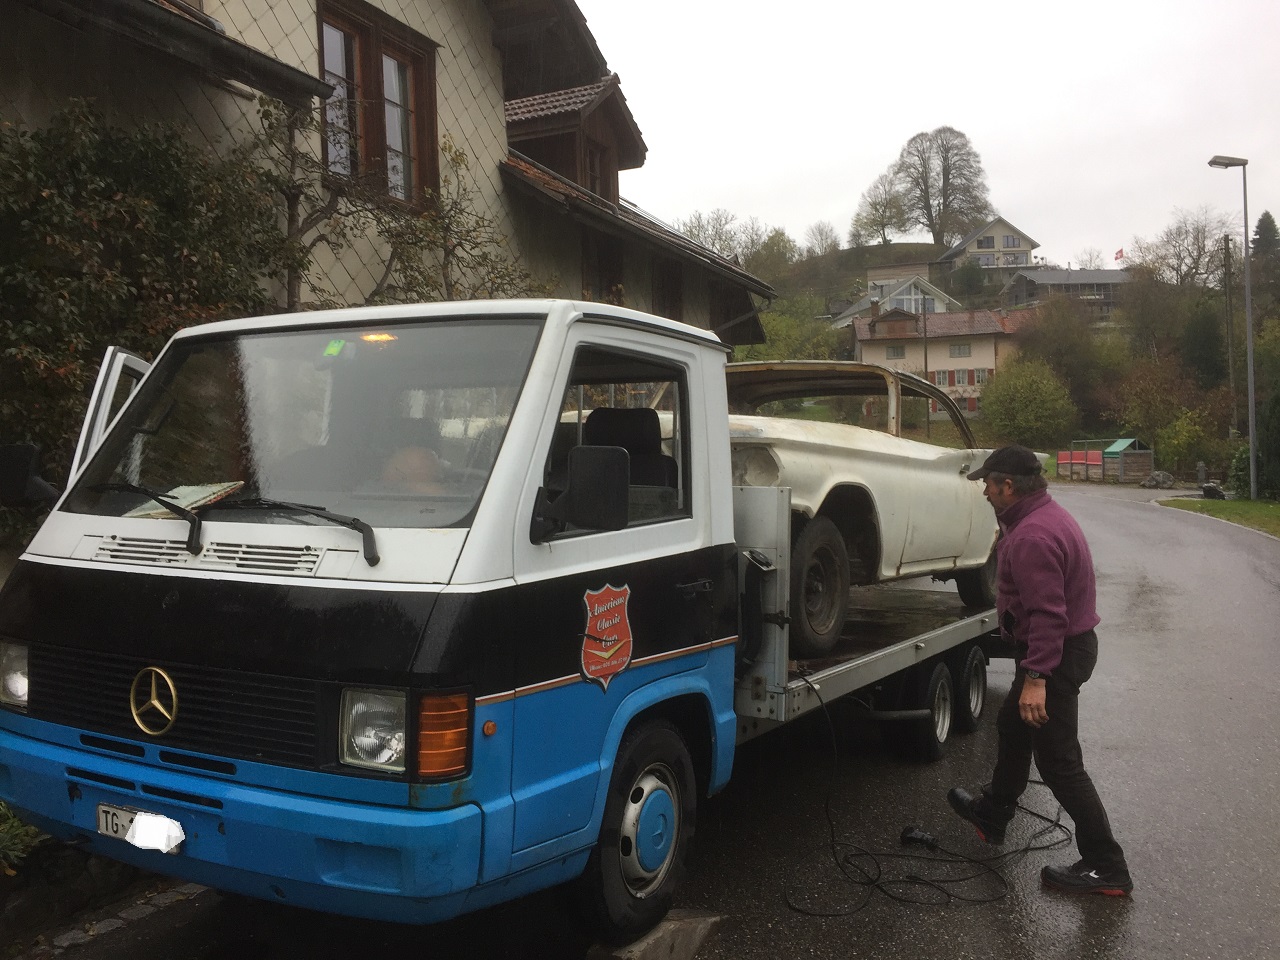 (IMG_4415_going_to_the_body_restorer.JPG) (IMG_4415_going_to_the_body_restorer.JPG)
Attachments
----------------
IMG_4412_I'm waiting.JPG (278KB - 401 downloads)
IMG_4415_going_to_the_body_restorer.JPG (391KB - 416 downloads)
|
|
| |
|
Board Moderator & Exner Expert 10K+
Posts: 13045
Location: Southern Sweden - Sturkö island | A big step Dieter, I can imagine that this is a huge relief for you. Now it will be a long wait until you get your car back again, but then the fun part begins.
Keep us posted! |
|
| |
|
Elite Veteran
Posts: 827
Location: tailFinland | I remember that stage nearly 5 years ago
I did the bodywork in my own Garage at left "dirty work side"
Edited by Adventurer 60 2017-10-29 5:15 PM
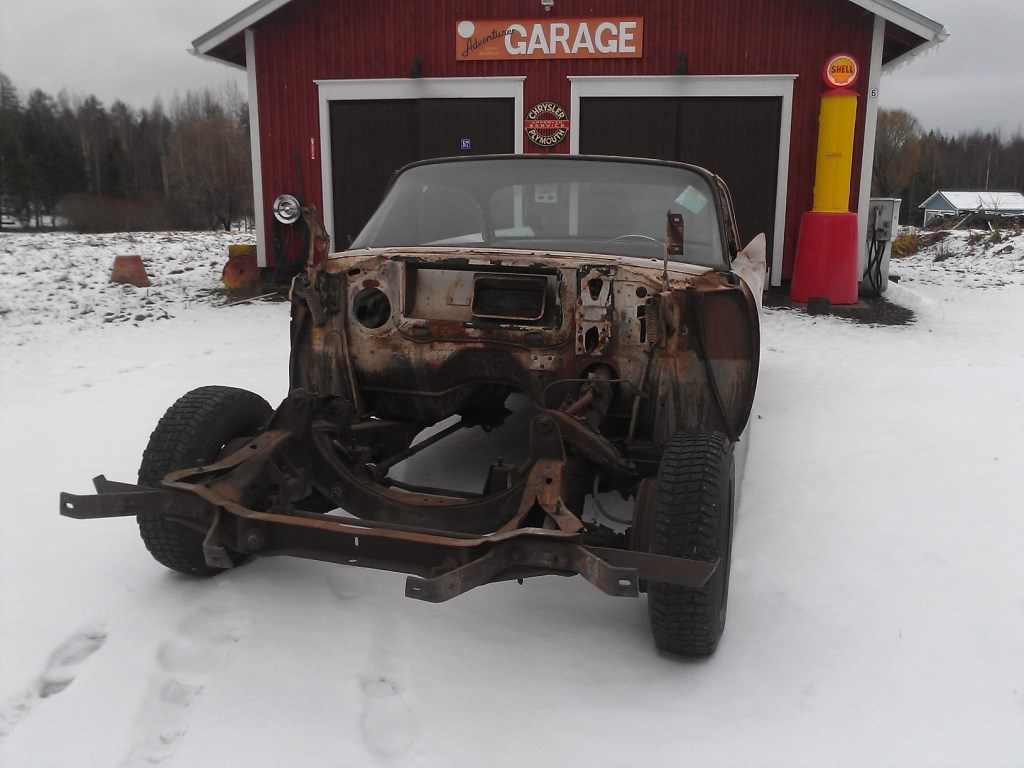 (300g.jpg) (300g.jpg)
Attachments
----------------
300g.jpg (134KB - 434 downloads)
|
|
| |
|
Elite Veteran
Posts: 827
Location: tailFinland | Is it going to be blasted and rotisserie?
In my case it was all worth of it. I first started, lying on a floor and desperately trying to weld, cut and grind hoping good results...
Then I drove 700 km and picked up the rotisserie that was made for F by the firend of mine , it was the best decission ever, doing body work has never been so fun
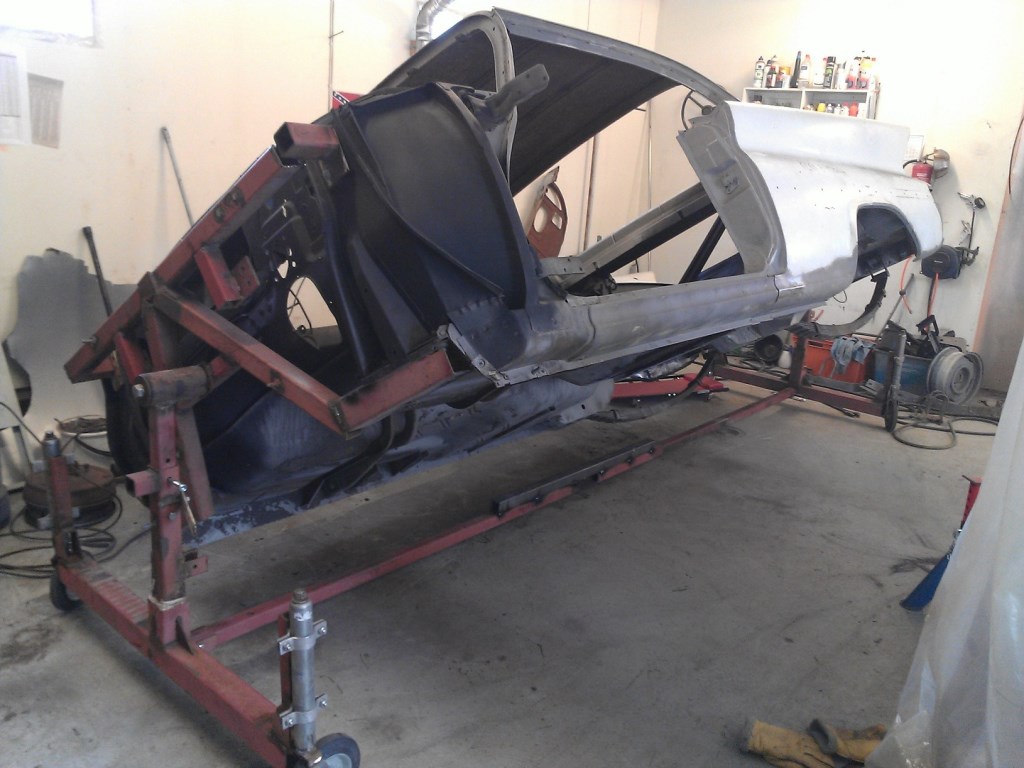 (grillisssss.jpg) (grillisssss.jpg)
Attachments
----------------
grillisssss.jpg (139KB - 430 downloads)
|
|
| |
|
Expert
Posts: 1530
Location: ZH, Switzerland | Hi Jari: thanks a lot for your input. For sure I can imagine that it's ways easier to work at the body. But I do not perform the body work myself, but Emil and his body worker (a turkian guy working like a wizard). My Letter is on a two pillar automotive lift. At least they could walk upright under the body,. But they have to work above their heads, what could be tortouring after a long time with no break. Some pictures of the progress... the name of the file is speaking for itself.... I was just surprised of how much dirt accumulated on several places. As far as I got out, none of the 1960 cars was painted at the area above the mounting structure to the subframe... Happy Restoring! Dieter
 (IMG_4421_suframe RH side straight again.JPG) (IMG_4421_suframe RH side straight again.JPG)
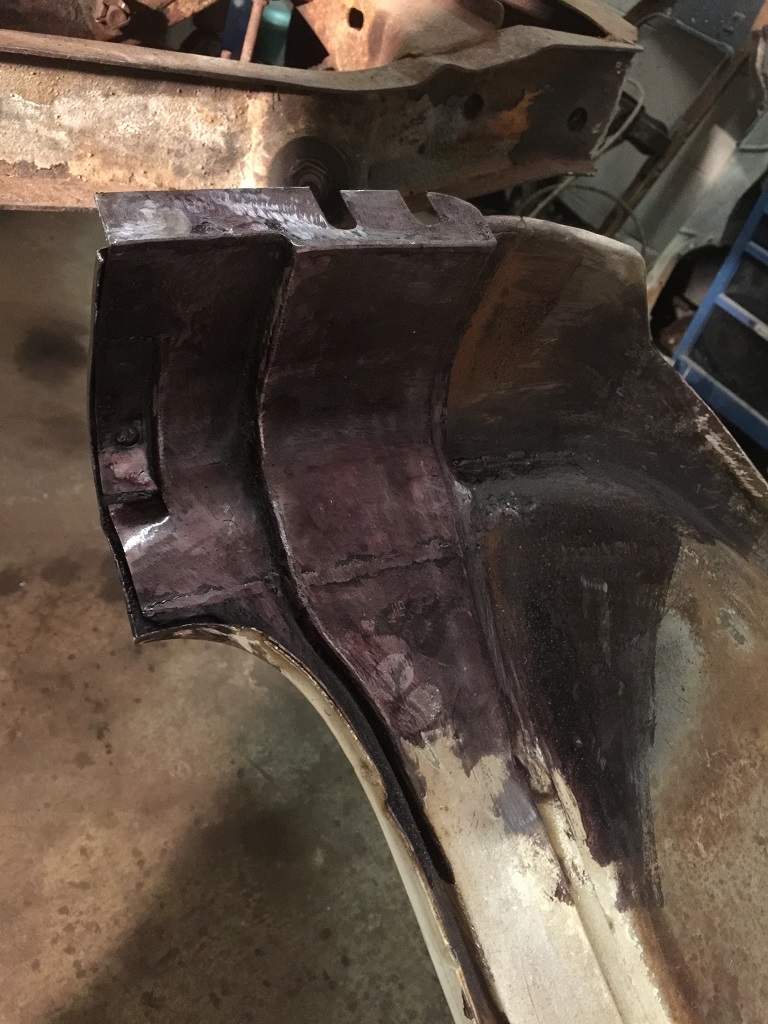 (IMG_4424_inside view RH front fender - reconstructed.JPG) (IMG_4424_inside view RH front fender - reconstructed.JPG)
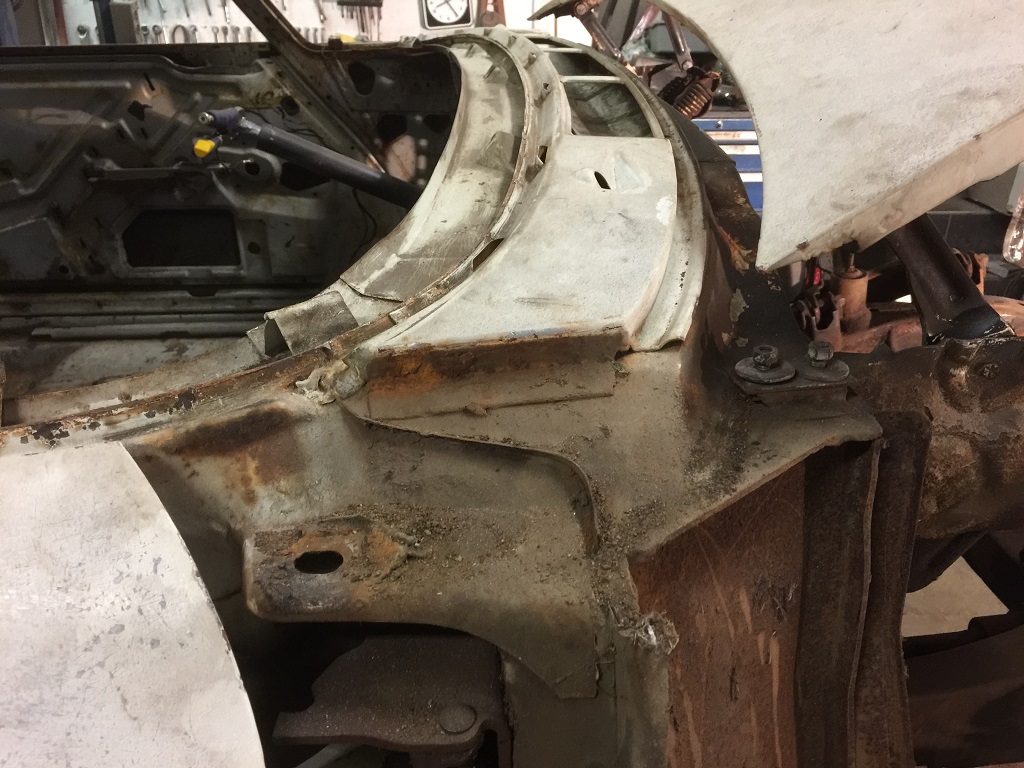 (IMG_4430_cowl area with on fender - look how much dirt accumulated here.JPG) (IMG_4430_cowl area with on fender - look how much dirt accumulated here.JPG)
Attachments
----------------
IMG_4421_suframe RH side straight again.JPG (285KB - 402 downloads)
IMG_4424_inside view RH front fender - reconstructed.JPG (271KB - 422 downloads)
IMG_4430_cowl area with on fender - look how much dirt accumulated here.JPG (274KB - 399 downloads)
|
|
| |
|
Board Moderator & Exner Expert 10K+
Posts: 13045
Location: Southern Sweden - Sturkö island | The progress seems to go on in a steady way and the result looks good Dieter! Thanks' for posting all Pictures - a good help for the Chrysler '60 owners. Keep us posted. |
|
| |
|
Expert
Posts: 1208
Location: SWITZERLAND | Happy for you Dieter, my "old" friend Emil is doing this job for you at resonable costs and good SWISS quality (similar as Swedish!).
Soon we well not see anymore rusty parts here, but "new" ones as Original when your baby will be born.
Here the other baby of Emil in his hand (year 2000), no rust, all clean.
Go on with luck! - SERGE - 
Edited by sermey 2017-11-10 9:24 PM
 (2000-05-21 Emils Baby.jpg) (2000-05-21 Emils Baby.jpg)
Attachments
----------------
2000-05-21 Emils Baby.jpg (120KB - 398 downloads)
|
|
| |
|
Expert
Posts: 1530
Location: ZH, Switzerland | sermey - 2017-11-10 3:16 AM Happy for you Dieter, my "old" friend Emil is doing this job for you at resonable costs and good SWISS quality (similar as Swedish!).
Soon we well not see anymore rusty parts here, but "new" ones as Original when your baby will be born.
Here the other baby of Emil in his hand (year 2000), no rust, all clean.
Go on with luck! - SERGE - Thanks a lot Serge. Is the baby the sister or brother of Cheyenne (apparently the older daugher)? Take care, Dieter |
|
| |
|
Expert
Posts: 1530
Location: ZH, Switzerland | This afternoon I met Emil again. Two guys were working at my Letter, but I didn't talk to them, just with Emil. A steady progress . I just showed Emil the rust damage at the front structure of the passenger door as a reminder not to forget. Emil explainded all work they performed this week. He didn't know what the recession (rain drainage) is for. I told him from my mind, that early 60 Chryslers had this recession instead of a tube drainage like e.g. Jari installed in his G. The rear reinforcement bar is bent back and all surrounding sheet metals replaced. The inner rocker and trunk floor section has been replaced because all these parts were crushed by an accident. At this pictures you'll notice the rear end of the 300 H Cheyenne is restoring (I asked Emil for the name of his daughter). Next Saturday I'm going to remove the tar proctection in the passenger room and at the underside of the passenger floor.... I promised it. I think the names of the pictures are explaining enough now. If not just PM me. Happy Restoring! Dieter
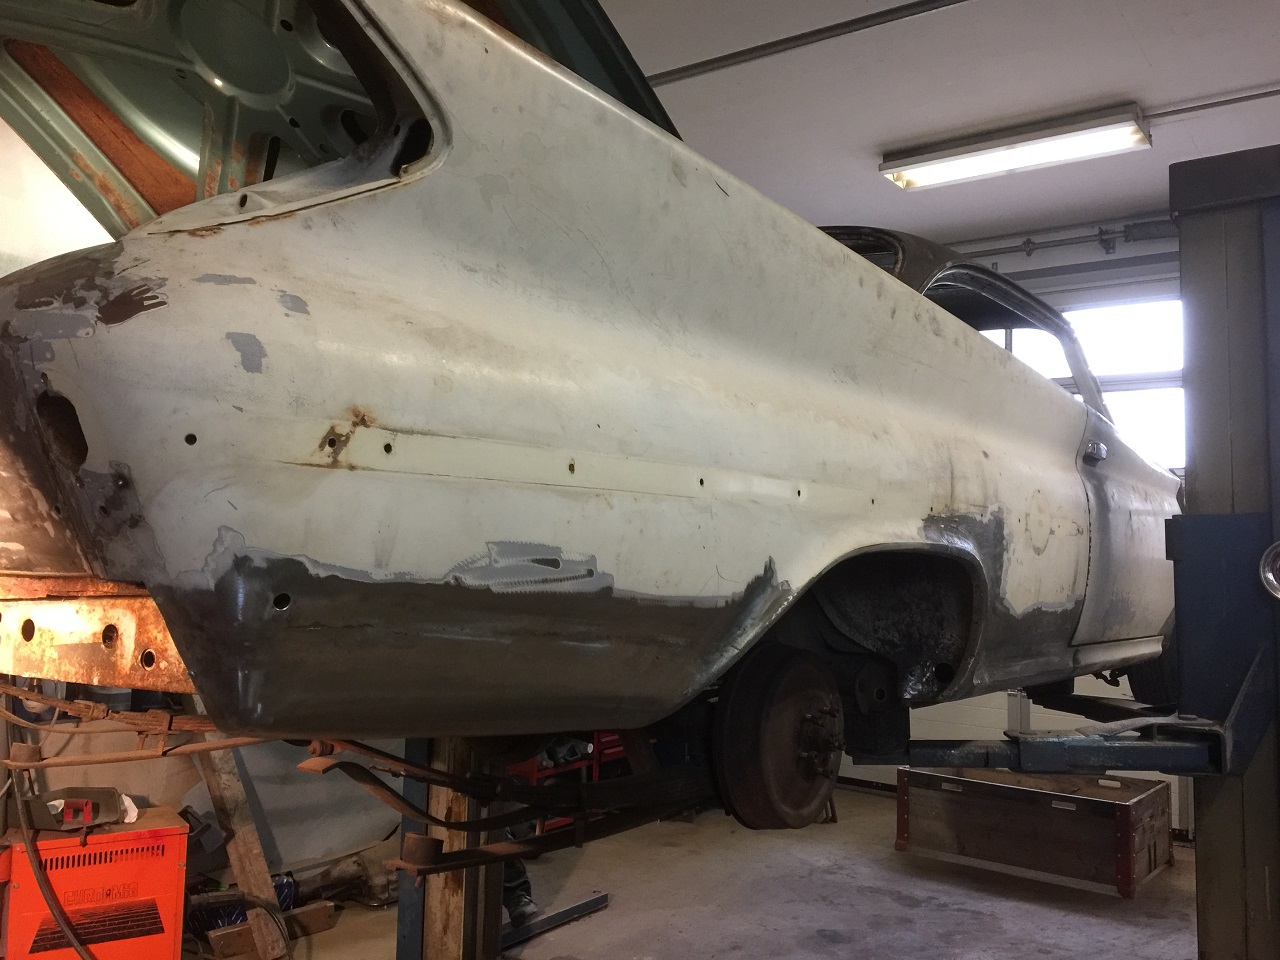 (IMG_4446_passenger rear quarter view.JPG) (IMG_4446_passenger rear quarter view.JPG)
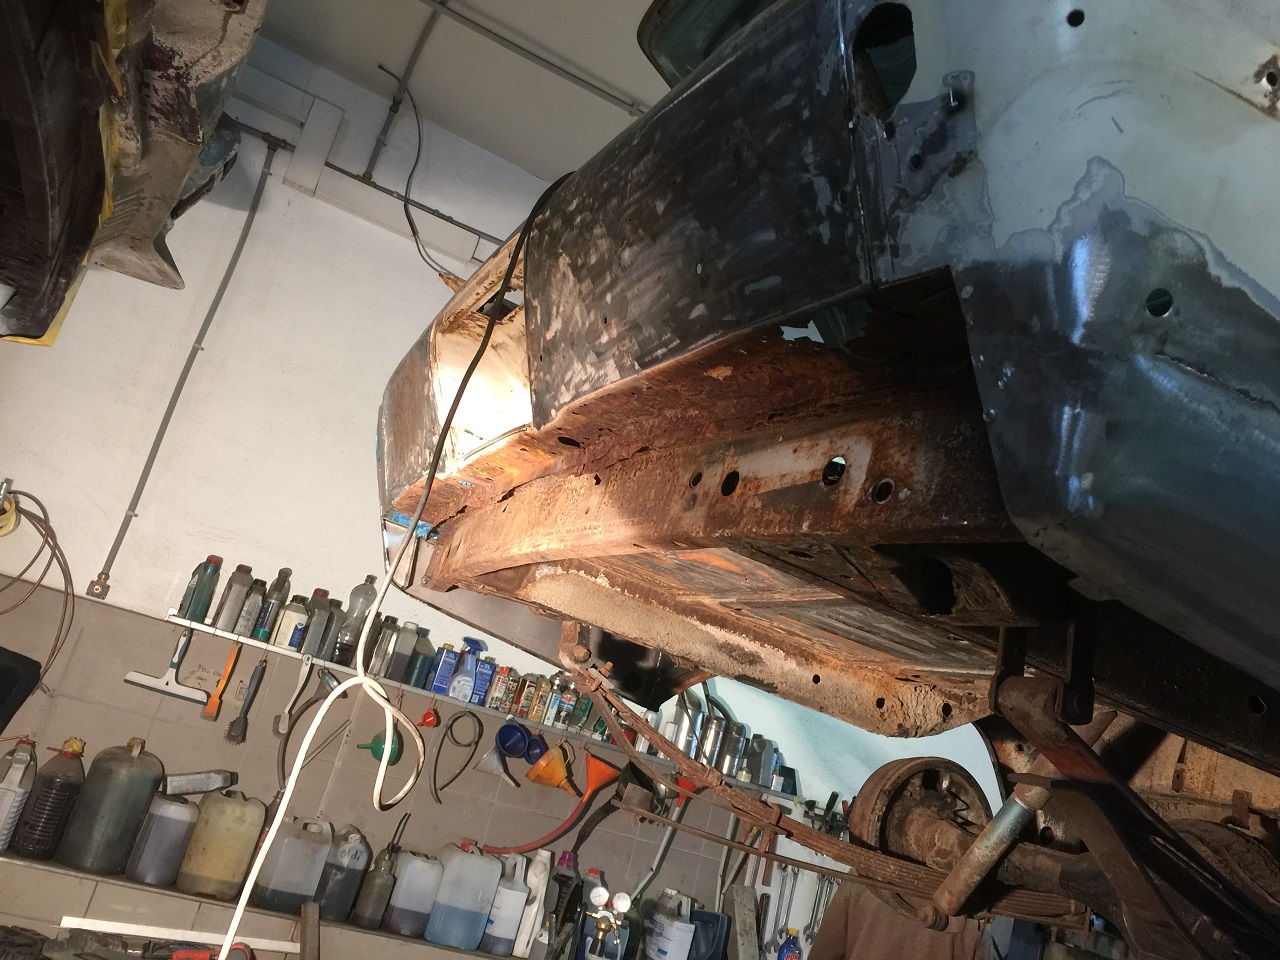 (IMG_4447_rear view with the H of Cheyenne.JPG) (IMG_4447_rear view with the H of Cheyenne.JPG)
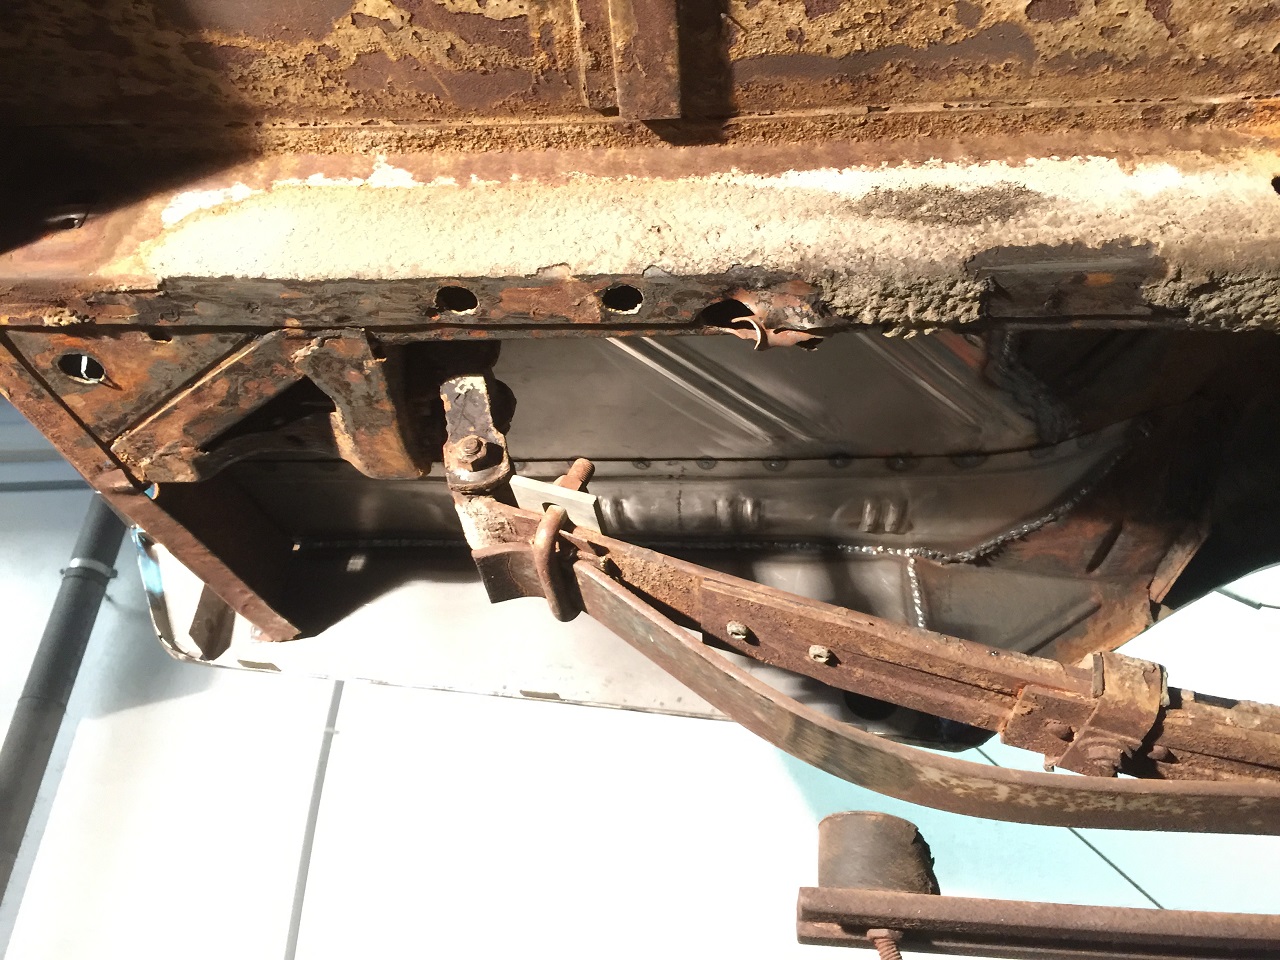 (IMG_4448_driver side rear undercarriage, accident damage repaired.JPG) (IMG_4448_driver side rear undercarriage, accident damage repaired.JPG)
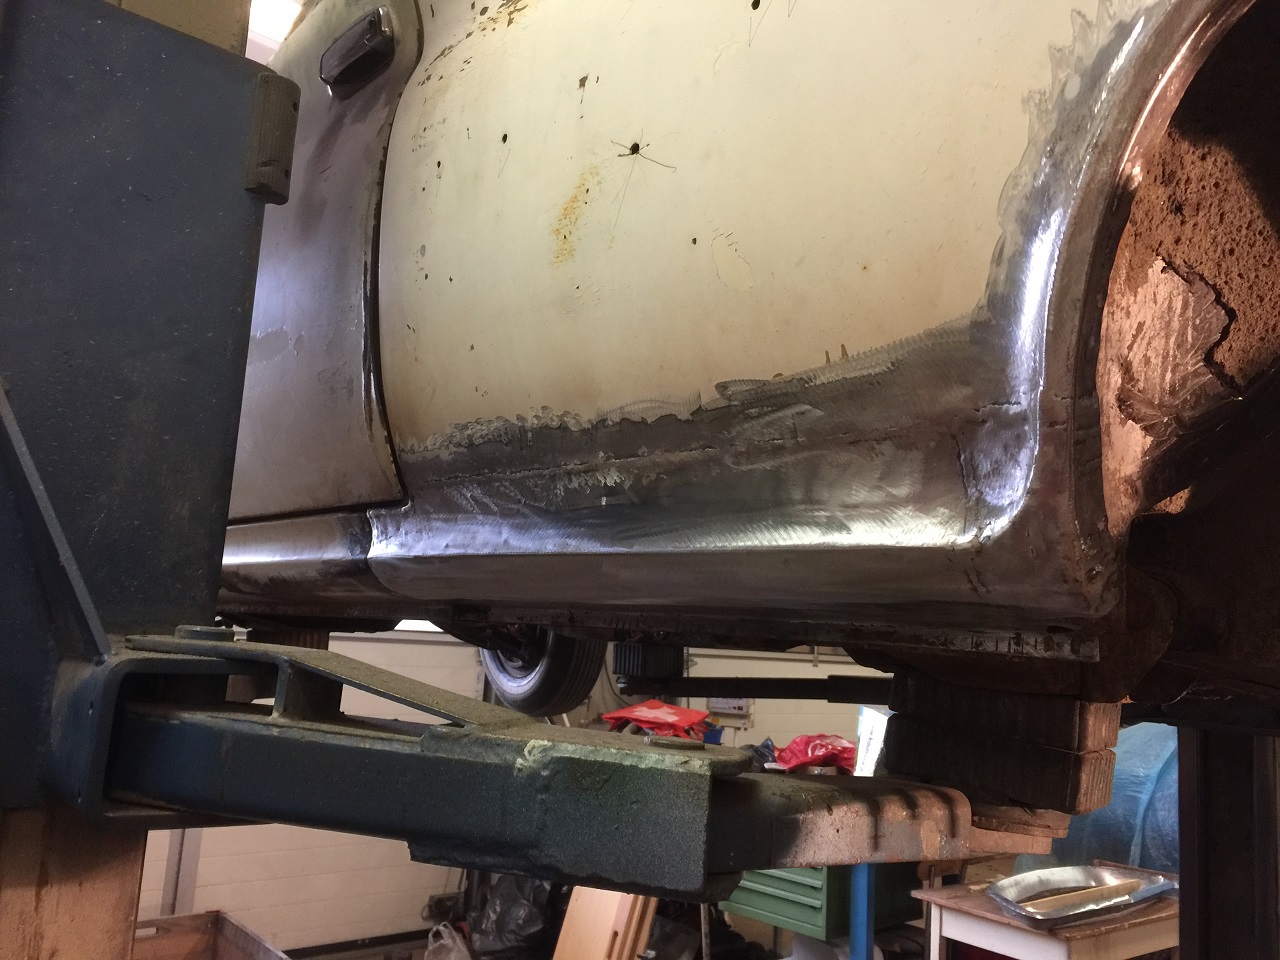 (IMG_4449_drivers side front, quarter lower section, repaired.JPG) (IMG_4449_drivers side front, quarter lower section, repaired.JPG)
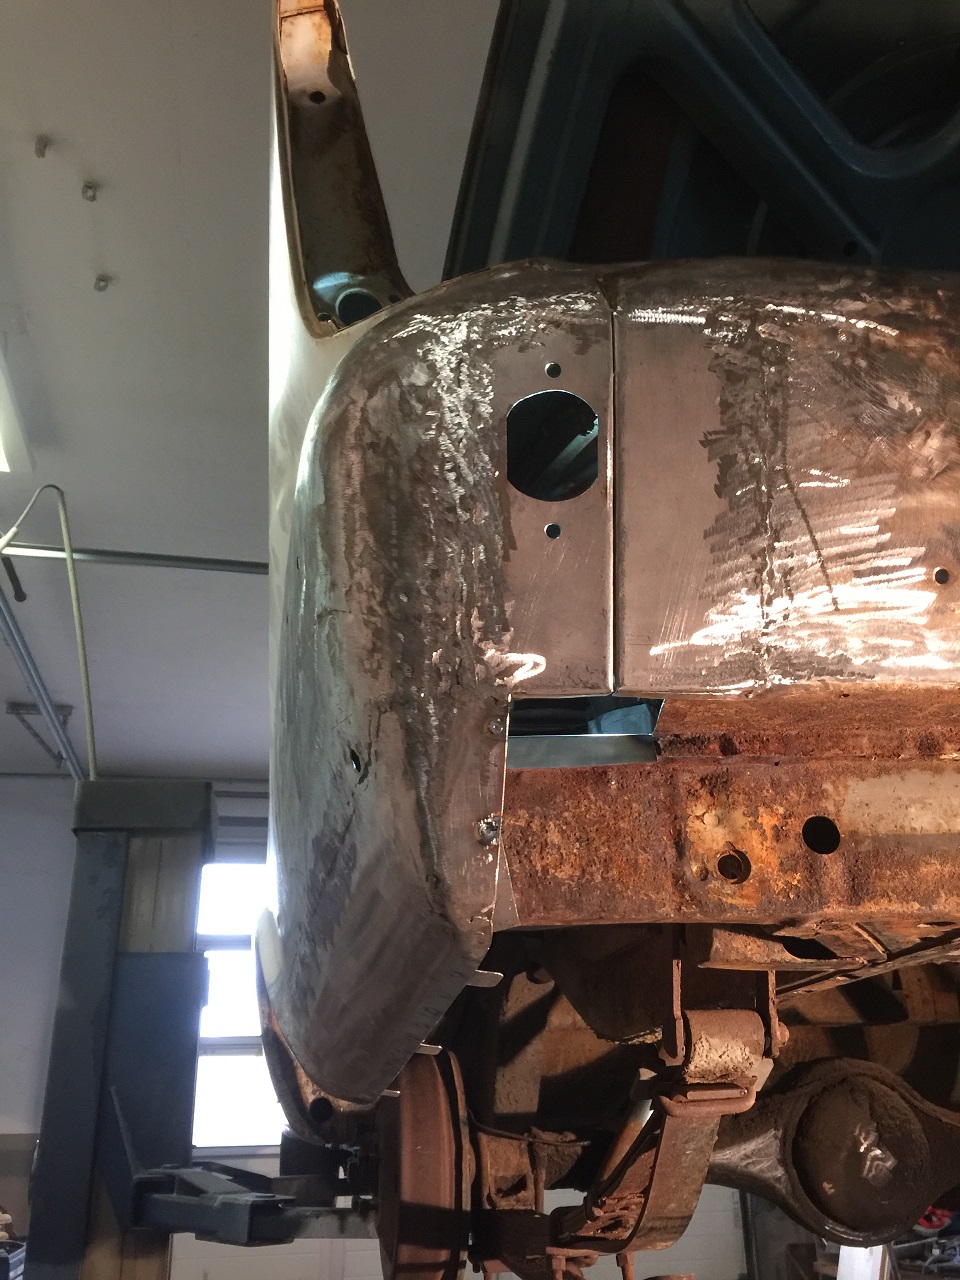 (IMG_4450_drvier side rear, accident repaired.JPG) (IMG_4450_drvier side rear, accident repaired.JPG)
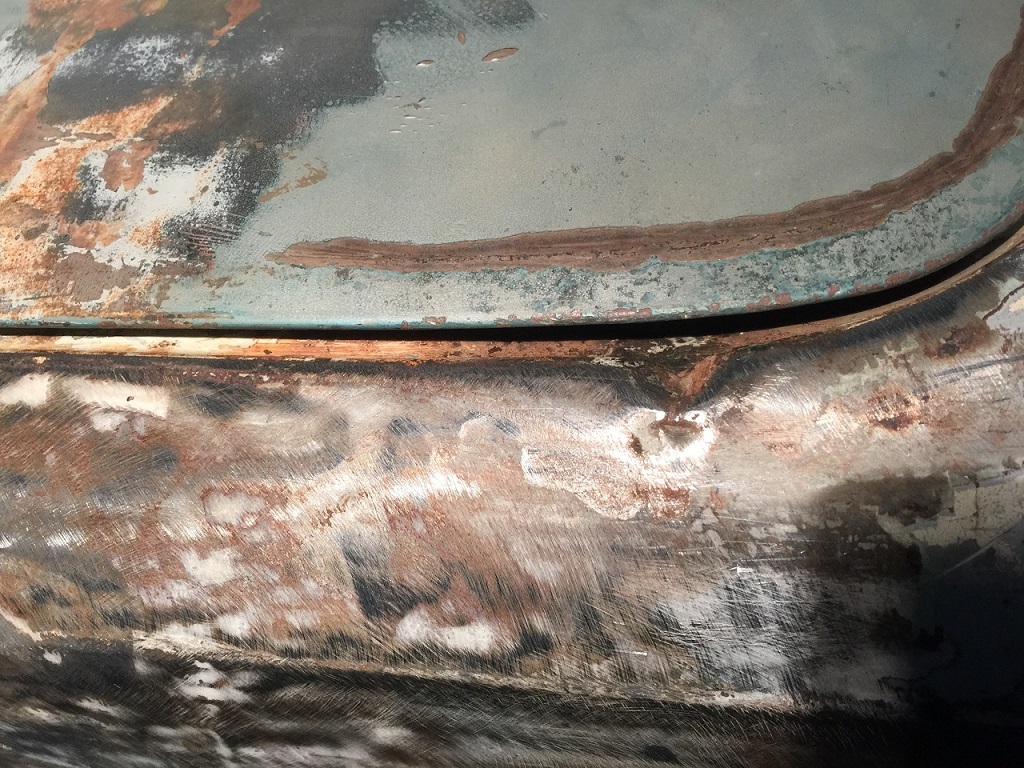 (IMG_4451_passenger side rear detail, rain drainage.JPG) (IMG_4451_passenger side rear detail, rain drainage.JPG)
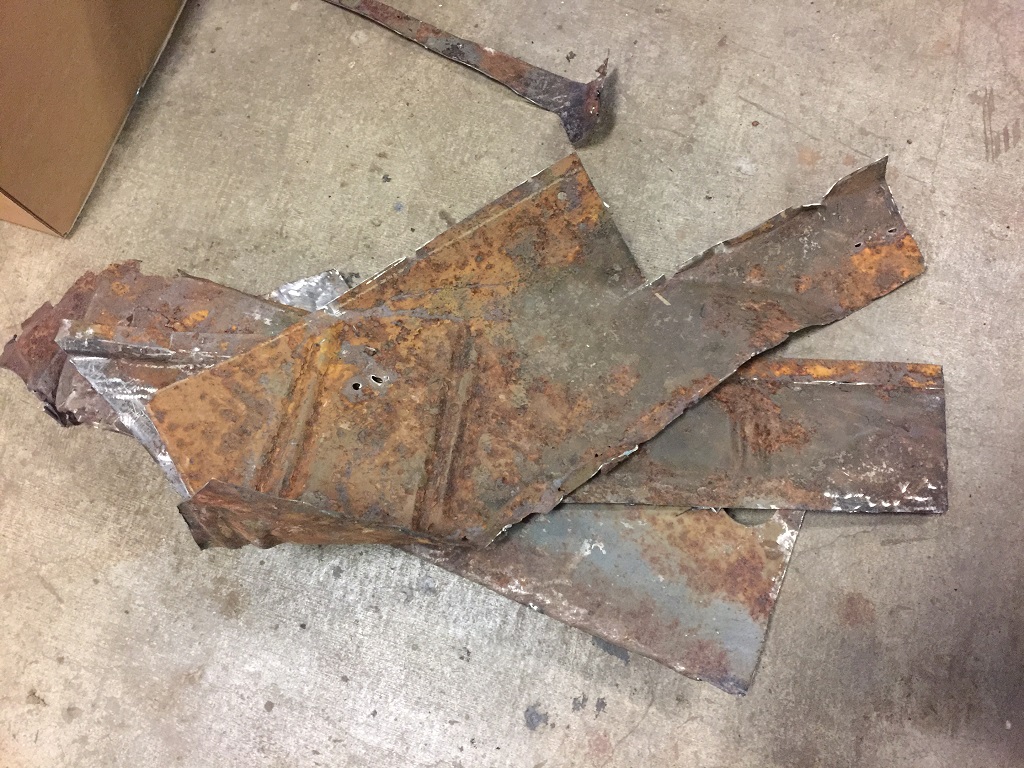 (IMG_4452_the thrash can is filling quite quick, part 1.JPG) (IMG_4452_the thrash can is filling quite quick, part 1.JPG)
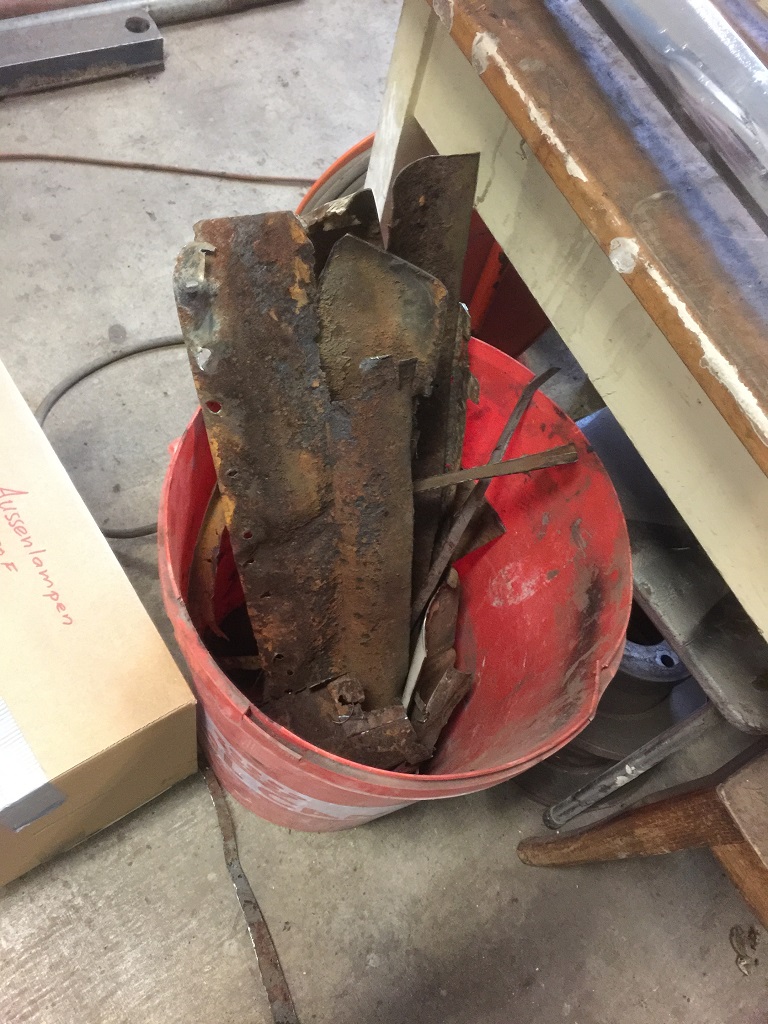 (IMG_4453_the trash can if filling quite fast, part 2.JPG) (IMG_4453_the trash can if filling quite fast, part 2.JPG)
Attachments
----------------
IMG_4446_passenger rear quarter view.JPG (326KB - 406 downloads)
IMG_4447_rear view with the H of Cheyenne.JPG (426KB - 404 downloads)
IMG_4448_driver side rear undercarriage, accident damage repaired.JPG (424KB - 404 downloads)
IMG_4449_drivers side front, quarter lower section, repaired.JPG (359KB - 419 downloads)
IMG_4450_drvier side rear, accident repaired.JPG (381KB - 413 downloads)
IMG_4451_passenger side rear detail, rain drainage.JPG (374KB - 423 downloads)
IMG_4452_the thrash can is filling quite quick, part 1.JPG (358KB - 405 downloads)
IMG_4453_the trash can if filling quite fast, part 2.JPG (288KB - 430 downloads)
|
|
| |
|
Expert
Posts: 1208
Location: SWITZERLAND | Thanks a lot Serge. Is the baby the sister or brother of Cheyenne (apparently the older daugher)? Dieter, this baby IS Cheyenne, look at the date of the picture (2000). You may have seen her now, 17 years old. When your Letter will have become rustfree and ready, she will be as well be ready for marry . . . . still rustfree! Friendly - SERGE -
Edited by sermey 2017-11-11 11:01 AM
|
|
| |
|
Expert
Posts: 1530
Location: ZH, Switzerland | Today I worked almost seven hours with no food and no beverage to remove the tar layer on the passenger room floor. More work with the heat gun at the undercarriage tomorrow.
Beside the works performed and documented with a picture, the rust damage at the passenger side door (top front of the inner structure) is repaired and also a rust hole near the mounting point of the body to the subframe (very rare damage according Emil). Still there are small adjusting issues at the rear lamp (driver side). Remember, the complete corner is reconstructed due to an older accident. Happy Restoring! Dieter BTW: at the passenger side c pillar was a crack in the fender at the front area of the c pillar - repaired...
Edited by di_ch_NY56 2017-11-18 1:29 PM
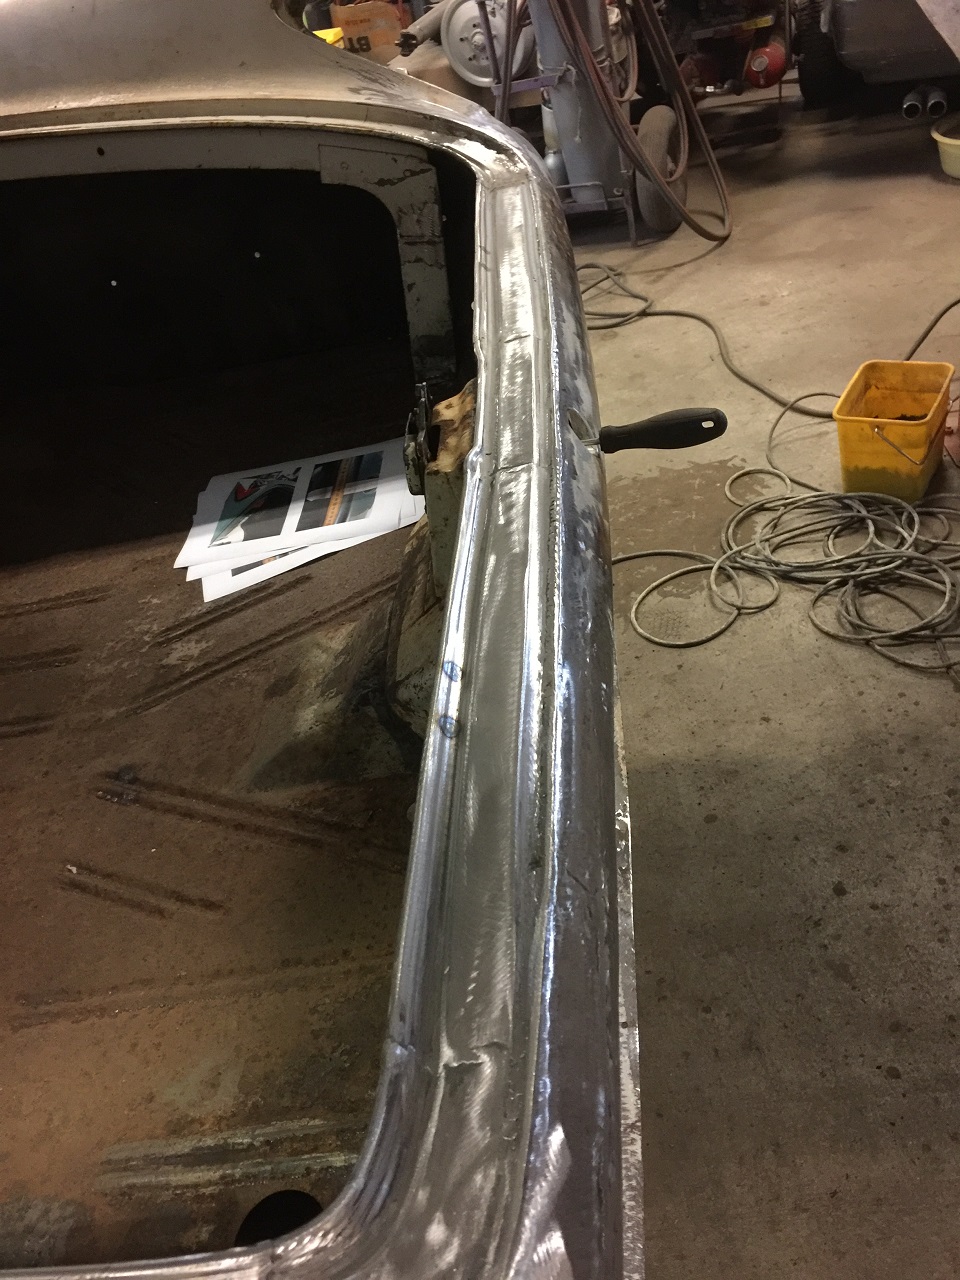 (IMG_4505_rear end reconstructed.JPG) (IMG_4505_rear end reconstructed.JPG)
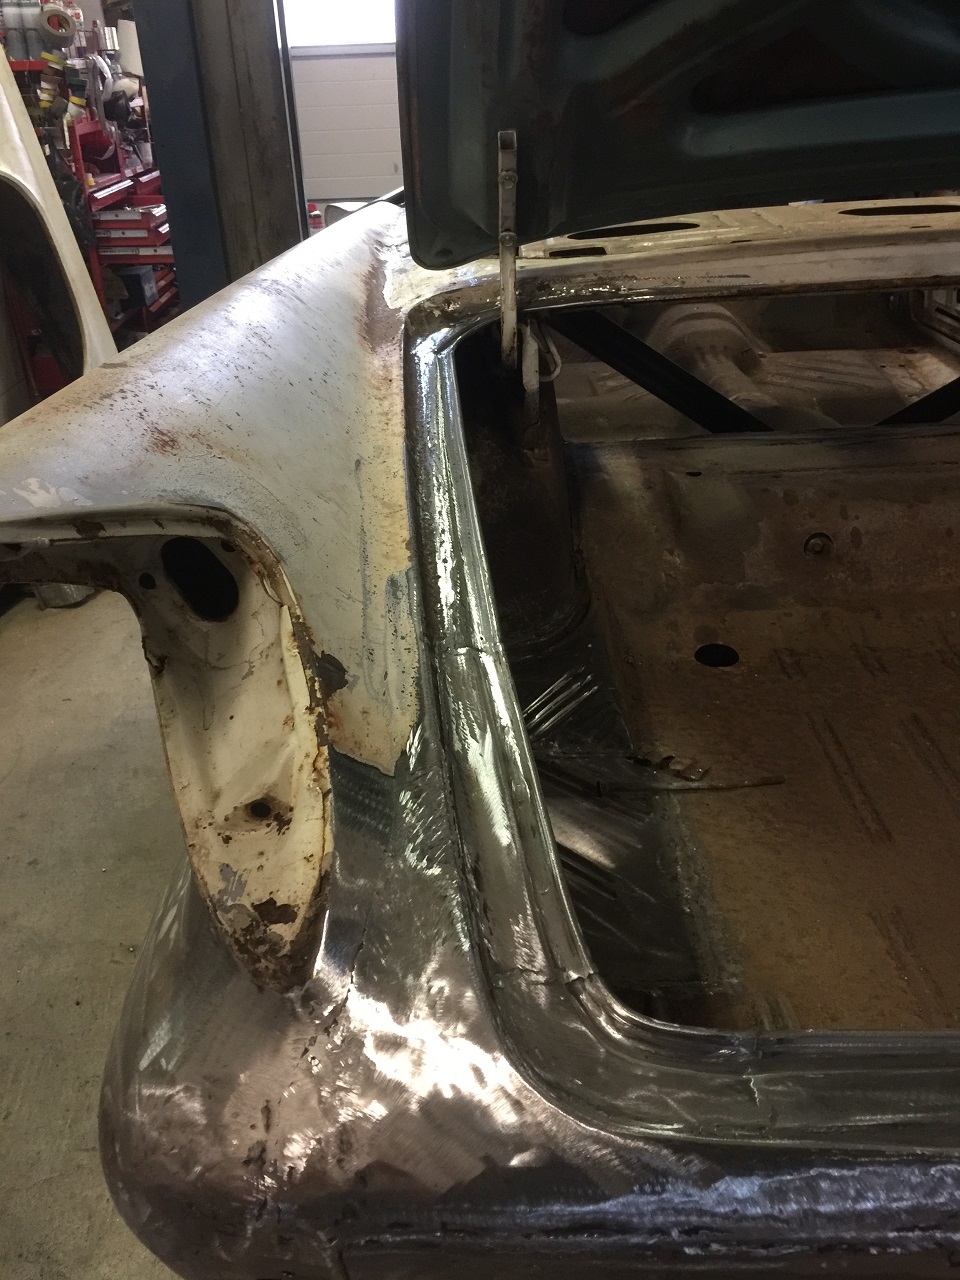 (IMG_4506_drivers side weatherstrip channel reconstructed.JPG) (IMG_4506_drivers side weatherstrip channel reconstructed.JPG)
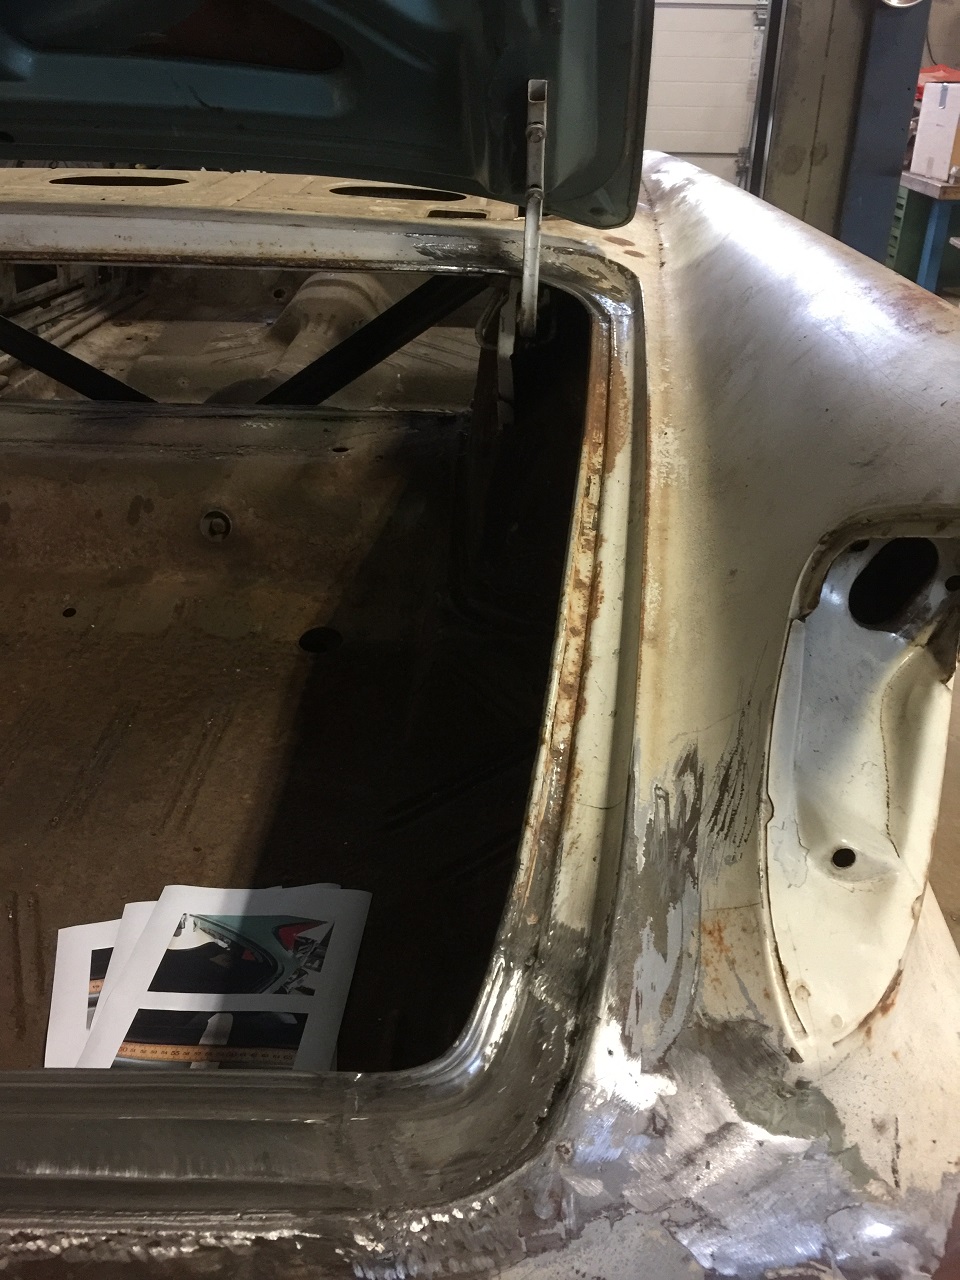 (IMG_4507_passengerside weatherstrip channel as it is.JPG) (IMG_4507_passengerside weatherstrip channel as it is.JPG)
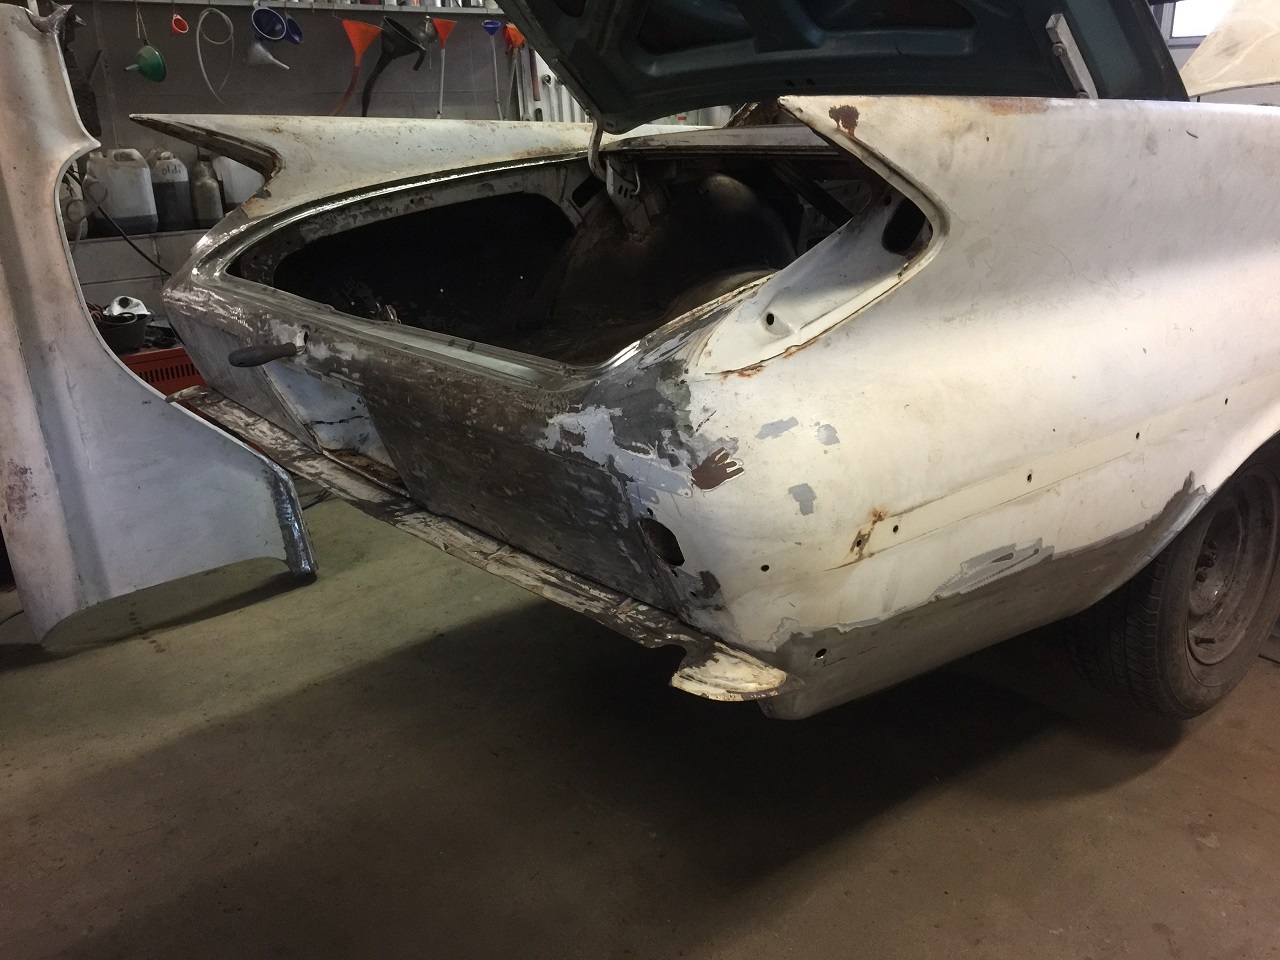 (IMG_4508_rear end complete.JPG) (IMG_4508_rear end complete.JPG)
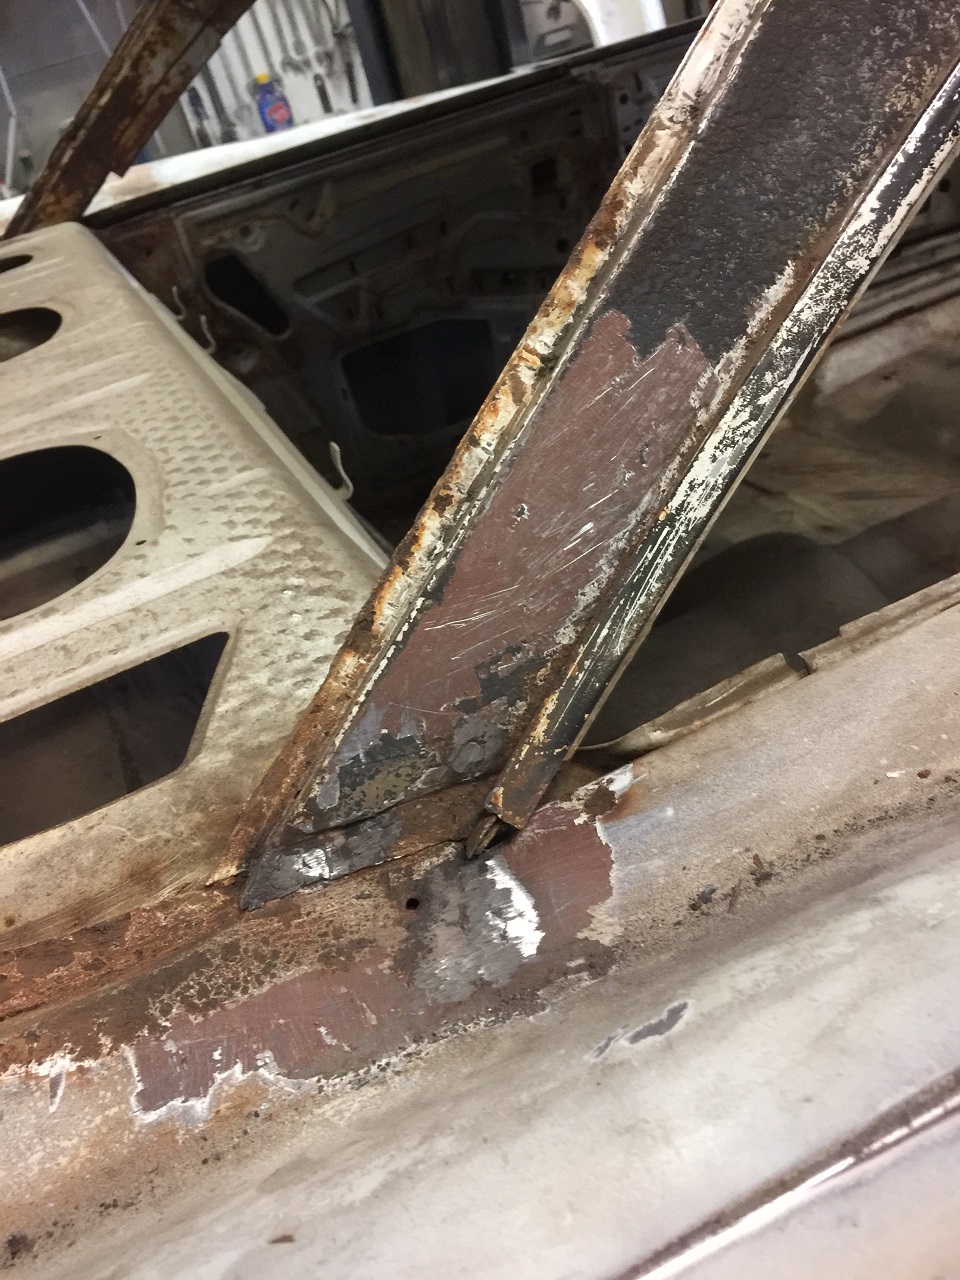 (IMG_4509_passenger side c pillar repaired.JPG) (IMG_4509_passenger side c pillar repaired.JPG)
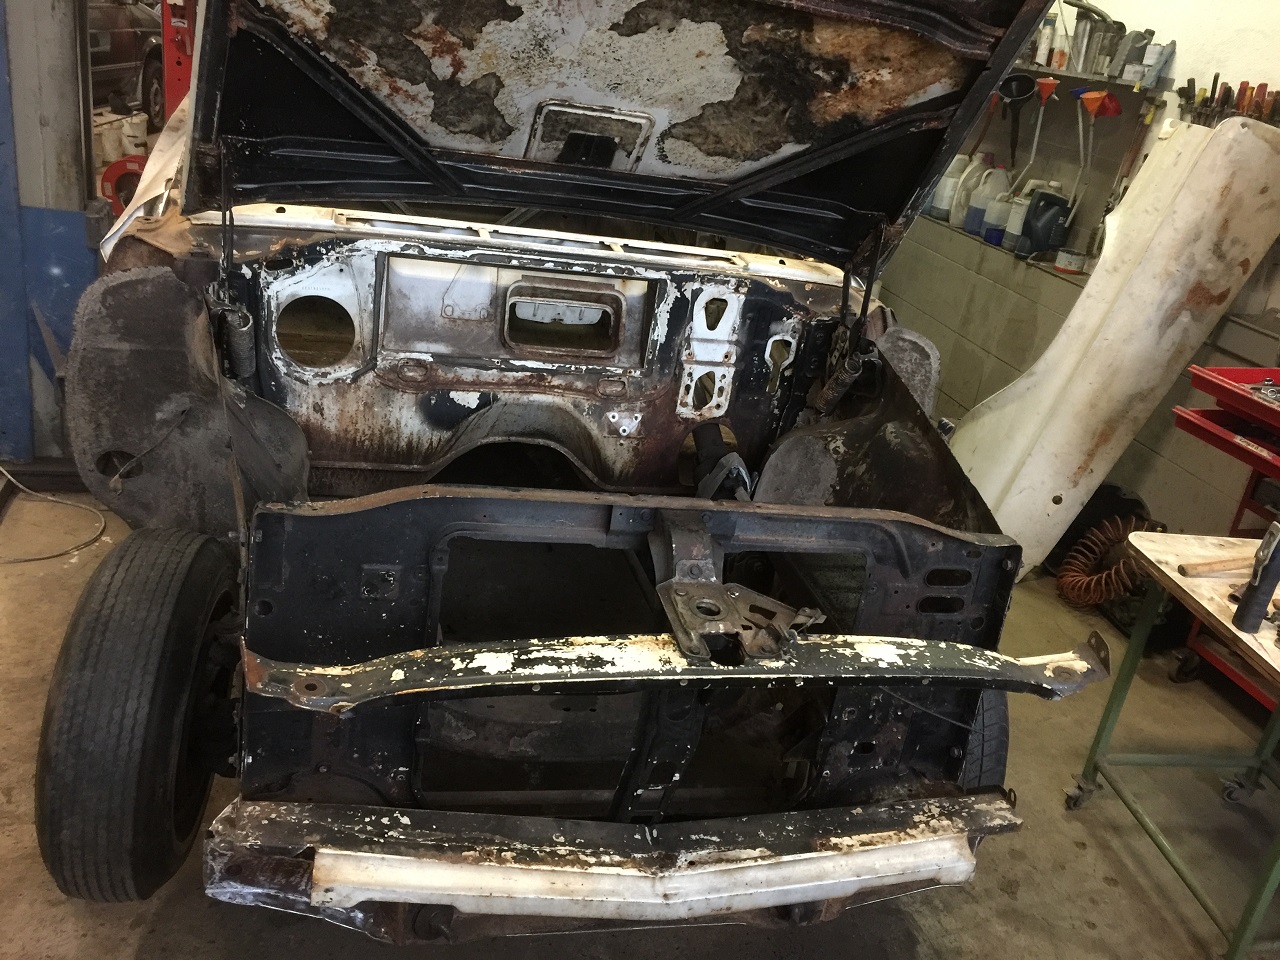 (IMG_4511_inner fender mounted with radiator yoke.JPG) (IMG_4511_inner fender mounted with radiator yoke.JPG)
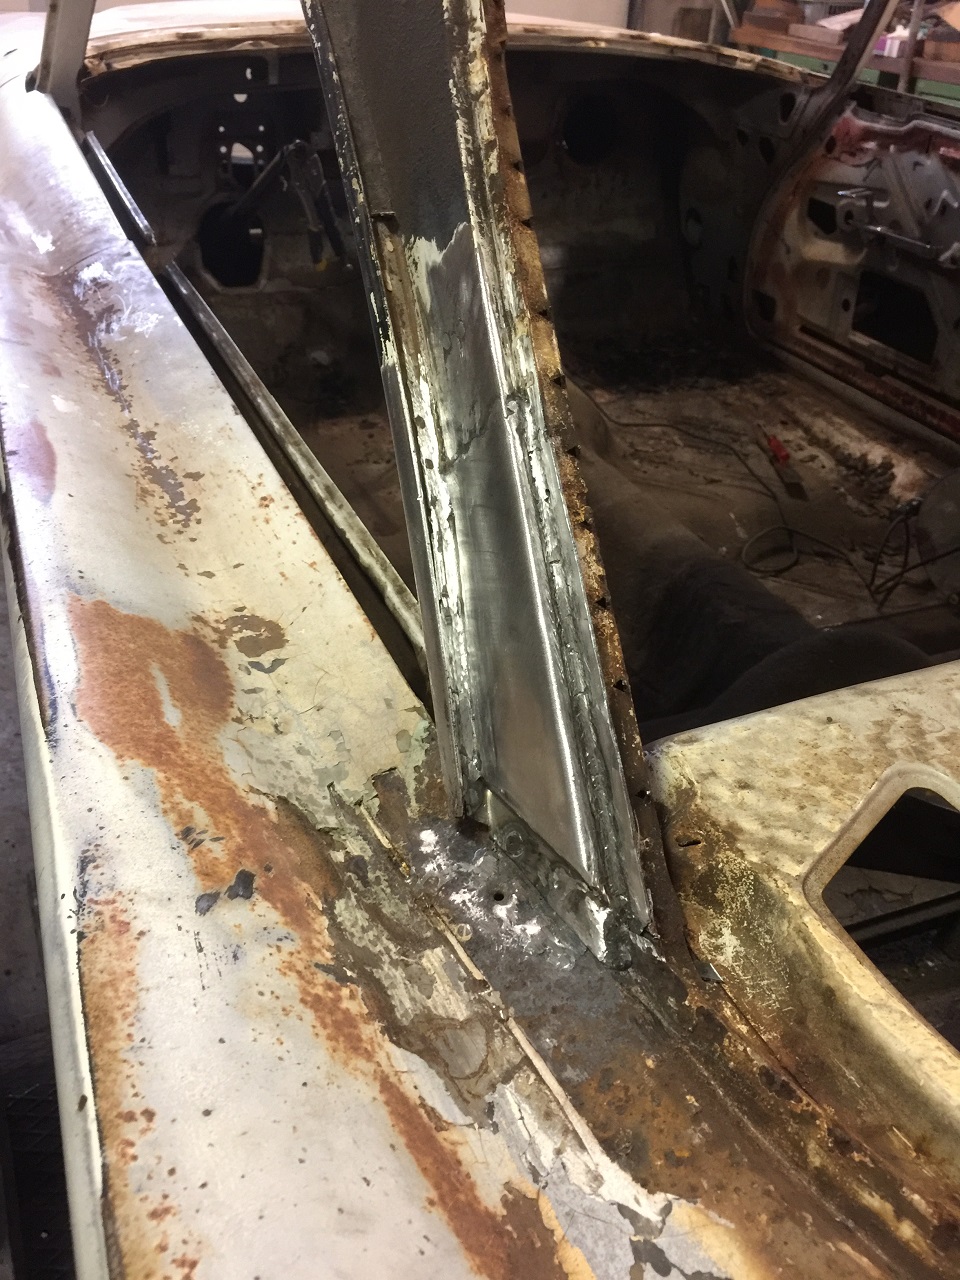 (IMG_4514 drivers side c pillar reconstructed.JPG) (IMG_4514 drivers side c pillar reconstructed.JPG)
 (IMG_4516_deck lid adjusted.JPG) (IMG_4516_deck lid adjusted.JPG)
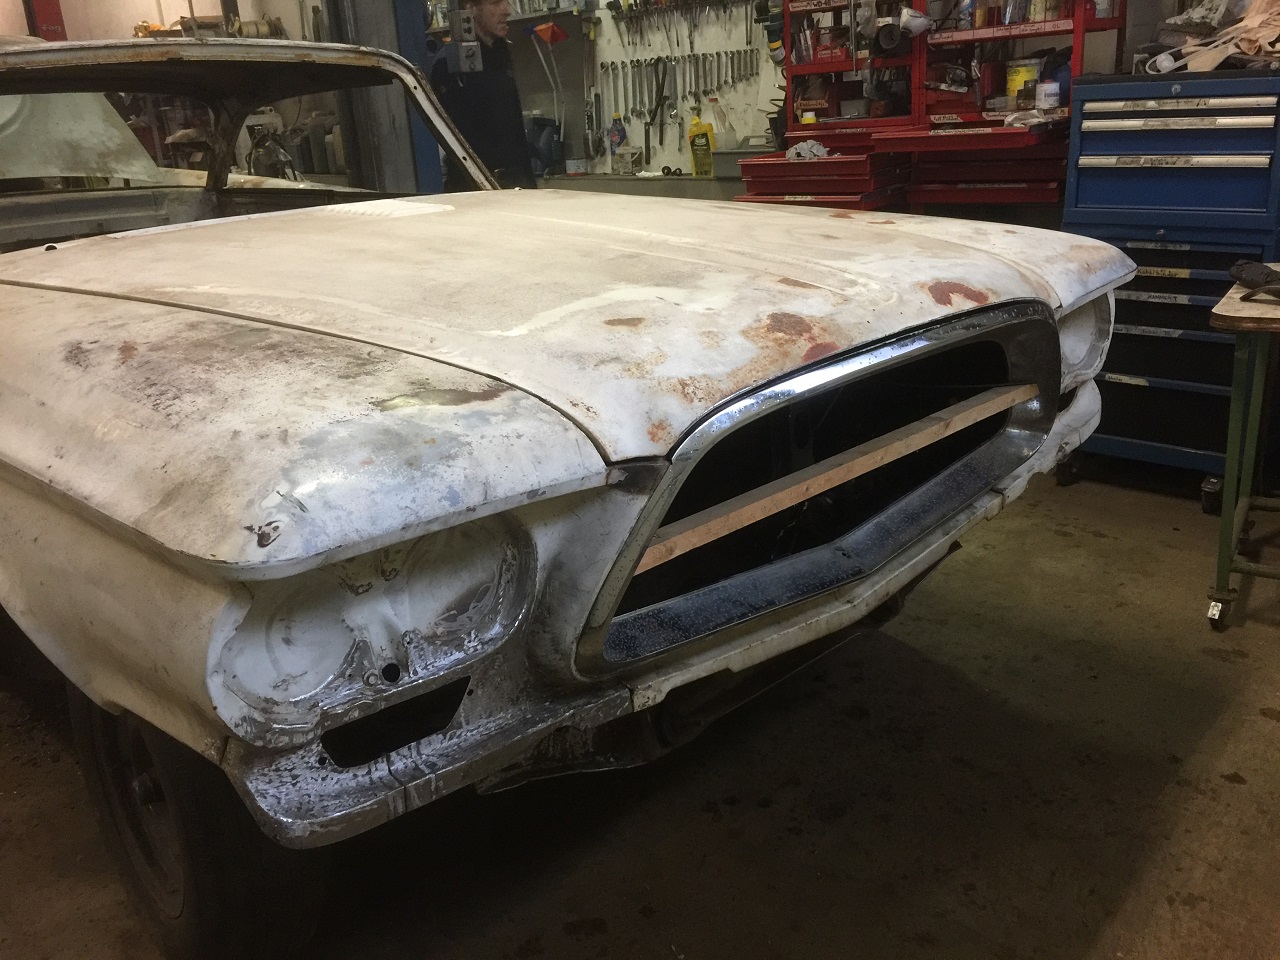 (IMG_4517_front end check with grille frame.JPG) (IMG_4517_front end check with grille frame.JPG)
Attachments
----------------
IMG_4505_rear end reconstructed.JPG (414KB - 498 downloads)
IMG_4506_drivers side weatherstrip channel reconstructed.JPG (387KB - 478 downloads)
IMG_4507_passengerside weatherstrip channel as it is.JPG (367KB - 492 downloads)
IMG_4508_rear end complete.JPG (341KB - 465 downloads)
IMG_4509_passenger side c pillar repaired.JPG (441KB - 487 downloads)
IMG_4511_inner fender mounted with radiator yoke.JPG (486KB - 497 downloads)
IMG_4514 drivers side c pillar reconstructed.JPG (450KB - 482 downloads)
IMG_4516_deck lid adjusted.JPG (356KB - 497 downloads)
IMG_4517_front end check with grille frame.JPG (398KB - 483 downloads)
|
|
| |
|
Board Moderator & Exner Expert 10K+
Posts: 13045
Location: Southern Sweden - Sturkö island | I'm happy to see that there's a steady progress on your car Dieter! I bet there's less butterflies in your stomach when you look at your car now.... |
|
| |
|
Expert
Posts: 1530
Location: ZH, Switzerland | Thanks Wizard (Sven) for your encouraging words.
On Sunday I was working for 11 hours with the heat gun and two scrapers (a painters scraper and a wood worker scraper). My open question is now: the routing of the weatherstrip between the inner and the outer front fender. Originally the weatherstrip was starting about two inches above the side fin of the outer front fender. But the question in discussion with Emil rose the question why not up to the corner at the inner fender... Happy Restoring! Dieter BTW: I almost cleaned the complete front suspension (steering link, lower control arms), a part of the propeller shaft tunnel and the floor area next to the tunnel...
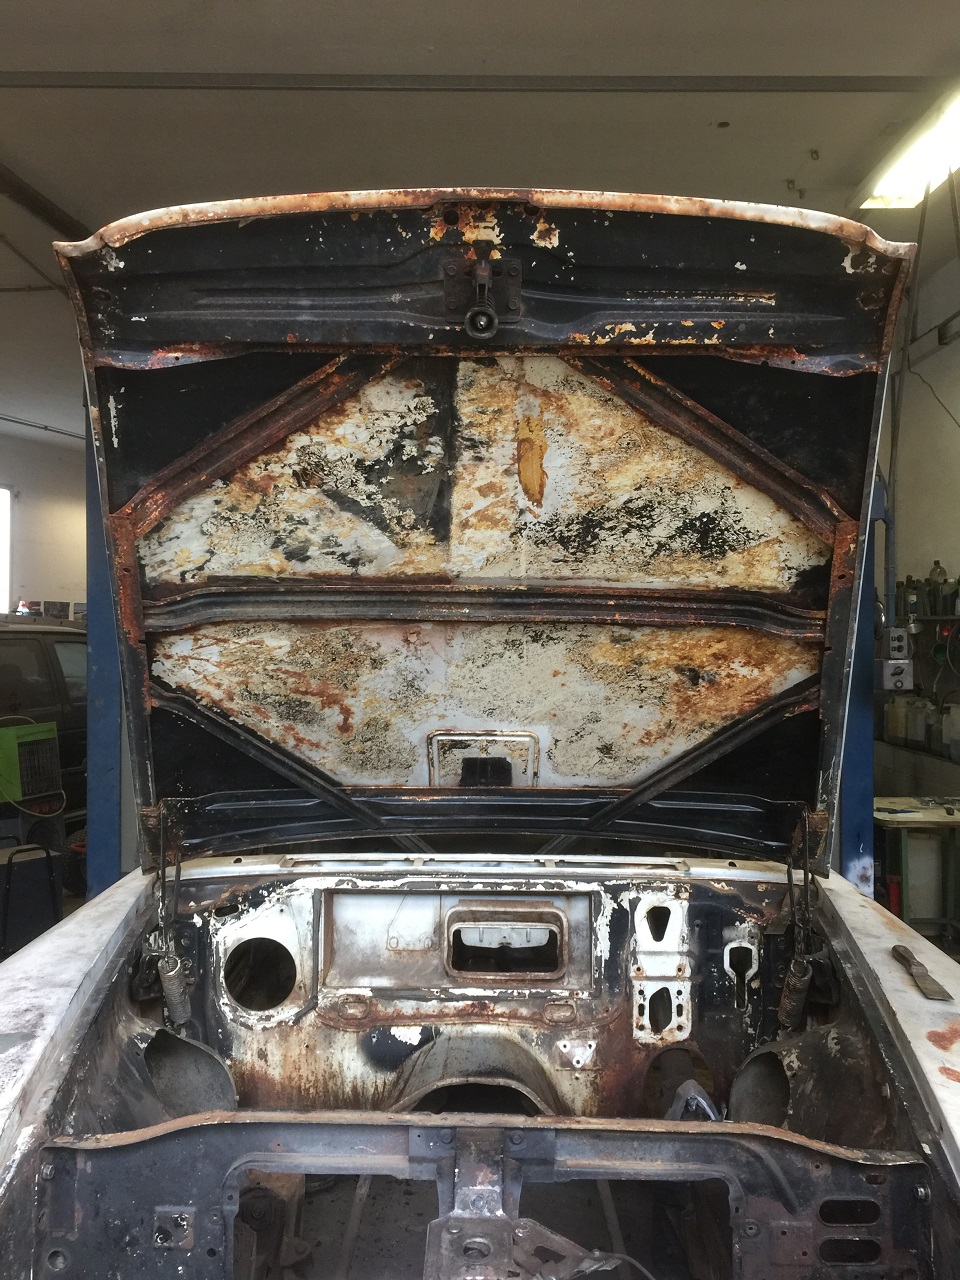 (IMG_4522_the inner side of the hood is cleaned (insulator pad).JPG) (IMG_4522_the inner side of the hood is cleaned (insulator pad).JPG)
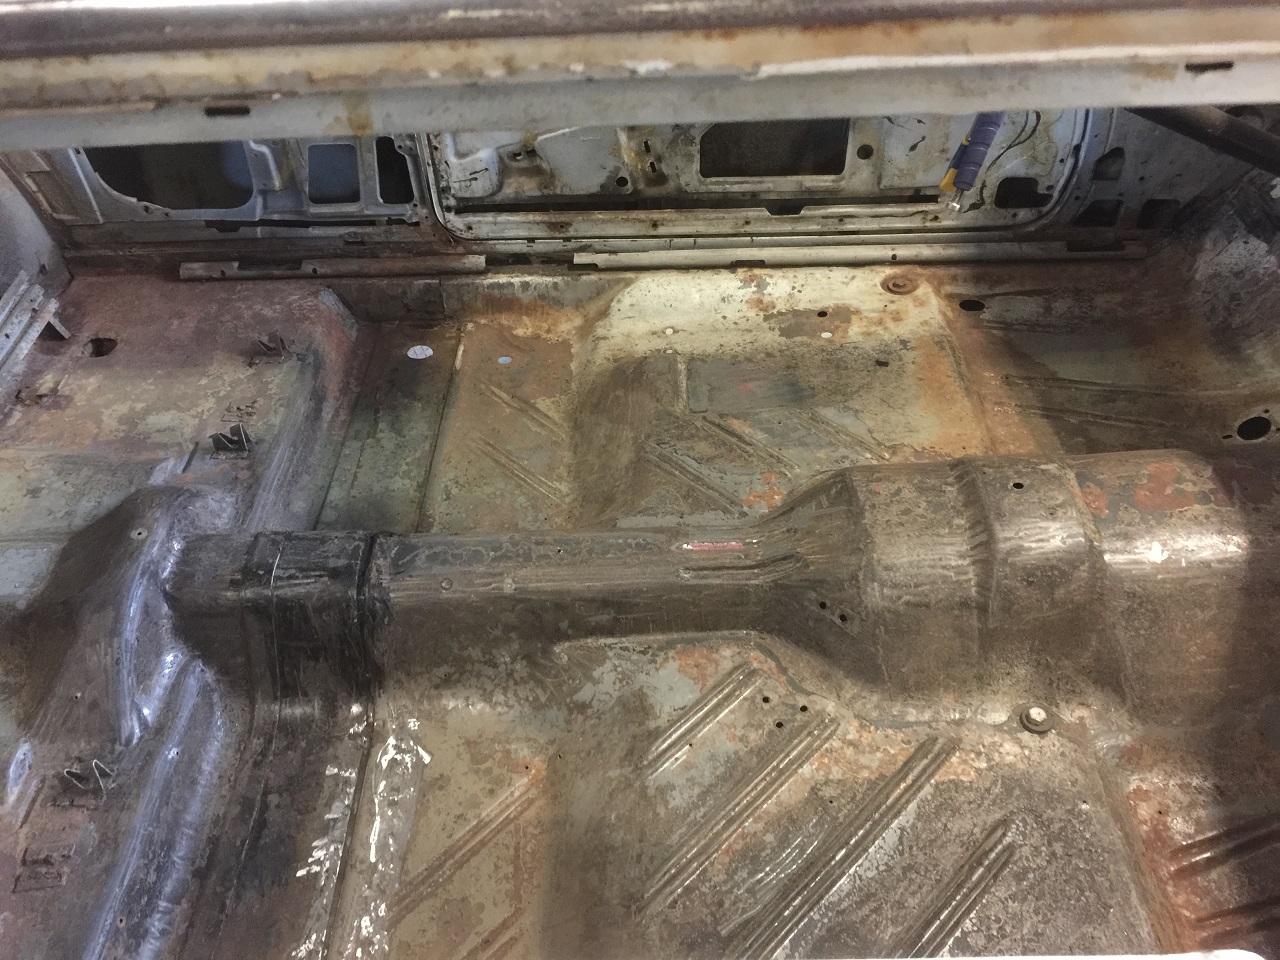 (IMG_4523_pass compartment floor no tar anymore.JPG) (IMG_4523_pass compartment floor no tar anymore.JPG)
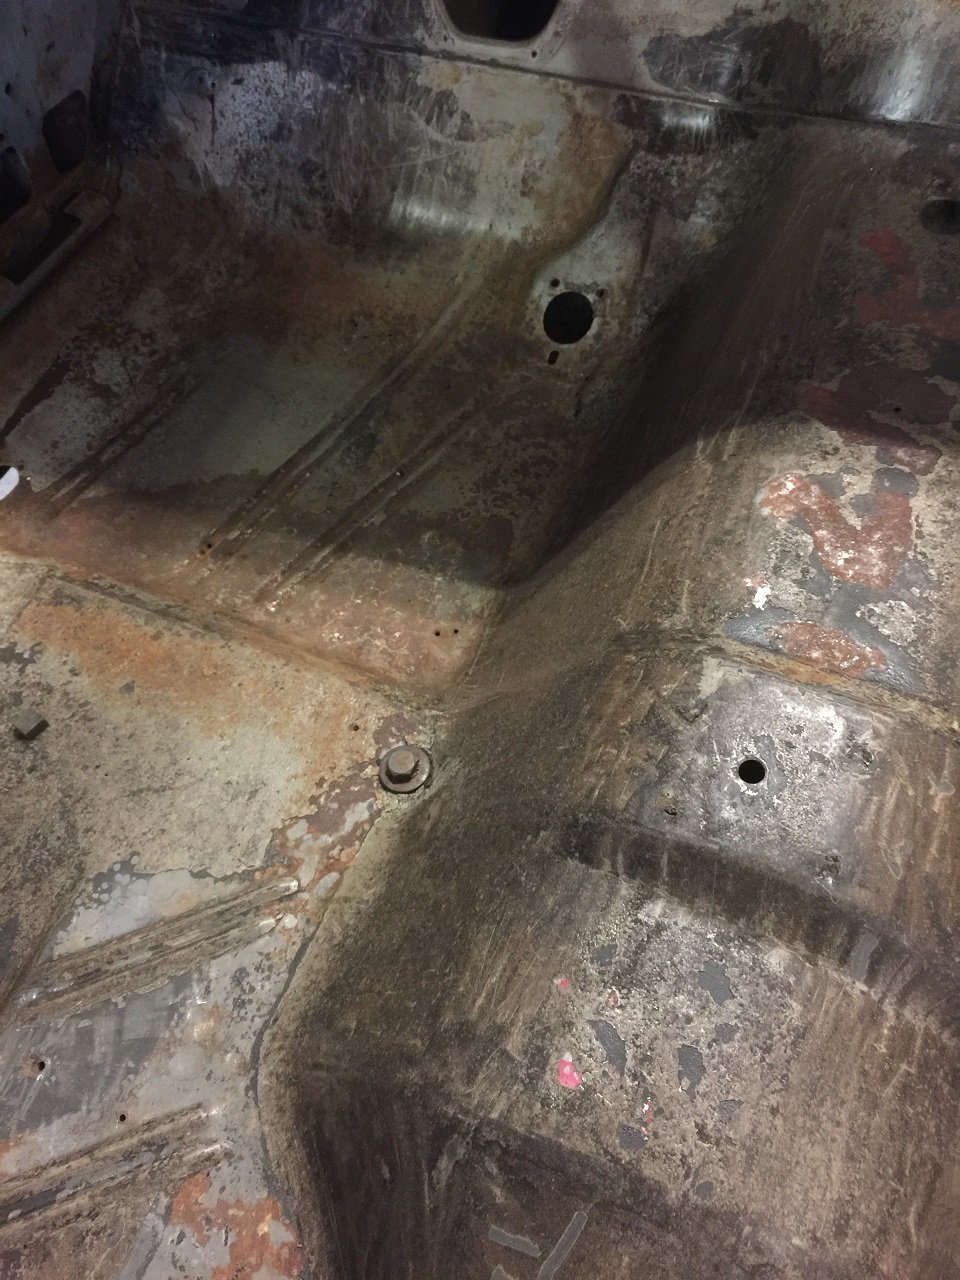 (IMG_4526_drivers side foot area clean and no rust at all.JPG) (IMG_4526_drivers side foot area clean and no rust at all.JPG)
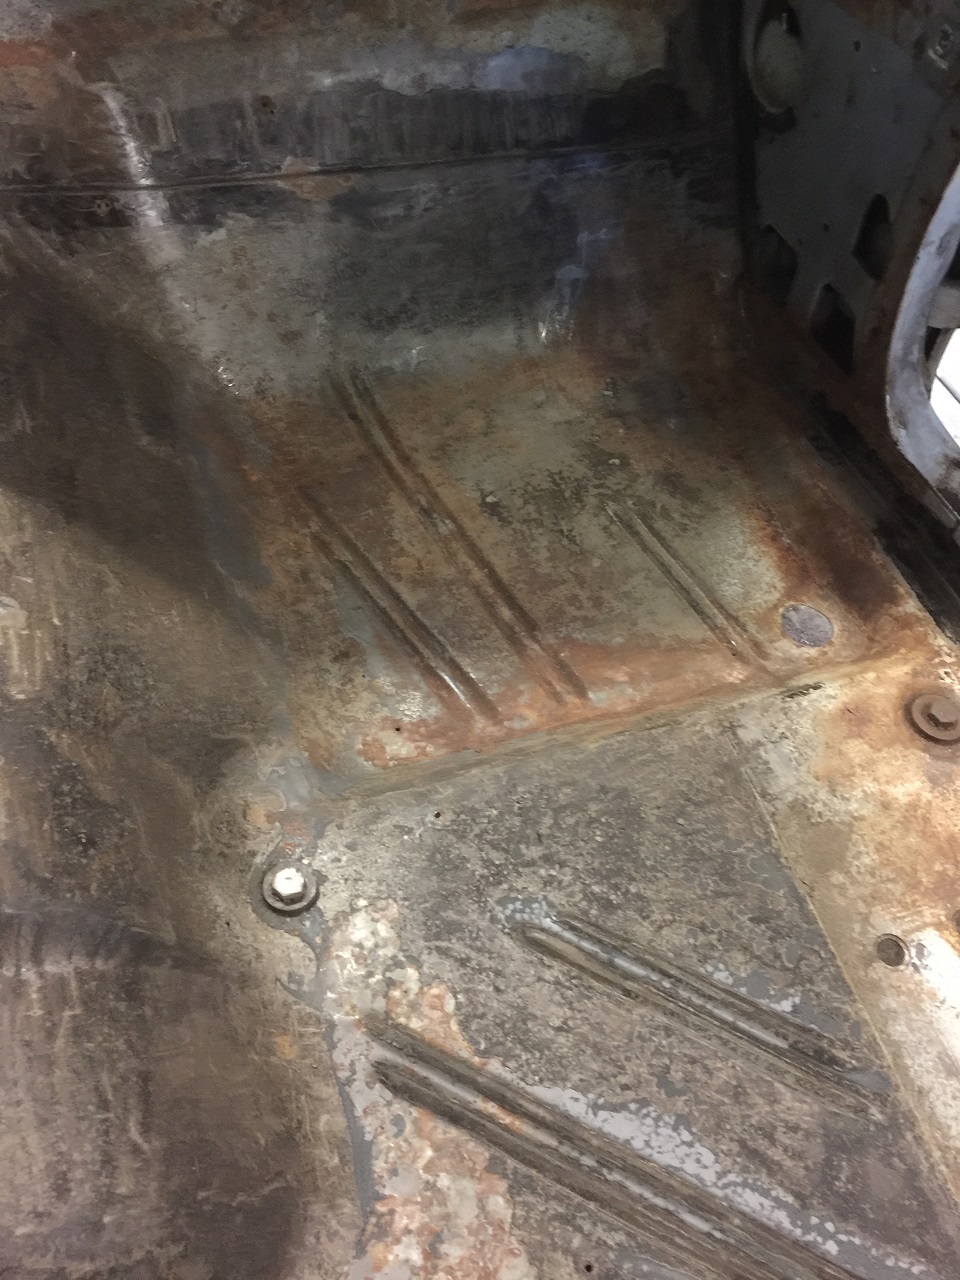 (IMG_4527_passenger side foot area clean and no rust at all.JPG) (IMG_4527_passenger side foot area clean and no rust at all.JPG)
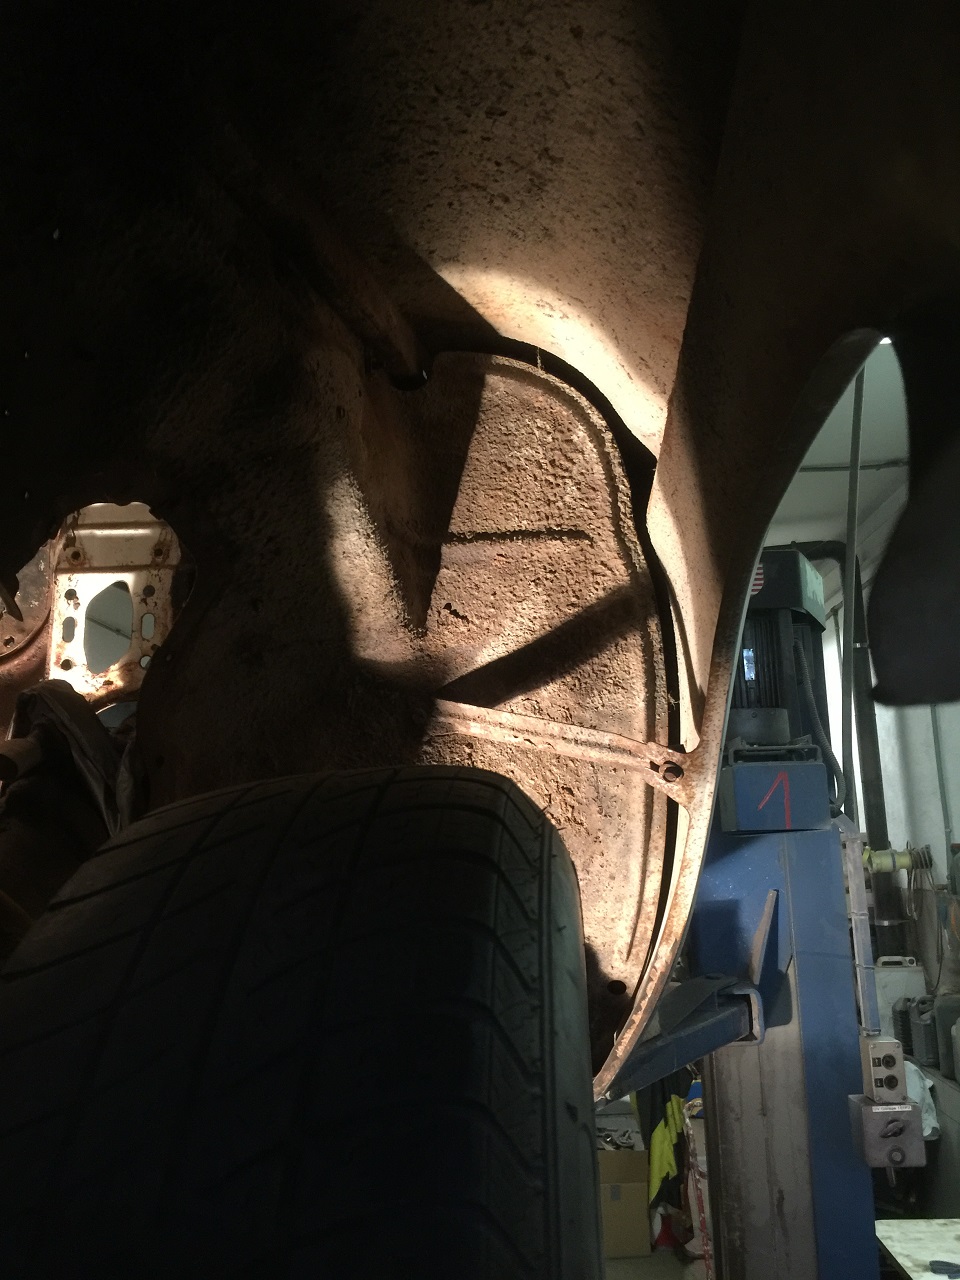 (IMG_4528_inner fender to fender weatherstrip routing.JPG) (IMG_4528_inner fender to fender weatherstrip routing.JPG)
Attachments
----------------
IMG_4522_the inner side of the hood is cleaned (insulator pad).JPG (487KB - 479 downloads)
IMG_4523_pass compartment floor no tar anymore.JPG (474KB - 472 downloads)
IMG_4526_drivers side foot area clean and no rust at all.JPG (469KB - 497 downloads)
IMG_4527_passenger side foot area clean and no rust at all.JPG (404KB - 490 downloads)
IMG_4528_inner fender to fender weatherstrip routing.JPG (315KB - 495 downloads)
|
|
| |
|
Expert
Posts: 1530
Location: ZH, Switzerland | Yesterday evening I cleaned the ball joint areas on both front suspensions plus some more around the propeller shaft tunnel area. I think I do not have to remove the color, just the tar... About the area around the position light/direction light case I'm really unhappy, It's ways too big (visible from the back)... Happy Restoring! Dieter
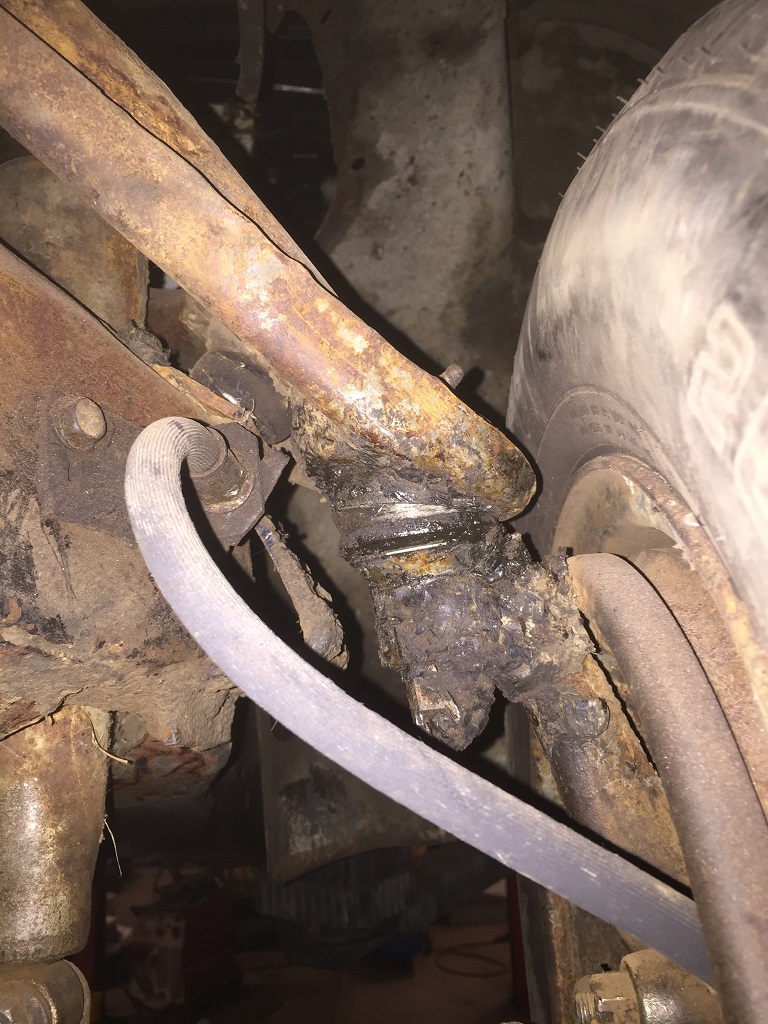 (IMG_4538 upper control arm LH.JPG) (IMG_4538 upper control arm LH.JPG)
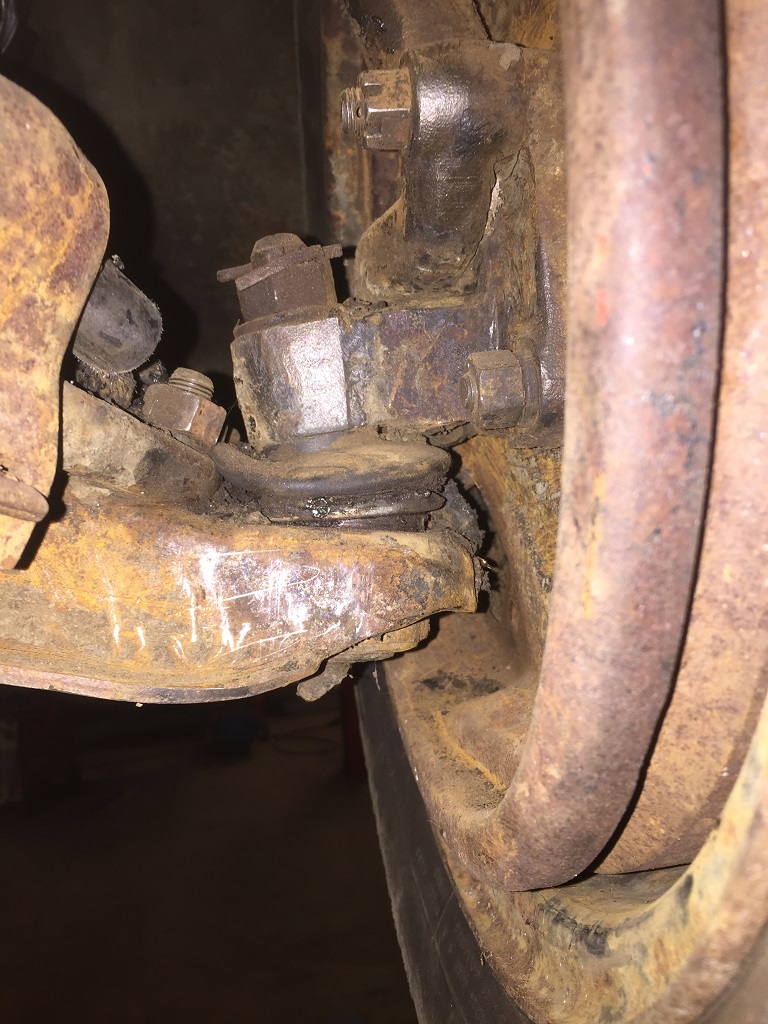 (IMG_4541 lower control arm LH.JPG) (IMG_4541 lower control arm LH.JPG)
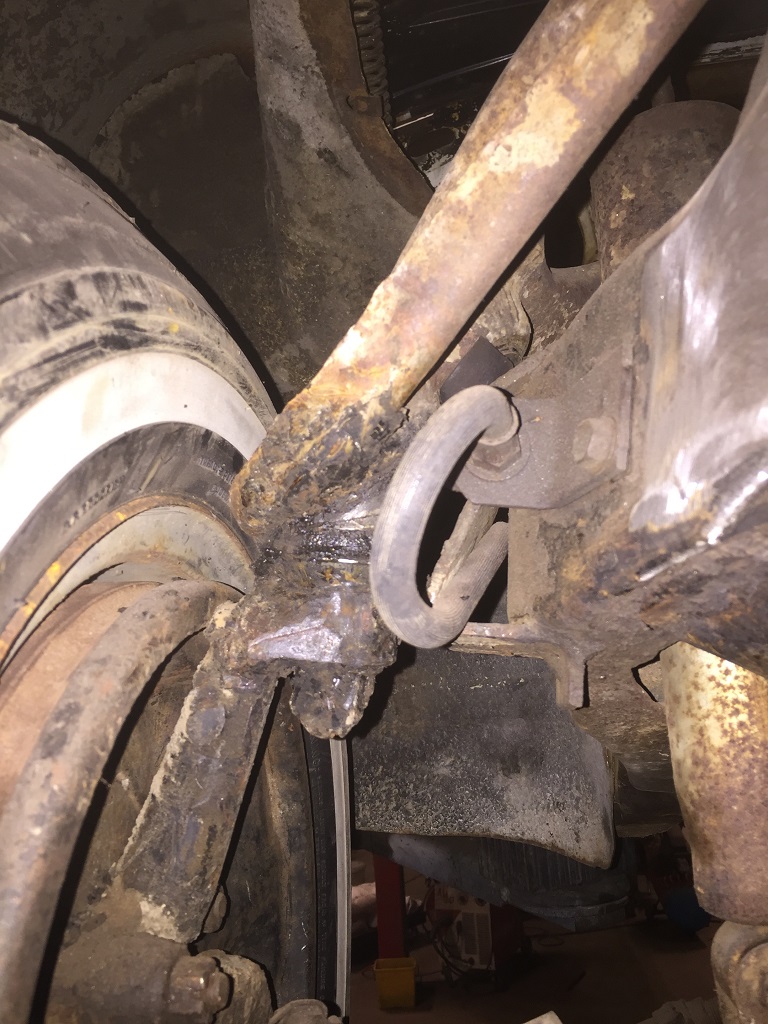 (IMG_4540 upper control arm RH.JPG) (IMG_4540 upper control arm RH.JPG)
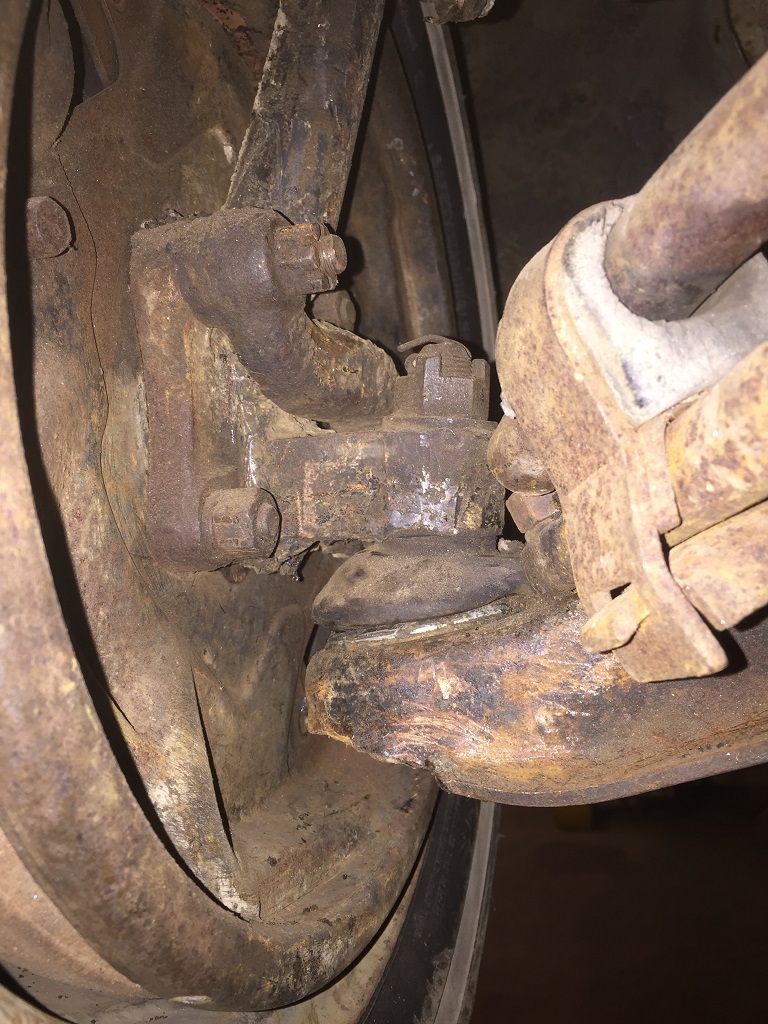 (IMG_4542 lower control arm RH.JPG) (IMG_4542 lower control arm RH.JPG)
 (IMG_4549 RH front light and position light installed.JPG) (IMG_4549 RH front light and position light installed.JPG)
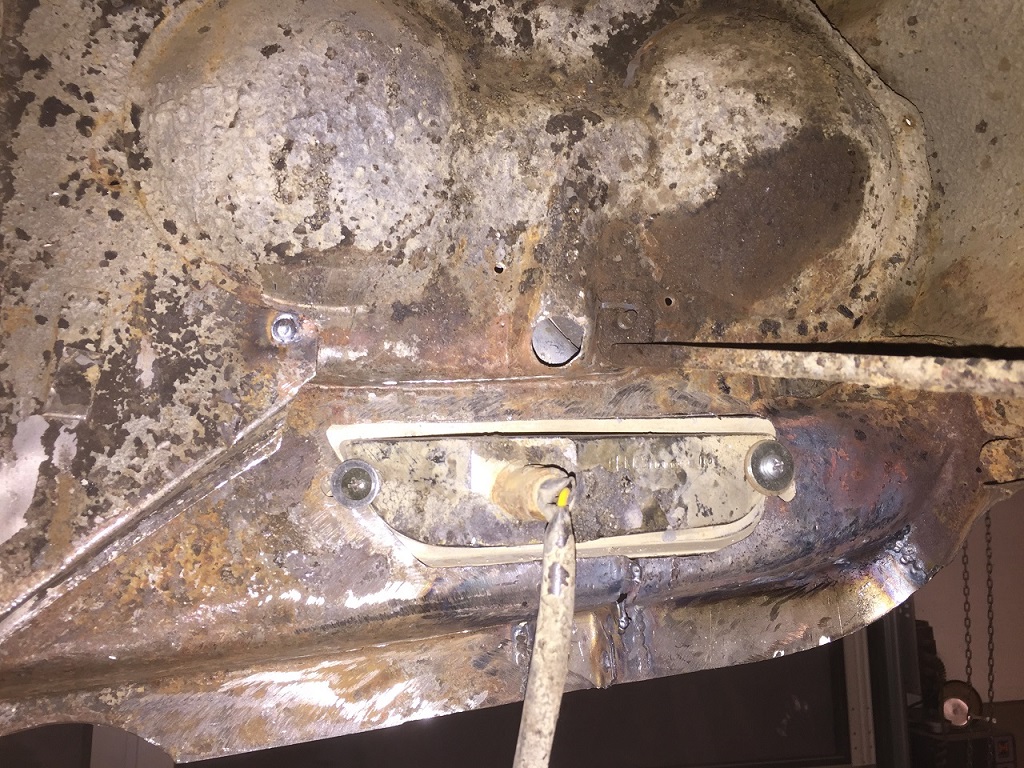 (IMG_4543 RH fender front rear view - position light area is ways to big.JPG) (IMG_4543 RH fender front rear view - position light area is ways to big.JPG)
Attachments
----------------
IMG_4538 upper control arm LH.JPG (288KB - 469 downloads)
IMG_4541 lower control arm LH.JPG (265KB - 461 downloads)
IMG_4540 upper control arm RH.JPG (267KB - 479 downloads)
IMG_4542 lower control arm RH.JPG (302KB - 464 downloads)
IMG_4549 RH front light and position light installed.JPG (240KB - 473 downloads)
IMG_4543 RH fender front rear view - position light area is ways to big.JPG (379KB - 463 downloads)
|
|
| |
|
Expert
Posts: 1530
Location: ZH, Switzerland | Early this week I called the company that's restoring the engine of my Letter. The engine is at the cylinder grinder's shop since weeks, the first piston is out (I'm so happy). At the time of the phone call the ultra sonic probe was not working correctly (at least a recalibration should be necessary) so I have to call again, next week, to hear if the block is still useable and what the next steps are. I'n the mean time I'm removing the tar layer at the undercarrigage and wheel housings. Happy Restoring! Dieter |
|
| |
|
Expert
Posts: 1530
Location: ZH, Switzerland | News from the engine restorer's house: The block succeeded the ultra sonic test. All cylinders have "enough meat" around. After my specific question I got the answer, that the cylinders have the original bore size, never ever shaved to an oversize step. From the impression of the good cylinder walls I think the engine didn't get much miles on it(no ultra high milage engine for sure). Happy Restoring! Dieter |
|
| |
|
Board Moderator & Exner Expert 10K+
Posts: 13045
Location: Southern Sweden - Sturkö island | Really good news Dieter! Another "fear factor" passed. |
|
| |
|
Expert 5K+
Posts: 5006
| that floorpan is very nice. |
|
| |
|
Elite Veteran
Posts: 827
Location: tailFinland | Heres a tip for you Dieter. Drain hole, tube and hose. Trunk lid surround will never rot again
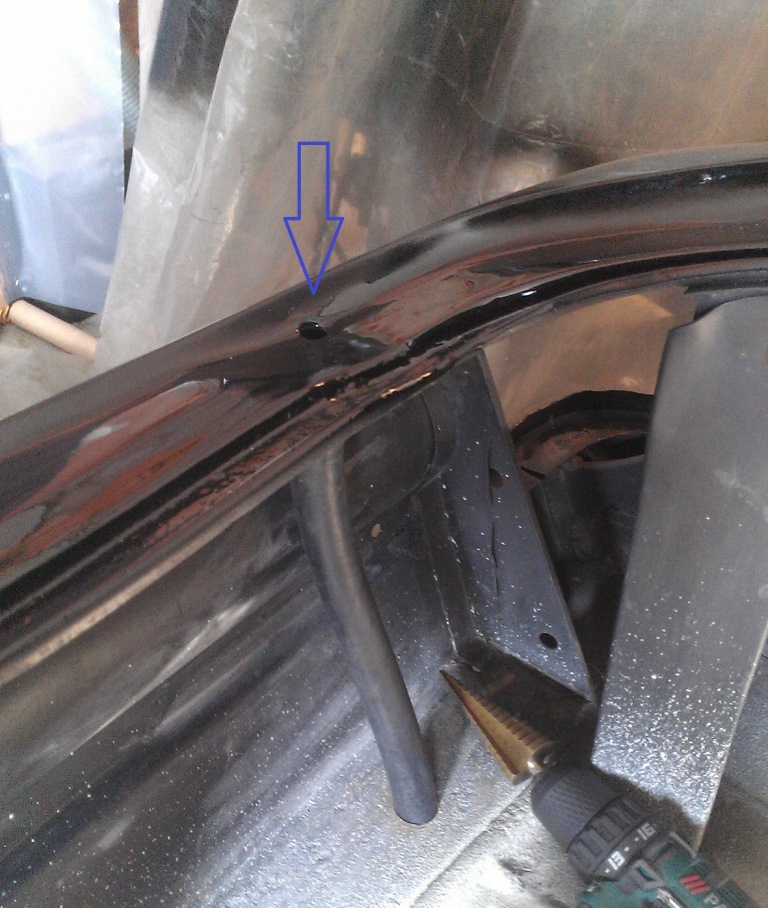 (WP_001586.jpg) (WP_001586.jpg)
Attachments
----------------
WP_001586.jpg (217KB - 434 downloads)
|
|
| |
|
Expert 5K+
Posts: 7393
Location: northern germany | properly painted metal does not rust. drilling holes in a panel to prevent holes? simply install the weatherstripping with polyurethane sealer (they leak from underneath) and you will never have a leaking trunk seal again.
and that hole can't prevent rust out of trunk edge if it isn't properly painted. its called capillarity. water seeps between the seal and the seal channel whether you drill a hole in the panel or not. and it will stay there for a long time. sealer is the only thing that can prevent that.
Edited by 1960fury 2017-12-21 4:59 PM
|
|
| |
|
Expert
Posts: 1530
Location: ZH, Switzerland | Actually I didn't count the hours nor how many weekends I'm working at the removal of the tar layer. But today I finished the passenger side inside of the front fender. From what I saw during removing of the tar layer, my Letter is rock solid. I hope after a full day of work tomorrow the drivers side inner and outer fender are finished as well from my side. All this work I'm performing to prepare my Letter for sand blasting that will follow quite soon as well. ASAP after finishing the sand blasting (under carriage, front subframe, passenger room floor, trunk floor, outer skin) my Letter will be transported to a painting company... :). Big thank you for all of your comments, Happy New Year! Happy Restoring! Dieter BTW: I do not do sand blasting myself... |
|
| |
|
Expert 5K+
Posts: 7206
Location: Victoria, BC, on Vancouver Island, Canada | Some of the original trunk lips had the drain holes and tubes installed, others didn't My early production US built 60 Chrysler has none. The Canadian built 60 DeSoto I used to own had them. Member Islander62 has a 1961 Canadian built Saratoga that has them. I've been told by another member that NONE of the USA built 1961 Chrysler or DeSotos had the drain holes. I have not put any drain holes in my own as the car is rarely out in the rain. The lip is well painted and the weatherstrip is solidly glued in so when the deck lid is shut it compounds the pressure of the rubber strip to stay sealed at the base. The design of this deck lid and lip is such a bad design that it can't help but rust out over the years if it stays wet, once the weatherstrip perishes / comes loose etc. then water gets under the rubber, sits and rusts the lip out. My own car was from the L.A. area and fortunately stayed dry for 50 years and has no rust issues at all.
Edited by imopar380 2018-01-02 5:05 PM
|
|
| |
|
Board Moderator & Exner Expert 10K+
Posts: 13045
Location: Southern Sweden - Sturkö island | Keep on Dieter, keep on and soon your car will be painted. A total different situation with a clean nice empty body for to mount the cleaned and renovated parts back in.
My car is early production as well and did not have the recessions - since I drive a lot and also in rain, I noticed that the water always remained in the corners of the trunk lip, exactly where the most cars has a rust issue. I made tools for to make recessions and made my own stainless trunk drains, as the reproduced ones leaves much to wish for. |
|
| |
|
Expert
Posts: 1530
Location: ZH, Switzerland | After hours spent to produce a template of the carrier of the quarter window weatherstrip (at the B pillar, seals the lower front end of the quarter window to the door opening) I decided to clean the kick up in the floor plan as well. Because it's a Letter car and not just a 0815 car. So you see that I'm not completely finished with removiing the under coating.... Happy Restoring! Dieter
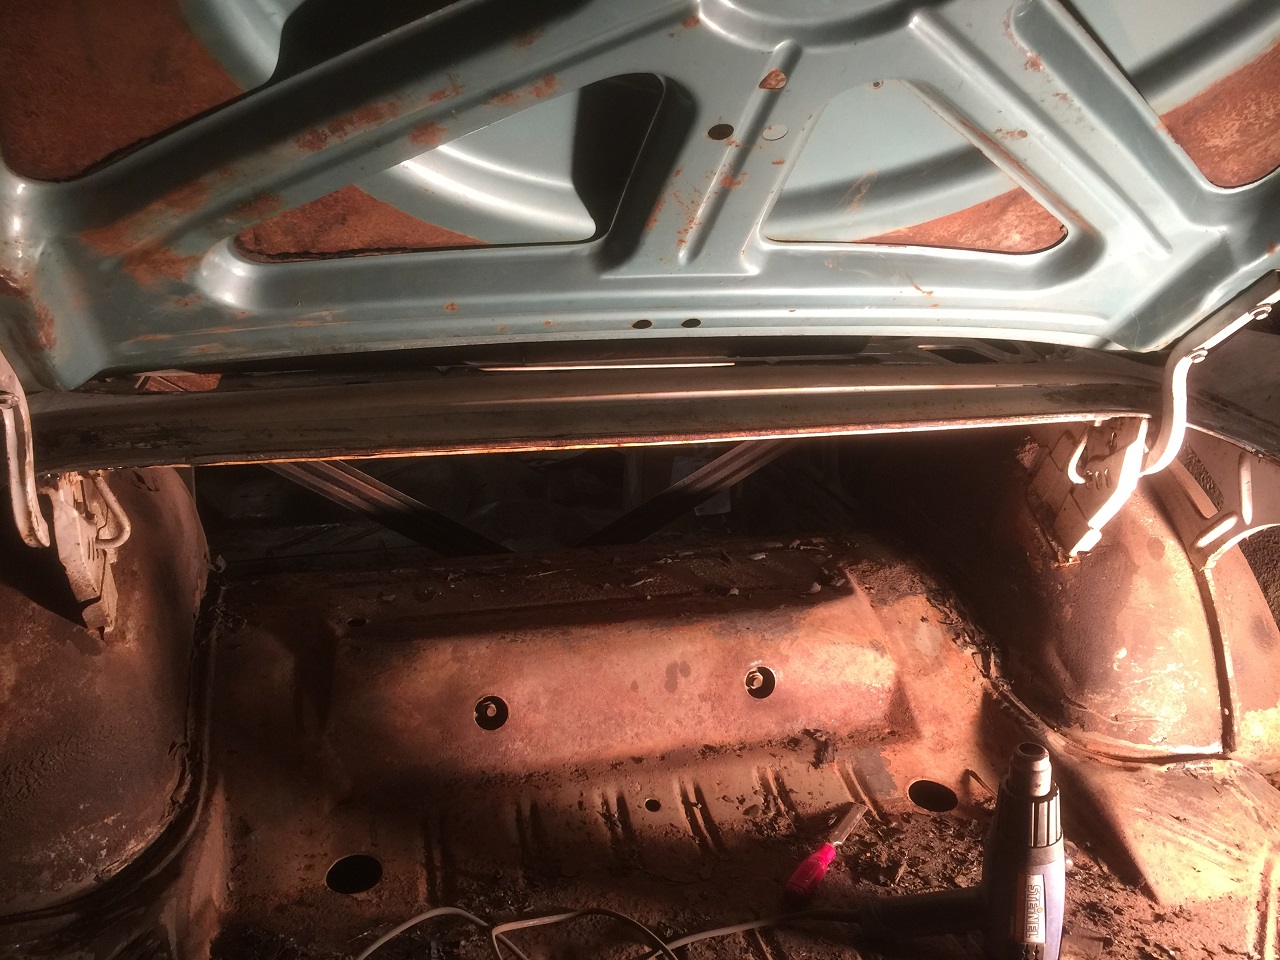 (IMG_4646_clean_the_kick_up_compltely.JPG) (IMG_4646_clean_the_kick_up_compltely.JPG)
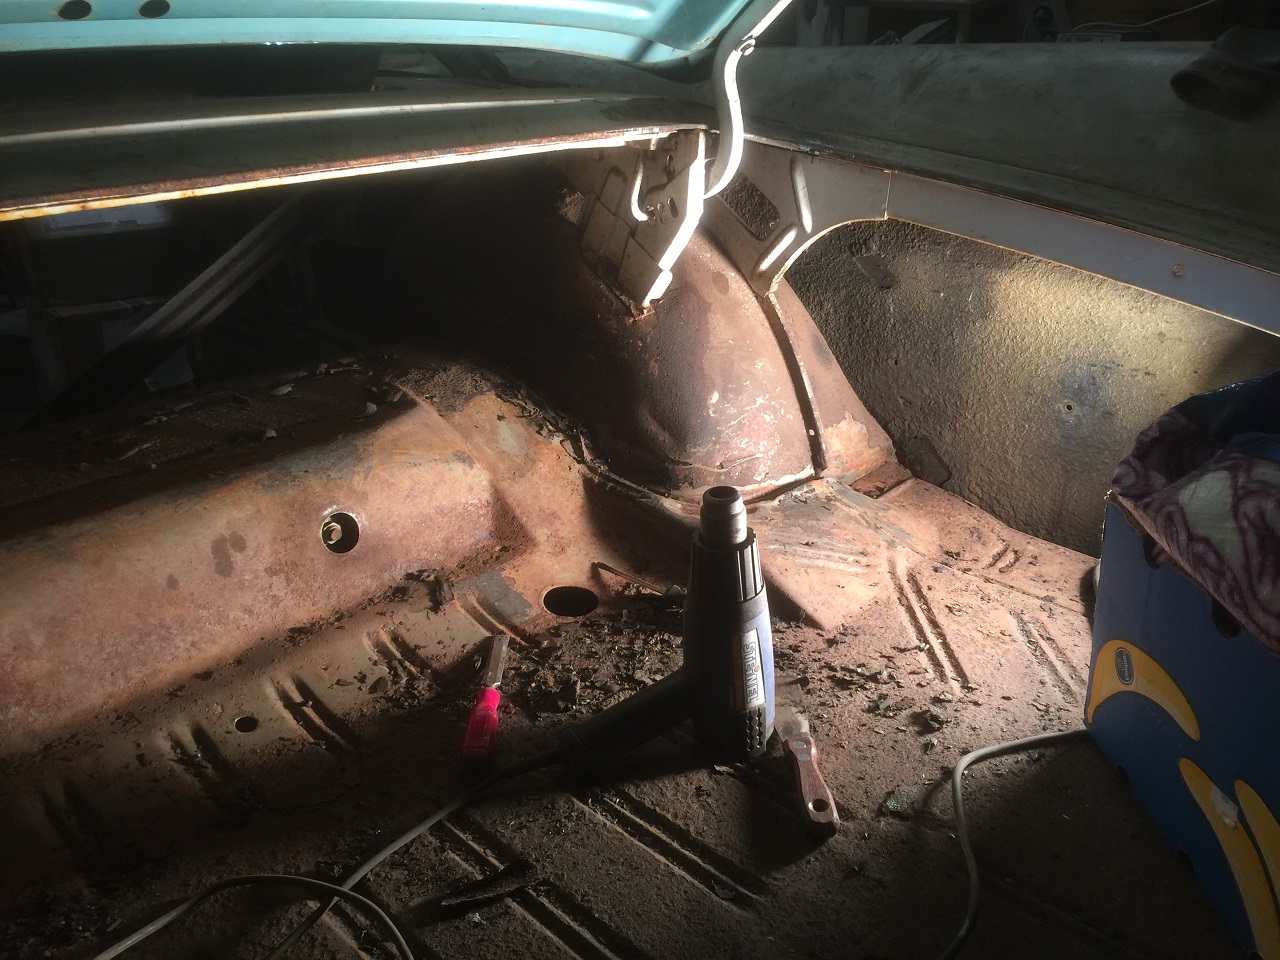 (IMG_4647_clean_inner_fender_pass_side.JPG) (IMG_4647_clean_inner_fender_pass_side.JPG)
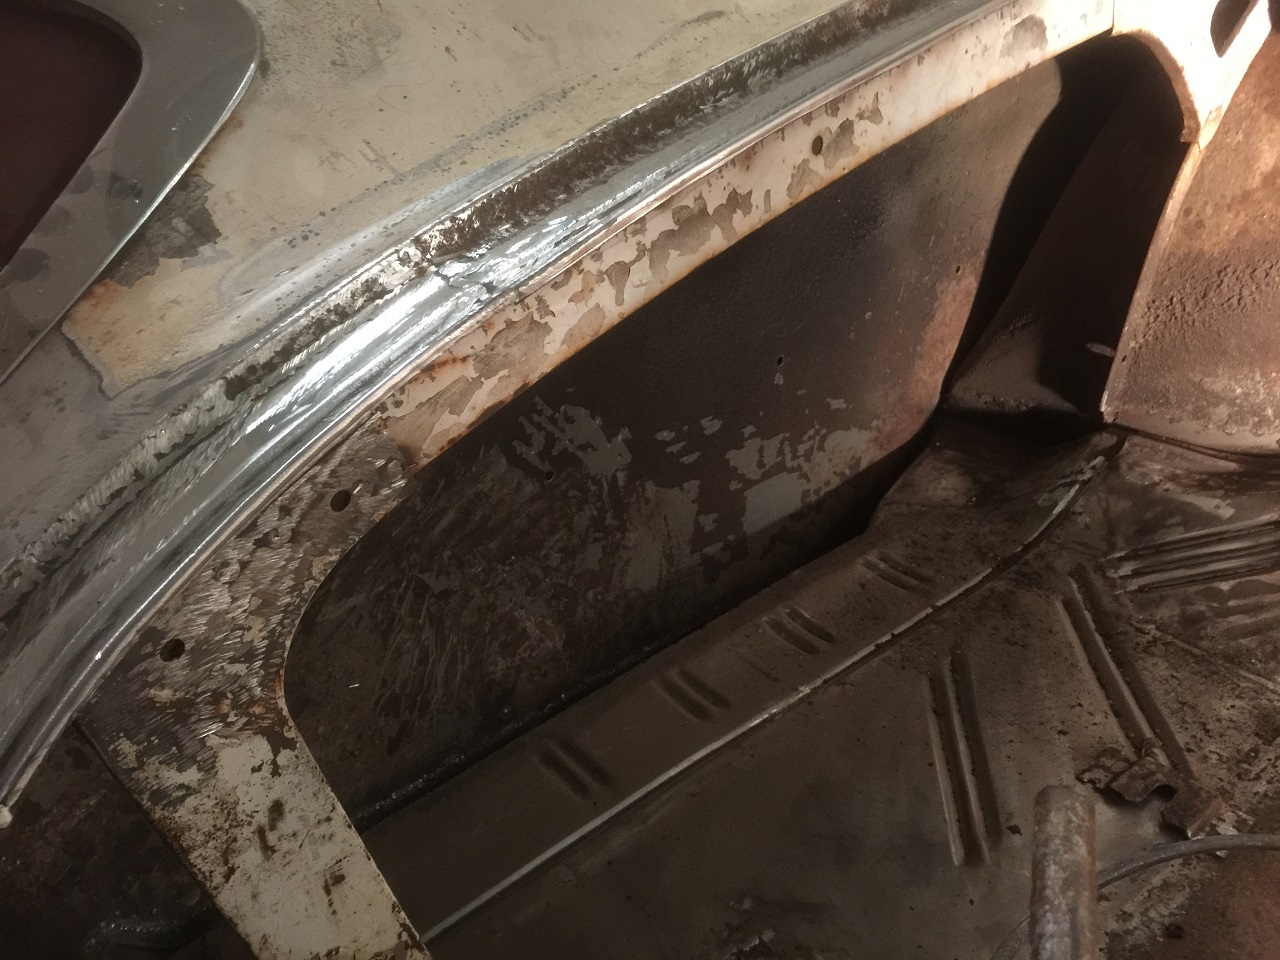 (IMG_4648_inner_fender_drivers_side_quite_clean.JPG) (IMG_4648_inner_fender_drivers_side_quite_clean.JPG)
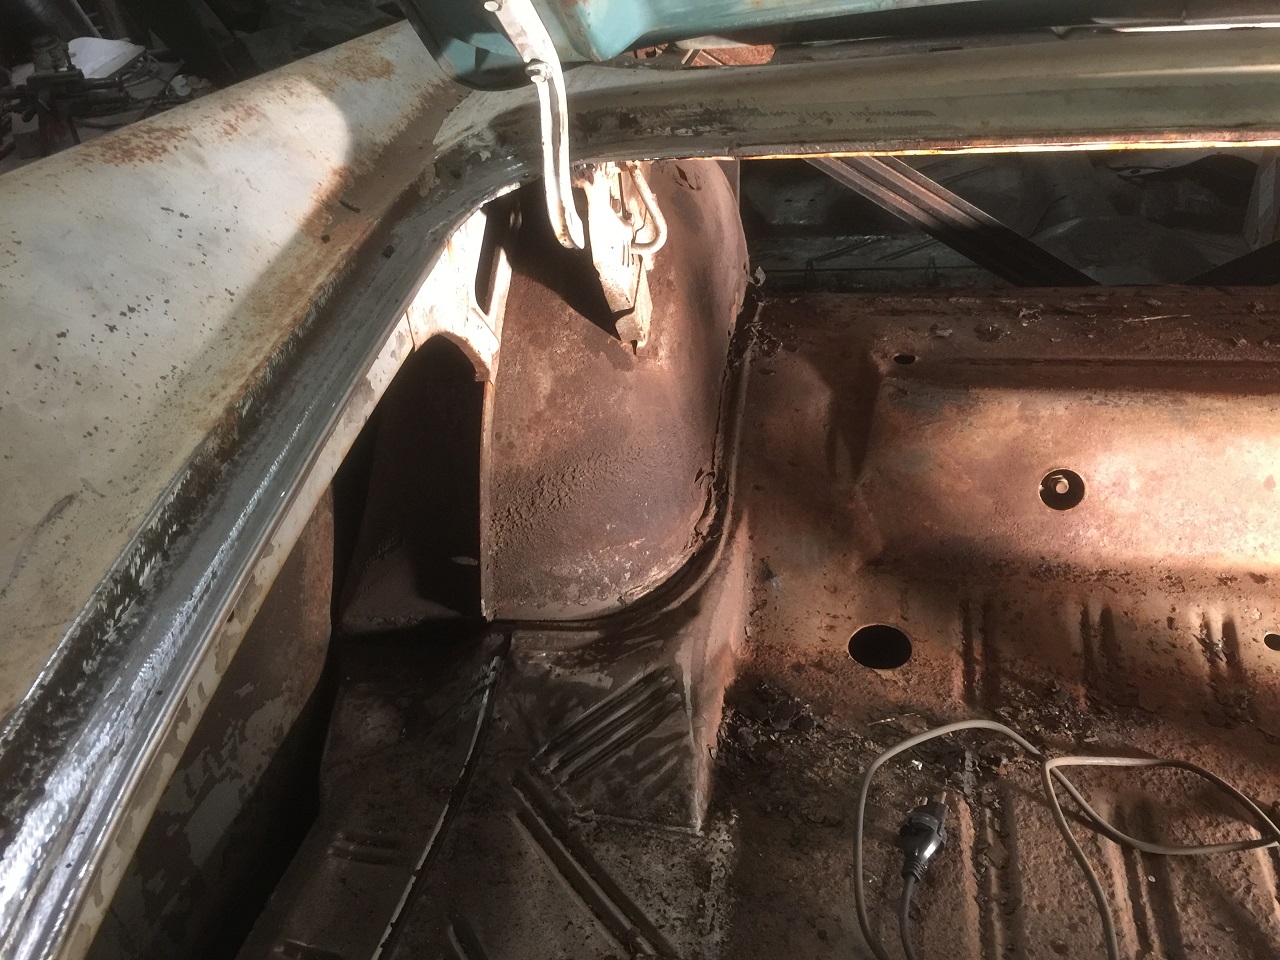 (IMG_4649_wheel_house_drivers_side_needs_cleaning.JPG) (IMG_4649_wheel_house_drivers_side_needs_cleaning.JPG)
Attachments
----------------
IMG_4646_clean_the_kick_up_compltely.JPG (392KB - 436 downloads)
IMG_4647_clean_inner_fender_pass_side.JPG (405KB - 446 downloads)
IMG_4648_inner_fender_drivers_side_quite_clean.JPG (384KB - 444 downloads)
IMG_4649_wheel_house_drivers_side_needs_cleaning.JPG (429KB - 420 downloads)
|
|
| |
|
Expert 5K+
Posts: 9650
Location: So. Cal | di_ch_NY56 - 2018-01-06 10:54 AM
....Because it's a Letter car and not just a 0815 car....
What is an 0815 car? The metalwork I see looks very good. And the fact that they let you work on it yourself as well means you picked a good shop.
Edited by Powerflite 2018-01-06 4:06 PM
|
|
| |
|
Expert 5K+
Posts: 7393
Location: northern germany | Powerflite - 2018-01-06 4:04 PM
di_ch_NY56 - 2018-01-06 10:54 AM
....Because it's a Letter car and not just a 0815 car....
What is an 0815 car?
ha, theres no 08/15 fl car. 08/15 is german slang for average or "run of the mill". in use since the 1. WW since it was something about the MG 08/15. conflicting storys about how the MG 08/15 became a synonym for average but from what i heard it was the mediocre quality of the 08/15.
Edited by 1960fury 2018-01-06 6:52 PM
|
|
| |
|
Expert
Posts: 1530
Location: ZH, Switzerland | Yes I know, I was not addressing an FL car, but any car else - especially a very decent daily driver roller coaster. Happy Restoring Dieter BTW: 0815 is used in Switzerland for facts and circumstancies that are very decent (below expectations and below average) |
|
| |
|
Expert
Posts: 1530
Location: ZH, Switzerland | Today I cleaned the rest of the kick up of the floor panel from the trunk side and both quarter sheets up to the fins as long there was under coating. While cleaning all the debris I scrapped off I discovered one more rust issue. it makes me not very happy, but Emil said it will be repaired as well after the sheet metal repair man returns... (most probably early February). It's a very uncommon place, but I do not wonder. it's a result of the big rust hole in the C pillar . Happy Restoring! Dieter
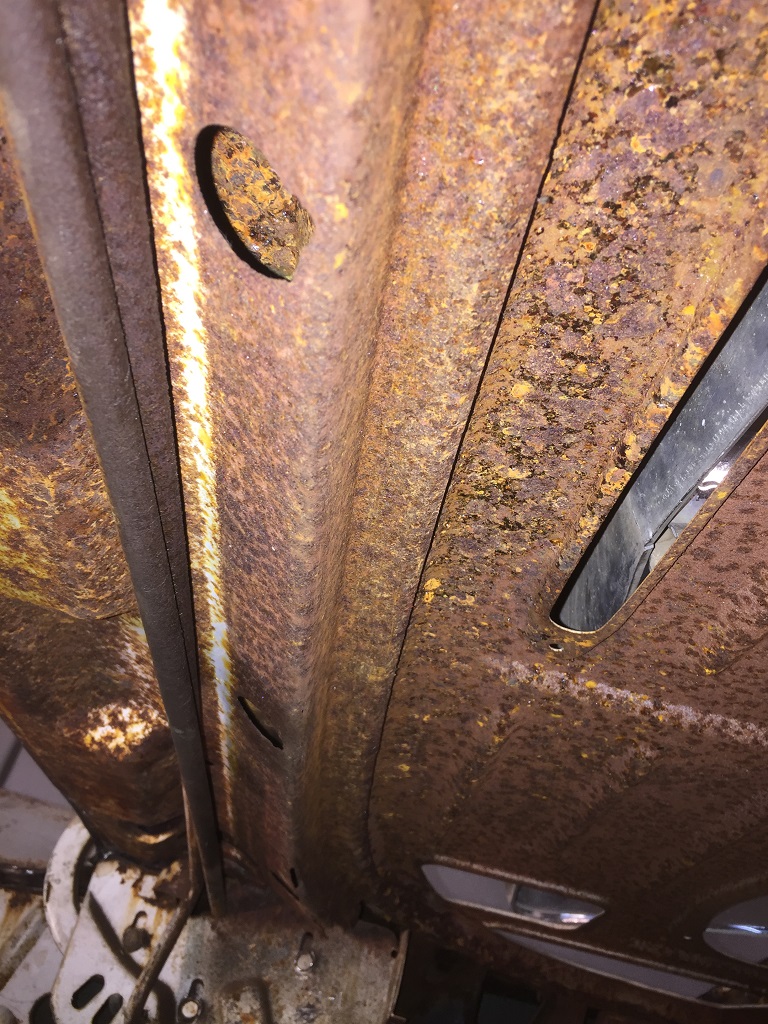 (IMG_4651_reinforcement below the lower rear window area drivers side view.JPG) (IMG_4651_reinforcement below the lower rear window area drivers side view.JPG)
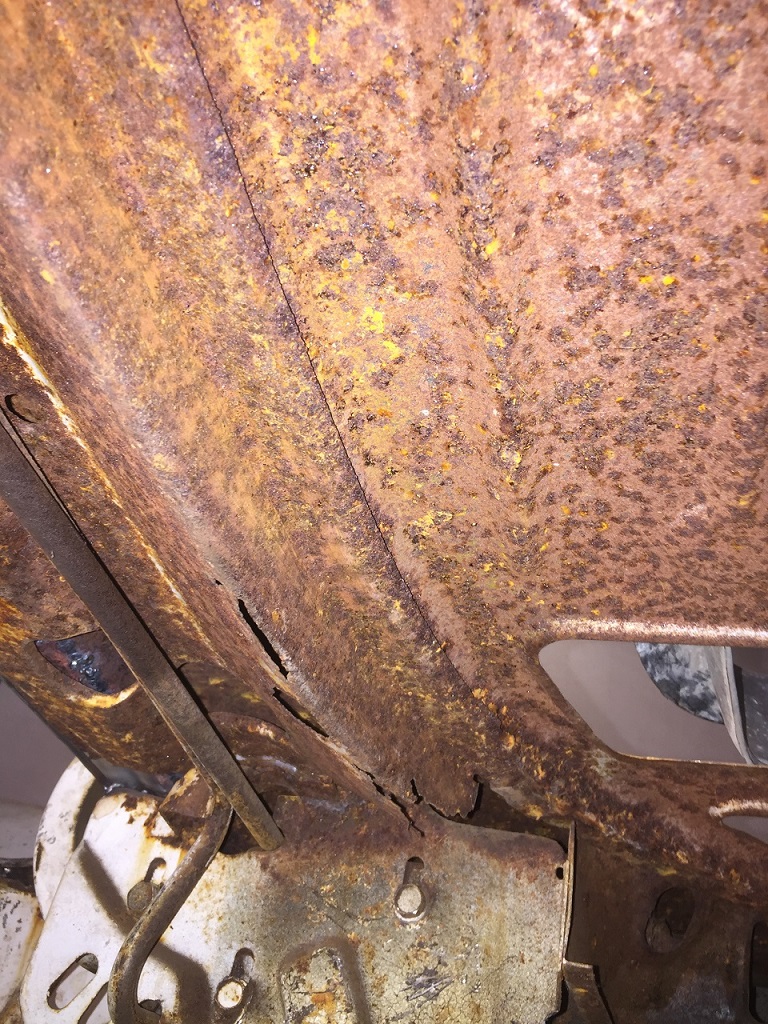 (IMG_4654_reinforcement below the lower rear window area middle.JPG) (IMG_4654_reinforcement below the lower rear window area middle.JPG)
Attachments
----------------
IMG_4651_reinforcement below the lower rear window area drivers side view.JPG (360KB - 462 downloads)
IMG_4654_reinforcement below the lower rear window area middle.JPG (419KB - 453 downloads)
|
|
| |
|
Board Moderator & Exner Expert 10K+
Posts: 13045
Location: Southern Sweden - Sturkö island | That complete area never had any primer or paint from the factory, in fact, most of the cars have at least surface rust there.
Most probably, as you write, the leaking C-pillar poured in an exessive amount of water in the trunk over the years.
After that the damage is repaired and sand blasted, it's a very good idea to at least prime the sheetmetal. |
|
| |
|
Expert 5K+
Posts: 7206
Location: Victoria, BC, on Vancouver Island, Canada | I often wondered why they didn't prime or paint that area.... This is what mine looks like today, still original, and un-painted underneath the parcel shelf. I have thought about cleaning it up and priming it but....haven't done it yet.
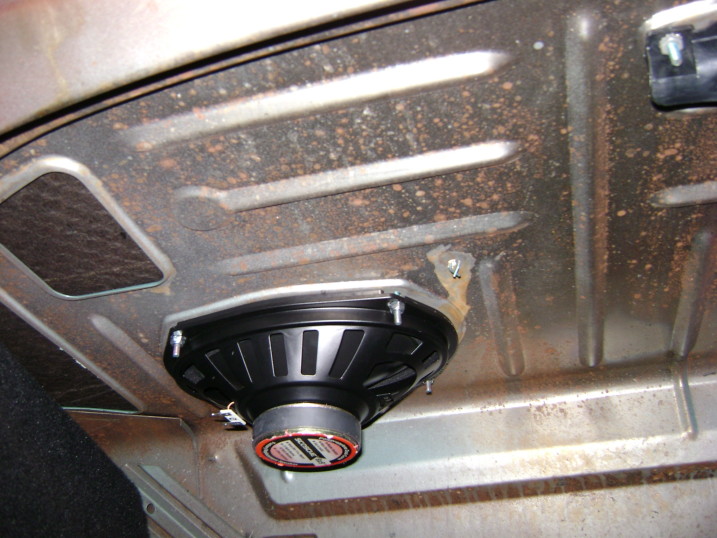 (shelf_underside.JPG) (shelf_underside.JPG)
Attachments
----------------
shelf_underside.JPG (109KB - 470 downloads)
|
|
| |
|
Board Moderator & Exner Expert 10K+
Posts: 13045
Location: Southern Sweden - Sturkö island | I've never seen this area in such a good state Ian, I came to think of Eastwood DiamondClear Satin http://www.eastwood.com/eastwood-diamond-satin-gloss-aerosol.html
for to keep the original look and for to protect for further surface rust |
|
| |
|
Expert
Posts: 1530
Location: ZH, Switzerland | Hi Wizard and Ian Big thank you for your comments over the whole timespan since I‘m the owner of my Letter. Big thank you to all forum members who put their comment into this thread as well. FYI: it‘s not the only area with no (at least) primer... please look under the dashboard (structure of the body, when the dashboard is out), the reinforcement between the kick board and the outer shell of the body structure to mention just the surfaces in the extended passenger compartment. I think it’s not convenient to paint there and needs ways more time than allowed at the assembly line. In my case... I‘m going to wire brush all these areas. These are the only areas I‘ll use epoxy primer out of rattle cans. Prior to start assembling my Letter... Happy Restoring Dieter |
|
| |
|
Expert
Posts: 1530
Location: ZH, Switzerland | Hi Sven In the mean time this is one of my favorite movies at Youtube.. it shows and expains (for me) why a professional paint job like necessary at my Letter is that expensive. Even if a professional industrial painter told me last Saturday, that he never ever could bill all the hours he spent on a project. This is the reason I want to get a professional painter that treats a customer car like his own baby. Because I would like to get a laiser straight body like the red metallic 300F convertible is from Matts A.... https://www.youtube.com/watch?v=Lw0ObOdWnRE Happy Restoring! Dieter
Edited by di_ch_NY56 2018-01-08 6:55 AM
|
|
| |
|
Expert
Posts: 1530
Location: ZH, Switzerland | From my restorer of the engine I'm getting back my engine fully painted. I could choose what color I want. So my decision fell to RAL 9005 semi gloss. The restorer mentioned orange, but this color is not time correct (but correct for e.g. a 426 HEMI). Happy Restoring! Dieter |
|
| |
|
Expert 5K+
Posts: 5006
| di_ch_NY56 - 2018-01-08 6:53 AM Hi Sven In the mean time this is one of my favorite movies at Youtube.. it shows and expains (for me) why a professional paint job like necessary at my Letter is that expensive. Even if a professional industrial painter told me last Saturday, that he never ever could bill all the hours he spent on a project. This is the reason I want to get a professional painter that treats a customer car like his own baby. Because I would like to get a laiser straight body like the red metallic 300F convertible is from Matts A.... https://www.youtube.com/watch?v=Lw0ObOdWnRE Happy Restoring! Dieter this is essentially how i paint in my driveway/garage booth. I try to stay away from trees :) but its alot more work. Its near impossible to find someone who "cares" about your car, its not theirs and they are just making money :) I tend not to believe any mechanic or painter who says they care about someone elses car :) This is why i normally just do it myself. Paint and body also that way i know its done right. The quotes you get from these guys also vary widely. Some guy will quote 30k and another 12 and another 6k... It often depends on how much work they have in the pipeline... alot of work, more expensive.? maybe they shop it out to someone else. Some people wait forever, some get blown off for over a year or 2. It like getting a home repair estimate, same principle... Guy looks at you and tries to figure out how much he can charge. See's how you react, does he need a paycheck right now?
Edited by mikes2nd 2018-01-14 10:56 AM
|
|
| |
|
Expert
Posts: 1530
Location: ZH, Switzerland | Thanks Mike That‘s exactly the experience I get on my own as well. In my eyes the most time consuming job is to straighten the body with filler. That step could repeat up to five times... extension: I was just thinking about your words again and (consequently) of what I could do myself: the straightening and sanding of the body. The movie explains the step very good. Take care, Dieter
Edited by di_ch_NY56 2018-01-14 11:29 AM
|
|
| |
|
Expert 5K+
Posts: 9650
Location: So. Cal | One thing I disagree with on the video is that I like to epoxy prime/seal the bare metal before I apply any filler. If you apply the filler within a week or two from the time you prime it, it will stick to the primer without any trouble. Filler absorbs water so if your paint gets thin and water is able to get to the bondo (like with a scratch or chip) then you will have rust developing underneath the bondo. But if you seal it off under the bondo first, you won't have this potential problem. I also seal over the top of the filler too before final paint of course. |
|
| |
|
Expert 5K+
Posts: 5006
| Me I follow directions which say bare metal correctly prepared(sand down to metal 36/40 and final scuff with at least 80). He is also following directions. I don't know who started this "bondo over sh*t is good" myth but its wrong.
Its impossible for water to get to the filler if you seal/primer/paint correctly. And once you get water in your bondo you are cooked, a simple coat of primer underneath isn't going to stop the bondo from absorbing water and rusting out, think about what you said, you just killed your own disagreement. You have water reaching your filler which is being absorbed... That is game over for your repair as the filler expands and no epoxy with constant water against it will last. It may be easier to peel the bondo off the car if you put epoxy underneath though to redo it.
There can also be reaction with the primer/other random crap under filler and the adhesion this is why its just better to avoid a nightmare.
The millions of formulas for primer from god knows where can react and screw with the filler(esp when applying the heat of the sun). I dont want some reaction later(which ive seen before) under the filler after youve painted.
|
|
| |
|
Expert 5K+
Posts: 9650
Location: So. Cal | I won't clog up his thread with this, but if you would like to discuss it, you can PM me.
Edited by Powerflite 2018-01-14 11:32 PM
|
|
| |
|
Expert 5K+
Posts: 5006
| nah ill stick with directions okay yeah back to the regular programming!
the problem with doing body work is it does take a lot of your time. Weigh the time vs the cost. Most quotes you get for paint jobs is nuts, like 100$ a hour nuts.
If your making 100$ an hour then I say go for it and have it done and avoid the hassle or if you have plenty of cash just outsource it. I like doing the work though on the car.
I like restoring more than driving them I think. |
|
| |
|
Expert
Posts: 1530
Location: ZH, Switzerland | Today I wanted to do just a small service at the 6 way electric seat gear. But ?? I started at the wrong side and now this small subporject turned out into a complete disassemblage of the gear. BTW: the gear was full of MoS2 grease, somebody apparently did anse vice not long ago, but forget to lube the bronce bushings of the shafts. I‘ll replace it with Molykote longterm W2. Question: did anybody remove /mount the flex wires in the loooong tubes to the passenger side sleave gear? Happy Restoration! Dieter |
|
| |
|
Board Moderator & Exner Expert 10K+
Posts: 13045
Location: Southern Sweden - Sturkö island | Yes Dieter, remove the tubes from master and slave units and pull out the cables, wash them and the tubes and apply new grease on them.
This should be easy work. |
|
| |
|
Expert
Posts: 1530
Location: ZH, Switzerland | Today, after sand blasting and glass perl blasting I got my crossrams back and brought it directly to a superb painting company nearby. Especially the passenger side crossram shows a very heavy toll to the resting under a blue, woven plane in the S.F. bay for six years. To enhance the negative effect of the electrochemical voltage serie (aluminum is ignoble to cast iron, means: cast iron eats aluminum) there were loads of leaves on the intake system near the cylinder heads. But I'll try to do the best to save my crossram... aluminum filler is necessary. Happy Restoring! Dieter
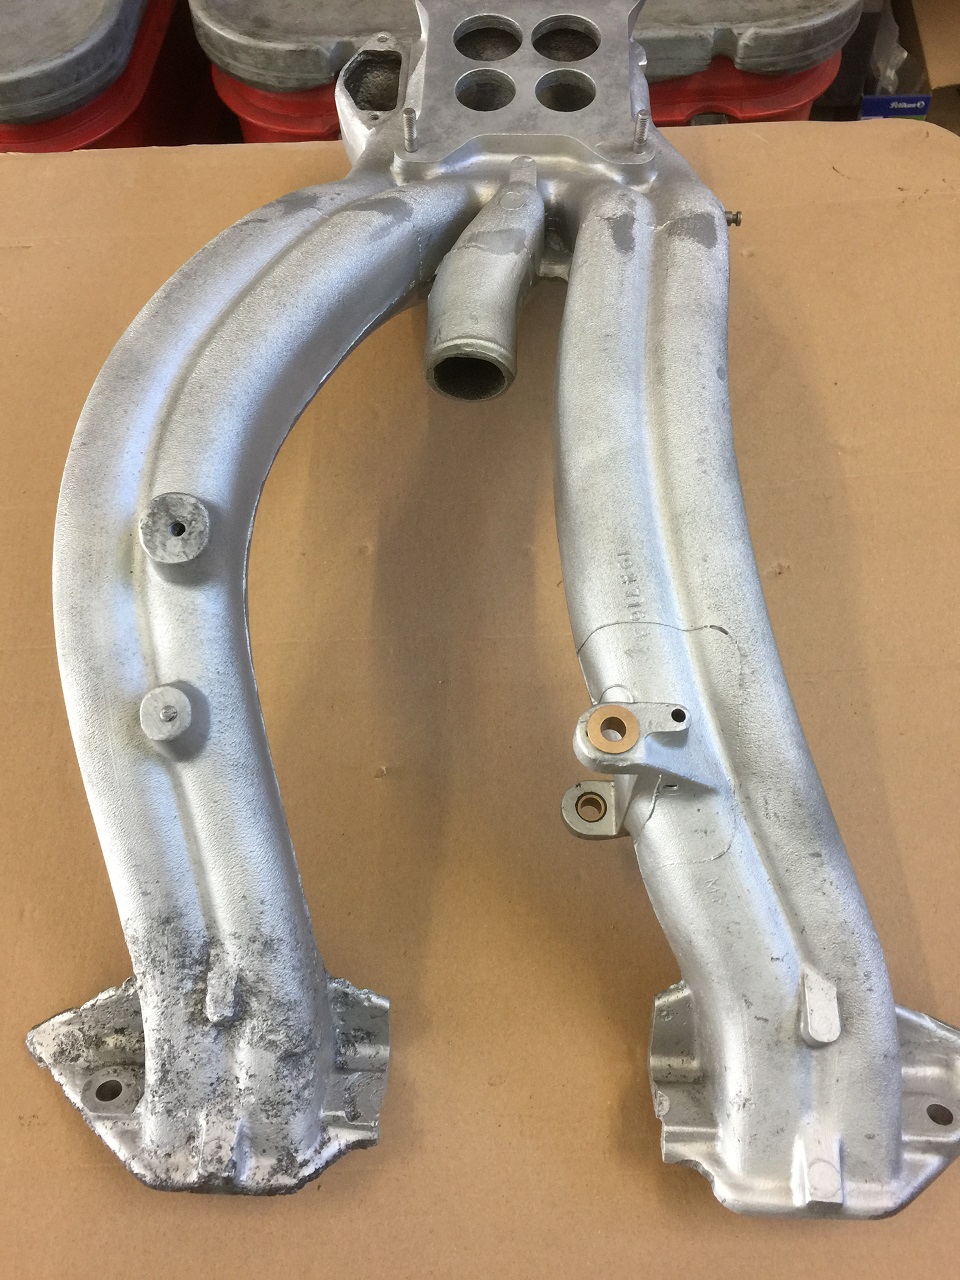 (IMG_4670_crossram right hand side.JPG) (IMG_4670_crossram right hand side.JPG)
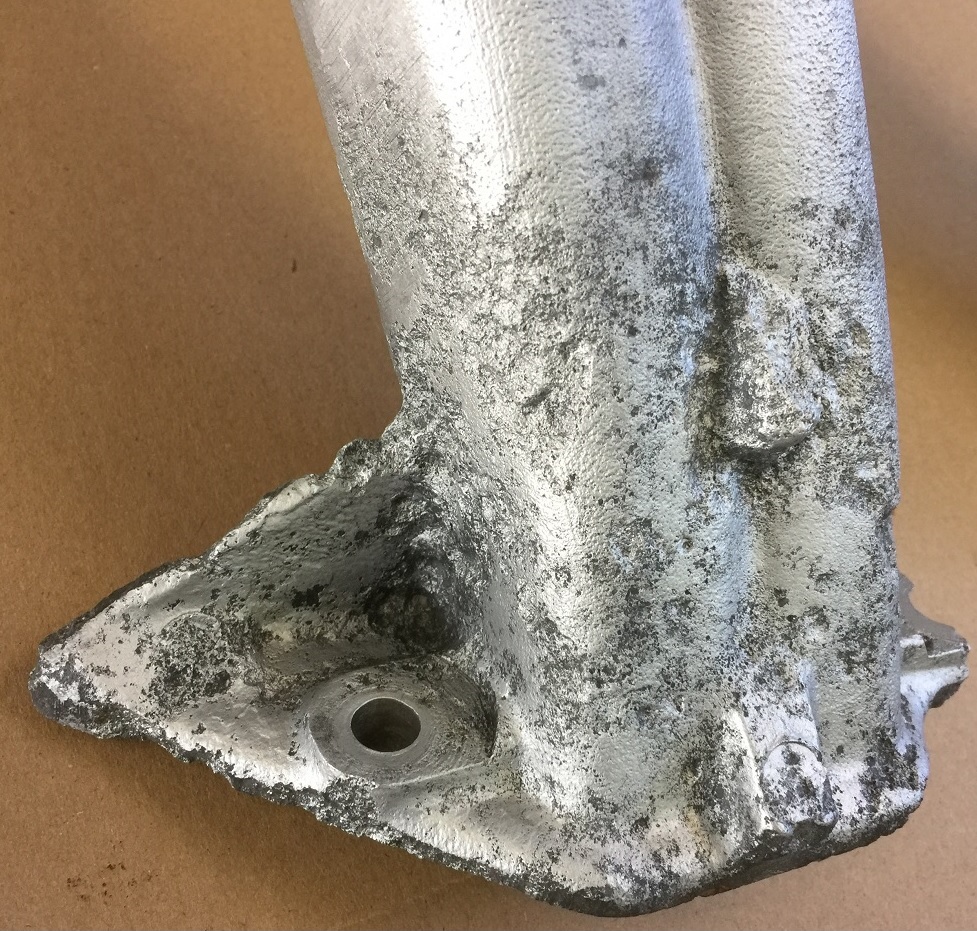 (IMG_xxxx_crossram right hand side Detail.jpg) (IMG_xxxx_crossram right hand side Detail.jpg)
Attachments
----------------
IMG_4670_crossram right hand side.JPG (409KB - 436 downloads)
IMG_xxxx_crossram right hand side Detail.jpg (429KB - 428 downloads)
|
|
| |
|
Expert
Posts: 1530
Location: ZH, Switzerland | The seat frame is "restored" and the front seats in their actual state mounted. I guess it's easy to see why I want to get everything new above the jute fabric layer ontop of the spring layer. The seat frame and spring web shows almost no sign of rust . Happy Restoring! Dieter BTW (edit): what surprises me most is that at the lower part (not exposed to the intense sun light at the S.F. bay area) the leather cover is still soft. The butt area at the drivers seat earlier was "repaired" with transparent tape. That destroyed the rubber foam cushion as well
Edited by di_ch_NY56 2018-02-04 2:17 PM
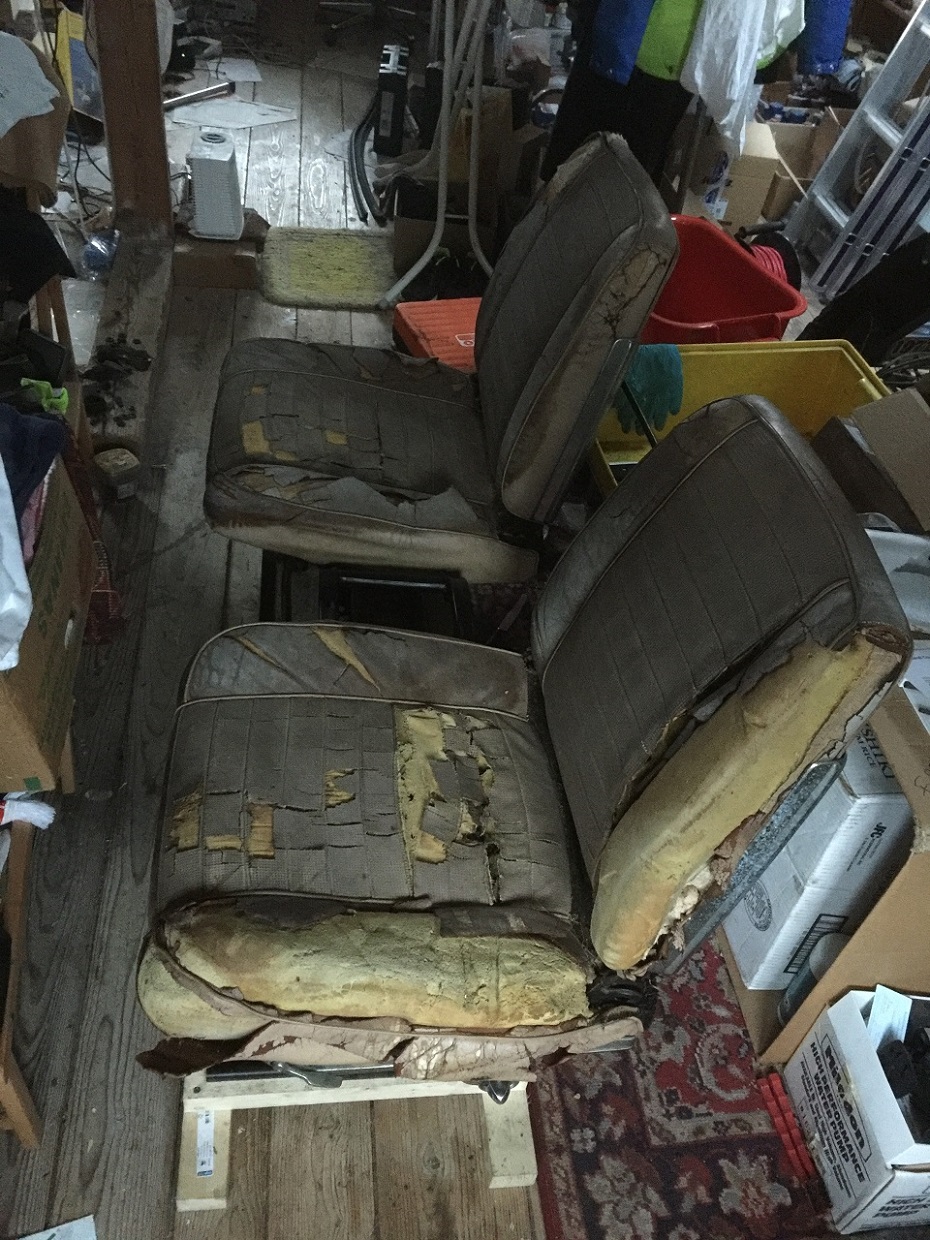 (IMG_4691_front seats on seat frame.JPG) (IMG_4691_front seats on seat frame.JPG)
Attachments
----------------
IMG_4691_front seats on seat frame.JPG (465KB - 429 downloads)
|
|
| |
|
Expert
Posts: 1530
Location: ZH, Switzerland | Yesterday I was at the shop for a very short time to discuss the further steps and to make sure that I gonna replace the ball joints myself. Why? at the shop they pressed out the old ball joints at the control arms of a 300H and pressed in the new ones. From Wizard I got a sunny clear warning not to press out and press in. So I got a appropriate Snap-On tool to perform that work myself.
Happy Restoring! Dieter
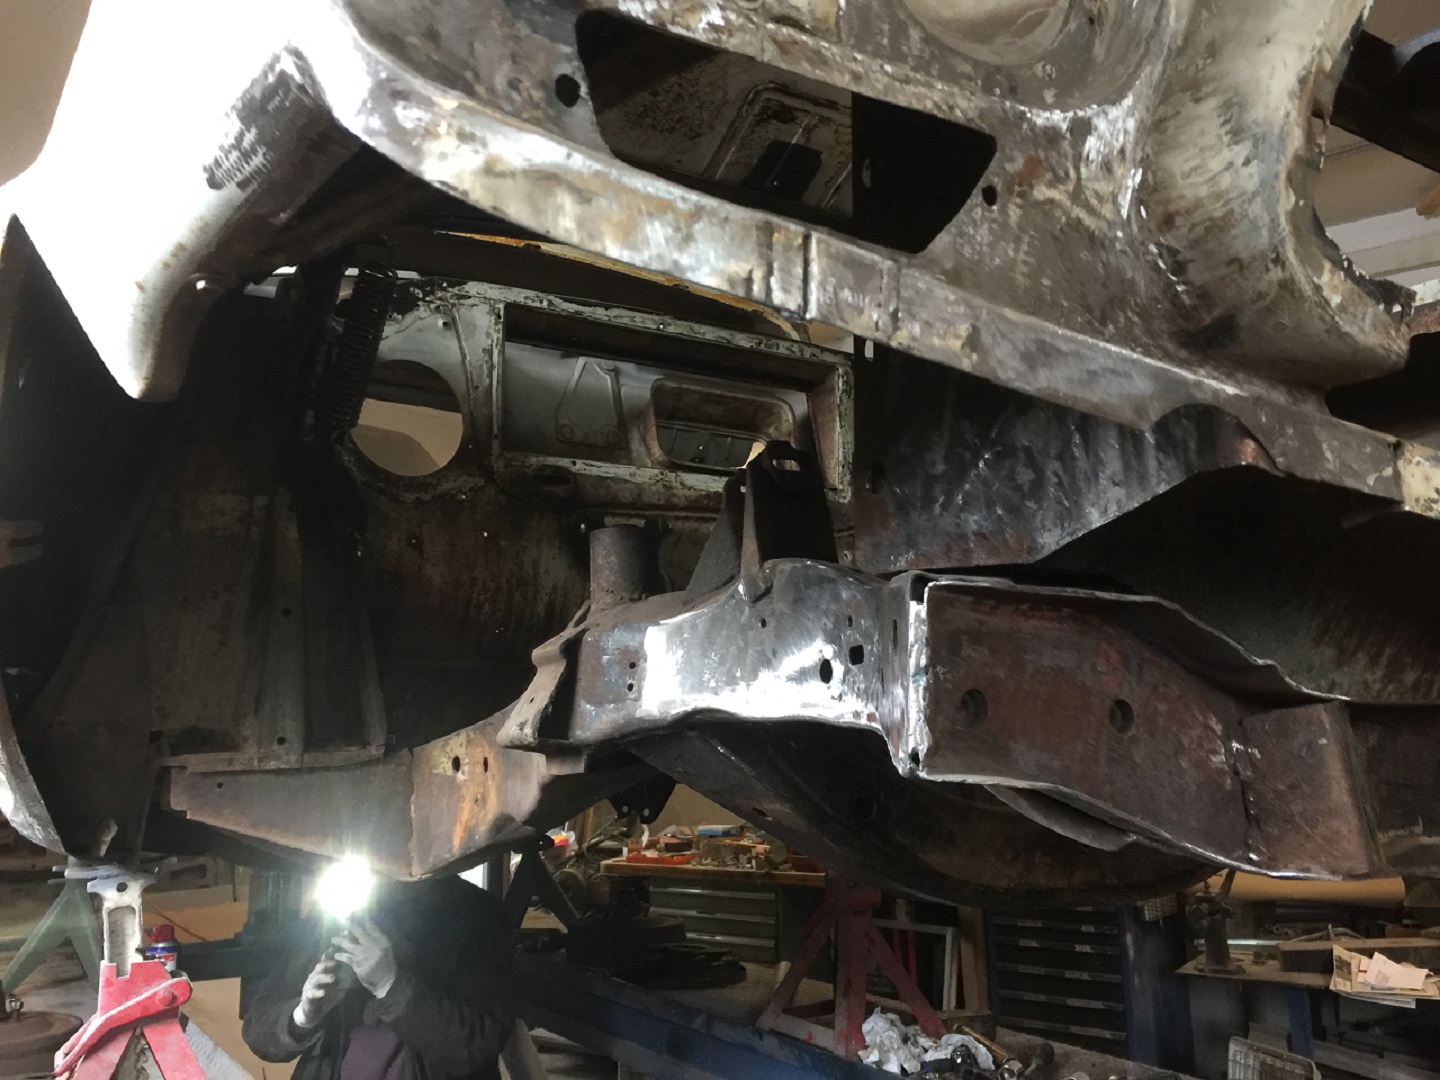 (IMG_4765_front suspension removed.JPG) (IMG_4765_front suspension removed.JPG)
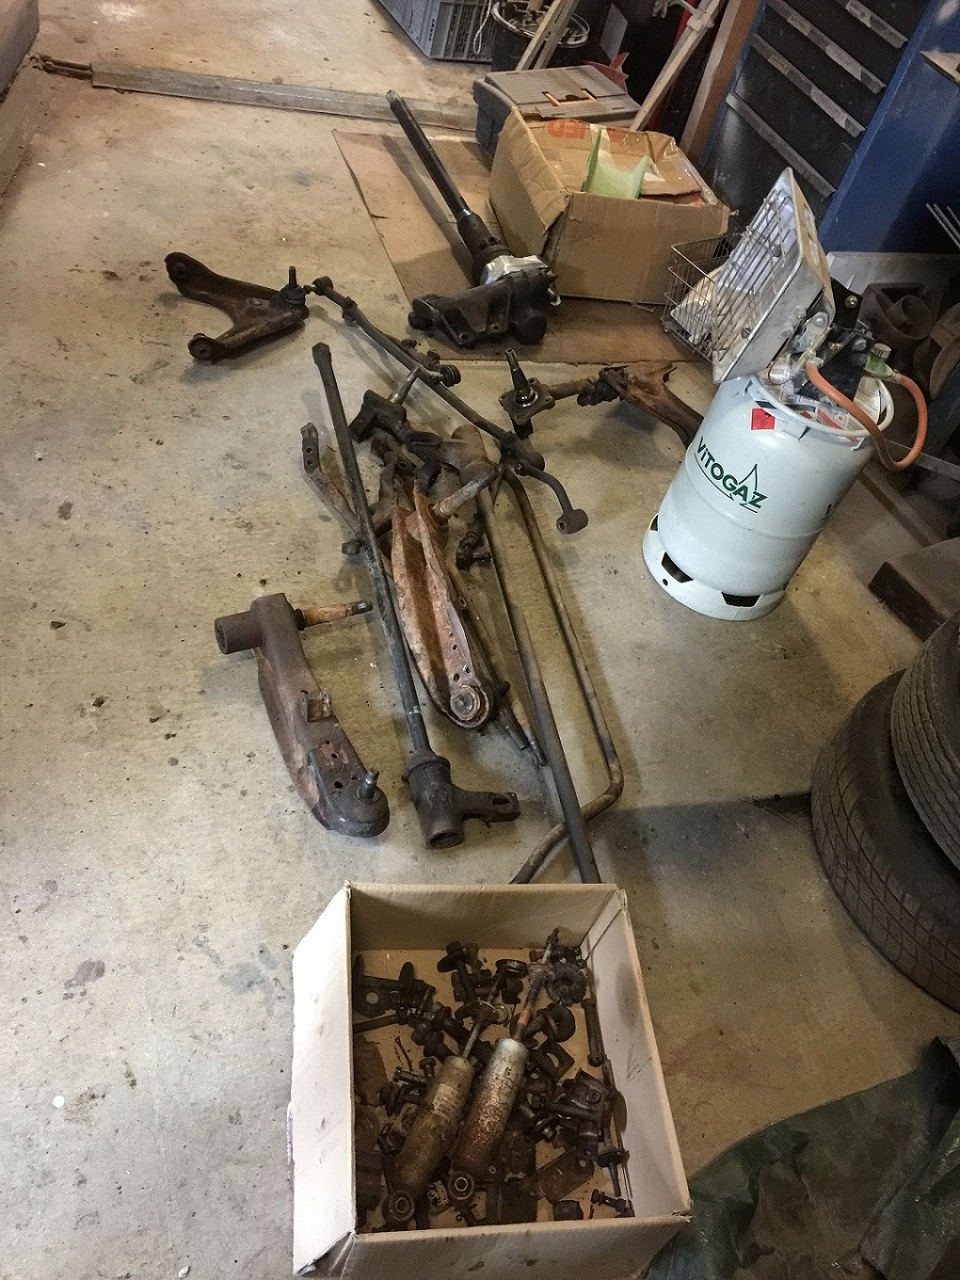 (IMG_4766_front suspension parts pile.JPG) (IMG_4766_front suspension parts pile.JPG)
Attachments
----------------
IMG_4765_front suspension removed.JPG (386KB - 423 downloads)
IMG_4766_front suspension parts pile.JPG (480KB - 428 downloads)
|
|
| |
|
Expert 5K+
Posts: 7393
Location: northern germany | di_ch_NY56 - 2018-03-04 2:04 AM
Yesterday I was at the shop for a very short time to discuss the further steps and to make sure that I gonna replace the ball joints myself. Why? at the shop they pressed out the old ball joints at the control arms of a 300H and pressed in the new ones. From Wizard I got a sunny clear warning not to press out and press in. So I got a appropriate Snap-On tool to perform that work myself.
Happy Restoring! Dieter
_______
Wow.... my suggestion is steer clear of that shop completly. the threads are visible also the large square head. how can anyone with more than 3 brain cells try to PRESS them out? again, avoid these "mechanics". |
|
| |
|
Expert 5K+
Posts: 9650
Location: So. Cal | Those threads on the control arms will strip out pretty easily so never use an impact air tool to install the ball joints. But you can use an impact air tool to remove them if they are too difficult to get out by hand. |
|
| |
|
Expert
Posts: 1530
Location: ZH, Switzerland | Thanks a lot for your answers. Yes, that's the reason I'm going to remove and install the ball joints myself, following the FSM strictly (by the way, the 1960 and 1962 are indentical in the description of the removal/install of the ball joints). The same is valid for the pinion seal as well. Today I was cleaning the upper side and the lower side of the front subframe (where the control arms and idler arm of the steering linkage were mounted). Beside I was cleaning the control arms and steering knuckels from tar and dirt to get them ready to sand blast. I decided to get rid of the additional spring package at the rear springs. From what I saw (when my Letter was in the state prior to the disassembling process) the rear was parallel to the front and not sinking down. Edit: I'll keep the canvas interliner in the rear springs. Gary Goers shows interliner made out of polyurethane, but that's not the same like the original canvas interliner. Body: the shop asked me, if I got the rubber between the radiator yoke and the front sub frame. Where to get em? I just could buy some 2 3/16" (around 3 cm) rubber patches to cut it myself - if there is no suplier. Happy Restoring! Dieter
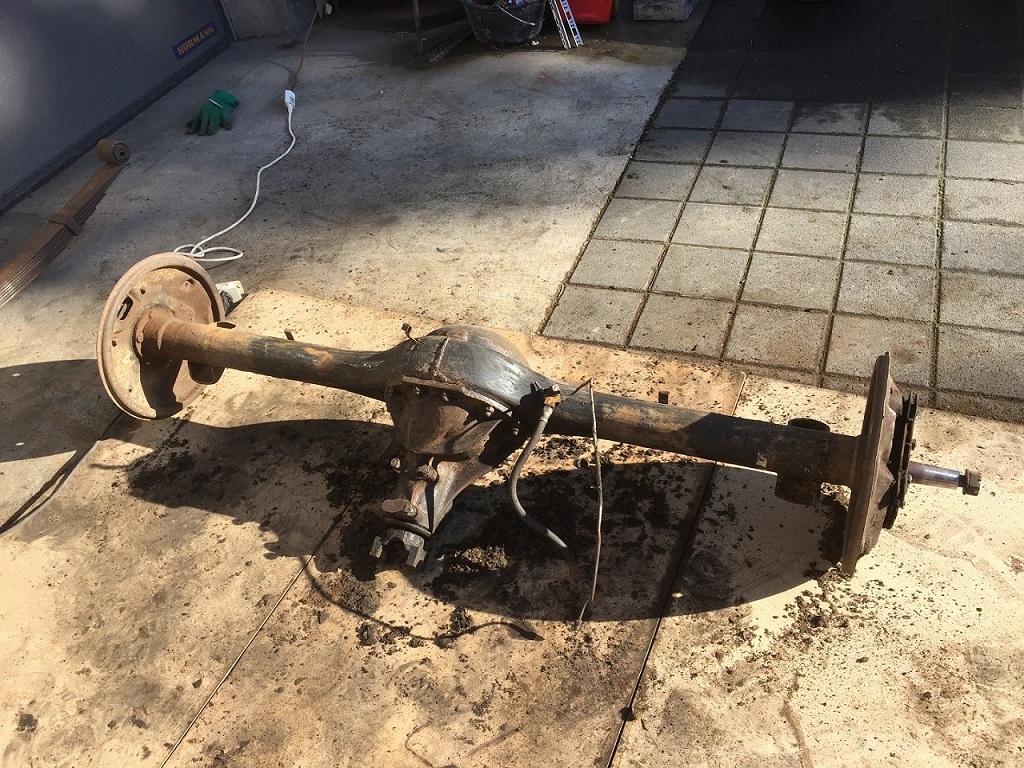 (IMG_4770_rear axle almost free from dirt and grime.JPG) (IMG_4770_rear axle almost free from dirt and grime.JPG)
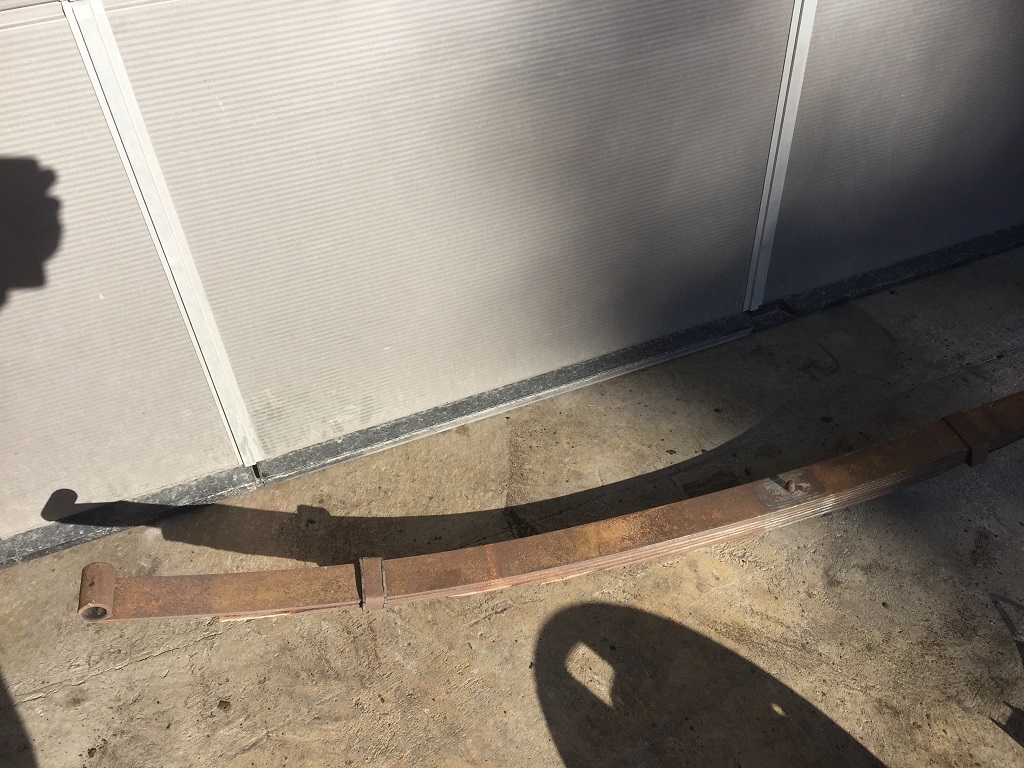 (IMG_4771_rear spring with no additional spring package.JPG) (IMG_4771_rear spring with no additional spring package.JPG)
 (IMG_4772_the sand blasting sand - quite fine.JPG) (IMG_4772_the sand blasting sand - quite fine.JPG)
Attachments
----------------
IMG_4770_rear axle almost free from dirt and grime.JPG (406KB - 420 downloads)
IMG_4771_rear spring with no additional spring package.JPG (285KB - 440 downloads)
IMG_4772_the sand blasting sand - quite fine.JPG (465KB - 426 downloads)
|
|
| |
|
Expert
Posts: 1530
Location: ZH, Switzerland | All the sheet metal of the front of the windshield is primered now. About 50% of the small parts are primered as well. The primer is a very nasty stuff, the same primer is used to prime the locomotives and waggons of the Swiss railway. I heard that the parts pile must be big enough to be worth to mix up the primer (it's very labor intensive). I hope this primer is bomb resistant and ways higher quality than that usually used for cars. The body worker will start to finish the resting issues. The passenger side fender revealed some more to do work (filler removed) due to the accident my Letter had in its earlier live. At least I know now as well where my Letter will go to get the finishing paint. I still aiming an Alaskan White color or as close as possible (e.g. Mercedes Benz Classic White is ways too yellowish, while contemporary white is ways too bright). Happy Restoring! Dieter Edit: What is that color at the sub frame (I assume Gun metallic)? The drivers side front fender is laying on the roof of a 1961 NY 4d HT, the rear window is still missing - must not be a new one, but I beg to get one rear window for the owner of the shop
Edited by di_ch_NY56 2018-03-11 8:39 AM
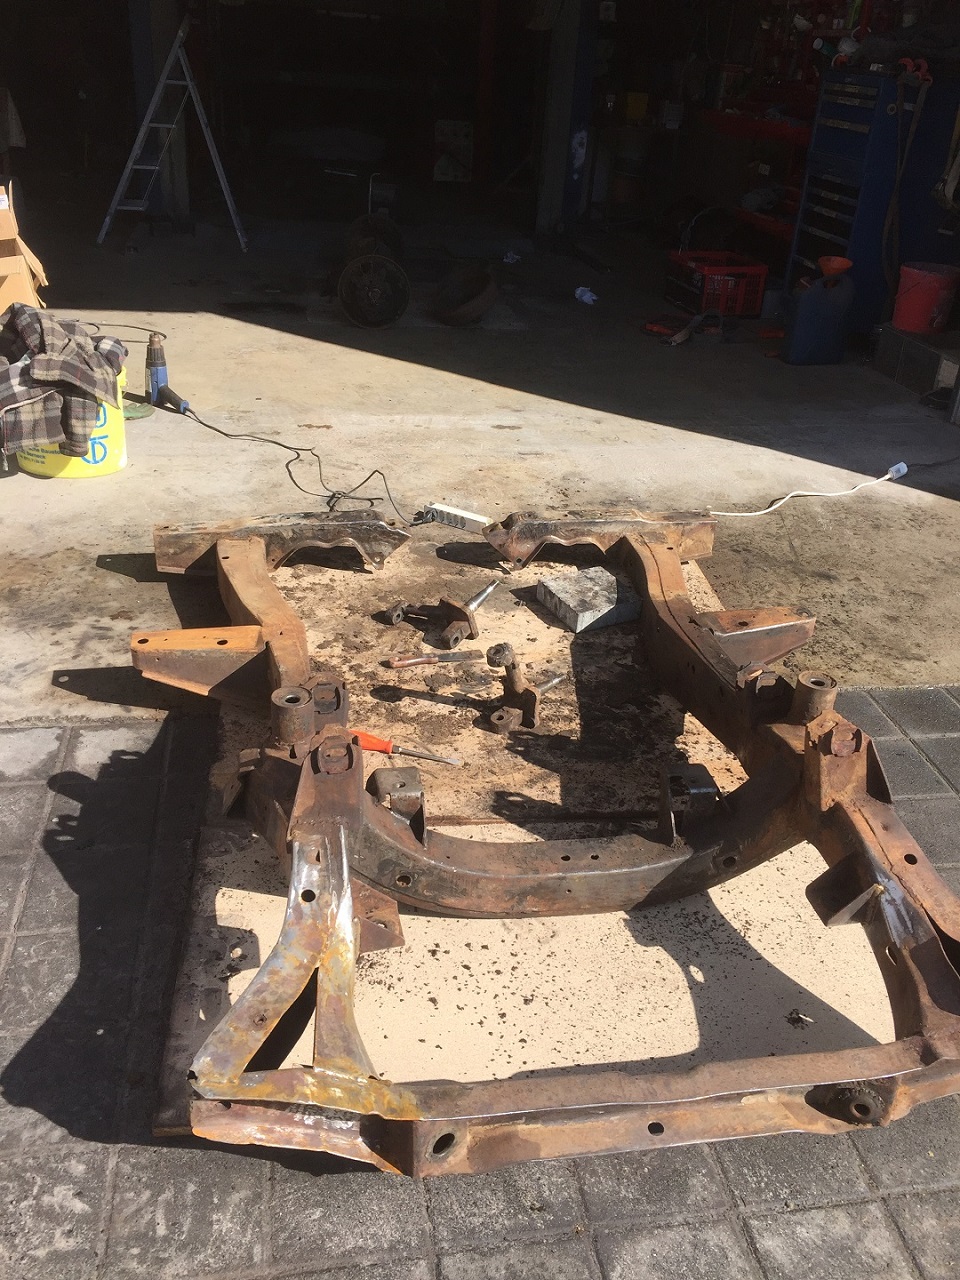 (IMG_4768_sub frame removing resting protection layer.JPG) (IMG_4768_sub frame removing resting protection layer.JPG)
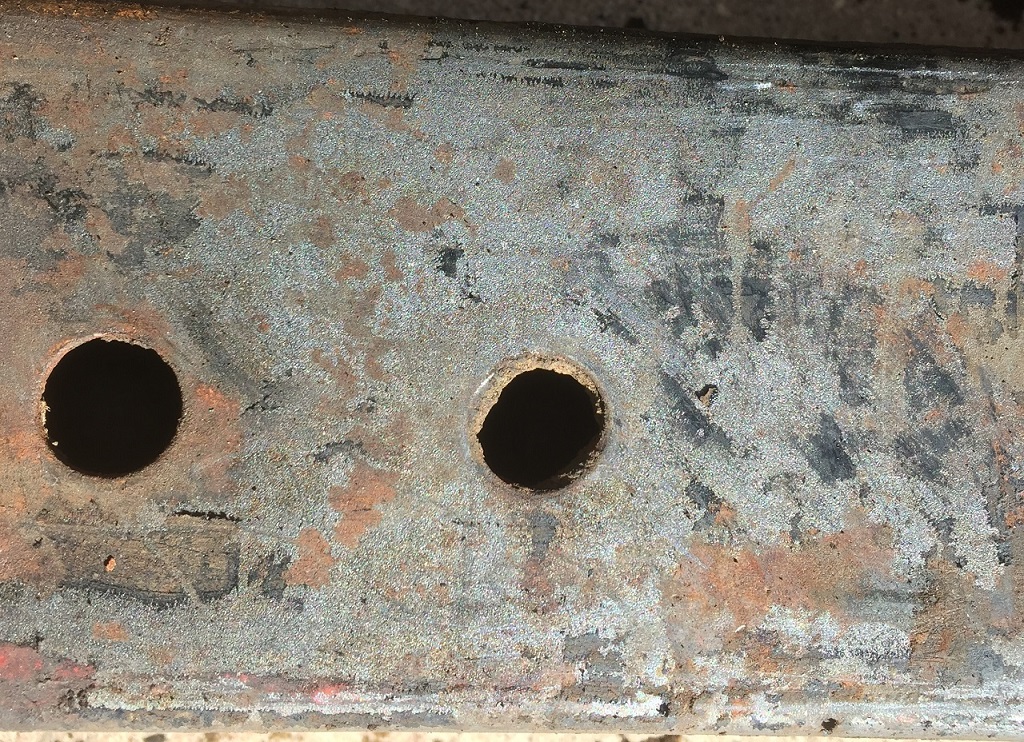 (IMG_4769 primer or color of the sub frame.JPG) (IMG_4769 primer or color of the sub frame.JPG)
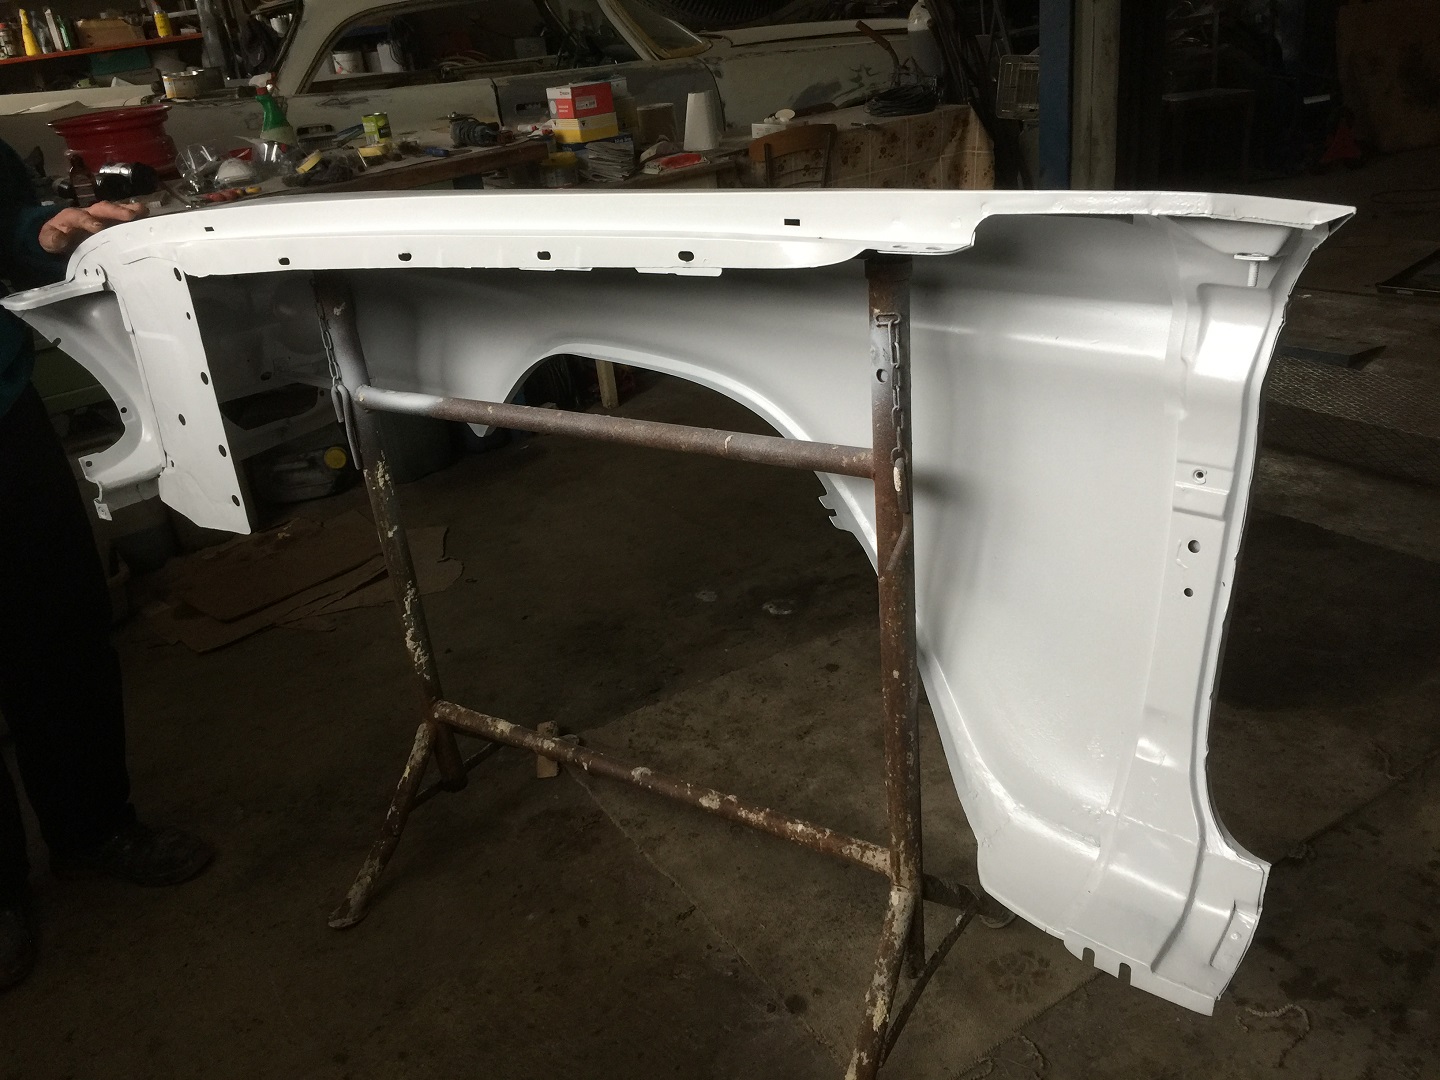 (IMG_4776 passenger side front fender.JPG) (IMG_4776 passenger side front fender.JPG)
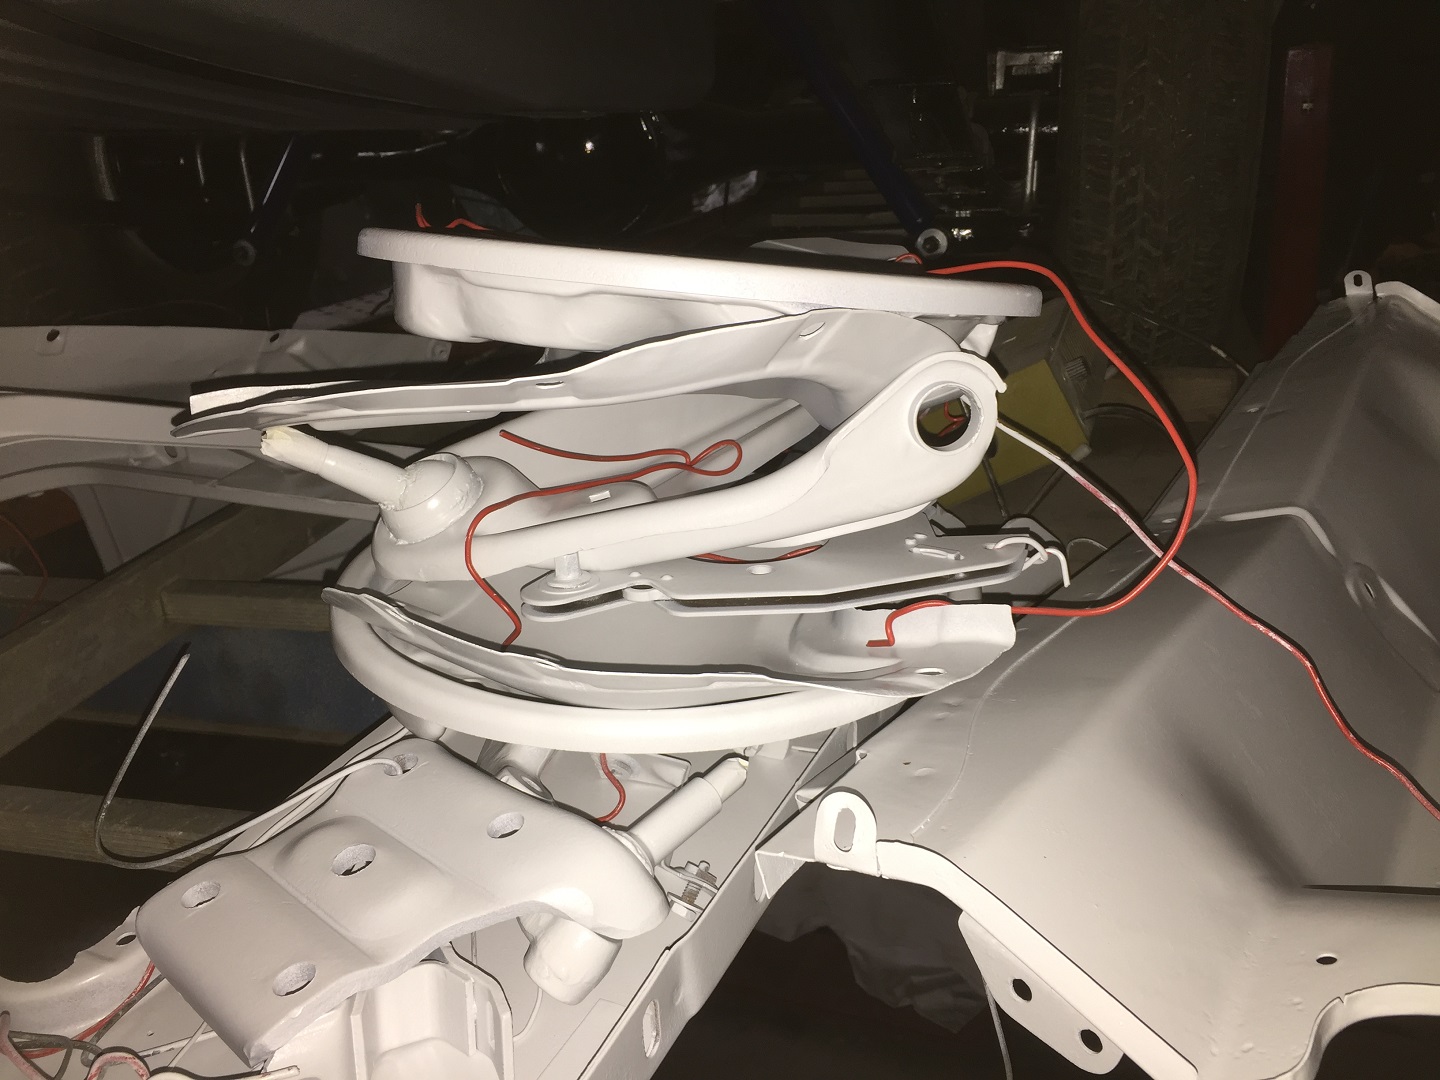 (IMG_4778_parts pile already primered.JPG) (IMG_4778_parts pile already primered.JPG)
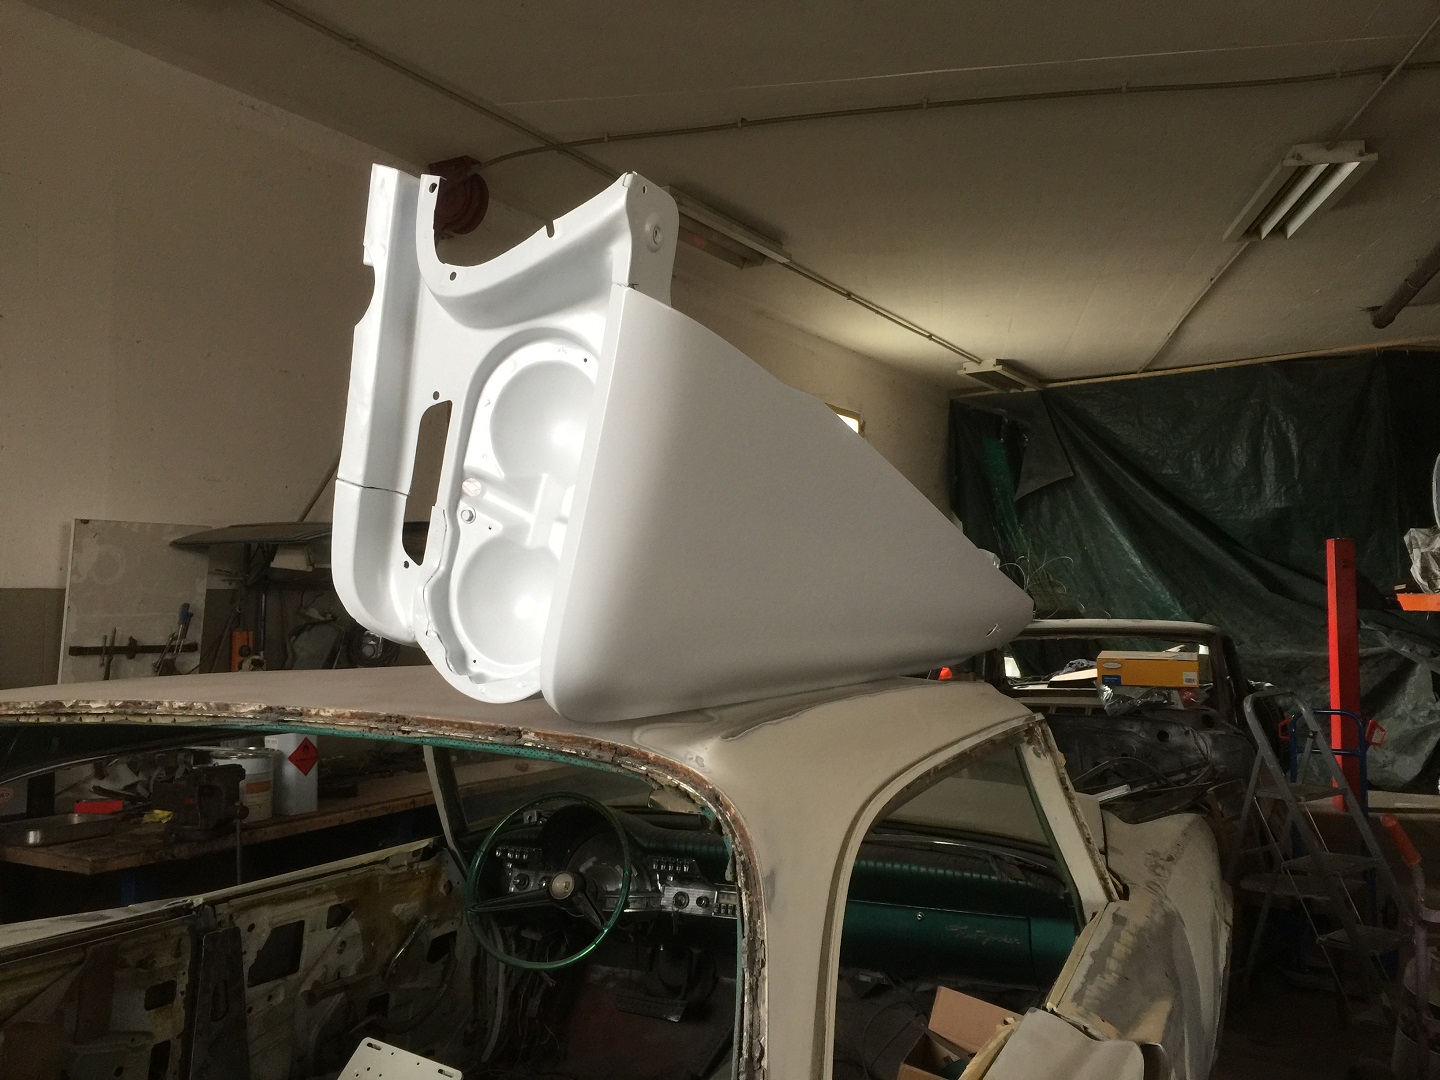 (IMG_4779_drivers side fender.JPG) (IMG_4779_drivers side fender.JPG)
Attachments
----------------
IMG_4768_sub frame removing resting protection layer.JPG (484KB - 419 downloads)
IMG_4769 primer or color of the sub frame.JPG (492KB - 434 downloads)
IMG_4776 passenger side front fender.JPG (401KB - 419 downloads)
IMG_4778_parts pile already primered.JPG (353KB - 412 downloads)
IMG_4779_drivers side fender.JPG (404KB - 407 downloads)
|
|
| |
|
Board Moderator & Exner Expert 10K+
Posts: 13045
Location: Southern Sweden - Sturkö island | It must feel good to finally see the parts primed - it gives a notice that the hard part of the restauration is soon over.
Keep us posted Dieter! |
|
| |
|
Expert
Posts: 1530
Location: ZH, Switzerland | wizard - 2018-03-10 6:47 PM It must feel good to finally see the parts primed - it gives a notice that the hard part of the restauration is soon over. Keep us posted Dieter! Yes, I'm happy. |
|
| |
|
Expert
Posts: 1530
Location: ZH, Switzerland | Yesterday I was working for uncounted hours at the underside of my Letter to remove some too thick resting tar to allow the further sand blasting process. I removed as much of the sealant in front of the doors as well. As well I met the body worker at the shop to explain the mounting and position of the drains. He catched the idea and spoke from drains as well. In the passing week he started wirh the replacement of the trunk floor. At the shop they discovered, that the drivers side spring shackle mounting box was crushed; they removed it, straighed it and mountd it again. Happy Restoring! Dieter |
|
| |
|
Expert 5K+
Posts: 5006
| https://www.muggyweld.com/products/
super alloy 5 goes to 600 degrees, super allow 1 is 350... not sure if an intake would even see 350. Wonder about the heat transfer in that are to the foot you are repairing.
this stuff works. |
|
| |
|
Expert
Posts: 1730
Location: Michigan | Dieter.
Are you powder coating any of the parts? I found it to be extremely tough and does a great job of sealing the metal from the elements. |
|
| |
|
Expert
Posts: 1530
Location: ZH, Switzerland | No, I guess none of the gloss black parts are power coated, but the color did dry very slow. I talked to the shop owner to get the underside of the body satin black. I assuem 2k colors. Happy Restoring! Dieter TW: edited some typing errors; due to the use of my phone, the computer is donw and needs a reinstall of Windows 10.
Edited by di_ch_NY56 2018-03-19 1:35 PM
|
|
| |
|
Expert
Posts: 1530
Location: ZH, Switzerland | I decided to get the underside charcoal black, satin. In the meantime (since my computer was down) a lot has happened. This Sunday after I got a big surprise, I started with wire brushing small parts for the subframe and front suspension. The big surprise you'll see at the photo collection following. The primer is Etokat (normally used for trains as well) Happy Restoring! Dieter
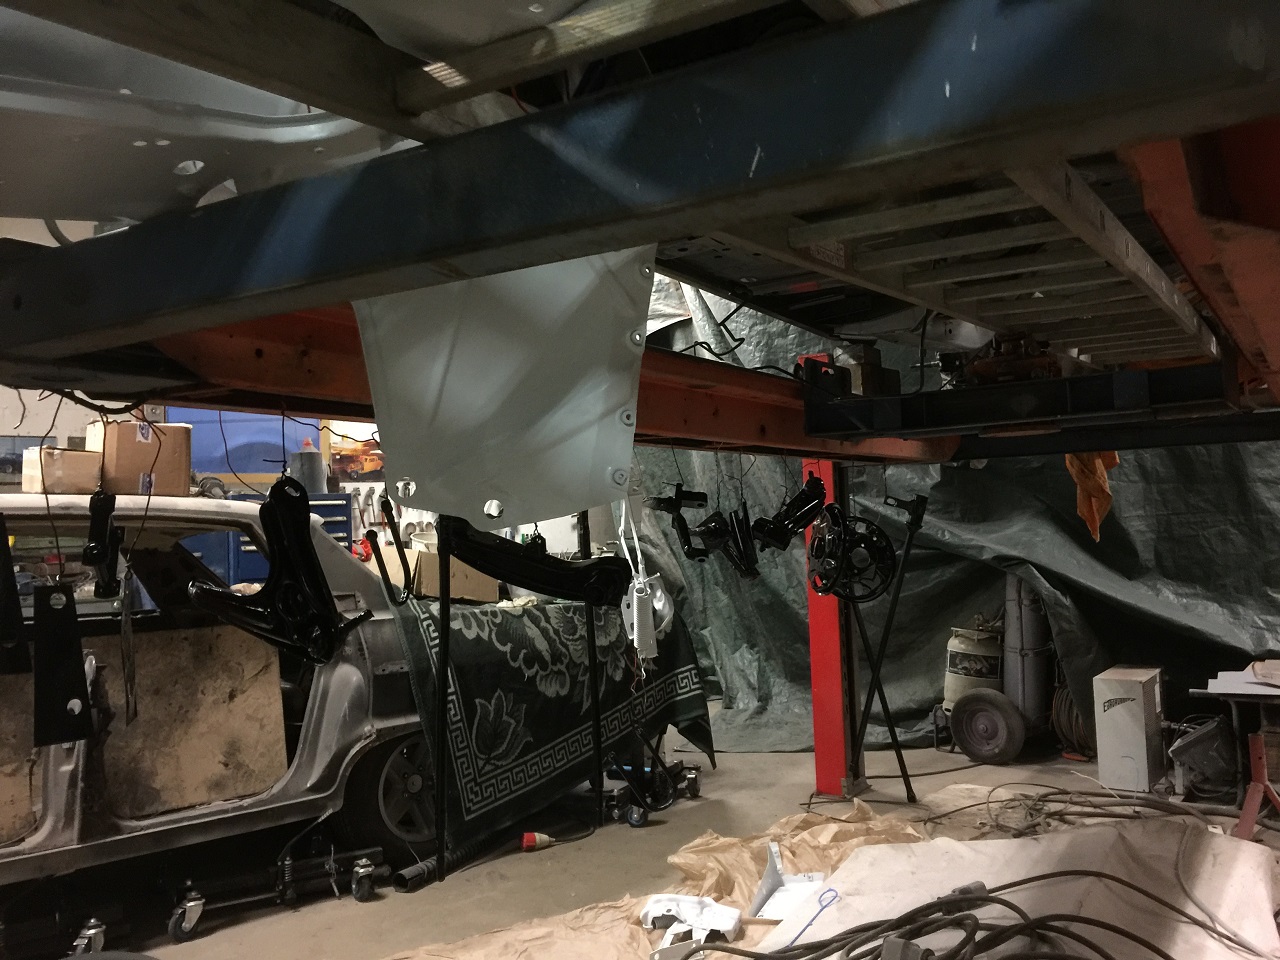 (IMG_4787_parts pile 1.JPG) (IMG_4787_parts pile 1.JPG)
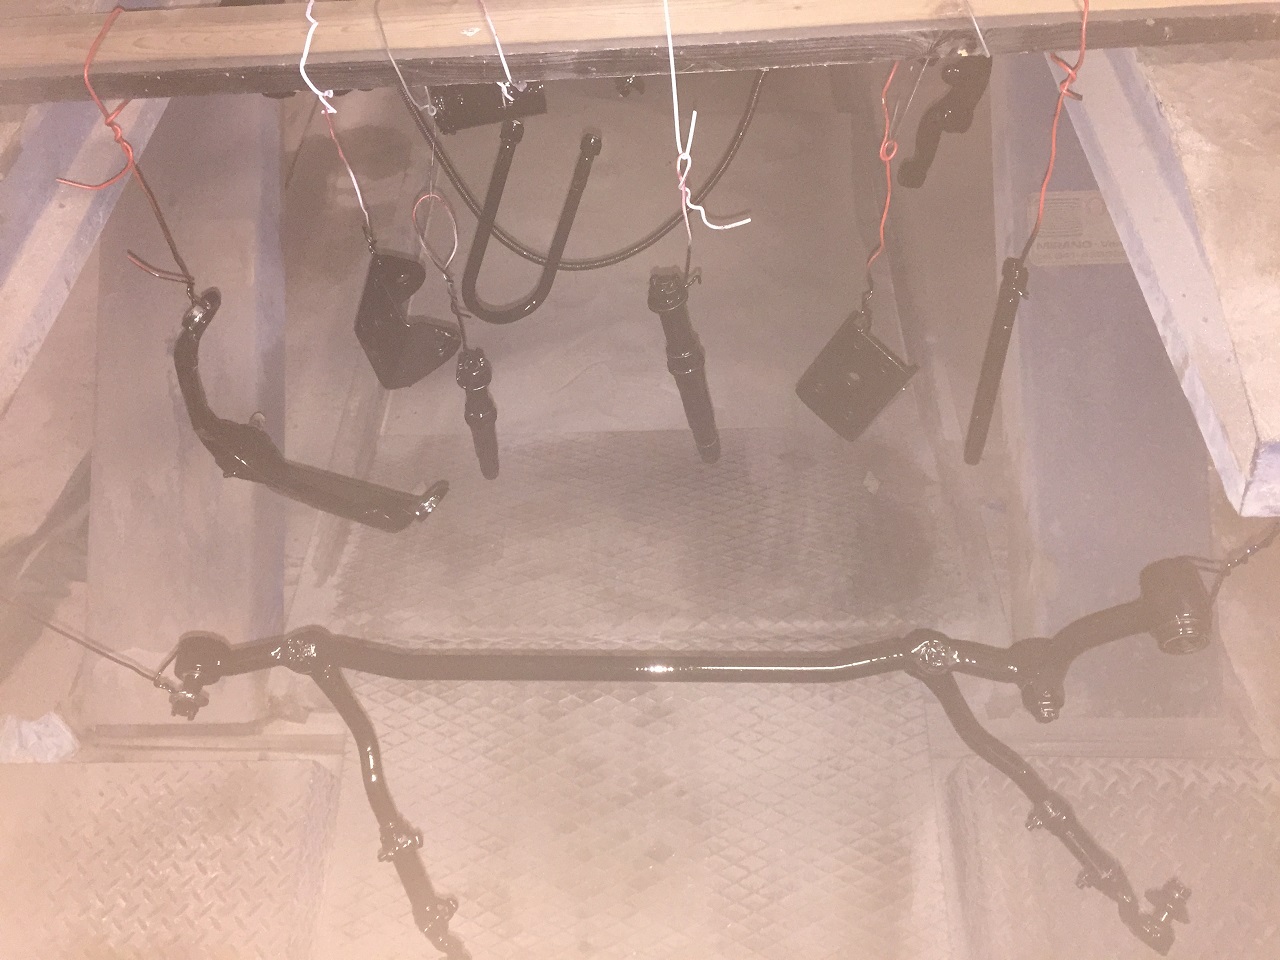 (IMG_4788_parts pile 2.JPG) (IMG_4788_parts pile 2.JPG)
 (IMG_4798_sign on differential 3.15.JPG) (IMG_4798_sign on differential 3.15.JPG)
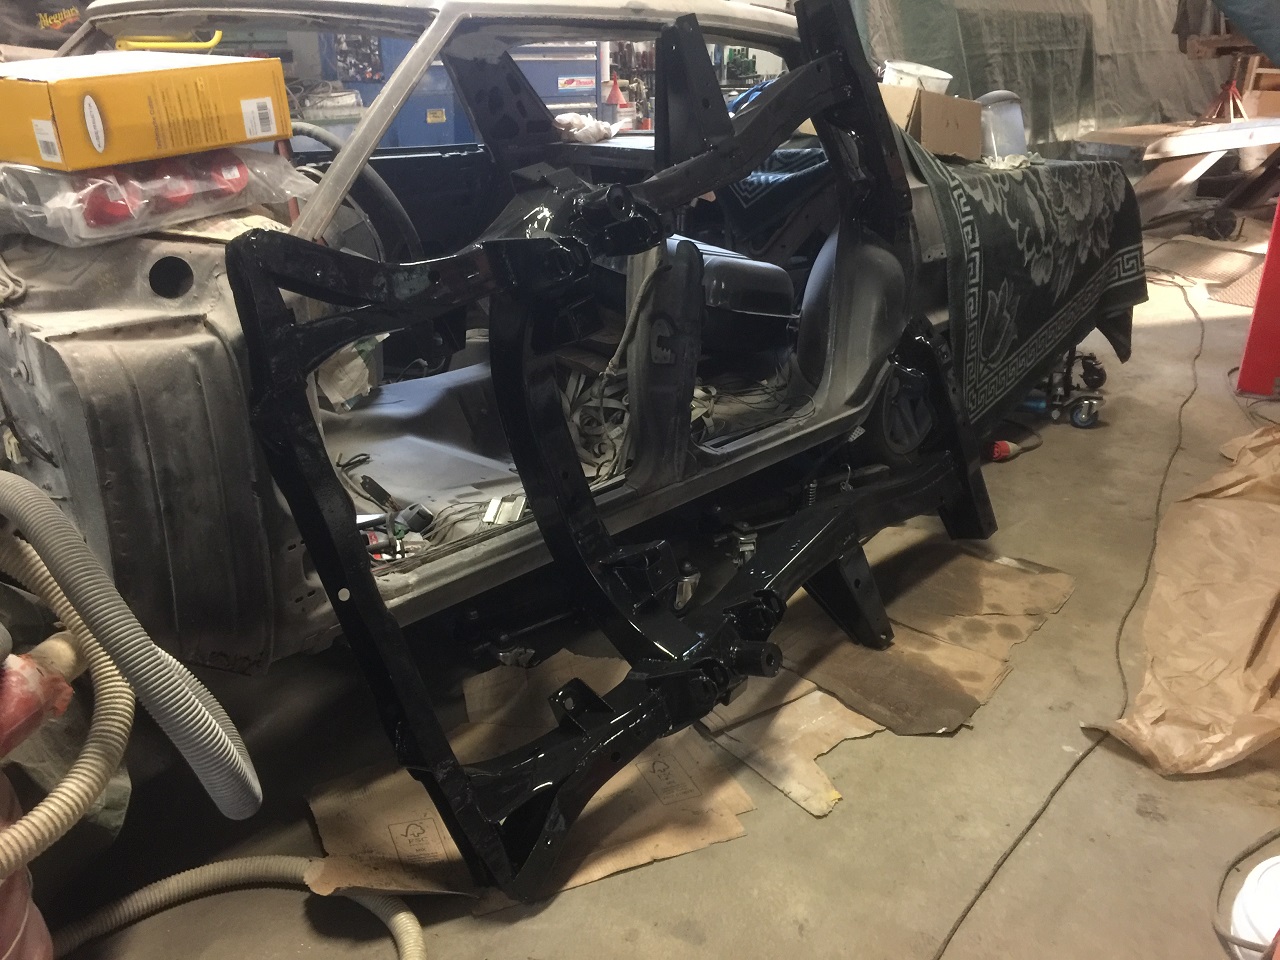 (IMG_4799_sub frame colored.JPG) (IMG_4799_sub frame colored.JPG)
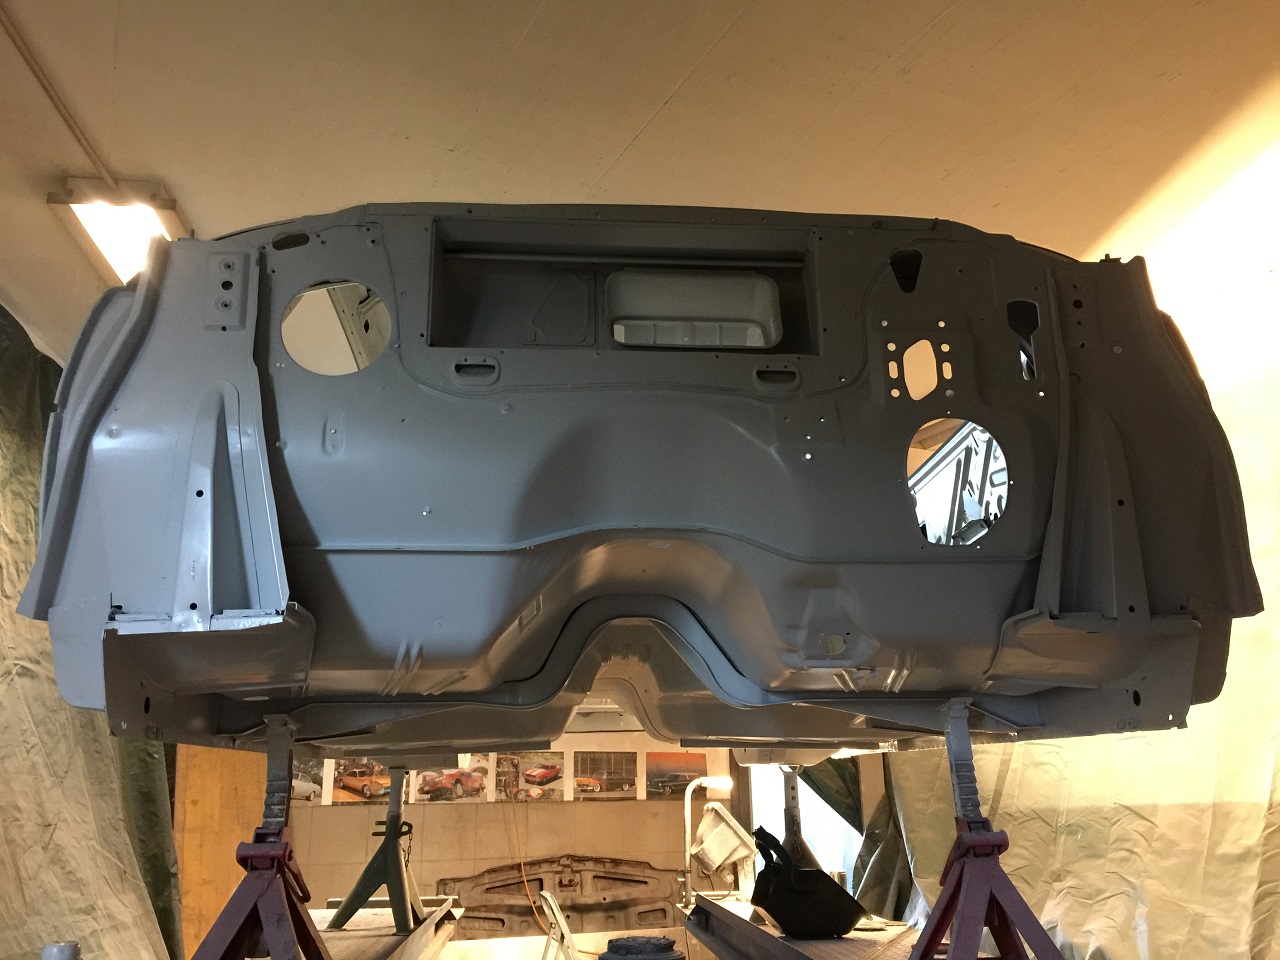 (IMG_4809_firewall and front foot area.JPG) (IMG_4809_firewall and front foot area.JPG)
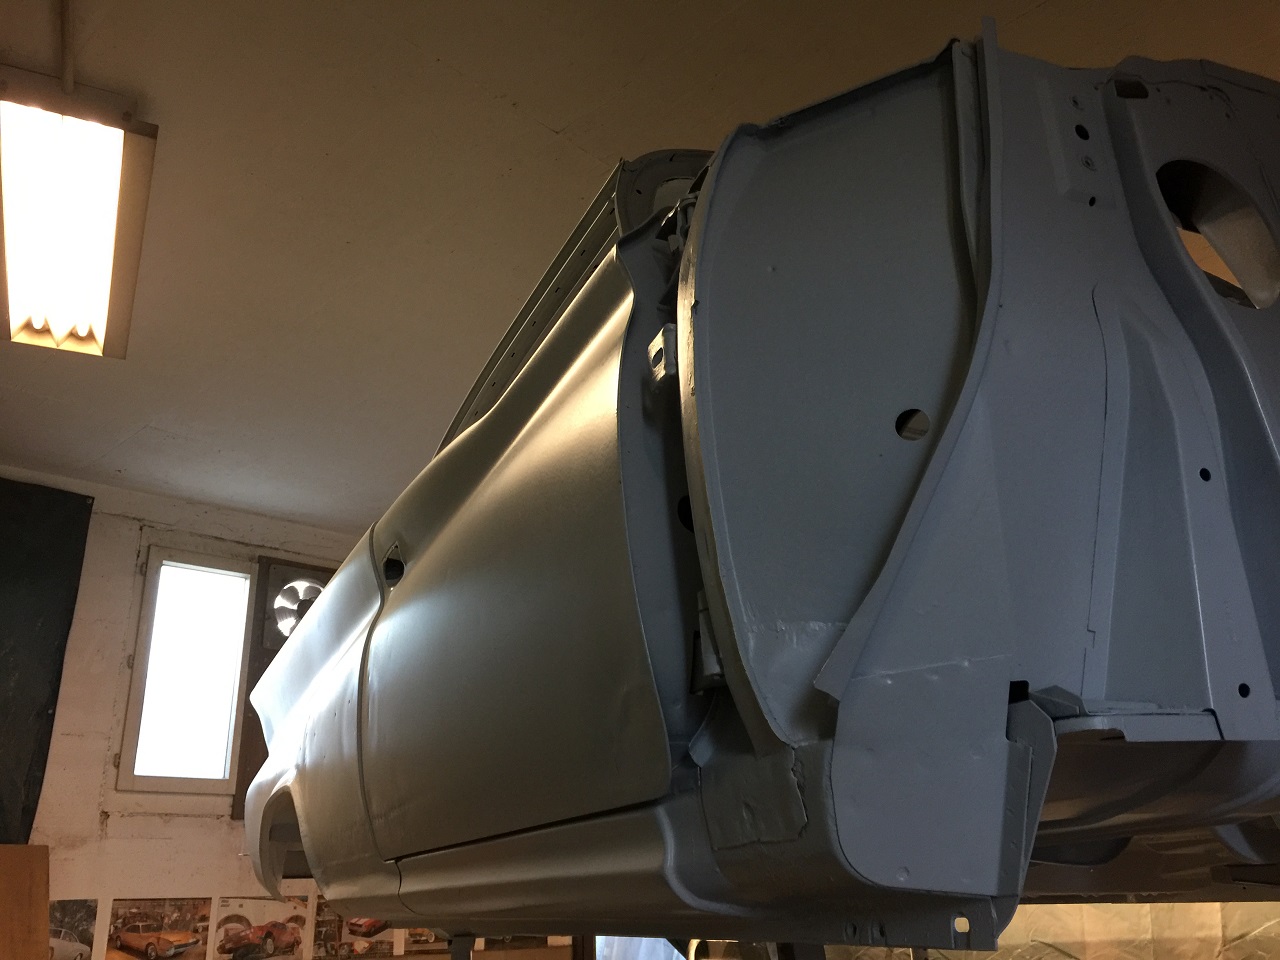 (IMG_4810_passenger side three quart view to the rear.JPG) (IMG_4810_passenger side three quart view to the rear.JPG)
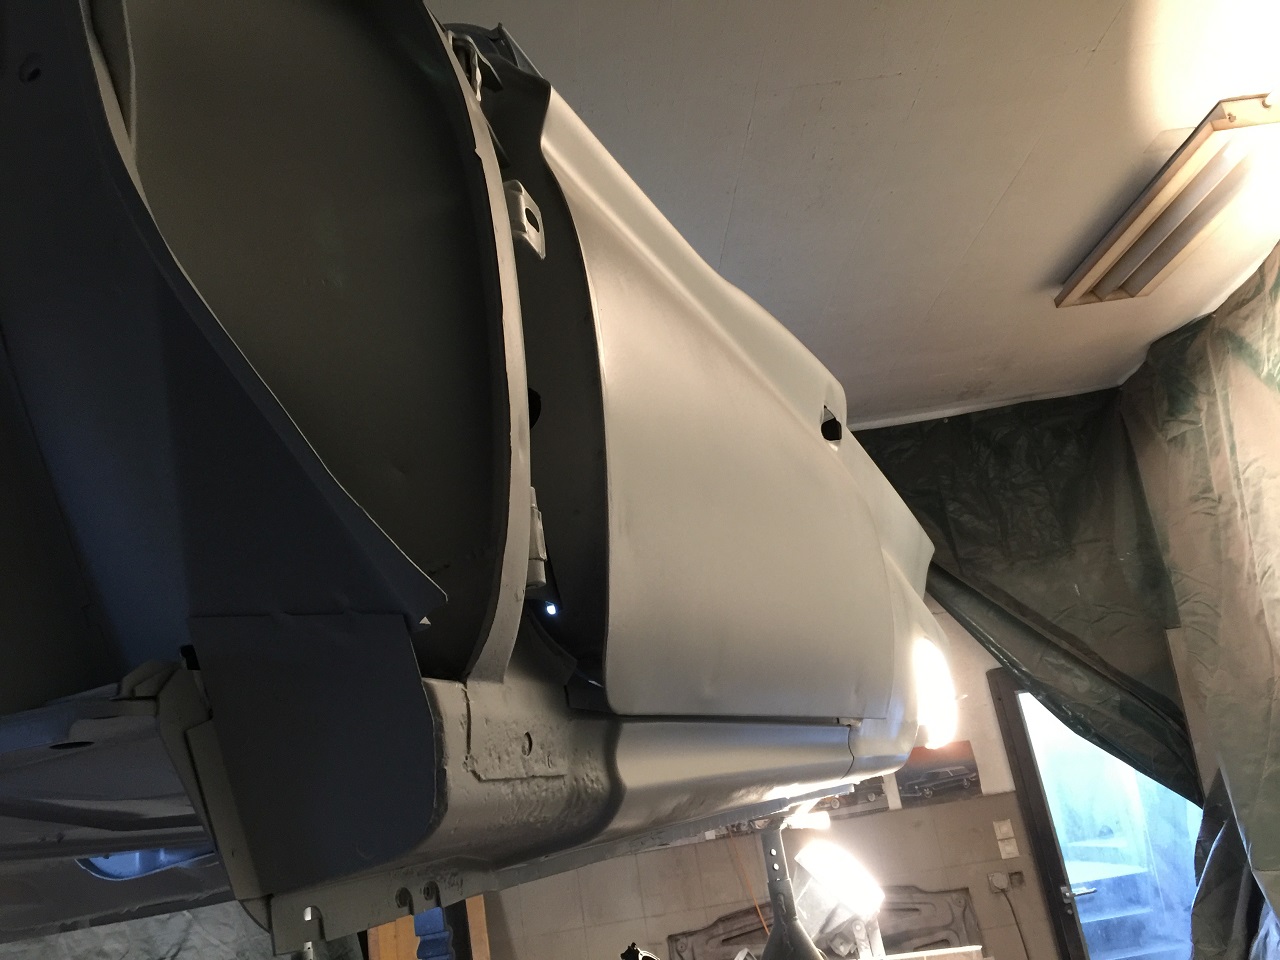 (IMG_4811_drivers side three quart view to the rear.JPG) (IMG_4811_drivers side three quart view to the rear.JPG)
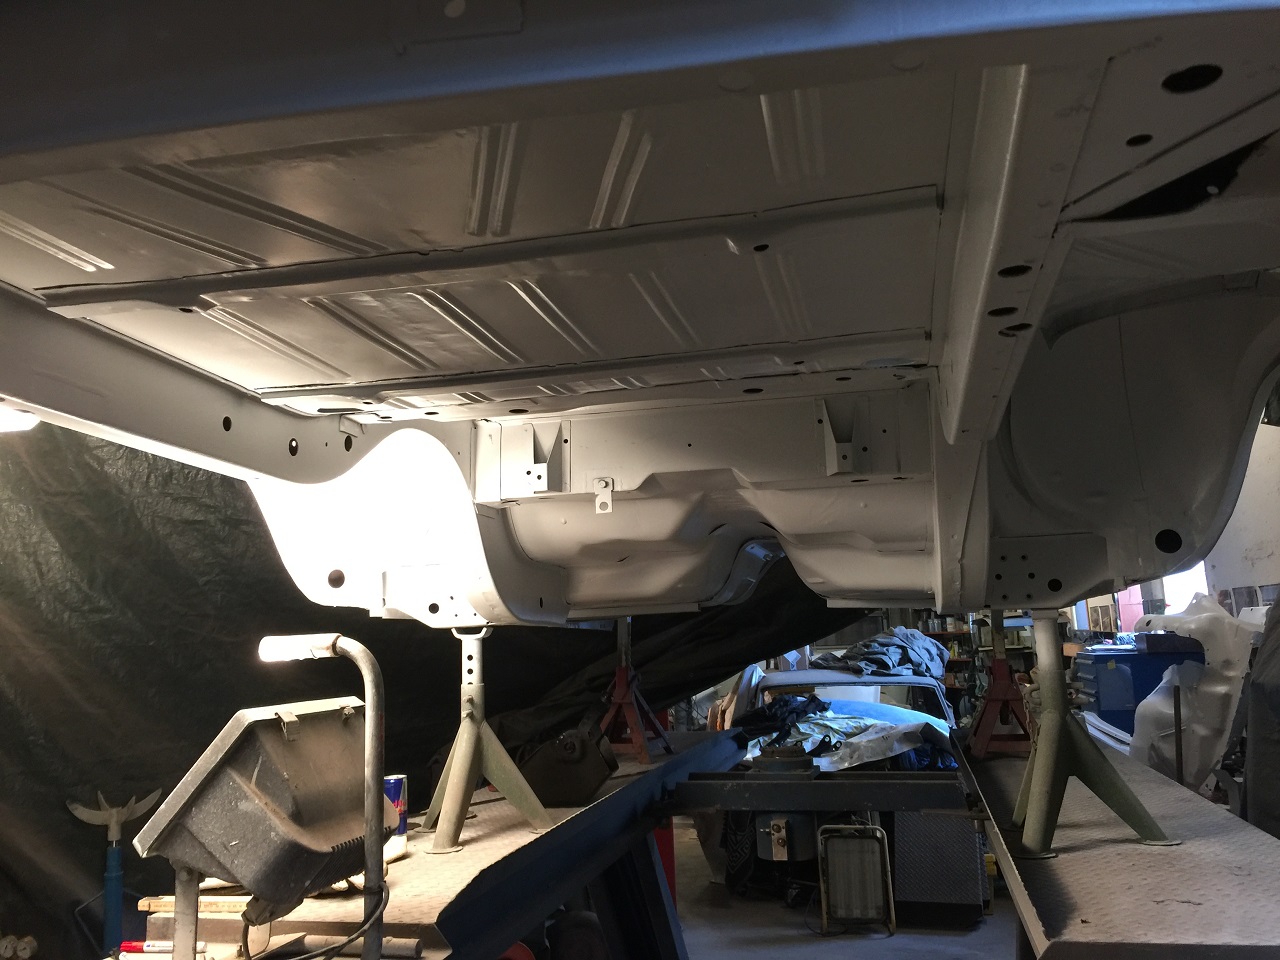 (IMG_4812_undercarriage from the rear (trunk).JPG) (IMG_4812_undercarriage from the rear (trunk).JPG)
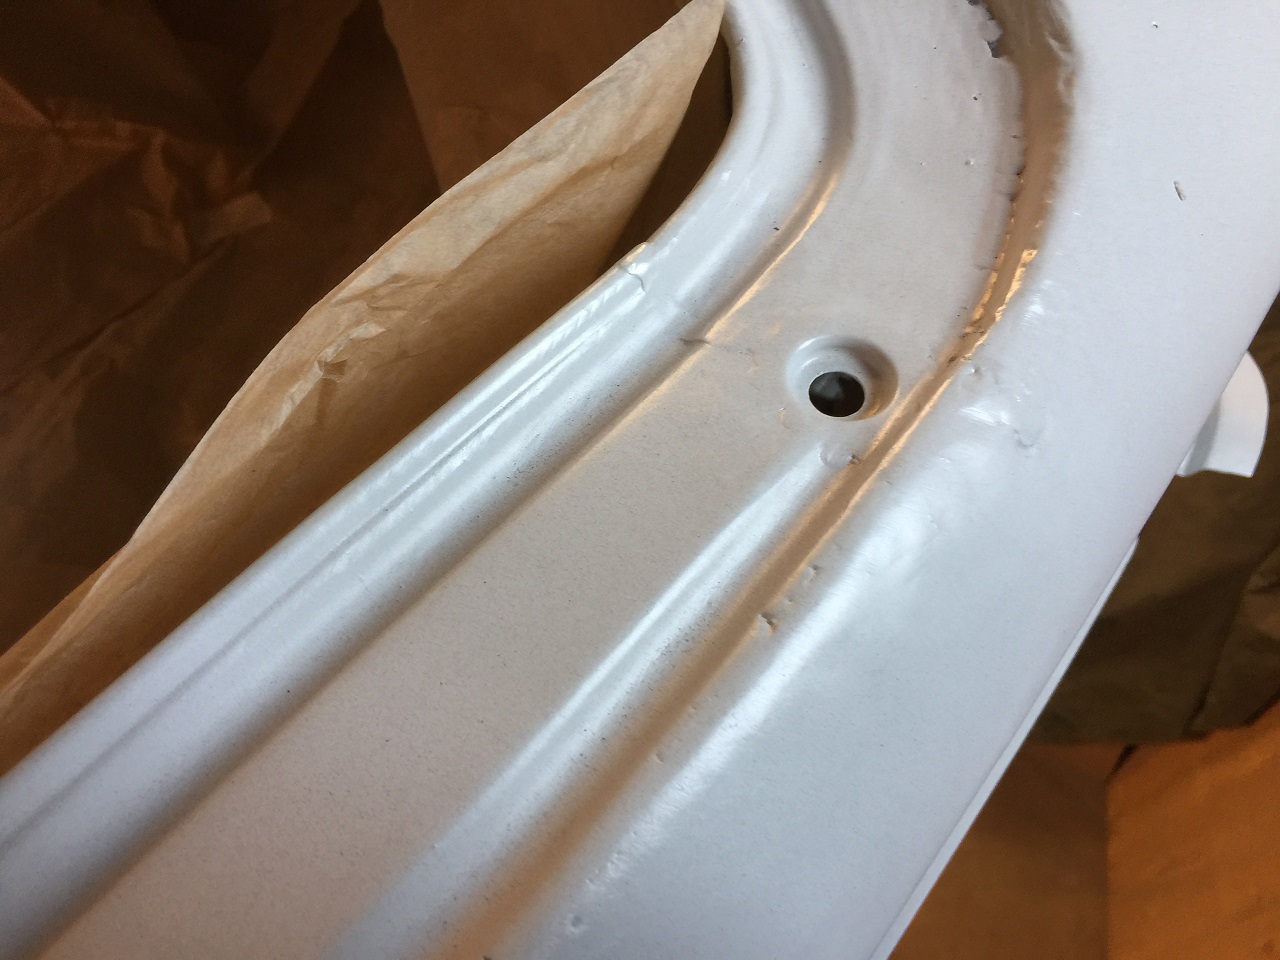 (IMG_4816_rain drain passenger side.JPG) (IMG_4816_rain drain passenger side.JPG)
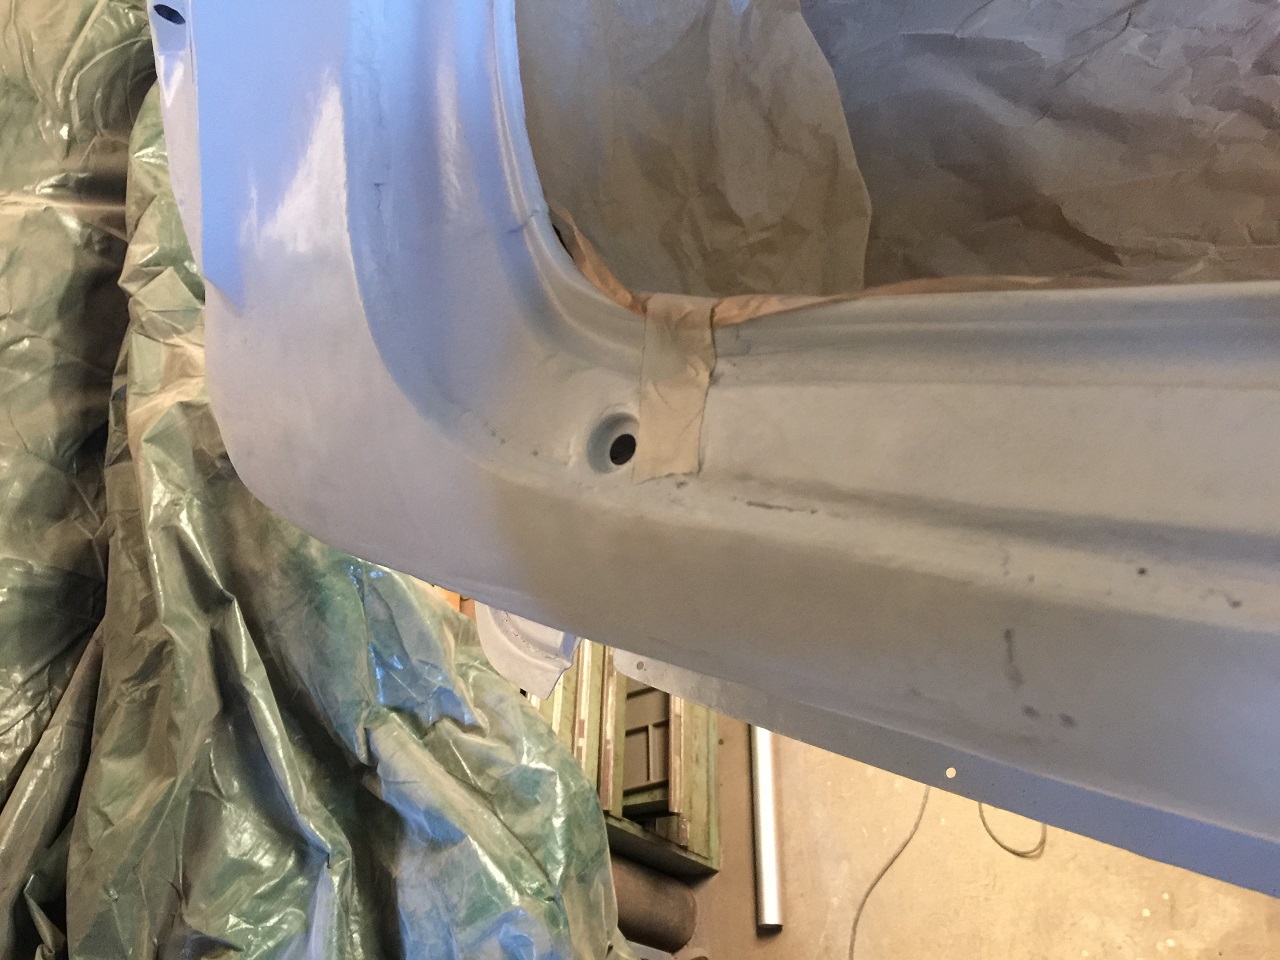 (IMG_4817_rain drain drivers side.JPG) (IMG_4817_rain drain drivers side.JPG)
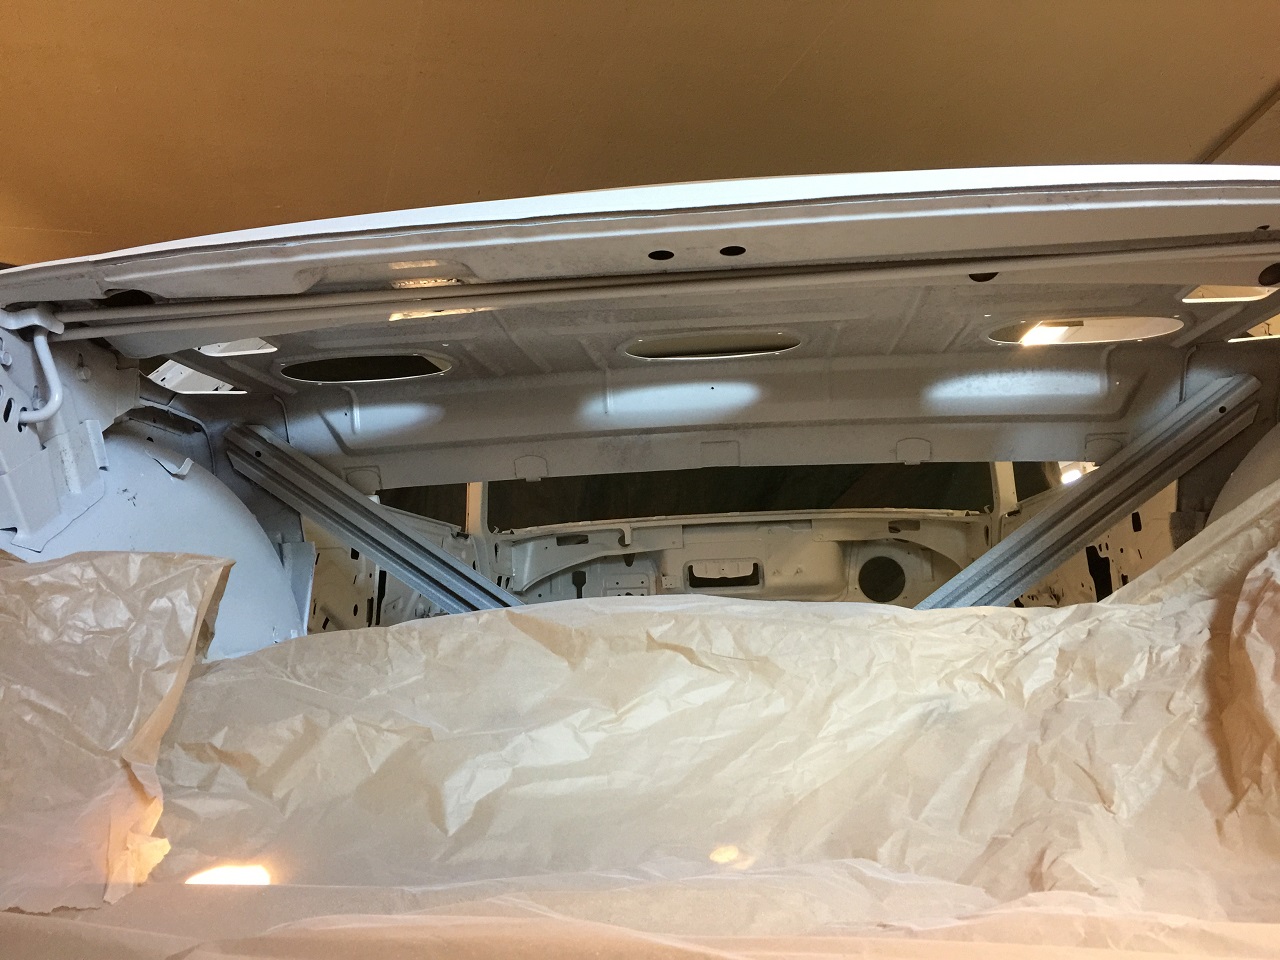 (IMG_4818_parcel shelf.JPG) (IMG_4818_parcel shelf.JPG)
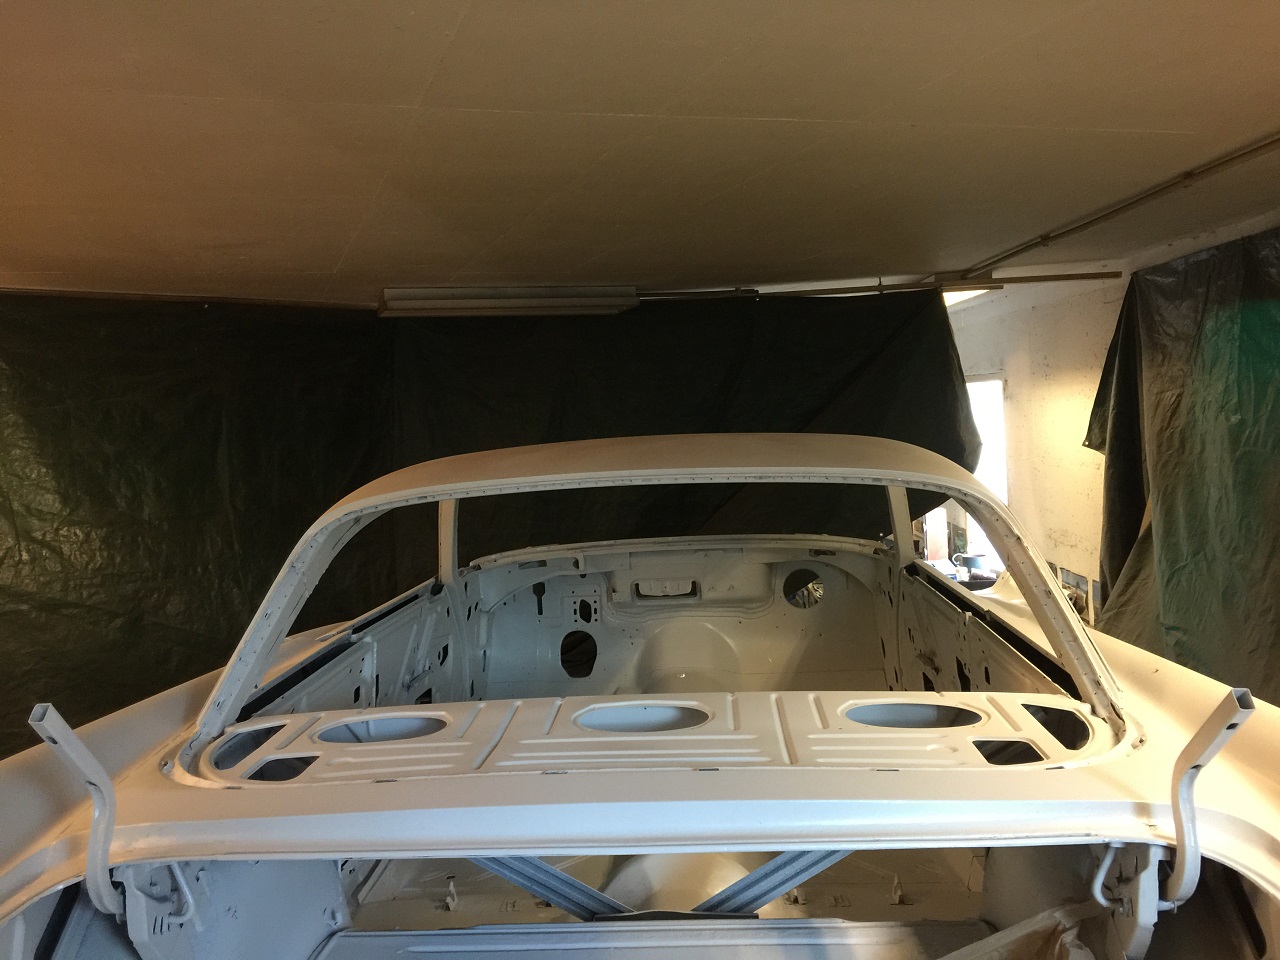 (IMG_4819_parecel shelf and roof.JPG) (IMG_4819_parecel shelf and roof.JPG)
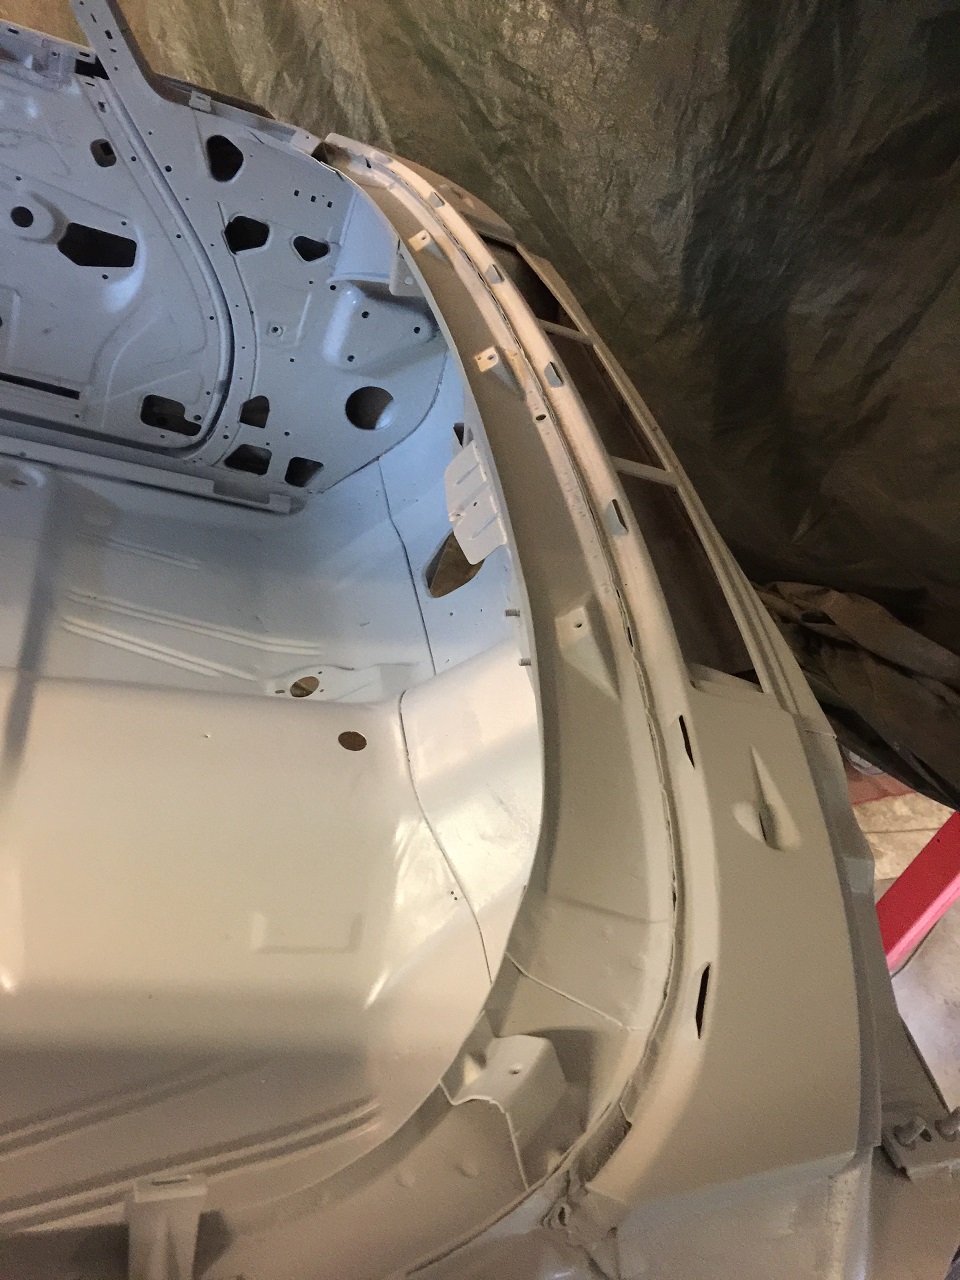 (IMG_4821_cowl and front foot area.JPG) (IMG_4821_cowl and front foot area.JPG)
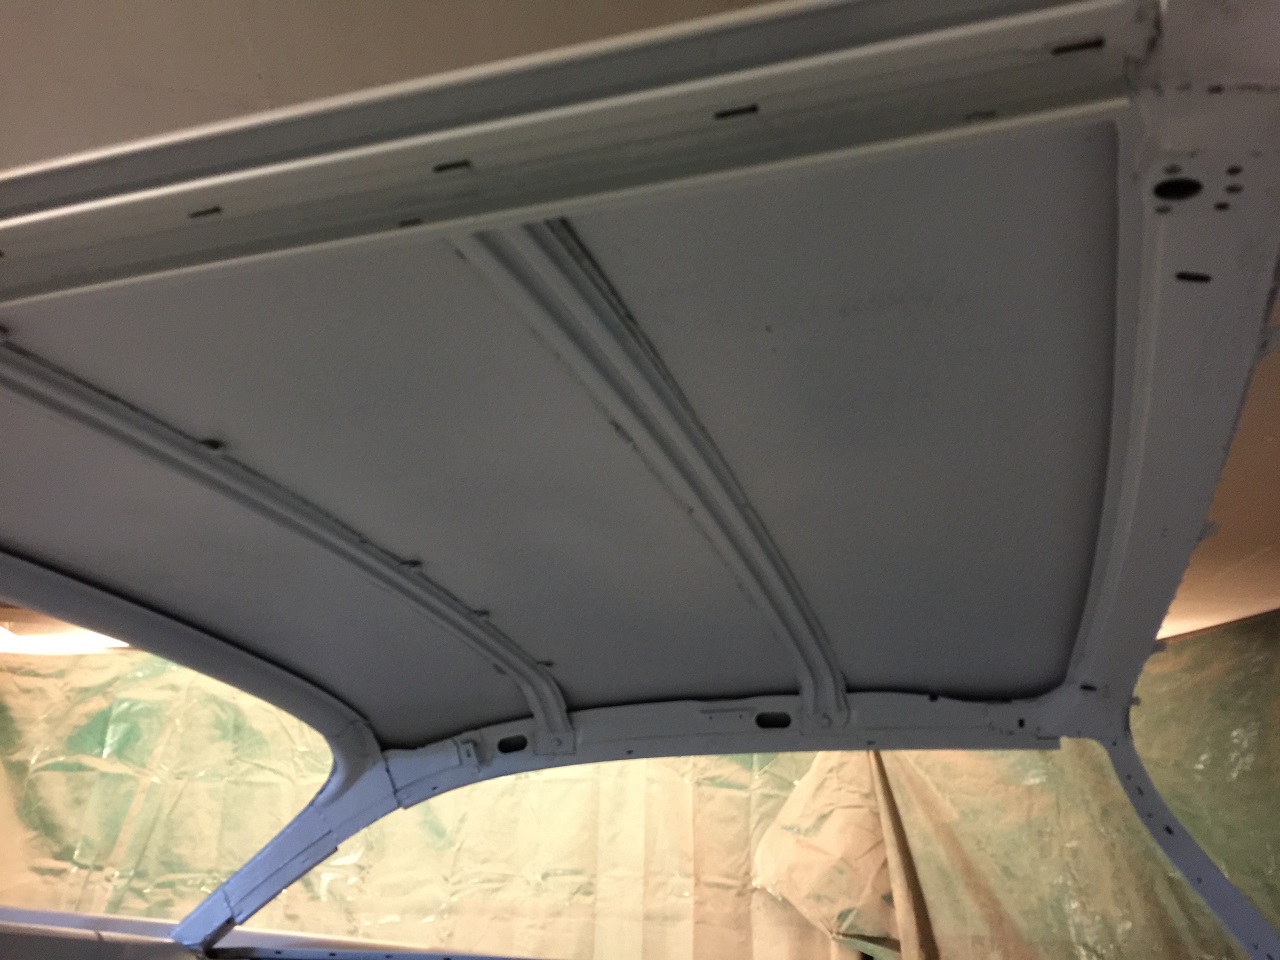 (IMG_4822_roof inside.JPG) (IMG_4822_roof inside.JPG)
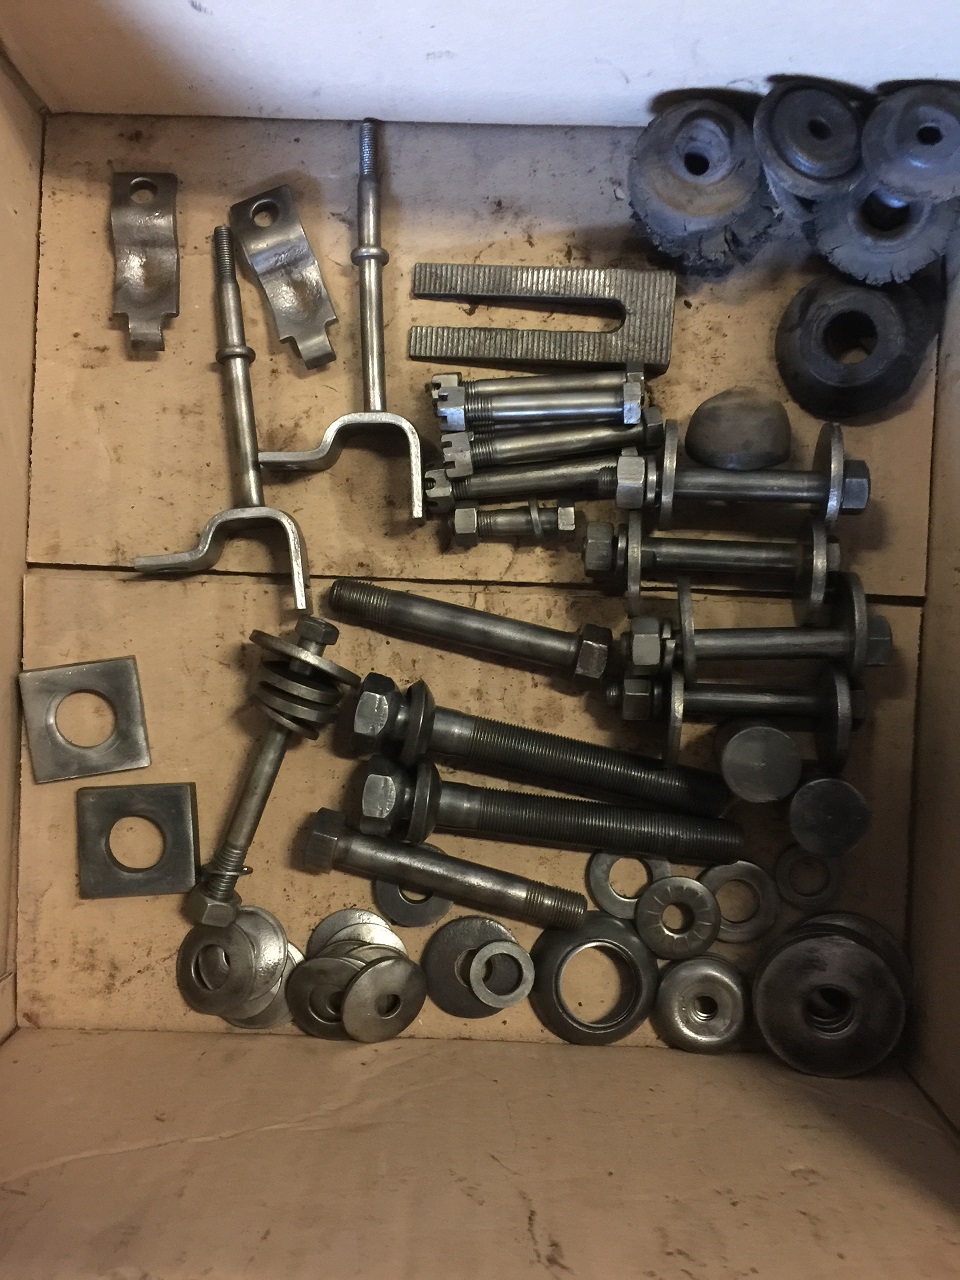 (IMG_4825_supension parts cleaned.JPG) (IMG_4825_supension parts cleaned.JPG)
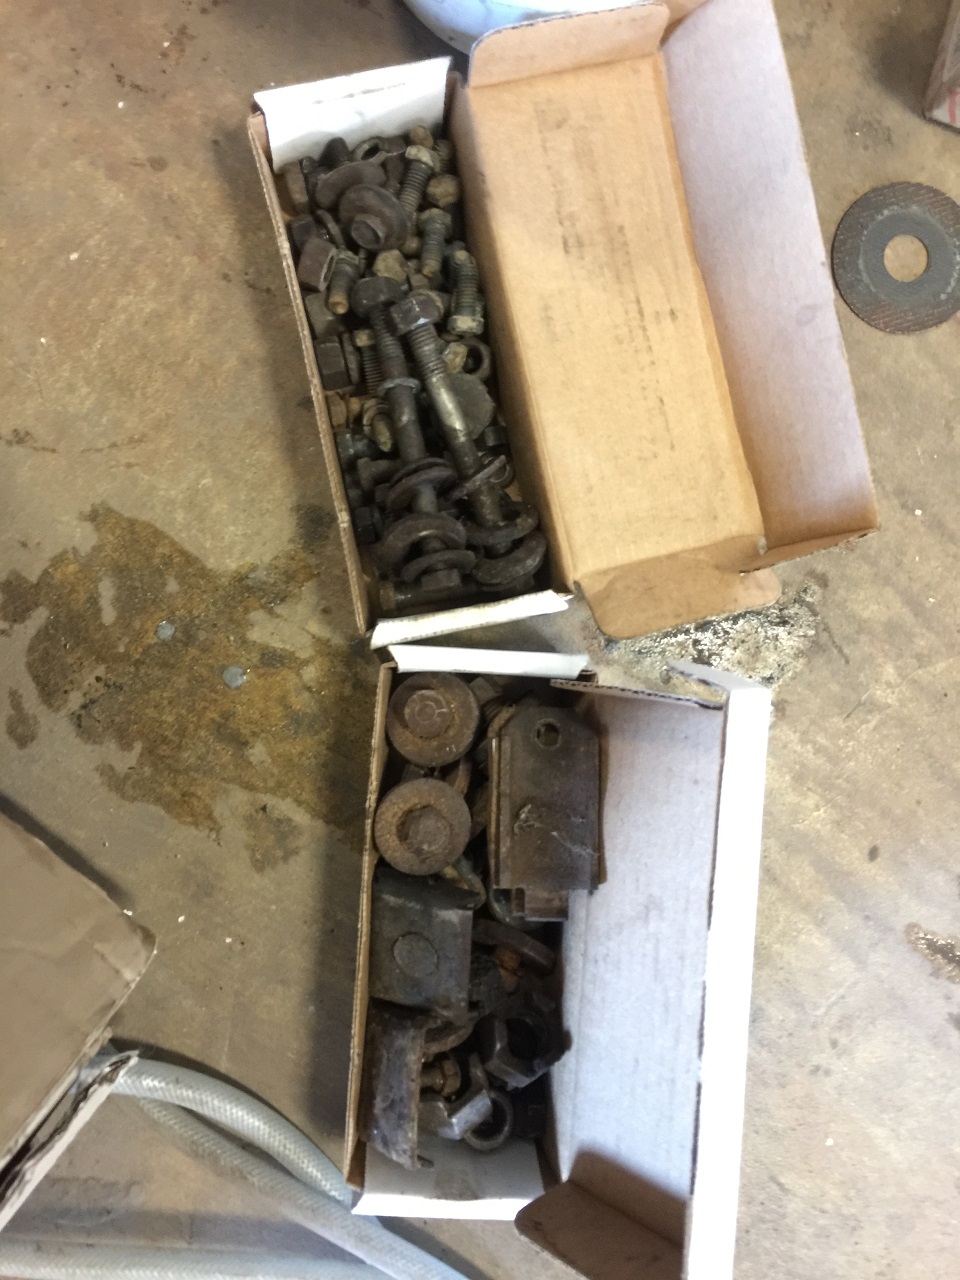 (IMG_4826_suspension parts waiting to be brushed.JPG) (IMG_4826_suspension parts waiting to be brushed.JPG)
Attachments
----------------
IMG_4787_parts pile 1.JPG (379KB - 398 downloads)
IMG_4788_parts pile 2.JPG (315KB - 401 downloads)
IMG_4798_sign on differential 3.15.JPG (455KB - 411 downloads)
IMG_4799_sub frame colored.JPG (387KB - 412 downloads)
IMG_4809_firewall and front foot area.JPG (334KB - 414 downloads)
IMG_4810_passenger side three quart view to the rear.JPG (263KB - 405 downloads)
IMG_4811_drivers side three quart view to the rear.JPG (264KB - 417 downloads)
IMG_4812_undercarriage from the rear (trunk).JPG (318KB - 406 downloads)
IMG_4816_rain drain passenger side.JPG (271KB - 419 downloads)
IMG_4817_rain drain drivers side.JPG (334KB - 413 downloads)
IMG_4818_parcel shelf.JPG (345KB - 406 downloads)
IMG_4819_parecel shelf and roof.JPG (315KB - 421 downloads)
IMG_4821_cowl and front foot area.JPG (378KB - 415 downloads)
IMG_4822_roof inside.JPG (291KB - 422 downloads)
IMG_4825_supension parts cleaned.JPG (375KB - 424 downloads)
IMG_4826_suspension parts waiting to be brushed.JPG (331KB - 391 downloads)
|
|
| |
|
Board Moderator & Exner Expert 10K+
Posts: 13045
Location: Southern Sweden - Sturkö island | Wow, there's been a lot of good progress Dieter! So big difference in comparision with when you got the car!
Very wise to put primer on the inside of the body also!
This is a big step in the restauration |
|
| |
|
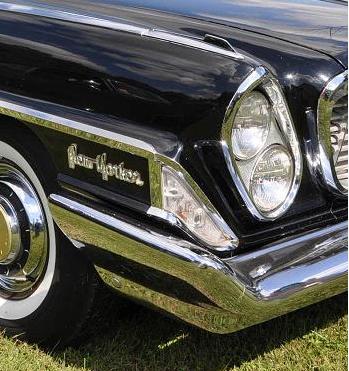
Expert
Posts: 3887
Location: Northen Virginia | beautiful work!!
|
|
| |
|
Elite Veteran
Posts: 827
Location: tailFinland | Nice progress Dieter. Do not forget to weld tubes under the drain holes at trunk edge. |
|
| |
|
Expert
Posts: 1530
Location: ZH, Switzerland | Adventurer 60 - 2018-03-25 11:44 AM Nice progress Dieter. Do not forget to weld tubes under the drain holes at trunk edge. Hi Jari
Thanks a lot. Look, the recession are made at Wizard's. Thanks to Wizard I got the mounting hardware. My plan is the same like Wizards to connect tubes at the mounting hardware and route it through the large plastic cups on each side of the filler neck in the floor of the trunk. Happy Restoring! Dieter |
|
| |
|
Elite Veteran
Posts: 827
Location: tailFinland | di_ch_NY56 - 2018-03-26 1:25 PM
Adventurer 60 - 2018-03-25 11:44 AM Nice progress Dieter. Do not forget to weld tubes under the drain holes at trunk edge. Hi Jari
Thanks a lot. Look, the recession are made at Wizard's. Thanks to Wizard I got the mounting hardware. My plan is the same like Wizards to connect tubes at the mounting hardware and route it through the large plastic cups on each side of the filler neck in the floor of the trunk. Happy Restoring! Dieter
Sound good! |
|
| |
|
Expert
Posts: 1530
Location: ZH, Switzerland | Thanks Jari Today I cleaned all the resting bolts, washers and hex nuts for the subframe and front suspension. The screws, washers and (eventually) hex nuts are still waiting. In the meantime the body got the final layer and color. The shop applied two layers, because the primer is almost white. Now the underside looks wonderful, the color is charcoal. I guess I'm going to inform the shop, that the final layer of color will be applied to the body with the front end mounted. This is ways better than from the factory (because really all body parts at least got a layer of primer, no blind spots like from the factory...) , but not as perfect as a Jan Fridberg restoration and Christers painting shop. Happy Restoring! Dieter
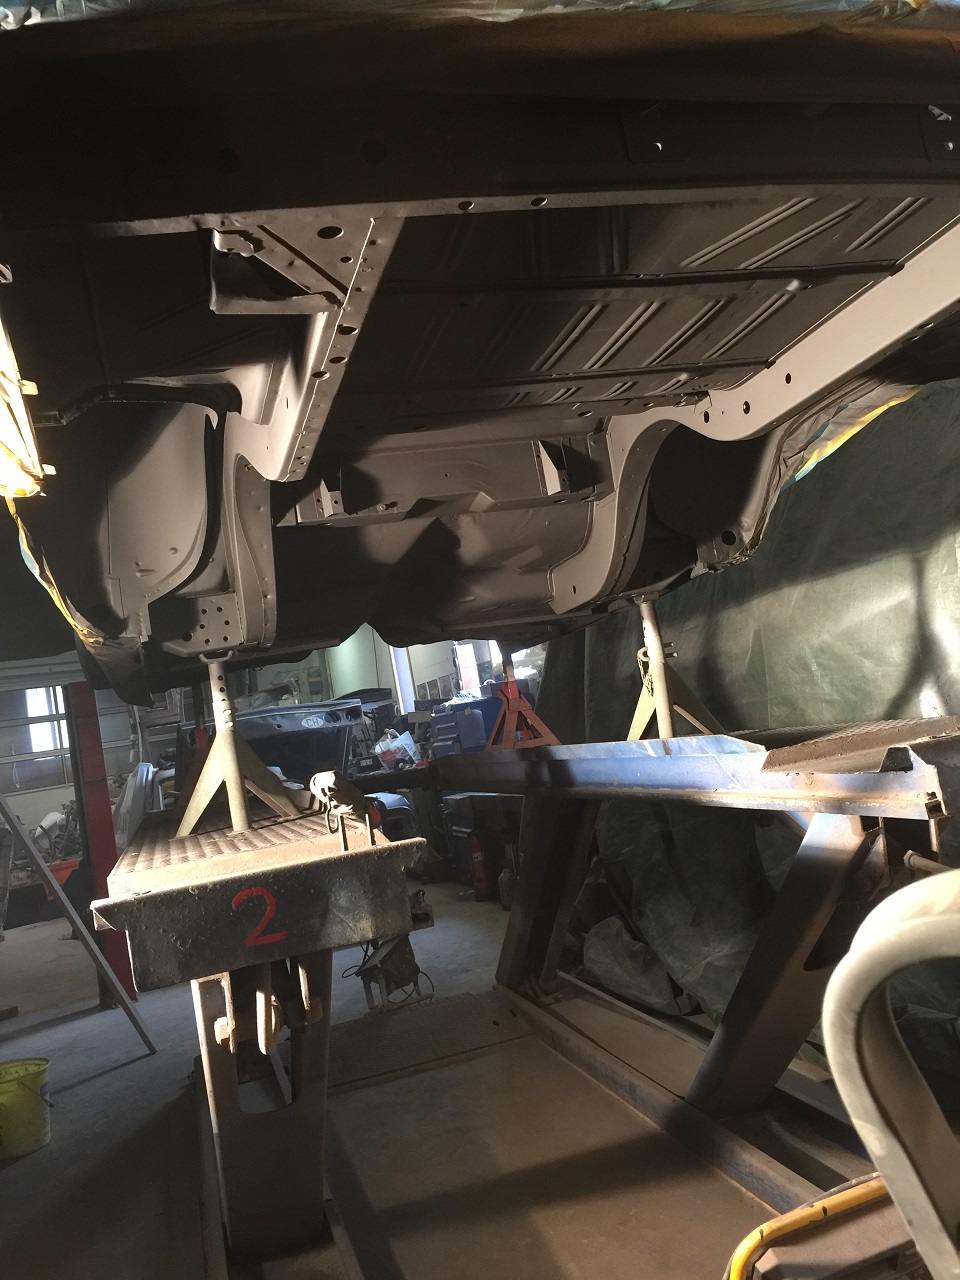 (IMG_4833_final color from the rear.JPG) (IMG_4833_final color from the rear.JPG)
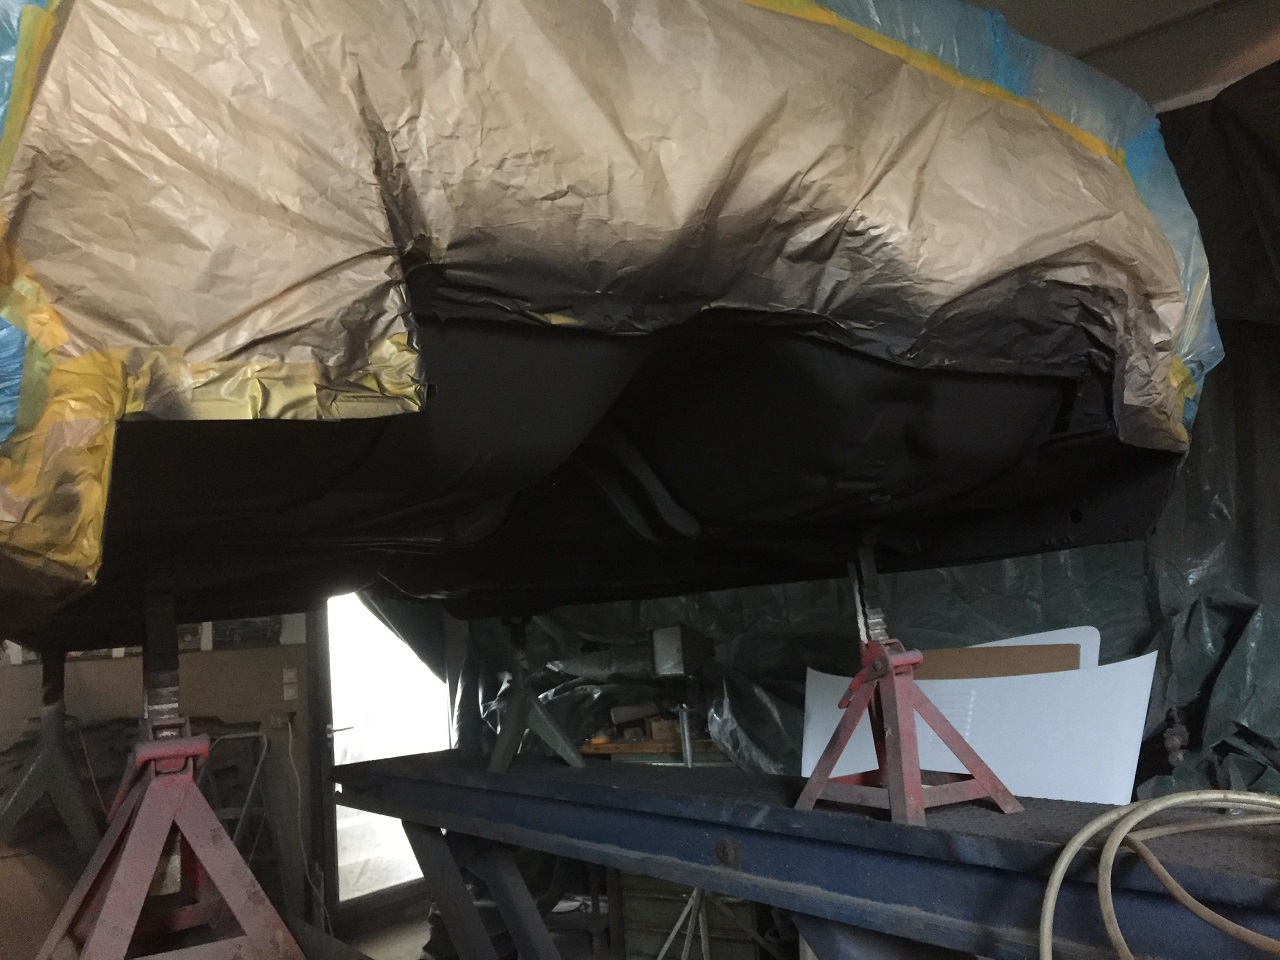 (IMG_4837 final color three quart front view.JPG) (IMG_4837 final color three quart front view.JPG)
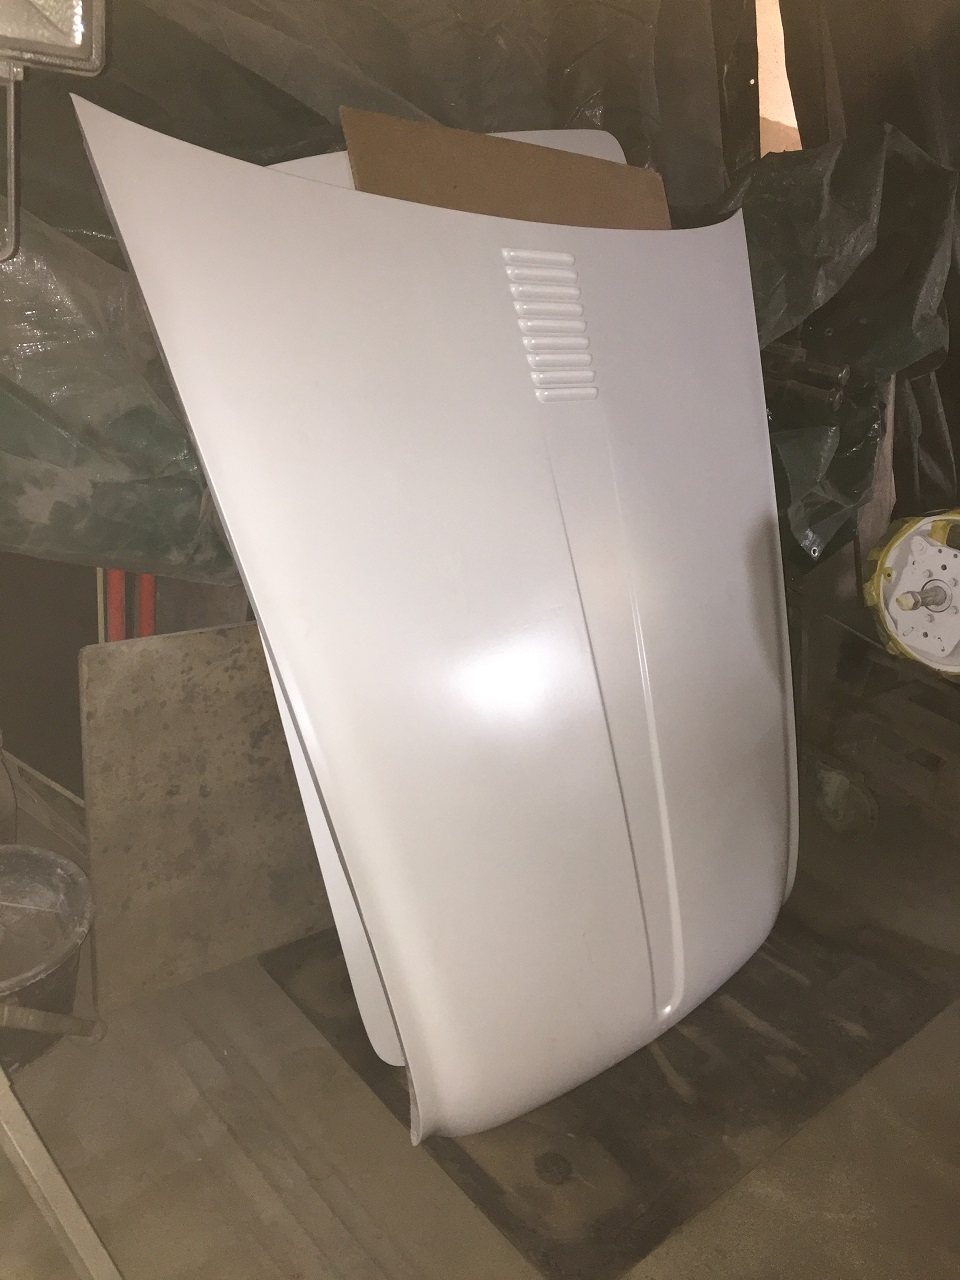 (IMG_4835_hood and decklid are waiting.JPG) (IMG_4835_hood and decklid are waiting.JPG)
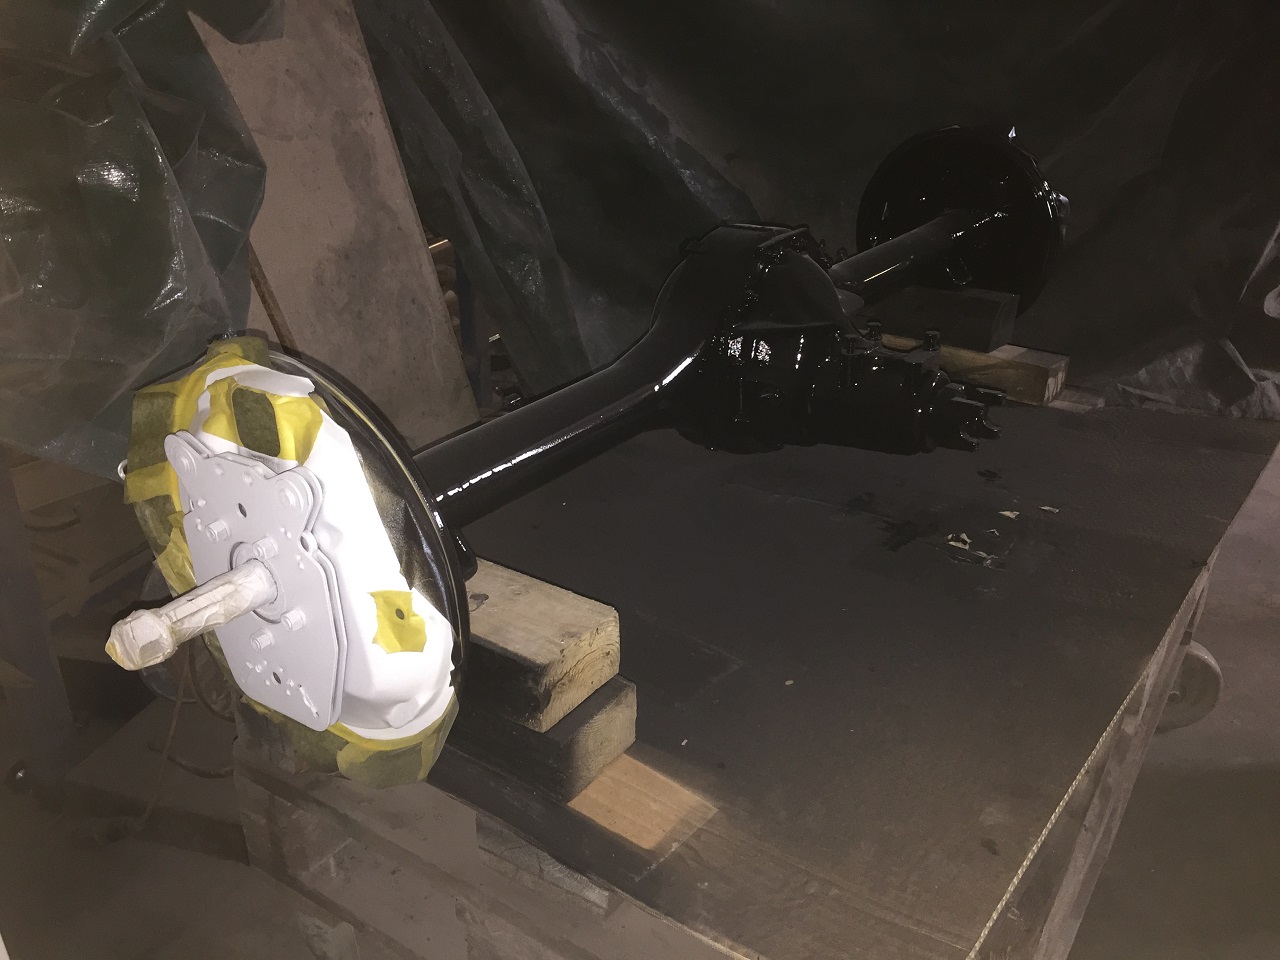 (IMG_4836_rear axle ready to mount.JPG) (IMG_4836_rear axle ready to mount.JPG)
Attachments
----------------
IMG_4833_final color from the rear.JPG (339KB - 466 downloads)
IMG_4837 final color three quart front view.JPG (335KB - 488 downloads)
IMG_4835_hood and decklid are waiting.JPG (277KB - 475 downloads)
IMG_4836_rear axle ready to mount.JPG (271KB - 469 downloads)
|
|
| |
|
Expert 5K+
Posts: 7393
Location: northern germany | the unibodys were dipped (not complete) in primer and baked in ovens, so theoretically primer blind spots in the lower parts are not possible. that factoy backed on primer is almost like galvanized. |
|
| |
|
Expert
Posts: 1530
Location: ZH, Switzerland | Yes, But most of us discovered bare metal areas (roof inside, under the parcel shelf, both sides at the firewall, covered by the inner and outer fender and more). I‘m leaving that discussion to put a question about the rear axle of my Letter.... Stamped in at the differential carrier is 3.15. That indicates a 3.15 differential ratio. At the fragment of the broadcast sheet I only could discover „ratio“ and the code is 523. I read it multiple to make sure that I didn‘t do a misread. Is the 3.15 axle that came from the factory or was it another, according the broadcast sheet? Happy Restoring! Dieter corrected... 523, not 529
Edited by di_ch_NY56 2018-03-31 1:47 PM
|
|
| |
|
Expert
Posts: 1530
Location: ZH, Switzerland | This week I had a big fortune to find an appropriate rubber rope to build a gasket (weatherstrip) between the bezel and the glass of the tachometer mounted in the center console. Ways earlier on I catched a tachometer at epain for a good price (because the pointer fell off and some rust issues at the bezel). I managed to mount the pointer again and good luck - it lights up as the scale does. I did a service and the input shaft rotates again. Now I cleaned the bezel, applied filler primer (I guess I need several layers to compensate the marks of the rust eating...
Happy Restoring! Dieter BTW: the matt black originally applied at the bezel is not water resistant....
Edited by di_ch_NY56 2018-03-31 3:08 PM
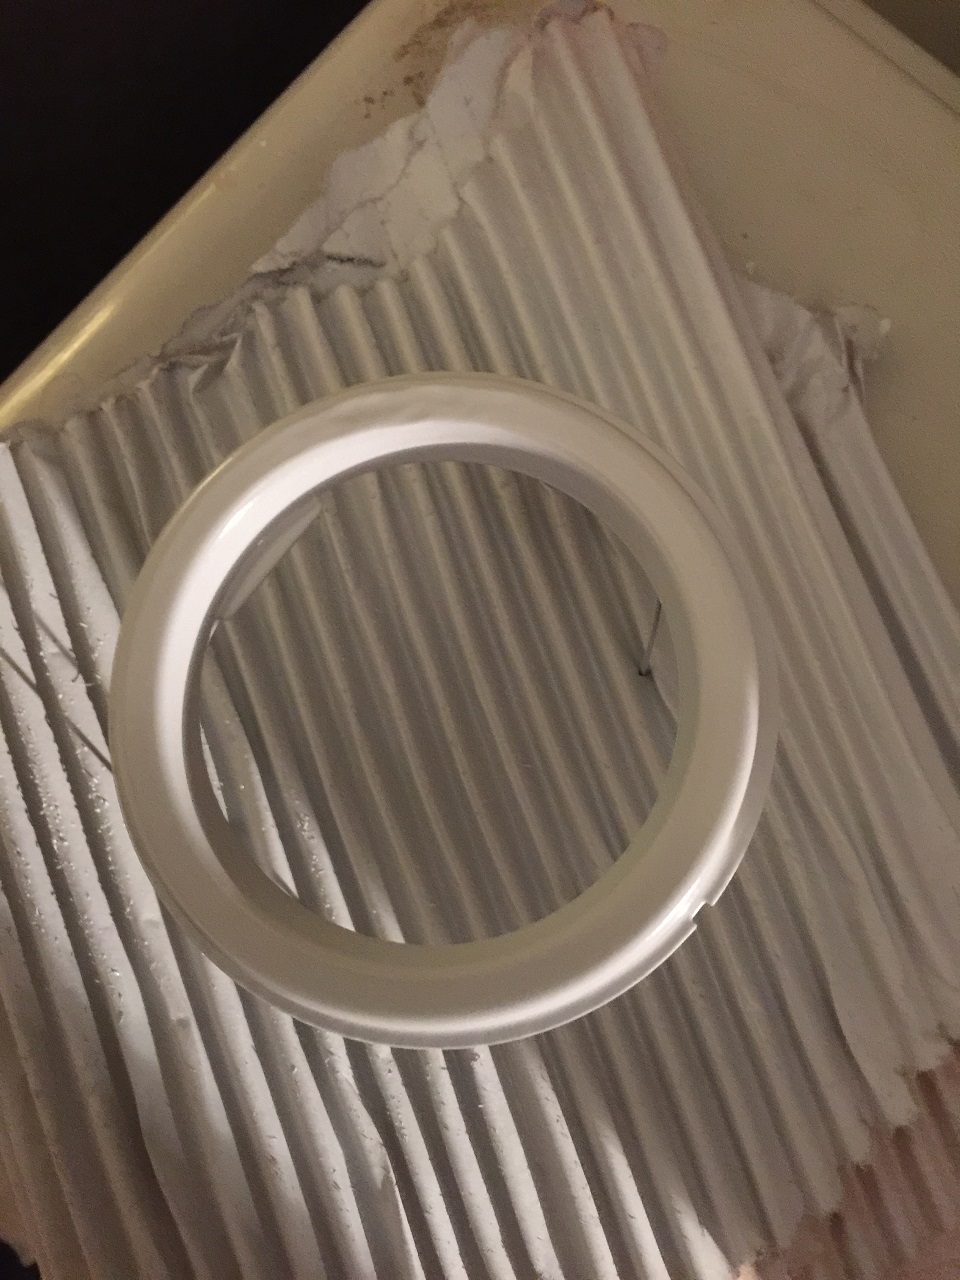 (IMG_4839_second tach bezel.JPG) (IMG_4839_second tach bezel.JPG)
Attachments
----------------
IMG_4839_second tach bezel.JPG (367KB - 532 downloads)
|
|
| |
|
Expert
Posts: 1530
Location: ZH, Switzerland | Today we mounted the subframe, the front suspension /w the steering gear and the rear axle back to my Letter. First we wanted to mount the dustshields and steering arm, but - a quiz - why are the screws too long now? A sunny idea and bang -- the brake mouning plate is not in place. So we chatched em and finished the front suspension, with one exception... the upper rubber at the stabilizer holders is still missing (in my second order this year for Gary Goers). The rear axle is back in place as well. After we got out, that the National 7216 pinion seal doesn't fit (outside diameter) we searched another one... SKF 18708. I figured out that the rear axle of my Letter is a 8.25 Plymouth axle and not the factory Chrysler 8.75 rear axle. Happy Restoring! (always some surprises) Dieter
Edited by di_ch_NY56 2018-04-01 2:58 PM
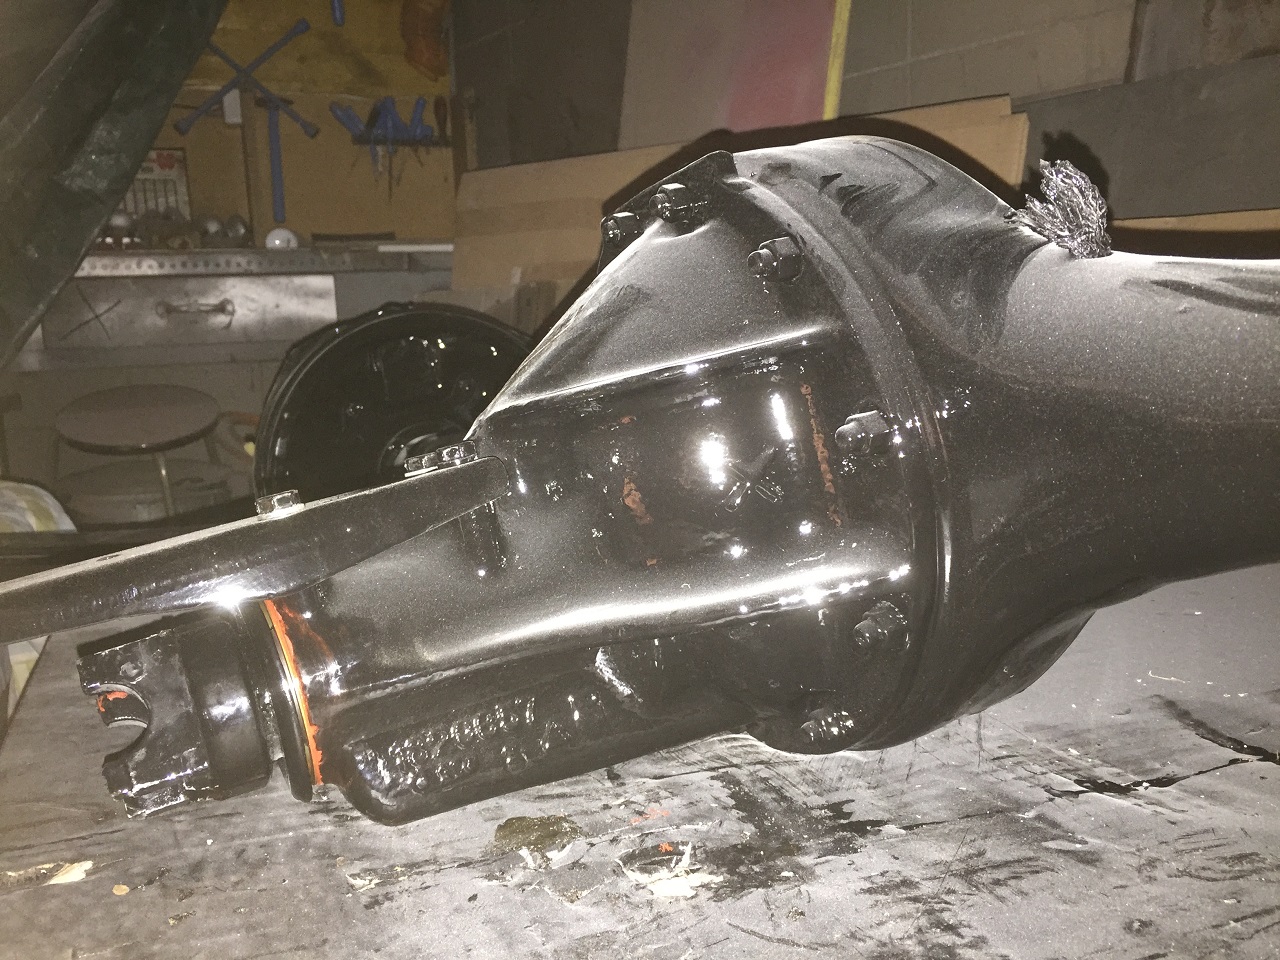 (IMG_4844_differential of my Letter.JPG) (IMG_4844_differential of my Letter.JPG)
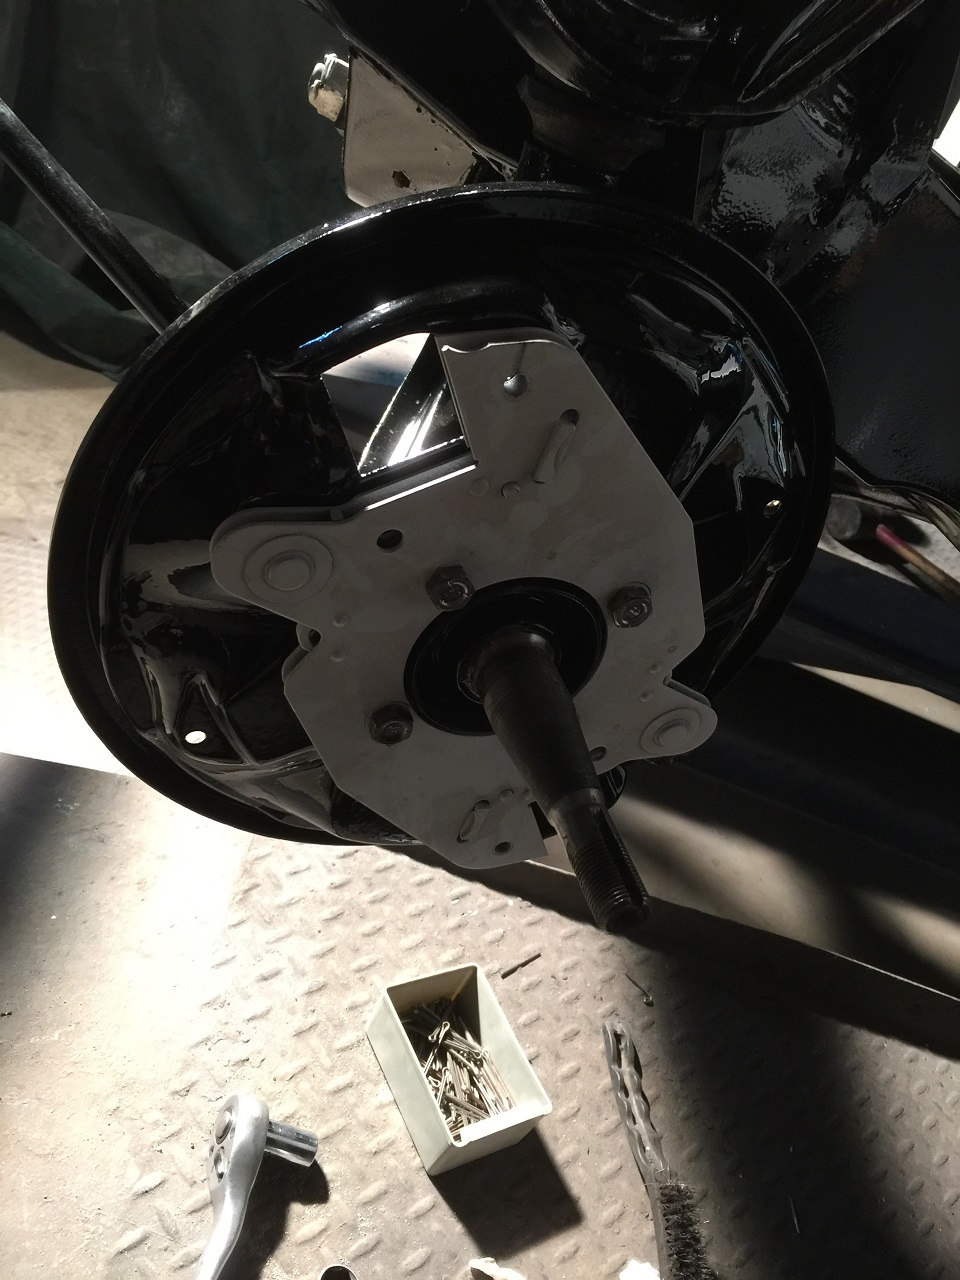 (IMG_4846_front brake shield mounted.JPG) (IMG_4846_front brake shield mounted.JPG)
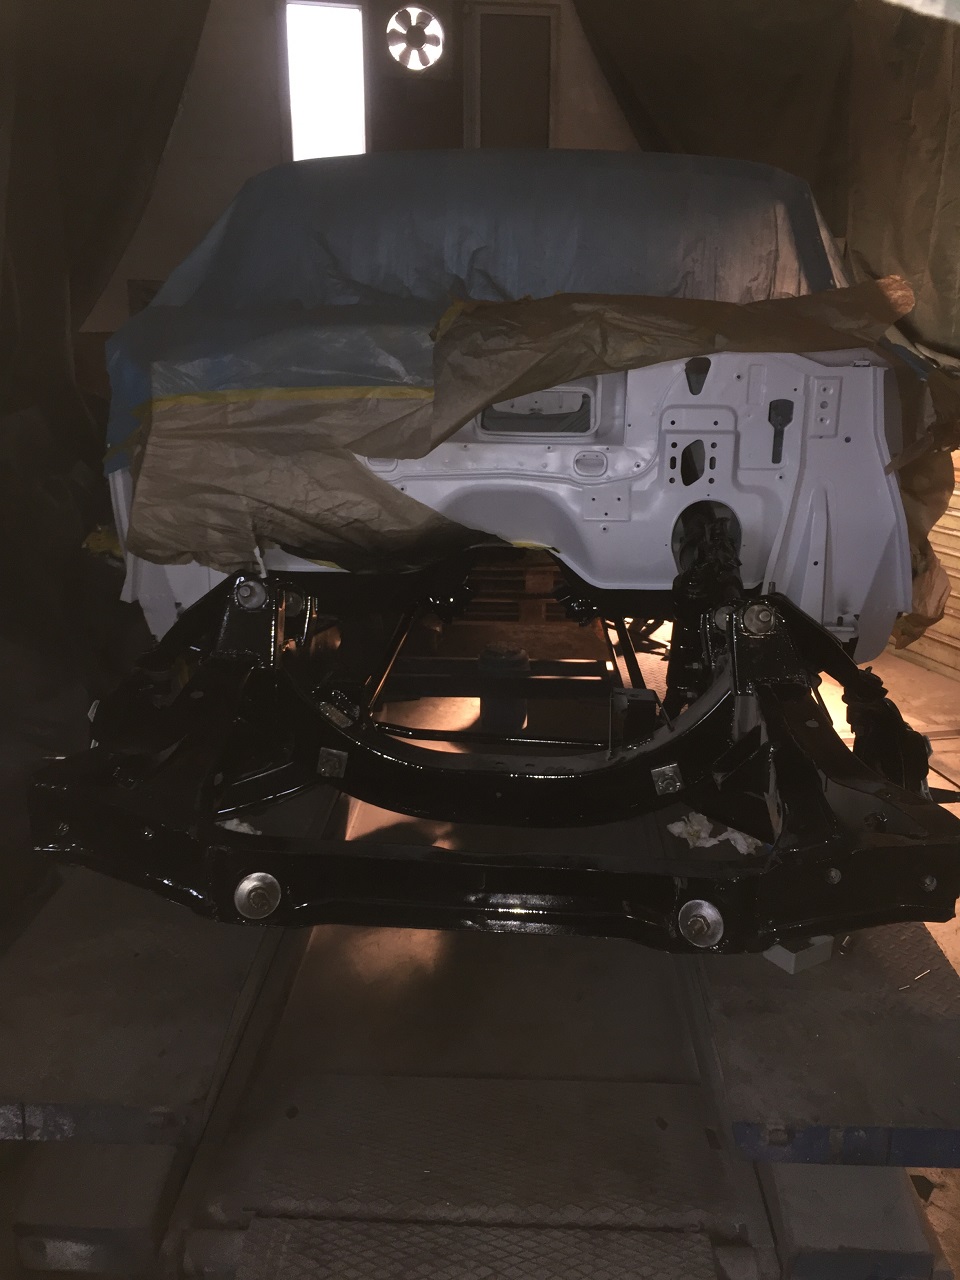 (IMG_4847_frame and front suspension almost finished.JPG) (IMG_4847_frame and front suspension almost finished.JPG)
Attachments
----------------
IMG_4844_differential of my Letter.JPG (490KB - 491 downloads)
IMG_4846_front brake shield mounted.JPG (323KB - 485 downloads)
IMG_4847_frame and front suspension almost finished.JPG (246KB - 493 downloads)
|
|
| |
|
Expert
Posts: 1730
Location: Michigan | Looking good Dieter |
|
| |
|
Expert
Posts: 1530
Location: ZH, Switzerland | Thanks a lot to all. Now just th the super gau has happened. E.G. the screws from the radiator yoke to the inner fenders, the screws ontop of the fenders near the windshield frame hve gone. Source? Thanks a lot Dieter Edit: please pm me, thank you very much
Edited by di_ch_NY56 2018-04-04 1:04 PM
|
|
| |
|
Expert
Posts: 1530
Location: ZH, Switzerland | Evidence of the work last weekend... almost finished at the assembly (rolling body). At the last picture of that weekend you'll discover the shop owner. You might notice that not all screws at the radiator yoke and front fenders to the inner fender are mounted... missing! (you could claim, you're self responsible because you didn't disassemble and assemble everything yourself). Happy Restoring! Dieter
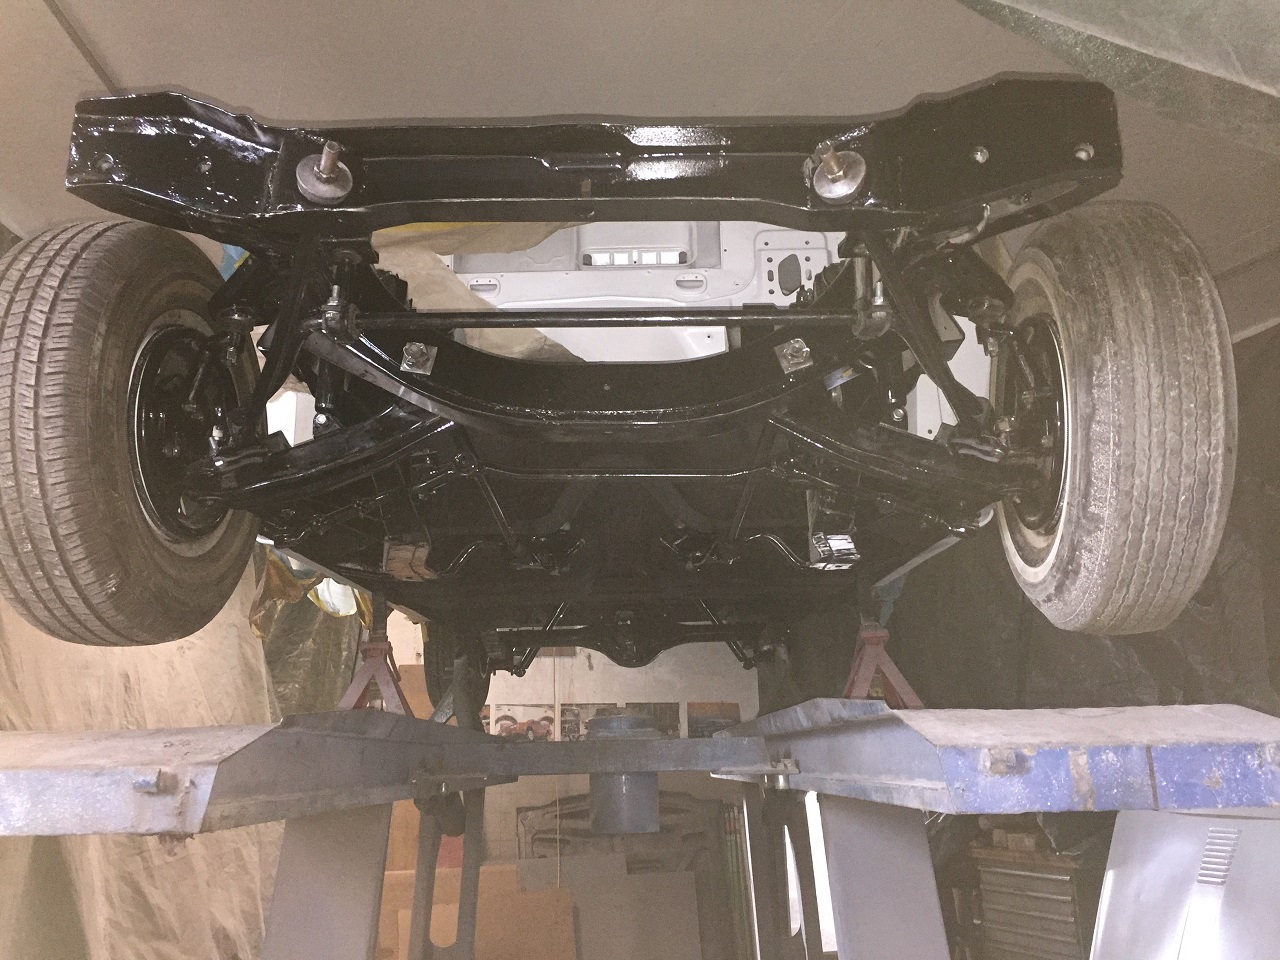 (IMG_4848_front suspension mouted from the bottom.JPG) (IMG_4848_front suspension mouted from the bottom.JPG)
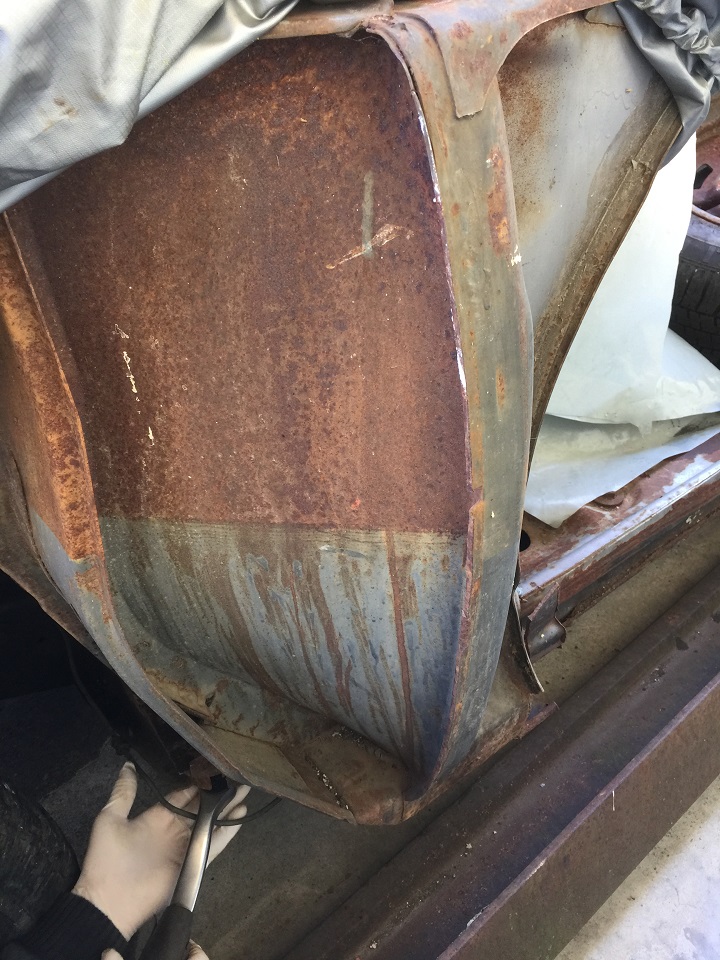 (IMG_4850_a 1960 Plymouth__border of the factory primer bath clearly visible.JPG) (IMG_4850_a 1960 Plymouth__border of the factory primer bath clearly visible.JPG)
 (IMG_4851_front suspension mounted from the top.JPG) (IMG_4851_front suspension mounted from the top.JPG)
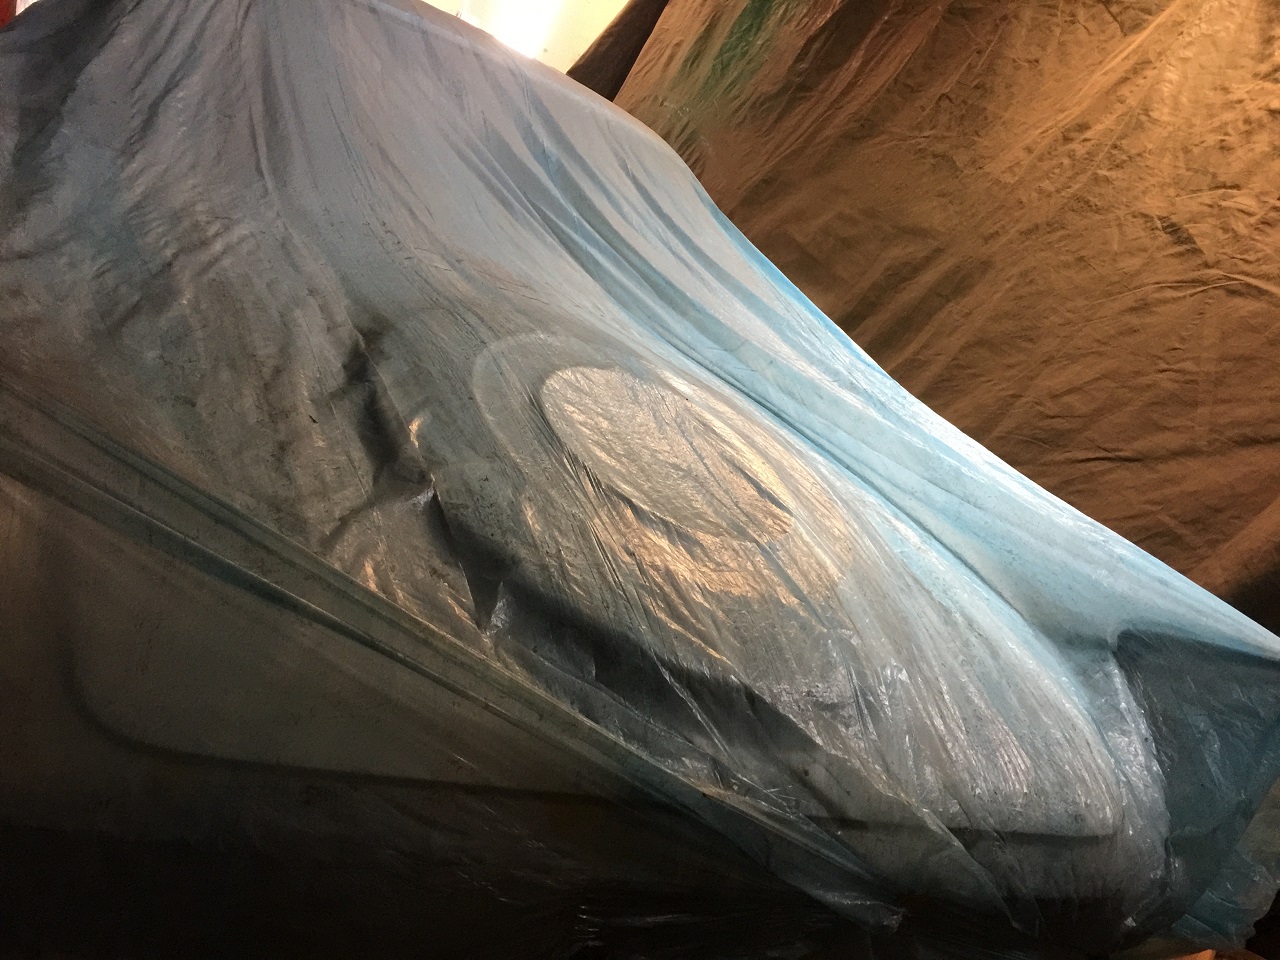 (IMG_4852_trunk lid mounted adjusted by myself.JPG) (IMG_4852_trunk lid mounted adjusted by myself.JPG)
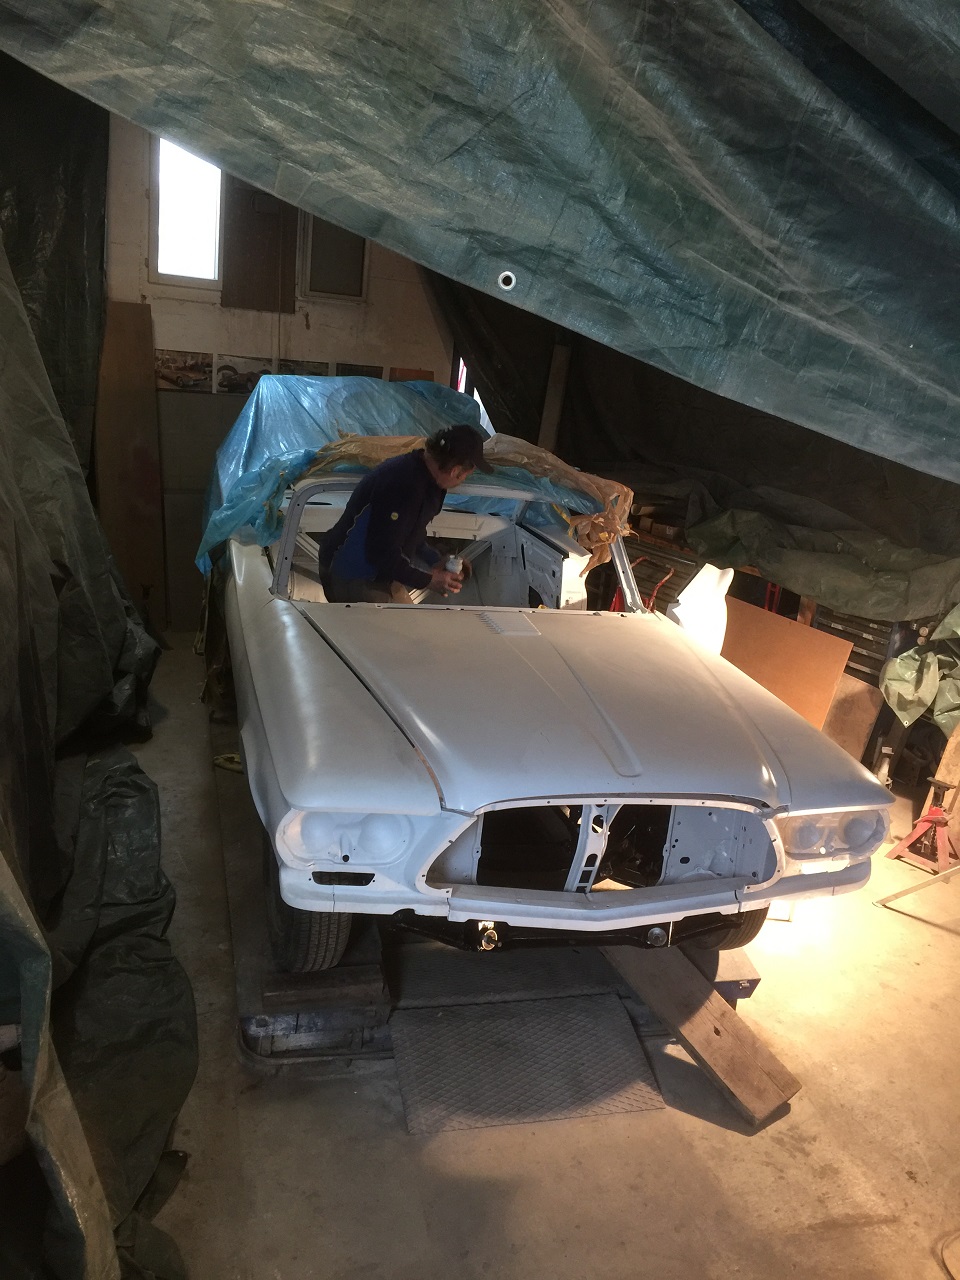 (IMG_4853_overview of my Letter.JPG) (IMG_4853_overview of my Letter.JPG)
Attachments
----------------
IMG_4848_front suspension mouted from the bottom.JPG (437KB - 472 downloads)
IMG_4850_a 1960 Plymouth__border of the factory primer bath clearly visible.JPG (271KB - 549 downloads)
IMG_4851_front suspension mounted from the top.JPG (422KB - 484 downloads)
IMG_4852_trunk lid mounted adjusted by myself.JPG (416KB - 472 downloads)
IMG_4853_overview of my Letter.JPG (355KB - 477 downloads)
|
|
| |
|
Member
Posts: 43
Location: Småland Sweden | Impressive work you are doing! Soon you can take your F on a trip to Sweden
Jan in Sweden
Edited by 60Mopars 2018-04-07 4:37 AM
|
|
| |
|
Expert
Posts: 1530
Location: ZH, Switzerland | 60Mopars - 2018-04-06 10:34 AM Impressive work you are doing! Soon you can take your F on a trip to Sweden Jan in Sweden A trip to Sweden is on my wish list for sure. But I affraid, for sure not next year. Today I had the first talk with one guy about the final painting. The painting company is run by two brothers. Personally I think I could be happy if I could drive my Letter the first time within five years. Actually I didn't get an update from the engine restoring company. The last information was, that all pistons now are out (the piston #1 had to be broken in parts prior to remove it), the rotating assembly and other parts are ordered. Bigger parts missing - the windshield, the gas tank, the brake lines, the gutter rails (not necessary to drive, but to finisth the Letter) and the door to quarter panel fillers (two on each side, one at the door, one at the quarter panel). In the meantime I was able to catch a straight rear bumer (:-). Happy Restoring! Dieter |
|
| |
|
Expert
Posts: 1530
Location: ZH, Switzerland | One more thou about my Letter.... For sure I could buy a complete interior, but without new rubber foam seat cushions (preferred from Gray Goers shop - no clues who ever will run his business...) it makes no sense to mount the new seat covers. But as long as I do not get my second order, I‘m not willing to spend more money to Gary Goers shop.... Happy Restoring! Dieter |
|
| |
|
Expert
Posts: 1530
Location: ZH, Switzerland | Over the weekend I sanded the bezel of the second tachometer twice or three times with applying one more layer of filler out of a rattle can to straighten the bumps out of the bezel. This early morning I applied Rally black (mat black) and assembled it later this morning. Fortunately I found a rubber rope to fit between the chromed ring and the lens glass. Final check and photo... Happy Restoring! Dieter
 (IMG_4941_tachometer assembled and illuminated.JPG) (IMG_4941_tachometer assembled and illuminated.JPG)
Attachments
----------------
IMG_4941_tachometer assembled and illuminated.JPG (195KB - 535 downloads)
|
|
| |
|
Expert
Posts: 1530
Location: ZH, Switzerland | Easy to see, after the starter motor I brushed the cooling fan a second time. This time with the drilling machine and two different shapes of wire brushes. But I assume I have to use emerald paper as well. Happy Restoring! Dieter
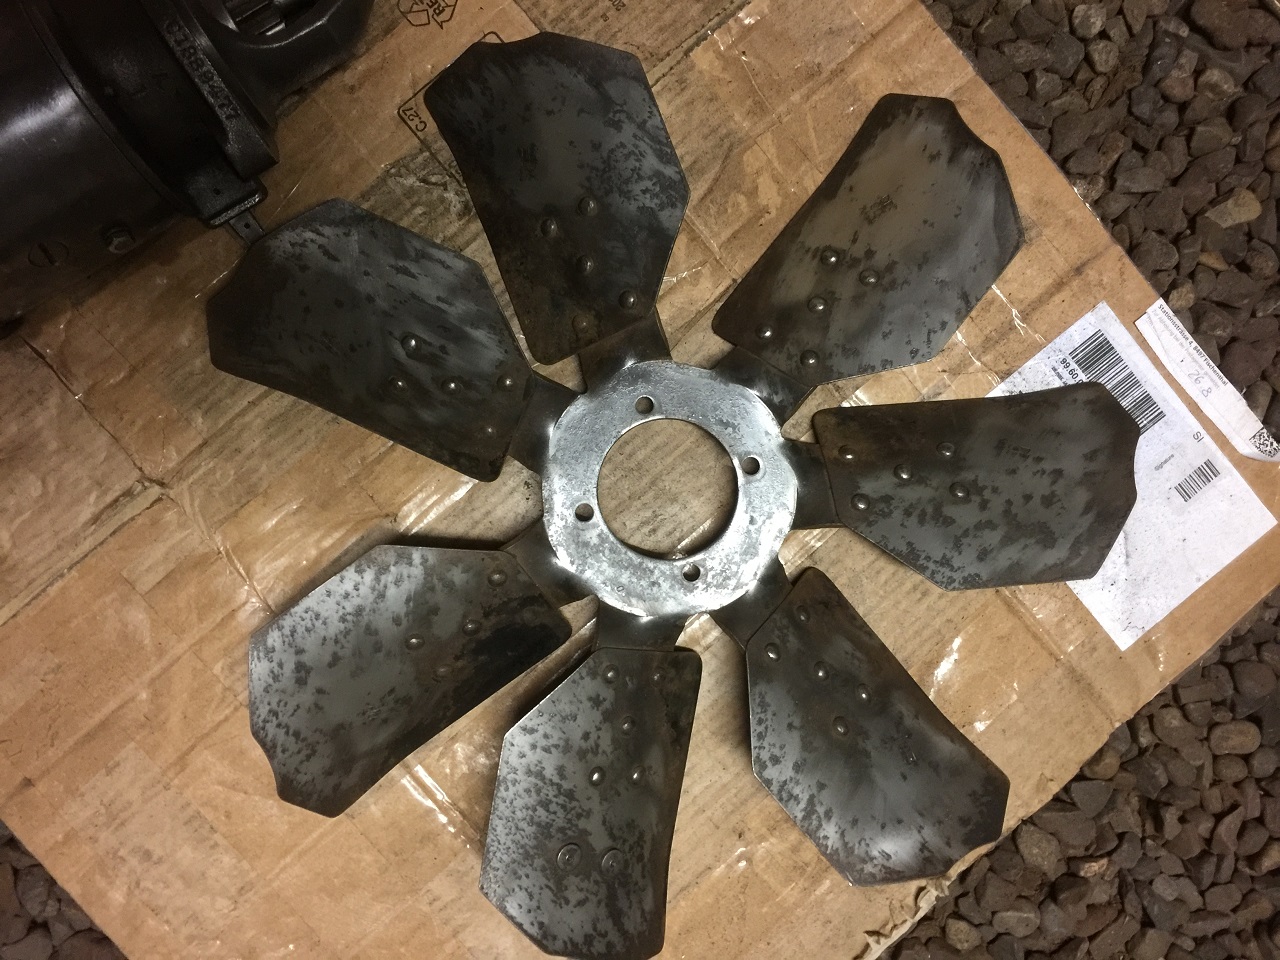 (IMG_4956_cooling fan front.JPG) (IMG_4956_cooling fan front.JPG)
 (IMG_4957_cooling fan back.JPG) (IMG_4957_cooling fan back.JPG)
Attachments
----------------
IMG_4956_cooling fan front.JPG (447KB - 475 downloads)
IMG_4957_cooling fan back.JPG (422KB - 455 downloads)
|
|
| |
|
Expert
Posts: 1530
Location: ZH, Switzerland | In the meantime I purchased a complete 8 3/4" rear end (out of a 1960 Windsor) from Big M to replace the 6 cylinder 1960 Dodge 8 1/4" rear axle. The 8 1/4" rear axle I hope I could sell after I got and installed the rear axle from Big M. Happy Restoring! Dieter |
|
| |
|
Expert
Posts: 1530
Location: ZH, Switzerland | di_ch_NY56 - 2018-03-31 6:21 PM Today we mounted the subframe, the front suspension /w the steering gear and the rear axle back to my Letter. First we wanted to mount the dustshields and steering arm, but - a quiz - why are the screws too long now? A sunny idea and bang -- the brake mouning plate is not in place. So we chatched em and finished the front suspension, with one exception... the upper rubber at the stabilizer holders is still missing (in my second order this year for Gary Goers). The rear axle is back in place as well. After we got out, that the National 7216 pinion seal doesn't fit (outside diameter) we searched another one... SKF 18708. I figured out that the rear axle of my Letter is a 8.25 Plymouth axle and not the factory Chrysler 8.75 rear axle. Happy Restoring! (always some surprises) Dieter I'm sorry and I realized that I was wrong with the judgement of the rear axle. The number on the side of the differential carrier shows 1820 657. According to many people here and my check again it's not a 8 1/4" rear end, but a small stem 8 3/4" rear axle. No wonder a Swedish friend wrote to me, I made a big mess with the axles and parts of the axle.... So the only work to perform at this axle is to exchange the axle shaft seals, the axle shaft bearings, shorten the axle shafts 1/8" to install the 742 differential carrier I purchased (/w a limited slip differential inside). To replace the axle shaft seals and axle shaft bearings is necessary, because at the shop the axle has been sand blasted. Happy Restoring! Dieter |
|
| |
|
Expert 5K+
Posts: 9650
Location: So. Cal | Shortening the axles 1/8" is required only if your rear end originally had an open gear set. If it originally had limited slip, you don't need to shorten the axles because they would be the correct length already. Also, if you do end up needing to shorten the axles, go slow and test fit them with the available shims that you have to adjust the play. If you go too far, you may end up needing to fabricate more shims.
Edited by Powerflite 2018-06-03 9:58 AM
|
|
| |
|
Expert
Posts: 1530
Location: ZH, Switzerland | Thanks a lot for your answer. Do you know, the 657/741 differential carrier was available with the Posi Traction option as well. In my opinion most were open carriers. When I have to shorten the axle shafts I'll bring it to a mechanical shop and will specify the shortening 1/8" (3.175 mm -0 mm, +0.05 mm); means between excatly 1/8" and 0.127" shorter (the result will be a little bit shorter; a bias to remove shims instead of adding shims). Happy Restoring! Dieter BTW: are the axle shafts mild steel to use a file?
Edited by di_ch_NY56 2018-06-05 2:15 PM
|
|
| |
|
Expert
Posts: 1530
Location: ZH, Switzerland | While sweeping through the picture collection I made, one particular picture catched my attraction. It shows older damages revealed during the sand blasting. No wonder why the body worker/painter shop estimated so many hours to straighten the contour of the body... End of June or early July my Letter should go to the body/painter shop (the body/painer shop got my agreement). Happy Restoring! Dieter
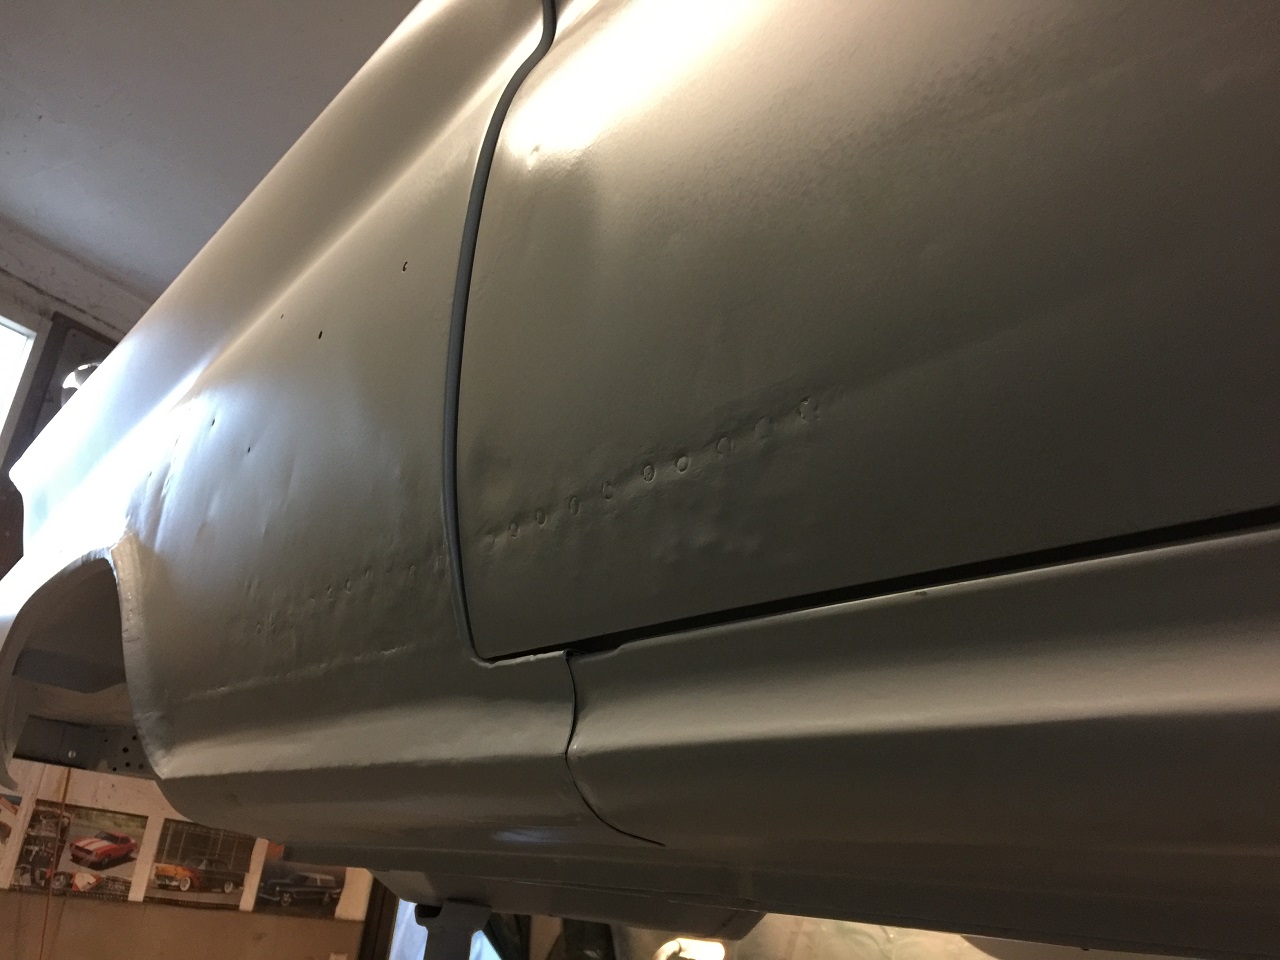 (IMG_4815_older accdent damages revealed.JPG) (IMG_4815_older accdent damages revealed.JPG)
Attachments
----------------
IMG_4815_older accdent damages revealed.JPG (247KB - 449 downloads)
|
|
| |
|
Elite Veteran
Posts: 827
Location: tailFinland | Yes, thas gonna take some time to straighten it up. Would be done finished with bondo in less than hour or two
remaind your body guy to fix door corner, to make it more round. It is over doing but looks much nicer when the whole car is finished.
I even fixed the whole shape of the doors in my G project, you can check my project posts how it got
|
|
| |
|
Expert
Posts: 1530
Location: ZH, Switzerland | Thanks a lot for your hin Jari. I hope I don't forget it to mention. This morning I visited the shop to visit the owner. He invited me for a small journey with him in his 60 NY 4d HT rat rod (/w a 383 engine). After refilling the gas tank I could drive his NY. It's a wonderful experience to ride a '60 Chrysler. After leaving him I attended to the body and painting shop (the owner told me he transportet my Letter Friday evening to the body and painting shop - good luck, the night was dry). At the body and painting shop I met the body smith. He just said, that the condition of my Letter is not bad. Could be a faster fixing and adjusting than excpeted. We'll see the result... For your enjoyment some more picures of my Letter. Happy Restoring! Dieter
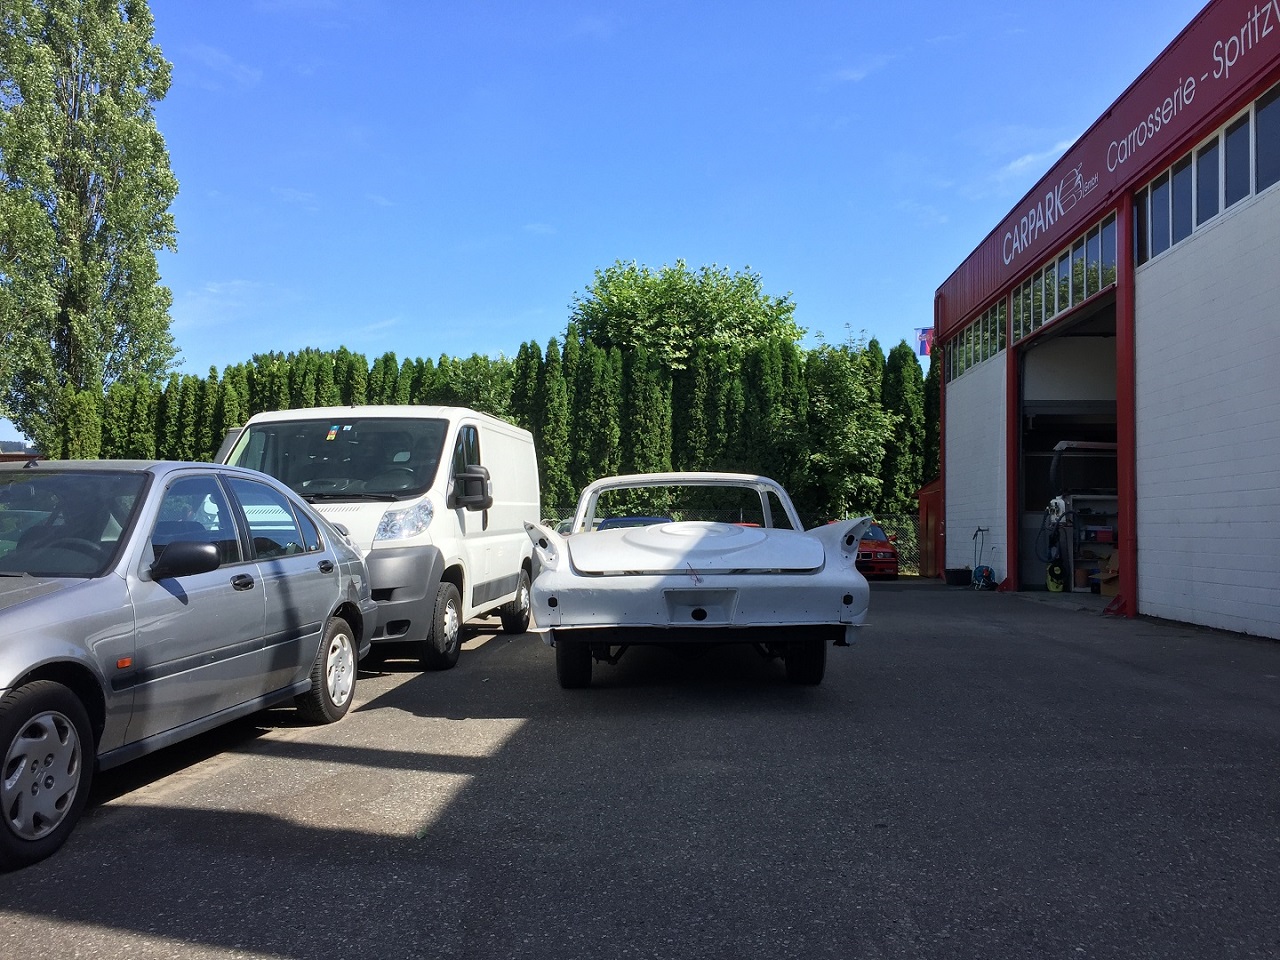 (IMG_5078_view from the back.JPG) (IMG_5078_view from the back.JPG)
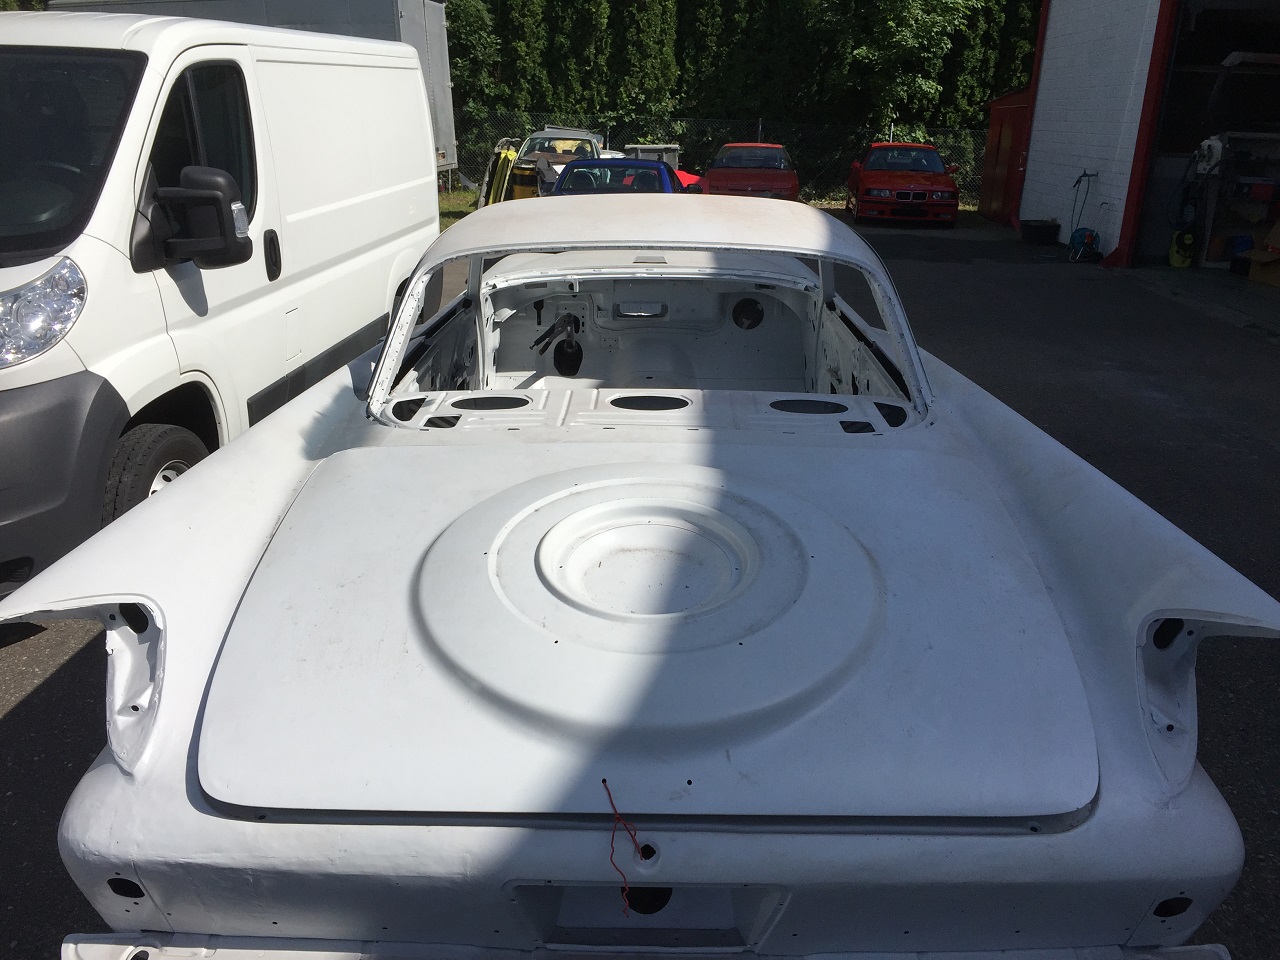 (IMG_5079_view from the back - birds view.JPG) (IMG_5079_view from the back - birds view.JPG)
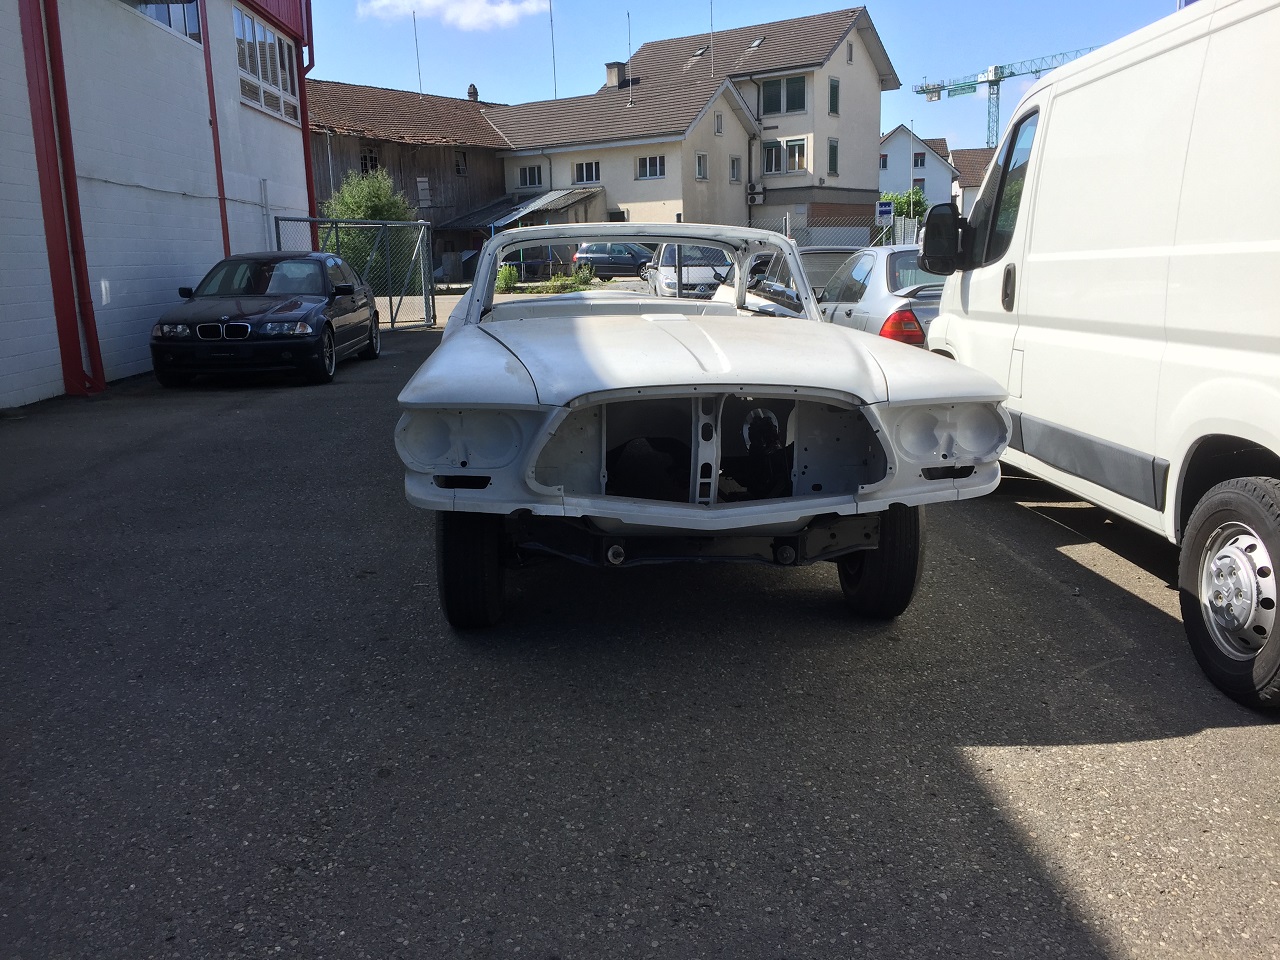 (IMG_5081_view to the front.JPG) (IMG_5081_view to the front.JPG)
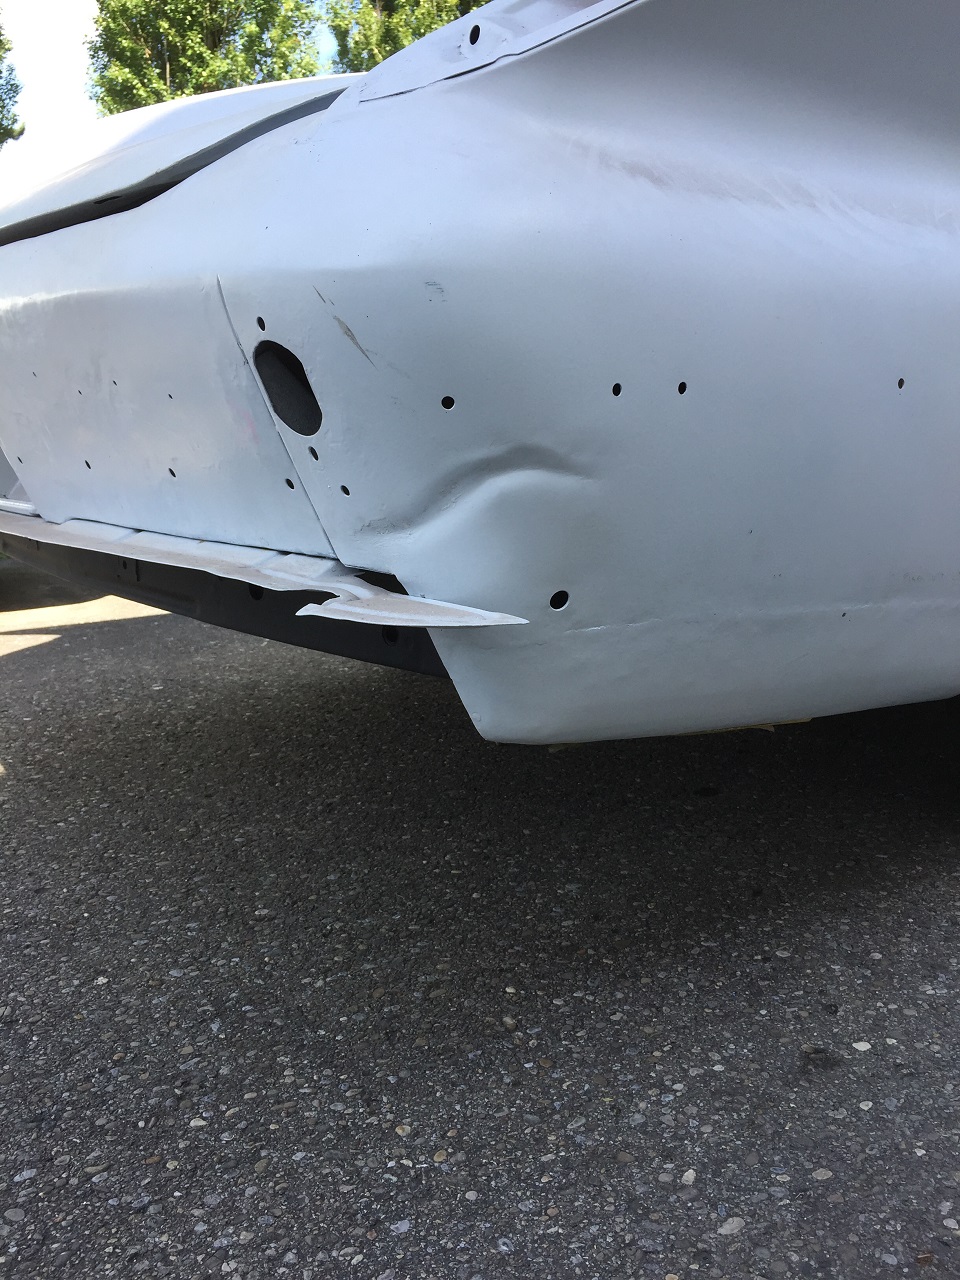 (IMG_5082_RH lower rear corner.JPG) (IMG_5082_RH lower rear corner.JPG)
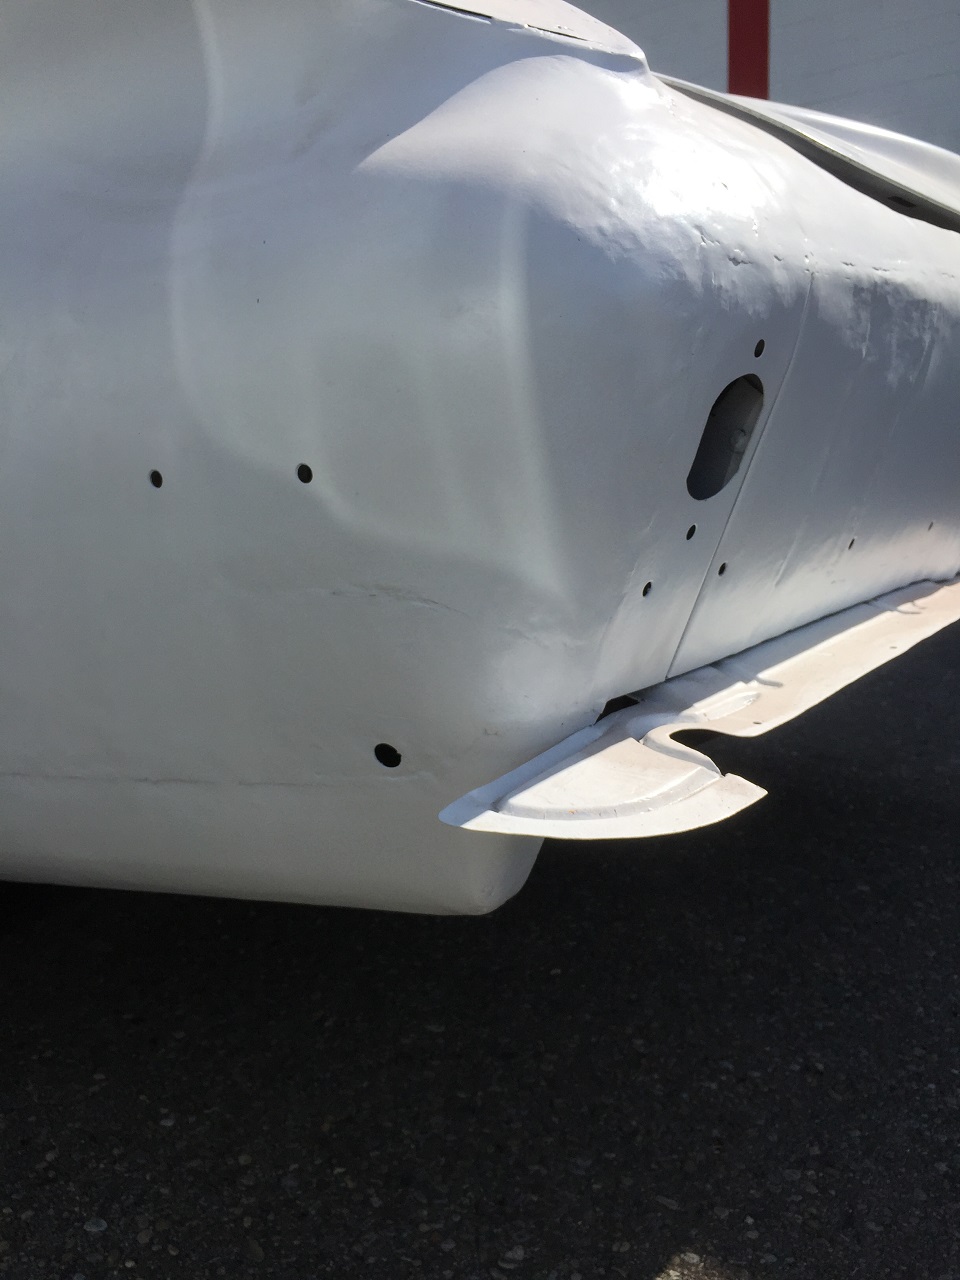 (IMG_5083_LH lower rear corner.JPG) (IMG_5083_LH lower rear corner.JPG)
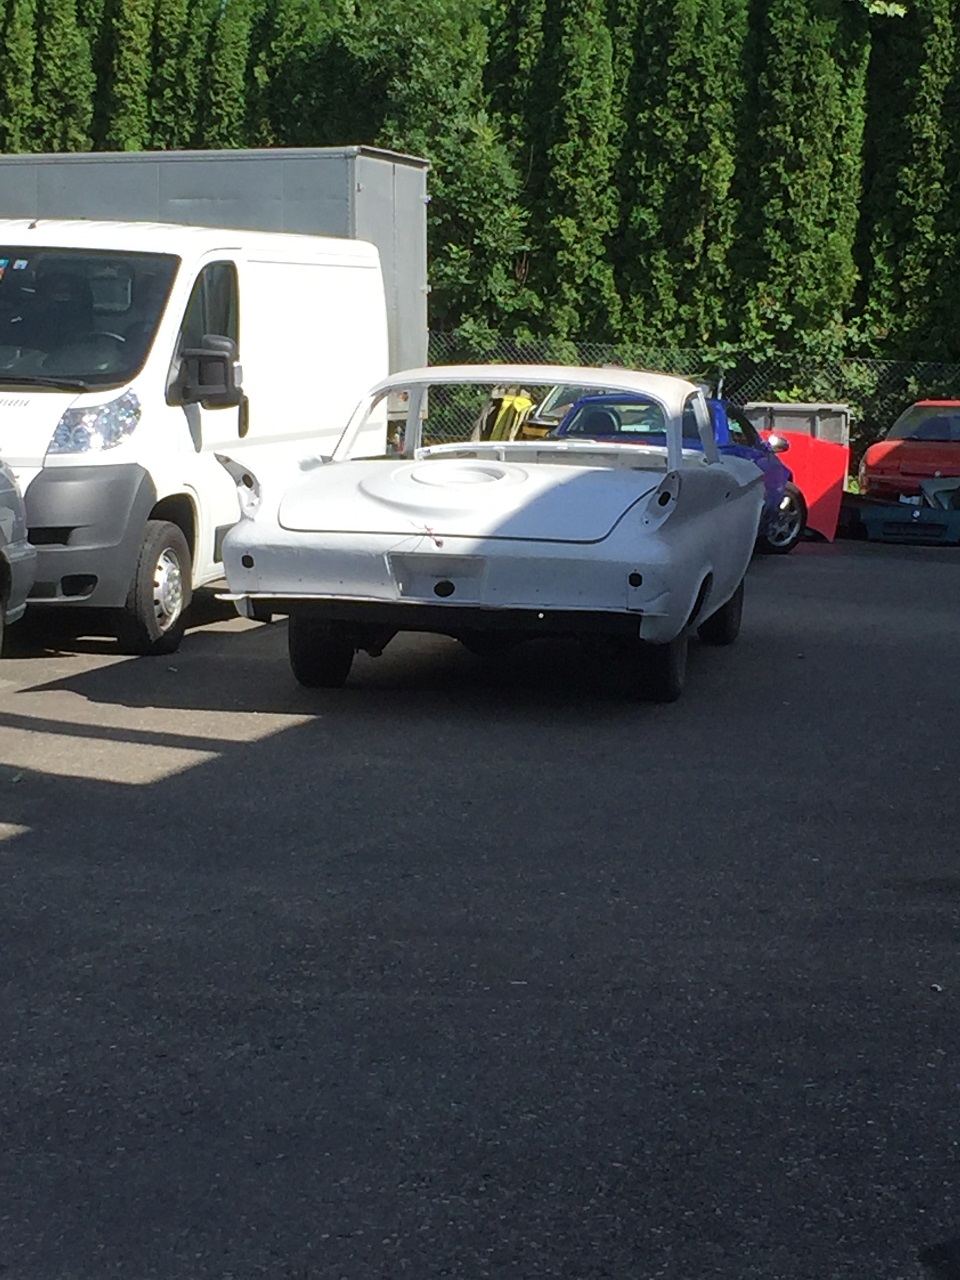 (IMG_5084_three quart RH rear view.JPG) (IMG_5084_three quart RH rear view.JPG)
Attachments
----------------
IMG_5078_view from the back.JPG (464KB - 451 downloads)
IMG_5079_view from the back - birds view.JPG (339KB - 468 downloads)
IMG_5081_view to the front.JPG (462KB - 449 downloads)
IMG_5082_RH lower rear corner.JPG (436KB - 442 downloads)
IMG_5083_LH lower rear corner.JPG (237KB - 435 downloads)
IMG_5084_three quart RH rear view.JPG (359KB - 451 downloads)
|
|
| |
|
Expert
Posts: 1530
Location: ZH, Switzerland | A sidemark to the rear end of my Letter... Nobody at the shop noticed that the drivers side rear fender is mounted about 1 cm (about 3/8") forward compared to the passenger side (yes, they noticed (after sand blasting) that the drivers side rear fender once was replaced). I always was courios why the wetherstrip channel at the drivers side is about 1 cm (about 3/8") less wide than at the passenger side - the inner end to the trunk is correct. I checked the distance between the end of the door opening and the start of the wheel well (bow) for the rear wheel after my Letter was primered on both sides. It's sunny clear now... The drivers side rear fender was replaced after an accident, but without straightening the reinforcement bow under the trunk floor prior.... Will see what I can do at the painter and body shop (two brothers). Next Saturday I'll bring all lamps to them. Happy Restoring! Dieter |
|
| |
|
Elite Veteran
Posts: 827
Location: tailFinland | You are in chritical stage now for the final result and appearance when the car is finished. Now it is important to adjust every single cap in hood, trunk lid and doors before car goes to paint booth.
An it is hard adjusting meaning cutting, grinding and welding. It is only way to do it right now. Make holes to fit their lids. Investing time and money now for it pays back later.
We had to remember that quality in 60's automobile industry was awful. cap tolerance was from 3 mm ti 12 mm in same panel, even there if was no collison history! Comparing 90;s Audies or BMWs wich had exact 4 mm cap in every lid regular Chrysler product quality looks bad.
I've seen many restored and "over done" forwarlookers in car events in Sweden, and they look like million dollar cars compared the ones that has not been "hard way adjusted caps".
Sure I admit it is over doing but if the car looks better than what is was when it left the factory... |
|
| |
|
Expert
Posts: 1530
Location: ZH, Switzerland | Hi Jari At some points you‘re absolutely right. I don‘t complain about bigger gaps nor some more imperfections. But when I compare the pictures /w measurements for the drain holes I got, I noticed that the trunk lid weatherstrip channel should be within a fraction of a millimeter (for a 1960 Chrysler with no collision history) and not with a difference of 5 to 10 millimeters from the RH side (7 cm like in the pictures) to the LH side (about 6 cm to 6.5 cm). So I said to the shop, estimate the position for to mount the recessions for the drain nipples. Because the measurements I got were not applicable at my Letter as it is right now. Happy Restoring! BTW: when I got my Letter, at the LH side I had too manies holes for the side trim (e.g. two upper and two lower holes for the F emblem). The LH side emblem is looking like new (bright colors, not mounted at the Letter for uncoutable years). |
|
| |
|
Expert 5K+
Posts: 7393
Location: northern germany | Adventurer 60 - 2018-06-30 8:24 AM
We had to remember that quality in 60's automobile industry was awful. cap tolerance was from 3 mm ti 12 mm in same panel,
Nonsense. You are mixing up things. The drivetrains outlasts any new power plant. The assembly quality of BODY panels wasn't as good but 12mm is BS.
Maybe new car manufacturers could learn from 1960 Mopars like how to produce seals that last 58+ years. |
|
| |
|
Expert
Posts: 1530
Location: ZH, Switzerland | From what I saw... Mopars of our decade were ways better and more accurate assembled than any competitor (GM and FoMoCo). Happy Restoring! Dieter
Edited by di_ch_NY56 2018-07-01 2:00 PM
|
|
| |
|
Elite Veteran
Posts: 827
Location: tailFinland | 1960fury - 2018-07-01 11:07 AM
Adventurer 60 - 2018-06-30 8:24 AM
We had to remember that quality in 60's automobile industry was awful. cap tolerance was from 3 mm ti 12 mm in same panel,
Nonsense. You are mixing up things. The drivetrains outlasts any new power plant. The assembly quality of BODY panels wasn't as good but 12mm is BS.
Maybe new car manufacturers could learn from 1960 Mopars like how to produce seals that last 58+ years.
Ok I gotta be bulls**ter then, you tell how much the tolerance was. Not sure about half inch neither but I have seen trunk lids in fwrl-cars where you can almost put your fingers thru.
Friend of mine collected 59 Plymouth/Kingsway/Diplomat doors for his rusty project in early 80's he had several left rear doors and noticed they were not same size,
difference was more than 5 mm in lenght. Those doors apparently were from different assembly plants and pressed not by same tools, but anyway they were designed to be same size. |
|
| |
|
Board Moderator & Exner Expert 10K+
Posts: 13045
Location: Southern Sweden - Sturkö island | It's all in the documentation and you're not far off Jari, the stackup was roundabout 3/8" (9,61mm). http://www.imperialclub.com/Repair/Lit/Master/150/150cover.htm
Stackup means the accumulated tolerances on a panel or several panels. |
|
| |
|
Expert 5K+
Posts: 7393
Location: northern germany |
Totally far off as 3/8 "stackup" is not 12mm (1/2") in (quote) "one panel". |
|
| |
|
Elite Veteran
Posts: 827
Location: tailFinland | 12 - 9,61 = 2,39 Yes I made about 20% error, I'm so sorry but both figures are too big. Perhaps the first owner never made a reclamation on those cars I've seen.
If you see 59 Dodge with trunk lid sitting ok - it has visited Jan Fridbergs body shop.
Try to sell new car these days with stackup that big (9,61 mm) no one would buy car like that, no one! That time was in the 70's when they made Escorts and Vauxhalls in England. Even russians made better with Moskwitsh and Lada.
Thats what i am talking about.
Edited by Adventurer 60 2018-07-04 5:28 PM
|
|
| |
|
Expert 5K+
Posts: 7393
Location: northern germany | Adventurer 60 - 2018-07-04 5:25 PM
12 - 9,61 = 2,39 Yes I made about 20% error, I'm so sorry but both figures are too big. Perhaps the first owner never made a reclamation on those cars I've seen.
If you see 59 Dodge with trunk lid sitting ok - it has visited Jan Fridbergs body shop.
Try to sell new car these days with stackup that big (9,61 mm ) no one would buy car like that, no one! That time was in the 70's when they made Escorts and Vauxhalls in England. Even russians made better with Moskwitsh and Lada.
Thats what i am talking about.
Again, the 3/8" is "stackup", you claimed 1/2" in ONE panel, that is BS, and what people want today is obviously different from way back when. I could male a list of things but it would be deleted by the "Mods".
At least you seem to be happy now, today, in this soooo smart and superior society, you can buy one of these superior cars that will last waaaay longer than those inferior, bad quality FL-cars (that are still around after 60 years) because of their perfect door gaps.
Edited by 1960fury 2018-07-04 5:58 PM
|
|
| |
|
Elite Veteran
Posts: 827
Location: tailFinland | I said 3 mm to 12 mm (what I have measured) I also said I'm sorry my mistake (i do not check manuals every time). Get over it now! besides I do not undestand why you have to be so offensive anyway about 2.39 millimiters.
Just wanted to give Dieter a tip becouse I have been thru same situation many times with my 60 and 61 Chrysler projects. I have gotten good tips at this forum and I dont judge are absolutely correct or not or just opinions. Dieter also replied that he don't care about bigger caps or more imperfections. Thats OK, you dont need to correct or customize things what factory has done.
I currenly own 4 FL cars, I have owned over ten of them along about other 20 old american cars during last 37 years. Some cars go some cars stay.
Yes I am very satisfied with my forward lookers and know from what they are made of. I have guts to be critical too. I don't live in 60's. I always got relatively new car provided by my employer so I also know what they are. I use them first 4-5 years or 150Kkm, thats it. But I never would choose a car that looks and feels crappy when its new.
End of discussion about this topic for me. |
|
| |
|
Expert
Posts: 1530
Location: ZH, Switzerland | Just to clarify what tortures or annoys me most is underlined with red bars in one picuture I took recently. About door gaps, hood gaps or deck lid gaps I'm quite tolerant. Of course it's possible to adjust the gaps equally around the perimeter. Happy Restoring! Dieter
 (IMG_5079_view from the back - birds view red - what tortures me most.jpg) (IMG_5079_view from the back - birds view red - what tortures me most.jpg)
Attachments
----------------
IMG_5079_view from the back - birds view red - what tortures me most.jpg (348KB - 423 downloads)
|
|
| |
|
Expert 5K+
Posts: 7393
Location: northern germany | Adventurer 60 - 2018-07-05 4:36 AM
I besides I do not undestand why you have to be so offensive anyway
This wasn't your first post. I have a good memory on some things. I could elaborate on that, but I'm not in the mood. It hits my nerve if certain people call these fine cars crap or poor quality cars. Nothing could be further from the truth.
I'm certainly happy that people back in the day bought these cars that (quote) "looked and felt crappy when new". |
|
| |
|
Expert
Posts: 1530
Location: ZH, Switzerland | On Saturday I was in the shop (body and paint) again to do some further measurements. Good news is, that my Letter is in the shop now. Results: The measurements differ about 1 cm ( ~ 3/8") ontop of the fin (B pillar to the end of the fin) - drivers side shorter. The hight of the B pillar (quarter panel at the end of the door opening) is about 1 cm (~3/8") higher at the drivers side than at the passenger side. If the hight of both doors is (almost) equal, it's impossible to match the upper end of the drivers door to the B pillar and keep the gap around the perimeter of the door equal. I was standing near the drivers side rear wheel and was thinking about consequences (or where to set the cut) of shifting the rear fender about 1 cm (~ 3/8") backwards (because it depends on where to cut the fender out - it seems the LH corner closer to the rear window of the trunk opening would move too). And if the hight of the door opening would lower as well... During my visit I had the chance to talk to the body worker at this shop again. I introduced him the hint of Jari (small bow at the lower rear end of the door to match the rounding of the body). Happy Restoring! Dieter
Edited by di_ch_NY56 2018-07-08 2:42 AM
|
|
| |
|
Expert
Posts: 1530
Location: ZH, Switzerland | Last Saturday I brought my Bahco tool case with some English sockets plus my model 300F (convertible) to the body and painting shop. The next steps are adjusting all moving parts (doors, trunk lid, hood) prior to disassemble it. They‘ll start soon. A big issue of the painter is to catch the correct color. Alaskian White is a kind of white with a shade of cream in it I assume. Happy Restoring! Dieter |
|
| |
|
Expert
Posts: 1740
Location: Alaska | Just to clarify, I believe that the 657 carrier with the 1 3/8 pinion was not available with limited slip. The 742 or its early equivalent with the 1 3/4 pinion was used with limited slip. Not sure, it may be possible to install limited slip in the 657 case. |
|
| |
|
Expert
Posts: 1530
Location: ZH, Switzerland | Because I was at the truck for nothing I decided to visit the body and painting shop. Still the yellow 02 Bimmer is in the shop. From the professional body worker I got the information that he‘ll start the work perfoming on my Letter on January 1st. That‘s good luck I said I could assist because I‘ll take my complete holiday as a piece during winter season. Happy Restoring! Dieter |
|
| |
|
Expert
Posts: 1530
Location: ZH, Switzerland | As the first step, the painter (and boss of the company), the apprentice (painter/body worker) and me removed the hood. it seems the work started at my Letter. We did a walk around and the painter notified me, that the trunk lid overlaps at the rear, left hand side. We'll discuss with the body worker (not present at my meeting) what the best solution will be to get the correct shape between the filler recession and the drivers door. Visible is that the gap between the trunk lid and the left hand side rear fender is not equal over the full lenght. But it's only visible, when the trunk lid is fully closed. Happy Restoring! Dieter
Edited by di_ch_NY56 2019-01-26 11:04 AM
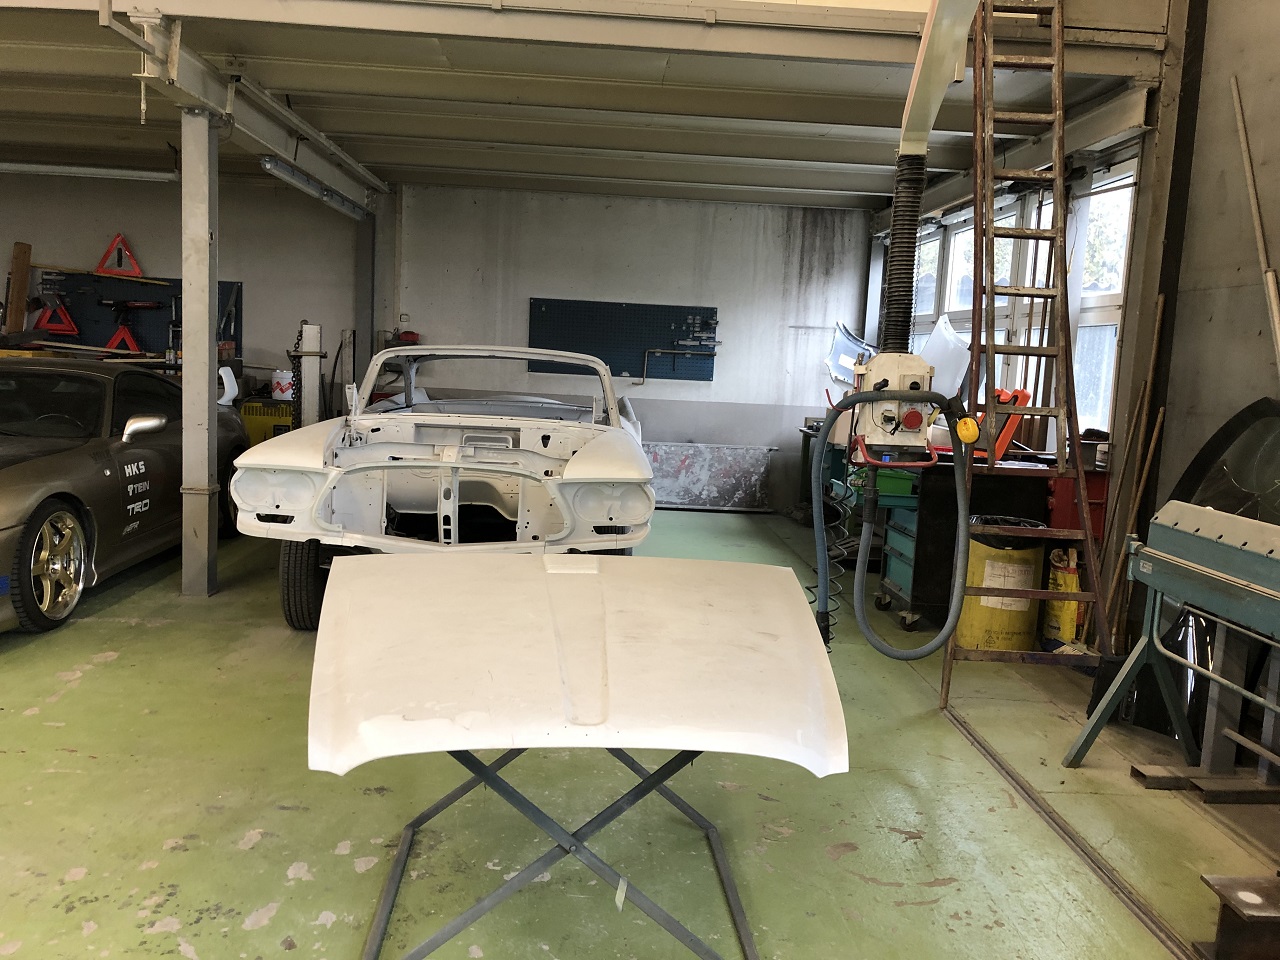 (IMG_5558_hood removed.JPG) (IMG_5558_hood removed.JPG)
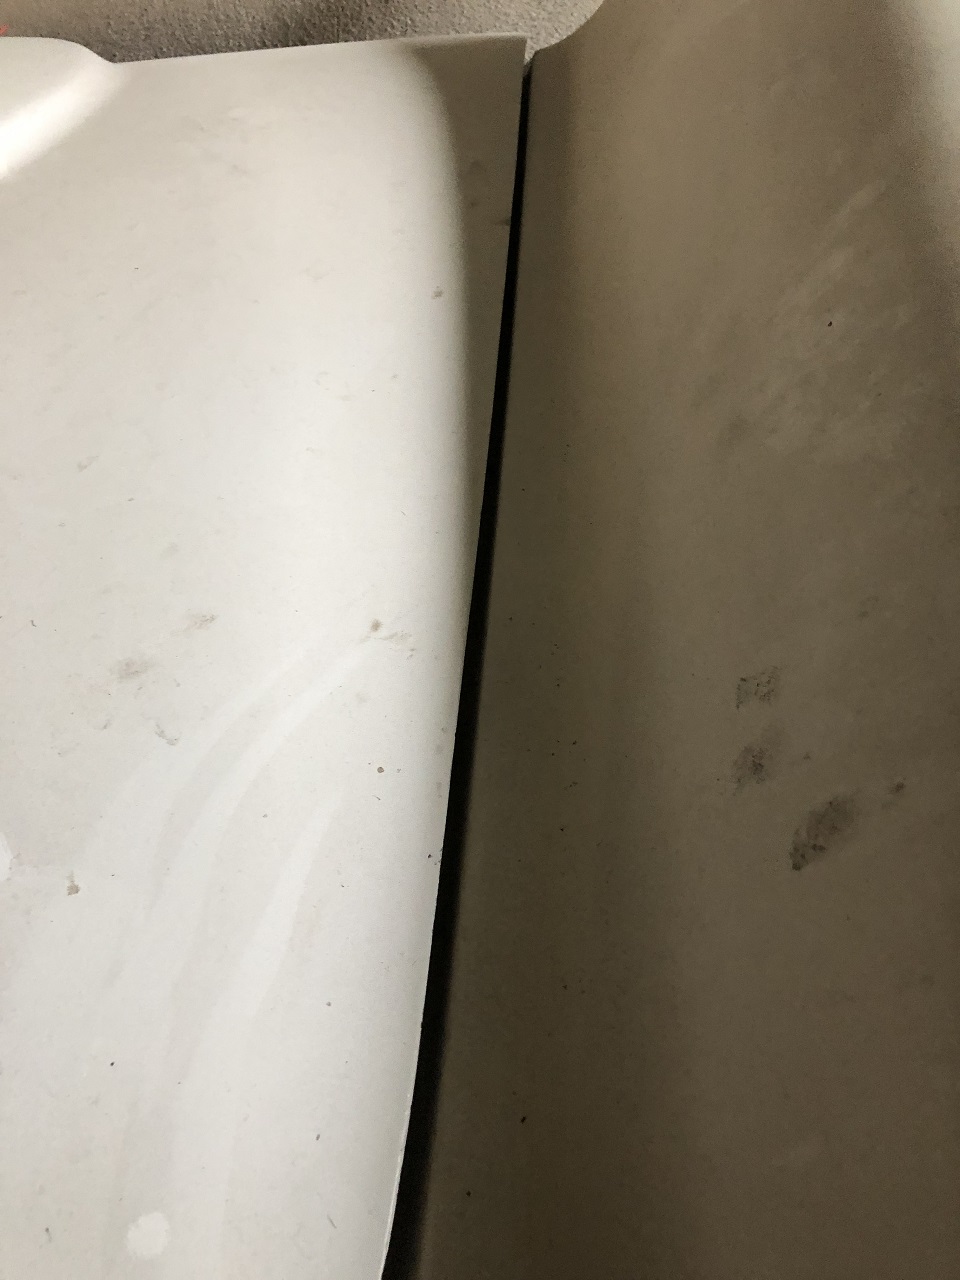 (IMG_5559_trunk lid to left hand rear fender.JPG) (IMG_5559_trunk lid to left hand rear fender.JPG)
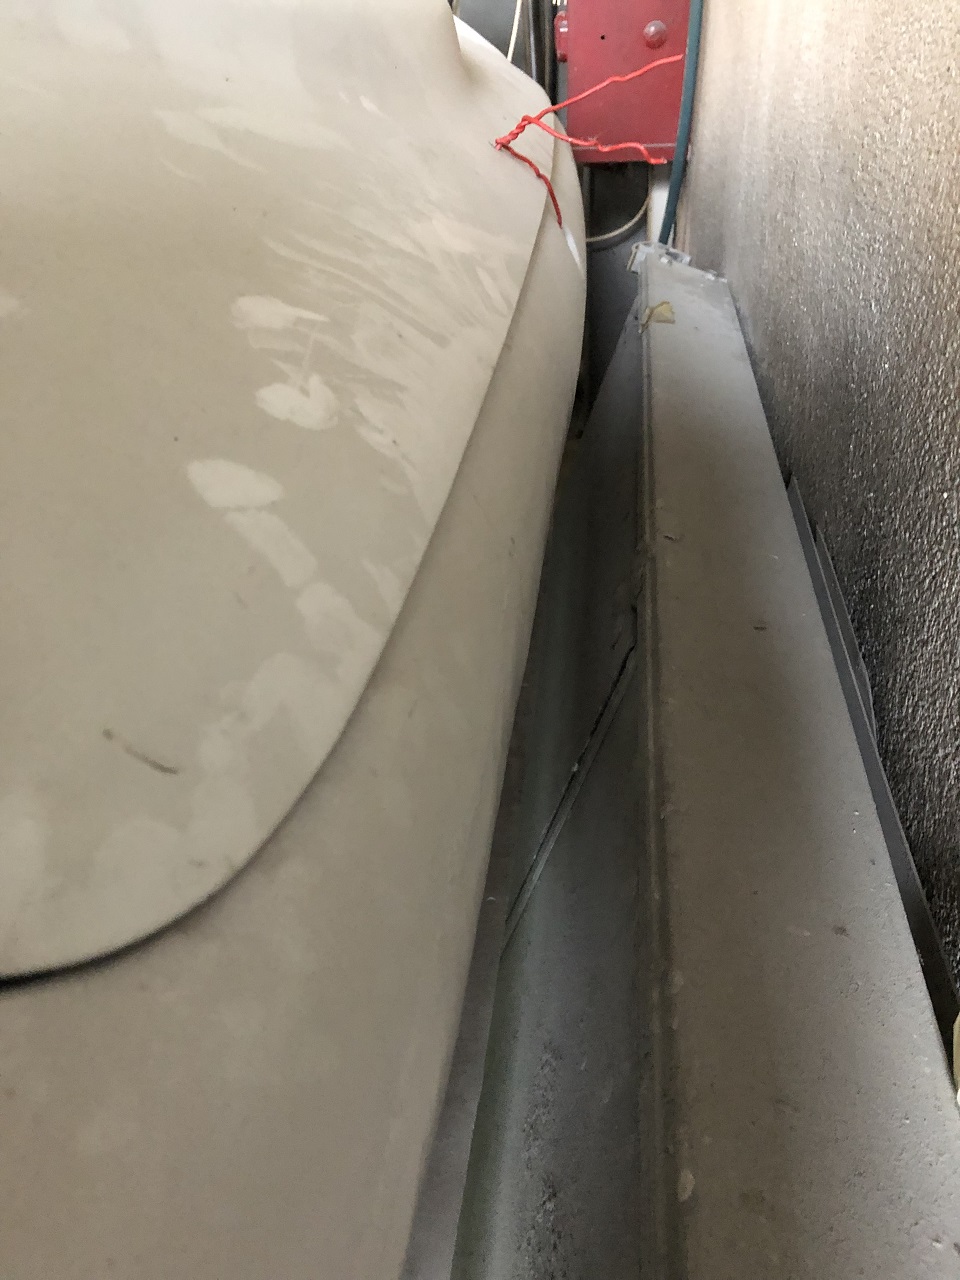 (IMG_5560_trunk lid overlaps rear end left hand side.JPG) (IMG_5560_trunk lid overlaps rear end left hand side.JPG)
Attachments
----------------
IMG_5558_hood removed.JPG (408KB - 369 downloads)
IMG_5559_trunk lid to left hand rear fender.JPG (234KB - 361 downloads)
IMG_5560_trunk lid overlaps rear end left hand side.JPG (295KB - 373 downloads)
|
|
| |
|
Expert
Posts: 1530
Location: ZH, Switzerland | With the help of the body worker and the painter (shop manager as well) we measured the distance between the end of the door opening to the end of the fin again. The result is that the difference ontop of the body line (upper end of door opening to top end of fin) 115.75 inch (294 cm). The distance at the passenger side is slightly longer 115.90 inch (294.4 cm). The difference is less than 3/16 inch, quite close to 1/8 inch (4 mm). I guess this is within the factory specification. The front end between the front fenders is fully disassembled to work on. The gap between the inner structure and the shell of the hood is filled with styrofoam to support the shell (keep it stable). I'll cut out the isolation mat to fit it between the diagonal beams of the inner structure as it was. With the isolation map the styrofoam it not visible anymore. Happy Restoring! Dieter BTW: my Letter has changed the place. It rests actually where the sports car was parked during the time I took the picture.
Edited by di_ch_NY56 2019-02-02 12:41 PM
|
|
| |
|
Expert
Posts: 1530
Location: ZH, Switzerland | Since at least two weeks, the body parts at the front end are disassembled. Today the apprentice started to prepare the parts for the paint system. But shortly he stopped and showed the parts to his boss, the painter and chairman of the shop. I got a short message to call back. The painter explained that these parts never evers saw sand blasting sand. They have heavy surface rust. I agreed to bring the parts to an industrial paint stripper company (the company who blasted the whole 02 bimmer). We were talking about the rest of the body... just my idea (without discussing with the painter)... if the body would show the same signes I have to pull the emergency cord. That means I'm going to crush the whole project, all parts included. Happy Restoring! Dieter
 (IMG_5587_body front end disassembled.JPG) (IMG_5587_body front end disassembled.JPG)
Attachments
----------------
IMG_5587_body front end disassembled.JPG (328KB - 360 downloads)
|
|
| |
|
Board Moderator & Exner Expert 10K+
Posts: 13045
Location: Southern Sweden - Sturkö island | It's tragical that the first "body-shop" obviously took some short-cuts Dieter, didn't you inspect the parts after the sand blasting?
You cannot stop this Project now - it will only hurt more as a torn down car has much lower value.
Just stay calm and take one step at the time. |
|
| |
|

Expert
Posts: 3967
Location: DFW, TX | That is frustrating. If there are serious problems with the body, maybe another (nice and solid) shell from the US can be found and shipped over? No one wants to see the project stop now! Especially you, I'm sure. |
|
| |
|
Expert
Posts: 1530
Location: ZH, Switzerland | Thanks for your words... Today I visited the shop again to take some pictures. About the battery tray I shouldn't say much - it's a courtesy of the shop owner (in exchange to my much worse battery tray). At the picture serie are two pictures of the resting outer fender (at the body) to the front subframe. In my opinion the distance should be the same. But it isn't. At the drivers side the distance is almost two fingers, while at the passenge side the same distance (lower end of the outer fender to the front sub frame) is almost one finger (to squezze through). Is there a way forseen to adjust the sub frame to the body (shims) or (I hope not) is the front sub frame diagonally bent? Dieter BTW the colored areas is a part of the paint system. I was present at the sandblasting of the underside of the body partially. Shortly after finishing the sandblasting the primer was applied. Next time I saw my Letter it was covered with primer.
Edited by di_ch_NY56 2019-02-27 1:40 PM
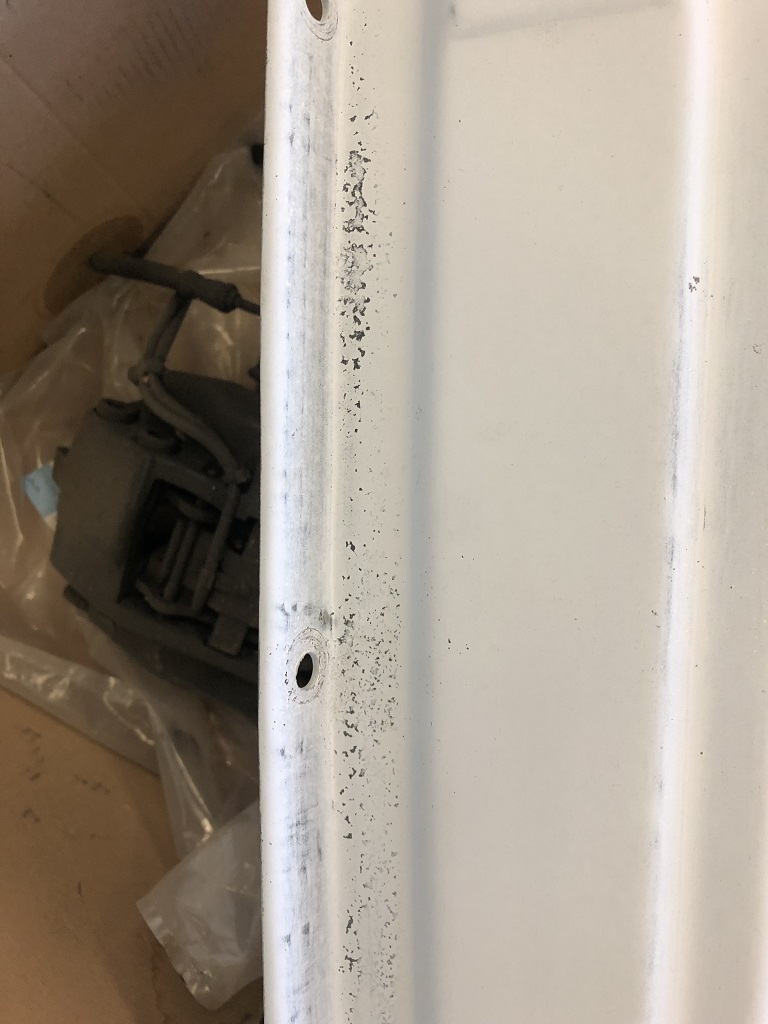 (IMG_5642_rust after the slight grinding with sandpaper 1.JPG) (IMG_5642_rust after the slight grinding with sandpaper 1.JPG)
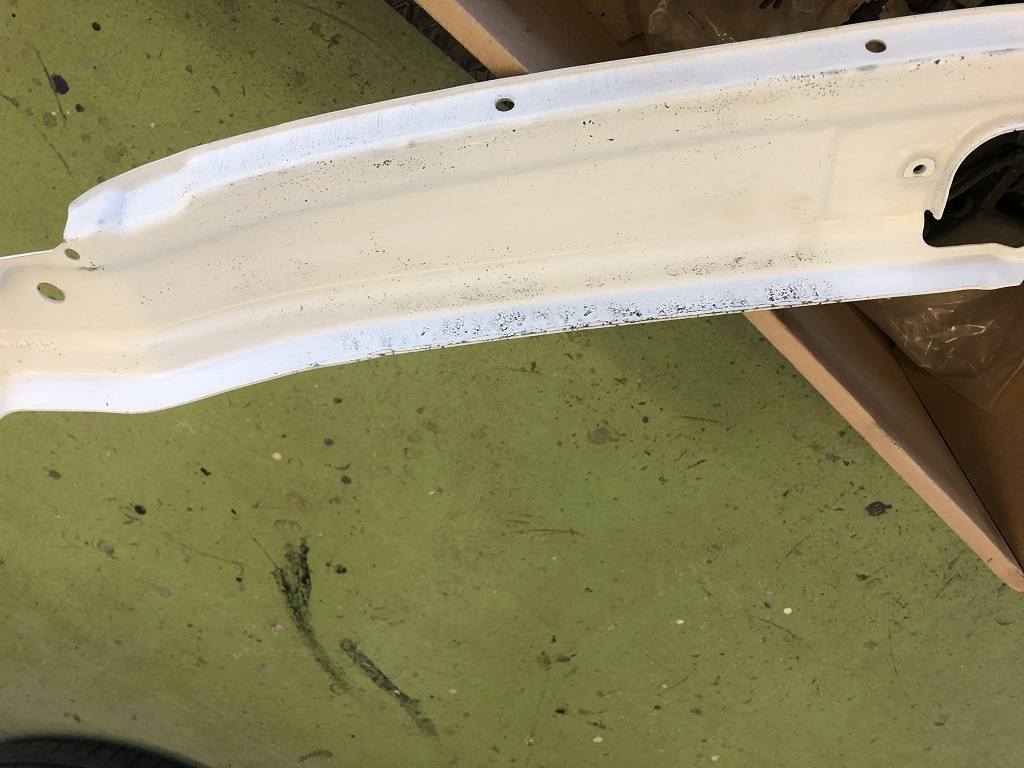 (IMG_5643_rust after the slight grinding with sandpaper 2.JPG) (IMG_5643_rust after the slight grinding with sandpaper 2.JPG)
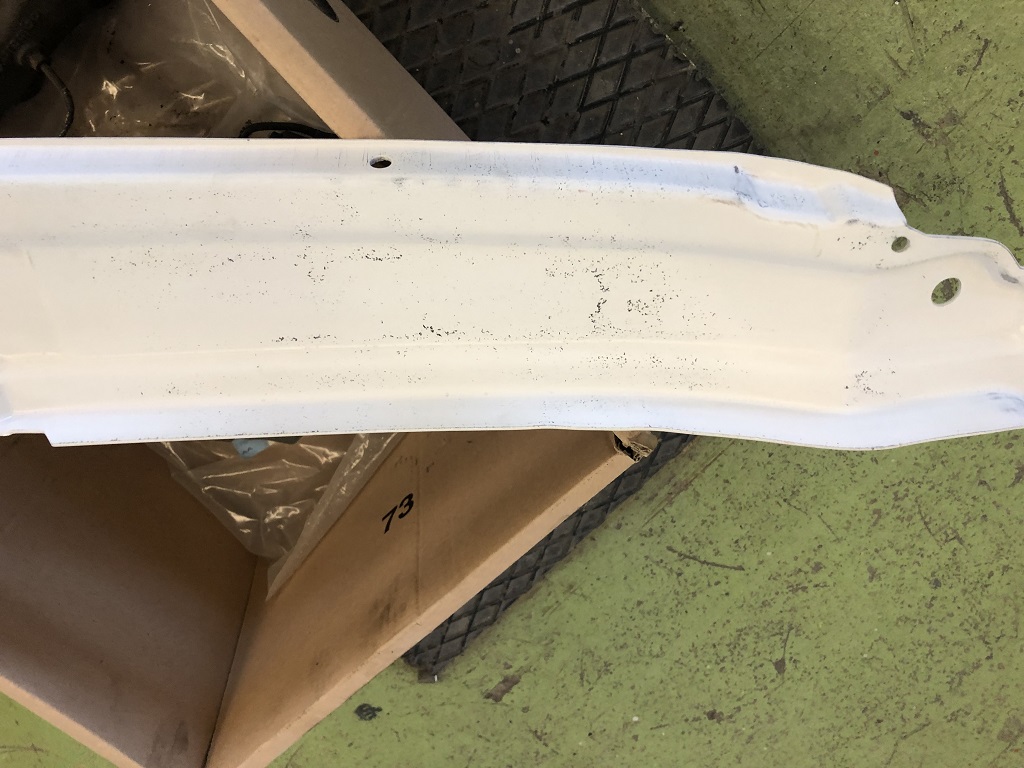 (IMG_5644_rust after the slight grinding with sandpaper 3.JPG) (IMG_5644_rust after the slight grinding with sandpaper 3.JPG)
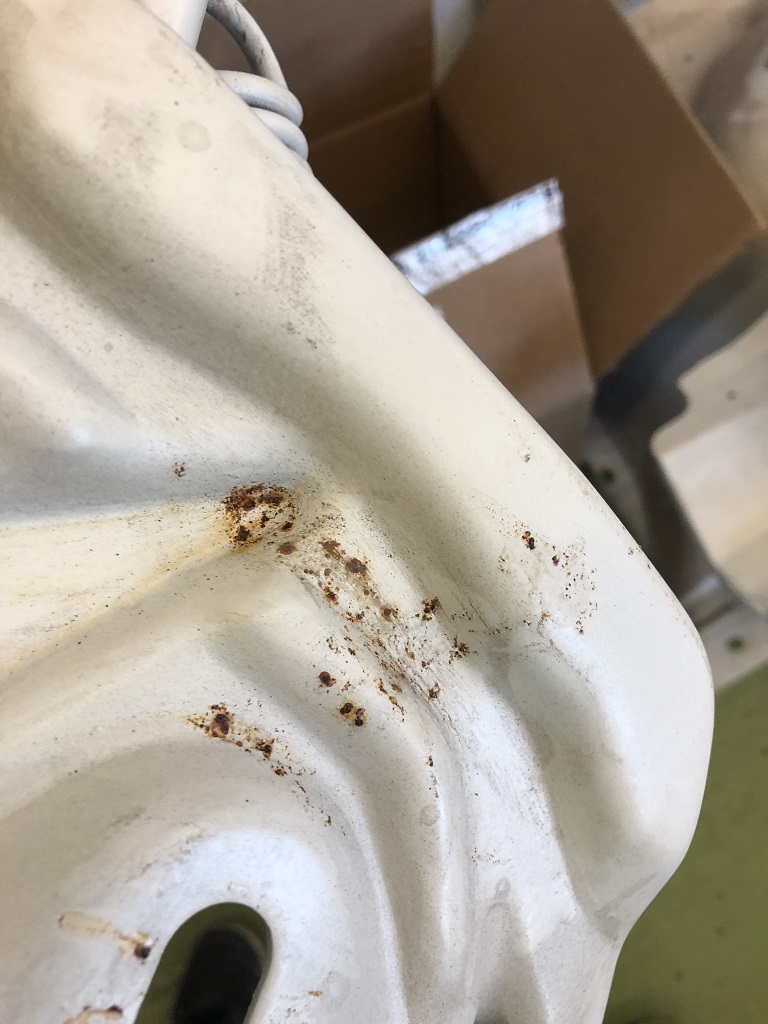 (IMG_5645_rust at one hinge inside.JPG) (IMG_5645_rust at one hinge inside.JPG)
 (IMG_5646_battery tray not completely sand blasted courtesy shop.JPG) (IMG_5646_battery tray not completely sand blasted courtesy shop.JPG)
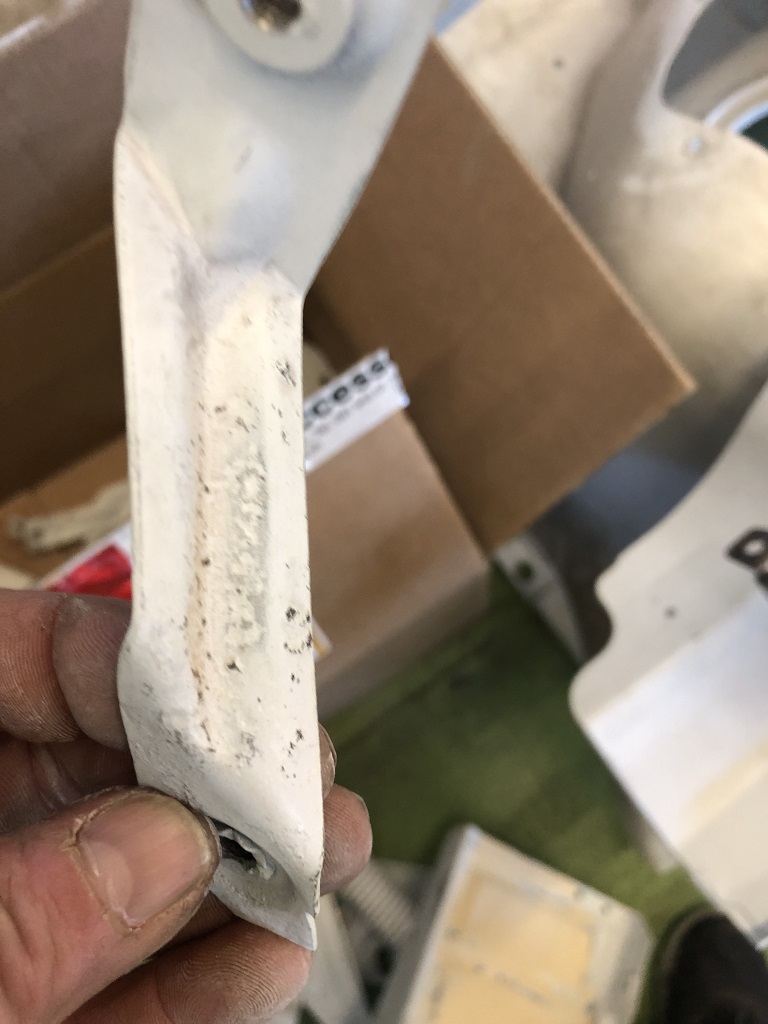 (IMG_5647_small reinforcements not sandblasted.JPG) (IMG_5647_small reinforcements not sandblasted.JPG)
 (IMG_5647_small reinforcements not sandblasted.JPG) (IMG_5647_small reinforcements not sandblasted.JPG)
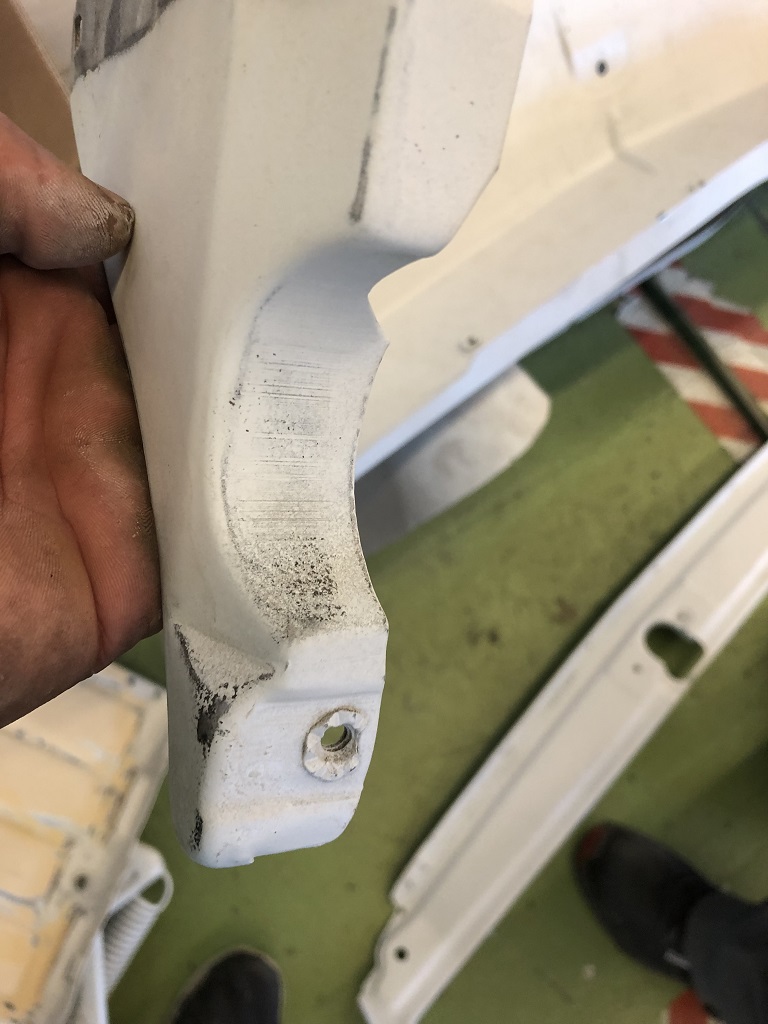 (IMG_5649_not completely sandblasted.JPG) (IMG_5649_not completely sandblasted.JPG)
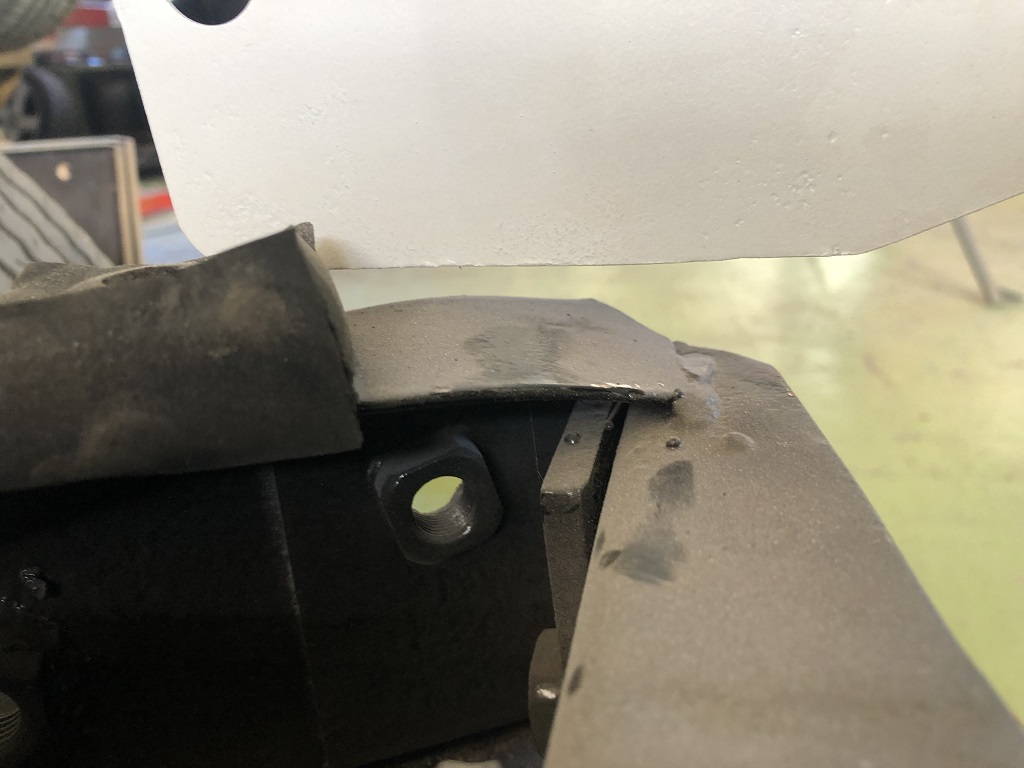 (IMG_5651_outer fender to frame drivers side.JPG) (IMG_5651_outer fender to frame drivers side.JPG)
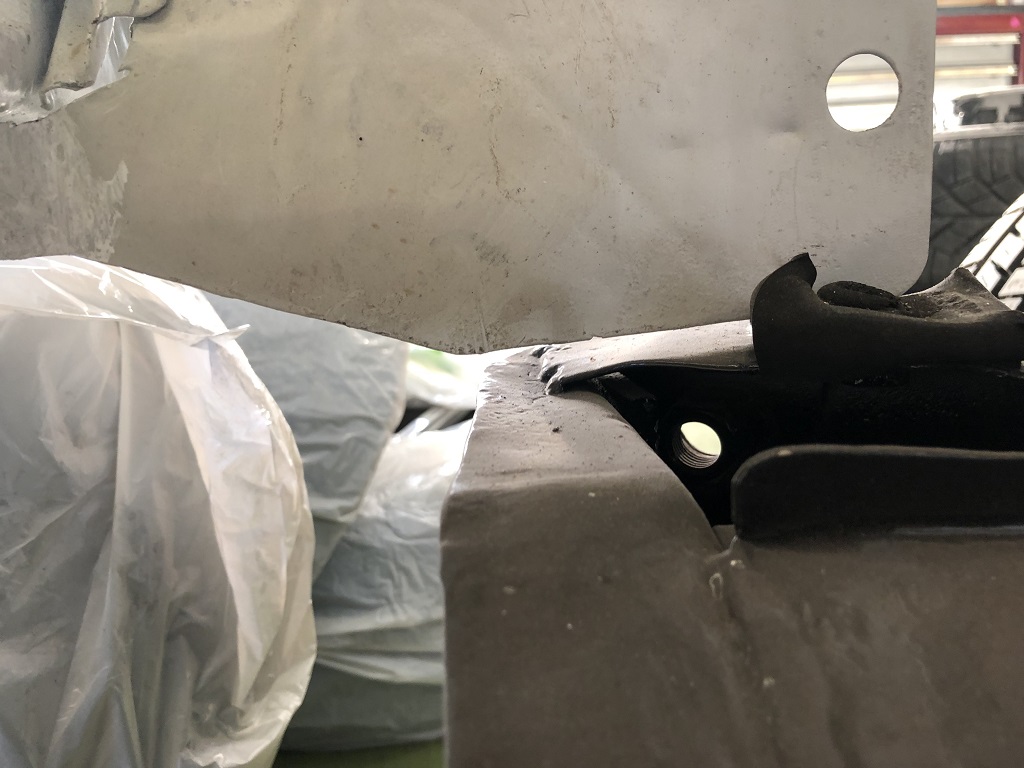 (IMG_5652_outer fender to frame passenger side.JPG) (IMG_5652_outer fender to frame passenger side.JPG)
Attachments
----------------
IMG_5642_rust after the slight grinding with sandpaper 1.JPG (154KB - 374 downloads)
IMG_5643_rust after the slight grinding with sandpaper 2.JPG (211KB - 375 downloads)
IMG_5644_rust after the slight grinding with sandpaper 3.JPG (220KB - 363 downloads)
IMG_5645_rust at one hinge inside.JPG (190KB - 364 downloads)
IMG_5646_battery tray not completely sand blasted courtesy shop.JPG (195KB - 361 downloads)
IMG_5647_small reinforcements not sandblasted.JPG (153KB - 371 downloads)
IMG_5647_small reinforcements not sandblasted.JPG (153KB - 358 downloads)
IMG_5649_not completely sandblasted.JPG (168KB - 353 downloads)
IMG_5651_outer fender to frame drivers side.JPG (153KB - 372 downloads)
IMG_5652_outer fender to frame passenger side.JPG (170KB - 348 downloads)
|
|
| |
|
Expert
Posts: 1530
Location: ZH, Switzerland | I got the answer (adjusting sub frame to the body) in the Service Reference Book 146 Suspension And Front-End Alignement Features - 1960 Models on page 5. There are shims as I expected.... Happy Restoring! Dieter BTW: What I know for sure... the underside of the hat deposing behind the rear seats I have to use the drilling machine and a sharp (rust consuming) wire wheel set to clean it. At the first shop there was just primer applied without a prior sand blasting... The owner of the body and painting shop offered I could do that job in his shop (originally I expected to perform that work when I have my Letter back). After the owner of the Body and Paint shop mentioned we'll look forward to get a perfect result I do not look back, too. We'll bing my Letter to a good end. Even though it turns out to be a financial black hole. Happy Restoring! Dieter |
|
| |
|
Board Moderator & Exner Expert 10K+
Posts: 13045
Location: Southern Sweden - Sturkö island | Dieter, the subframe adjustment is one thing, the fitment of the inner fenders is another.
You can follow the proceedure in the manual for to check and eventually adjust the subframe to the body.
I'll check the gap on my inner fenders, I don't expect it to be totally even on both sides.
|
|
| |
|
Expert
Posts: 1530
Location: ZH, Switzerland | wizard - 2019-03-02 1:10 PM Dieter, the subframe adjustment is one thing, the fitment of the inner fenders is another. You can follow the proceedure in the manual for to check and eventually adjust the subframe to the body. I'll check the gap on my inner fenders, I don't expect it to be totally even on both sides. Hi Sven When I visited my Letter yesterday I noticed that there is a spacer plate, about 1/8" thick, under to rear upper mounting of the passenger side front fender. At the cowl it is about 3/32" too high. Both front gaps from the doors to the front fender are looking parallel, even though the rear end of both doors is about 1/8" too low on both side. Actually I don't know if the sub frame is not adjusted correct or bent. Or if this spacer plate should be under the front mounting of the sub frame to the body. Normally if the radiator yoke is mounted, you could check it at the vertical front bolts from the radiator yoke to the sub frame (where there is a rubber isolation between). That rubber isolation I'm seeking as well - don't know if the rubber spacer for my Beast are the same. Happy Restoring! Dieter
Edited by di_ch_NY56 2019-03-03 11:51 AM
|
|
| |
|
Board Moderator & Exner Expert 10K+
Posts: 13045
Location: Southern Sweden - Sturkö island | I just checked on my car Dieter and the space is actually more or less even.
Normally, when a fender or the whole subframe is demounted, the location and number of shims as well as the thickness of the pack must be documented.
Check if you have any photos of the shims at the subframe mounting first of all.
If not, you must perform the proceedure in the fsm.
The subframe to body alignment/adjustment is very important for the correct height and track gauge.
Once the subframe is correctly aligned/adjusted, then it will be more easy to adjust the front fenders - of course, the doors must be adjusted first so that the gap is as even as possible in the rear end of the doors.
|
|
| |
|
Expert
Posts: 1530
Location: ZH, Switzerland | To adjust the subframe to the body I need four equal tires with the identical tire pressure... Actually on all four corners are different tires (also size of) mounted. These tires are just temporarely... Then some impression from my Letter.... note the driver side rear corner. No wonder the chrome moulding was not mounted when I purchased the Letter... Dieter
Edited by di_ch_NY56 2019-03-04 12:04 PM
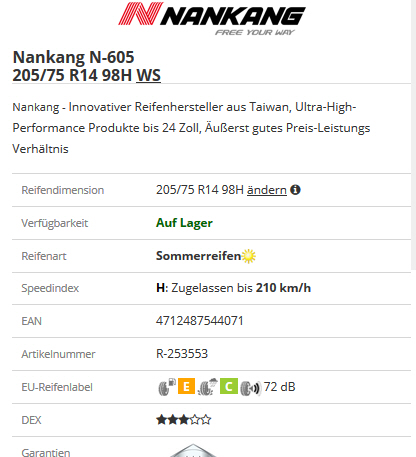 (Nakang tire.jpg) (Nakang tire.jpg)
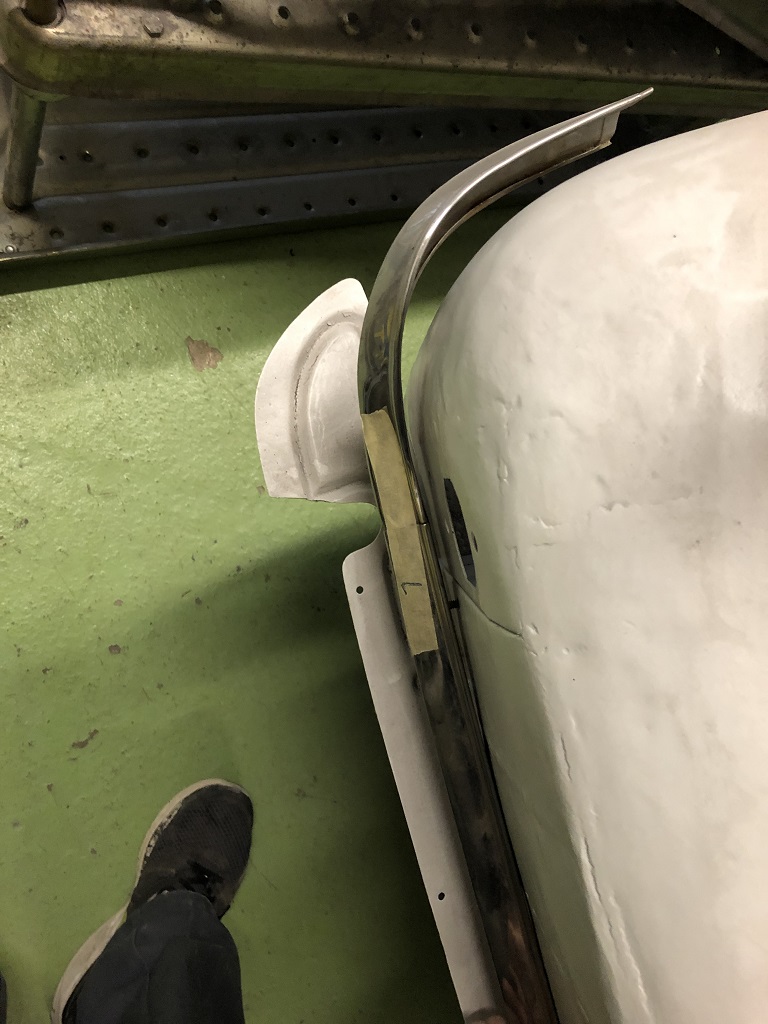 (IMG_5666_drivers side rear corner outside with moulding around.JPG) (IMG_5666_drivers side rear corner outside with moulding around.JPG)
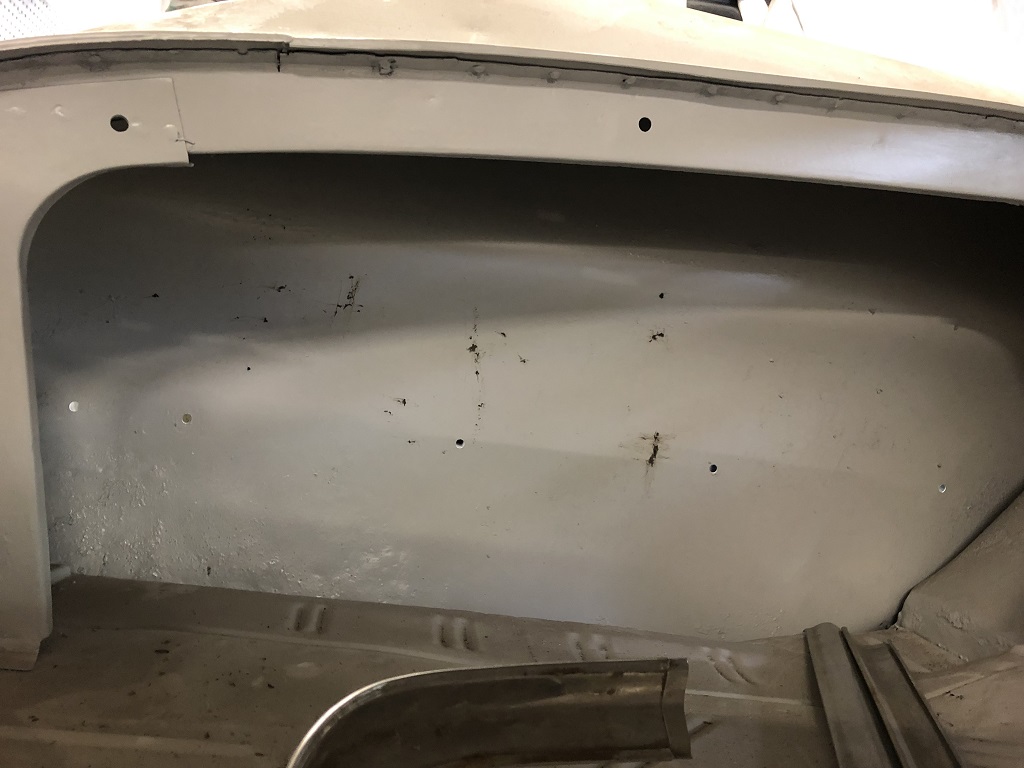 (IMG_5667_drivers side rear corner inside the trunk.JPG) (IMG_5667_drivers side rear corner inside the trunk.JPG)
Attachments
----------------
Nakang tire.jpg (115KB - 358 downloads)
IMG_5666_drivers side rear corner outside with moulding around.JPG (193KB - 339 downloads)
IMG_5667_drivers side rear corner inside the trunk.JPG (151KB - 353 downloads)
|
|
| |
|
Expert 5K+
Posts: 5006
| that sucks, I know the feeling where you like uhg what else? I get my own parts sandblasted and do my own body work.
Your too far in to quit though. Itll be worth it in the end
that would explain the rear quarter repair on the drivers side being off.
I think if you used a puller you could get it to move back a 1/4 inch, hopefully. It appears it has been "rounded" off a bit. Obviously gently and slowly.
You can see from your "redline" picture, the edge has been flatted from the damage. You need to put that body line back in place a little more. Its very tricky work.
As a body guy, I always try to use the trim and other body mouldings to make sure there was no damage and everything fits perfect.
That corner which was damaged should have been inspected carefully. It appears not a lot of work was done there at all(which is fine I guess it didn't cost you anything).
I hate "redoing" work, that's the worst... your redoing work but at least you didn't pay to have this ****up. |
|
| |
|
Expert
Posts: 3967
Location: DFW, TX | ouch, that is no good
It's just metal. It can be fixed, and should be. It would be better if they had done better collision repair back then, but this is just the reality for many of these old cars.
My dad works in a resto shop. You would be surprised how often they will finish the body and paint work, just to find out that the trim fits like that! And then have to pull it all back apart and fix it.
|
|
| |
|
Elite Veteran
Posts: 827
Location: tailFinland | I feel sorry for you Dieter. How can any painter who has even little self respect can paint on surface rust for a customer who paid for sand blasting...
Here that kinda crook would be hanged from his bollocks.
Lee Meyer in South Ca has a 60 Windsor coupe and is parting it out. You should ask him if he got a decent left rear fender.
Right fender was busted if I remember right.
He also got some F-parts for sale.
He is in Facebook
|
|
| |
|
Board Moderator & Exner Expert 10K+
Posts: 13045
Location: Southern Sweden - Sturkö island | Dieter, don't use the moulding as reference - it might be warped from the accident. Use a neck profile ruler on the right side, turn it and recheck the left side.
As reference, you might find one locally as well…..
https://www.dhgate.com/store/product/1-pcs-high-quality-profile-gaug... |
|
| |
|
Expert 5K+
Posts: 5006
| well the moulding gets you an idea, yes check everything extensively... I think the trim is probably undamaged and a replacement. Im sure it was destroyed in the accident. |
|
| |
|
Expert
Posts: 1530
Location: ZH, Switzerland | When I look at the trim of the drivers side.... the rear and the corner are looking fantastic. Do dent, nothing. Of course the side trim (long rail) has many dents from carless door openers on both sides. A big smile I got when I saw the 300 F ornament of the drivers side... all original colors and absolutely no discoloration from the environment. That shows me, that the drivers side trim was removed, eventually replaced (some parts) long, long ago. The really professional body worker at the second shop would produce templates out of body steel from the passenger side rear corner and flip it. Could be or most possible this is a ways more expensive solution than purchase the item Wizard proposed. Happy Restoring! Dieter BTW: I was just curious and wanted to get an impression about the quotation (how far is the actual drivers side rear corner from it's original shape). |
|
| |
|
Expert
Posts: 1530
Location: ZH, Switzerland | Some pictures (as a collection) of my visit this morning. I was just wondering how the underside of the dashboard carrier/inner, lower windshield frame surrounding looks like. From the hood shelf under the rear window I knew, that the shop owner took a brush to apply the primer. It looks like I have to clean the whole underside again with a rotating wire brush... The reinforcement of the roof I have to remove myself as well. I guess on the side of the rubber I'm going to apply rust inhibitor color. Absolutely clear now is why the drivers side rear corner doesn't match. Two pictures (passenger side and drivers side). Happy Restoring! Dieter BTW: because the subframe is mounted through a positive locking system at the rear, there is just to adjust the hight of the front mounting point after the adjustemts of the doors, following the front fenders and then the hight of the frame. If the front track is not inline the rear track, the subframe is bent or twisted and needs a replacement or a extensive repair.
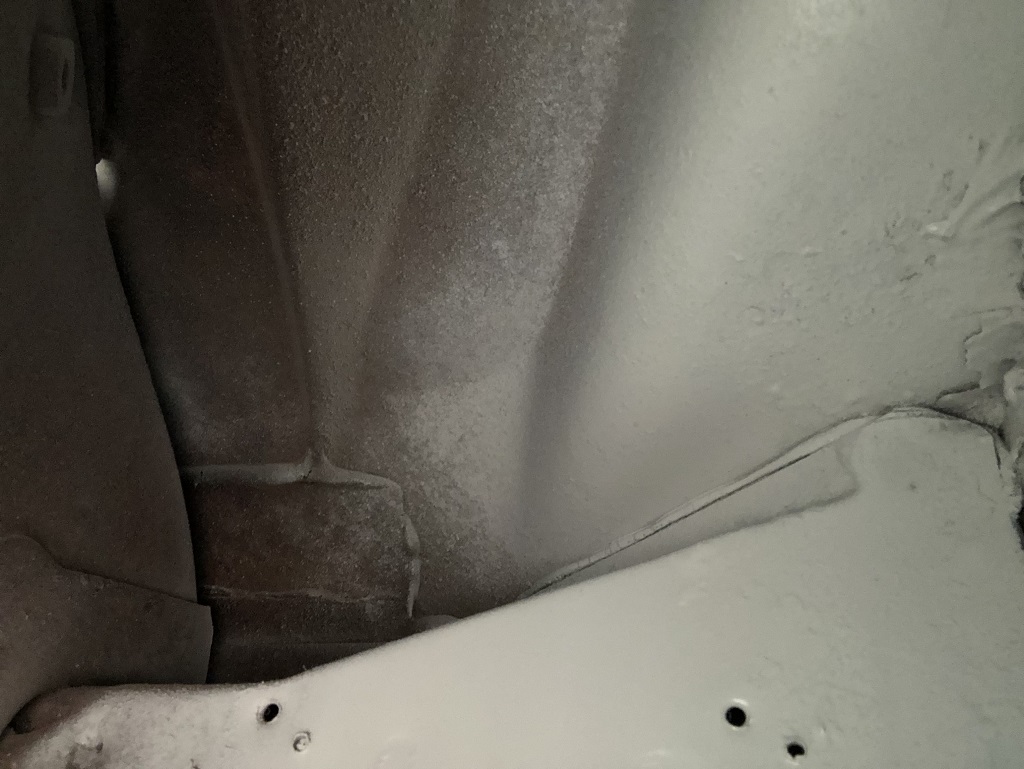 (IMG_5685_underside inside dashbord carrier drivers side.JPG) (IMG_5685_underside inside dashbord carrier drivers side.JPG)
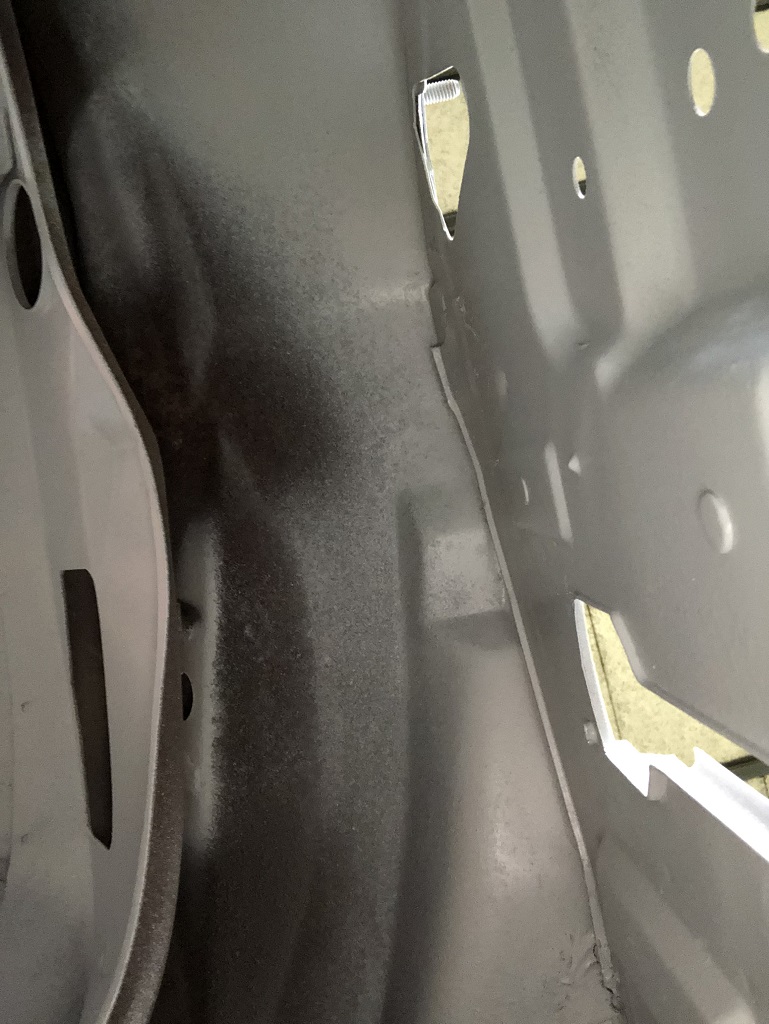 (IMG_5686_underside inside dashbord carrier center.JPG) (IMG_5686_underside inside dashbord carrier center.JPG)
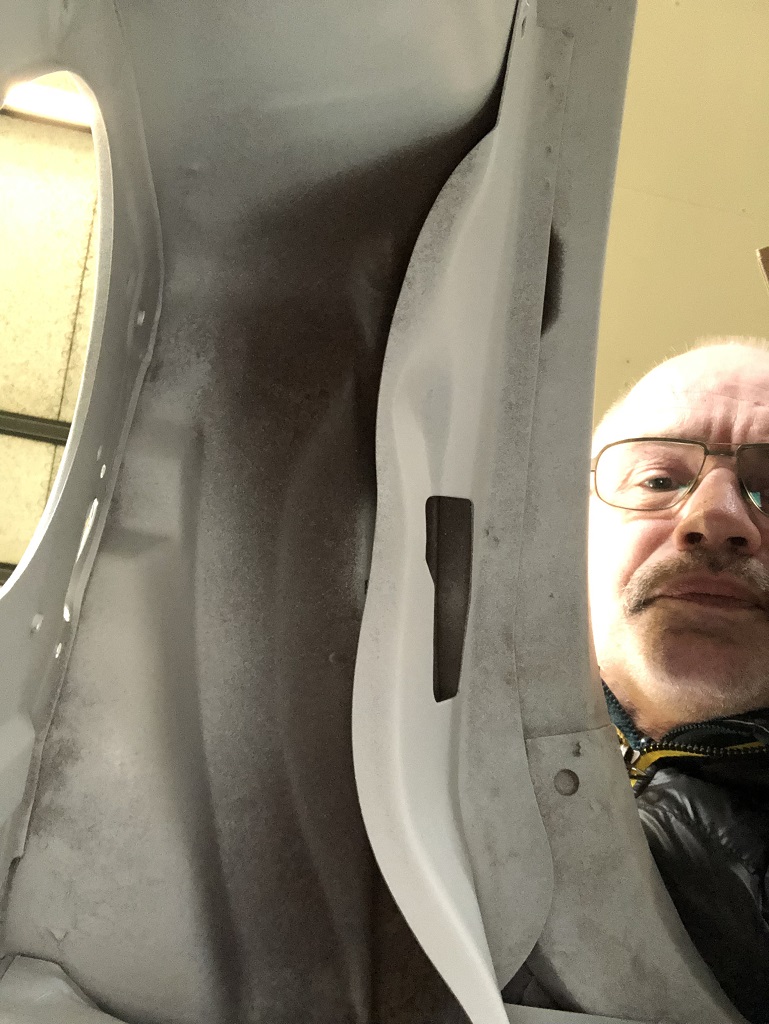 (IMG_5687_underside inside dashbord carrier passenger side.JPG) (IMG_5687_underside inside dashbord carrier passenger side.JPG)
 (IMG_5689_roof reinforcement.JPG) (IMG_5689_roof reinforcement.JPG)
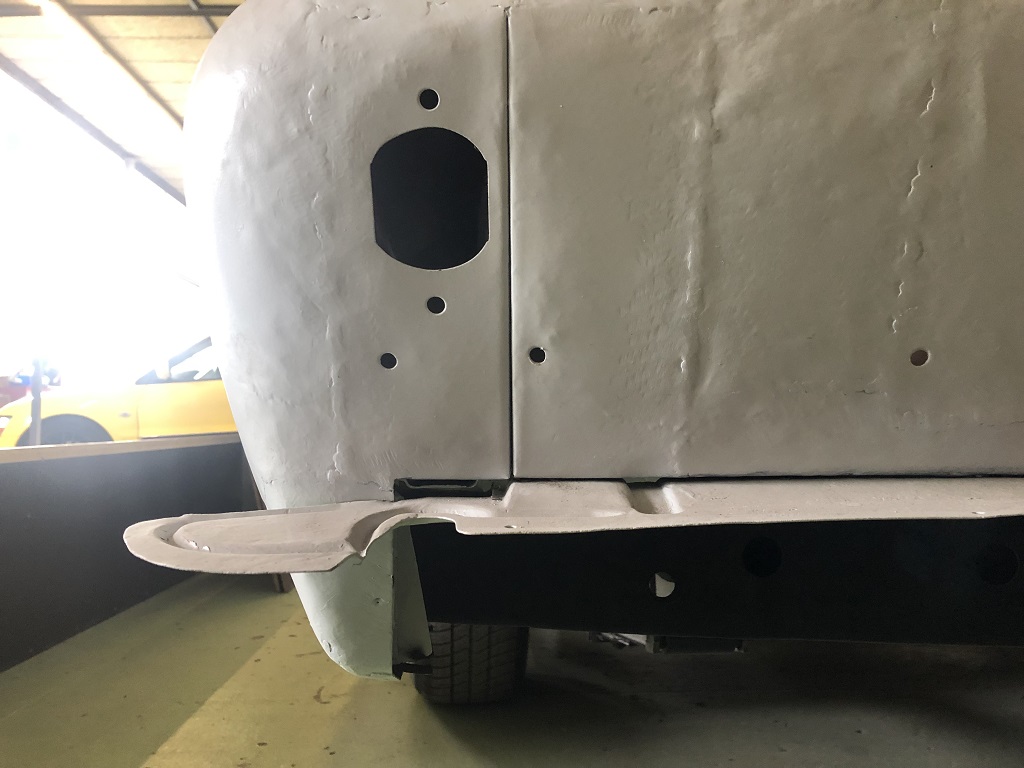 (IMG_5694_rear corner drivers side.JPG) (IMG_5694_rear corner drivers side.JPG)
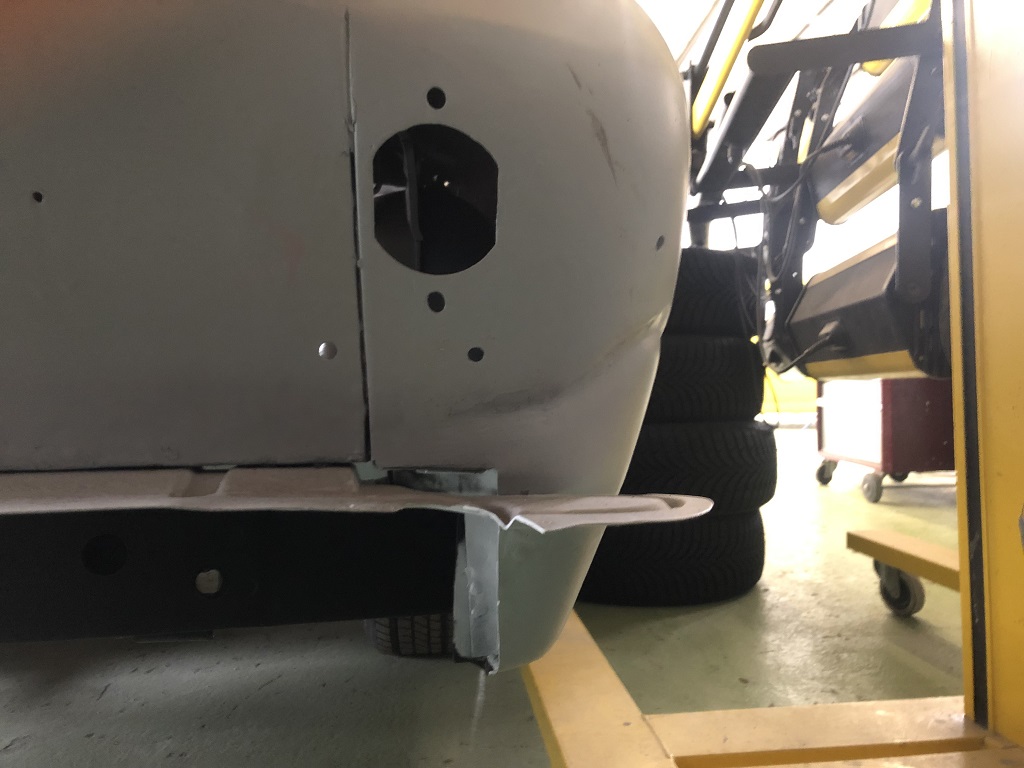 (IMG_5695_rear corner passenger side.JPG) (IMG_5695_rear corner passenger side.JPG)
Attachments
----------------
IMG_5685_underside inside dashbord carrier drivers side.JPG (199KB - 406 downloads)
IMG_5686_underside inside dashbord carrier center.JPG (236KB - 399 downloads)
IMG_5687_underside inside dashbord carrier passenger side.JPG (249KB - 420 downloads)
IMG_5689_roof reinforcement.JPG (206KB - 410 downloads)
IMG_5694_rear corner drivers side.JPG (159KB - 419 downloads)
IMG_5695_rear corner passenger side.JPG (162KB - 420 downloads)
|
|
| |
|
Board Moderator & Exner Expert 10K+
Posts: 13045
Location: Southern Sweden - Sturkö island | Dieter, the backside of the cowl and under the dash, roof and rear shelf was never painted at all. Surely, you can do it better with a wire brush, but it's more like "nice to have", not necessary.
Please eludicate us how you concluded that it's absolutely clear why the corners doesn't match??
The dent in the right rear corner is a result of a kiss from the bumper - it should be smooth.
Or, am I missing something?
As for the subframe - did the guys check the diagonal measurements in the FSM, Group 13, paragraph 2, fig 5?
Hypothetically, if the diagonal measures are equal for A and B, it means that the subframe is not askew. This measures cannot be made with accuracy when the subframe is mounted, hence the "in-line" center line checks in the FSM.
So, the conclusion is; IF the subframe has the same diagonal measurements AND the body isn't severly damaged, then, hypothetically, the center line will be true when the subframe is mounted.
As for the frame to body check/adjustment refer to Group 13, paragraph 3 - this operation is done for to adjust eventual height differencies between the subframe and the body. |
|
| |
|
Expert
Posts: 1530
Location: ZH, Switzerland | When the rear bumper is removed, the horizontal pressed steel piece (welded to the trunk floor or an extension of the trunk floor) appears. At both pictures (drivers side and passenger side) it's clearly visible that the distance between the ends of that sheet metal to the body is not equal on each side. The distance of the passenger side is about one inch (2 to 2.5 cm), while the distance at the drivers side is almost double ( I used the phone and took a finger as a reference, walked to the other side and compared, not mm accuracy, but a quality value expression). First time I thought something is not correct was, when the (farmer) body worker at the first shop completed the weather channel on the rear wall. It is not parallel like on JoseFin and every other 60 to 63 Chrysler, but tapered from the middle of the distance between the license plate recession and the corner where the weather strip channel changes the direction. I couldn't mount the recessions for the weather strip channel like you on the pictures you provided. At the drivers side I said, take the measurement at the construction. Because I knew that the channel should be parallel. At the very drivers side it's about 3/8" (1 cm, accurate) less wide. Today I measured the inclination of the rear wall. Even though the measurement was all other than very accurate (tilt meter used with the rubber bumper around my iPhone X), it's sunny clear that at the drivers side some material is missing - the inclination on the drivers side is steeper, almost 3 degrees. Visible from the top of the fin to the floor around the foot print of my Letter the diameter at the bottom where the rear fender turns around to the rear wall is noticealbe smaller on the drivers side than on the passenger side. Happy Restoring! Dieter |
|
| |
|
Expert
Posts: 1530
Location: ZH, Switzerland | About the measurement of the distance A and B (from the rear leaf spring mounting point to the (I guess) mounting hole for the radiator yoke) should be possible on a car lift with four A4 sheets fixed to the floor and a plummet. Then this distance could be measured at the floor. The tolerance between each diagonal measurement is 0.25" (6.35 mm)according the FSM. For that measurement the subframe must be mounted at the body. Happy Restoring! Dieter BTW: both pictures are illustration, that I was not a severe damage at the frame. The main impact of that particular accident hit the front of the passenger side fenders, both inner and outer. BTW 2: I cleaned the subframe outside the building from coating... there was no damage at the color of the frame (e.g. flaking/exfoliate color) at all.
Edited by di_ch_NY56 2019-03-09 11:41 AM
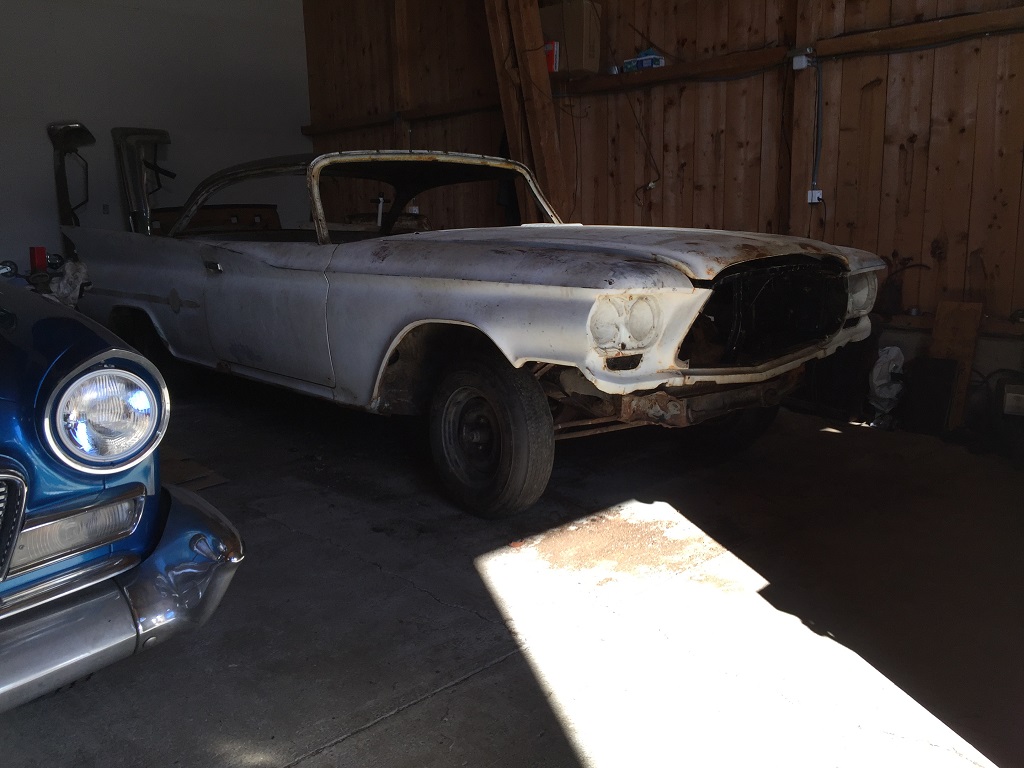 (IMG_4365_subframe as it was.JPG) (IMG_4365_subframe as it was.JPG)
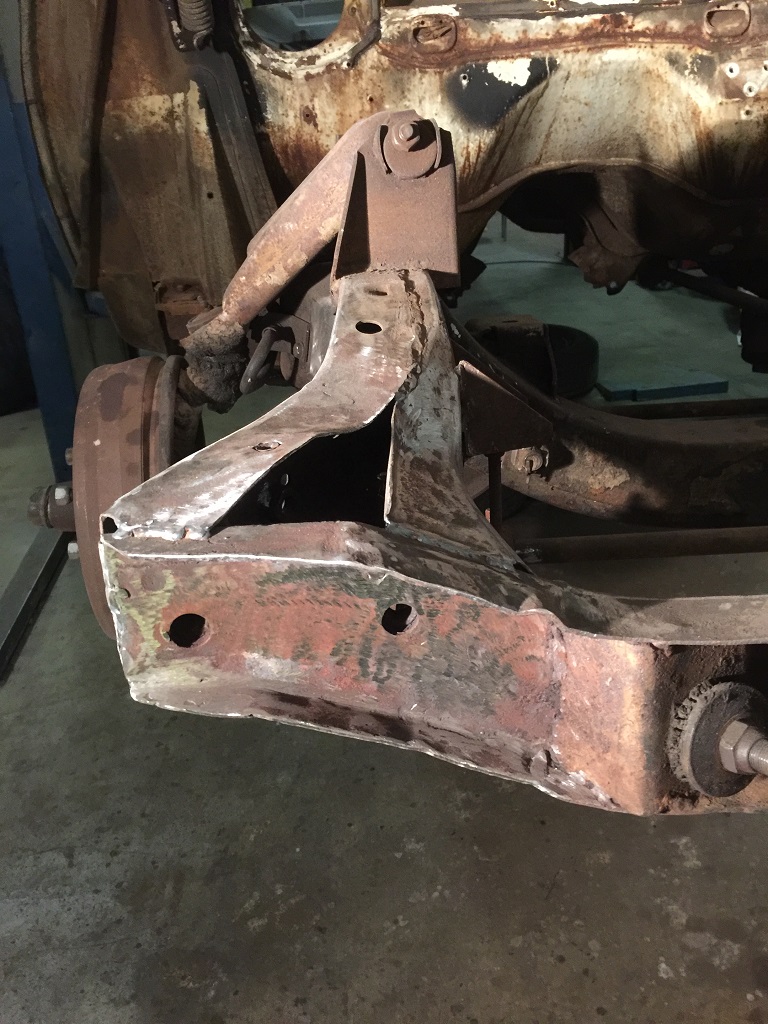 (IMG_4421_subframe repaired.JPG) (IMG_4421_subframe repaired.JPG)
Attachments
----------------
IMG_4365_subframe as it was.JPG (191KB - 406 downloads)
IMG_4421_subframe repaired.JPG (285KB - 400 downloads)
|
|
| |
|
Board Moderator & Exner Expert 10K+
Posts: 13045
Location: Southern Sweden - Sturkö island | A and B measurements in this case refers only to the subframe. Check the GSM and it will be clear.
The triangular measurement is a way when one doesn't have the special tools. |
|
| |
|
Expert
Posts: 1530
Location: ZH, Switzerland | wizard - 2019-03-08 7:31 PM A and B measurements in this case refers only to the subframe. Check the FSM and it will be clear. The triangular measurement is a way when one doesn't have the special tools. I'm sorry, with all of my respect to you I think FSM chapter 23, page 17, Fig. 9 fits as well for the mounted subframe/body assembly. |
|
| |
|
Board Moderator & Exner Expert 10K+
Posts: 13045
Location: Southern Sweden - Sturkö island | Yes Dieter, those measurements will cover everything. It might be difficult to reach some of the points, but it should be doable with some tooling. |
|
| |
|
Expert
Posts: 1530
Location: ZH, Switzerland | As my Letter represents (just the outer front fender mounted at the front end and the subframe) I decided to purchase a set of 1/8" 46-85 Mopar Body, Fender Shims Alignement Adjusters Caster Camber Square at epain to put it between the passenger side front mounting brace. As I wrote earlier, the drivers side front fender is about 1.5 to 2 fingers above the subframe, while the passenger side front fender touches the subframe. Happy Restoring! Dieter
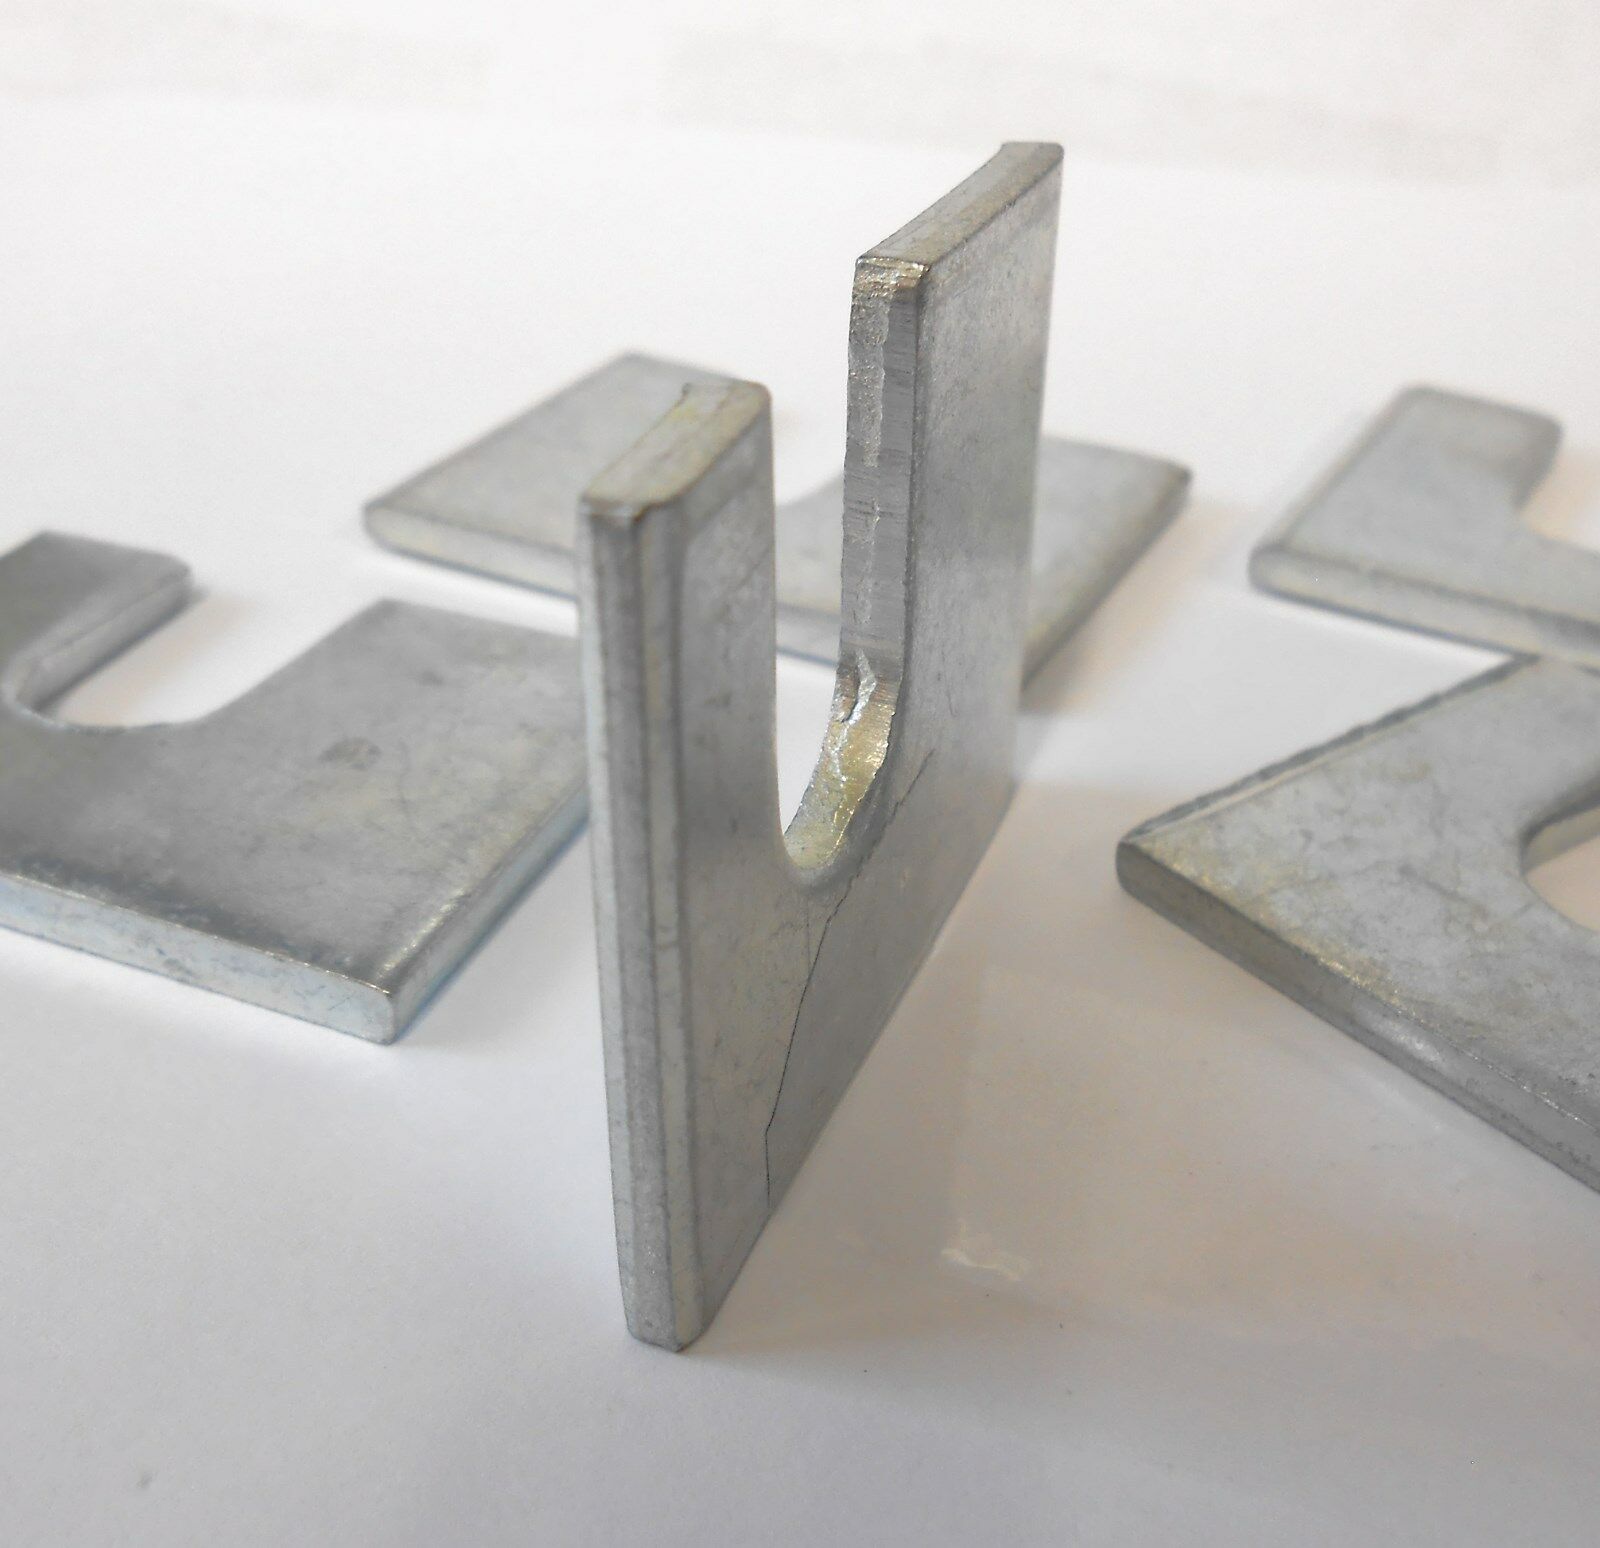 (body shim.jpg) (body shim.jpg)
Attachments
----------------
body shim.jpg (146KB - 408 downloads)
|
|
| |
|
Expert
Posts: 1530
Location: ZH, Switzerland | This week the radiator yoke (disassembled), the hood hinges, the inner fenders and the service covers went to the professional sand blaster shop. The foreman just shaked his head when he saw the parts how they were sandblasted. I'll getting it back epoxy coated (correct: the body and painter shop). As soon as they are back in the shop they'll start with the building up the paint layer construction. Today the painter and me used a long water spirit level buble bar to check the side to side standing of the body on the wheels. From the painter the judgement was quite good. With the same size of tires on all four corners it could stay horizontal whithin few millimeters. The body is not warped diagonally. That's a good sign. Happy Restoring! Dieter |
|
| |
|
Expert
Posts: 1530
Location: ZH, Switzerland | These are the parts (hopefully the only batch) to sandblast again like I addressed in my last entry. Happy Restoring! (zynic in the meantime)
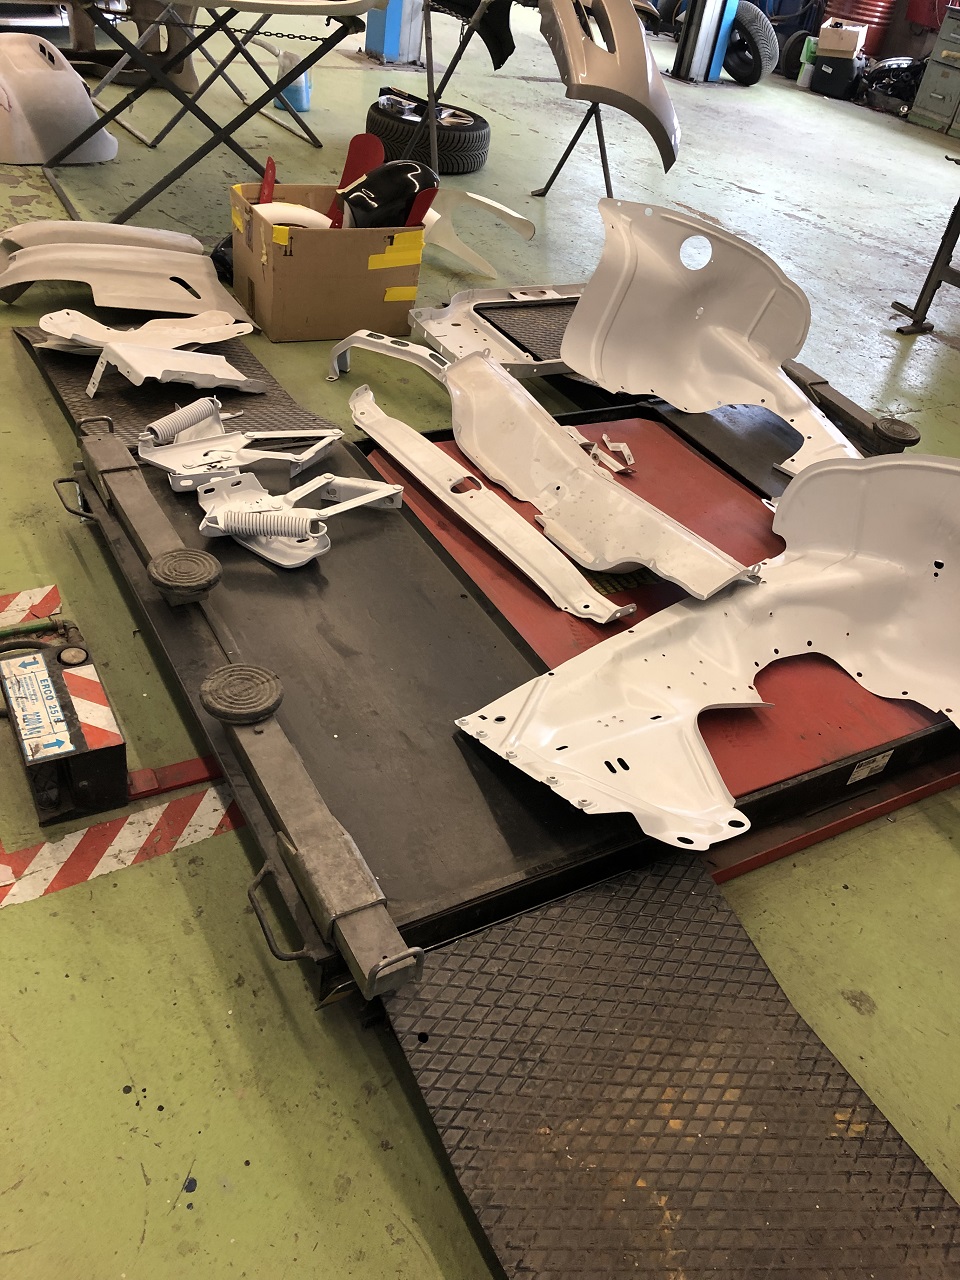 (IMG_5587_parts to sandblast a second time.JPG) (IMG_5587_parts to sandblast a second time.JPG)
Attachments
----------------
IMG_5587_parts to sandblast a second time.JPG (473KB - 400 downloads)
|
|
| |
|
Expert
Posts: 1530
Location: ZH, Switzerland | Last Saturday I was at the shop again. The painter said, next week the newly sandblasted parts will arrive at his shop. I assume next Saturday I‘ll visit him again. Further he communicated that his brother will cut and put in slices of sheet metal to bring the drivers side left hand side corner will come back in the original shape. |
|
| |
|
Expert
Posts: 1530
Location: ZH, Switzerland | Today when I visited the body&paint shop I was surprised. My Letter moved one place forward to the working area. The painter joined me (he came later, was ill like me, but I was driving the truck the whole week). We were walking around my Letter and discussing the solution for different issues (e.g. drivers side rear corner, zone below and around the passenger side tail light, the bump of the rear bumper on the passenger side, the outer wheel well passenger side, two harmonic dents near the rear top of the passenger side fin). The target is to use as less as possible of body filler. Dieter |
|
| |
|
Expert
Posts: 1530
Location: ZH, Switzerland | Yesterday after the vistit at the paint & bodyshop I visited the low quality shop again to pick up my grille frame. It made a tour to east Turkey and back. The costs were about two month salaries of an employee in that country (in local currency). I temporarely mounted the grille mesh just to look at. I'm aware to clean and eventually paint the grille mesh in satin black. Dieter BTW: I'm aware hypothetically to fix the spots and let rechrome it locally - I postpone that project to my retirement age.
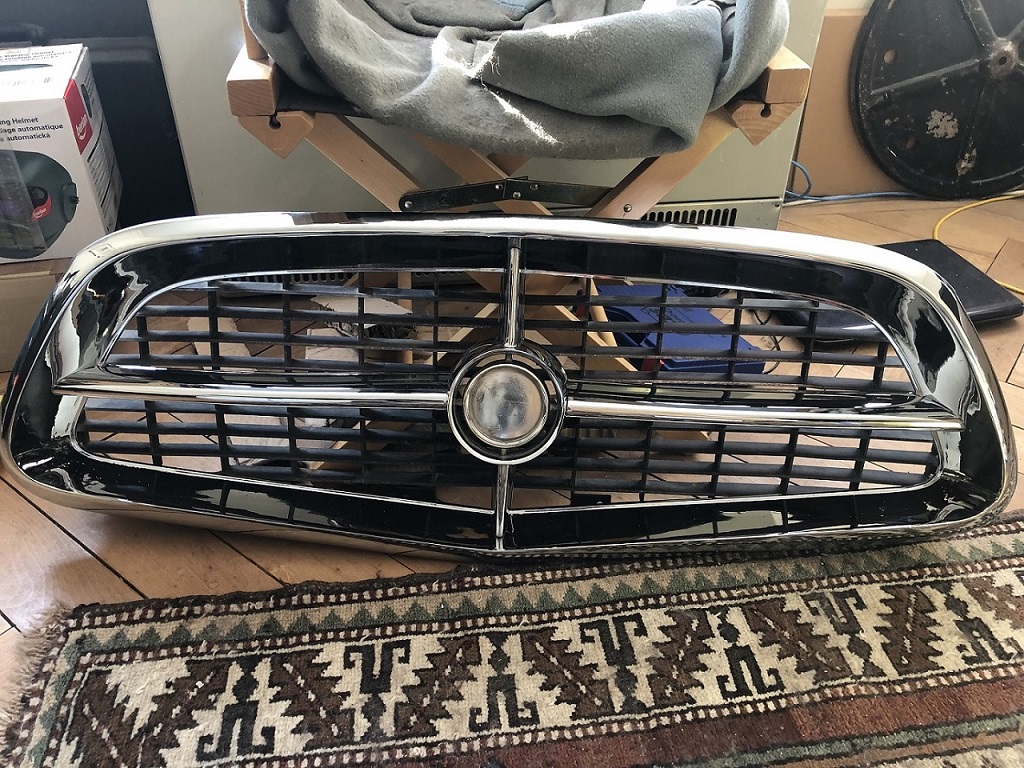 (IMG_5928_grill frame repaired and rechromed.JPG) (IMG_5928_grill frame repaired and rechromed.JPG)
Attachments
----------------
IMG_5928_grill frame repaired and rechromed.JPG (395KB - 366 downloads)
|
|
| |
|
Expert
Posts: 1530
Location: ZH, Switzerland | Just the upper three quarts of the grille frame have contact to the front end sheet metal. That perimeter is in a astonishing good condition compared to the condition of the body at the very beginning of the restoration. The bottom quart of the surrounding is free hanging in the air on a 1960 Chrysler. At least at my Letter. Dieter |
|
| |
|
Expert
Posts: 1530
Location: ZH, Switzerland | di_ch_NY56 - 2019-04-14 8:03 PM These are the parts (hopefully the only batch) to sandblast again like I addressed in my last entry. Happy Restoring! (zynic in the meantime) While the inner fenders were out of the car and the service covers present I tried to see how they will fit. But as long as the inner fenders are not mounted they will not fit perfect. Because the inner fenders are under tension while mounted. Dieter |
|
| |
|
Expert
Posts: 1530
Location: ZH, Switzerland | Today I brought the mounting hardware to the body&paint shop. The UNF 9/16, UNF 3/4 and UNF 7/8 screws and hex nuts I ordered recently. Because the screws are UNF the hex nuts were cold welded and the threads are severly damaged. At the front top of the vertical piece (holding the bumber at the junction of the center and side parts of the rear bumper) is a snubber. It's 200 at Garys catalog, page 28. Dieter
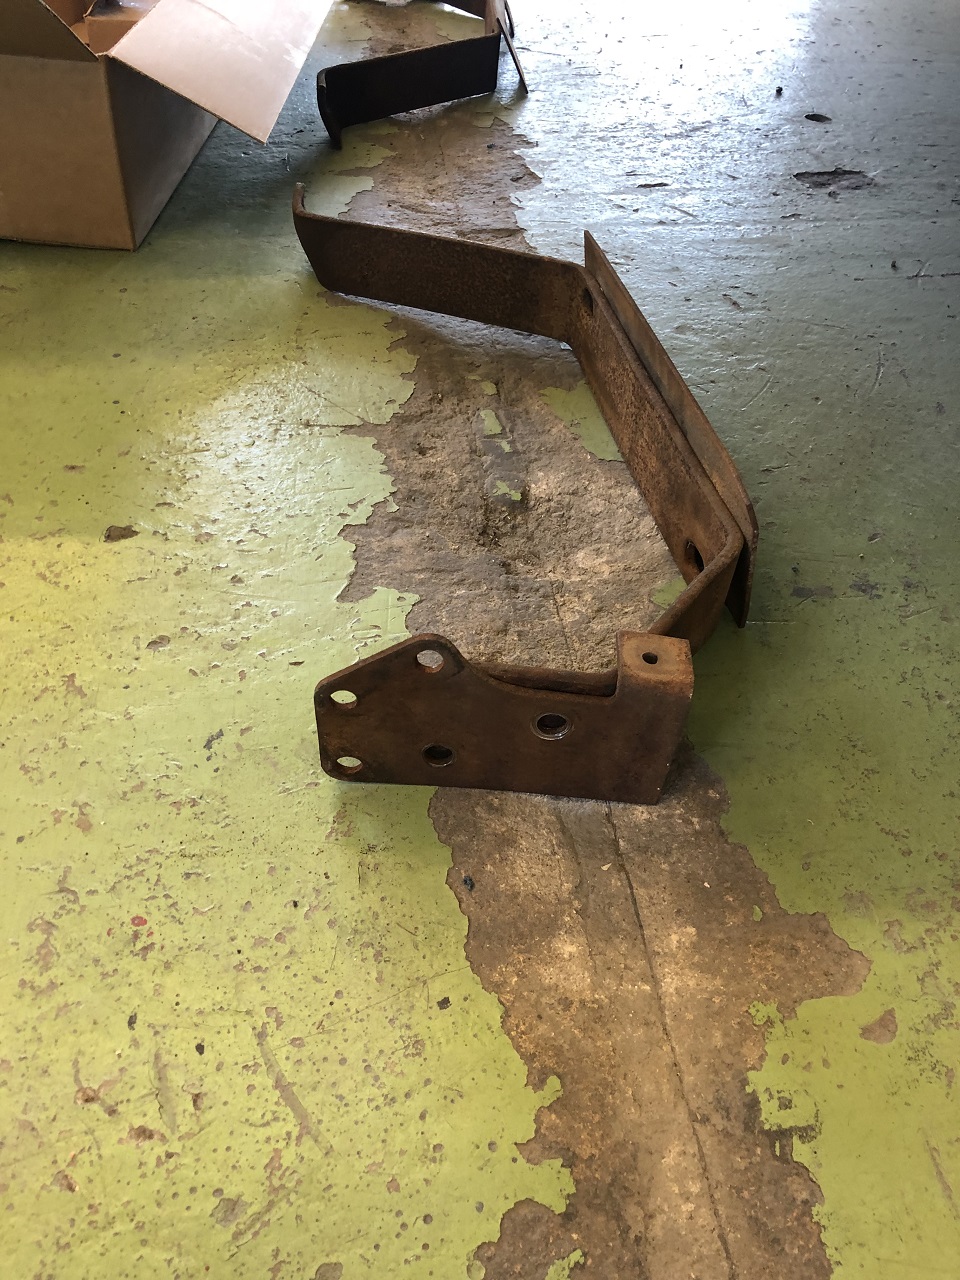 (IMG_5946_rear bumper mounting hardware.JPG) (IMG_5946_rear bumper mounting hardware.JPG)
Attachments
----------------
IMG_5946_rear bumper mounting hardware.JPG (482KB - 375 downloads)
|
|
| |
|
Expert
Posts: 1530
Location: ZH, Switzerland | All the parts of the front end (second time sandblasting) are back. The surface of the service doors is now smooth like silk. On some other parts rust has taken the toll. So on visible areas filler and primer will be used to make these surfaces flat again (filler only for the recessions taken by rust). On the positive side the painter said, these parts are a pleasure to work on now. Not as good.... he announced they'll start working on my Letter past the end of our summer holiday season (defined by school holidays, five weeks). So the whole body will be delayed once more. It's what the engine builder announced (he expects) ways earlier this year. But for the engine, still no solution is in sight. Except e.g. take a running 1960 Imperial (or New Yorker) engine and transfer all Letter specific parts to that engine (intake system, exhaust manifold, camshaft, distributor, ignition cable guiding parts).
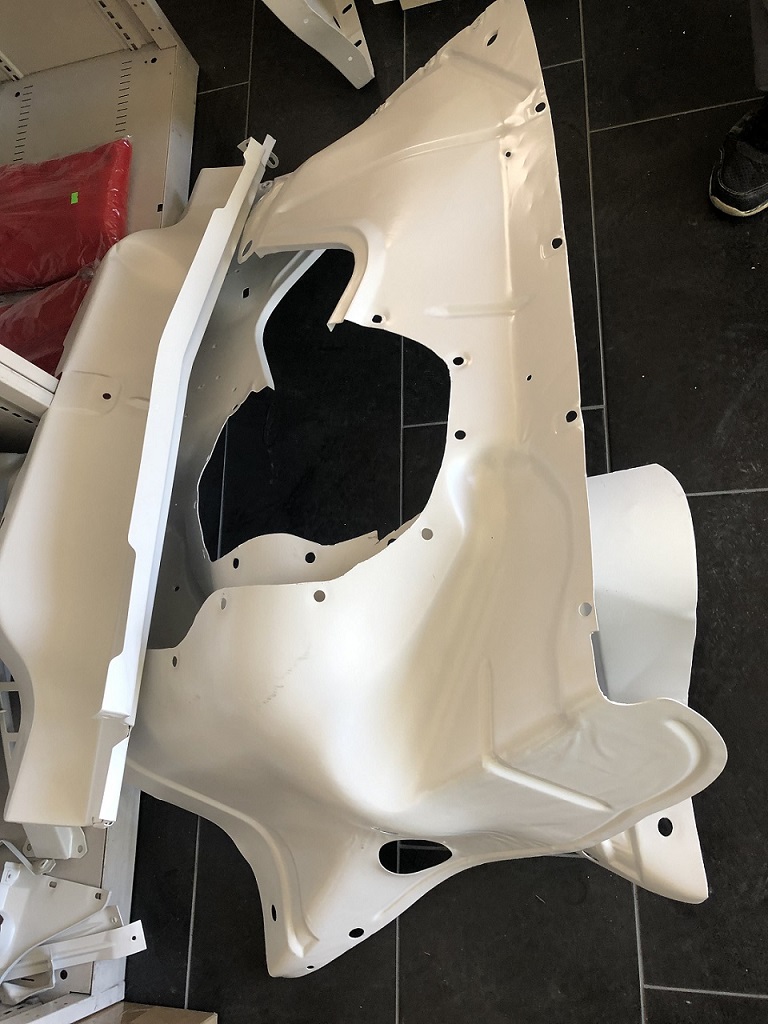 (IMG_6039_inner front fenders and bottom traverse of front end.JPG) (IMG_6039_inner front fenders and bottom traverse of front end.JPG)
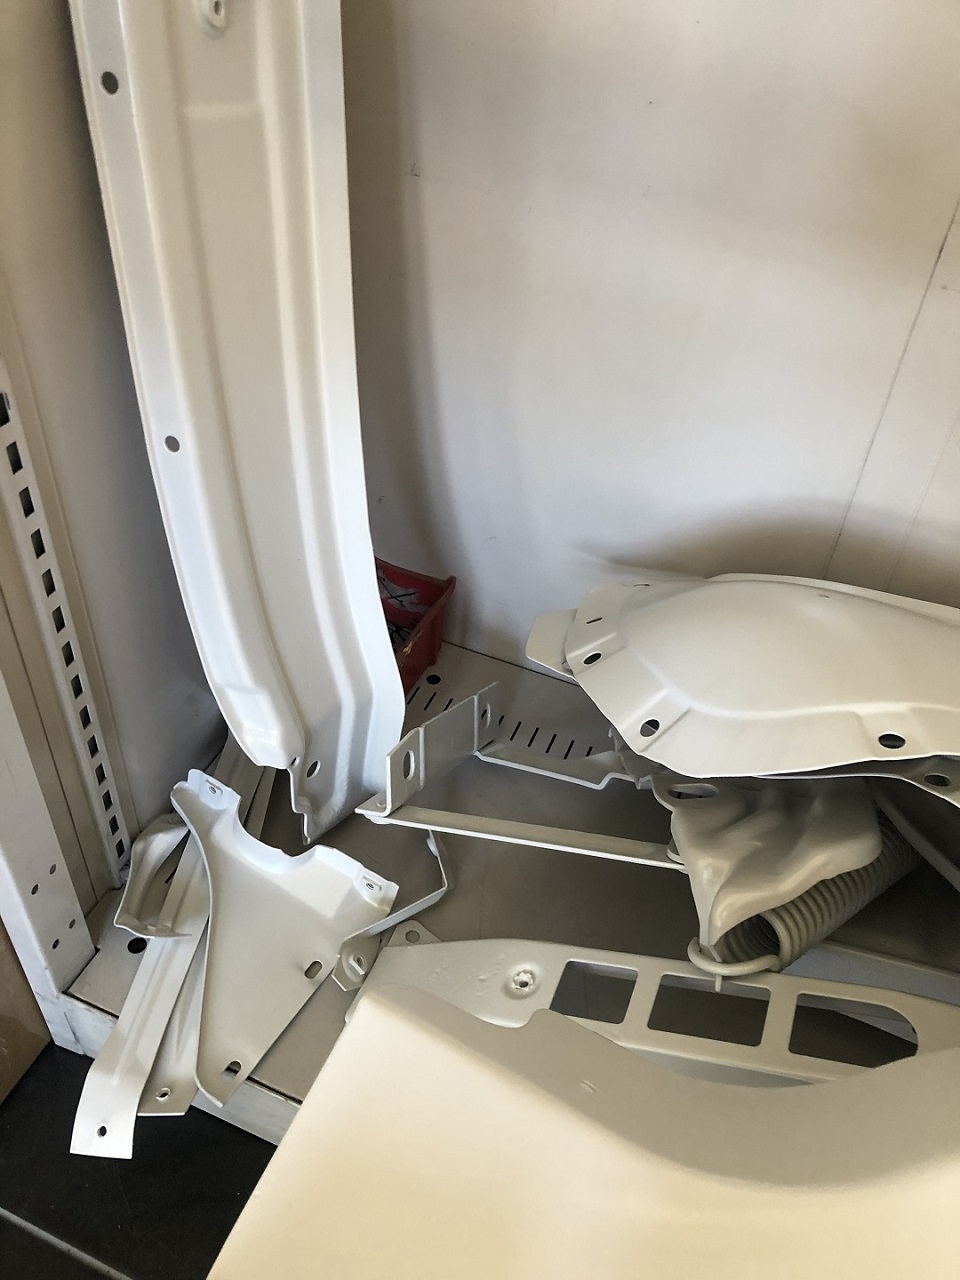 (IMG_6040_fender reinforcement bars and upper traverse of front end.JPG) (IMG_6040_fender reinforcement bars and upper traverse of front end.JPG)
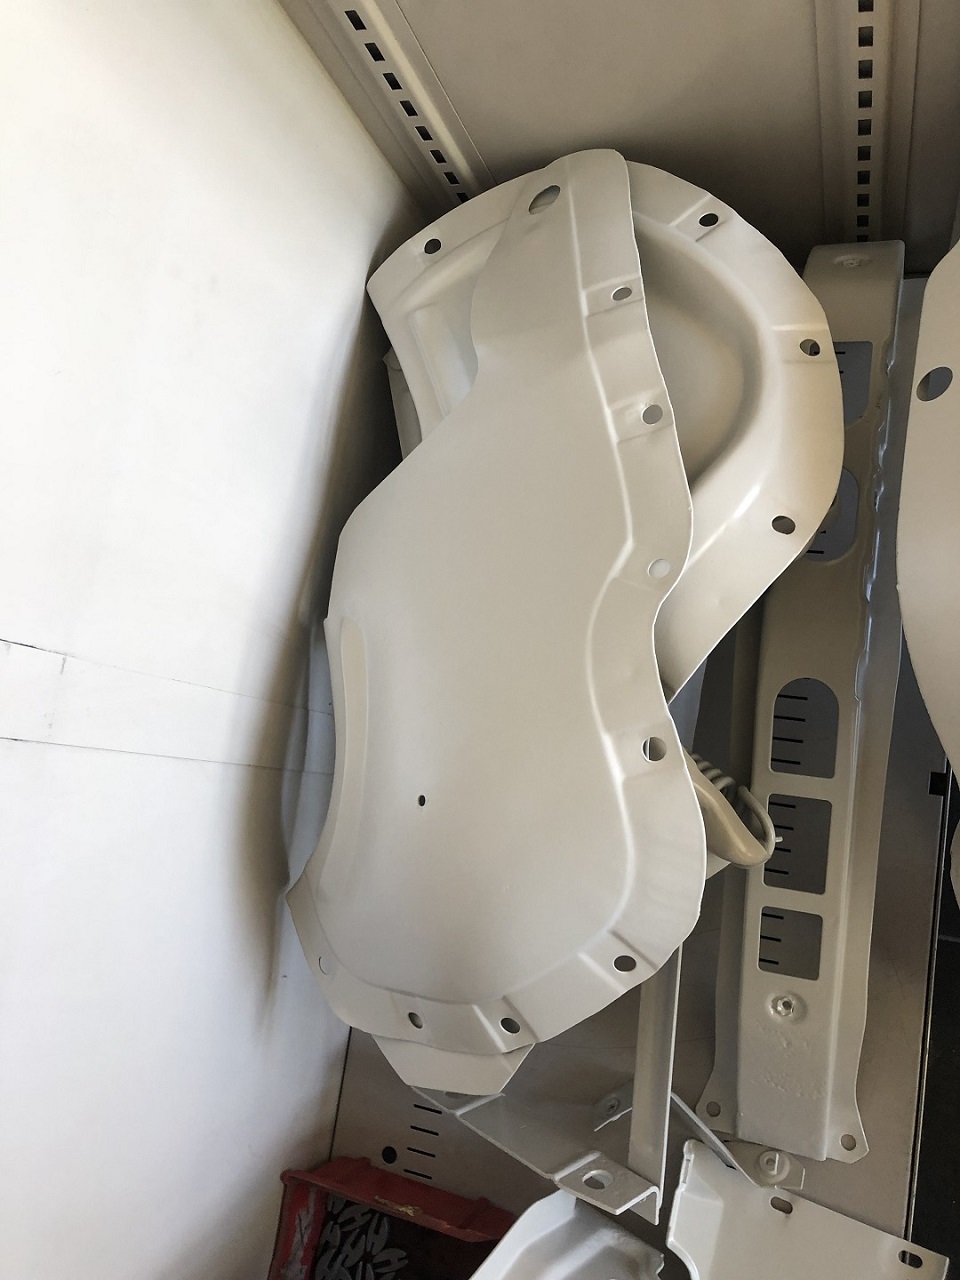 (IMG_6041_service doors and vertical carrier of front end.JPG) (IMG_6041_service doors and vertical carrier of front end.JPG)
Attachments
----------------
IMG_6039_inner front fenders and bottom traverse of front end.JPG (204KB - 369 downloads)
IMG_6040_fender reinforcement bars and upper traverse of front end.JPG (244KB - 368 downloads)
IMG_6041_service doors and vertical carrier of front end.JPG (225KB - 366 downloads)
|
|
| |
|
Expert
Posts: 1530
Location: ZH, Switzerland | On the last entry, on the first picture ontop (6039_...) is the drivers side inner fender. Actually the shop is closed due to the holiday season. It'll open August 5th this year again. Next Saturday I'll visit them again. Happy Restoring! Dieter |
|
| |
|
Expert
Posts: 1530
Location: ZH, Switzerland | I guess it's sunny clear for everybody - I listened too earnest to a friend. For the surprice I have to pay just for the body (painted at the end est. price (my opinion) just for the body: CHF 65'000.-, about the same amount in USD) I could have shipped the combo body/engine/transmission to Sweden forth and back many times via a freight exchange service and I assume with the restoration of the body (Malung) and engine (Sturkö) in Sweden I would have the body/engine/transmisison combo back now and working. The engine according factory specifivations. I know I'm responsible and I'm listeing ways to close to many guys. That's my fault. Until now, absolutely no solution for the crankshaft is in sight. In my opinion the idea with an aftermarktet crankshaft is falling down like a card house, because there is (apparently) no market case in sight for a any factory (Scat, Eagle, ...). Happy Restoring! Dieter |
|
| |
|
Expert
Posts: 1530
Location: ZH, Switzerland | The adjusting of the body (/w doors) started. I visited the body and color shop again today. From what we noticed (rust under the primer on many places) the whole body needs another sand blast at another company again. IMG_6311_..... shows a rust that could produce bubbles unter the paint coating within few years. To get a car that is very solid, the sheet metal must be free from any rust under the primer - even more when the surface rust areas were not 100% dry like in my case. Costs me another 5000 bucks. The comment of the body and paint is absolutlely correct: "it's the last point of doing such a work (sand blast again) again".
Happy Restoring! Dieter
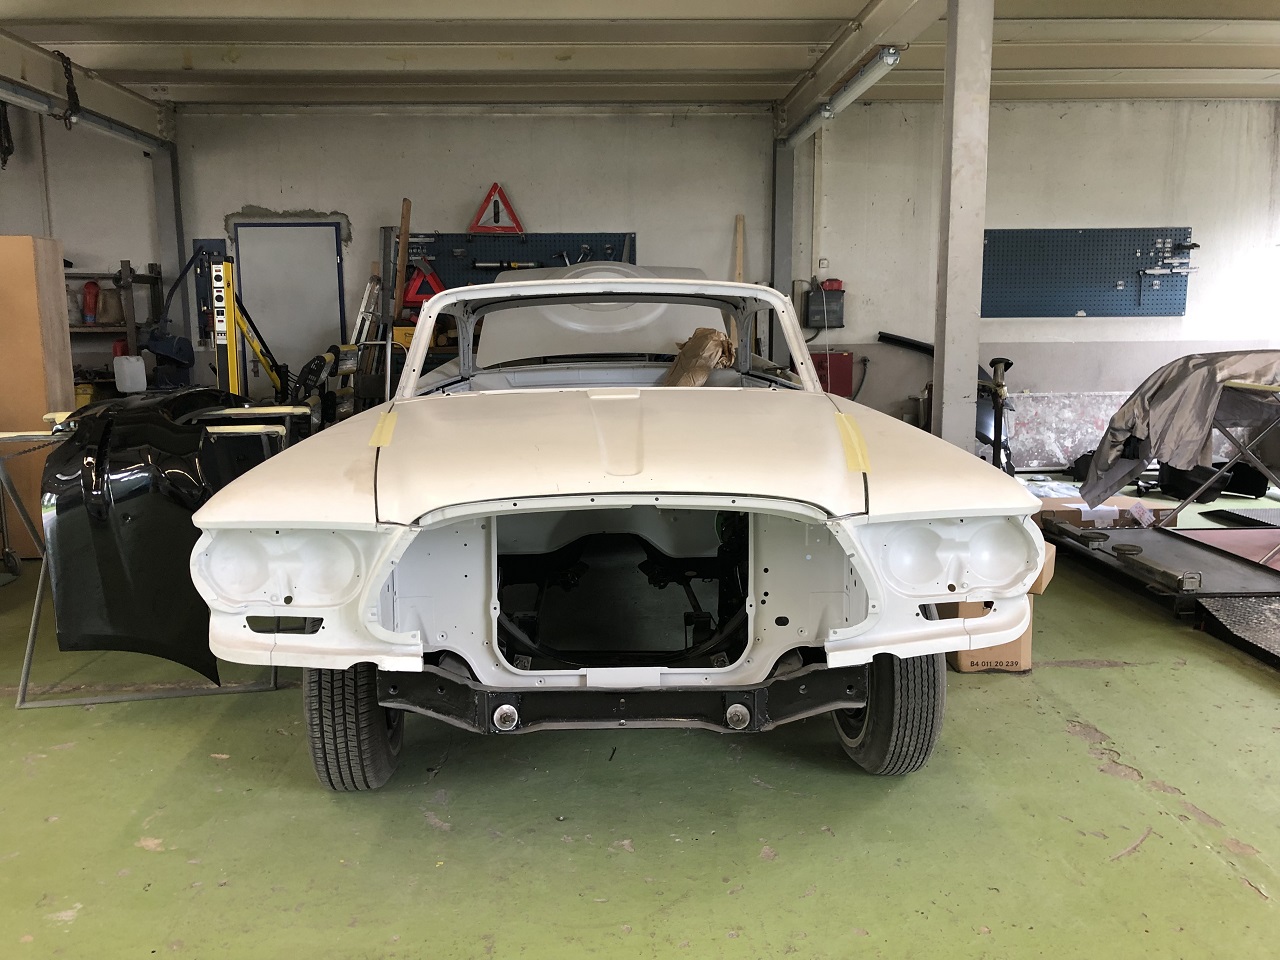 (IMG_6304_front view of my Letter.JPG) (IMG_6304_front view of my Letter.JPG)
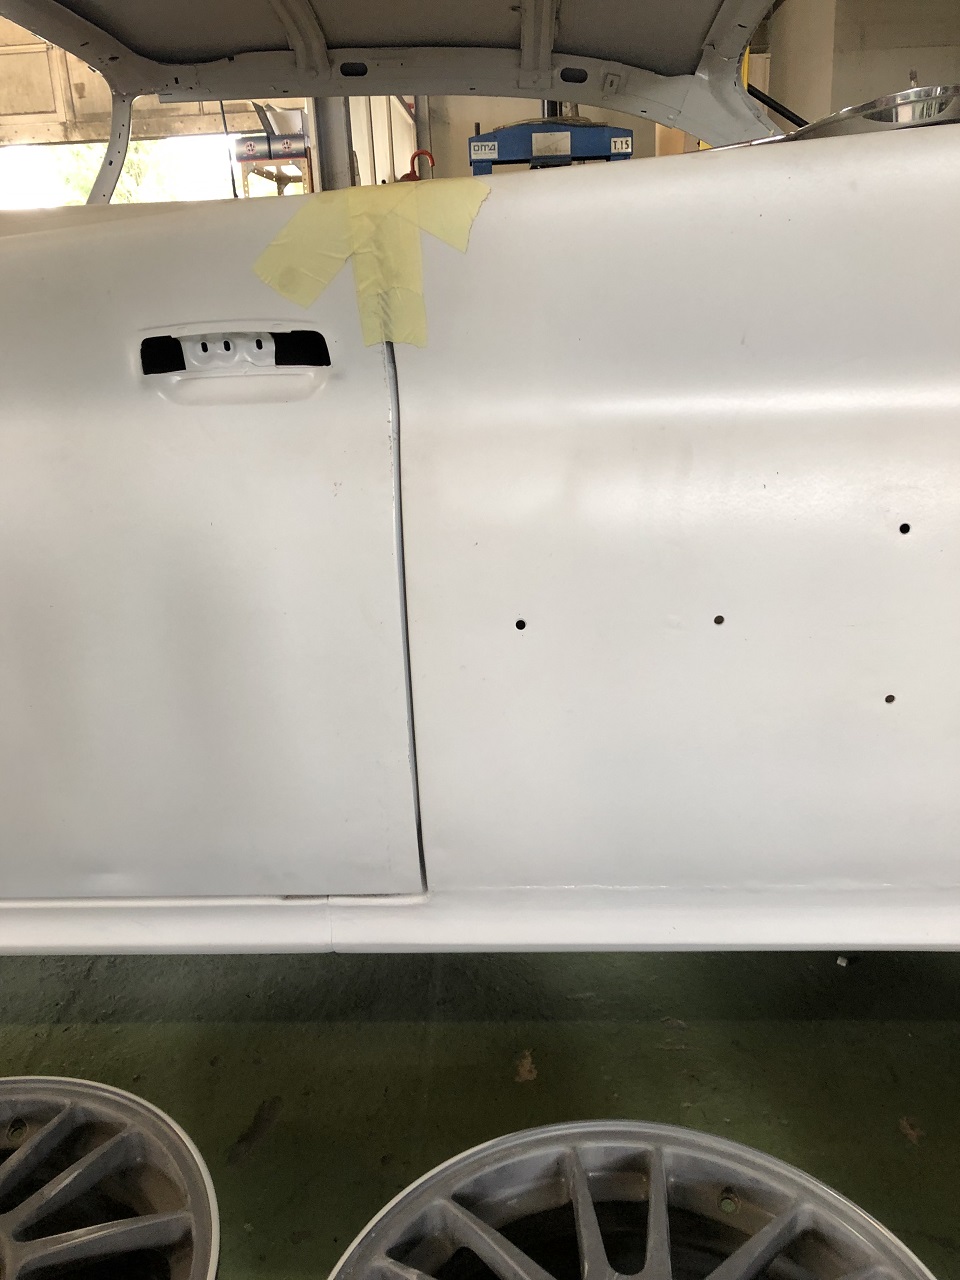 (IMG_6306_drivers side door to rear quarter adjustment.JPG) (IMG_6306_drivers side door to rear quarter adjustment.JPG)
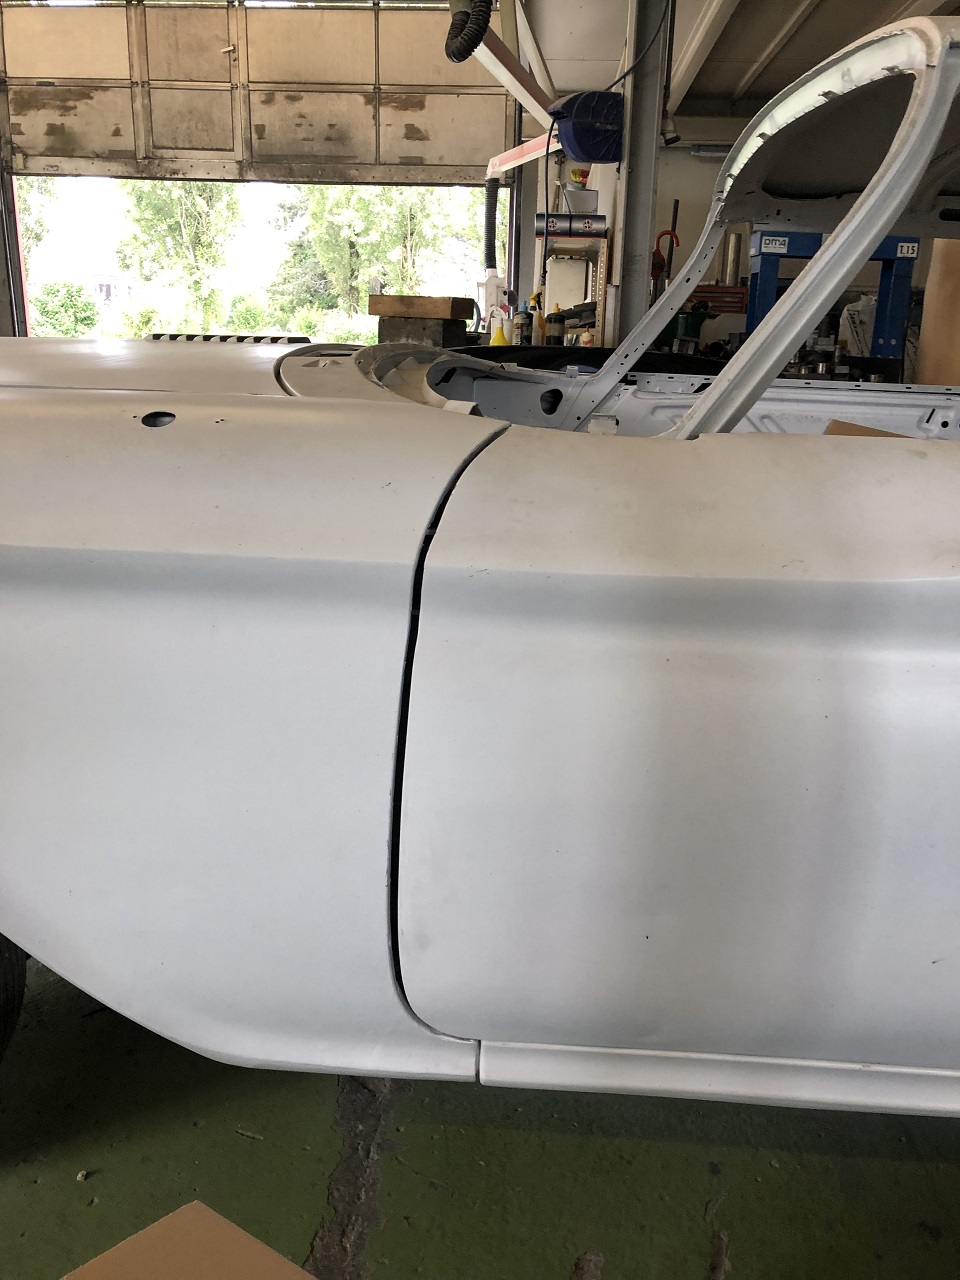 (IMG_6305_drivers side door to front fender adjustment.JPG) (IMG_6305_drivers side door to front fender adjustment.JPG)
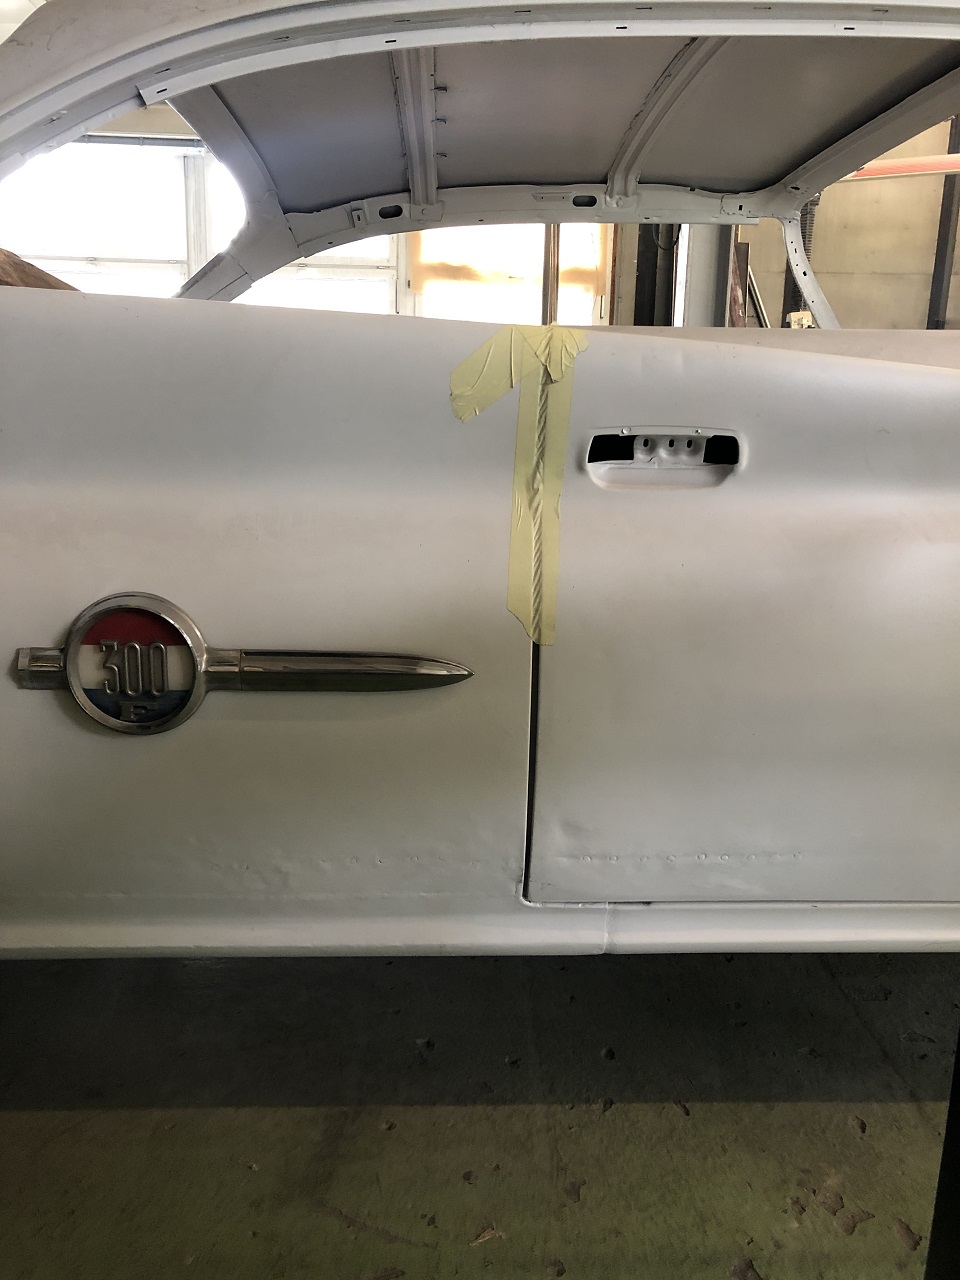 (IMG_6308_passenger side door to rear quarter adjustment.JPG) (IMG_6308_passenger side door to rear quarter adjustment.JPG)
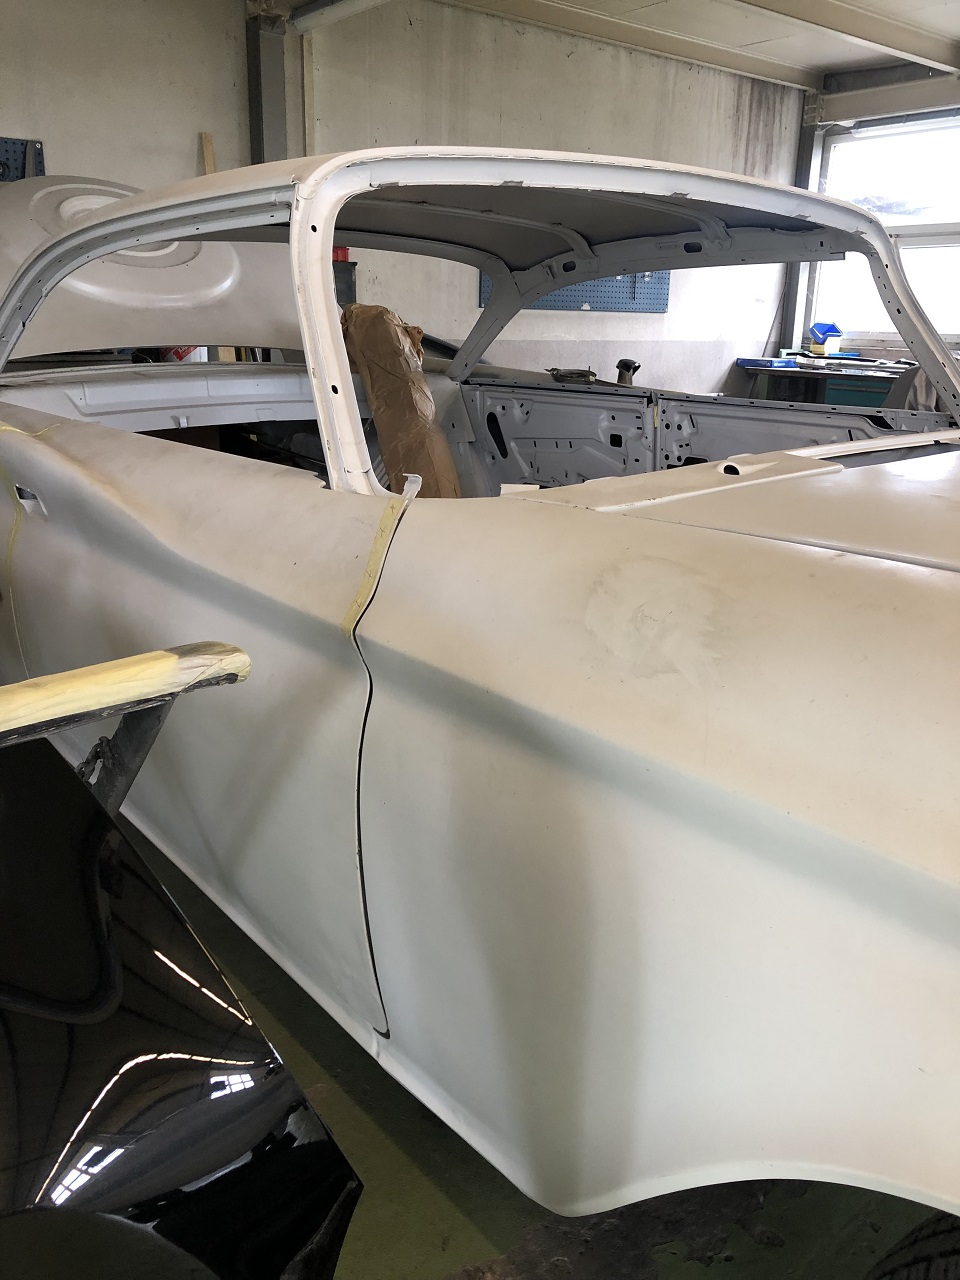 (IMG_6309_passenger side door to front fender adjustment.JPG) (IMG_6309_passenger side door to front fender adjustment.JPG)
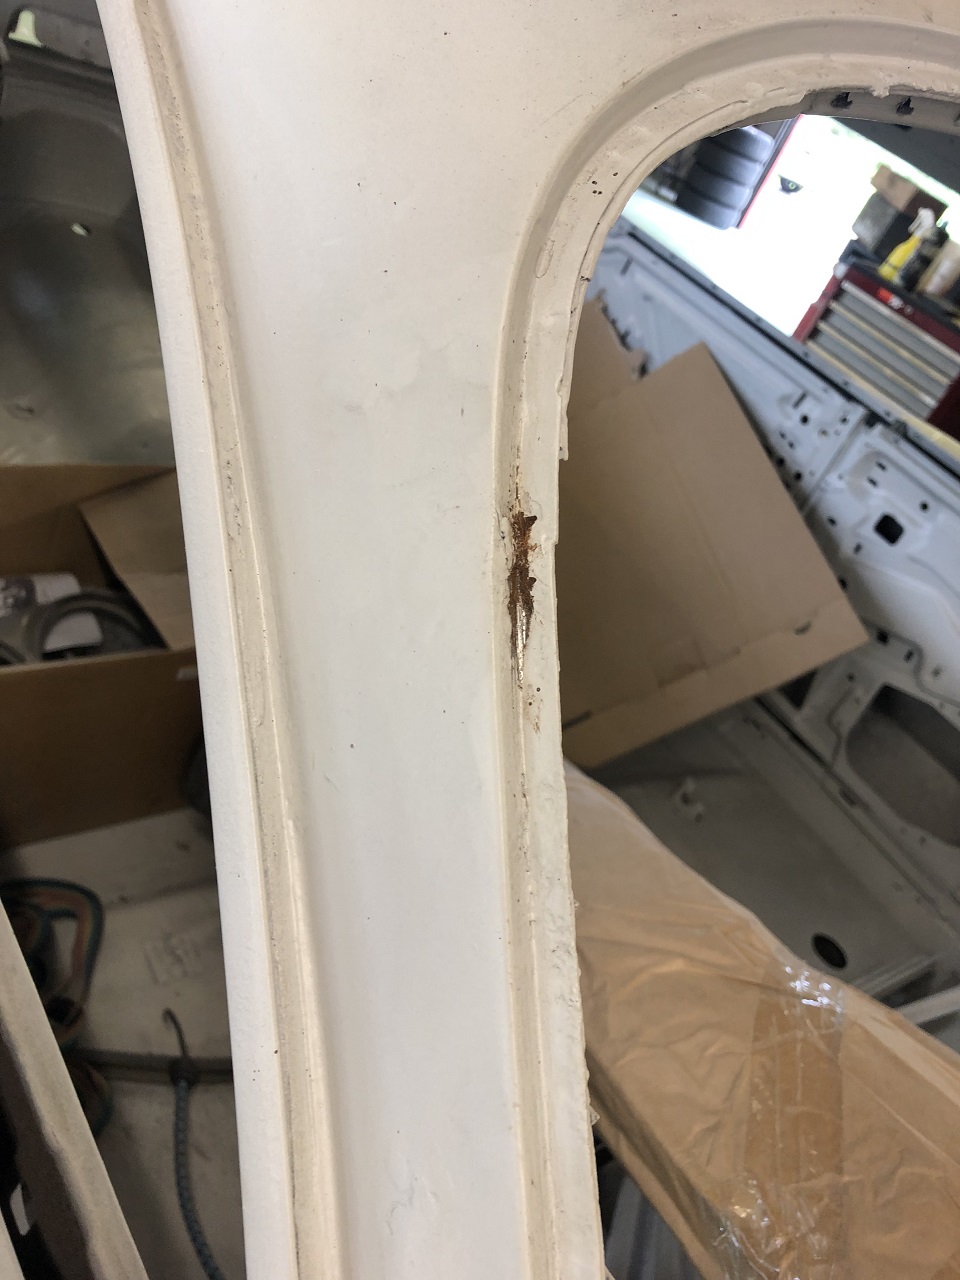 (IMG_6310_C-pillar driver side rust under the primer.JPG) (IMG_6310_C-pillar driver side rust under the primer.JPG)
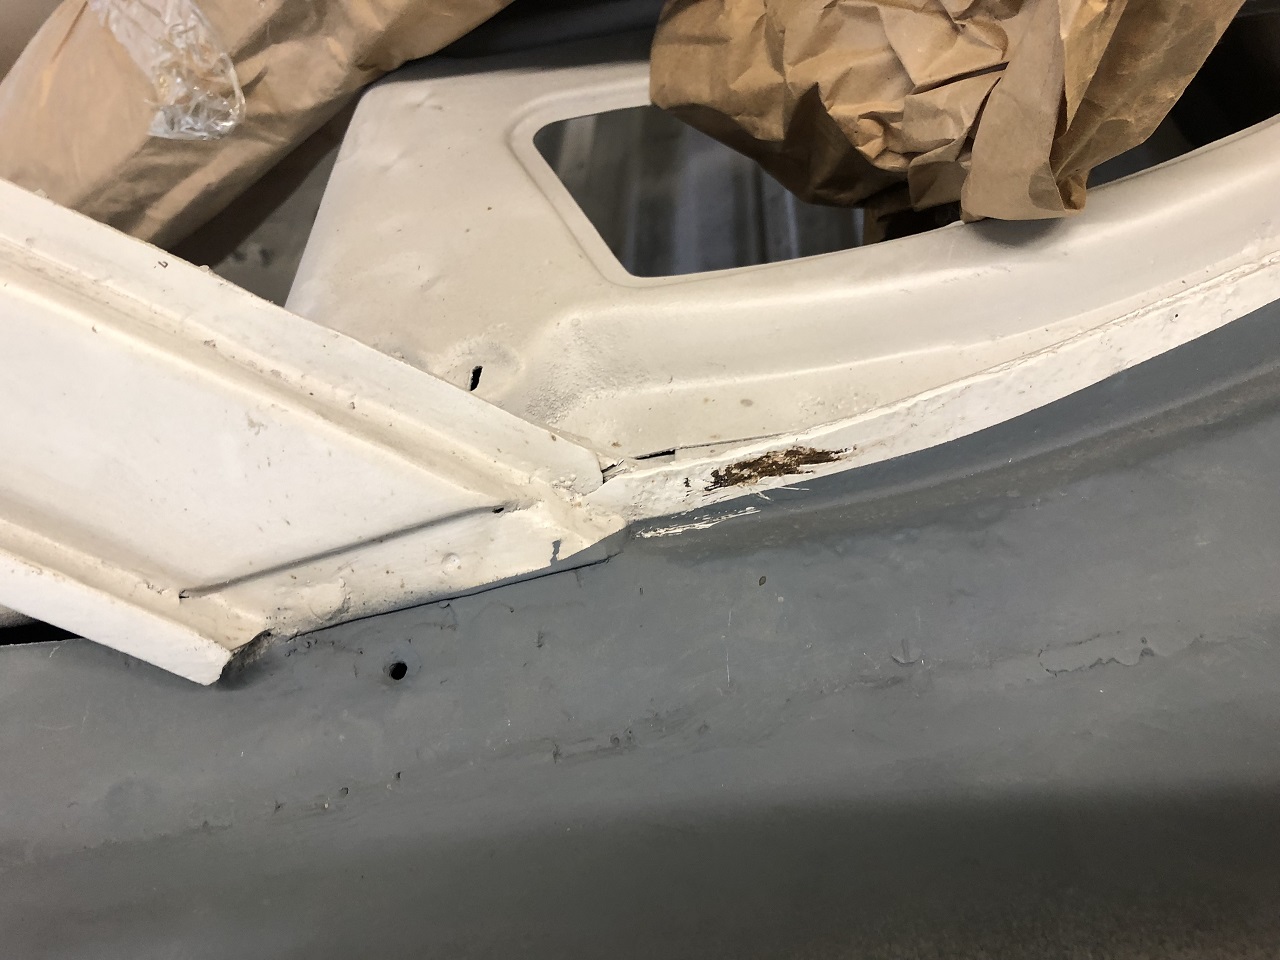 (IMG_6311_rear window drivers side bow rust under the primer.JPG) (IMG_6311_rear window drivers side bow rust under the primer.JPG)
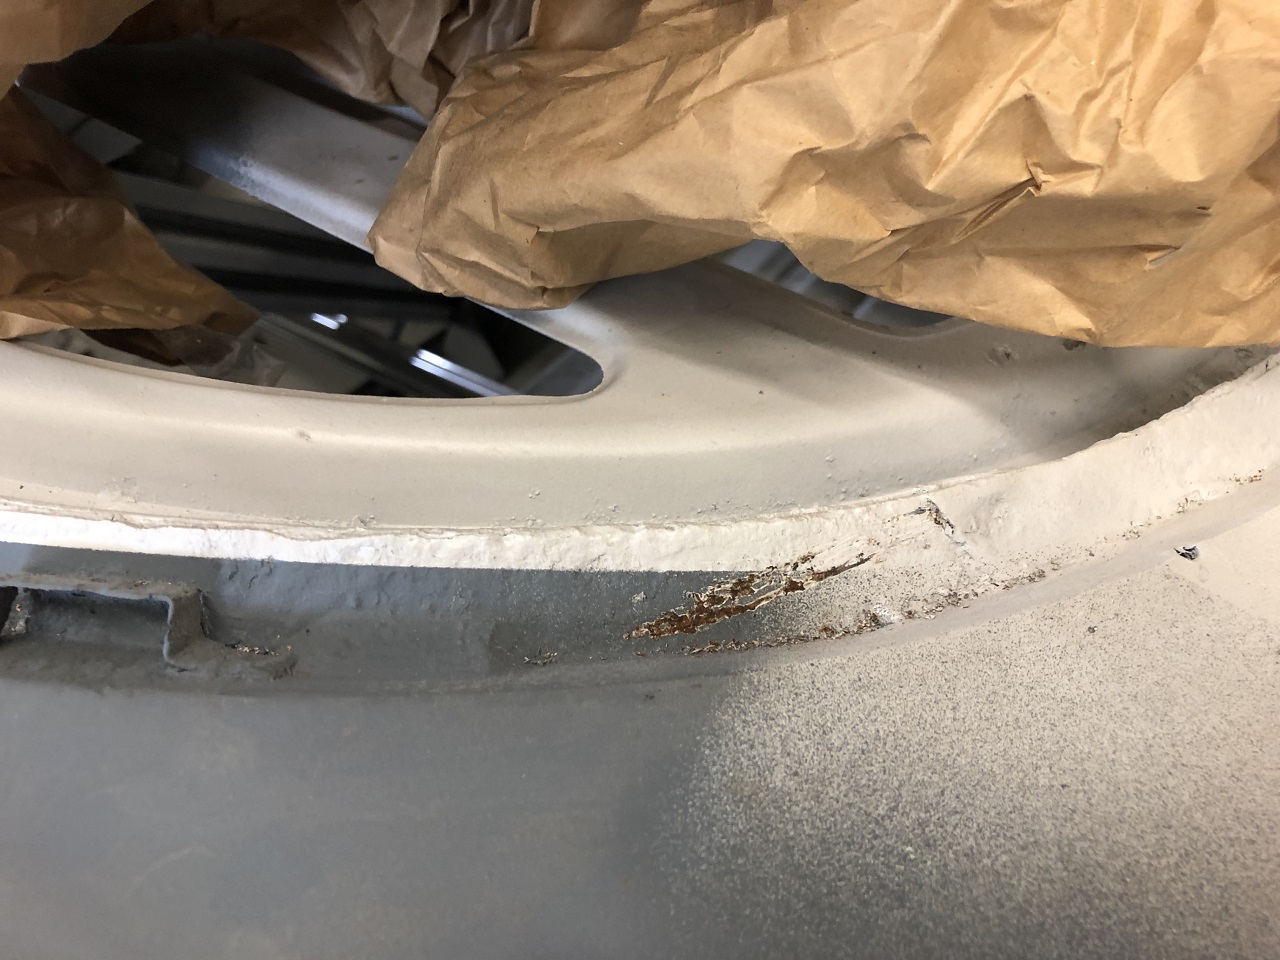 (IMG_6312_rear window drivers side one more test.JPG) (IMG_6312_rear window drivers side one more test.JPG)
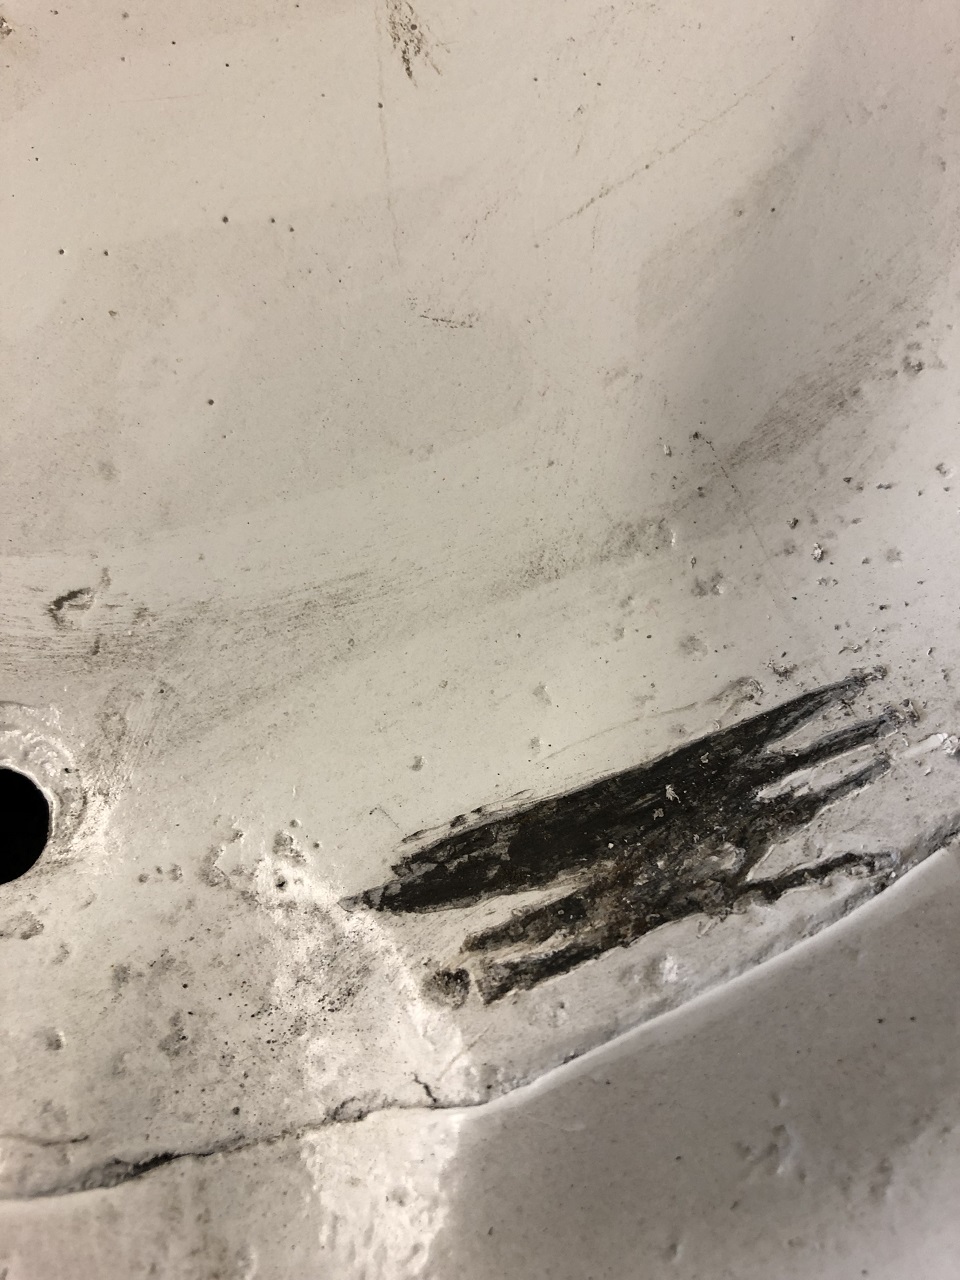 (IMG_6313_trunk lid fake spare wheel recession - rust under the primer.JPG) (IMG_6313_trunk lid fake spare wheel recession - rust under the primer.JPG)
Attachments
----------------
IMG_6304_front view of my Letter.JPG (357KB - 362 downloads)
IMG_6306_drivers side door to rear quarter adjustment.JPG (249KB - 355 downloads)
IMG_6305_drivers side door to front fender adjustment.JPG (301KB - 351 downloads)
IMG_6308_passenger side door to rear quarter adjustment.JPG (251KB - 350 downloads)
IMG_6309_passenger side door to front fender adjustment.JPG (280KB - 359 downloads)
IMG_6310_C-pillar driver side rust under the primer.JPG (262KB - 354 downloads)
IMG_6311_rear window drivers side bow rust under the primer.JPG (265KB - 366 downloads)
IMG_6312_rear window drivers side one more test.JPG (322KB - 379 downloads)
IMG_6313_trunk lid fake spare wheel recession - rust under the primer.JPG (340KB - 362 downloads)
|
|
| |
|
Expert
Posts: 1530
Location: ZH, Switzerland | Today sorting out of the rear windows and windshield mouldings. I took the very bad looking grille frame (from Charles Marshall) with me for a further check. The owner (and painter) of the paint and body shop introduced me to a guy, originally from Adana. This guy told me, the started working as panel-beater as a 10 year old boy. He learned his business from his dad. His benefit was the very close Incirlik Air Base where the Amercans to their cars with them to Turkey. He said, the original sheet metal was 1.2 mm. Also he told me, the other guy from the farm smith body shop wanted to hire him, but he denied.
He looks very happy to work on my Letter. Within two weeks he'll solve all body problems at my Letter.
Happy Restoring! Dieter
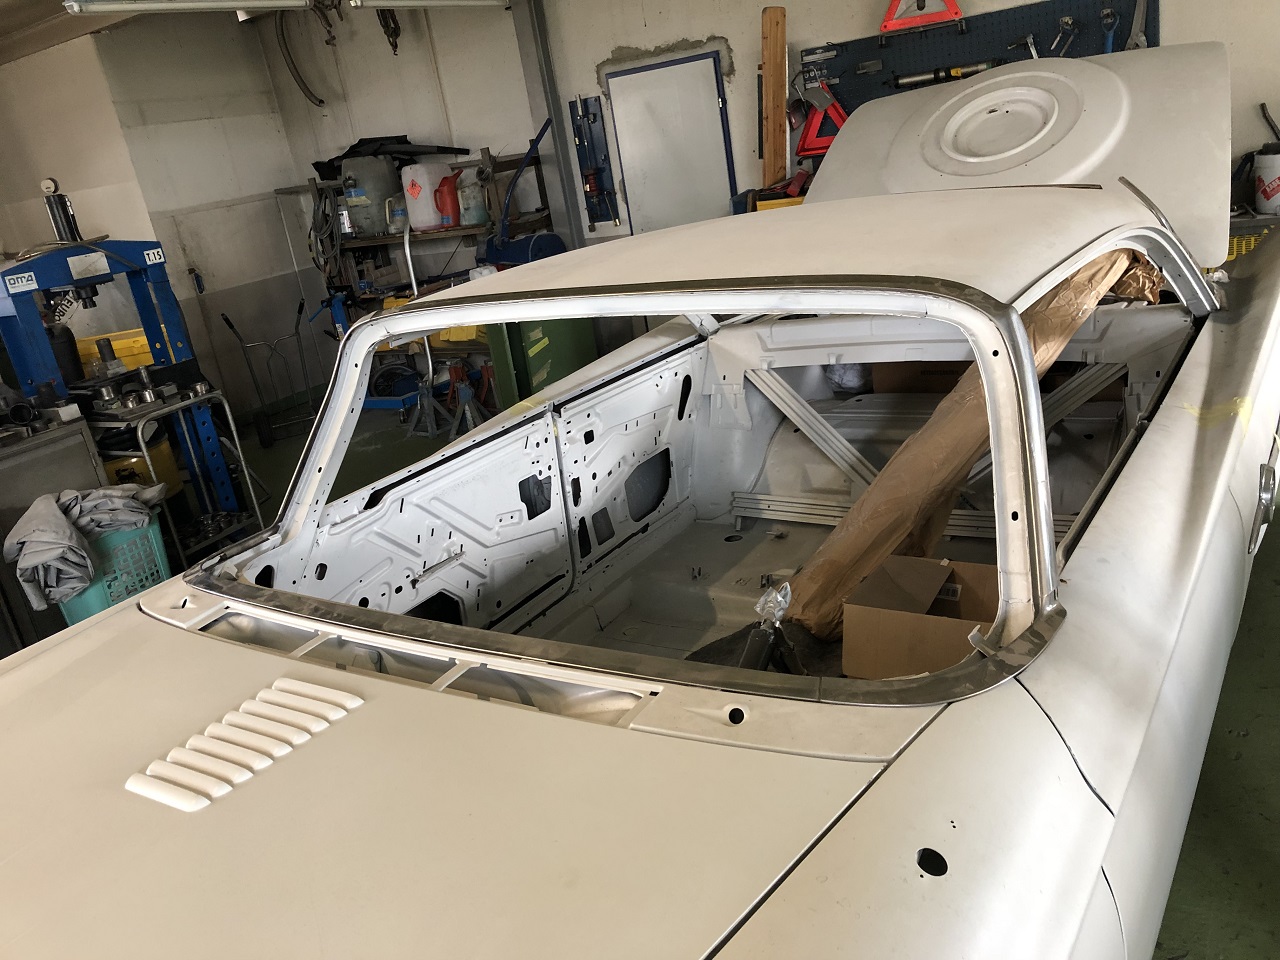 (IMG_6364_test mounting windshield moulding.JPG) (IMG_6364_test mounting windshield moulding.JPG)
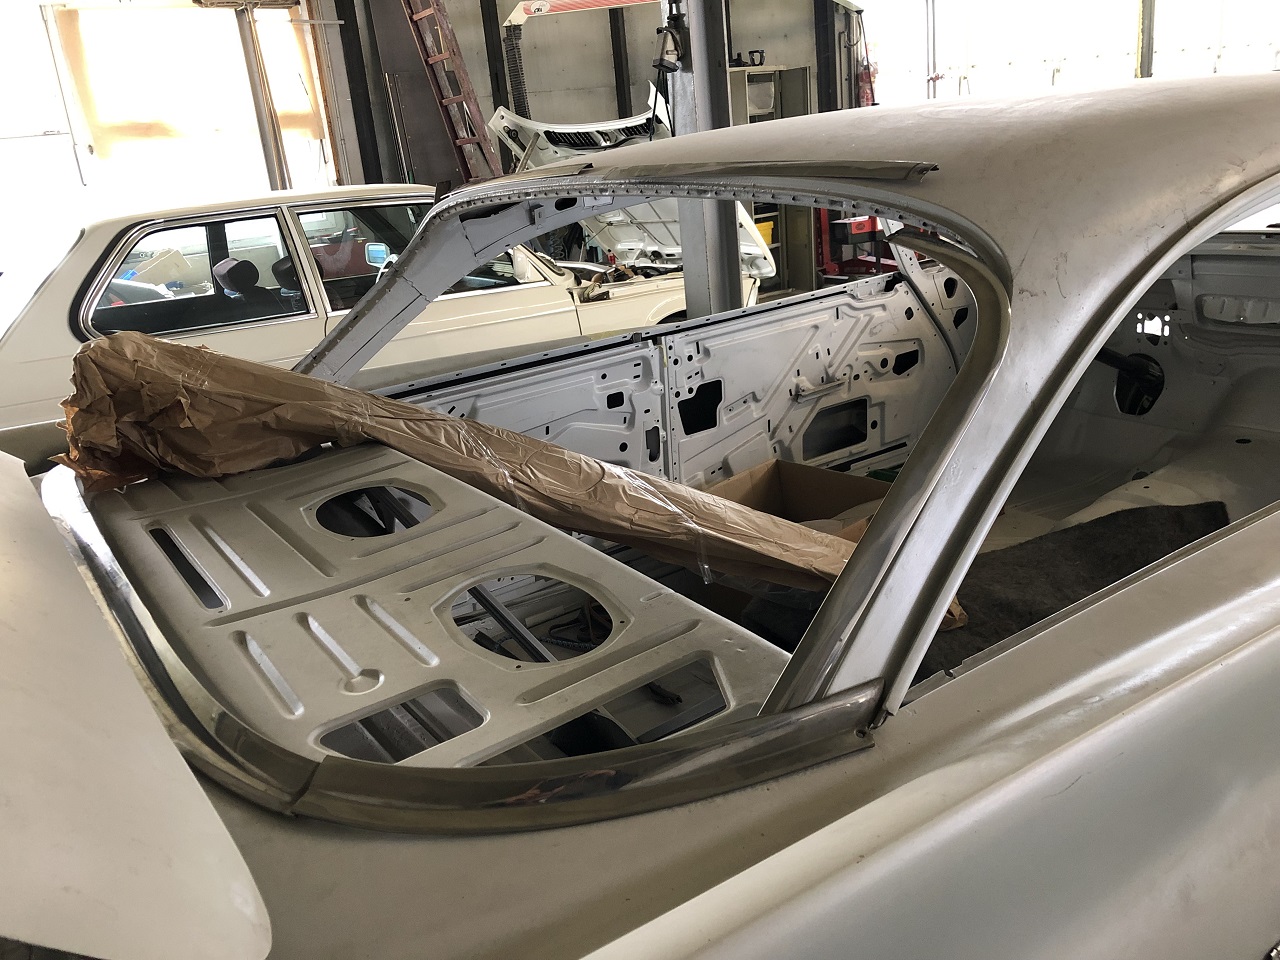 (IMG_6365_test mounting rear window moulding.JPG) (IMG_6365_test mounting rear window moulding.JPG)
Attachments
----------------
IMG_6364_test mounting windshield moulding.JPG (360KB - 342 downloads)
IMG_6365_test mounting rear window moulding.JPG (407KB - 388 downloads)
|
|
| |
|
Expert
Posts: 1530
Location: ZH, Switzerland | Yesterday I met the boss of the highly professional body & painting shop again. The body metal smith will start in the new week. I provided few fotos of how the rear end should look like. From the discussion I heard what I expected. At the farm smith the Serbian body worker left with a hefty fight. I didn't got his salary. The farmer smith owner claimed, "his" former body smith had stolen some newly chromed pot metal parts. The boss of the actual shop, where my Letter actually is, was surprised about the really bad work of the Serbian body worker. He's a good body worker as well, but under bad influence. The boss (of the higly professional body and painting shop) claimed that the amount I paid at the farm smith should be enough to do the whole body work on my Letter as it was prior to the work under discussion. Bad enough the farm smith owner has a part I would like to get (the cover of the passenger side access hole for the antenna). This guy (the farm smith owner) is the biggest betrayer and liar I personally every met in my life. Happy Restoring! Dieter
Edited by di_ch_NY56 2019-09-22 10:42 AM
|
|
| |
|
Expert
Posts: 1530
Location: ZH, Switzerland | Yunus worked for one and a half day at my Letter. The work he performed is astonishing! It's just the raw shape and one more half day is necessary. He had to do some cuts with the angle grinder to release the tension caused by accidents and all other than professional work perforemed from months to tens of years earlier. For the adjustment of the hood, fenders, doors and trunk lid I'm more than happy. It's just raw adjusted by sight and not with measurement tape. But in my opinion from what I saw (other cars of that decade) it's more than perfect. Happy Restoring! Dieter
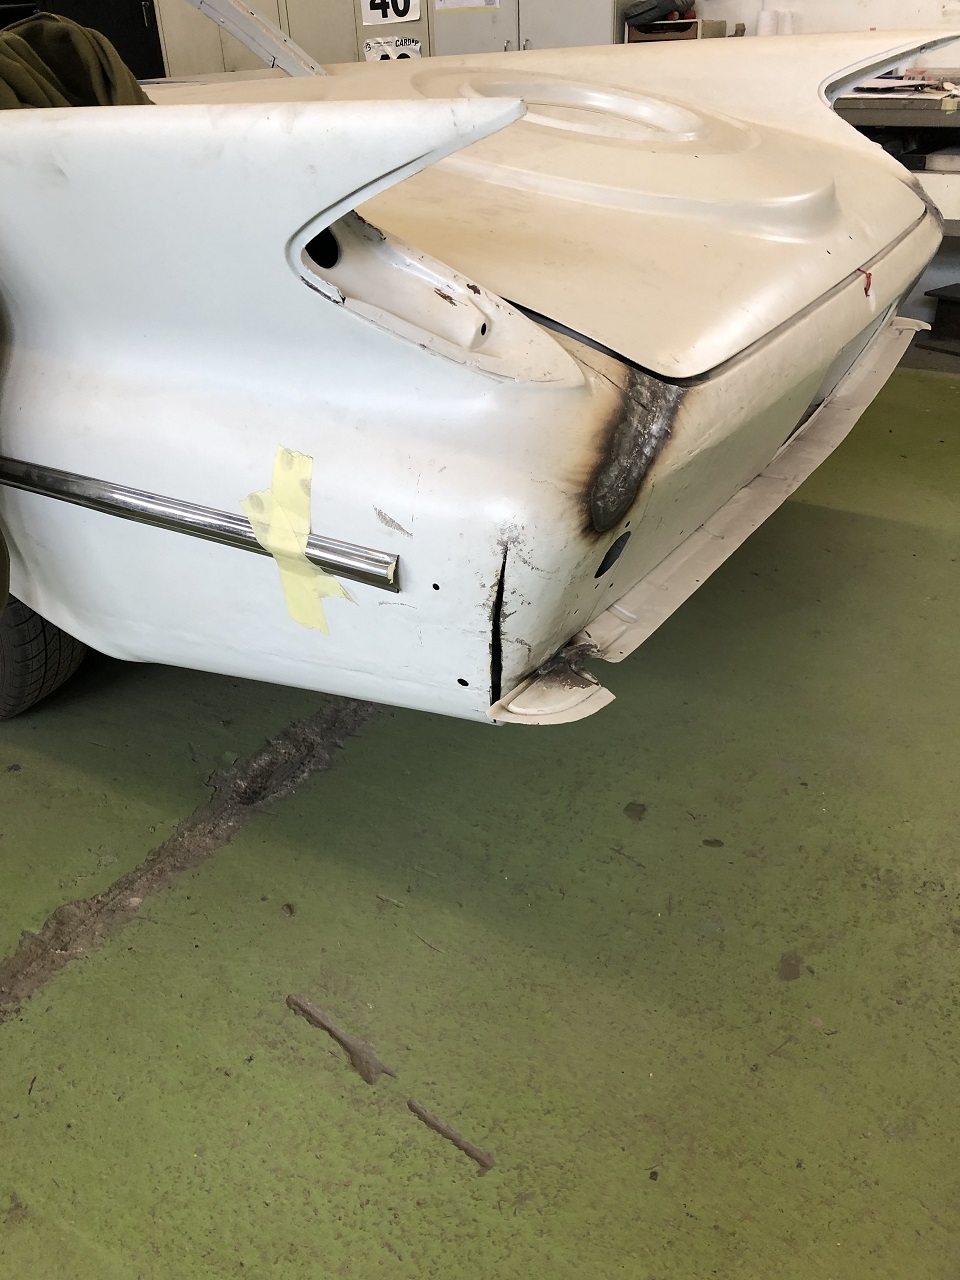 (IMG_6496 driver side rear corner back in shape (raw).JPG) (IMG_6496 driver side rear corner back in shape (raw).JPG)
 (IMG_6497 back view of driver side rear corner.JPG) (IMG_6497 back view of driver side rear corner.JPG)
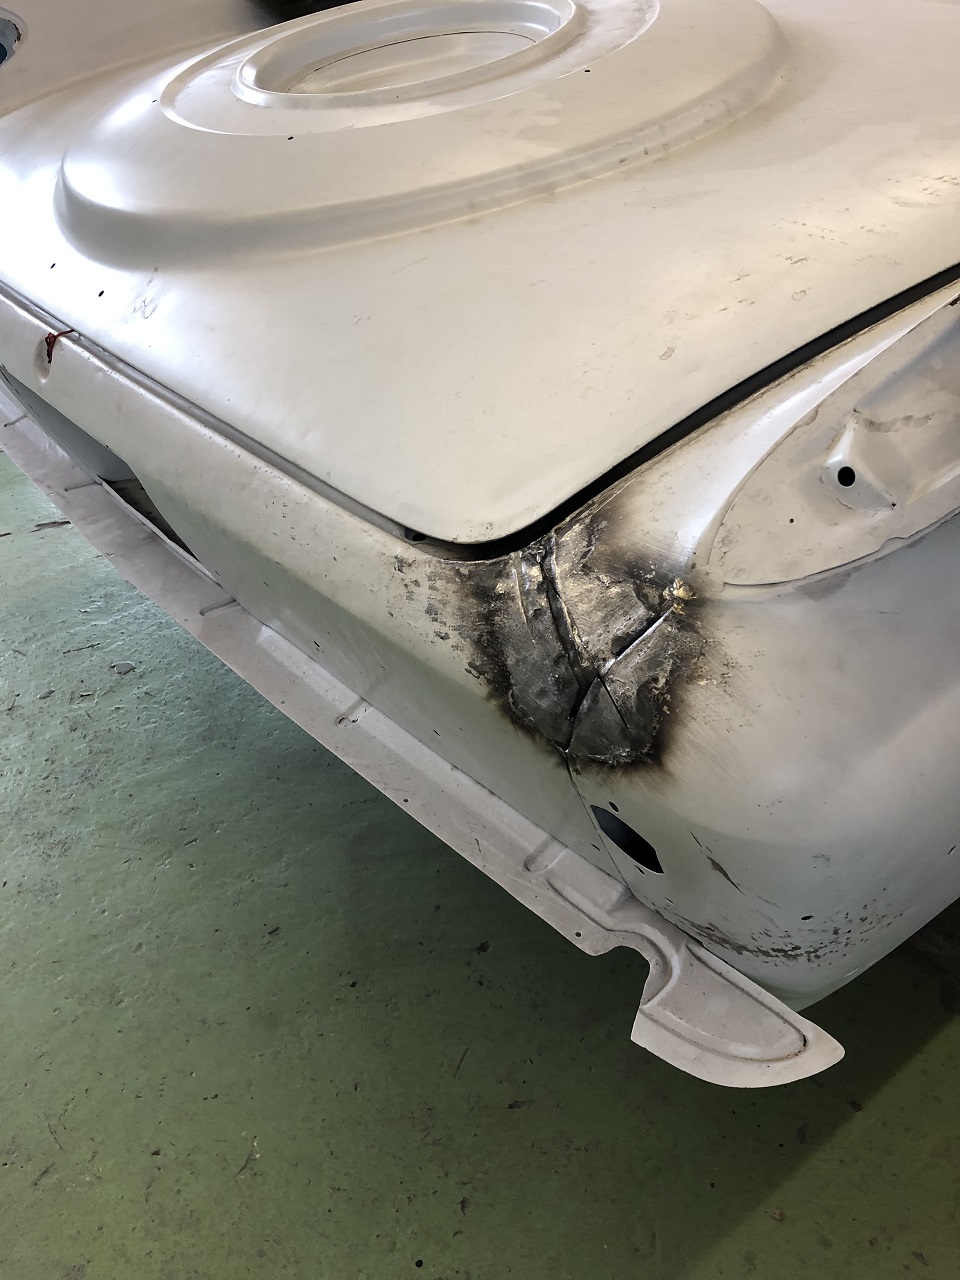 (IMG_6498 signs of one more accident corrected passenger side rear corner.JPG) (IMG_6498 signs of one more accident corrected passenger side rear corner.JPG)
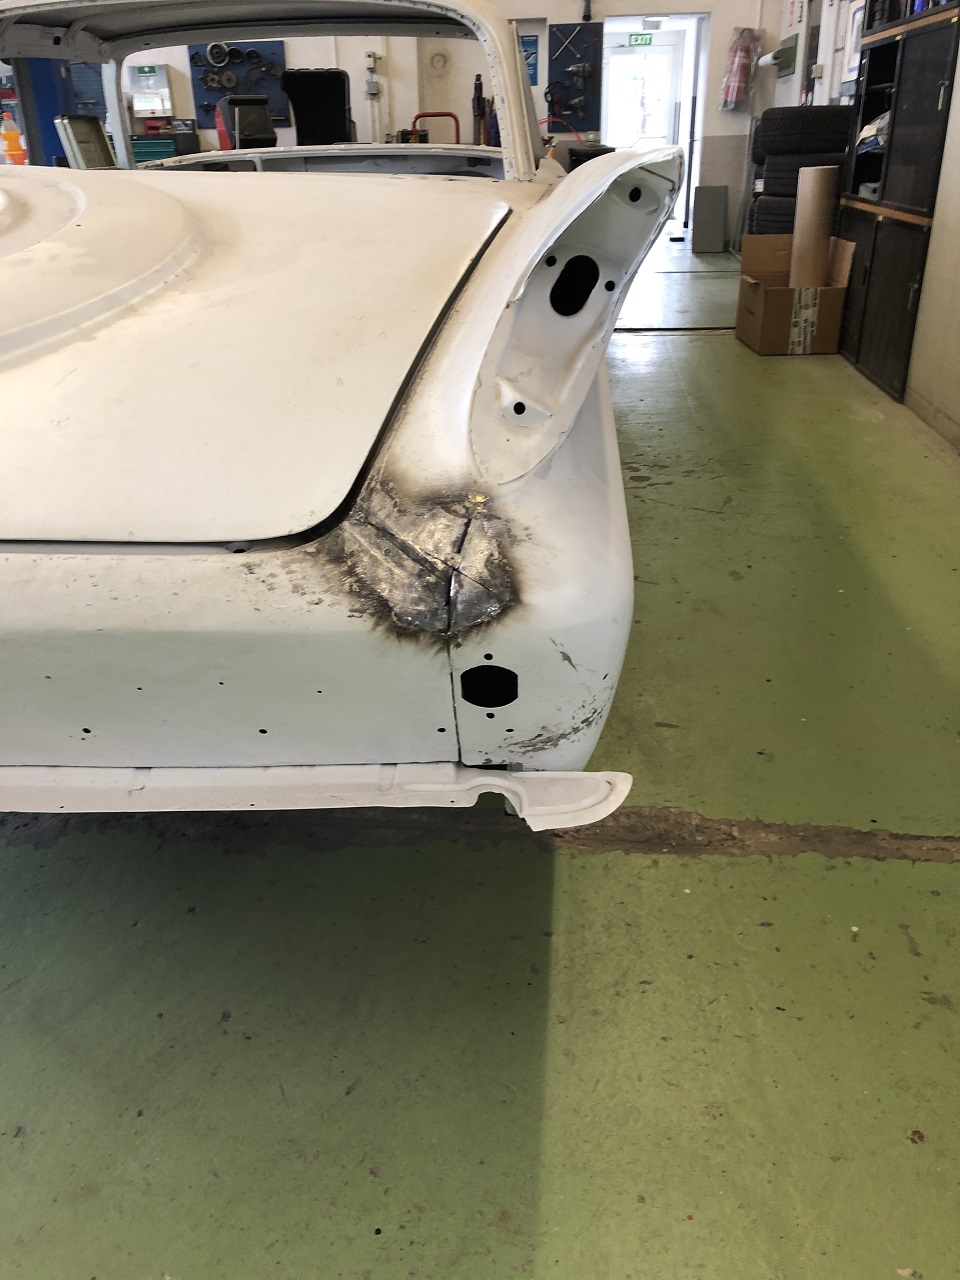 (IMG_6499 rear view of the passenger side rear corner correction.JPG) (IMG_6499 rear view of the passenger side rear corner correction.JPG)
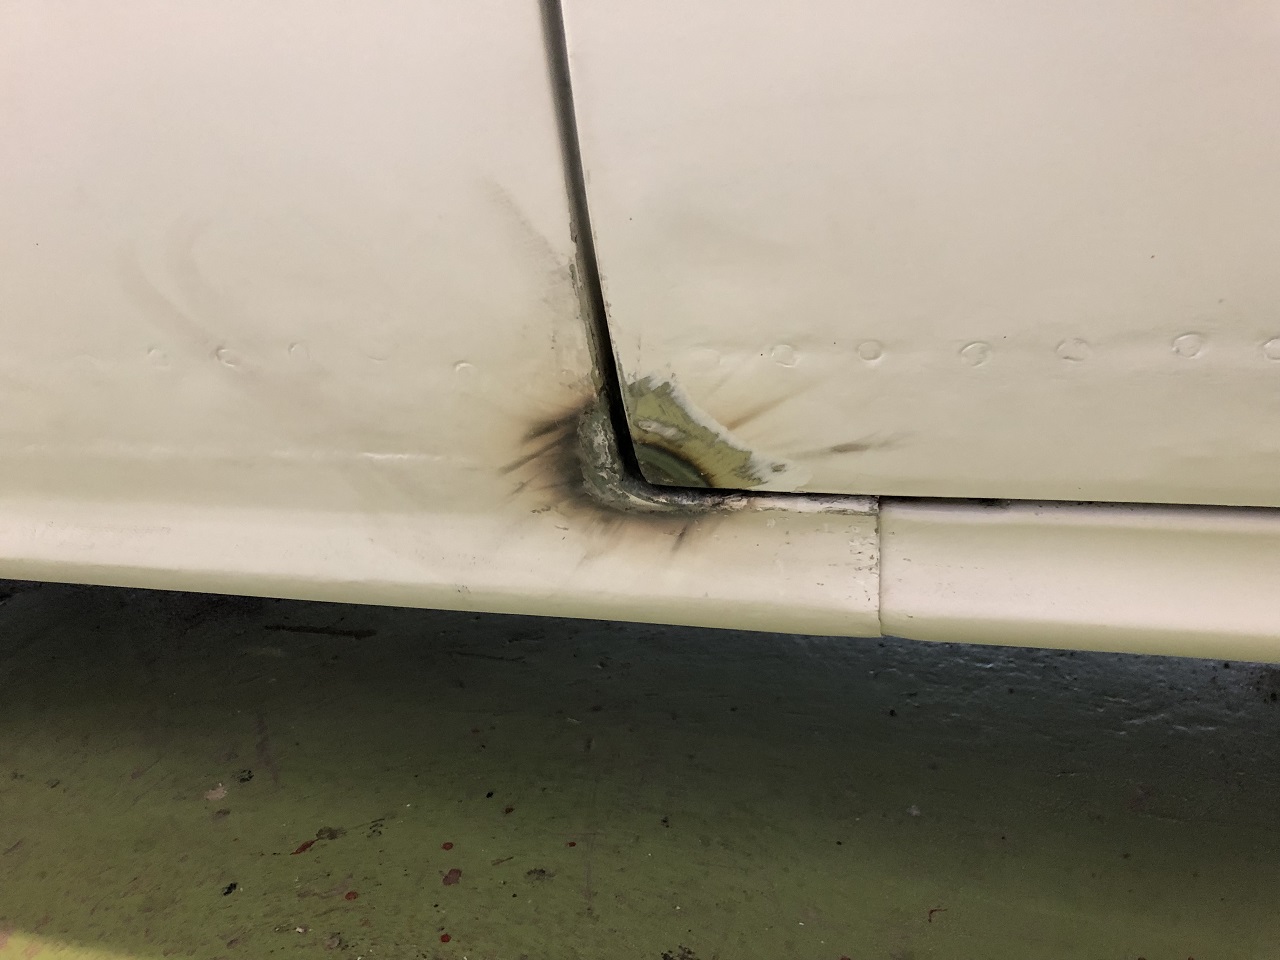 (IMG_6500 Passeger side door opening correction.JPG) (IMG_6500 Passeger side door opening correction.JPG)
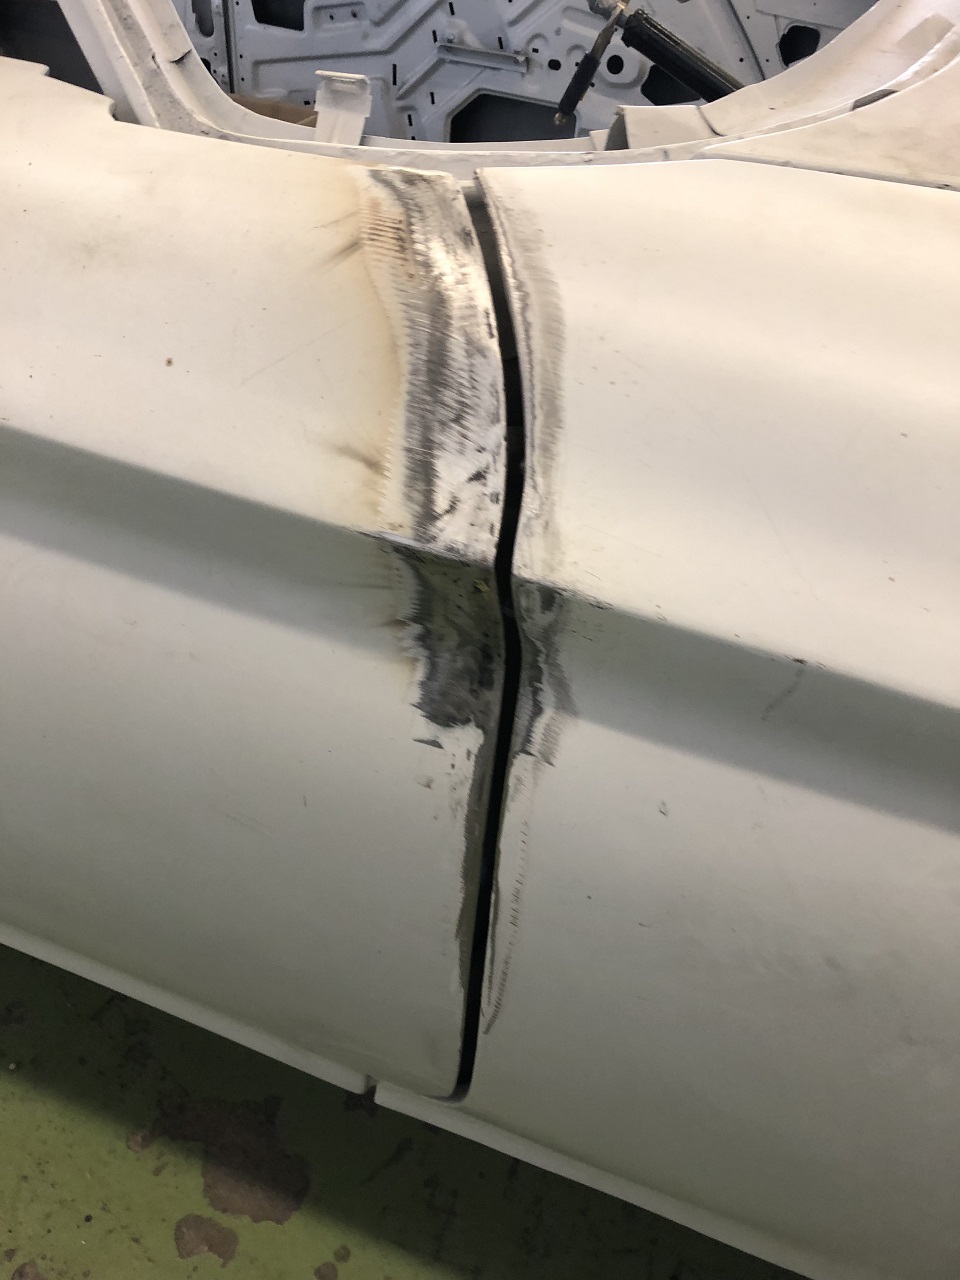 (IMG_6501 front bow of passenger door corrected.JPG) (IMG_6501 front bow of passenger door corrected.JPG)
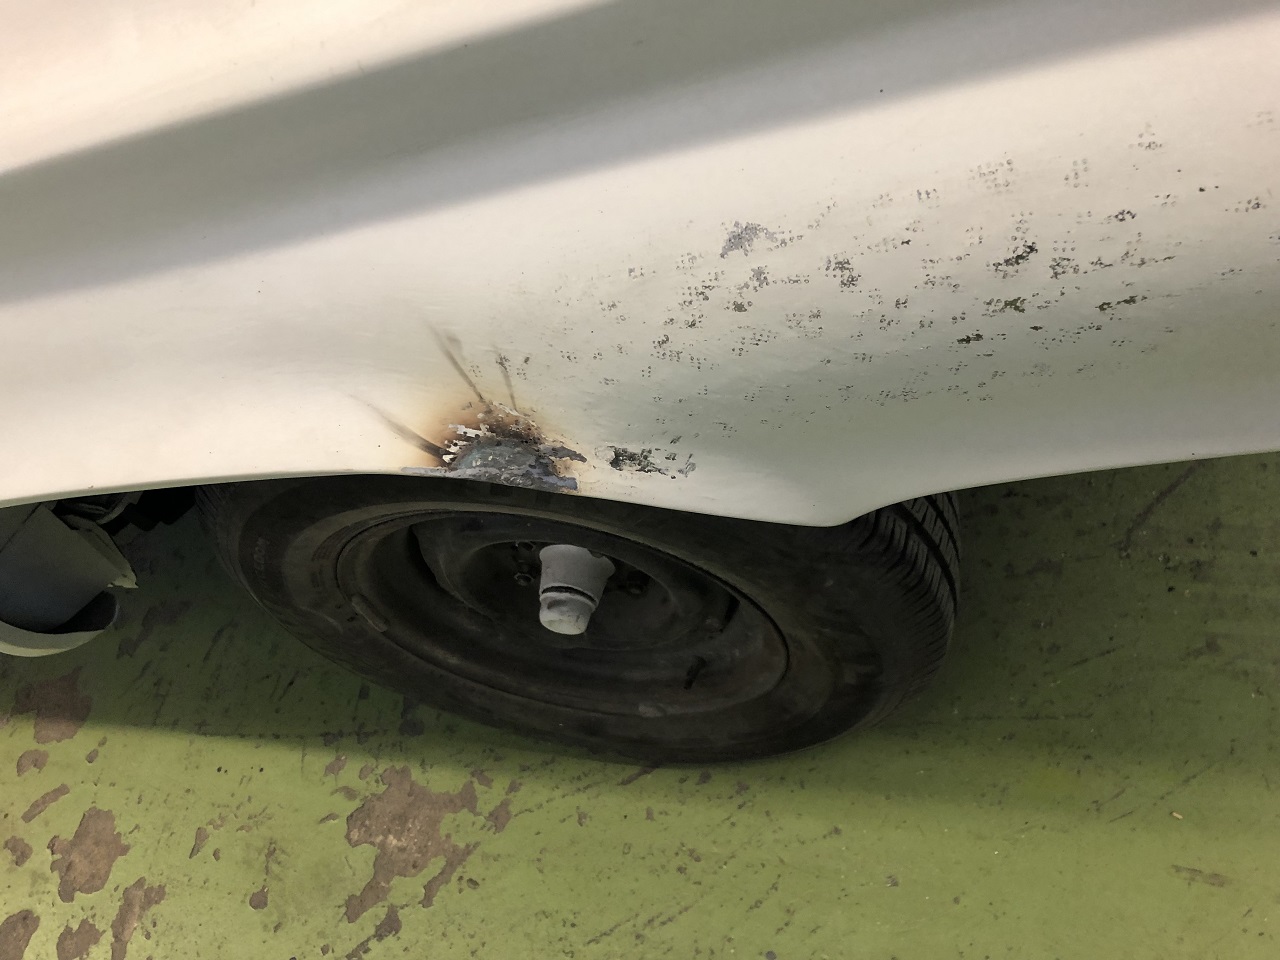 (IMG_6502 passenger side front fender bow in shape again.JPG) (IMG_6502 passenger side front fender bow in shape again.JPG)
 (IMG_6503 passenger side front fender to hood correction.JPG) (IMG_6503 passenger side front fender to hood correction.JPG)
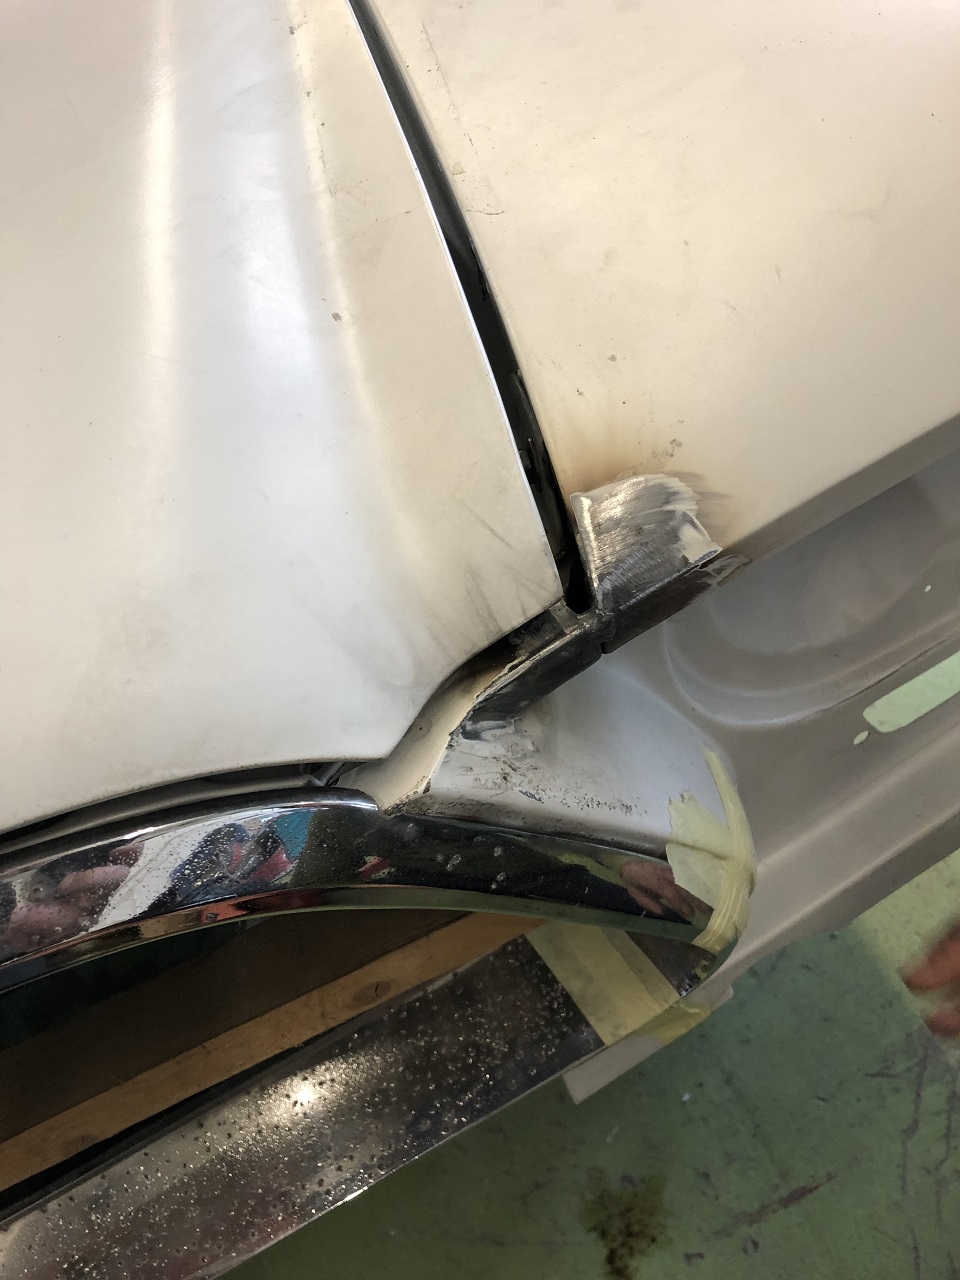 (IMG_6504 drivers side front fender to hood correction.JPG) (IMG_6504 drivers side front fender to hood correction.JPG)
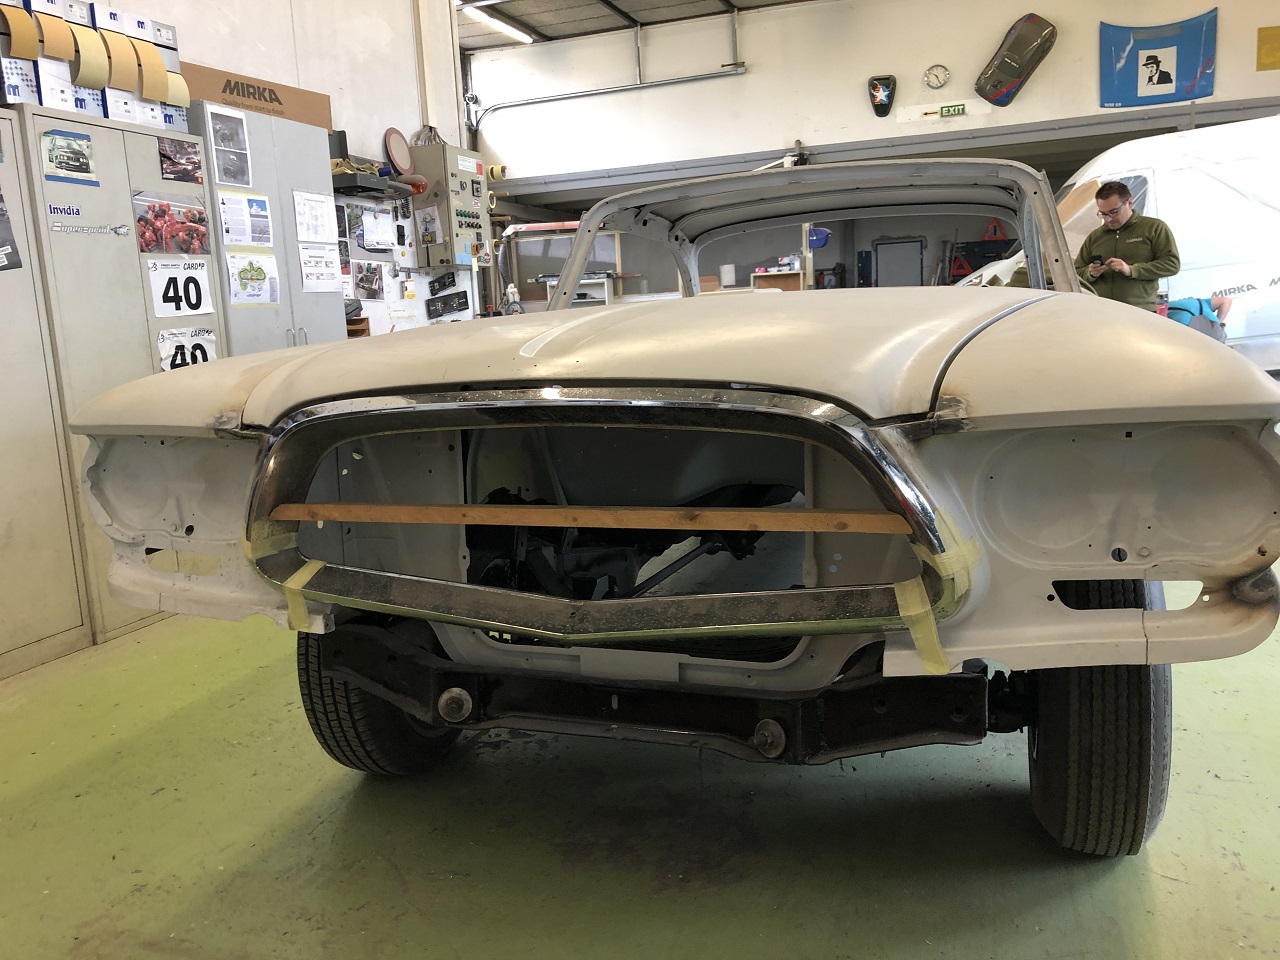 (IMG_6505 front view.JPG) (IMG_6505 front view.JPG)
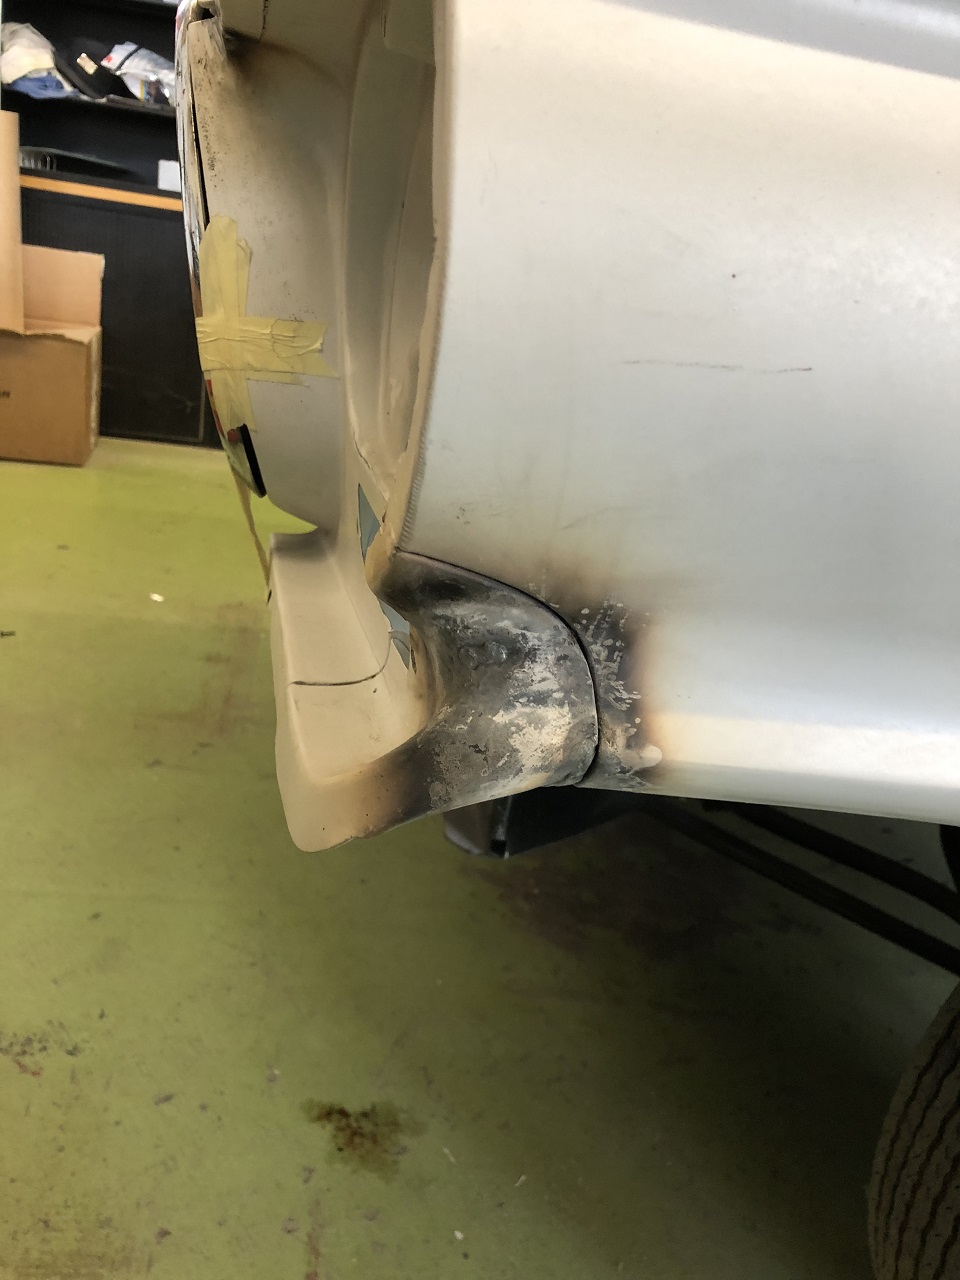 (IMG_6506 drivers side front fender issue fixed.JPG) (IMG_6506 drivers side front fender issue fixed.JPG)
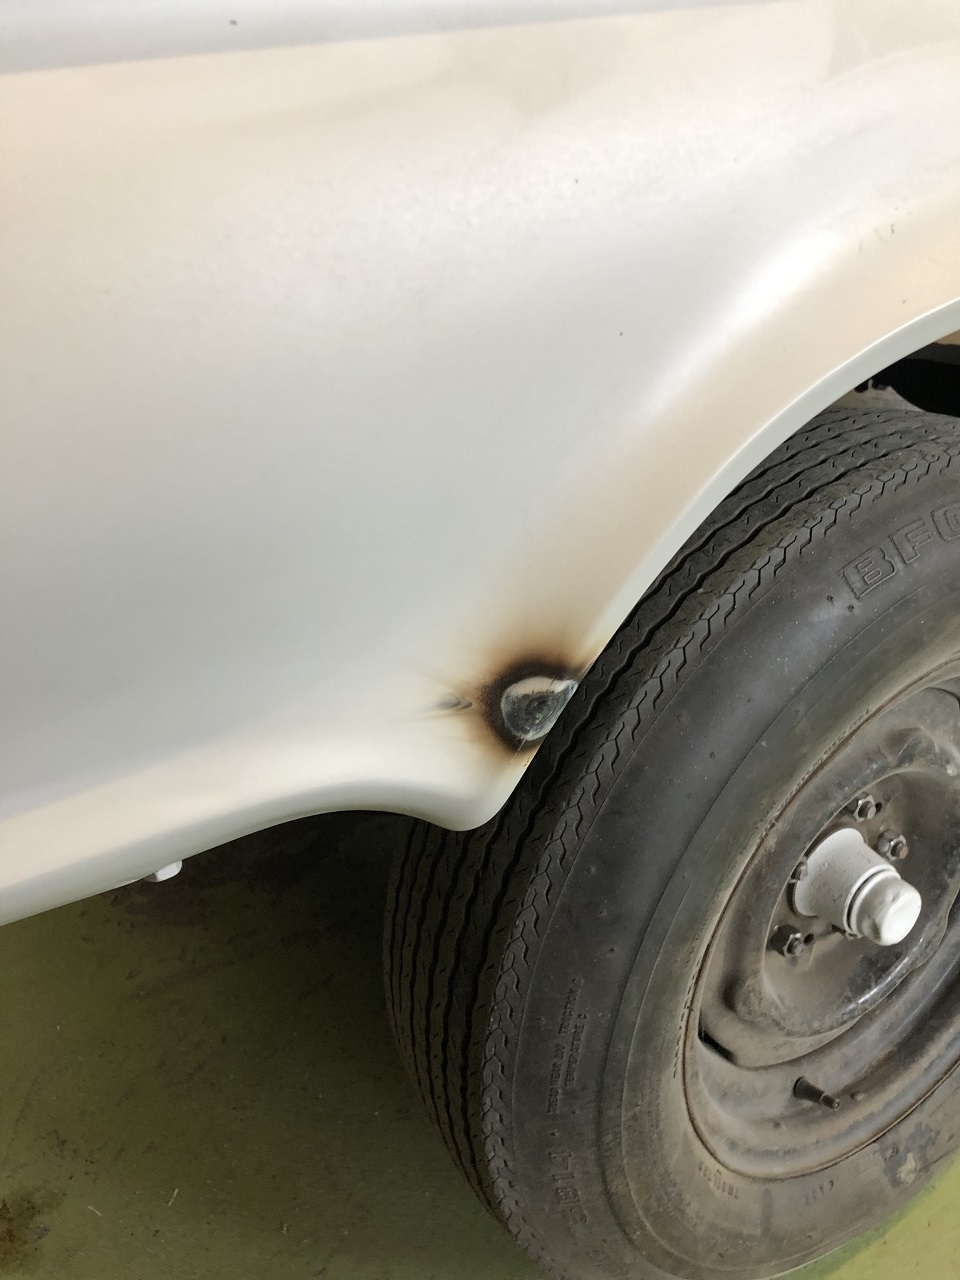 (IMG_6507 drivers side front fender issue 2 fixed.JPG) (IMG_6507 drivers side front fender issue 2 fixed.JPG)
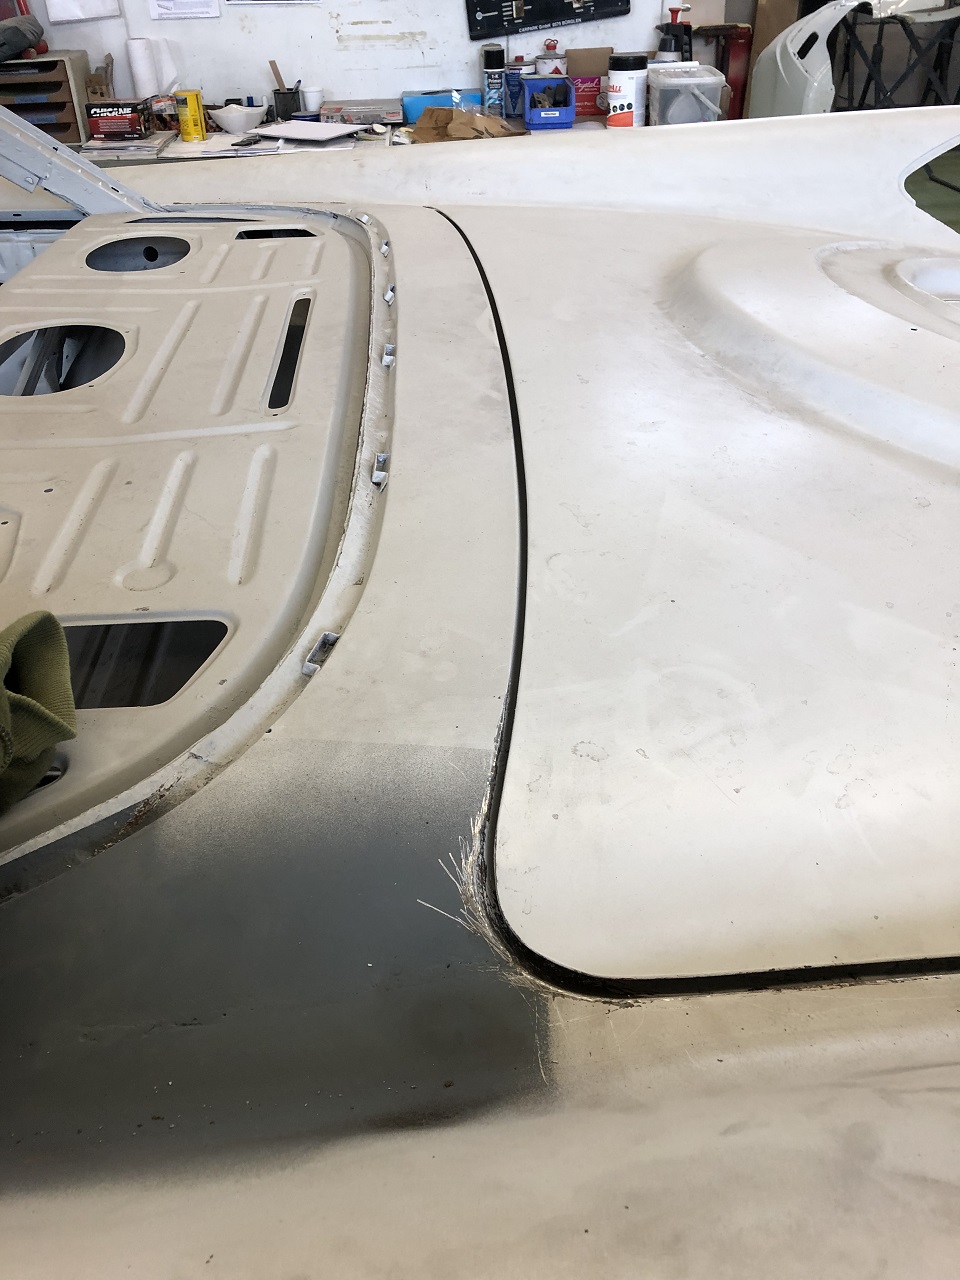 (IMG_6508 trunk lid adjustment to the rear window.JPG) (IMG_6508 trunk lid adjustment to the rear window.JPG)
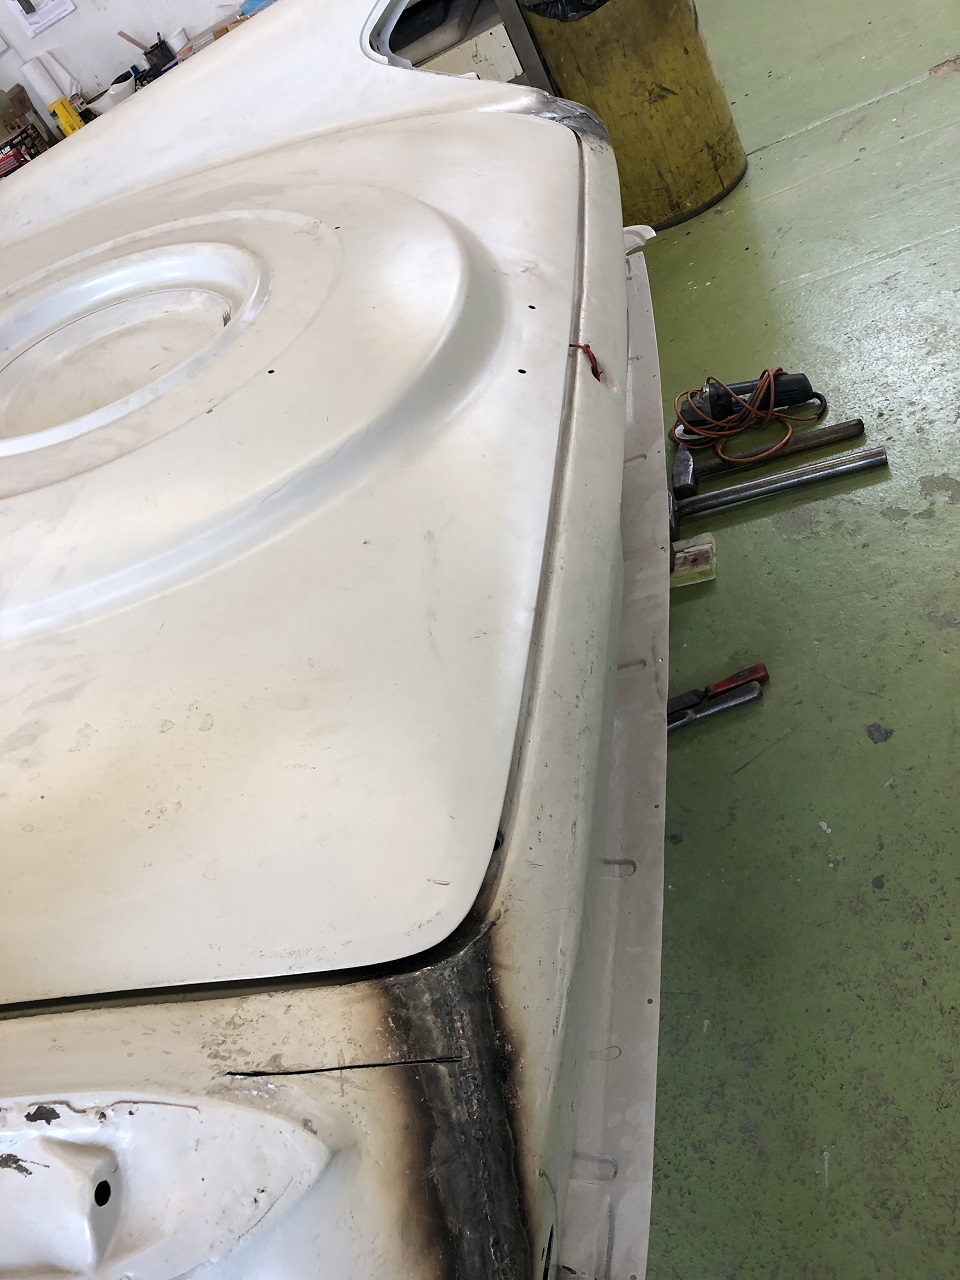 (IMG_6509 trunk lid adjustment to the vertical rear wall.JPG) (IMG_6509 trunk lid adjustment to the vertical rear wall.JPG)
 (IMG_6510 four fifth side-rear view.JPG) (IMG_6510 four fifth side-rear view.JPG)
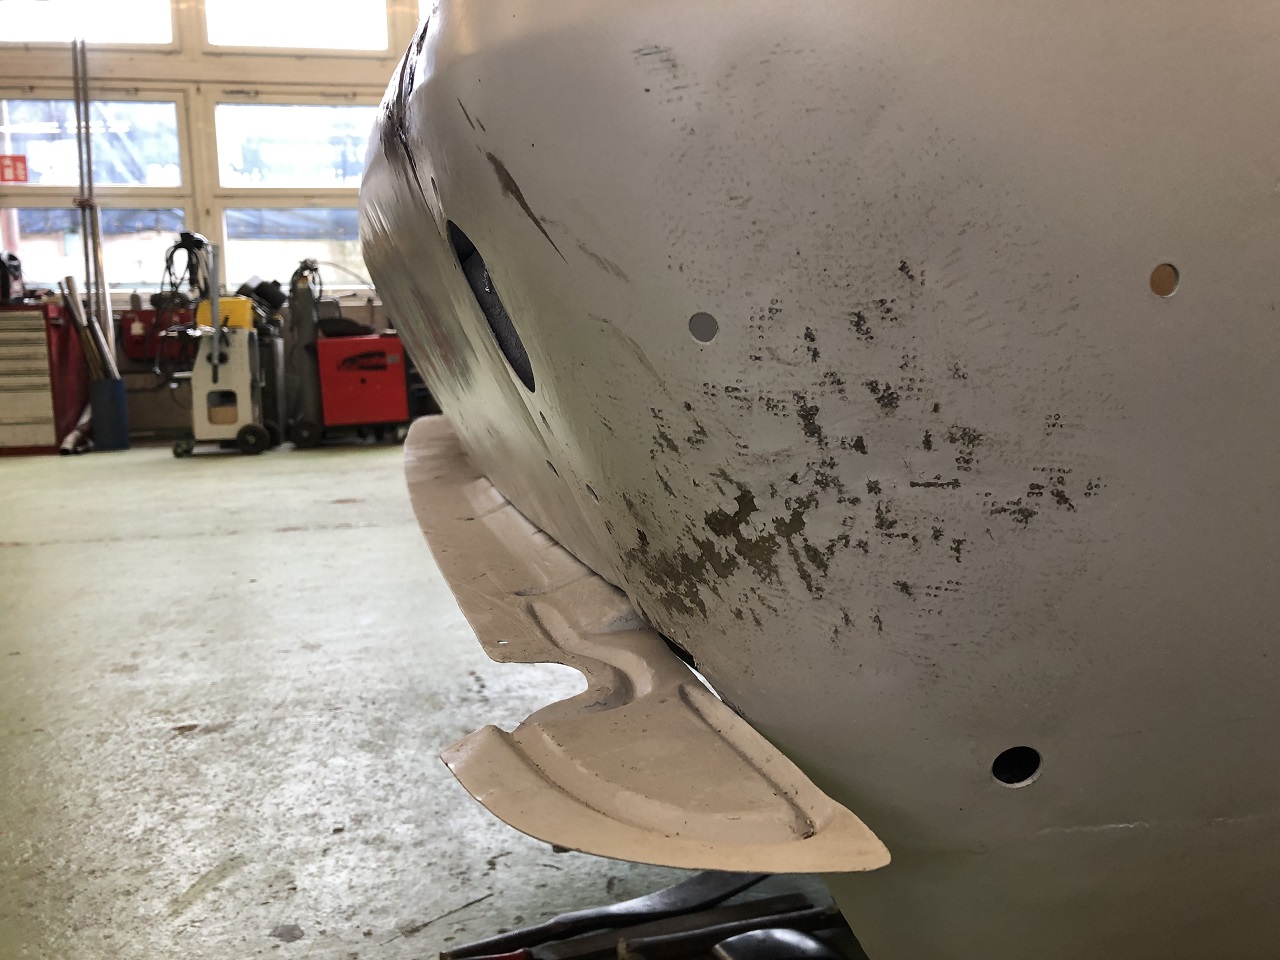 (IMG_6511 Passenger side rear bump from bumper removed.JPG) (IMG_6511 Passenger side rear bump from bumper removed.JPG)
 (IMG_6512 Toold set of Yunus.JPG) (IMG_6512 Toold set of Yunus.JPG)
Attachments
----------------
IMG_6496 driver side rear corner back in shape (raw).JPG (317KB - 344 downloads)
IMG_6497 back view of driver side rear corner.JPG (419KB - 354 downloads)
IMG_6498 signs of one more accident corrected passenger side rear corner.JPG (308KB - 356 downloads)
IMG_6499 rear view of the passenger side rear corner correction.JPG (297KB - 348 downloads)
IMG_6500 Passeger side door opening correction.JPG (226KB - 349 downloads)
IMG_6501 front bow of passenger door corrected.JPG (220KB - 356 downloads)
IMG_6502 passenger side front fender bow in shape again.JPG (254KB - 348 downloads)
IMG_6503 passenger side front fender to hood correction.JPG (275KB - 338 downloads)
IMG_6504 drivers side front fender to hood correction.JPG (274KB - 360 downloads)
IMG_6505 front view.JPG (358KB - 346 downloads)
IMG_6506 drivers side front fender issue fixed.JPG (228KB - 333 downloads)
IMG_6507 drivers side front fender issue 2 fixed.JPG (240KB - 333 downloads)
IMG_6508 trunk lid adjustment to the rear window.JPG (290KB - 329 downloads)
IMG_6509 trunk lid adjustment to the vertical rear wall.JPG (311KB - 335 downloads)
IMG_6510 four fifth side-rear view.JPG (290KB - 343 downloads)
IMG_6511 Passenger side rear bump from bumper removed.JPG (321KB - 352 downloads)
IMG_6512 Toold set of Yunus.JPG (229KB - 364 downloads)
|
|
| |
|
Expert 5K+
Posts: 5006
| darn dude... going to have it blasted now? glad to see your not still going backwards...
|
|
| |
|
Regular
Posts: 52
| Sorry to hear about your troubles. Poor work and care, done by your blaster, make me sick. You have a fine looking car. Refer to the scene in American Gangster movie, the alpaca scene. "That's genuine alpaca carpet, You Blot Dat s**t" |
|
| |
|
Expert
Posts: 1530
Location: ZH, Switzerland | Thanks a lot dudes. There are some small adjustments at the grill frame perimeter to adjust. The grill frame itself I purchased from a betrayer in the States (active with ways too positive anounced parts at the Chrysler 300 International Club as well). The original one looks ways better, but for this work the old, bad looking is good enough. When all ajustments and open issues are solved, yes, my Letter goes to a complete sandbalsting (except the inner quarter and inner door structure) again. When my Letter comes back from the sandblasting it will be primered again with a very high quality primer. After going back to the body&paint shop, the painter starts his work with applying the color with professional build up of the layers prior to apply the final color close to factory Alaska white color. That needs loads of time, because the layers will be naturally dried. One guy visiting the actual body&paint-shop judged a very positive signal for the undercarriage of my Letter. That's the only good work of the former farm smith shop. But no wonder, there was no rust nor any bad destruction of an accident. I do not want to do further coments about the farm smith shop. I want to get rid of that time. Happy Restoring! Dieter |
|
| |
|
Board Moderator & Exner Expert 10K+
Posts: 13045
Location: Southern Sweden - Sturkö island | Great that the works have started on your Letter again Dieter. Interesting approach on the chrash damages.
Just mind that the pot metal in the grille frame might be somewhat warped, so please check with the other grille frame as well. |
|
| |
|
Expert
Posts: 1530
Location: ZH, Switzerland | This is the original, newly chromed grille frame. One picture shows the grille frame with the mesh installed just to watch how it would look. Happy Restoring! Dieter BTW: the original grille frame is not bent - confirmed by the painter who assisted. Sidemark: during seeking a very good grille frame years ago once I saw a picture at epain ('60 NY parting out). That grille frame was broken into six parts all around the perimeter. From the time area where these grille frame were built - I assume the quality of the pot metal was that kind that a grill frame didn't bend but break into parts. Furthermore that quality of that pot metal has a big affinity to zinc pest.
Edited by di_ch_NY56 2019-10-19 12:46 PM
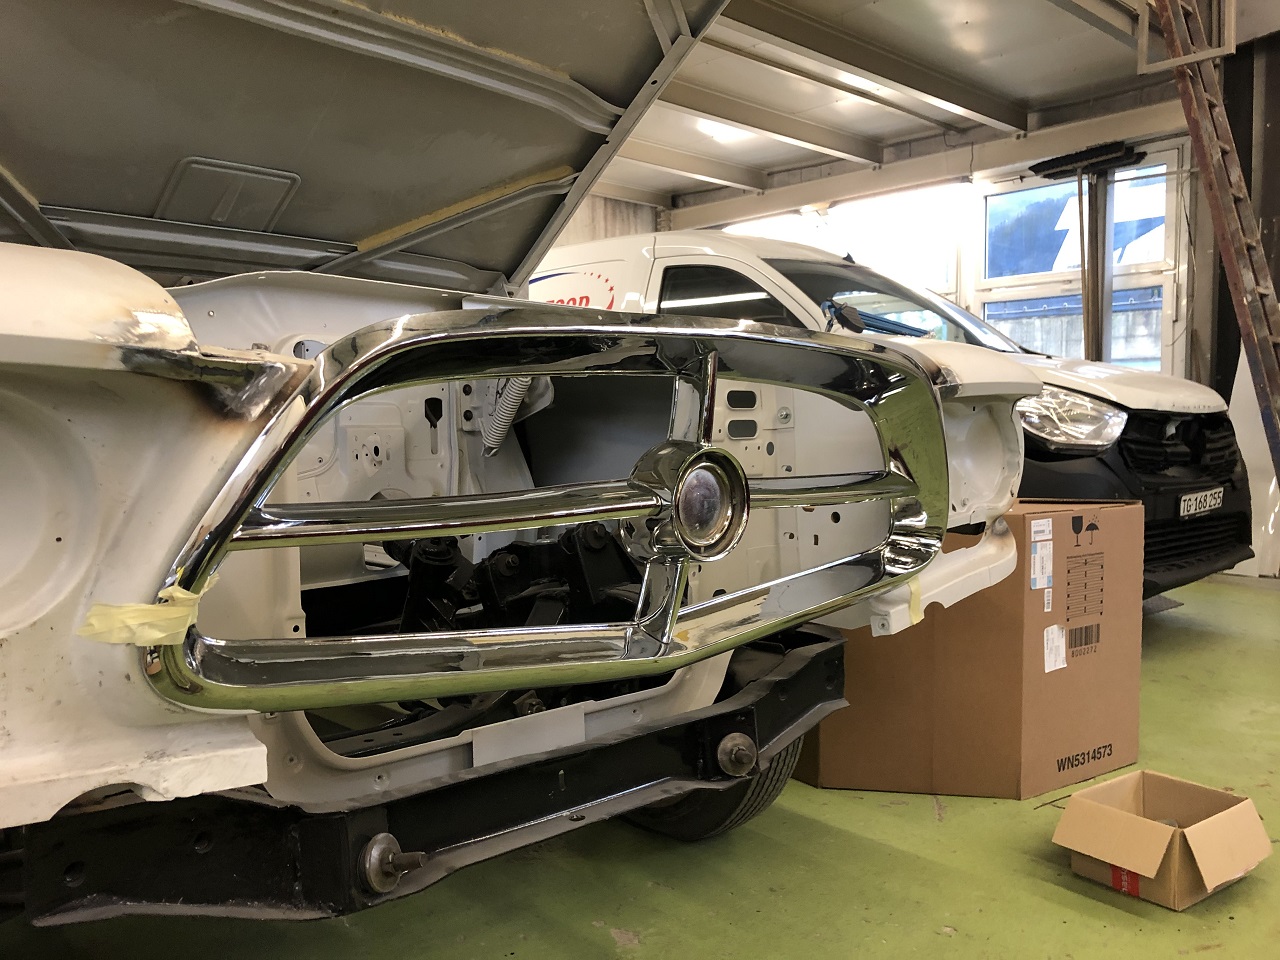 (IMG_6549_original grille frame from right side.JPG) (IMG_6549_original grille frame from right side.JPG)
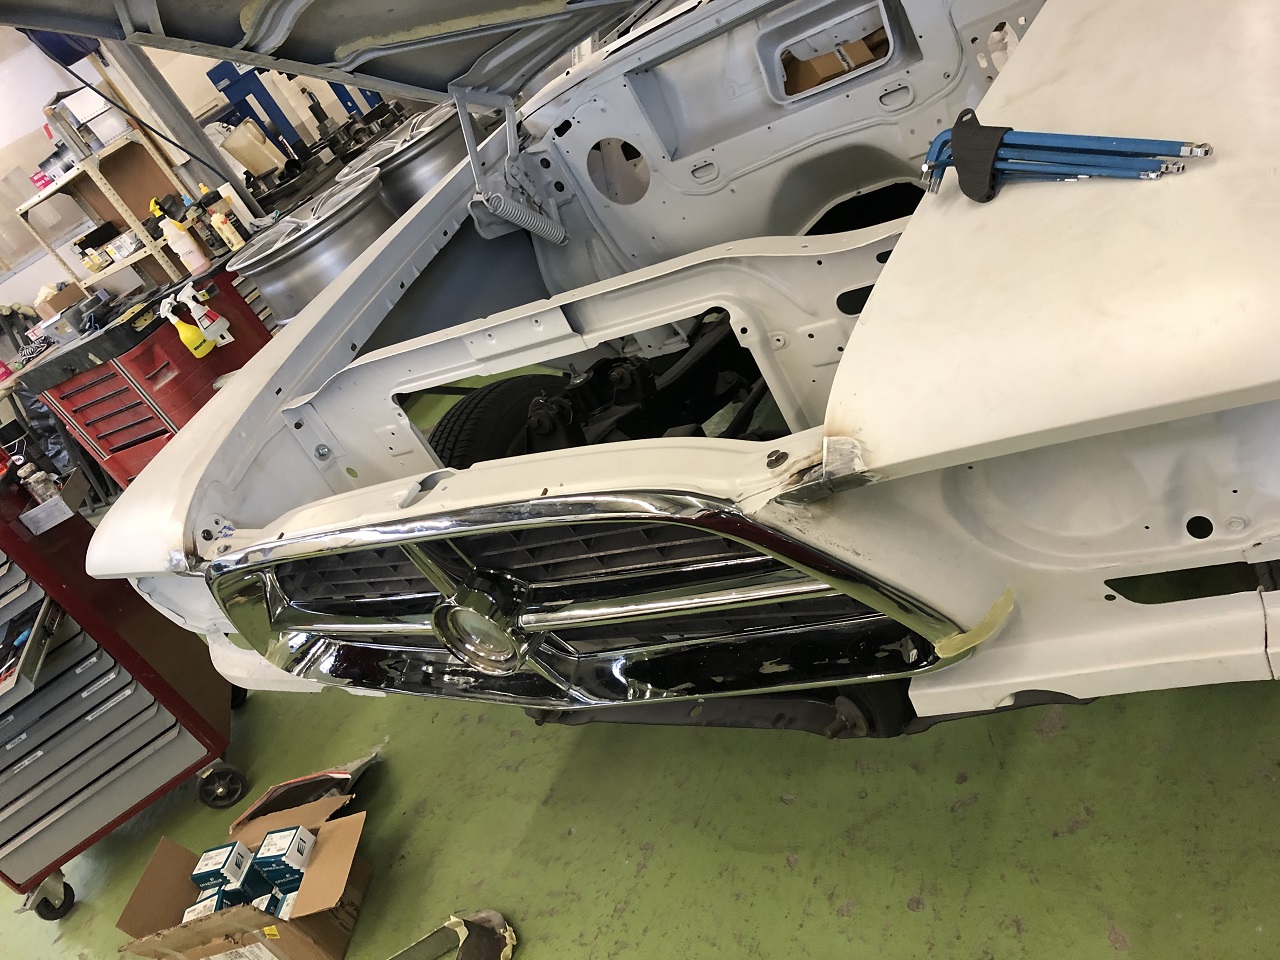 (IMG_6550_original grille frame from top.JPG) (IMG_6550_original grille frame from top.JPG)
Attachments
----------------
IMG_6549_original grille frame from right side.JPG (397KB - 325 downloads)
IMG_6550_original grille frame from top.JPG (443KB - 325 downloads)
|
|
| |
|
Expert
Posts: 1530
Location: ZH, Switzerland | The plan on my Letter is first to finish the front end to get it ready to sand blast again together with the doors. After these parts are brought to the sand blaster, the finishing works will be performed at the rear end of my Letter. When these parts are back (primered) the buidling process of the color layers starts. The body of my Letter goes to the sand blaster as well. When it comes back, the building process of the color layers will start as well. The painter will paint a sample mild steel plate piece first to show it to me. He'll aim to the original formula of Alaska White WW1. Happy Restoring Dieter BTW: what I got out while elaborating... 1960 all Chrysler models were painted in a two coat system, first base color coat, second a protective clear coat layer. |
|
| |
|
Expert
Posts: 1223
Location: Ramona, CA | di_ch_NY56 - 2019-10-19 9:40 AM
BTW: the original grille frame is not bent - confirmed by the painter who assisted. Sidemark: during seeking a very good grille frame years ago once I saw a picture at epain ('60 NY parting out). That grille frame was broken into six parts all around the perimeter. From the time area where these grille frame were built - I assume the quality of the pot metal was that kind that a grill frame didn't bend but break into parts. Furthermore that quality of that pot metal has a big affinity to zinc pest.
Yes, they break when hit. I bought this one to get the emblem for my wagon.
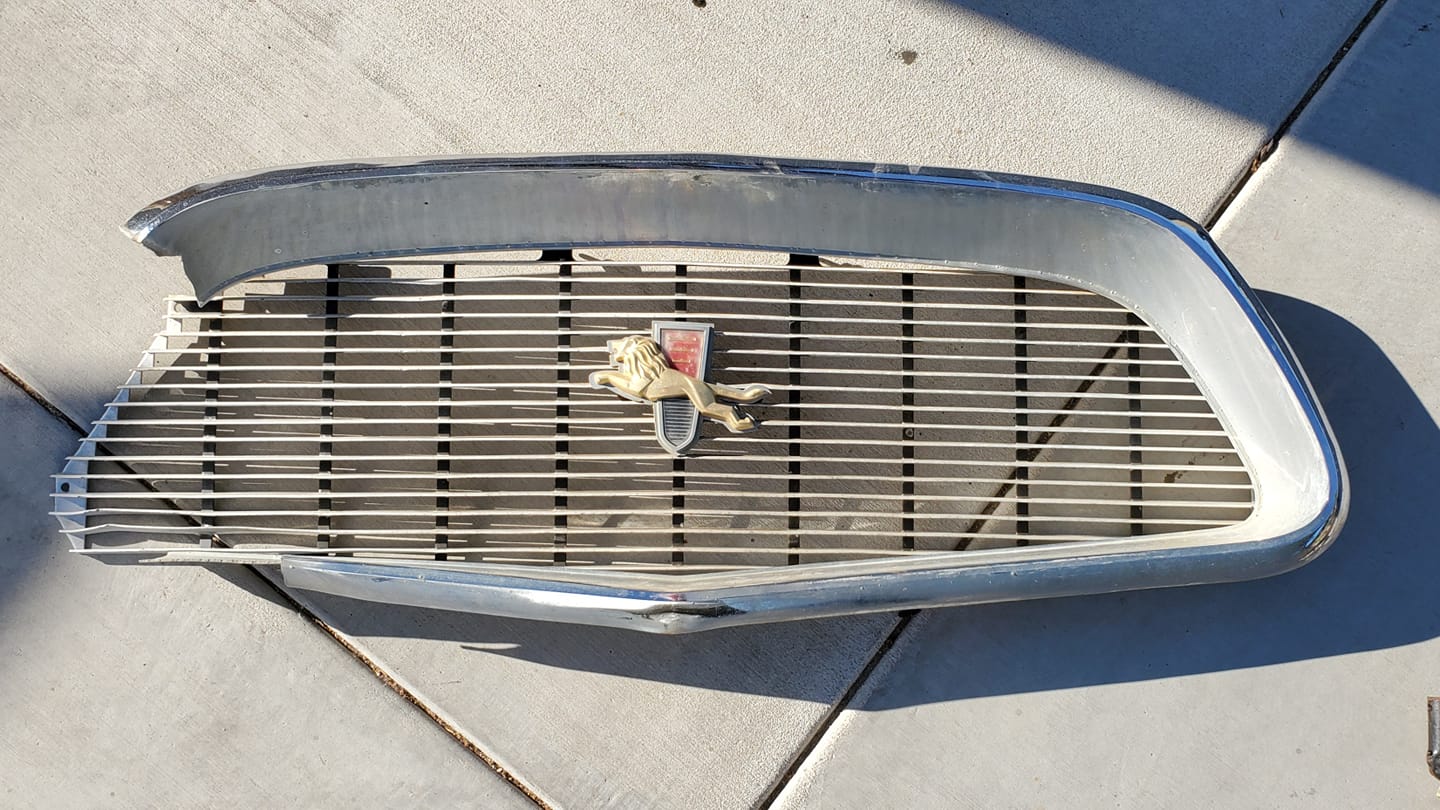 (grille_broken.jpg) (grille_broken.jpg)
Attachments
----------------
grille_broken.jpg (198KB - 319 downloads)
|
|
| |
|
Expert
Posts: 1530
Location: ZH, Switzerland | This morning, after three Saturdays in a row working with the truck, I visited the body&paint shop again. Some parts now have some progress... All the work performed and pending for the next week is prework for the second sand blasting. This parts will go to the sand blasting again prior Christmas Season. As you could notice, this time the doors and front end are removed and treated seperately. The parts already sand blasted again I know, the surface will be almost as smooth as a baby skin. Happy restoring Dieter
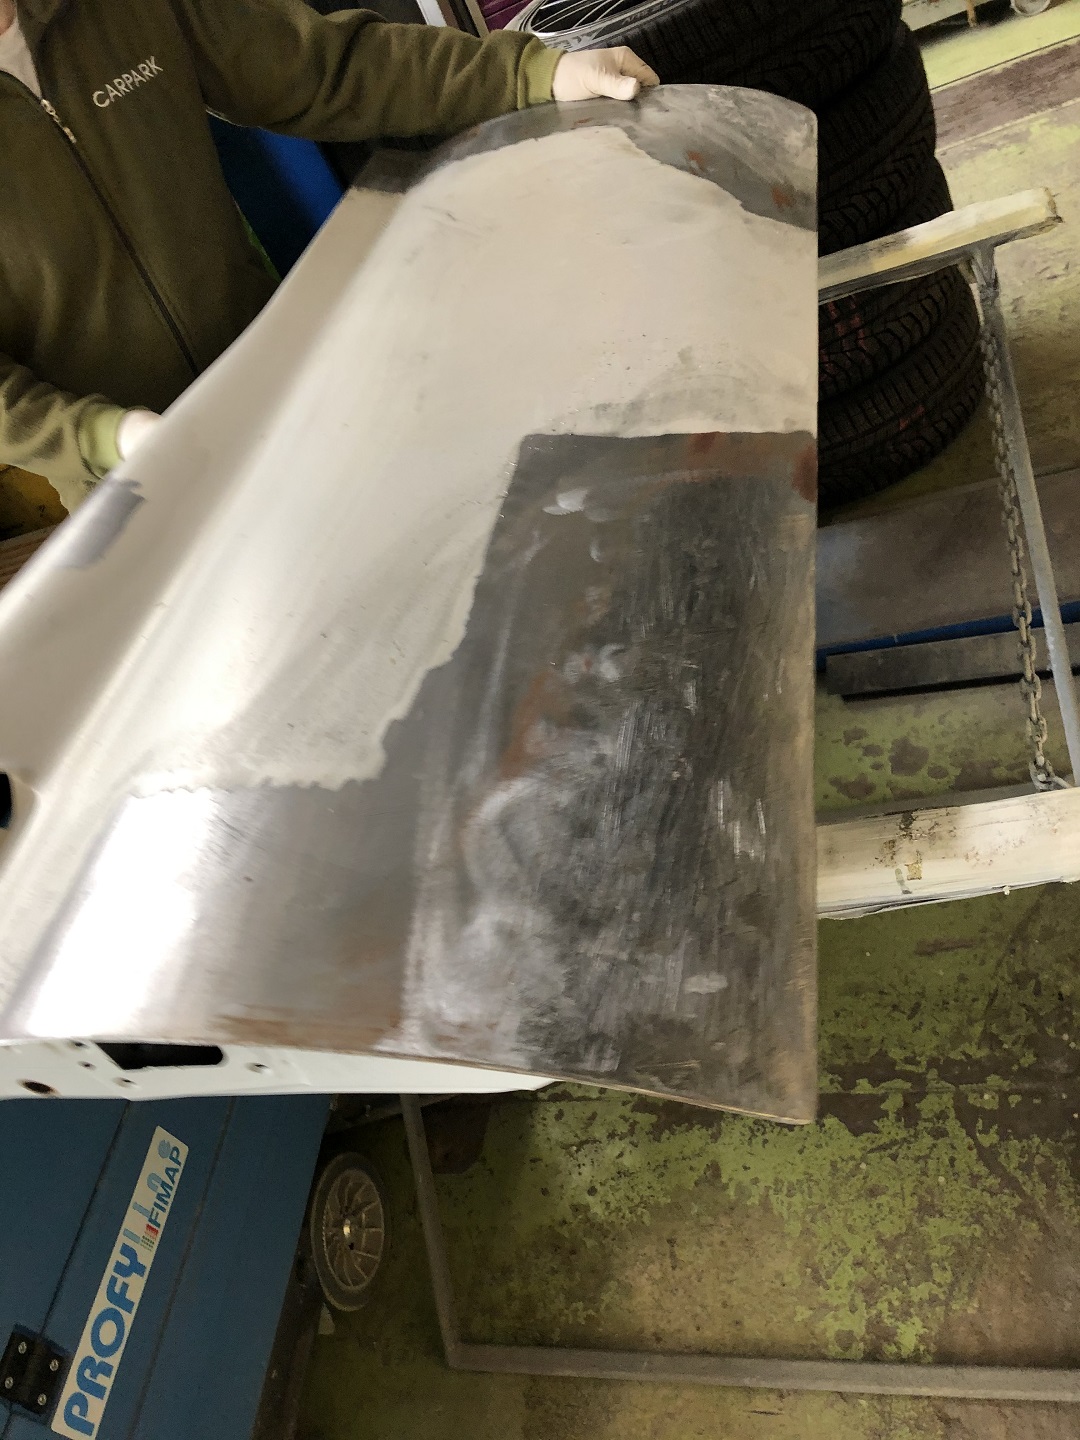 (IMG_6699_passeger side door.JPG) (IMG_6699_passeger side door.JPG)
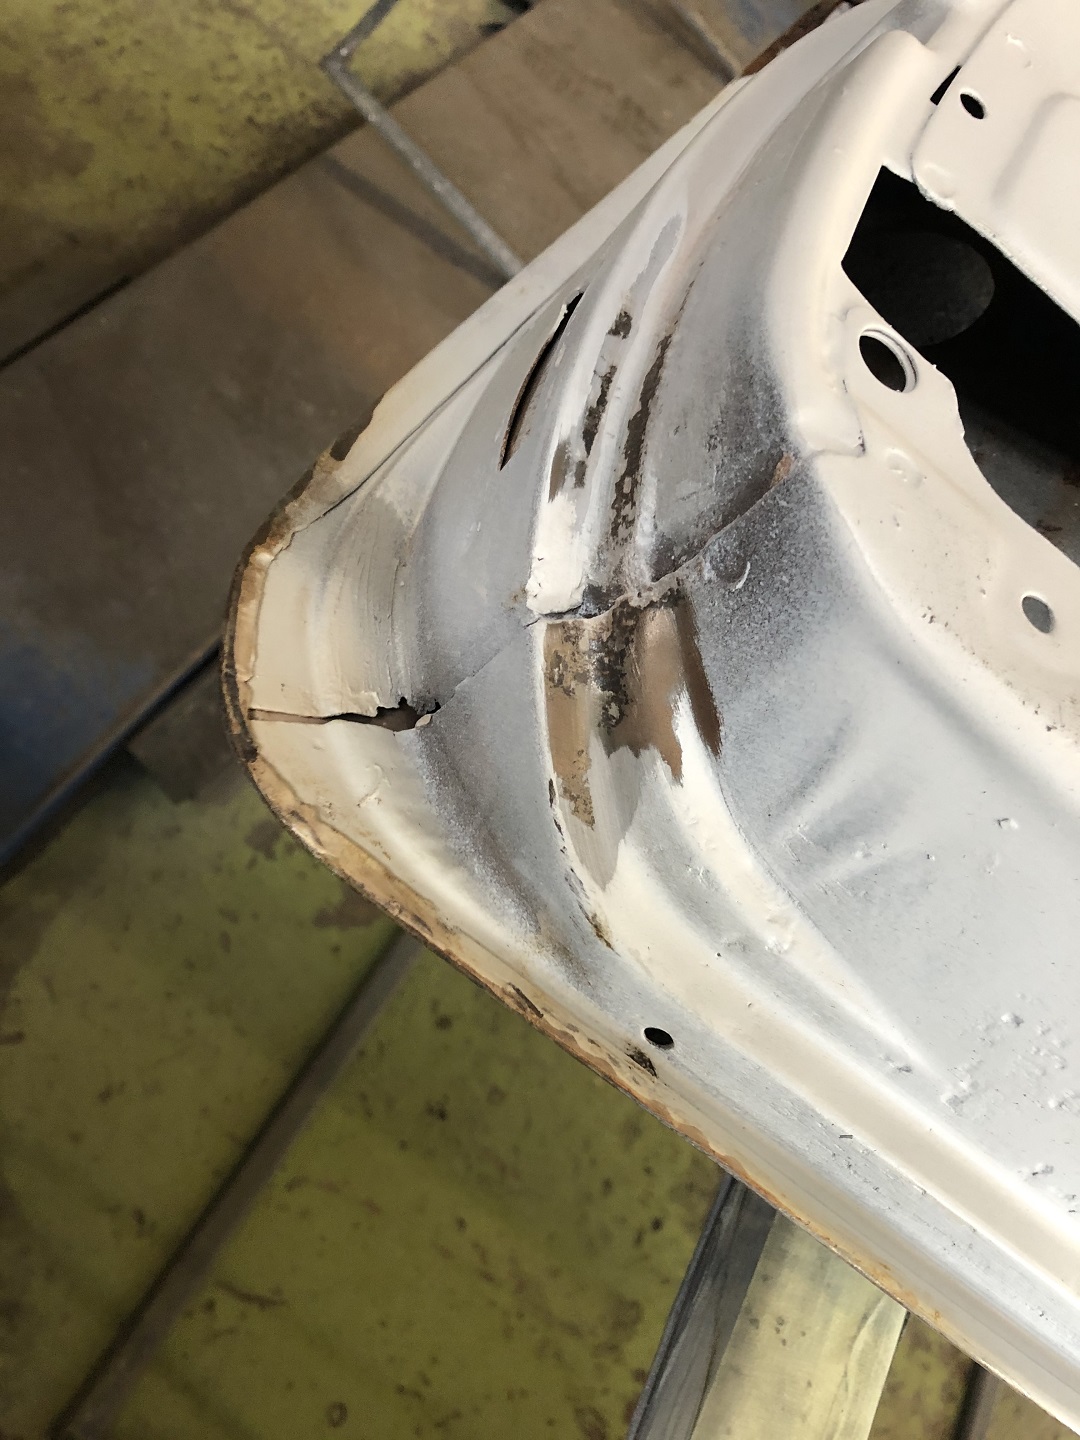 (IMG_6700_passenger side door rust and tar on the inside corner.JPG) (IMG_6700_passenger side door rust and tar on the inside corner.JPG)
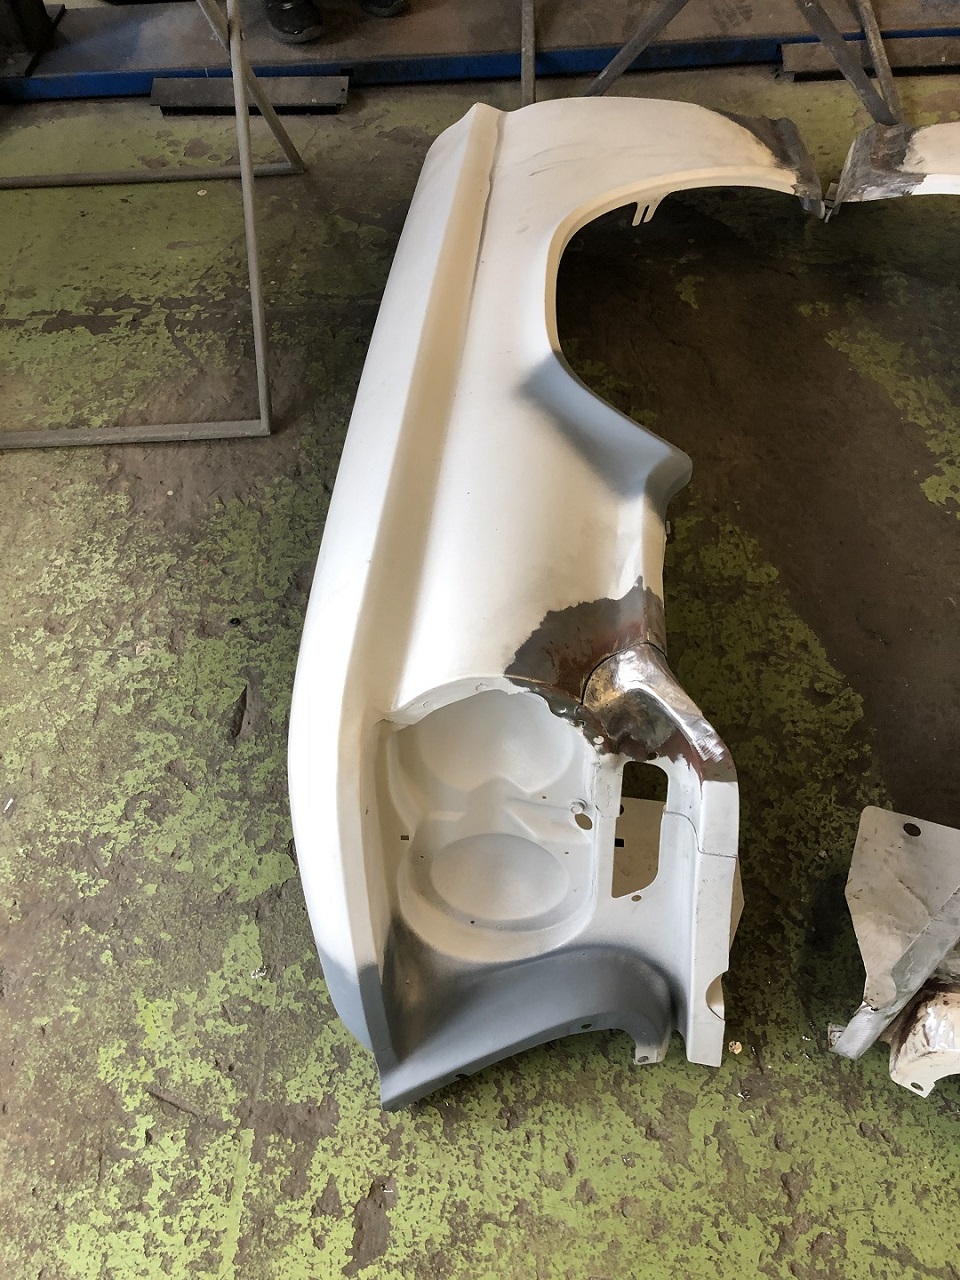 (IMG_6701_drivers side fender tin layer applied and protected.JPG) (IMG_6701_drivers side fender tin layer applied and protected.JPG)
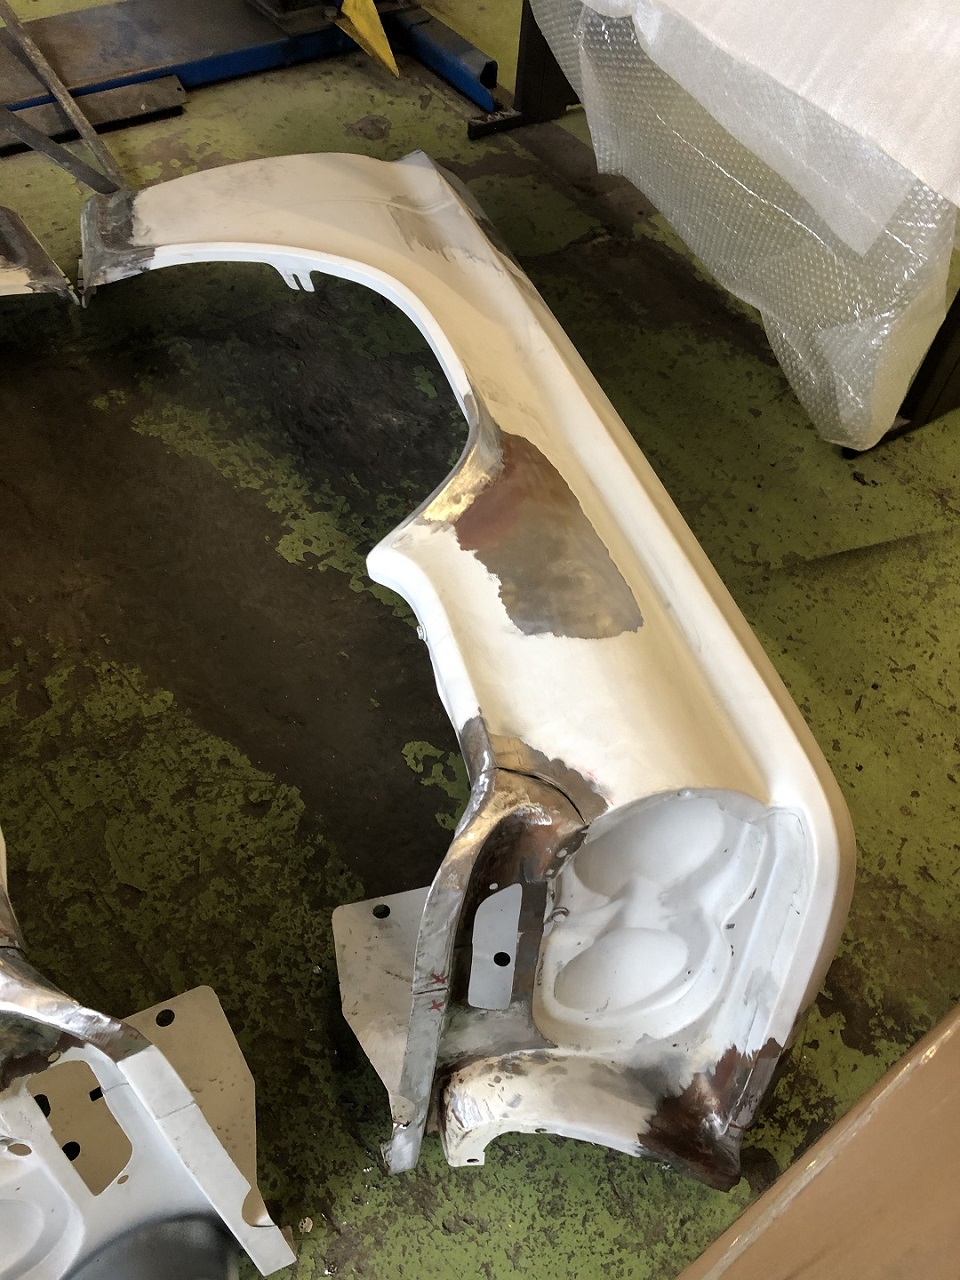 (IMG_6702_passenger side fender front shape now correct and tin layer applied.JPG) (IMG_6702_passenger side fender front shape now correct and tin layer applied.JPG)
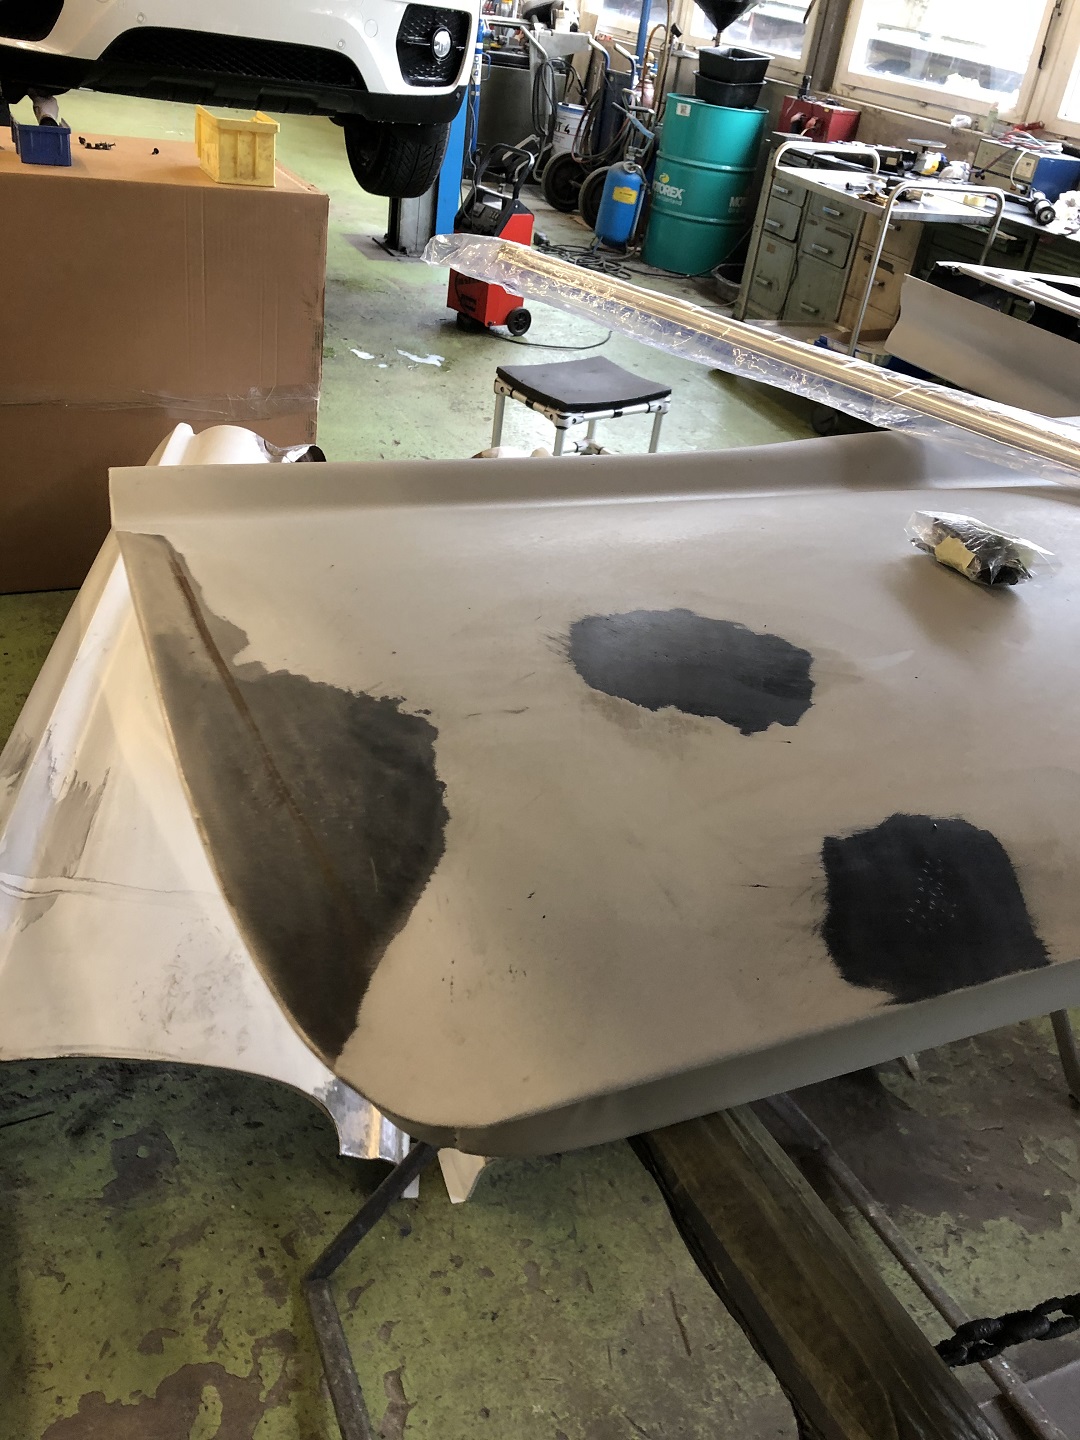 (IMG_6703_drivers side side door dents pulled out.JPG) (IMG_6703_drivers side side door dents pulled out.JPG)
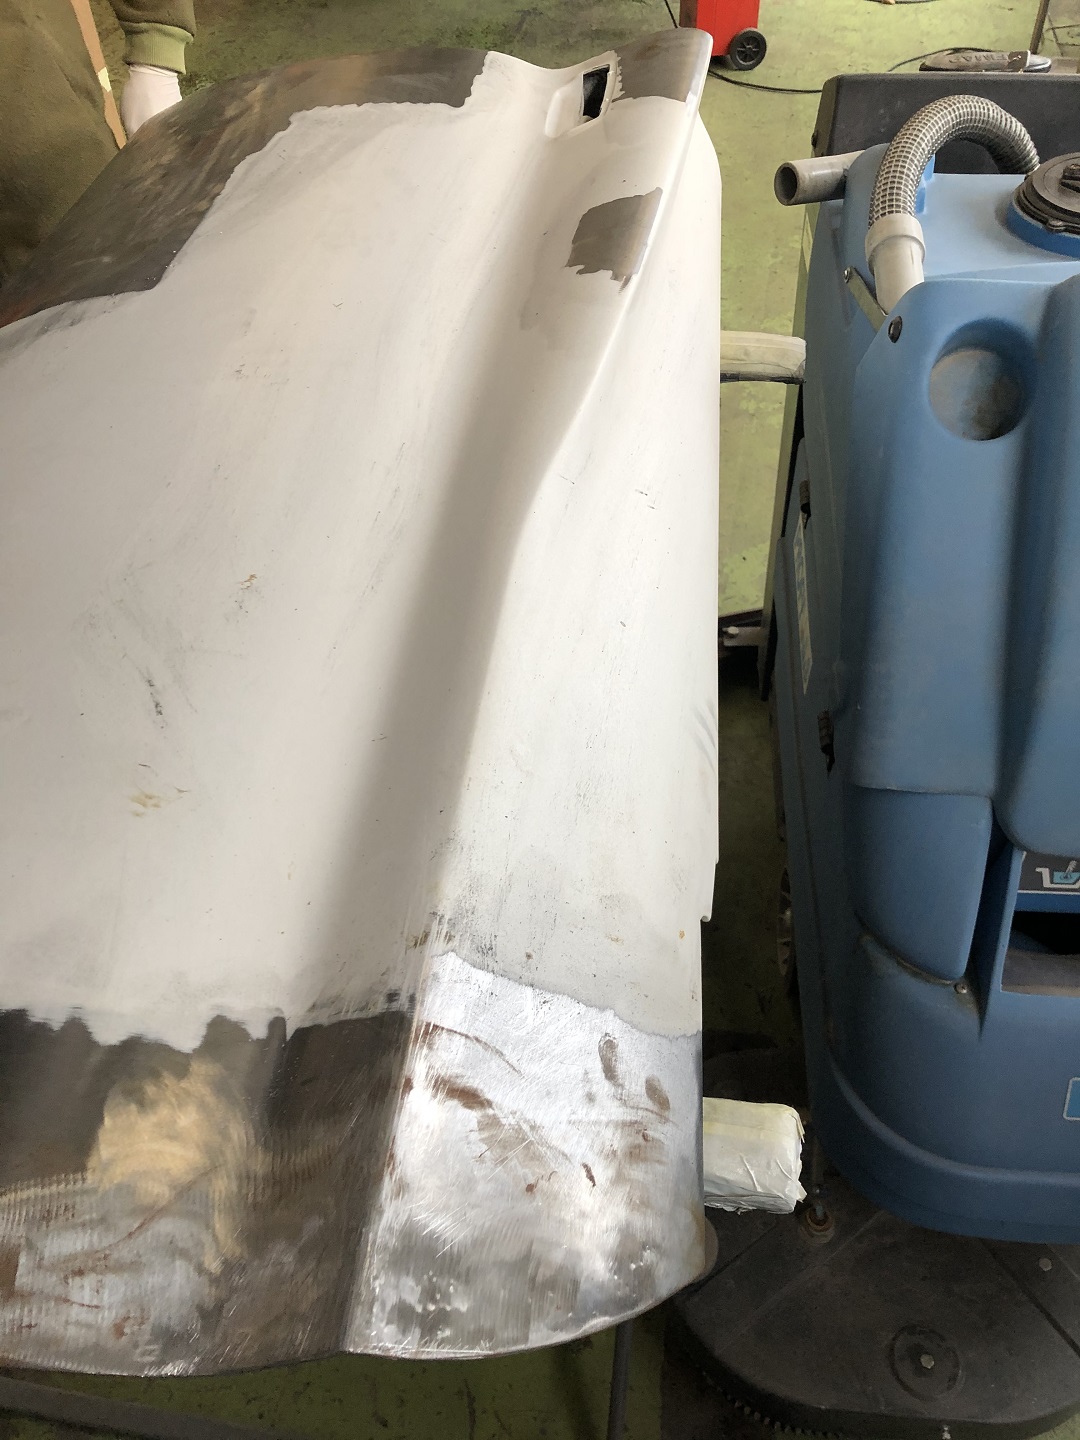 (IMG_6704_passenger side door dents pulled out and tin layer applied.JPG) (IMG_6704_passenger side door dents pulled out and tin layer applied.JPG)
Attachments
----------------
IMG_6699_passeger side door.JPG (468KB - 320 downloads)
IMG_6700_passenger side door rust and tar on the inside corner.JPG (395KB - 322 downloads)
IMG_6701_drivers side fender tin layer applied and protected.JPG (470KB - 315 downloads)
IMG_6702_passenger side fender front shape now correct and tin layer applied.JPG (406KB - 320 downloads)
IMG_6703_drivers side side door dents pulled out.JPG (451KB - 323 downloads)
IMG_6704_passenger side door dents pulled out and tin layer applied.JPG (389KB - 326 downloads)
|
|
| |
|
Expert
Posts: 1530
Location: ZH, Switzerland | On Saturday I visited the Body&Painting shop again. All the parts in my last essay are protected with primer now. on every area with thin tin layer there is a message writen onto the primer to pass the information to the sand blaster. On the painter stand now is the hood. At the passenger side is a flat area with a small bump to the outside. To solve that issue all the foam between the inner structure and the shell of the hood is removed now. That issue will be solved prior to bring all parts to the sand blaster... Happy Restoring! Dieter |
|
| |
|
Expert
Posts: 1530
Location: ZH, Switzerland | This Saturday I visited the body and paint shop again. The sand blasting is postponed to the new year. The body section of the body and paint shop is very busy now with other, regular work with very tight timeframes. Happy Restoring! Dieter
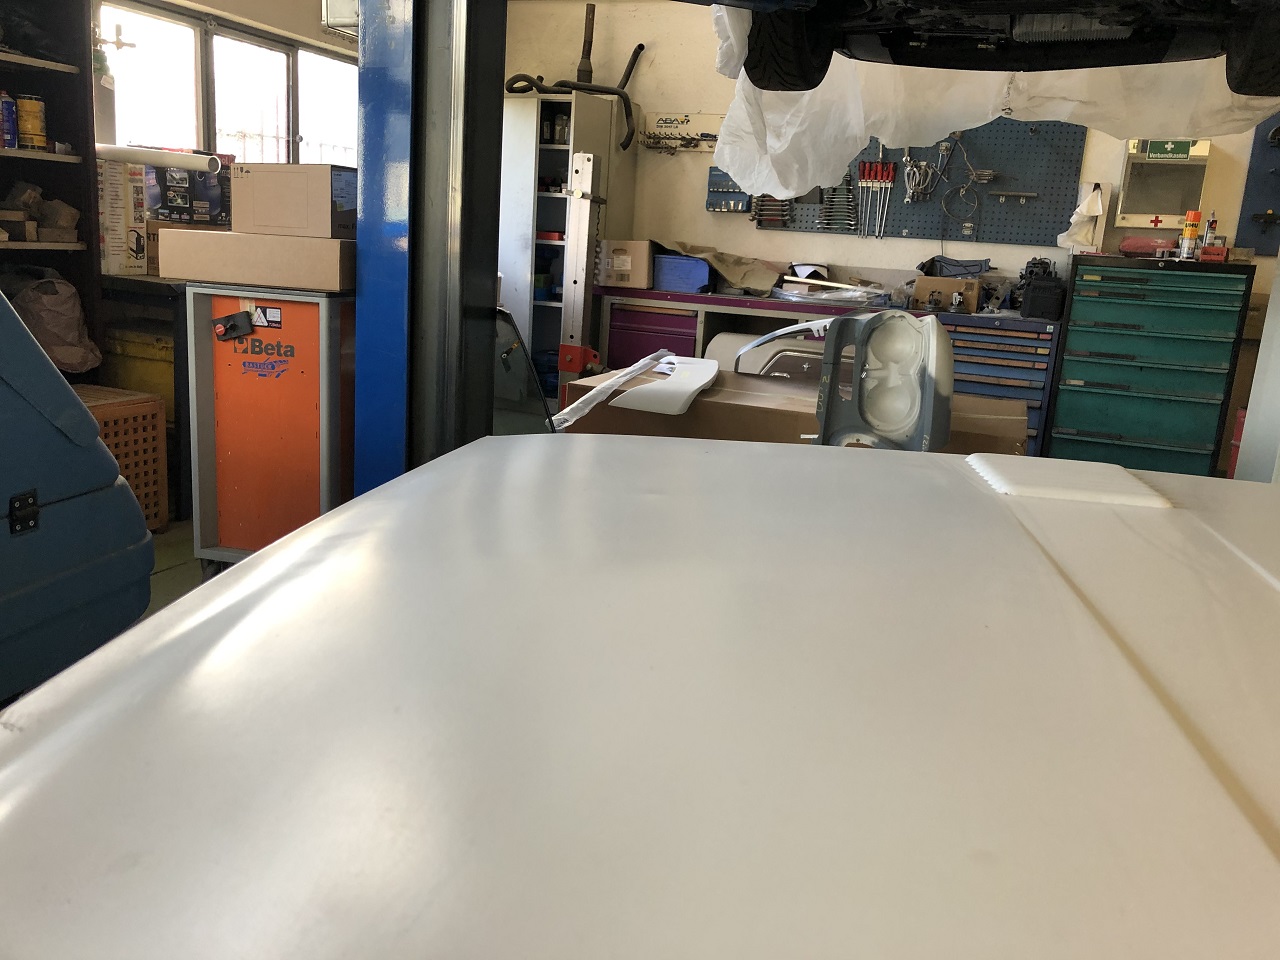 (IMG_6750_hood with flat area and conter bump.JPG) (IMG_6750_hood with flat area and conter bump.JPG)
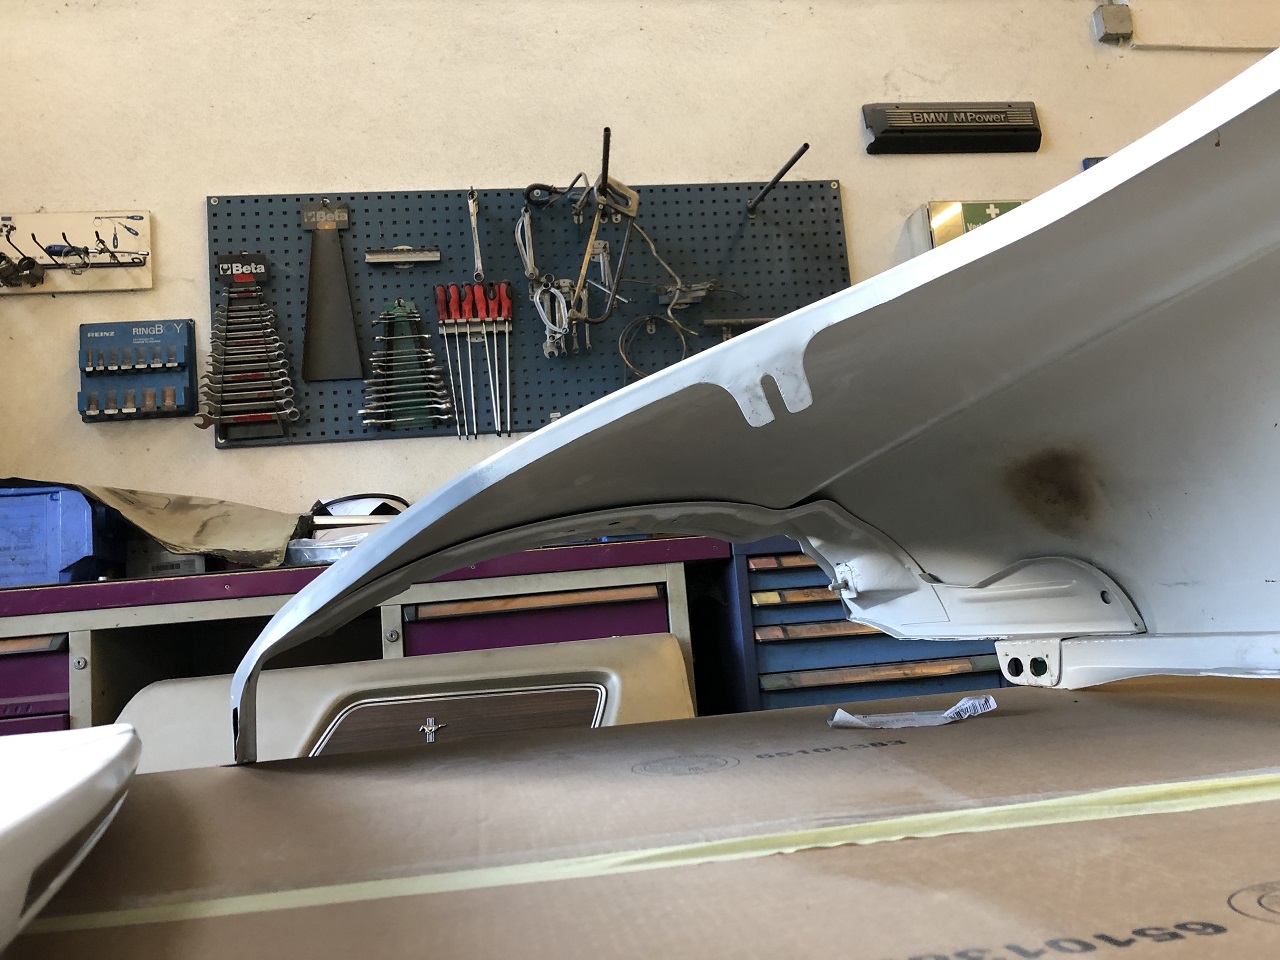 (IMG_6752_rear inside structure of passenger side front fender.JPG) (IMG_6752_rear inside structure of passenger side front fender.JPG)
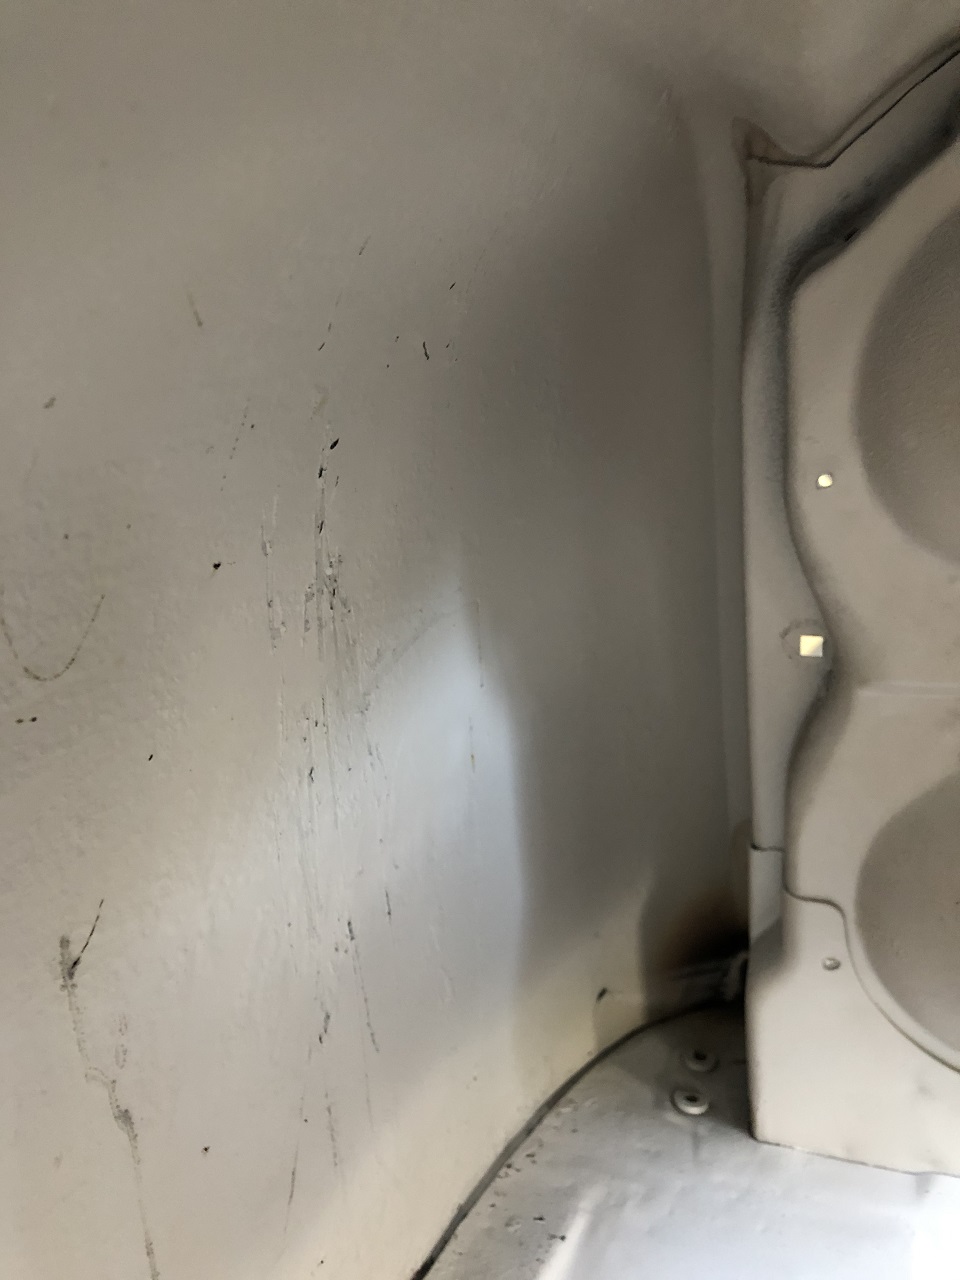 (IMG_6753_above headlamp bowls passenger side front fender.JPG) (IMG_6753_above headlamp bowls passenger side front fender.JPG)
Attachments
----------------
IMG_6750_hood with flat area and conter bump.JPG (284KB - 308 downloads)
IMG_6752_rear inside structure of passenger side front fender.JPG (330KB - 316 downloads)
IMG_6753_above headlamp bowls passenger side front fender.JPG (196KB - 316 downloads)
|
|
| |
|
Expert
Posts: 1530
Location: ZH, Switzerland | This morning I went to the paint & body shop once again. Idea was to break free the ball joints at the front suspension. Success: with the original socket, a 3/4" drive with a T handle and a 6.6 feet 1" gas tube as an extension pipe I could break free all four ball joints in the upper and lower arm of the front suspension. Three of four are that free, that I could use the 3/4" drive with T handle alone. Assisting was the painter for few minutes. The fourth moved as well, but not that much, that I could use the T handle alone. So I'm going again for that one. Happy Restoring! Dieter |
|
| |
|
Expert
Posts: 1530
Location: ZH, Switzerland | I visited the shop once again. One question rose: what to correct? the trunk lid or the inner side of the rear fender at the passenger side? I'll appreciate your anser very much, thank you. Happy Restoring! Dieter
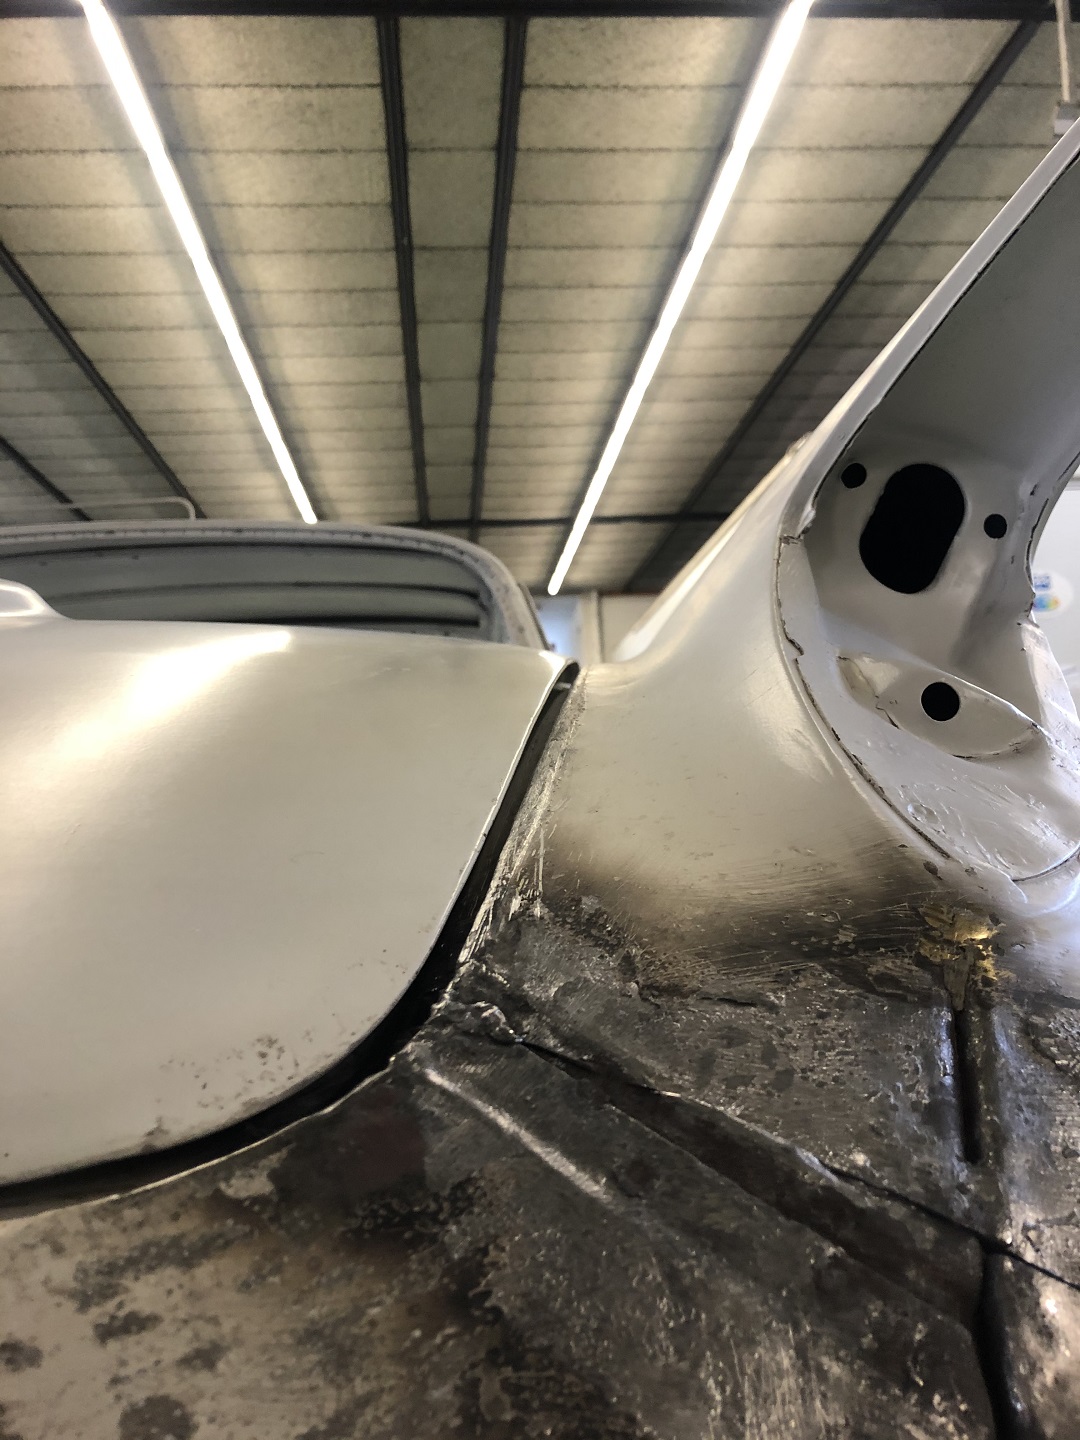 (IMG_6771_trunk lid to passenger side fender adjusting.JPG) (IMG_6771_trunk lid to passenger side fender adjusting.JPG)
 (IMG_6771_trunk lid to passenger side fender adjusting with pointers.JPG) (IMG_6771_trunk lid to passenger side fender adjusting with pointers.JPG)
Attachments
----------------
IMG_6771_trunk lid to passenger side fender adjusting.JPG (414KB - 307 downloads)
IMG_6771_trunk lid to passenger side fender adjusting with pointers.JPG (416KB - 308 downloads)
|
|
| |
|
Board Moderator & Exner Expert 10K+
Posts: 13045
Location: Southern Sweden - Sturkö island | Difficult to say Dieter, how much are we talking about here? Judging from your photos it seems to be roundabout 3 - 5 mm.
It would be best to adjust the trunk lid, eventually it would be able to straighten the radius somewhat.
The fender would mean either to cut and weld, or to use lead for to build it up.
If we think about the factory appearance, then it's "good" as is |
|
| |
|
Expert
Posts: 1730
Location: Michigan | I would say the fender. You have a lot of work into that already and if you touch the deck lid it may be noticeable from the rear in comparison to the other side of the car. This is assuming the deck lid is perfectly straight. |
|
| |
|
Expert
Posts: 1530
Location: ZH, Switzerland | Big thank you for your answers. I assume I have to visit the shop again to compare the radius of the deck lid to the fender (weatherstrip channel) on both sides to decide if the correction is to do on the deck lid or the perimeter of the passenger side inner side of the rear fender. From Jari I got the hint to check his thread - I'll do it asap. Merry Christmas to all! Happy Restoring! Dieter |
|
| |
|
Board Moderator & Exner Expert 10K+
Posts: 13045
Location: Southern Sweden - Sturkö island | If you have some pieces left of the trunk weatherstrip, mount 4 pieces in the corners and close the deck lid.
It doesn't affect much, but it gives a clue of how the lid will close with the weatherstrip mounted.
I had to shim up my trunk lid hinges slightly for to be able to close the lid without too much force |
|
| |
|
Expert
Posts: 1530
Location: ZH, Switzerland | wizard - 2019-12-22 6:06 PM If you have some pieces left of the trunk weatherstrip, mount 4 pieces in the corners and close the deck lid. It doesn't affect much, but it gives a clue of how the lid will close with the weatherstrip mounted. I had to shim up my trunk lid hinges slightly for to be able to close the lid without too much force Thanks a lot for your hint. I just watched some 60 NY, 61 G of Jari. None of the cars have an exact following of the contour of the trunk lid to the inner fenders. Some cars have a big gap at the end of the trunk lid where others the contour doesn't follow the fender line (trunk opening) exactly (within a 1 mm)... (;-) The inner side of the fenders is almost not to correct due to the vertical reinforcement that runs under the skin of the inner side of the rear fenders... Happy Restoring! Dieter BTW: Yunus is in the shop again. He assisted me with the lower ball joint at the drivers side (one turn more, but still goinig strong). He announced he'll finish his work prior to the end of that year (closing the slots, tin applying, side of both rear fenders). It could be that the body is fully painted prior to the summer 2020. When I'm thinking ahead (one of best character qualities) my first job when the body is back in the barn is to install the restored wiring harness (tail lamp sockets and citric acid bath for the terminals). (:-)
Edited by di_ch_NY56 2019-12-23 12:31 PM
|
|
| |
|
Board Moderator & Exner Expert 10K+
Posts: 13045
Location: Southern Sweden - Sturkö island | Dieter, it seems like the ball joint is binding in the threads. Try to tighten it somewhat, heat up the control arm with a hot air gun and try to loosen it while it still is hot. If you have bad luck, the ball joint could destroy the threads while you demount it. Work slow and carefully.
|
|
| |
|
Expert
Posts: 1530
Location: ZH, Switzerland | wizard - 2019-12-22 6:55 PM Dieter, it seems like the ball joint is binding in the threads. Try to tighten it somewhat, heat up the control arm with a hot air gun and try to loosen it while it still is hot. If you have bad luck, the ball joint could destroy the threads while you demount it. Work slow and carefully. We were (Yunus and me today, Mehmet and me on Saturday) very careful. When breaking all four free, I wiggled forth and back, used a lot of WD40 to penetrate. We'll try tomorrow again. Yunus promised my Letter would be on the car lift to get better access. |
|
| |
|
Expert
Posts: 1530
Location: ZH, Switzerland | One more subject rose (first time at the first shop)... the mounting of the radiator yoke to the subframe. There are two holes in the subframe and corresponding holes on the bottom of the radiator yoke. Originally there were rubber washers installed, but the guys at the first shop threw them away. I'm attaching a section out of the chapter 7 cooling to show which parts I mean - where the hell do I get it.... Happy Restoring! Dieter
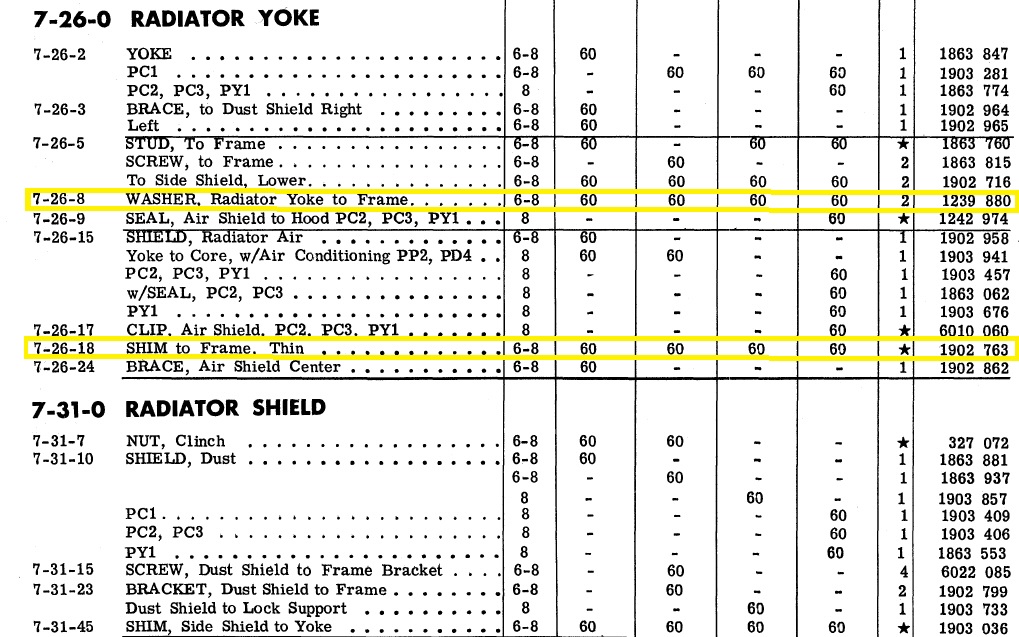 (mounting radiator yoke to front subframe.jpg) (mounting radiator yoke to front subframe.jpg)
Attachments
----------------
mounting radiator yoke to front subframe.jpg (249KB - 305 downloads)
|
|
| |
|
Expert
Posts: 1530
Location: ZH, Switzerland | For the mounting hardware from the radiator yoke to the front subframe I sent a mail to Jan. Hopefully I'll get an answer. Last day I visited the body and painting shop, the owner of the shop showed me the formula for the WW-1 (Alaskan White) color. It's very interesting, what's all in that color. The owner (and painter at the same time) will paint a sample sheet metal to show me the result. He'll order 8 Liters after his estimation for two layers of the finishing color. Happy Restoring! Dieter
Edited by di_ch_NY56 2019-12-25 5:55 AM
|
|
| |
|
Board Moderator & Exner Expert 10K+
Posts: 13045
Location: Southern Sweden - Sturkö island | Dieter, just checked on my car, there are mounted som generic square body shims, seems like 1"x1";
Drivers side - thickness roundabout 1mm
Passenger side - thickness roundabout 2mm
The washers are practically normal round big body washers.
So you don't have to search for anything special, just fabricate what you need when it's time to mount the radiator yoke.
The big round body washers should be avalable in some local hard ware shop in various sizes.
|
|
| |
|
Expert
Posts: 1530
Location: ZH, Switzerland | wizard - 2019-12-24 5:46 PM Dieter, just checked on my car, there are mounted some generic square body shims, seems like 1"x1"; Drivers side - thickness roundabout 1mm Passenger side - thickness roundabout 2mm The washers are practically normal round big body washers. So you don't have to search for anything special, just fabricate what you need when it's time to mount the radiator yoke. The big round body washers should be avalable in some local hard ware shop in various sizes. Hi Sven Merry Christmas and a Happy New Year to you, Ingegerd and the dogs Thank you very much for the time you spent for me. When I'm thinking about that issue, I came to the conclusion that the front end should be stable in its own. I think to fill the gaps with shims when the front end is mounted. Emil showed me that detail (yoke to subframe) on his 61 NY. On the 61 NY there is a rubber washer between the radiator yoke and the subframe. At the former white 300F convertible at Jans he used round steel washers with zinc coating (at least under the hex nut head, the only thing visible in the pictures of the restoration of that car). Happy Restoring! Dieter BTW: for the hood I found an original looking hood pad at epain (at least the shape). The painter is claiming with no support from the inner structure of the hood, the hood shell is very flexible and not stable enough to work on it(building up the color layers). But for that (hood shell stability) as well I purchased some rummer mats (3, 4, 5 mm thinkness) ways earlier.
(:-) no wonder ChryCo changed the inner structure for the '61 model year. |
|
| |
|
Board Moderator & Exner Expert 10K+
Posts: 13045
Location: Southern Sweden - Sturkö island | And to you Dieter!
Your note about the hood puzzles me somewhat Dieter - there are one cross beam and 4 corner beams on the under side of the hood. Normally, the hood is not unstable.
That makes me think, has the hood been sand blasted? If so, it's very easy to get the sheet metal too hot which gives a "wiggly-woggly effect".
The hood of the '59 New Yorker I owned back in the seventies had the body sand blasted by a guy who couldn't find his own ass with two hands and a flashlight.
The result was that the hood could easily contain 5 liters of water - totally sunk down in the middle. I crimped up the hood back to shape with a MIG-welder with a soldering tip mounted and sponges of cold water.
As for the mats you purchased Dieter, make sure that they are intended to be mounted vertical and hanging.
There are two types of bitumen mats here; one for floor boards (will fall of the inner side of a door skin) and one for vertical use - much better glue.
|
|
| |
|
Expert
Posts: 1530
Location: ZH, Switzerland | Hi Sven Yes the hood has been sandblasted as well.... The painter has never ever seen a not sandblasted hood with no isolation mat nor the cardpaper slices under the traverse beam from one side to the other. Do you think, the farm smith guys destroyed the hood of my Letter? About the pads, the seller advertised glue is not within the parcel. I have to look for it separately. Happy Restoring! Dieter |
|
| |
|
Board Moderator & Exner Expert 10K+
Posts: 13045
Location: Southern Sweden - Sturkö island | Just checked my hood Dieter;
The two front corner beams does not have any air gap, theyr're in contact with the hood, no asphalt board
The middle beam has roundabout 15mm gap in the middle and roundabout 5mm gap at the ends - thin asphalt board, but not in Contact with the hood.
The rear corner beams has roundabout 15mm air gap, no asphalt board
The beam closest th the cowl has 10mm gap in the middle, 5mm gap at the ends, no asphalt board.
It's very likely that the hood "skin" has lost it's stability due to the sand blasting. It's VERY easy to do some damage with the wrong media and/or too long blasting at the same point.
Also, it's impossible for me to imagine how stabile your hood is Dieter, I can only tell you that my hood is very stabile and does not "give" for pressing with a sponge or cloth in any point.
Your hood is not destroyed, but it's a task to crimp it back again. My method worked for me back in the seventies.
No welding wire in the welder
A thick soldering tip (10-15mm diameter) mounted to the welding pistol with one or two hose clamps
Test with low Amps first -10-20 Amps and "draw" circles in the weak areas
Cool down immedeately with a wet sponge
Naturally, the soldering tip will do some small "ditches", but that's easy to fix later.
I'd recommend to test on a sheet metal with no value first for training.
I bet that the shop body guy has his method for to fix it
|
|
| |
|
Expert
Posts: 1530
Location: ZH, Switzerland | Thank you very much for your instruction. I printed it out, like the first one. I'll take both print outs with me to the paint&body shop. The painter is performing all that work, his brother (the body guy) I didn't meet since about two weeks. From my memories the weak, wobbly area is where the flat surface is, closer to the cowl on the passenger side (with the convex bump in the middle). Happy Restoring! Dieter
Edited by di_ch_NY56 2019-12-26 1:41 PM
|
|
| |
|
Expert
Posts: 1530
Location: ZH, Switzerland | This morning I visited the shop again. What I found out is the tension is only weak and wobbly at the sunken down area near the passenger side cowl end. There could be seen three or four ropes (as a pattern) of extremly heavy sand blasting (cavitary like holes out of the surface). I showed the instruction to the painter. He knows that procedure (apparently used on modern cars as well to bring back the surface tension on repaired doors, hoods, hatch lids) as well and has a machine for that. He thinks, no problem, just do it. The video shows how it reacts. All other location the hood is as it should be. hood in motion The doors are removed now and ready to ship it to the sand blasting company early next year. The doors are looking really good! Happy Restoring! Dieter
Edited by di_ch_NY56 2019-12-27 8:16 AM
 (IMG_6775_hood with weak area near the passenger side end.JPG) (IMG_6775_hood with weak area near the passenger side end.JPG)
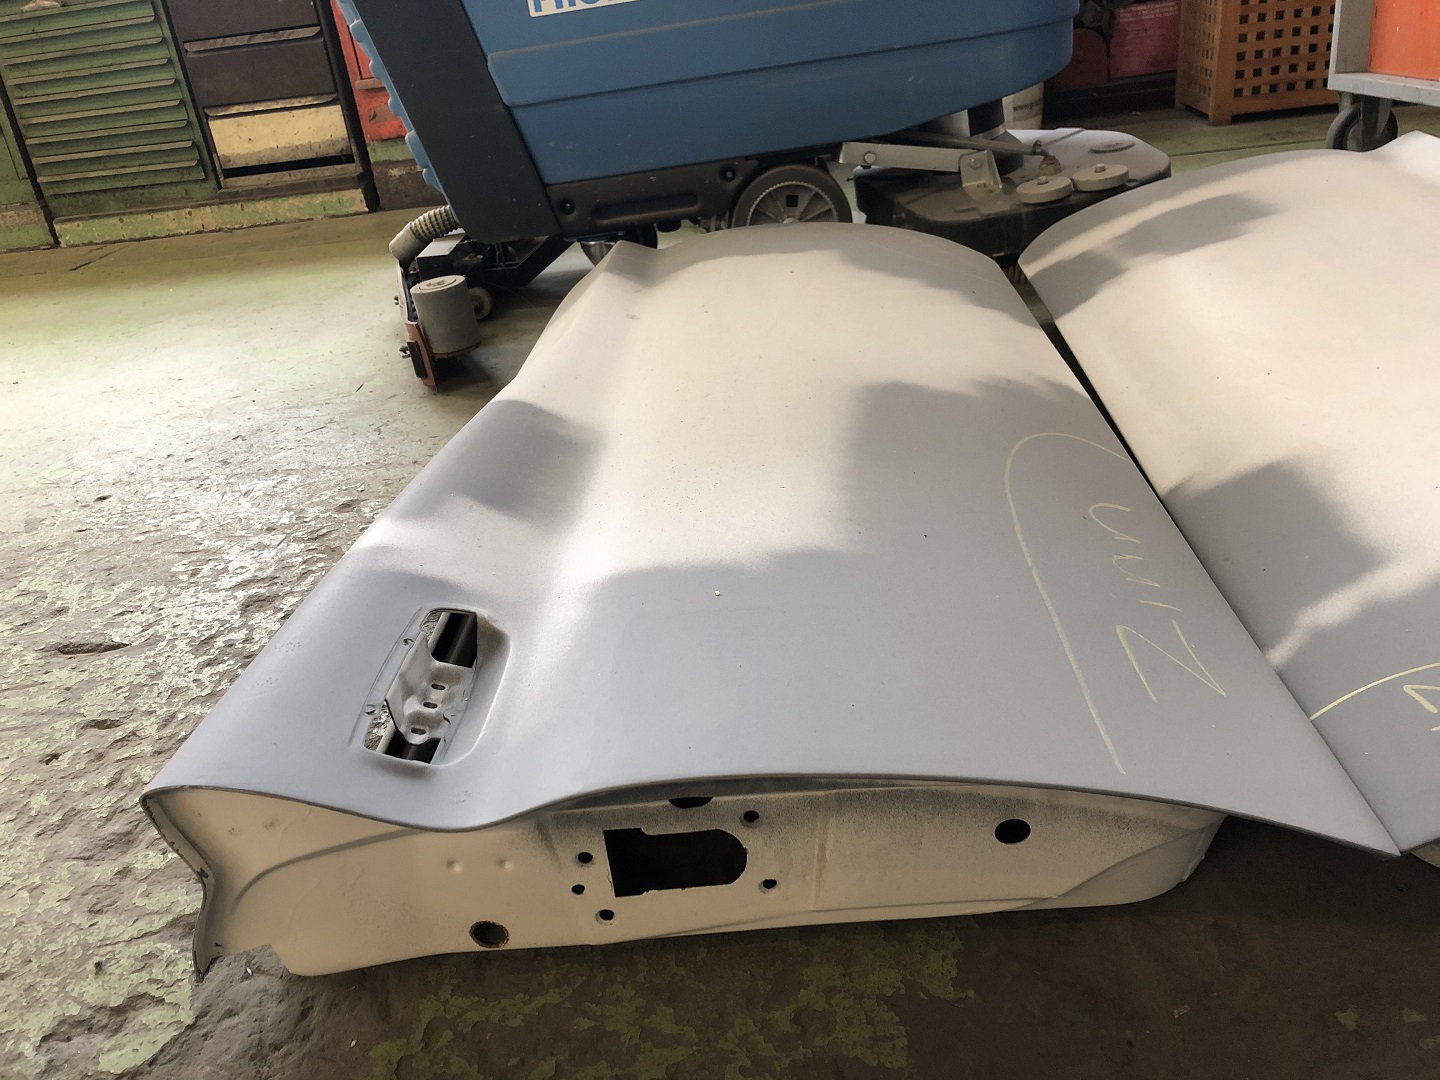 (IMG_6778_passenger side door.JPG) (IMG_6778_passenger side door.JPG)
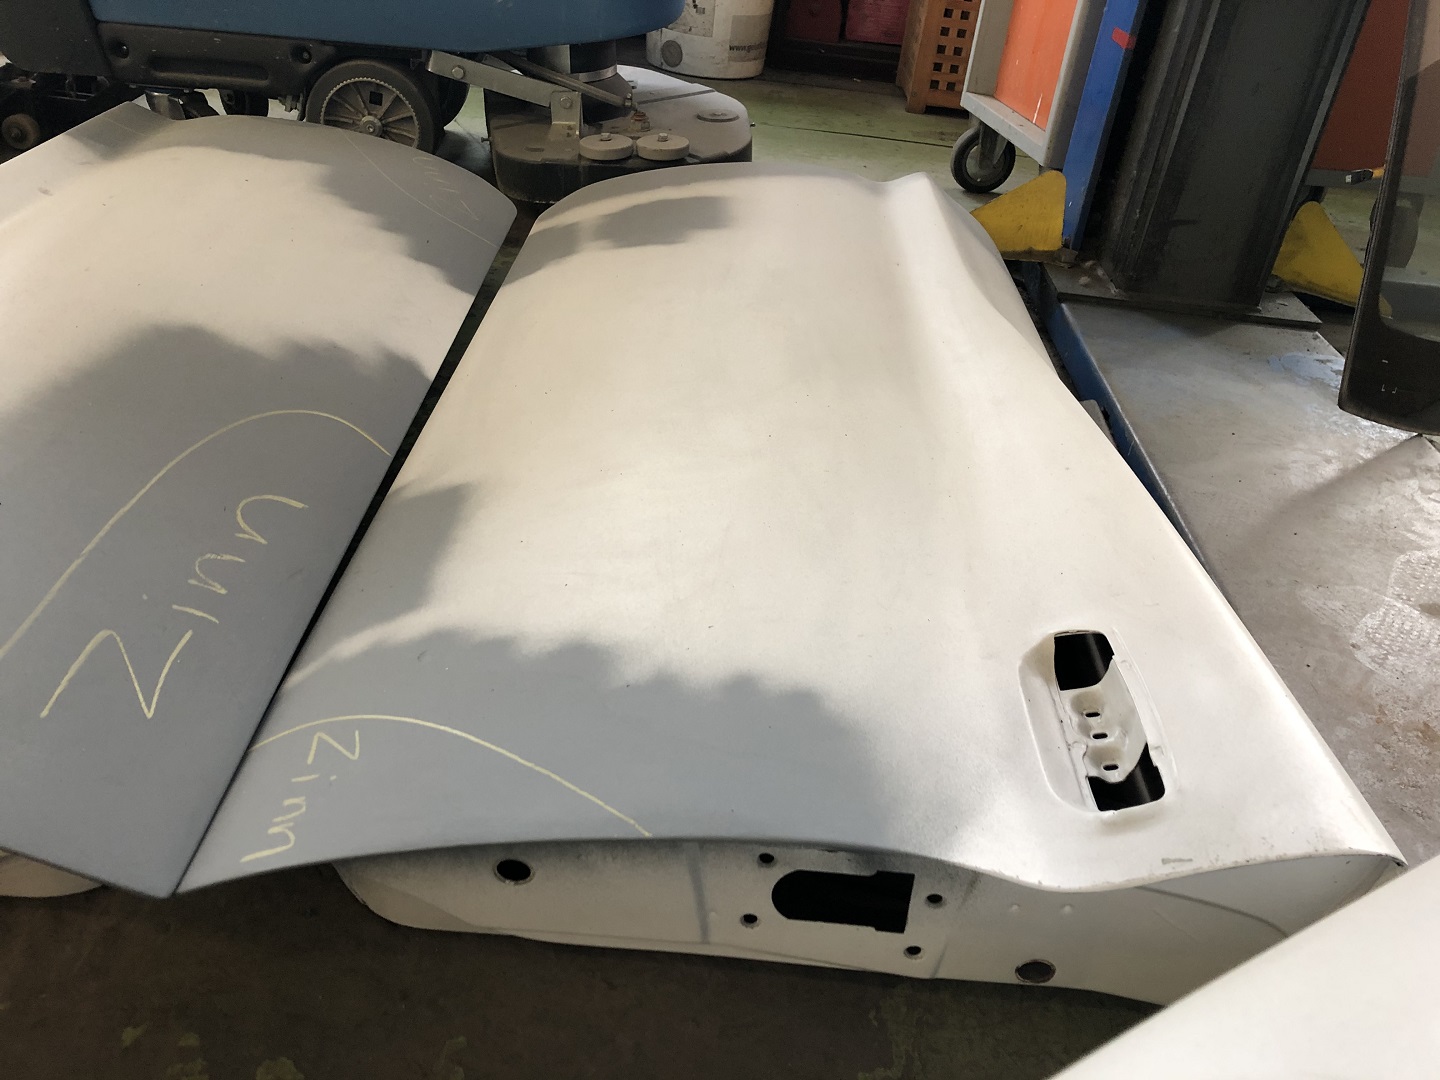 (IMG_6779_drivers side door.JPG) (IMG_6779_drivers side door.JPG)
Attachments
----------------
IMG_6775_hood with weak area near the passenger side end.JPG (406KB - 397 downloads)
IMG_6778_passenger side door.JPG (460KB - 400 downloads)
IMG_6779_drivers side door.JPG (331KB - 387 downloads)
|
|
| |
|
Board Moderator & Exner Expert 10K+
Posts: 13045
Location: Southern Sweden - Sturkö island | Yes Dieter the hood is damaged from too heavy sand blasting and lost the shape due to too much material.
The hood must be shrinked back to normal state again. |
|
| |
|
Expert
Posts: 1530
Location: ZH, Switzerland | A solution for the engine actually is in sight, even though it's not very urgent to get the engine. I don't know of how many of you, guys, are reminding that the cylinder head gasket blew between the cylinder #1 and the water channel next to it to the cylinder #3. How deep the damage on the block and cylinder head is, I have no clue. But for sure, there is a damage. On all pictures where the damage is visible, there is a rod circle. Happy Restoring! Dieter
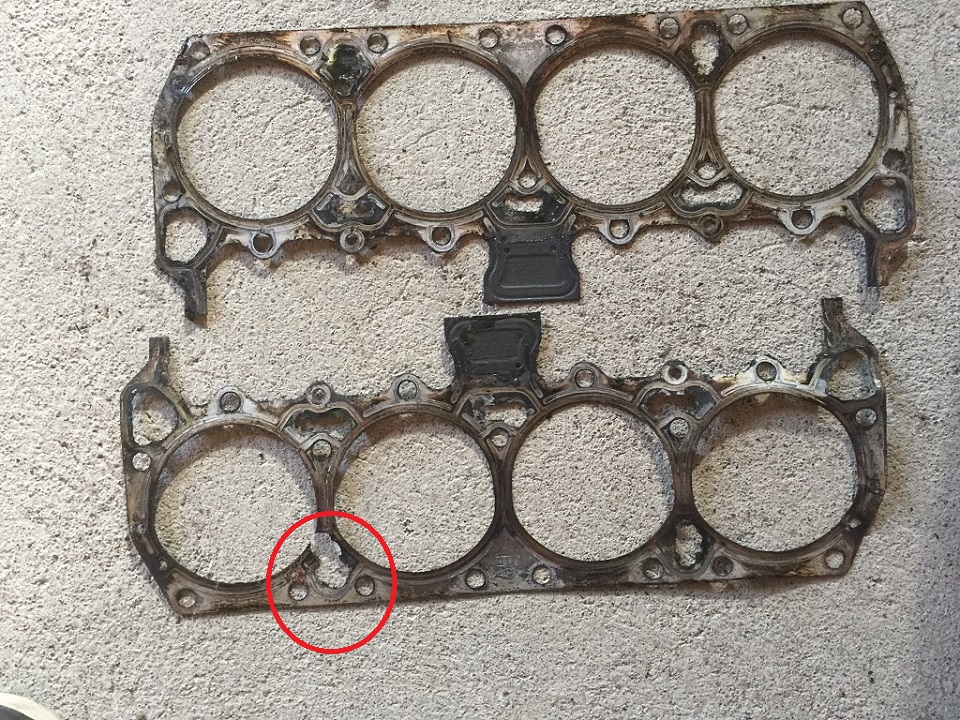 (IMG_2093 on top head gasket passenger side bottom head gasket drivers side.JPG) (IMG_2093 on top head gasket passenger side bottom head gasket drivers side.JPG)
 (IMG_2090 engine cylinder head passenger side.JPG) (IMG_2090 engine cylinder head passenger side.JPG)
 (IMG_2091 engine cylinder head drivers side.JPG) (IMG_2091 engine cylinder head drivers side.JPG)
 (IMG_2089 engine still installed passenger side cylinder bank.JPG) (IMG_2089 engine still installed passenger side cylinder bank.JPG)
 (IMG_2092 engine still installed drivers side cylinder bank.JPG) (IMG_2092 engine still installed drivers side cylinder bank.JPG)
Attachments
----------------
IMG_2093 on top head gasket passenger side bottom head gasket drivers side.JPG (451KB - 393 downloads)
IMG_2090 engine cylinder head passenger side.JPG (271KB - 363 downloads)
IMG_2091 engine cylinder head drivers side.JPG (361KB - 383 downloads)
IMG_2089 engine still installed passenger side cylinder bank.JPG (375KB - 384 downloads)
IMG_2092 engine still installed drivers side cylinder bank.JPG (359KB - 385 downloads)
|
|
| |
|
Expert 5K+
Posts: 7393
Location: northern germany | This gotta be the 1rst natural aspirated Mopar Big Block ever that blew a head gasket. Very weird. |
|
| |
|
Expert
Posts: 1530
Location: ZH, Switzerland | 1960fury - 2020-01-02 12:49 PM This gotta be the 1rst natural aspirated Mopar Big Block ever that blew a head gasket. Very weird. Happy New Year Sid Most probably you're right. Think about the life of my engine in my Letter prior to my ownership. It's a factory replaced engine, according the metal tag attached at the front of the drivers side cylinder bank. When I removed the intake runners there was just the gasket of the valley pan cover between. No RTV nothing else, neither a supplement intake gasket. With this scenario I really could imagine that the cylinder #1 got wrong air to the mixture. It's the only piston with a meltet top. All seven other piston were looking like new, from the top. Even at the cylinder walls honing marks were visible. I'm ways more than sure, that the owner prior to the seller to me (the guy noted in the title of my Letter) blew the engine heavily. The piston of the first cylinder had to be cutted into three pieces (!) to remove it. I could really imagine, that after the very last switch off of the engine after really heating the car the piston sized (melted to the cylinder wall). Furthermore, the very first pictures I put into my thread are showing a really heavy damage from water (rain, blizzard, thunderstorms). This guy lost interest in the Letter and was to lazy to close the hood. From the seller I know, that the Letter rested for seven years under a blue, woven plane (as the same plane - just green instead of blue - does, locally purchased) disintegrated. You don't believe where all this fibres were.... Happy Restoring! Dieter
Edited by di_ch_NY56 2020-01-03 7:44 AM
|
|
| |
|
Expert 5K+
Posts: 7393
Location: northern germany | Yes. Happy new year to you too and best of luck with your project. |
|
| |
|
Expert
Posts: 1530
Location: ZH, Switzerland | Thanks Sid Here are two elder pictures of the crankshaft still installed in the engine and the connection rod bearing shells visible. At the top left position is the piston - conncetion rod assembly of cylinder #8. At the top right position the one out of cylinder #2 (order like installed) I think the crankshaft doesn't look that bad... Happy Restoring! Dieter
 (IMG_3604_crankshaft still in the engine block.JPG) (IMG_3604_crankshaft still in the engine block.JPG)
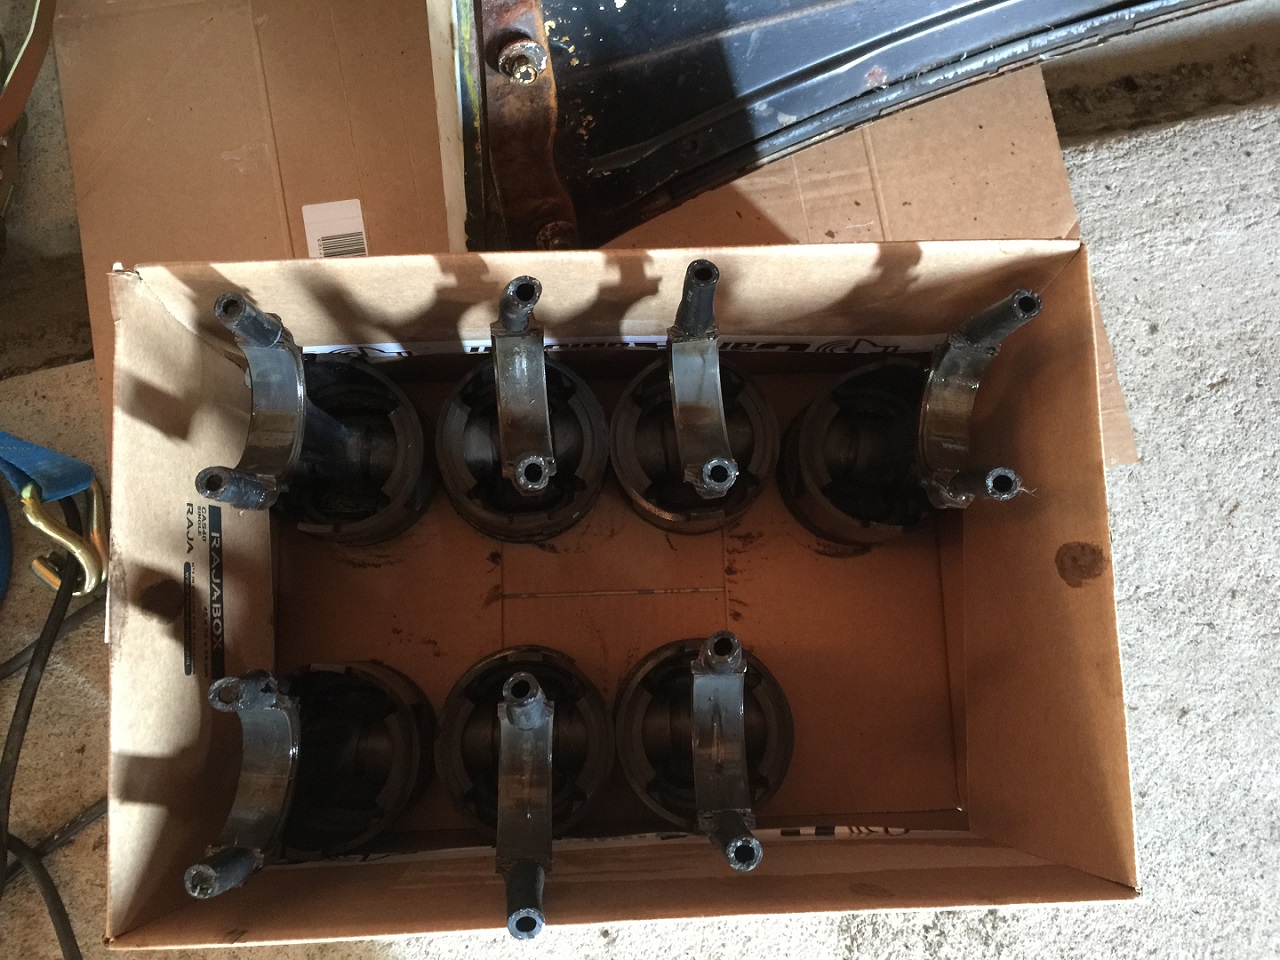 (IMG_3605_all pistons I could remove.JPG) (IMG_3605_all pistons I could remove.JPG)
Attachments
----------------
IMG_3604_crankshaft still in the engine block.JPG (366KB - 384 downloads)
IMG_3605_all pistons I could remove.JPG (406KB - 393 downloads)
|
|
| |
|
Expert
Posts: 1530
Location: ZH, Switzerland | This is the original thermostat housing, cleaned outside. It shows many rusting through spots. At the sheet I noted the parts number of the cylinder head and engine block. Both parts numbers I found at internet. Following is the year range or the engine size (cylinder heads). Happy Restoring! Dieter BTW: at the hood there are three sectors with no primer anymore. The owner of the body&painting shop will use his plotter to dig out the weak sectors to bring the tension back into the sheet metal.
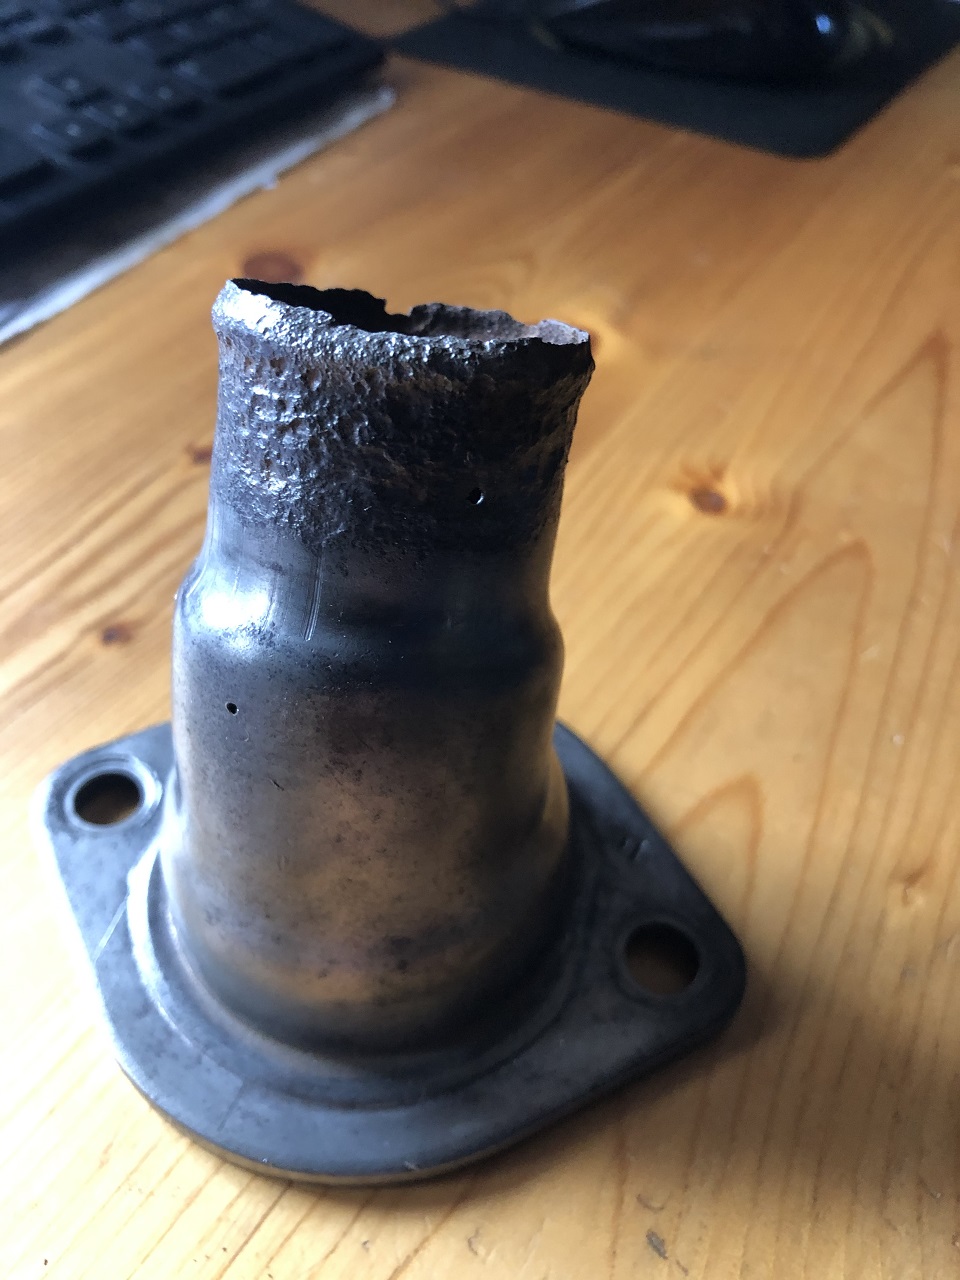 (IMG_6818_original thermostat housing front.JPG) (IMG_6818_original thermostat housing front.JPG)
 (IMG_6819_original thermostat housing inside.JPG) (IMG_6819_original thermostat housing inside.JPG)
Attachments
----------------
IMG_6818_original thermostat housing front.JPG (272KB - 374 downloads)
IMG_6819_original thermostat housing inside.JPG (268KB - 390 downloads)
|
|
| |
|
Expert
Posts: 1530
Location: ZH, Switzerland | This morning I visited the engine rebuilder in Switzerland again. The crankshaft is back home at him and looking good (as a passing mention from him about the crankshaft). I persisted to use the stock factory cylinder heads they came with my engine. This afternoon I sent a mail as a confirmation about our talk to the engine restorer where I underlined, that I want my crankshaft in the engine (and not the rotating assembly from Zurich out of a 413 eninge with a broken engine block (for about 2500.- local currency) - the engine rebuilder loud thought about that option as well, but elaborated, .060 pistons are speeking against - it's another engine rebuilder and a friend of my engine rebuilder). Happy Restoring! Dieter
Edited by di_ch_NY56 2020-01-13 9:24 AM
|
|
| |
|
Location: North Australia | Dieter, when I built my 60 Imperial engine, I had an issue with the rear side of the new cam sprocket hitting a bump in the casting of the engine block. May be worth letting your engine builder know to check. Pretty easy fix, I just machined the back of the sprocket for clearance. Steve. |
|
| |
|
Expert
Posts: 1530
Location: ZH, Switzerland | 60 Imp - 2020-01-12 10:45 PM Dieter, when I built my 60 Imperial engine, I had an issue with the rear side of the new cam sprocket hitting a bump in the casting of the engine block. May be worth letting your engine builder know to check. Pretty easy fix, I just machined the back of the sprocket for clearance. Steve. Thanks Steve for your hint. Happy Restoring! Dieter |
|
| |
|
Expert
Posts: 1530
Location: ZH, Switzerland | The passenger side of the hood got the tension back, very little correction of the hight the painter will do. The painter worked helically from the outside tho the center, with additional spots where necessary. The drivers side has a weak area as well. That will be the next. The older apprentice used a plastic wire brush to clean the primer off the hood. The grinding marks appeared. It's impossible to date these marks. The cold be there for a very long time, but there were absolutely no sand blasting marks appearing at the cleaned areas. But he has very little time to work on right now. I assisted him while disassembling a passenger side rear door of a 2019 BMW 5 series (last week I assisted with partial disassemblin and finally removing the drivers side door of a Merc Sprinter (4x4, Fedex). He said good bye to his brother - he had to left the company. So the painer is doing painting and body work with two apprentices. I removed all the upright mounted stems ontop of the side of the cowl (two stems on each side to mount the outer front fender near the windshield). These stems are brushed and looking almost like new. Happy Restoring! Dieter
Edited by di_ch_NY56 2020-01-15 1:42 PM
 (IMG_6827_hood weak area almost in shape.JPG) (IMG_6827_hood weak area almost in shape.JPG)
 (IMG_6828_somebody worked with an angle grinder.JPG) (IMG_6828_somebody worked with an angle grinder.JPG)
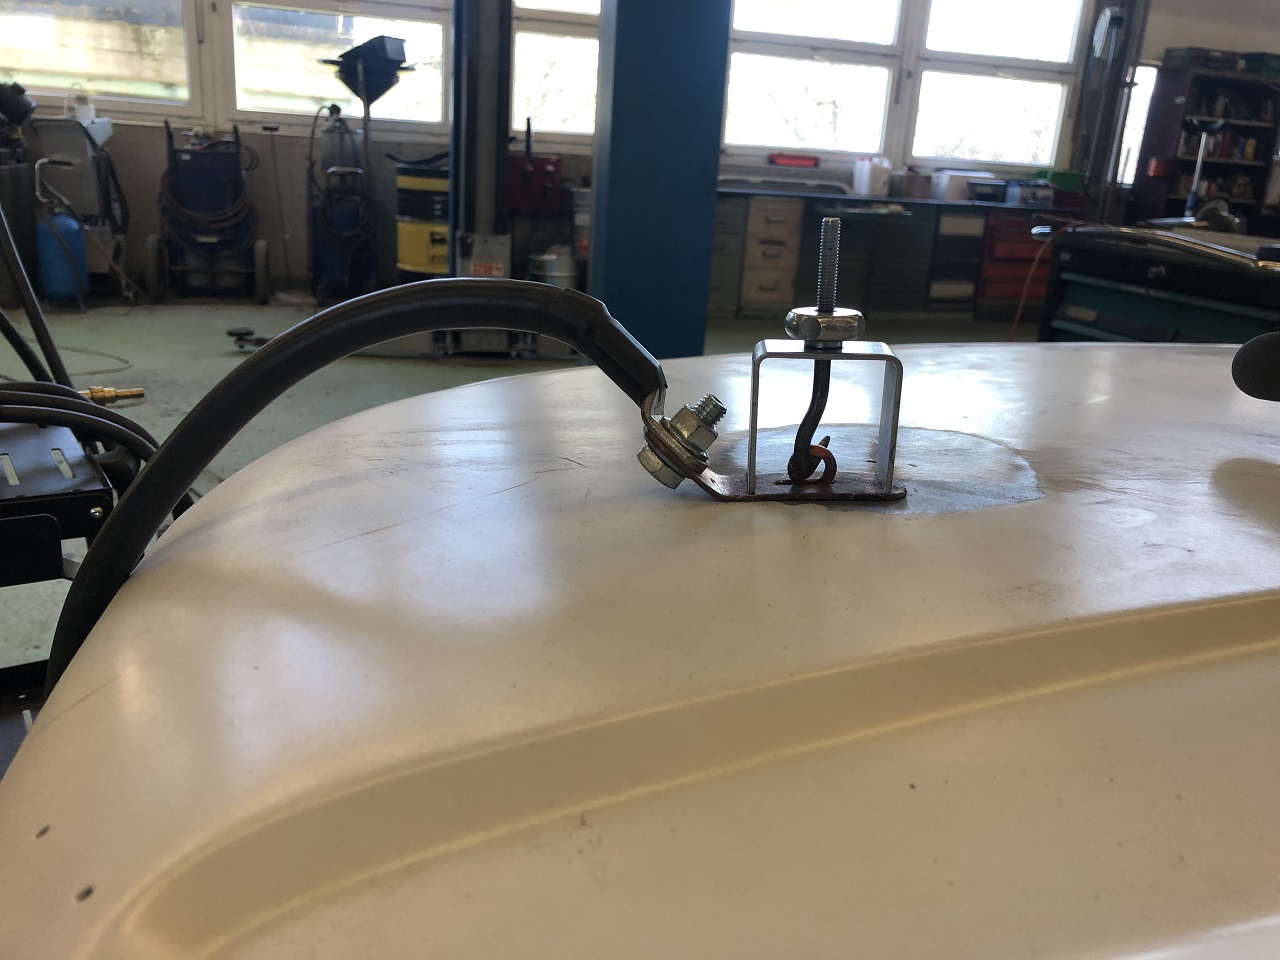 (IMG_6829_earth connection of the plotter.JPG) (IMG_6829_earth connection of the plotter.JPG)
Attachments
----------------
IMG_6827_hood weak area almost in shape.JPG (263KB - 365 downloads)
IMG_6828_somebody worked with an angle grinder.JPG (470KB - 350 downloads)
IMG_6829_earth connection of the plotter.JPG (253KB - 353 downloads)
|
|
| |
|
Expert 5K+
Posts: 9650
Location: So. Cal | Neat, how does that shrinker work? I assume it causes the entire flat to get hot, but what is the purpose of the center screw? |
|
| |
|
Expert
Posts: 1730
Location: Michigan | WHOA.. hold the phone.. what is going on here.. what is that electrical wire connected to that thingy and what is it for? |
|
| |
|
Expert
Posts: 1530
Location: ZH, Switzerland | As far as I concern, the ring is welded to the hood surface to get with the flat piece of soft iron a very good connection to the ground. The plotter machine works like welder, but no welding wire, but a big half ball at the lower end, a three dimensional frame and a thread with conter thread in the top plate to screw the ball (with threaded stem) back and forth. It sticks to the surface and then turn the spindle to lift it up. Switch off the current, break off the ball. At the picture you see the welding marks, easy to remove. Wizard did this with a welding pistol, but no wire in and pulling the pistol. Happy Restoring! Dieter |
|
| |
|
Expert 5K+
Posts: 5006
| shrinking disc is a nice choice also... |
|
| |
|
Expert
Posts: 1530
Location: ZH, Switzerland | Thanks The painter said, the current is much higher than anticipated. The spots will go with sand blasting. Of course he could use a torch and cool with water (sponge). But the second method (torch) needs at least half of a working day to fix the area in the hood. To fix the weak area (actually finished) at the passenger side he worked for about an hour. The second area ahead of the drivers seat (smaller than the area of the passenger side) needs to be done. Too many emergency cars came in (accidents to fix). Happy Restoring! Dieter BTW: the painter needs that plotter as well for contemporary cars to fix big dents (caused by an accident) in the sheet metal where the sheet metal is not replaced.
Edited by di_ch_NY56 2020-01-18 10:14 AM
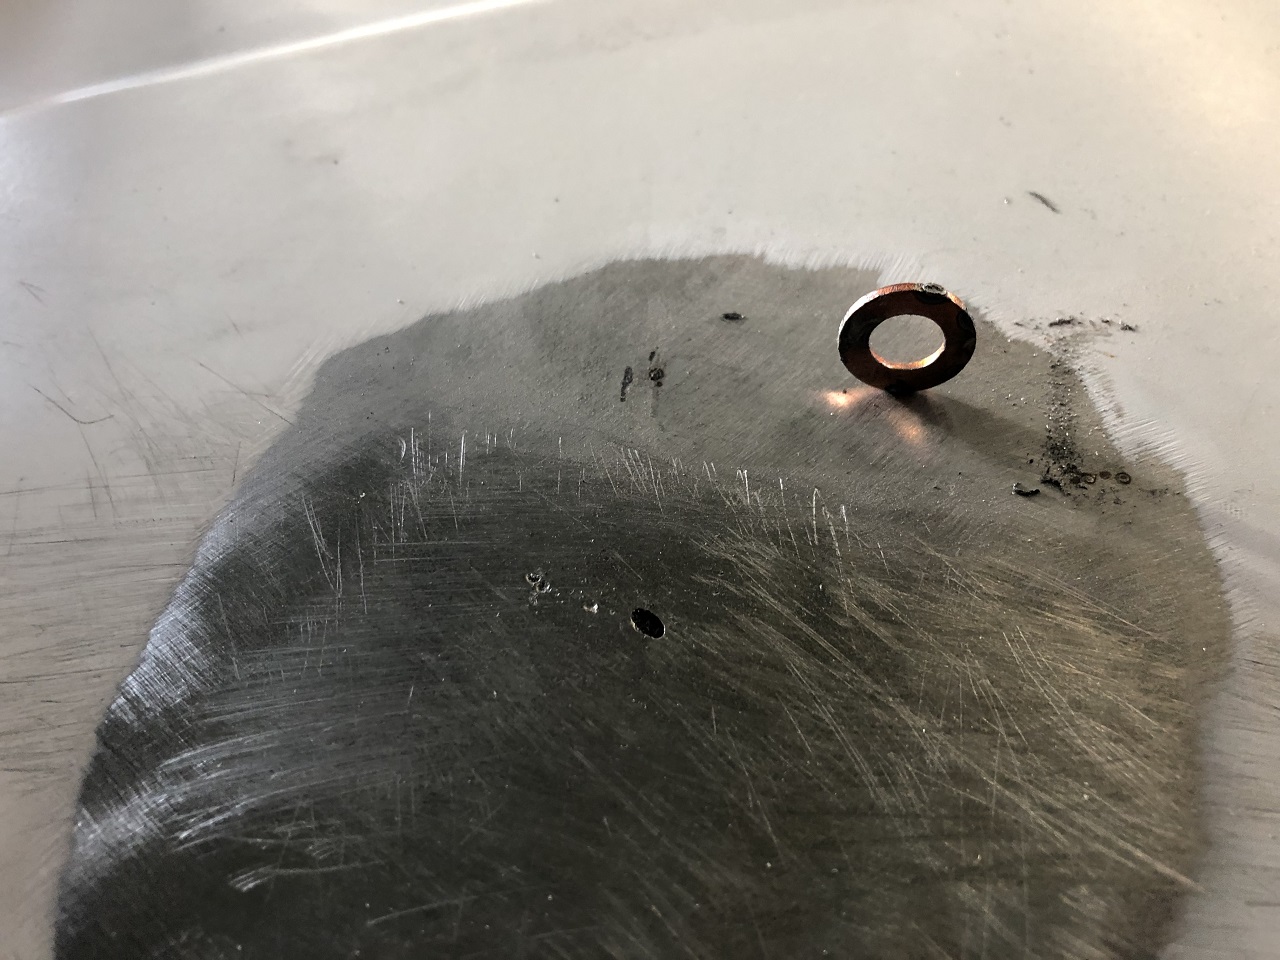 (IMG_6837_earth mounting ring.JPG) (IMG_6837_earth mounting ring.JPG)
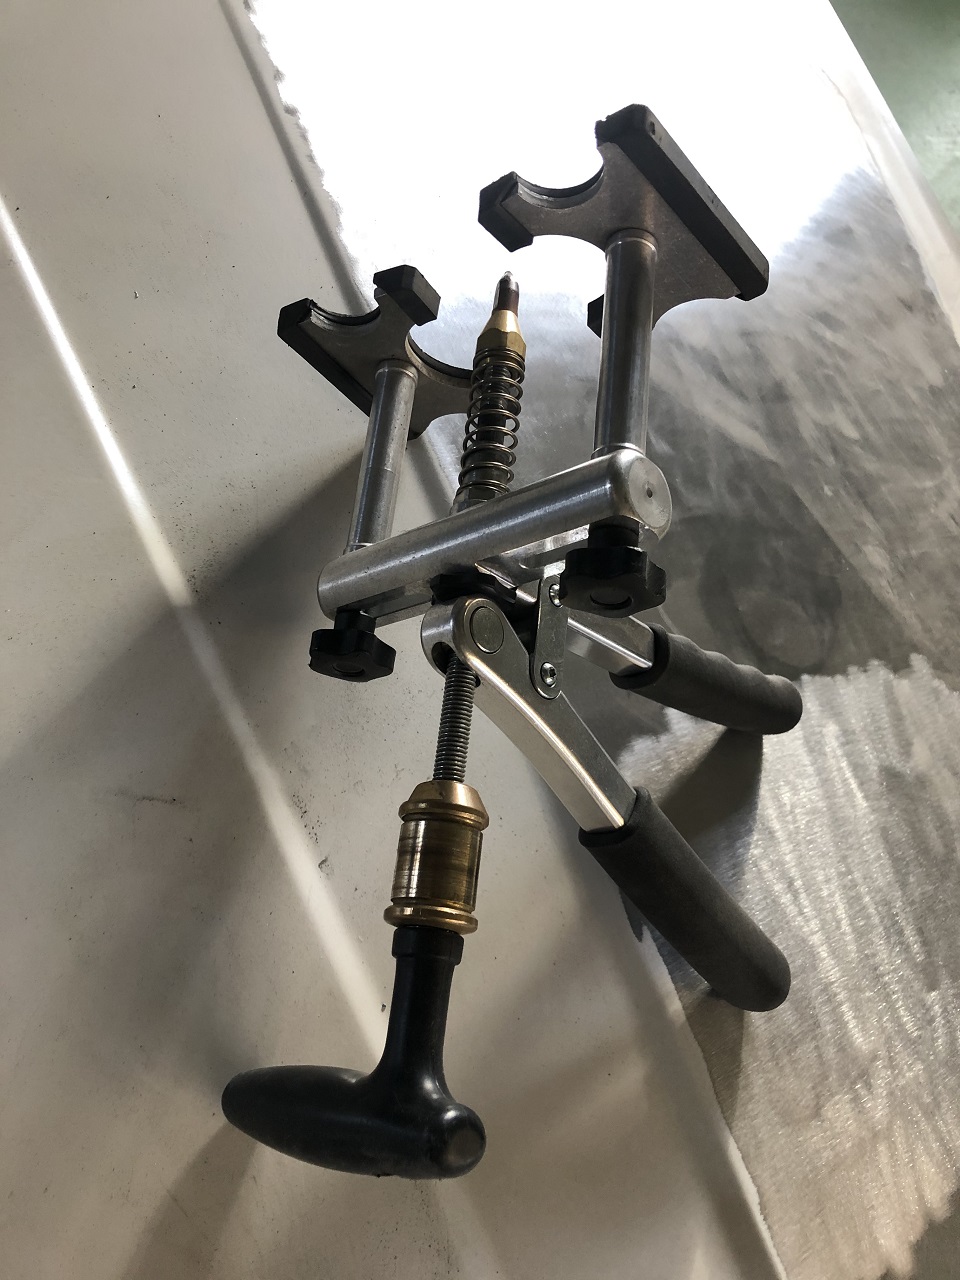 (IMG_6836_plotter to dig out sheet metal.JPG) (IMG_6836_plotter to dig out sheet metal.JPG)
Attachments
----------------
IMG_6837_earth mounting ring.JPG (331KB - 371 downloads)
IMG_6836_plotter to dig out sheet metal.JPG (298KB - 387 downloads)
|
|
| |
|
Expert
Posts: 1530
Location: ZH, Switzerland | Today I had a free day. So I visited Mehmet at the paint & body shop (CarPark) again. I carried more than enough 5/16" threaded stems with me to mount the fenders back to the body. A longer and a shorter one earlier I brought at home, wire brushed and used as templates for the lenght. During watching him preparing the parts and helping him deciding if 7G or Primer is the correct tone (of Tiefseeblau metallic) to paint parts on a 2013 BMW F20, Mehmet told me that all parts (front fenders, both doors, hood (finished)) are at the professional sand blaster now. Prospective: On Saturday Yunus is coming to fix the rear end definitively. Wihin two weeks we are getting back the front fenders, both doors and the hood. All parts actually at the sand blaster are coming back with primer (like the first batch, few pages back in my thread). The primer has a rest period of two weeks until the building process of the color structure could start. Happy Restoring! Dieter
Edited by di_ch_NY56 2020-01-22 2:03 PM
|
|
| |
|
Expert
Posts: 1530
Location: ZH, Switzerland | When the body is back home, prior to the summer holiday season locally, first I'm going to install the wiring harness (engine bay, dashbord, passenger room and tail harness). Sooner, or later, but for sure prior to the 2020 New Years Eve, I'll be ready to install the tar mats, the traditional (I do not want modern sound deadener) floor isolation and the carpet. My impression is, that the floor isolation and carpet are identical to the 2 door hard top New Yorker bundle. Except, that I have to cut out some square areas for the mounting of the center console. The 300 F heel pad was mounted ontop of the carper heel pad, when I removed the original heel pad and the carpet. The carpet was quite soft, with loops. What company (carpet/isolation mats) would you recommend? Happy Restoring! Dieter
Edited by di_ch_NY56 2020-02-02 2:46 PM
|
|
| |
|
Expert
Posts: 1530
Location: ZH, Switzerland | I visted the paint&body shop again for many hours on Saturday. First I helped the shop owner to elaborate the cause of the no oil temp and beep and blinking oil pressure light in a Golf 2 with a 16 valve G60 engine (very rare factory engine). Both wires where exchanged at the sensors.... At my Letter I opened all tabs at the inside (passenger side) roof rail tabs. I assume I need these tabs to install the headliner. Yunus was working on a Fedex Merc Sprinter to work out the roof end. Because he had to work overheads he got very tired. So the work on the body end has postponed to the next weekend. Because the trunk of my Letter was empty (no parts in it) I got angry again and took some pictures. When I removed the tar surface, the lines around the wheel wells were straight (with no bumps...). Mehmet the shop owner showed me the result of the sand blasting company (pictures on his phone). The fenders and and the hood are looking very nice now even though the hood has some rusting through spots - no grave. Happy Restoring! Dieter
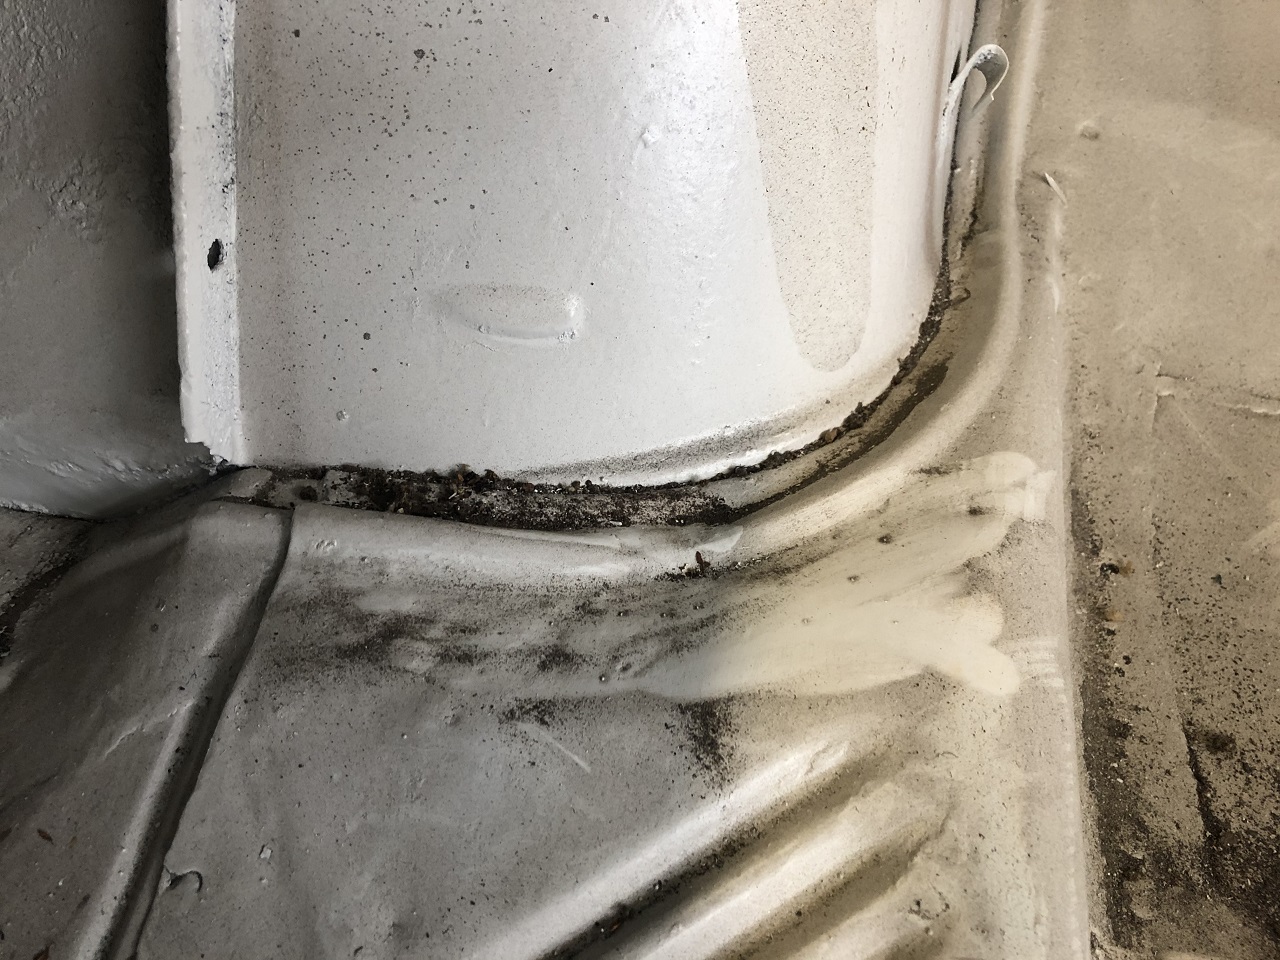 (IMG_6899_trunk inside wheel well junction drivers side.JPG) (IMG_6899_trunk inside wheel well junction drivers side.JPG)
 (IMG_6898_trunk inside wheel well junction passenger side.JPG) (IMG_6898_trunk inside wheel well junction passenger side.JPG)
 (IMG_6896_Merc Sprinter roof damage partially fixed.JPG) (IMG_6896_Merc Sprinter roof damage partially fixed.JPG)
Attachments
----------------
IMG_6899_trunk inside wheel well junction drivers side.JPG (445KB - 351 downloads)
IMG_6898_trunk inside wheel well junction passenger side.JPG (415KB - 357 downloads)
IMG_6896_Merc Sprinter roof damage partially fixed.JPG (51KB - 346 downloads)
|
|
| |
|
Expert 5K+
Posts: 5006
| wow dude... I feel your pain on the amount of work.. I guess this is why i do all my own work, even if it takes valuable time, i can't handle dealing with outside shops.
I sent some of my stuff to sandblast. i told them to only do edges, never larger wide open spots, i use paint stripper for those area. Even when i had my doors done, i told them not to do the skins.
Of course my sandblaster just burnt down so im hosed but im not doing any sandblasting for a while.
https://twitter.com/TomLivingston5/status/1222705404045594625
|
|
| |
|
Regular
Posts: 65
| My 61G blew a head gasket pretty early in life. The story I got was it was in a cannonball run and the guy started having problems and stopped and got a different car lol. The weird thing is, my car was delived to one of the plants in Detroit area. |
|
| |
|
Expert
Posts: 1530
Location: ZH, Switzerland | Thanks for your answers. This morning I was at the paint&body shop once again (no work today thank to Sabrina on Greta Land - oh sorry, Europe). The parts from the sandblaster came back. The black color is marker color. Some minor rust spots appeared. Something to repair. The sandblaster was asking for the body to proceed. But next Saturday first the rear end has to be finished... Happy Restoring! Dieter
 (IMG_6911_front fenders sandblasted again.JPG) (IMG_6911_front fenders sandblasted again.JPG)
 (IMG_6912_doors sandblasted again.JPG) (IMG_6912_doors sandblasted again.JPG)
 (IMG_6913_hood sandblasted again 1.JPG) (IMG_6913_hood sandblasted again 1.JPG)
 (IMG_6914_hood sandblasted again inside 2.JPG) (IMG_6914_hood sandblasted again inside 2.JPG)
 (IMG_6916_hood sandblasted again another point of view 3.JPG) (IMG_6916_hood sandblasted again another point of view 3.JPG)
Attachments
----------------
IMG_6911_front fenders sandblasted again.JPG (460KB - 360 downloads)
IMG_6912_doors sandblasted again.JPG (444KB - 336 downloads)
IMG_6913_hood sandblasted again 1.JPG (387KB - 351 downloads)
IMG_6914_hood sandblasted again inside 2.JPG (483KB - 378 downloads)
IMG_6916_hood sandblasted again another point of view 3.JPG (364KB - 350 downloads)
|
|
| |
|
Expert 5K+
Posts: 7393
Location: northern germany | Since SANDblasting is unfortunately so popular, I always like to state following facts: Sandblasting weakens drastically parts by increasing the surface area/reducing its surface tension.
Every parts will be measurably weaker and more prone to dents than before. Sandblasting non rusted body panels is a big, big mistake,
especially for a unibody car. Same is of course true for suspension components.
Edited by 1960fury 2020-02-11 8:16 AM
|
|
| |
|
Expert
Posts: 1530
Location: ZH, Switzerland | 1960fury - 2020-02-10 2:15 PM Since SANDblasting is unfortunately so popular, I always like to state following facts: Sandblasting weakens drastically parts by increasing the surface area/reducing its surface tension. Every parts will be measurably weaker and more prone to dents than before. Sandblasting non rusted body panels is a big, big mistake, especially for a unibody car. Same is of course true for suspension components. Yes.... Today I discussed with the boss of the body&painting shop. At the farmers smith shop my Letter was prior, they are at the wrong meaning that not really all rust has to be removed. Covered with a good layer of primer and the color layers would protect these spots from further developping. That's completely false (within about three years I would have rust bubbles everywhere). I was not aware of that, otherwise I wouldn't let them sandblast. The owner of that shop is a plastic bomber builder. The H of his daughter is coverd with thick layer of filler all around on several areas.... no wonder the daughter wouldn't show me her H (furthermore I hypothetically would recognise my set of body screws (all brushed to the state of new) on her H). The weakness of the hood was not caused by sandblasting, but working with the angle grinder with a fan leaf disc - that's ways more aggresive and heat building. The sheet metal on that era cars is that thick, that it's very difficult to deform sheet metal, not like on contemporary cars. Happy Restoring Dieter |
|
| |
|
Elite Veteran
Posts: 649
Location: Finland | My god Dieter , you must be incredibly patient! Since my nerves couldn`t take all that waiting and arranging I had to learn myself to do bodywork and paint 35 years ago.
For me two-three years is maximum time to spend on a full restoration. I have to admit the paint jobs I do are not perfect...but good enough for me...
Keep up the good work! |
|
| |
|
Expert
Posts: 1530
Location: ZH, Switzerland | Last Saturday I visited the body&paint shop again. I decided to mount all the mouldings around the rear of my Letter (moulding complete) to check where some adjustment at the body has to be done. Happy Restoring! Dieter BTW: the drivers side moulding is mounted the first time since.... I don't know from how long. The long, longitutinal moulding needs some work at the rear. The rear is chewed due to an earlier collision.
Edited by di_ch_NY56 2020-02-16 12:18 AM
 (IMG_6934_three quarts drivers side rear view with moulding mounted.JPG) (IMG_6934_three quarts drivers side rear view with moulding mounted.JPG)
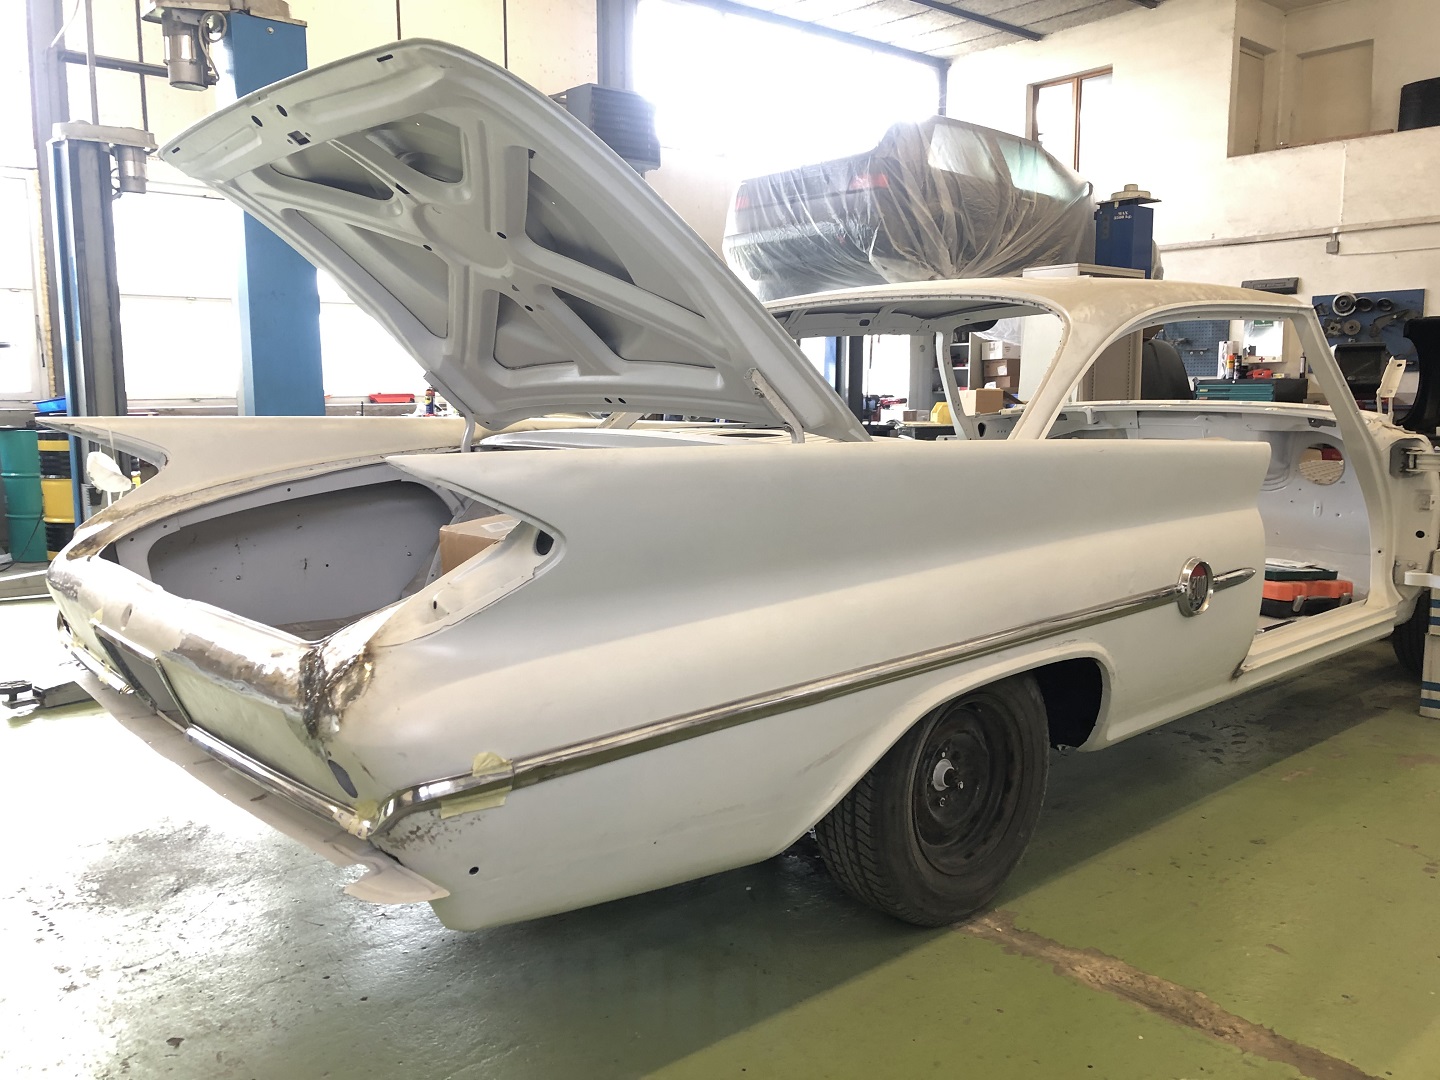 (IMG_6936_three quarts passengers side rear view with moulding mounted.JPG) (IMG_6936_three quarts passengers side rear view with moulding mounted.JPG)
Attachments
----------------
IMG_6934_three quarts drivers side rear view with moulding mounted.JPG (458KB - 348 downloads)
IMG_6936_three quarts passengers side rear view with moulding mounted.JPG (399KB - 360 downloads)
|
|
| |
|
Expert
Posts: 1530
Location: ZH, Switzerland | This morning I worked with the side and rear end mouldings. At the arrow shaped front end of the drivers side moulding, I removed the door opening dents from other car drivers (male&female). I mouted the rear mouldings with clips as well and removed all addhesive paper pieces. Mehmet helped me a little and showed me some of his experience to do the job. His comment: working together is far easier. The vin tag and the body tag will be removed to be stored in an envelope in the office of Mehmet. I told him, without these two tags, the car is worthless. My letter is full of red circles. In most of these circles there is a recession to dig out with the body plotter, even on the outside end of the passenger side fin. Guess these really small recessions were filled up with body filler during the production process. I was assisting him with press a fast on on the oil temp wire and gave him the advice to use heat shrink tube from the wire to almost the front of the fast on. It's his Golf gen 3 16V G60 race car.
 (IMG_6957_drivers side front end moulding.JPG) (IMG_6957_drivers side front end moulding.JPG)
Attachments
----------------
IMG_6957_drivers side front end moulding.JPG (320KB - 337 downloads)
|
|
| |
|
Expert
Posts: 1530
Location: ZH, Switzerland | Today I partially cleaned the position-/direction light housing of the drivers side front. It was primarely very dirty, but apparently well protected from the environment influences. due to the headlight bezel and the front fender shape. In the back is the passenger side position-/directional light housing as a comparison as it looked quite similar. Happy Restoring! Dieter
 (IMG_6958_drivers side position light case partially cleaned.JPG) (IMG_6958_drivers side position light case partially cleaned.JPG)
Attachments
----------------
IMG_6958_drivers side position light case partially cleaned.JPG (416KB - 331 downloads)
|
|
| |
|
Expert
Posts: 1530
Location: ZH, Switzerland | Free day today. I took the oportunity to visit the shop once again. Both front doors (the only ones, two door hardtop) are in work now for the color layer build up. It's getting good! Happy Restoring! Dieter BTW: the passenger side front door is the upper one in the first picture
Edited by di_ch_NY56 2020-03-02 7:33 AM
 (IMG_6990_drivers side door.JPG) (IMG_6990_drivers side door.JPG)
 (IMG_6991_passenger side door.JPG) (IMG_6991_passenger side door.JPG)
Attachments
----------------
IMG_6990_drivers side door.JPG (440KB - 330 downloads)
IMG_6991_passenger side door.JPG (479KB - 330 downloads)
|
|
| |
|
Expert 5K+
Posts: 9650
Location: So. Cal | Nice job, that's going to look great. I think he got more filler on his face than on the door. |
|
| |
|
Expert
Posts: 1530
Location: ZH, Switzerland | Powerflite - 2020-03-01 4:53 PM Nice job, that's going to look great. I think he got more filler on his face than on the door. :laugh: Hi Nathan The primer thickness is 200 micron, the filler thickness is marginal, just small imperfections on the door perimeter. With grinding down the filler, the primer will reach the normal thickness of about 100 micron (metric). Both apprentices were working on my doors. They are clever, compared both doors and where just one door had a small ditch or dent, they applied filler. The face of the apprentice I oversprayed to protect him, his a youth, below 20yo. Happy Restoring! Dieter
Edited by di_ch_NY56 2020-03-02 12:31 PM
|
|
| |
|
Expert
Posts: 1530
Location: ZH, Switzerland | Do to a free day (working on Saturday) I went to the shop. The doors are ready to build up the color layers. The preparation of the hood began this morning. Actually all of the shop are cleaning the heating ducts of the heater for the paint and burn in chamber. What a mess.... Happy Restoring! Dieter
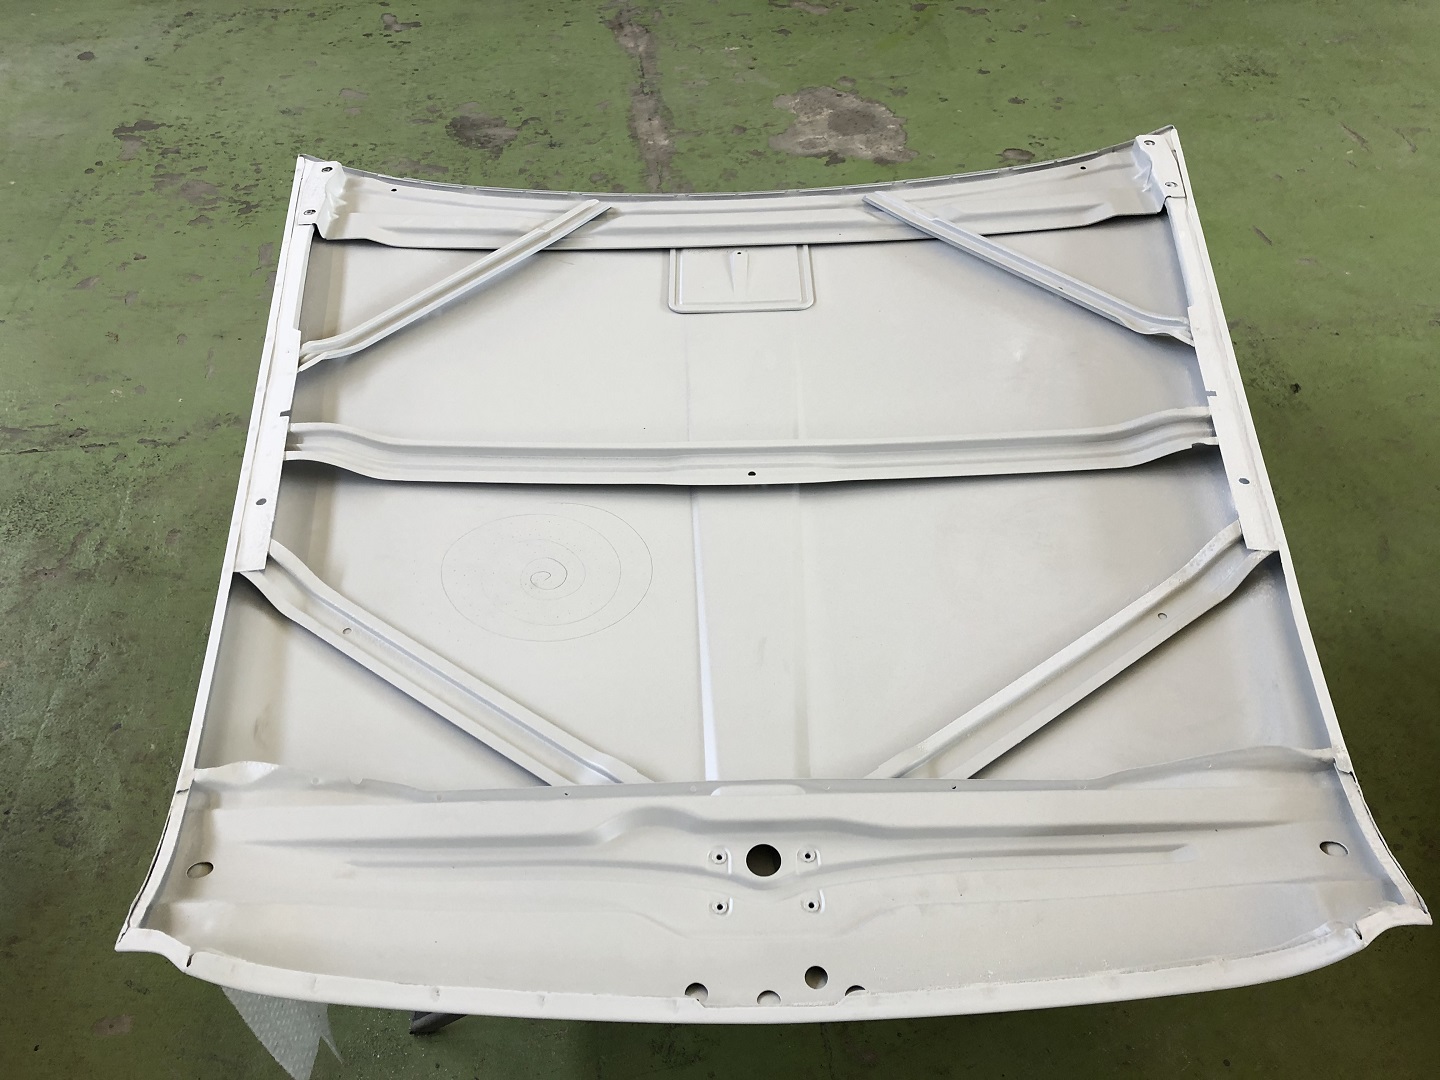 (IMG_7005_work on hood started.JPG) (IMG_7005_work on hood started.JPG)
Attachments
----------------
IMG_7005_work on hood started.JPG (368KB - 340 downloads)
|
|
| |
|
Expert
Posts: 1530
Location: ZH, Switzerland | The biggest issue now is the drivers side rear corner, or almost the sole one. At the pictures you'll notice where the work is... waiting for Yunus Doors are covered and ready for the color layer prep, the hood is in work now. Happy Restoring! Dieter
 (IMG_7020 drivers side rear corner from the front.JPG) (IMG_7020 drivers side rear corner from the front.JPG)
 (IMG_7021 drviers side rear corner from the rear.JPG) (IMG_7021 drviers side rear corner from the rear.JPG)
Attachments
----------------
IMG_7020 drivers side rear corner from the front.JPG (349KB - 328 downloads)
IMG_7021 drviers side rear corner from the rear.JPG (374KB - 319 downloads)
|
|
| |
|
Expert
Posts: 1530
Location: ZH, Switzerland | Today, even though I should stay at home (Corona), I went to the shop and luckily I met Yunus. Within a short time the rear end of the body of my Letter was in shape again - or almost. The vertical line up around the drivers side curve will be done until the next weekend. I promised to bring all the tail lamps (position lamp and back up lamp) next time I'll visit the shop My Letter is almost ready to go to the sandblast shop once again. Happy Restoring! Dieter BTW: the three parts at the bottom (shield), in the front (vertical reinforcement) and on the top of the radiator yoke are in work now.
 (IMG_7103_rear end almost finished.JPG) (IMG_7103_rear end almost finished.JPG)
Attachments
----------------
IMG_7103_rear end almost finished.JPG (453KB - 329 downloads)
|
|
| |
|
Expert
Posts: 1530
Location: ZH, Switzerland | This week I could pick up the parcels from Quirey Quality Design Co. The content looks very promissing to get suberb seats in my Letter. Happy Restoring! Dieter
 (IMG_7115_Qirey Quality Design Co delivery.JPG) (IMG_7115_Qirey Quality Design Co delivery.JPG)
Attachments
----------------
IMG_7115_Qirey Quality Design Co delivery.JPG (401KB - 319 downloads)
|
|
| |
|
Expert 5K+
Posts: 5006
| those are nice... wonder if Garys old stock? or if he is making new? |
|
| |
|
Expert
Posts: 1530
Location: ZH, Switzerland | mikes2nd - 2020-03-28 5:54 PM those are nice... wonder if Garys old stock? or if he is making new? As far as I got out, Gary Goers did the sewing himself. The whole stock pile of Garys went to QQDC (the leather stock I assume as well). At the Gary Goers thread (vendor section) you'll see the whole story. QQDC hired a self employee sewing woman. This is the reason QQCD asked for a part paying prior to start working on the seat covers. Happy Restoring! Dieter |
|
| |
|
Expert
Posts: 1530
Location: ZH, Switzerland | This morning I mounted the tail and back up lamps to see how they will fit. Just some minor adjustments are to do. But Yunus has to see it and he'll correct it. Happy Restoring! Dieter
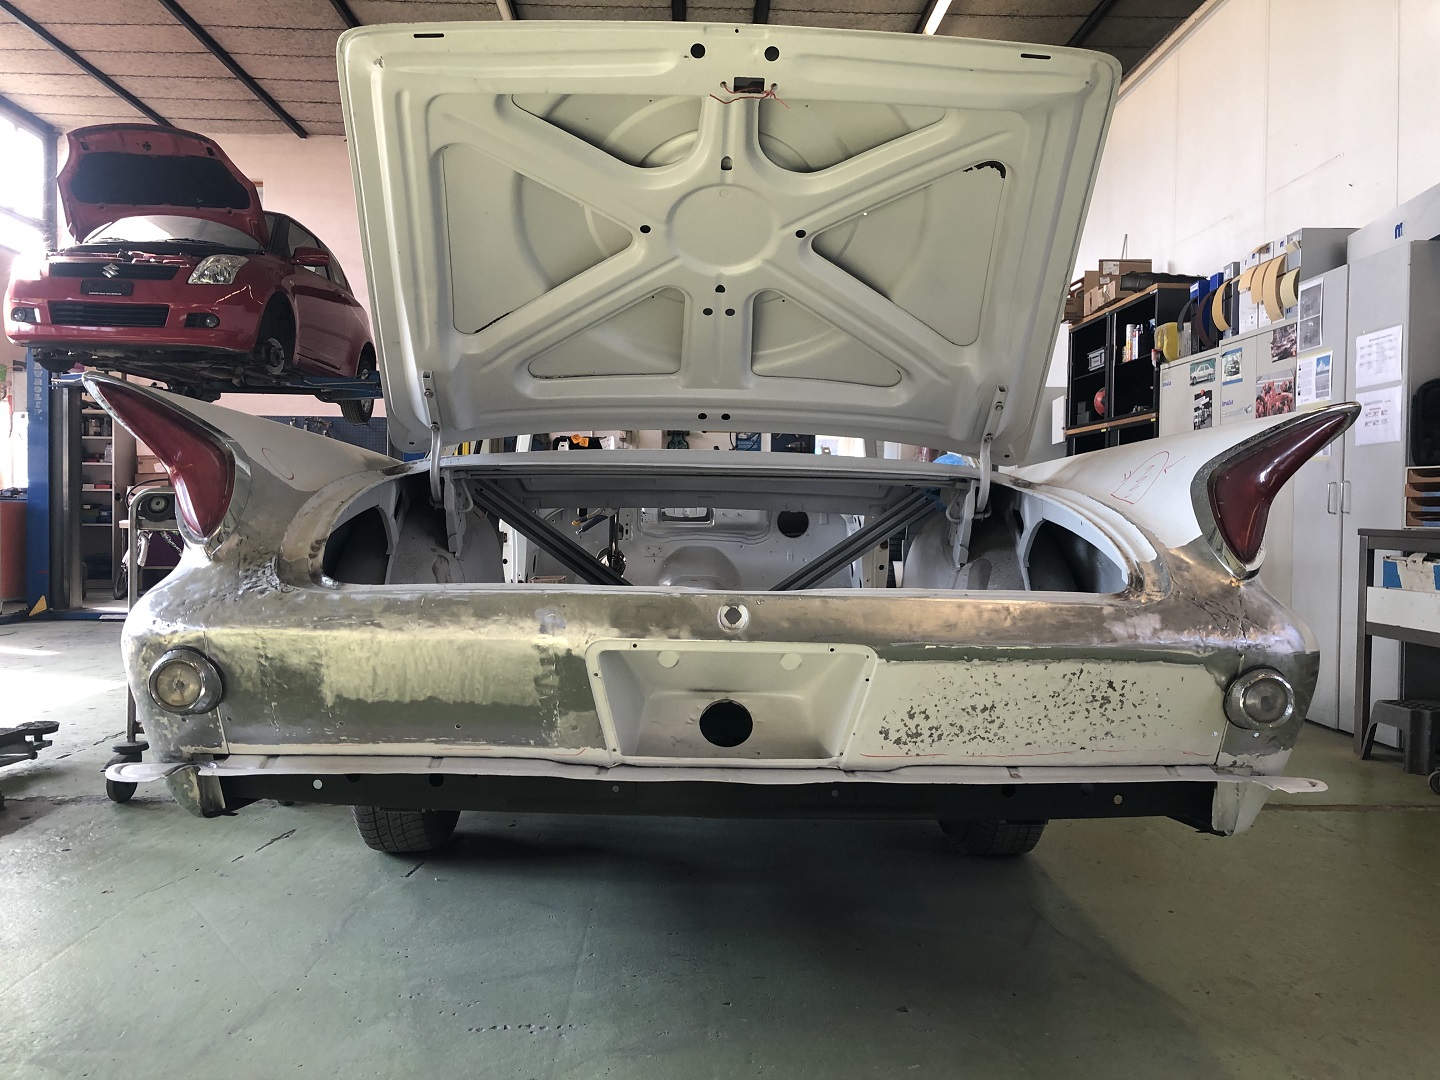 (IMG_7137_rear view with tail and back up lamps.JPG) (IMG_7137_rear view with tail and back up lamps.JPG)
Attachments
----------------
IMG_7137_rear view with tail and back up lamps.JPG (466KB - 317 downloads)
|
|
| |
|
Expert
Posts: 1530
Location: ZH, Switzerland | This afternoon I went to the body and paint shop again. To my surprise I only detected the deck lid alone. The owner brough my Letter to the sand blasting company again. The professional sand blaster already did a slight primer removing blast on some areas. The result is ways worse than ever expected. The parcel shelf apparently was not sand blasted at the first shop, as the lower channel outside the rear glass rubber. The passenger side rear fender showed grave under rustings (rust not properly removed prior and laying water when raining at the first shop plus delayed primer application). My actual shop owner (highly professional with BMW certification) just told me, if I would leave my Letter with that prior Etokat primer, I would not have pleasure more than two to three years until bubbles under the color would rise like on Hiobs back everywhere. That's how the farmers smith (or even ways worse) works. Happy Restoring! Dieter BTW: even if I would win the Euro millions jackpot I never ever would buy a FL or any other car at the former shop (the chance by the way is ways smaller than a flees testi bag, but always bigger than zero as if I wouldn't participate) |
|
| |
|
Expert
Posts: 1530
Location: ZH, Switzerland | Almost Midnight yesteray I got a phone call from the boss of the body&paint shop. Since 4 pm the sand blaster (former professional car painter) was on duty on my Letter. For all who warned me about the second time sand blasting... the boss of the body&paint shop called about what they discovered. The body was not sand blasted but stripped down chemically. The lock smith shop washed, but not perfect. The sand blasting (acutally my Letter is coated with primer again) guy discovered surface rust where originally no surface rust was (prior to bring my Letter to there) present (e.g. roof shell, vertical surfaces). In other words they applied the primer over the rust. The sand blaster was working for another four hours this morning (total 12 hours). As the result... the body (until painted) will cost me more the USD 60k. Dieter
Edited by di_ch_NY56 2020-04-19 3:56 AM
|
|
| |
|
Expert
Posts: 1530
Location: ZH, Switzerland | This midday I got a short note from my body&paint shop boss. My letter is back in his shop. The primer will cure for two weeks now. Happy Restoring! Dieter BTW: my impression is (from all parts I saw, sand blasted by the professional sand blaster) the sand is ways finer than that of the first shop.
Edited by di_ch_NY56 2020-04-20 1:32 PM
 (ESLN2395_partial view trunk floor drivers side fender passenger side inner quarter panel.JPG) (ESLN2395_partial view trunk floor drivers side fender passenger side inner quarter panel.JPG)
Attachments
----------------
ESLN2395_partial view trunk floor drivers side fender passenger side inner quarter panel.JPG (172KB - 318 downloads)
|
|
| |
|
Expert 5K+
Posts: 9650
Location: So. Cal | That looks great! Should be the end of your troubles with the sandblasting. |
|
| |
|
Expert
Posts: 1530
Location: ZH, Switzerland | thanks a lot Nathan |
|
| |
|
Expert
Posts: 1530
Location: ZH, Switzerland | This morning I met my Letter in the paint booth of the body&paint company. All over marker paint applied. On several places there revealed rusting through holes, but I got evidence that my Letter was absolutely rustfree prior to apply the primer coat (20 kg, 44 lbs). All dents were pulled out prior to the sand blasting. The body is now straight. Happy Restoring! Dieter
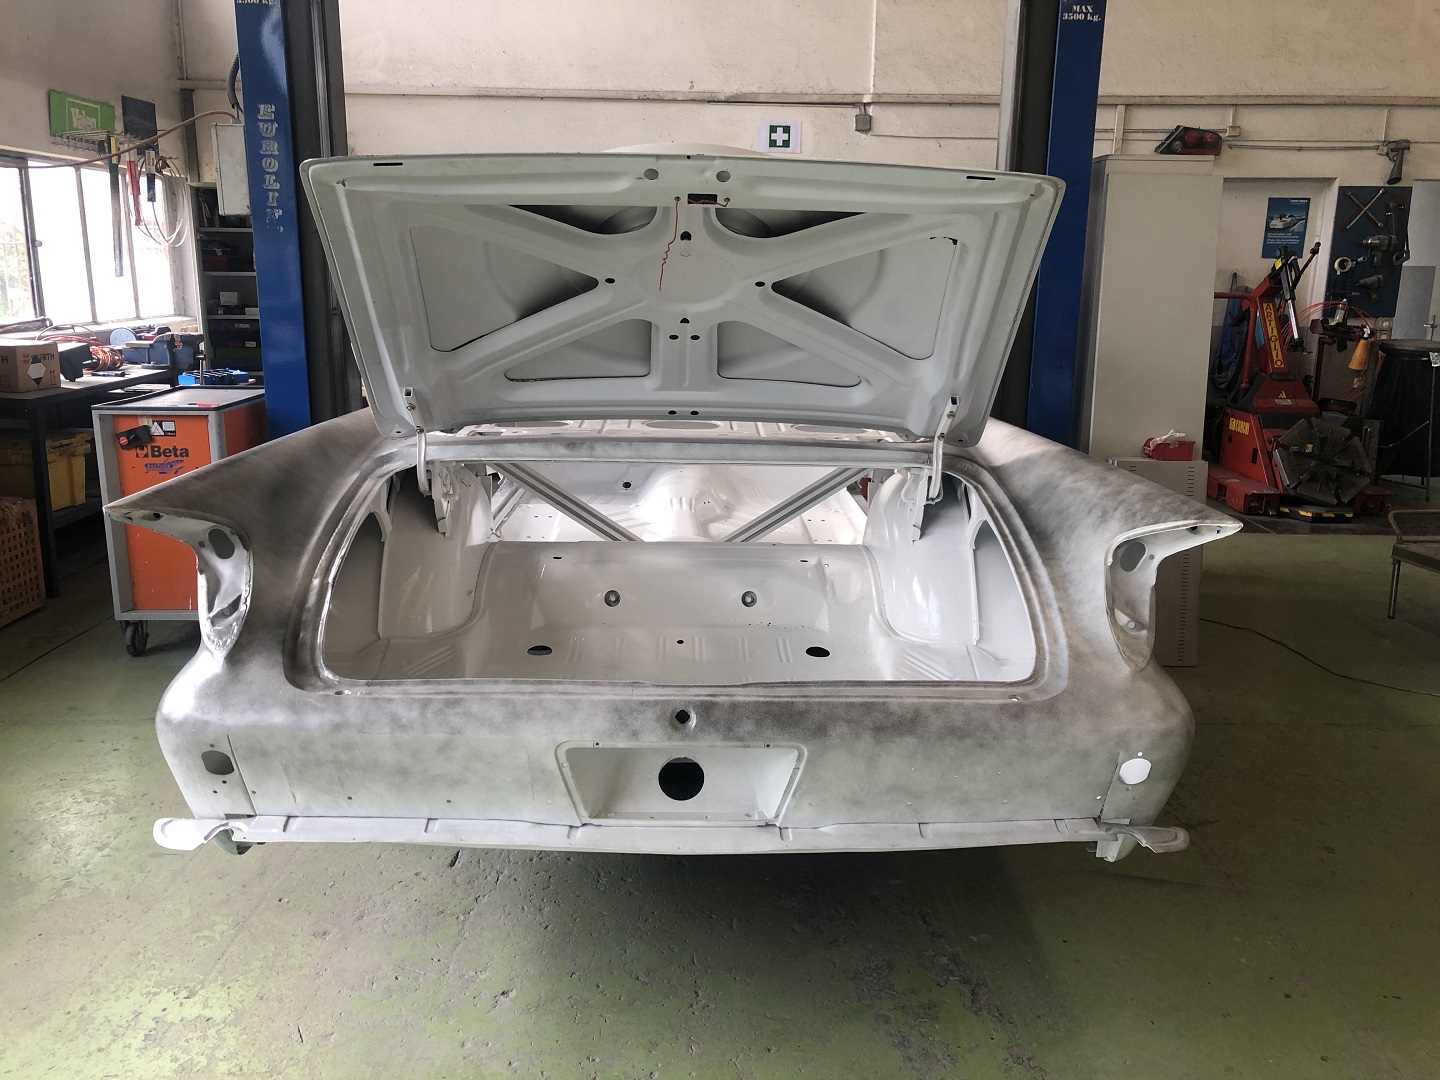 (IMG_7242_rear view with marker paint.JPG) (IMG_7242_rear view with marker paint.JPG)
Attachments
----------------
IMG_7242_rear view with marker paint.JPG (449KB - 387 downloads)
|
|
| |
|
Expert
Posts: 1730
Location: Michigan | So what are we looking at here Dieter? I see gloss white inside and primer outside? Is this in between sprays of the gloss white? Those rear corners look great from this view. It seems like they put lots of hours into getting that corrected. |
|
| |
|
Expert
Posts: 1530
Location: ZH, Switzerland | Beltran - 2020-04-24 7:44 PM So what are we looking at here Dieter? I see gloss white inside and primer outside? Is this in between sprays of the gloss white? Those rear corners look great from this view. It seems like they put lots of hours into getting that corrected. Thanks Mark The drivers side corner is almost done. A small difference on the inner side of the fins will be corrected. The passenger side opening for the tail light is perfect. The drivers side opening has a small flat area to correct at the inside to the trunk opening. To reveal... except of the undercarriage (already sand blasted and coated with charcoal grey color) the whole body outside and inside was sand blasted. Within a very, very short time between sand blasting (one apprentice of the body&paint shop assisted to vac clean the whole body from the sand), and applying the primer, the primer was applied (inside and outside of course). Even the inside of the roof and the underside of the parcel shell were sand blasted and coated with new primer. Because the professional sand blaster used a very fine sand to sand blast, the result with primer is glossy. I made a collection of 18 pictures where very small rusting through spots revealed. In my opinion it's too much to display here. From the boss of the body&paint shop I'll get a broad collection of pictures (plus a small movie) taken during the sand blasting. This is the evidence the whole process was done very carefully. Next work at the sand blasting company is to sand blast the trunk lid and small parts of the rear bumper mountings. Happy Restoring! Dieter |
|
| |
|
Expert
Posts: 1208
Location: SWITZERLAND | This rear view is pompous, Dieter. Could be a Convertible! - SERGE - |
|
| |
|
Expert
Posts: 1530
Location: ZH, Switzerland | sermey - 2020-04-25 9:03 PM This rear view is pompous, Dieter. Could be a Convertible! - SERGE - Thanks Serge It's a hardtop coupe. I'm happy with the steel roof. The convertible has different hinges for the trunk lid and reinforcements between the sheet metal between the front end of the trunk opening and the attachement of the end of the soft top. Kind regards Dieter
Edited by di_ch_NY56 2020-04-28 2:13 PM
|
|
| |
|
Elite Veteran
Posts: 649
Location: Finland | Well Dieter , now it is starting to look very promising. Hope your nightmare stages of the resto is over.. |
|
| |
|
Expert
Posts: 1530
Location: ZH, Switzerland | 22mafeja - 2020-04-28 8:51 AM Well Dieter , now it is starting to look very promising. Hope your nightmare stages of the resto is over.. Hi Ralf It's not over, just getting worse. Because I'm all on my own to finance this adventure. From the environment here I live most people just giving me the advice to quit my hobby instead of to be solidarity in finacial ways. The solidarity is a one way from me to all others. Happy Restoring! Dieter
Edited by di_ch_NY56 2020-05-01 7:08 AM
|
|
| |
|
Expert
Posts: 1530
Location: ZH, Switzerland | I decided to close the screw holes for the mouting of the remote push button for the seek function of the radio. As far as I remember, this push button was not connected to the wiring harness. I assisted the boss of the paint&body shop to mount a roof spoiler on hid Lancer Evo under build up again (after getting a full body restoration with a new color). When he has finished his own project he'll start on my Letter. Furthermor I brought a really big USB-stick to him. I'm getting a full documentation on pictures... Happy Restoring! Dieter
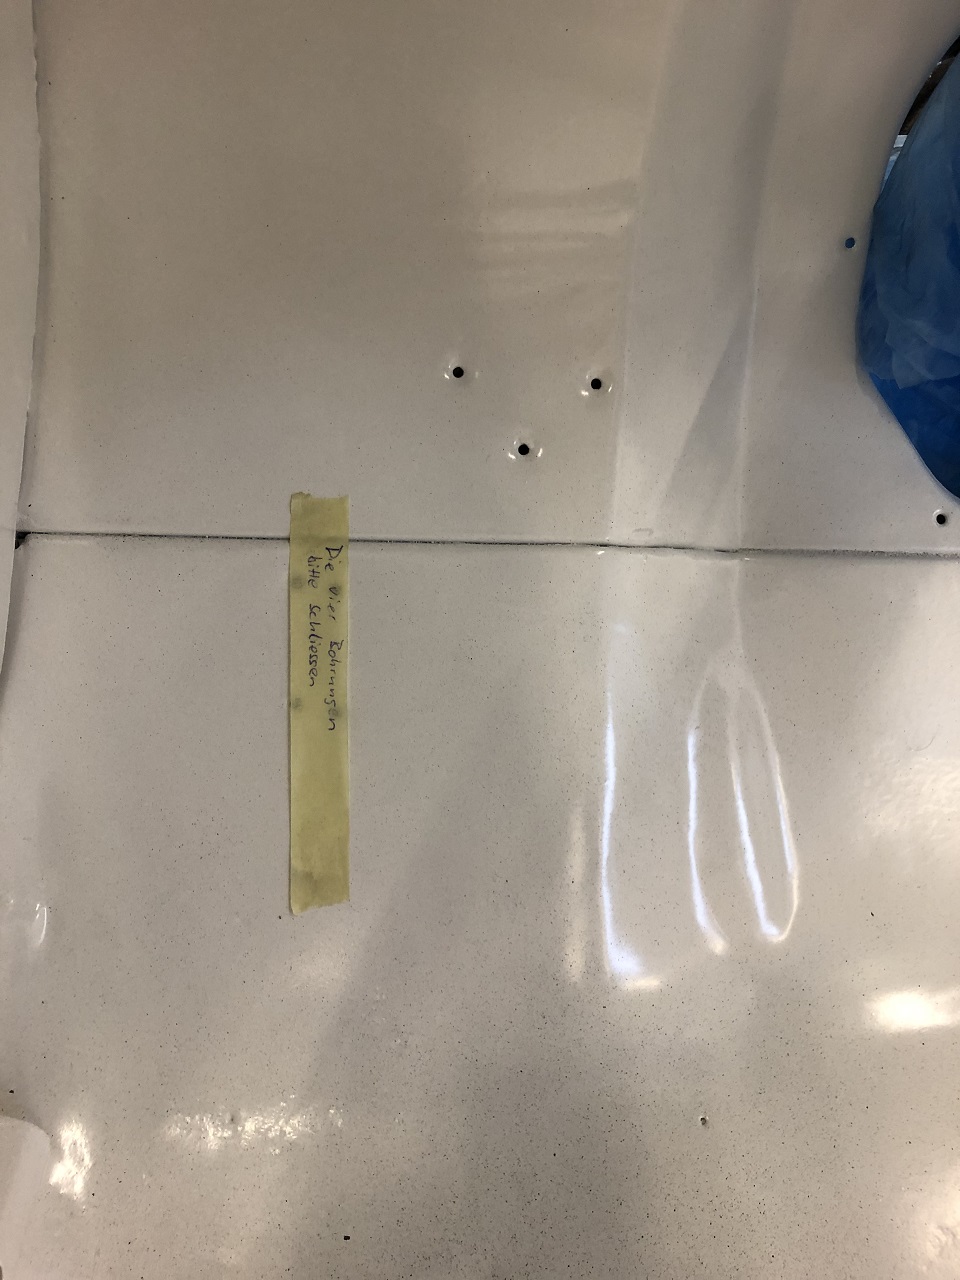 (IMG_7293_section of the firewall drivers side.JPG) (IMG_7293_section of the firewall drivers side.JPG)
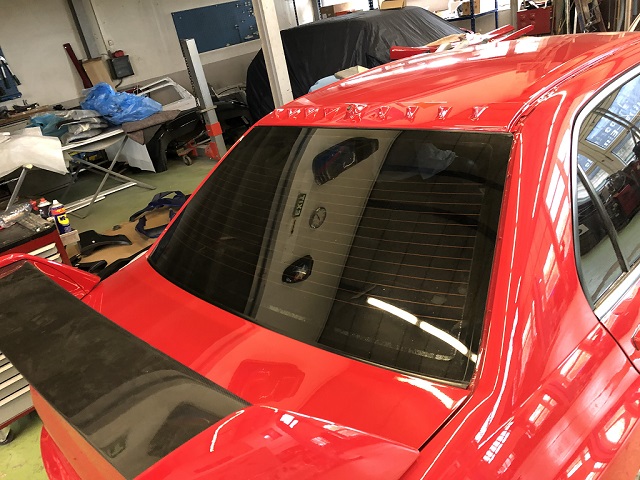 (IMG_7294_Lancer Evo roof.JPG) (IMG_7294_Lancer Evo roof.JPG)
Attachments
----------------
IMG_7293_section of the firewall drivers side.JPG (285KB - 411 downloads)
IMG_7294_Lancer Evo roof.JPG (150KB - 409 downloads)
|
|
| |
|
Expert
Posts: 1530
Location: ZH, Switzerland | I got a vast collection of pictures from the body shop and the sand blasting. Only a few I'm displaying here. One questing rose about the parcel shelf. In my opinion it should be flat table. But here I want to make it sure. Happy Restoring! Dieter
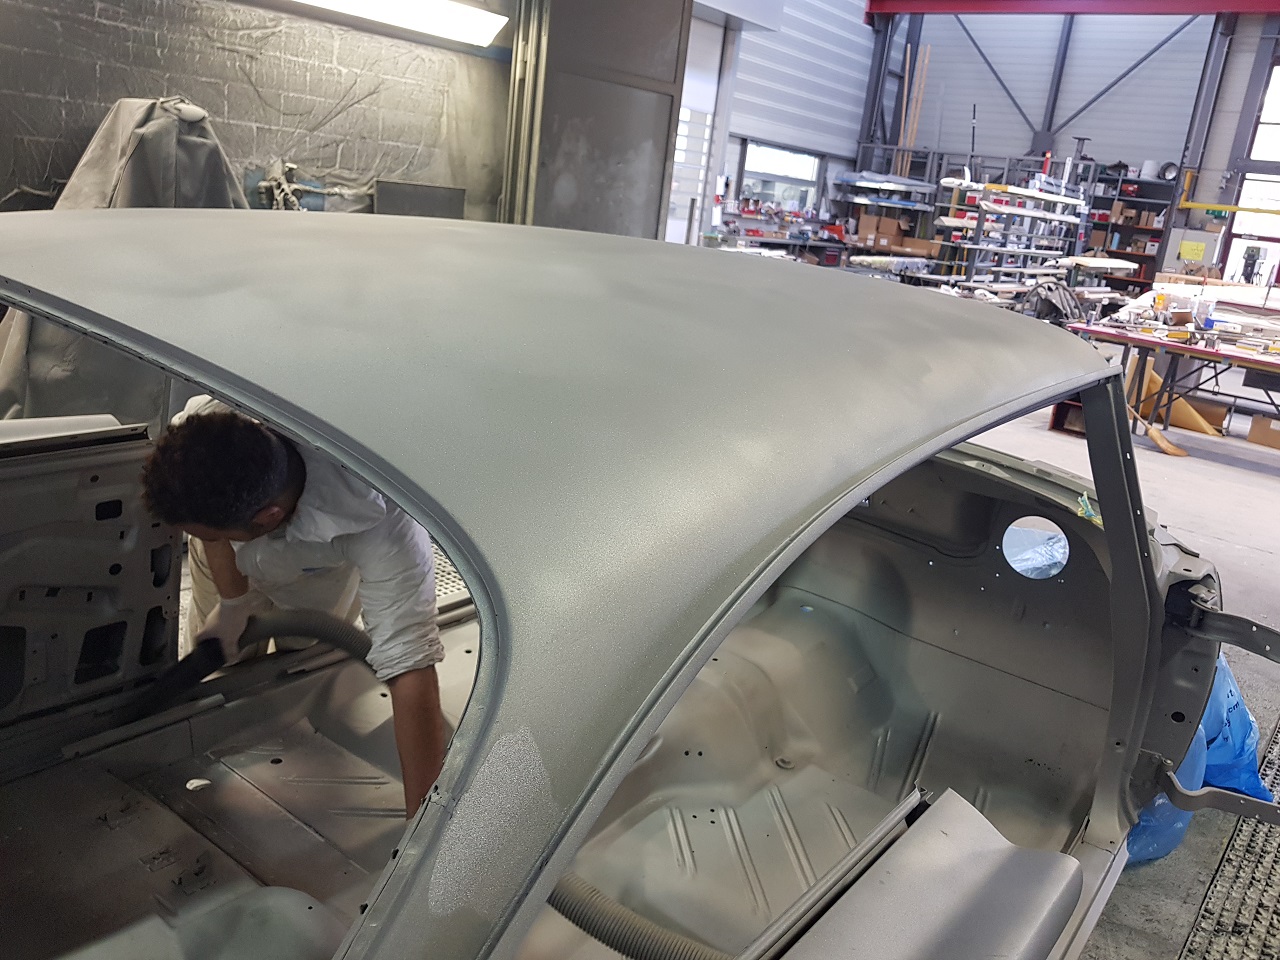 (20200418_130046_sand blasted vacuum cleaning 1.jpg) (20200418_130046_sand blasted vacuum cleaning 1.jpg)
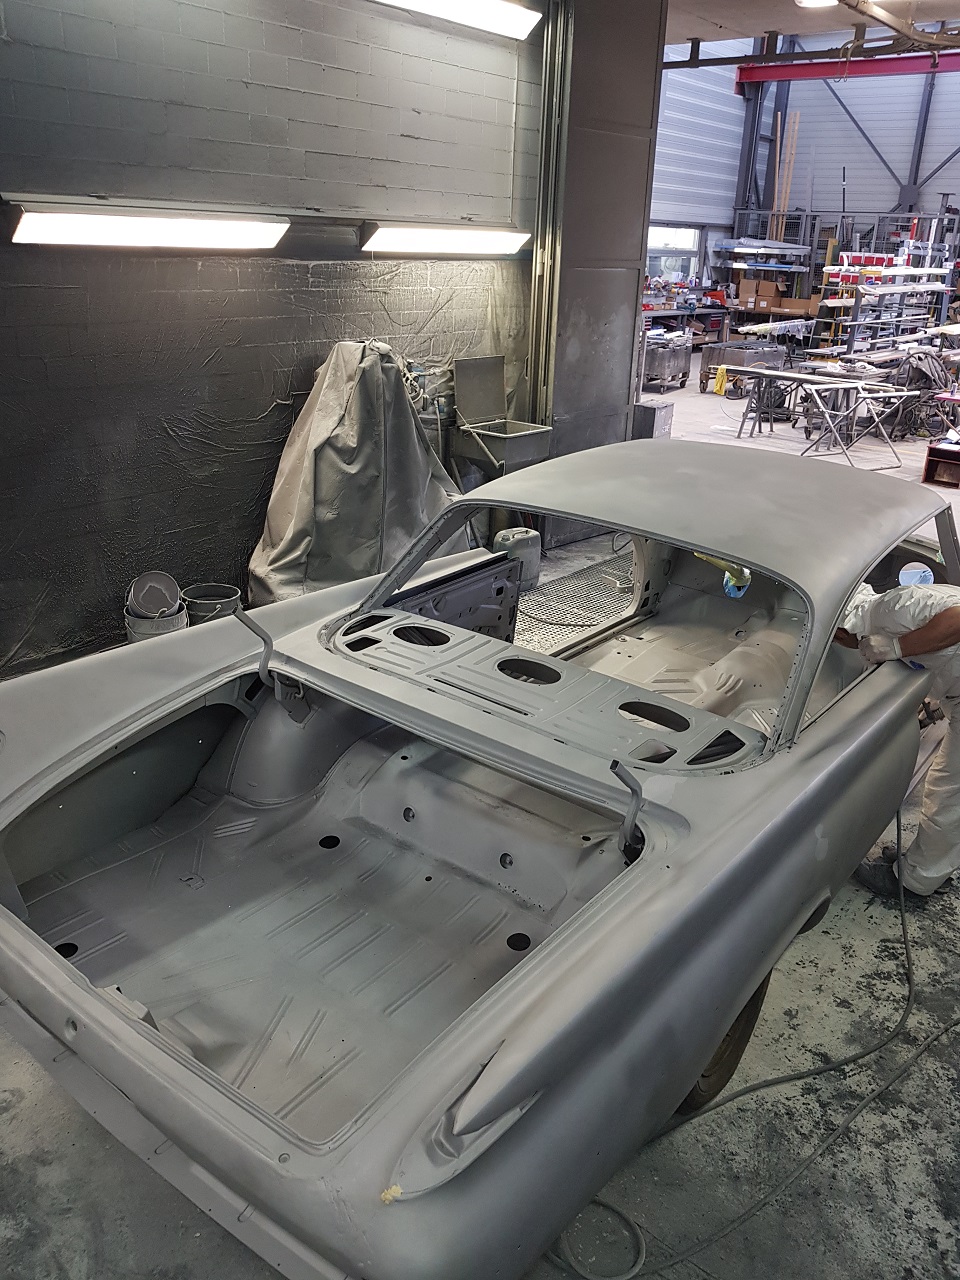 (20200418_130541_snad blasted vacuum cleaning 2.jpg) (20200418_130541_snad blasted vacuum cleaning 2.jpg)
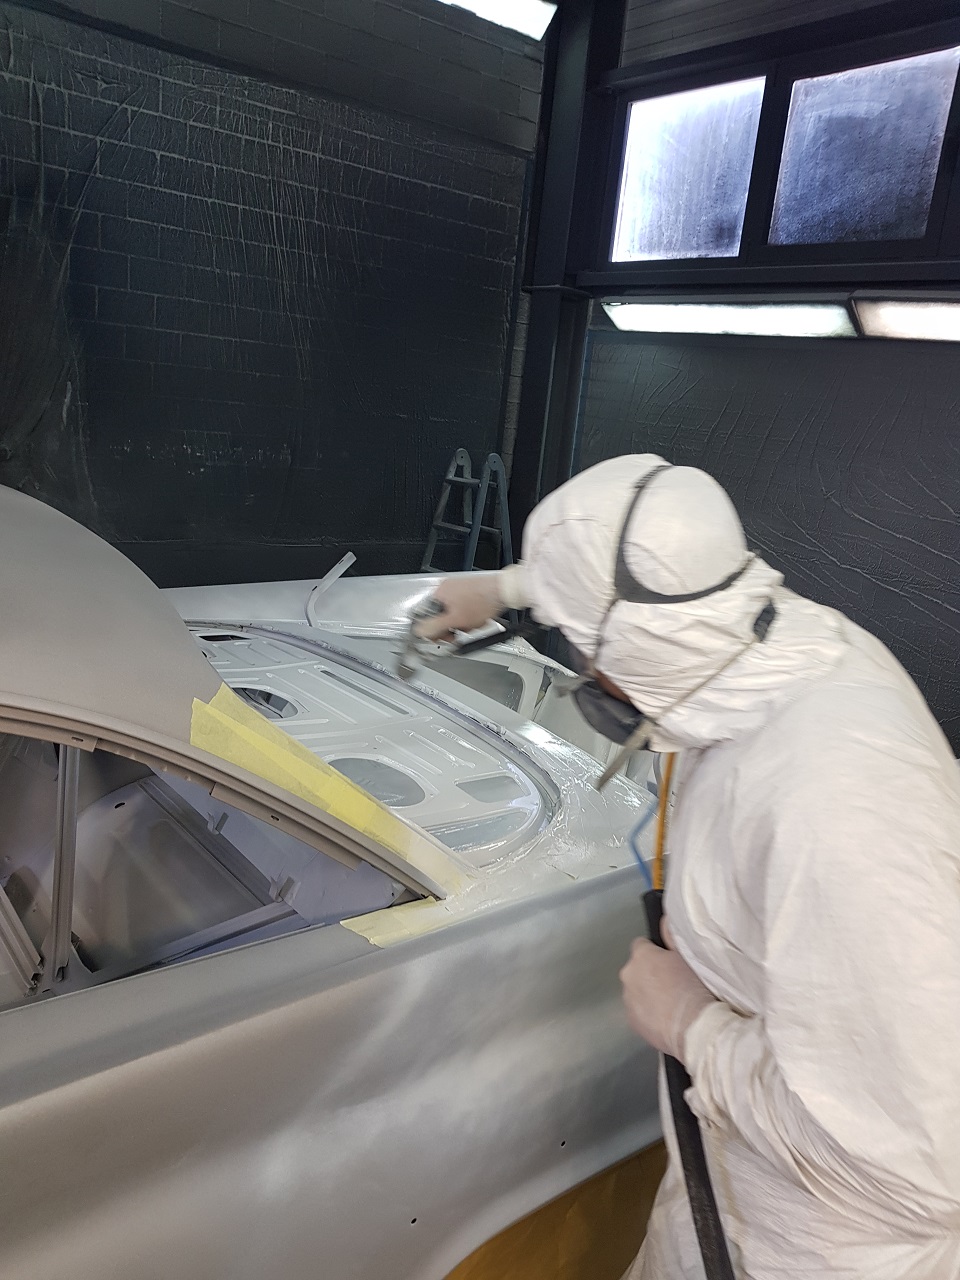 (20200418_135610_applying primer.jpg) (20200418_135610_applying primer.jpg)
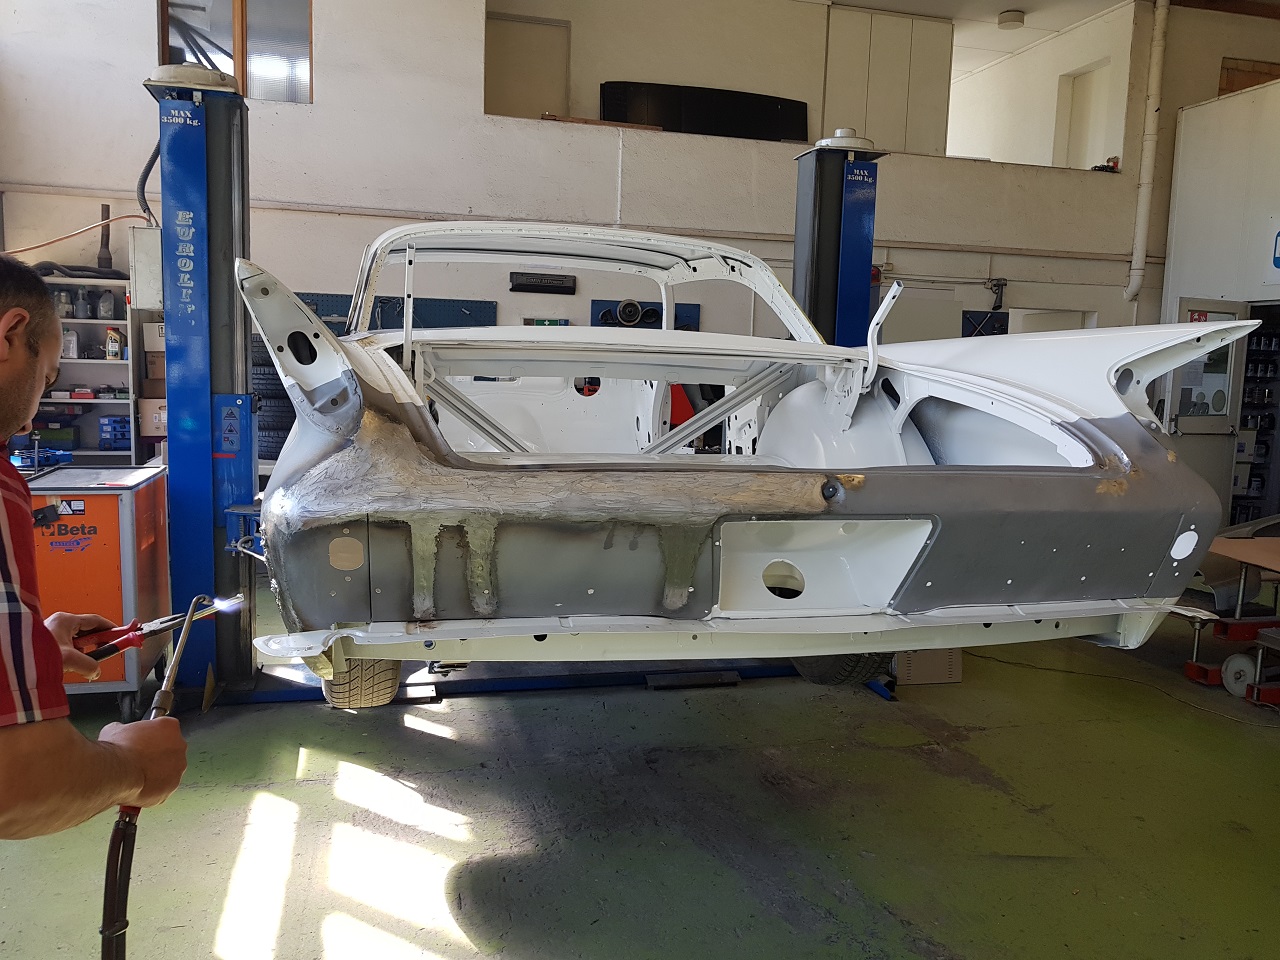 (20200423_111758 shape correcting with tin.jpg) (20200423_111758 shape correcting with tin.jpg)
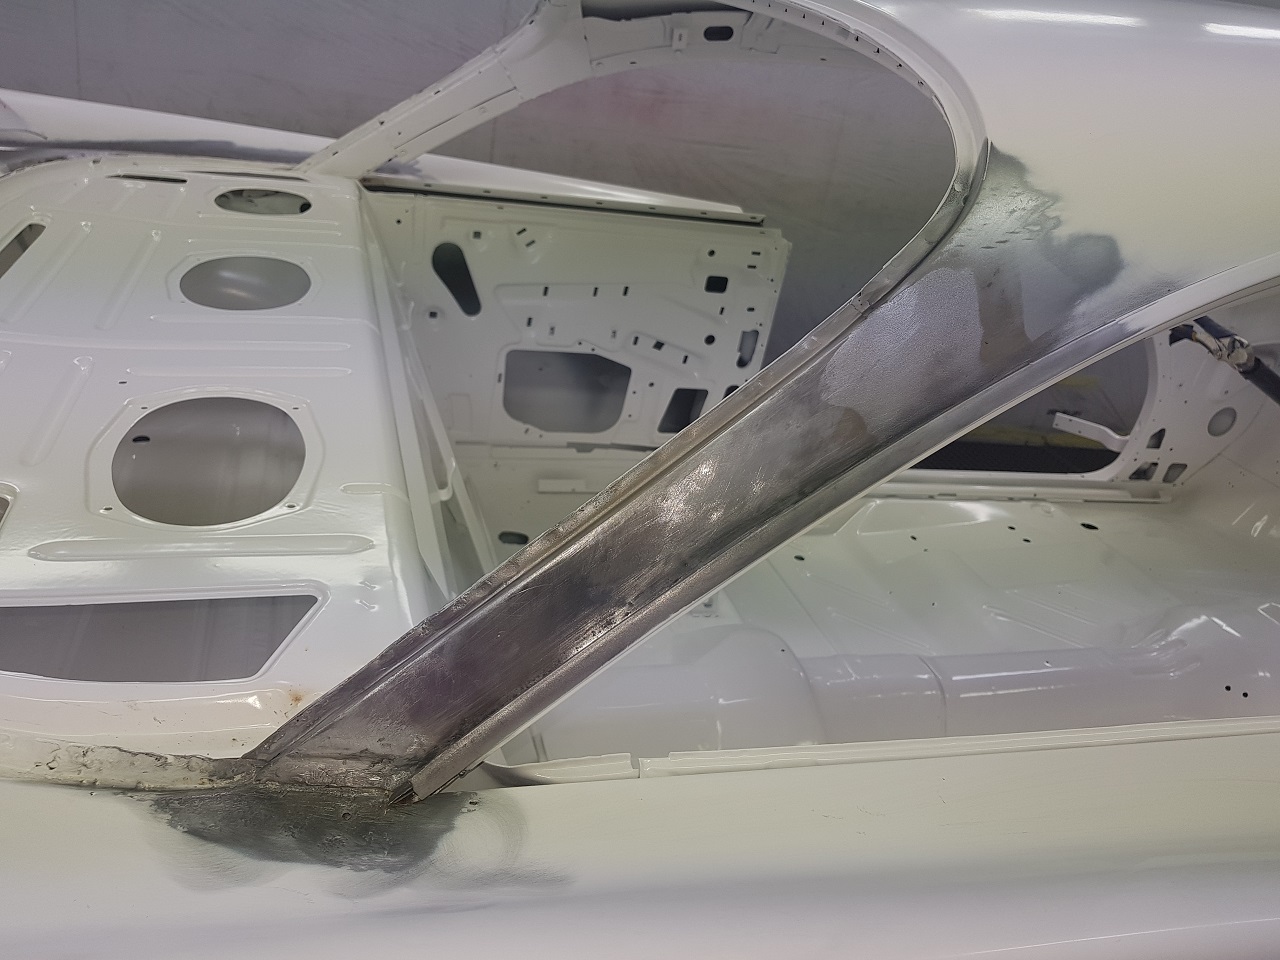 (20200424_144845 c pillar passenger side finished.jpg) (20200424_144845 c pillar passenger side finished.jpg)
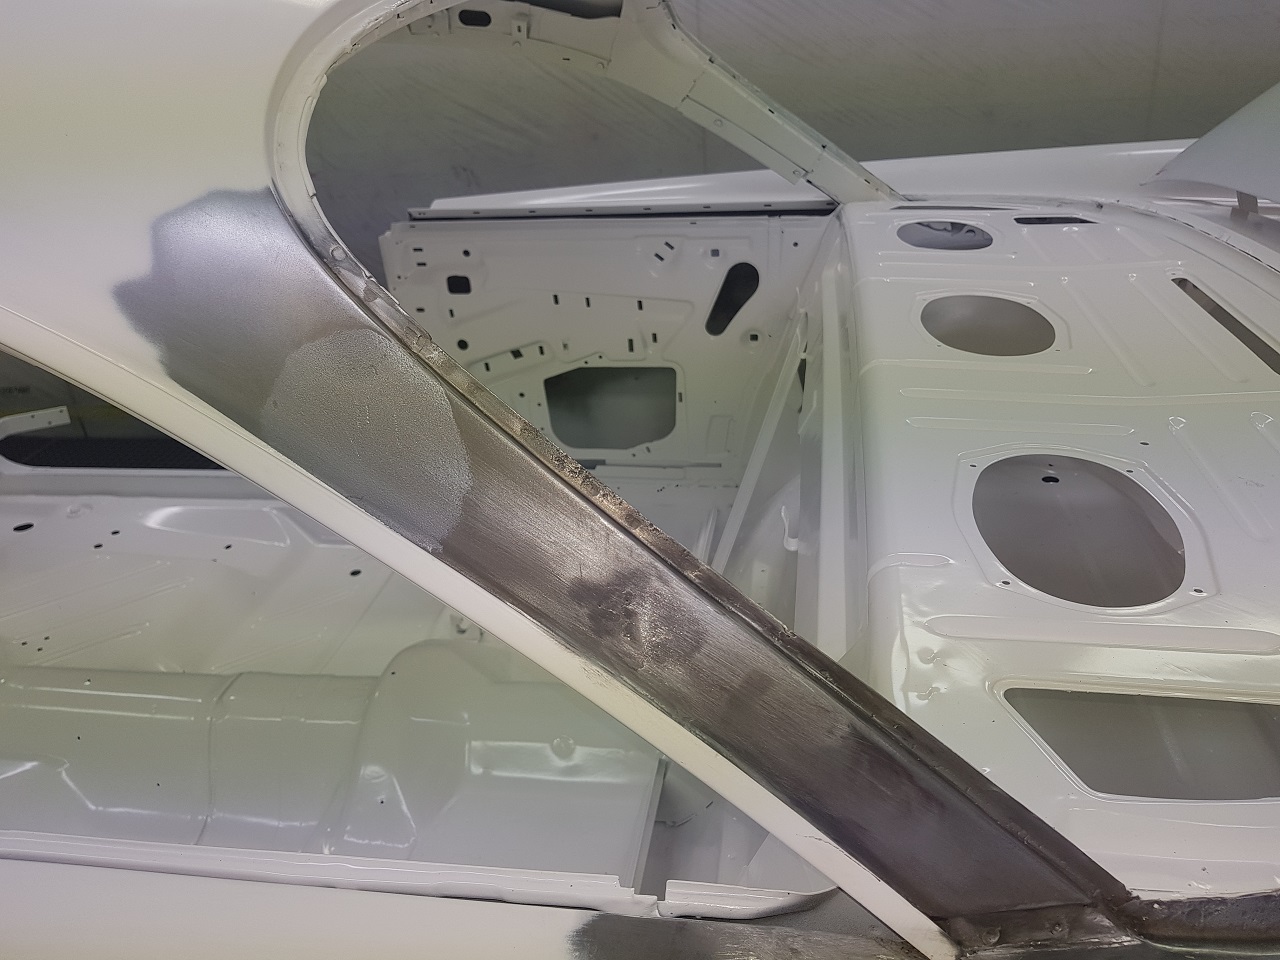 (20200424_144910 c pillar drivers side finished.jpg) (20200424_144910 c pillar drivers side finished.jpg)
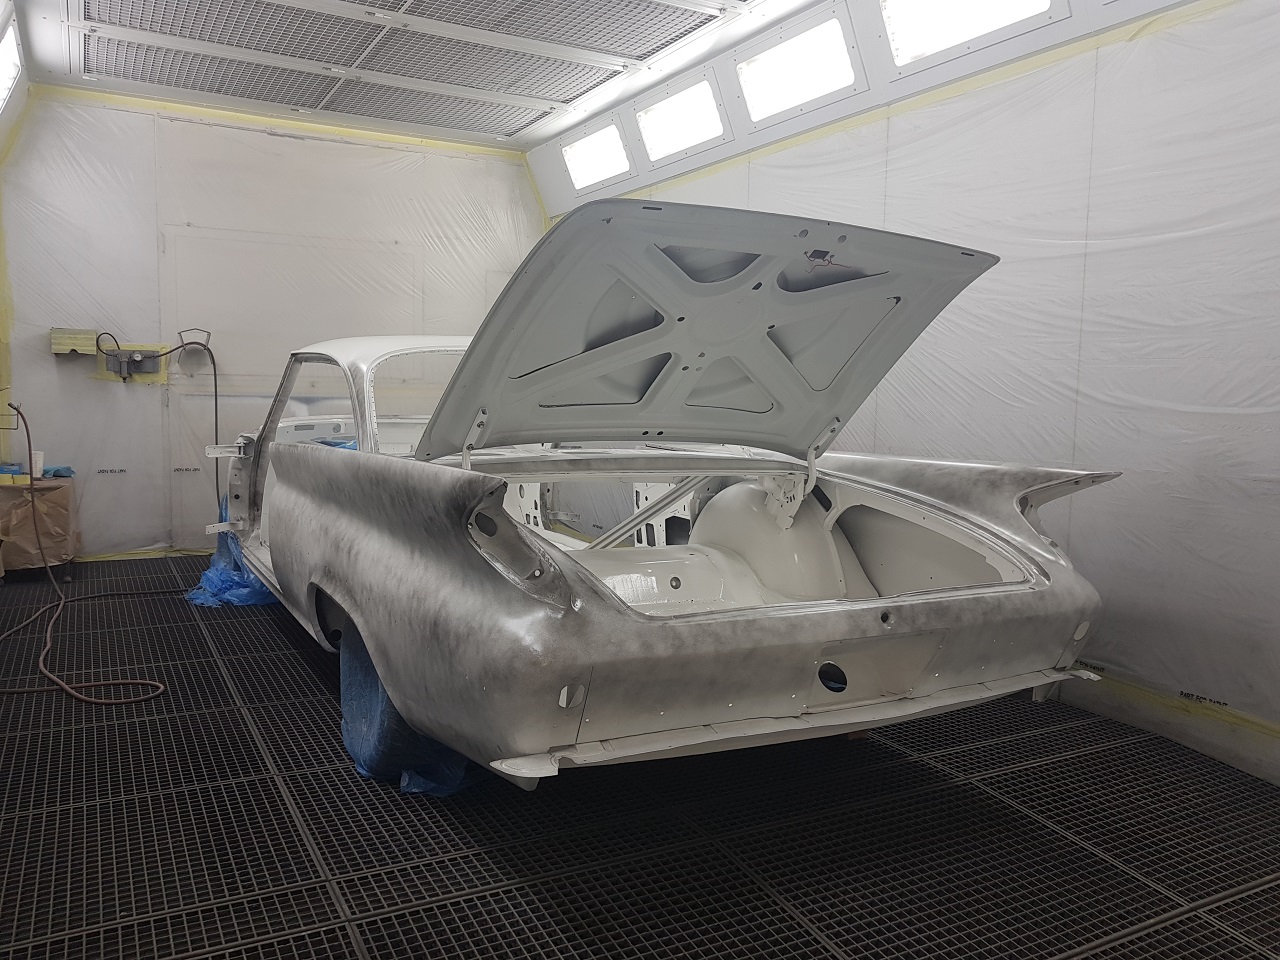 (20200424_163437 primer finished.jpg) (20200424_163437 primer finished.jpg)
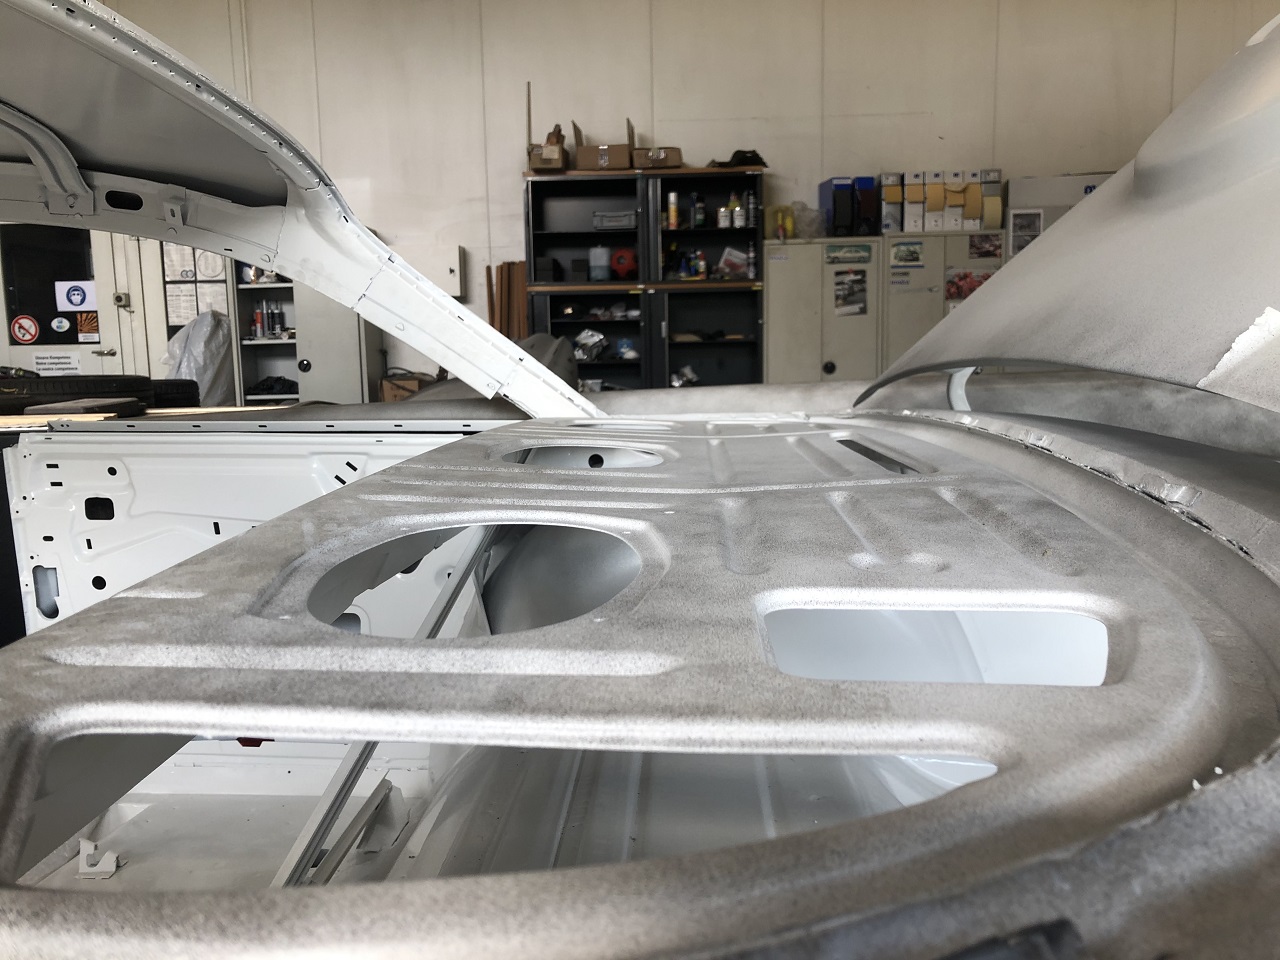 (IMG_7325 parcel shelf flat or as it is.JPG) (IMG_7325 parcel shelf flat or as it is.JPG)
Attachments
----------------
20200418_130046_sand blasted vacuum cleaning 1.jpg (411KB - 376 downloads)
20200418_130541_snad blasted vacuum cleaning 2.jpg (472KB - 403 downloads)
20200418_135610_applying primer.jpg (345KB - 408 downloads)
20200423_111758 shape correcting with tin.jpg (406KB - 419 downloads)
20200424_144845 c pillar passenger side finished.jpg (293KB - 393 downloads)
20200424_144910 c pillar drivers side finished.jpg (304KB - 404 downloads)
20200424_163437 primer finished.jpg (429KB - 396 downloads)
IMG_7325 parcel shelf flat or as it is.JPG (323KB - 405 downloads)
|
|
| |
|
Expert
Posts: 1530
Location: ZH, Switzerland | Update: I googled through my broad collection of pictures and got out, that the parcel shelf was flat (like a table on the upper side) until it was at the farmer smith shop. It will turn to flat soon. Happy Restoring! Dieter |
|
| |
|
Expert
Posts: 1530
Location: ZH, Switzerland | some more pictures
 (IMG-20200417-WA0020 start sand blasting condition of the roof.jpg) (IMG-20200417-WA0020 start sand blasting condition of the roof.jpg)
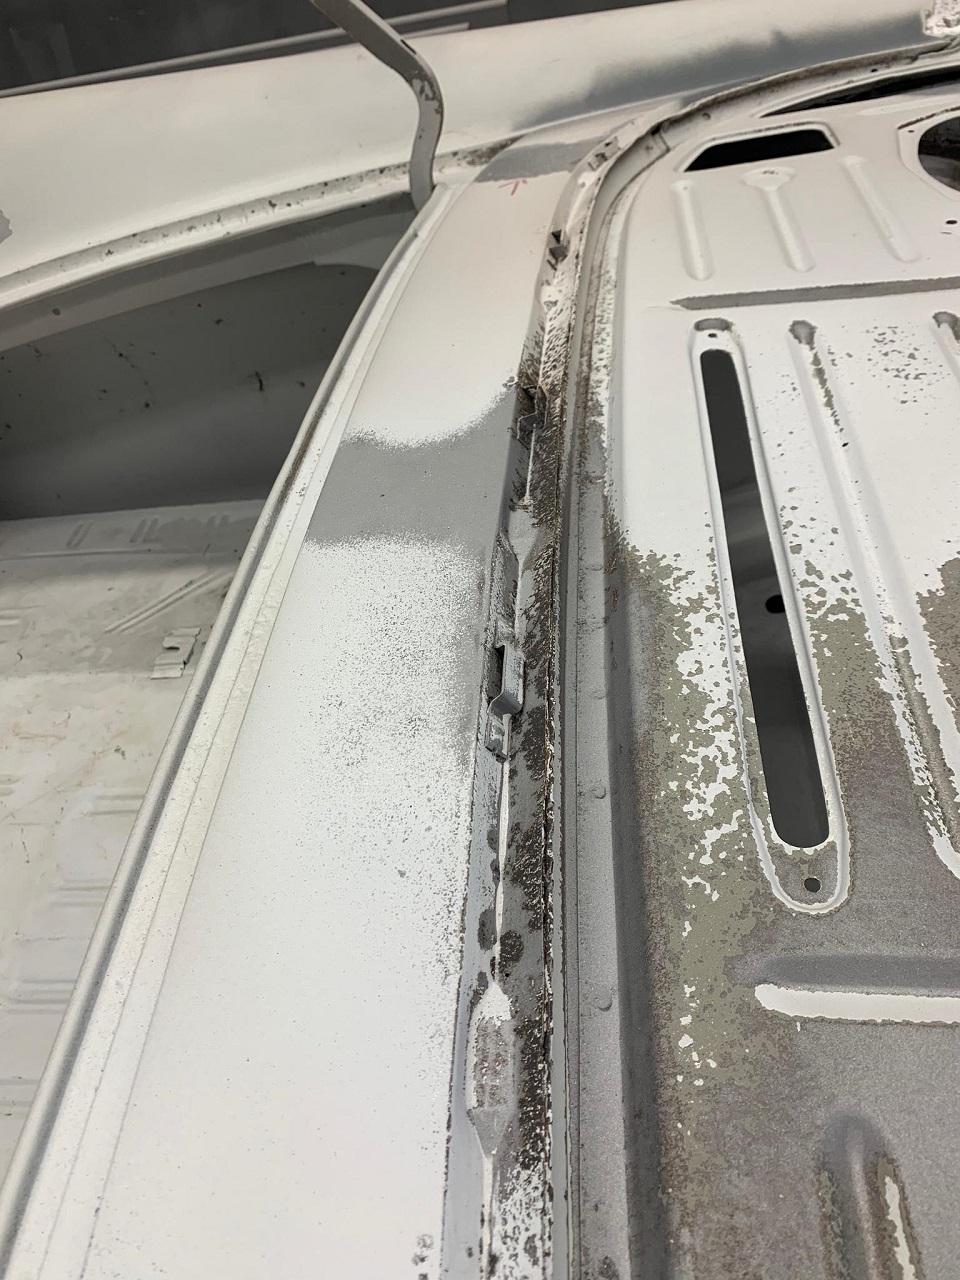 (IMG-20200417-WA0021 start sand blasting lower rear window channel.jpg) (IMG-20200417-WA0021 start sand blasting lower rear window channel.jpg)
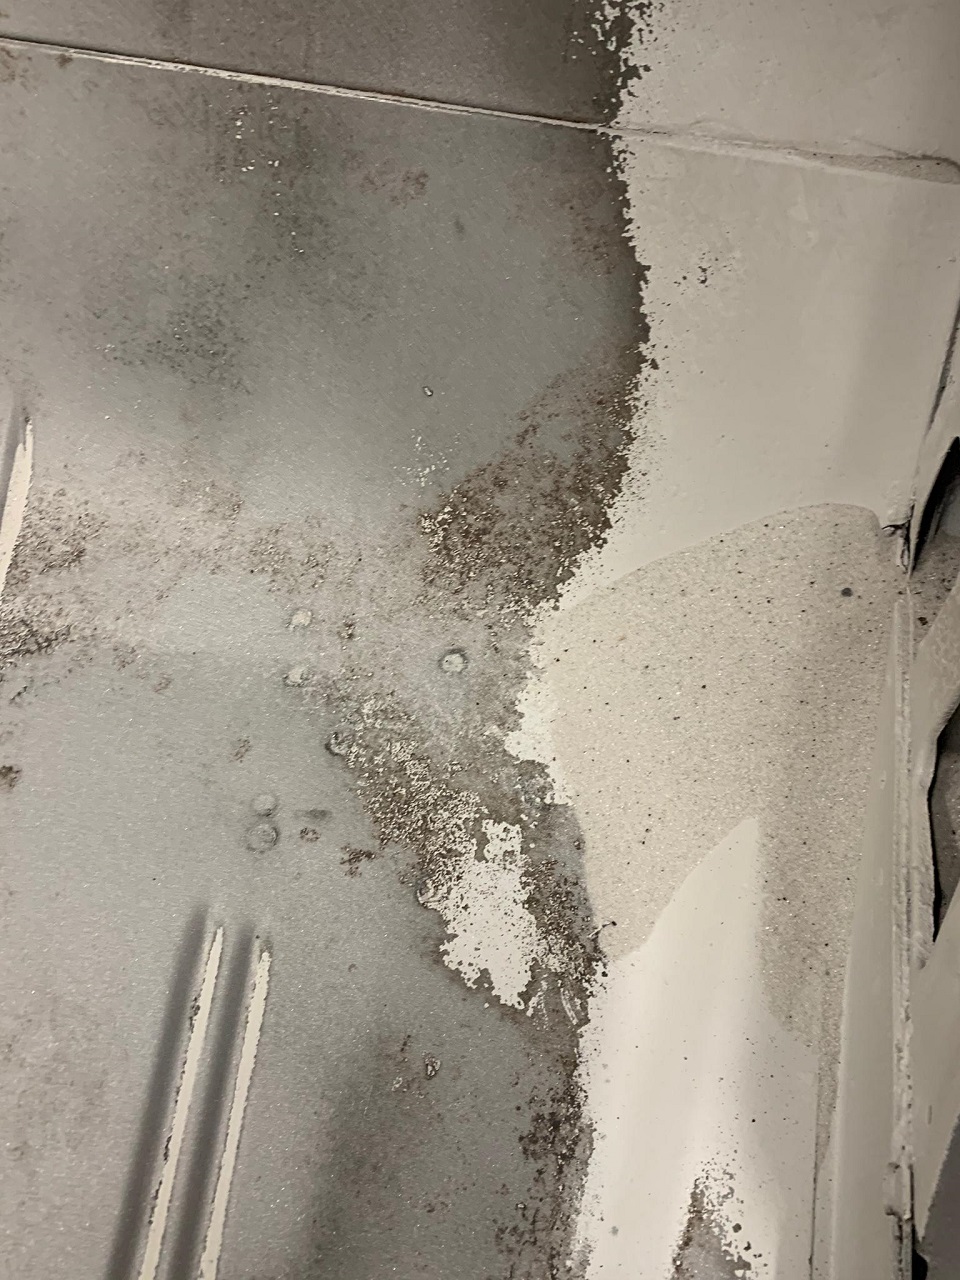 (IMG-20200417-WA0028 start sand blasting passenger side floor.jpg) (IMG-20200417-WA0028 start sand blasting passenger side floor.jpg)
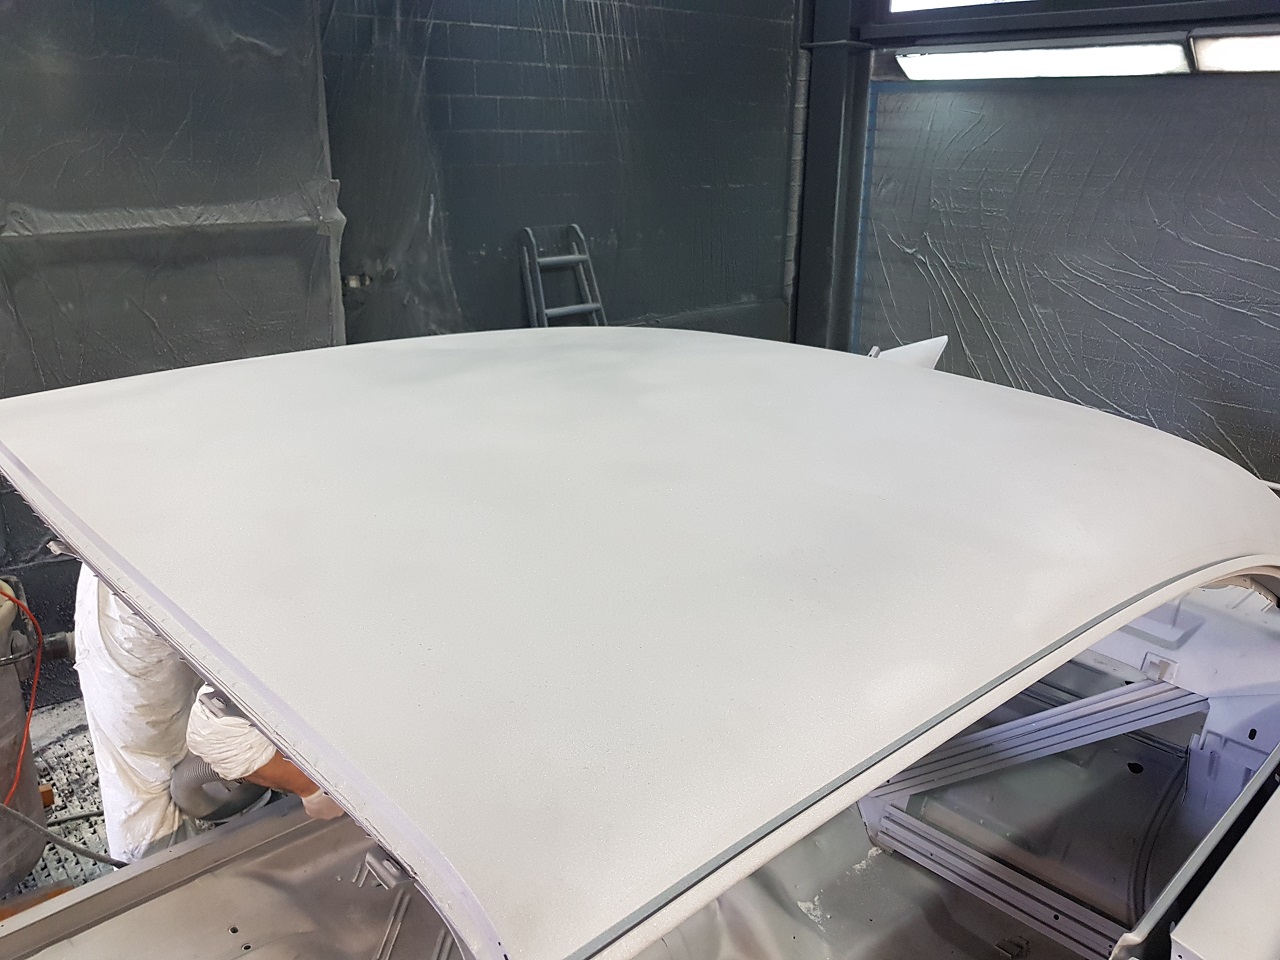 (20200418_125925 roof prior applying the primer.jpg) (20200418_125925 roof prior applying the primer.jpg)
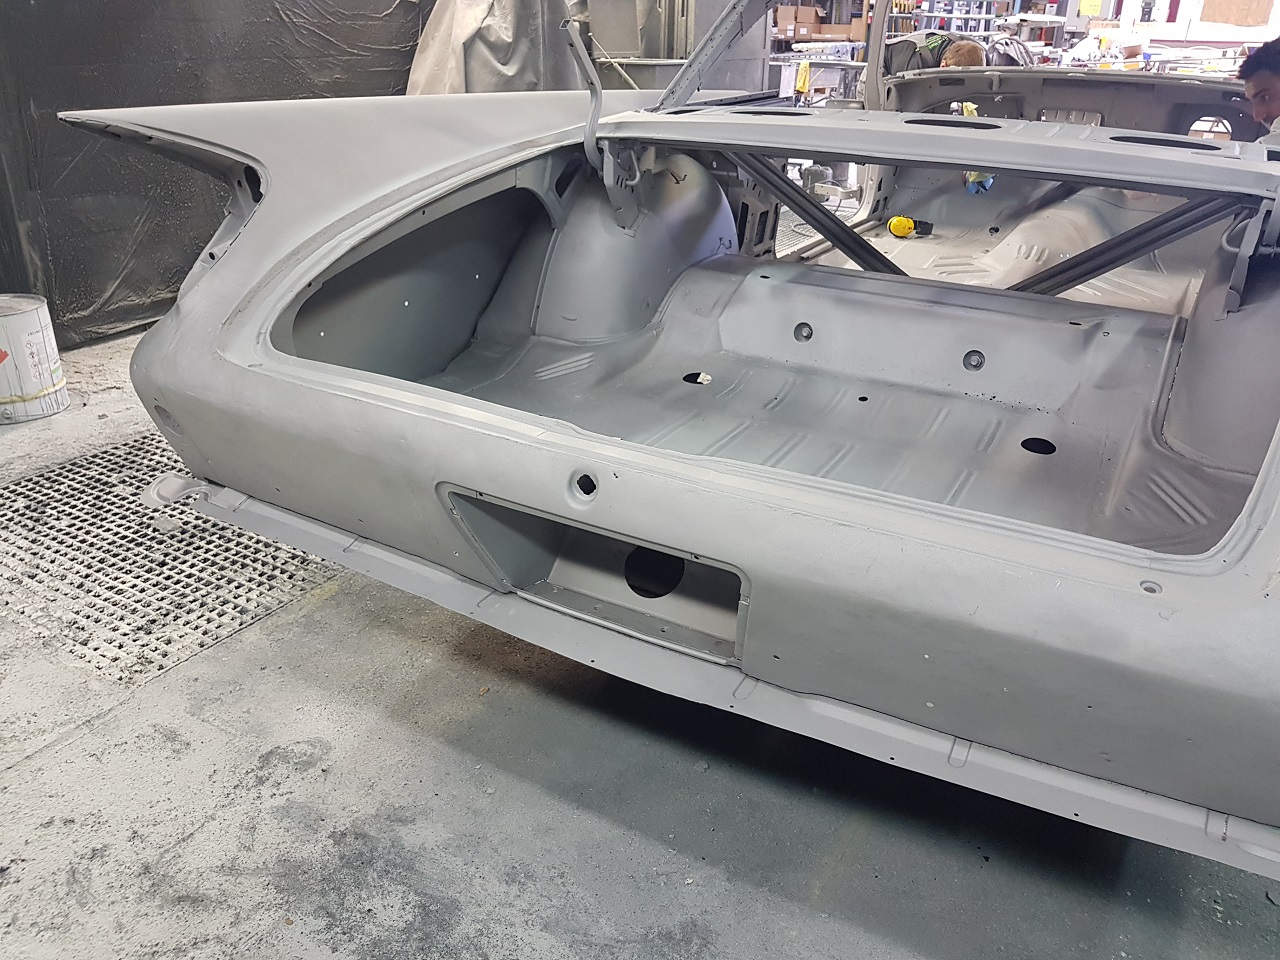 (20200418_130016 rear end prior to applying the primer.jpg) (20200418_130016 rear end prior to applying the primer.jpg)
Attachments
----------------
IMG-20200417-WA0020 start sand blasting condition of the roof.jpg (462KB - 451 downloads)
IMG-20200417-WA0021 start sand blasting lower rear window channel.jpg (388KB - 379 downloads)
IMG-20200417-WA0028 start sand blasting passenger side floor.jpg (398KB - 422 downloads)
20200418_125925 roof prior applying the primer.jpg (342KB - 436 downloads)
20200418_130016 rear end prior to applying the primer.jpg (471KB - 381 downloads)
|
|
| |
|
Expert
Posts: 1530
Location: ZH, Switzerland | Today a short visit at the body&paint shop. The surface preparation process has begun at the firewall of the body. Two apprentices are working on Saturday and overtime to work from the front to the back. The outer shell the boss will do himself. Preparation of the deck lid (getting out small dents) has started as well. Soon the deck lid and the rear bumper mountings will go to the sand blaster. The parcel shell is flat again. Happy Restoring! Dieter BTW: no new pictures today
Edited by di_ch_NY56 2020-05-16 9:43 AM
|
|
| |
|
Expert
Posts: 1530
Location: ZH, Switzerland | This day I went to the body&paint shop again. Since the pandemic shut down has released to a certain degree, the shop is flooded again with courant normale (work on contemporary cars). I could take some picutures... Happy Restoring! Dieter
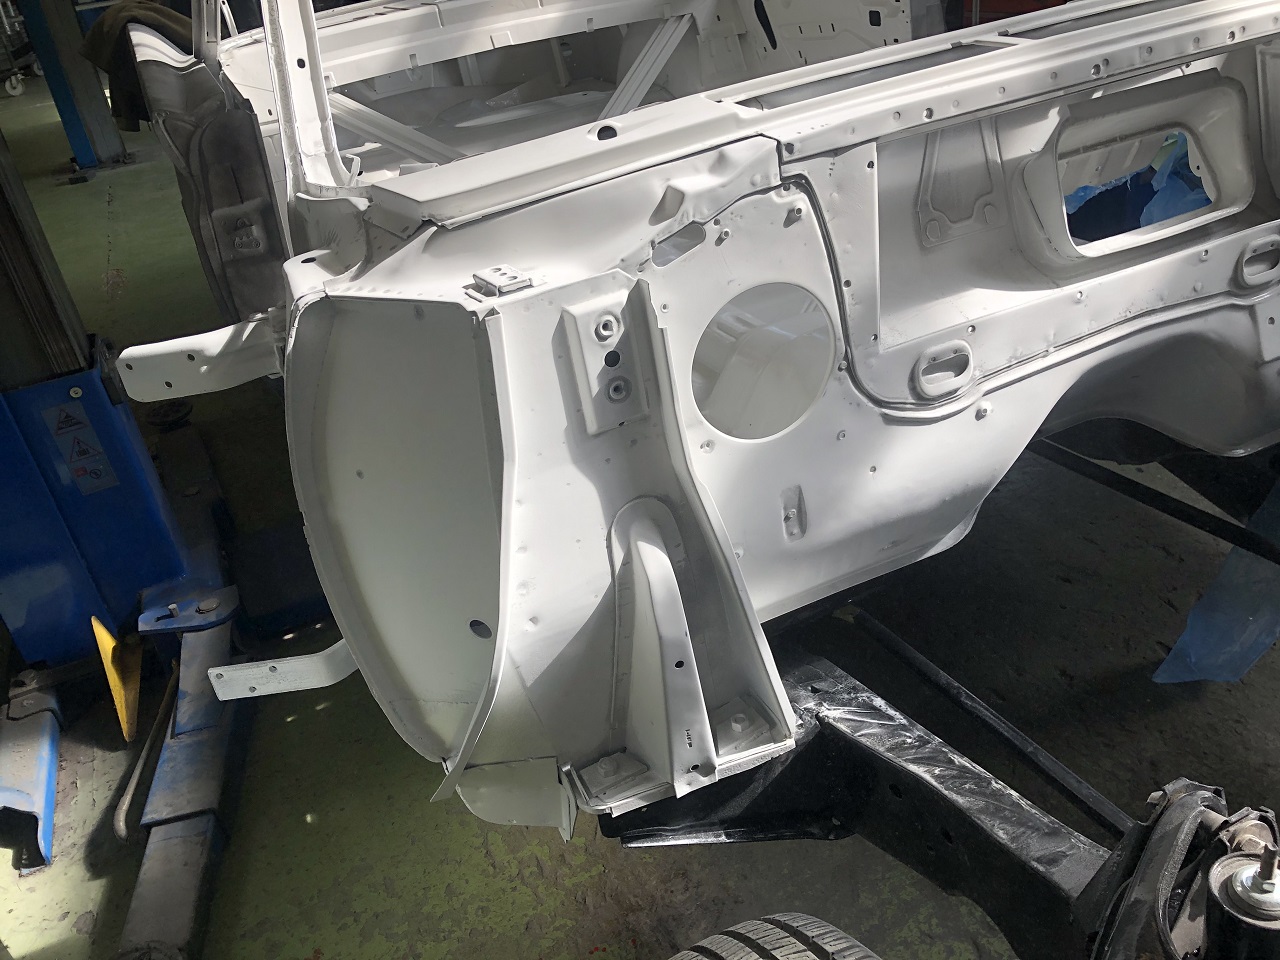 (IMG_7386 firewall passenger side view.JPG) (IMG_7386 firewall passenger side view.JPG)
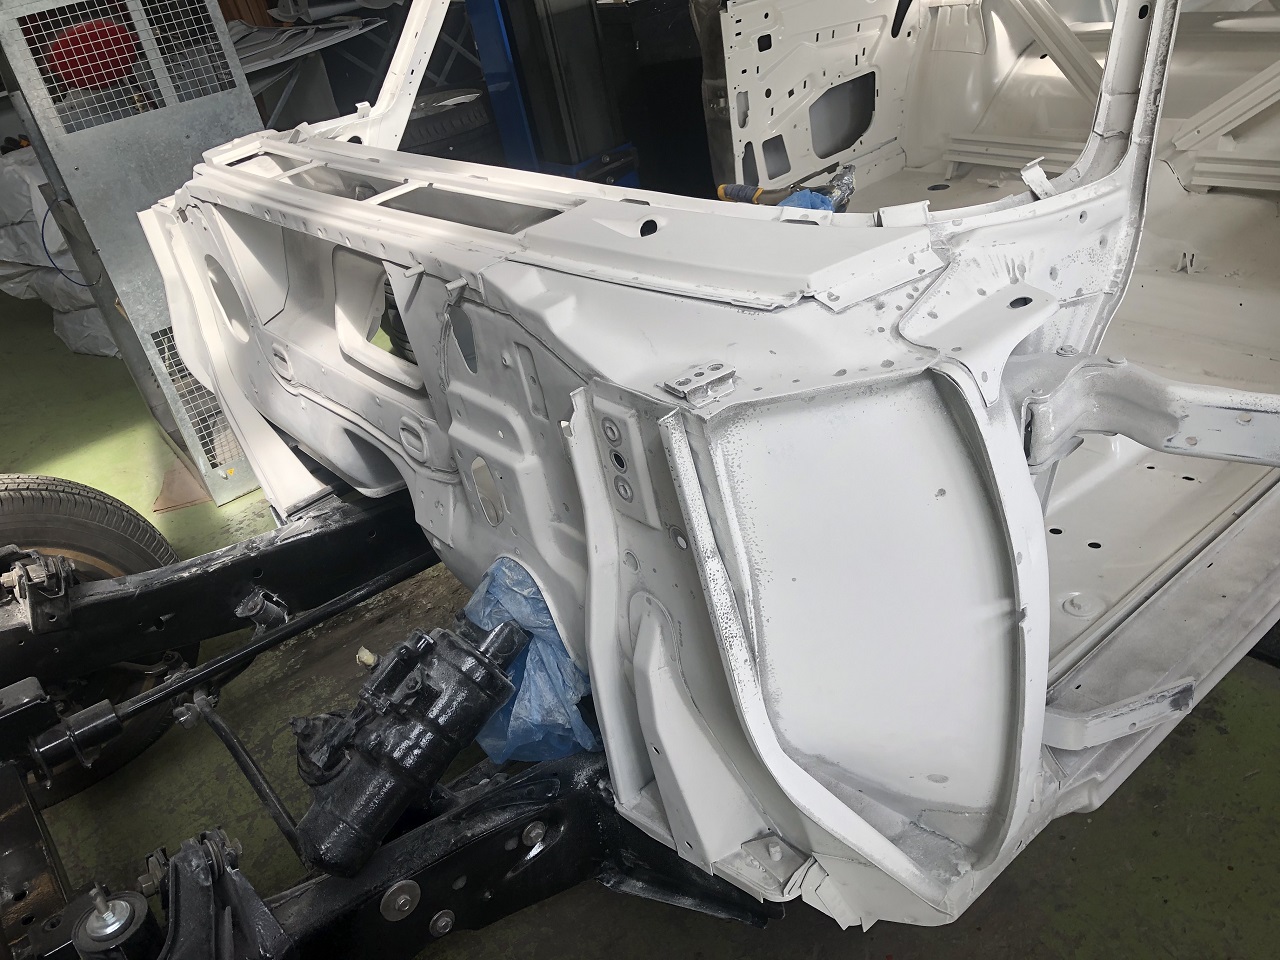 (IMG_7387 firewall drivers side view.JPG) (IMG_7387 firewall drivers side view.JPG)
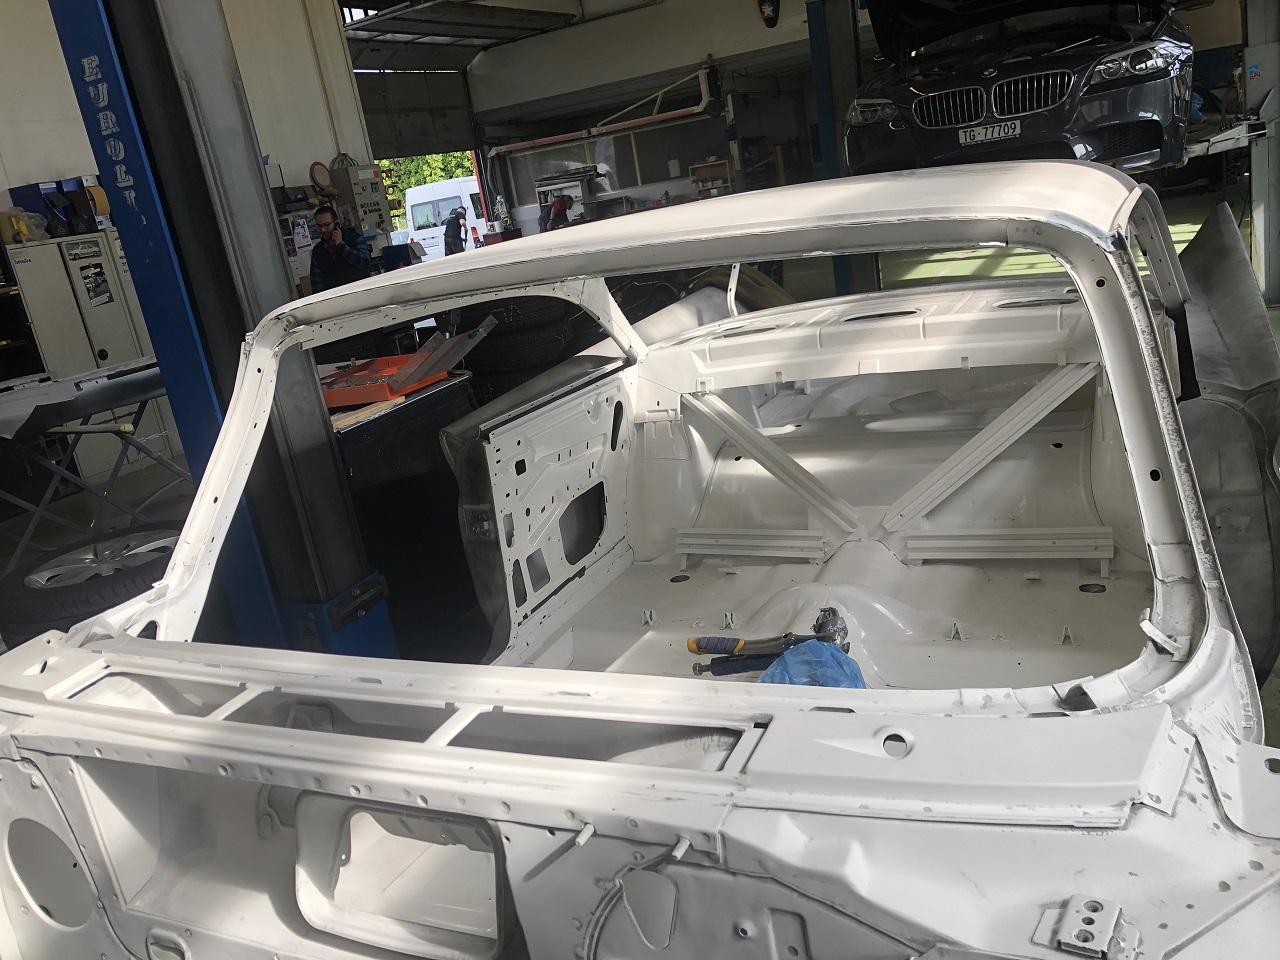 (IMG_7388 front cowl windshield frame.JPG) (IMG_7388 front cowl windshield frame.JPG)
Attachments
----------------
IMG_7386 firewall passenger side view.JPG (360KB - 391 downloads)
IMG_7387 firewall drivers side view.JPG (402KB - 443 downloads)
IMG_7388 front cowl windshield frame.JPG (366KB - 385 downloads)
|
|
| |
|
Expert
Posts: 1530
Location: ZH, Switzerland | di_ch_NY56 - 2020-04-30 1:07 PM 22mafeja - 2020-04-28 8:51 AM Well Dieter , now it is starting to look very promising. Hope your nightmare stages of the resto is over.. Hi Ralf It's not over, just getting worse. Because I'm all on my own to finance this adventure. From the environment here I live most people just giving me the advice to quit my hobby instead of to be solidarity in finacial ways. The solidarity is a one way from me to all others. Happy Restoring! Dieter It's not exact what I wrote... I have help from two muslim, living in Switzerland, and the two apprentices who are working overtime. Not from my family, my relatives, not from people who are claiming to be my friend, not from members here nor any who claims to be a Christ, an Atheist or not defined. Happy Restoring! Dieter |
|
| |
|
Expert
Posts: 1530
Location: ZH, Switzerland | I'm getting another half year delay on the body. The shut down of Corona is releasing now, due to a very low ciffre of new cases. So the body&paint shop got flooded with work. One apprentice is in the hospital (accute appendicitis). The best on this scenario is - I got more time to save money. For the engine I'll keep the agreed time stamp for the delivery of the turn key ready engine /w power print out and test sheet. I still have the engine assembly stand. For sure I'll find guys locally to mount the engine/trans combo into my Letter when it's ready. Happy Restoring! Dieter BTW: right now I'm on a good way to finance the adventure. |
|
| |
|
Expert 5K+
Posts: 5006
| darn dude I do all my own work an I might catch you! I'm running fuel lines and brake lines. About to do my wiring, but my bodywork is mostly done. |
|
| |
|
Expert
Posts: 1530
Location: ZH, Switzerland | Because of no work with my dump truck yesterday and today, I went to the body&paint shop. All the parts (there are a lot) from the front end are down in the shop again (stored on the first floor above). The shop owner prepared the trunk lid to dig out even the slightest imperfection (dent) prior to bring it the the sand blaster as well. He repaired a big dent in the shield below the radiator yoke and the apprentices are working on the battery tray, the vertical bar and more. Happy Restoring! Dieter |
|
| |
|
Expert
Posts: 1530
Location: ZH, Switzerland | some new pictures... The pittings on the inner fender will be cured as well... Happy Restoring! Dieter
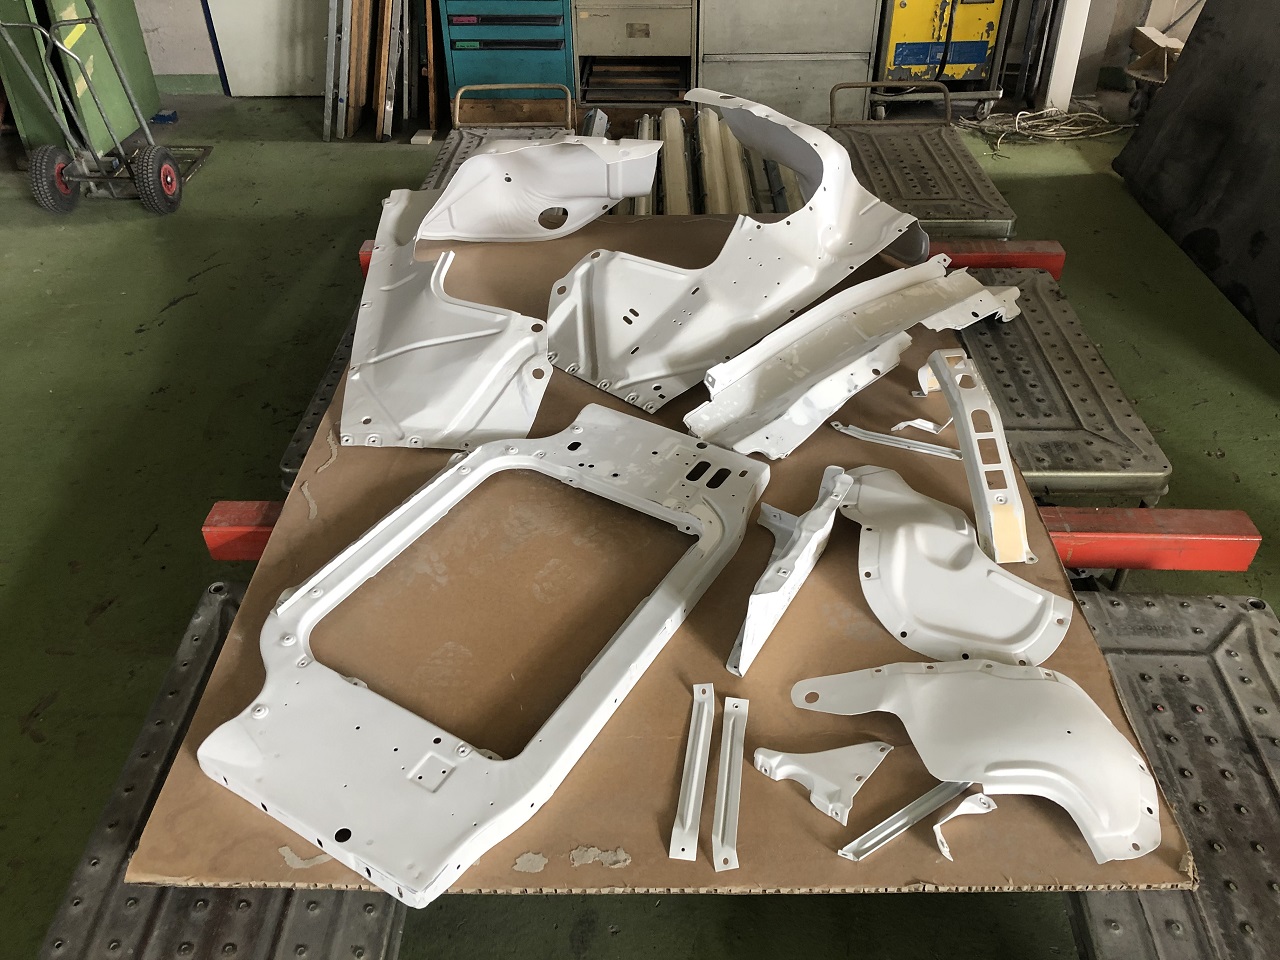 (IMG_7532 front end parts overview.JPG) (IMG_7532 front end parts overview.JPG)
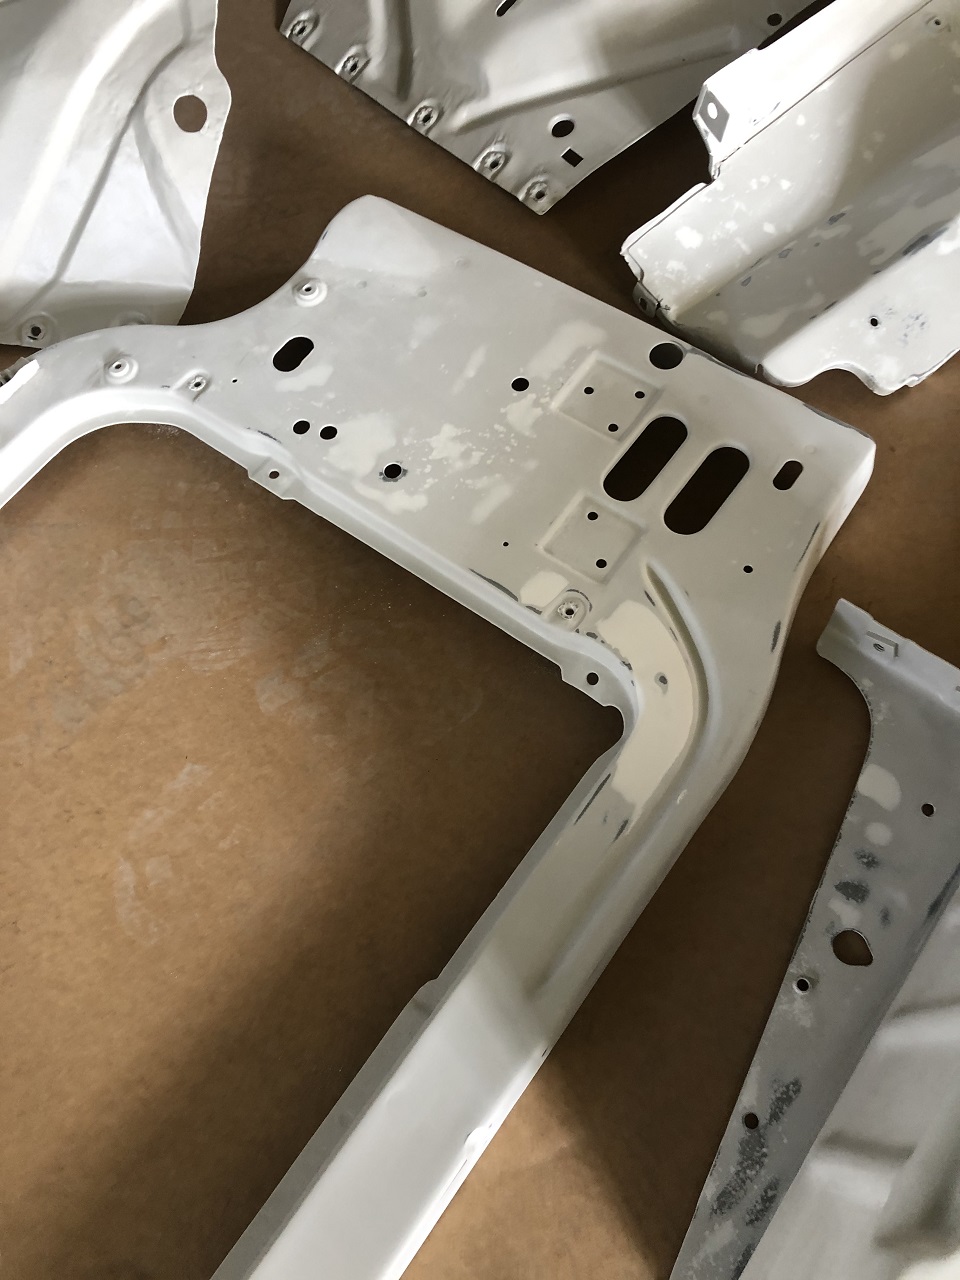 (IMG_7533 rad yoke and splash shield.JPG) (IMG_7533 rad yoke and splash shield.JPG)
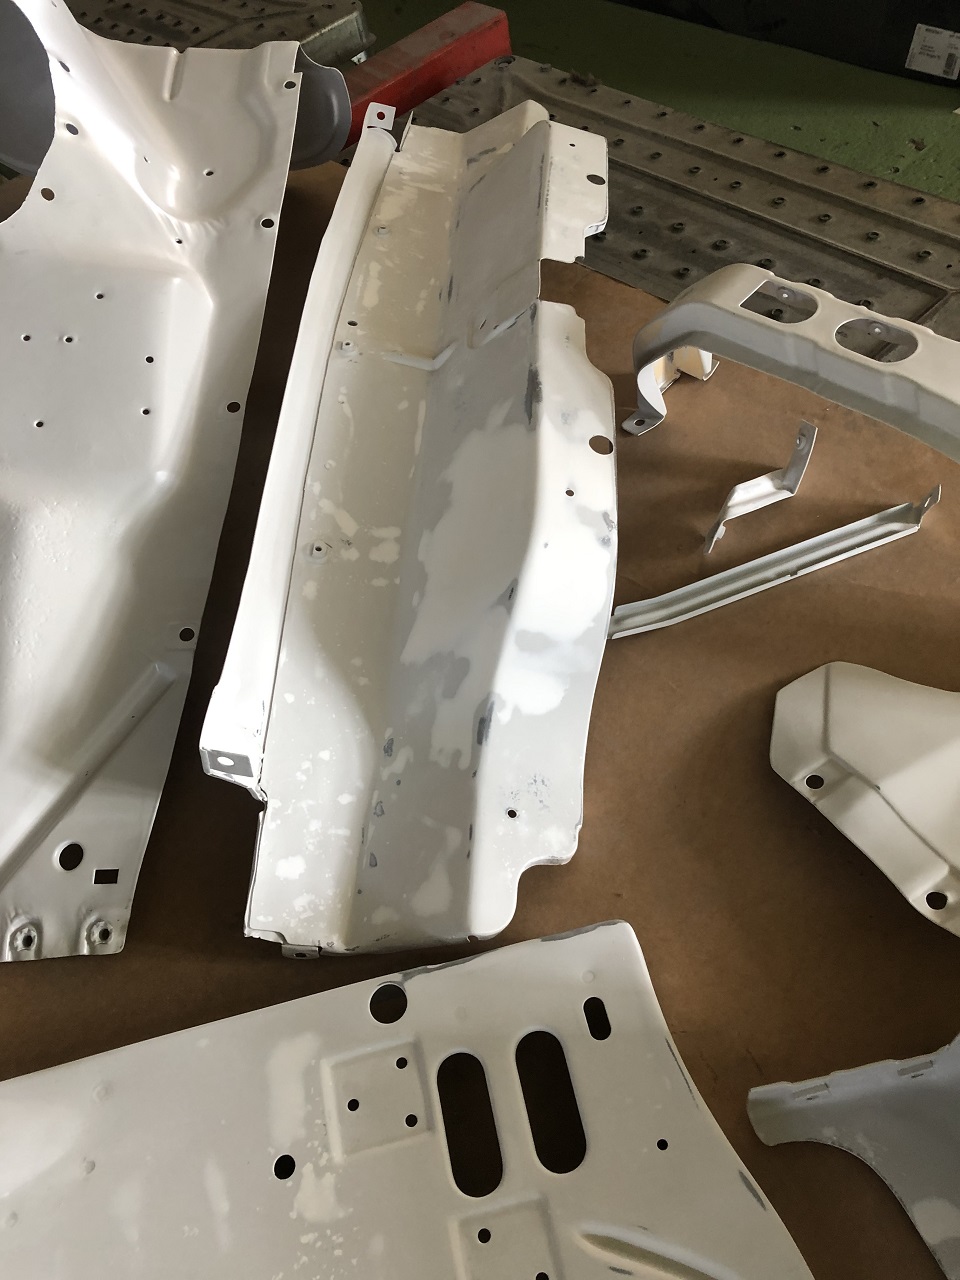 (IMG_7534 splash shield had a big dent.JPG) (IMG_7534 splash shield had a big dent.JPG)
Attachments
----------------
IMG_7532 front end parts overview.JPG (397KB - 346 downloads)
IMG_7533 rad yoke and splash shield.JPG (266KB - 345 downloads)
IMG_7534 splash shield had a big dent.JPG (269KB - 341 downloads)
|
|
| |
|
Expert
Posts: 1530
Location: ZH, Switzerland | The inner parts are covered with a layer of primer again. Originally from the sand blaster company the parts came with a layer thickness of 200 micron. At the body & paint shop they shaved off at least 100 micron to get a normal layer thickness. The result will be a very fine surface to get a pleasure when fondling the surface that will last for a very, very long time. Today I went to the engine restoration shop. The point the engine builder brought up is still to discuss... a) me I'm going to install the engine, but the Letter has to go to the engine builder, because he's turning the ignition key, or b) key ready engine. Either way... we'll see what's the output of the restored engine (back in the days up to about 1970 brutto engine power was measured, nowadays netto power (/w alternator, water pump, air filters and exhaust system)). I heard the whole story from the engine builder.... both down payments I did back in 2018 for the engine are NOT lost. Happy Restoring! Dieter
Edited by di_ch_NY56 2020-07-28 2:13 PM
|
|
| |
|
Expert
Posts: 1530
Location: ZH, Switzerland | The trunk lid and some small parts are back from the sand blaster and immediately covered with primer... Actually the boss of the body&paint shop is working on a 2019 BMW X3 M40d, very low odometer readings, where a person destroyed the hood, front fender, front door, rear door, rear quarter panel plus a rim at the drivers side. The bimmer body shop was working with no success.... Thinking at the engine.... because the engine builder resists to mention the final price of the rebuilt engine I do not see a coorperation anymore. I know two prices from the Chrysler 300 Club International (forum, where a member was complaining about the USD 12000.- price tag (key ready engine) while the builder offered USD 6000.-) and from Sweden.
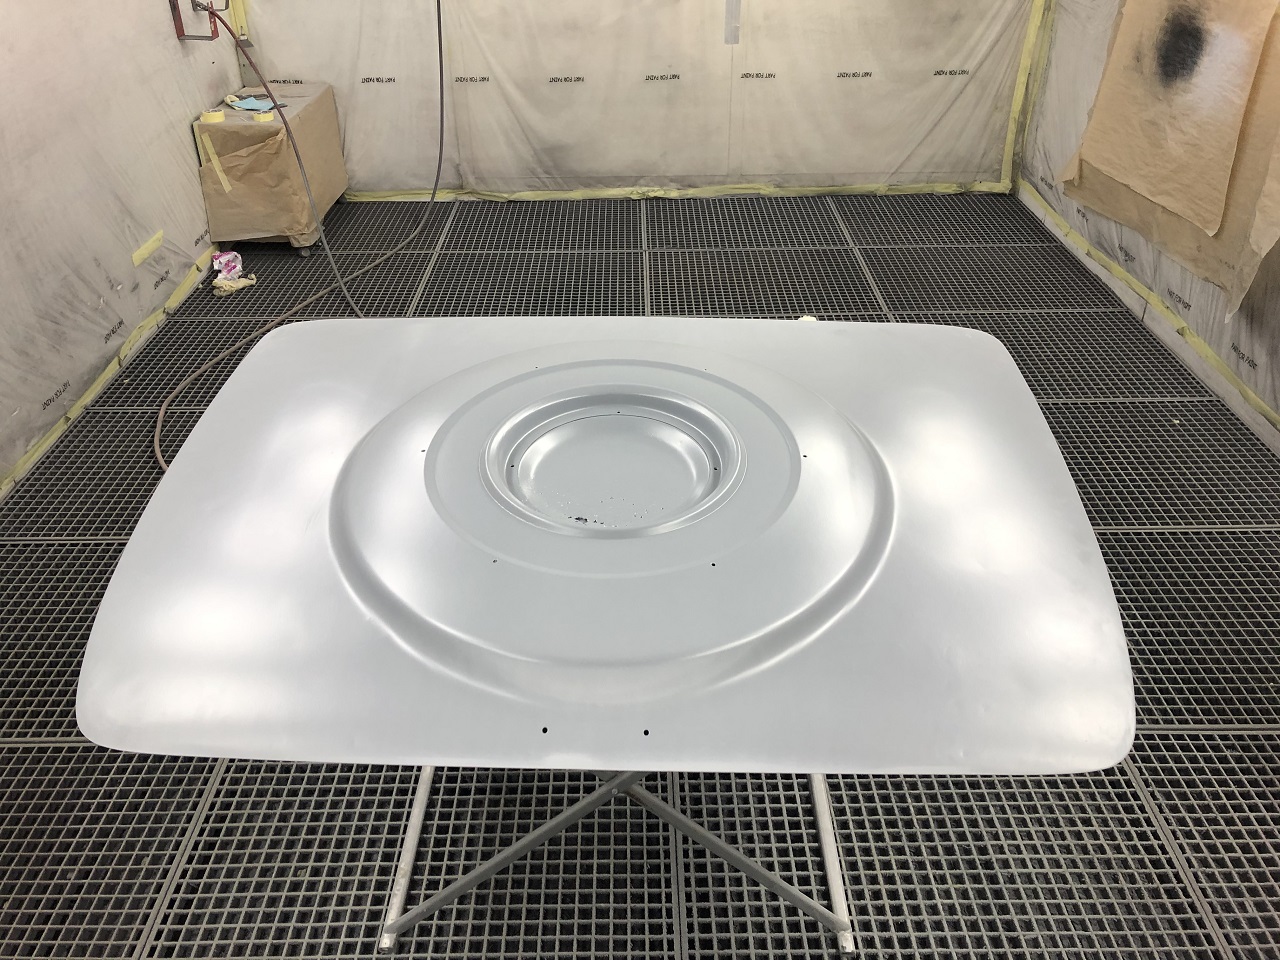 (IMG_7738 trunk lid outside.JPG) (IMG_7738 trunk lid outside.JPG)
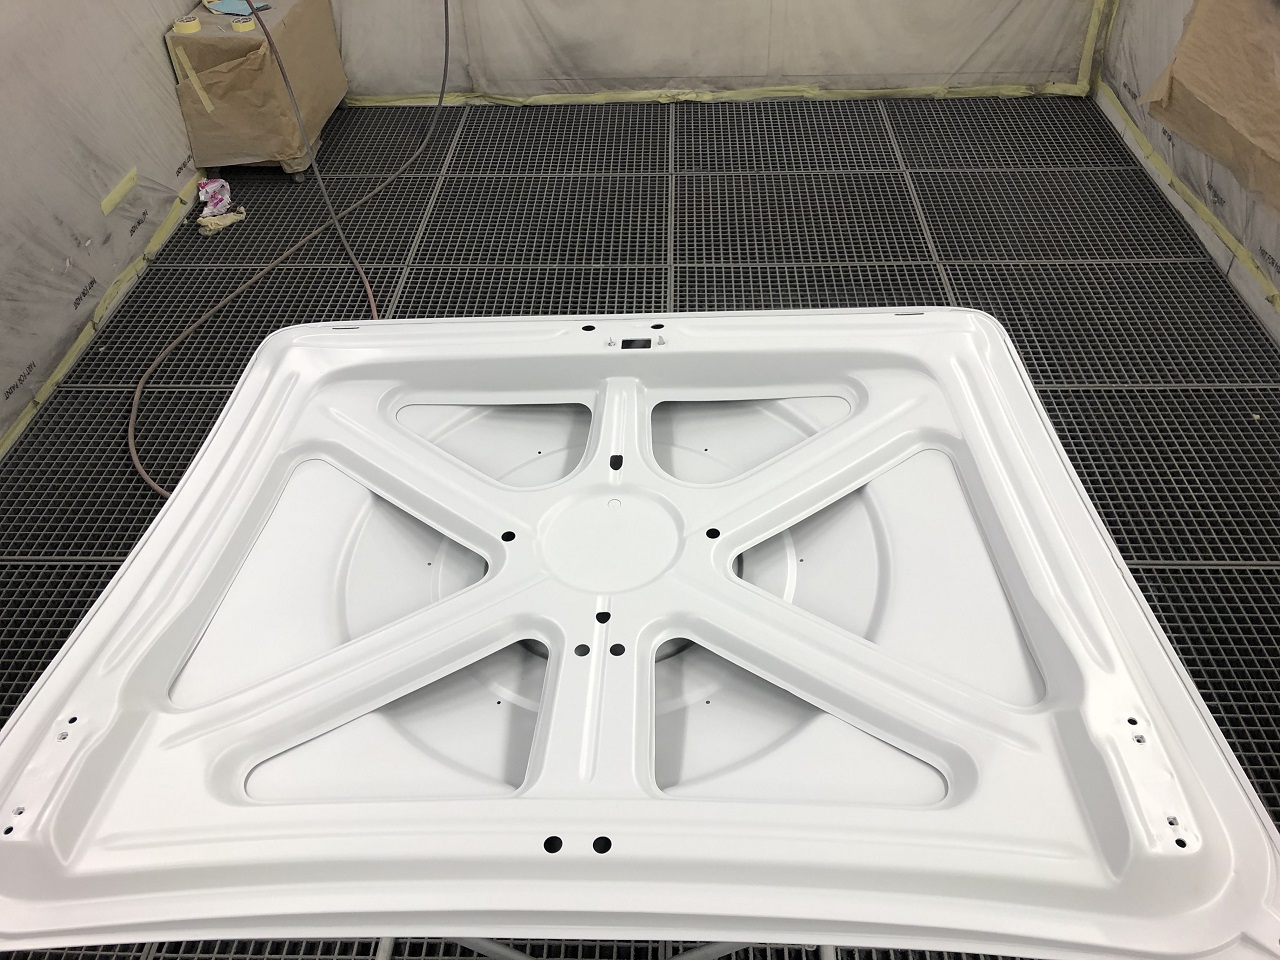 (IMG_7736_trunk lid inside.JPG) (IMG_7736_trunk lid inside.JPG)
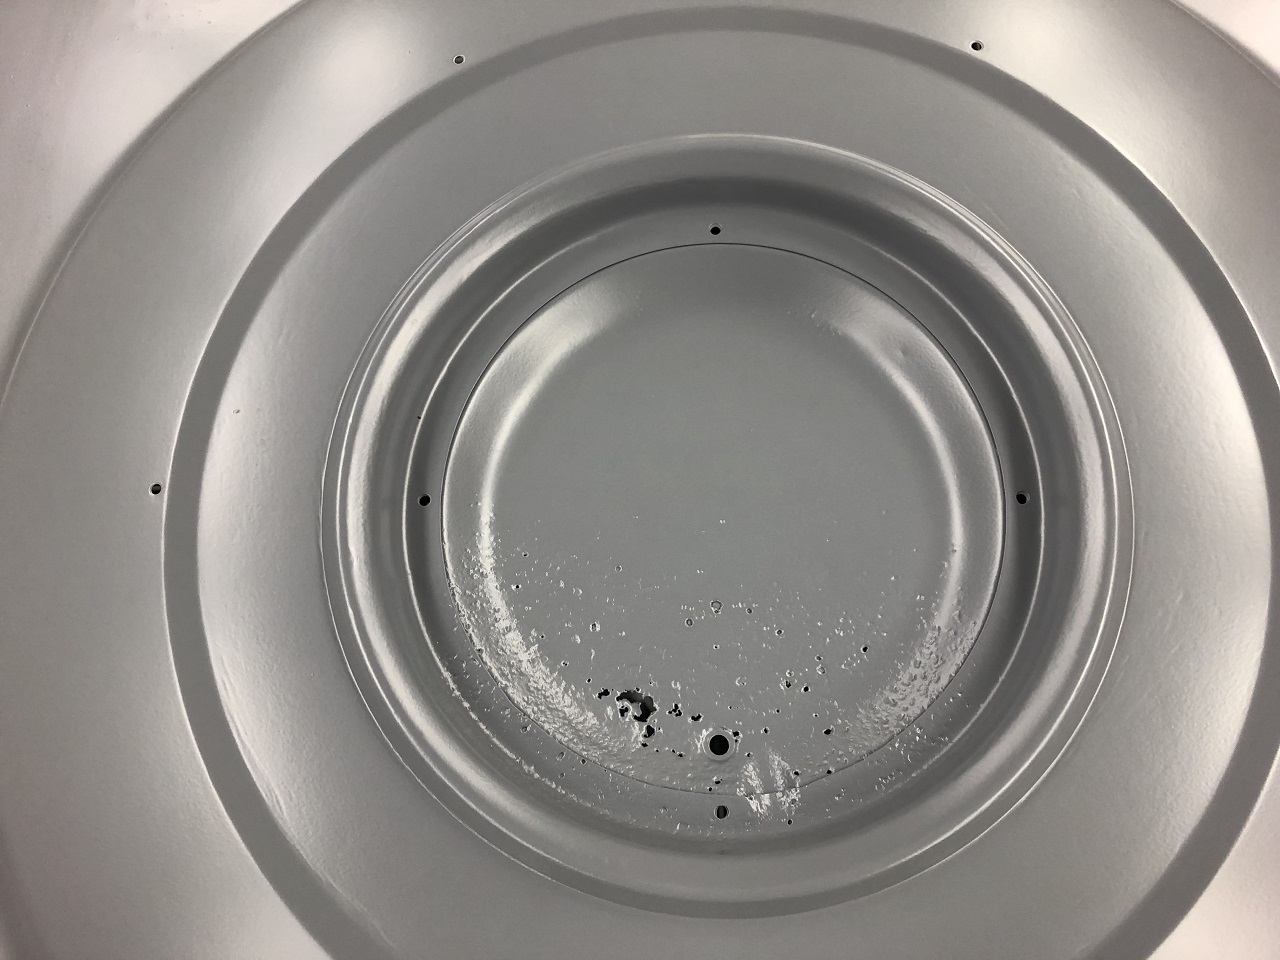 (IMG_7737_trunk lid toilet base.JPG) (IMG_7737_trunk lid toilet base.JPG)
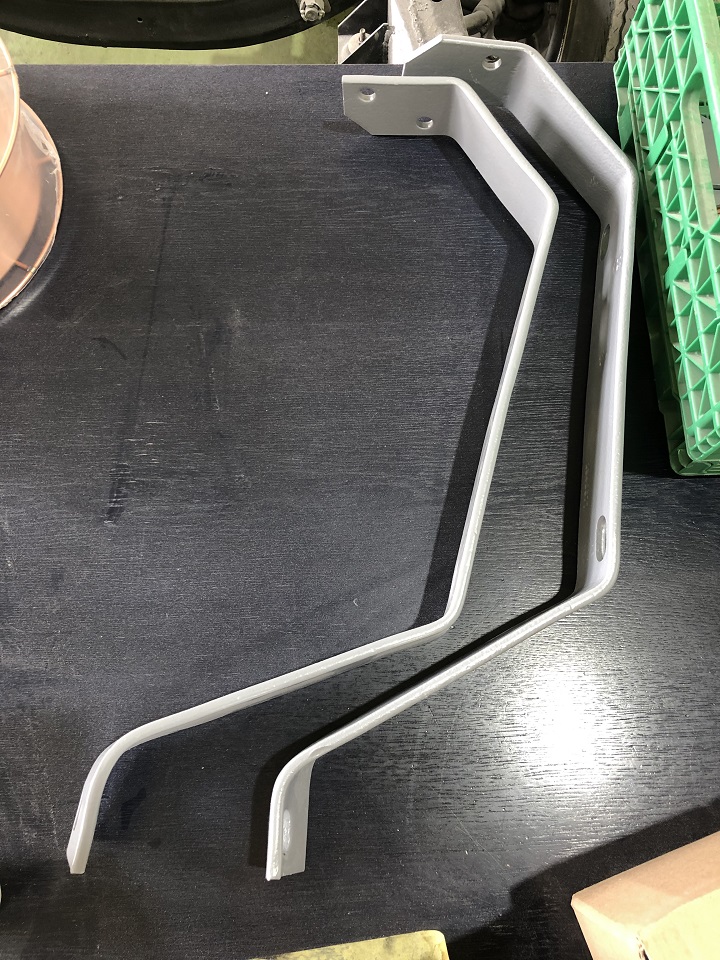 (IMG_7739 rear bumper holder.JPG) (IMG_7739 rear bumper holder.JPG)
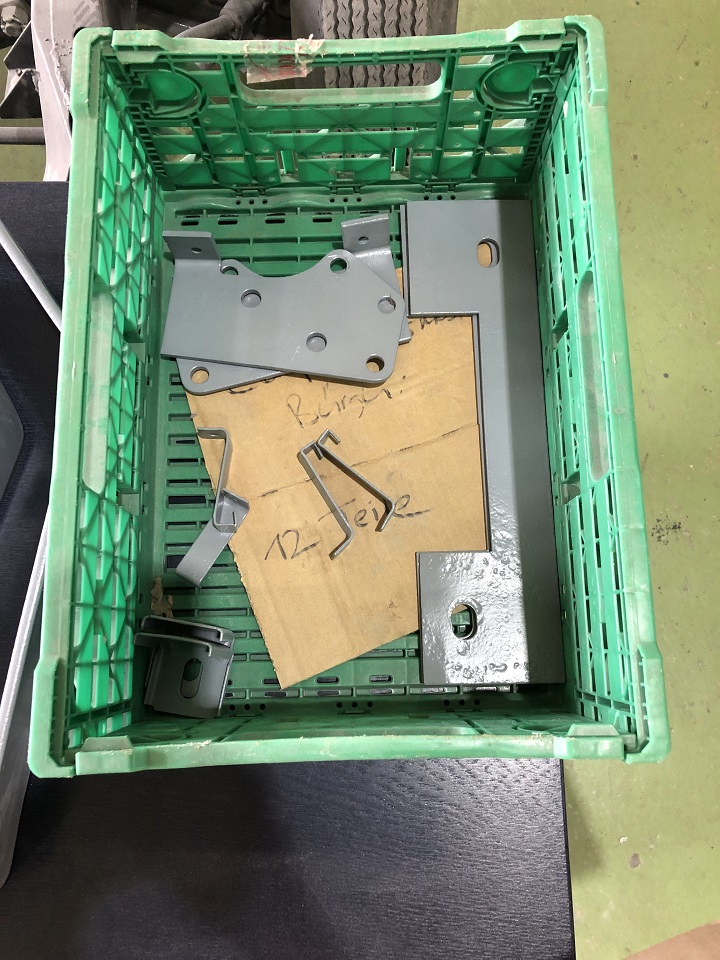 (IMG_7740 small hardware.JPG) (IMG_7740 small hardware.JPG)
Attachments
----------------
IMG_7738 trunk lid outside.JPG (474KB - 309 downloads)
IMG_7736_trunk lid inside.JPG (410KB - 308 downloads)
IMG_7737_trunk lid toilet base.JPG (282KB - 311 downloads)
IMG_7739 rear bumper holder.JPG (319KB - 310 downloads)
IMG_7740 small hardware.JPG (270KB - 322 downloads)
|
|
| |
|
Expert
Posts: 1530
Location: ZH, Switzerland | Some little bit more progress at my Letter. I was discussing the jumping cracker noise on the passenger side rear floor section with the painter and body shop owner. Originall he didn't want to hurt the primer surface. But when I said, it's noticeable even with the sound/temperatue deadenng mat and the carpet installed, he agreed to use the plotter to get out the tension in that floor section. During that investigation I looked under the Letter again and noticed the lock shmith shop just corrected the shape of the reinforcement bar instead of installing a new, reproduced one like announced. Happy Restoring! Dieter
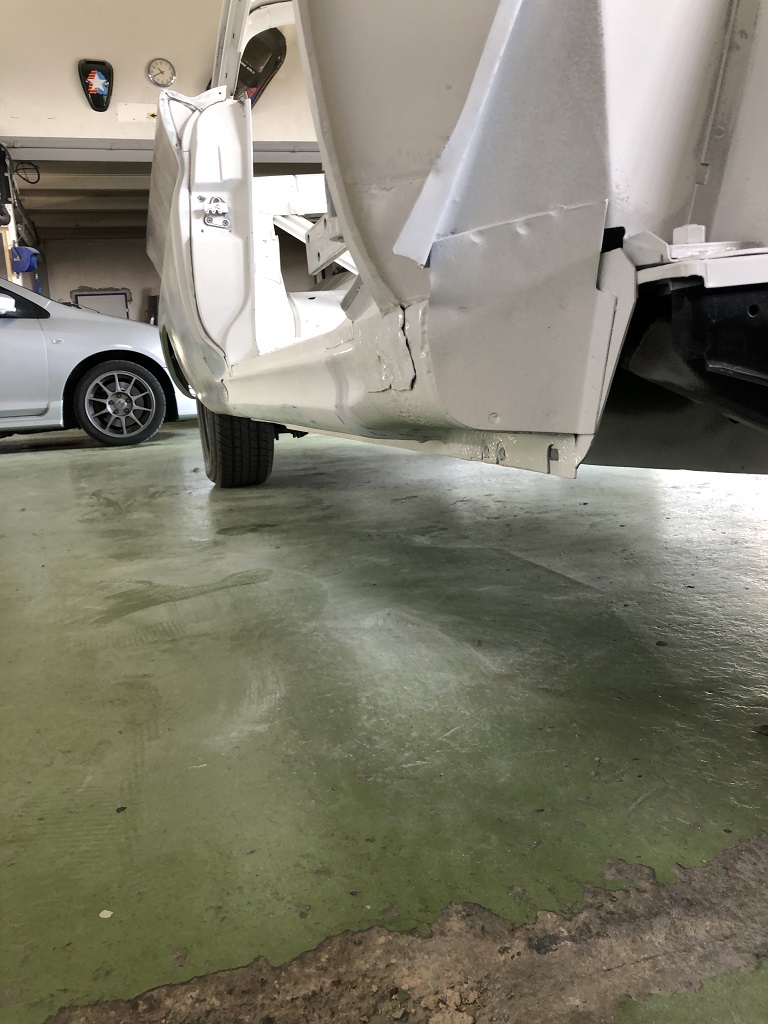 (IMG_7826 rocker panel passenger side.JPG) (IMG_7826 rocker panel passenger side.JPG)
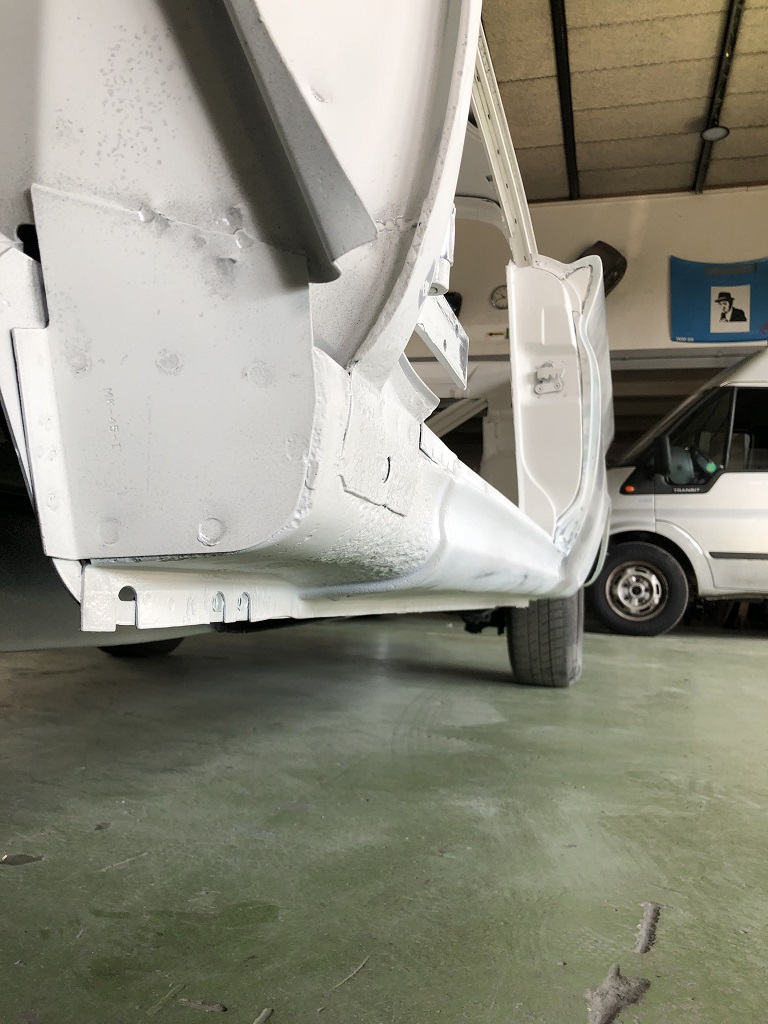 (IMG_7827 rocker panel drivers side.JPG) (IMG_7827 rocker panel drivers side.JPG)
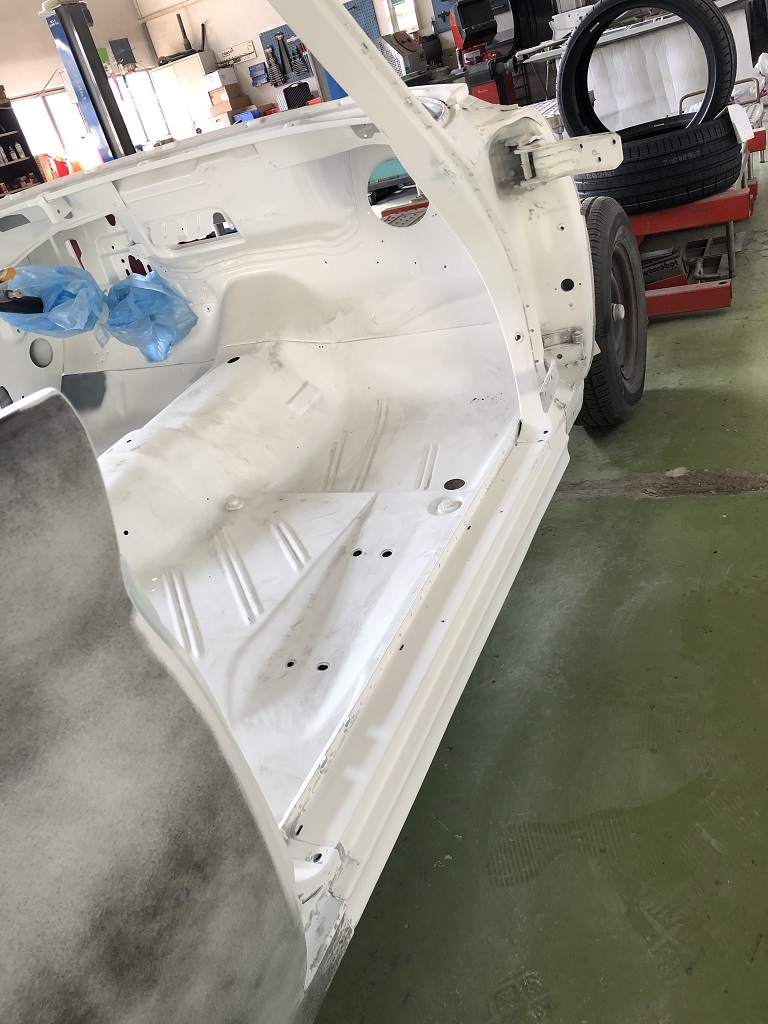 (IMG_7828 door opening passenger side.JPG) (IMG_7828 door opening passenger side.JPG)
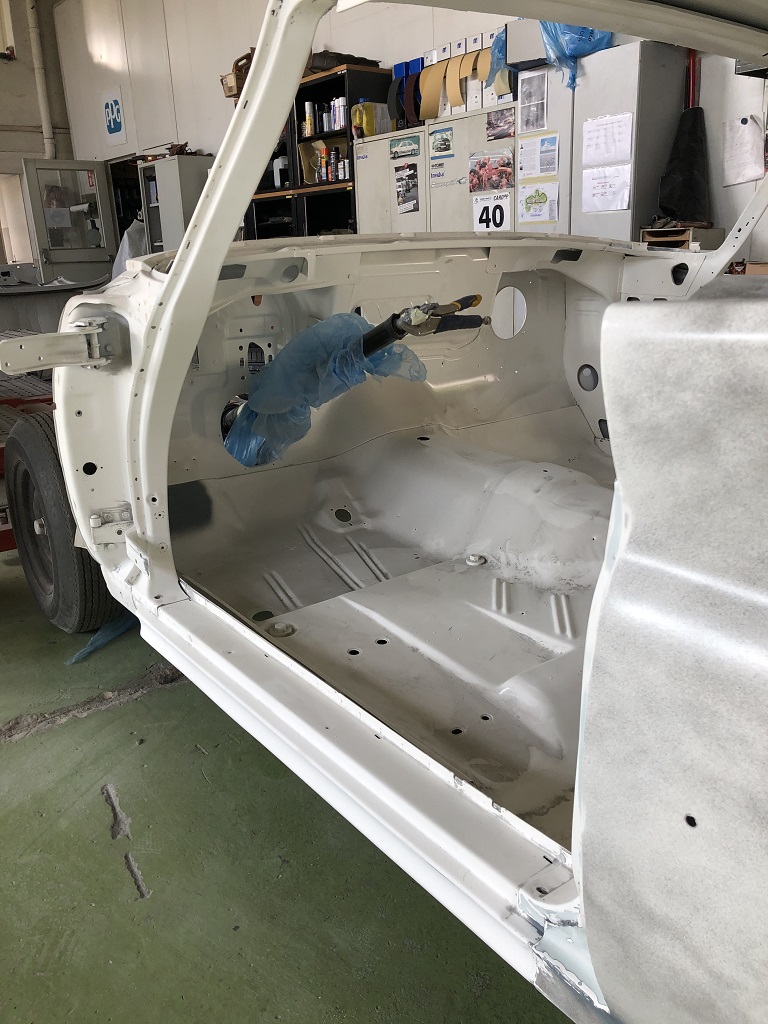 (IMG_7830 door opening drivers side.JPG) (IMG_7830 door opening drivers side.JPG)
Attachments
----------------
IMG_7826 rocker panel passenger side.JPG (220KB - 288 downloads)
IMG_7827 rocker panel drivers side.JPG (214KB - 287 downloads)
IMG_7828 door opening passenger side.JPG (243KB - 289 downloads)
IMG_7830 door opening drivers side.JPG (255KB - 287 downloads)
|
|
| |
|
Expert
Posts: 1530
Location: ZH, Switzerland | Some more progress at my Letter.. The surface of the roof is in work, also the C-pillars. The work on the weatherstrip surface and perimeter around the trunk opening are under work as well. Happy Restoring! Dieter
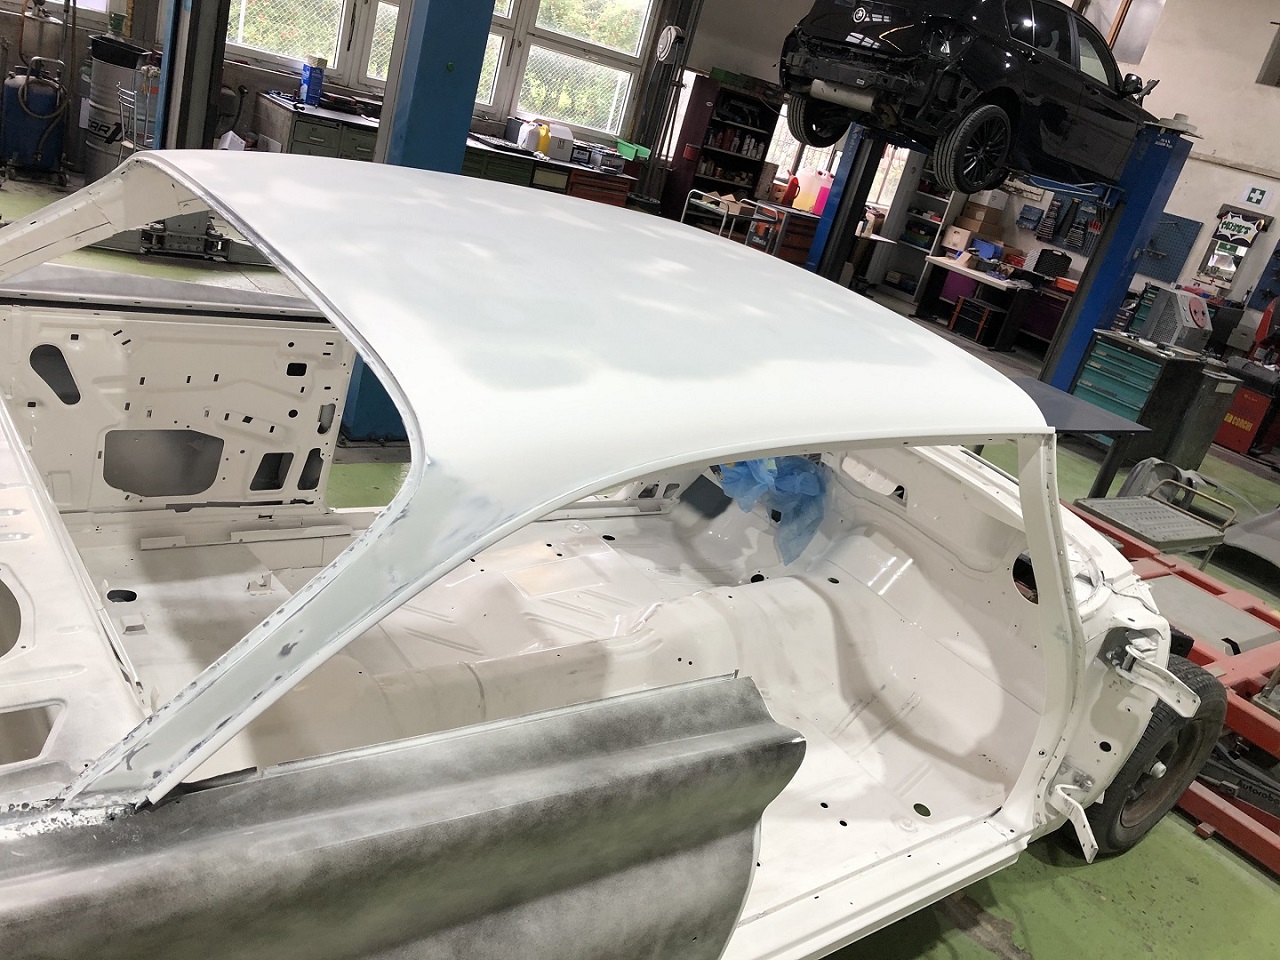 (IMG_7861 roof from passenger side.JPG) (IMG_7861 roof from passenger side.JPG)
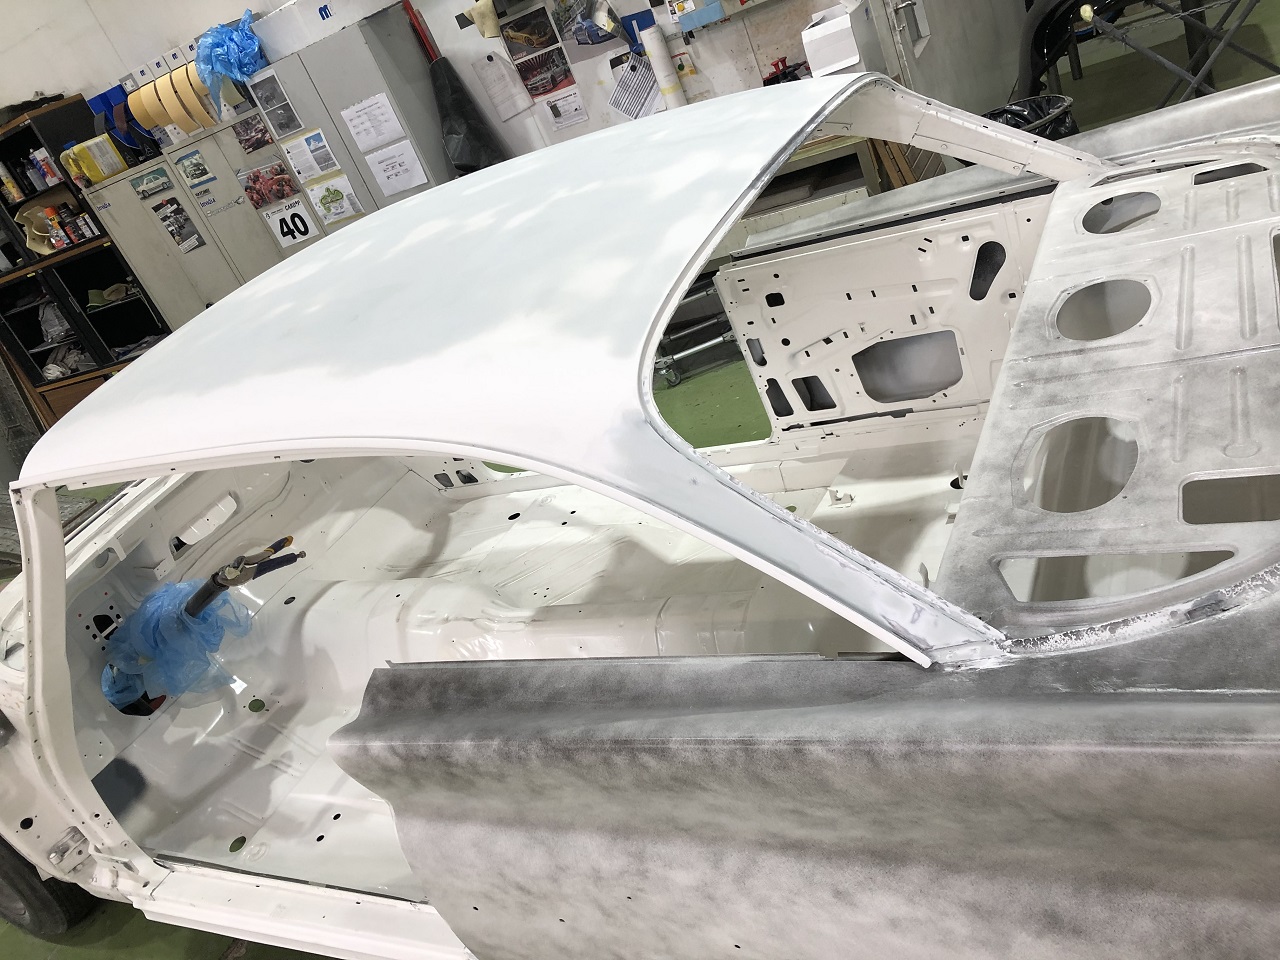 (IMG_7862 roof from drivers side.JPG) (IMG_7862 roof from drivers side.JPG)
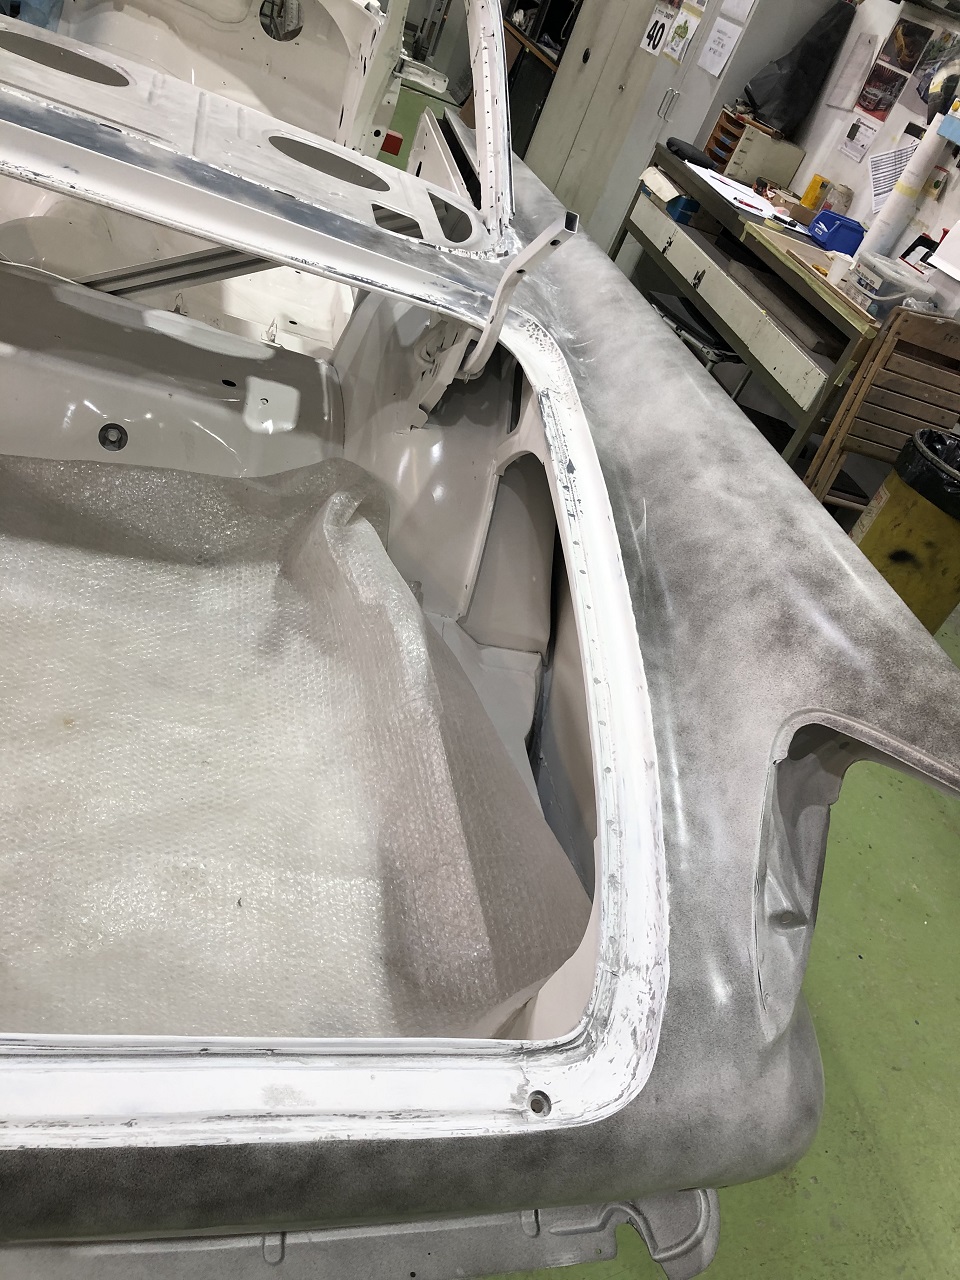 (IMG_7863 trunk opening passenger side.JPG) (IMG_7863 trunk opening passenger side.JPG)
 (IMG_7864 trunk opening drivers side.JPG) (IMG_7864 trunk opening drivers side.JPG)
Attachments
----------------
IMG_7861 roof from passenger side.JPG (412KB - 296 downloads)
IMG_7862 roof from drivers side.JPG (402KB - 290 downloads)
IMG_7863 trunk opening passenger side.JPG (445KB - 274 downloads)
IMG_7864 trunk opening drivers side.JPG (423KB - 277 downloads)
|
|
| |
|
Expert
Posts: 1530
Location: ZH, Switzerland | The trunk opening perimeter (weatherstrip channel) is in work now. The whole passenger floor area will be on work with abrasive pads to get a surface where the metal bondo will be rest on for a long time. As far as there is visible on pictures there were many pin head sized rusting trough holes visible after sand blasting and applying high quality primer. According to the body and paint shop owner, the body of my Letter would last as it will be for at least 60 years. Happy Restoring! Dieter |
|
| |
|
Expert
Posts: 1530
Location: ZH, Switzerland | The trunk surrounding is raw finished. The work on he lower rear window body lip (where the rear window weatherstrip sits) started. What I noticed... the drivers side rear fender sits at the reinforcement now like on the passenger side. The torture was, that the Letter got two accidents at the drivers side rear. After the first accident apparently the drivers side rear fender has been replaced (not very precise). Happy Restoring! Dieter
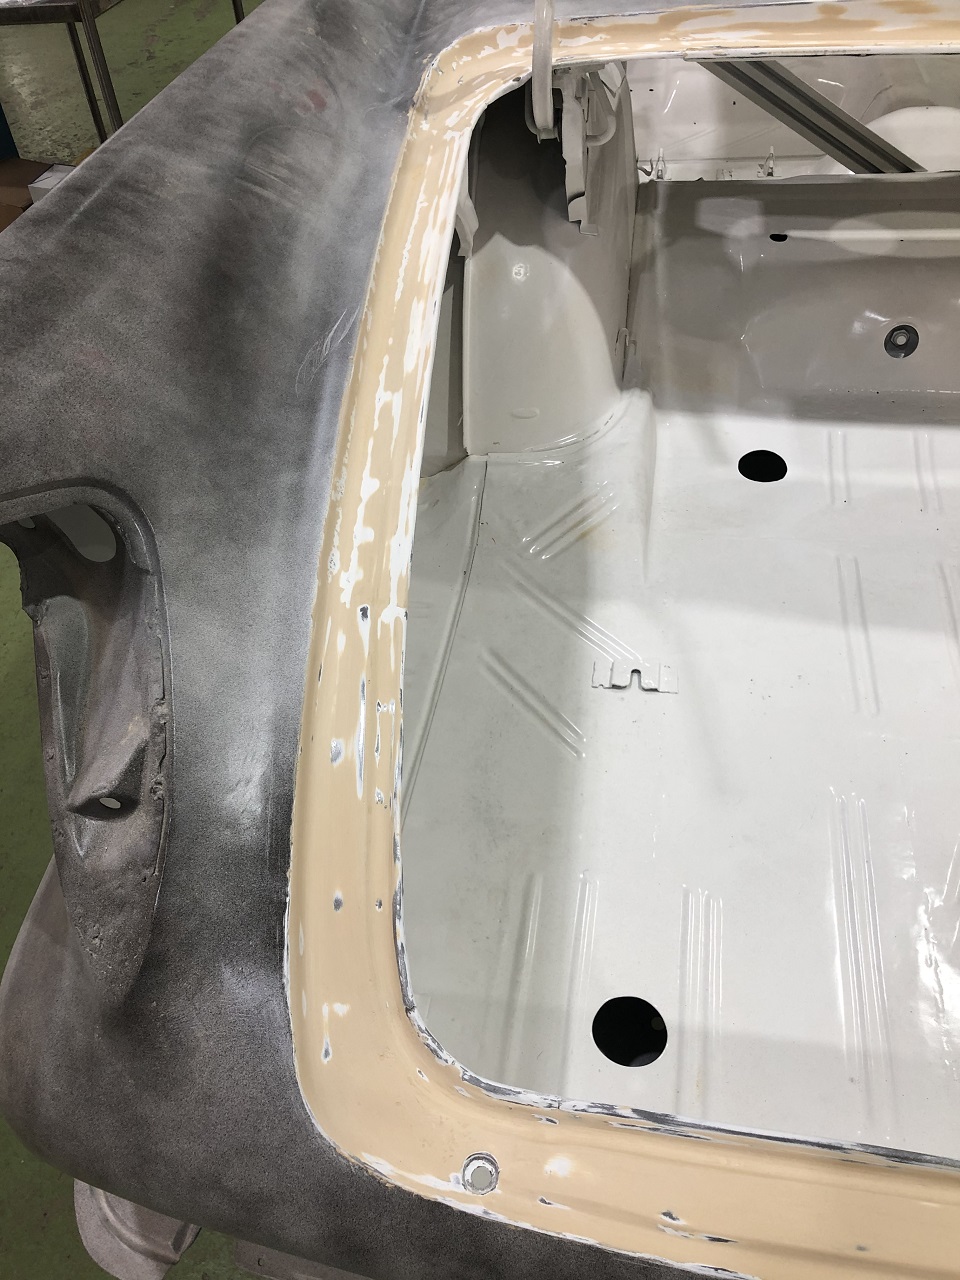 (IMG_7941 trunk weatherstrip channel drivers side.JPG) (IMG_7941 trunk weatherstrip channel drivers side.JPG)
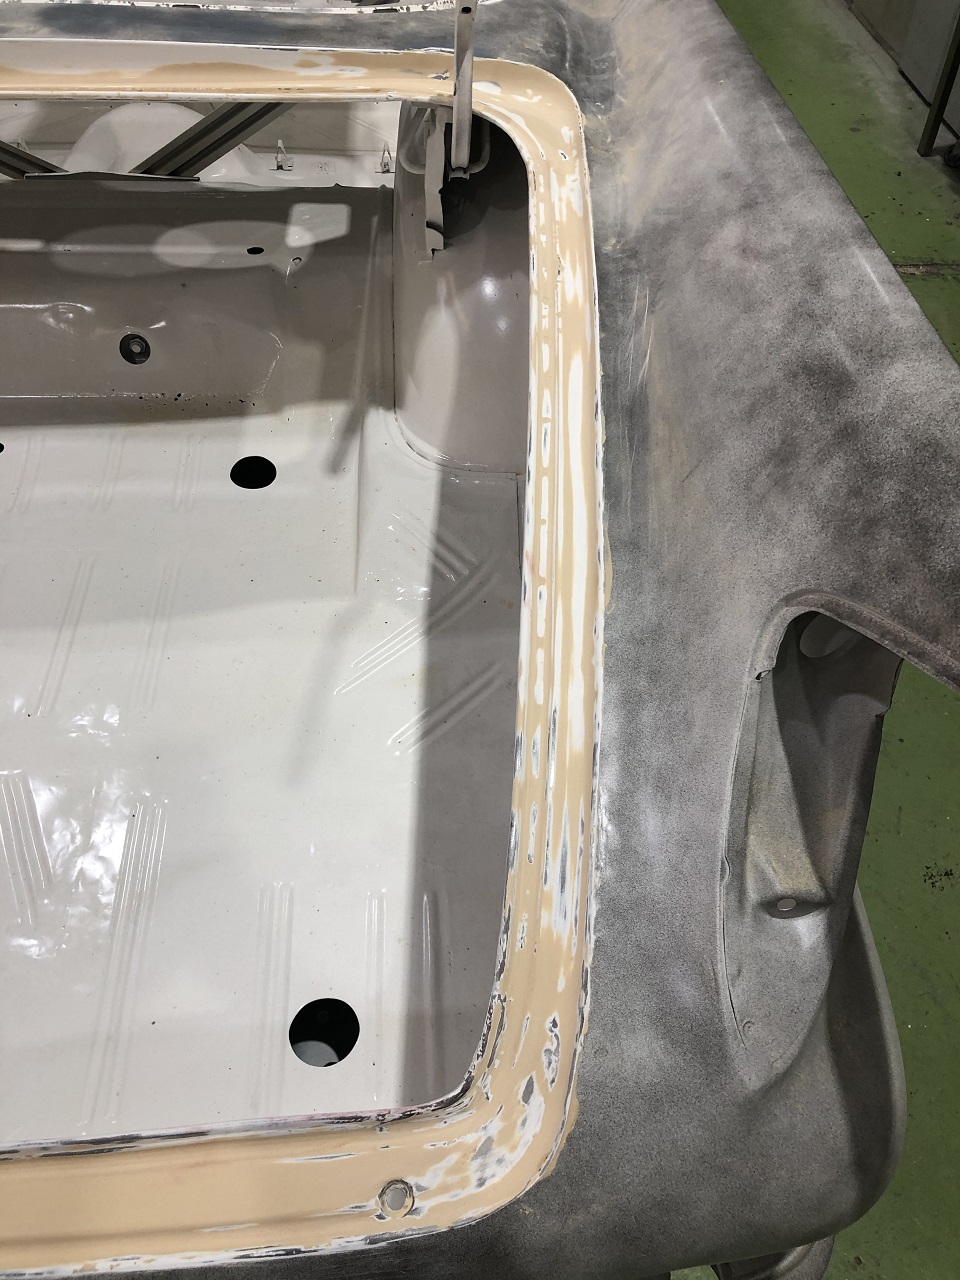 (IMG_7942 trunk weatherstrip channel passenger side.JPG) (IMG_7942 trunk weatherstrip channel passenger side.JPG)
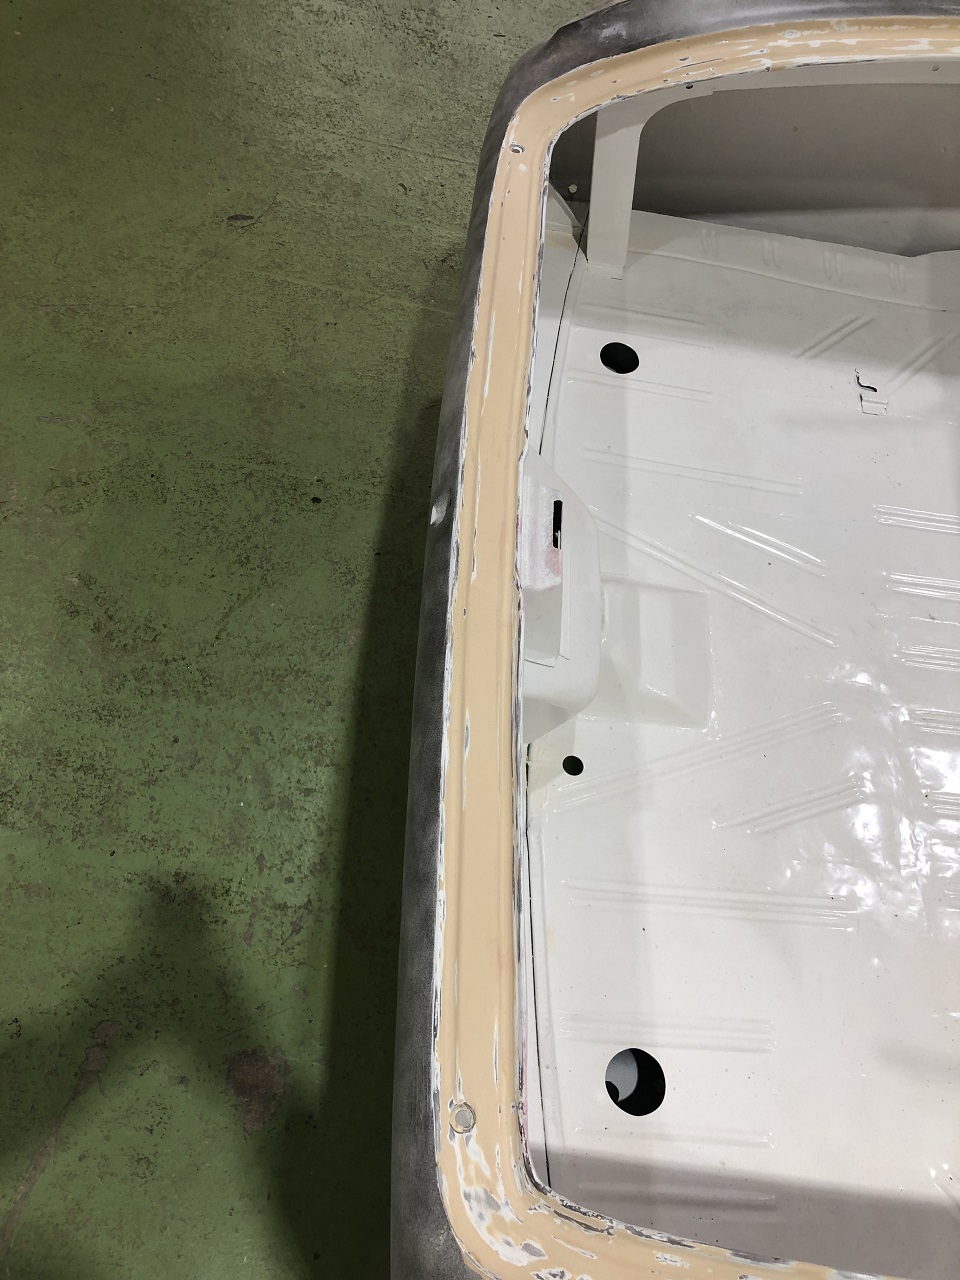 (IMG_7943 trunk weatherstrip channel rear center.JPG) (IMG_7943 trunk weatherstrip channel rear center.JPG)
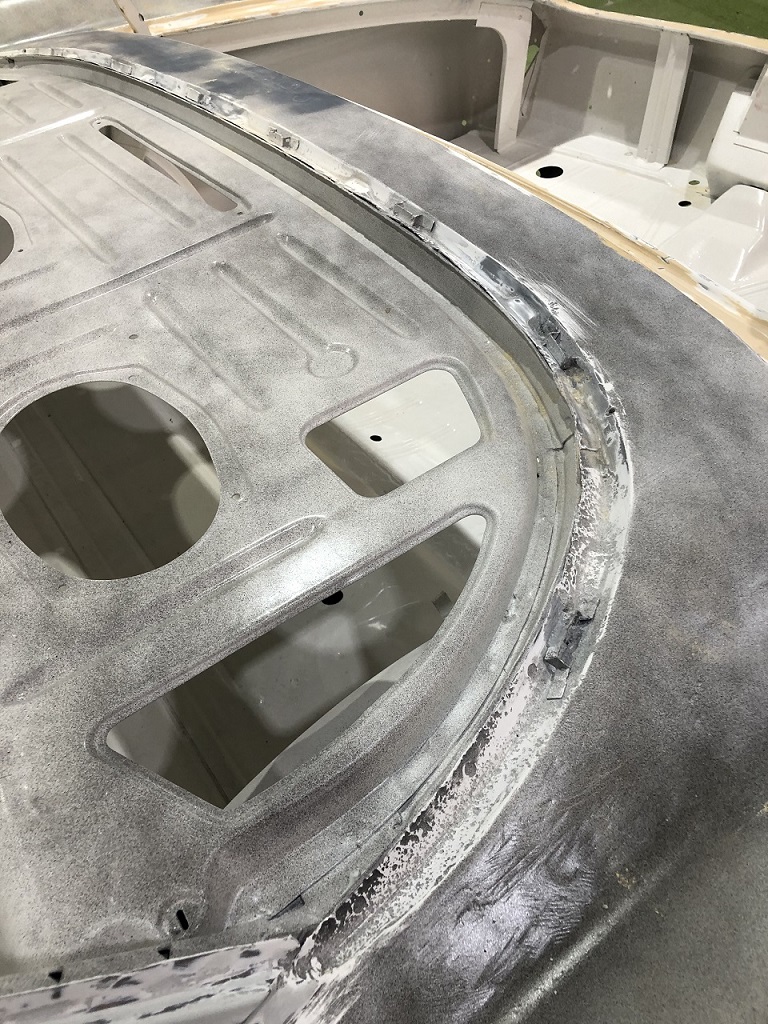 (IMG_7944 lower rear window channel drivers side.JPG) (IMG_7944 lower rear window channel drivers side.JPG)
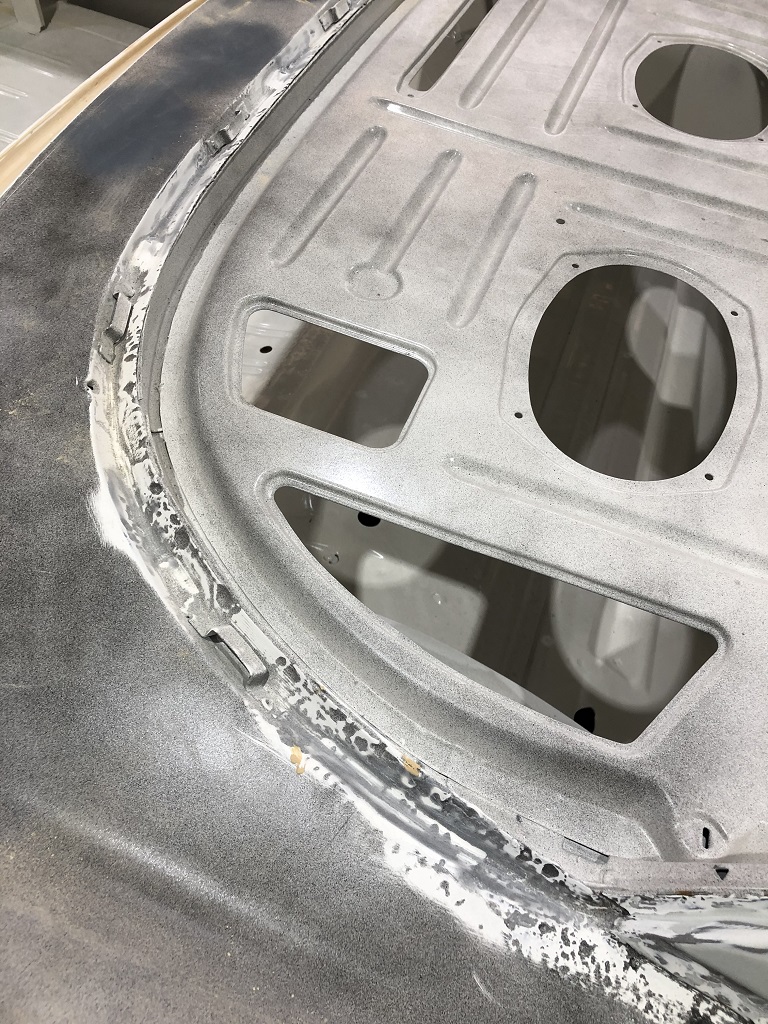 (IMG_7945 lower rear window channel passenger side.JPG) (IMG_7945 lower rear window channel passenger side.JPG)
Attachments
----------------
IMG_7941 trunk weatherstrip channel drivers side.JPG (354KB - 271 downloads)
IMG_7942 trunk weatherstrip channel passenger side.JPG (368KB - 272 downloads)
IMG_7943 trunk weatherstrip channel rear center.JPG (338KB - 266 downloads)
IMG_7944 lower rear window channel drivers side.JPG (358KB - 274 downloads)
IMG_7945 lower rear window channel passenger side.JPG (375KB - 278 downloads)
|
|
| |
|
Expert 5K+
Posts: 5006
| that is a pain in the ass.... |
|
| |
|
Expert
Posts: 1530
Location: ZH, Switzerland | mikes2nd - 2020-10-09 4:36 PM that is a pain in the ass.... For sure, yes |
|
| |
|
Expert
Posts: 1530
Location: ZH, Switzerland | The apprecntice (the older one) started at the front weatherstrip channel of the trunk opening. First of all the first layer and partially the second layer applied to dry out over weekend. Happy Restoring! Dieter
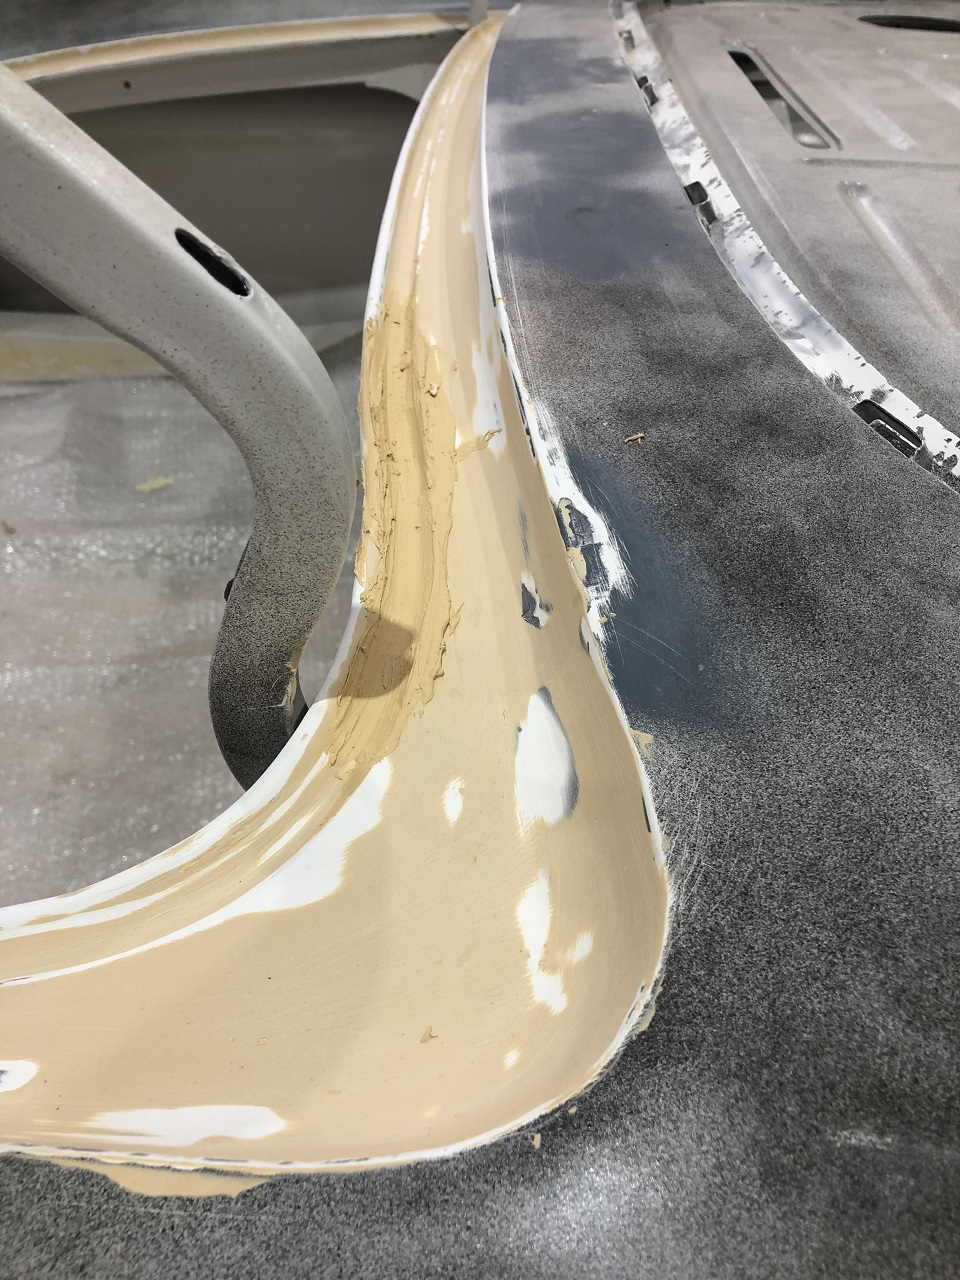 (IMG_7957 trunk weatherstrip channel passenger side front corner.JPG) (IMG_7957 trunk weatherstrip channel passenger side front corner.JPG)
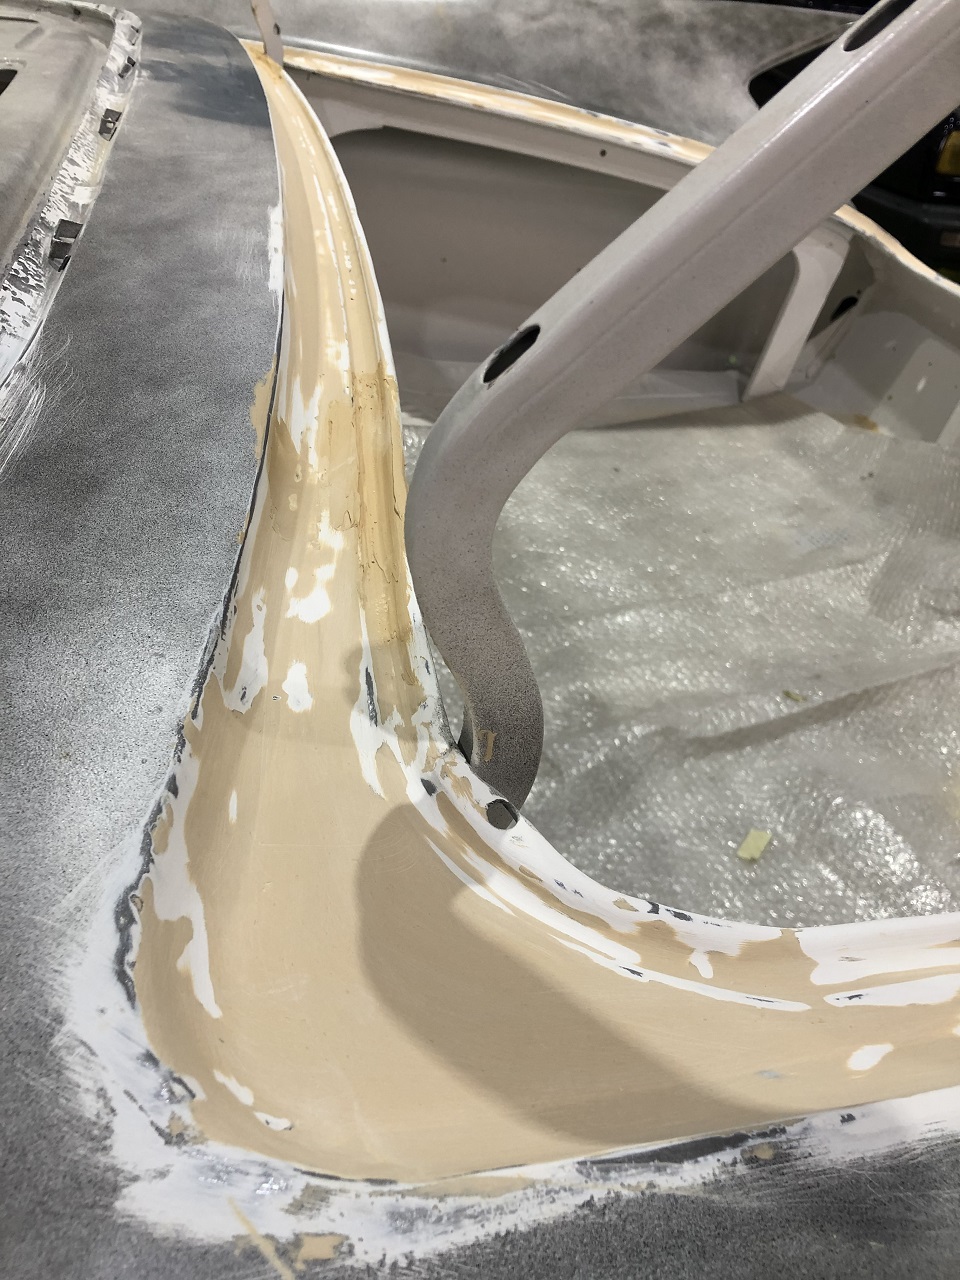 (IMG_7958 trunk weatherstrip channel drivers side front corner.JPG) (IMG_7958 trunk weatherstrip channel drivers side front corner.JPG)
Attachments
----------------
IMG_7957 trunk weatherstrip channel passenger side front corner.JPG (437KB - 269 downloads)
IMG_7958 trunk weatherstrip channel drivers side front corner.JPG (385KB - 270 downloads)
|
|
| |
|
Expert
Posts: 1530
Location: ZH, Switzerland | This afternoon I visited the body&paint shop again. At the front door the sign "only enter with wearing the protection mask ". So I wore one. There is some progress at the body... Bad news from the boss of the shop... both apprentices are now in quarantine - so he's working all alone now for some time. I hope and wish to the joungsters that they will be tested negative or at least do not suffer badly and will get a full recovery fast with no late disability. Happy Restoring Dieter
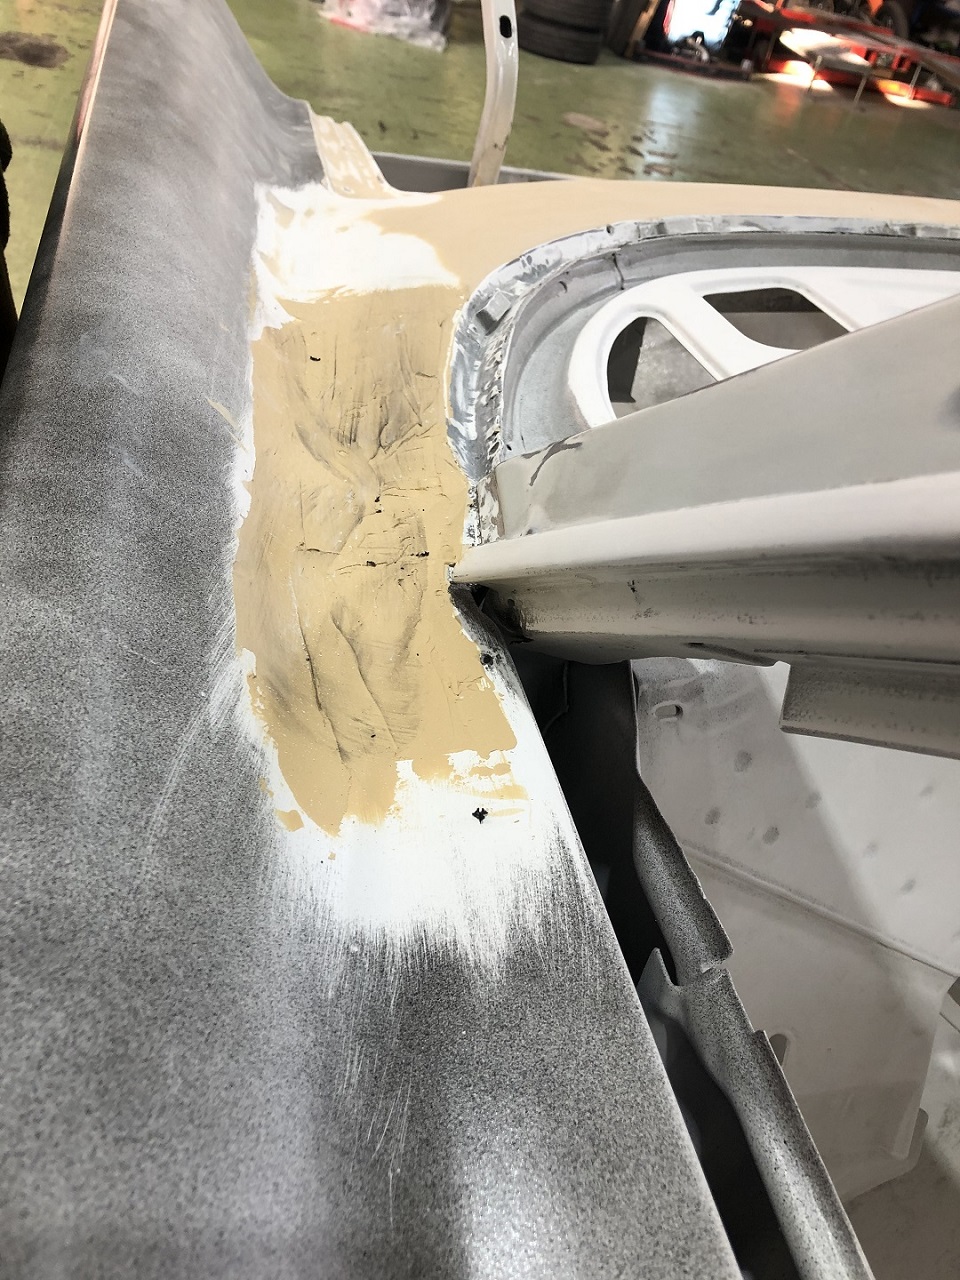 (IMG_7986 passenger side wing and c pillar.JPG) (IMG_7986 passenger side wing and c pillar.JPG)
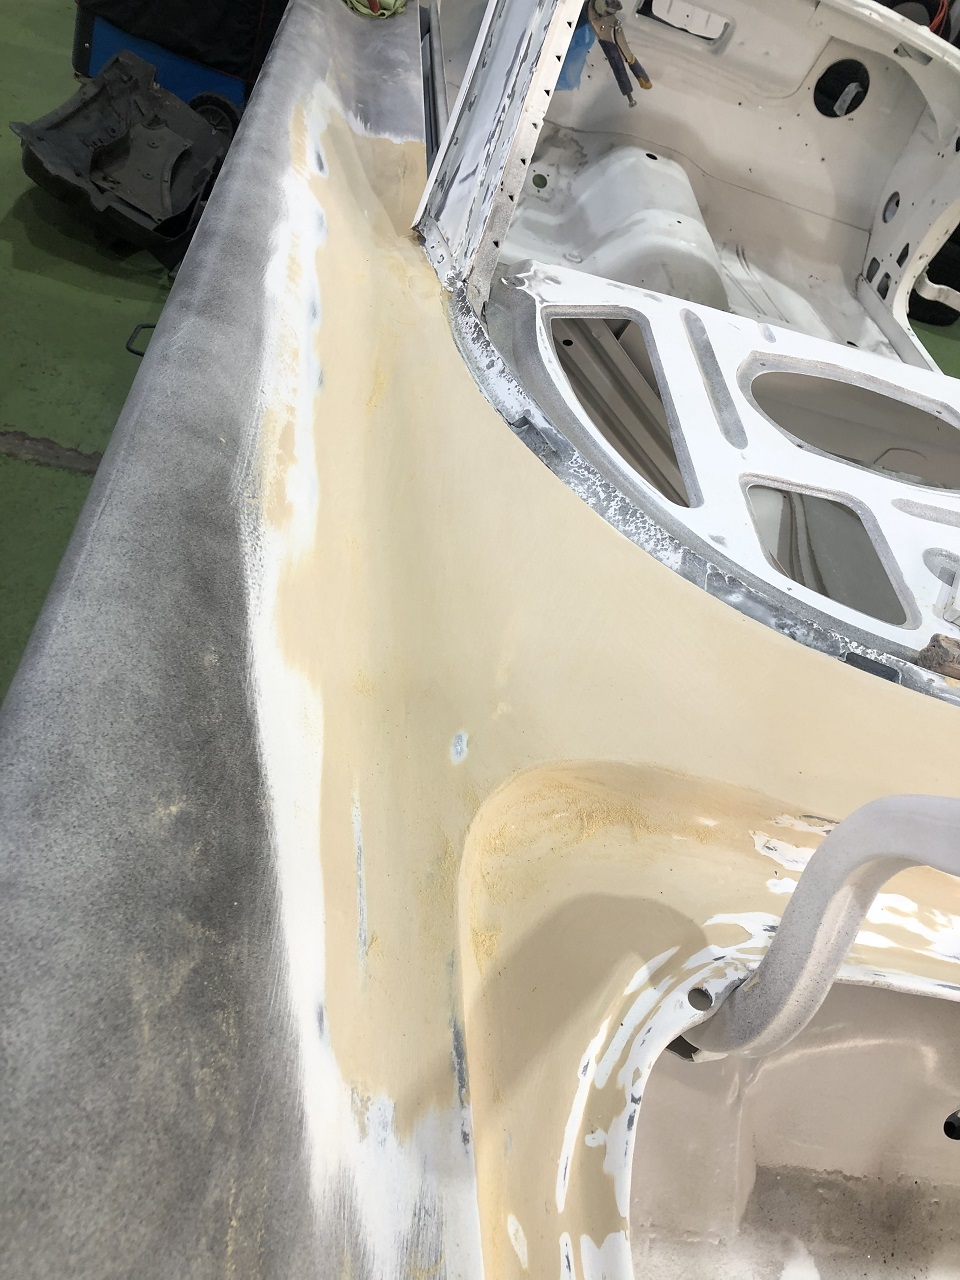 (IMG_7987 drivers side wing and c pillar.JPG) (IMG_7987 drivers side wing and c pillar.JPG)
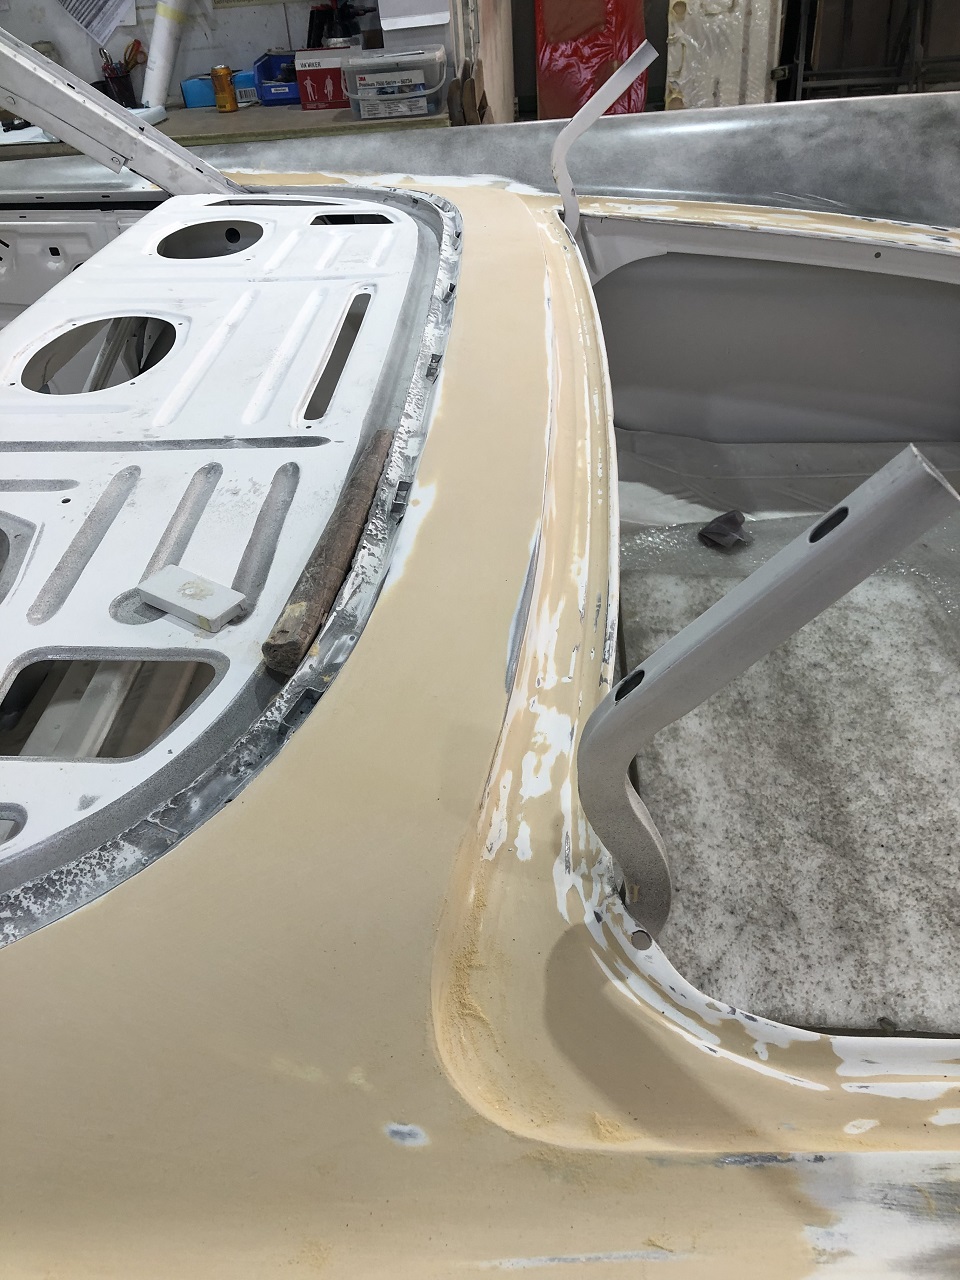 (IMG_7988 rear deck and front of trunk opening.JPG) (IMG_7988 rear deck and front of trunk opening.JPG)
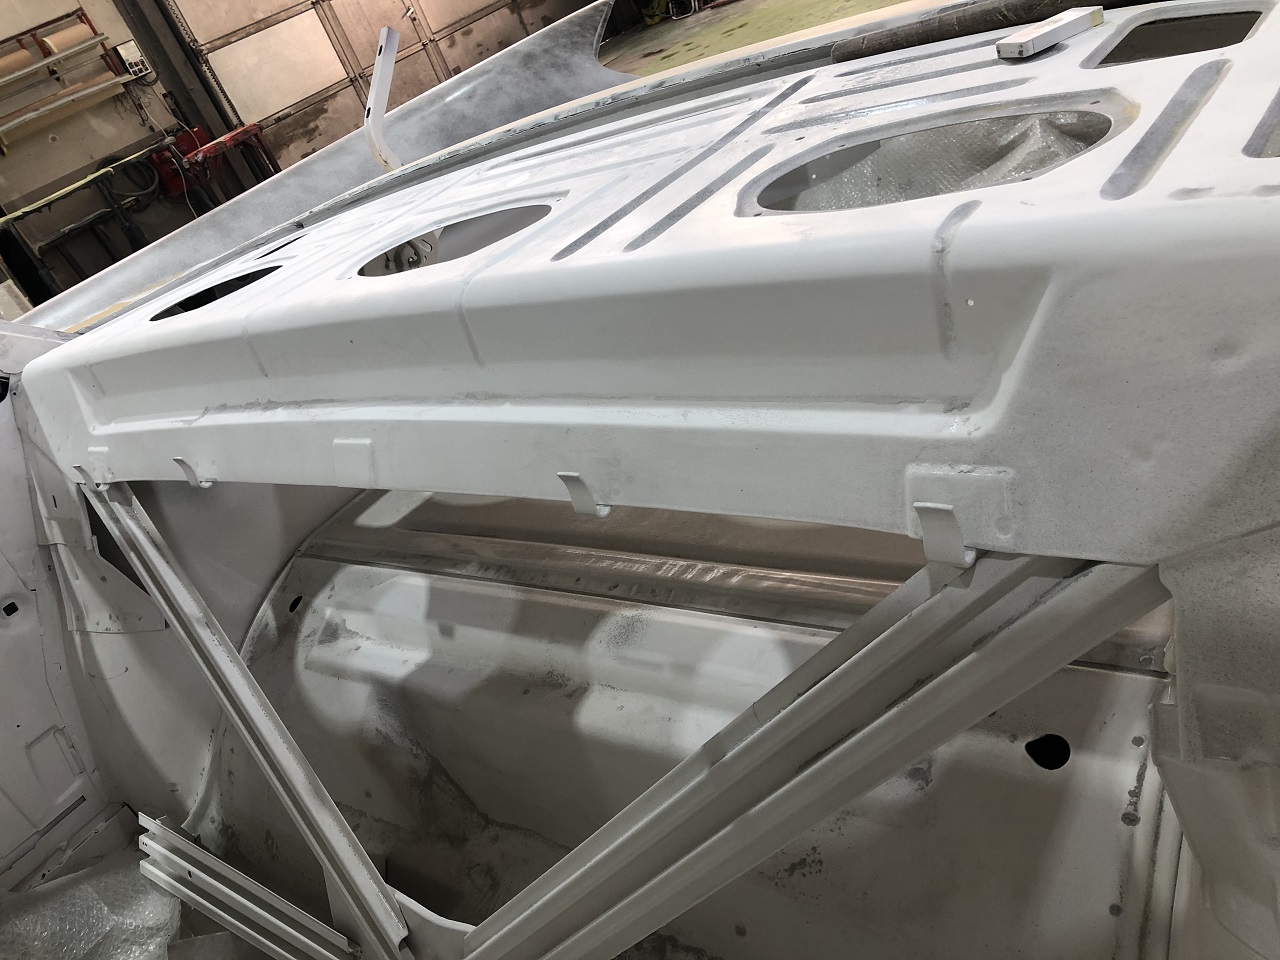 (IMG_7989 parcel shelf and reinforcement.JPG) (IMG_7989 parcel shelf and reinforcement.JPG)
Attachments
----------------
IMG_7986 passenger side wing and c pillar.JPG (432KB - 279 downloads)
IMG_7987 drivers side wing and c pillar.JPG (348KB - 266 downloads)
IMG_7988 rear deck and front of trunk opening.JPG (360KB - 265 downloads)
IMG_7989 parcel shelf and reinforcement.JPG (342KB - 264 downloads)
|
|
| |
|
Expert
Posts: 1530
Location: ZH, Switzerland | Good luck for the two apprentices. They got both a Negative test result. In the mean time in the shop, last time I discovered a BMW M3 -V8 (E92) with a front damage from a hit on to the car in the front of that. Now the front end has been disassembled. The parts laying on the front of my Letter will cost between 8k and 10k CHF. Until that car is finished... the total costs will be close to 20k CHF - ways too much for a guy that has really no money... (enough off topic) Next week the apprentices should start working again in the shop. I hope next Saturday I could provide some progress. Happy Restoring! Dieter
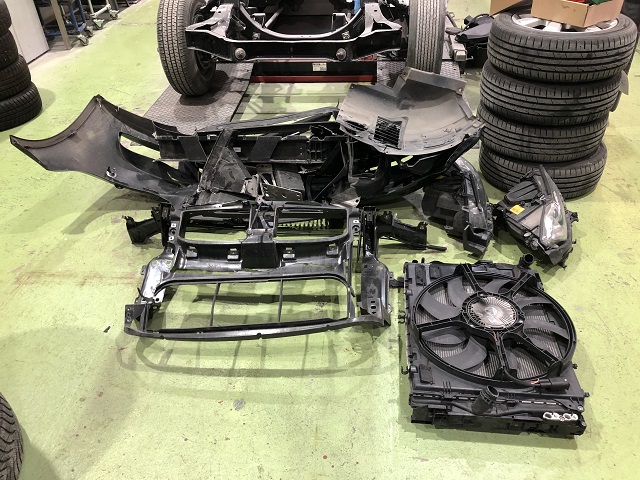 (IMG_7998 BMW E92 M3 front end parts.JPG) (IMG_7998 BMW E92 M3 front end parts.JPG)
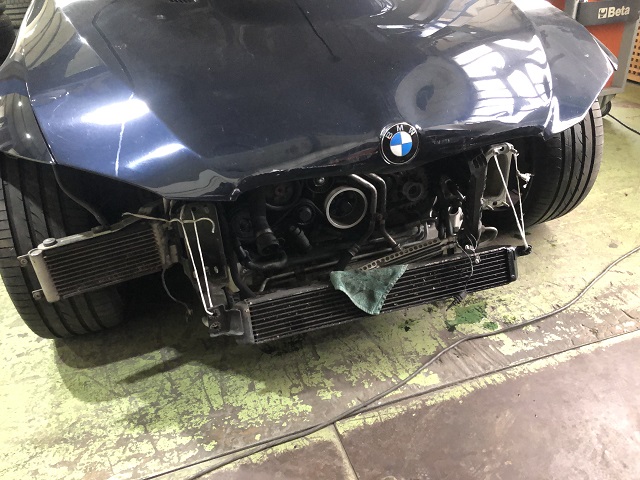 (IMG_7999 BMW E92 M3 front end car.JPG) (IMG_7999 BMW E92 M3 front end car.JPG)
Attachments
----------------
IMG_7998 BMW E92 M3 front end parts.JPG (165KB - 265 downloads)
IMG_7999 BMW E92 M3 front end car.JPG (140KB - 256 downloads)
|
|
| |
|
Expert
Posts: 1530
Location: ZH, Switzerland | Yesterday evening I called my Boss to ask for work for today. His answer was "Dear Dieter, you could do what you want." So I took the oportunity to visit the engine builders shop - of course with a nose/mouth-mask. At the table I noticed the piston/connection-set of 8 pistons. Ross forged pistons, 0.060 oversized, slightly higher compression ratio. This set came out of a rebuilt 413 engine with a heavy crack in the engine block after the first drive on the road. That engine is slightly younger than mine, with a weaker engine block and the later style crankshaft. Because that engine was for sale many years ago I assume the engine builder could bargain the seller. The engine should be ready early/mid January 2021. Now I know the costs frame for the engine as well. Happy Restoring Dieter
Edited by di_ch_NY56 2020-11-02 4:38 AM
|
|
| |
|
Expert
Posts: 1530
Location: ZH, Switzerland | The older apprentice is on duty again now. He gets some hints from the boss. The side walls the boss does it himself. The drivers side gets slightly more filler, because the drivers side rear fender once has been replaced and not mounted as precise as from the factory... Happy Restoring! Dieter
Edited by di_ch_NY56 2020-11-03 1:35 PM
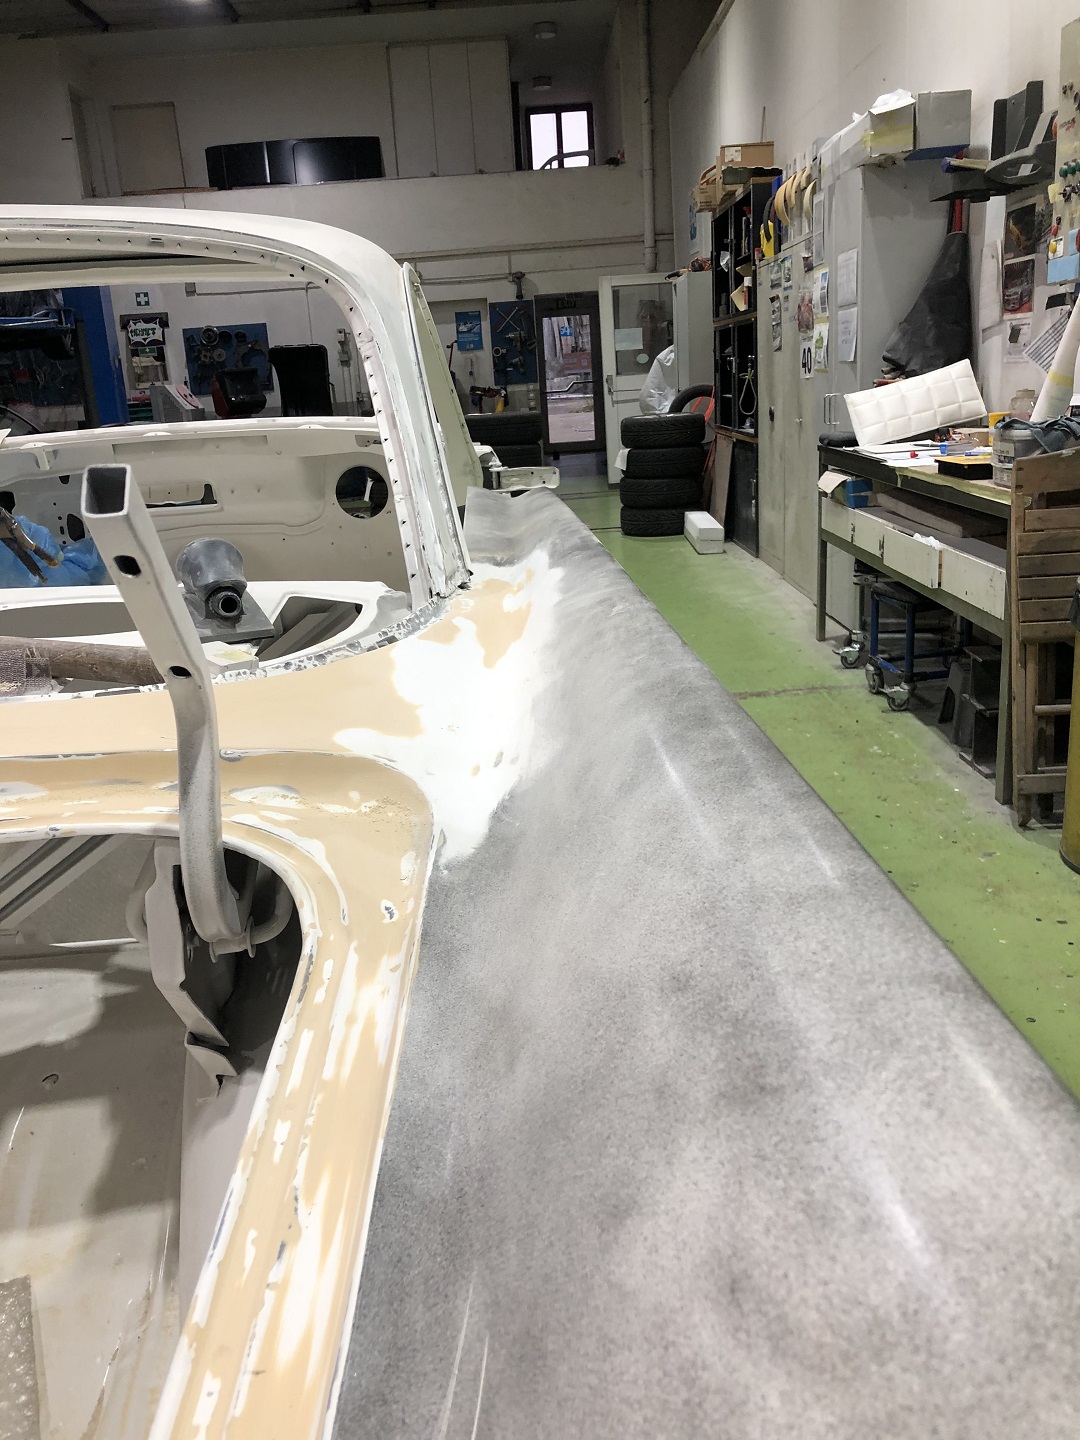 (IMG_8005 C pillar from the back passenger side.JPG) (IMG_8005 C pillar from the back passenger side.JPG)
 (IMG_8006 C pillar from the front passenger side.JPG) (IMG_8006 C pillar from the front passenger side.JPG)
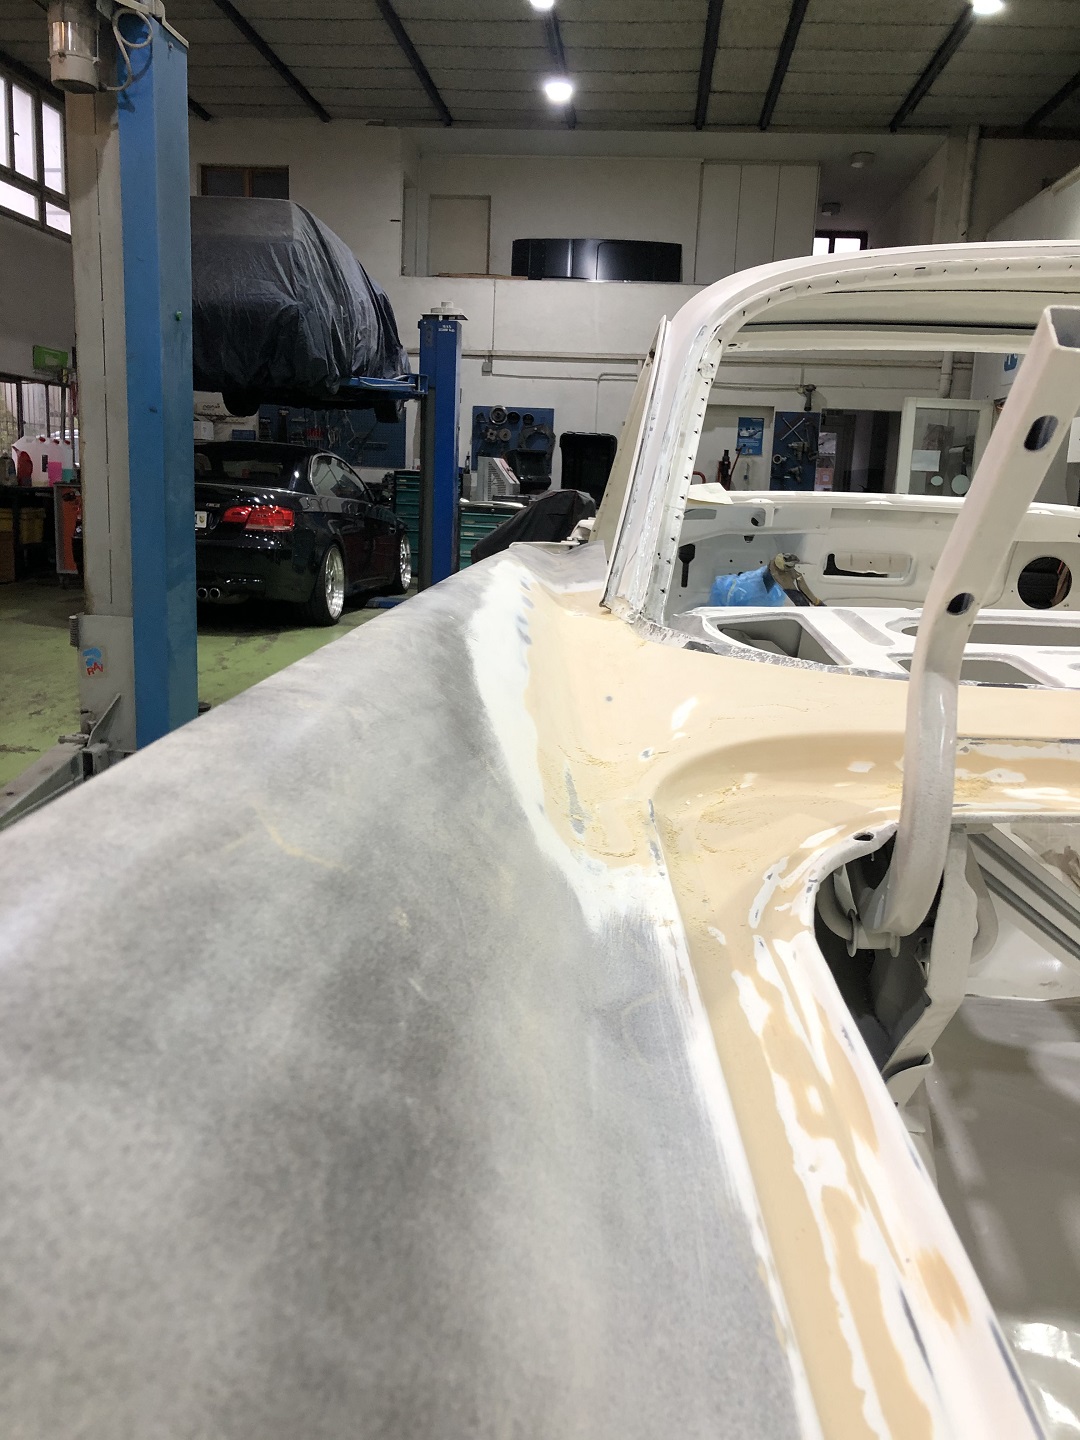 (IMG_8007 C pillar from the back drivers side.JPG) (IMG_8007 C pillar from the back drivers side.JPG)
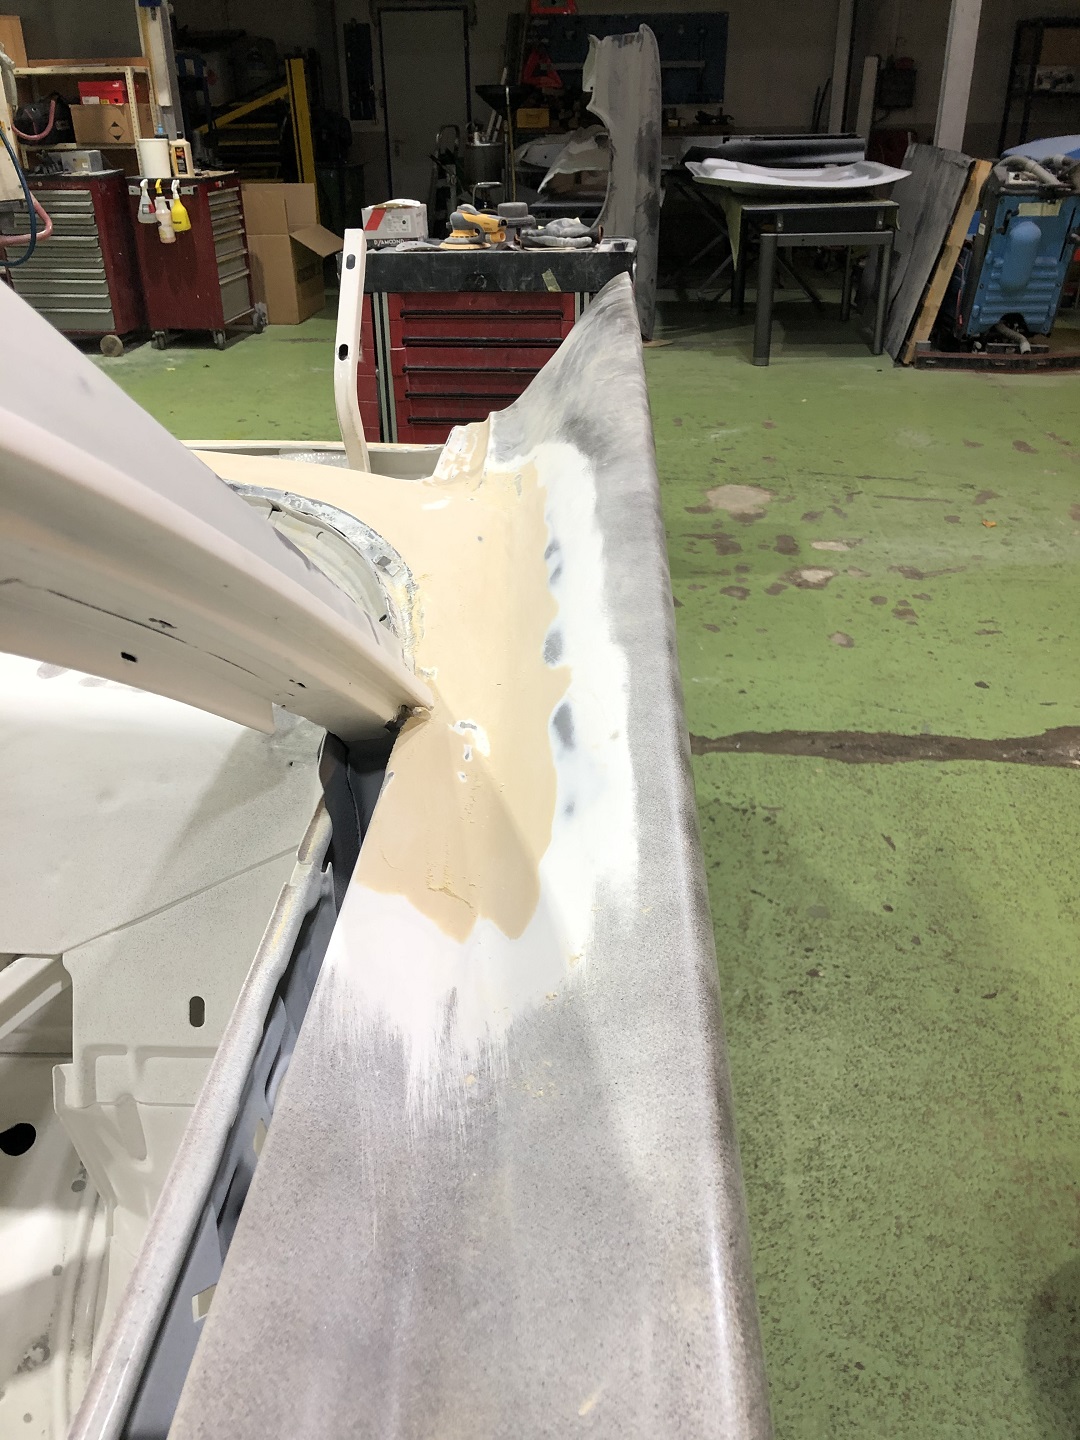 (IMG_8009 C pillar from the front drivers side.JPG) (IMG_8009 C pillar from the front drivers side.JPG)
Attachments
----------------
IMG_8005 C pillar from the back passenger side.JPG (460KB - 256 downloads)
IMG_8006 C pillar from the front passenger side.JPG (465KB - 255 downloads)
IMG_8007 C pillar from the back drivers side.JPG (406KB - 253 downloads)
IMG_8009 C pillar from the front drivers side.JPG (481KB - 253 downloads)
|
|
| |
|
Expert
Posts: 1530
Location: ZH, Switzerland | Apparently some very weak areas went away during sand blasting. Following pictures are displaying evidence. How should the transition of the C pillar to the rear fenders look like original? How is the transition sealed? To restore the inner lower ends of the C pillar, weld in additional steel sheets is almost impossible. I'll appreciate your hints very much. Thank you. The rotted away transition from the rain channel to the A pillar is like peanuts compared to the C pillars... Happy Restoring! Dieter
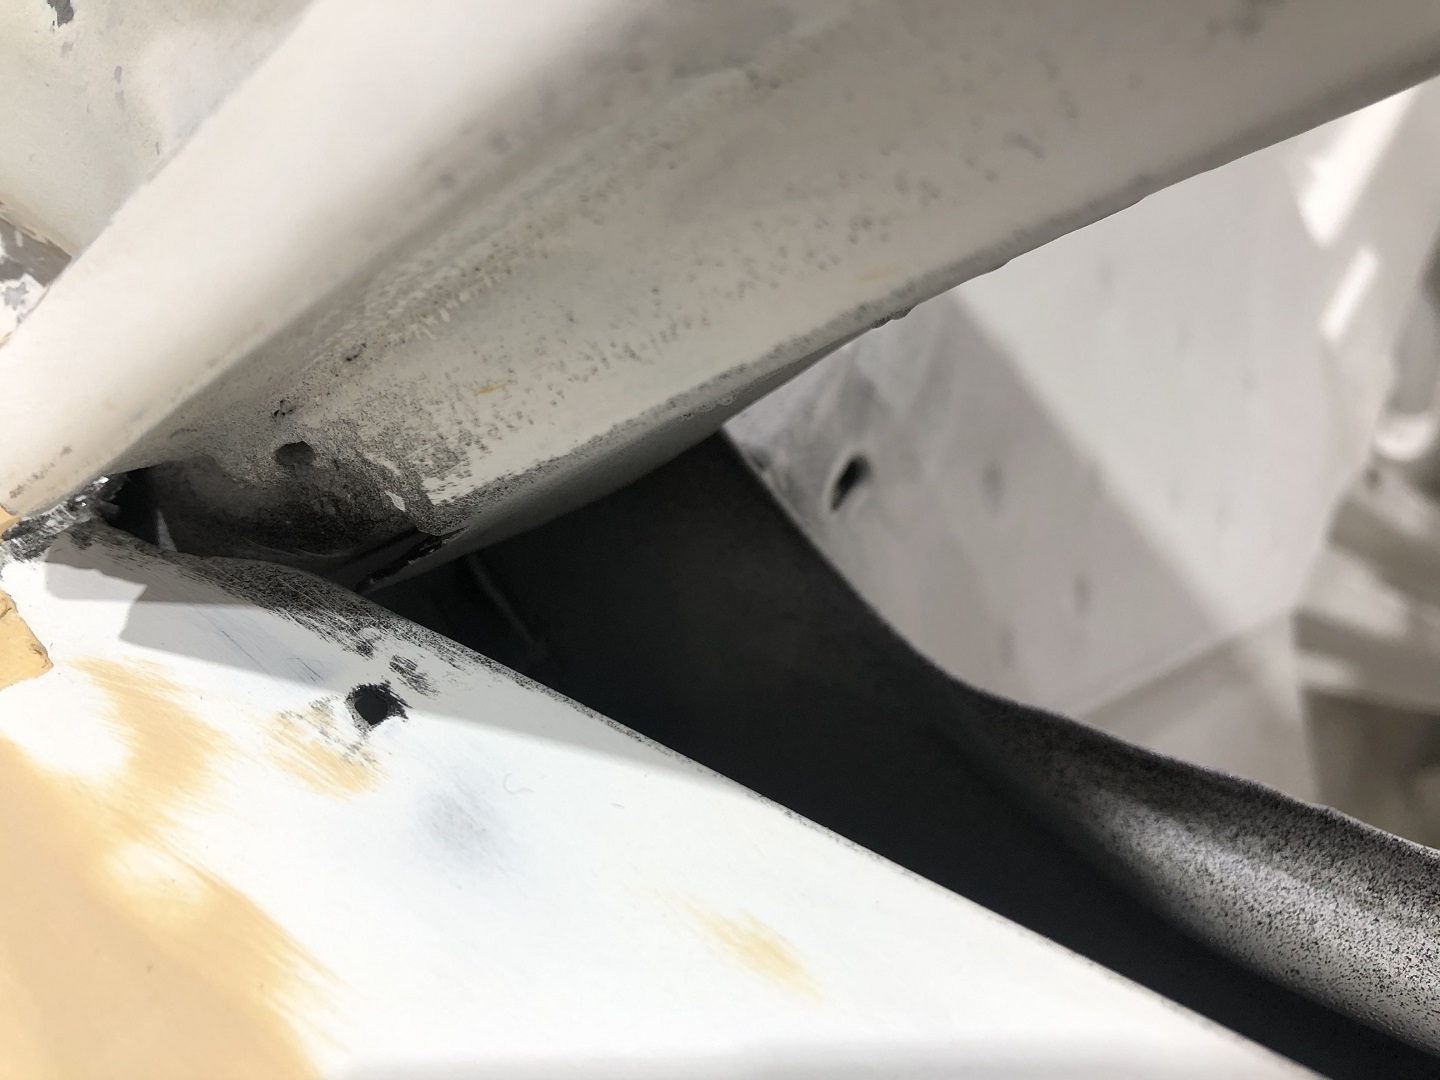 (IMG_8012 C pillar front sight missing metal passenger side.JPG) (IMG_8012 C pillar front sight missing metal passenger side.JPG)
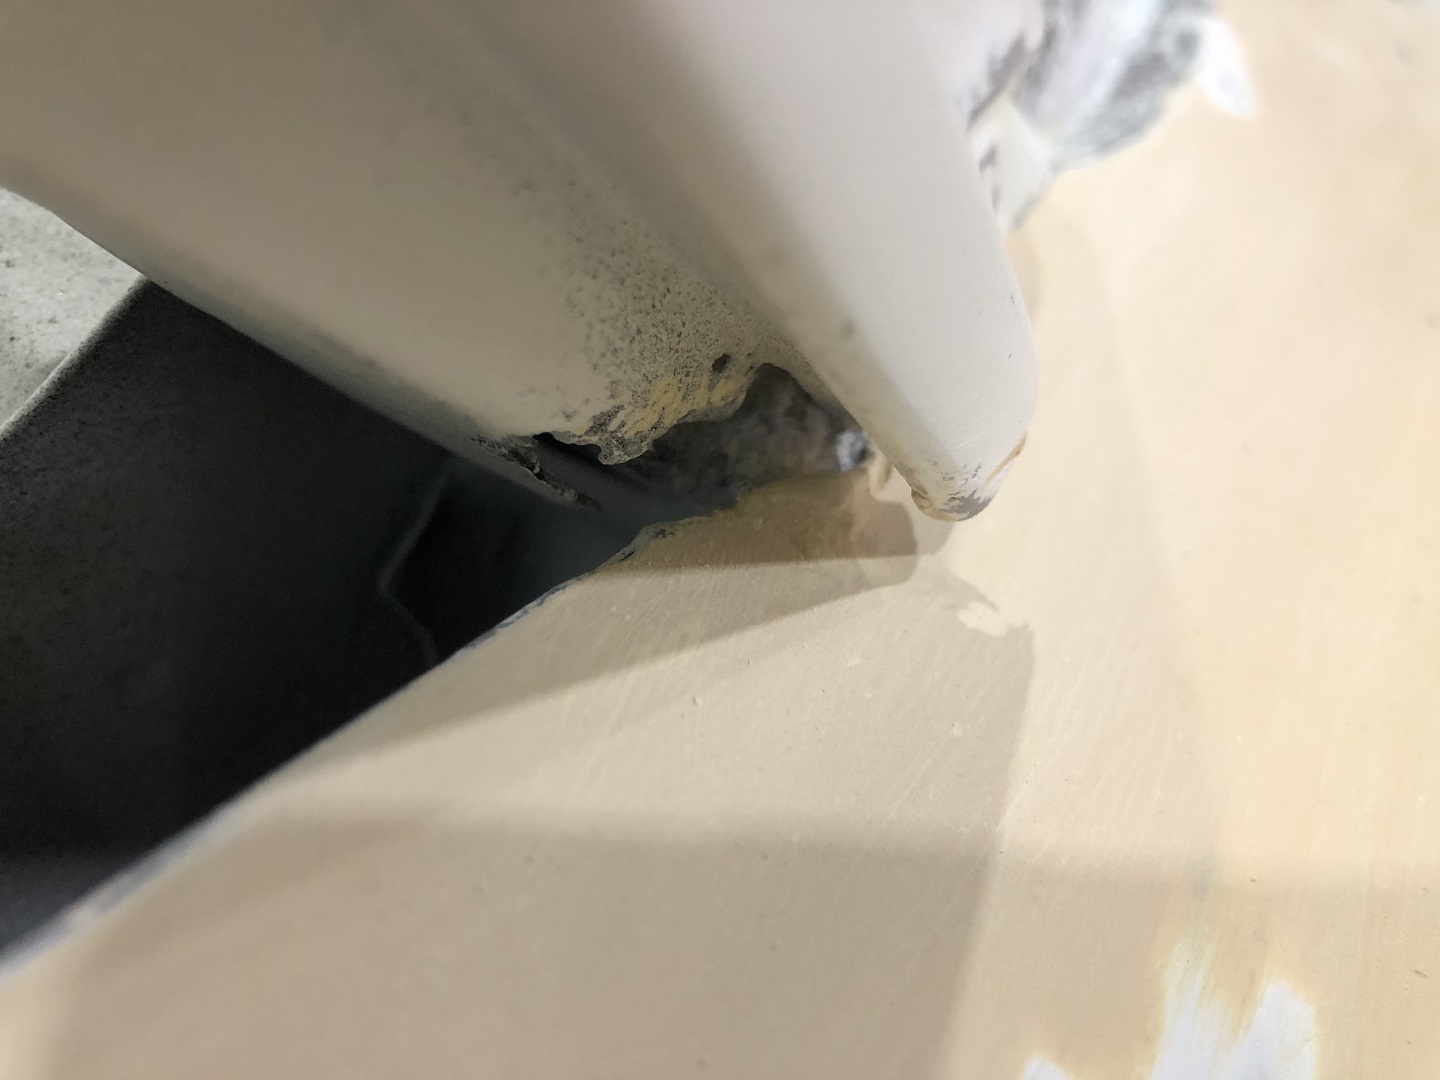 (IMG_8013 C pillar front sight missing metal drivres side.JPG) (IMG_8013 C pillar front sight missing metal drivres side.JPG)
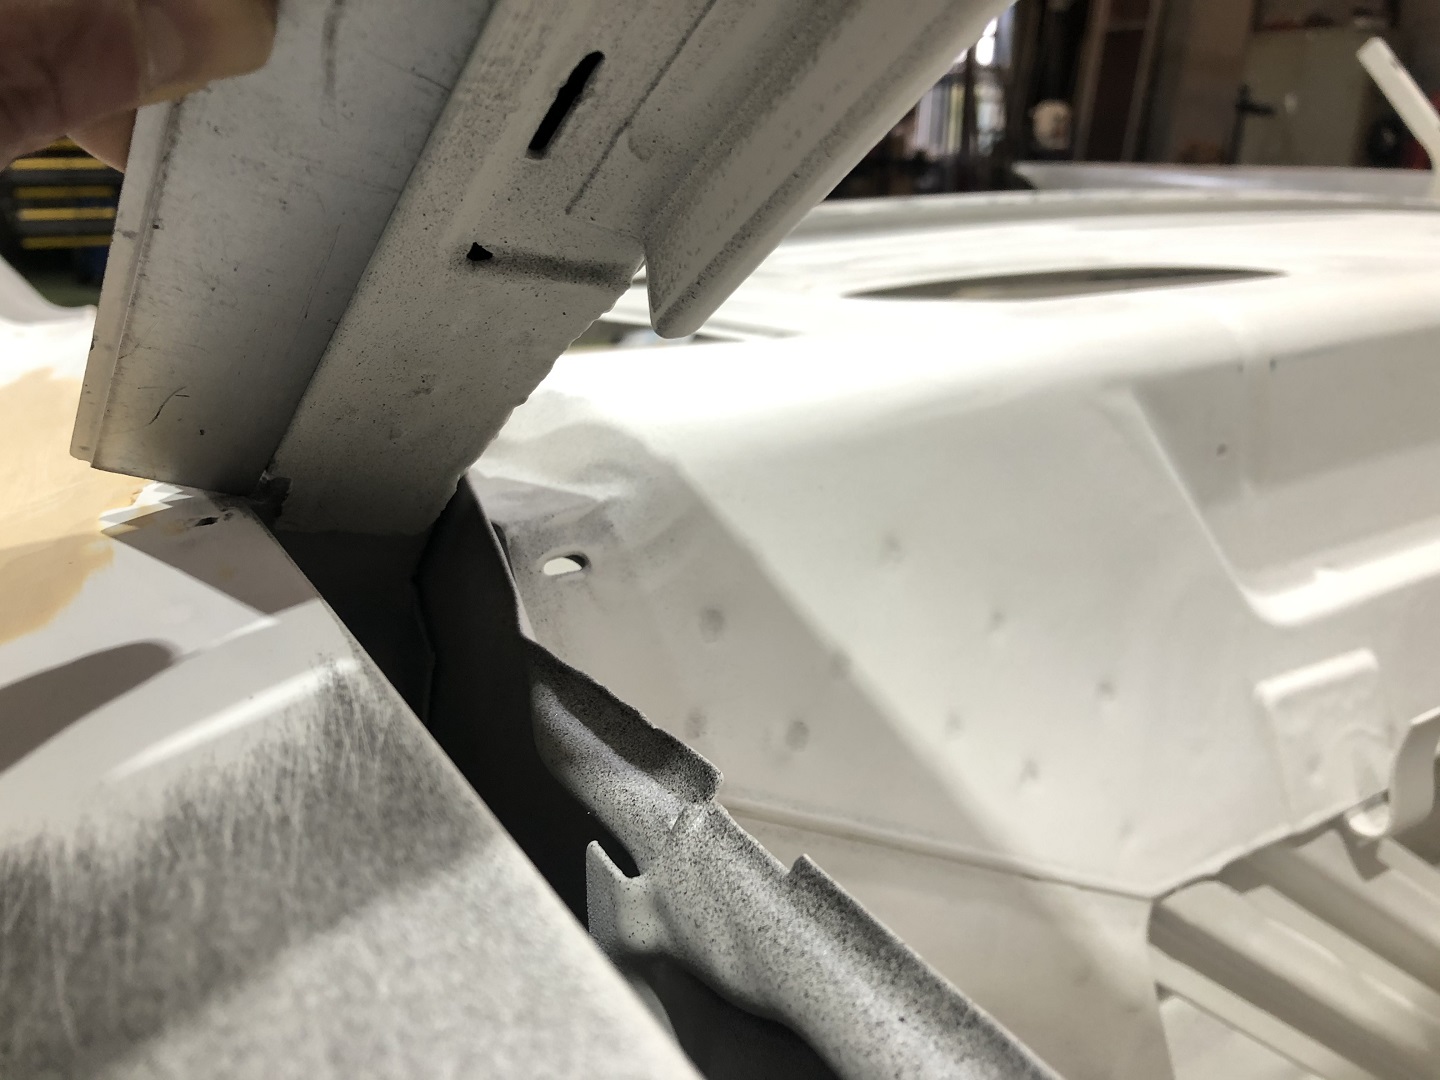 (IMG_8014 C pillar front sight with a straight reference passenger side.JPG) (IMG_8014 C pillar front sight with a straight reference passenger side.JPG)
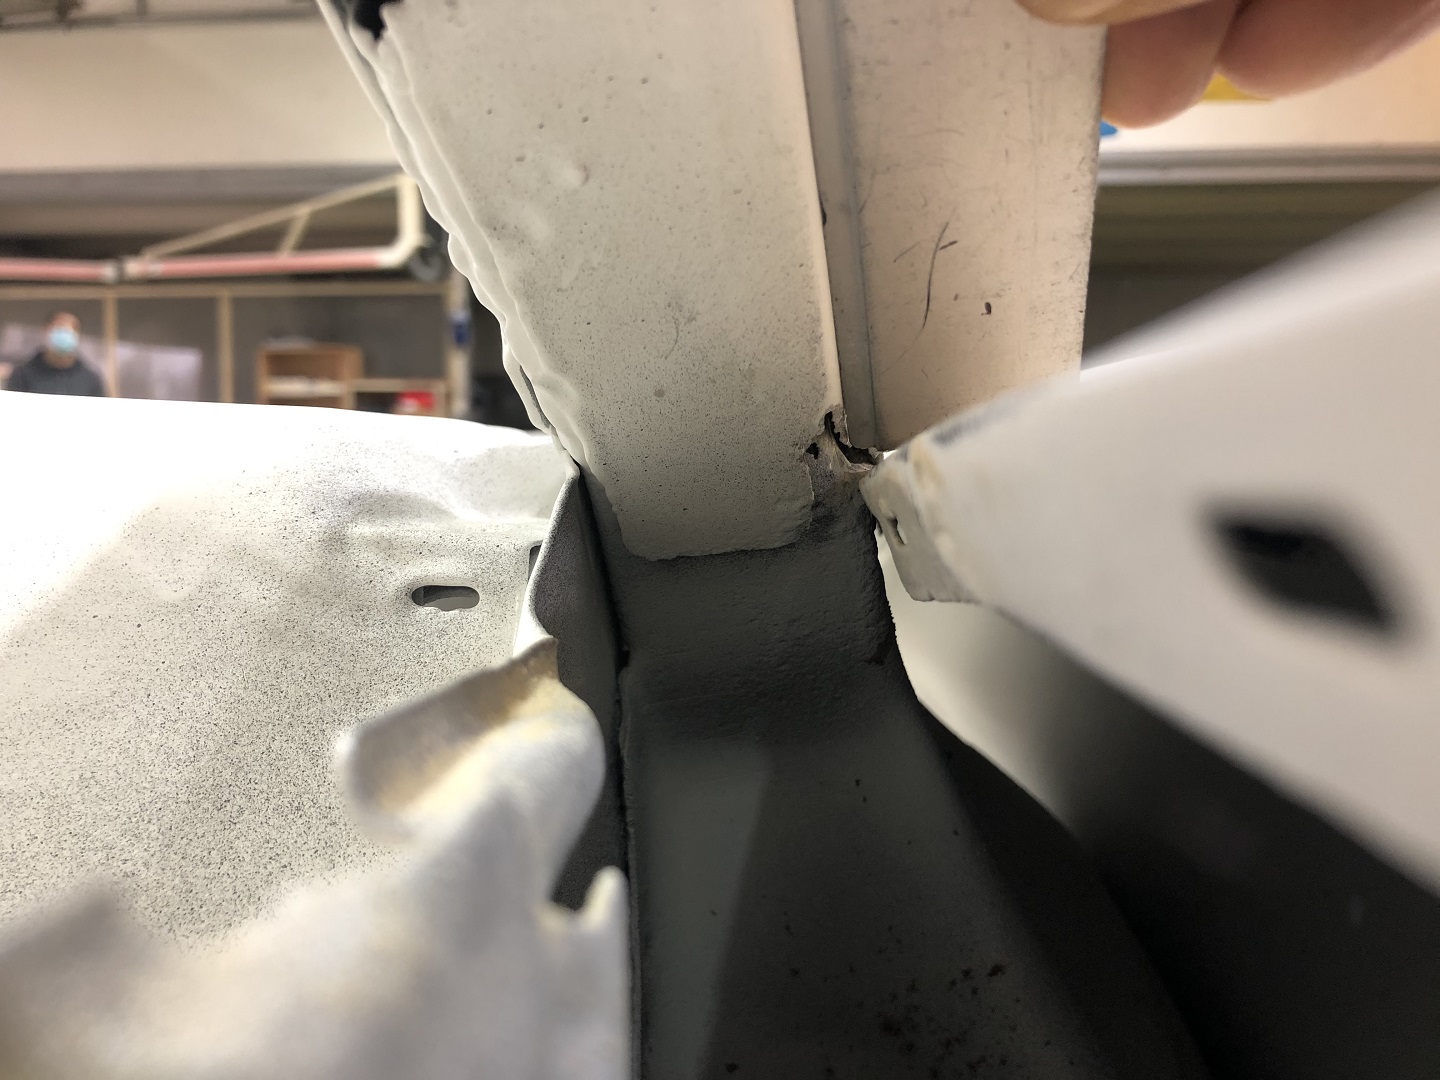 (IMG_8015 C pillar front sight with a straight reference drivers side.JPG) (IMG_8015 C pillar front sight with a straight reference drivers side.JPG)
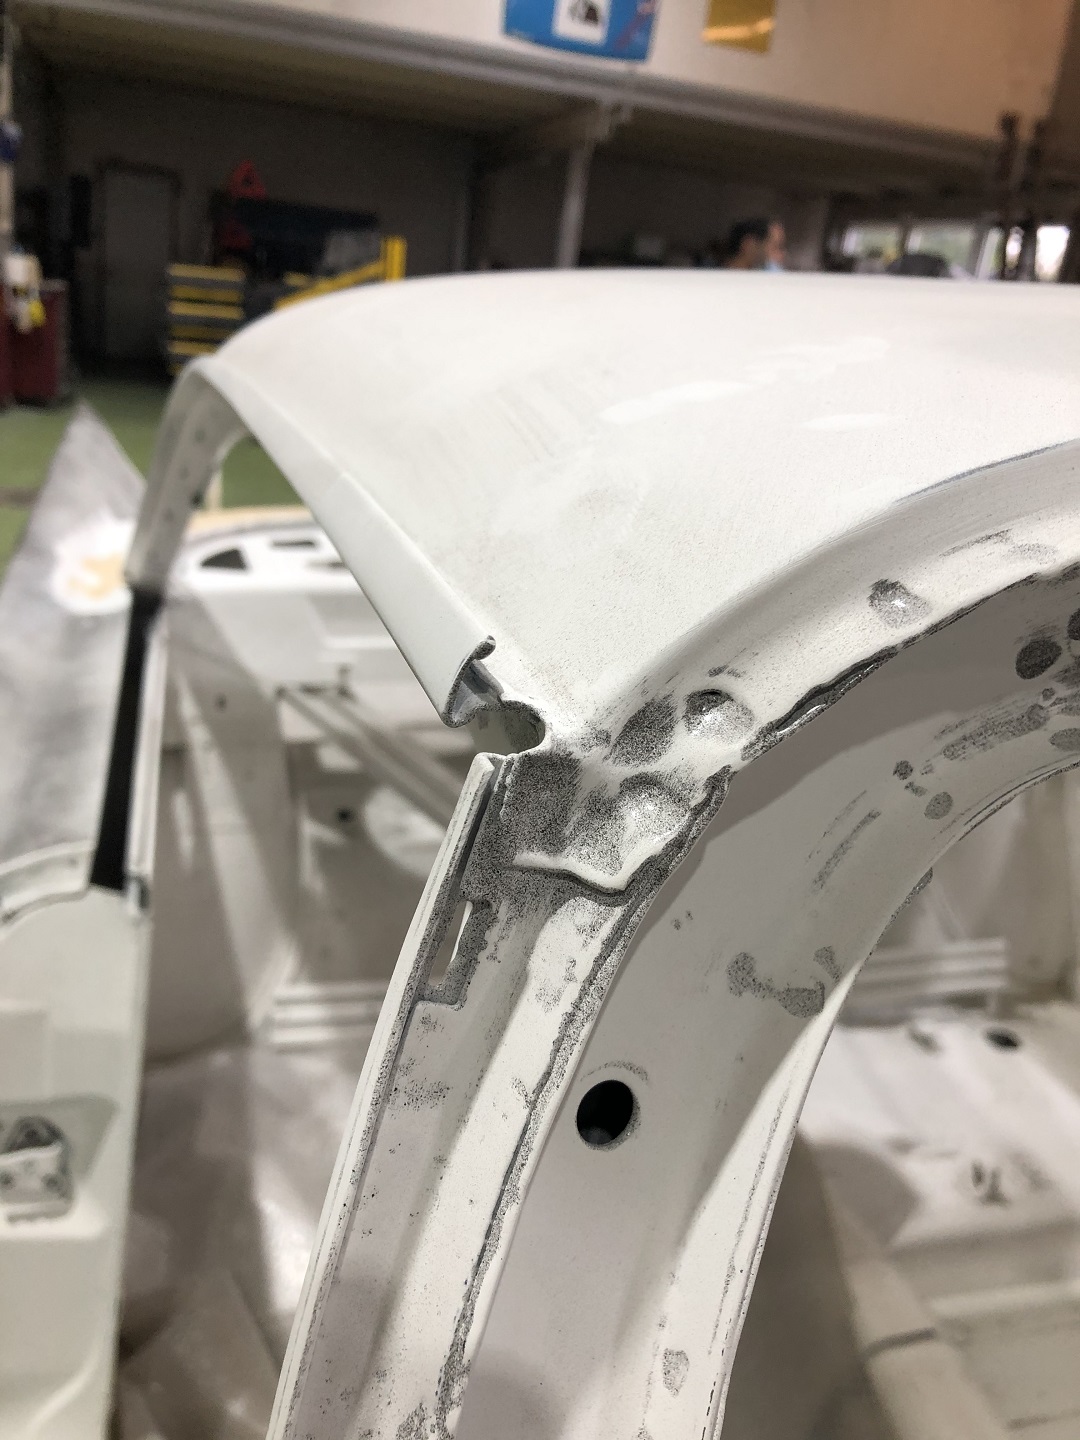 (IMG_8016 A pillar to roof transition passenger side rotted away front view.JPG) (IMG_8016 A pillar to roof transition passenger side rotted away front view.JPG)
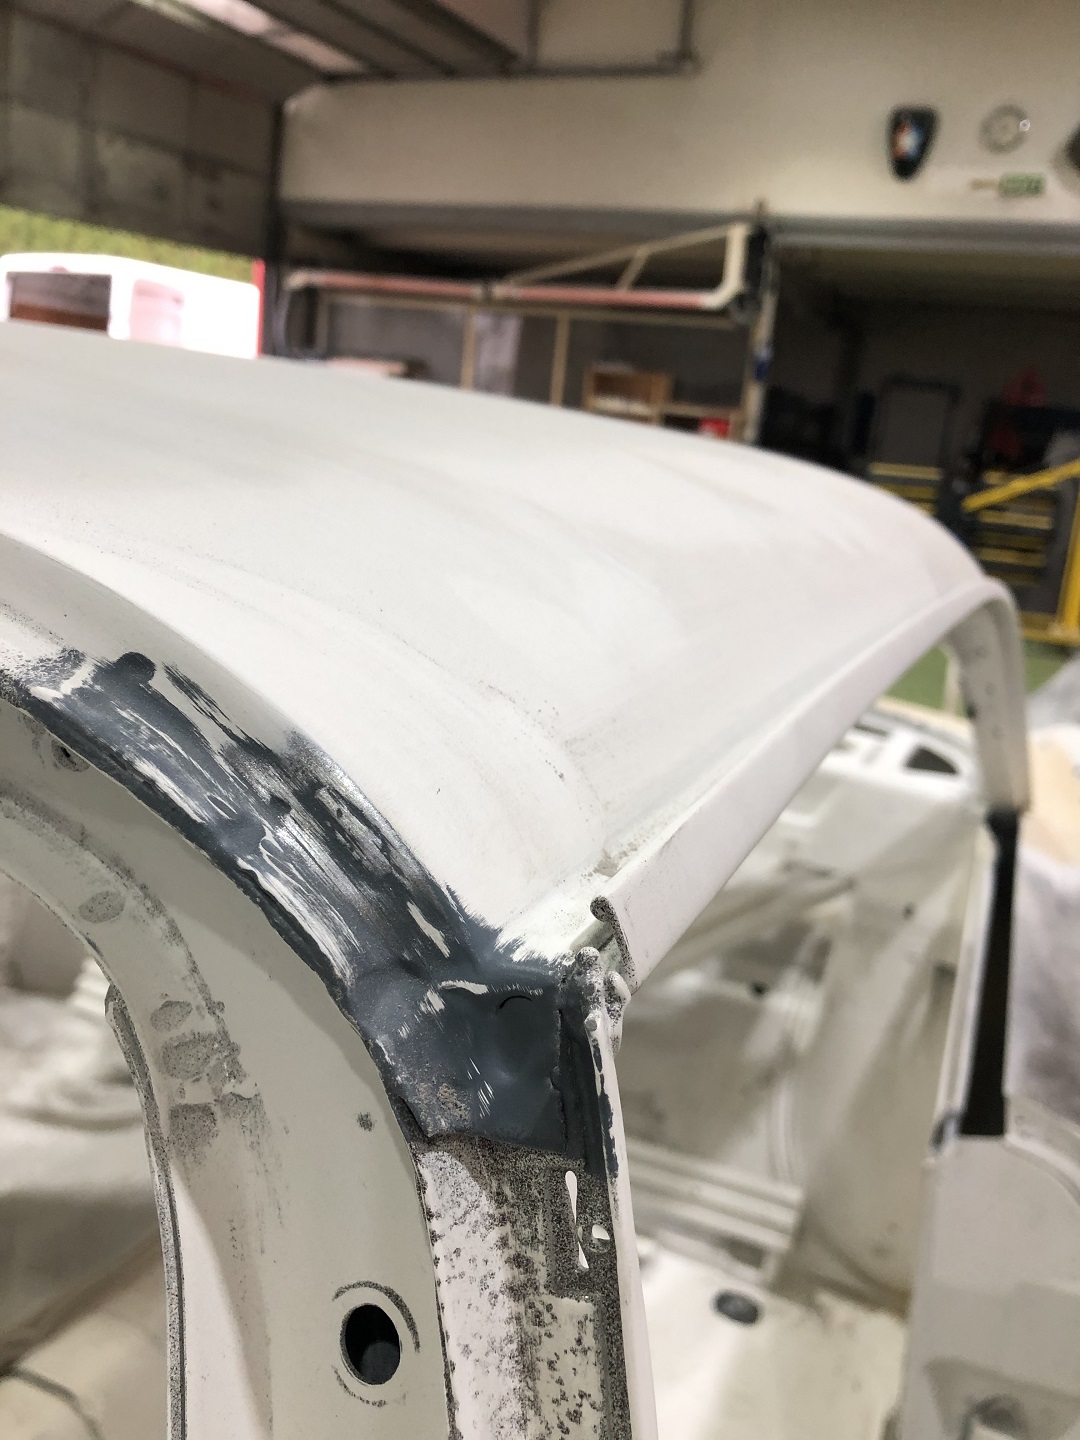 (IMG_8018 A pillar to roof transition drivers side reference front view.JPG) (IMG_8018 A pillar to roof transition drivers side reference front view.JPG)
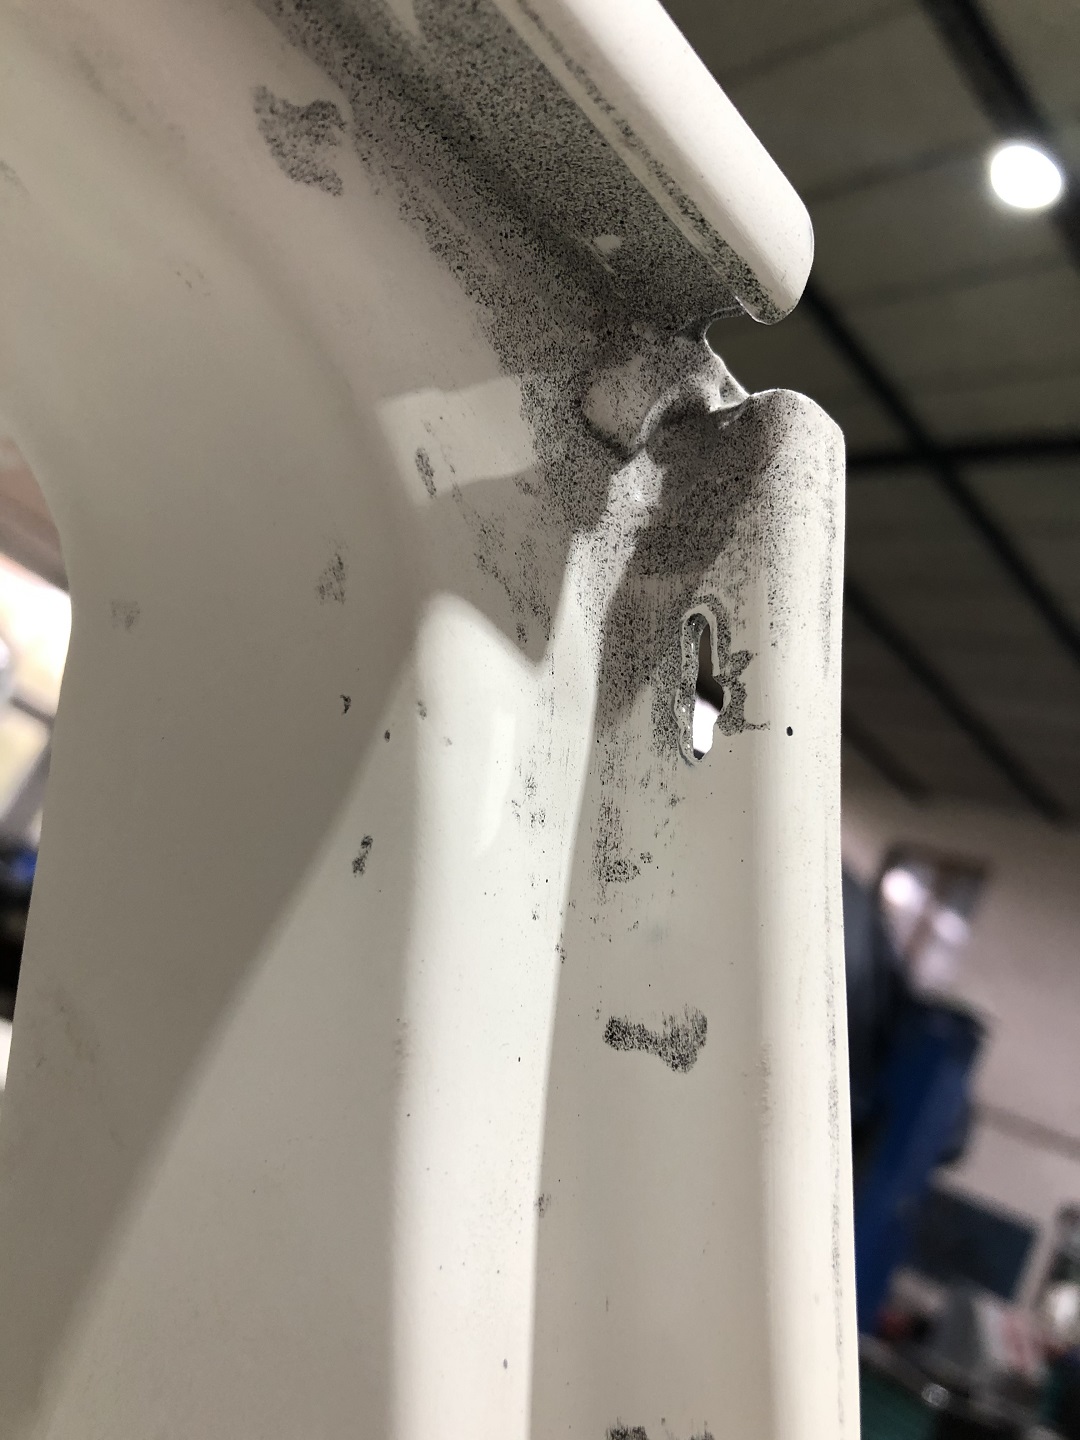 (IMG_8019 A pillar to roof transition passenger side rotted away rear view.JPG) (IMG_8019 A pillar to roof transition passenger side rotted away rear view.JPG)
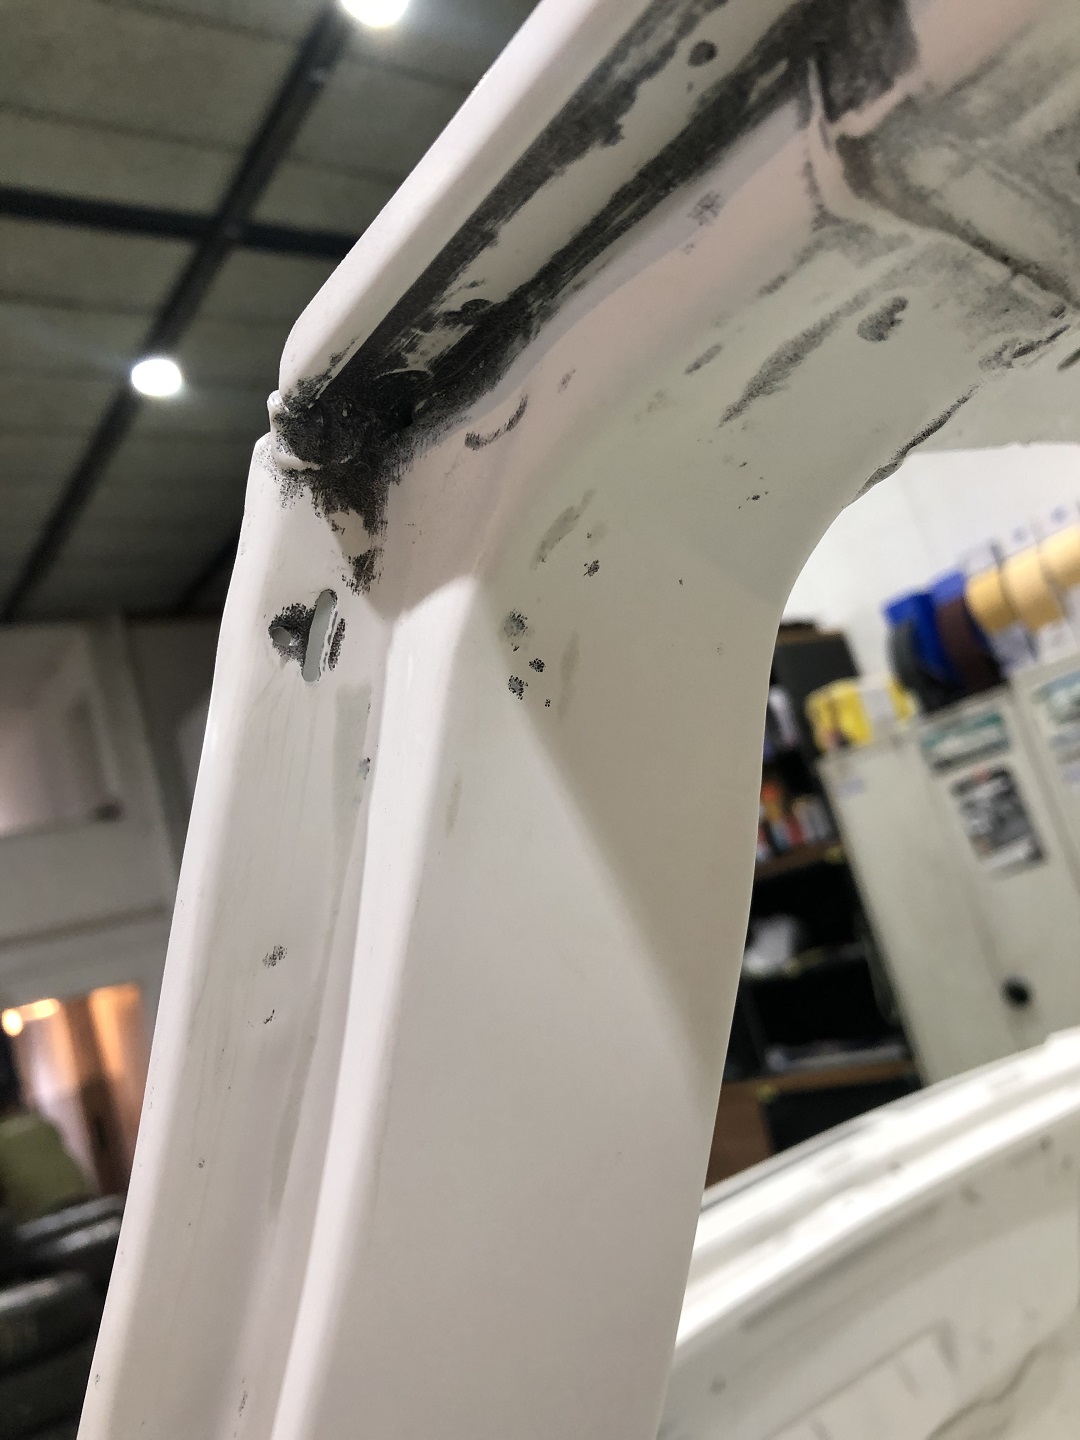 (IMG_8022 A pillar to roof transition drivers side reference rear view.JPG) (IMG_8022 A pillar to roof transition drivers side reference rear view.JPG)
Attachments
----------------
IMG_8012 C pillar front sight missing metal passenger side.JPG (262KB - 248 downloads)
IMG_8013 C pillar front sight missing metal drivres side.JPG (218KB - 269 downloads)
IMG_8014 C pillar front sight with a straight reference passenger side.JPG (289KB - 247 downloads)
IMG_8015 C pillar front sight with a straight reference drivers side.JPG (352KB - 250 downloads)
IMG_8016 A pillar to roof transition passenger side rotted away front view.JPG (371KB - 243 downloads)
IMG_8018 A pillar to roof transition drivers side reference front view.JPG (356KB - 251 downloads)
IMG_8019 A pillar to roof transition passenger side rotted away rear view.JPG (320KB - 254 downloads)
IMG_8022 A pillar to roof transition drivers side reference rear view.JPG (284KB - 258 downloads)
|
|
| |
|
Elite Veteran
Posts: 649
Location: Finland | Hello Dieter , I get really upset when I see there is put bondo on the c pillar area which really needs a professional bodywork guy first. The right guy just starts to do the job and ends when it is done ,
you shouldn`t have to tell him how! Those corners are filled with some bitumen compound or something from the factory but any polyuretane compound is fine. I don`t see any damage on the a pillars..
Are you sure your car is at the right shop, I think it is getting forward very slowly..hope you pay every two weeks or so...hope I have the wrong feeling... |
|
| |
|
Expert
Posts: 1530
Location: ZH, Switzerland | On the passenger side the rear fender bondo thickness is very minor around the C pillar. Just to fill up small imperfections. The drivers side is another story. Still visible at the vertical piece of the drivers side rear fender. This fender once was replaced without prior structural correction at the rear wall. This fender was not mounted as precise as it was from the factory. The C pillars at the roof are almost free from bondo. Happy Restoring! Dieter |
|
| |
|
Expert
Posts: 1530
Location: ZH, Switzerland | The open areas of the working area are protected now with primer. I discussed the further procedure at the rear end of the body. The drivers side rear lip of the trunk opening needs some more work, but can only be performed when the trunk lid is mounted. Still evidence of the more than weak work of the farmers smith shop. In the meantime I notice every imperfection on car and truck bodys. Happy Restoring! Dieter
Edited by di_ch_NY56 2020-11-14 10:10 AM
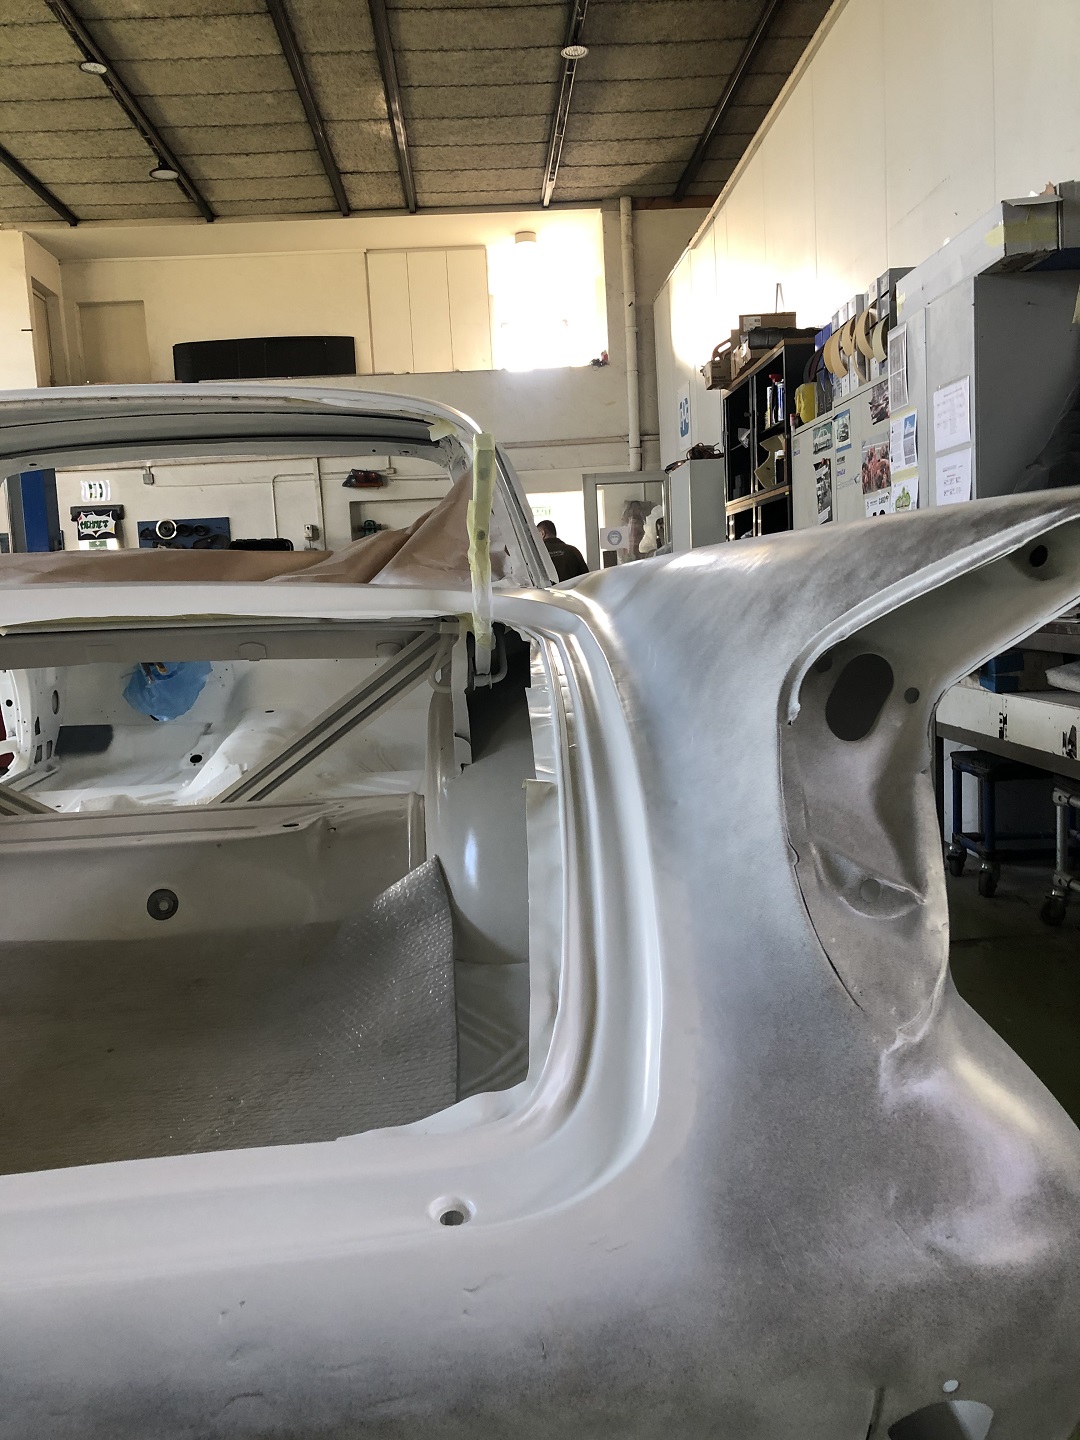 (IMG_8035 passenger side rear fender view.JPG) (IMG_8035 passenger side rear fender view.JPG)
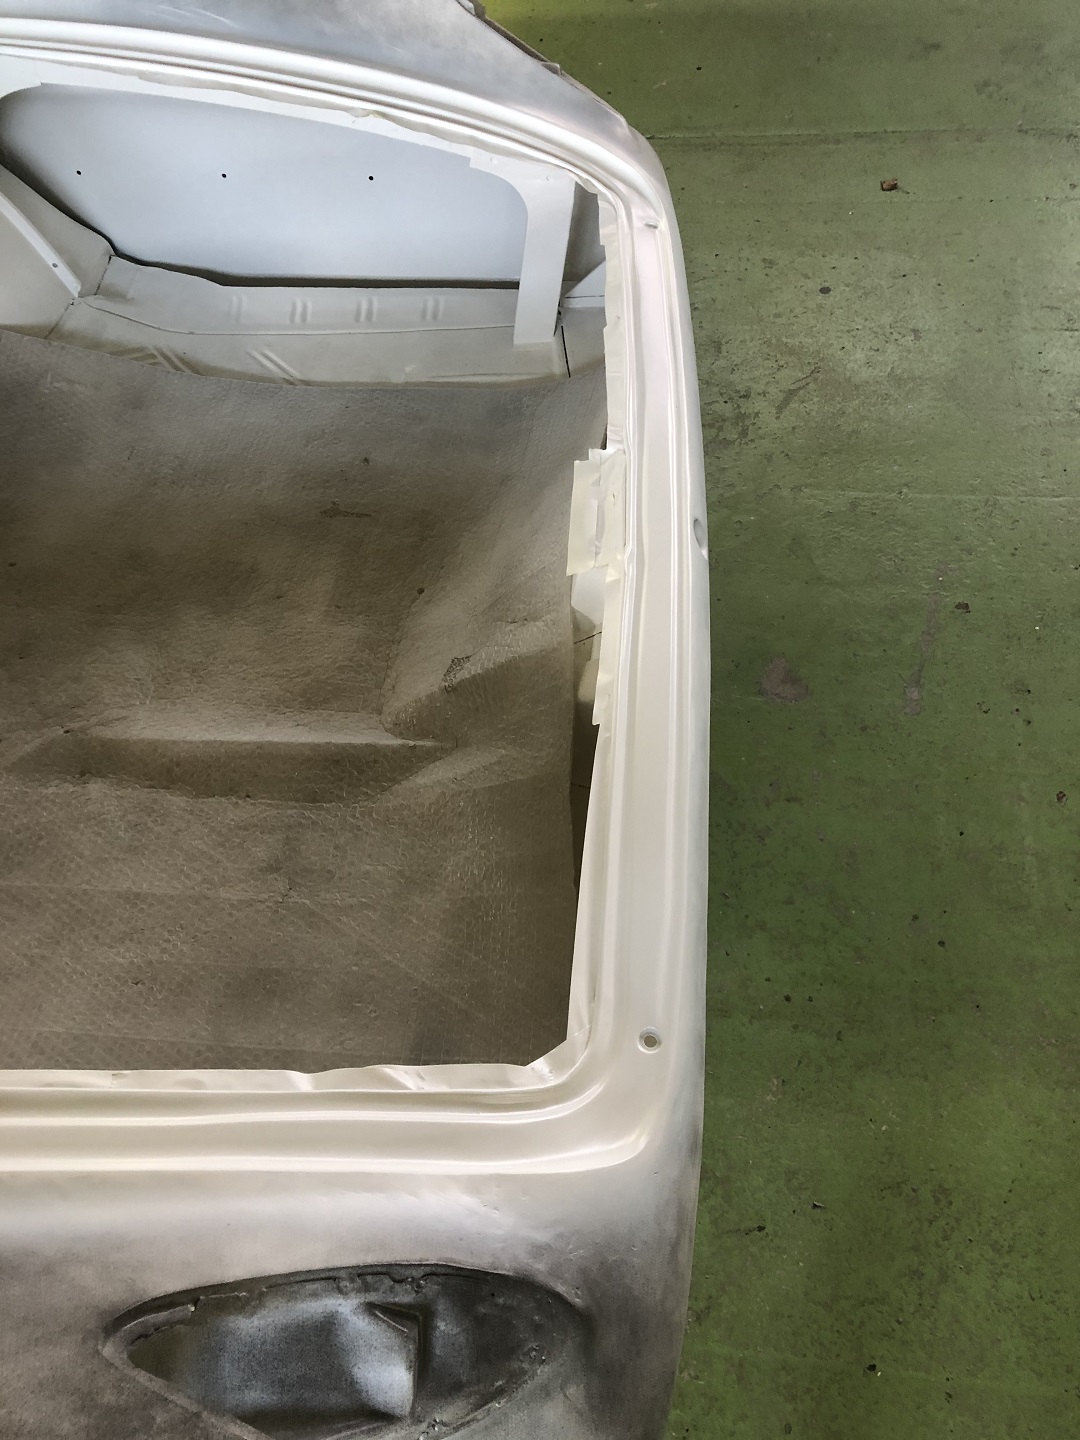 (IMG_8036 rear end view of the trunk.JPG) (IMG_8036 rear end view of the trunk.JPG)
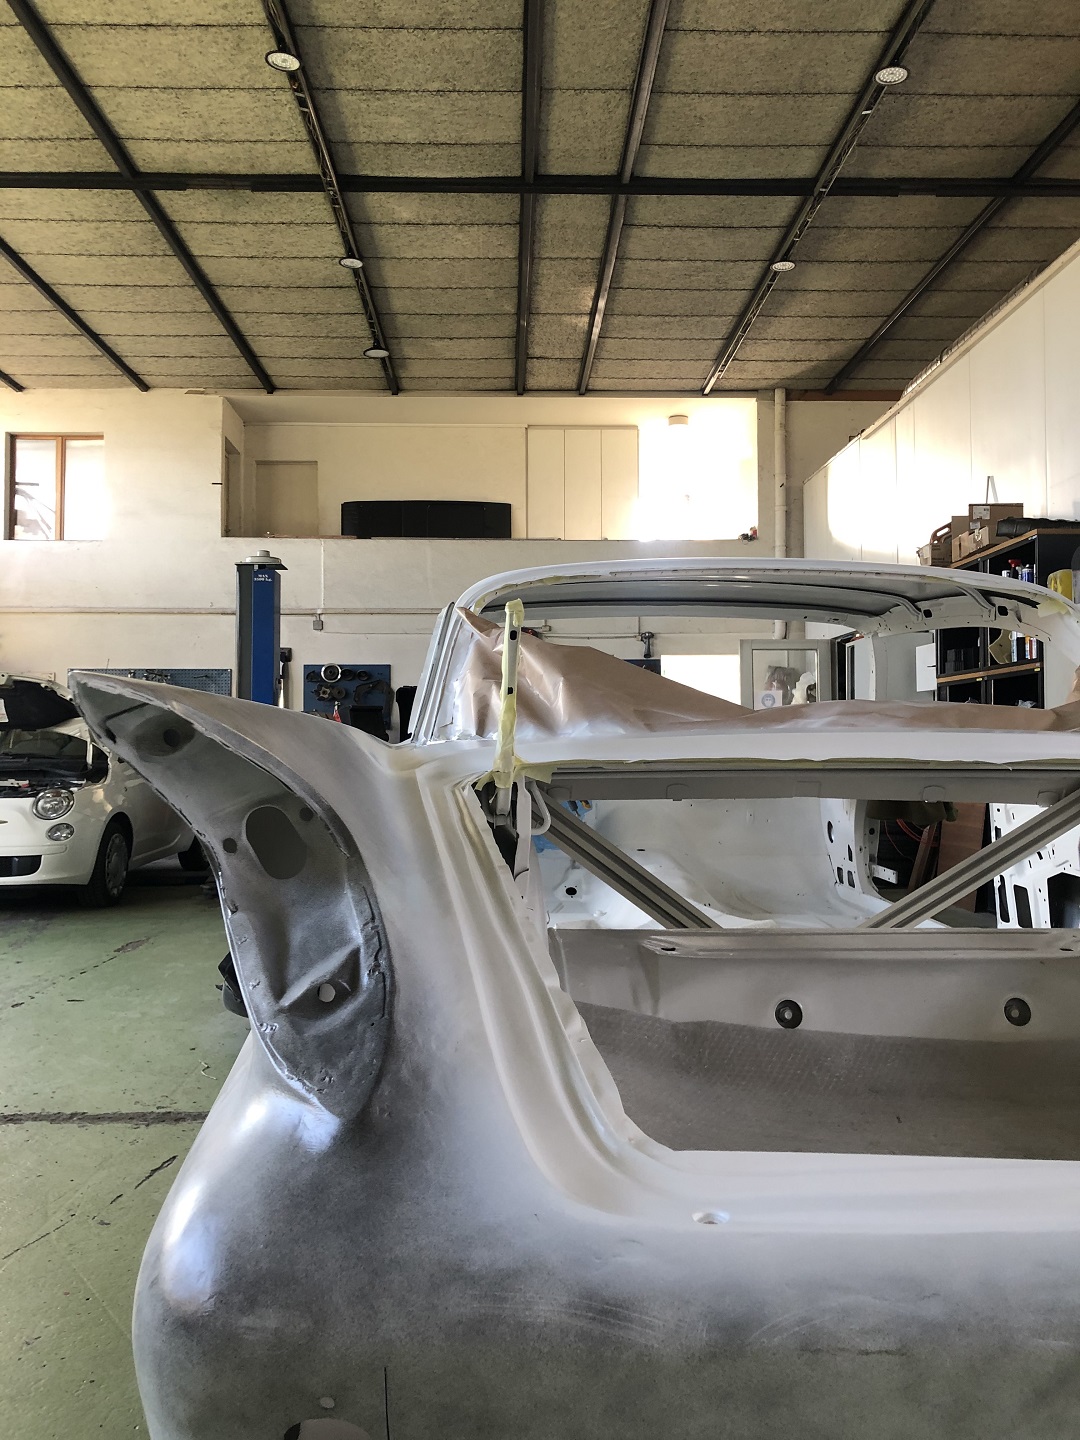 (IMG_8037 drivers side rear fender view.JPG) (IMG_8037 drivers side rear fender view.JPG)
Attachments
----------------
IMG_8035 passenger side rear fender view.JPG (434KB - 248 downloads)
IMG_8036 rear end view of the trunk.JPG (417KB - 246 downloads)
IMG_8037 drivers side rear fender view.JPG (488KB - 266 downloads)
|
|
| |
|
Expert
Posts: 1530
Location: ZH, Switzerland | some more progress... Sunny clear... ugly welding from the farmer smith shop needs a little bit more bondo... Happy Restoring! Dieter
Edited by di_ch_NY56 2020-11-21 7:51 AM
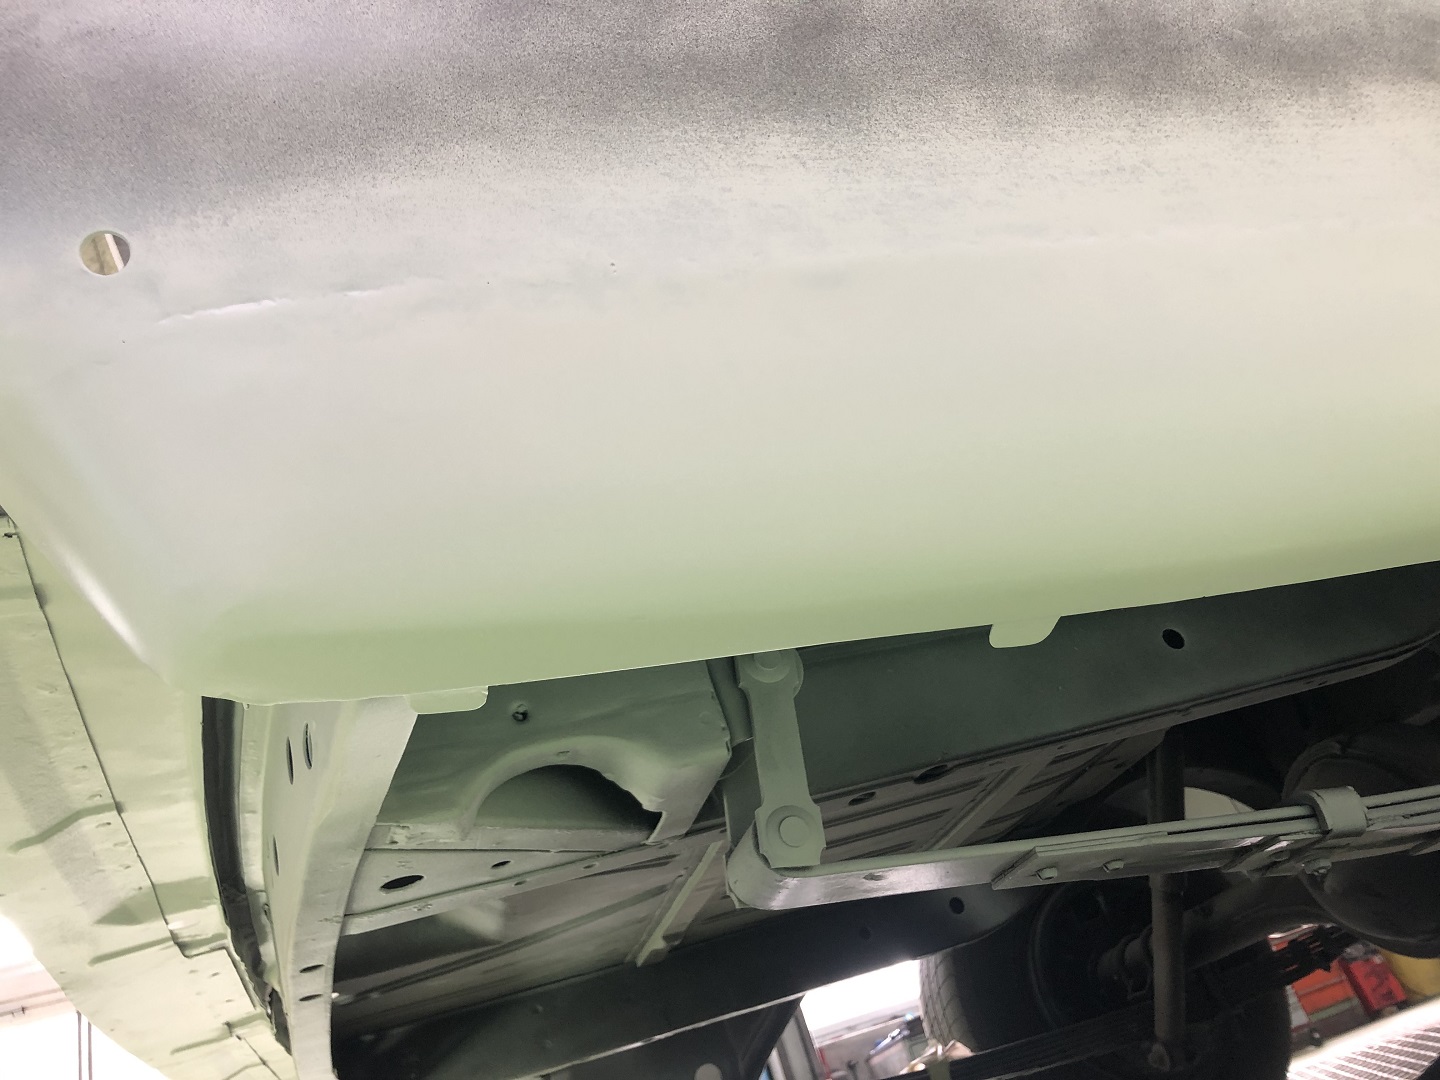 (IMG_8055 passenger side rear quarter panel low section.JPG) (IMG_8055 passenger side rear quarter panel low section.JPG)
 (IMG_8056 passenger side rear wheel well and rocker panel.JPG) (IMG_8056 passenger side rear wheel well and rocker panel.JPG)
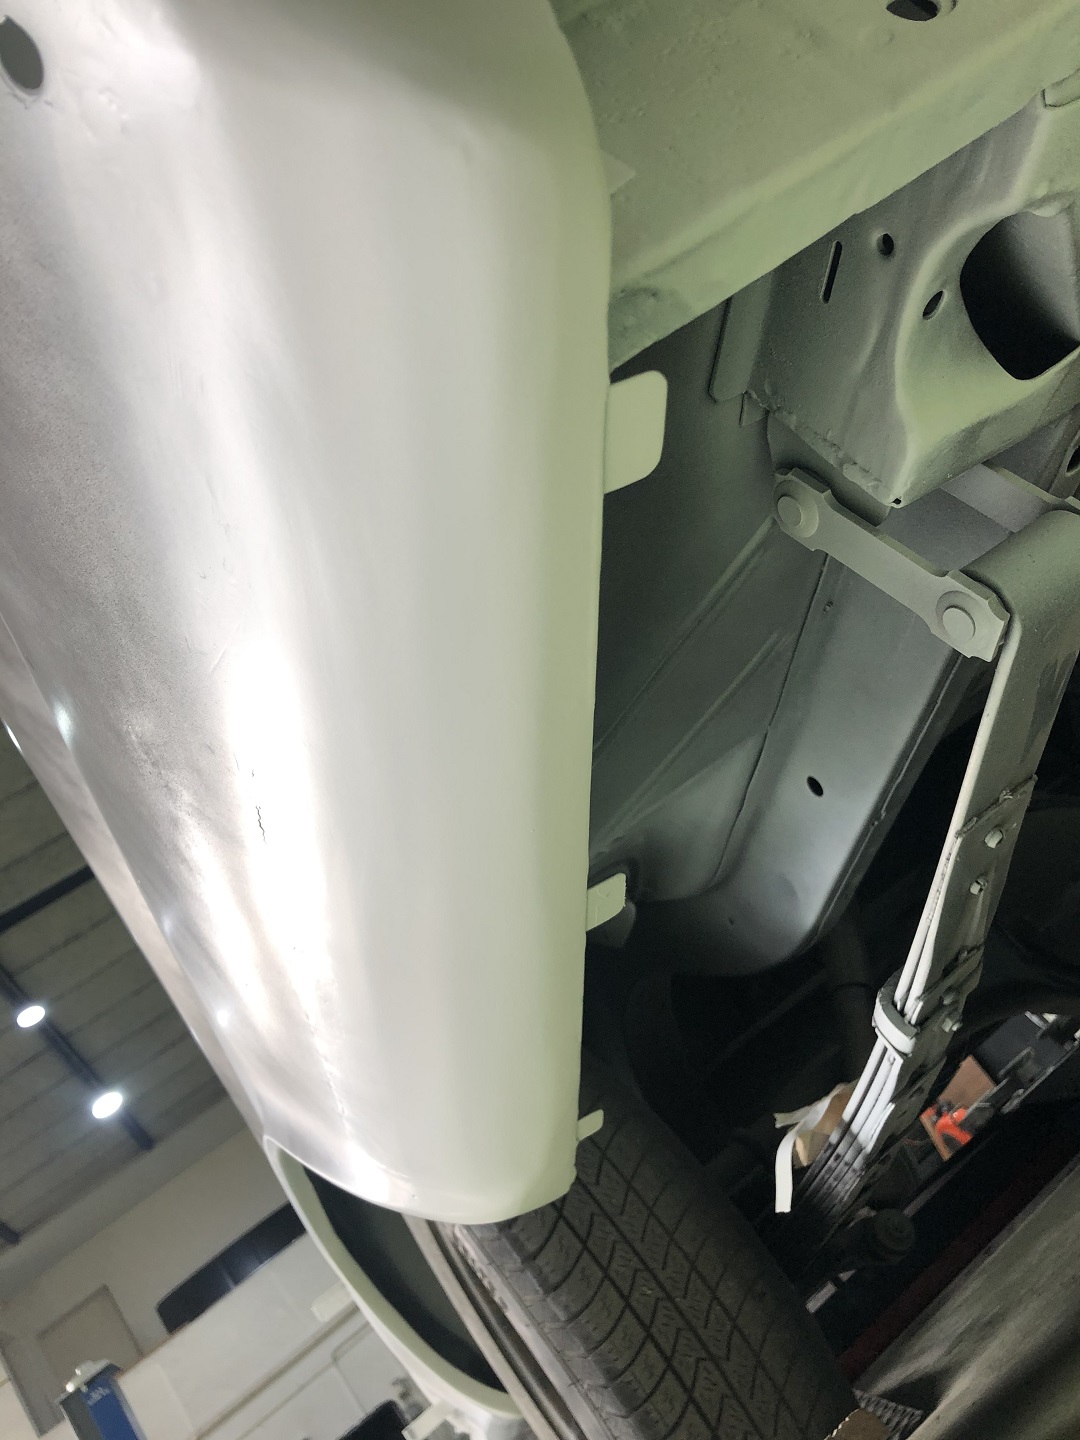 (IMG_8057 drivers side rear quarter panel low section.JPG) (IMG_8057 drivers side rear quarter panel low section.JPG)
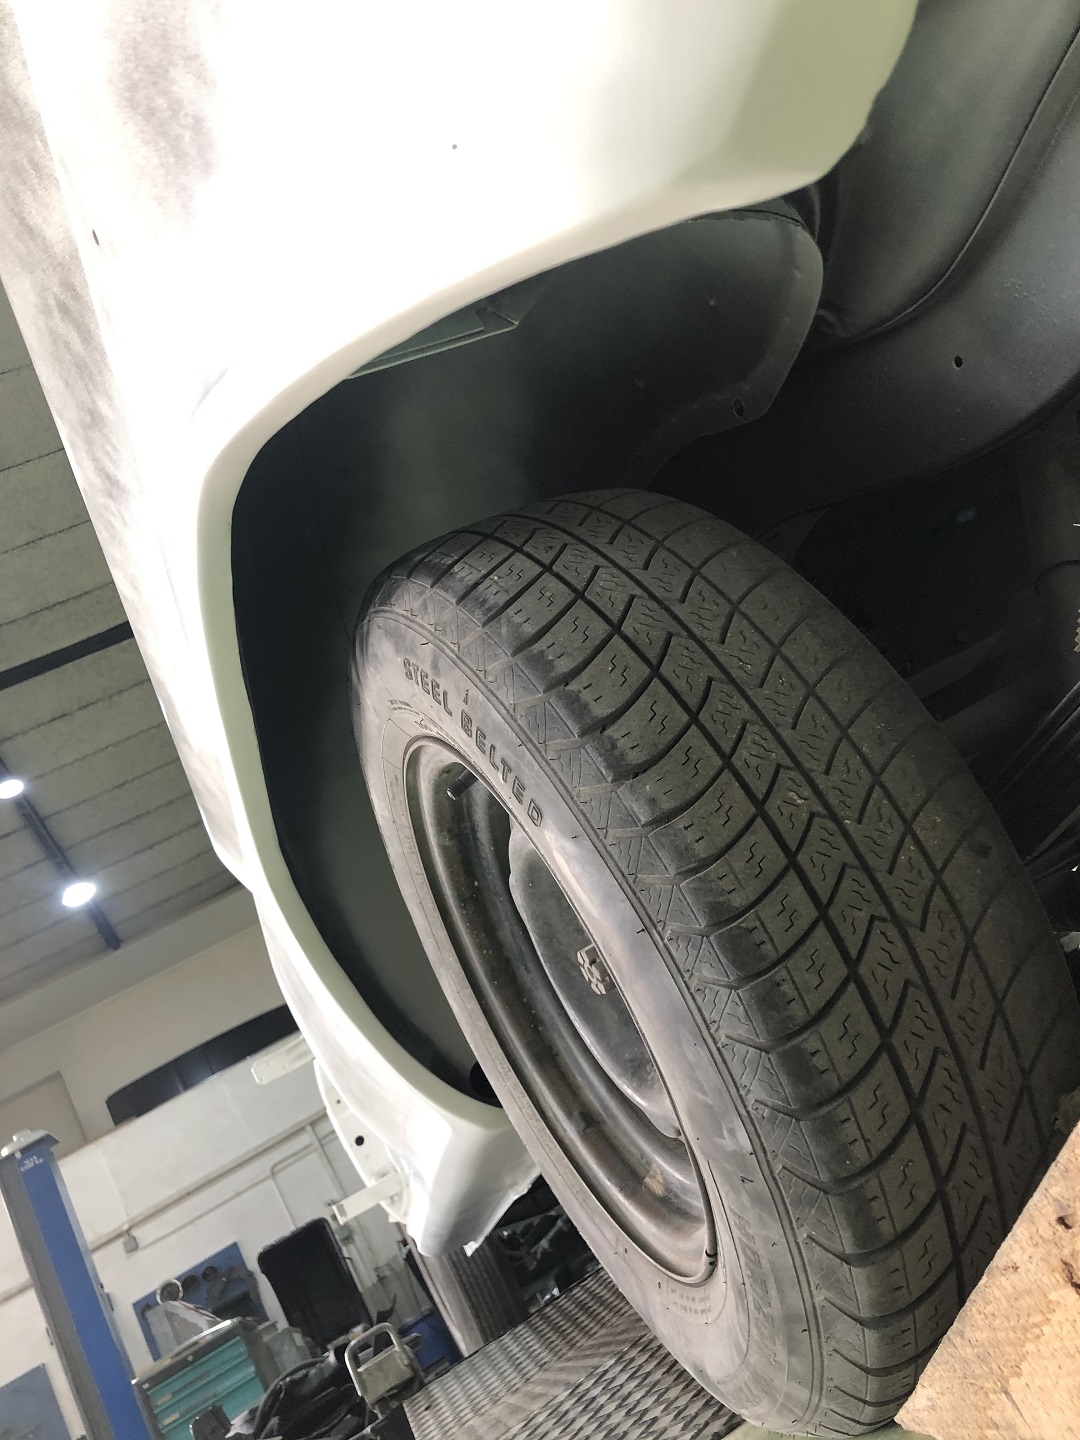 (IMG_8058 drivers side rear wheel well and rocker panel.JPG) (IMG_8058 drivers side rear wheel well and rocker panel.JPG)
Attachments
----------------
IMG_8055 passenger side rear quarter panel low section.JPG (333KB - 256 downloads)
IMG_8056 passenger side rear wheel well and rocker panel.JPG (470KB - 241 downloads)
IMG_8057 drivers side rear quarter panel low section.JPG (337KB - 253 downloads)
IMG_8058 drivers side rear wheel well and rocker panel.JPG (411KB - 246 downloads)
|
|
| |
|
Expert
Posts: 1530
Location: ZH, Switzerland | Interesting detail about the carpet when I disassembled my Letter... After I removed the 300 F heel pad, the common heel pad in the carpet appeared. The carpet goes over the propeller shaft tunnel as in any other 1960 Chrysler cars. The only difference are about four or six square holes in the carpet (as well as the isolation mat) where the fully length middle console with two arm rests meets the floor to screw it down. The old carpet I kept to use it as a template. But I can stick with a regular 1960 New Yorker carpet in color black. Because I would like to stick with the flocked and pressed textile isolation mat (not with Dynamat isolation mats as some others were or are installing), I have to seek for new mats locally. Thickness between 10 mills and 1/2 inch. Happy Restoring Dieter
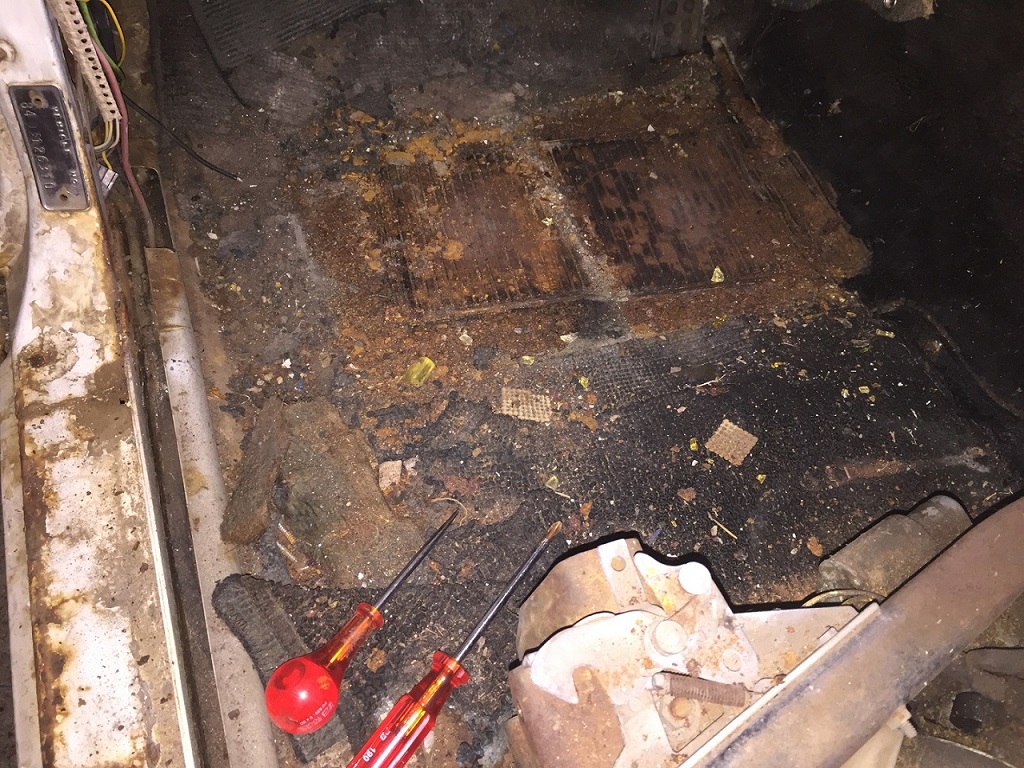 (IMG_2154 original floor carpet plus carpet of center console.JPG) (IMG_2154 original floor carpet plus carpet of center console.JPG)
Attachments
----------------
IMG_2154 original floor carpet plus carpet of center console.JPG (381KB - 250 downloads)
|
|
| |
|
Expert
Posts: 1530
Location: ZH, Switzerland | This morning I visited the Body&Paint-Shop once again. to my surprise the boss was working on my Letter this early morning. The older apprentice has to seek a new way. He didn't do what the boss wanted and got nasty many times until the boss said - there is the door. The younger apprentice (the younger one with more hearth blood in his work) is on a job training outside the company. So I assisted the boss in the paint booth to pack in the BMW 5 to get the horizontal surface of the trunk lid painted with absolutely no spray dust somewhere on the body. He explainded the the whole outside surface will be staightened. Then after the filler layer (with the spay gun as I understud) first the inside of the passenger compartment will be painted. After that the body shell from the roof down including the firewall. Today first time I heard the amount aiming to. It's less than I expected, sand blasting included. But I do not communicate of how much. Happy Restoring! Dieter BTW the filler will be sanded down again, to get out the smallest imperfections. At the picture near the end of the fin a new layer was appliled. That will be sanded down. I imagine, if anybody would check with a paint thickness meter, he will measure nowhere more than a few tenth of a millimeter.
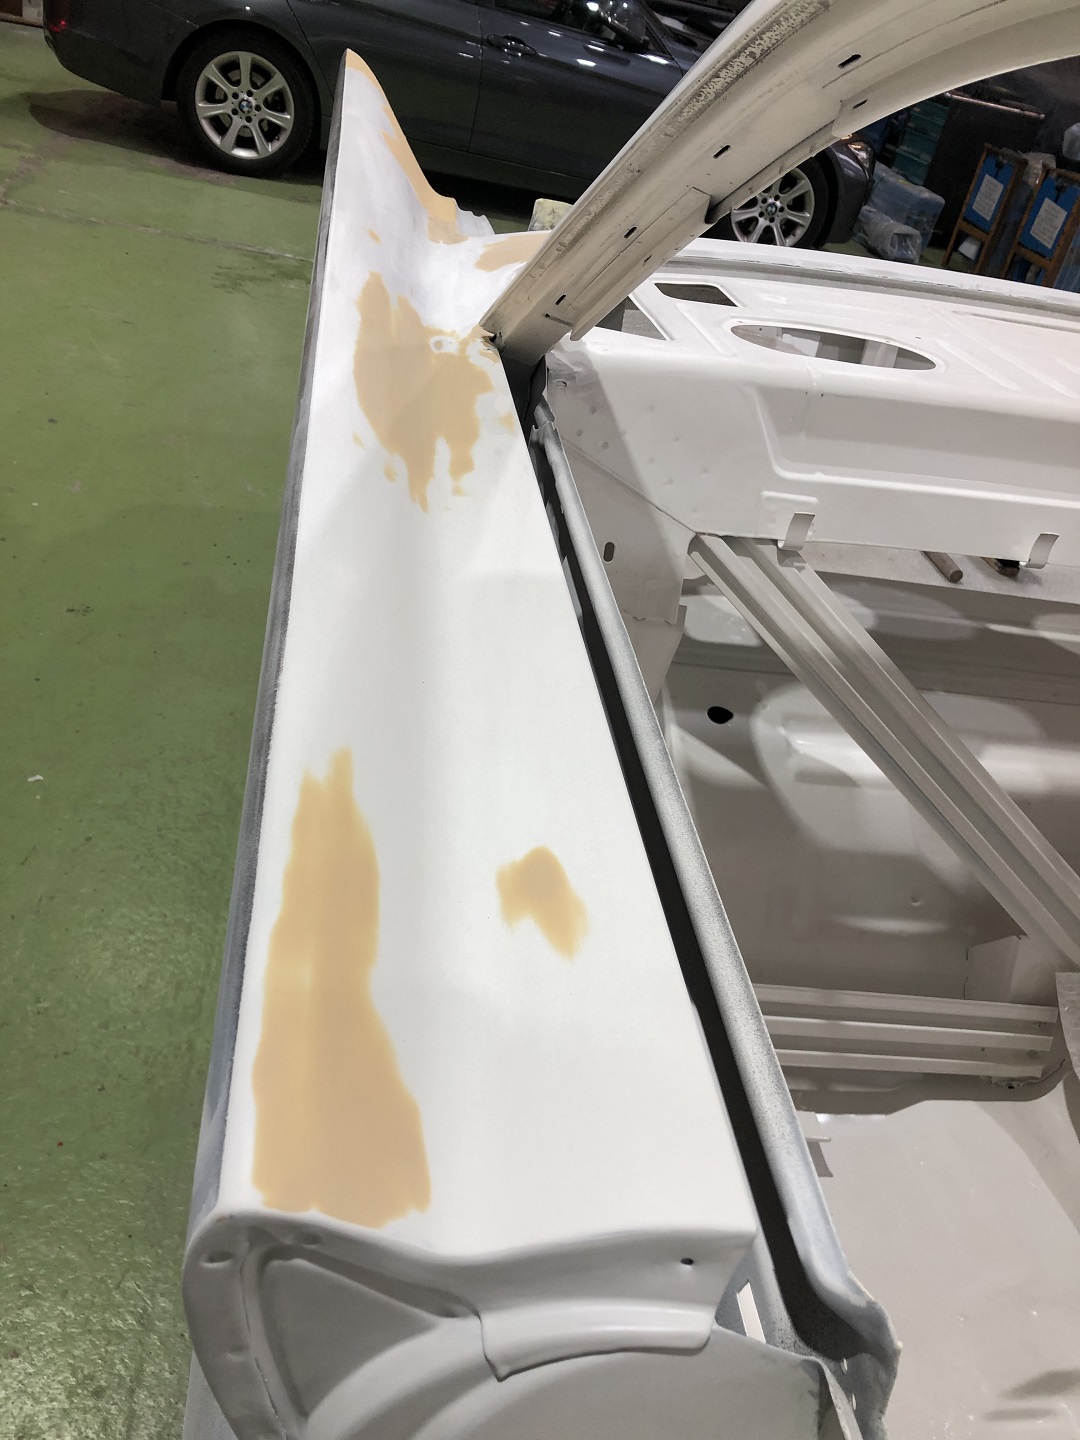 (IMG_8068 passenger side fin.JPG) (IMG_8068 passenger side fin.JPG)
Attachments
----------------
IMG_8068 passenger side fin.JPG (337KB - 247 downloads)
|
|
| |
|
Expert
Posts: 1530
Location: ZH, Switzerland | This afternoon for few hours I worked for parts at my Letter. I cleaned the addhesive area of the dashboard again with the wire brush. Then I assembled the three parts (dashboard, lid and black insert). The red circle in the relating picture rises a question: what size of screw is there (flat countersunk i assume)? I picked the short fuel line, that is in the subframe. I cleaned it, even the holder and the screw. The fuel line is absolutely free - to my surprise in the steel fuel lines there was still fuel in it during the disassemblage. I appreciate your answer highly. Big thank you in advance. Happy Restoring! Dieter BTW: the dashboard goes to the body&paint shop after the Letter is finished there. I assume it'll get a sandblast as well and for sure a painting again in the same colors.
Edited by di_ch_NY56 2020-11-28 10:43 AM
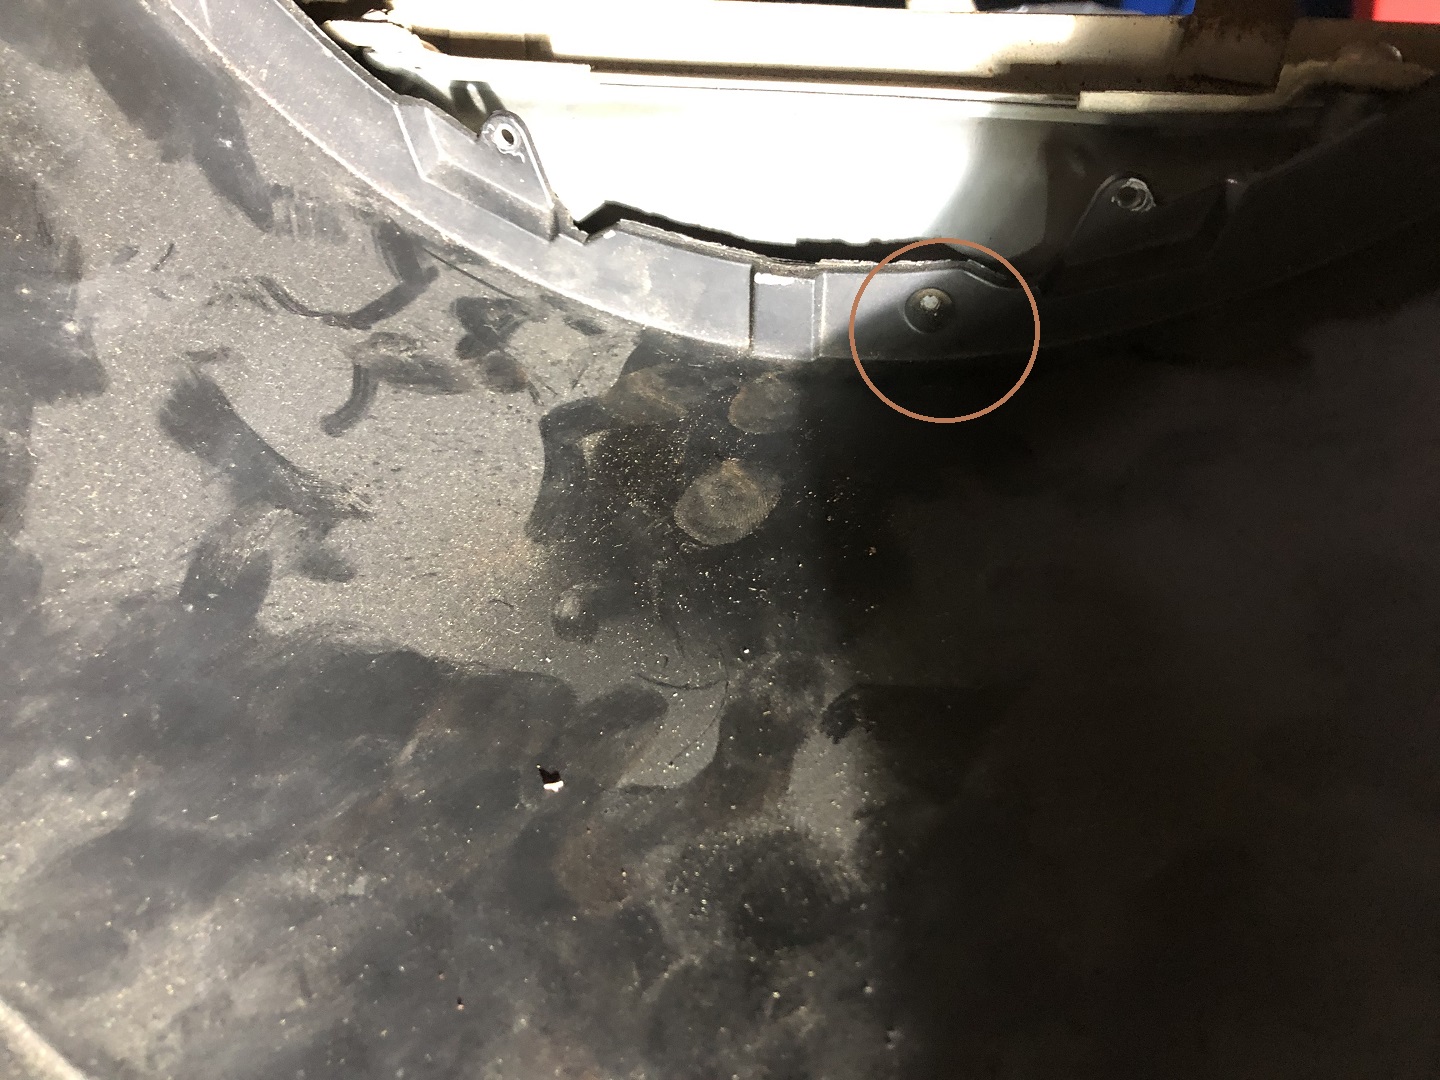 (IMG_8071 dashboard instrument recession.JPG) (IMG_8071 dashboard instrument recession.JPG)
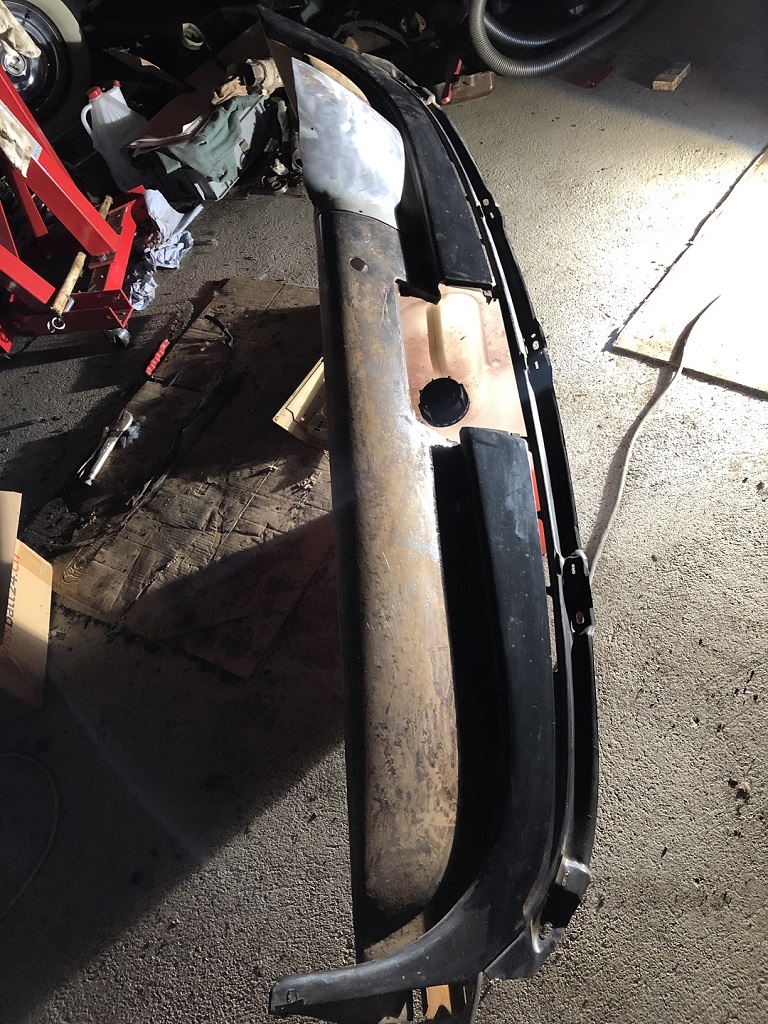 (IMG_8072 dashboard top view.JPG) (IMG_8072 dashboard top view.JPG)
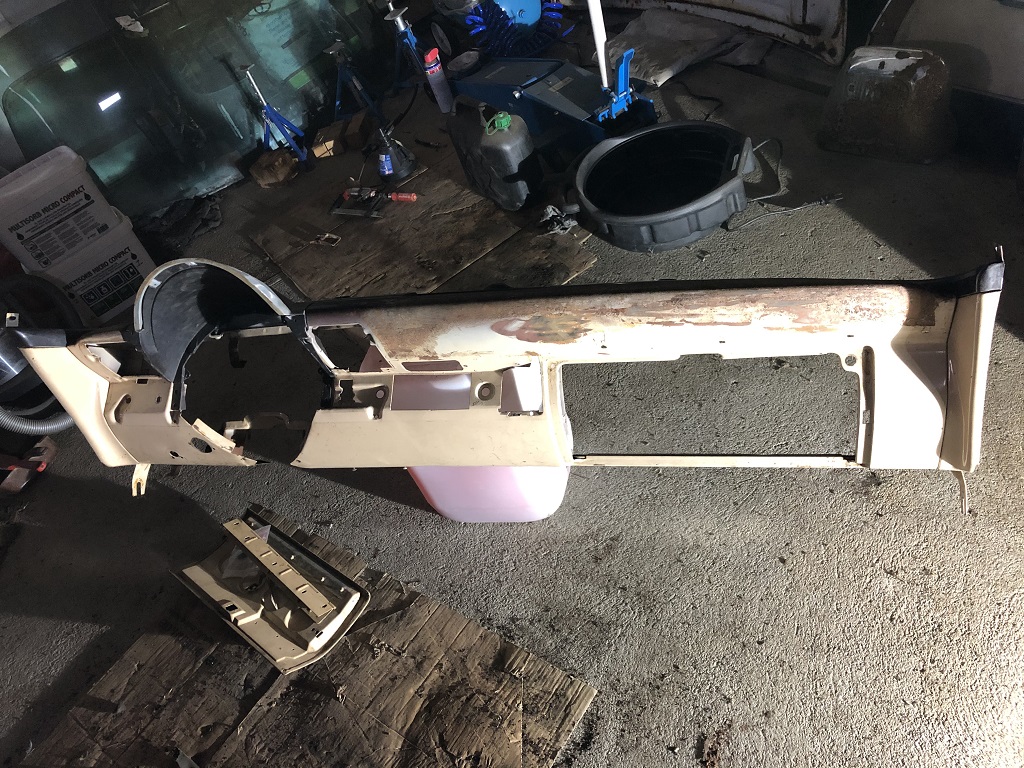 (IMG_8073 dashboard dogs view bottom part.JPG) (IMG_8073 dashboard dogs view bottom part.JPG)
Attachments
----------------
IMG_8071 dashboard instrument recession.JPG (454KB - 245 downloads)
IMG_8072 dashboard top view.JPG (371KB - 246 downloads)
IMG_8073 dashboard dogs view bottom part.JPG (381KB - 249 downloads)
|
|
| |
|
Expert
Posts: 1530
Location: ZH, Switzerland | di_ch_NY56 - 2020-11-27 4:39 PM This afternoon for few hours I worked for parts at my Letter. I cleaned the addhesive area of the dashboard again with the wire brush. Then I assembled the three parts (dashboard, lid and black insert). The red circle in the relating picture rises a question: what size of screw is there (flat countersunk i assume)? I picked the short fuel line, that is in the subframe. I cleaned it, even the holder and the screw. The fuel line is absolutely free - to my surprise in the steel fuel lines there was still fuel in it during the disassemblage. I appreciate your answer highly. Big thank you in advance. Happy Restoring! Dieter BTW: the dashboard goes to the body&paint shop after the Letter is finished there. I assume it'll get a sandblast as well and for sure a painting again in the same colors. The size of the screw I got out. Thanks a lot. Happy Restoring! Dieter |
|
| |
|
Expert
Posts: 1530
Location: ZH, Switzerland | I started with applying once more Gummi-Pflegestift at the windshield and rear window rubber. On both weatherstrips the side pointing to the passenger compartment is clean and looks like new. The side to the outside needs more cleaning, most probably with water and soap. At the rear window rubber I started with removing the additional sealer. There is only sealer used at the body side, not at the window side. Removing the cement is a very, very time consuming job. Happy Restoring! Dieter
Edited by di_ch_NY56 2020-12-02 9:23 AM
|
|
| |
|
Expert
Posts: 1530
Location: ZH, Switzerland | Both B posts of the side doors show a clear difference between the passenger side (original rear fender) and the drivers side. For everybody who believed I'm telling BS about the drivers side rear fender... Happy Restoring! Dieter
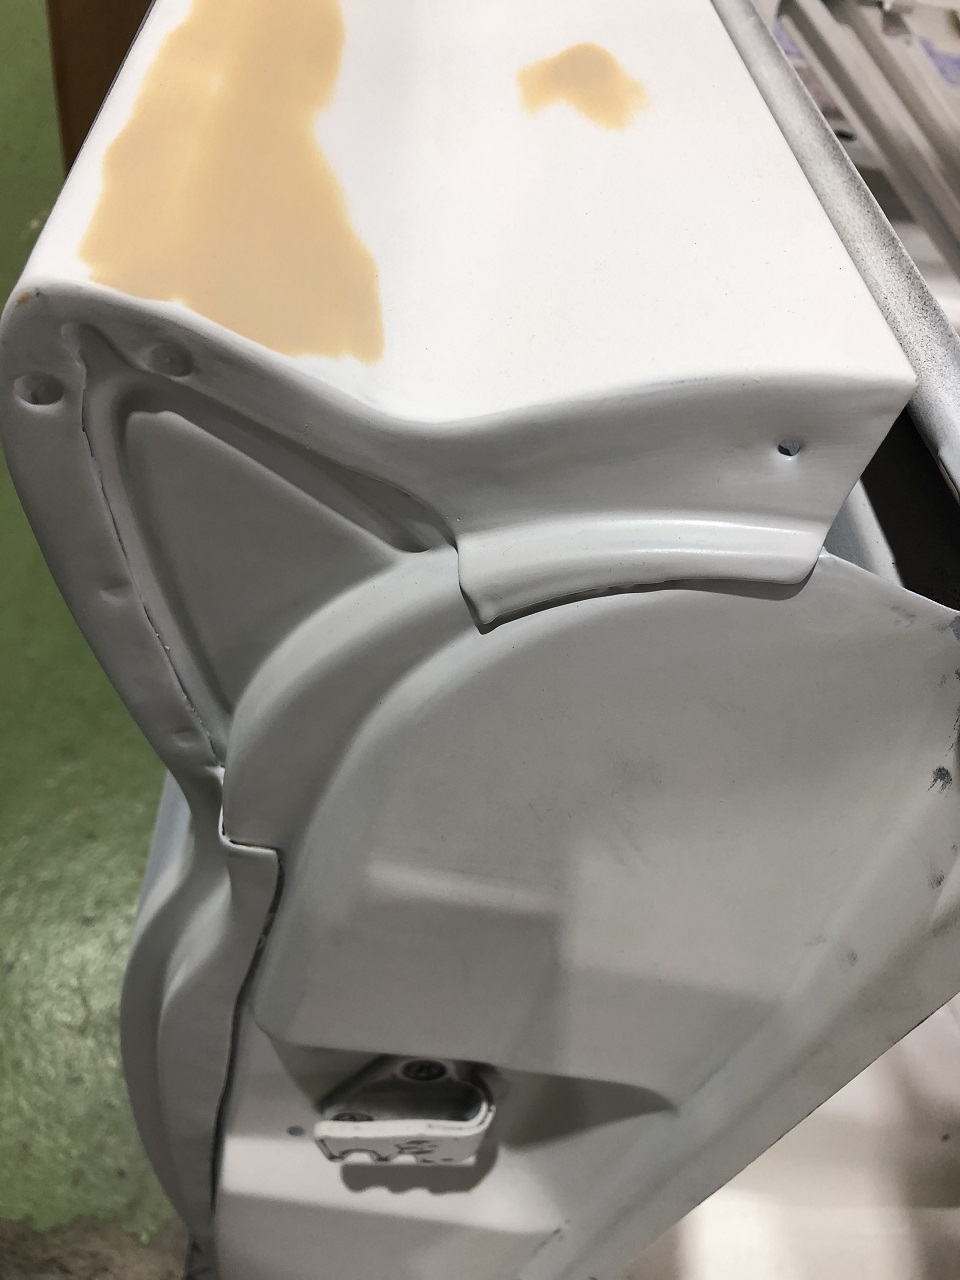 (IMG_8108 B post top passenger door.JPG) (IMG_8108 B post top passenger door.JPG)
 (IMG_8117 B post top drivers side door.JPG) (IMG_8117 B post top drivers side door.JPG)
Attachments
----------------
IMG_8108 B post top passenger door.JPG (208KB - 234 downloads)
IMG_8117 B post top drivers side door.JPG (206KB - 241 downloads)
|
|
| |
|
Elite Veteran
Posts: 649
Location: Finland | The rh quarter panel is as from the factory...the lh is not...it has been mig welded imo. It has either been replaced or adjusted. |
|
| |
|
Expert
Posts: 1530
Location: ZH, Switzerland | 22mafeja - 2020-12-04 9:56 PM The rh quarter panel is as from the factory...the lh is not...it has been mig welded imo. It has either been replaced or adjusted. Hi Ralf Thank you very much for your confirmation. It's what I'm trying to tell since a long time. For sure the LH rear fender once (long ago) has been replaced without correcting the structure damage as commaned in the factory service manual. It's the very first car I'm restoring. I had big pressure to dissassemble it very quick as soon as it was in the barn (summer hot like hell, winter freezing cold). If ever I would restore another car first I would check what would fit. From the pictures prior to purchase and the first appearance at me, the drivers side stainless steel molding I assume was never mounted again since the replacement of the drivers side rear fender. The 300 F ornament on the drivers side looks pretty like new. There were double holes in the fender for the ornament carrier that gave a hint of what happened. The molding bows (three dimensional) the the rear vertical stainless steel moldings to conjunct the frame around the filler tube of the fuel tank recession apparently were replaced (the bows are identical (except they are mirrored for RH and LH application). Kind regards Dieter |
|
| |
|
Expert
Posts: 1530
Location: ZH, Switzerland | The last few free days (weather condition and Covid-19 slow down of building investments) I did "nurse" and clean the rear window and the windshield weatherstrip. Good luck I got the hint to purchase "Gummipflege". On both weatherstrips the side pointing to the passenger compartment are looking like new again. On the outside there is loads of accumulated dust and dirt. Below a "new" used looking surface appears, excpt on some top area, where the rubber started to disintegrate (like cancer pop ups). Happy Restoring! Dieter BTW: Please do not present a bottle of wine as a present - I do not drink wine.
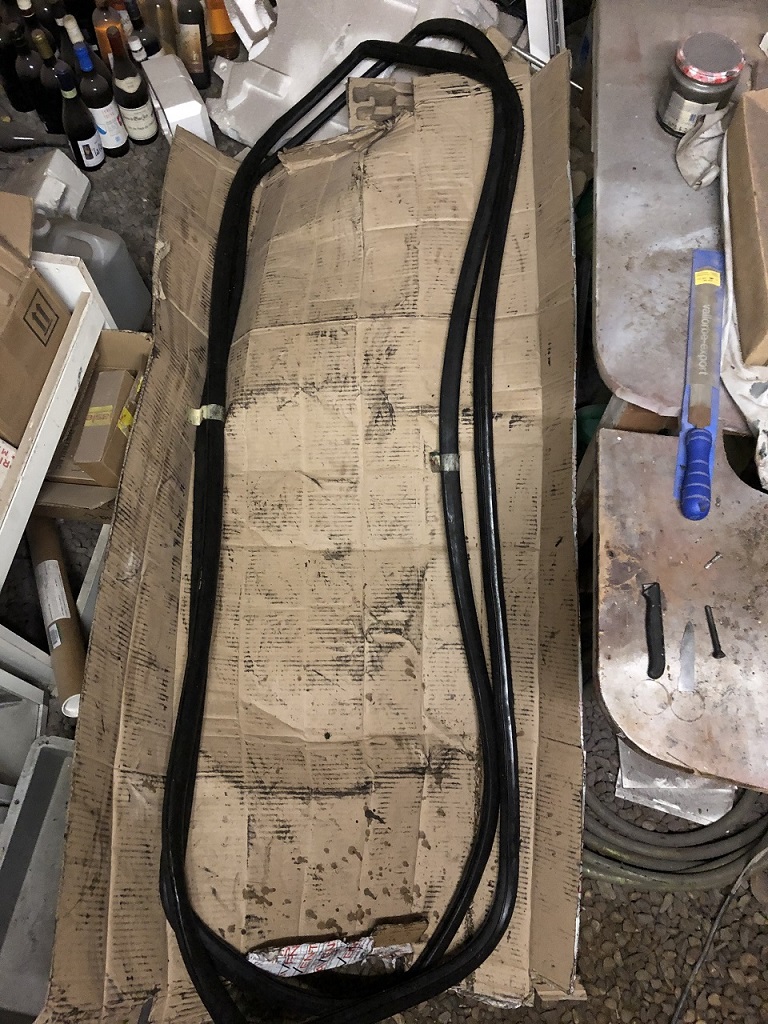 (IMG_8122 weatherstrips under cleaning.JPG) (IMG_8122 weatherstrips under cleaning.JPG)
Attachments
----------------
IMG_8122 weatherstrips under cleaning.JPG (348KB - 241 downloads)
|
|
| |
|
Expert
Posts: 1530
Location: ZH, Switzerland | On the rear window weatherstrip there are three sectors where the rubber was not mounted with care to the lip of the body opening for the rear window. These three sectors the rubber doesn't spring back, even though the rubber is soft like new again. Hints? Happy Restoring! Dieter BTW: Hint except carfully mounting.. Thanks
Edited by di_ch_NY56 2020-12-12 6:54 AM
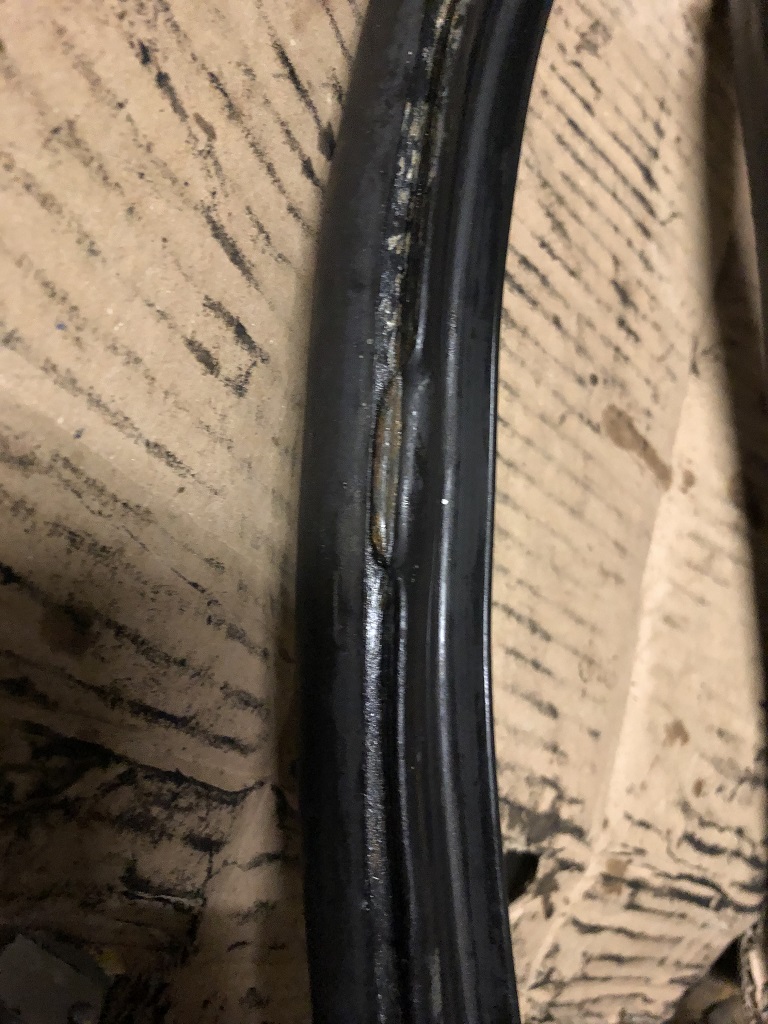 (IMG_8142 rear window weatherstrip detail.JPG) (IMG_8142 rear window weatherstrip detail.JPG)
Attachments
----------------
IMG_8142 rear window weatherstrip detail.JPG (252KB - 235 downloads)
|
|
| |
|
Expert
Posts: 1530
Location: ZH, Switzerland | It's a trial. Will see if it works to fold back the inner lip and open the body channel. Happy Restoring! Dieter
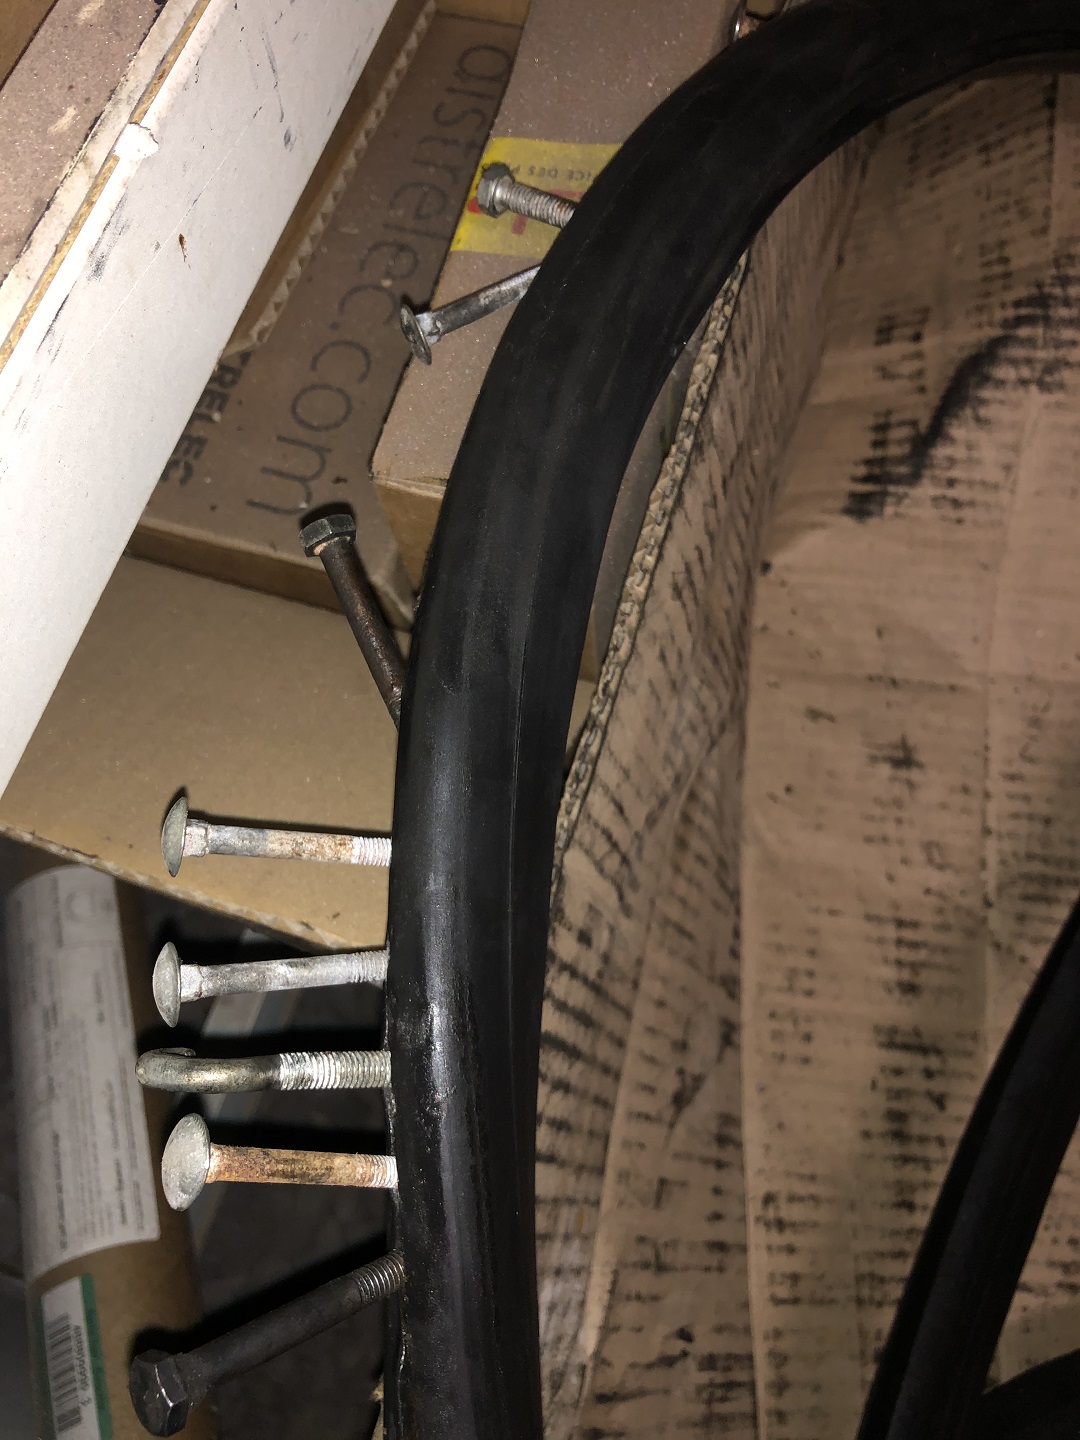 (IMG_8148 rear window weatherstrip trial.JPG) (IMG_8148 rear window weatherstrip trial.JPG)
Attachments
----------------
IMG_8148 rear window weatherstrip trial.JPG (389KB - 232 downloads)
|
|
| |
|
Expert
Posts: 1530
Location: ZH, Switzerland | Because on Dec. 21st I had an accident while working in my garden, only small works performed for my Letter. I cleanded the big connectors and the trunk light/dome light wiring connectors. Following day I cleaned the big connectors (body and directional signal swich) on the bigger wiring harness. I repaired the trunk light socket (the contacts were flying away while removing the bulb) with a new s29 socket, from which I took the contacts. The trunk light works again (checked with voltage and bulb). The back up light sockets will be replaced while completely rusted. Today I cleaned the buttons of the transmission and the heater system. For sure, there are nicer bezels than mine. To bring it up to concours level several weenkends of work will follow (after removing the chrome surface). Happy Restoring! Ddieter
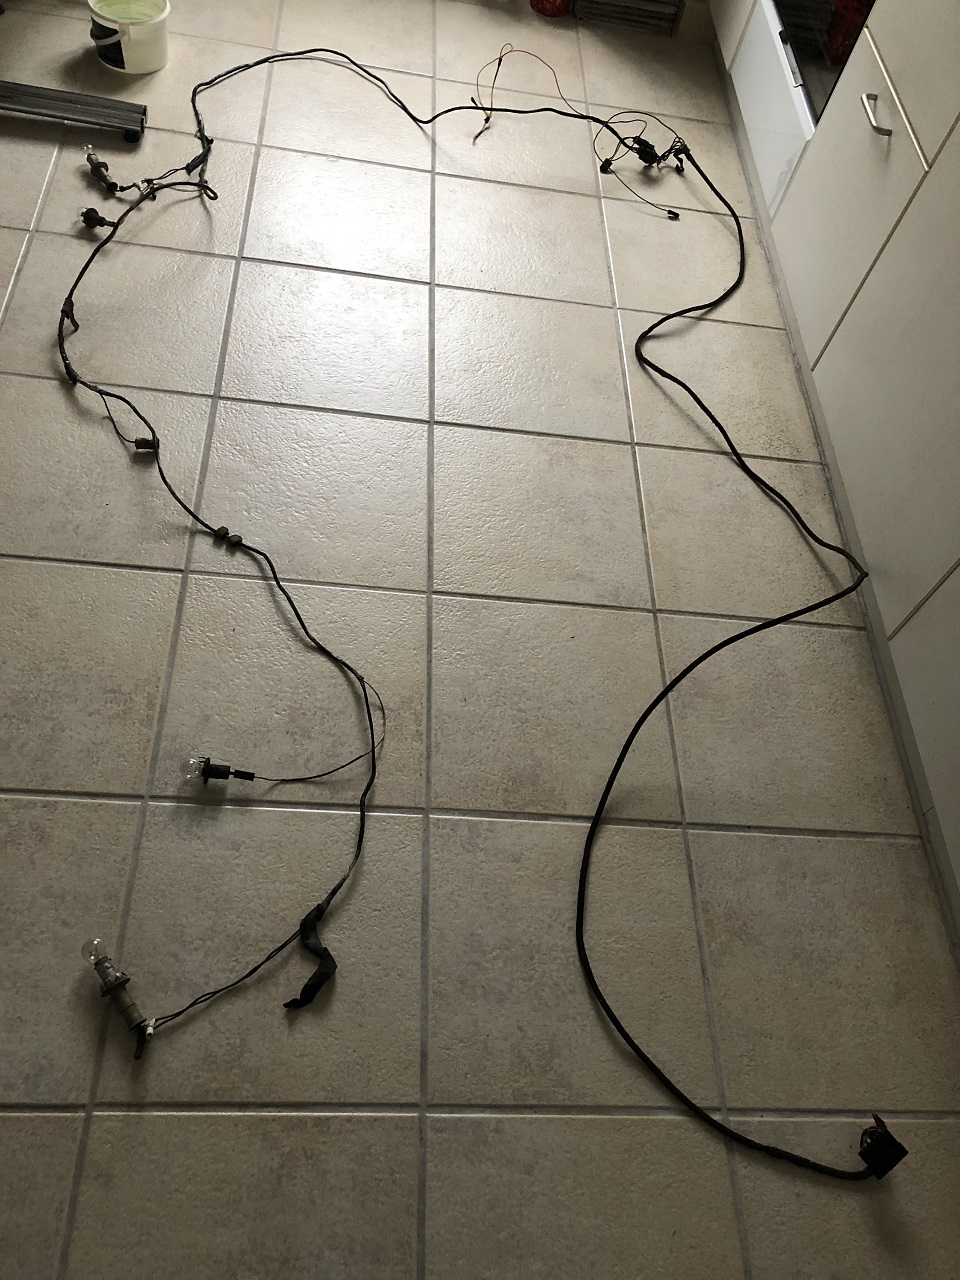 (IMG_8178 rear wiring harness.JPG) (IMG_8178 rear wiring harness.JPG)
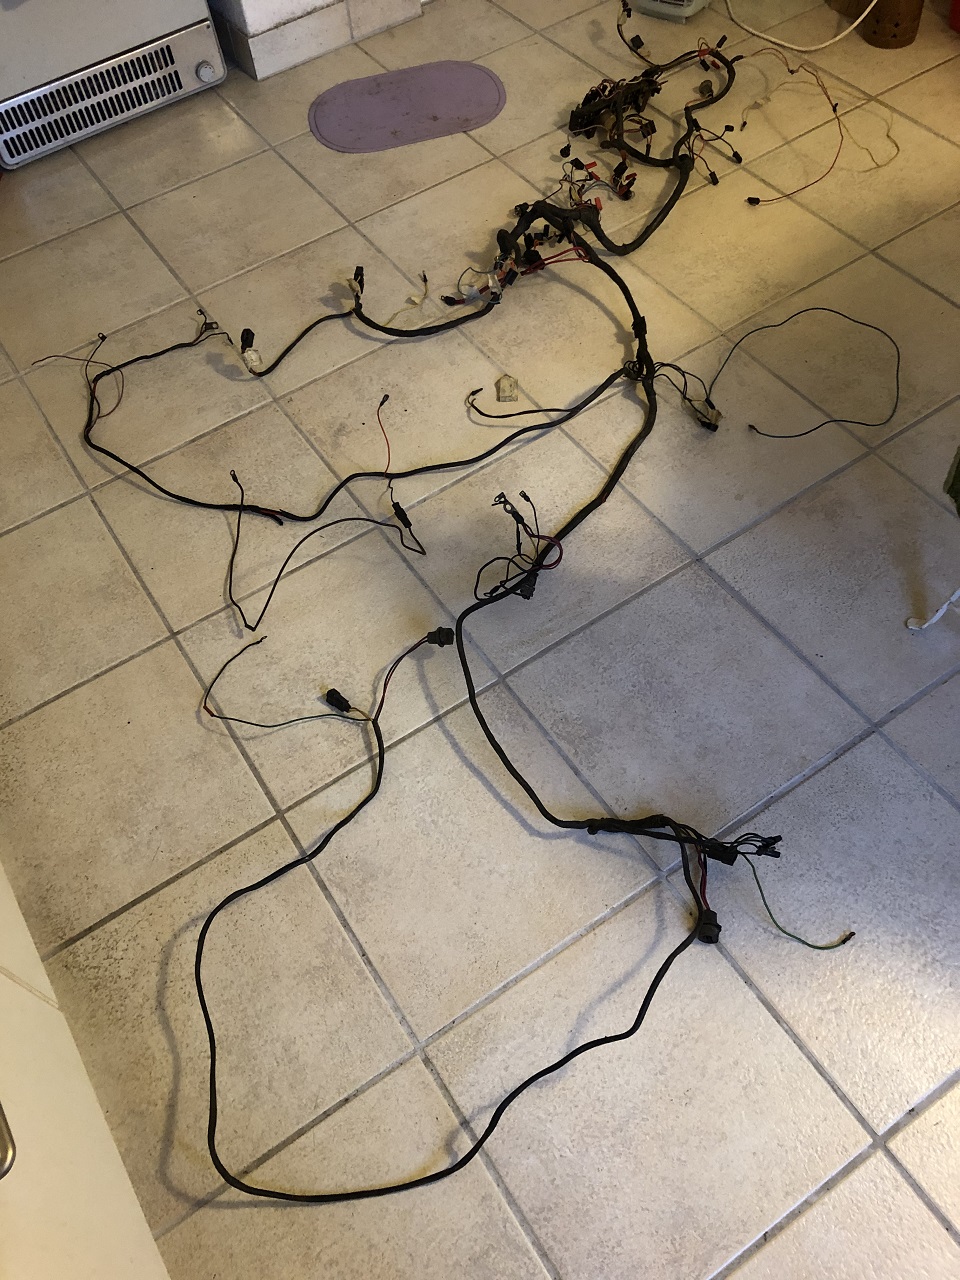 (IMG_8193 engine bay and dashboard wiring harness.JPG) (IMG_8193 engine bay and dashboard wiring harness.JPG)
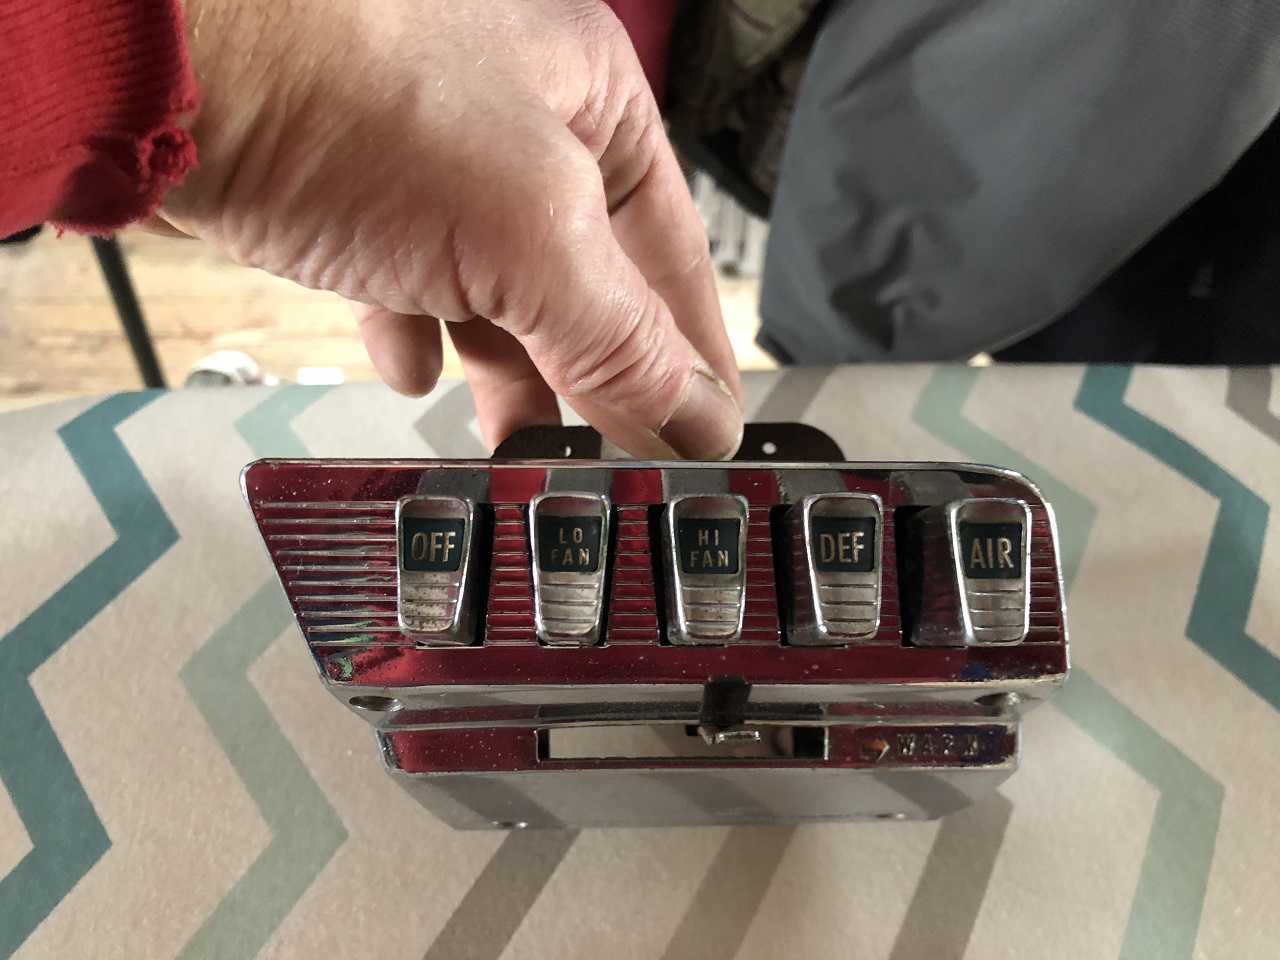 (IMG_8204 heater push button assembly.JPG) (IMG_8204 heater push button assembly.JPG)
Attachments
----------------
IMG_8178 rear wiring harness.JPG (439KB - 229 downloads)
IMG_8193 engine bay and dashboard wiring harness.JPG (473KB - 231 downloads)
IMG_8204 heater push button assembly.JPG (311KB - 238 downloads)
|
|
| |
|
Expert
Posts: 1530
Location: ZH, Switzerland | This early afternoon I cleaned the bezel around the trans push buttons. The procedure how to get out all corrosion craters I know (chemically removing the chrome, one copper layer, then mill out all little craters, fill it with solder tin, shave and polishe the bezel, one more copper layer and finally the chrome layer). But I assume first (when the body is back) installing the wiring harness and preliminary the dash board to install the ignition switch and the transmission gear selector. I'll cover the floor with a thick wool blanket to protect it. from this morning on, the first part of the (cleaned, coated with a thin coat of grease) fuel line (inside the subrame) is installed and closed at the output end. Happy Restoring! Dieter
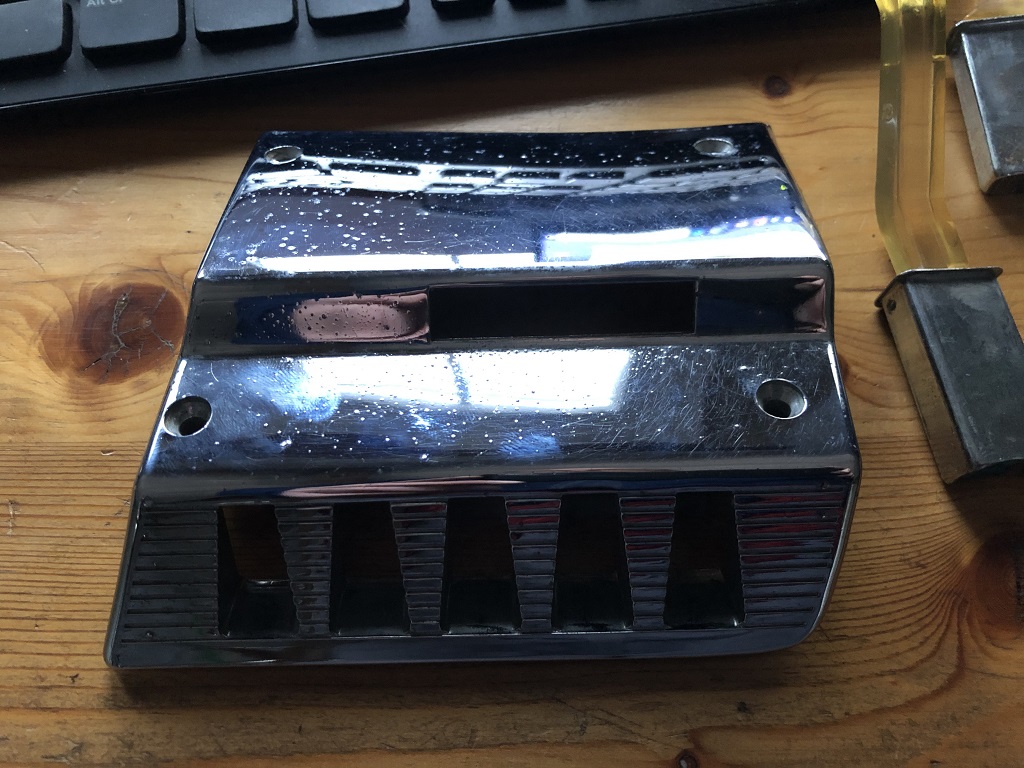 (IMG_8214 trans selector case bottom up view.JPG) (IMG_8214 trans selector case bottom up view.JPG)
Attachments
----------------
IMG_8214 trans selector case bottom up view.JPG (262KB - 239 downloads)
|
|
| |
|
Expert
Posts: 1530
Location: ZH, Switzerland | The fuse holder is cleaned and the mounting straps painted. The contacts I cleanded mechanically. The box I cleaned with a slightly humid paper towel to prevent creeping current. The pivot point at the firewall is cleaned and got the first coat of 1k rust converting primer. I guess I'll paint it gloss black. Happy Restoring! Dieter BTW: the stack of parts waiting to be installed gets bigger and bigger. BTW2: all fuses getting in very easy now, the transition resistance over two contacts is below 0.1 Ohms.
Edited by di_ch_NY56 2020-12-30 9:25 AM
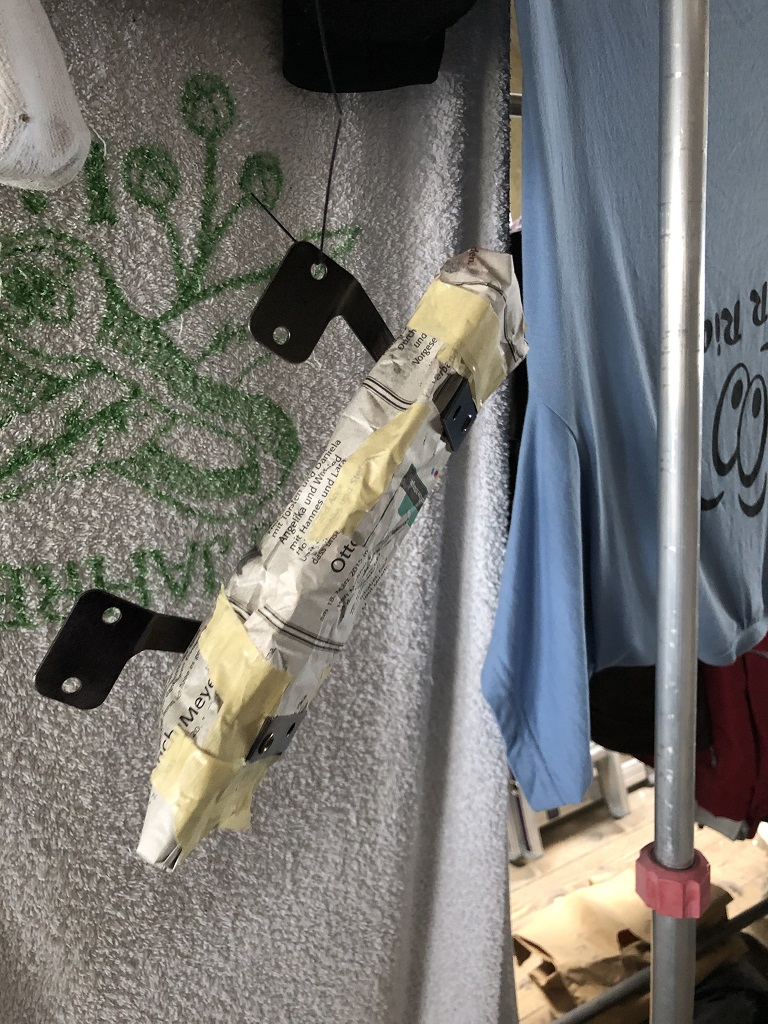 (IMG_8216 fuse holder cleaned and holding straps painted.JPG) (IMG_8216 fuse holder cleaned and holding straps painted.JPG)
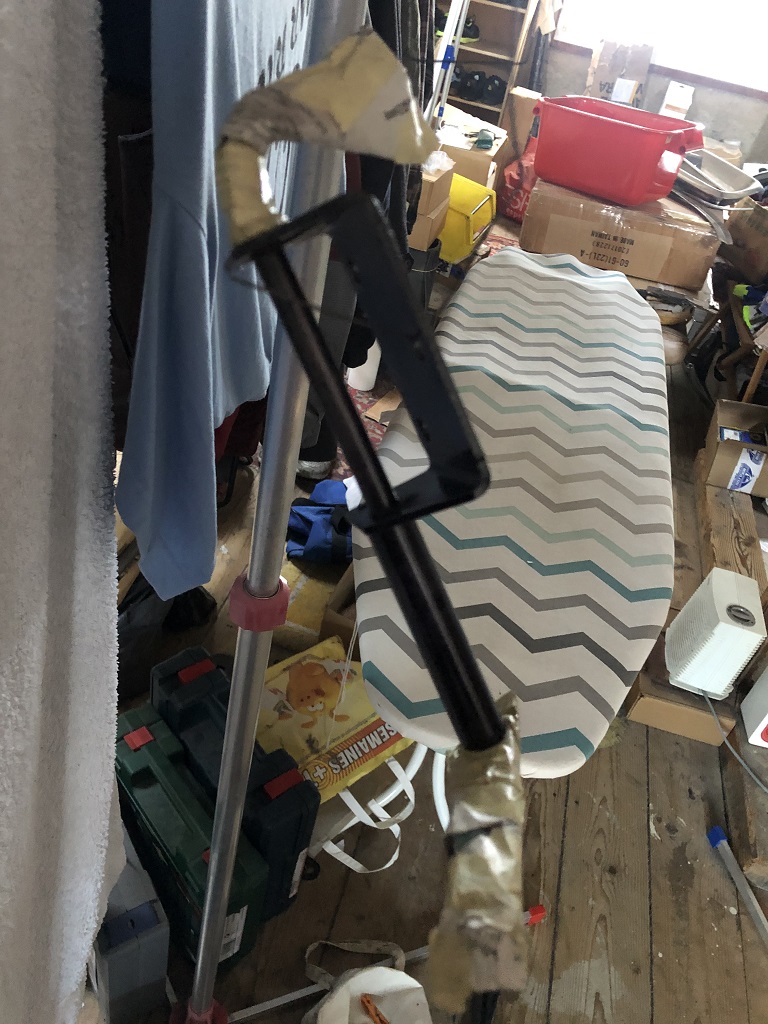 (IMG_8231 accelerator pivot cleaned and painted.JPG) (IMG_8231 accelerator pivot cleaned and painted.JPG)
Attachments
----------------
IMG_8216 fuse holder cleaned and holding straps painted.JPG (342KB - 231 downloads)
IMG_8231 accelerator pivot cleaned and painted.JPG (269KB - 231 downloads)
|
|
| |
|
Expert
Posts: 1530
Location: ZH, Switzerland | This day I cleaned the A-Pillar moldings (posts left/right on the windshield). These are made out of die cast (zinc). The dashboard chrome molding around the aluminum plates are looking really sad (cleaned as well). The aluminum plates I'll replace with reproduction from Jan. Some more parts from the parts stack in my attic are visible. E.g. the directional switch. Happy New Year! Happy Restoring! Dieter
Edited by di_ch_NY56 2021-01-03 5:31 AM
 (IMG_8242 A-Pillar molding cleaned.JPG) (IMG_8242 A-Pillar molding cleaned.JPG)
 (IMG_8241 Dashboard bezels and part of directional signal switch.JPG) (IMG_8241 Dashboard bezels and part of directional signal switch.JPG)
Attachments
----------------
IMG_8242 A-Pillar molding cleaned.JPG (286KB - 361 downloads)
IMG_8241 Dashboard bezels and part of directional signal switch.JPG (316KB - 357 downloads)
|
|
| |
|
Expert
Posts: 1530
Location: ZH, Switzerland | Today I was lucky, I got a thermostat housing (thank you Nathan) that looks surprisingly identical to the one on the engine and a NOS cap for the power steering pump. The original power steering pump cap I brushed with the rotating brush and discovered a rusting through hole and heavy corrotion ontop of the cap. The rubber seal on the other hand is still fine. There was no water inside the power steering pump. Happy Restoring! Dieter BTW: condition of the die cast parts of the passenger compartment. Most probably made out of Zamak 3. Humidity (greater than 65%) is a main factor for blisters and pittings (as signs of zinc pest). Parts made after 1960 are usually considered free of the risk of zinc pest since the use of purer materials and more controlled manufacturing conditions make zinc pest degradation unlikely (wikipedia)
Edited by di_ch_NY56 2021-01-04 11:53 AM
|
|
| |
|
Expert
Posts: 1530
Location: ZH, Switzerland | Long time at the body&paint shop to visit my Letter and helping mounting a rear fender of a 2019 Renault Clio. I marked some resting issues and showed it to the boss, e.g. the hole under the drivers side rear seat. it should be flat and round as the one on the passenger side. The trunk floor is in work now (recessions on the welding line). Happy Restoring! Dieter
 (IMG_8266 front foot well area passenger side.JPG) (IMG_8266 front foot well area passenger side.JPG)
 (IMG_8267 front foot well area drivers side.JPG) (IMG_8267 front foot well area drivers side.JPG)
 (IMG_8268 rear seat area passenger side.JPG) (IMG_8268 rear seat area passenger side.JPG)
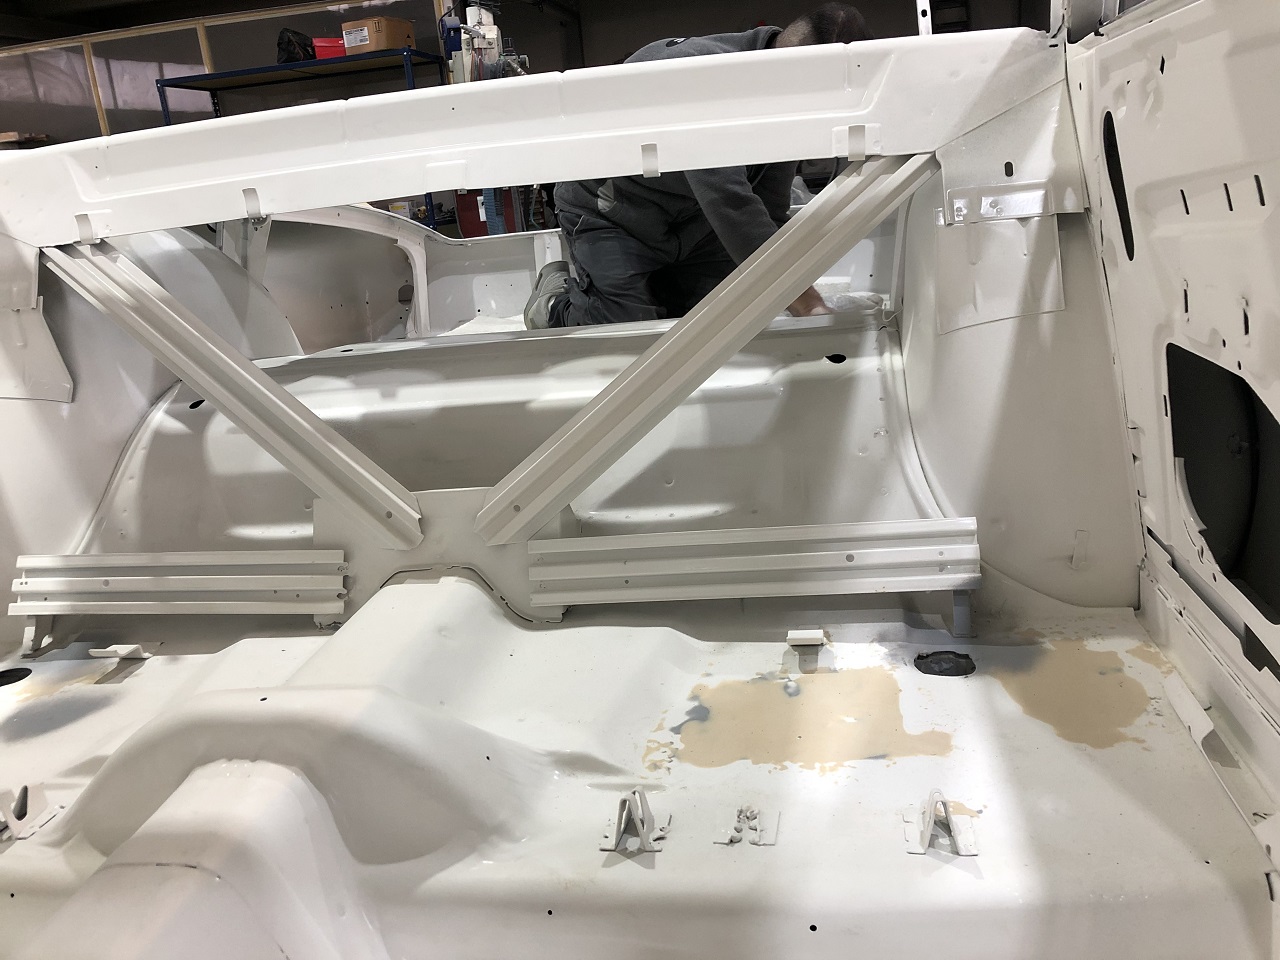 (IMG_8270 rear seat area drviers side.JPG) (IMG_8270 rear seat area drviers side.JPG)
Attachments
----------------
IMG_8266 front foot well area passenger side.JPG (256KB - 355 downloads)
IMG_8267 front foot well area drivers side.JPG (258KB - 345 downloads)
IMG_8268 rear seat area passenger side.JPG (264KB - 356 downloads)
IMG_8270 rear seat area drviers side.JPG (299KB - 351 downloads)
|
|
| |
|
Expert
Posts: 1530
Location: ZH, Switzerland | First of all a question. What do you use to close the gaps at both A pillar base junction to the rocker panel? On the passenger side the jumping cracker is history (I'm very, very happy - got my Letter with that jumping cracker, noticeable even with the carpet installed). On the drivers side rear passnger seat floor, the hole is round again and the floor is even like before (destoryed by the lock smith shop, with no notification). Happy Restoring! Dieter
 (IMG_8314 A pillar base passenger side.JPG) (IMG_8314 A pillar base passenger side.JPG)
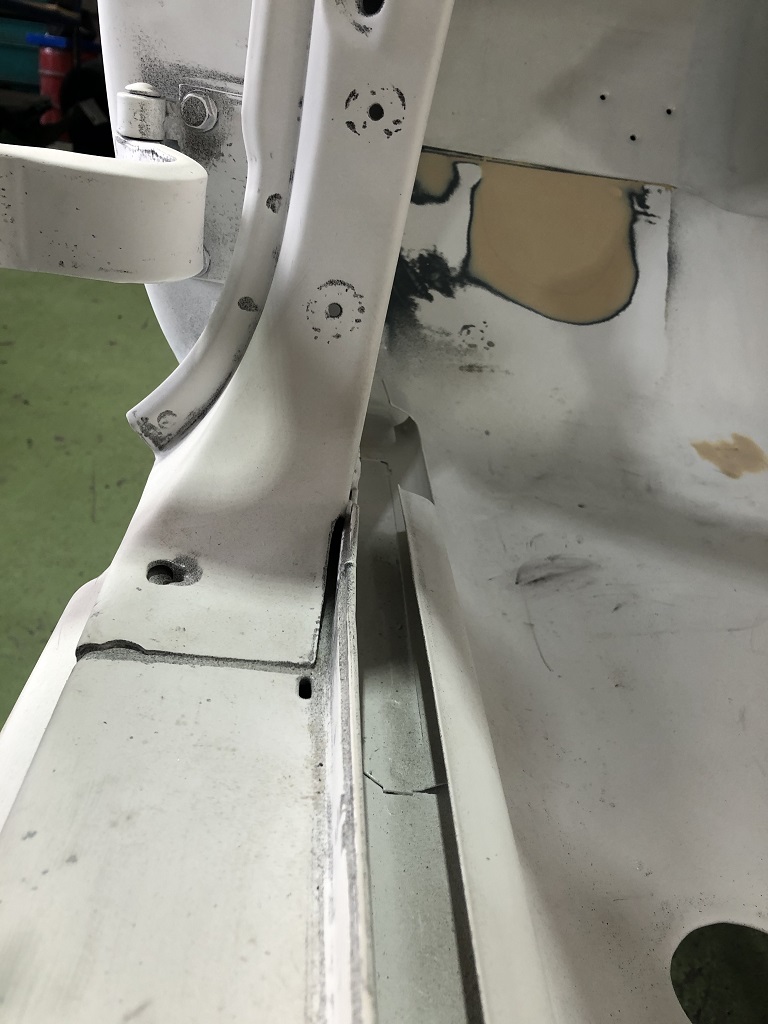 (IMG_8315 A pillar base drivers side.JPG) (IMG_8315 A pillar base drivers side.JPG)
 (IMG_8316 rear passenger floor drivers side.JPG) (IMG_8316 rear passenger floor drivers side.JPG)
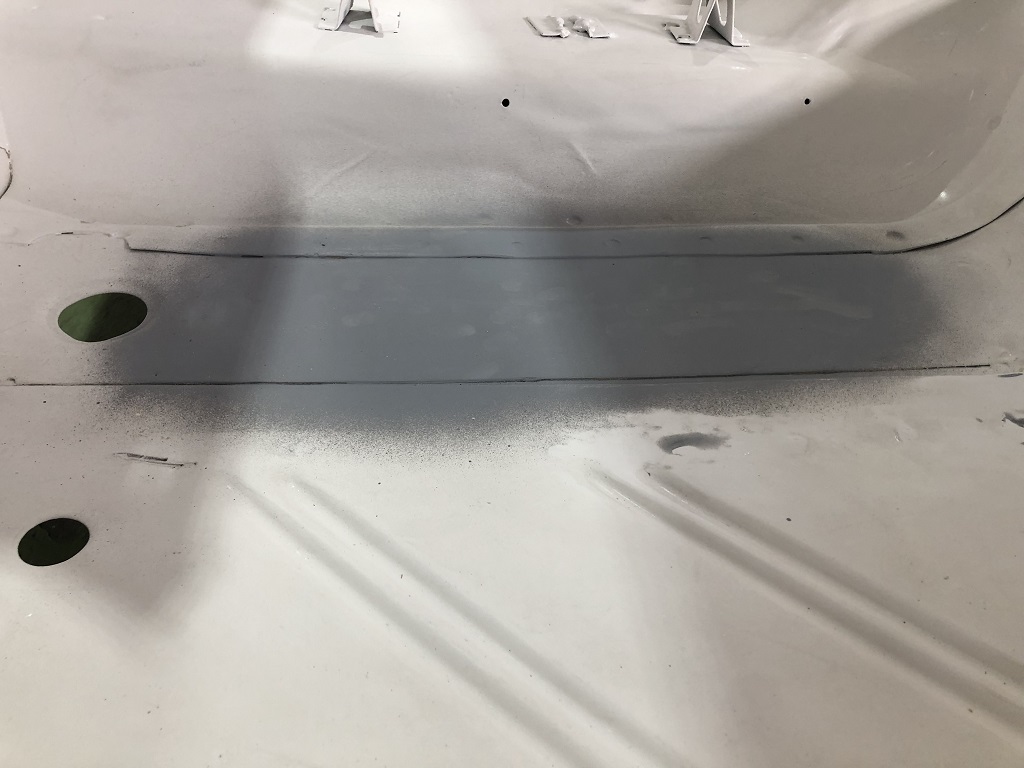 (IMG_8317 foot well passenger side.JPG) (IMG_8317 foot well passenger side.JPG)
Attachments
----------------
IMG_8314 A pillar base passenger side.JPG (151KB - 352 downloads)
IMG_8315 A pillar base drivers side.JPG (169KB - 352 downloads)
IMG_8316 rear passenger floor drivers side.JPG (153KB - 346 downloads)
IMG_8317 foot well passenger side.JPG (141KB - 335 downloads)
|
|
| |
|
Expert
Posts: 1208
Location: SWITZERLAND | I hope Dieter, soon you will come to the lucky part of your restoration. Have you all parts ready for assemble? Good Luck! - SERGE - |
|
| |
|
Expert
Posts: 1530
Location: ZH, Switzerland | The propeller shaft is free from rust. Pending works are coat of final color, replacement of the u-joint, replacement of the dust boot and a new grease package (2 ounces, 56 gramm). (2) The propeller shaft is finally painted. I'm waiting for the parts ordered at RockAuto. After I got the notification, I'll visit Leif to visit him and pick up the parcel. I'm asking me, if the dust boot already once has been replaced. I'm missing two tabs at the front cover of the B/T. Happy Restoring! Dieter
Edited by di_ch_NY56 2021-01-21 1:24 PM
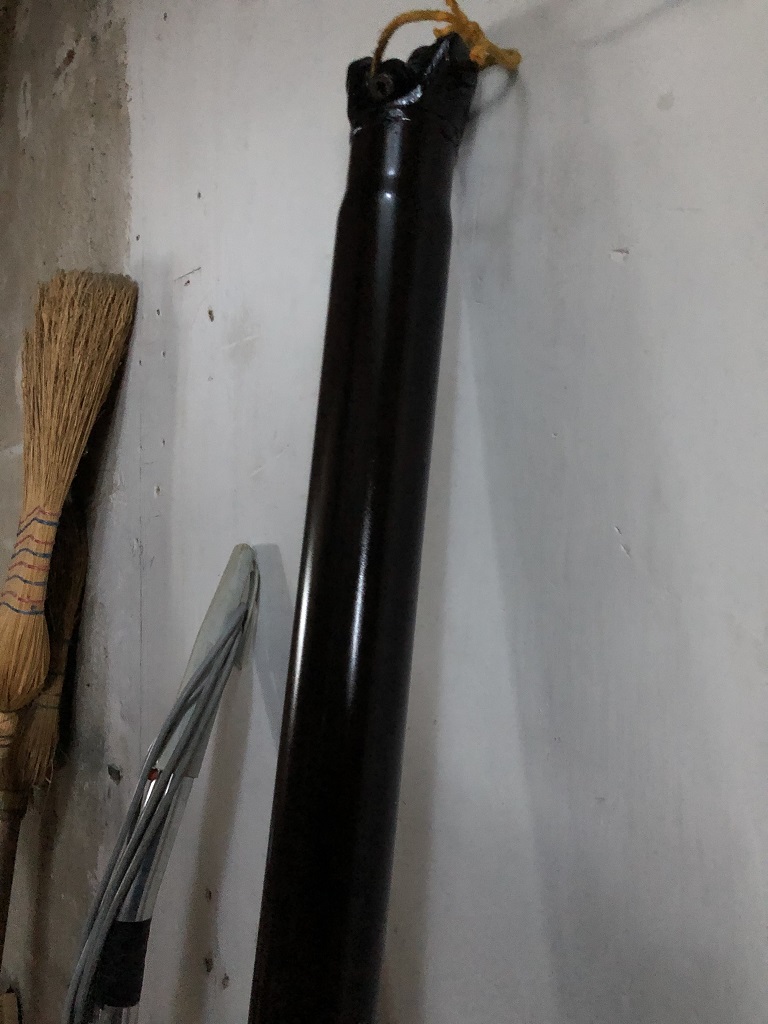 (IMG_8327 rear end propeller shaft.JPG) (IMG_8327 rear end propeller shaft.JPG)
 (IMG_8332 front end propeller shaft.JPG) (IMG_8332 front end propeller shaft.JPG)
Attachments
----------------
IMG_8327 rear end propeller shaft.JPG (188KB - 333 downloads)
IMG_8332 front end propeller shaft.JPG (123KB - 332 downloads)
|
|
| |
|
Expert
Posts: 1530
Location: ZH, Switzerland | I got the new brake lines this morning. Checked the content of the parcel and packed the brake lines into the box again (waiting to be installed) in my attic. Happy Restoring! Dieter
 (IMG_8351 new brake lines.JPG) (IMG_8351 new brake lines.JPG)
Attachments
----------------
IMG_8351 new brake lines.JPG (306KB - 331 downloads)
|
|
| |
|
Expert 5K+
Posts: 5006
| Disk brake upgrade? |
|
| |
|
Expert
Posts: 1530
Location: ZH, Switzerland | mikes2nd - 2021-01-27 3:54 PM Disk brake upgrade? Thanks for your question. No, I'm keeping the original four drum set up. For the speed of the traffic in Switzerland it's enough. For sure with a disk brake set up at the front axle, the braking power would be better, but no chance to get the historic state when getting to the traffic administration. Happy Restoring! Dieter |
|
| |
|
Elite Veteran
Posts: 649
Location: Finland | I also keep the drum brakes on my Firedome 58. I think they are reasonably good , of course you`d better not do more than one 75 mph to zero stops each afternoon
In Finland we may put disc brakes and still get the historic vehicle registration.. |
|
| |
|
Expert
Posts: 1530
Location: ZH, Switzerland | I did a phone call to the engine restorer.. the engine block is at the zyinder grinder shop. At the restorers the crankshaft has been polished (.01 under size prior polishing - once grinded is the judgement of the engine restorer). Bearings for the crankshaft and camshaft are ordered. Happy Restoring! Dieter |
|
| |
|
Expert
Posts: 1530
Location: ZH, Switzerland | The body and paint shop owner works very carefully (more than most generic swiss professionals). We visited the freshly primed Letter and discussed about the further steps. The body&paint shop owner announced, that the rear end is almost finished. Happy Restoring! Dieter
 (IMG_8418 rear end three quarts view passenger side.JPG) (IMG_8418 rear end three quarts view passenger side.JPG)
 (IMG_8419 driver side rear end sight to the front.JPG) (IMG_8419 driver side rear end sight to the front.JPG)
 (IMG_8421 passenger side rear end.JPG) (IMG_8421 passenger side rear end.JPG)
Attachments
----------------
IMG_8418 rear end three quarts view passenger side.JPG (315KB - 302 downloads)
IMG_8419 driver side rear end sight to the front.JPG (288KB - 302 downloads)
IMG_8421 passenger side rear end.JPG (284KB - 302 downloads)
|
|
| |
|
Elite Veteran
Posts: 1157
Location: D-70199 Heslach | Sieht bis jetzt sehr gut aus, Dieter.
Looks good until now, Dieter |
|
| |
|
Expert
Posts: 1530
Location: ZH, Switzerland | As almost ever Saturday moring I did visit the paint and body shop. The boss (owner) worked at my Letter. The passenger side rear panels are almost finished. The four dark spots are small recessions (0.1 millimeters or less). We walked around my Letter and were discussing the work to be performed at the rear end panel. The boss will do a final inspection and correct small imperfections all around prior to apply the primer. The the sanding will be done and the final layers of the original color will be applied. From the boss I heard, all imperfections will be solved prior the final layers of the original color. So there is no correction at the surface with the final coatings of the original color (the boss worked some certain time to get the formula of that color). Happy Restoring! Dieter
 (IMG_8484 passenger side quarter panel.JPG) (IMG_8484 passenger side quarter panel.JPG)
Attachments
----------------
IMG_8484 passenger side quarter panel.JPG (209KB - 286 downloads)
|
|
| |
|
Expert
Posts: 1530
Location: ZH, Switzerland | This morning I visited the shop again. The drivers side wing is almost finished. There is only a slight surface of filler (just with the primer there is no correction without filler). Happy Restoring Dieter BTW: the most left hand part of the vertical line of the rear sheet metal the boss will adjust the line. It's about 1 centimeter to high compared to the correct passenger side area. The tempory body worker made an error.
Edited by di_ch_NY56 2021-03-20 1:40 PM
 (IMG_8514 drivers side wing almost finished.JPG) (IMG_8514 drivers side wing almost finished.JPG)
Attachments
----------------
IMG_8514 drivers side wing almost finished.JPG (343KB - 273 downloads)
|
|
| |
|
Expert
Posts: 1530
Location: ZH, Switzerland | Little further progress at the 300 F. Checking the clearance around the tail lights. Last Saturday the owner of the body and paint shop told me, he did order the primer for the 300 F. Happy Restoring! Dieter
 (IMG_8611 tail lights fit in - check.JPG) (IMG_8611 tail lights fit in - check.JPG)
Attachments
----------------
IMG_8611 tail lights fit in - check.JPG (233KB - 252 downloads)
|
|
| |
|
Expert
Posts: 1530
Location: ZH, Switzerland | this afternoon I did open the B/T of the propeller shaft of my Letter. There was a big, big load of old grease inside (all small parts cleaned with White Spirit). One button doesn't look that nice.
Ways earlier while shifting the B/T-case forth and back while putting force CW and CCW (during shifting and pulling) I didn't feel any scores. What to do now? (2) Some time back I purchased a B/T overhaul kit, containing the pin, 2 rollers, needle bearing, 2 shoes, 2 springs, two rubber O-rings, case cover (/wo "Detroit" stamp) and the gasket. The original cover has/had two missing tabs, an eaten up gasket and two bumps in the covers from the rollers. It fits the completely crushed driver side rear axle rubber stop on the rail over the axle (replaced on both sides). Happy Restoring! Dieter
Edited by di_ch_NY56 2021-05-12 2:09 PM
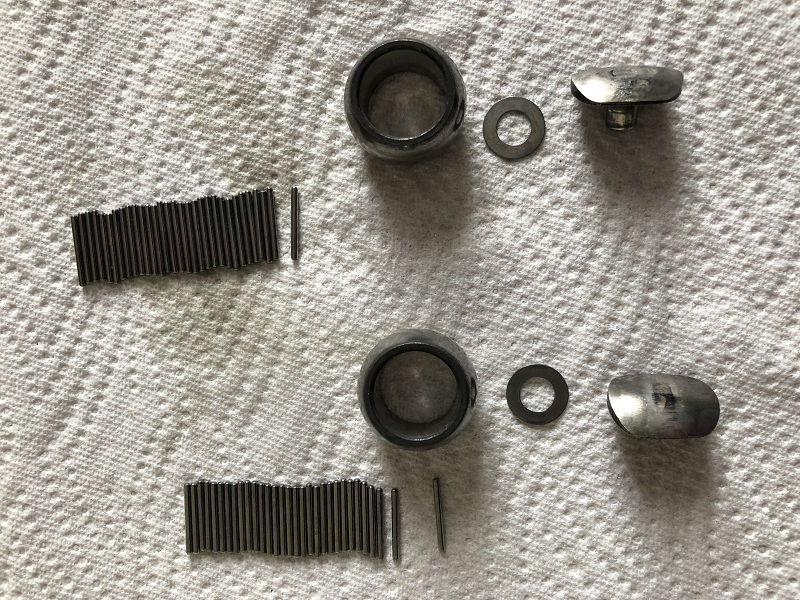 (IMG_8690 ball-trunion internal cleaning and surprise.JPG) (IMG_8690 ball-trunion internal cleaning and surprise.JPG)
Attachments
----------------
IMG_8690 ball-trunion internal cleaning and surprise.JPG (282KB - 235 downloads)
|
|
| |
|
Board Moderator & Exner Expert 10K+
Posts: 13045
Location: Southern Sweden - Sturkö island | You need a NOS b&t restiring Kit Dieter, the housing is direkt damage as well. Check with a small dentist Mirror. To changed the housing requires än hydraulic press and some distance pressing tools. |
|
| |
|
Expert
Posts: 1530
Location: ZH, Switzerland | wizard - 2021-05-11 9:53 PM You need a NOS b&t restiring Kit Dieter, the housing is direkt damage as well. Check with a small dentist Mirror. To changed the housing requires än hydraulic press and some distance pressing tools. It's almost impossible to get a NOS b&t restoring kit with a good housing... for me. I guess it's the Chrysler Joint Package 1739 680 (16-03-1 in the 1960 Chrysler parts catalog). Happy Restoring! Dieter
Edited by di_ch_NY56 2021-05-13 12:25 AM
|
|
| |
|
Expert
Posts: 1530
Location: ZH, Switzerland | I'm just asking myself if the b/t-case is not to salvagealbe? The damage is on one side where the shoe rides. The output torque of the transmission (highest at the transition from stand still to drive under full throttle) is transferred over the parallel, good surfaces. Happy Restoring! Dieter of course the singers politeness is quite
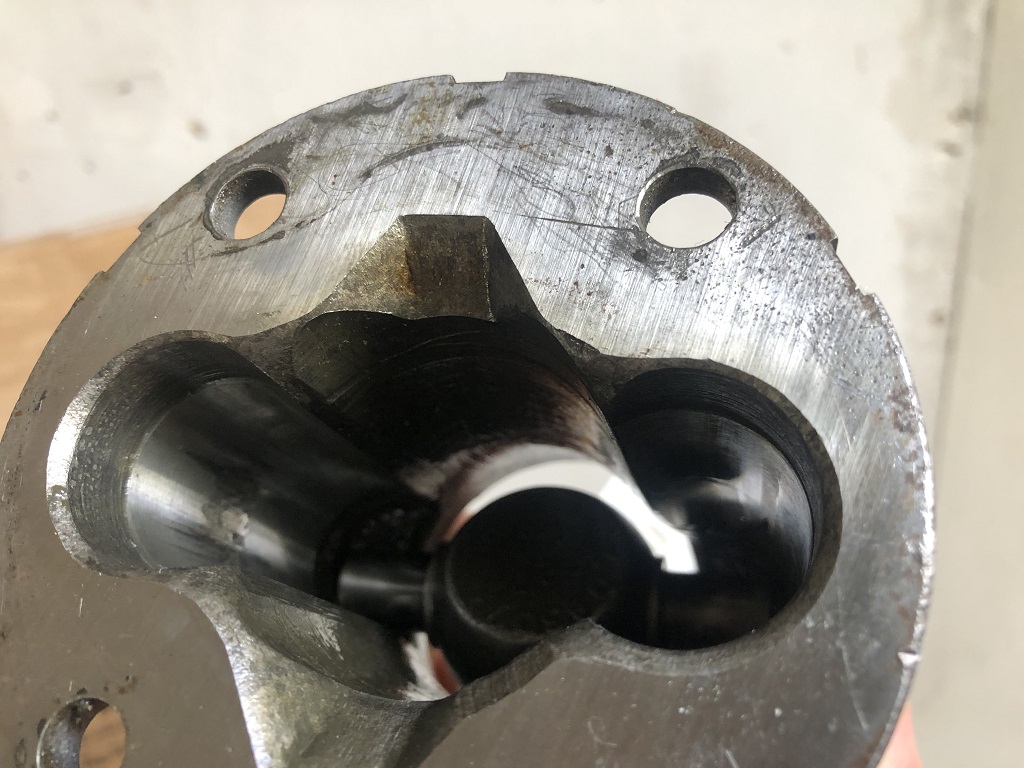 (IMG_8693 ball trunnion case inside.JPG) (IMG_8693 ball trunnion case inside.JPG)
Attachments
----------------
IMG_8693 ball trunnion case inside.JPG (220KB - 233 downloads)
|
|
| |
|
Expert 5K+
Posts: 9650
Location: So. Cal | You could try welding the old shoe to build it up and grinding the profile back to where it should be, or try to get a good replacement, and then try it out. If it doesn't work, then I would convert the driveshaft to a slip-yolk version.
Edited by Powerflite 2021-05-13 11:23 AM
|
|
| |
|
Expert
Posts: 1530
Location: ZH, Switzerland | Powerflite - 2021-05-12 5:22 PM You could try welding the old shoe to build it up and grinding the profile back to where it should be, or try to get a good replacement, and then try it out. If it doesn't work, then I would convert the driveshaft to a slip-yolk version. Big thank you for your comment. Happy Restoring! Dieter BTW: I had a phone call to the engine restorer. The engine block is right now at the cylinder grinder shop since some time. |
|
| |
|
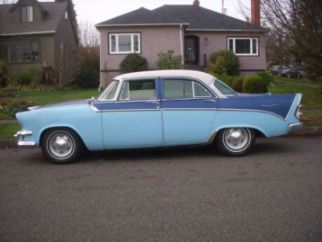
Expert 5K+
Posts: 9899
Location: Lower Mainland BC | .
Dieter: Check your bluemail email.
|
|
| |
|
Expert
Posts: 1530
Location: ZH, Switzerland | 56D500boy - 2021-05-12 8:21 PM . Dieter: Check your bluemail email. thanks Dave It's 4.25 inch (around 10.8 centimeters) As far as I know, the same size like on the 1956 New Yorker, because the restoring kit from epain I purchased ways earlier than I purchased the 300 F. Happy Restoring! Dieter
Edited by di_ch_NY56 2021-05-13 2:29 PM
|
|
| |
|
Board Moderator & Exner Expert 10K+
Posts: 13045
Location: Southern Sweden - Sturkö island | The housing is done Dieter, any wear inside the slots, especially in the drive direktion will create vibrations on acceleration. The b&t is a really sturdy constant velocity construction if given proper maintenance.
The reason I rekommenderar NOS is that the "yellow" ones cost half the price, but lasts a couple of years. A NOS one will work another 60 years. |
|
| |
|
Expert
Posts: 1530
Location: ZH, Switzerland | wizard - 2021-05-13 7:12 AM The housing is done Dieter, any wear inside the slots, especially in the drive direktion will create vibrations on acceleration. The b&t is a really sturdy constant velocity construction if given proper maintenance. The reason I rekommenderar NOS is that the "yellow" ones cost half the price, but lasts a couple of years. A NOS one will work another 60 years. Dear Sven For sure a NOS will last ways longer than a preused. I do not drive ten-thousands of miles every year (neither with the NY nor in future with the 300 F). Actually we all will not know what the future will bring (e.g. how long will we be able to get fuel for our beaties nor how long we will stay on live. But for sure another 60 years I will not survive ( would turn almost to 120 years old, more than the maximum biological livespan of a human). For absolutely sure I will not convert one of my Chrysler cars to an electric drive. In my opinion every oldtimer already converted lost his soul. Stay healthy, kind regards to Ingegerd as well Dieter BTW: I know (read) that Porsche and some industrial co-investors will erect a plant to produce eco-friendly fuel for old Porsche cars (a Liter, a little bit more than a liquid quart) will most probably cost CHF 4 to CHF 5 (USD 19 to USD 23.- every gallon). |
|
| |
|
Expert
Posts: 1530
Location: ZH, Switzerland | Actually I have the worst case scenario at the drive line (transmission, e-brake drum, propeller shaft)... I'm getting a 4 3/8" B/T, hopefully cut at the front welding seam of the propeller shaft. The brake drum (on the existing A466) fit's the small (4") B/T (with a discolored pin and a beyond repair body). The A466 transmission is a Plymouth High Power version. At the parts catalog I noticed several 59" propeller shafts for different cars (apparently some with the small B/T and some with the big B/T). At an uncertain time at my 300 F not only the original A466 has been dropped, but the propeller shaft as well. I hope that a very, very kind (and positiv thinking about me) would like to investigate where the original transmission sits and will inform me. I know a very precise working mechanic shop rebuilding propeller shafts as well (when I visited their site, I realised, that this would had been a valuable alternative for rebuilding the engine). Happy Restoring! Dieter BTW: original propeller shaft: 1856 933
original brake drum: 1857 032
original A466: 1949 808 |
|
| |
|
Board Moderator & Exner Expert 10K+
Posts: 13045
Location: Southern Sweden - Sturkö island | Most probably Big M would have the large propeller shaft and the large drum Dieter. Check for prices and compare with the cost of converting your propeller shaft. |
|
| |
|
Expert
Posts: 1530
Location: ZH, Switzerland | wizard - 2021-05-15 2:53 PM Most probably Big M would have the large propeller shaft and the large drum Dieter. Check for prices and compare with the cost of converting your propeller shaft. Hi Sven you might be right. But it's not only the parts price for the brake drum and the propeller shaft, the shipping costs (plus import fees, car parts additional fee and VAT) are a big factor as well. I guess I do not have to hurry. I got several more weeks delay for the body and the engine (at least the engine is/was at the cylinder grinder shop since/for few weeks, I'm more interested that the body&paint shop owner works on cars (BMW from a dealer) that bring him good money). I don't know your opinion, but for the car power test stand, I could use the existing propeller shaft slightly shaved the brows at the inside of one arm in the case and use the propeller shaft sub project for my next winter holiday season. Happy Restoring! Dieter
Edited by di_ch_NY56 2021-05-16 10:17 AM
|
|
| |
|
Expert
Posts: 1530
Location: ZH, Switzerland | The first trial with the 2001 Dodge Neon CV boot 614-001 at the temporary wrong propeller shaft mounted for break in and power test of the engine. The brows in the case I shaved with a small, round rasp. I used silicone oil instead of grease. But I was able to work the boot through the case with loads of patience and no #@*&^%. I still hope I'll get a 1658 931 or 1658 933 propeller shaft from Williams CA, 95987 Happy Restoring Dieter |
|
| |
|
Expert
Posts: 1530
Location: ZH, Switzerland | The first trial with the 2001 Dodge Neon CV boot 614-001 at the temporary wrong propeller shaft mounted for break in and power test of the engine. The brows in the case I shaved with a small, round rasp. I used silicone oil instead of grease. But I was able to work the boot through the case with loads of patience and no #@*&^%. I still hope I'll get a 1658 931 or 1658 933 propeller shaft from Williams CA, 95987 Happy Restoring Dieter BTW: other members here will discover immediatly what fault I did.... (;)
 (IMG_8699 wrong propeller shaft first trial with the CV boot.JPG) (IMG_8699 wrong propeller shaft first trial with the CV boot.JPG)
Attachments
----------------
IMG_8699 wrong propeller shaft first trial with the CV boot.JPG (246KB - 225 downloads)
|
|
| |
|
Elite Veteran
Posts: 1157
Location: D-70199 Heslach | di_ch_NY56 - 2021-05-17 4:19 PM
hope I'll get a 1658 931 or 1658 933 propeller shaft from Williams CA, 95987
I think from John................ |
|
| |
|
Expert
Posts: 1530
Location: ZH, Switzerland | ToMopar - 2021-05-17 3:07 PM di_ch_NY56 - 2021-05-17 4:19 PM hope I'll get a 1658 931 or 1658 933 propeller shaft from Williams CA, 95987 I think from John................ Hi Sid Yes, but until now no answer... Happy Restoring! Dieter |
|
| |
|
Expert 5K+
Posts: 5006
| hmm mine went on good, yours is cheap molded, two piece and then welded together.
Get a better quality one |
|
| |
|
Expert
Posts: 1530
Location: ZH, Switzerland | I got an answer from John (Big M). More later on. Happy Restoring! Dieter I know, if I'll get the parts I have to restore a second propeller shaft and brake drum, I guess, both will be black (brake drum satin, propeller shaft glossy) |
|
| |
|
Expert
Posts: 1530
Location: ZH, Switzerland | I'm getting the parts I did wish to get. Big thank you to John Fowlie. Happy Restoring! Dieter |
|
| |
|
Expert
Posts: 1530
Location: ZH, Switzerland | On the license frame (rear) the plate is flat. The whole assembly has minor surface rust. But both threaded stems are shot. One broke off during removal from the body, on the other I could not turn the hex nut to the bottom end. As you can see, the flat button (top view) is spot welded to the bracket with several spots. First I tried to free the circumference with the Dremel. Then I destroyed two drills while trying to drill through the spots. Next Saturday the big angle grinder to work the buttons from top to down to remove both stems. With no threaded stems the bracket is easier to clean. I guess this solution has been chosen by Chrysler Coorperation back in the days to shorten the mounting time on the assembly line. Space for an allen or a hex screw is more than enough. Happy Restoring! Dieter
 (IMG_8727 mounting bracket hinge of the license plate holder bottom.JPG) (IMG_8727 mounting bracket hinge of the license plate holder bottom.JPG)
 (IMG_8726 mounting bracket hinge of the license plate holder top view.JPG) (IMG_8726 mounting bracket hinge of the license plate holder top view.JPG)
Attachments
----------------
IMG_8727 mounting bracket hinge of the license plate holder bottom.JPG (174KB - 217 downloads)
IMG_8726 mounting bracket hinge of the license plate holder top view.JPG (176KB - 231 downloads)
|
|
| |
|
Expert 5K+
Posts: 9899
Location: Lower Mainland BC | di_ch_NY56 - 2021-05-23 8:31 AM I'm getting the parts I did wish to get. Big thank you to John Fowlie.
Dieter: I will keep the 4 3/8" Ball and Trunion that I have until you get your drive shaft from John at Big M and decide that you don't need mine housing and bits. However, if you do need it, then I will ship it to you (at your expense).
But, if you don't decide that you need it, I will offer it to whoever wants to pay for shipping, e.g. CDN$37 to Texas.
So please let me know.
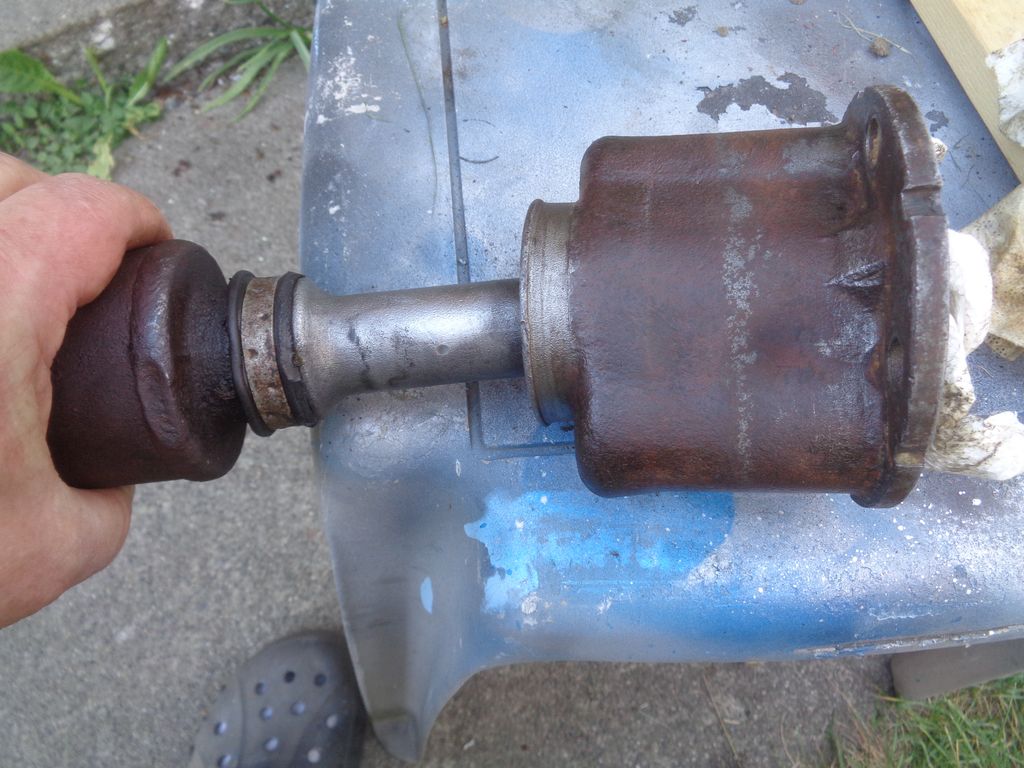
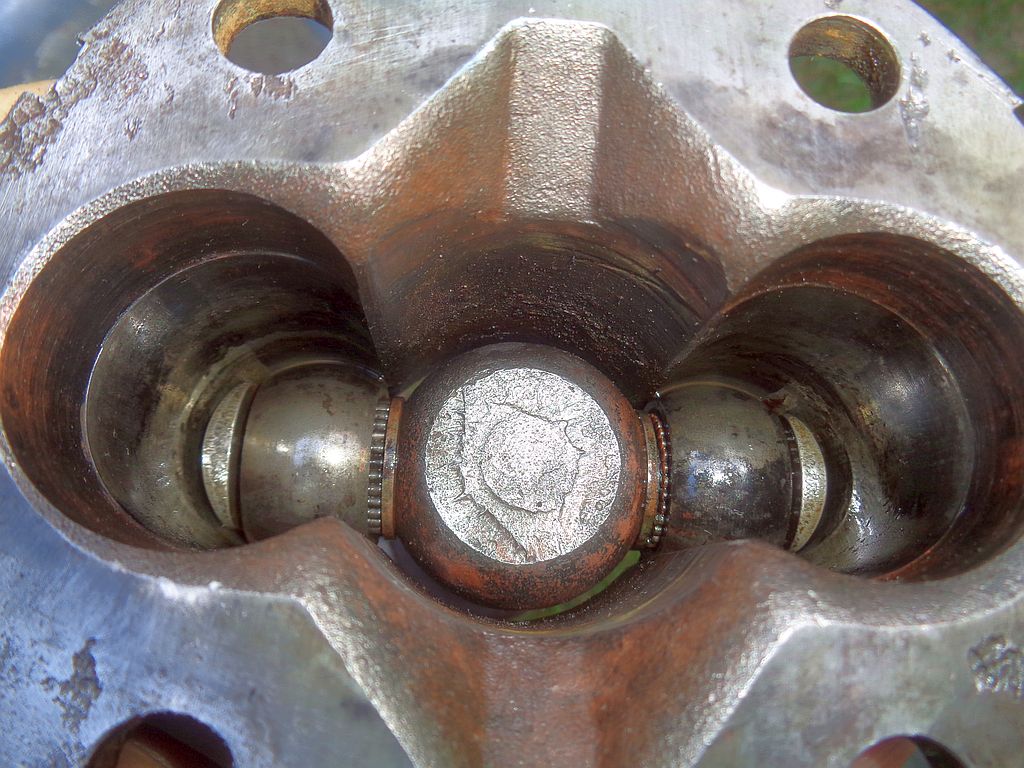
REFERENCE: http://www.forwardlook.net/forums/forums/thread-view.asp?tid=71485&...
|
|
| |
|
Expert
Posts: 1530
Location: ZH, Switzerland | Hi Dave Thanks a lot. I got the message from John and paid the requested amount. This morning I visited the body and paint-shop once again. The owner said, he wanted to give me a surprise... following pictures are some of the collection I got from the owner of the body and paint-shop. Every time my Letter was resting for a natural coring time of the layer - no heat or infrared lamp to enforce the curing time. Happy Restauration! Dieter BTW: asking for August 2021 to be finished... depends on how many regular cars are dropping in.
 (20210526_182812 three quart rear view drivers side first layer of filler.jpg) (20210526_182812 three quart rear view drivers side first layer of filler.jpg)
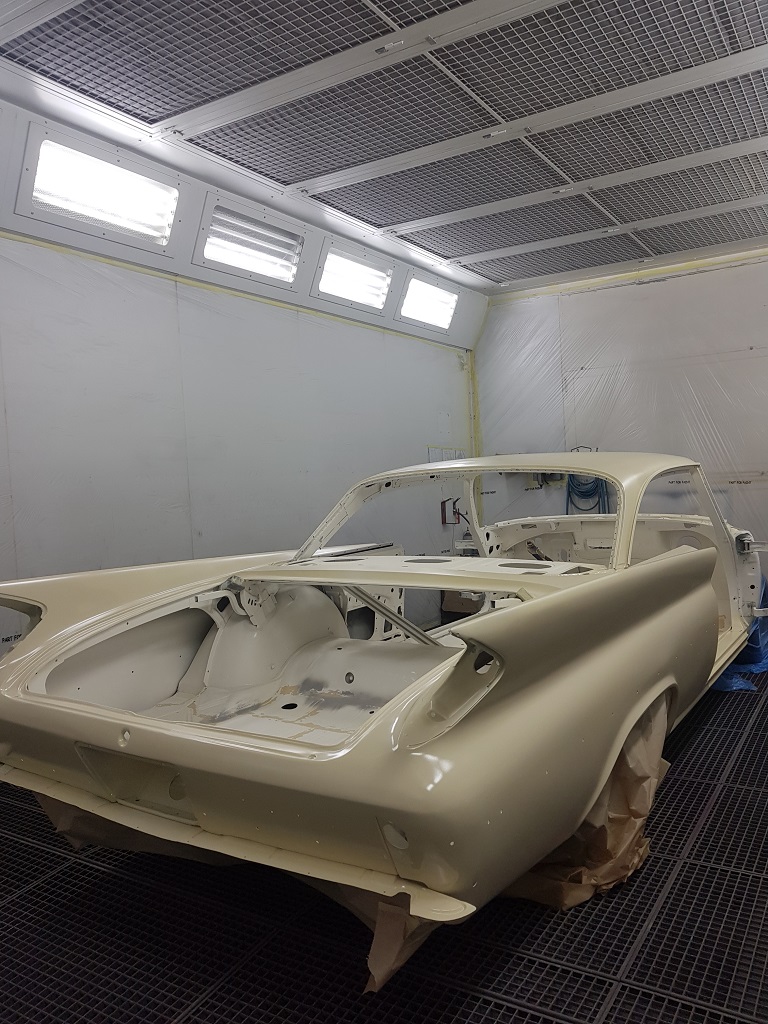 (20210526_182822 three quart rear view passenger side first layer of filler.jpg) (20210526_182822 three quart rear view passenger side first layer of filler.jpg)
 (20210526_195225 view to inside passenger floor and part trunk floor.jpg) (20210526_195225 view to inside passenger floor and part trunk floor.jpg)
 (20210526_195232 view to inside foot well and propeller shaft tunnel.jpg) (20210526_195232 view to inside foot well and propeller shaft tunnel.jpg)
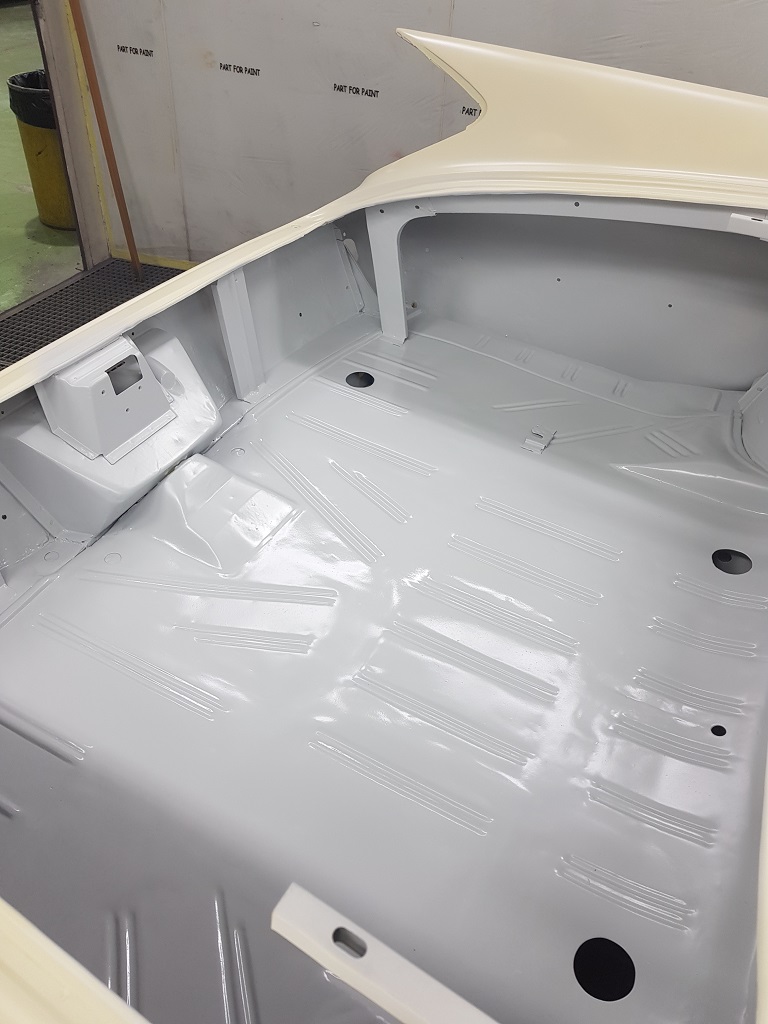 (20210526_195237 view to the trunk floor.jpg) (20210526_195237 view to the trunk floor.jpg)
 (20210527_170553 three quart rear view passenger side one more primer layer.jpg) (20210527_170553 three quart rear view passenger side one more primer layer.jpg)
 (20210527_170600 three quart rear view drivers side one more primer layer.jpg) (20210527_170600 three quart rear view drivers side one more primer layer.jpg)
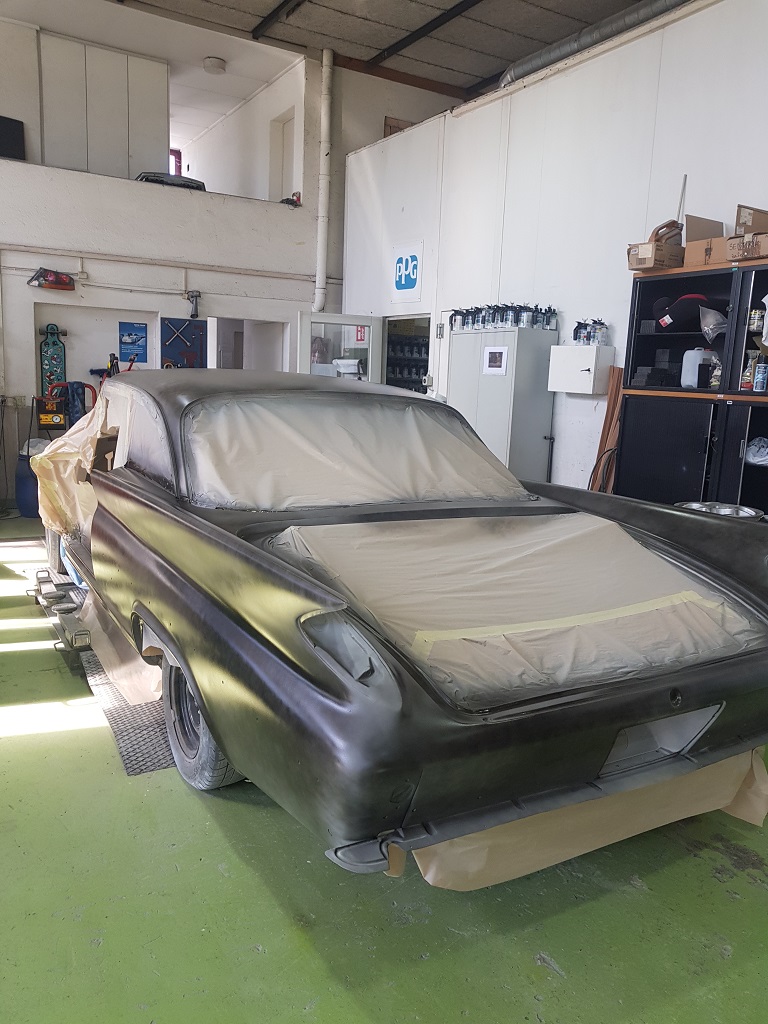 (20210528_092131 marker layer all over as I met my Letter.jpg) (20210528_092131 marker layer all over as I met my Letter.jpg)
Attachments
----------------
20210526_182812 three quart rear view drivers side first layer of filler.jpg (291KB - 229 downloads)
20210526_182822 three quart rear view passenger side first layer of filler.jpg (295KB - 224 downloads)
20210526_195225 view to inside passenger floor and part trunk floor.jpg (157KB - 224 downloads)
20210526_195232 view to inside foot well and propeller shaft tunnel.jpg (171KB - 229 downloads)
20210526_195237 view to the trunk floor.jpg (169KB - 213 downloads)
20210527_170553 three quart rear view passenger side one more primer layer.jpg (254KB - 217 downloads)
20210527_170600 three quart rear view drivers side one more primer layer.jpg (247KB - 221 downloads)
20210528_092131 marker layer all over as I met my Letter.jpg (252KB - 221 downloads)
|
|
| |
|
Elite Veteran
Posts: 649
Location: Finland | It is going to be a stunning paint job Dieter! |
|
| |
|
Expert
Posts: 1530
Location: ZH, Switzerland | 22mafeja - 2021-05-29 8:06 AM It is going to be a stunning paint job Dieter! Thank you Ralf, it will be a stunning pearl (body wise). Happy Restoring! Dieter |
|
| |
|
Expert
Posts: 1530
Location: ZH, Switzerland | For the steering pump of my Letter I purchased a stock NOS cap moparts # 2120 617. It's too small, it would fall into the filler neck of the P/S pump I got with my Letter. Will see if I got another than stock pump with the belt tensioner. Happy Restoring! Dieter
Edited by di_ch_NY56 2021-05-30 10:39 AM
|
|
| |
|
Expert
Posts: 1530
Location: ZH, Switzerland | Both front fenders are under work again to level out the last and smallest imperfections. Some work on the body performed as well. Happy Restoring! Dieter BTW: thank you for shipping at John. BTW2: pls do not complain about the plaster. As you can see on the drivers side fender, almost all will be shaved off (pls keep in mind, that - from the factory - a thick layer of filler under the final coat was applied back in the time where these cars were build - not only American, but European cars as well).
Edited by di_ch_NY56 2021-06-19 8:21 AM
 (IMG_8805 front fender drivers side.JPG) (IMG_8805 front fender drivers side.JPG)
 (IMG_8806 front fender passenger side.JPG) (IMG_8806 front fender passenger side.JPG)
Attachments
----------------
IMG_8805 front fender drivers side.JPG (320KB - 196 downloads)
IMG_8806 front fender passenger side.JPG (437KB - 185 downloads)
|
|
| |
|
Expert
Posts: 2002
Location: Branson, MO | di_ch_NY56 - 2021-06-19 7:15 AM
(pls keep in mind, that - from the factory - a thick layer of filler under the final coat was applied back in the time where these cars were build - not only American, but European cars as well).
I don't think so. |
|
| |
|
Expert 5K+
Posts: 7393
Location: northern germany | Viper Guy - 2021-06-19 2:28 PM
di_ch_NY56 - 2021-06-19 7:15 AM
(pls keep in mind, that - from the factory - a thick layer of filler under the final coat was applied back in the time where these cars were build - not only American, but European cars as well).
I don't think so.
Neither do I. |
|
| |
|
Board Moderator & Exner Expert 10K+
Posts: 13045
Location: Southern Sweden - Sturkö island | For imperfections they used lead filler back then |
|
| |
|
Expert
Posts: 1530
Location: ZH, Switzerland | wizard - 2021-06-19 4:41 PM For imperfections they used lead filler back then Thanks for your clarification. At the pictures of the freshly sand blasted body you might see some lead filler. It doesn't shave off when sand blasting, but I guess most of the imperfection came from the street with the about three or four pre-owner (rear drivers side fender replaced, front drivers side fender replaced (light yellow appeared under the drivers side rear mirror) and ... not to talk about the accident damage at the passenger side front). Happy Restoring! Dieter BTW: I don't know if the model year consultant of the Chrysler 300 Club Internation just looked after the originality or if he discovered all damages at the body as well. From the seller and the Chrysler 300 Club Internation I know, that I got an original 300 F. |
|
| |
|
Expert
Posts: 1530
Location: ZH, Switzerland | Even the passenger side front fender lost most of the plaster. Between the fender wheel bow and the front light bezel there is a little bit more plaster (on primer, not on bare metal!) because of the hammering out of a (most probably) accident-damage. The surface on the roof is grinded down and completly smooth now. Both C-pillar have a really small area where the surface is a little bit lower (marker color slightly shaved) to correct. Sooner, or later, I have to call the engine restorers to ask for the actual state of the engine. Happy Restoring! Dieter |
|
| |
|
Expert
Posts: 1530
Location: ZH, Switzerland | Both front fender got primer again (truck chassis primer quality). The passenger side front fender has a really slight dent (only visible with light/shadow border, almost not while stroking with fingers along the fender) just ahead of the flake type dust. Happy Restoring! Dieter
 (IMG_8845 drivers side front fender.JPG) (IMG_8845 drivers side front fender.JPG)
 (IMG_8846 passeger side front fender.JPG) (IMG_8846 passeger side front fender.JPG)
Attachments
----------------
IMG_8845 drivers side front fender.JPG (315KB - 178 downloads)
IMG_8846 passeger side front fender.JPG (267KB - 177 downloads)
|
|
| |
|
Expert
Posts: 1530
Location: ZH, Switzerland | Today I got the power steering pump cap Mopar parts # 2127 284. It's the correct cap for the power steering pump I removed from the engine. Furthermore I found a source for the carpet (super plush quality, black, custom molded) and the correct jute sound and heat deadener (plus some square feet flat carpet for the center console I just have to measure, what the surface area is). Happy Restoring! Dieter
Edited by di_ch_NY56 2021-07-15 1:31 PM
|
|
| |
|
Expert
Posts: 1530
Location: ZH, Switzerland | My Letter (body wise) has holiday season for few weeks. Happy Restoring! Dieter |
|
| |
|
Expert 5K+
Posts: 5006
| theres no holidays in car restoration... get on the internet and order parts! |
|
| |
|
Expert 5K+
Posts: 9899
Location: Lower Mainland BC | mikes2nd - 2021-08-01 6:30 AM
theres no holidays in car restoration... get on the internet and order parts!
Except Dieter is in Europe and most of Europe goes on holiday for the month of August.
|
|
| |
|
Expert
Posts: 1530
Location: ZH, Switzerland | Today I was in the shop... The illumination of the shop is improving actually. I did refill the rh rear tire (completely flat). In the paint booth is an AMG GTS (with all body parts removed) to get a new paint shop. In front of the booth bumpers, hood, doors, front fenders and hatch lid with a fresh coat of primer and marker coat . The AMG GTS.... from a guy with a very thick wallet (originally with a foiling applied - another shop removed the foiling (the only question mark from my side is why didn't they remove the windshield as well?), the owner got rid of the like of the foiling surface, now.... a completely new layer of paint - apparently a very lucrative job...). This is the reason, my project stalls. Happy Restoring! Dieter BTW: I don't buy anymore parts in advance... no space anymore in my house |
|
| |
|
Expert
Posts: 1530
Location: ZH, Switzerland | This morning I was at the body and paint shop. The detailing work on the trunk lid has started. The very skilled body worker from Turkey did remove some minor dents from the sand blasting. With the owner of the body and paint shop I discussed the further work on the trunk lid (especially the bowl under the ornament). Happy Restoring! Dieter |
|
| |
|
Expert
Posts: 1530
Location: ZH, Switzerland | di_ch_NY56 - 2021-05-16 5:19 PM The first trial with the 2001 Dodge Neon CV boot 614-001 at the temporary wrong propeller shaft mounted for break in and power test of the engine. The brows in the case I shaved with a small, round rasp. I used silicone oil instead of grease. But I was able to work the boot through the case with loads of patience and no #@*&^%. I still hope I'll get a 1658 931 or 1658 933 propeller shaft from Williams CA, 95987 Happy Restoring Dieter BTW: other members here will discover immediatly what fault I did.... (;) Big thanks to Big M. I got the the emergency brake drum and the propeller shaft. this early morning I unpacked both parcels and discovered.... both propeller shafts are identical. The diameter of the flange of the B/T-housing is identical. Later on.... I'll cleaning the b/t-housing and will look how the state of the inside of the housing is. Happy Restoring! Dieter |
|
| |
|
Expert
Posts: 1530
Location: ZH, Switzerland | B/T-state: the case inside looks very promission, one roller is stuck, both gliding shoes show almost no wear. This morning is was at the painter and body shop. Both front fenders are in work again. The passenger side front fender needs a bit adjustment due to the more than discutable body work in the first shop (the paint&body-shop owner said, his employee was working for hours on the outside line of the passenger side front fender). Happy Restoring! Dieter BTW: note the very careful installation of the front fenders
Edited by di_ch_NY56 2021-09-18 9:51 AM
 (IMG_9122 front fender pair in work view from right hand side.JPG) (IMG_9122 front fender pair in work view from right hand side.JPG)
 (IMG_9123 front fender pair in work view from left hand side.JPG) (IMG_9123 front fender pair in work view from left hand side.JPG)
Attachments
----------------
IMG_9122 front fender pair in work view from right hand side.JPG (380KB - 216 downloads)
IMG_9123 front fender pair in work view from left hand side.JPG (356KB - 209 downloads)
|
|
| |
|
Expert
Posts: 1530
Location: ZH, Switzerland | I managed to work away the roller and needle bearing on the propeller shaft from Big M (only one side was difficult). I noticed that the inside washer on one side was partially eaten up (the side the roller and needle bearing went away with no problem, one needle was missinig). Visible from eye and took the vernier caliper (metric) to measure the offset of the pin... almost 1/8". Of course, not visible from the outside (assembled). So I guess I'm going to remove the center pin on both propeller shafts and use the b/t case from the "new" propeller shaft and the parts from the restoring kit (even though the cover doesn't have the "Detroit" embossing) and the existing original propeller shaft w/o the pin and b/t case. Happy Restoring! Dieter |
|
| |
|
Expert
Posts: 1530
Location: ZH, Switzerland | This morning once again I visited the body and paint shop. The picture was taken at the beginning of my stay there. But almost at the end of my visit, the trunk lid has been finished to the state to get a fresh coat of primer. The work on the hood just started (few spots are very coarse due to the heavy sand blasting and will need some filler - but really all rust has been removed). The body is almost finished as most other parts as well. Happy Restoring! Dieter
 (IMG_9196 trunk lid on work.JPG) (IMG_9196 trunk lid on work.JPG)
Attachments
----------------
IMG_9196 trunk lid on work.JPG (419KB - 193 downloads)
|
|
| |
|
Expert
Posts: 1530
Location: ZH, Switzerland | Yesterday I went to the body and paint shop to replace the cv axles on my very high milage V50 and installed new Taiwanese fog lamps (the glass on both fog lamps were beyond polishing). The owner showed me the trunk lid (even the border of the inner bowl and the skin is open again - just the absolute minimum of filler used). The hood is in the paint booth and looks georgous with primer coat. The outer skin of both front doors are on the last step of preparing. The owner and his employee (very skilled and very efficient - former Stadler Rail locomotive and carriage painter - he does a very good job). The owner of the paint and body shop asked for a 50% pre payment - for sure he'll get it. Next saturday a first sample (quite big piece of sheet metal he announced) will be painted with the top coat to show it to me. As noted ways earlier here, he got the original formula of the color to mix it with a contemporary paint brand (most probalbly PPG). I got a quite accurate estimation of the delivery date: spring 2022 (end of March). At the engine restoreres (I did a phone call recently) he announced to do a phone call just prior Christmas Season. At that time the engine block still was at the engine block machining company. Happy Restoring! Dieter |
|
| |
|
Expert
Posts: 1530
Location: ZH, Switzerland | Pictures to the last entry. In the meantime the door outer skin on both front doors is almost finished as well. Happy Restoring! Dieter
 (IMG_9249 hood.JPG) (IMG_9249 hood.JPG)
 (IMG_9250 trunk lid almost finished.JPG) (IMG_9250 trunk lid almost finished.JPG)
 (IMG_9251 both doors.JPG) (IMG_9251 both doors.JPG)
Attachments
----------------
IMG_9249 hood.JPG (409KB - 191 downloads)
IMG_9250 trunk lid almost finished.JPG (332KB - 198 downloads)
IMG_9251 both doors.JPG (333KB - 193 downloads)
|
|
| |
|
Expert 5K+
Posts: 5006
| looking good, its all downhill now... |
|
| |
|
Expert
Posts: 1530
Location: ZH, Switzerland | mikes2nd - 2021-10-30 3:49 PM looking good, its all downhill now... Thank you Mike In the meantime the trunk lid and one door got the fine primer layer. When the owner has time he'll do a further progress on the body (grinding the primer layer to the half thickness), first inside the fin on the passenger side from the door opening to the tail, than the quarter panels. Happy Restoring! Dieter |
|
| |
|
Expert
Posts: 1530
Location: ZH, Switzerland | This morning I was at the body and paint shop once again. One door will get fine filler and a grinding job again. The hood is under a grinding job again. The work on the body did resume on a very small amount until the tire change season (Summer to Winter) has passed. The owner of the body and paint shop showed the first sample painted in the formula he got from a door handle polisher from PPG (WW1 Alsakan White, Polar White, Sable White, Oyster White, White White White (Golss)) with contemporary indigrients (already at least one car has been painted with this color formula somewhere on the Earth). We did look at the sample under foggy sky. The color is a warm cream white, a little bit more than the Mercedes Classic White (a car ahead of me, when I drove home). I guess my Letter will look gorgeous with that color (two layers and a glaze layer (as he used on a Pearl Yellow metallic AMG GTS coupe)). Happy Restoring! Dieter
Edited by di_ch_NY56 2021-11-13 1:51 PM
|
|
| |
|
Expert
Posts: 1530
Location: ZH, Switzerland | The first three parts got the first layer of the final color. These are the inside of the doors and the hood inside. Next week the inner side of the trunk lid, the front fenders and the complete inner structure of the front clip will be painted in the same color (Alaskian White - original formula as I did mention earlier). The color in nature looks gorgeous. Happy Restoring! Dieter
Edited by di_ch_NY56 2021-12-11 7:03 AM
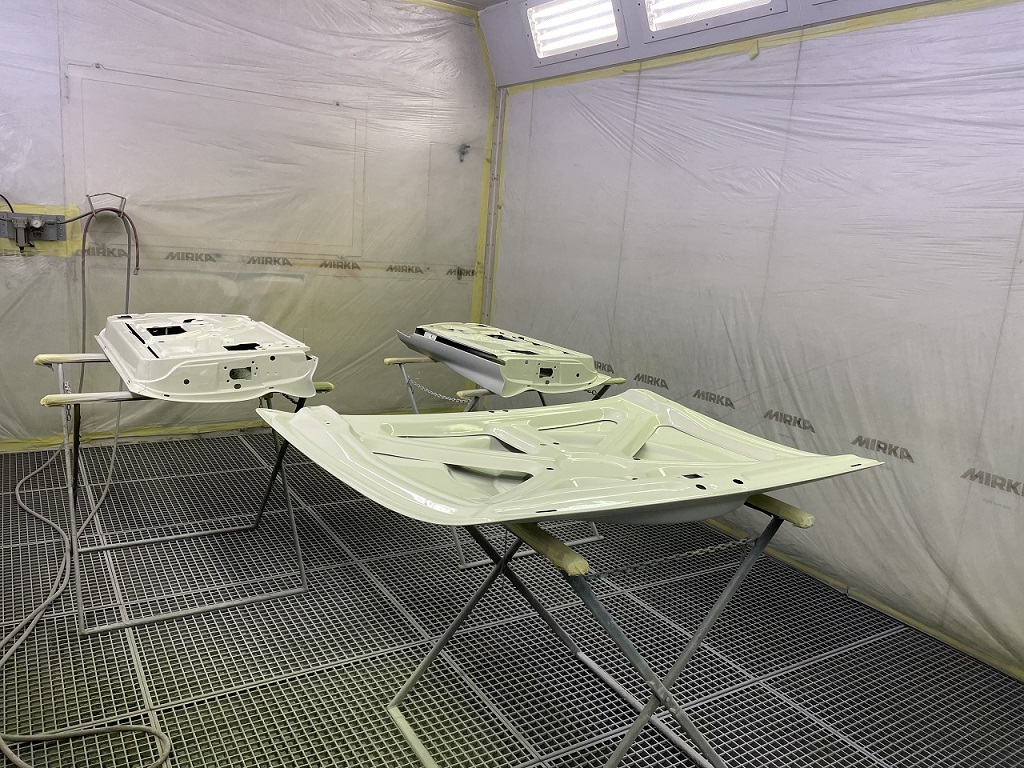 (IMG_9381_doors and hood.JPG) (IMG_9381_doors and hood.JPG)
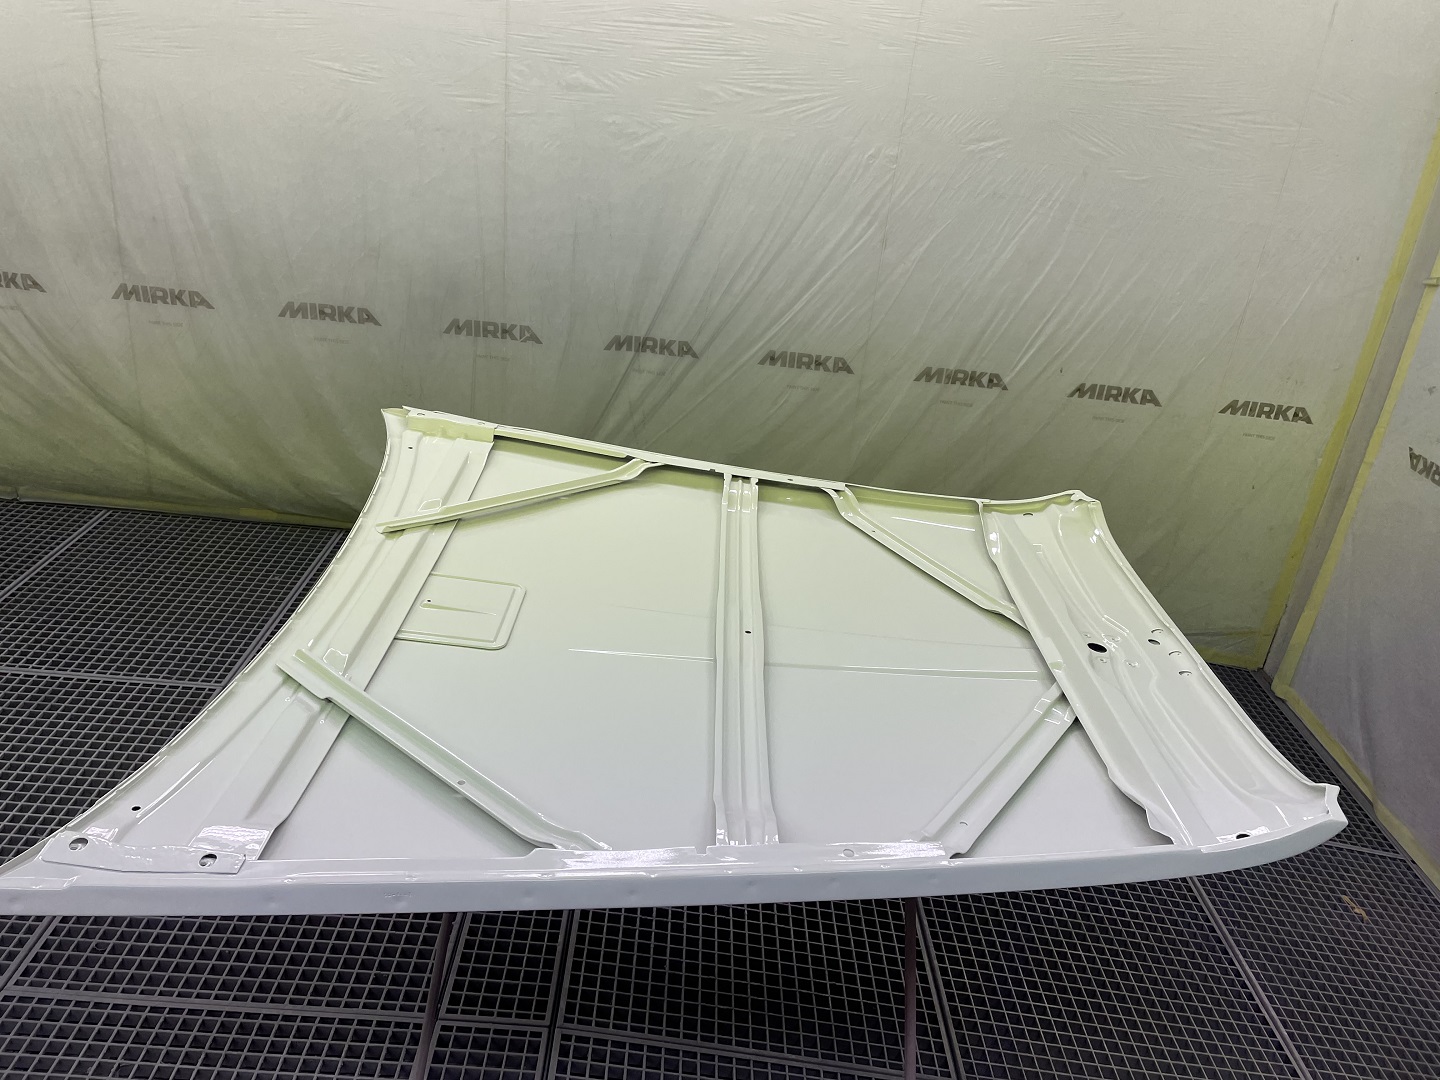 (IMG_9382_close up view.JPG) (IMG_9382_close up view.JPG)
Attachments
----------------
IMG_9381_doors and hood.JPG (339KB - 176 downloads)
IMG_9382_close up view.JPG (444KB - 182 downloads)
|
|
| |
|
Board Moderator & Exner Expert 10K+
Posts: 13045
Location: Southern Sweden - Sturkö island | Very nice Dieter! |
|
| |
|
Elite Veteran
Posts: 649
Location: Finland | I am happy for you Dieter...it seems to be top quality. |
|
| |
|
Expert
Posts: 1530
Location: ZH, Switzerland | Few parts got the final paint, not in picture are radiator yoke, hood latch beam, lower end profile, vertical reinforcement, inner front fenders. At the body, the passenger side fin got a fine grinding (ready now). The rear wall of the trunk got the final touch up. Under discussion is the very, very low recession around the trunk lock opening. The boss of the body and paint shop would like to egalize the small imperfection (in his eyes). Resting are both side walls (quarter panels) to get the fine touch. Next week over the boss will spend his (highly deserved) Season Holidays until New Year with his family. So further progress next year. Happy Restoring! Dieter
 (IMG_9406 hood.JPG) (IMG_9406 hood.JPG)
 (IMG_9405 drivers side door.JPG) (IMG_9405 drivers side door.JPG)
 (IMG_9404 trunk lid.JPG) (IMG_9404 trunk lid.JPG)
 (IMG_9407 body rear end on work again.JPG) (IMG_9407 body rear end on work again.JPG)
Attachments
----------------
IMG_9406 hood.JPG (358KB - 167 downloads)
IMG_9405 drivers side door.JPG (341KB - 162 downloads)
IMG_9404 trunk lid.JPG (292KB - 175 downloads)
IMG_9407 body rear end on work again.JPG (498KB - 160 downloads)
|
|
| |
|
Board Moderator & Exner Expert 10K+
Posts: 13045
Location: Southern Sweden - Sturkö island | This is going to be a very beautiful car with a high professional paint work. The "down-side" is that all chrome should be in very nice condition as well. |
|
| |
|
Expert
Posts: 1530
Location: ZH, Switzerland | wizard - 2021-12-17 4:30 PM This is going to be a very beautiful car with a high professional paint work. The "down-side" is that all chrome should be in very nice condition as well. Thank you Sven Spot on The weak point on my Letter is all the chrome and stainless steel parts. I know a guy who could (as he would) do that in his free time as he did it for his own car. I guess everybody here knows that the weak point on cars of that area is the pot metal (internal corroding). That is the reason, why my project takes sooooooooo long... (in time). Happy Restoring! Dieter
Edited by di_ch_NY56 2021-12-18 11:15 AM
|
|
| |
|
Board Moderator & Exner Expert 10K+
Posts: 13045
Location: Southern Sweden - Sturkö island | Yes Dieter, all the stainless can be straightened and polished to a spendid result. The pot metal is a real drag and very expensive work.
Mount the best you have and work on the spare ones |
|
| |
|
Expert 5K+
Posts: 5006
| yeah restoring these cars take forever...
but amazing work.
|
|
| |
|

Veteran
Posts: 217
Location: Echuca | Progress is progress, the car is looking great and I'm sure the end result will be worth it! |
|
| |
|
Expert
Posts: 1530
Location: ZH, Switzerland | Big thanks for all comments. Yesterday, late evening I got a set of pictures from the boss of the paint and body shop. I didn't mention it to him, but for me he's like a friend. The boss now is gonna enjoy his well deserved Christmas Holiday until January 1st 2022. He's working as a bee (underestimated). Big thank you to the boss of the paint and body shop. Happy Restoring! Dieter
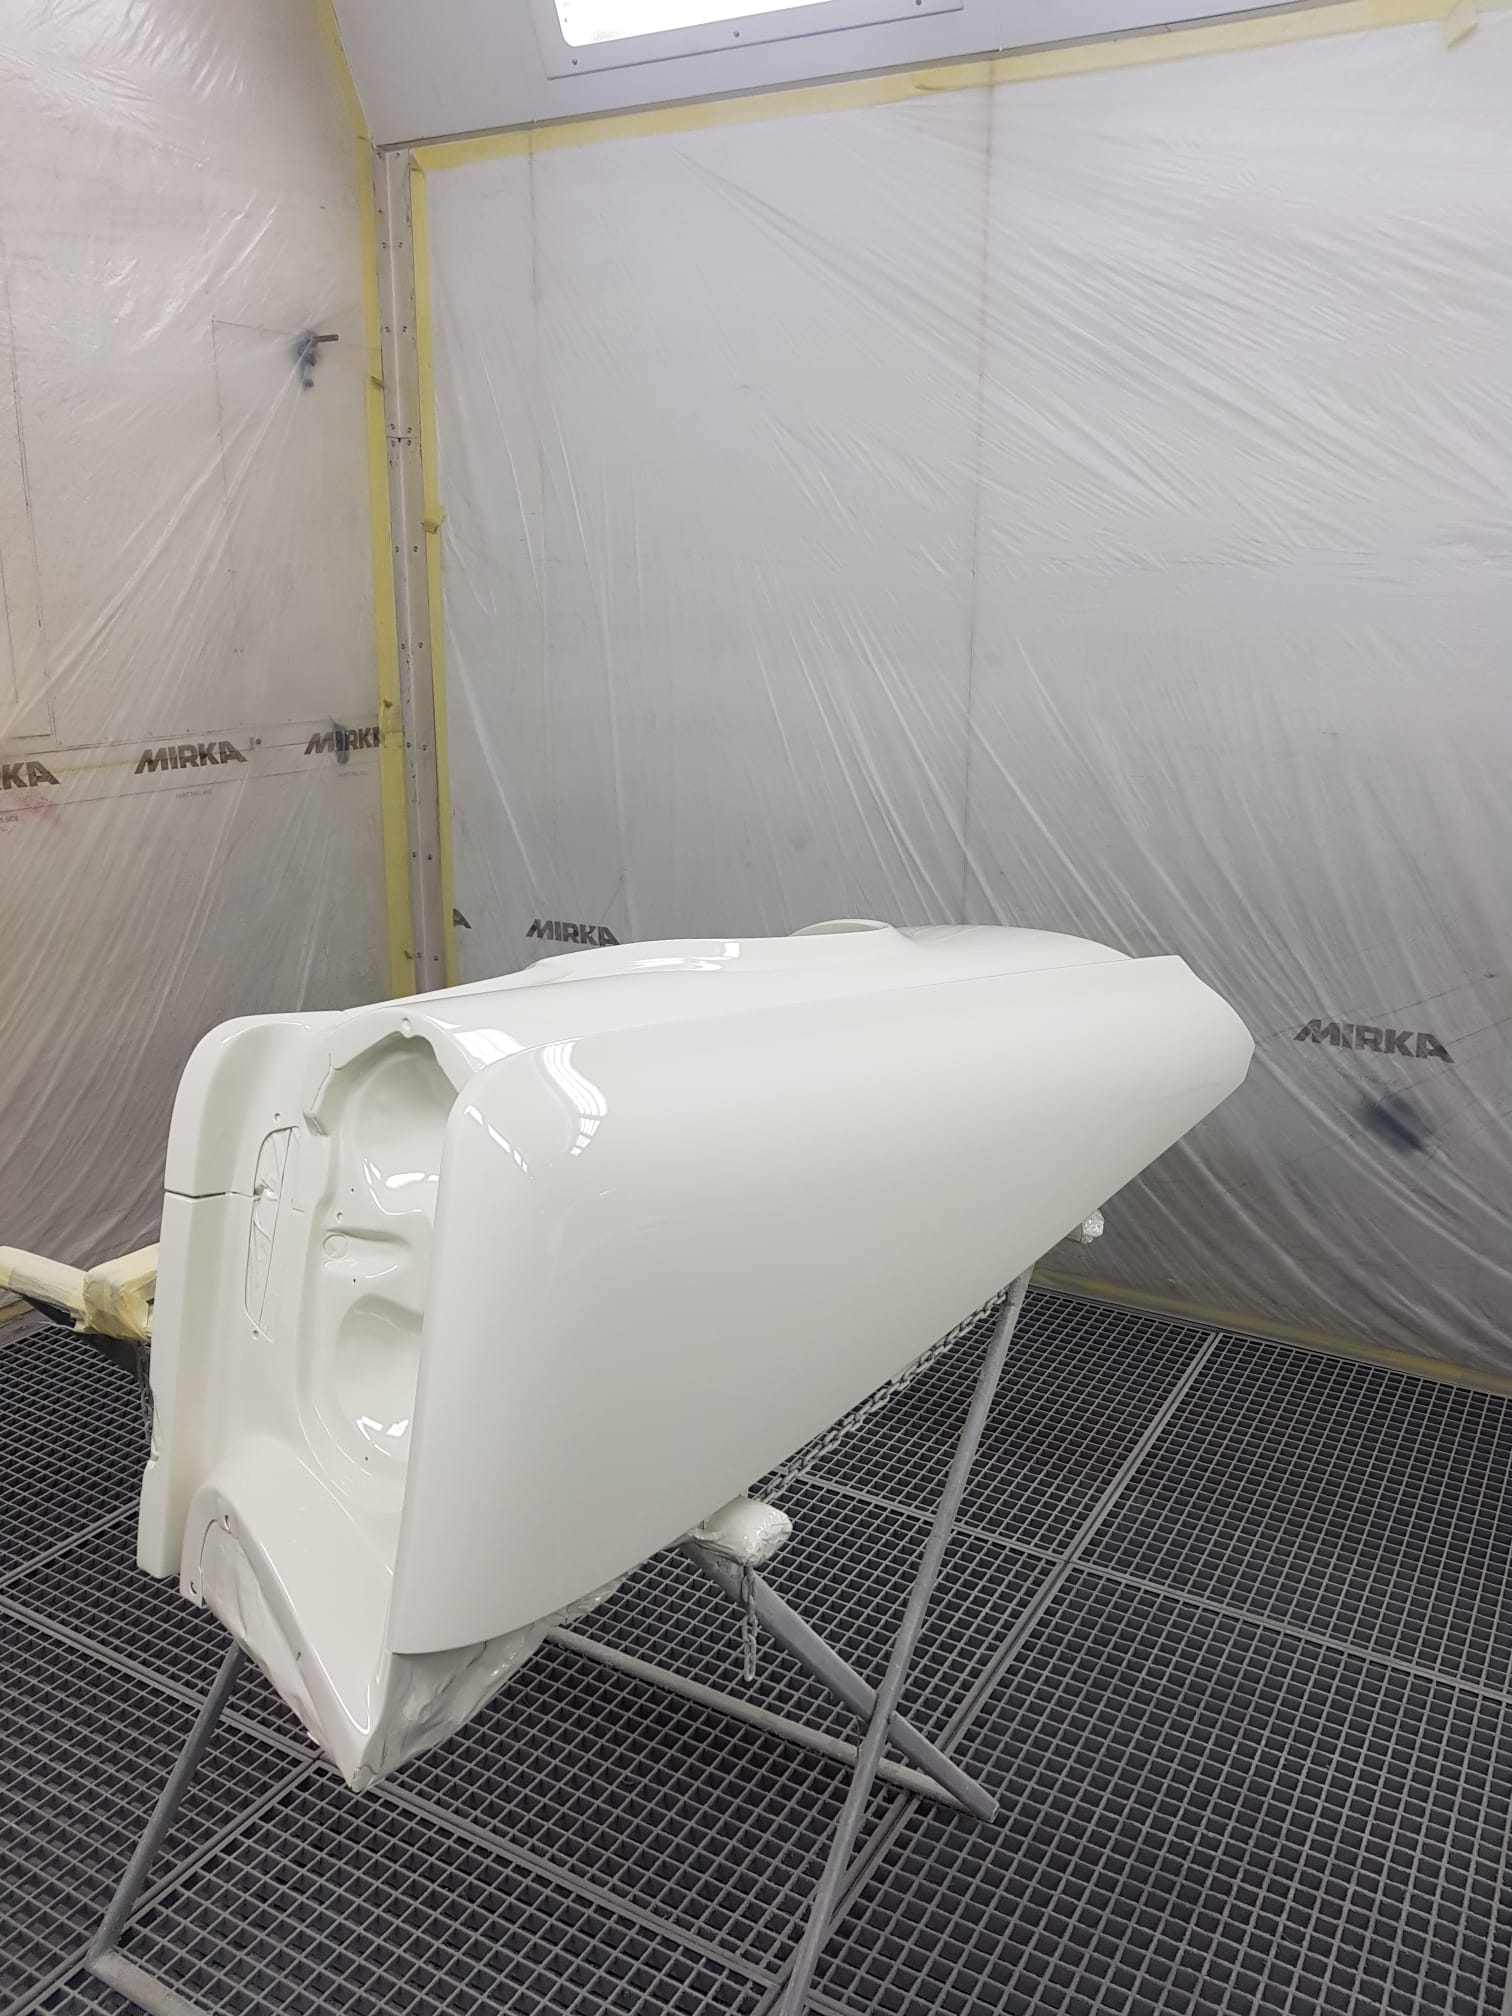 (IHNN2590 passenger side fender front top view.JPG) (IHNN2590 passenger side fender front top view.JPG)
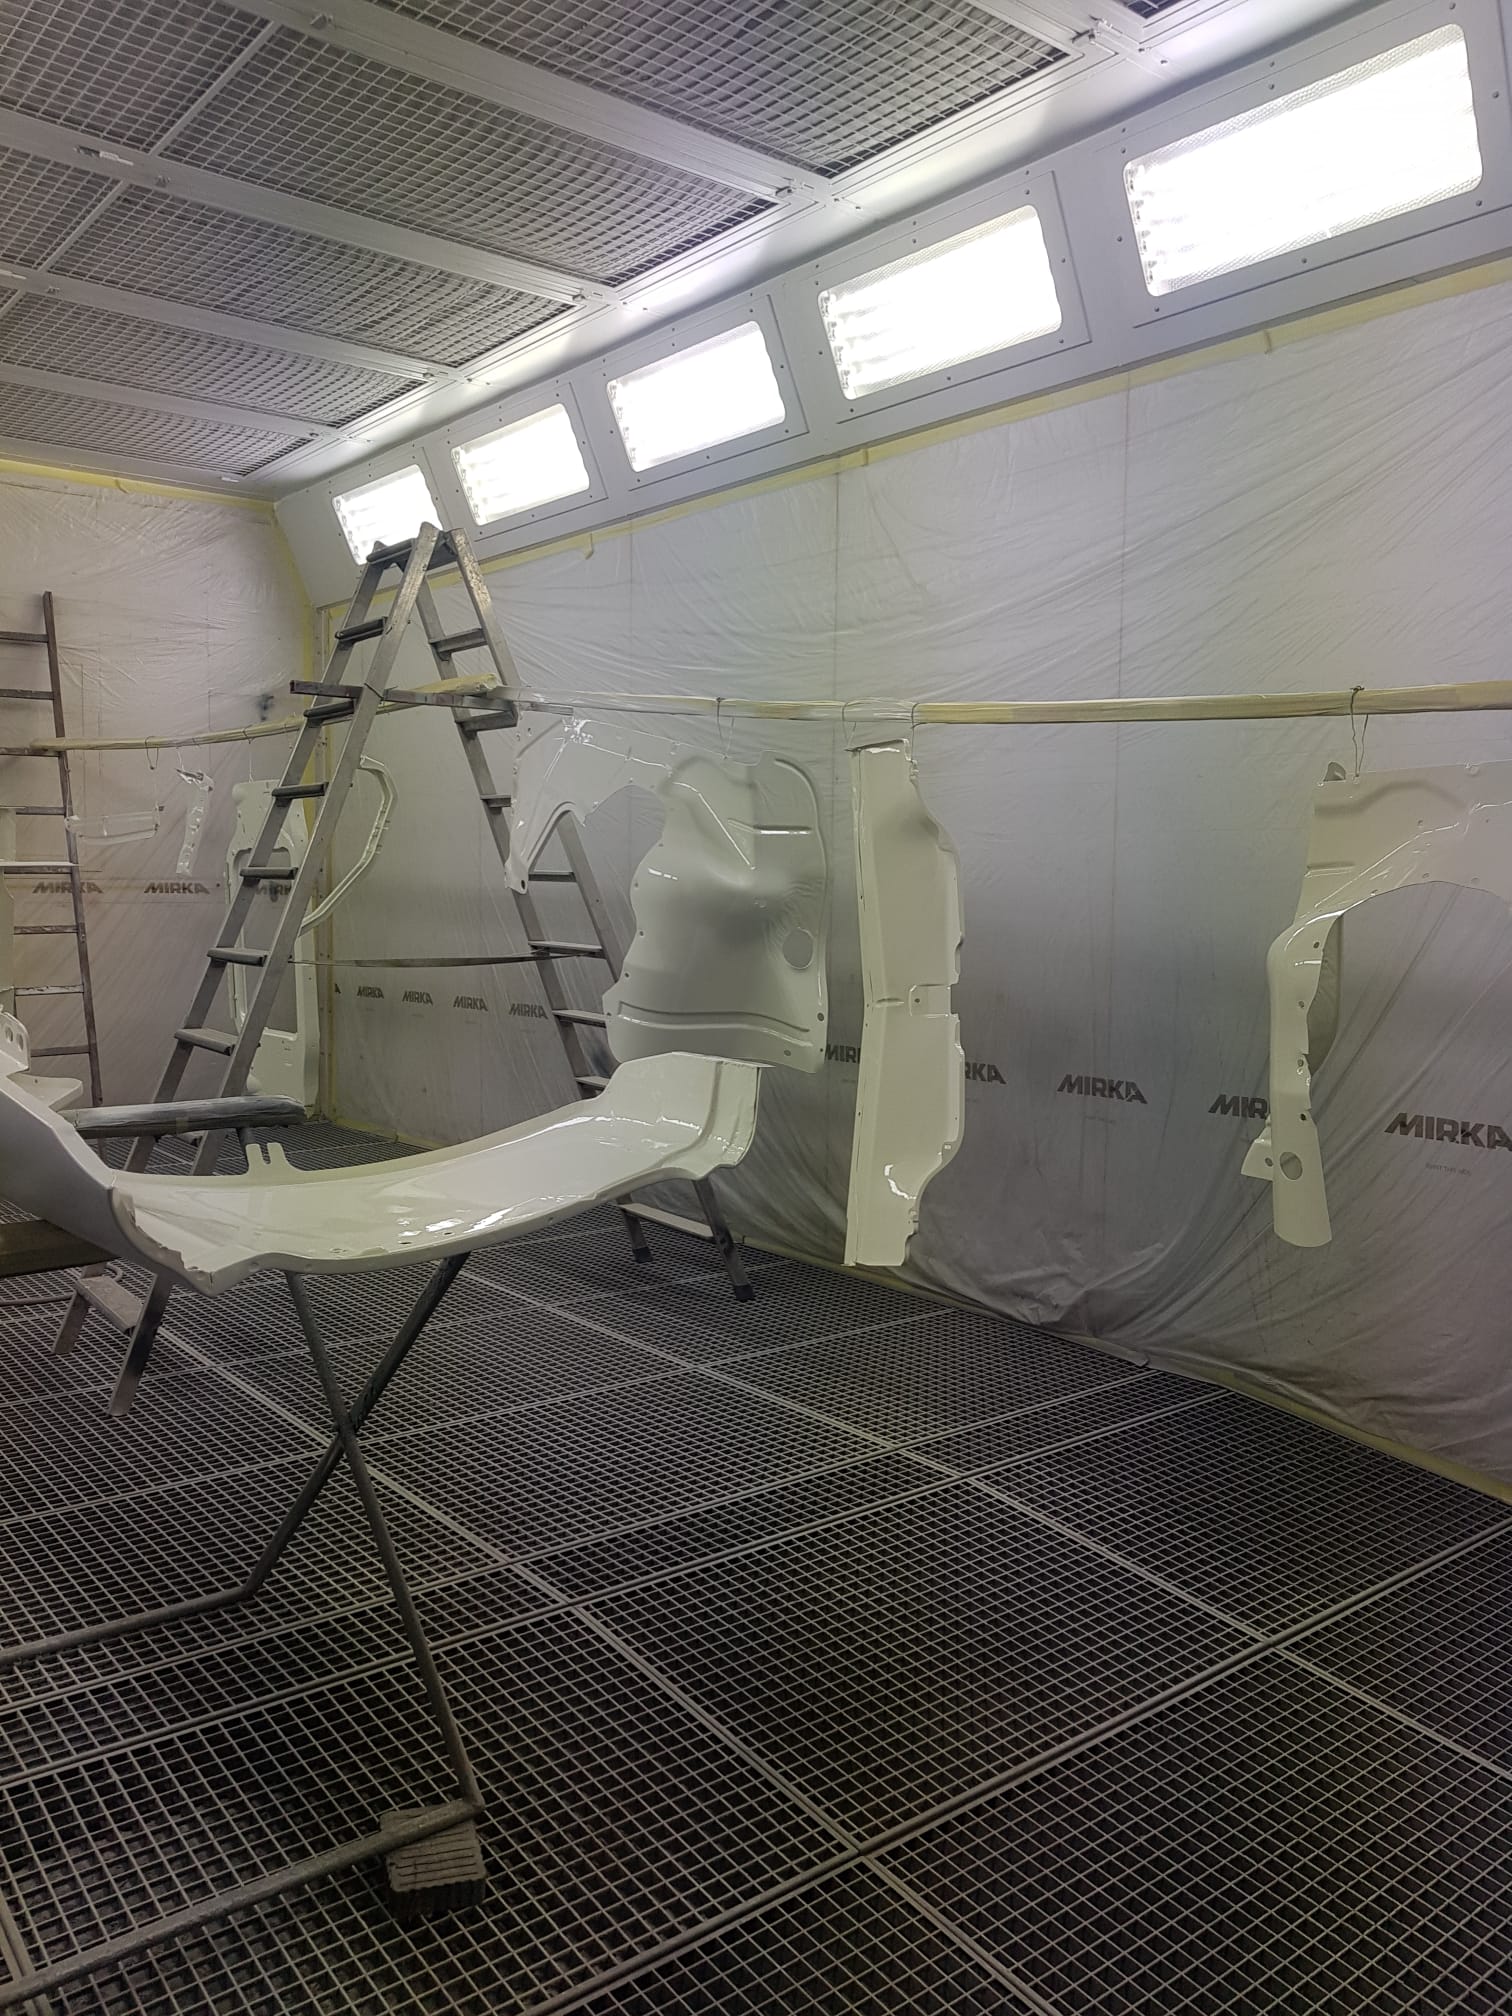 (OJAT5867 overwiew paint booth with drivers side fender.JPG) (OJAT5867 overwiew paint booth with drivers side fender.JPG)
 (WBCR7826 hood inside trunk lid inside both doors inside (top view).JPG) (WBCR7826 hood inside trunk lid inside both doors inside (top view).JPG)
 (ETVV0767 hood inside.JPG) (ETVV0767 hood inside.JPG)
 (IMWY2327 drivers door inside and some more parts.JPG) (IMWY2327 drivers door inside and some more parts.JPG)
Attachments
----------------
IHNN2590 passenger side fender front top view.JPG (303KB - 173 downloads)
OJAT5867 overwiew paint booth with drivers side fender.JPG (478KB - 180 downloads)
WBCR7826 hood inside trunk lid inside both doors inside (top view).JPG (269KB - 170 downloads)
ETVV0767 hood inside.JPG (281KB - 165 downloads)
IMWY2327 drivers door inside and some more parts.JPG (354KB - 176 downloads)
|
|
| |
|
Board Moderator & Exner Expert 10K+
Posts: 13045
Location: Southern Sweden - Sturkö island | That's like Christmas gifts, all hard boxes just like we like.
Well, Merry Christmas Dieter |
|
| |
|
Elite Veteran
Posts: 649
Location: Finland | Looks incredible...but you need a lot of "safe" space to store these goodies in before they sit on the car. |
|
| |
|
Member
Posts: 43
Location: Småland Sweden | Great work, better than when new.
Merry Christmas! |
|
| |
|
Expert
Posts: 1530
Location: ZH, Switzerland | Merry Christmas to all of you. Big thank you for your wishes. |
|
| |
|
Expert
Posts: 1530
Location: ZH, Switzerland | Happy New Year to everybody! I went to the barn to seek for the arm rests ontop of the center console. Finally I got em. The screws at the pivot of the rear arm rest are frozen. The vent windows will have some work as well. Main point is the broken adjuster screw holder at the drivers side. It was already broker prior to remove it from the door. Happy Restoring! Dieter
 (IMG_9477 center console front piece.JPG) (IMG_9477 center console front piece.JPG)
 (IMG_9478 center console rear piece.JPG) (IMG_9478 center console rear piece.JPG)
 (IMG_9479 vent window door window channel both vent windows.JPG) (IMG_9479 vent window door window channel both vent windows.JPG)
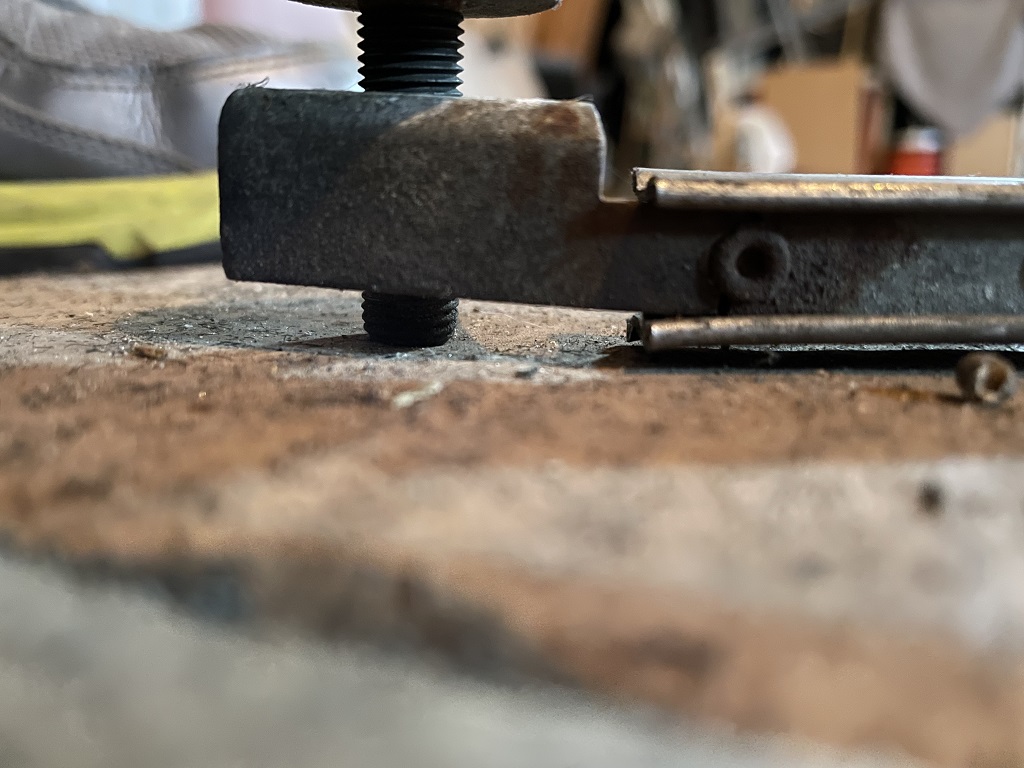 (IMG_9481 vent window lower adjuster base broken.JPG) (IMG_9481 vent window lower adjuster base broken.JPG)
Attachments
----------------
IMG_9477 center console front piece.JPG (361KB - 154 downloads)
IMG_9478 center console rear piece.JPG (375KB - 158 downloads)
IMG_9479 vent window door window channel both vent windows.JPG (293KB - 164 downloads)
IMG_9481 vent window lower adjuster base broken.JPG (192KB - 162 downloads)
|
|
| |
|
Board Moderator & Exner Expert 10K+
Posts: 13045
Location: Southern Sweden - Sturkö island | The best tool for loosen frozen bolts/nuts is an induction heater. I bought one for roundabout $400 and it works like a dream, no open flame, only induction heat instantly.
Here's some examples https://www.amazon.com/induction-heater/s?k=induction+heater
Here's my heater https://www.biltema.se/en-se/tools/electric-tools/screwdriver/induct...
|
|
| |
|
Expert
Posts: 1530
Location: ZH, Switzerland | I got the two UNF 10-32 x 7/32" screws of rear hinge band out with WD40 and loads of pressure to the PH2-screwdriver. The structure is made out of a 3D fibreglass structure. Fortunately I still have a very nice catch up stainless steel rope with the white isolation like cover around it on the front arm rest as Bob in a video (YouTube) described. Happy Restoring! Dieter Picture: inside the front arm rest... with a part of the underside of the cover (quite thick faux leather, light tan colored)
 (IMG_9489 inside the front arm rest.JPG) (IMG_9489 inside the front arm rest.JPG)
Attachments
----------------
IMG_9489 inside the front arm rest.JPG (294KB - 158 downloads)
|
|
| |
|
Board Moderator & Exner Expert 10K+
Posts: 13045
Location: Southern Sweden - Sturkö island | https://www.youtube.com/watch?v=2rZEyXhVshs
https://www.amazon.se/Svart-Flock-fibrer-sqm-instrumentbr%C3%A4dor/d...
A good alternative perhaps?
First glue, then the flock fibre |
|
| |
|
Expert
Posts: 1530
Location: ZH, Switzerland | Thanks Sven I'm going to ask the painter if he knows a shop in Switzerland who does that procedure glue and flocking. For me myself it's ways beyond my possibilities at home. I guess the same procedure was applied duriing the production time. The only way I can do myself is model railway powder (black) and a glue out of a rattle can. Anybody here with an alternative way? Happy Restoring! Dieter |
|
| |
|
Expert 5K+
Posts: 5006
| Liquid wrench work 100 times better than WD40... only way to go, beats em all, even kroil and PB |
|
| |
|
Expert 5K+
Posts: 9899
Location: Lower Mainland BC | di_ch_NY56 - 2022-01-02 8:15 AM
I'm going to ask the painter if he knows a shop in Switzerland who does that procedure glue and flocking. For me myself it's ways beyond my possibilities at home. I guess the same procedure was applied duriing the production time. The only way I can do myself is model railway powder (black) and a glue out of a rattle can. Anybody here with an alternative way?
Dieter: In North America, there is (or was) a contact paper (sticky glue on one side with a peel-off cover paper) that was black flocked on the upper side. You might check hobby shops for that.
Fabric stores here in North America will typically carry a low "nap" (fibre height) black velvet or "velvetine". I have used that for a few house projects (back side of display cabinet). I think I used spray glue.
Just some ideas.
|
|
| |
|
Expert
Posts: 1530
Location: ZH, Switzerland | 56D500boy - 2022-01-02 4:22 PM di_ch_NY56 - 2022-01-02 8:15 AM I'm going to ask the painter if he knows a shop in Switzerland who does that procedure glue and flocking. For me myself it's ways beyond my possibilities at home. I guess the same procedure was applied duriing the production time. The only way I can do myself is model railway powder (black) and a glue out of a rattle can. Anybody here with an alternative way? Dieter: In North America, there is (or was ) a contact paper (sticky glue on one side with a peel-off cover paper ) that was black flocked on the upper side. You might check hobby shops for that. Fabric stores here in North America will typically carry a low "nap" (fibre height ) black velvet or "velvetine". I have used that for a few house projects (back side of display cabinet ). I think I used spray glue. Just some ideas. : ) Dave: big thank you for your hint. At epain I got "Self-Adhesive Velvet Flock Contact Paper Liner for Jewelry". I assume that's exactly what it was rolling off the assembly line (my F). During the journey this morning with my V50 under the cover (middle arm rest like) is a bin with exactly the same finish. Very kind to touch it. I guess prior, clean the bin with thinner and smoothen it.
Happy Restoring! Dieter
Edited by di_ch_NY56 2022-01-03 2:43 PM
|
|
| |
|
Expert
Posts: 1530
Location: ZH, Switzerland | What do you think about that "Tan Light Parchment Vinyl Upholstery Fabric Durable Grade Vinyl Fabric by Yard"for door panels (base) and arm rest (two sewing lines at the outer edges). I was looking at epain.us I was seeking for "light tan vinyl fabric". Happy Restoring! Dieter
Edited by di_ch_NY56 2022-01-03 10:49 AM
|
|
| |
|
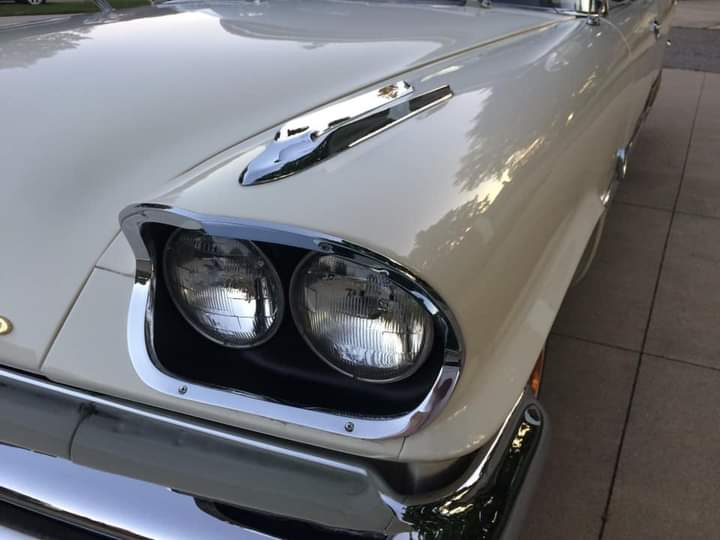
Elite Veteran
Posts: 1141
Location: Blackpool, United Kingdom. | Hi Dieter,
Not picking , but something looks odd on the body line here, it may just be the light?
 (20210528_092131 marker layer all over as I met my Letter~2.jpg) (20210528_092131 marker layer all over as I met my Letter~2.jpg)
Attachments
----------------
20210528_092131 marker layer all over as I met my Letter~2.jpg (196KB - 167 downloads)
|
|
| |
|
Expert
Posts: 1530
Location: ZH, Switzerland | springsweptwing - 2022-01-02 5:15 PM Hi Dieter, Not picking , but something looks odd on the body line here, it may just be the light? Sad, you couldn't visit my Letter in natura. From looking again at the picture, the odd looking body line (your words) are exactly where the sun ray beam is on the floor. Saturday before Christmas Season I saw my Letter wet (silicone remover) and we inspected the lines both, the Boss of the Body and Paint shop and me. Nothing odd at all. Kind regards Dieter |
|
| |
|
Expert
Posts: 1530
Location: ZH, Switzerland | I wrote down three orders (with an order date) for that year for Quirey Quality Design. Plus the order date for the ordering of the windshield, a NAGS W590, green, with smoke band. Preferred is the windshield direct from Finnland (or North European Country), instead of a detour over California. Corresponding to the expectable progress at my Letter. Happy Restoring! Dieter BTW: the red circle is not with no reason. At that area the surface is more coarse than the rest. But it will become as smooth as the rest of the Letter. |
|
| |
|
Expert
Posts: 1530
Location: ZH, Switzerland | Today I sorted some parts and put a label with the content to the card box of parts of my Letter. The bags with the rubber ends of the B post and door end fell into my sight. One carrier was rusted away. So I made a card paper template. I assume the carriers were made out of spring steel. For the lower end of the front glass run channel (was broken off prior the removing from the door) I'm asking the guys I know from earlier for help to repair the adjuster beam. Happy Restoring! Dieter BTW: I know the vacuum canister still is not ready to install (some work with a steel rasp, further removing of loose rust (lower end of the mounting frame is welded on) and smoe more).
Edited by di_ch_NY56 2022-01-09 9:00 AM
 (IMG_9496 vacuum canister brushed.JPG) (IMG_9496 vacuum canister brushed.JPG)
 (IMG_9509 vacuum canister repaired.JPG) (IMG_9509 vacuum canister repaired.JPG)
 (IMG_9511 rear door end and b pillar rubbers.JPG) (IMG_9511 rear door end and b pillar rubbers.JPG)
 (IMG_9481 lower adjuster of the glass run channel and vent window frame at the drivers side.JPG) (IMG_9481 lower adjuster of the glass run channel and vent window frame at the drivers side.JPG)
Attachments
----------------
IMG_9496 vacuum canister brushed.JPG (392KB - 164 downloads)
IMG_9509 vacuum canister repaired.JPG (273KB - 152 downloads)
IMG_9511 rear door end and b pillar rubbers.JPG (323KB - 154 downloads)
IMG_9481 lower adjuster of the glass run channel and vent window frame at the drivers side.JPG (192KB - 167 downloads)
|
|
| |
|
Expert
Posts: 1530
Location: ZH, Switzerland | I did use 400 grit wet sanding paper to clean the vacuum canister. It got the first layer of epoxy rust inhibitor. From the engine restorer I got good news... the cylinder grinder did start working on the engine. Everything okay so far was his comment (the engine restorer visited the cylinder grinder shop). More within two weeks about the engine. Just a quite small final paying will follow (two prepayments confirmed on paper). Happy Restoring! Dieter |
|
| |
|
Elite Veteran
Posts: 649
Location: Finland | Are you going to open up the can? It seems to be full of rust.. maybe I am wrong..
There is the possibility to shorten the can 1/2" or so and tig weld on a new bottom if the rust is on the bottom . |
|
| |
|
Expert
Posts: 1530
Location: ZH, Switzerland | 22mafeja - 2022-01-10 6:24 AM Are you going to open up the can? It seems to be full of rust.. maybe I am wrong.. There is the possibility to shorten the can 1/2" or so and tig weld on a new bottom if the rust is on the bottom . I did shake the can. Just a minor amout of rust in the can. I assume I could let it, as it is. Now I'm going to apply stone chip resistant color to the can. Afterwards a layer, or two of satin black. Happy Restoring! Dieter
Edited by di_ch_NY56 2022-01-11 3:41 AM
|
|
| |
|
Elite Veteran
Posts: 1141
Location: Blackpool, United Kingdom. | Hi Dieter,
Those vacuum canisters are used on a few makes of vehicles, you may be better buying a new one and putting you're valve in it? You don't know how bad it is inside and will only develop more holes later.
https://www.google.com/search?q=headlight+vacuum+canister&cl...
Paul.
Edited by springsweptwing 2022-01-11 8:37 AM
|
|
| |
|
Expert
Posts: 1530
Location: ZH, Switzerland | Hi you're probably right. As described I did apply some stuff onto the vacuum bottle (canister)... Happy Restoring! Dieter
 (IMG_9518 vacuum bottle actual state.JPG) (IMG_9518 vacuum bottle actual state.JPG)
Attachments
----------------
IMG_9518 vacuum bottle actual state.JPG (271KB - 150 downloads)
|
|
| |
|
Board Moderator & Exner Expert 10K+
Posts: 13045
Location: Southern Sweden - Sturkö island | Just install a plastic fuel filter in a hidden position. On the tube that goes to the engine. |
|
| |
|
Expert
Posts: 1530
Location: ZH, Switzerland | wizard - 2022-01-10 6:16 PM Just install a plastic fuel filter in a hidden position. On the tube that goes to the engine. I'll do it |
|
| |
|
Expert 5K+
Posts: 7206
Location: Victoria, BC, on Vancouver Island, Canada | Looks like there is a hole in the vacuum canister. You will have to do something with that or you'll have a vacuum leak causing a rough engine idle.
 (IMG_9518 vacuum bottle actual state.JPG) (IMG_9518 vacuum bottle actual state.JPG)
Attachments
----------------
IMG_9518 vacuum bottle actual state.JPG (64KB - 143 downloads)
|
|
| |
|
Expert
Posts: 1530
Location: ZH, Switzerland | imopar380 - 2022-01-10 10:02 PM Looks like there is a hole in the vacuum canister. You will have to do something with that or you'll have a vacuum leak causing a rough engine idle. Hi Ian I did use a vacuum pump (manually driven) to check. This area is repaired with electronic thin and an electronic welding station. I pumped down to 15 in Hg Vac. It was keeping the vacuum and releasing it very, very slow prior to proceed the further restoration. Dieter |
|
| |
|
Expert
Posts: 1530
Location: ZH, Switzerland | My Letter got some progress... At the propeller shaft I got later I went to friends nearby to press the pin out (easy job with the ancient manual Sauerer press). The plan is to use the pin and the b/t case in conjunction of the second propeller shaft with new rollers with needles (end cups the best ones). Happy Restoring! Dieter
 (IMG_9528 doors and front fenders.JPG) (IMG_9528 doors and front fenders.JPG)
 (IMG_9529 trunk lid and hood.JPG) (IMG_9529 trunk lid and hood.JPG)
 (IMG_9532 b-t case with grease and Saurer press.JPG) (IMG_9532 b-t case with grease and Saurer press.JPG)
Attachments
----------------
IMG_9528 doors and front fenders.JPG (199KB - 200 downloads)
IMG_9529 trunk lid and hood.JPG (270KB - 188 downloads)
IMG_9532 b-t case with grease and Saurer press.JPG (258KB - 181 downloads)
|
|
| |
|
Board Moderator & Exner Expert 10K+
Posts: 13045
Location: Southern Sweden - Sturkö island | Make sure that the pin is totally centered when you press it in Dieter. It's very important. |
|
| |
|
Expert
Posts: 1530
Location: ZH, Switzerland | wizard - 2022-01-14 8:08 PM Make sure that the pin is totally centered when you press it in Dieter. It's very important. The pin on the second propeller shaft was about 5 mill out of center. For sure I keep in mind that the pin must be centered - the more precise - the less the vibration caused by the propeller shaft (the U-Joint at the first propeller shaft (colored) turns almost itself, that light). In my mind.... 1/1000 mill accuracy, the second friend at the barn in Wald ZH (almost finished his 1938 MG Sedan) is retired machine mechanic. If you want to do a favor for me, please build a 5 mill disc as you did for my Beast, because the second b/t-case shows wearing marks. Happy Restoring! Dieter
 (IMG_9533 second b-t case inside.JPG) (IMG_9533 second b-t case inside.JPG)
Attachments
----------------
IMG_9533 second b-t case inside.JPG (305KB - 180 downloads)
|
|
| |
|
Board Moderator & Exner Expert 10K+
Posts: 13045
Location: Southern Sweden - Sturkö island | Ok Dieter, I have a couple on the shelf - whats the cc measurements between the bolt holes?
Presume that you have the large B&T |
|
| |
|
Board Moderator & Exner Expert 10K+
Posts: 13045
Location: Southern Sweden - Sturkö island | Ok Dieter, I have a couple on the shelf - whats the cc measurements between the bolt holes?
Presume that you have the large B&T |
|
| |
|
Expert
Posts: 1530
Location: ZH, Switzerland | Hi Sven It's around 82 millimeter cc, the same size as the Beast has (both B/T original and later arriven have the same diameter and the purchased rollers are fitting with the pin into the B/T-case). This day I went to my mum and did enjoy a super delicious meal. I adjusted her television set that she could watch television again,... Then, after the meal I went to the basement to work on my drill rig (constructed 1982 as with all the basic mechanical operations). I repaired the washing water bottle cover (better appearance than that from epain) with success. On Monday remove the rest of the brass tube... plus the B/T-case will get at least one layer of primer. Happy Restoring! Dieter
 (IMG_9535 self produced drill rig (1982).JPG) (IMG_9535 self produced drill rig (1982).JPG)
 (IMG_9536 washer bottle cover repaired.JPG) (IMG_9536 washer bottle cover repaired.JPG)
Attachments
----------------
IMG_9535 self produced drill rig (1982).JPG (356KB - 181 downloads)
IMG_9536 washer bottle cover repaired.JPG (193KB - 182 downloads)
|
|
| |
|
Expert
Posts: 1530
Location: ZH, Switzerland | The too long brass tube is shortened, a little bit too far. But okay This morning the second B/T-case got two layers of rust converting and sealing primer, two coats of metallic color and one layer of clear coat. The color is almost identical to the color of the propeller shaft. Happy Restoring! Dieter |
|
| |
|
Expert
Posts: 1530
Location: ZH, Switzerland | The too long brass tube is shortened, a little bit too far. But it's okay. This morning the second B/T-case got two layers of rust converting and sealing primer, two coats of metallic color and one layer of clear coat. The color is almost identical to the color of the propeller shaft. Happy Restoring! Dieter
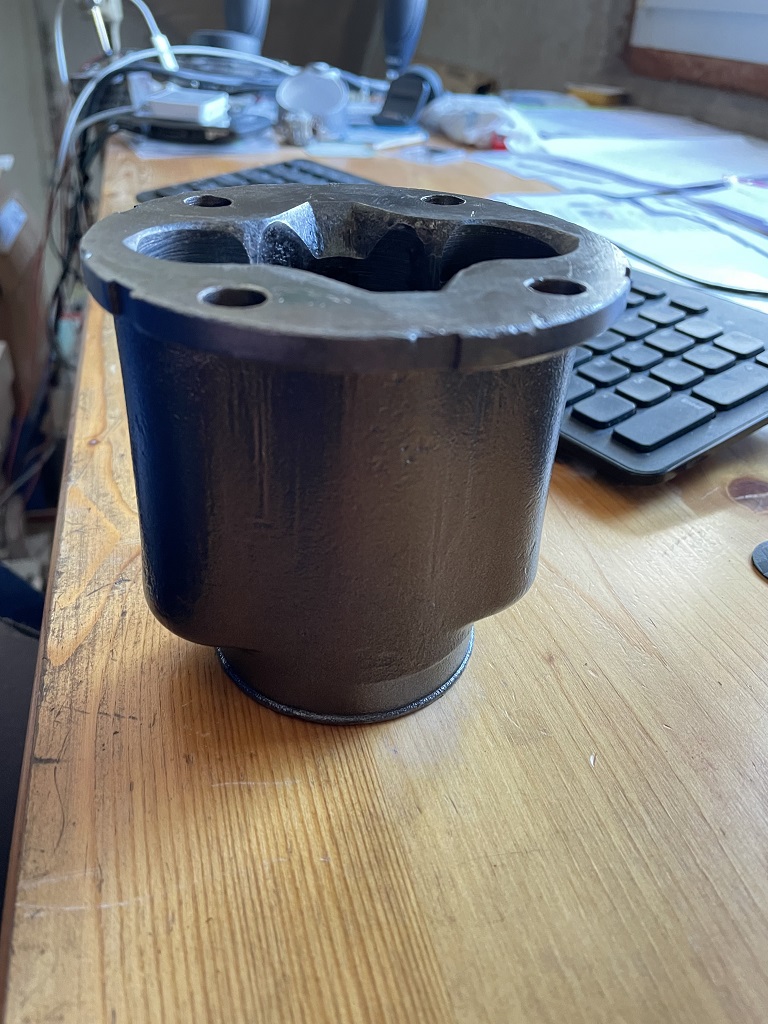 (IMG_9541 second b-t painted.JPG) (IMG_9541 second b-t painted.JPG)
Attachments
----------------
IMG_9541 second b-t painted.JPG (264KB - 180 downloads)
|
|
| |
|
Expert
Posts: 1530
Location: ZH, Switzerland | I did open the lower part of the wash water container cover to look after... The internal of the lower part of the wash water container cover looks like new (even the spring shows the original color). While the second (later purchased) wash water container cover looks very corroded inside. While opening a load of rust poured out. Now wonder, the spring is broken and very rusty. This morning I felt like a dentist, cleaning all internal parts of the second cover. The cover itself looks very brittle... So, the only way is to use that one as a parting out item. Happy Restoring! Dieter BTW: this week as well: power steering pump, the same type as described in the service bulletin "151 Steering Service Tips for 1960".
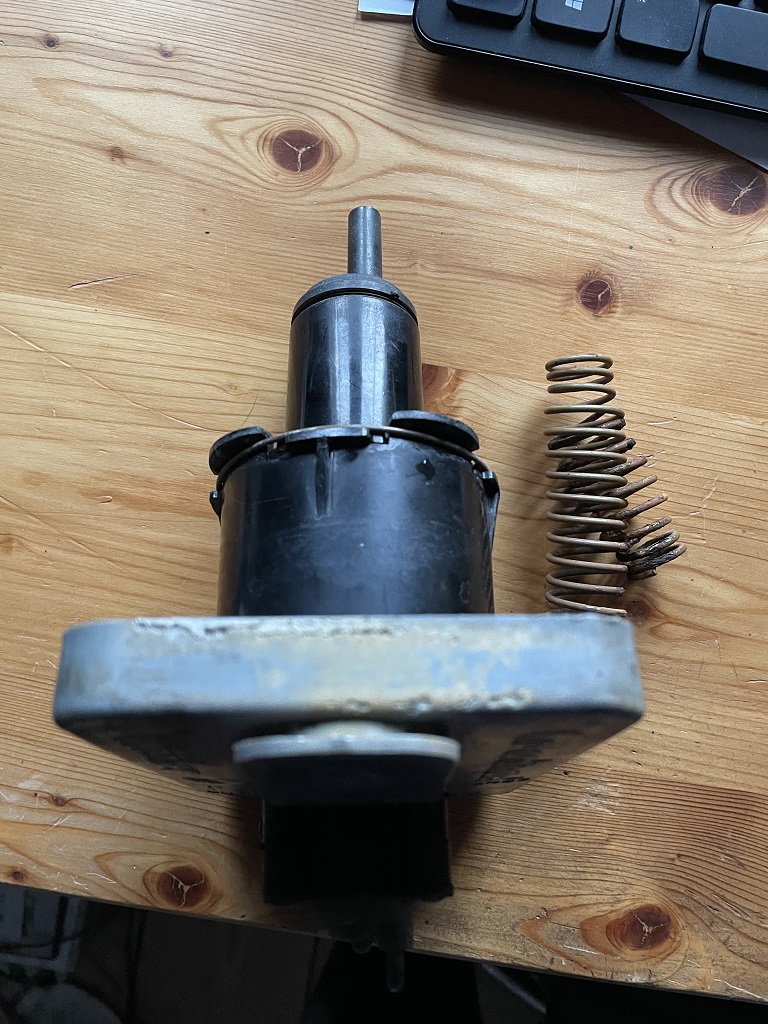 (IMG_9544 second wash water bottle cover partially disassembled.JPG) (IMG_9544 second wash water bottle cover partially disassembled.JPG)
Attachments
----------------
IMG_9544 second wash water bottle cover partially disassembled.JPG (318KB - 180 downloads)
|
|
| |
|
Expert
Posts: 1530
Location: ZH, Switzerland | The Trico washer mechanism I did a complete disassembly and did clean the parts. Happy Restoring! Dieter
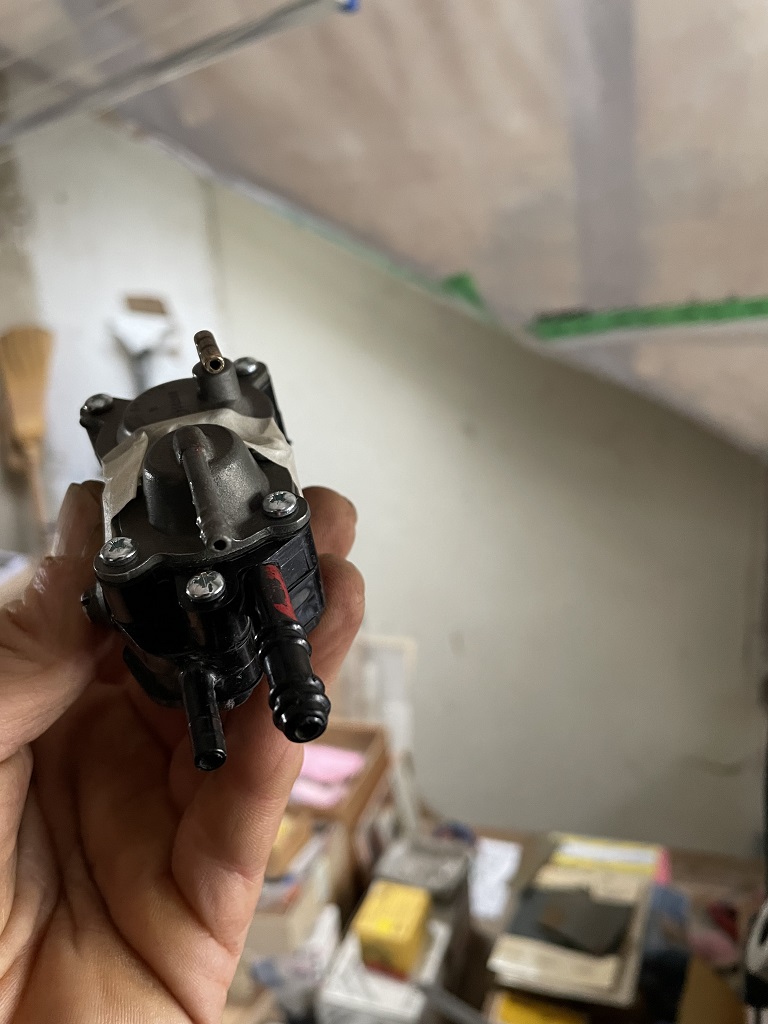 (IMG_9546 Trico washer mechanism checked and cleaned.JPG) (IMG_9546 Trico washer mechanism checked and cleaned.JPG)
Attachments
----------------
IMG_9546 Trico washer mechanism checked and cleaned.JPG (170KB - 188 downloads)
|
|
| |
|
Expert
Posts: 1530
Location: ZH, Switzerland | Yesterday afternoon fighting with the first propeller shaft. With loads of effort and four people turning the spindle at the ancient Saurer press, the pin finally was out. A rubber booth mounted, the second B/T-case and the pin of the fist propeller shaft, it was almost impossible to press in the pin again. The whole press started to rotate on the floor (.157 inch / 4 millimeter per rotation at the spindle of the press). One participant promissed to take his 20 ton hydraulic press with him from his garage - next Saturday next trial. Happy Restoring! Dieter BTW: engine stalling at the cylinder grinder (engine restorer has a imense stack of cars to work on). A sad story. BTW2: the pin of the first propeller shaft is colored the whole length of the forged beam (with the guy who will bring his press we discoussed the mounting at the factory, an Alfa Romeo expert, that most probably the forged bean was glowing red when initially pressing in the pin at the factory) |
|
| |
|
Board Moderator & Exner Expert 10K+
Posts: 13045
Location: Southern Sweden - Sturkö island | No heat was used for to mount the pin. The tolerances are tight, but it should only be pressed in. My hydraulic press is 12 ton and it will do the job. Absolute straingtness is demanded. I have wooden blocks for to support the propeller shaft horisontal. |
|
| |
|
Expert
Posts: 1530
Location: ZH, Switzerland | Technical dates of the B/T pin installation: 0.04 mm, well below the factory specification of 0.003 Inch. I did use the hydraulic press again with a measurement installation to see how much the pin did move. Later on the evening both rollers (from the parcels) cleaned and installed with the grease by packed with the Dodge Neon cv drive shaft boot (614 001). I was hardly fighting to bring back the rear end of the boot. Finally I found a solution to install the boot, even with a felt ring (breathing of the B/T-case). The long tube needs a grinding with sand paper and a new layer of color (too early painted). Happy Restoring! Dieter
 (IMG_9646 Neon rubber booth fighting.JPG) (IMG_9646 Neon rubber booth fighting.JPG)
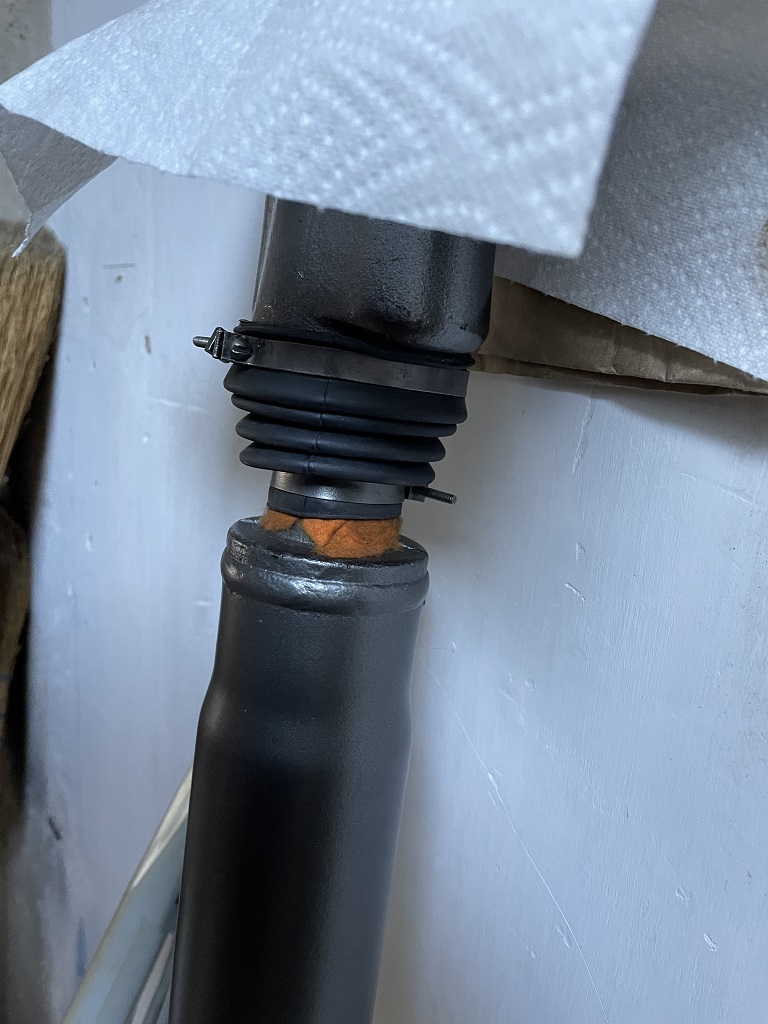 (IMG_9653 installation finished.JPG) (IMG_9653 installation finished.JPG)
Attachments
----------------
IMG_9646 Neon rubber booth fighting.JPG (279KB - 180 downloads)
IMG_9653 installation finished.JPG (216KB - 181 downloads)
|
|
| |
|
Board Moderator & Exner Expert 10K+
Posts: 13045
Location: Southern Sweden - Sturkö island | I don't recognize the jute felt around the shaft Dieter. As I recall it should be a square piece only. |
|
| |
|
Expert
Posts: 1530
Location: ZH, Switzerland | wizard - 2022-02-05 9:40 PM I don't recognize the jute felt around the shaft Dieter. As I recall it should be a square piece only. I'm sorry, I do not have an example with the felt installed. Neither does the service manual show the felt installed. So I did trim the felt to get a little better appearance. Happy Restoring! Dieter
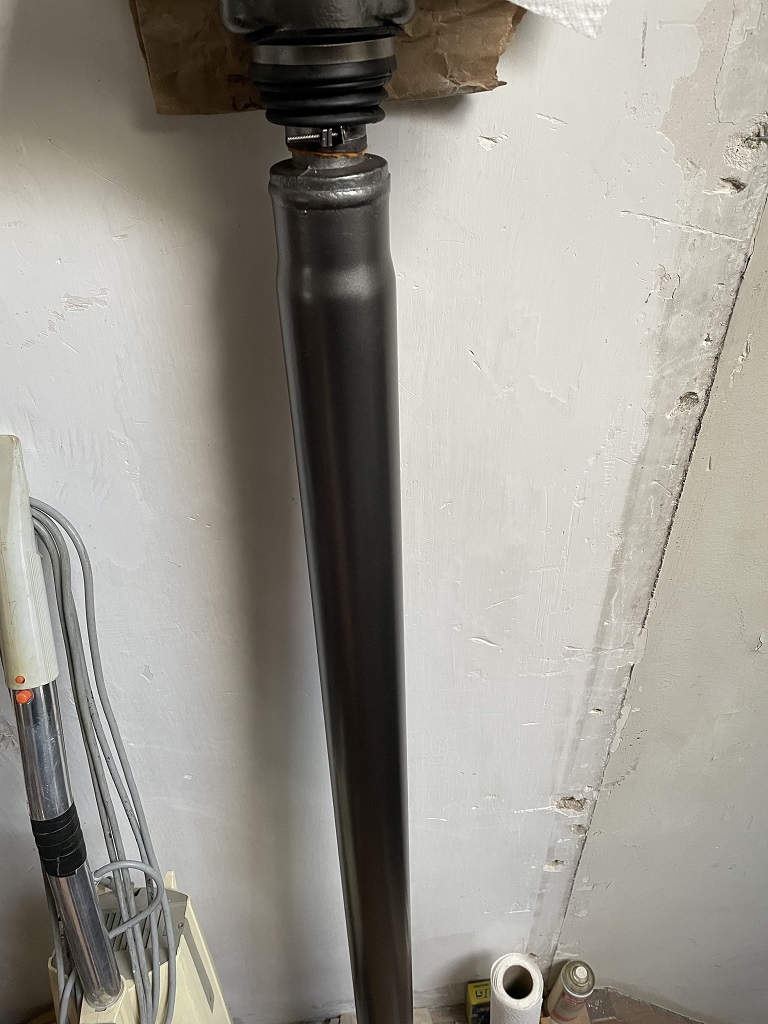 (IMG_9659 felt trimmed.JPG) (IMG_9659 felt trimmed.JPG)
Attachments
----------------
IMG_9659 felt trimmed.JPG (229KB - 175 downloads)
|
|
| |
|
Expert
Posts: 1530
Location: ZH, Switzerland | Some pictures from the boss of the body and paint shop. Some work has been performed at my Letter. Happy Restoring! Dieter
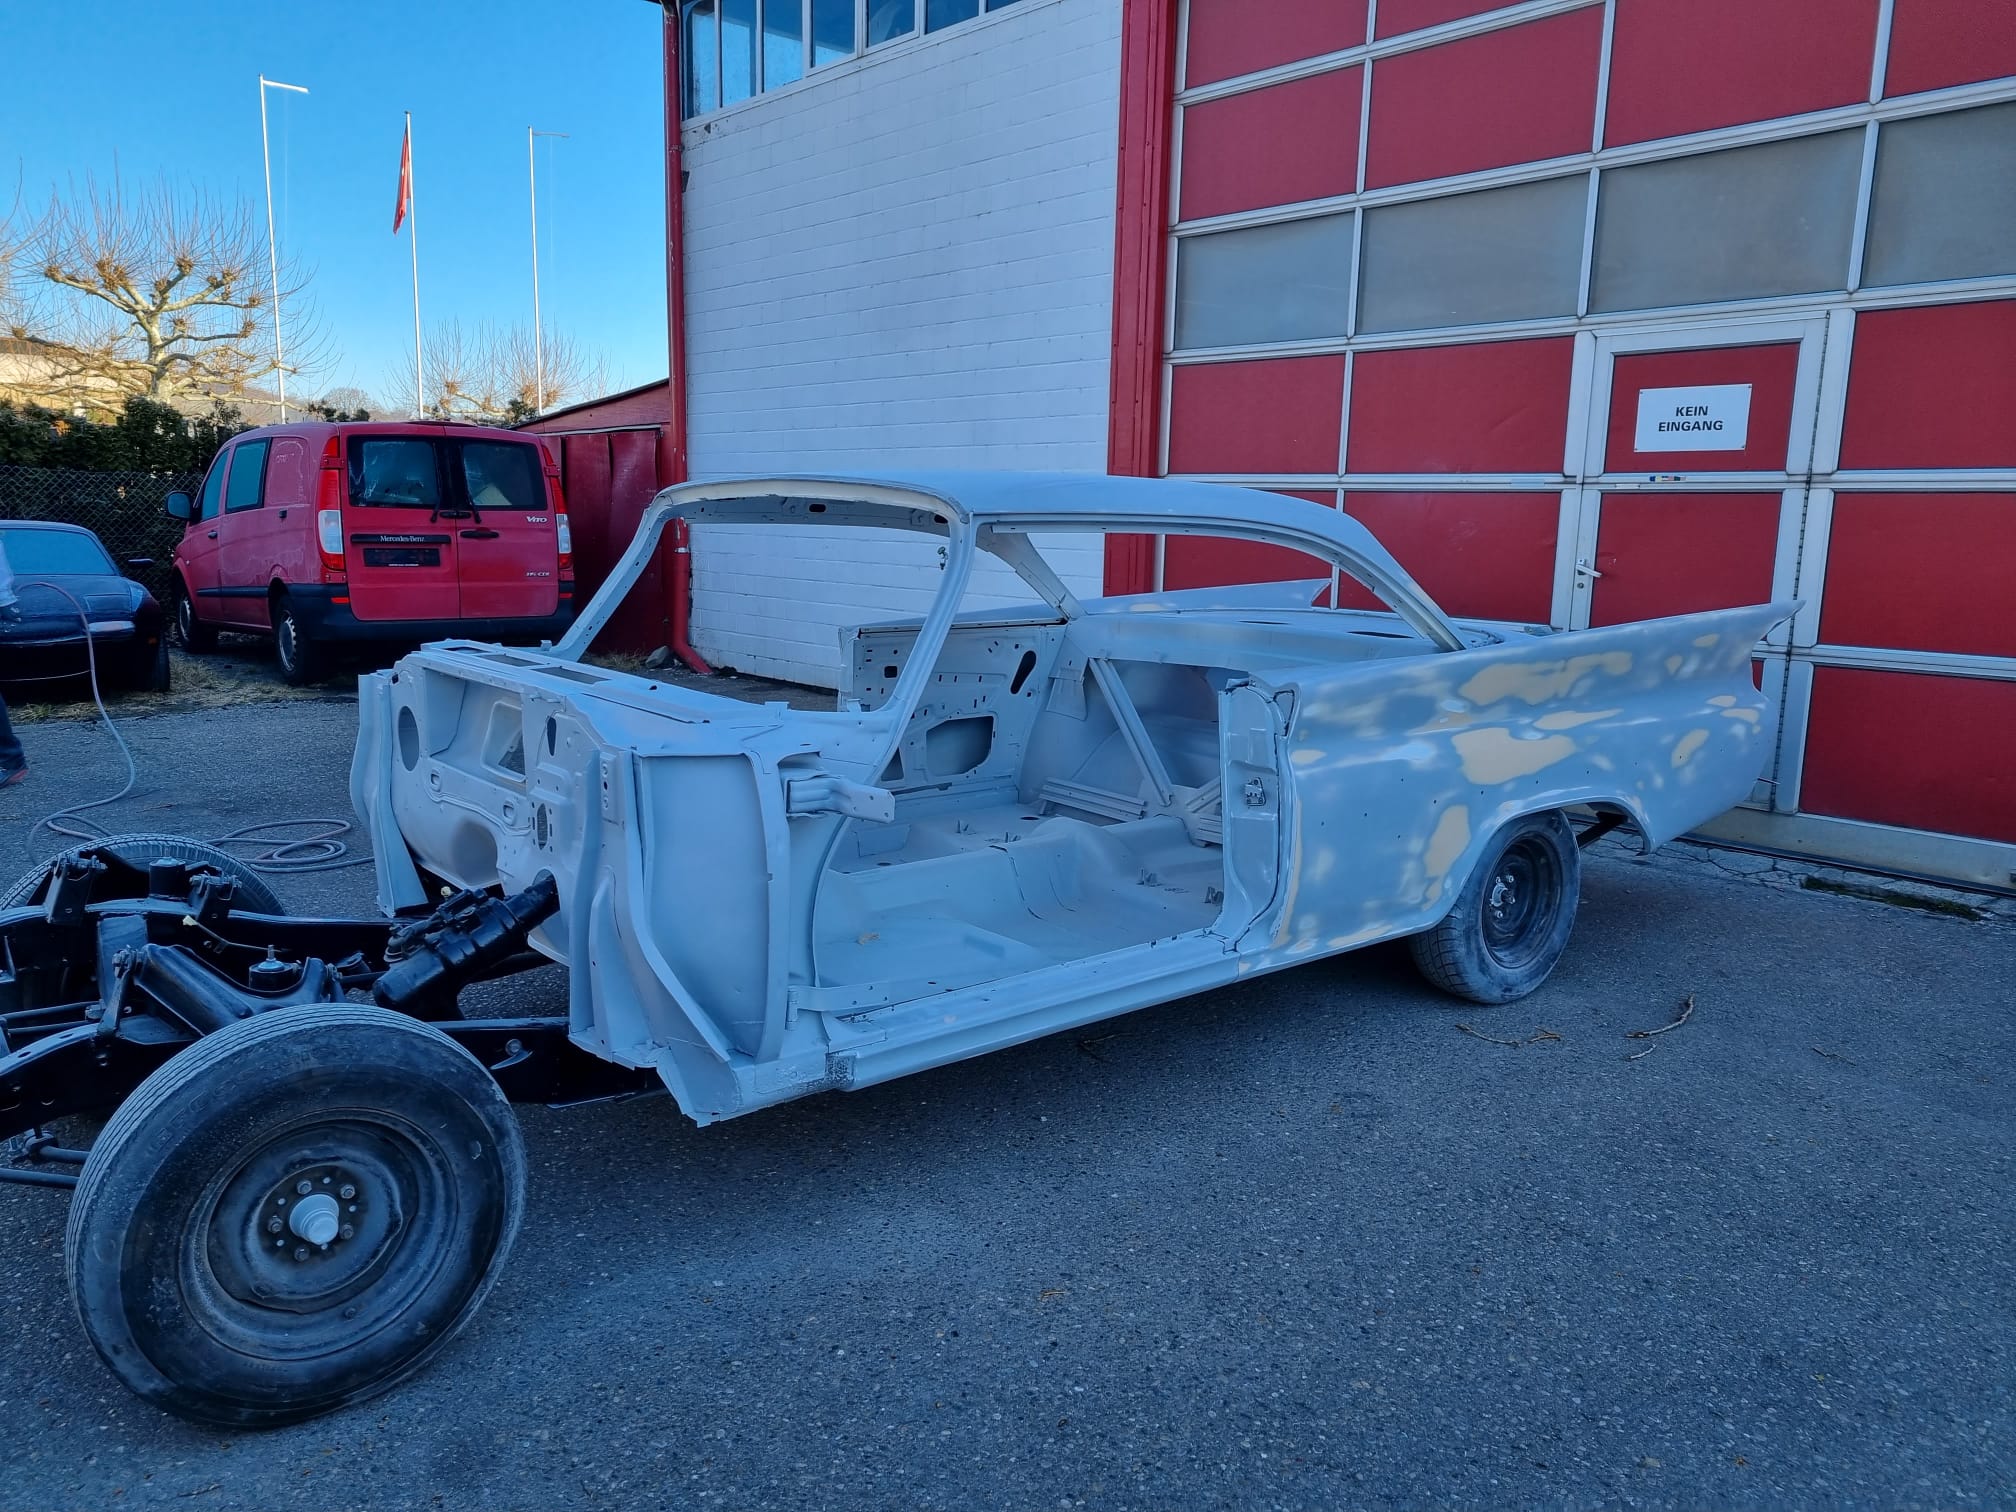 (KSZJ1160 body drivers side.JPG) (KSZJ1160 body drivers side.JPG)
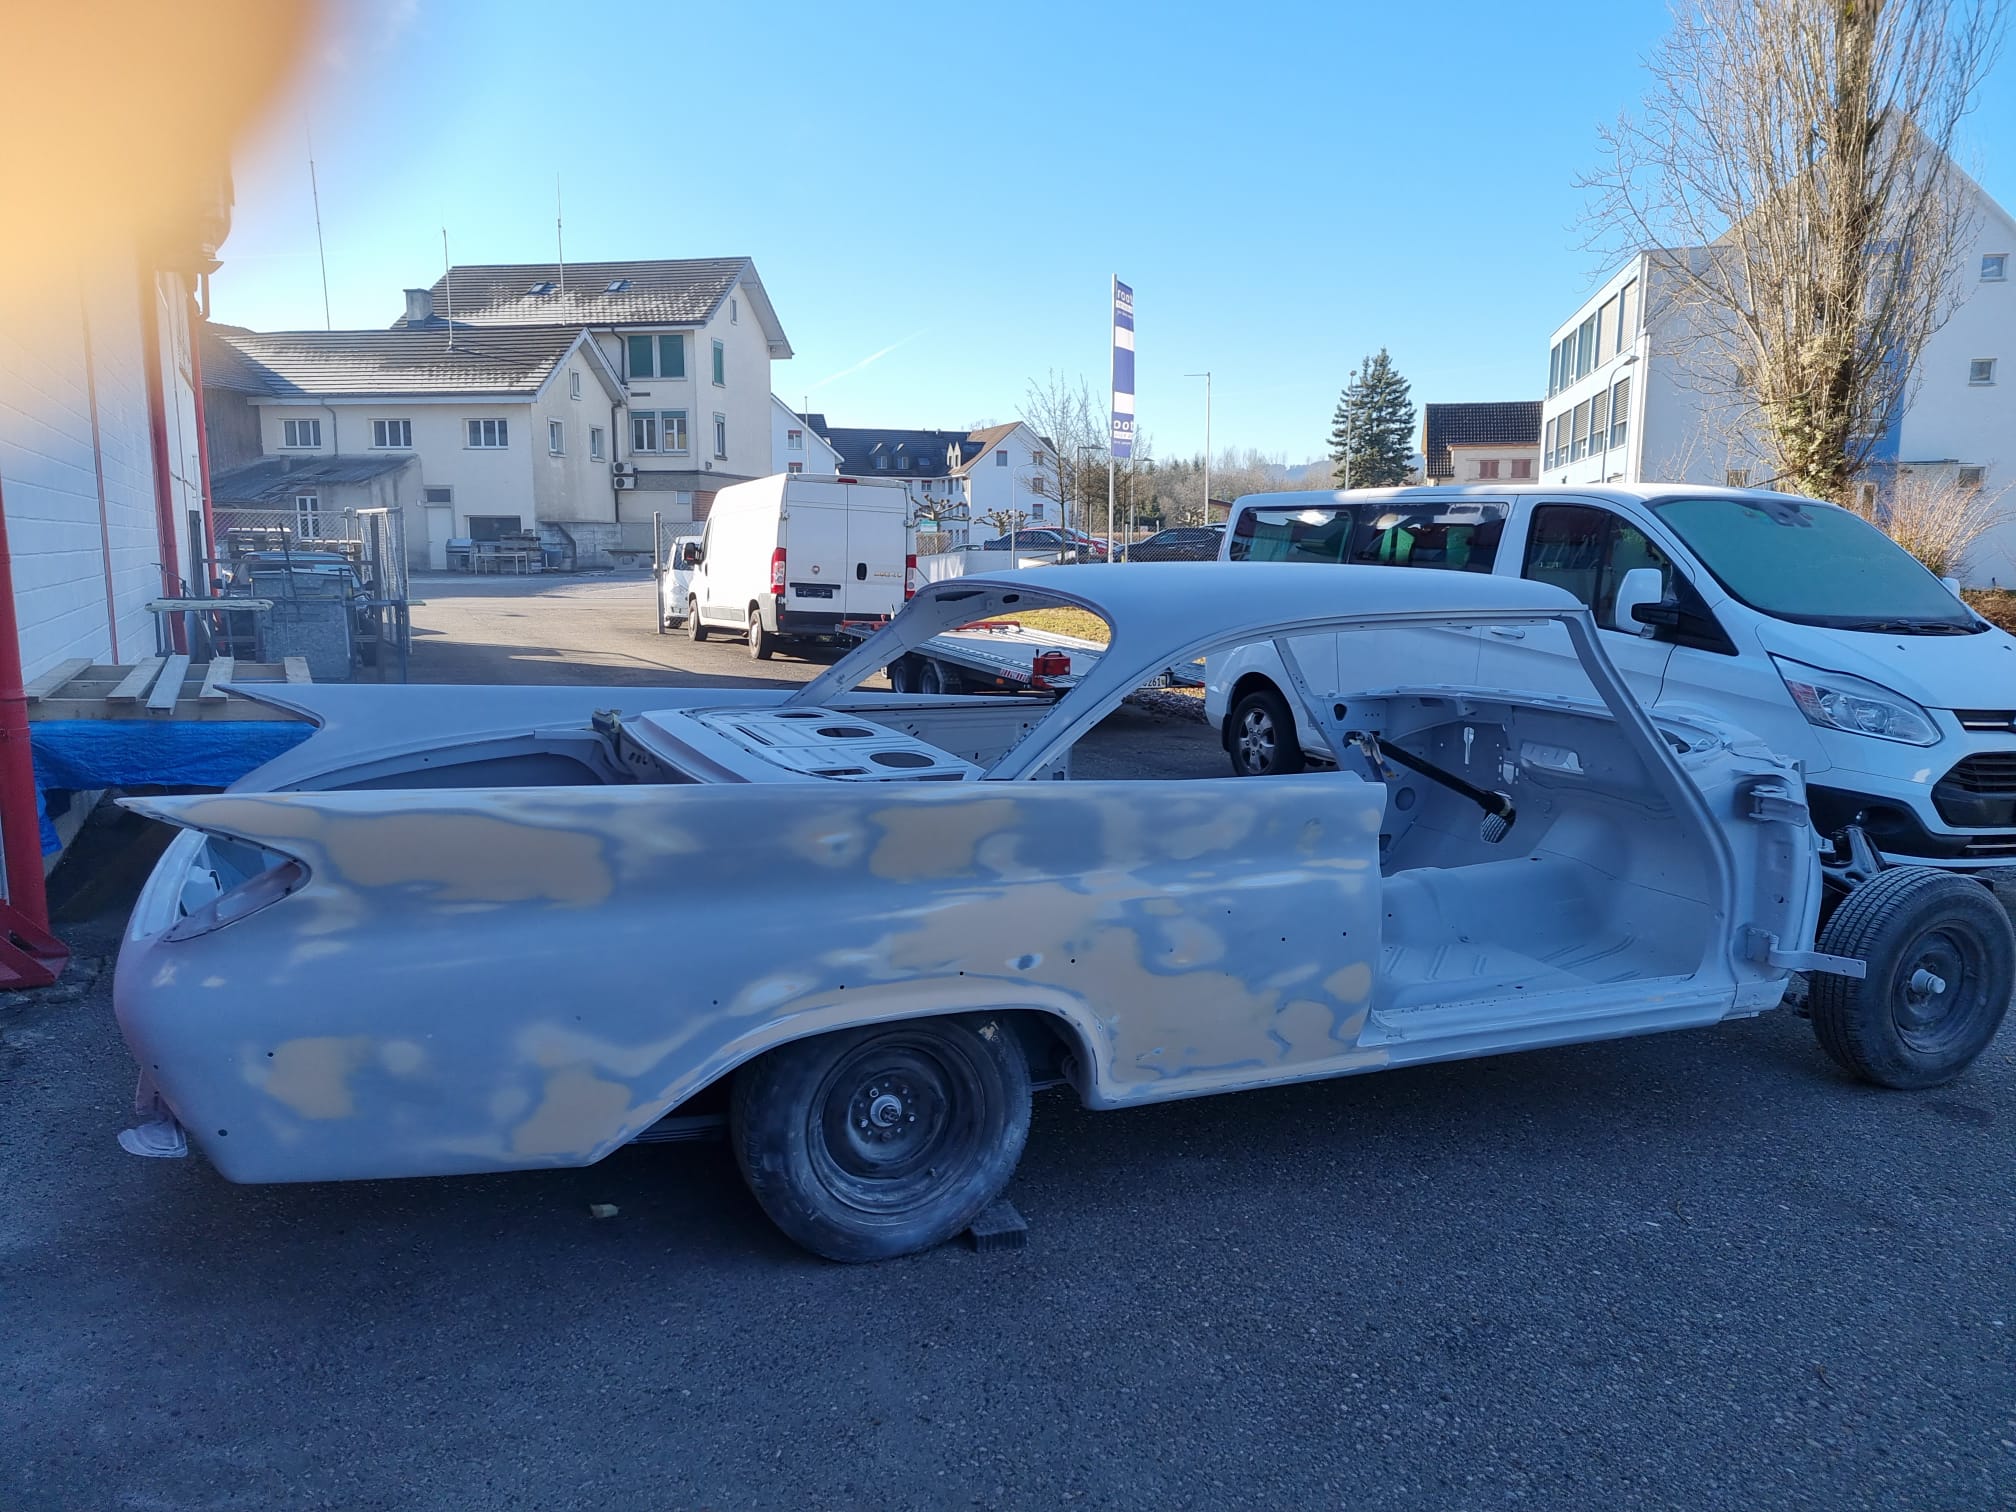 (OCKS3558 body passenger side.JPG) (OCKS3558 body passenger side.JPG)
 (KEEL9478 body three quart right side view.JPG) (KEEL9478 body three quart right side view.JPG)
 (LYXY1864 body three quart left side view.JPG) (LYXY1864 body three quart left side view.JPG)
 (JQYL2777 body firewall front view.JPG) (JQYL2777 body firewall front view.JPG)
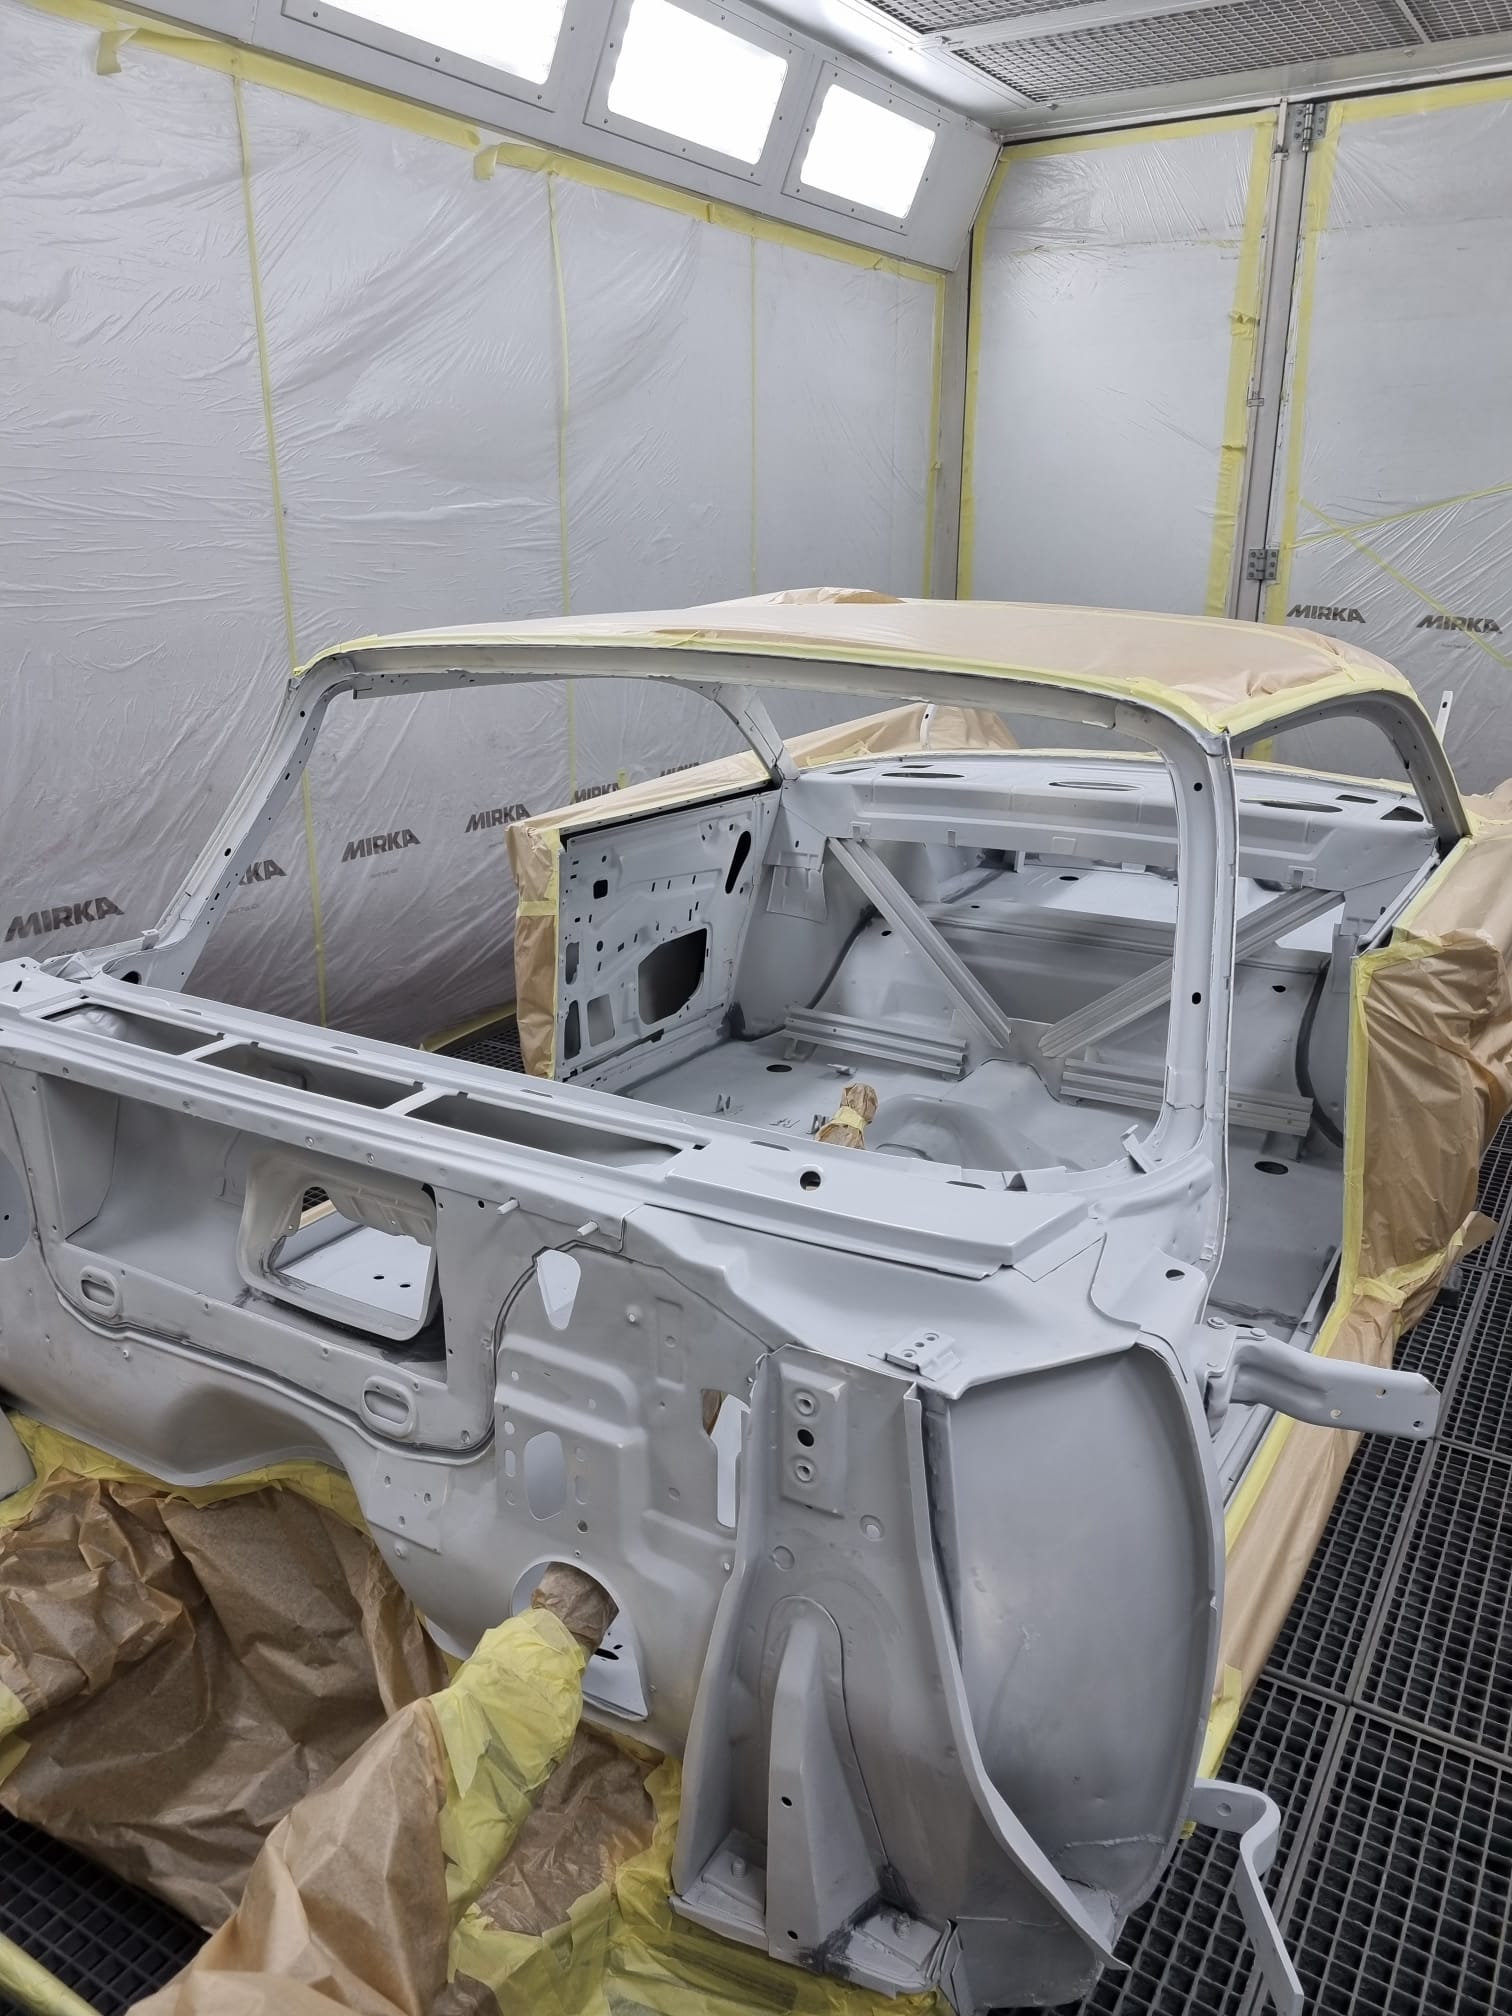 (UUBF6478 body firewall three quart drivers side view.JPG) (UUBF6478 body firewall three quart drivers side view.JPG)
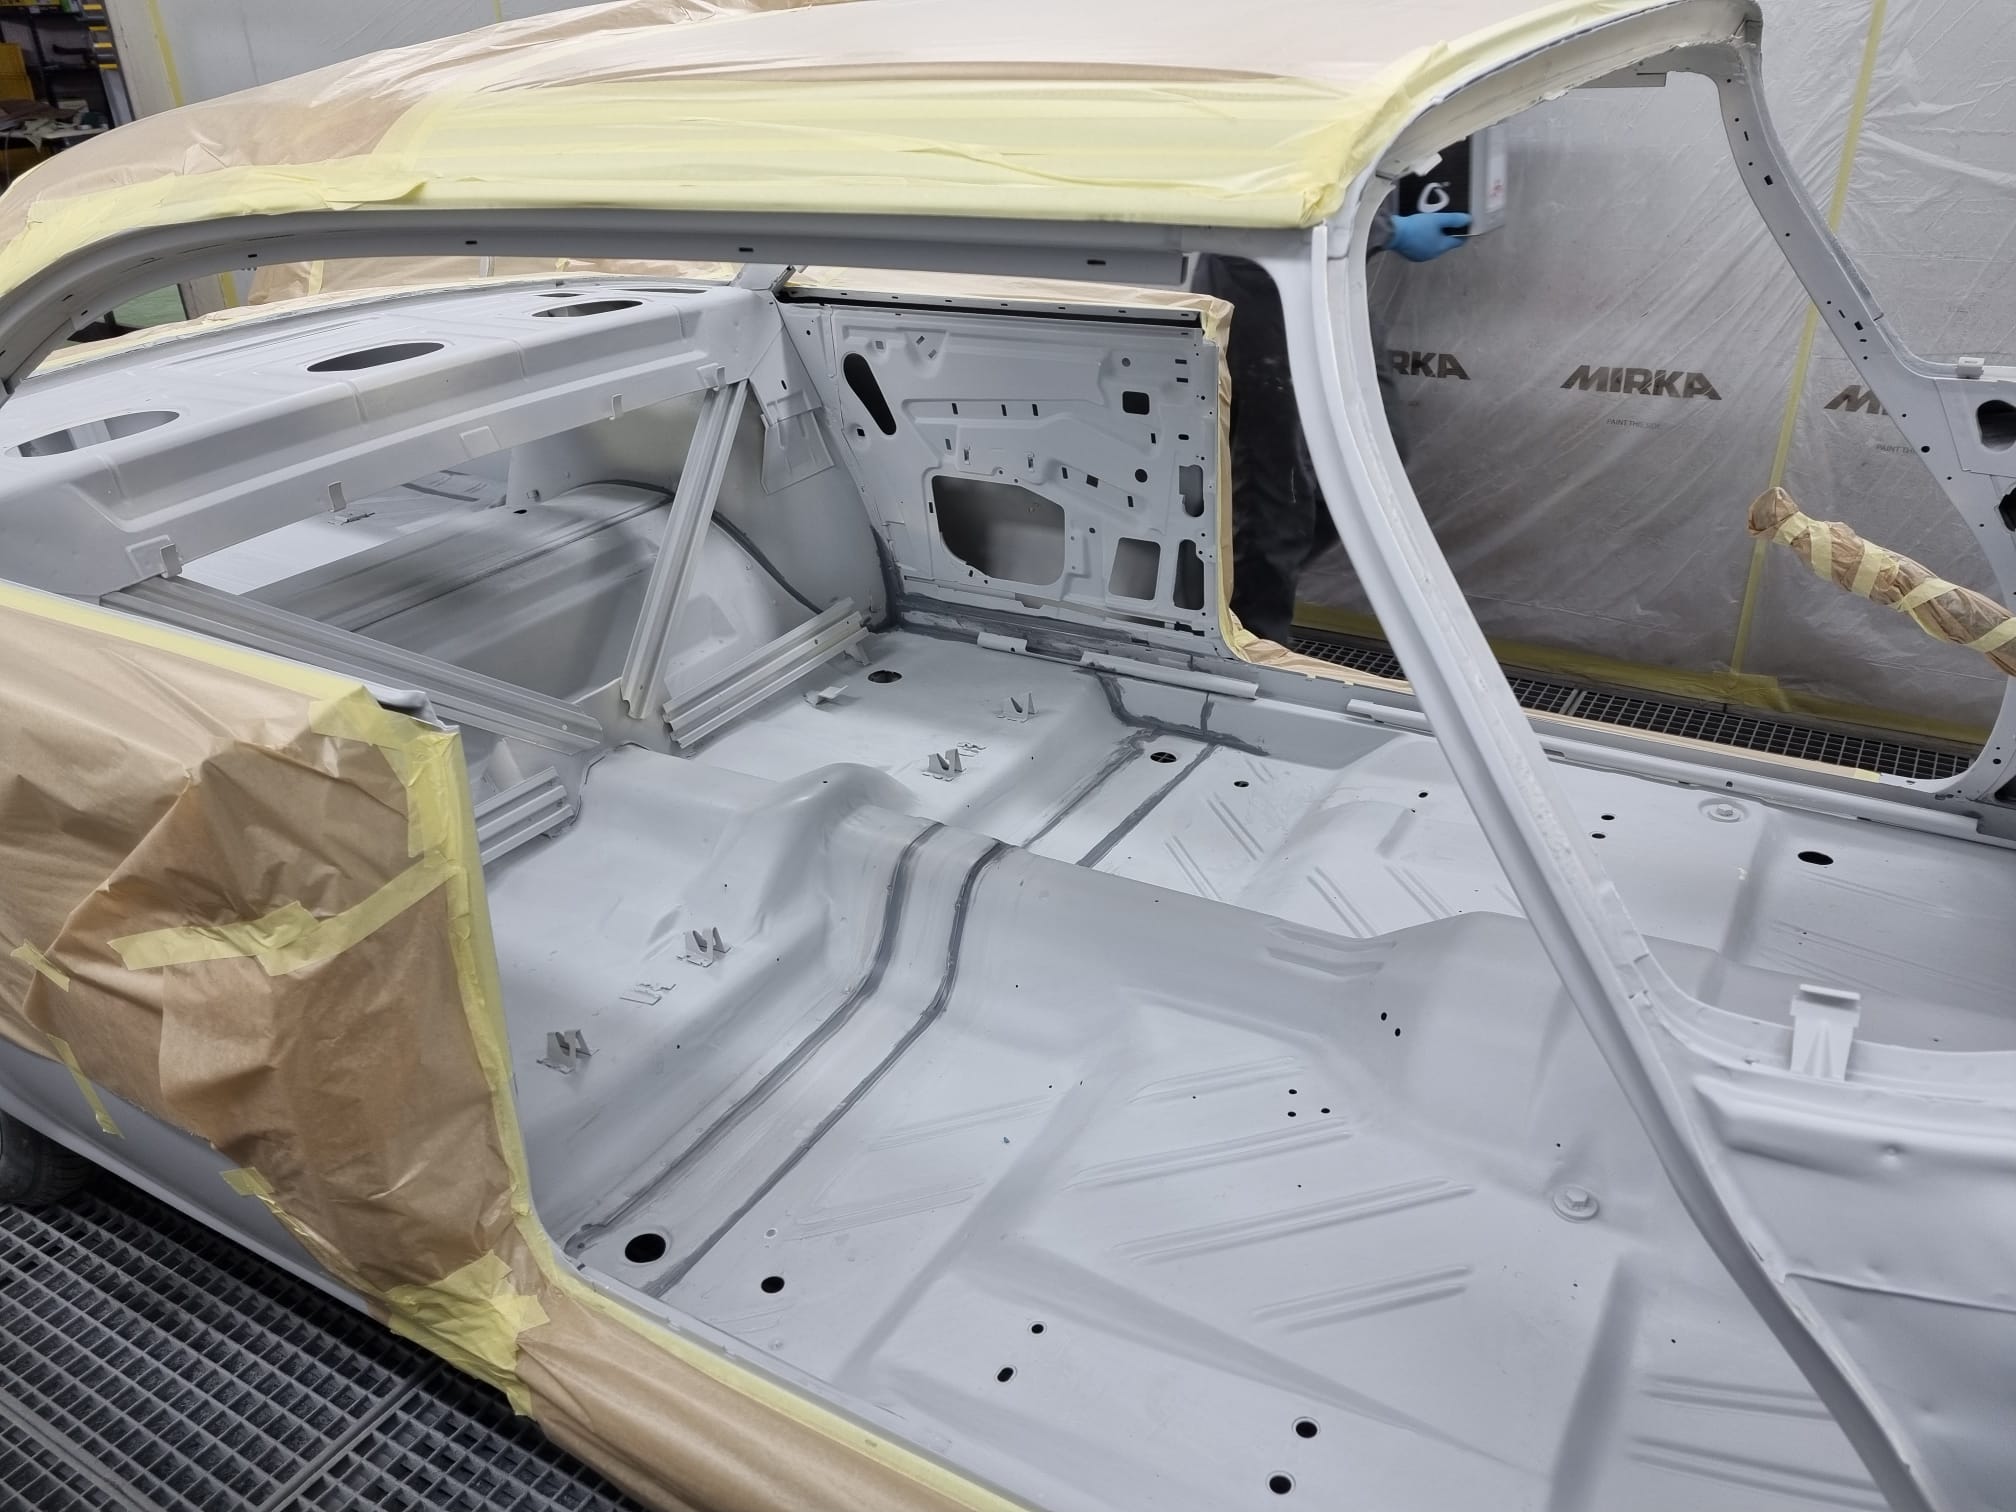 (WORL0243 body three quart view to inside sealed.JPG) (WORL0243 body three quart view to inside sealed.JPG)
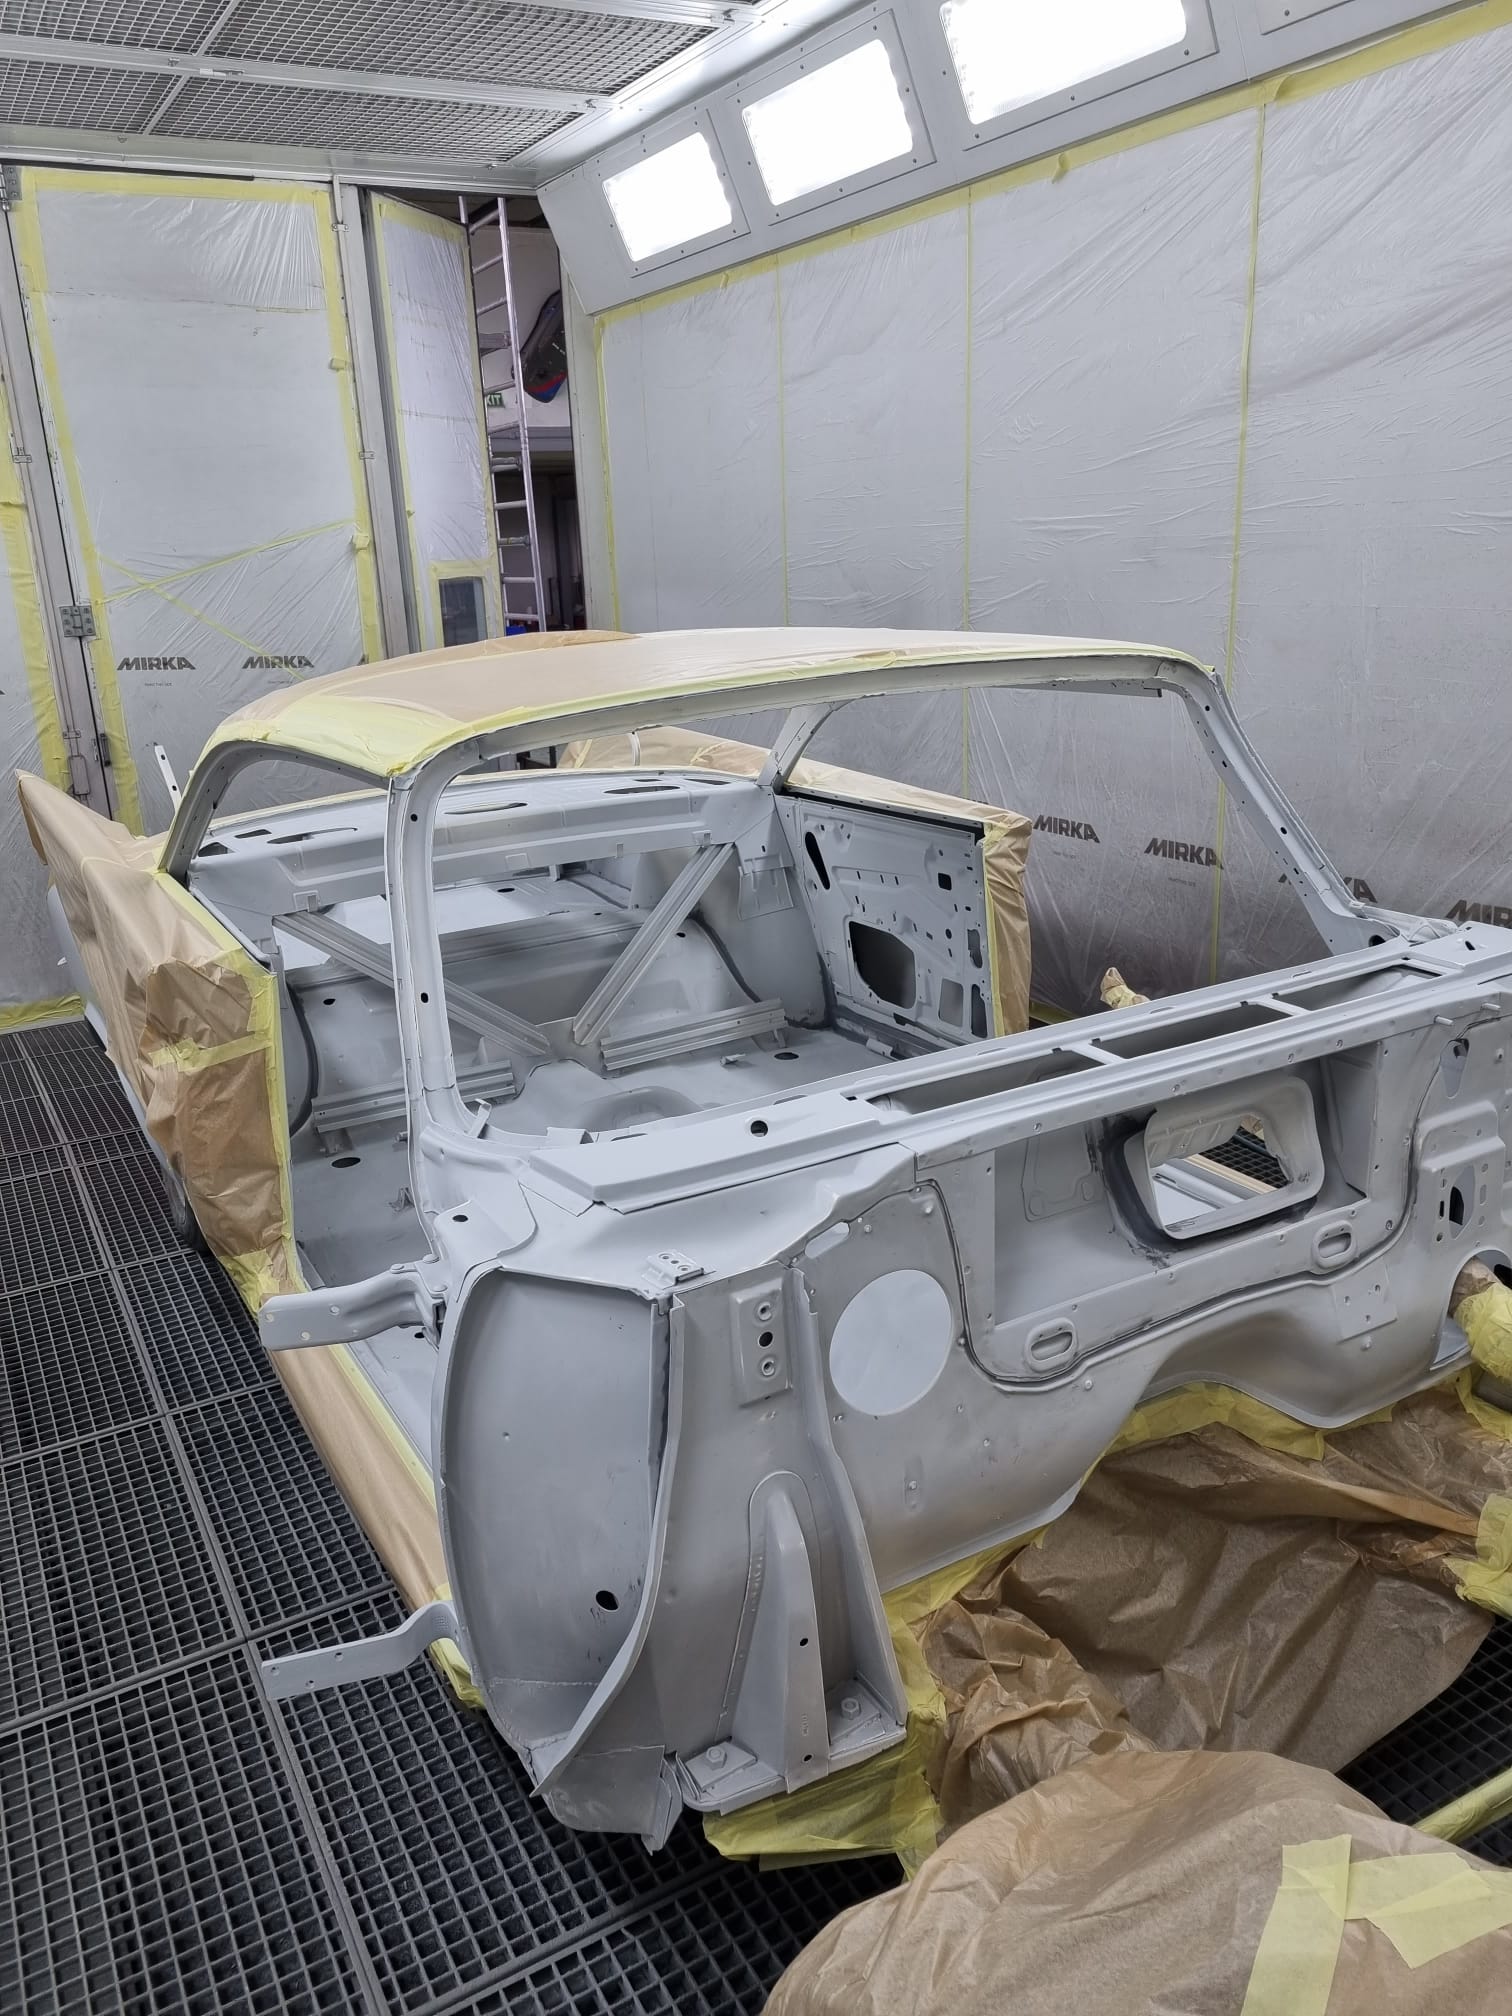 (NGGL4087 body firewall three quart passenger side front view.JPG) (NGGL4087 body firewall three quart passenger side front view.JPG)
 (MSPZ6740 body three quart front view passenger compartment painted.JPG) (MSPZ6740 body three quart front view passenger compartment painted.JPG)
 (UIIX1679 body sixty degree front view drivers side passenger compartment painted.JPG) (UIIX1679 body sixty degree front view drivers side passenger compartment painted.JPG)
 (YCPI2690 body three quart top view trunk painted.JPG) (YCPI2690 body three quart top view trunk painted.JPG)
Attachments
----------------
KSZJ1160 body drivers side.JPG (441KB - 175 downloads)
OCKS3558 body passenger side.JPG (387KB - 173 downloads)
KEEL9478 body three quart right side view.JPG (406KB - 178 downloads)
LYXY1864 body three quart left side view.JPG (390KB - 164 downloads)
JQYL2777 body firewall front view.JPG (324KB - 168 downloads)
UUBF6478 body firewall three quart drivers side view.JPG (307KB - 170 downloads)
WORL0243 body three quart view to inside sealed.JPG (254KB - 163 downloads)
NGGL4087 body firewall three quart passenger side front view.JPG (376KB - 164 downloads)
MSPZ6740 body three quart front view passenger compartment painted.JPG (337KB - 168 downloads)
UIIX1679 body sixty degree front view drivers side passenger compartment painted.JPG (295KB - 181 downloads)
YCPI2690 body three quart top view trunk painted.JPG (195KB - 169 downloads)
|
|
| |
|
Board Moderator & Exner Expert 10K+
Posts: 13045
Location: Southern Sweden - Sturkö island | Very professional work indeed. It will be a fantastic car when it's ready! |
|
| |
|
Expert
Posts: 1530
Location: ZH, Switzerland | Yesterday afternoon I went to the paint and body shop. The body is painted now. The Letter looks wonderful in the original color. Pictures later. I tired to remove the washing water nozzle at the cowl vent. With no success (electrochemical corrosion, the cowl vent is made out aluminum). Many times CRC 5-56 penetrating oil applied. Furthermore some marks from laying on tree leafs for years (coloration). I do not want to destroy the nozzle (very hard to get for me). Happy Restoring! Dieter
Edited by di_ch_NY56 2022-02-23 2:22 AM
 (IMG_9762.JPG windshield water nozzle installed top side.JPG) (IMG_9762.JPG windshield water nozzle installed top side.JPG)
 (IMG_9761 windshield water nozzle installed bottom side.JPG) (IMG_9761 windshield water nozzle installed bottom side.JPG)
Attachments
----------------
IMG_9762.JPG windshield water nozzle installed top side.JPG (250KB - 175 downloads)
IMG_9761 windshield water nozzle installed bottom side.JPG (297KB - 172 downloads)
|
|
| |
|
Board Moderator & Exner Expert 10K+
Posts: 13045
Location: Southern Sweden - Sturkö island | Two possibilities Dieter,
- Apply heat from a fan heat-gun
- Split the nut with a Dremel grinder with cutting discs
You will always find a nut, the nozzle is worse..... |
|
| |
|
Expert
Posts: 1530
Location: ZH, Switzerland | With patience I got it out. One nozzle has a slight sign from the bench vise (with emerald paper between). Happy Restoring! Dieter |
|
| |
|
Elite Veteran
Posts: 1157
Location: D-70199 Heslach | Dieter, the inner paintshop looks perfect,- as I expect
now waiting for the outer paint....
|
|
| |
|
Expert
Posts: 1530
Location: ZH, Switzerland | Thanks Tom On Saturday I'll be at the paint & body shop again. I'll take and I'll get some pictures. The cowl vent intake insert (two versions) is made out of aluminum. I'll take it with me to the body&paint shop to look what we can do... Happy Restoring! Dieter |
|
| |
|
Board Moderator & Exner Expert 10K+
Posts: 13045
Location: Southern Sweden - Sturkö island | The cowl vent should have been painted Dieter.
I've seen the anodized cowl vents on some cars, but I'm not sure which cars that had them. |
|
| |
|
Expert
Posts: 1530
Location: ZH, Switzerland | This morning I visited the body&paint shop once again. I was astonished when I saw my Letter. We relocated the Letter to mount both front doors and the front end, except the inner fenders (not mounted until the engine is in). For the whole front end all new screws, hex nuts, washers. On Monday the boss of the shop and his employee will install the hood and do the final polish of the color. My job I to bring the door locks to secure the doors for the transport to me. Most probably next week. Happy Restoring! Dieter BTW: installing were the boss of the body/paint shop and me
BTW2: The whole front suspension needs an adjustment for sure, ball joints included (at the first location the parts were ejected into the air and fell together as they are now).
Edited by di_ch_NY56 2022-02-26 12:40 PM
 (IMG_9773 first impression rear view.JPG) (IMG_9773 first impression rear view.JPG)
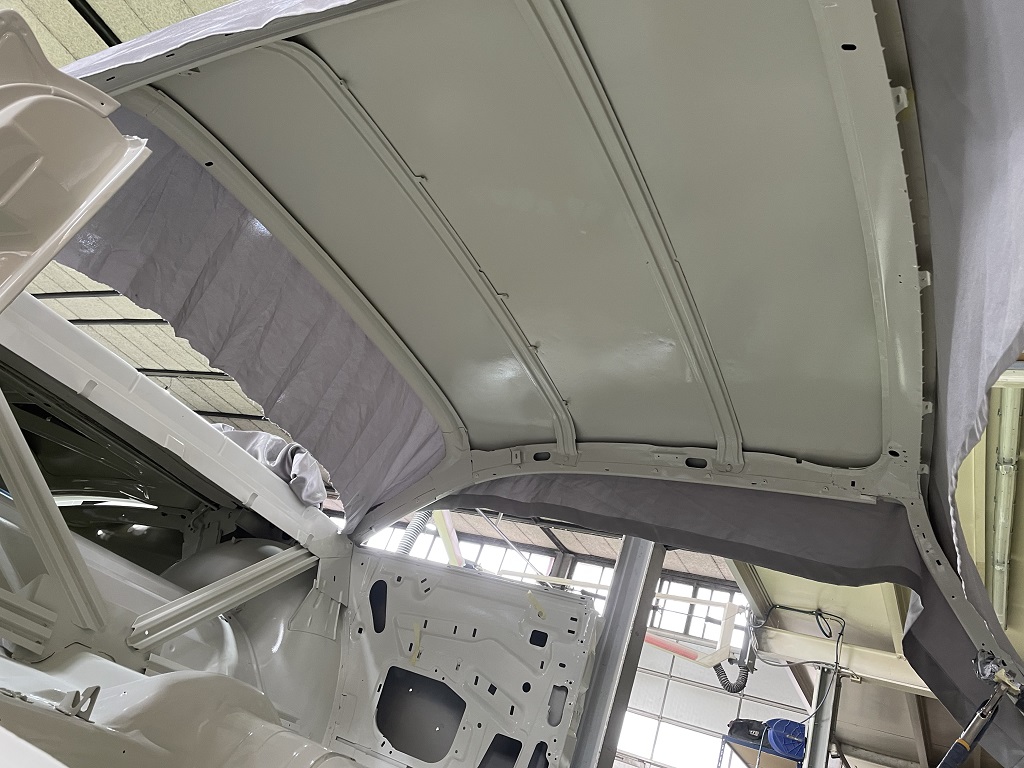 (IMG_9781 roof inside view.JPG) (IMG_9781 roof inside view.JPG)
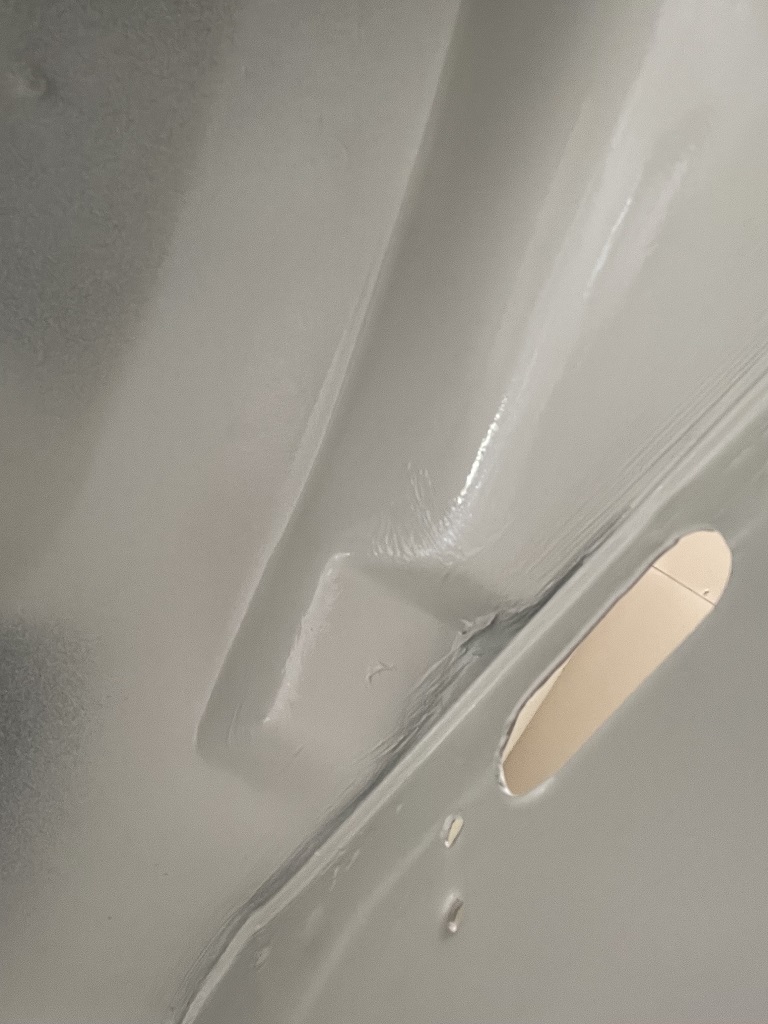 (IMG_9783 cowl inside view.JPG) (IMG_9783 cowl inside view.JPG)
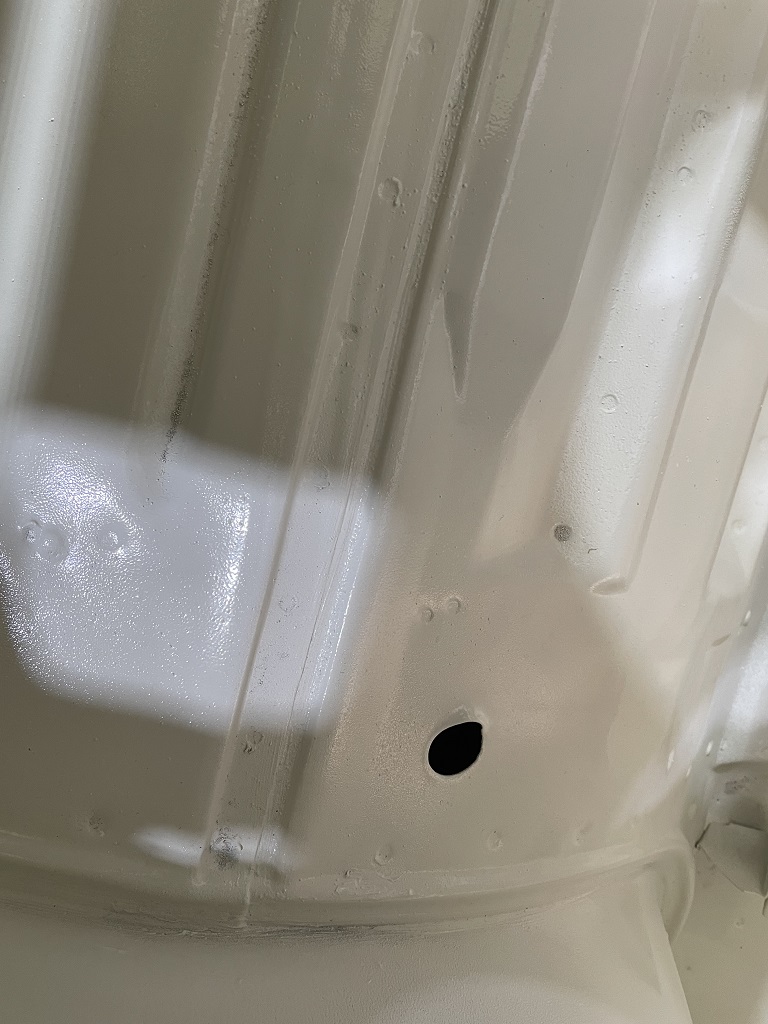 (IMG_9784 hat table bottom view.JPG) (IMG_9784 hat table bottom view.JPG)
 (IMG_9782 my screw collection.JPG) (IMG_9782 my screw collection.JPG)
 (IMG_9789 assembly time drivers side front fender mounted.JPG) (IMG_9789 assembly time drivers side front fender mounted.JPG)
Attachments
----------------
IMG_9773 first impression rear view.JPG (280KB - 170 downloads)
IMG_9781 roof inside view.JPG (240KB - 165 downloads)
IMG_9783 cowl inside view.JPG (214KB - 172 downloads)
IMG_9784 hat table bottom view.JPG (202KB - 173 downloads)
IMG_9782 my screw collection.JPG (336KB - 159 downloads)
IMG_9789 assembly time drivers side front fender mounted.JPG (285KB - 168 downloads)
|
|
| |
|
Board Moderator & Exner Expert 10K+
Posts: 13045
Location: Southern Sweden - Sturkö island | Sweet, they were never that good from the factory... |
|
| |
|
Expert
Posts: 1530
Location: ZH, Switzerland | Ready to ship, but my employer (driving several different BMW M models, and three Lambos, jealous) does everything, that I cannot get it... (second part of the amount paid). Happy Restoring
 (MYLN9966 three quart front view (bird view passenger side).JPG) (MYLN9966 three quart front view (bird view passenger side).JPG)
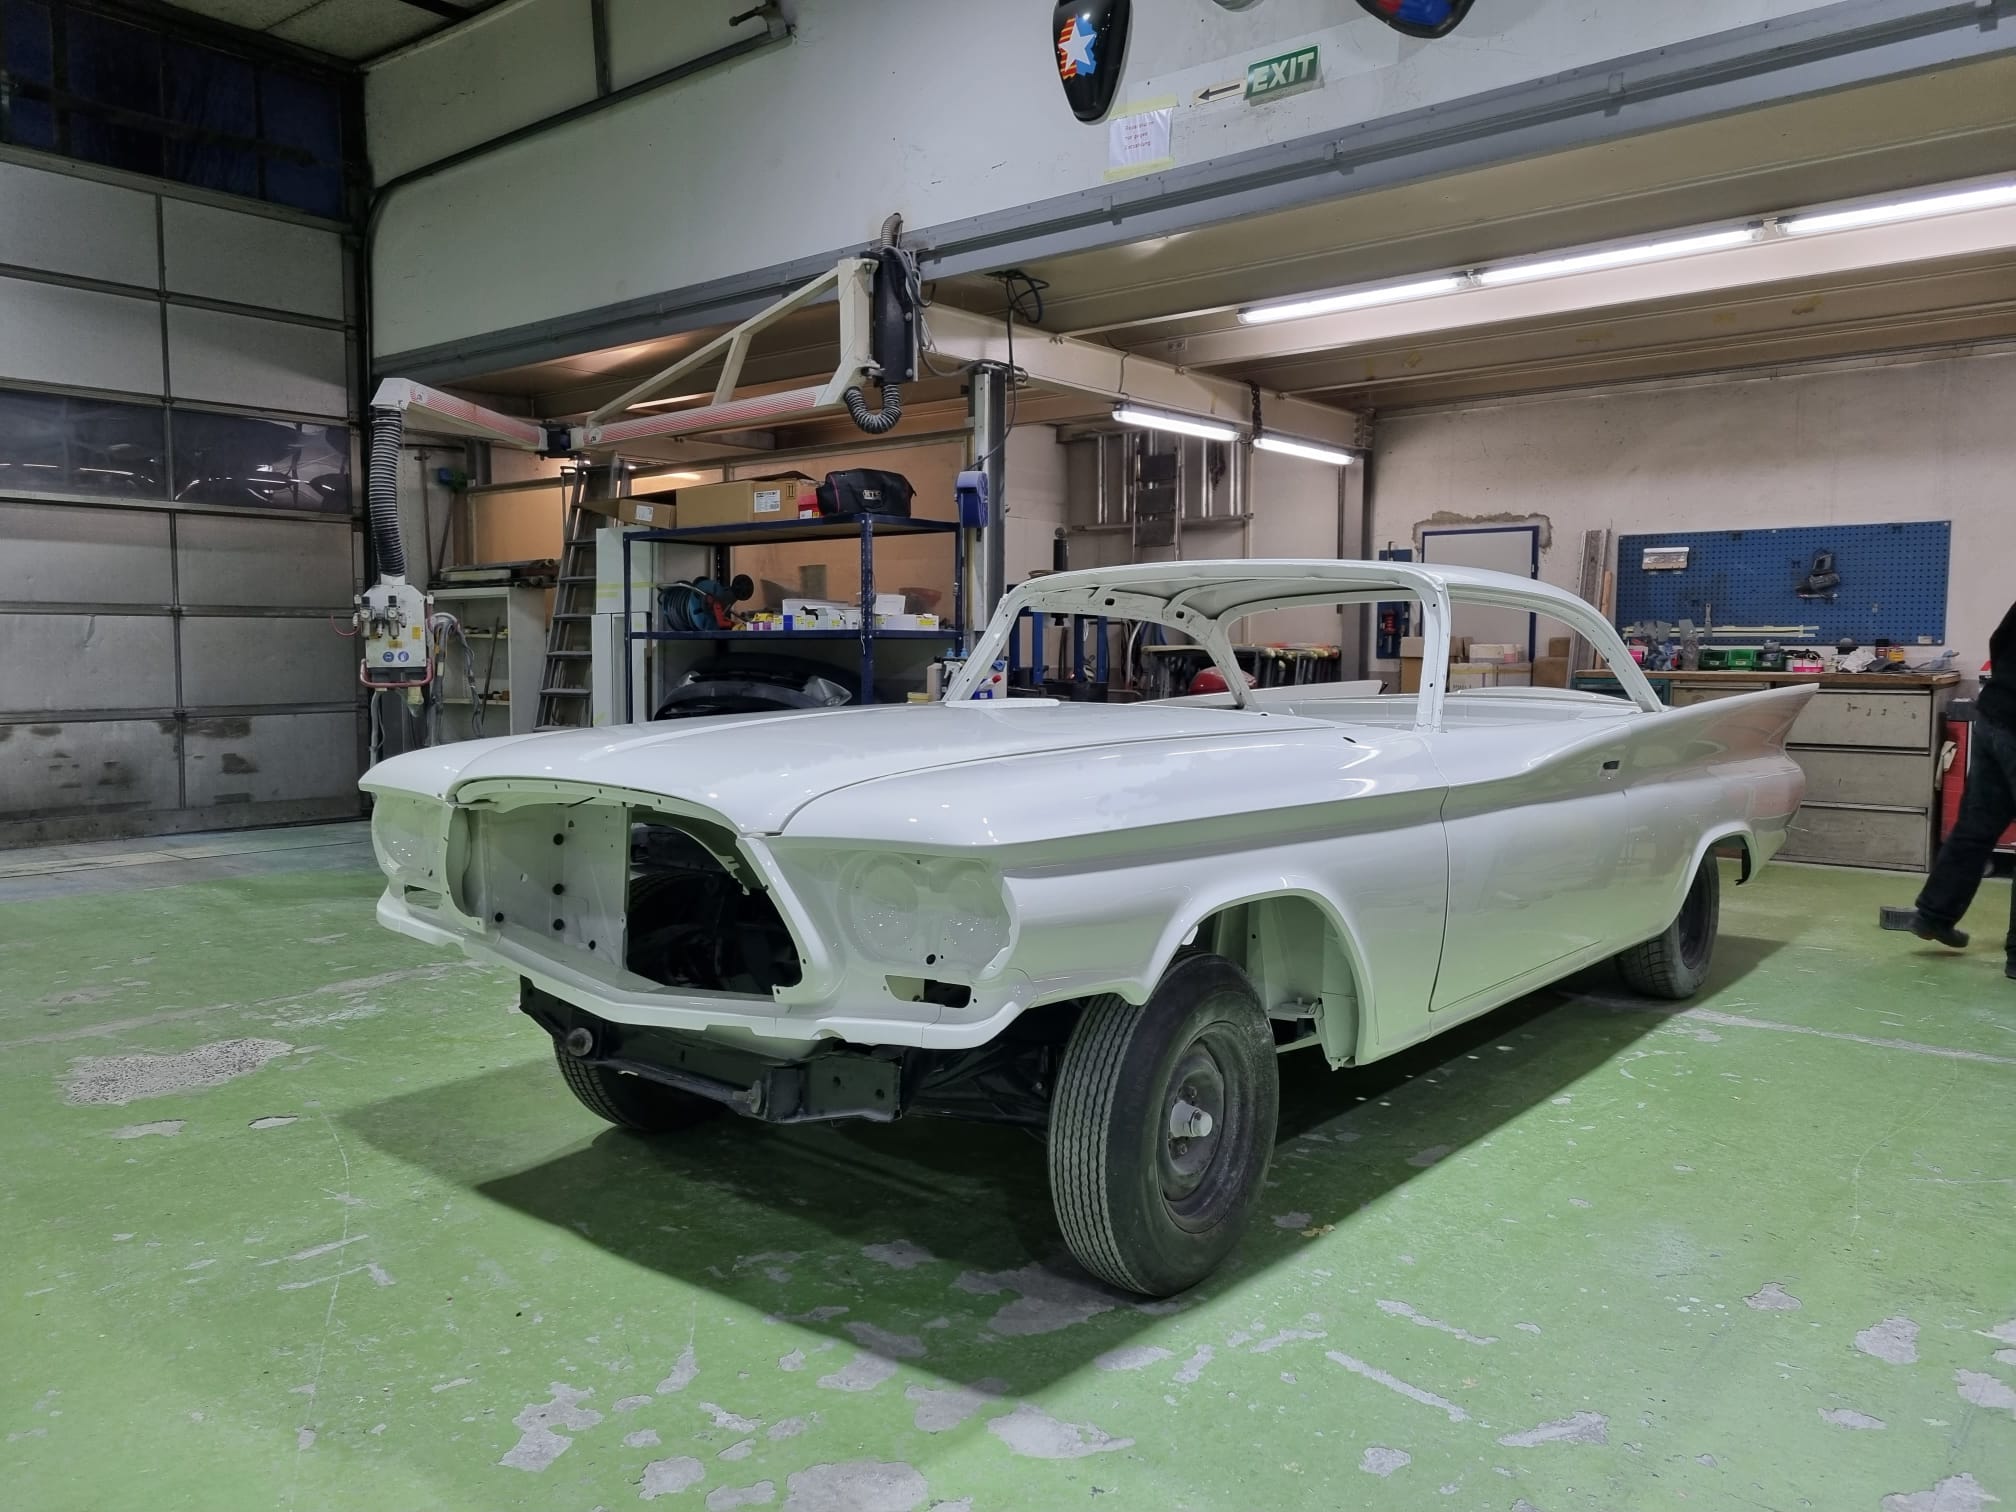 (PGXV0021 three quart front view (drivers side).JPG) (PGXV0021 three quart front view (drivers side).JPG)
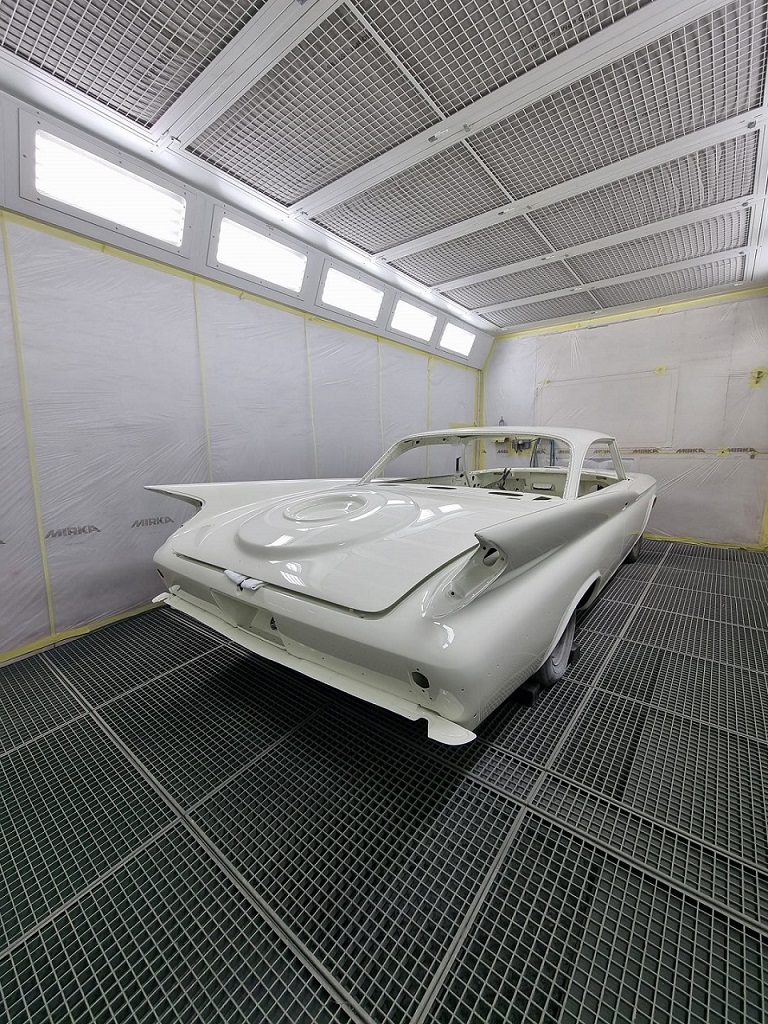 (OKSI4967 three quart rear view (passenger side).JPG) (OKSI4967 three quart rear view (passenger side).JPG)
Attachments
----------------
MYLN9966 three quart front view (bird view passenger side).JPG (410KB - 161 downloads)
PGXV0021 three quart front view (drivers side).JPG (294KB - 170 downloads)
OKSI4967 three quart rear view (passenger side).JPG (400KB - 165 downloads)
|
|
| |
|
Board Moderator & Exner Expert 10K+
Posts: 13045
Location: Southern Sweden - Sturkö island | Very nice Dieter, it will be fun to start mounting the car now! |
|
| |
|
Expert
Posts: 3967
Location: DFW, TX | Spectacular! Beautiful work they have done on your 300. Congratulations. |
|
| |
|
Regular
Posts: 62
Location: arizona | Looks amazing. Phenomenal job |
|
| |
|
Expert
Posts: 1530
Location: ZH, Switzerland | Thanks you very much for your comments. In the mean time I mounted the fuel tank with the sender in it, the whole fuel line to the exit of the front subframe, the inner and outer door openers. As the pictures are telling, it looks like I have the get out the clips with the fuel line at the passenger side as well to fiddle out the resting sand blasting sand. I applied on several areas transparent fluid wax out of rattle can to preserve the seams, but the front end needs some more. Happy Restoring! Dieter
 (IMG_9873 sand blasting sand in the drivers side rocker.JPG) (IMG_9873 sand blasting sand in the drivers side rocker.JPG)
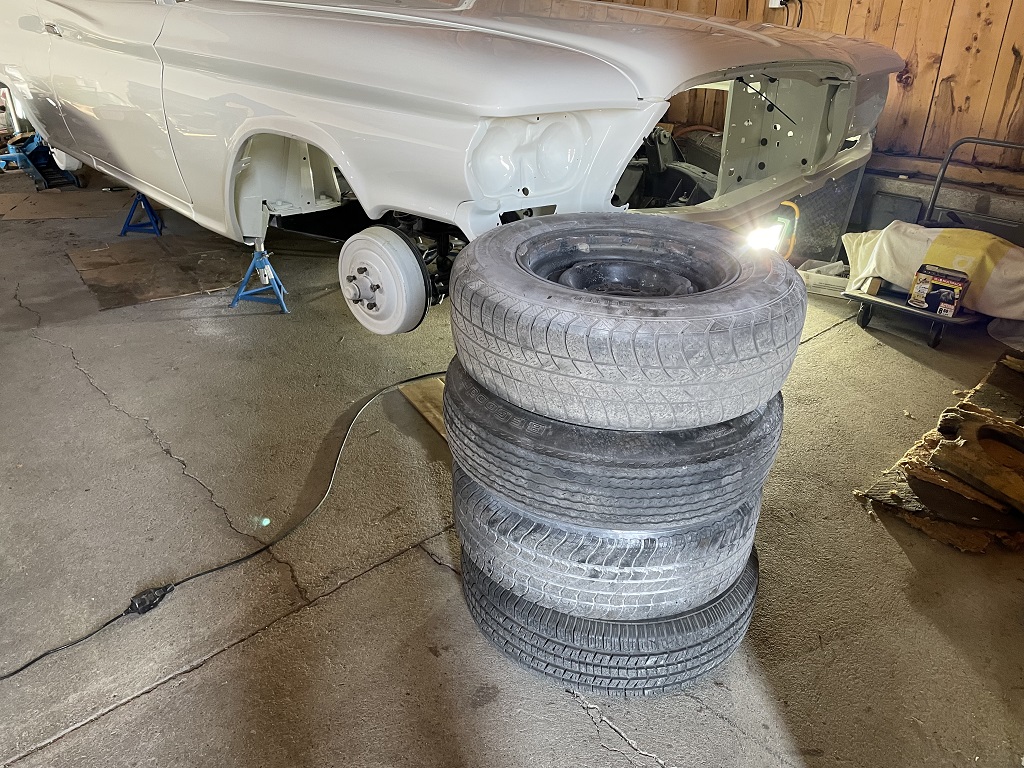 (IMG_9874 wheels removed to get sand blasted and new tires.JPG) (IMG_9874 wheels removed to get sand blasted and new tires.JPG)
Attachments
----------------
IMG_9873 sand blasting sand in the drivers side rocker.JPG (394KB - 163 downloads)
IMG_9874 wheels removed to get sand blasted and new tires.JPG (385KB - 155 downloads)
|
|
| |
|
Board Moderator & Exner Expert 10K+
Posts: 13045
Location: Southern Sweden - Sturkö island | Back in the barn again Dieter. Now the interesting works ahead. |
|
| |
|
Elite Veteran
Posts: 1157
Location: D-70199 Heslach | The best job starts now. Assemble all the nice parts.... |
|
| |
|
Expert
Posts: 1530
Location: ZH, Switzerland | The door locks are installed, both doors do close very smooth. But the drivers side door is a little bit too far in, how to adjust, except adjusting the body mounted part? Still more than enough sandblasting sand in both front ends of the rockers. I was working it out with a small painting brush and all the fingers of my hands. No air compressor today (Sunday). More works on removing sandblasting sand next Saturday. The exhaust hangers are temporary mounted on both sides, but the screws not fully tighned. The clips (3) are off from the fuel line. When the rockers are quite enough free from sandblasting sand, through these holes I'll apply transparent fluid wax (very good quality, but not cheep). Happy Restoring! Dieter
 (IMG_9908 better illumination now.JPG) (IMG_9908 better illumination now.JPG)
 (IMG_9909 still more than enough sandblasting sand in the front area of both rockers.JPG) (IMG_9909 still more than enough sandblasting sand in the front area of both rockers.JPG)
 (IMG_9911 drivers door closed a little too far in.JPG) (IMG_9911 drivers door closed a little too far in.JPG)
Attachments
----------------
IMG_9908 better illumination now.JPG (388KB - 147 downloads)
IMG_9909 still more than enough sandblasting sand in the front area of both rockers.JPG (202KB - 156 downloads)
IMG_9911 drivers door closed a little too far in.JPG (149KB - 159 downloads)
|
|
| |
|
Board Moderator & Exner Expert 10K+
Posts: 13045
Location: Southern Sweden - Sturkö island | Dieter, mount the door weatherstrip first. This might be just enough to get a more proper alignment. If not, the door lock catch mounted to the pillar can be adjusted to the best fit. |
|
| |
|
Expert
Posts: 1530
Location: ZH, Switzerland | wizard - 2022-03-19 8:17 PM Dieter, mount the door weatherstrip first. This might be just enough to get a more proper alignment. If not, the door lock catch mounted to the pillar can be adjusted to the best fit. Thanks. I used the biggest cross blase screw driver and the impact driver with the fitting cross blade to try to open the screws at the striker plate - no success. Yesterday once again 4 hours removing sand blasting sand (with lowered air volume at the nozzel I got better results). From the rear wheel well I noticed at the start up to a thickness of 1 centimeter sand blasting sand in the rockers and longitudinal rails in the rear axle well, as wel in the two boxes under the rear seats accessible from the bottom and internally connected the longitudinal rails at the the end sheet of the propeller shaft tunnel. In the rails of the front Subframe as well - Sand Blast Sand removed... So one more full Saturday afternoon as Sand Blasting residuals removing... Happy Restoring! Dieter |
|
| |
|
Board Moderator & Exner Expert 10K+
Posts: 13045
Location: Southern Sweden - Sturkö island | Youtube must try reach the screws from the backside and soak the threads with rust penetrating fluid.
Get a PH3 screw bit for 1/4" ratchet and try.
If the screw heads are worn you can get diamond powder paste - it will help to get optimum grip.
Heat is not and option now that the car is painted. |
|
| |
|
Expert
Posts: 1530
Location: ZH, Switzerland | wizard - 2022-03-26 2:52 PM Youtube must try reach the screws from the backside and soak the threads with rust penetrating fluid. Get a PH3 screw bit for 1/4" ratchet and try. If the screw heads are worn you can get diamond powder paste - it will help to get optimum grip. Heat is not and option now that the car is painted. I guess you'll see now what's the problem... in my opinion, drill out the heads and separate the striker plate from the back plate (different position as the one on the passenger side... visible from the slot of the quarter window). Then apply loads of heat (until red glowing), then from the back with a vise grip (plate in the bench vise) - hypothetically I could save the plate and the threads in it. Then purchase a few of these screws. Happy Restoring Dieter BTW: the wing nut at the threaded stem (battery tray, to hold down the battery) was solid frozen. First I tried 5-56, then the propane torch. Finally with wiggling it break free.
 (IMG_9940 striker plate drivers side.JPG) (IMG_9940 striker plate drivers side.JPG)
Attachments
----------------
IMG_9940 striker plate drivers side.JPG (186KB - 138 downloads)
|
|
| |
|
Board Moderator & Exner Expert 10K+
Posts: 13045
Location: Southern Sweden - Sturkö island | Yes Dieter, in that state it's yhe only option.
Start with a small drill and work up with larger drills.
Cover the pillar with protective material, perhaps masonite with a cut out as large as the striker. |
|
| |
|
Expert
Posts: 1530
Location: ZH, Switzerland | I got both plates out. The resting stems are out as well. As far as I did measure, the screws are #12-24, about 3/8 inch long. Happy Restoring! Dieter |
|
| |
|
Board Moderator & Exner Expert 10K+
Posts: 13045
Location: Southern Sweden - Sturkö island | Great Dieter!!!! |
|
| |
|
Expert
Posts: 1530
Location: ZH, Switzerland | The dashboard, four rims and some other stuff is sand blasted now. No primer actually. Because both, the boss of the body and paint shop got Corona. On one rime I discovered a stamp 6" x 14". Two rims are that size, the two other slightly wider (e.g. 6.5"). This afternoon I cleaned the floor (loads of quarz sand sucked up with the vac cleaner - from the first location where my Letter was). Again I mounted the clips and did clip in the fuel line after I unloaded the third rattle can of transparent wax (professional grade). I mounted the front and the rear brake (on the axle shaft) distributor. Temporary I did close the openings with adhesive tape that no dust will enter. I checked... new brake cylinders in plastic bags are waiting, as well as a set of brake hoses. All junction steel plates are mounted (from the brake line to the brake hose). I guess I'll take my old brake cylinders with me to measure the flange to compare with the new, to have a look if they will fit. With the driver side LED-lamp I discovered that the tie rod end boot is cracked as well. Hell... where do I get new tie rod ends for my Letter? Happy Easter Season Happy Restoring!
 (IMG_9999 dashboard sand blasted and two of four rims.JPG) (IMG_9999 dashboard sand blasted and two of four rims.JPG)
 (IMG_0001 dashboard sand blasted back side and third out of four rims visible.JPG) (IMG_0001 dashboard sand blasted back side and third out of four rims visible.JPG)
Attachments
----------------
IMG_9999 dashboard sand blasted and two of four rims.JPG (314KB - 124 downloads)
IMG_0001 dashboard sand blasted back side and third out of four rims visible.JPG (322KB - 126 downloads)
|
|
| |
|
Expert 5K+
Posts: 9899
Location: Lower Mainland BC | di_ch_NY56 - 2022-04-16 10:52 AMWith the driver side LED-lamp I discovered that the tie rod end boot is cracked as well. Hell... where do I get new tie rod ends for my Letter?
Dieter: I think that the PN for your 300's outer tie rod ends is 2084 353. Searching on "2084353" doesn't show up anything the easy way.
Nothing at Hiltop or Grease Monkey but Len Dawson does show 4. Not cheap but he has some.
http://www.dpmotorparts.com/inventory_4_b.cfm (enter 2084353 in the box and click on the "Search")
Moog still lists a bunch of parts for 1960 Chrysler 300s, just not tie rod ends (which is strange). You might have to get creative and go to a year or two later or newer (?)
Here is a listing for 1962 Chrysler outers:
https://www.ebay.com/itm/165375524489?hash=item2681263e89:g:Uo4AAOSw...
Moog's search on 1960 Chrysler 300:
https://www.moogparts.com/find-my-part/find-my-part-results.html?typ...
Edited by 56D500boy 2022-04-16 4:19 PM
|
|
| |
|
Expert
Posts: 1530
Location: ZH, Switzerland | Thanks Dave That could be a solution, but the parts numbers on the tie rod ends for the full size 1960 Chrysler (Imperial included) is 1881 821 (passenger side) and 1881 820 (drivers side). Happy Easter Season Happy Restoring! BTW: comapring to many old pictures I took during the disassembly and restoring at both places I decided to take the tie rod ends from Andy Bernbaum. Hypothetically I'll get the correct tie rod ends.
Edited by di_ch_NY56 2022-04-17 3:15 AM
|
|
| |
|
Expert
Posts: 1530
Location: ZH, Switzerland | After visiting my Mum and getting a very good dinner on the way at home I did a small detour to visit my Letter to remove all four cotter pins at the front suspension (steering knuckle). I hope to get the ball joint out with no problems because the whole front suspension was disassembled at the first place. I'll take a big 3/4" ratchet with me as well to loosen the pre-loosened ball joints fully to exchange it prior the brake line job.
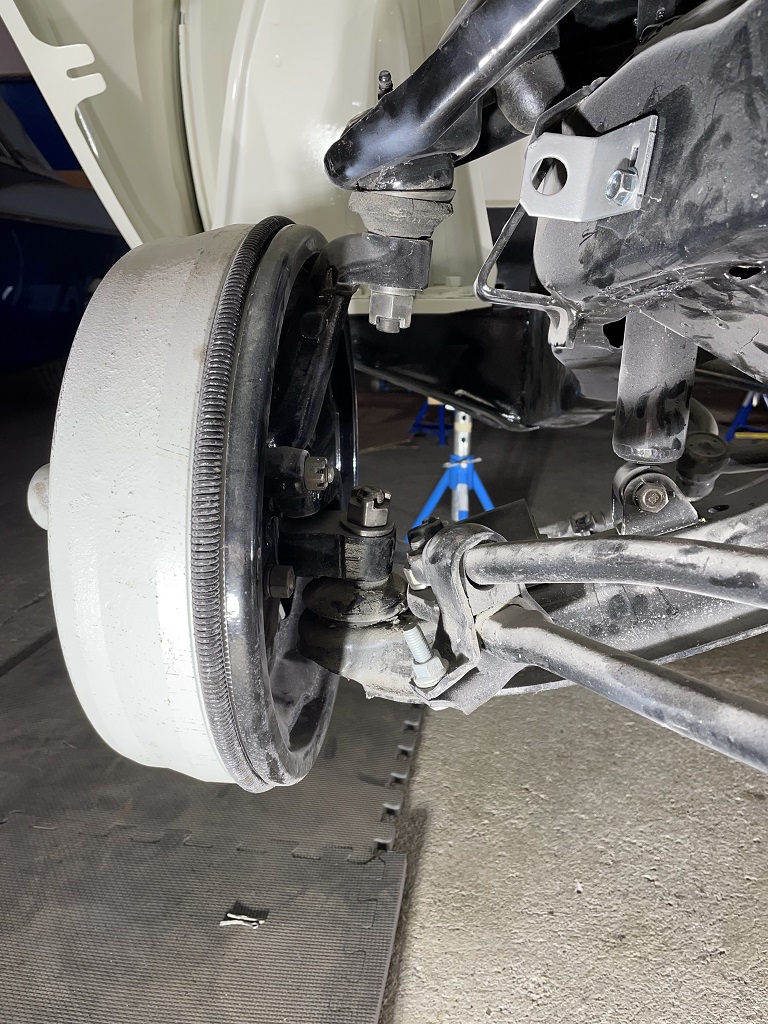 (IMG_0005 cotter pins all removed to remove the nuts.JPG) (IMG_0005 cotter pins all removed to remove the nuts.JPG)
Attachments
----------------
IMG_0005 cotter pins all removed to remove the nuts.JPG (338KB - 122 downloads)
|
|
| |
|
Expert 5K+
Posts: 9899
Location: Lower Mainland BC | di_ch_NY56 - 2022-04-16 11:44 PM Thanks Dave That could be a solution, but the parts numbers on the tie rod ends for the full size 1960 Chrysler (Imperial included) is 1881 821 (passenger side) and 1881 820 (drivers side). BTW: comparing to many old pictures I took during the disassembly and restoring at both places I decided to take the tie rod ends from Andy Bernbaum. Hypothetically I'll get the correct tie rod ends.
Umm....those 1881 821 and 820 numbers are for the *INNER* tie rod ends, *NOT* outer.
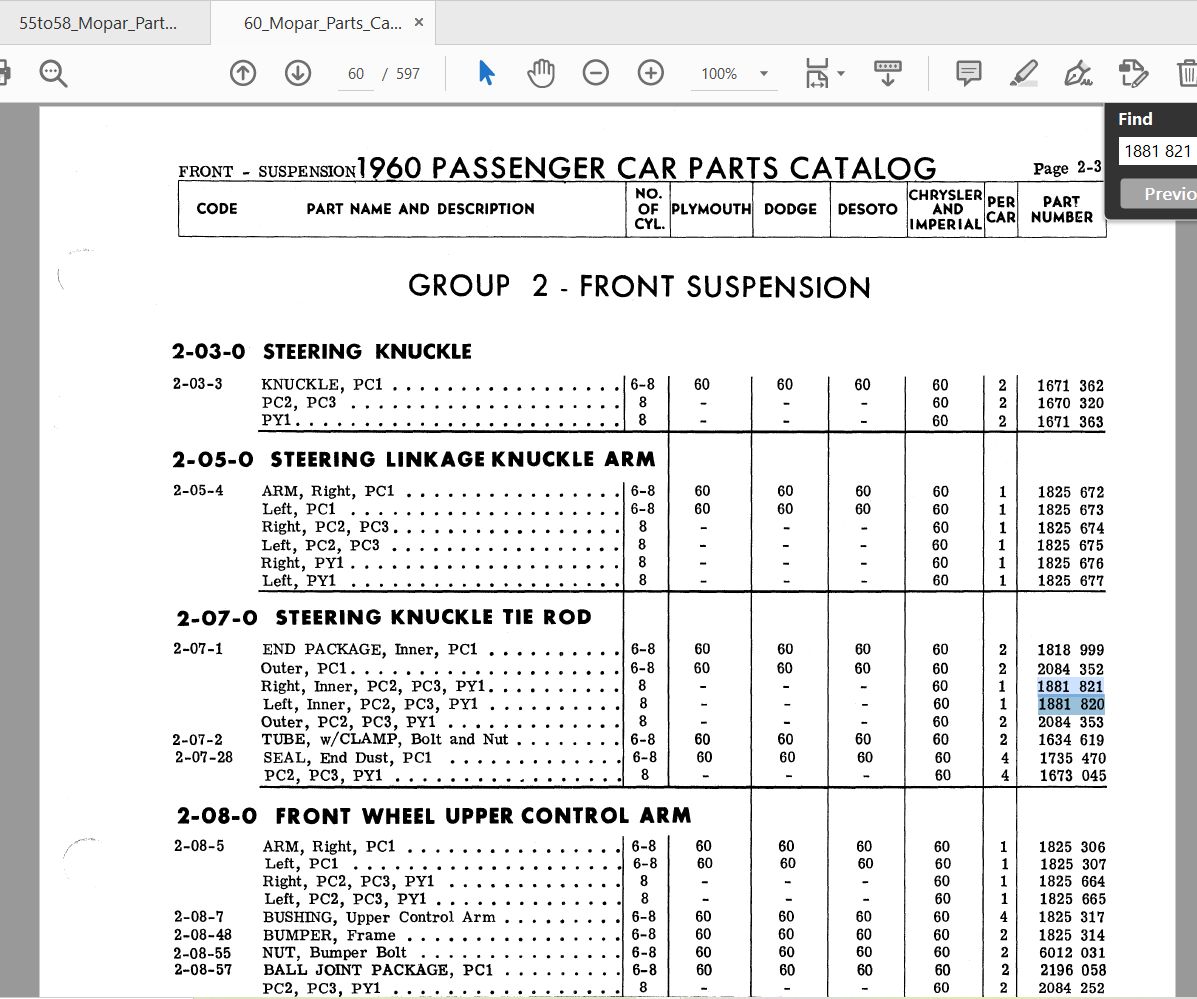 (1960ChryslerInnerTieRodEndsPN.jpg) (1960ChryslerInnerTieRodEndsPN.jpg)
Attachments
----------------
1960ChryslerInnerTieRodEndsPN.jpg (194KB - 123 downloads)
|
|
| |
|
Expert
Posts: 1530
Location: ZH, Switzerland | Dave, you're correct. After a second look I discovered the correct number you provided. This morning (many hours) I exchanged both upper ball joints... the driver side went out three turnings and that was it. I could dig it out. The new one is tightened. The lower ball joint on the drivers side is that tight, that I could wiggle the body of the Letter on the stands. A tool press out the stem of the lower ball joint I do not have. So I have to look for a solution for next Saturday afternoon. BTW: correct, last December I got a 3/4" Stahlwille ratchet with a long handle - easy to work with. And in the box I discovered two more tie rod ends, looking back - no urge to buy another two tie rod ends.... Happy Restoring! Dieter
Edited by di_ch_NY56 2022-04-18 7:31 AM
 (IMG_0007 passenger side upper ball joint exchanged.JPG) (IMG_0007 passenger side upper ball joint exchanged.JPG)
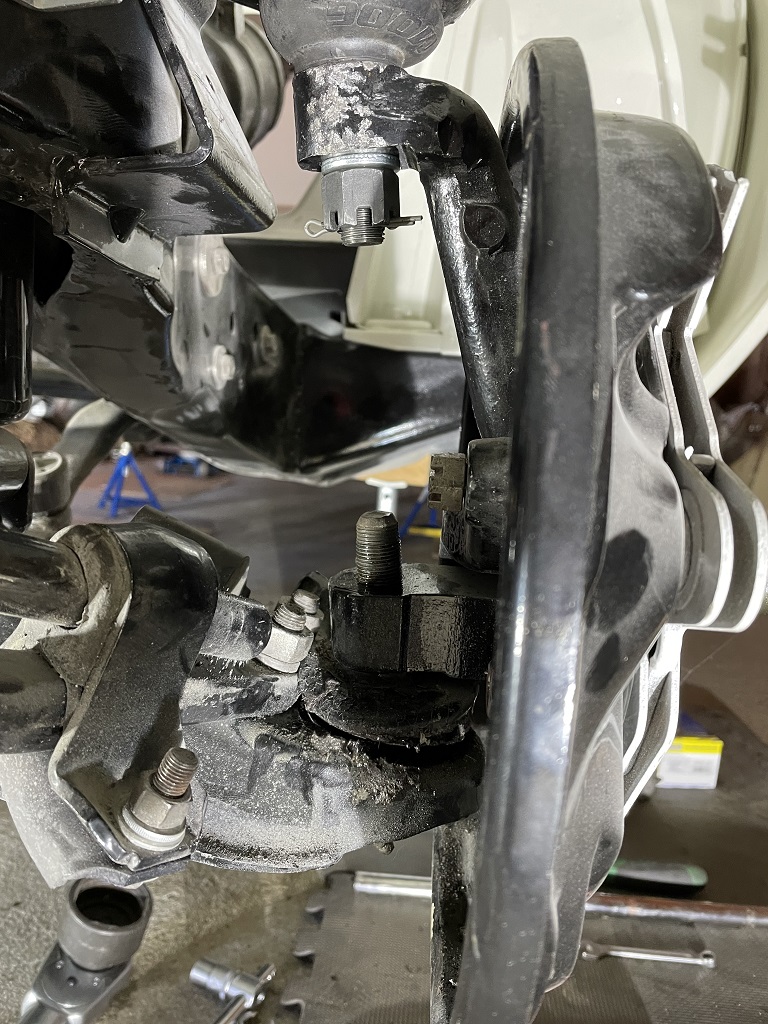 (IMG_0008 drivers side upper ball joint exchanged.JPG) (IMG_0008 drivers side upper ball joint exchanged.JPG)
 (Chrysler tool to remove the ball joints.jpg) (Chrysler tool to remove the ball joints.jpg)
Attachments
----------------
IMG_0007 passenger side upper ball joint exchanged.JPG (408KB - 127 downloads)
IMG_0008 drivers side upper ball joint exchanged.JPG (321KB - 114 downloads)
Chrysler tool to remove the ball joints.jpg (129KB - 123 downloads)
|
|
| |
|
Expert
Posts: 1530
Location: ZH, Switzerland | This afternoon, just a few hours to get the resting ball joints out. All four ball joints at the front axle are exchanged now. Next Saturday I'll mount the wheel brake cylinders... and further cleaning of the speedo and tach cable. Happy Restoring!
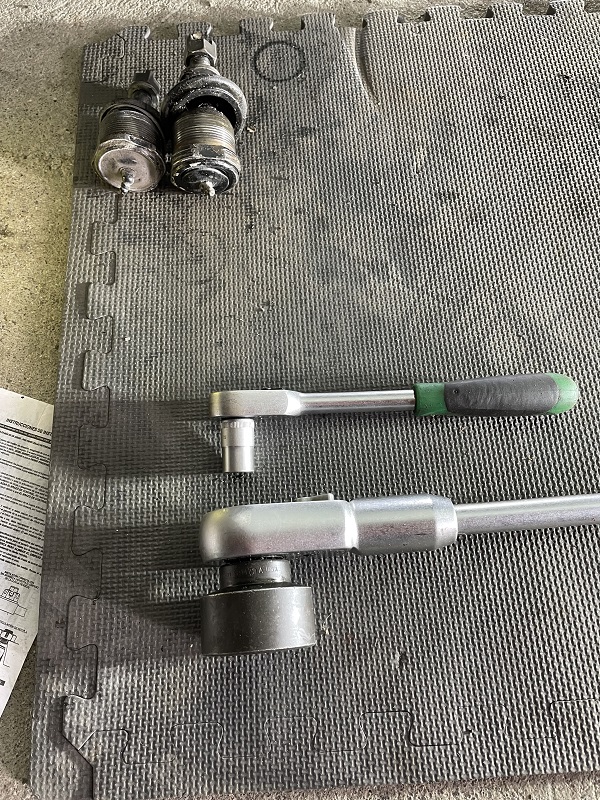 (IMG_0032 old ball jonts passenger side.JPG) (IMG_0032 old ball jonts passenger side.JPG)
 (IMG_0033 old ball joints drivers side.JPG) (IMG_0033 old ball joints drivers side.JPG)
Attachments
----------------
IMG_0032 old ball jonts passenger side.JPG (348KB - 122 downloads)
IMG_0033 old ball joints drivers side.JPG (299KB - 121 downloads)
|
|
| |
|
Expert
Posts: 1530
Location: ZH, Switzerland | At the picture with the new upper ball joint you might notice that the brake support plate got a primer layer (Etokat at the first location). Neither the old nor the new brake cylinders will fit (paint layers too thick). I have to brush all the color down inisde the dust shield and brake support plate (what an incompentent team was that, hell on earth). |
|
| |
|
Expert
Posts: 1530
Location: ZH, Switzerland | I took the support plate and the dust shields at home... I noticed that the brake cylinders first must be mounted into the support plate and then the support plate to the dust shield (different, than on my 1956 Chrysler New Yorker - brake cylinders exchangeable without removing the support plate). I had to take the brake pins out of the old dust boots and clean four more of these pins at the rotating wire brush. They all got a layer of WD 40... The screws at to mount the assembly to the spindle hub got a small amount of copper paste to get it out easier next time... Dieter BTW: the dashboard (hardware included) and rims got a primer layer in the mean time.
Edited by di_ch_NY56 2022-04-30 12:37 PM
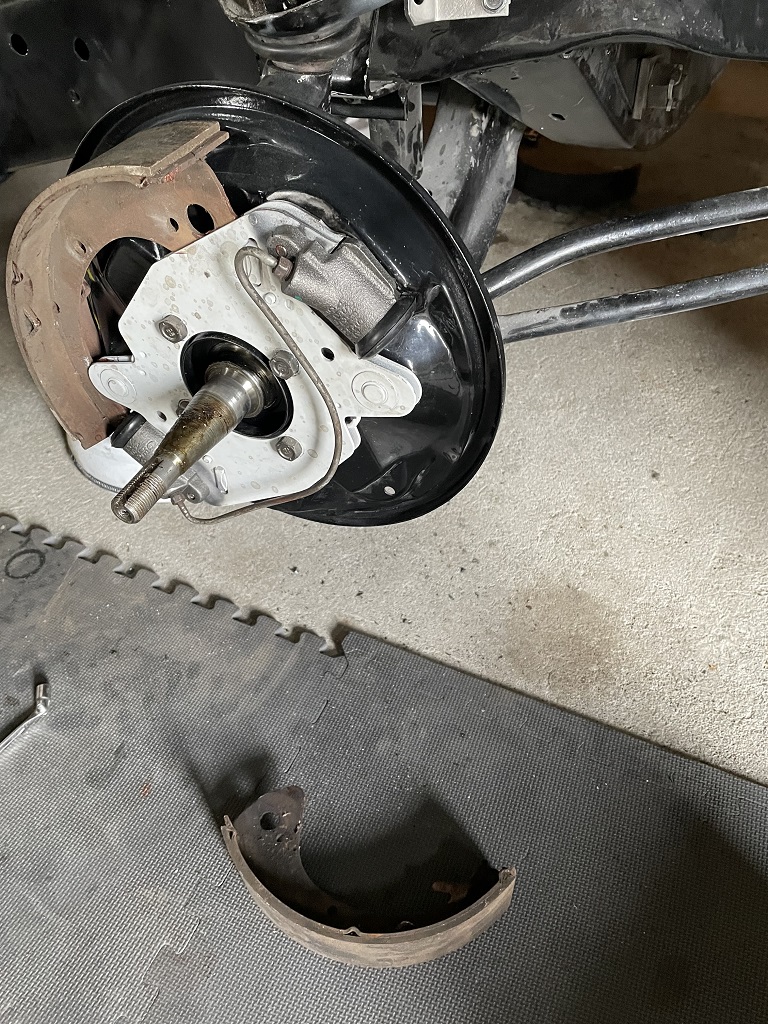 (IMG_0067 front brake cylinders mounted.JPG) (IMG_0067 front brake cylinders mounted.JPG)
Attachments
----------------
IMG_0067 front brake cylinders mounted.JPG (414KB - 122 downloads)
|
|
| |
|
Expert 5K+
Posts: 9899
Location: Lower Mainland BC | di_ch_NY56 - 2022-04-30 9:34 AM I noticed that the brake cylinders first must be mounted into the support plate and then the support plate to the dust shield
(different, than on my 1956 Chrysler New Yorker - brake cylinders exchangeable without removing the support plate).
Like these:
 |
|
| |
|
Expert
Posts: 1530
Location: ZH, Switzerland | I cleaned the brake pad carriers and added heat resistance copper paste at the contact areas. Brand new return springs are mounted as well. The brake hoses front and at the rear axle to the corresponding carriers are mounted as well (clips to keep the brake hose in place as well). Soon, the brake lines...
 (IMG_0070 brake pad mounted.JPG) (IMG_0070 brake pad mounted.JPG)
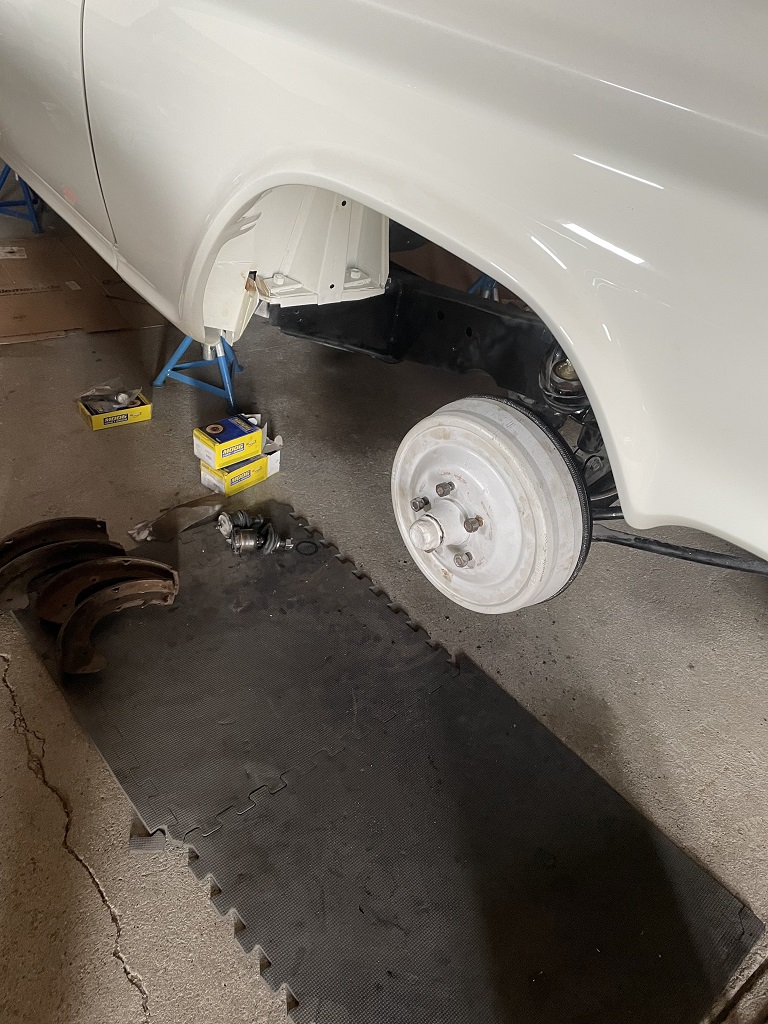 (IMG_0071 as well the return springs are mounted.JPG) (IMG_0071 as well the return springs are mounted.JPG)
Attachments
----------------
IMG_0070 brake pad mounted.JPG (298KB - 145 downloads)
IMG_0071 as well the return springs are mounted.JPG (274KB - 151 downloads)
|
|
| |
|
Expert
Posts: 1530
Location: ZH, Switzerland | Today I went to the paint&body-shop to visit the owner. One bad news and one good news (a joke). All parts are painted, the dashboard and corresponding parts got a clear coat as well. This afternoon, wanting to install the brake lines.... only the long brake line I could conned to both ends, but some points to discuss around the front subframe and the rear axle tunnel longitudinal rail... The brake line kit from InlineTubes is from below the lowest bottom drawer, not worth the money I spent. I tried to bent it to the shape the old front axle brake lines show. The wheels got glossy black and a new set of tires. The tire on the passenger side front wheel is mounted, just to look how it looks. Dieter BTW.: new brake lines for the front axle, the rear axle (destroyed at the first shop) and the main brake line from the main brake cylinder to the distribution block are welcome... different supplier?
Edited by di_ch_NY56 2022-05-14 11:37 AM
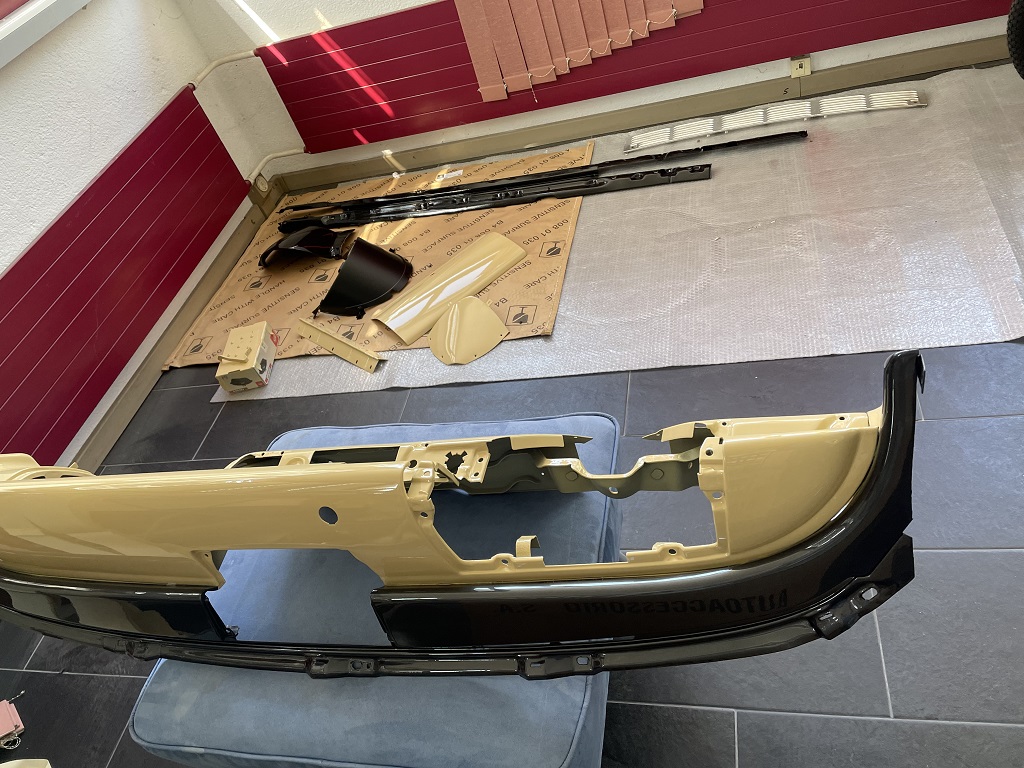 (IMG_0124 dashboard and small parts painted.JPG) (IMG_0124 dashboard and small parts painted.JPG)
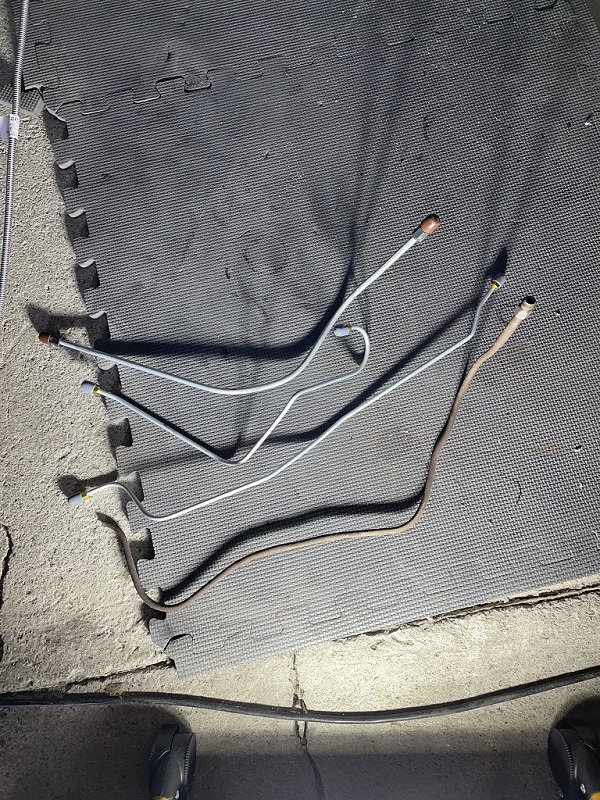 (IMG_0129 main brake line and rear axle brake lines are a joke InlineTube.JPG) (IMG_0129 main brake line and rear axle brake lines are a joke InlineTube.JPG)
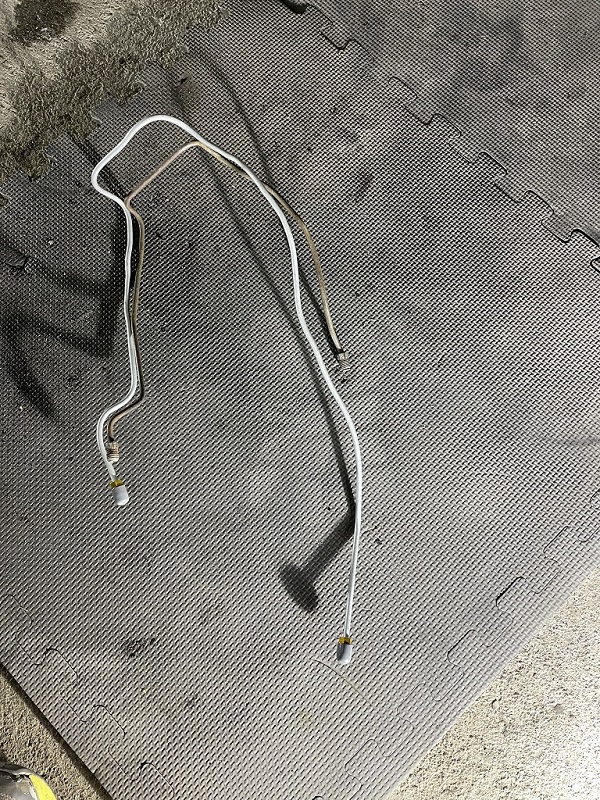 (IMG_0130 drivers side front wheel brake line does not fit InlineTube.JPG) (IMG_0130 drivers side front wheel brake line does not fit InlineTube.JPG)
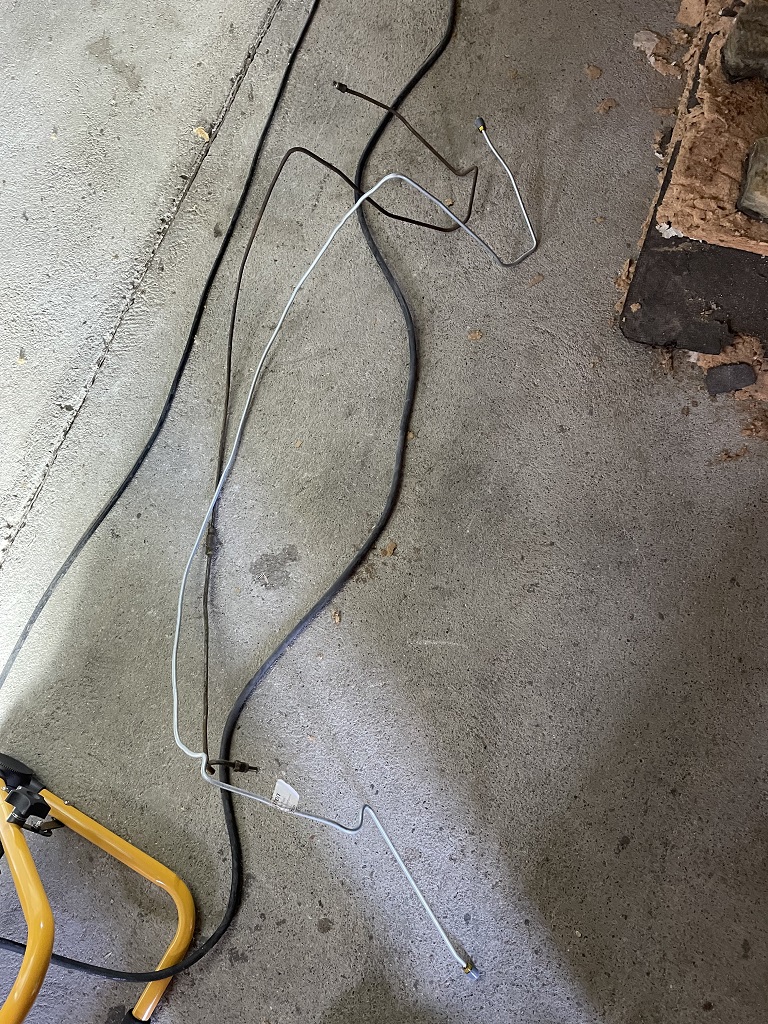 (IMG_0131 passenger side front wheel brake line from InlineTube.JPG) (IMG_0131 passenger side front wheel brake line from InlineTube.JPG)
Attachments
----------------
IMG_0124 dashboard and small parts painted.JPG (301KB - 149 downloads)
IMG_0129 main brake line and rear axle brake lines are a joke InlineTube.JPG (327KB - 155 downloads)
IMG_0130 drivers side front wheel brake line does not fit InlineTube.JPG (390KB - 153 downloads)
IMG_0131 passenger side front wheel brake line from InlineTube.JPG (478KB - 154 downloads)
|
|
| |
|
Expert 5K+
Posts: 9650
Location: So. Cal | Make your own brake lines yourself. The tool you purchase will pay for itself the first time you use it. The dash looks great. Chrysler never painted the dash so shiny because they were worried about reflections into the driver's eyes. So they made all the dash paint with a satin finish. |
|
| |
|
Expert
Posts: 1530
Location: ZH, Switzerland | Powerflite - 2022-05-13 6:49 PM Make your own brake lines yourself. The tool you purchase will pay for itself the first time you use it. The dash looks great. Chrysler never painted the dash so shiny because they were worried about reflections into the driver's eyes. So they made all the dash paint with a satin finish. A 3/16 inch roll of steel brake line is at me now, the tools are in shipping mode. I just ask, did you forget, that the dashboard has a cover ontop? So most of the shiny area will be covered with the dash pad. |
|
| |
|
Expert
Posts: 1530
Location: ZH, Switzerland | in the mean time... partial assembly (preliminary) of the dashboard (new dash board pad ordered, no answer to the question of new aluminum panels).
brake reinforcement plate painted (two layer of rust inhibitor epoxy primer, two layer glossy black). Brake booster packed into a big box to send it to the States for a restoration. No answer until now (no wonder, it's Whit Moday). Happy Restoring! Dieter
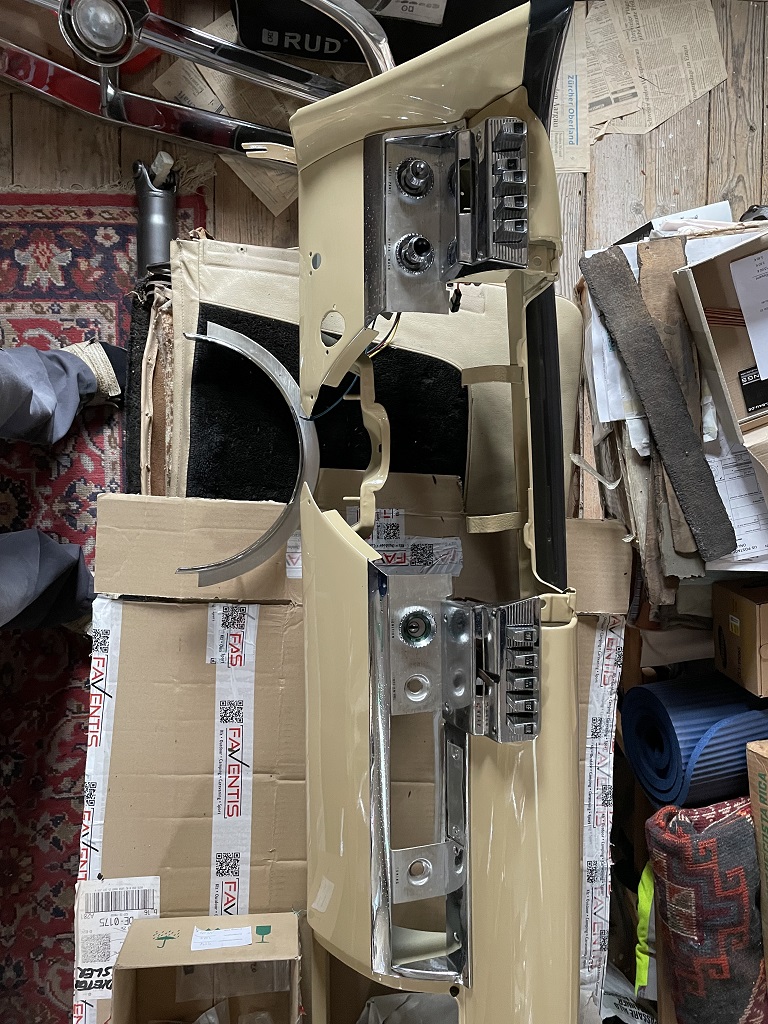 (IMG_0222 dashboard preliminary part assembly.JPG) (IMG_0222 dashboard preliminary part assembly.JPG)
 (IMG_0235 brake reinforcement plate painted.JPG) (IMG_0235 brake reinforcement plate painted.JPG)
Attachments
----------------
IMG_0222 dashboard preliminary part assembly.JPG (364KB - 141 downloads)
IMG_0235 brake reinforcement plate painted.JPG (287KB - 145 downloads)
|
|
| |
|
Board Moderator & Exner Expert 10K+
Posts: 13045
Location: Southern Sweden - Sturkö island | Jan Fridberg should have the alu panels repopped Dieter |
|
| |
|
Expert
Posts: 1530
Location: ZH, Switzerland | Today I mounted the NOS heater control box into the cleaned holder and back into the moulding. The original heater box... I could remove all buttons without destroying the take up area of the buttons. It is fully functional (all buttons were working hassel free, the fan was working on both speeds, just most of the nipple broke off - I do not dispose it). Prior I removed the rust and did massage penetrating oil onto the holder. Thank you Sven for the nice parts I could purchase from you. Happy Restoring! Dieter BTW: the illumination got a new bulb (the original one wouldn't last long anymore - from the appearance) BTW2: the brake booster is on the way to Booster Dewey - I hope I'll get it back once
Edited by di_ch_NY56 2022-06-12 10:15 AM
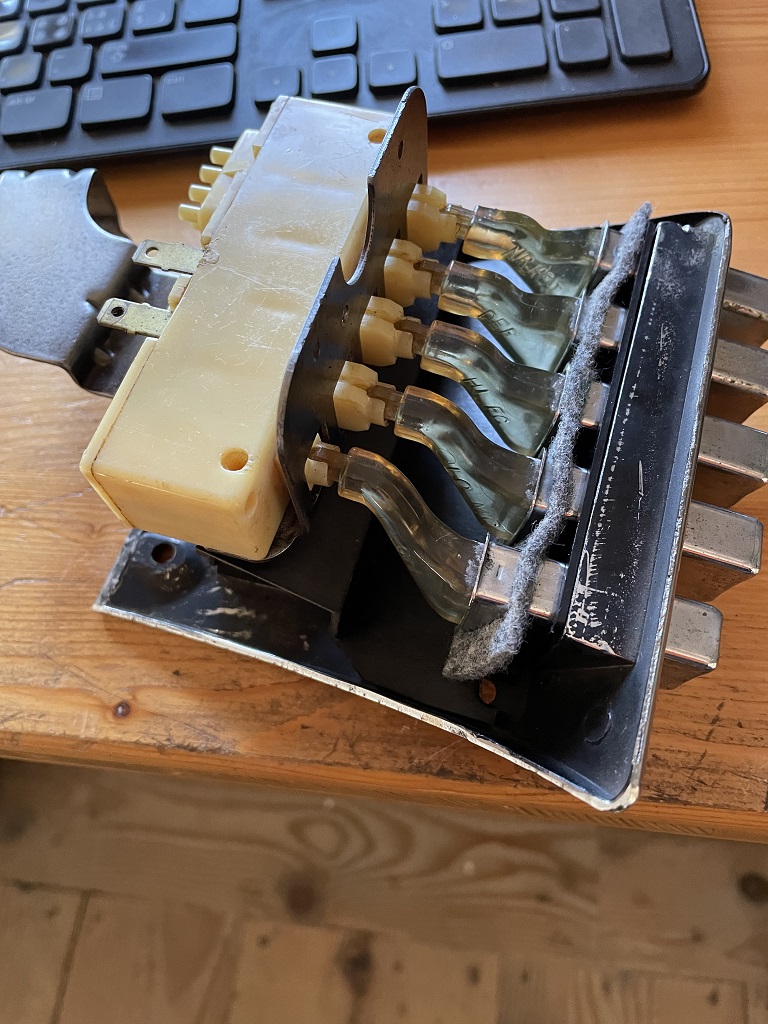 (IMG_0251 NOS heater control box.JPG) (IMG_0251 NOS heater control box.JPG)
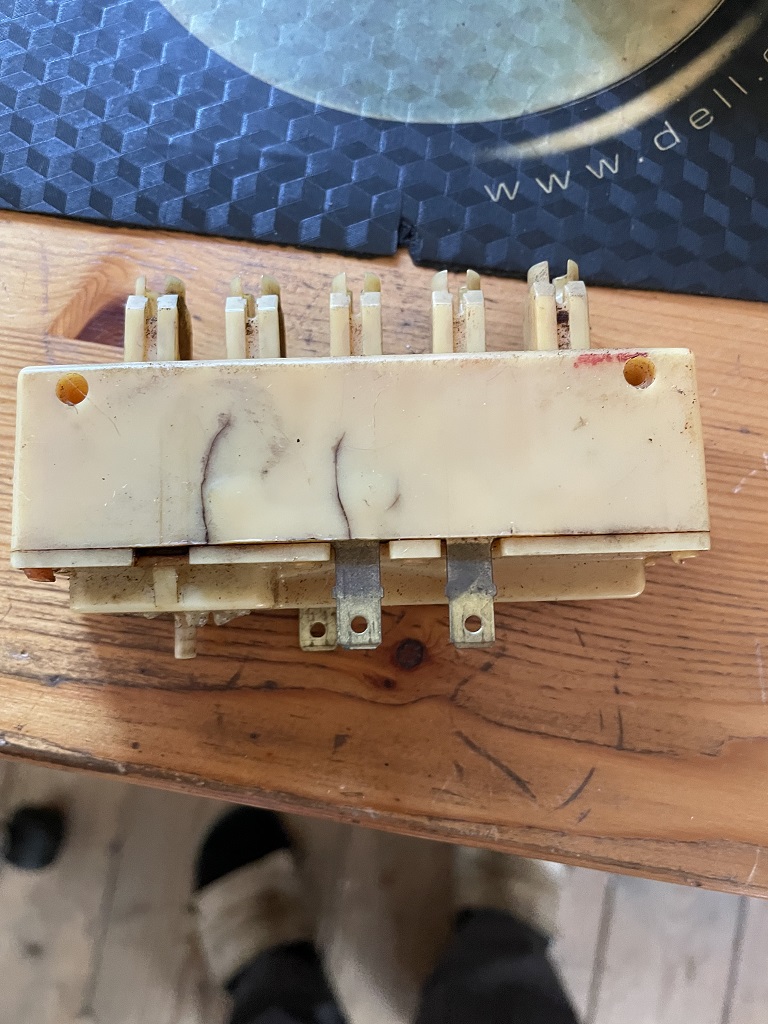 (IMG_0252 original heater control box.JPG) (IMG_0252 original heater control box.JPG)
Attachments
----------------
IMG_0251 NOS heater control box.JPG (285KB - 150 downloads)
IMG_0252 original heater control box.JPG (262KB - 140 downloads)
|
|
| |
|
Expert
Posts: 1530
Location: ZH, Switzerland | I got the new dash panels. I did mount it yesterday evening. The new panels are looking gorgeous. To the engine... The block is bored out, the pistons mounted. I got a notification from the engine builder, containing three pictures (enclosed in the entry). Short: the engine block is good, the camshaft is toast (lobes worn down), the judgement of the crankshaft is desastrous. Crankshaft: not like the engine block new at the time, but cut to one step undersize. After grinding, hardening, polishing... one tenth bent of the whole length and many hair cracks did appear. Cylinder grinder and the engine builder do not recomend to use this crankshaft longer - it's jam. SO, I NEED A NEW EARLY RB CRANKSHAFT, the better the condition, the sooner, the better ~ big thank you Big thank you Dieter
 (bild1 journal bearing with straightening mark and load of hair cracks.jpg) (bild1 journal bearing with straightening mark and load of hair cracks.jpg)
 (bild2 journal bearing with straightening mark and loads of hair cracks.jpg) (bild2 journal bearing with straightening mark and loads of hair cracks.jpg)
 (bild3 journal bearing with straightening mark and load of hair cracks.jpg) (bild3 journal bearing with straightening mark and load of hair cracks.jpg)
Attachments
----------------
bild1 journal bearing with straightening mark and load of hair cracks.jpg (437KB - 133 downloads)
bild2 journal bearing with straightening mark and loads of hair cracks.jpg (433KB - 143 downloads)
bild3 journal bearing with straightening mark and load of hair cracks.jpg (456KB - 132 downloads)
|
|
| |
|
Elite Veteran
Posts: 649
Location: Finland | This is very sad Dieter. I am no crankshaft expert but in my eyes it looks like it has been worn out and welded and then badly grinded. I will keep the eyes open for a RB axle here in Finland. |
|
| |
|
Expert
Posts: 1530
Location: ZH, Switzerland | 22mafeja - 2022-06-24 5:23 PM This is very sad Dieter. I am no crankshaft expert but in my eyes it looks like it has been worn out and welded and then badly grinded. I will keep the eyes open for a RB axle here in Finland. Hi Ralf
I had a long phone call this morning with the engine restorer about the crankshaft.
First of all installed in my 300 F was a factory refurbished 413 engine.
During the refurbishment process they did use the old crankshaft, cut to the first undersize measurement, but not hardened (soft surface).
Then they had to straighten the crankshaft, because it was apparently bent. The cylinder grinder is a very professional person. He said, too bad he didn't see the damage sooner, he did grind the crankshaft to the next undersize measurement - nothing did appear until the crankshaft got a hardening process for the surface of the bearing surfaces. During the hardening the cracks did open. the cracks did appear during the polishing process! The cylinder grinder said, nobody knows how deep theese cracks are (forged crankshaft). Of course during the hardening the crankshaft bent again. For sure the crankshaft could get hammer and chisel (round tip) hits to get it straight again. But the risk for a crankshaft cracking (falling into two parts) will rise drastically. BTW: my first thought was the same as yours, with no background information. kind regards Dieter |
|
| |
|
Elite Veteran
Posts: 649
Location: Finland | Hmm I wouldn`t have ordered any hardening at all. Just grinding and polishing. The hardening seems to be the beginning of the troubles.
Surely it would not have been needed on an engine going to be used very carefully. |
|
| |
|
Expert
Posts: 1530
Location: ZH, Switzerland | 22mafeja - 2022-06-24 10:47 PM Hmm I wouldn`t have ordered any hardening at all. Just grinding and polishing. The hardening seems to be the beginning of the troubles. Surely it would not have been needed on an engine going to be used very carefully. Hypthetically just the main and connecting rod bearing surfaces are hardened. It's a question if thermal hardening or chemical hardening is better. But for sure a hardened surface at the bearing surface would last ways longer than a soft surface. Sidemark, but very interesting... the engine builder did resist from balancing the rotating assembly. So, this way no amount lost for a useless job. BTW: The trouble began at the Chrysler factory. The should have thrown away that bent crankshaft and use a new one, just like the engine block. Apparently the engine block has been exchanged (why else did the engine block have the original bore measurement?). Of course during the thermal process this crankshaft sprung back to the original shape (bent). Happy Restoring! Dieter
Edited by di_ch_NY56 2022-06-26 2:17 AM
|
|
| |
|
Expert
Posts: 1530
Location: ZH, Switzerland | Brake lines are done, except the one from the main brake cylinder to the distributor. But... At one hex nut is free turning at the top right position (one of five) - the threaded stem almost has no thread anymore. Replacement? Happy Restoring! Dieter
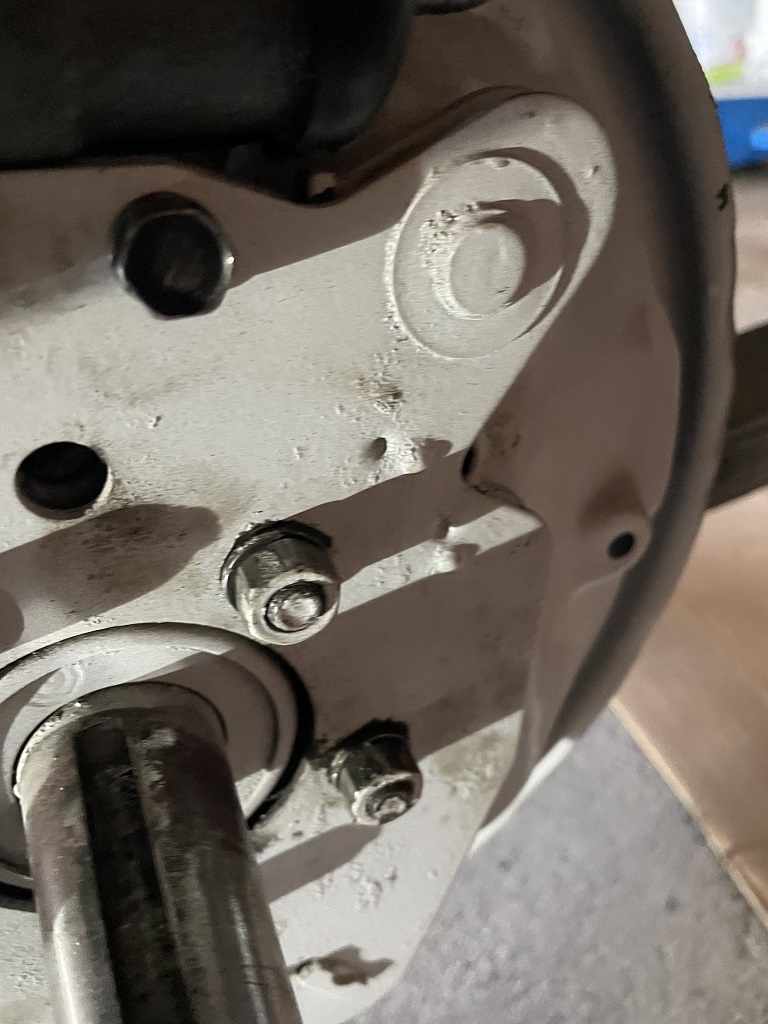 (IMG_0365 brake shoe support plate rear axle drivers side - note hex nuts.JPG) (IMG_0365 brake shoe support plate rear axle drivers side - note hex nuts.JPG)
Attachments
----------------
IMG_0365 brake shoe support plate rear axle drivers side - note hex nuts.JPG (236KB - 130 downloads)
|
|
| |
|
Board Moderator & Exner Expert 10K+
Posts: 13045
Location: Southern Sweden - Sturkö island | Zollshop.de
|
|
| |
|
Expert
Posts: 1530
Location: ZH, Switzerland | wizard - 2022-07-09 11:42 AM Zollshop.de Thanks Sven - as far as I got out, it's pressed in. Will see if the Zollshop has the fitting press in screw |
|
| |
|
Board Moderator & Exner Expert 10K+
Posts: 13045
Location: Southern Sweden - Sturkö island | Hmm, mine are ordinary bolts and nuts Dieter |
|
| |
|
Elite Veteran
Posts: 649
Location: Finland | What length are they? I might have one in one of my boxes...
I suppose the bolt head is round with a section cut of for locking behind the axle flange.. |
|
| |
|
Expert
Posts: 1530
Location: ZH, Switzerland | 22mafeja - 2022-07-11 5:18 PM What length are they? I might have one in one of my boxes... I suppose the bolt head is round with a section cut of for locking behind the axle flange.. UNF 3/8-24 x 1-1/4" - I did order the bolts at epain
Edited by di_ch_NY56 2022-07-12 12:59 PM
|
|
| |
|
Expert
Posts: 1530
Location: ZH, Switzerland | Old brake shield bolt (almost no thread on it) of the brake support plate drivers side rear is removed. Light tap with a fitting punch and a light hammer hits was enough to get it out. New bolt (modified screw) installed and all five screws tightened equally. Happy Restoring! Dieter BTW: still recovering from Covid-19 (16.7.2022 grill party at the employers hall) - negativ again since August, 1st
Edited by di_ch_NY56 2022-08-02 9:21 AM
 (old brake shield bolt out - new screw modified.jpg) (old brake shield bolt out - new screw modified.jpg)
Attachments
----------------
old brake shield bolt out - new screw modified.jpg (51KB - 126 downloads)
|
|
| |
|
Expert 5K+
Posts: 9650
Location: So. Cal | I'm surprised it stripped the bolt. Everytime I have had that trouble, the nut strips, but the bolt is fine. Usually, the bolt is very hard, but the nut is much softer. |
|
| |
|
Expert
Posts: 1530
Location: ZH, Switzerland | Powerflite - 2022-08-01 6:03 PM I'm surprised it stripped the bolt. Everytime I have had that trouble, the nut strips, but the bolt is fine. Usually, the bolt is very hard, but the nut is much softer. I don't know if the first shop (lock and farmer smith but not a car mechanic) did sandblast that stem... I had big difficulties to remove all the sand blast sand. Happy Restoring! Dieter |
|
| |
|
Expert
Posts: 1530
Location: ZH, Switzerland | While assembling the dashboard. I wanted to install the Chrysler 403 Golden Touch radio into the dashboard - not mounted, when I got my Letter. What I discovered is - one mounting nut is missing - where to get one? - mounting support rear to the dashboard lower end is missing - where got get one? I'll appreciate your help. Thank you. Dieter
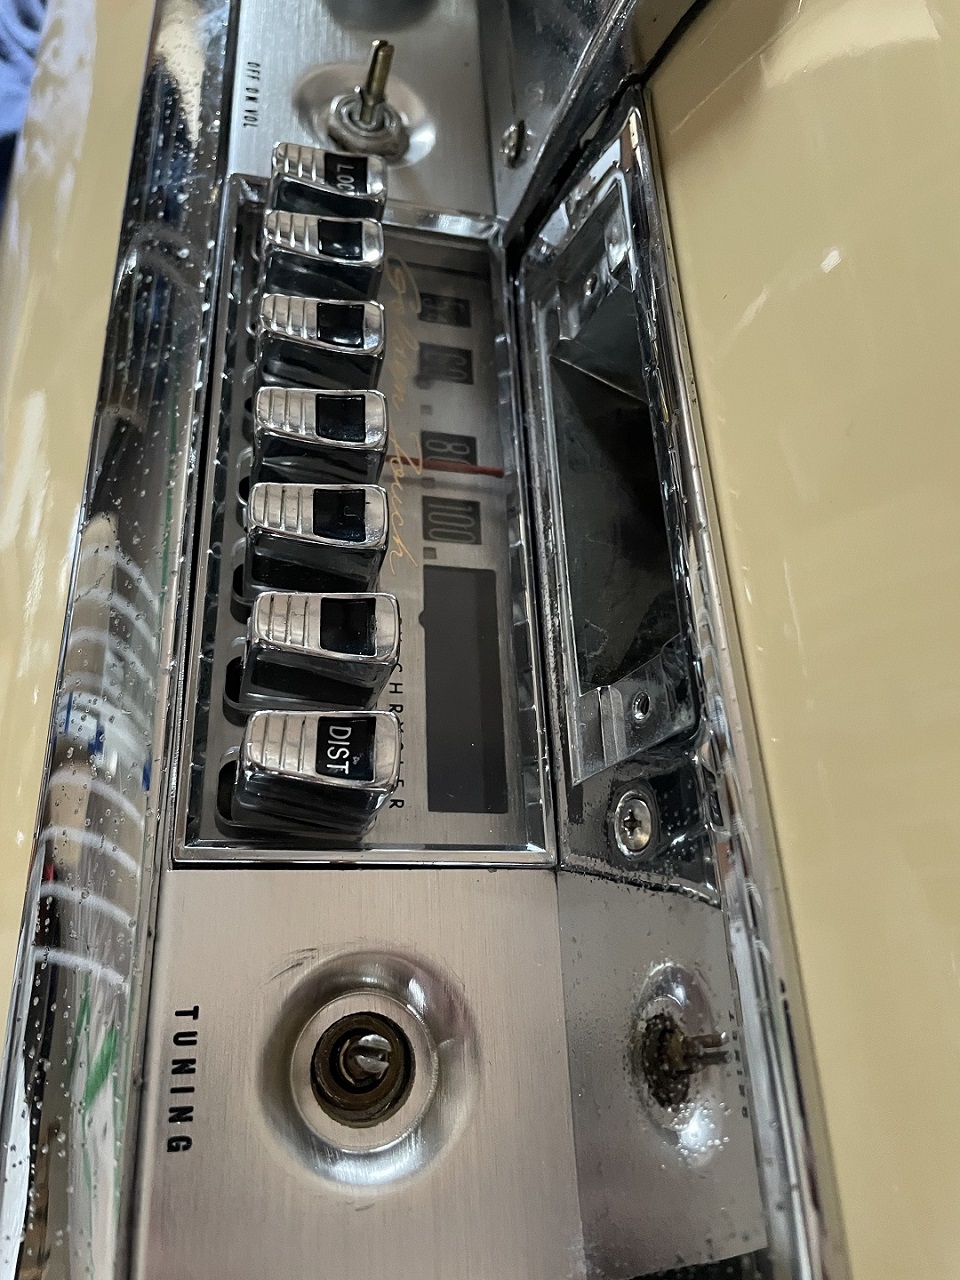 (IMG_0740 Chrysler Radio 403 installing.JPG) (IMG_0740 Chrysler Radio 403 installing.JPG)
Attachments
----------------
IMG_0740 Chrysler Radio 403 installing.JPG (411KB - 94 downloads)
|
|
| |
|
Board Moderator & Exner Expert 10K+
Posts: 13045
Location: Southern Sweden - Sturkö island | I might have both Dieter, I'll check.... |
|
| |
|
Expert
Posts: 1530
Location: ZH, Switzerland | wizard - 2022-10-01 2:30 PM I might have both Dieter, I'll check.... big thanks to you |
|
| |
|
Expert
Posts: 1530
Location: ZH, Switzerland | Just minor details are still waiting for the dash board. It's almost ready to install. I'm waiting for the dash pad now and some small parts already ordered.
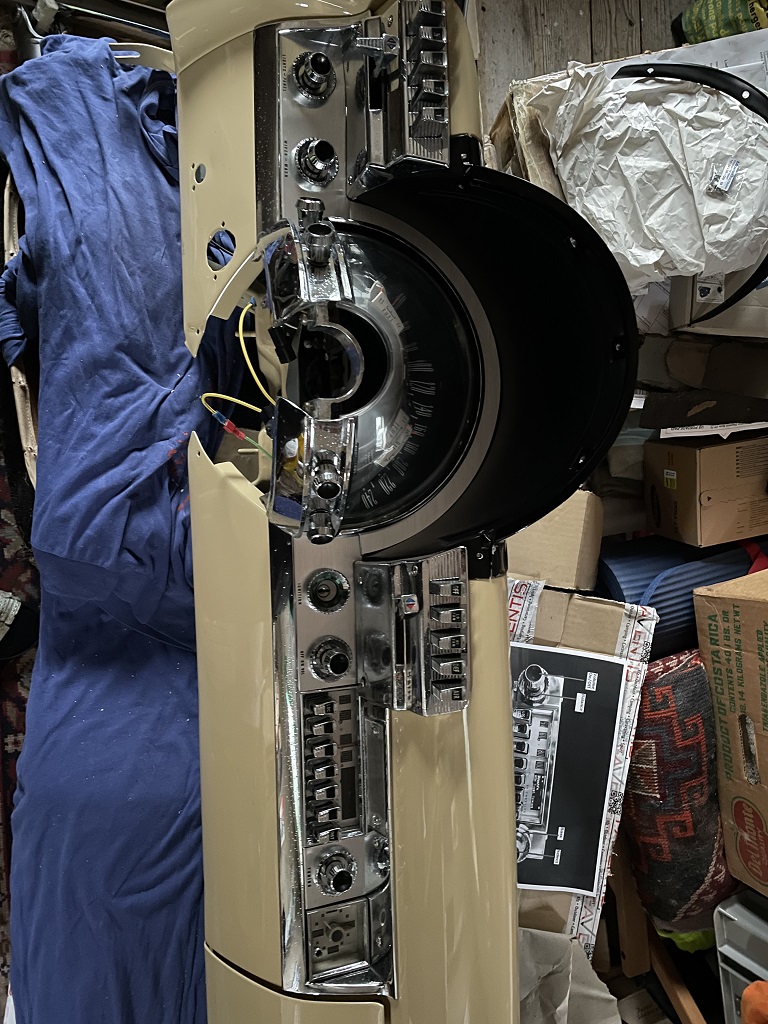 (IMG_0774 dashboard waiting for the dash pad.JPG) (IMG_0774 dashboard waiting for the dash pad.JPG)
Attachments
----------------
IMG_0774 dashboard waiting for the dash pad.JPG (320KB - 93 downloads)
|
|
| |
|
Expert
Posts: 1530
Location: ZH, Switzerland | This afternoon first I cleaned up the trunk floor, the axle tunnel and passenger compartment floor (resting sand blasting sand due to force out the sand with pressurized air and nozzle). Then I laid out first the roof wiring (illumination while door is open) and installed the wiring. Some time and the end with the connectors got through the C-pillar as it was. Then the rear light wiring and installed it. Next was the center console and electric window lift wiring. Finally the main wiring, containing the dash board wiring, the engine wiring and the front lights... Missing... the dash board (just the soft cover - pot metal problems later - retirement of me), the circuit breakers (toDo list on Sunday), the engine and the inner fenders (after the engines is installed).
 (IMG_0823 wiring trunk.JPG) (IMG_0823 wiring trunk.JPG)
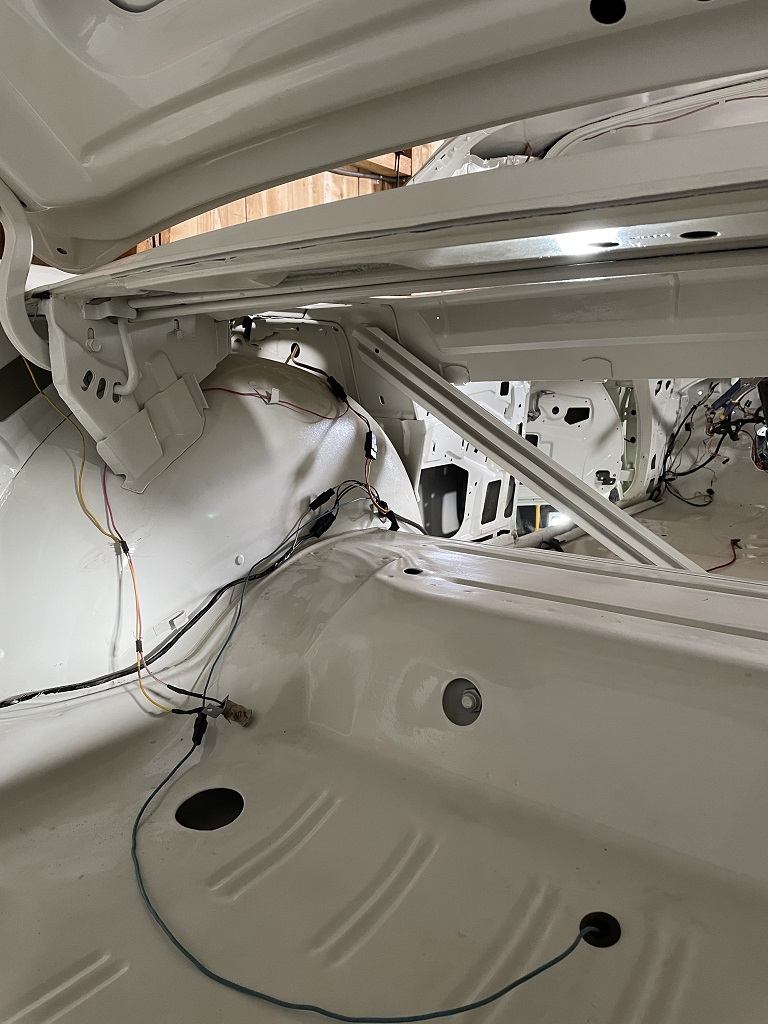 (IMG_0824 connetions trunk and passenger compartment light.JPG) (IMG_0824 connetions trunk and passenger compartment light.JPG)
 (IMG_0825 passenger room compartment.JPG) (IMG_0825 passenger room compartment.JPG)
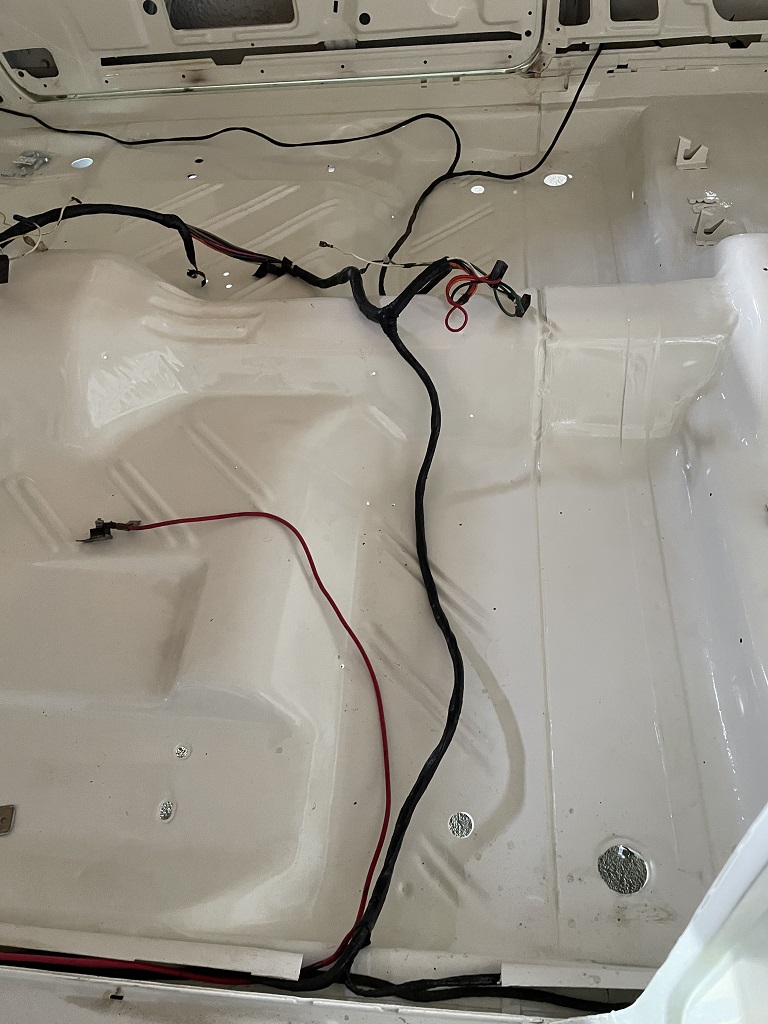 (IMG_0826 passenger compartment center wiring.JPG) (IMG_0826 passenger compartment center wiring.JPG)
 (IMG_0827 foot well and dash board wiring.JPG) (IMG_0827 foot well and dash board wiring.JPG)
 (IMG_0829 engine compartment wiring.JPG) (IMG_0829 engine compartment wiring.JPG)
Attachments
----------------
IMG_0823 wiring trunk.JPG (206KB - 91 downloads)
IMG_0824 connetions trunk and passenger compartment light.JPG (233KB - 88 downloads)
IMG_0825 passenger room compartment.JPG (195KB - 89 downloads)
IMG_0826 passenger compartment center wiring.JPG (227KB - 93 downloads)
IMG_0827 foot well and dash board wiring.JPG (259KB - 93 downloads)
IMG_0829 engine compartment wiring.JPG (305KB - 91 downloads)
|
|
| |
|
Expert
Posts: 1530
Location: ZH, Switzerland | Prior Christmas I traded in the old rear bumper for the cover of the antenna acces at the farmer smith's. During the Christmas Season I restored and mounted the cover on the passenger side inner fender (antenna cable access). The crankshaft did arrive and is at the engine restorer's now (last week: two weeks holiday, I didn't see my engine block while googling around). The dash pad is on the road as well. A solution for the long awaited brake booster is on sight. Happy Restoring! BTW: partial restoration of the kitchen at me is on work as well.
Edited by di_ch_NY56 2023-01-11 2:10 AM
 (IMG_1062 Antenna access cover mounted.JPG) (IMG_1062 Antenna access cover mounted.JPG)
Attachments
----------------
IMG_1062 Antenna access cover mounted.JPG (163KB - 72 downloads)
|
|
| |
|
Elite Veteran
Posts: 1157
Location: D-70199 Heslach | Dieter
happy new year. The service door on inner fender looks familar and may similar to 57 Fireflite
Can't wait to see yout "F" in person
Regards from Stuttgart
/ToM |
|
| |
|
Board Moderator & Exner Expert 10K+
Posts: 13045
Location: Southern Sweden - Sturkö island | That car is gonna be real nice once it's don, that's for sure!
Great news about the crank Dieter. Let me know before you mount the dash pad - I have some advices..... |
|
| |
|
Expert
Posts: 1530
Location: ZH, Switzerland | Thanks a lot to you (both) Early August 2022 I started with mounting the exhaust system as well. The drivers side muffler didn't fit as expected. So I will have a look next Saturday. Because when I brought the crankshaft to the engine shop, I took the resting parts of the muffler system back to the barn (the exhaust system has to be mounted prior the engine, except you'll remove the steering box). Happy Restoring! Dieter |
|
| |
|
Expert
Posts: 1530
Location: ZH, Switzerland | The dashpad has arriven. It looks very nice. In short form.. I have to cut out the surrounding of the speaker grille. Then... what glue to use? I assume fluid glue to use a small brush, am I wrong? It doesn't hurry... Happy Restoring! Dieter |
|
| |
|
Board Moderator & Exner Expert 10K+
Posts: 13045
Location: Southern Sweden - Sturkö island | No glue at all Dieter. The pad is held in place with tabs in the front towards the windsheild. Push through and bend slighty with pincer. Over the glowbox there are clips with studs and nuts. Under the AstraDome cap theres a garnish with screws.
It's best to put a light coat of silicone on the AstraDome pot metal housing for easier mounting.
Cut out for the speaker grille and rearview mirror first when you mouted the pad. If there still is the transport safety in the AstraDome area, then cut it out before mounting. Trim the areas for the pushbuttom unit when the pad is mounted. The radio garnish must be removed before mounting the pad. |
|
| |
|
Expert
Posts: 1530
Location: ZH, Switzerland | wizard - 2023-01-12 8:37 PM No glue at all Dieter. The pad is held in place with tabs in the front towards the windsheild. Push through and bend slighty with pincer. Over the glowbox there are clips with studs and nuts. Under the AstraDome cap theres a garnish with screws. It's best to put a light coat of silicone on the AstraDome pot metal housing for easier mounting. Cut out for the speaker grille and rearview mirror first when you mouted the pad. If there still is the transport safety in the AstraDome area, then cut it out before mounting. Trim the areas for the pushbuttom unit when the pad is mounted. The radio garnish must be removed before mounting the pad. Thank you very much for your very accurate guide to mount the dash pad. In the barn I have to look for the bar with the threaded stems... it's not mounted on the dash pad. I guess I'll take a scissor to cut that area out (soft). Happy Restoring! Dieter
 (IMG_1175 detail 1960 Chrysler dashpad.JPG) (IMG_1175 detail 1960 Chrysler dashpad.JPG)
Attachments
----------------
IMG_1175 detail 1960 Chrysler dashpad.JPG (280KB - 74 downloads)
|
|
| |
|
Board Moderator & Exner Expert 10K+
Posts: 13045
Location: Southern Sweden - Sturkö island | If I recall, there should be 5 small clips with studs welded to them Dieter. You must cut in the proper area for to install them. If you still have the old dashpad - check if the clips are still there. On my pad, the tabs in the front was included |
|
| |
|
Expert
Posts: 1530
Location: ZH, Switzerland | wizard - 2023-01-13 10:35 AM If I recall, there should be 5 small clips with studs welded to them Dieter. You must cut in the proper area for to install them. If you still have the old dashpad - check if the clips are still there. On my pad, the tabs in the front was included Thanks for your information. The dashpad is now mounted. But not without scratches at the antracite metallic surface (of course, visible area) I noted that the countersunk phillips screws (8-24 * 3/8") were too short for two position. So I did order a set of the same screws, but 1/2" long. I mounted the whole exhaust system this morning. The hex nuts at the joints are just slightly torqued. But the metal strip with 5 studs (I saw it, when I removed the old dashpad - a pain to do it; it's was broken in small pieces and the foam did glue to the surface). I came to the conclusion that I have to take a second 110 Liter trash bag with me, to move from one to the other with a chance to find the strip. Happy Restoring Dieter
Edited by di_ch_NY56 2023-01-14 12:37 PM
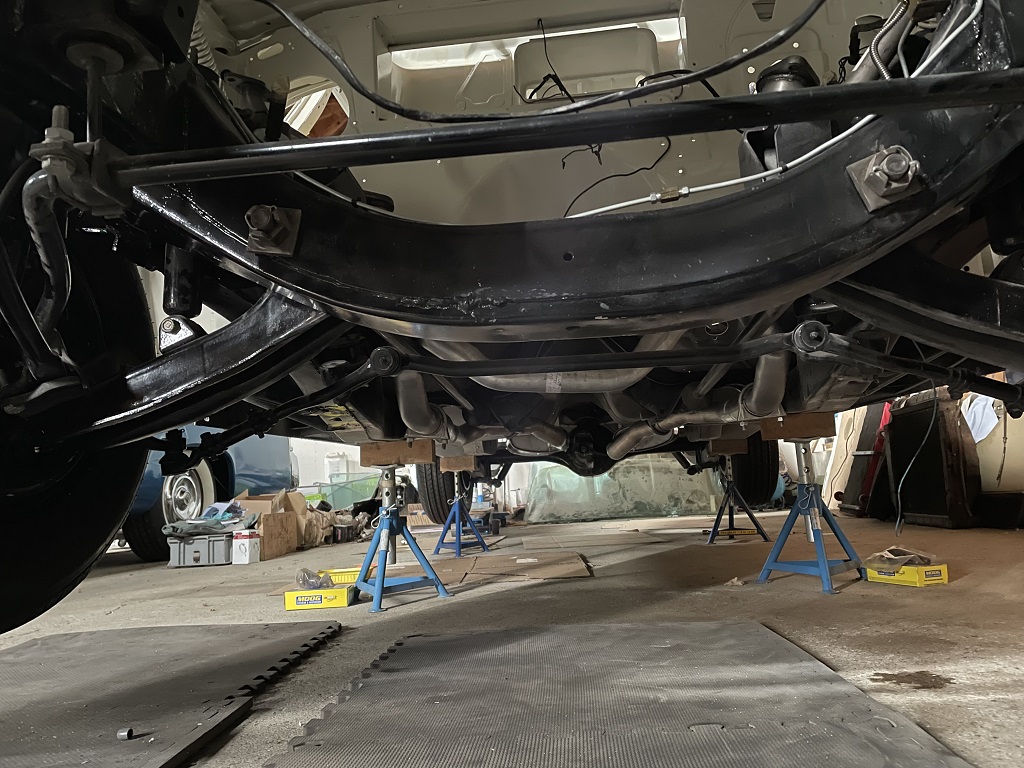 (IMG_1177 exhaust system installed.JPG) (IMG_1177 exhaust system installed.JPG)
 (IMG_1178 dash pad mounted.JPG) (IMG_1178 dash pad mounted.JPG)
Attachments
----------------
IMG_1177 exhaust system installed.JPG (293KB - 73 downloads)
IMG_1178 dash pad mounted.JPG (309KB - 73 downloads)
|
|
| |
|
Board Moderator & Exner Expert 10K+
Posts: 13045
Location: Southern Sweden - Sturkö island | Dieter, I found a couple of spare clips. I think there were 5 of them. It's a must to have them, but it's not difficult to fabricate new ones. It seems that the clips are just tucked in on the upward bent area of the dash pad.
 (20230115_113944.jpg) (20230115_113944.jpg)
Attachments
----------------
20230115_113944.jpg (166KB - 66 downloads)
|
|
| |
|
Board Moderator & Exner Expert 10K+
Posts: 13045
Location: Southern Sweden - Sturkö island | As for the risk of damage the paint, I use thin but good plastic strips for to guide in the taabs.
Far as I recall, you should have the clips as we discussed this when you removed the old dashpad. I don't think that there was a strip with 5 studs. |
|
| |
|
Expert
Posts: 1530
Location: ZH, Switzerland | Dear Sven Please excuse me. It was not a plan to mount the dash pad asap. So I thought I'll read your very good guide later. Too late, yesterday. I could slap my head, inseart the rear first and bend all tabs. But... I bent the tabs afterwards, the light gap has disappeared and the area above the glove box fits good and tight. At the time righ now. Happy Restoring! Dieter |
|
| |
|
Board Moderator & Exner Expert 10K+
Posts: 13045
Location: Southern Sweden - Sturkö island | Remove the pad again, fix the paint damages, find the clips and mount it properly. Mopar did not mount anything not needed, the pad will tend to shrink somewhat due to the ambient. |
|
| |
|
Expert
Posts: 1530
Location: ZH, Switzerland | wizard - 2023-01-14 6:35 PM Remove the pad again, fix the paint damages, find the clips and mount it properly. Mopar did not mount anything not needed, the pad will tend to shrink somewhat due to the ambient. Postponed to the Spring. Happy Restoring! Dieter |
|
| |
|
Expert
Posts: 1530
Location: ZH, Switzerland | got the band with the threaded stems for the dash pad, but I assume to contact Tony. One more thing that needs my attention asap!
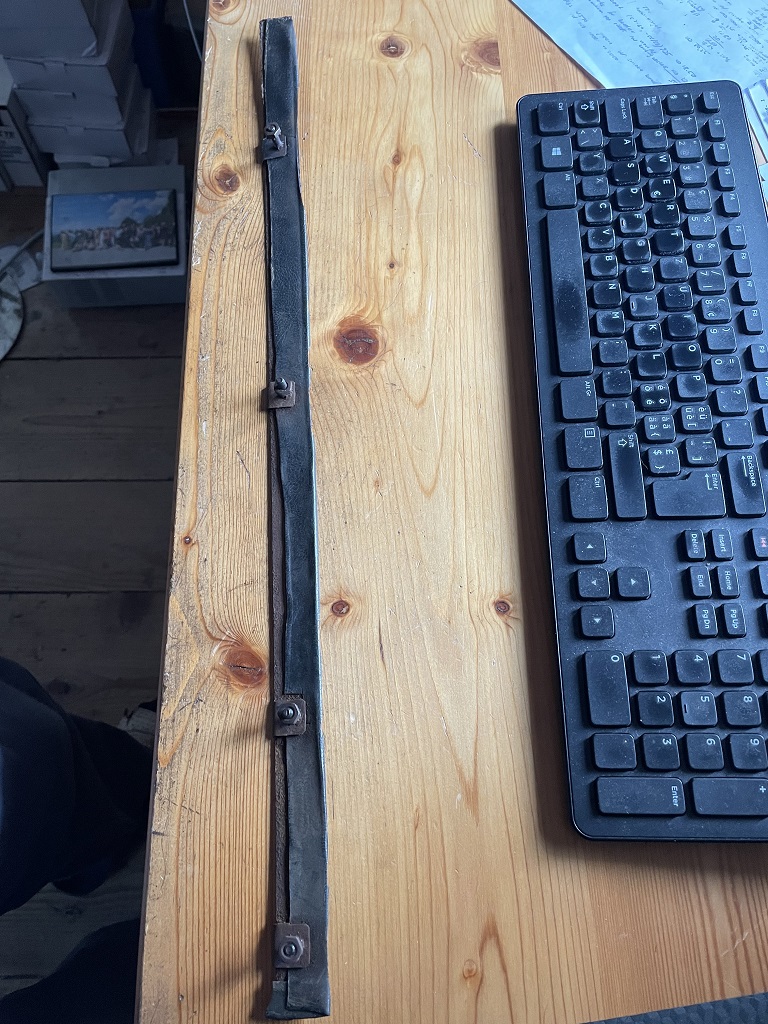 (IMG_1250 dash pad mounting strip (old one).JPG) (IMG_1250 dash pad mounting strip (old one).JPG)
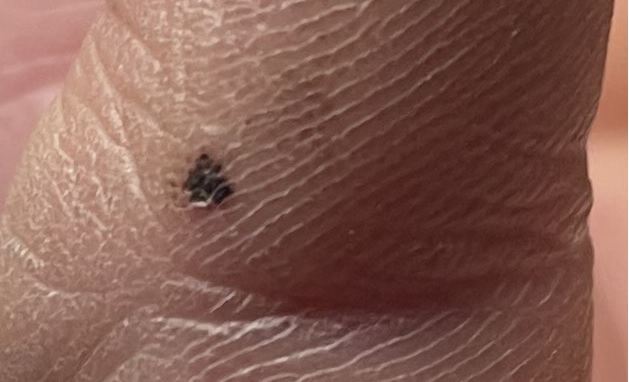 (IMG_1246 malignant melanoma.JPG) (IMG_1246 malignant melanoma.JPG)
Attachments
----------------
IMG_1250 dash pad mounting strip (old one).JPG (341KB - 64 downloads)
IMG_1246 malignant melanoma.JPG (57KB - 71 downloads)
|
|
| |
|
Expert
Posts: 1530
Location: ZH, Switzerland | Dash board stripped again to ship to the body and paint shop to get a new surface of charcoal metallic color. I assume I'm going to install the dash board afterwards direct into the car. Happy Restoring! dieter |
|
| |
|
Expert
Posts: 1530
Location: ZH, Switzerland | Dash board stripped again to ship to the body and paint shop to get a new surface of charcoal metallic color. I assume I'm going to install the dash board afterwards direct into the car. Happy Restoring! Dieter BTW: April, 29th this year appointment at the dermatologist to check my skin.
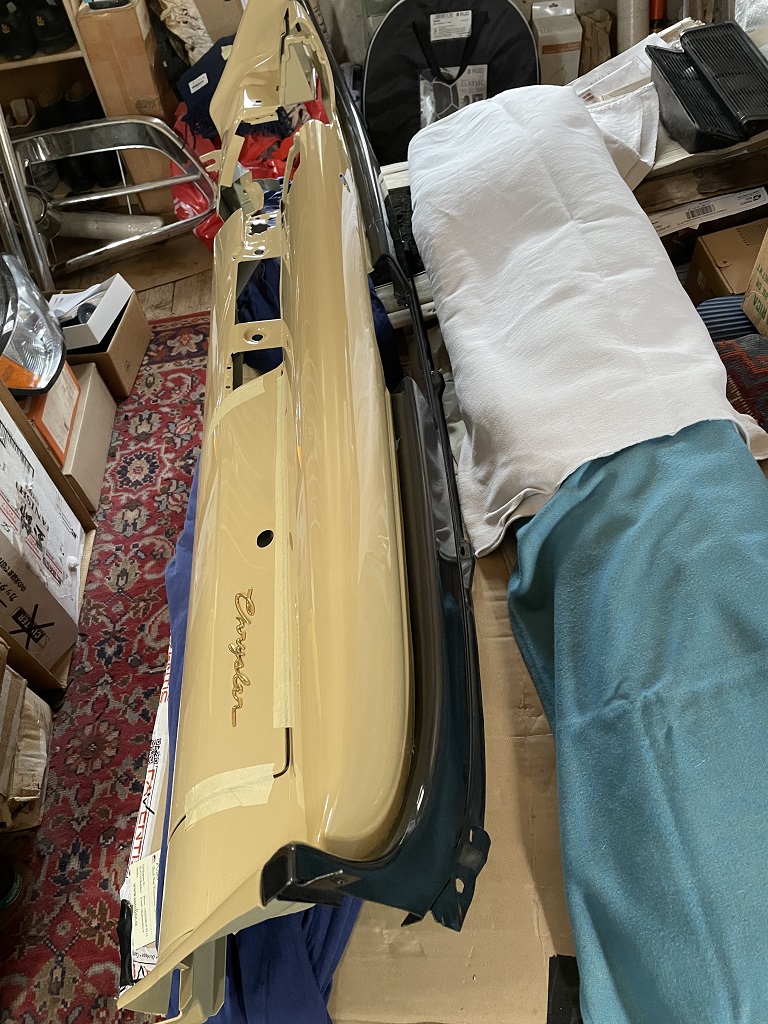 (IMG_1278 dashboard stripped again to ship.JPG) (IMG_1278 dashboard stripped again to ship.JPG)
Attachments
----------------
IMG_1278 dashboard stripped again to ship.JPG (343KB - 65 downloads)
|
|
| |
|
Board Moderator & Exner Expert 10K+
Posts: 13045
Location: Southern Sweden - Sturkö island | Your dashboard will be fantastic once it's ready Dieter. To mount the dashpad, two persons is needed to keep control of the tabs. Cut small strips of plastic to use as guides for the tabs. Mount everything in the dashboard and mount the unit with two persons in the car. Dont forget the cable harness and the windlace before mounting the dashboard.
|
|
| |
|
Expert
Posts: 1530
Location: ZH, Switzerland | Got a phone call from the engine builder. He did ask for an appointment at the cylinder grinder company near the engine builders home. March 1st. I'll be there on the afternoon. Title of the mail for the appointment dates is "work on heads and engine block". My Idea was from Nick's Garage "413 Head Work - Valve Job, Bowl Work and New Seals". Happy Restoring! Dieter |
|
| |
|
Expert
Posts: 1530
Location: ZH, Switzerland | The windshield trim clips (361 B from Quirey Quality Design, as well as the #704 upper windshield and rear window clips) I got. The rear window trim clips (361 A are not deliverable). Where to get it? I need 10 clips, the original all mostly are rusted away. I'll appreciate your answer. Thanks Happy Restoring! Dieter
Edited by di_ch_NY56 2023-02-25 5:20 AM
|
|
| |
|
Board Moderator & Exner Expert 10K+
Posts: 13045
Location: Southern Sweden - Sturkö island | Check with Big M, John Fowlie Dieter. Otherwise, hopefully you have at least one for to use as a template for to fabricate new ones. |
|
| |
|
Expert
Posts: 1530
Location: ZH, Switzerland | wizard - 2023-02-24 11:32 AM Check with Big M, John Fowlie Dieter. Otherwise, hopefully you have at least one for to use as a template for to fabricate new ones. Thanks, reproduction in Switzerland is the very most expensive way (tool costs!). At least I have two ones (all others were broken into parts due to the corrosion), at one the perimeter is good, on the other the mounting to the body is quite okay, but very coarse, do to the rust. Happy Restoring! Dieter
Edited by di_ch_NY56 2023-02-25 7:32 AM
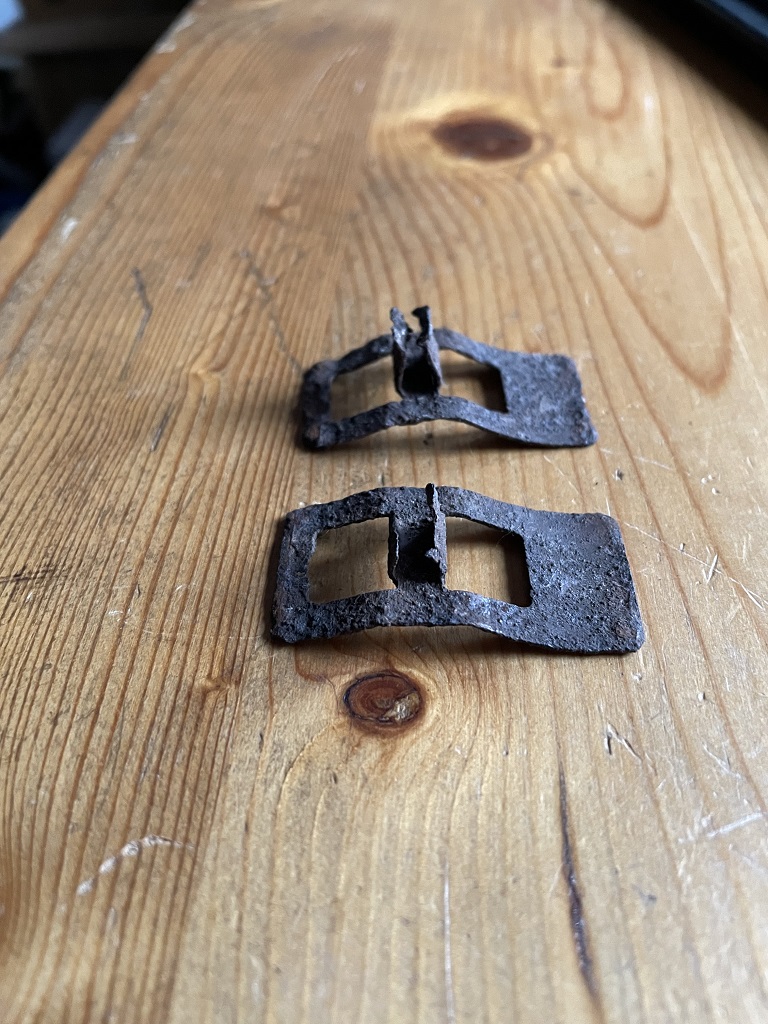 (IMG_1292 361 B windshield molding clips (lower).JPG) (IMG_1292 361 B windshield molding clips (lower).JPG)
Attachments
----------------
IMG_1292 361 B windshield molding clips (lower).JPG (303KB - 64 downloads)
|
|
| |
|
Board Moderator & Exner Expert 10K+
Posts: 13045
Location: Southern Sweden - Sturkö island | Then you must try with Big M Dieter.
My photos below shows the clips for a 4DHT - compare with your clips, perhaps they are the same?
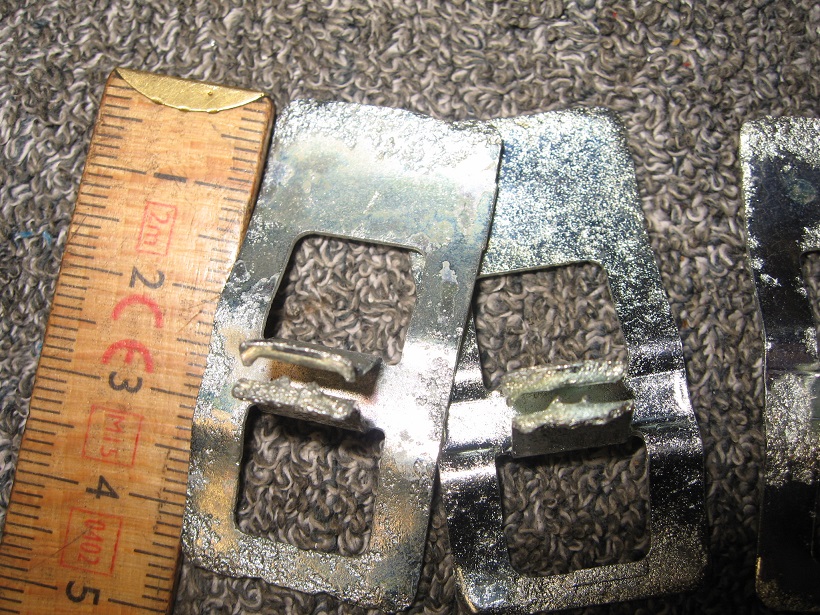 (Clip Backlight Molding-rez.jpg) (Clip Backlight Molding-rez.jpg)
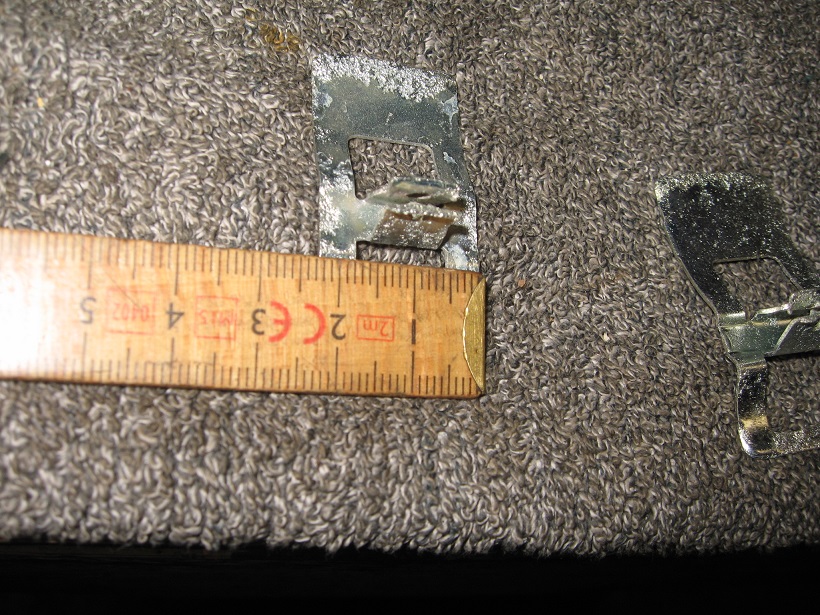 (Clip Backlight Molding_1-re.jpg) (Clip Backlight Molding_1-re.jpg)
 (Clip Backlight Molding_2-rez.jpg) (Clip Backlight Molding_2-rez.jpg)
Attachments
----------------
Clip Backlight Molding-rez.jpg (304KB - 62 downloads)
Clip Backlight Molding_1-re.jpg (269KB - 59 downloads)
Clip Backlight Molding_2-rez.jpg (155KB - 60 downloads)
|
|
| |
|
Expert
Posts: 1530
Location: ZH, Switzerland | wizard - 2023-02-24 3:28 PM Then you must try with Big M Dieter. My photos below shows the clips for a 4DHT - compare with your clips, perhaps they are the same? exactly the same size, thanks my friend! I was looking into the chapter 23, parts book, exactly the same parts number.
Edited by di_ch_NY56 2023-02-25 10:17 AM
|
|
| |
|
Board Moderator & Exner Expert 10K+
Posts: 13045
Location: Southern Sweden - Sturkö island | Great Dieter, that means that you have more possibilities to find some. Most inportant that the "claws" are still there and not rusted away. Not the best solution as for clips, but it works.
As you can see, my spare clips has been cleaned from rust and been given a fresh galvanizing.
|
|
| |
|
Expert
Posts: 1530
Location: ZH, Switzerland | Today a free working day for private affairs... I had an appointment with the engine builder at the cylinder grinder shop. Discussion about further steps at the engine. The crankshaft (replacement is grinded and hardened, had a color protection layer and the polished surface is another thing in Switzerland). Discussion about the engine. For the crack, for sure there is a appropriate technical solution to make it sealed for ever. All exhaust valve seats are beyond cutting (too deep). Hardened rings will be installed. The guides for the valve stems are worn out mainly on the exhaust side. The engine builder will have an eye for valves with an oversized stem. New words as well. The engine comes to the engine test stand to get it broken in and power/torque measurements over a wide rev range. Happy Restoration! Dieter
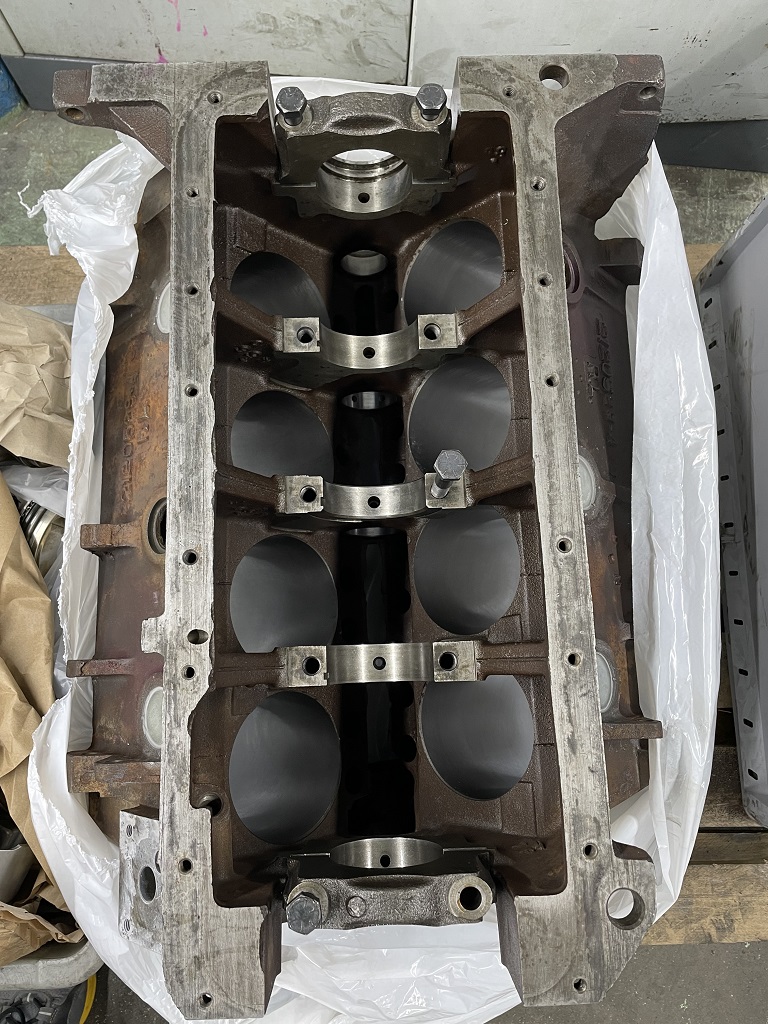 (IMG_1308 cylinder block bottom view.JPG) (IMG_1308 cylinder block bottom view.JPG)
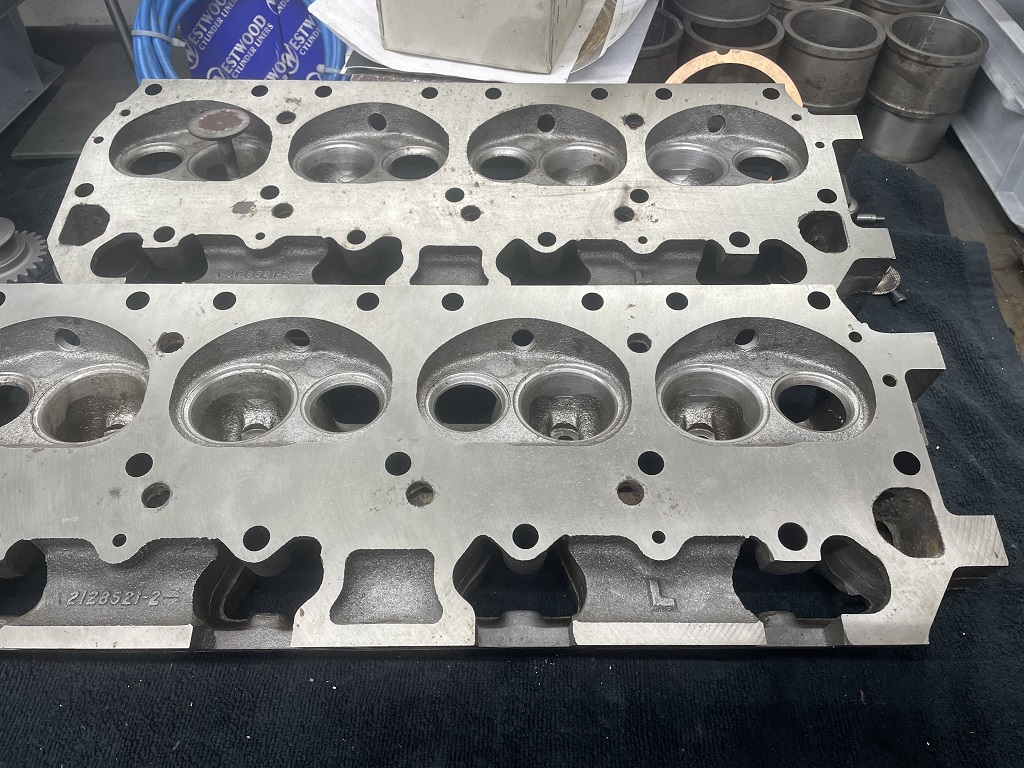 (IMG_1309 cylinder heads.JPG) (IMG_1309 cylinder heads.JPG)
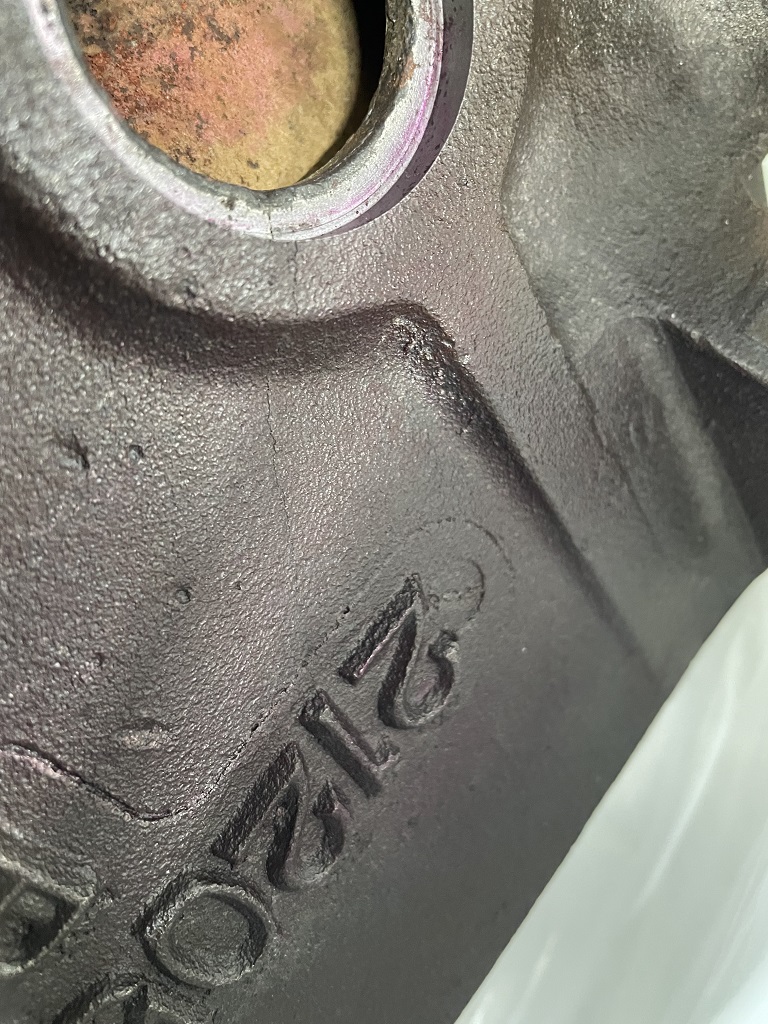 (IMG_1307 crack in the block.JPG) (IMG_1307 crack in the block.JPG)
 (IMG_1311 crack in the block magnified.PNG) (IMG_1311 crack in the block magnified.PNG)
Attachments
----------------
IMG_1308 cylinder block bottom view.JPG (332KB - 94 downloads)
IMG_1309 cylinder heads.JPG (343KB - 88 downloads)
IMG_1307 crack in the block.JPG (349KB - 84 downloads)
IMG_1311 crack in the block magnified.PNG (246KB - 83 downloads)
|
|
| |
|
Board Moderator & Exner Expert 10K+
Posts: 13045
Location: Southern Sweden - Sturkö island | As for cracks, look on youtube Dieter. Theres a kit with drilling template and short alu screws.....
here's the link https://www.youtube.com/watch?v=Pq0wfU4ZaKk
|
|
| |
|
Expert
Posts: 1530
Location: ZH, Switzerland | Thanks Sven I let the companies working. The boss of the company we met, did propose that solution as well. Another solution could be JB welding. I did watch the video. The crack in the example seems to be wider than the crack in the block. Nobody knows, if the really thin crack goes fully through the wall. Rember the cracks you and me noticed at the cylinder heads of my Beast... |
|
| |
|
Expert 5K+
Posts: 9650
Location: So. Cal | I would cut a groove into it, pre-heat it, & weld it with nickel wire - either that or braze it with brass; but it would take more heat that way. |
|
| |
|
Expert
Posts: 3887
Location: Northen Virginia | in Argentina it is a guy who weld blocks of tractors and big machinery. He told me something like that, he made the cast iron very hot in a furnace and while hot he weld it. But he keep it hot and gradually bring it to room temperature over a 7 days period... |
|
| |
|
Expert
Posts: 1530
Location: ZH, Switzerland | Thank you for the replays. I had another idea as well: Muggy Weld. That could work as well. Happy Restoring! Dieter
Edited by di_ch_NY56 2023-03-05 4:49 AM
|
|
| |
|
Board Moderator & Exner Expert 10K+
Posts: 13045
Location: Southern Sweden - Sturkö island | Even normal soldering could work, given clean surfaces and use of acid.
My friend and had this discussion long time ago, and one thing was just JB Weld, but with all holes temporary closed and vacuum applyed to the cylinder bank. If the crack goes trough, then the vacuum could suck in JB weld in the crack. |
|
| |
|
Board Moderator & Exner Expert 10K+
Posts: 13045
Location: Southern Sweden - Sturkö island | hemidenis - 2023-03-04 7:30 AM
in Argentina it is a guy who weld blocks of tractors and big machinery. He told me something like that, he made the cast iron very hot in a furnace and while hot he weld it. But he keep it hot and gradually bring it to room temperature over a 7 days period...
This is the serious way of handling with the problem Denis. What the old guys did back then, here in Sweden they used coal bedding, bringing the item up to good heat, then welding it hot. This prevent new cracks to form around the weld - a very common thing to happen if welding cold. |
|
| |
|
Expert 5K+
Posts: 9650
Location: So. Cal | Yes, however, with advances in cast iron welding rod, namely using the proper nickel alloy; it's now quite easy to weld cast iron without cracking, and only use a much smaller amount of preheat. My welds here didn't crack and don't leak. I cut and added a whole section to it.
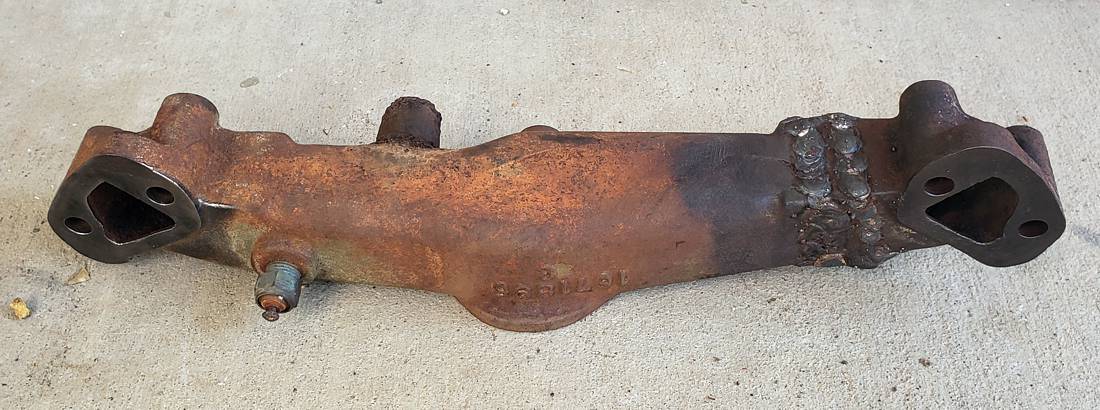 (392 Extended Crossover Welded.jpg) (392 Extended Crossover Welded.jpg)
Attachments
----------------
392 Extended Crossover Welded.jpg (123KB - 86 downloads)
|
|
| |
|
Board Moderator & Exner Expert 10K+
Posts: 13045
Location: Southern Sweden - Sturkö island | I saw your work, really nice! |
|
| |
|
Expert
Posts: 1530
Location: ZH, Switzerland | The engine block was initially magnafluxed. I just wonder why this crack they didn't discover. The result I got, was that all cylinder bores are co-centrical with an almost identical bore wall thickness. One idea... cold welding.. Pontiac engine welding https://www.youtube.com/watch?v=uNwYdFNDlM8 Happy Restoring! Dieter
Edited by di_ch_NY56 2023-03-12 12:58 PM
|
|
| |
|
Expert 5K+
Posts: 9899
Location: Lower Mainland BC | di_ch_NY56 - 2023-03-12 9:46 AM
The engine block was initially magnafluxed. I just wonder why this crack they didn't discover. The result I got, was that all cylinder bores are co-centrical with an almost identical bore wall thickness. One idea... cold welding..
https://www.youtube.com/watch?v=uNwYdFNDlM8
Happy Resotring! Dieter
No fancy formating required to activate the link, just a carriage return on the keyboard.
|
|
| |
|
Expert
Posts: 1530
Location: ZH, Switzerland | Yesterday afternoon I did clean the filter cases of my Letter. Of course the covers need a new paint job. The underside of the base plate a surface rust removal and rust inhibiter primer. Happy Restoring! Dieter
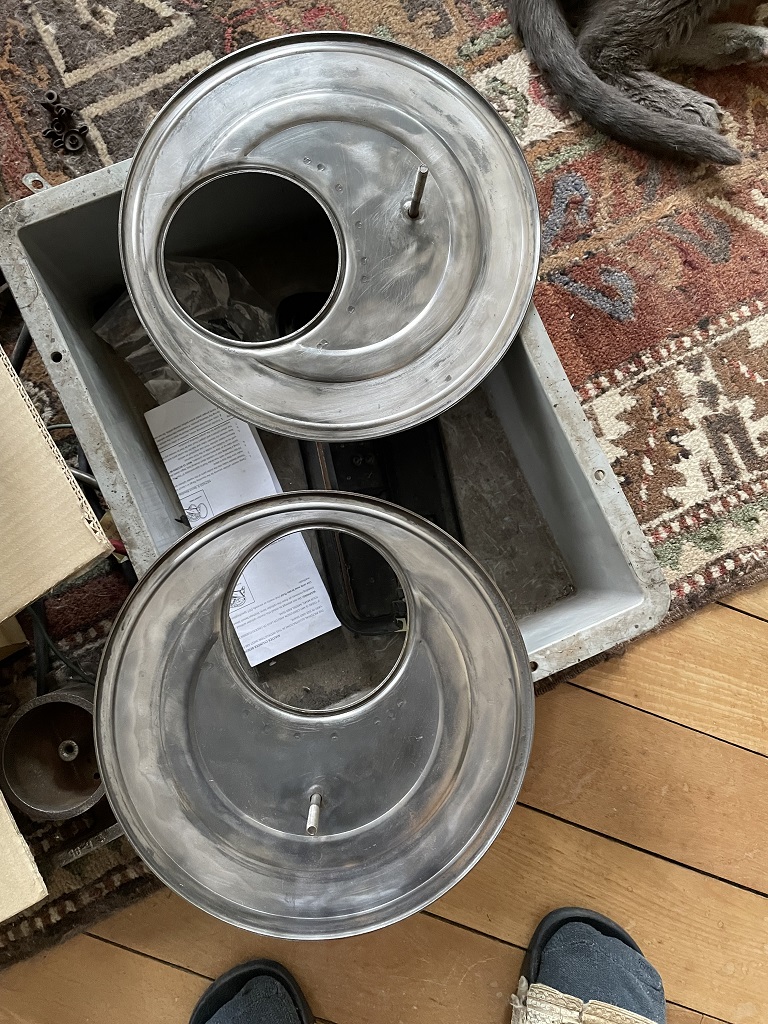 (IMG_1501 air filter case top view base plate.JPG) (IMG_1501 air filter case top view base plate.JPG)
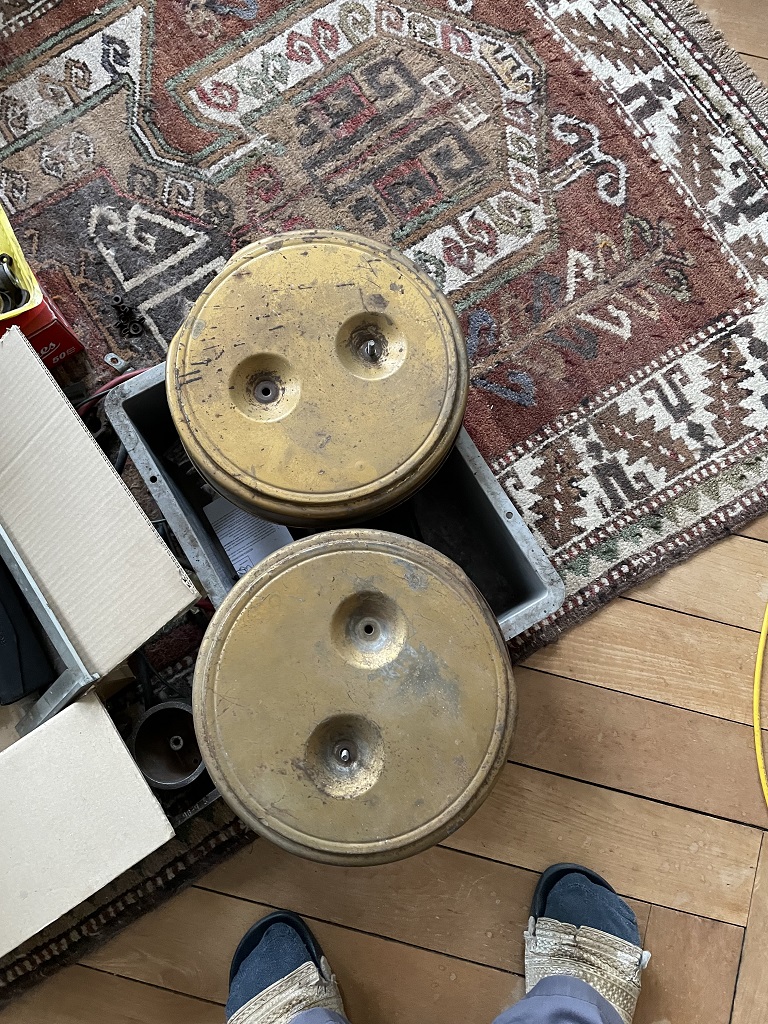 (IMG_1500 air filter case top view.JPG) (IMG_1500 air filter case top view.JPG)
Attachments
----------------
IMG_1501 air filter case top view base plate.JPG (390KB - 81 downloads)
IMG_1500 air filter case top view.JPG (455KB - 87 downloads)
|
|
| |
|
Regular
Posts: 76
Location: Okielahoma | How’s the project coming? Did you find a solution for the block? |
|
| |
|
Expert
Posts: 1530
Location: ZH, Switzerland | jwheath68 - 2023-04-17 4:40 PM How’s the project coming? Did you find a solution for the block? Hi Thank you for your question. Nothing new under the sky. No answer from the engine builder nor from the cylinder grinder shop. The last I sent to the cylinder grinder shop is the metal stitching process documented on an engine block (preferred method over two component glue with a CNC-machined plate over the crack). Happy Restoring! Dieter |
|
| |
|
Expert
Posts: 1530
Location: ZH, Switzerland | Last Tuesday, or last Tuesday one week ago, I destroyed the top thread (leaking now). No replacement in sight anymore. So the brake system will be unfinished forever... Happy Restoring! Dieter
Edited by di_ch_NY56 2023-04-22 4:48 AM
 (Brake line Tee 1960.jpg) (Brake line Tee 1960.jpg)
Attachments
----------------
Brake line Tee 1960.jpg (3KB - 77 downloads)
|
|
| |
|
Expert 5K+
Posts: 9899
Location: Lower Mainland BC | di_ch_NY56 - 2023-04-22 1:47 AM<
I destroyed the top thread (leaking now). No replacement in sight anymore. So the brake system will be unfinished forever...
Not like you to be so negative Dieter.  Of course there are solutions to your problem and probably not for too much $$. Of course there are solutions to your problem and probably not for too much $$.
Following your 5-58-1 hint in that tiny tiny image from the 1960 Mopar parts catalogue, I found what I think is the correct PN for the tee on page 5-11 as PN 2123 218.
When I chased 2123 218 in eBay as "2123218 brake line tee", there were no perfect hits but there were some very close ones. Have a look at these and post a photo of your tee:
https://www.ebay.com/sch/i.html?_from=R40&_trksid=p2510209.m570.l131...
One example:
Brake Line 3-Port Tee Fitting SAE 3/8-24 Inverted Flare Edelmann 3/16" 3-Way Tee
https://www.ebay.com/itm/122665110171

Hang in there. All is NOT lost
|
|
| |
|
Expert
Posts: 1530
Location: ZH, Switzerland | I'm very nervous... so a storm in a water glass did appear. I'm in contact with John (Big M). The brake tee is not forgotten. sooner, or later I gonna get it. Big thanks to you John. Happy Restoring! Dieter |
|
| |
|
Extreme Veteran
Posts: 443
Location: Beaumont TX | Yes, however, with advances in cast iron welding rod, namely using the proper nickel alloy; it's now quite easy to weld cast iron without cracking, and only use a much smaller amount of preheat. My welds here didn't crack and don't leak. I cut and added a whole section to it. Amazing welding cast iron Nathan. I didn't know that could be done yet. I thought only brazing worked which wasn't all that strong. I'm sure glad to know about this. There are opportunites for me on this. Thanks for showing this. |
|
| |
|
Expert
Posts: 1530
Location: ZH, Switzerland | There is a professional cast iron welder in Germany, who restored the exhaust manifold with one broken mounting ear (to the exhaust system). He welds the Mercedes Benz truck engine with imperfections from the casting process. I did a proposal mail to the engine builder and cylinder grinder. But no answer so far.... IVG Reviguss GmbH
Thomas Tscherneschek
Am Steinfeld 3 - 5
91592 Buch am Wald
Deutschland Happy Restoring! Dieter |
|
| |
|
Expert
Posts: 1530
Location: ZH, Switzerland | The main brake cylinder is back together (intended was to install the boot correctly). Of course I know that work had to be done prior to mount the brake cylinder to the reinforcement plate.... To mount the collar with the boot again, I had to release the brake pressure through the brake cylinder at the passenger side rear wheel. Of course I did open the bleeding screw too ways (should be 1/4 of a 360 degree turn). In comparison to the New Yorker (Beast) the wheels were not mounted wile replacing all wheel cylinders. Sometimes, of often, I feel overstrained while restoring that car. Happy Restoring! Dieter
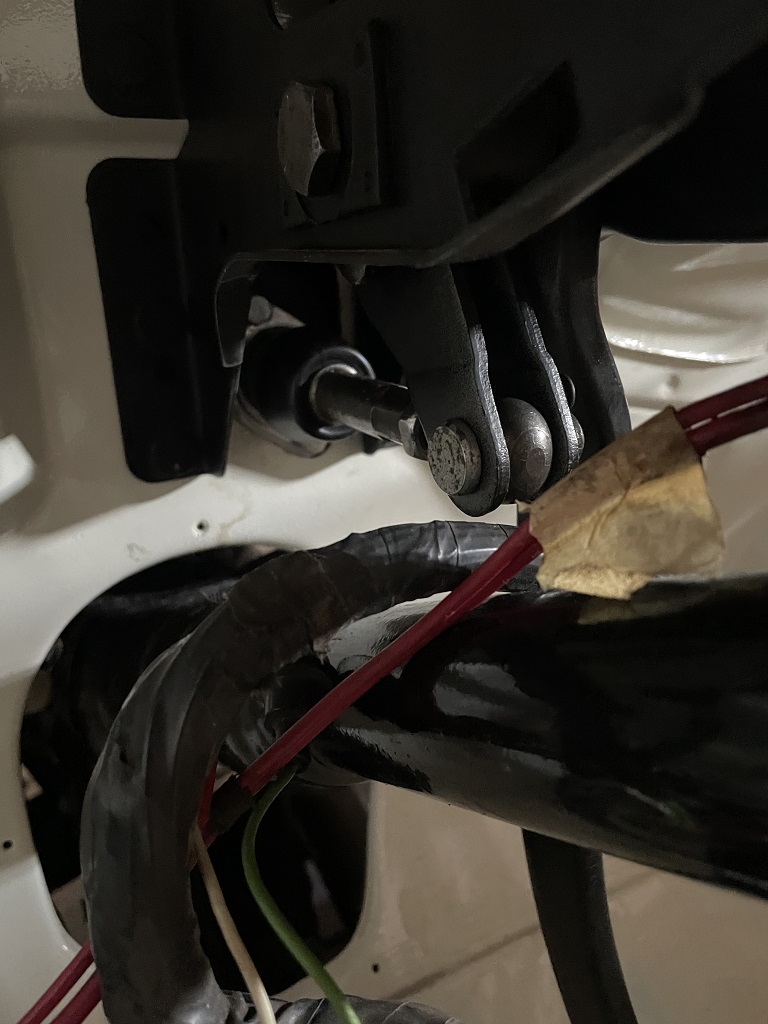 (IMG_1693 main brake cylinder.JPG) (IMG_1693 main brake cylinder.JPG)
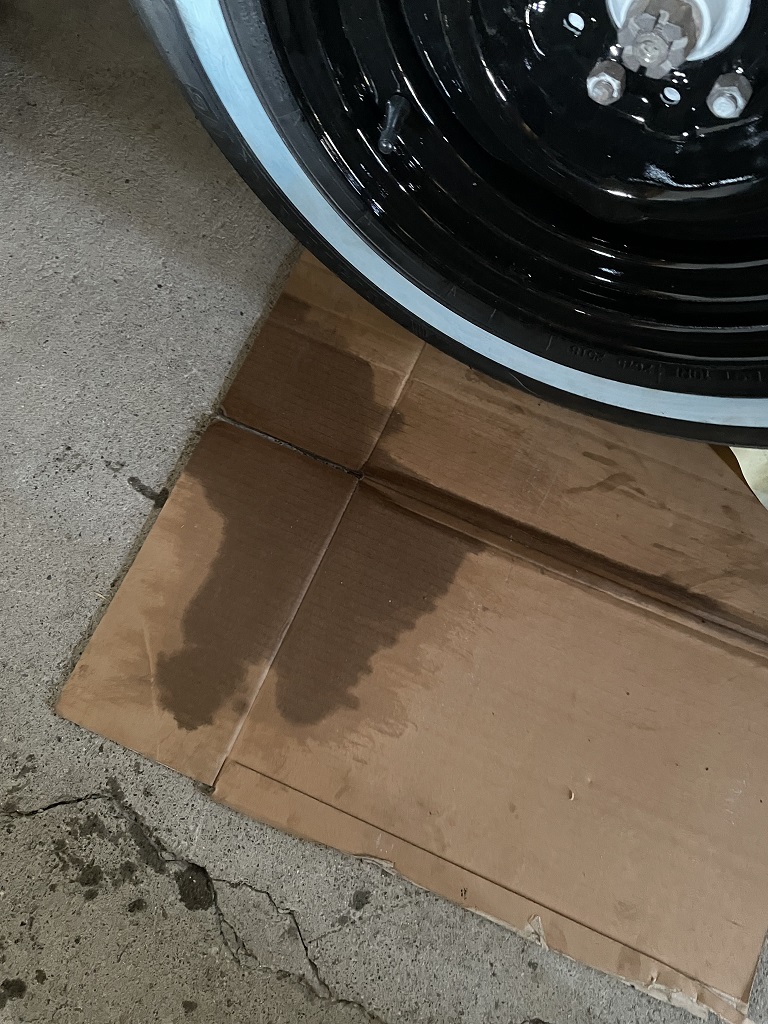 (IMG_1694 release brake pressure.JPG) (IMG_1694 release brake pressure.JPG)
Attachments
----------------
IMG_1693 main brake cylinder.JPG (185KB - 69 downloads)
IMG_1694 release brake pressure.JPG (302KB - 67 downloads)
|
|
| |
|
Expert
Posts: 1530
Location: ZH, Switzerland | The brake sytem is basically bleeded now. Some air bubbles are still in the system, with a geysir in the main brake cylinder pot when applying the brakes with my left hand, while inspecting the pot through the open windshield opening. Full air extraction later on when the passenger floor is protected. Happy Restoration! dieter |
|
| |
|
Expert
Posts: 1530
Location: ZH, Switzerland | The dashboard is at the body and paint shop again for the charcoal part repainting job. Ready during August 2023. Engine: absolutley bad story. Nothing did happen so far Even though the amount is ready on my account for years. I assume mostly due to a talk of a member here to the engine builder boss. A black painting on me forever. He shot directly into my back. I do not forgive, I do not want to talk to that person anymore. The rumour the engine builder did mention at the visit of the cylinder grinders job was "he has no money, we will wait until he saved some money"! Happy Restoring! Dieter |
|
| |
|
Expert
Posts: 1530
Location: ZH, Switzerland | News about the engine block. I got a call from the engine builder last week. He went to the Gussschweisser homepage and did agree with a professional repair of the engine block crack. This morning I wrote to the company (Gusschweisser.de) to ask if they would be open at July, 31st, 2023. There are two options I'm thinking about now. a) picking up the engine block at the cylinder grinders and bring it to Germany on the same day (July 31st) b) picking up the engine block on July, 29th this year and store it over the weeking in my daily driver to start early on the Monday to drive 335 km one way from my home to bring the engine block to Germany (Buch am Wald). Happy Restoring! Dieter |
|
| |
|
Expert
Posts: 3887
Location: Northen Virginia | Darn I missed the whole engine saga. What a pain in the neck, apparently engines rebuilders are the same around the world, they don't even consider making things right to a customer living in another country. |
|
| |
|
Expert
Posts: 1530
Location: ZH, Switzerland | hemidenis - 2023-07-15 3:40 PM Darn I missed the whole engine saga. What a pain in the neck, apparently engines rebuilders are the same around the world, they don't even consider making things right to a customer living in another country. The whole saga did turn another way. I got a mail from the wife of the professional cast iron welder in Berg am Wald in Germany. No appointment available for a not definded time due to the reason the welder is on duty actually. I did a phone call to the engine builder to inform and propose "metal stitching method" as an alternative. We did agree to wait to what will happen to the professional cast welder (most probably a health issue). Happy Restoring! Dieter |
|
| |
|
Expert
Posts: 3967
Location: DFW, TX | I don’t know if you’re looking to replace your engine, but a ‘60 Imperial 413 just came available for a cheap price. Might be a rebuildable core? Not mine, just want to help.
https://www.facebook.com/groups/ForwardLook/permalink/10159926237314... |
|
| |
|
Elite Veteran
Posts: 649
Location: Finland | I am suffering with you Dieter. I don`t tell you what to do here , I am just telling you what I would consider. Make a cover plate out of soft copper sheet hammering it to fit over the whole
freeze plug hole and attaching it to the cylinderblock with a number of M5 12.9 machine screws. When the copper is formed to fit you put enough 260 deg celsius silicone on the block and
screw it down evenly so the silicone comes out all around the cover. Sweep off the extra material and carefully wash the edges. Of course you first of all have to put a stop screw at the absolute end of the crack.Copper can be painted with epoxy as primer.
I mention this since I have done this once 30 years ago and still today it is not leaking. This I know since I still use the tractor it was done to.
It is frankenstein thinking yes but hey these are still cars aren`t they and your youth is ticking away Dieter. |
|
| |
|
Expert 5K+
Posts: 7393
Location: northern germany | I've never seen a cast iron weld that lasted. That doesn't mean it is not possible, BUT in such an application, were you spend many thousands of Euros and many, many hours into a block, you should be 100% sure.
Given the fact, that there is no numbers matching block, only a vague time matching and that the 300 blocks were regular 413 New Yorker/Imperial blocks, I'd get a parts car with a good 413. I will buy the 8.3/4 from you then, if its not an Imp |
|
| |
|
Expert
Posts: 1530
Location: ZH, Switzerland | Two times verified that nearby is a good, professional cast iron welder (oldtimer engine blocks and heads, and more) Over the last two afternoons I replaced the master brake cylinder. Easy to replace and all is sealed again. At the pedal now pressure builds up (few air bubbles went out of the reservoir,I guess that's normal). Not easy, but I managed to get the front wheels off as well (heat gun) - no wonder the center hole and the flange at the brake drum must be clean, with no color on it. Now I have to look for a person who holds the brake pedal downl (or a bag with snow chains) to start bleeding.
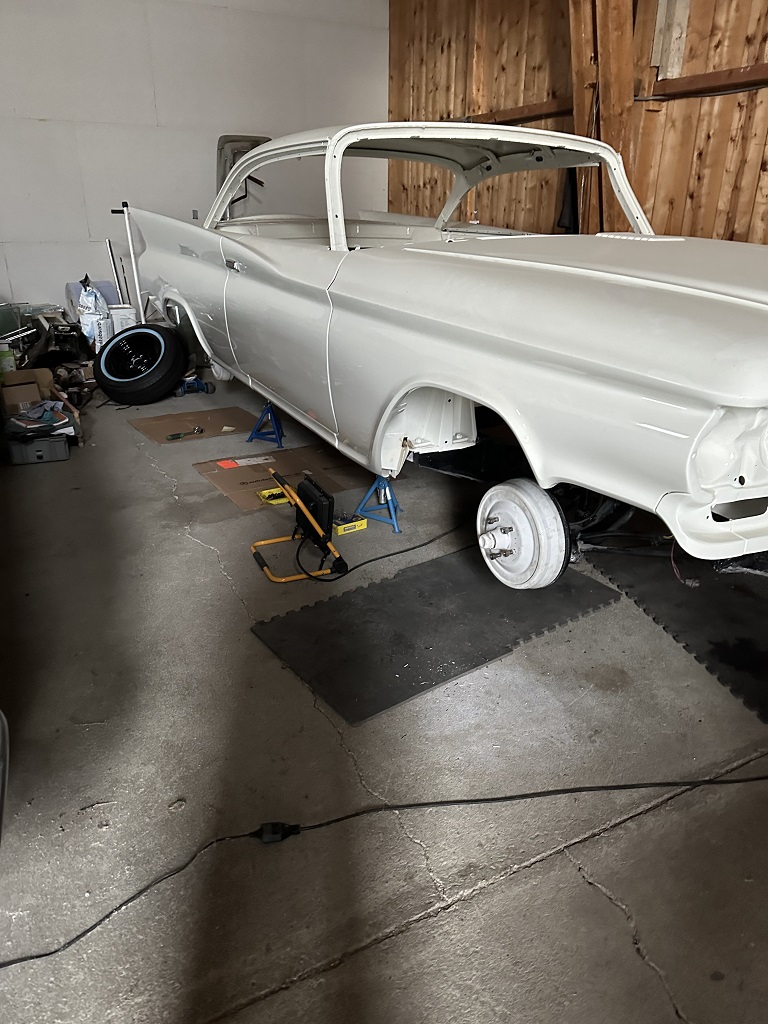 (IMG_2511 brake systen ready for bleeding.JPG) (IMG_2511 brake systen ready for bleeding.JPG)
Attachments
----------------
IMG_2511 brake systen ready for bleeding.JPG (259KB - 36 downloads)
|
|
| |
|
Board Moderator & Exner Expert 10K+
Posts: 13045
Location: Southern Sweden - Sturkö island | Nice to see your posts again Dieter! Since you don't have the dashboard mounted it should be easy to put in a wooden wedge somewhere on the pedal fulcrum.
You can bleed the brakes by first open a bleeder, press down the pedal, insert suitable wooden wedge, tighten the bleeder, remove the wedge. Repeat as needed. This is how I do it when I dont have any helper available.
Takes longer time, but works...... |
|
| |
|
Expert
Posts: 1530
Location: ZH, Switzerland | wizard - 2023-12-28 4:06 PM Nice to see your posts again Dieter! Since you don't have the dashboard mounted it should be easy to put in a wooden wedge somewhere on the pedal fulcrum. You can bleed the brakes by first open a bleeder, press down the pedal, insert suitable wooden wedge, tighten the bleeder, remove the wedge. Repeat as needed. This is how I do it when I dont have any helper available. Takes longer time, but works...... Thanks my friend, I guess I need one more bottle of DOT4-Brake fluid... Most probably next week. Happy New Year 2024 for you and your family.
Edited by di_ch_NY56 2023-12-30 11:37 AM
|
|
| |
|
Expert
Posts: 1530
Location: ZH, Switzerland | The brake are bled, the rear brake pads adjusted. |
|
| |
|
Expert
Posts: 1530
Location: ZH, Switzerland | Last week I had a phone call the the employee of the cyinder grinder company (where the block, the crankshaft, both cylinder heads and the rotating assembly are sitting now). I did fully agree with the metal stitching method for the crack in the engine block. Furthermore I said, please clean the other side of the block as well to check for a crack as well. I did inform the engine builder. No anser so far. He (the engine builder) was hanging on the idea, that I gonna seek for a better 413 engine block. My answer was just (in the mail) it's like seeking for a needle in a haystack. Happy Restoring! Dieter |
|
| |
|
Elite Veteran
Posts: 1157
Location: D-70199 Heslach | Dieter, don't give up to convince the engine builder that he should do his job |
|
| |
|
Expert
Posts: 1530
Location: ZH, Switzerland | Thanks to MoPar Now longer ago I got 12 clips for the moulding (surrounding windshield and rear window). The ones are smaller (I assume for the windshield) the others are bigger (I assume for the rear window). The bigger clips I just have three rusted clips. But double amount of the smaller clips. See picture....
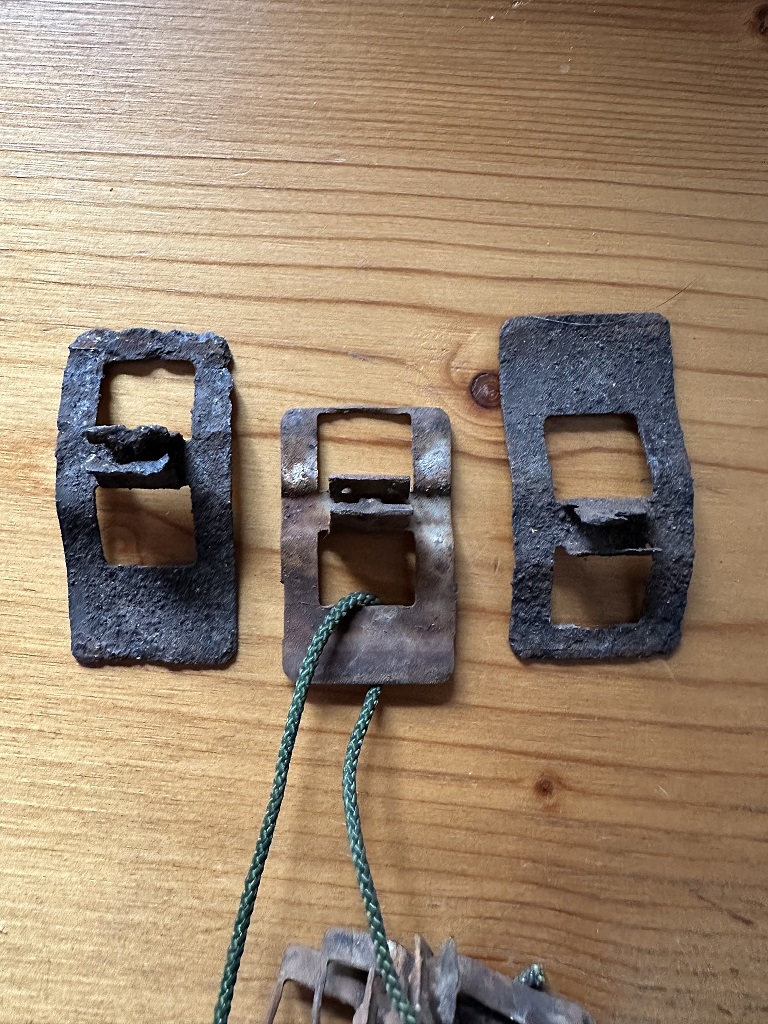 (IMG_3035 window moulding clips.JPG) (IMG_3035 window moulding clips.JPG)
Attachments
----------------
IMG_3035 window moulding clips.JPG (382KB - 6 downloads)
|
|
| |
|
Board Moderator & Exner Expert 10K+
Posts: 13045
Location: Southern Sweden - Sturkö island | Dieter, ask Carlo Notaro, he might have some https://www.facebook.com/notaro.se/
|
|
| |
|
Expert
Posts: 1530
Location: ZH, Switzerland | Thanks Sven I'm in contact with John. |
|
| |