|
|
User has resigned from board
 
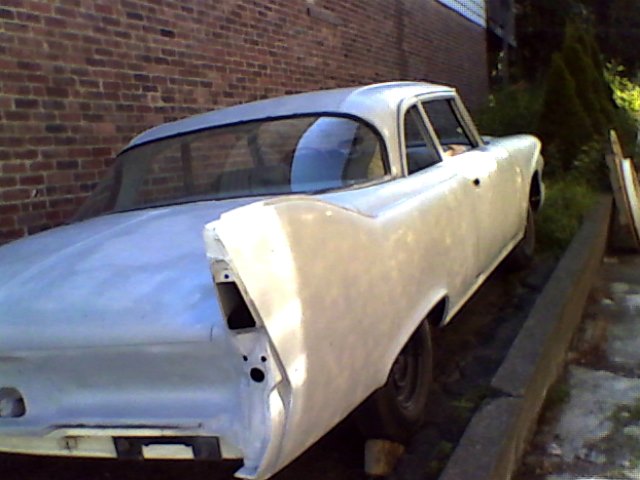
| 60 plymouth, question, paint cars.com has starfire super gloss jet black acrylic enamel paint kit, includes 1 gallon of jet black acrylic, 1quart medium reducer, i pint enamel hardner, $ 70.00 is this a good price , is this enought to paint my car, if yes how many coats will it cover, next i will be DA ing my old paint, could someone give me simple very simple ABCDEF ,steps on what i need to do from start to finish, example 1st wash and dewax the paint, 2nd DA the paint with X grit sand paper, then use this type primer, sand it with this grit paper, then prime again then sand it with this ect ect do this then do that, ect ect also the trim around front and back glass removal, front looks like u remove the screws inside the door on both side, the rear glass im not sure where to start to remove im sure once i start this, i will have many dumb questions that i will ask member for there advice , im in no rush, no time frame, but willing to try it, maybe ill have first time luck and it will come out nice, thank you in advance
Edited by 196061SAVOY 2015-05-01 6:43 PM
| |
| | |
Expert 5K+
Posts: 8445
  
Location: Perth Australia | First of all
Get a service manual and read about the trim and glass removal and make sure you understand it (so you dont break anything)
Depending exactly on what your doing, greatly alters what you need to do to "paint" your car
If the paint thats on it now isnt bad, just faded, then you dont need much, good clean, light scuff (I have seen this done with a scotchbrite pad) and spray away
If you need to remove all the paint because its full of cracks, then you need much more and if your doing bodywork, much more again
I get a bit confused with imperial measurements a little, so I cant advise you on exactly how much of what your going to need, but I like to double the amount of paint they say I will need (blow over paint job, 4 litres is enough) and I mix all of the paint in one bucket if it came in multiple cans (this is to make sure the colour is consistent) then pour it back into their cans
But really, there is no recipe for how to re paint a car, each part will have its own requirements, but the biggest thing to remember is preperation
Paint hides nothing, if it looks a but crap, or its not right without paint, its worse with it and black is the absolute worse colour for someone thats not experienced in bodywork and painting to paint a car with
Watch lots of u tube stuff on painting and read lots, things like grades of paper ect, comes down to what you have to sand and what stage in paint prep your at
But as I said above, learn how to properly pull the car apart first and lable or bag everything, even if you think you'll remember, label it anyway, takes a litle extra time to do at the start, but makes it heaps easier at the other end of the job (photos help a lot as well)
Good luck
| |
| | |
User has resigned from board
| <p>thanks, I was ganna pm u, I saw in an earlier post u gave Plymouth some advice on him using acrylic enamel, I can re read that post, I have been reading, and have watched some utub videos , but for the simple reason of still not really understanding what im about to do, that's why im asking here, if I had the knowledge I would give the simple details on what one need to do, heres what im thinking of doing, 1st DA the paint, or im not sure I may chemical stripper , im not exspecting any any body work , this is a solid car , then high build primer, sand then paint im removing doors, truck, hood, and fenders, I will sand and paint those , then do the back half, I want black, cant change my mind, tonight i removed the front windshield moldings , came off easy , putting it back maybe tricky, nothing in my book explains the back molding, ill search the web, iv got time plenty of time, if I cant get the simple abcdef here then ill ask a body shop, its not rocket science im only painting a car, how hard can it be , and if i f**k it up bad, i have a tendency to do that, then ill send it out and have a couple mexicans paint it, but i wanna try at the least,</p>
Edited by 196061SAVOY 2015-05-01 9:50 PM
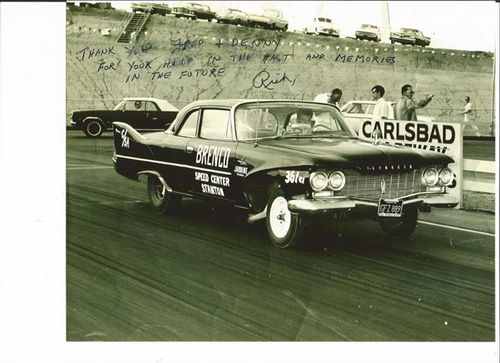 (Gasser.jpg) (Gasser.jpg)
 (Snapshot_20141101_2.JPG) (Snapshot_20141101_2.JPG)
 (387.jpg) (387.jpg)
Attachments
----------------
 Gasser.jpg (20KB - 123 downloads) Gasser.jpg (20KB - 123 downloads)
Snapshot_20141101_2.JPG (40KB - 124 downloads)
387.jpg (44KB - 125 downloads)
| |
| | |
User has resigned from board
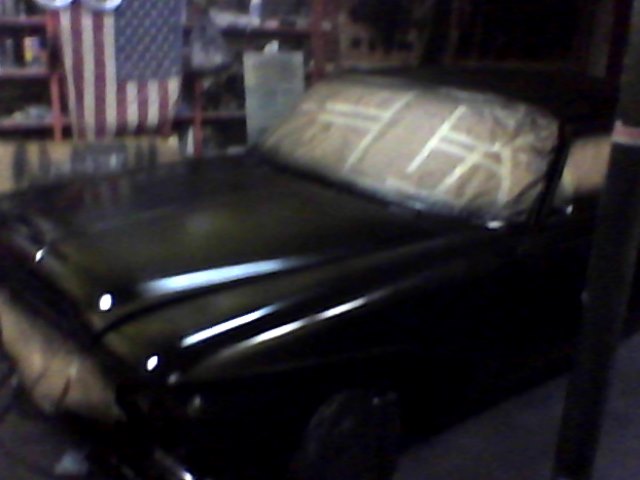
| <p>if it looks like this black 60 savoy when its done ill be happy, I don't want minty mint because I wont drive it, I want it to look like it was painted back in 1960, I don't mind a few flaws, I don't go to shows, I just go for rides and then stop at the local watering hole, plus plus im changing the interior color to black with red plain jane flat vinyl seats or all red ,through autointeriors $350 for front and back,</p>
Edited by 196061SAVOY 2015-05-01 10:15 PM
| |
| | |

Expert 5K+
Posts: 8948

Location: WHEELING,WV.>>>HOME OF WWVA | rule of thumb , if you think you just put on too much , you did ! ----------------------------------------------------later | |
| | |
User has resigned from board
| I always thought "more the better" in most things in life, okay, but not paint, yea, iv been think hard about doing this, painting my car myself, for a long time, and more so lately , Im removing all trim , ect ect this week end, after that I will begin to remove paint, I wanna see "like a kid ; whats under this paint, after that ? one step at a time, i will search out an independent body shop , there is a maaco shop somewhat close, maybe that would be my best option, we'll see, ill try and post picture af my feeble attempt at this endeavor , i figure if Plymouth, from mississippi can do it, i should take a shot at it, maybe he will chime in on his experience with home painting | |
| | |
Expert 5K+
Posts: 8445
Location: Perth Australia | Dont remove paint unless you have to, especially if its the original paint, its been there for 55 years, it aint going to fall off
Basics are, wash, rub back (800 wet/dry by hand), wash with wax + grease remover, etch primer (it will stick good), wash with w+g remover, high fill primer, proof coat (very light dusting of paint), rub back again until you cant see any proof coat (This is one stage that can make or break a paint job, a lot of this should be done with a long sanding board (sometimes called a body file) following the lines of the car and it will show up high and low spots on the panels)
Up to you wether you address these or not (black will show these like a twisted mirror)
After the proof coat stage (and repairs), another coat of primer (especially if you rubbed to metal during proof coat), rub back again with 800, then wash with w+g remover again, then paint
Before the paint, you want the car shiny, but dont go finer than 800 paper because you need something for the paint to bite into and if you stay to coarse, you will see the sanding lines
I dont actually own a air da sander, I use an electric random orbital sander (does the same job) but it has a rectangular base that makes it easier to get into the edges, but I only use this for the heavier/rougher stages not the final stages of painting
Remember if you can see it or feel it, paint wont hide it
As for top coats, this is proof of the pudding time
If you didnt clean it properly, you will get stuff coming out of seams ect and into the paint, you can get fish eyes (little pin hole that refuses to let paint be there), water in seams (probably worse than dirt) and paint lifting
As for orange peel where the paint surface looks like a golf ball, I (thankfully) havnt had that happen to me, but I believe its because of the wrong ratio of thinners to paint
To fix faults in the top coat, there is only one way, let it dry (longer the better), sand the area back and do it again
I wouldnt buy a "paint kit" because you are going to run out of everything because you will stuff something up and you will have to do something again (everyone does, some wont admit it ) and if your doing a colour change, then 4 ltrs is not enough and I would start with 20 litres of thinners ( i use it to clean the spray gun)
Speaking of spray guns, you need one for the high fill (has a bigger nozzle) and another for the paint (I use gravity fed guns myself, they use less air. so less over spray)
Dont go the airless spray gun road, they are for painting fences, you need a good compressor (with water filters and air regulator), you need plenty of hose, you need a dusting gun (air blower), you especially need and understanding house mate or landlord because you will make a mess and it wont happen in a weekend
Best thing is to show good pictures of the car and what your doing, so its easier to advise on the actual bit your doing
The next thing is, no 2 people will do this the same way!!!!!!!!!!!!!!!!!!!
I expect some to dis agree with how I do it and thats fine, but its how I do it
I am not a panel beater/spray painter and I learn something every time I do paint
Have fun, and talk to your paint supplier about what ppe you need (respirator ect), not clever to try and paint without one
The other thing is dont chemically strip unless you have to and if you do, pay particular attention to cleaning the seams, it will eat new paint even better than old
| |
| | |
User has resigned from board
| thanks, holy s**t, that's a ton of work, maybe ill bit the bullet and send it out , I was ganna W&G it, then DA it, or strip it, ( i striped my 65 442 a few years back, before I sent it out to be painted, the painter seemed to be happy, that he had a clean canvas to start with, he never said " u dumb f**k why did u strip off all the old paint" he never said a thing painted my 442 for 3gs 2 stage base clear came out mint ), then W&G it good, then high build primer, wet sand, W&G it good again, high build primer,wet sand W&G it see how it looks and feels, then blast it with 1 stage acrylic enamel for dummies , im way over my head, REAR WINDOW stainless steel removal, that's all I have left to remove any ideas, looks like the long pieces slide into the small squares at center top and bottom and at each side, whats the trick on popping those/that off,
 (murph 033 (2) (800x600).jpg) (murph 033 (2) (800x600).jpg)
 (IMG_4708.jpg) (IMG_4708.jpg)
 (1965demmerwithstripe.jpg) (1965demmerwithstripe.jpg)
Attachments
----------------
murph 033 (2) (800x600).jpg (240KB - 108 downloads)
IMG_4708.jpg (12KB - 127 downloads)
1965demmerwithstripe.jpg (123KB - 107 downloads)
| |
| | |
Expert 5K+
Posts: 8445
Location: Perth Australia | My plymouth is a big back window one and it was out when I got it, but yours is the same as a sedan one, so it should be the same as my dodge
Its all just clipped in, no screws
As you un clip it, you should be able to separate the strips from the joiners
If you pull the window out, make a note of which clip went where, there are different sizes (didnt work that one out until I was putting it back together)
Those clips will be a pain if you dont pull the window, but doing that opens another can of worms
If the paints really good on yours and there is absolutely no rust or repairs needed, you could do it quicker, but doing a colour change means you have to get into the door jams ect and trying to protect the interior is a pain and the door rubbers (gaskets) will give the game away (unless you replace them) because you cant paint under them with them there
Doing the same colour makes it a weekend job with a mate or two giving you a hand
I did a colour change on my dodge, not sure if you have read my thread on it, but it will give you an idea, johns thread on his 59 plymouth is another good one, the Swedish one is brilliant for rust repairs, but not much on the painting side
Main thing is to get your tools and supplies sorted first
As I said above, a good compressor is a must, the small ones wont be able to keep up with your spray guns and definitely not with a sander, get plenty of paper, plenty of tape and masking paper, plenty of thinners and if you do have some minor dents to deal with, plenty of filler
High fill primer wont get dents, its just to catch sanding scratches that you will miss (its kind of like a thick paint)
Dont be scared of it, just take your time, nothing better than being able to stand back and say "I did that"
I would recommend keeping it the same colour if you havnt painted before, but I know that advice will fall on deaf ears 
| |
| | |
User has resigned from board
| thanks mick, I think your right on, on all accounts, the aircraft stripper, didn't work on this paint ,as I thought, 1 returned the can, tomorrow, I will bring it to the guy who painted my 442, get a price on changing it over to black and keeping the same color, if price is out of sight then I will continue my quest, ill try DA ing it, yes theres twice as much work involved in changing the color, and as u said, black is a tough color, never mind doing it your first time, maybe maybe best to leave to a professional, finished up today with the last few items needing to be removed, just the back window trim, now I know I can just pop it off and not worry about bending anything, | |
| | |
Expert 5K+
Posts: 8445
Location: Perth Australia | Pop it off very carefully or you will bend it
No bull in a china shop stuff here
It may be glued in with silicone or stuck in the clips
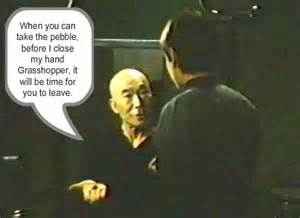
Careful "young grasshopper"
| |
| | |
User has resigned from board
| <p>iv been looking at different pictures of 60 savoy, seeing if I can find an old fashion color other than black that I might like, something different, something u don't see often, not only do u never see a 60 savoy barreling around the mean asfault jungles, of the usa, but one so mind blowing, people run away screaming, he he , a color so ugly, that its beautiful, like a beautiful asian girl/women. I kinda like this combo, puke and more puke green, this color combo might calm me down and set me streight , being such a diff looking car, u need a paint color that add some character, my car was bought new oyster white so thats some food for thought, if it was good enough for the old man who bought it new maybe its time to bring her back to her glory, plus white hides everything but but i dont see white id get a complex, heres comes the white whale, but then again if the price is right anythings possible, ill know more this week what direction i will be going, i need to chat with my vietnames painter, see how busy he is, and hope he needs some easy money for his casino shakes.</p>
Edited by 196061SAVOY 2015-05-03 11:47 PM
 (4781038829_a25e175fc6_z.jpg) (4781038829_a25e175fc6_z.jpg)
Attachments
----------------
4781038829_a25e175fc6_z.jpg (149KB - 98 downloads)
| |
| | |
Expert
Posts: 2312
Location: Arizona | It might look better with those greens reversed. | |
| | |
User has resigned from board
| I went back to the air craft stripper , spent about 8 hours today with a couple puddy knifes little under half the car done, not easy, slow going, trunk showing shiny clean metal in spots, rear quarters,, fins, have a thin light pinkish white color after paint removed, looks thin , not bondo, some type primer ? im not finding multiple layers , looks like just 1 layer, in its 55 years somebody took it down to bare metal , ill take some pictures tomorrow | |
| | |
User has resigned from board
| <p>I prefer no bondo, or body filler on an otherwise clean rust free car, some people are obsessed with straight, perfectly straight, I prefer metal under primer and paint, I don't get on my belly to look down the side of a car to see if it has waves, id rather have waves and all steel then no waves and a coat of bondo, bondos cheating, I hate skim coats of bondo,</p>
Edited by 196061SAVOY 2015-05-04 10:41 PM
| |
| | |
User has resigned from board
| getting there waiting on pictures from friend with phone camera, what iv found is ,no primer on metal, thin skim coat of, I think bondo right over the metal, the body, 1 layer of paint, scraping off in strips like plastic, roof has 2 layers, was all blue at one time, then roof was painted white, so that will be a pain in the u know what to get off, cheap cheap paint job, im glad im stripping it, after all paint is removed ill need to take it somewhere, out of prying eyes to sand off the skim coat of bondo, ganna be messy, got a better idea of what the metal looks like, in places the metal is showing clean, but other spots, small spots I see just surface rust, that when sanded cleans up clean , nothing serious as of now, no wonder the paint was lifting, im on the fence with the color ,the body white, snow white bright clean white color, with either a red or black roof,
 (4edef03a3a3351212a94a44a5962c466.jpg) (4edef03a3a3351212a94a44a5962c466.jpg)
Attachments
----------------
4edef03a3a3351212a94a44a5962c466.jpg (32KB - 109 downloads)
| |
| | |
User has resigned from board
| I thought of this combo, with out the graphics , but un sure, I wish I had a side view, and a front view, the black hood with white fenders might look dumb, but I like the white, that's the white id want, | |
| | |

Expert
Posts: 1493
Location: Jamaica Plain, MA | You are brave, "Grasshopper." Where in MA are you? I might be able to offer you some support. Be careful with the stripper. I know everyone says that, including the can, but it can't be made not poisonous until all the VOCs are gone, so you want to cover up with goggles, a mask, gloves and a suit or a the right clothes, and, make sure animals and children can't get any where near your run-off and your trash. Depending on the level of finish you want, seriously consider if you want to remove the glass. The resto guys on here will have issue with this, but if you take your car apart without the resources to put it back together, you're not doing yourself any favors. There is not reason to take the glass out for a driver unless you have rust issues in the channels. Do, however remove all the stainless and pot metal. You can tape off the bumpers. I'd take off the outside door handles, but you can skip that if you mask carefully.
Disclaimer-- this site is for and by people who for the most part are purists, which is what the site is pretty much for. But, if you want to get a driver on the road, it's ok to do things old school and get your car presentable, and go back and do a complete resto later. You should enjoy your car. I was too lazy to read all the advice in this thread, so forgive me if this has been stated: painting your car without a booth is where I draw the line... as in I think it's a bad idea, especially here in MA where there is going to be dust and pollen in the air until the next snowfall unless you have a giant garage, a way to keep everything clean, and the understanding about how to fix eff-ups. I know a few shops who can do a primer-sealer, surfacer with some wet-sanding, and a single stage enamel inside a clean booth, and thermo-set the paint for a price that is way less than all the gear and paint you need if you DYI. If you prep the car well enough, it will be of the quality you seek, and chemically stable. PM me if you want to know about a couple of shops in the Boston area that I trust, and who can help a guy on a budget. One last thing-- most of the finest show cars in the world have Bondo on them-- this is to get the metal as smooth as possible and to cover weld-lines. It's not a sin, it's a part of ironing out an old car. I am not talking about inch-thick Bondo, but the fancy cars coming out of resto shops and rod shops usually have some skimming. A little Bondo magnet will help you tell if there is too much. If you want to learn how to paint, I'd get a hold of a beater or two and practice on them first. And read/youtube a LOT. Maybe you have a friend who will let you practice on their 92 Toyota. Happy to tell you about any of this, and local support.
Jon | |
| | |
User has resigned from board
| thanks, nope, Im good, im almost done with stripping the paint, I want to do this, strip the paint, iv done it before, I decided not to try and paint my self, I will send it out after I clean it up, im saving myself a few bucks, plus the guy who paints it, a lot of time, so win win every things cool here, just tellin a story,
 (thEFGTZ77X.jpg) (thEFGTZ77X.jpg)
Attachments
----------------
thEFGTZ77X.jpg (5KB - 109 downloads)
| |
| | |
Expert
Posts: 1493
Location: Jamaica Plain, MA | Nice deal. Looking forward to seeing pics. | |
| | |
User has resigned from board
| still out there, paints all off, working on removing the coat of ? bondo/slick sand, must be a cal thing, slow going messy as all hell, trying to get some pictures soon, I see 1960 clean metal, so far so good, | |
| | |
User has resigned from board
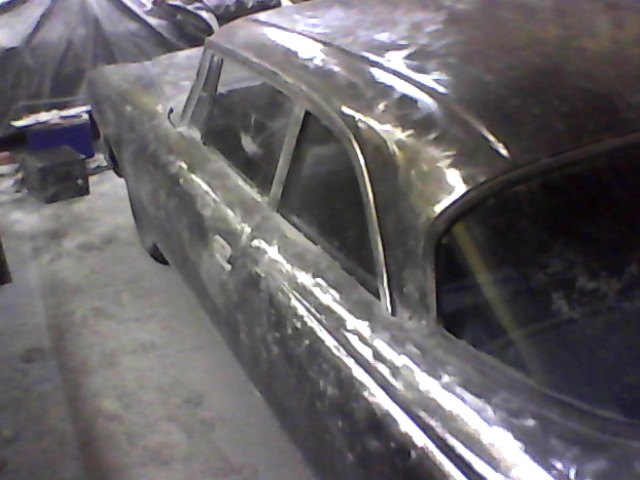
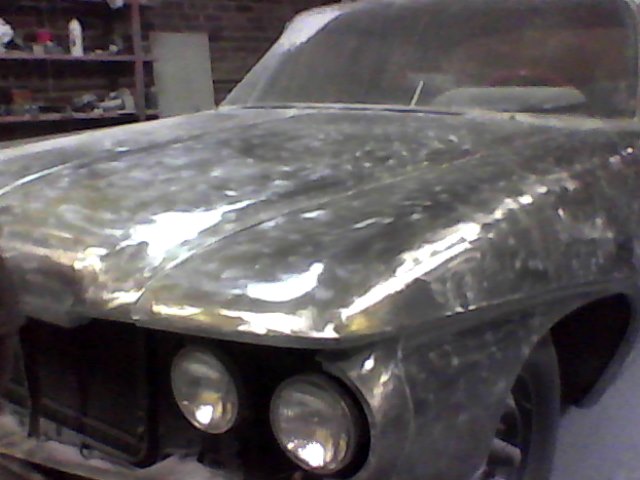
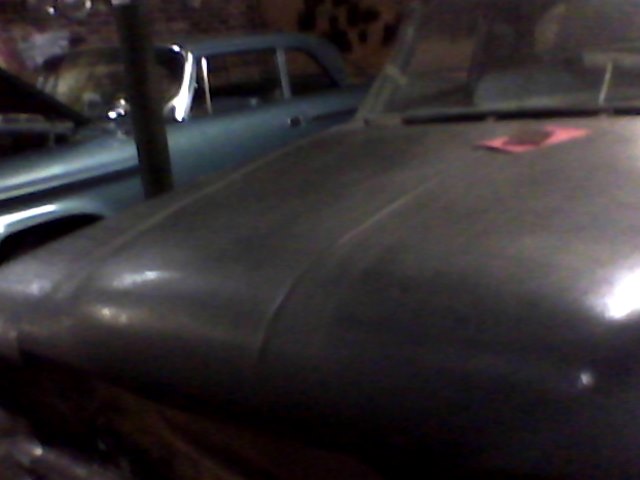
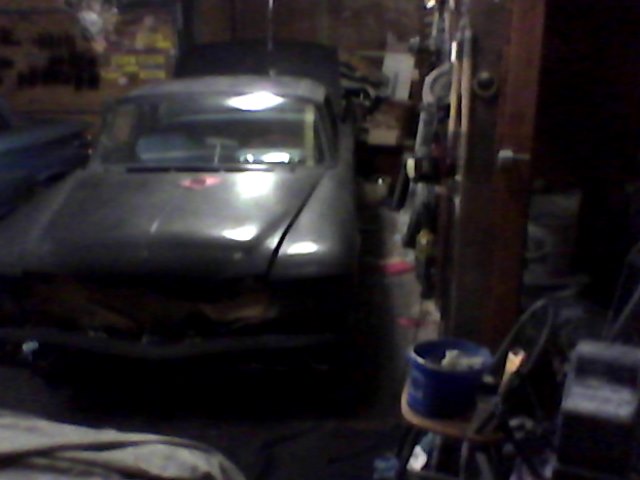
| done!!!!!!!!!!!!!!!! striped the paint by hand, then sanded off the s**tty slick sand/bondo, the guy should be shot, who coated this rust free 60, with that s**t
 (Snapshot_20150511_3.JPG) (Snapshot_20150511_3.JPG)
 (Snapshot_20150511_6.JPG) (Snapshot_20150511_6.JPG)
 (Snapshot_20150511_5.JPG) (Snapshot_20150511_5.JPG)
 (Snapshot_20150511_2.JPG) (Snapshot_20150511_2.JPG)
 (Snapshot_20150511_1.JPG) (Snapshot_20150511_1.JPG)
 (murph 031 (2) (800x600) (640x480) (640x480).jpg) (murph 031 (2) (800x600) (640x480) (640x480).jpg)
Attachments
----------------
Snapshot_20150511_3.JPG (46KB - 99 downloads)
Snapshot_20150511_6.JPG (32KB - 101 downloads)
Snapshot_20150511_5.JPG (46KB - 103 downloads)
Snapshot_20150511_2.JPG (43KB - 113 downloads)
Snapshot_20150511_1.JPG (52KB - 98 downloads)
murph 031 (2) (800x600) (640x480) (640x480).jpg (194KB - 113 downloads)
| |
| | |
User has resigned from board
| <p>7/1/15 going for paint, gives me time to tidy up door jams, ect ect ,sand down the trunk floor and paint it, and clean the awful awful mess I made in my garage , I should have made a plastic box around my car before I did this, my garage cave will never be clean again, grrrr,( add that one to" murphy's law" list ) from now till 7/1 any steps I should take on keeping the steel clean, is there anything I can wipe it down with to remove very light s**t slick sand spots, it will be kept dry and covered inside till then,</p>
Edited by 196061SAVOY 2015-05-12 9:52 PM
| |
| | |
Expert
Posts: 1530
Location: ZH, Switzerland | But the result (murphy 31) looks wonderful. Congratulation! Happy Motoring! Dieter | |
| | |
Expert 5K+
Posts: 8445
Location: Perth Australia | It needs to be primed
Covered, it will still rust from the moisture in the air
Raw steel thats in storage is oiled, but your painter wont like you if you do that
You will need about 4 to 6 ltrs of etch primer
paint shop should be putting this on anyway before they do much
| |
| | |
User has resigned from board
| thanks, im keeping an eye on it, I figure my painter will need to go over all the metal with something scotch bright pad , so ill wait on primer it for now, what im thinking is removing doors fenders, sand inside edge of the doors, behind doors on body, top edge of fire wall, inside fenders, edge of fenders that hood covers, remove trunk hood, clean paint the inside bottom, places u wont see and difficult to reach and extra detail work for the painter, etch prime the bare metal, prime, w&g, then im thinking of coating those places with a good rattle can paint of enamel, gloss black enamel, remove splash shields, clean paint those, clean up parts of frame paint that, that's what I plan to doing, iv got 6 weeks before she goes, so tidy things up, then the painter can focus his time on painting the outside metal with onyx black, yes im going black gatta do it red interior, ill be happy with that | |
| | |
Expert 5K+
Posts: 8445
Location: Perth Australia | Dont paint anything with anything without talking to your painter first
If you use or do something thats not compatible with the paint they use, you could ruin the entire job
I would only prime (with what the painter tells you to prime with) and let the painter do the rest
I dont know how the painters do it really, I am an auto elec and what your trying to do is the same as someone running wires everywhere and then asking me to just put the ends on the wires and expecting it to be all good, it wont be!!!!!
I still think you should have a crack at doing it yourself, black is not a good choice for a first time, but metallics would be worse (hard to fix runs)
If your going to use rattle cans inside the jams, your not going to make it worse
All your colour paint should be the same type, application method, manufacturer, even batch to make sure of colour and chemical consistency (I mix all the colour paint into one container, then pour it back into their original containers if its in multiple lots)
| |
| | |
User has resigned from board
| thanks, right now, im pulling fenders, clean paint undersides, and sanding some spots I could not get to, pulling splash shields then clean and paint , pulling doors, sanding off old paint , trunk lid pulling that and again sanding, trunk floor sanding it down and that I will paint , my garage is a eye sore there no way I could ever paint in there now, im sending it out for paint 7/1/15, thanks again for all your advise, ill post picture when its painted, my guy/painter works on it when he has down time at his shop, my 442 took almost 2 months, but worth the wait, | |
| | |
User has resigned from board
| getting there, fenders pulled, undersides cleaned, painted, splash shields sanded cleaned painted, working on doors, then trunk floor, then interior , try and paint the dash, trim ect ect ect 7/1/15 paint, cant come soon enough
 (Snapshot_20150524_3.JPG) (Snapshot_20150524_3.JPG)
 (Snapshot_20150524_4.JPG) (Snapshot_20150524_4.JPG)
 (Snapshot_20150524_2.JPG) (Snapshot_20150524_2.JPG)
 (Snapshot_20150524_1.JPG) (Snapshot_20150524_1.JPG)
 (Snapshot_20150524_5.JPG) (Snapshot_20150524_5.JPG)
Attachments
----------------
Snapshot_20150524_3.JPG (66KB - 96 downloads)
Snapshot_20150524_4.JPG (40KB - 89 downloads)
Snapshot_20150524_2.JPG (46KB - 119 downloads)
Snapshot_20150524_1.JPG (44KB - 116 downloads)
Snapshot_20150524_5.JPG (50KB - 93 downloads)
| |
| | |
Expert 5K+
Posts: 8445
Location: Perth Australia | Keep the pictures coming
Ask your painter if he minds taking pictures during the time he has it as well for your build album
| |
| | |
User has resigned from board
| I was set on red interior, dash, seats, carpet ect ect but I saw a new Mercedes today, black with a bluish interior, look very nice, calm, subtle with the black paint , now im thinking leaving it as is , I will just replace the seat covers with a plain vinyl some type of blue/green turquoise waiting on samples, the red interior might be too much on this particular car , plus im doing a ton on this car this year, next year I can always change it to red, doors off sanded, trunk floor sanded primed, plenty time before 7/1/15 I can see the light now ,
 (Snapshot_20120919_2.JPG) (Snapshot_20120919_2.JPG)
Attachments
----------------
Snapshot_20120919_2.JPG (60KB - 97 downloads)
| |
| | |
Expert
Posts: 2637
Location: Minor Hill, TN | 1 of the responses is right the car needs to be primered before the paint epoxy primer is your best bet
| |
| | |
User has resigned from board
| yup | |
| | |
User has resigned from board
| Im done! yea! moving it to the side till 7/1/15 and pulling out the 61 savoy, haven't been able to go for a ride in a month, I found this picture of a 60 savoy black with looks like bluish interior , cant wait
 (8617374045_0bc2032a04.jpg) (8617374045_0bc2032a04.jpg)
Attachments
----------------
8617374045_0bc2032a04.jpg (18KB - 102 downloads)
| |
| | |

Expert
Posts: 3967
Location: DFW, TX | You're very brave!
There is nothing wrong with a skim coat of filler. That's the only way you're going to get panels perfectly smooth, unless you know a very talented metal worker and have a near-unlimited budget for him.
Is that your green '65 4-4-2? Nice car!!
Keep us posted with updates. It looks like you have a really nice body to start with there. You might want to get a new camera though!  | |
| | |
User has resigned from board
| yes , I need to buy one, , the 442, was a cal black plate zero rust, orig paint , came out mint , the 60 savoy, cal black plate ,zero rust , a skim coat over the entire car? no thanks | |
| | |
Expert
Posts: 3967
Location: DFW, TX | Your take on a skim coat of filler is interesting, seeing as you plan to use high build primer. They are both used for the same reason - getting a flat surface so the paint looks its best.
I know it will be outstanding and I look forward to your updates.  | |
| | |
User has resigned from board
| <p>ah, life's good, just ordered my seat covers through auto interiors , smooth vinyl aqua/blue, and the door panel material, smooth vinyl light blue/aqua, very nice colors , and enough material for an accent of aqua/blue , light blue/aqua door panels will match my dash and door trim, and the accent on door panels will match my seats, the body will be jet black/alla Baltimore black, $475 total, door material in a few days , seat covers in a couple weeks! SMS who? perfectfit.com sells the panel/card board 7$ each 1/8 thick 32x48, min 4 says oem for chrysler </p>
Edited by 196061SAVOY 2015-06-15 9:10 PM
Attachments
----------------
Kraft Tan Waterproof Panelboard.url (0KB - 80 downloads)
| |
| | |
User has resigned from board
| <p>making some progress, couple coats of primer/some small dimples filled with gold bondito/ I decided after contemplating my limited ability at painting a car, not just any car but a 60 savoy, to paint the hard to reach/pain in my ass places that I know will cause me problems. I used rustolium prof grade gloss enamel, for inside door/doors/under the trunk lid and probly the inside edge of fenders under hood and very top of fire wall areas u wont/dont see, (they actualy came out pritty good) and even that simple task I screwed up/ cant respay that s**t to early, otherwise it will lift, had to wait, wait seems to be the theme with me and this paint job, I had to strip and re spay the drivers door, then ill only have to screw up the body, doors/trunk/hood closed and taped up/ then let the super gloss black /ruducer/hardner spay' I bought a grizzly LVLP gun made for the home/amature painter who doesn't have the high cfm rating compressor/air reserve. my first week of august to have it painted has come and gone one step forward 3 steps back/'MURPHYS LAW', so when its time and ready, I will paint with fingers crossed , keep the faith!!!</p>
Edited by 196061SAVOY 2015-08-09 11:09 AM
 (murph 031 (2) (800x600) (640x480).jpg) (murph 031 (2) (800x600) (640x480).jpg)
 (Snapshot_20150511_2.JPG) (Snapshot_20150511_2.JPG)
 (Snapshot_20150809.JPG) (Snapshot_20150809.JPG)
 (Snapshot_20150809_1.JPG) (Snapshot_20150809_1.JPG)
 (Snapshot_20150809_3.JPG) (Snapshot_20150809_3.JPG)
 (Snapshot_20150809_4.JPG) (Snapshot_20150809_4.JPG)
 (Snapshot_20150809_5.JPG) (Snapshot_20150809_5.JPG)
 (Snapshot_20150809_6.JPG) (Snapshot_20150809_6.JPG)
 (winternats_zpsxyedjtde.jpg) (winternats_zpsxyedjtde.jpg)
 (Gasser.jpg) (Gasser.jpg)
Attachments
----------------
murph 031 (2) (800x600) (640x480).jpg (194KB - 109 downloads)
Snapshot_20150511_2.JPG (43KB - 103 downloads)
Snapshot_20150809.JPG (72KB - 95 downloads)
Snapshot_20150809_1.JPG (51KB - 96 downloads)
Snapshot_20150809_3.JPG (51KB - 98 downloads)
Snapshot_20150809_4.JPG (57KB - 107 downloads)
Snapshot_20150809_5.JPG (66KB - 106 downloads)
Snapshot_20150809_6.JPG (46KB - 114 downloads)
winternats_zpsxyedjtde.jpg (67KB - 99 downloads)
Gasser.jpg (20KB - 118 downloads)
| |
| | |
Expert
Posts: 1500
Location: Lordstown, Ohio | Something you need to think on. Is some "lower" grades of body fillers will produce staining or shadowing in base/clear finishing | |
| | |
Expert 5K+
Posts: 8445
Location: Perth Australia | Good stuff
Your getting there
| |
| | |
User has resigned from board
| <p>I used the gold stuff wont shrink, minner stuff, tryin to make it as flat as I can, don't wanna say shoulda coulda musta ,after im done, im all most ready, sunday Mondays and Tuesdays I work on her, the rest of the week a couple hours at night, I give 100% credit to all the men/mates that do this and more,</p>
Edited by 196061SAVOY 2015-08-10 12:36 PM
| |
| | |
User has resigned from board
| cant find much info/videos on the new style LVLP, low volume low pressure spay gun, very similar to the HVLP , sapose to be able to spay/automize the paint with less air pressure to the gun, anybody ever use one of these guns, iv seen one video where the guy runs 28 lbs to the gun with the paint control wide open, another recommends 17 ilbs, I will test it out just before I blast the car , but would help if someone has info on what pressure spays best, biggest fair is bad orange pale and runs, thanks august 23rd or 30th I will paint
 (Snapshot_20150809_13.JPG) (Snapshot_20150809_13.JPG)
 (Snapshot_20150809_12.JPG) (Snapshot_20150809_12.JPG)
 (Snapshot_20150809_11.JPG) (Snapshot_20150809_11.JPG)
 (Snapshot_20150809_10.JPG) (Snapshot_20150809_10.JPG)
 (Snapshot_20150809_9.JPG) (Snapshot_20150809_9.JPG)
 (Snapshot_20150809_8.JPG) (Snapshot_20150809_8.JPG)
 (Snapshot_20150809_7.JPG) (Snapshot_20150809_7.JPG)
Attachments
----------------
Snapshot_20150809_13.JPG (33KB - 101 downloads)
Snapshot_20150809_12.JPG (30KB - 104 downloads)
Snapshot_20150809_11.JPG (42KB - 107 downloads)
Snapshot_20150809_10.JPG (47KB - 89 downloads)
Snapshot_20150809_9.JPG (33KB - 127 downloads)
Snapshot_20150809_8.JPG (27KB - 112 downloads)
Snapshot_20150809_7.JPG (42KB - 129 downloads)
| |
| | |
Expert 5K+
Posts: 8445
Location: Perth Australia | HVLP guns are brilliant
I control the pressure at the gun (the air bleed screw)
If you control it at the compressor using the regulator on the moisture filter, the first pull on the trigger will give lots of pressure, then it comes down
There is no hard and fast rule to what pressure you use as each gun will be a little different
Using the HVLP gun reduces how much paint is flying around in the air (getting on everything) and also "dry" paint (where its dull and sort of sits on itself)
As for orange peel and runs, orange peel is the paint is to thick, I thin the paint about 75% (1/4 paint, the rest thinners), as for runs, this comes if you try to get to much paint on one spot to quickly
There is "technique" to spraying, but not hard to pick up, basically, a smooth side to side motion, keeping the gun an even distance from the panel and overlapping strokes
Always paint in the same direction and try to paint the entire panel in one application (not 1/2 and 1/2, hard to do when it comes to the roof and bonnet and boot)
It is best to mix the paint and thinners in a separate container and poor the paint into the pot (you can and should filter it when you poor it in, but I didnt on the dodge and didnt get any splatters, lumpy bits), also, once you fill the pot point the gun somewhere other than the car and give it a test shot, each mix will be a little different and you will need to re tune the gun
It would be good to get yourself a scrap of sheet metal (piece of fence tin or something) to practice on and also test your spray pattern to make
sure its even
The clear coat that I used was much thicker than the paint and had to be thinned even more (about 1/5 paint to thinners)
Easy to see if it was to thick as it made (what I called) spider webs
When doing your strokes, if you pull the trigger about 1/2 way, you will get only air and no paint, this takes a bit of practice, but you want to start and end your strokes with only air and you start before the panel and end after it
When your actually painting, you should pretty much have air going through the gun non stop (this helps the air pressure stay even)
If you finish a panel and you have to wait for the paint to "flash off" (about 5 min) and you still have paint in the gun, you dont have to empty it, just leave it in there ready and you can also top it up if your ready to go onto the next one
Along the sides, its good to cross from 1 panel into the next, this helps build thickness into the edges (helps stop you cutting through the paint when you sand/buff the paint)
You can colour sand the paint between coats if you want, this helps get/keep the paint flat and reduce orange peel, but its a lot of work, but remember that every time you touch the car with anything, you need to wipe it down with prepsol (wax and grease remover) and sand it with nothing coarser than 400 grit wet and make sure the car is dry afterwards (blow off the car with air and pay particular attention where there are holes or seams in the panels and edges)
Preparation is the key, the better the prep, the better the job, sand the entire car with 400 wet paper and if you get through the primer, you will need to re prime that area
The car (primer) should be shiny
Your car will need at least 6 litres of paint to do the outside, not counting door jams ect, I always get at least 50 % more than I think I will need to make sure I dont run out
4 litres of prepsol should be enough and get your thinners in 20 litre drums (I used 2 1/2 drums doing the dodge), dont forget that you will also be using your thinners to clean your gun every so often
If your coloured paint is in multiple tins, pour it all into a big bucket and mix it all up and then put it back into its tins, this makes sure that there is no slight colour difference between 1 tin or another
I am glad your having a go, sounds hard, but its not really
Oh, dont try to wipe off a run or pick out a bug that drowns itself in the paint, the next coat wont fix it
If the bug is small (tiny), it will become part of the car, if its big (like a fly), stop and try to pick it with something pointy to minimize the damage, you will have to sand it out later
Bugs are bad, worse than runs
But please do a test panel first with the primer that your using right through to completed paint, if there is a chemical mis match with what your using, its better to have the paint flare up on a test panel than the car
| |
| | |
User has resigned from board
| I painted my 60 savoy this morning, not good, not good, came out like s**t, tons of orange pale, the whole car is a big orange skin, bad, very bad, but ,but I tried, I figure I can sand it down with some 1000 and use the paint as a base for a better finish, iv got less than 300$ in materials, im very good now at fixing minor dings with bondo, I have learned a ton, but, but, im no painter, I don't have the right compressor, the right gun, the space to do it properly, or the experience, luckily I used a hardner, so maybe Tuesday ill sand it down with 800,1000, 1200 im done, im cooked, over cooked, its deff harder than it looks, too all that do this type of work my HAT is off to you
 (Snapshot_20150830_5.JPG) (Snapshot_20150830_5.JPG)
 (Snapshot_20150830_4.JPG) (Snapshot_20150830_4.JPG)
 (Snapshot_20150830_2.JPG) (Snapshot_20150830_2.JPG)
 (Snapshot_20150830_1.JPG) (Snapshot_20150830_1.JPG)
Attachments
----------------
Snapshot_20150830_5.JPG (33KB - 114 downloads)
Snapshot_20150830_4.JPG (37KB - 118 downloads)
Snapshot_20150830_2.JPG (31KB - 111 downloads)
Snapshot_20150830_1.JPG (29KB - 157 downloads)
| |
| | |
Expert
Posts: 1500
Location: Lordstown, Ohio | 196061SAVOY - 2015-08-30 7:36 PM
I painted my 60 savoy this morning, not good, not good, came out like s**t, tons of orange pale, the whole car is a big orange skin, bad, very bad, but ,but I tried, I figure I can sand it down with some 1000 and use the paint as a base for a better finish, iv got less than 300$ in materials, im very good now at fixing minor dings with bondo, I have learned a ton, but, but, im no painter, I don't have the right compressor, the right gun, the space to do it properly, or the experience, luckily I used a hardner, so maybe Tuesday ill sand it down with 800,1000, 1200 im done, im cooked, over cooked, its deff harder than it looks, too all that do this type of work my HAT is off to you
Depending what product you used, its best to cut it now (meaning sanding) Why? because the longer it cures, some product turns into a rock. I use nothing but PPG products. The clear I use is best to cut it within 24h-48 hrs. and start buffing soon after. If you wait to long, it will be like buffing a rock.
Also, if you never buffed before, practice other wise you may create a bigger issue | |
| | |
User has resigned from board
| acylic enamel, reducer, hardner I followed the recip to a T it the gun, air pressure , did not atomize the paint, at time it spayed nice at other it spit, nothing I could do but put at least a base down, ill try and find a shop that will maybe just spay me 2 coats of enamel with a proper gun and proper air pressure alls well life goes on | |
| | |
Expert 5K+
Posts: 8445
Location: Perth Australia | Not much help now, but if the paint was not atomizing and it was spitting, the paint is to thick or the pressure is to low, I am thinking it was to thick
Have another go at it, but you cant just paint over it and hope the paint will fill the craters, you need to rub it back with wet and dry(wet) and probably with 400 then 600 or 800
Its hard to see the paint in those pictures, but it needs to be sanded back to flat, so the depth of the craters tells you how much you need to sand off
I know you dont want to here this, but it happens and I think everyone thats ever painted a car will have a horror story to tell
Just on the thickness of the paint in the gun, when I mix mine, its not much thicker than the thinners, as in, its very watery, but its a balancing act, to thick will be lumpy, to thin and it will not shine
| |
| | |
Expert 5K+
Posts: 8948
Location: WHEELING,WV.>>>HOME OF WWVA | sounds like maybe the gun you used had a tip that was way too small for your recipe . i try to judge viscosity more with a mixing paddle . if it don't run off the paddle
as to what looks right to me , i add thinner . my gun is a sharpe platinum with a 1.5 needle tip , i think ! it requires a tad more thinner ---------------------------------later | |
| | |
User has resigned from board
| thanks. the coat of black paint feel like an alligators back, as u rub your hand over it , here what I will try, from the advice of another hack painter, wet sand down the paint with 400, then I will let my helper, adviser, re shoot 2 light coats then 1 final heavy coat, as advised , my adviser is not a professional painter but has more experience and has learned from his mistakes over the years, after seeing it in person, he thinks it can be saved by both of us sanding down the rough paint with 400 grit then re spaying 2 light coats then 1 heavier coat, he seems optimistic about fixing it so the journey continues thanks again I need to order another paint kit, ill probably buy 2 kits just to be on the safe side, | |
| | |
User has resigned from board
| so the 8 parts paint 2 parts reducer and 1 part activator should be ignored, any advice on what would be correct ****tail formula, so what % of a gallon of enamel paint should be reduced 1gallon of paint 1 quart of reducer, , i used those cups with the numbers on them i used 8 parts paint 2 parts reducer and 1 part activator, i have no clue i very sure it was the air pressure to the gun, i started off setting up the gun by what i had learned of the net, did a few practice spays on some wall paper, looked good, then i spayed that fresh air cowel vent under the windshield, that i had hanging on the wall, i panic and thought the paint went on to thick and started f**king with the ajustments on the gun and completely lost it, in the end the piece actually came out very good, smooth, best part of the job so murphyslaw what can i say im cursed with it | |
| | |
User has resigned from board
| finished sanding down the new paint with 400, smooth! im off to vegas Saturday night, ganna try and hit a 5 or 6 or 7 or 8 team parley, 8 team pays 150 to 1 so for 100$ would pay 15 Gs,
 (Snapshot_20150910_2.JPG) (Snapshot_20150910_2.JPG)
 (Snapshot_20150910_1.JPG) (Snapshot_20150910_1.JPG)
 (Snapshot_20150910.JPG) (Snapshot_20150910.JPG)
 (Snapshot_20150910_3.JPG) (Snapshot_20150910_3.JPG)
Attachments
----------------
Snapshot_20150910_2.JPG (33KB - 108 downloads)
Snapshot_20150910_1.JPG (30KB - 124 downloads)
Snapshot_20150910.JPG (30KB - 110 downloads)
Snapshot_20150910_3.JPG (33KB - 105 downloads)
| |
| | |
Expert 5K+
Posts: 8445
Location: Perth Australia | Just read the post above your last one
8 paint, 2 reducer(thinners), 1 hardener
I would have thought it should have been more like 8 thinners, 2 paint, 1 hardener
I didnt use or need hardener, but my mix was about 25% paint, the rest thinners
| |
| | |
User has resigned from board
| <p>um, my kit contain 1 gallon of paint, I quart of reducer, 1 pint hardener, my after thought is the gun was set up wrong, and the air pressure was to low, plus after mixing the paint I don't think I gave it some time to jell, I mixed it then poured it in the gun and spayed, I think I made every mistake that one could make, but the gun I used was the new low pressure low volume gun, if not this fall then early spring I may have another go at it, but I will buy a better or try and find a used air compressor with more cfm and air reserve , and buy a hvlp gun from what iv been told I should have put down 2 light guide coats and then berry the final coat heavy, iv watched many many videos of guys painting , and my spay came out to thick and to narrow, could have been the gun itself and my low pressure i feel 100% better now that i was able to sand it down, im very good at getting dirty, removing engines, trans , brakes ect ect, but when it comes to the finesse stuff, i choke, im too much in a hurry, forget what i learned, and this is what happens , i always always have to do things twice when it comes to fixing these old cars, i go too fast, no patience at all , none, zero patience!!!</p>
Edited by 196061SAVOY 2015-09-10 9:11 PM
| |
| | |
Expert 5K+
Posts: 8445
Location: Perth Australia | HVLP gun is what you need and a reasonable compressor to keep up, but the "LP" part means low pressure, so your average air compressor should keep up
I painted all my coats about the same, a guide coat is almost no paint at all, kind of a dusting, but I have never laid down a heavy coat, that invites runs, just even, consistent coats with extra attention paid to the edges (need to have a bit more there to try and help when buffing, so you dont cut through)
6 liters of paint, 20 liters of thinners will paint the car and jams, if your painting inside doors and under the boot and bonnet ect, more like 8 and 30 to 40
Its always more thinners than paint, otherwise it will be to thick and you get orange peel and runs
Also, prepsol or wax and grease remover is very important, otherwise you get fish eyes
4 liters (1 US gallon) is enough to pain the outside of a camry, the large US cars need more
Not sure what you mean by the paint gelling, to me, that sounds like its starting to harden (take ages in a sealed paint pot, but maybe not so long with a hardener), but that would be the last thing you want, the paint should be watery to atomize out of the gun
You have to remember, the professional paint shops have very expensive equipment that can handle thicker paints ect and will use different techniques than what you will use at home
| |
| | |
User has resigned from board
| "i see said the blind man" here's want I did, I filled the paint cup up to the #8 line with paint, then added reducer up 2 more lines then added the hardener up to the next line, daaaaa 8x2x1 that's why it came out so thick, so I need to better understand how to mix paint, this time I will mix it all together 1 gallon paint I quart reducer and 1 pint of hardener | |
| |
|