|
|
Elite Veteran
Posts: 964
  
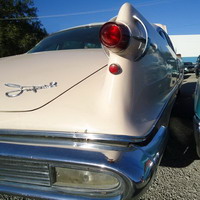
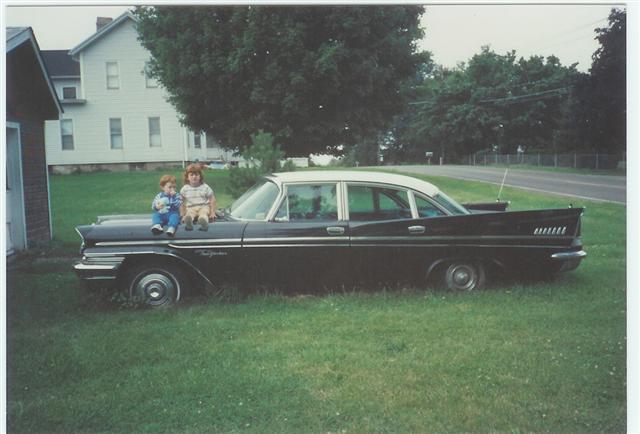
Location: San Antonio, TX | I'll start posting my pictures to as I dig into thecar
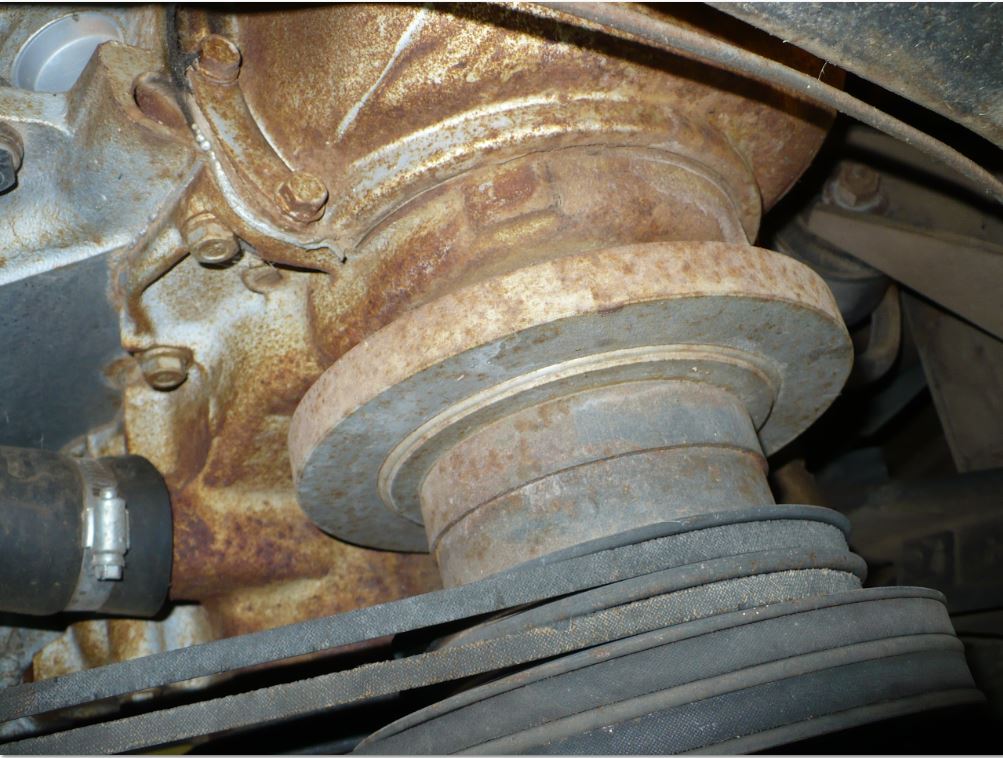 (harmonic.JPG) (harmonic.JPG)
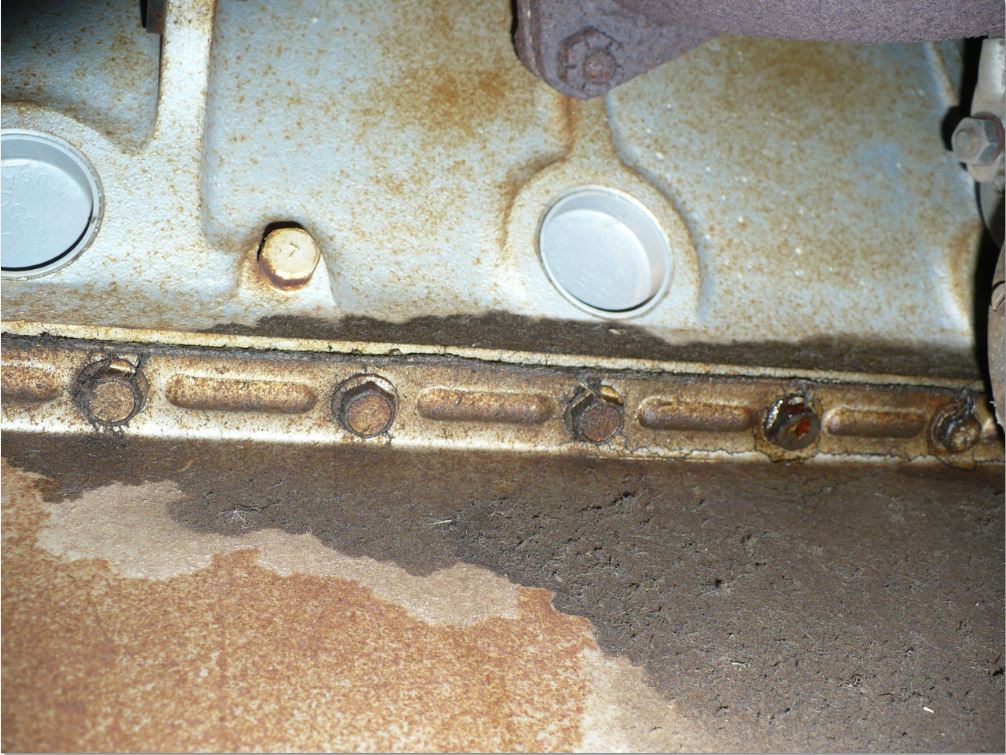 (freezeplugs.JPG) (freezeplugs.JPG)
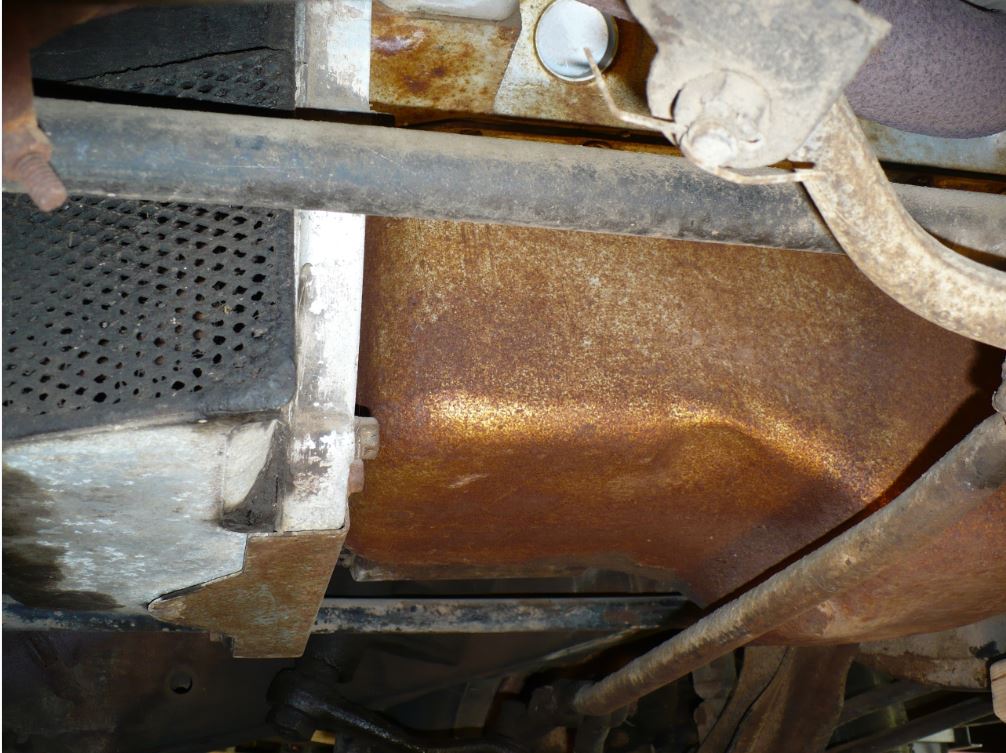 (oilpan.JPG) (oilpan.JPG)
Attachments
----------------
 harmonic.JPG (134KB - 586 downloads) harmonic.JPG (134KB - 586 downloads)
freezeplugs.JPG (162KB - 588 downloads)
oilpan.JPG (135KB - 575 downloads)
|
|
| |
|

Expert
Posts: 1737

Location: Hay Lakes, Alberta, Canada | Hmmm...new frost plugs. Has the engine been gone through? |
|
| |
|
Elite Veteran
Posts: 964
Location: San Antonio, TX | According to the receipts the engine was rebuilt in 1997. It appears to have less than 100 miles on it since then.
Dave |
|
| |
|
Expert
Posts: 2492

Location: Kansas City, KS | Great looking car, Dave. Congrats!
It's strange how you keep starting with a hardtop and but then end up with a sedan. |
|
| |
|
Elite Veteran
Posts: 964
Location: San Antonio, TX | Thanks. I actually do like the look of the aluminum door frame sedans. LOTS of glass. |
|
| |
|
Elite Veteran
Posts: 964
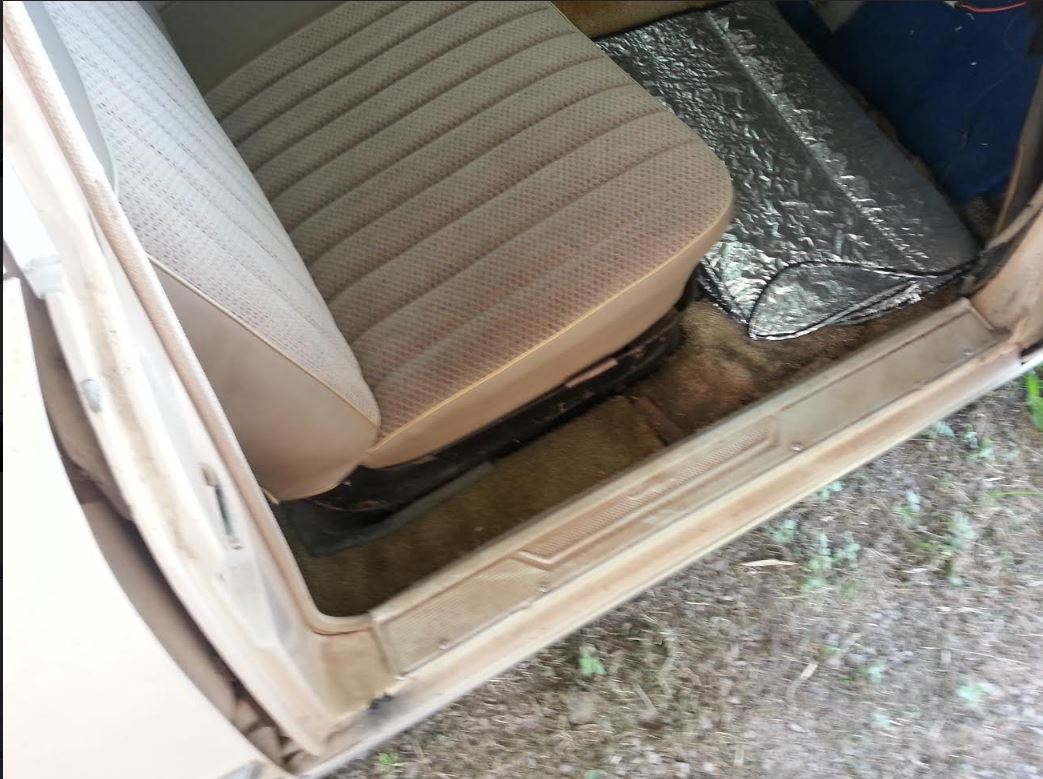
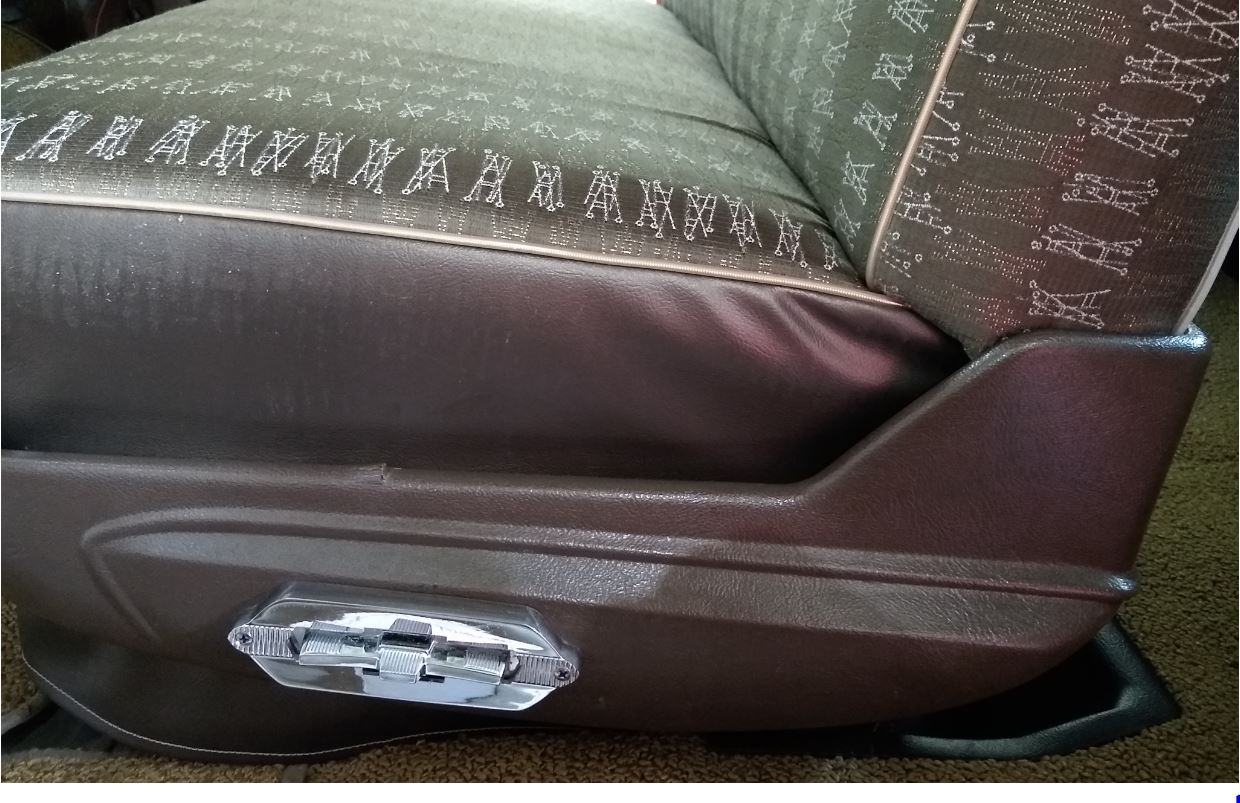
Location: San Antonio, TX | Got all the way down to the power seat troughs. Whew. I'm feeling really, really fortunate about the condition of the floors. Once I have the floors cleaned up I'll be installing the new carpet. No luck posting pictures. I'll try again later.
Edited by macedon 2015-08-02 9:22 AM
|
|
| |
|
Exner Expert 19,174 posts. Neil passed away 18 Sep 2015. You will be missed, Neil!
Posts: 19146

Location: bishop, ca |
Nice 'going' Dave!
I like the More-Door models, mucho!
They are a sort of Devil-may-care car, nowadays!
How does your car's power seat operate?
Thanks to the recent generosity of website member Gregcon, I've acquired and/or have rebuilt a power seat, and would like to
Pay-it-Forward, to a worthy person, in Re; those spare parts' availability to a needy restorer.
|
|
| |
|
Expert
Posts: 1730
Location: Michigan | Dave. Make sure the cam is broken in properly. I am tearing apart a 273 V8 out of a 66 cuda because the previous owner said that it was drive home after the rebuild then parked. Well. .the cam was never broke in to the lifters and it ate the cam with less than 100 miles 'since the rebuild'. |
|
| |
|
Elite Veteran
Posts: 964
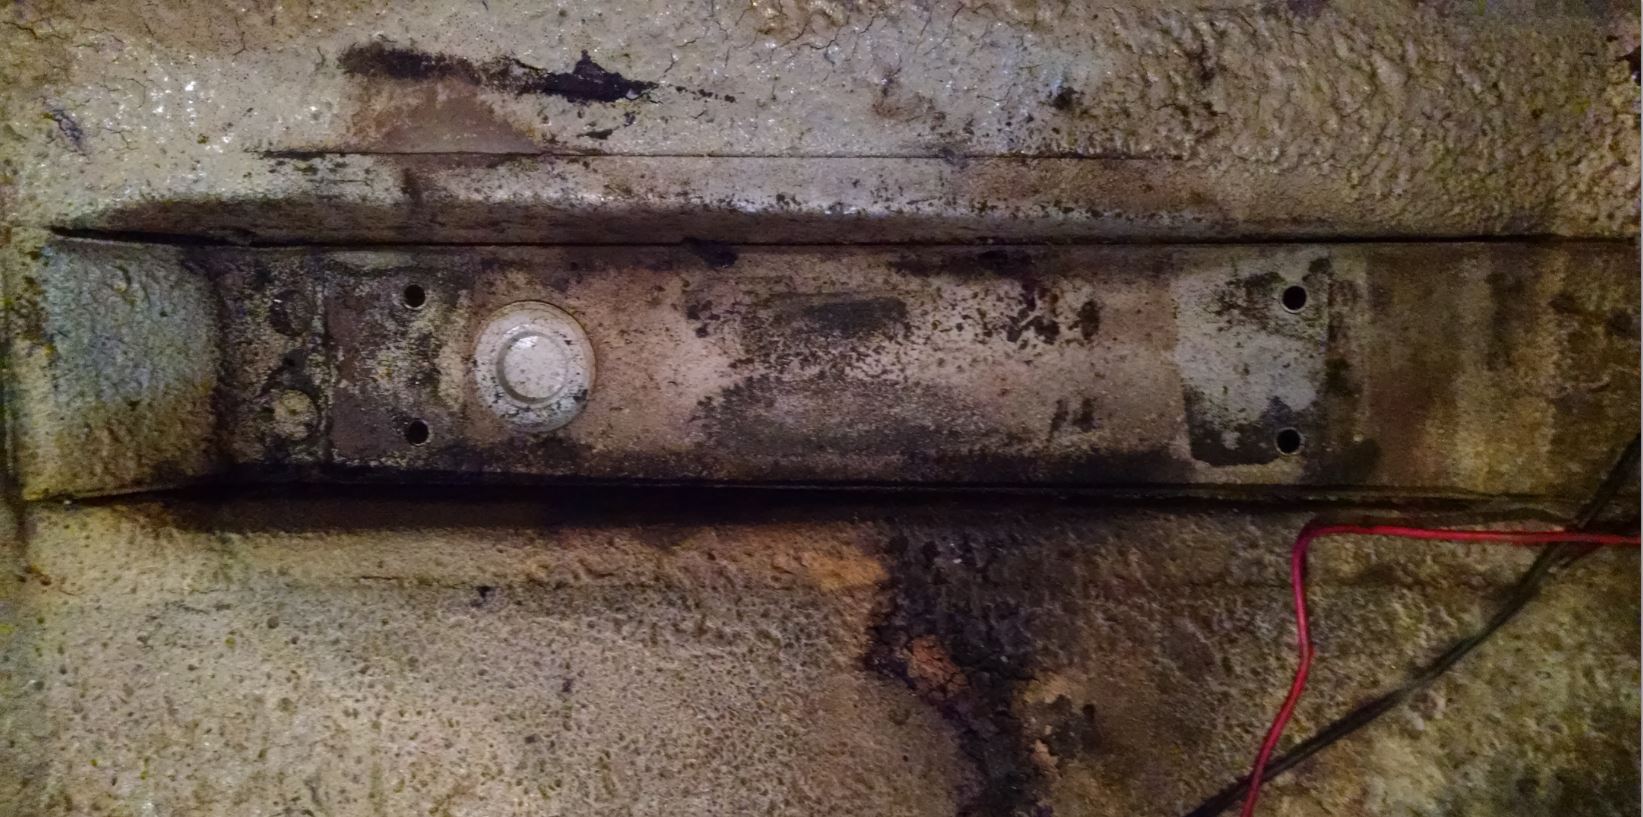
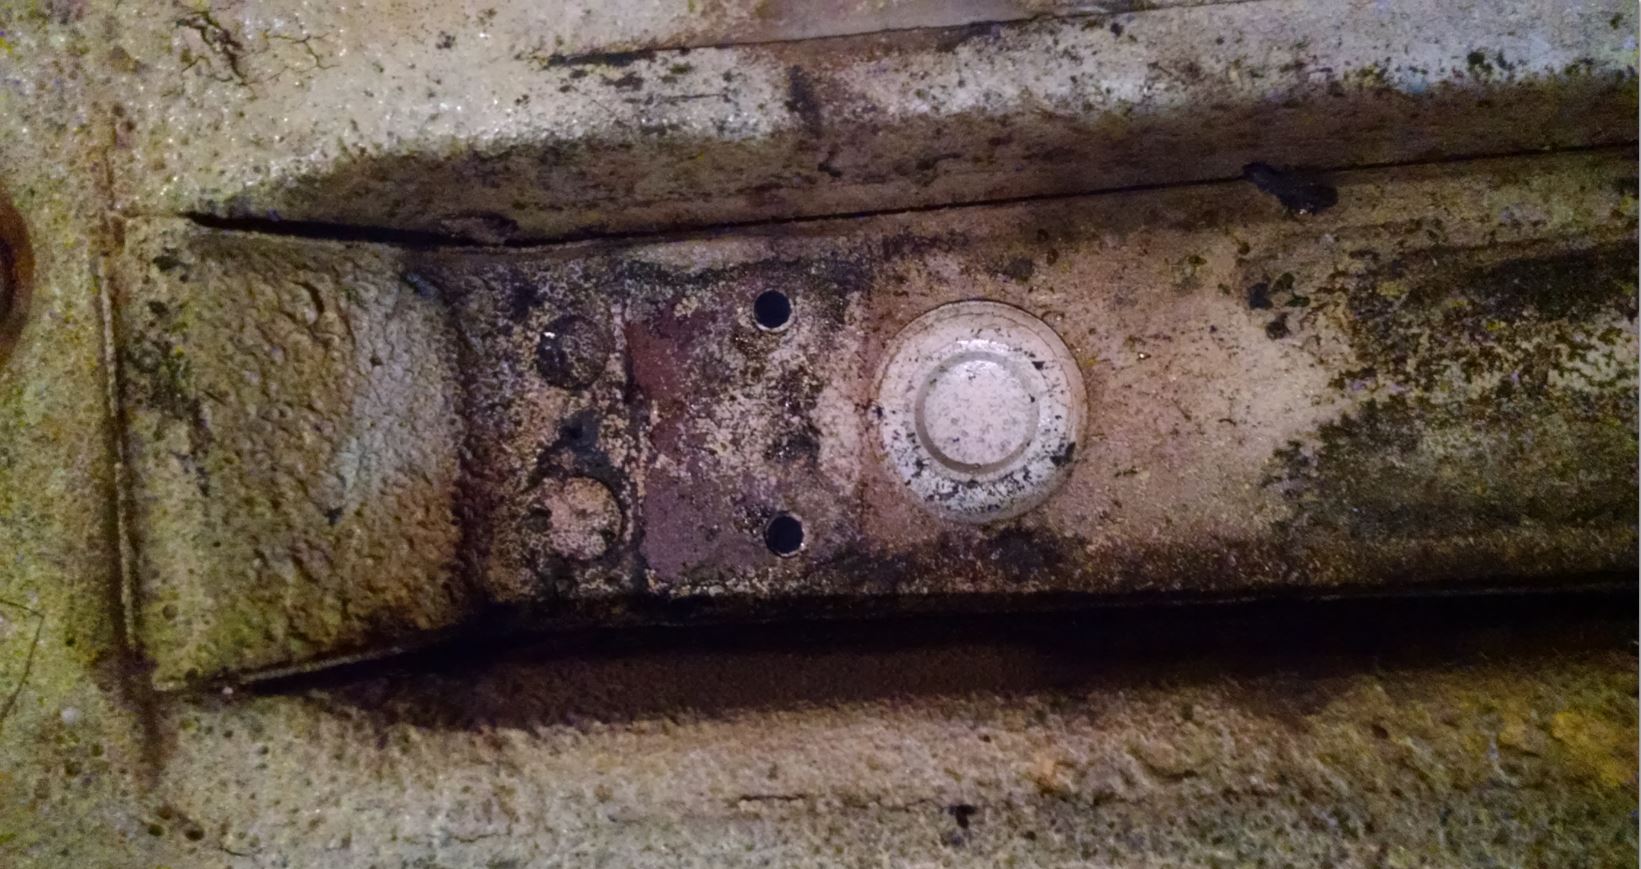
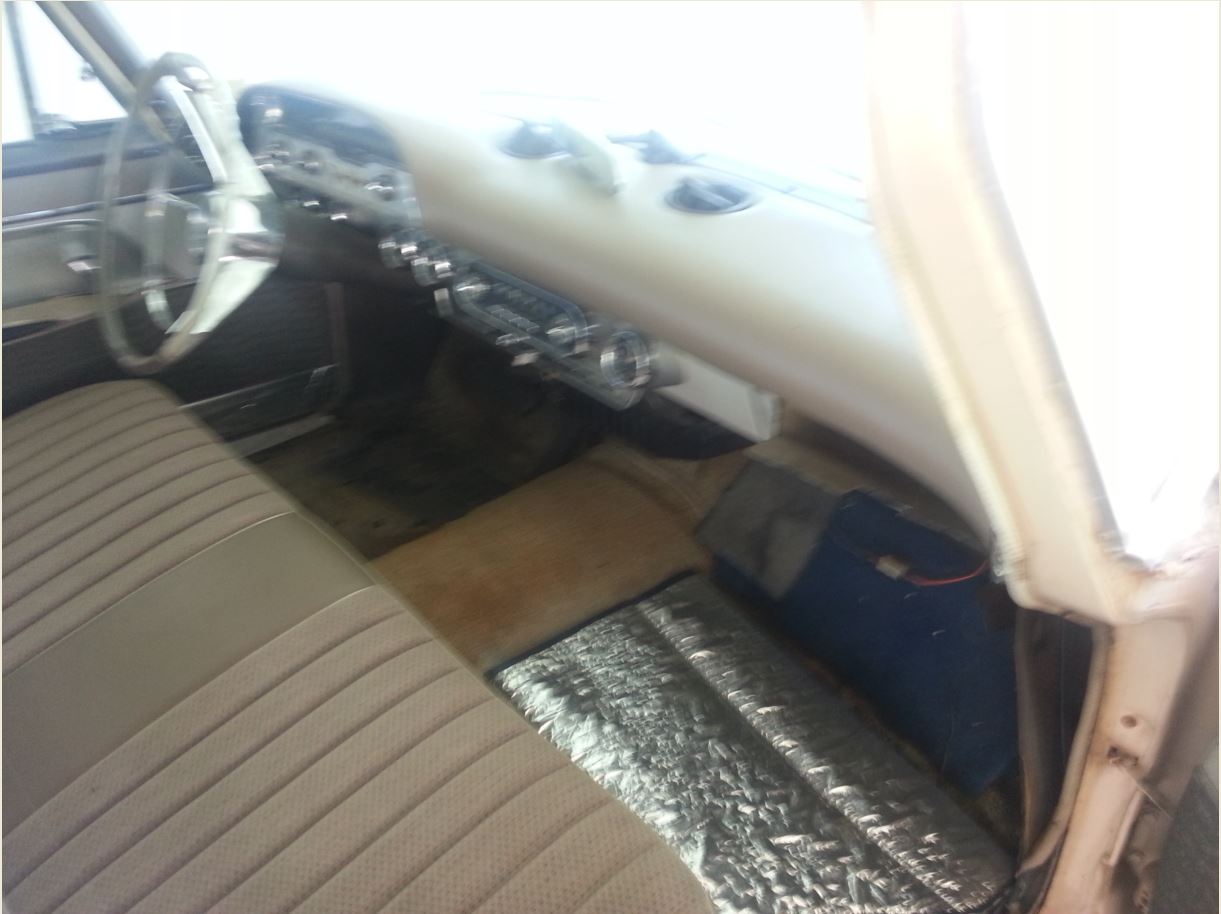
Location: San Antonio, TX | Power seat is kinda jumpy. Might just be the switch. Not sure yet. I've got the entire assembly on my bench for cleaning, lube and test. Hopefully all goes well.
OK, pics are uploading now.
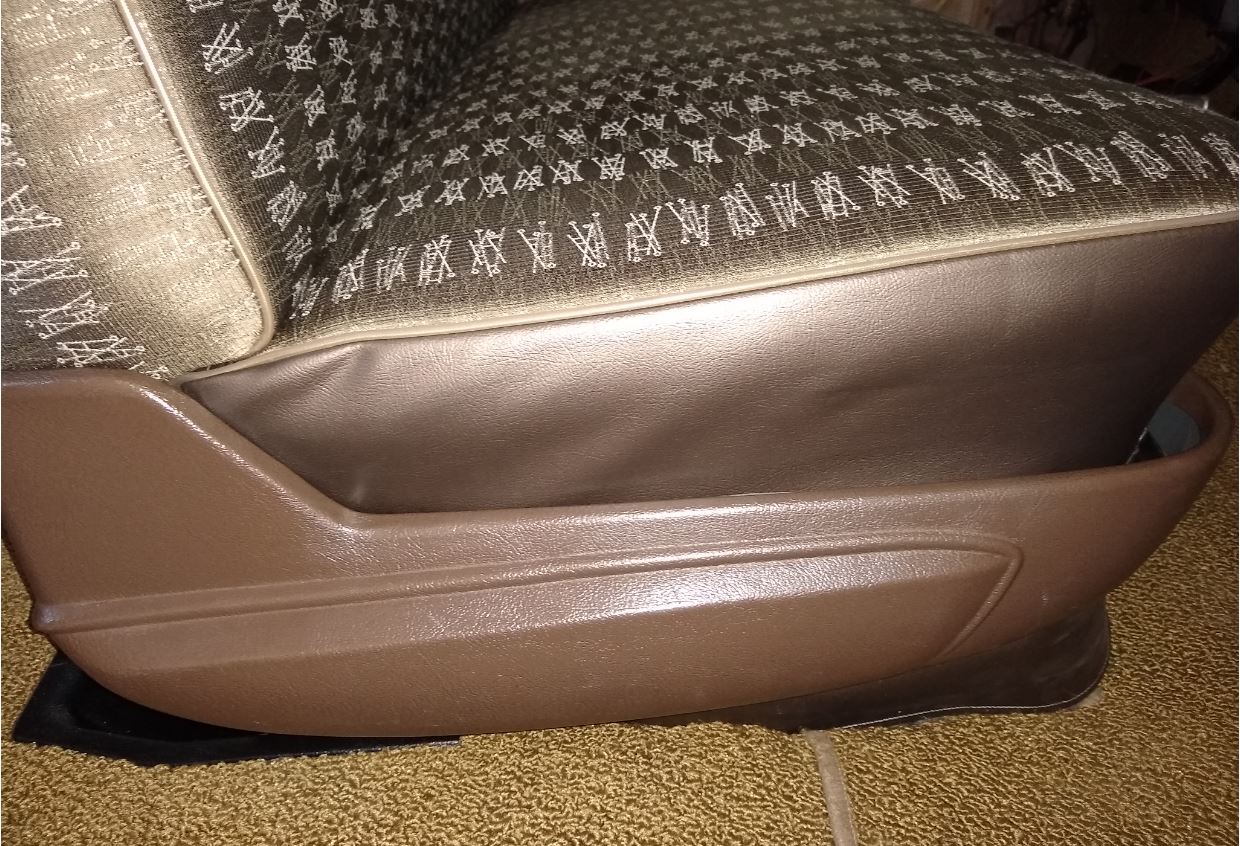
As you can see there is no rust in the power seat troughs. I'm very lucky. So far the only real rust I've found is on the passenger side. Leaky water valve caused some problems. I'll cut out about a 1 inch by 2 inch area near the forward frame bolt. Other than that I'm going with Por-15 and then Herculiner.
Edited by macedon 2015-08-02 9:19 AM
 (trough.JPG) (trough.JPG)
 (trough2.JPG) (trough2.JPG)
Attachments
----------------
trough.JPG (242KB - 596 downloads)
trough2.JPG (245KB - 587 downloads)
|
|
| |
|
Elite Veteran
Posts: 964
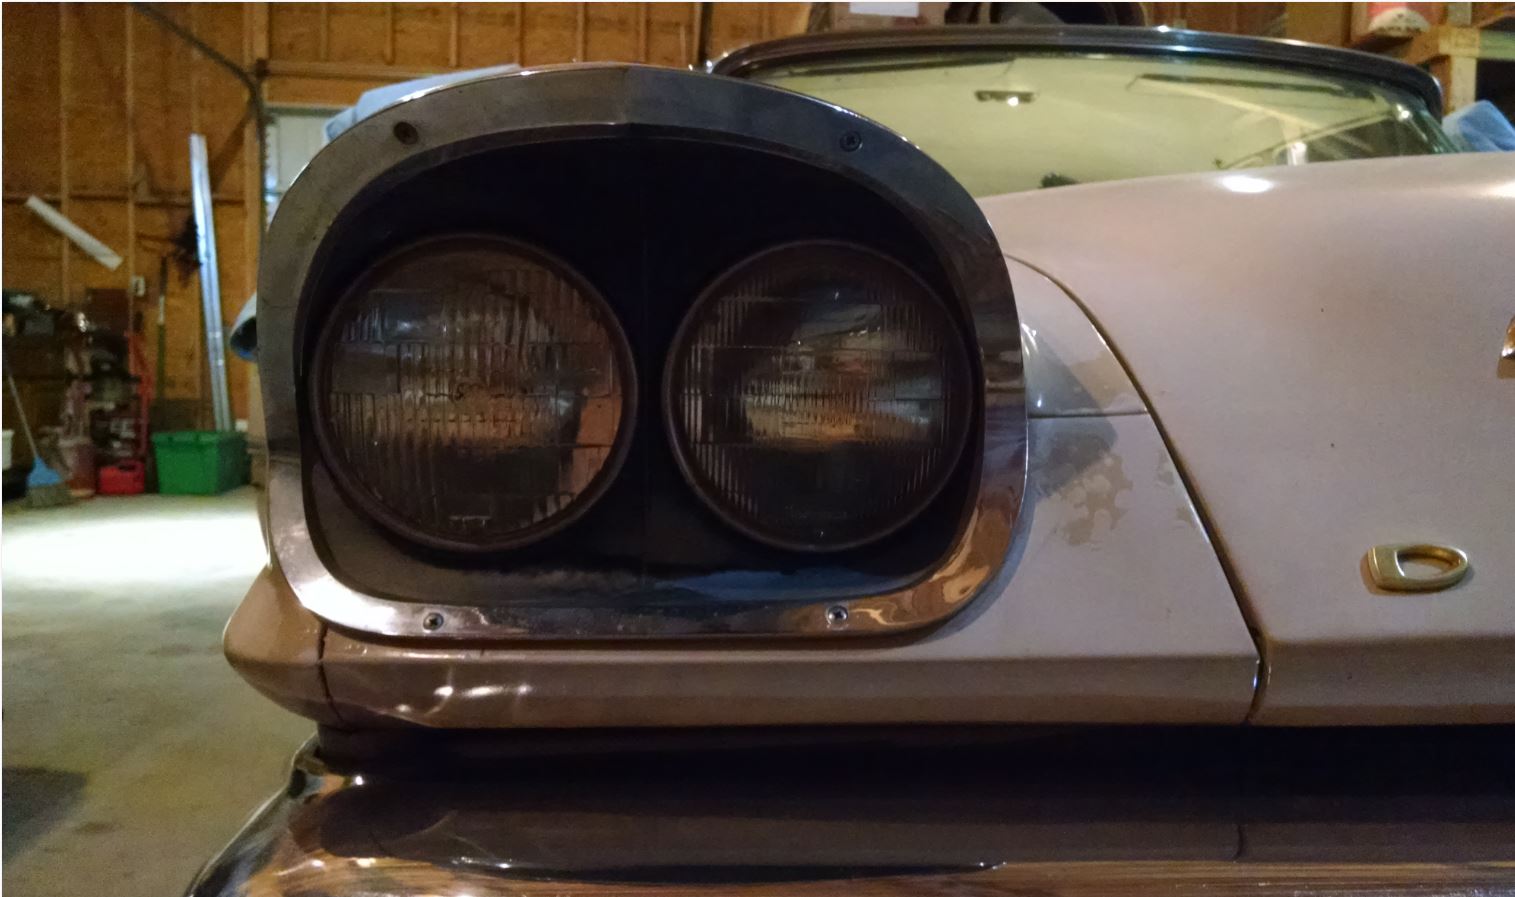
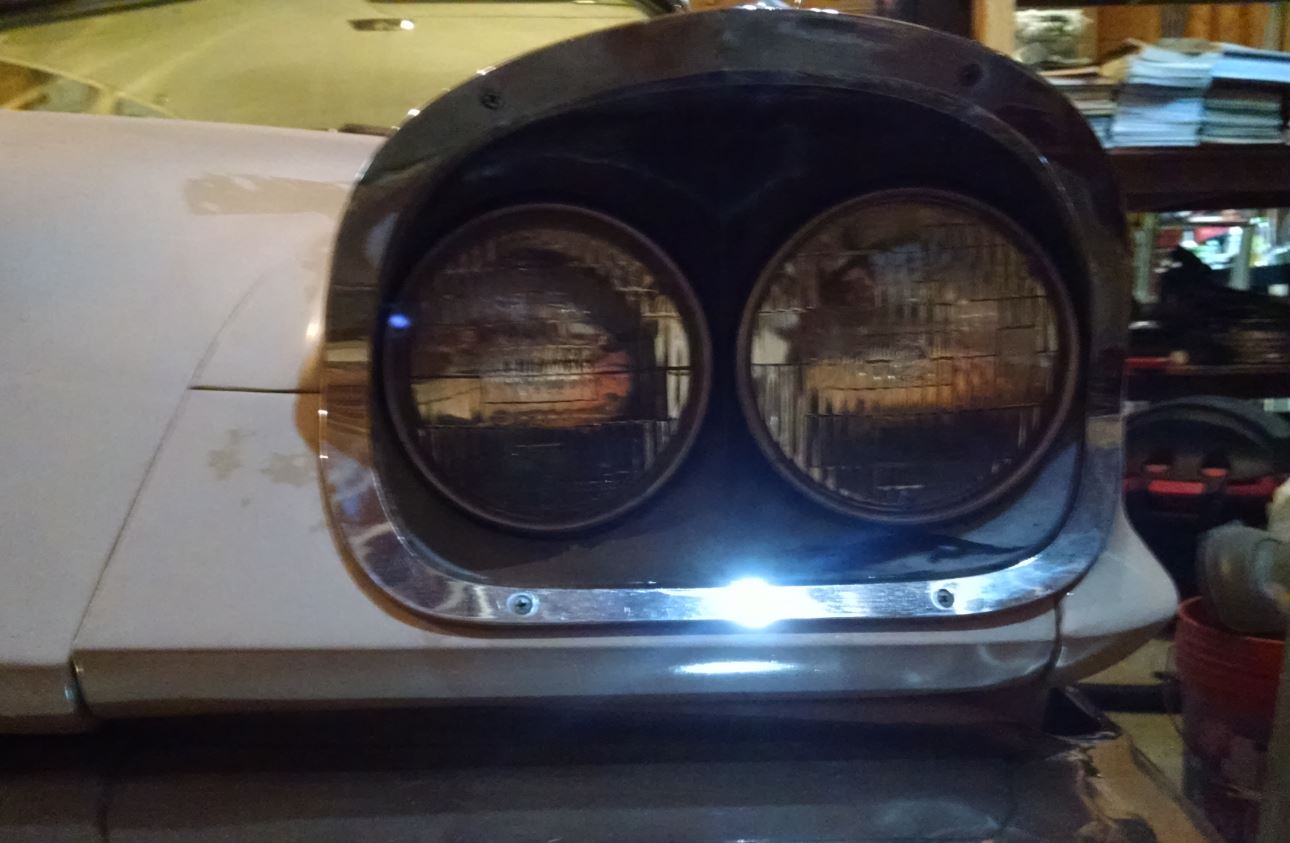
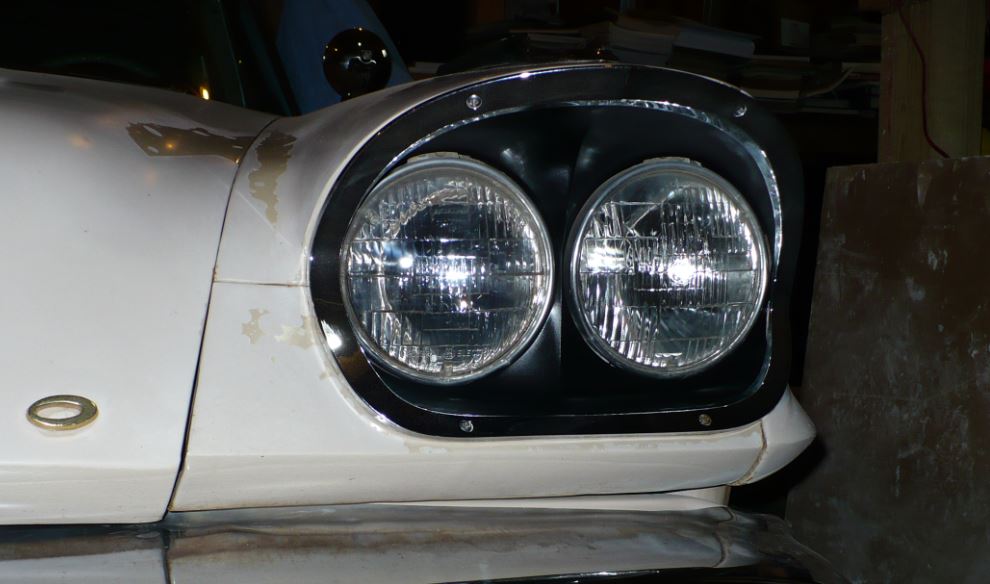
Location: San Antonio, TX | Did a little refresh work on the headlight doors.
 (rightold.JPG) (rightold.JPG)
 (leftold.JPG) (leftold.JPG)
 (drivernew.JPG) (drivernew.JPG)
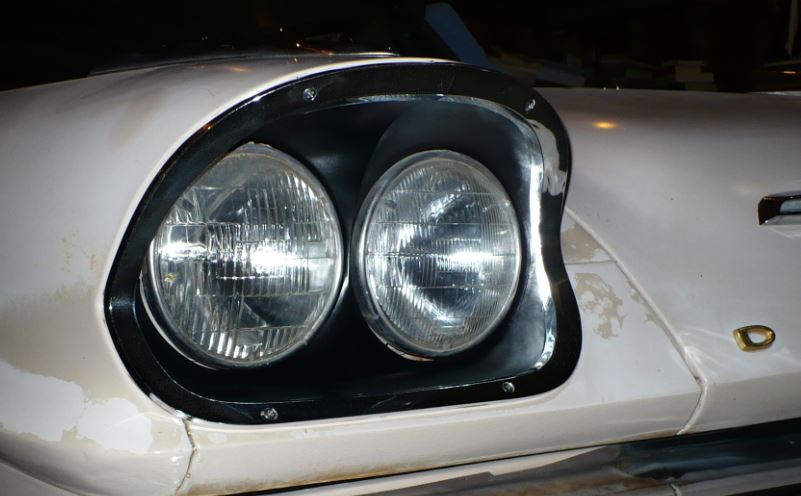 (rightnew.JPG) (rightnew.JPG)
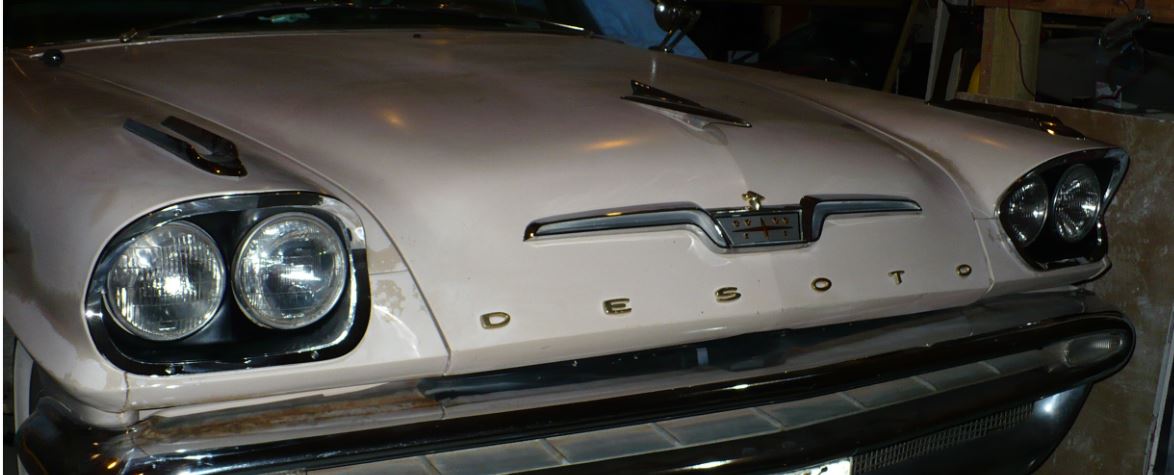 (frontnew.JPG) (frontnew.JPG)
Attachments
----------------
rightold.JPG (137KB - 575 downloads)
leftold.JPG (106KB - 582 downloads)
drivernew.JPG (72KB - 581 downloads)
rightnew.JPG (55KB - 600 downloads)
frontnew.JPG (73KB - 577 downloads)
|
|
| |
|
Exner Expert 19,174 posts. Neil passed away 18 Sep 2015. You will be missed, Neil!
Posts: 19146
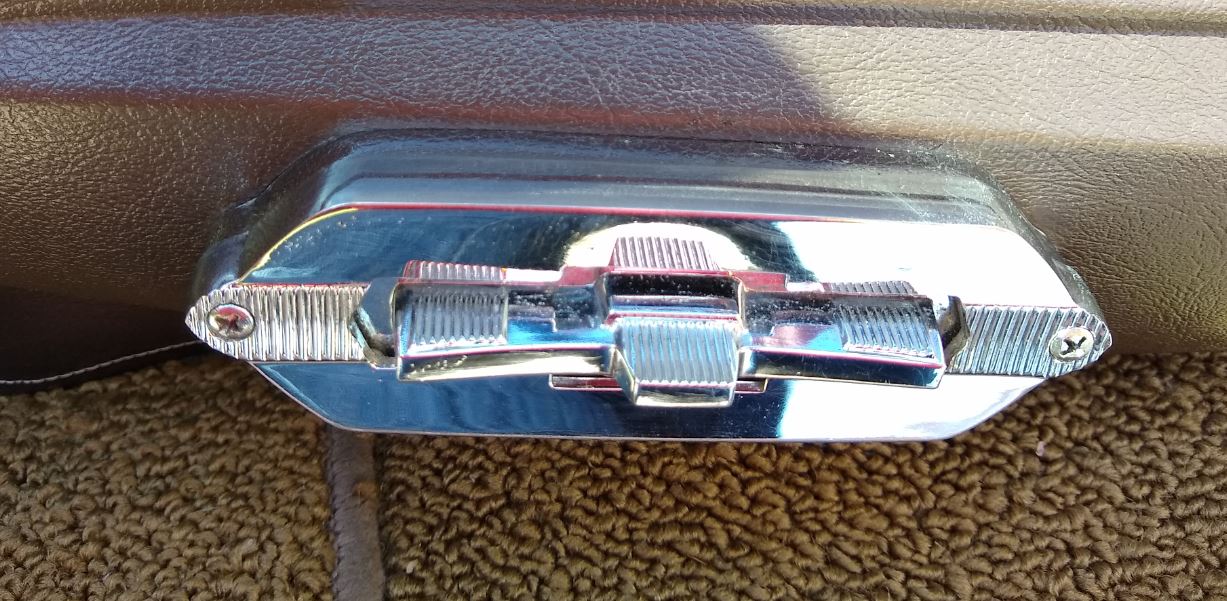
Location: bishop, ca | I'm curious about which style of power seat control switches your car has in it (you gotta check the switch,
internally).
The switch will need a cleaning and lub'ing, if it is untouched, original, anyway.
One , later, style is more mechanically advanced, internally ...looks the same, externally, as the earlier version.
Edited by d500neil 2015-08-18 11:16 PM
|
|
| |
|

Board Moderator & Exner Expert 10K+
Posts: 13152
Location: Southern Sweden - Sturkö island | What a nice car with lot of potential Dave - the engine does not have any leaks as it seems and the floorboards are another nice surprise  |
|
| |
|
Elite Veteran
Posts: 964
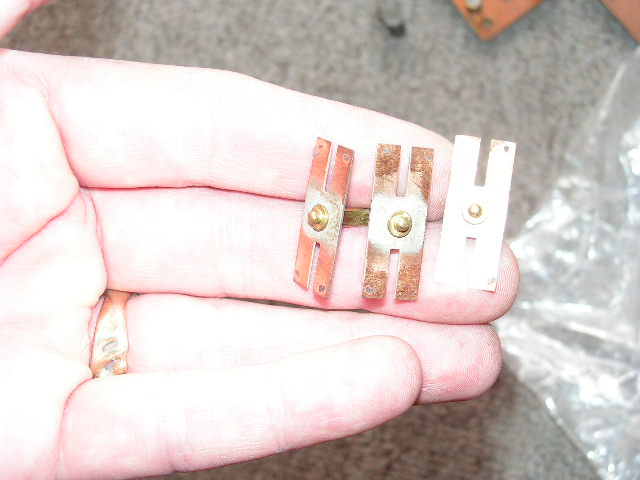
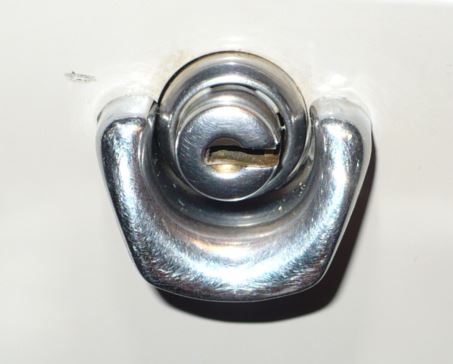
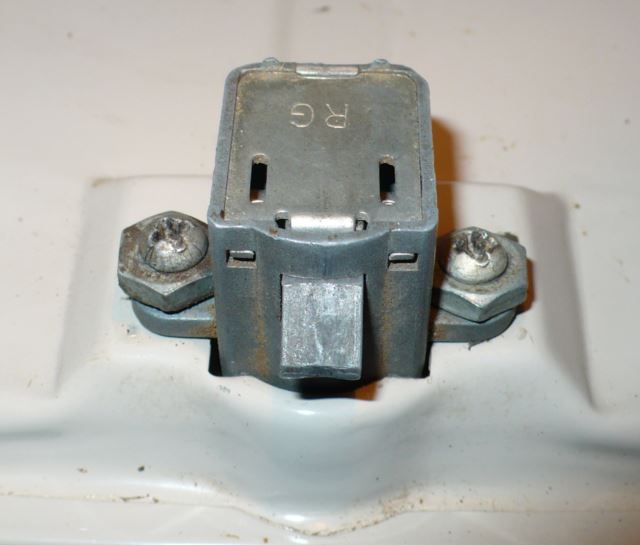
Location: San Antonio, TX | Doesn't look half bad actually. I'll clean up the contacts and lube the rocker switches. Yet another reason I love old cars... electrical components that I can actually work on.
 (pwrseatswitch1.JPG) (pwrseatswitch1.JPG)
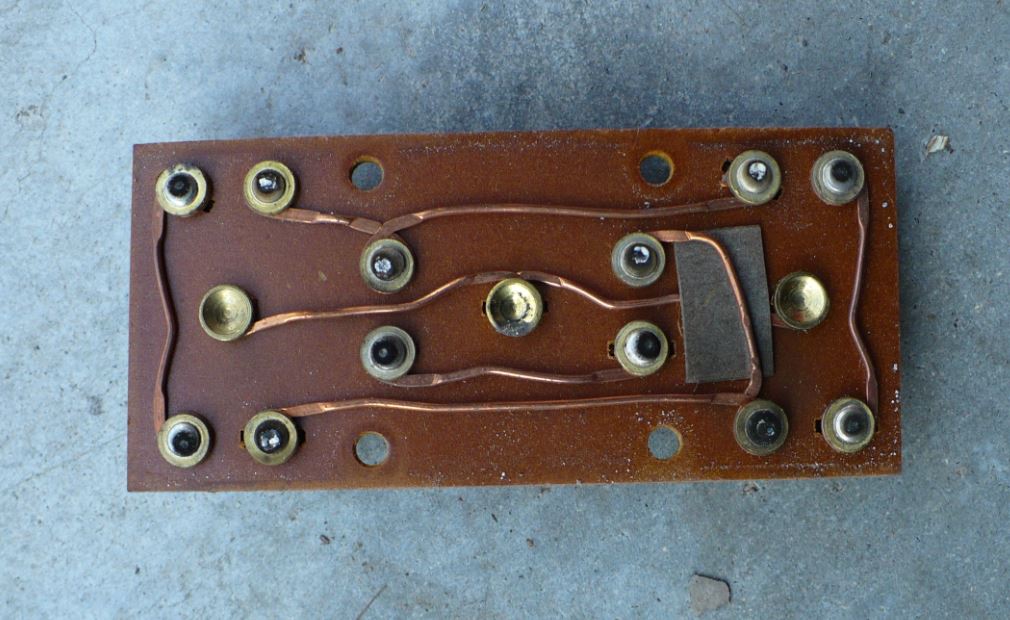 (pwrseatswitch2.JPG) (pwrseatswitch2.JPG)
Attachments
----------------
pwrseatswitch1.JPG (112KB - 572 downloads)
pwrseatswitch2.JPG (113KB - 564 downloads)
|
|
| |
|
Exner Expert 19,174 posts. Neil passed away 18 Sep 2015. You will be missed, Neil!
Posts: 19146
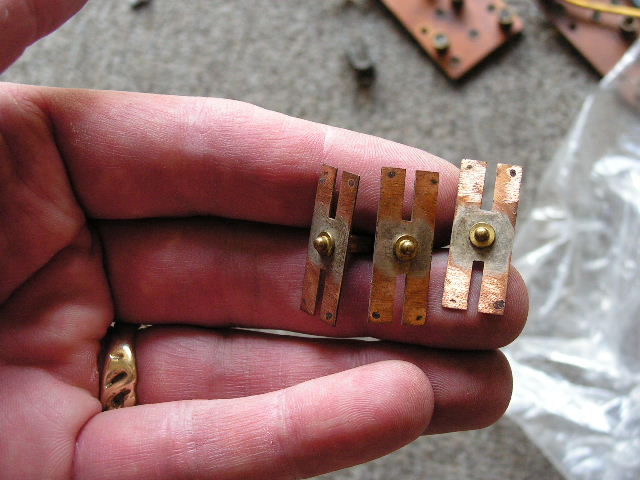
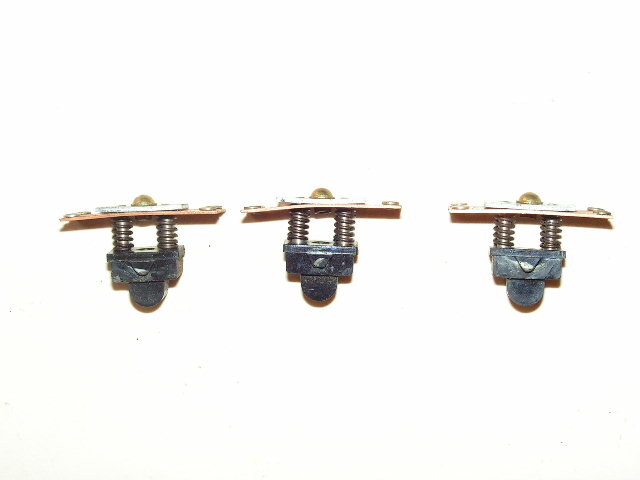
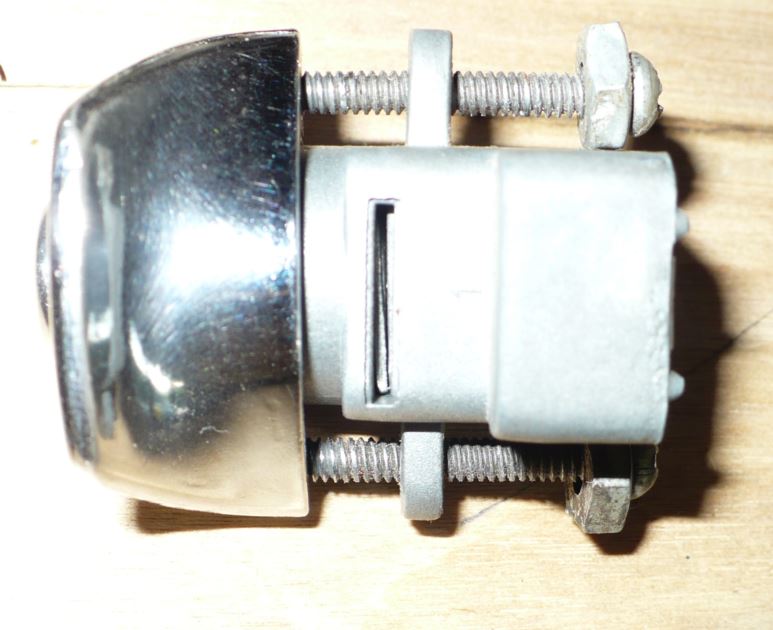
Location: bishop, ca | Not too bad, there!
Here's some pics of the First Generation (like your car) and the improved-design Second Generation of the power seat
control.
You need, carefully, to rub-off the electrical contact-corrosion inside the switch, to improve its operation.
Looks like its contact points are in GOOD condition (as opposed to my examples.
 (PICT3164-C.JPG) (PICT3164-C.JPG)
 (PICT3183.JPG) (PICT3183.JPG)
 (PICT3164-A.JPG) (PICT3164-A.JPG)
 (PICT3164-B.JPG) (PICT3164-B.JPG)
 (PICT3172.JPG) (PICT3172.JPG)
Attachments
----------------
PICT3164-C.JPG (106KB - 591 downloads)
PICT3183.JPG (53KB - 573 downloads)
PICT3164-A.JPG (108KB - 559 downloads)
PICT3164-B.JPG (97KB - 585 downloads)
PICT3172.JPG (74KB - 593 downloads)
|
|
| |
|
Location: North Australia | macedon - 2015-08-19 7:41 PM
Doesn't look half bad actually. I'll clean up the contacts and lube the rocker switches. Yet another reason I love old cars... electrical components that I can actually work on.
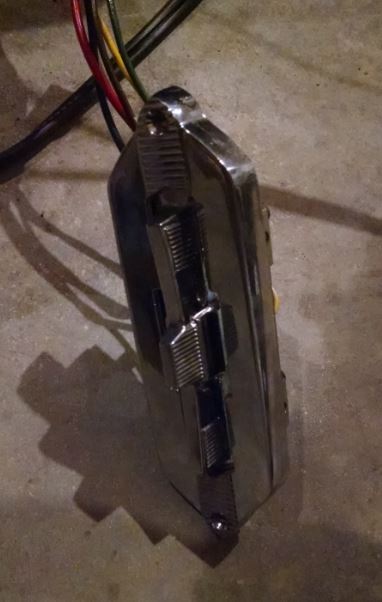
I am hearing you on the electrics! (I am a fitter and Turner). The power switch back panel pics are cool, never seen a circuit board like that. Flattened copper wire, unreal
Your car looks to be in very similar condition as my Imperial was when I got it in 2010.
Looks like you are doing a great job, keep the pics coming, it's a buzz watching the progress of these cars as they come back to life. And it's a 57 Desoto!
When will you drive it ?
Steve.
|
|
| |
|
Elite Veteran
Posts: 964
Location: San Antonio, TX | Thanks. I drove it three times in July. Then I pulled the seats and carpet out. I'm almost done with the floors. There wasn't much to do. Couple of small rust issues from a leaky water valve. |
|
| |
|
Elite Veteran
Posts: 964
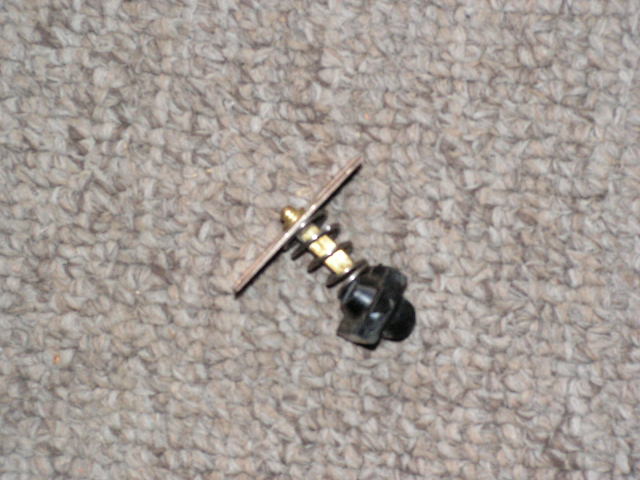
Location: San Antonio, TX | Power seat switch serviced and reassembled. Bench tested the power seat mechanism and it worked like a champion. I have a question though... the switch was not installed on the seat when I got the car. So does anyone know... the switch toggle has ridges on one side only. Do they face up or down?
 (switch.JPG) (switch.JPG)
Attachments
----------------
switch.JPG (36KB - 588 downloads)
|
|
| |
|
Regular
Posts: 65
| Hi Dave, I have a similar car and my switch has the ridges facing up.
Mine also operates jumpy. Also, the red power feed under the carpet
gets chafed easily because of the routing. I noticed that your center
plastic hood medallion looks new. Is it original? I have a Fireflite sedan
and a Firedome 4dr hdtp and both are cracked and separating. Looks like
a fine original car you have there.
Perry of Pa.
|
|
| |
|
Elite Veteran
Posts: 964
Location: San Antonio, TX | Hey Perry,
Thanks for the info. Much appreciated. The hood emblem is new. I got it from a guy named George Laurie who lives in Australia. Not sure if he still makes them.
Post pictures of your cars when you get a chance.
|
|
| |
|
Expert
Posts: 1505
Location: New Castle PA | Hi, Perry. Always wanted to meet you, but never seem to be in your part of the state when there's a show. Yes, George Laurie and Emblemagic are the 2 sources for the hood emblem. I have contact information for each if you need it. Your cars look nice (I have several pictures in my collection from various shows you've attended). Maybe see you next year at the NDC show near Baltimore. |
|
| |
|
Regular
Posts: 65
| Dave,
Sorry, but haven't figured out pictures yet.
I am curious where you ordered your carpet from. Most suppliers only carry carpet for 2 doors. I did manage to find mine
at Newark Supply.
Ed,
I thought I would see you at Carlisle this year. I've had the only 57 Desoto there the last 5 years.
Perry
|
|
| |
|
Elite Veteran
Posts: 964
Location: San Antonio, TX | Got the carpet from Factory OEM Parts. Very happy with it. Heel pad is not exactly like original but close. |
|
| |
|
Elite Veteran
Posts: 964
Location: San Antonio, TX | Checking how things fit and look. Not all together yet. Seat was recovered some time before I got it. Not horrible... it will do until I get the original materials.
 (fit.JPG) (fit.JPG)
Attachments
----------------
fit.JPG (83KB - 575 downloads)
|
|
| |
|
Elite Veteran
Posts: 964
Location: San Antonio, TX | Plunking away... making some progress. And a couple of before pictures.
Edited by macedon 2017-04-07 3:26 PM
 (april7a.JPG) (april7a.JPG)
 (beforea.JPG) (beforea.JPG)
 (beforeb.JPG) (beforeb.JPG)
Attachments
----------------
april7a.JPG (200KB - 530 downloads)
beforea.JPG (102KB - 515 downloads)
beforeb.JPG (130KB - 528 downloads)
|
|
| |
|
Extreme Veteran
Posts: 537
Location: Upstate NY | Wow! Great job! Your steering wheel is in amazingly good condition. Who did your dash?
Keep sending the pictures. You have quite a car. |
|
| |
|
Elite Veteran
Posts: 964
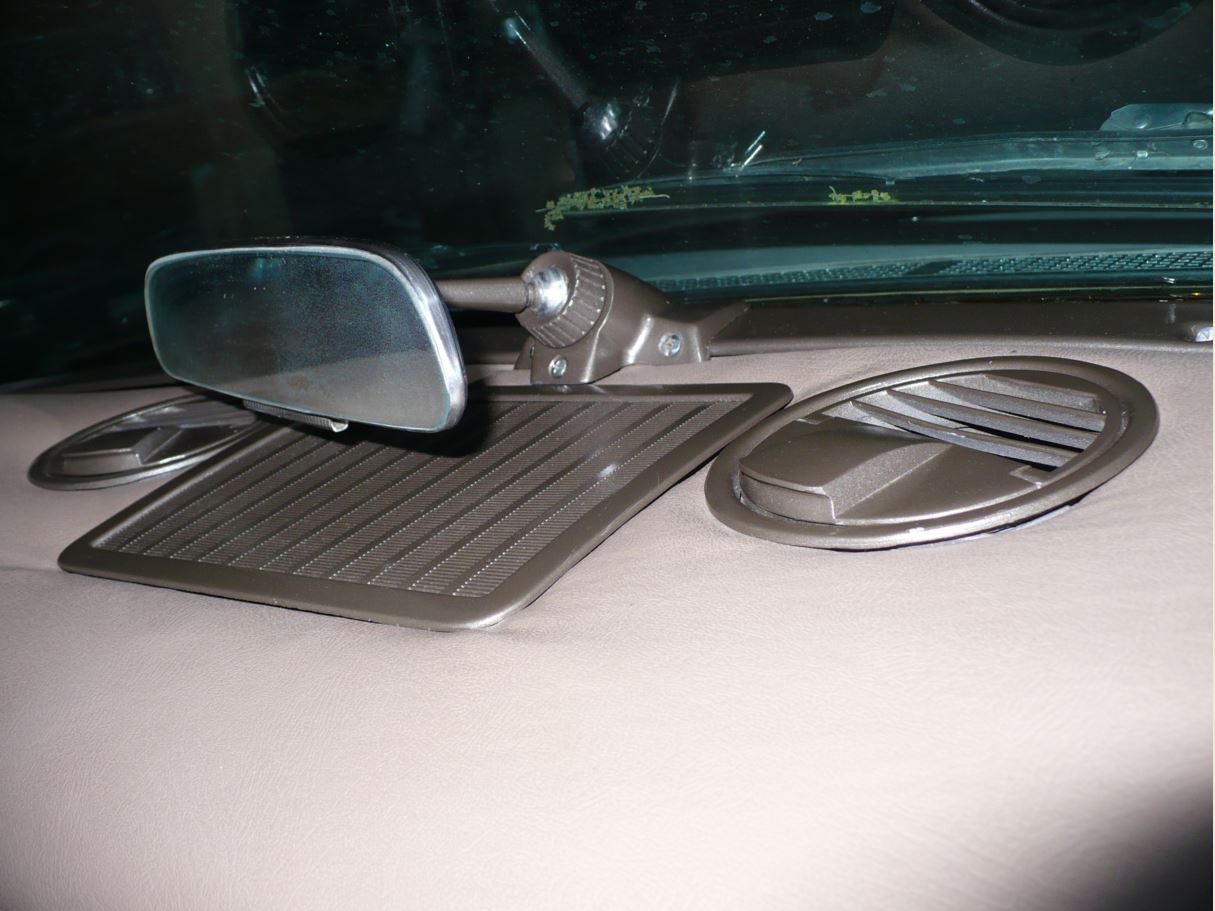
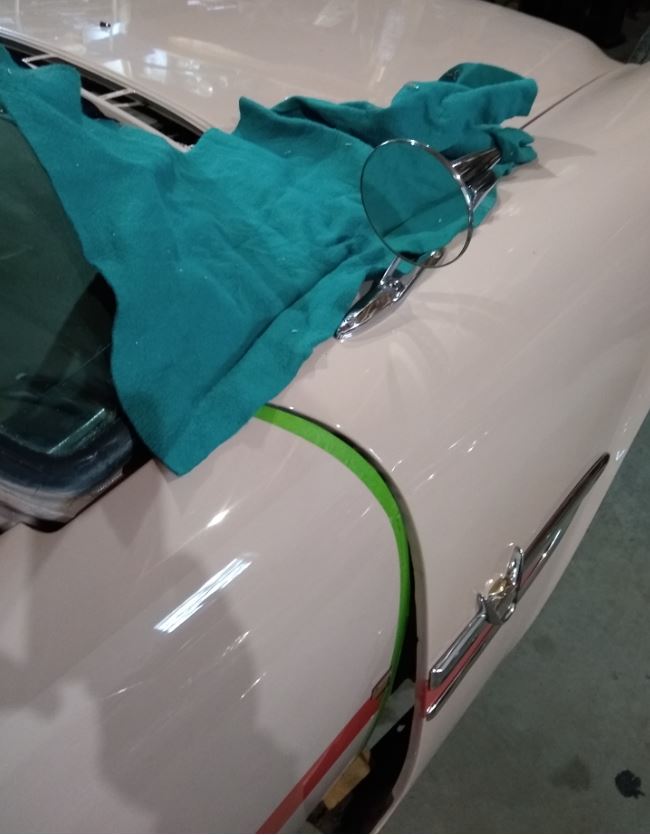
Location: San Antonio, TX | Rear view mirror back in today
 (rv.JPG) (rv.JPG)
Attachments
----------------
rv.JPG (126KB - 544 downloads)
|
|
| |
|
Elite Veteran
Posts: 964
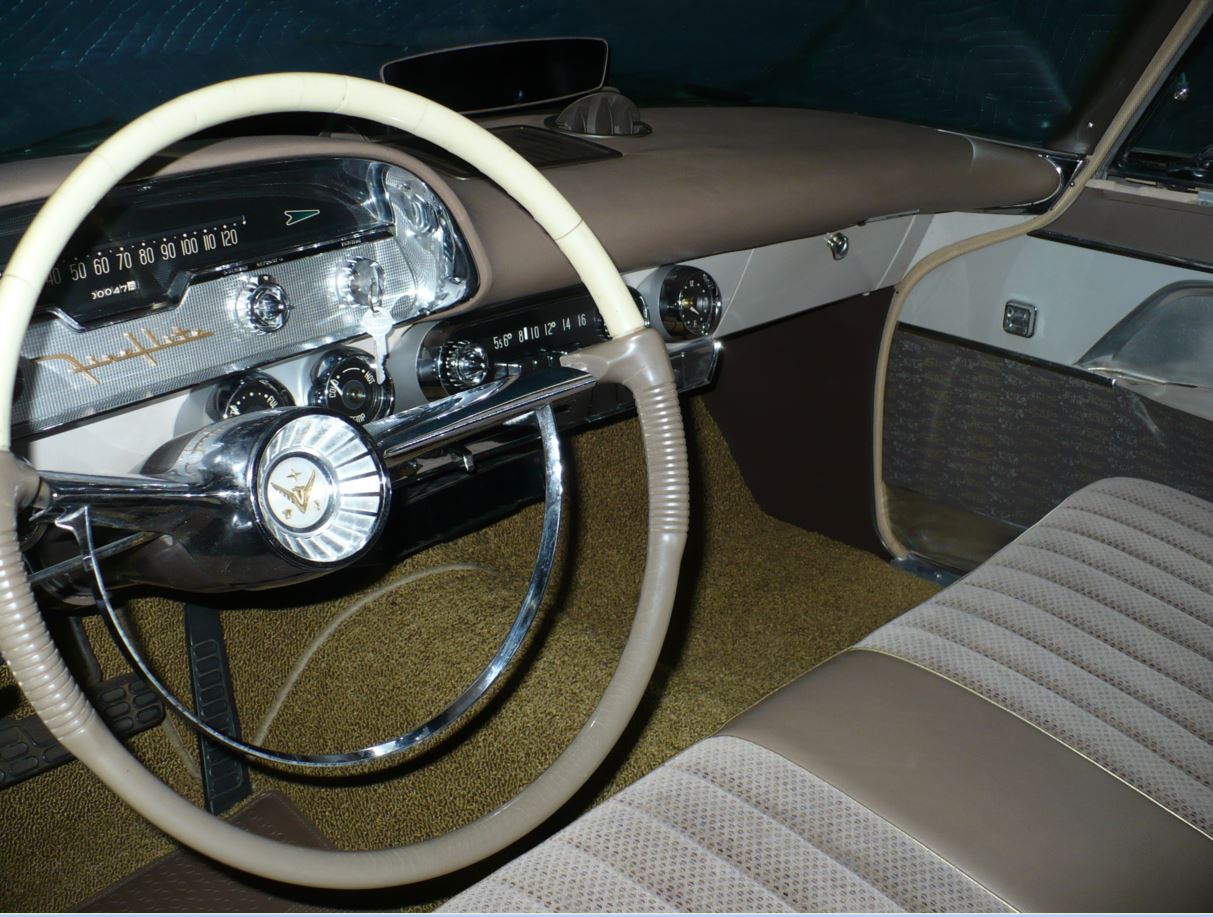
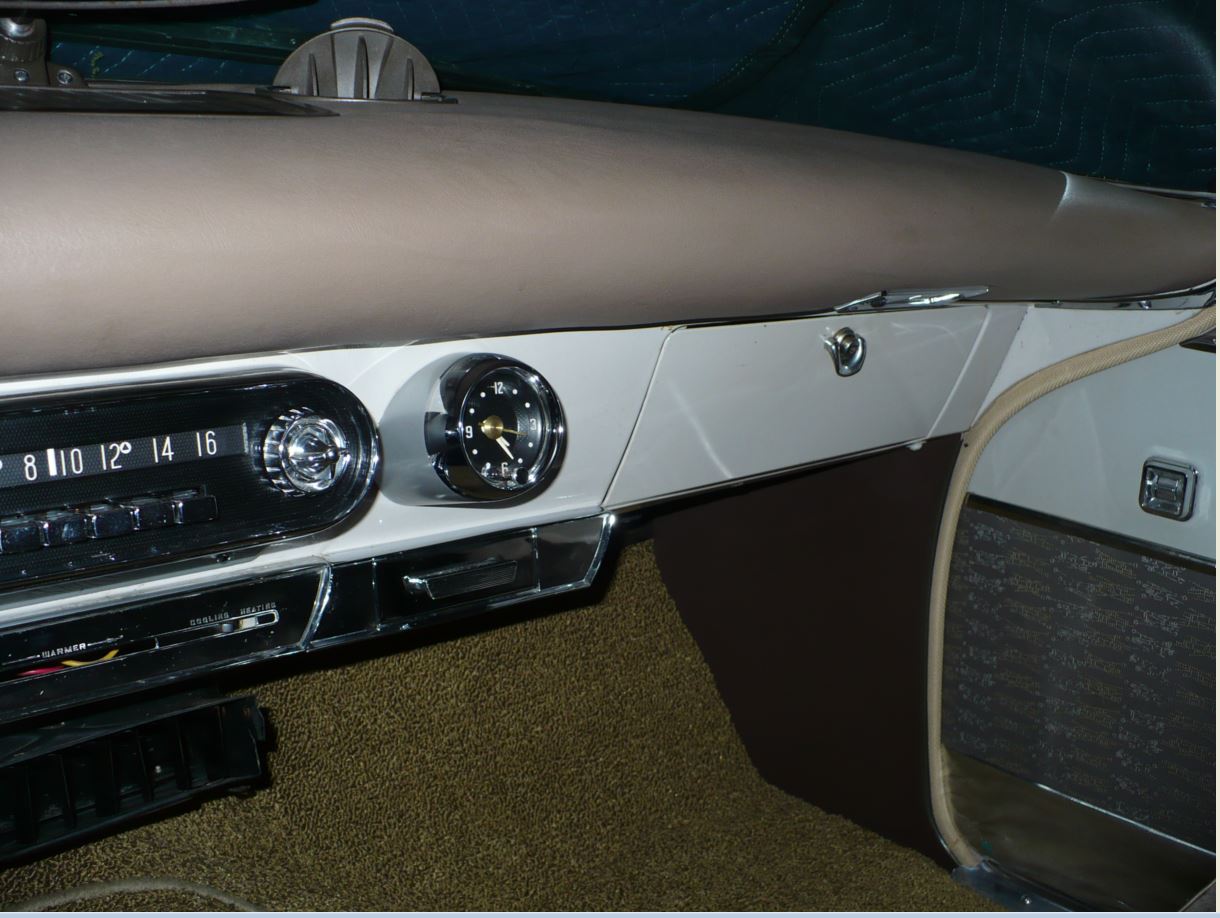
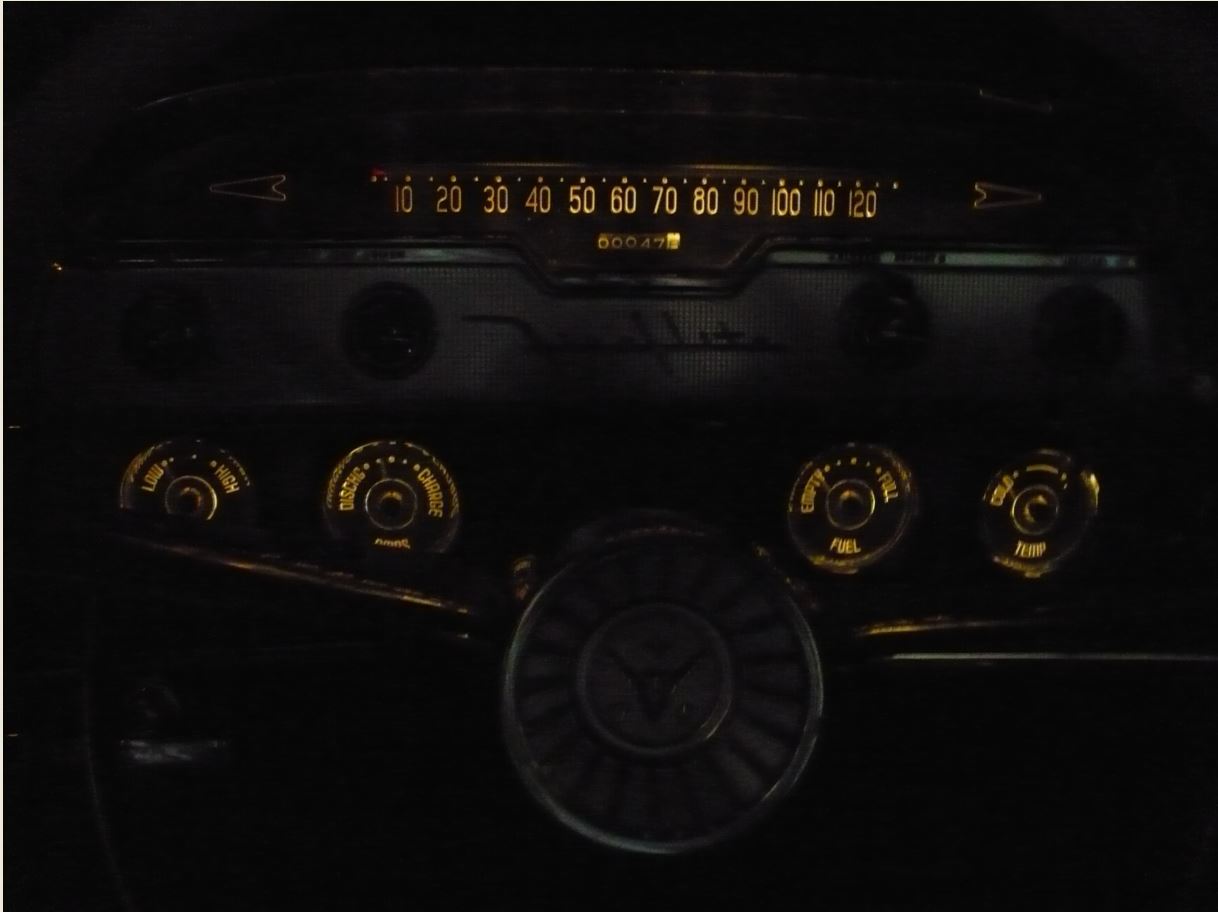
Location: San Antonio, TX | Finally! I got the dash back together. Took much longer than I had hoped. Partly because I'm picky. But now I have a fresh wiring harness and all the lights, gauges, switches, radio, clock, etc have been gone through. Everything works. Absolutely everything. Even the stupid lighters that will never get used.
 (dashjul17.JPG) (dashjul17.JPG)
 (clock.JPG) (clock.JPG)
 (dark1.JPG) (dark1.JPG)
Attachments
----------------
dashjul17.JPG (182KB - 513 downloads)
clock.JPG (137KB - 500 downloads)
dark1.JPG (66KB - 495 downloads)
|
|
| |
|
Expert
Posts: 1505
Location: New Castle PA | Very nice! I don't think I've ever seen a pushbutton surround like that on the glovebox door. Was that an accessory of some sort? |
|
| |
|
Elite Veteran
Posts: 964
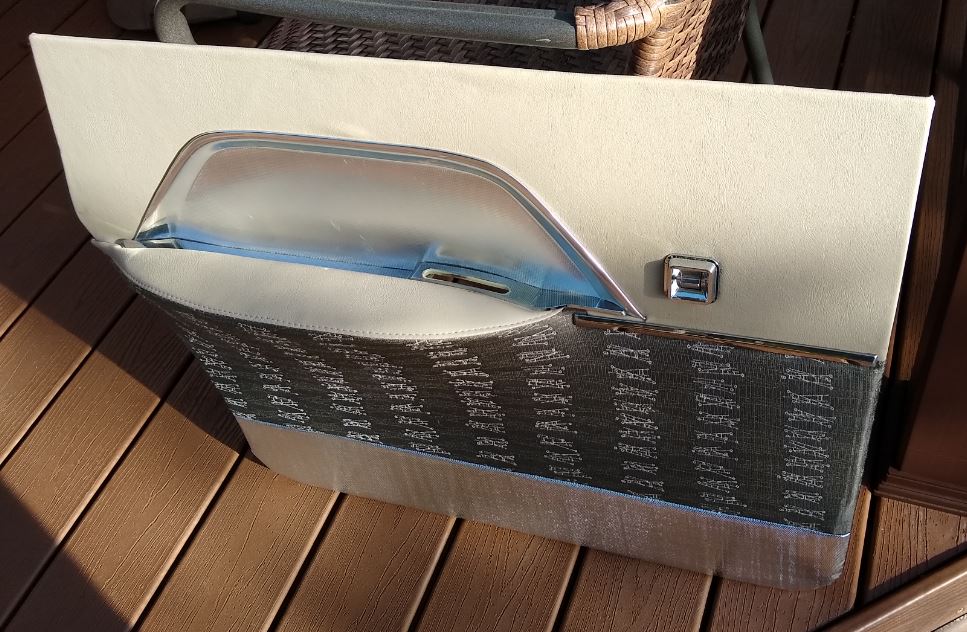
Location: San Antonio, TX | While I do have a great bit of paperwork on this car there is no mention of this. It is actually pretty slick and functional. You just hook the side of your index finger under the bottom lip and push the button with your thumb. Gives you total control of the door, both pulling and pushing. You can control the pressure just right as you close the door to get the latch to catch nicely. Neat little add. It must have been fairly specific to this application. You can see in the pictures that it uses the original mounting holes. You just have to drill them out through the face of the door to mount.
 (glovebuttonsurround.JPG) (glovebuttonsurround.JPG)
 (glovebuttonsurround2.JPG) (glovebuttonsurround2.JPG)
 (glovebuttonsurround3.JPG) (glovebuttonsurround3.JPG)
 (glovebuttonsurround4.JPG) (glovebuttonsurround4.JPG)
Attachments
----------------
glovebuttonsurround.JPG (25KB - 500 downloads)
glovebuttonsurround2.JPG (37KB - 504 downloads)
glovebuttonsurround3.JPG (57KB - 499 downloads)
glovebuttonsurround4.JPG (61KB - 497 downloads)
|
|
| |
|
Expert
Posts: 4159
Location: Connecticut | That glovebox lock assembly is used on 59 Dodge. Not sure about 57-8 Dodge.
Ron |
|
| |
|
Elite Veteran
Posts: 964
Location: San Antonio, TX | Works like a champ on '57 DeSoto's too
|
|
| |
|
Location: Parts Unknown | Many of my DeSotos have had that little hook thing
on the knob. My current car has one. Opening the GB
door is a PITA without one if there is any resistance in
the movement.
|
|
| |
|
Extreme Veteran
Posts: 415
Location: upstate new york | Dave,
I have a couple questions....nice pics of the car by the way....The power seat switch....mine came all apart like that also...I think i'm missing a piece inside that keeps it all snug in the switch...do you have a diagram or pictures of the mechanism? Is there a spacer piece that keeps the black plastic box, the circuit board all snug inside the casting???
Also where did you get you carpet from? I need 1 for my 57 New Yorker....
Thanks,
billy |
|
| |
|
Elite Veteran
Posts: 964
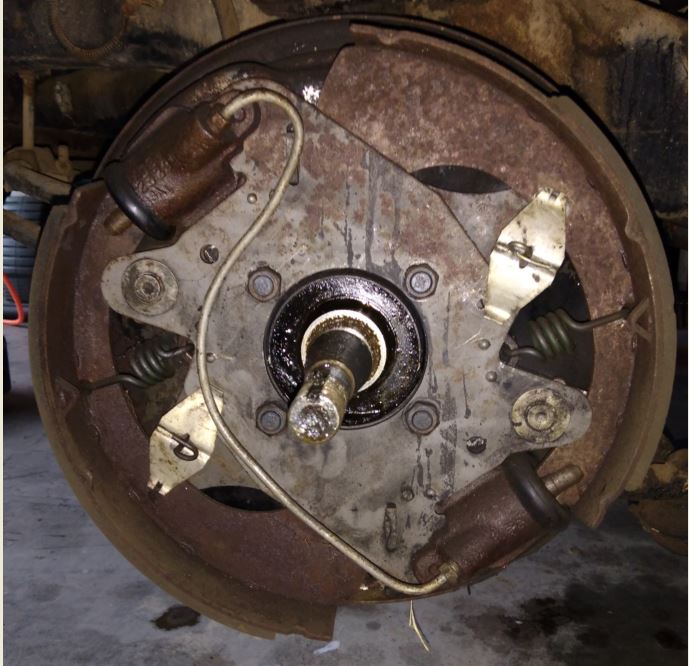
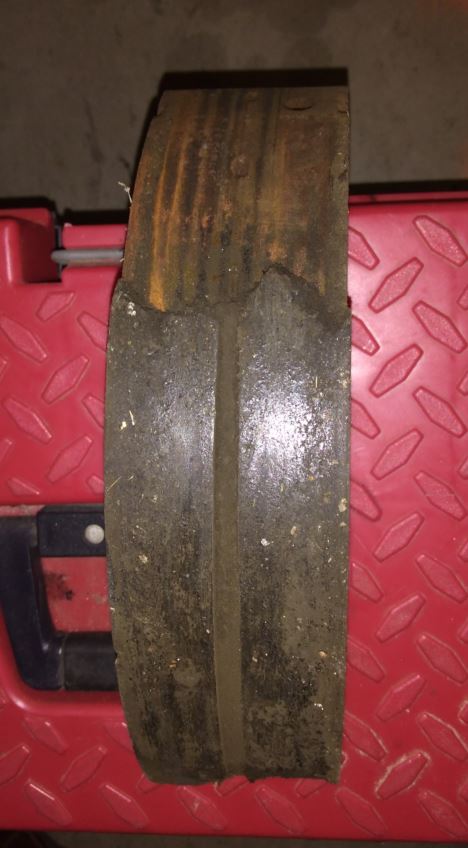
Location: San Antonio, TX | Been putting this off for too long. BTW... this was the good side. The other side had a very leaky wheel cylinder. It was really ugly, but I forgot to take a picture.
Not sure how that chunk of shoe came off.
Edited by macedon 2017-12-05 2:14 PM
 (brakeb4.JPG) (brakeb4.JPG)
 (brakeafter.JPG) (brakeafter.JPG)
 (missing.JPG) (missing.JPG)
Attachments
----------------
brakeb4.JPG (82KB - 498 downloads)
brakeafter.JPG (82KB - 495 downloads)
missing.JPG (58KB - 484 downloads)
|
|
| |
|
Elite Veteran
Posts: 964
Location: San Antonio, TX | Restored a set of Texas 57 plates for the sedan.
 (tx57.JPG) (tx57.JPG)
Attachments
----------------
tx57.JPG (110KB - 477 downloads)
|
|
| |
|
Expert
Posts: 1226
Location: D-70199 Heslach | It look very good with the time correct numberplates |
|
| |
|

Expert
Posts: 3974
Location: DFW, TX | Your Desoto is looking great! |
|
| |
|
Elite Veteran
Posts: 964
Location: San Antonio, TX | Thanks... making progress, however slight. Plan to drive it till the fall and then get it ready for a re-spray. |
|
| |
|
Elite Veteran
Posts: 964
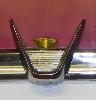
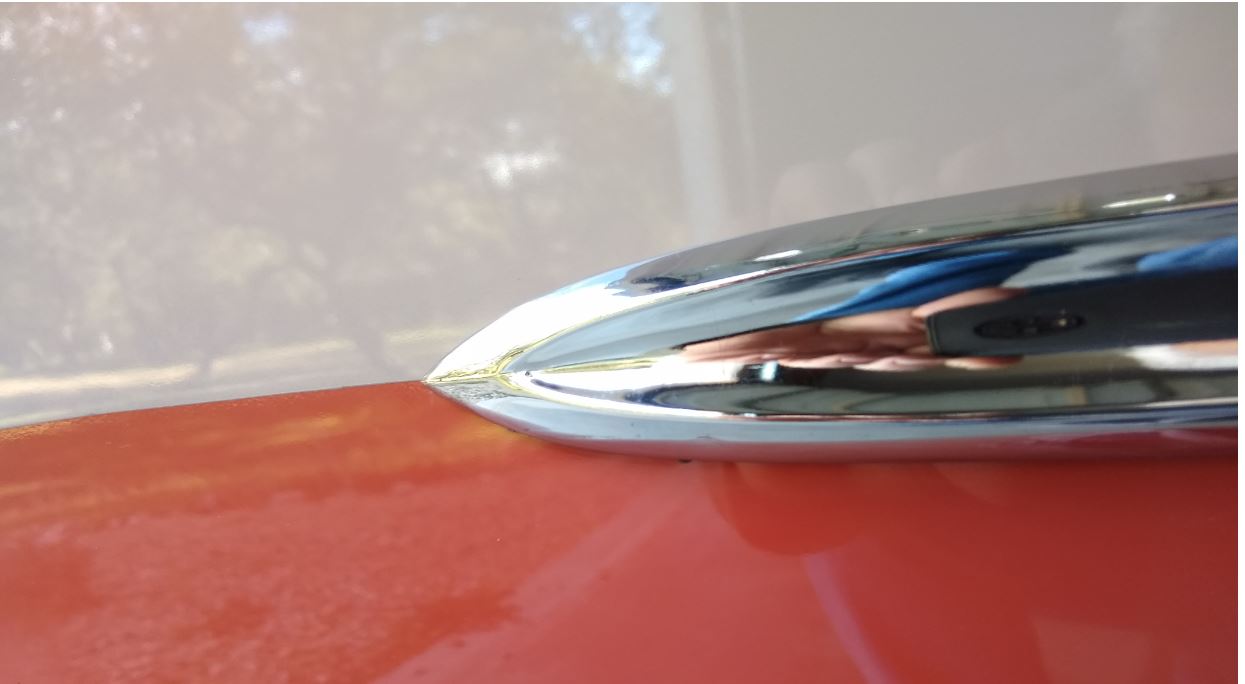
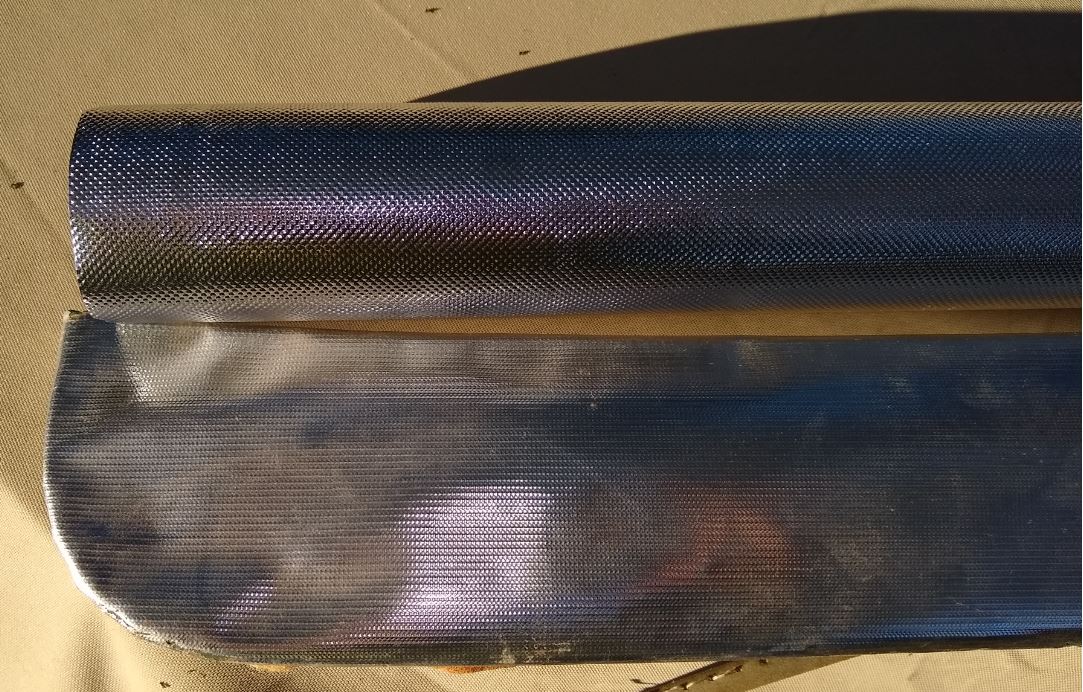
Location: San Antonio, TX | Working the rear glass stainless trim. Top piece had a pretty good dent on the edge. It was in a tough spot to work on, but I got a decent result I think.
 (trimbefore.JPG) (trimbefore.JPG)
 (trimafter.JPG) (trimafter.JPG)
Attachments
----------------
trimbefore.JPG (36KB - 467 downloads)
trimafter.JPG (74KB - 477 downloads)
|
|
| |
|

Exner Expert 10K+
Posts: 10254
Location: So. Cal | Nice job. How did you manage to do it? I like to use wood objects to pound on these but it isn't always easy to figure out how to do it well. |
|
| |
|
Extreme Veteran
Posts: 537
Location: Upstate NY | I agree! Really nice work. I also would like to know the technique. What did you use? |
|
| |
|
Elite Veteran
Posts: 964
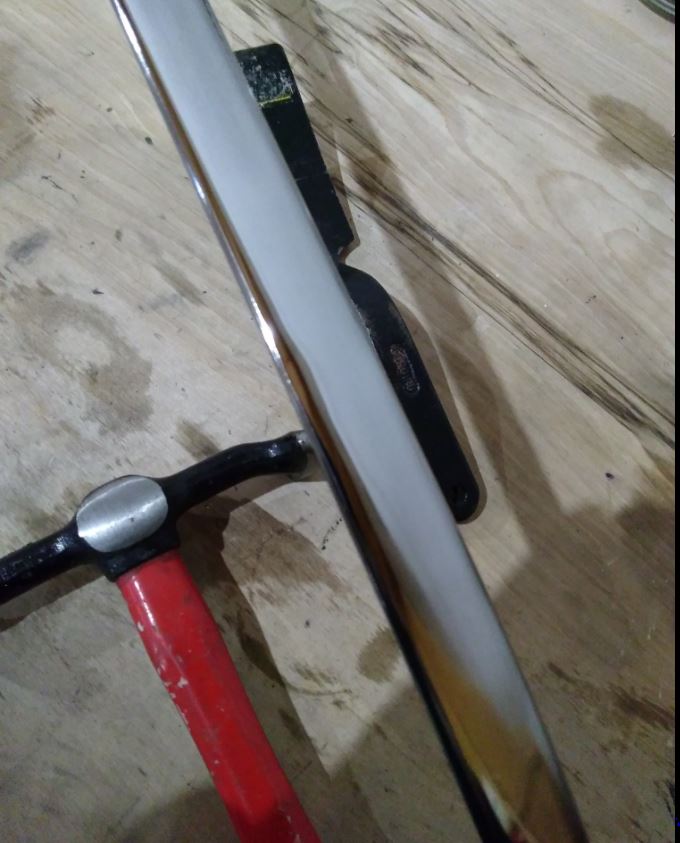
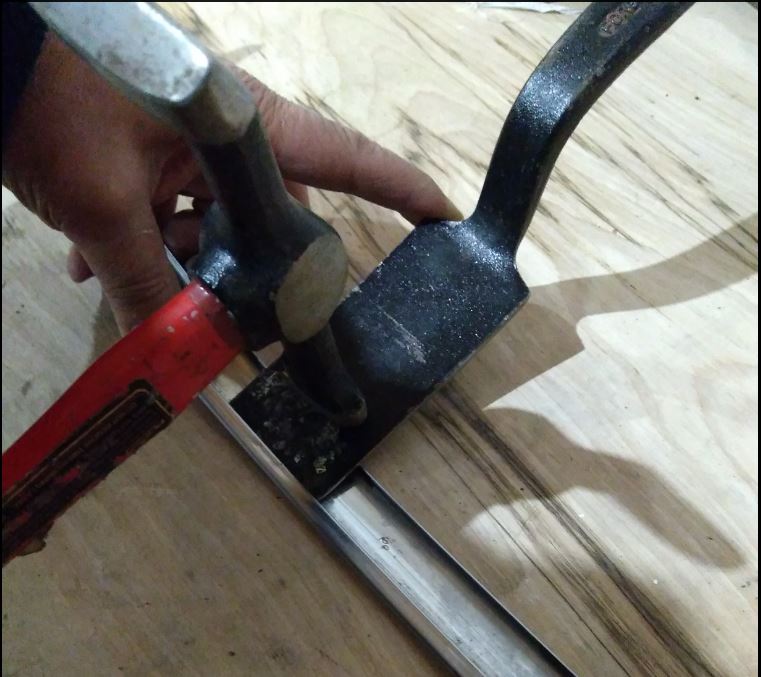
Location: San Antonio, TX | Worked from the backside of the trim with the face flush against wood. Worked the spoon north-south and east-west as I struck the back. That got it popped back out pretty nice. Then sand and polish.
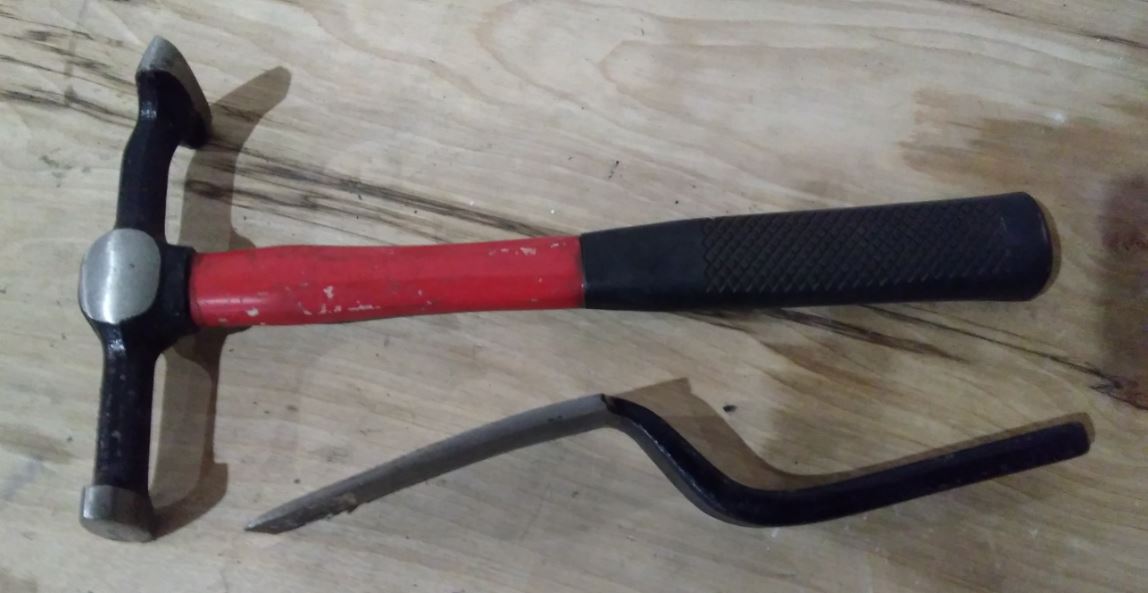 (tools.JPG) (tools.JPG)
 (spoon.JPG) (spoon.JPG)
Attachments
----------------
tools.JPG (70KB - 470 downloads)
spoon.JPG (77KB - 491 downloads)
|
|
| |
|
Exner Expert 10K+
Posts: 10254
Location: So. Cal | You have great coordination with the camera! I'm not sure if I could have taken that last shot. Thanks for the great explanation. |
|
| |
|
Extreme Veteran
Posts: 537
Location: Upstate NY | Yes, thanks for your pictures. I have some stainless to fix. I at least see I need to buy a spoon. I hope mine comes out like yours! |
|
| |
|
Veteran
Posts: 164
Location: Alvin, Texas | Nice work on the trim!
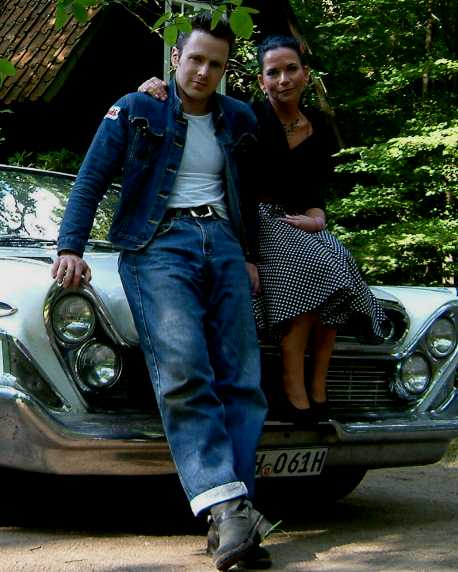
There is some videos on YouTube as well. Check out the car in the back ground.
https://youtu.be/Ft41IG2BAG8
I hope the link works. |
|
| |
|
Elite Veteran
Posts: 964
Location: San Antonio, TX | Excellent video. Of course the 57 is red and white. |
|
| |
|
Elite Veteran
Posts: 964
Location: San Antonio, TX | There... much better. Now have a matched pair of 57 Dagmars. Thanks Danny.
I have a really nice 58 driver's side for sale or trade now. I'll list it in the parts section.
 (matched.JPG) (matched.JPG)
Attachments
----------------
matched.JPG (112KB - 465 downloads)
|
|
| |
|
Expert
Posts: 3974
Location: DFW, TX | Looks like it was born there!  |
|
| |
|
Elite Veteran
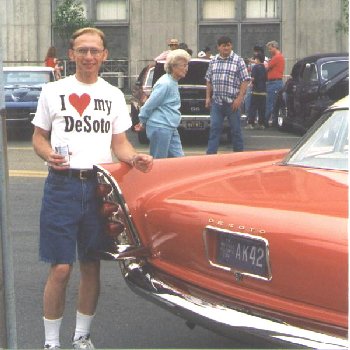
Posts: 964
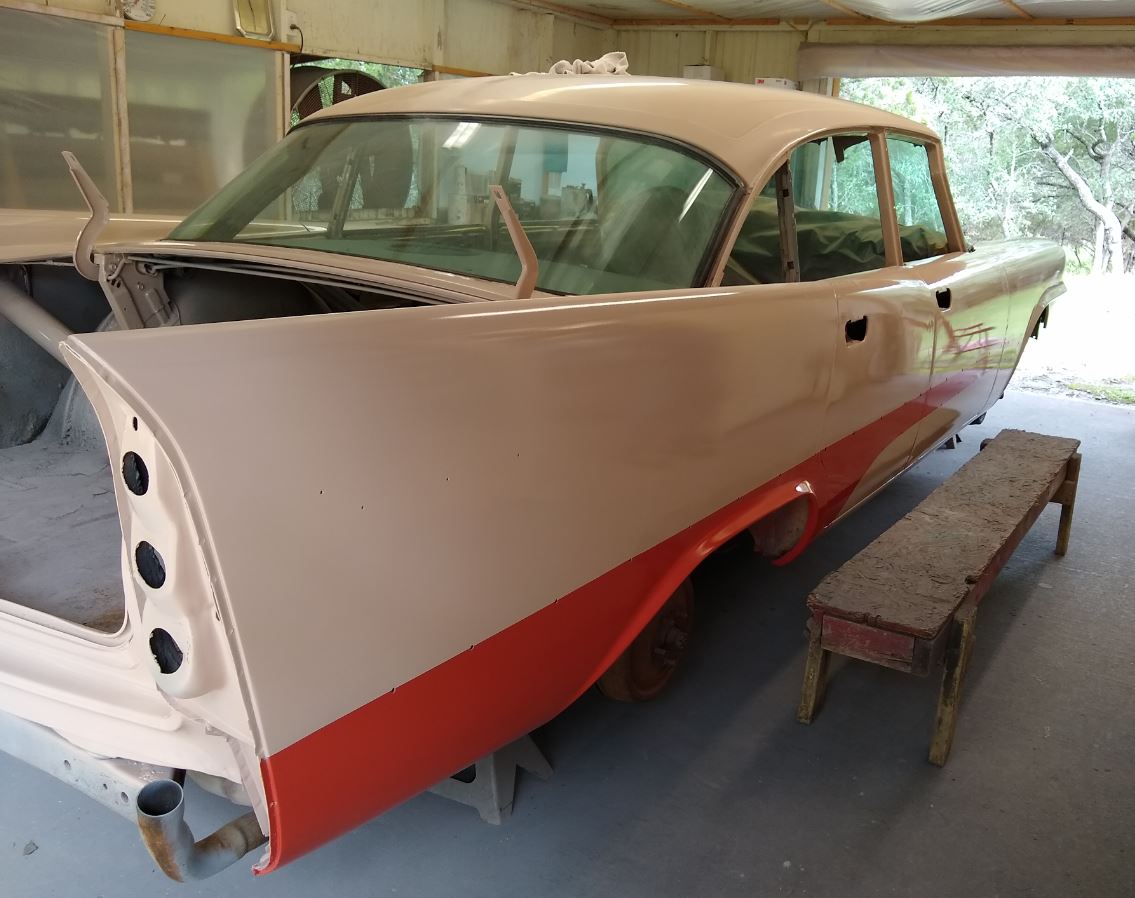
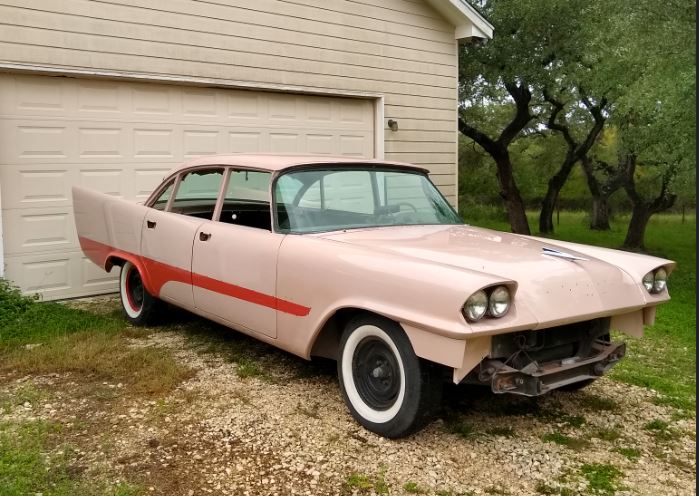
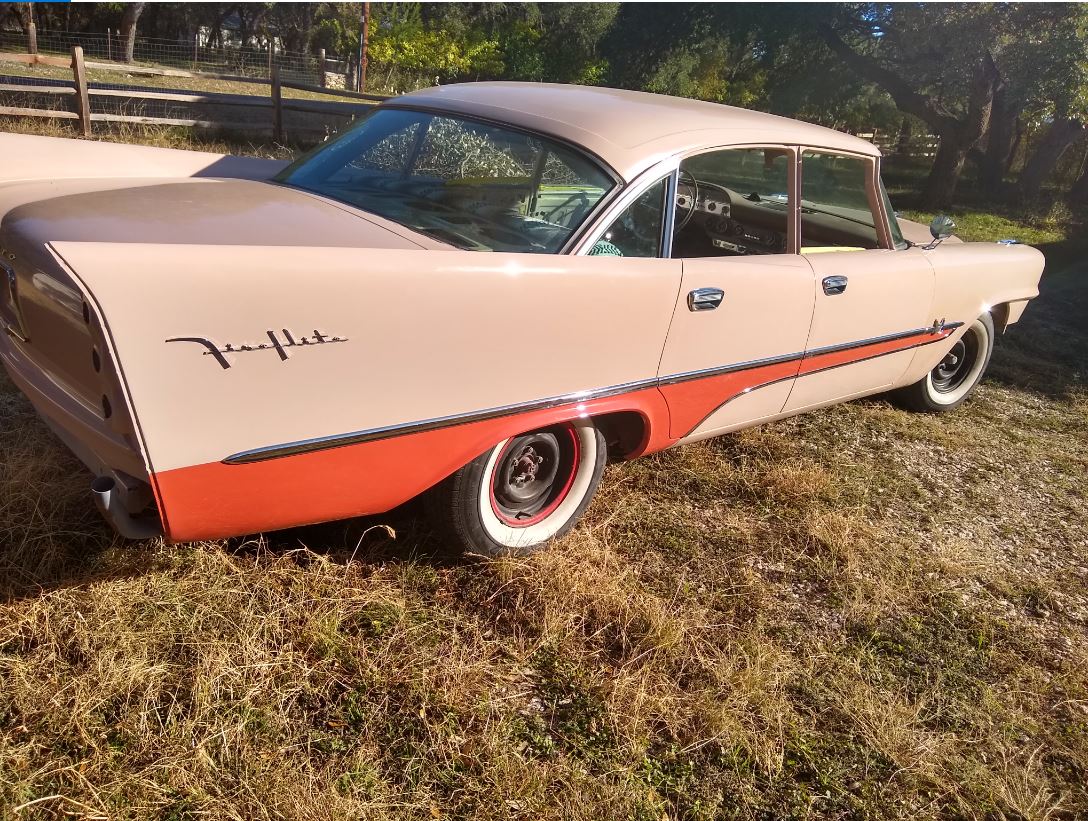
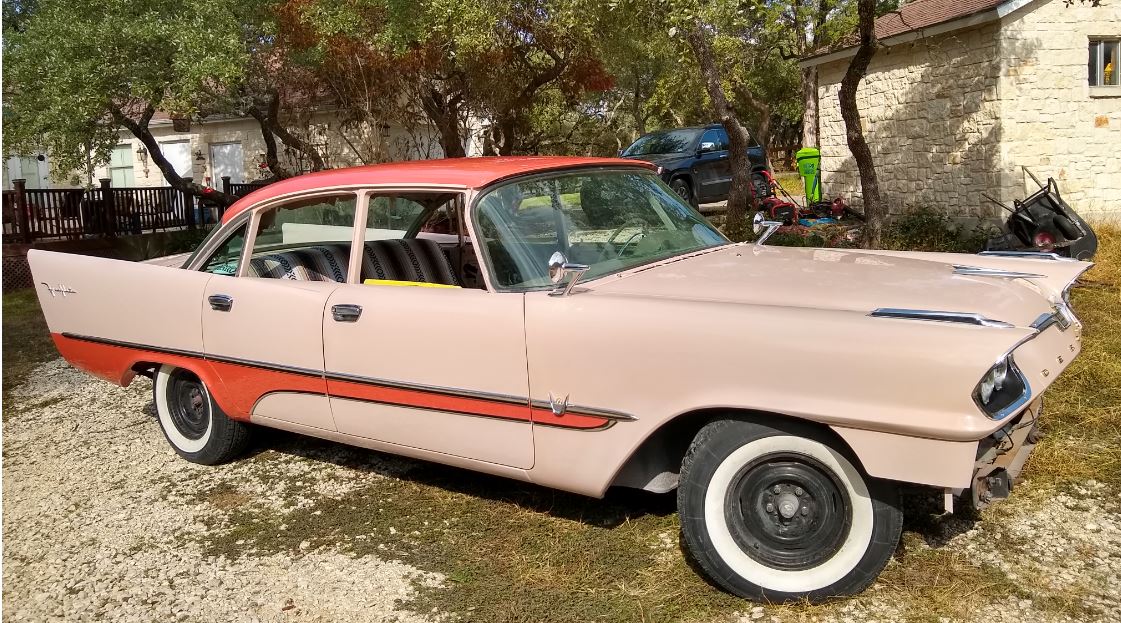
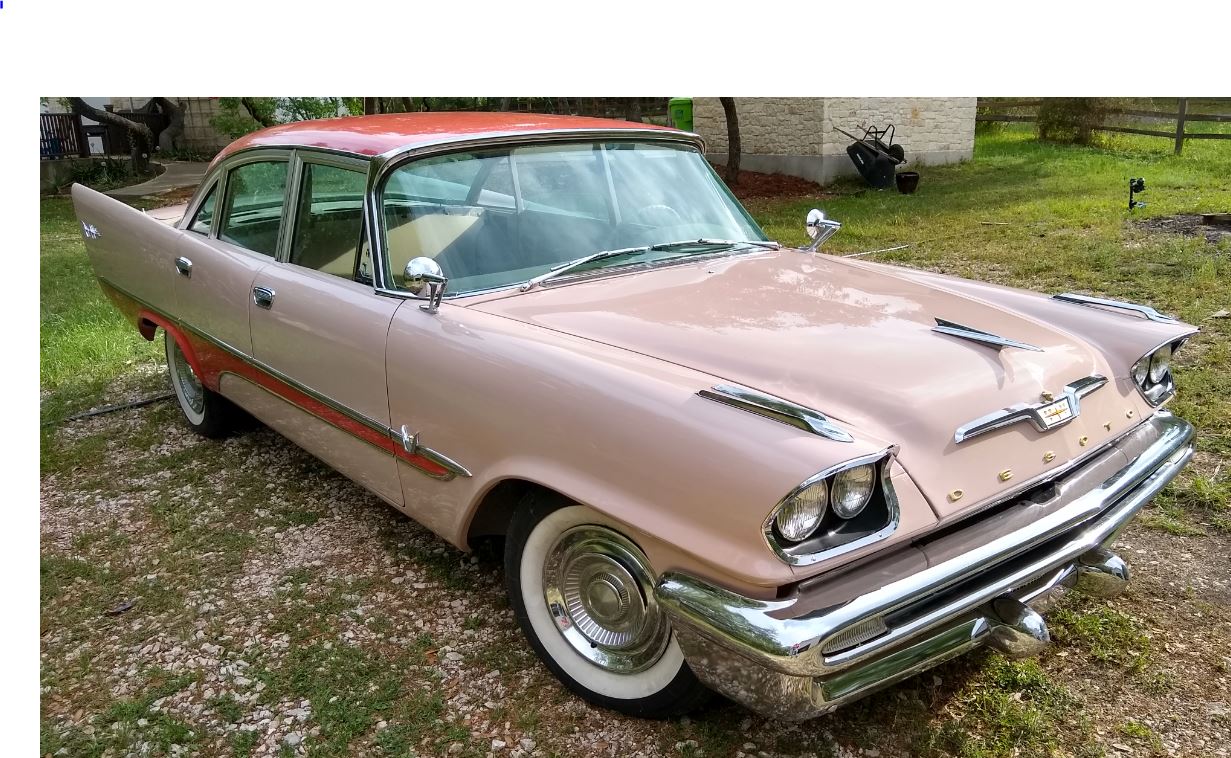
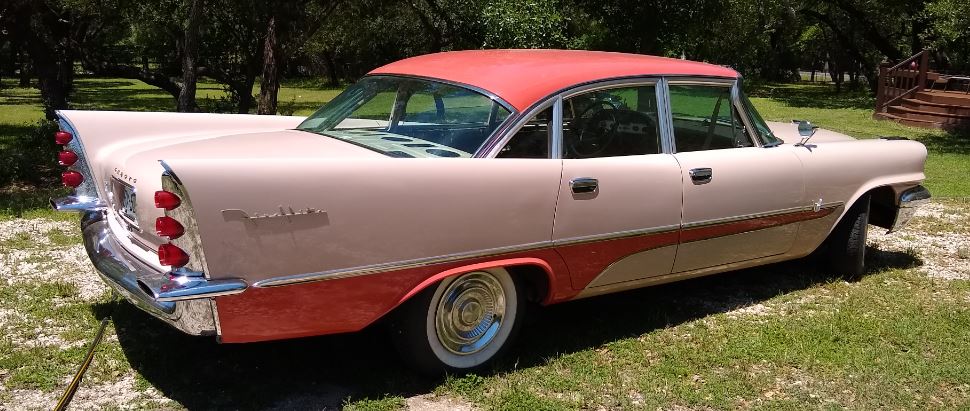
Location: San Antonio, TX | Today is a little bittersweet. Went for a drive this morning, but I knew it was going to be the last one for a while. Got my painter lined up so now I am going to strip her down. As we all know there's a lot of chrome and stainless to come off. Going with original Sahara Tan and a Mandarin Rust color sweep.
Edited by macedon 2018-08-03 11:57 AM
 (bittersweet.JPG) (bittersweet.JPG)
Attachments
----------------
bittersweet.JPG (134KB - 454 downloads)
|
|
| |
|
Exner Expert 10K+
Posts: 10254
Location: So. Cal | Should be fun. Are you going to keep the same color scheme or change it up a little? |
|
| |
|
Elite Veteran
Posts: 964
Location: San Antonio, TX | Yeah, looking forward to seeing it with fresh paint. The guy doing the paint did my friend's 61 Starliner. Awesome job.
The trim tag on this car says XXX which is Sahara Tan. I have the original dealer sales invoice and it says Color Sweep in the listed options. Not really sure what happened there. I think it was delivered as an all Sahara Tan car. The respray done in the 90's added brown to the sweep and the roof. So all that being said...
I'm going to repaint the roof and body Sahara Tan and then giving it a Mandarin Rust sweep. I like how those colors look together. |
|
| |
|
Exner Expert 10K+
Posts: 10627
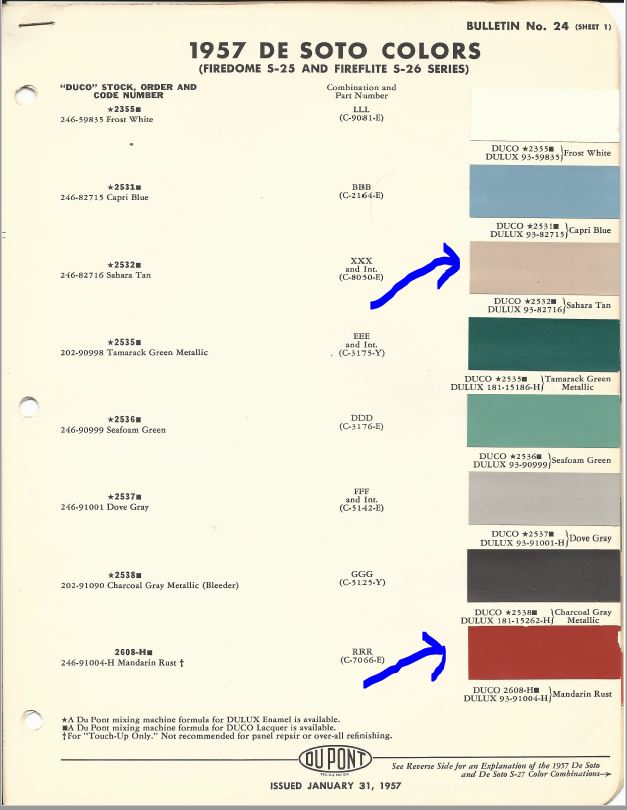
Location: Lower Mainland BC | So these colours?:
 |
|
| |
|
Elite Veteran
Posts: 964
Location: San Antonio, TX | Yes. I'm going off a Dupont chip, but yes Sahara Tan XXX and Mandarin Rust RRR.
 (chip.JPG) (chip.JPG)
Attachments
----------------
chip.JPG (68KB - 447 downloads)
|
|
| |
|
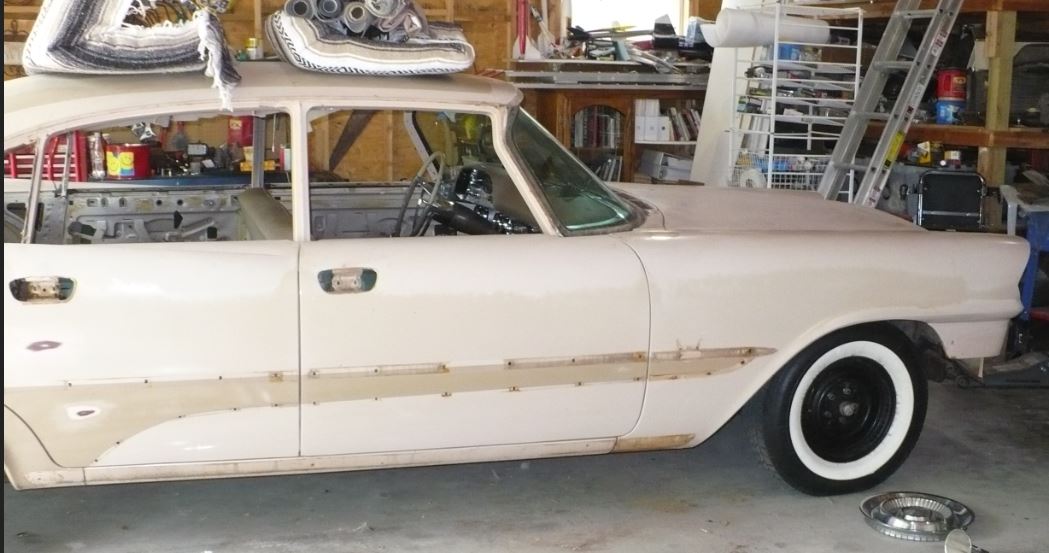
Elite Veteran
Posts: 964
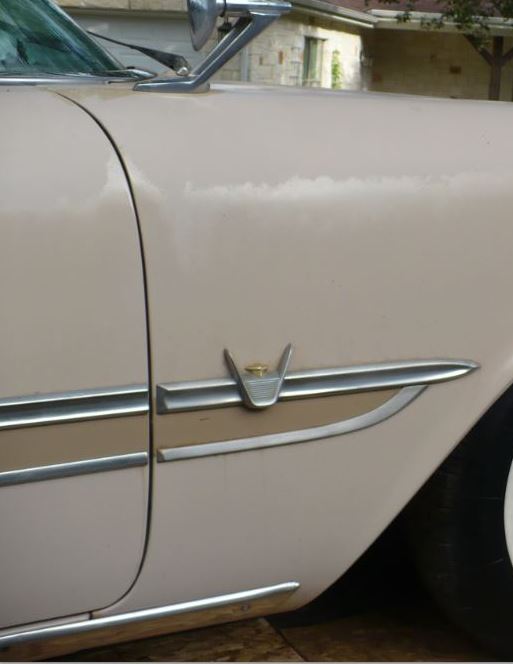
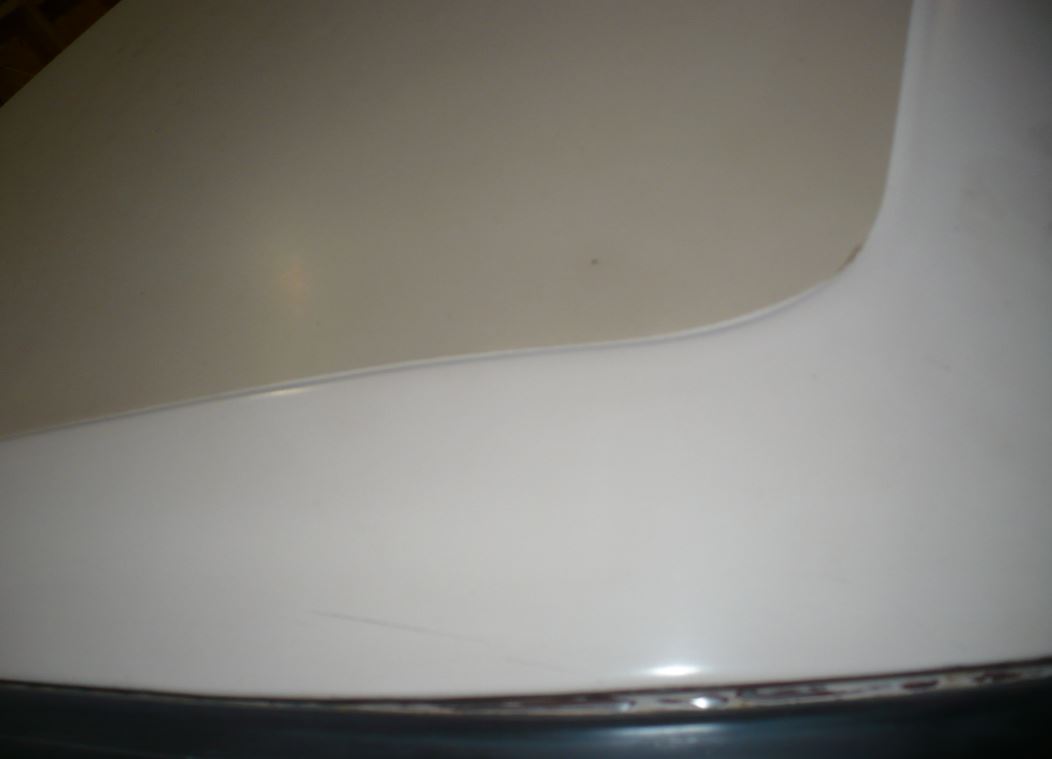
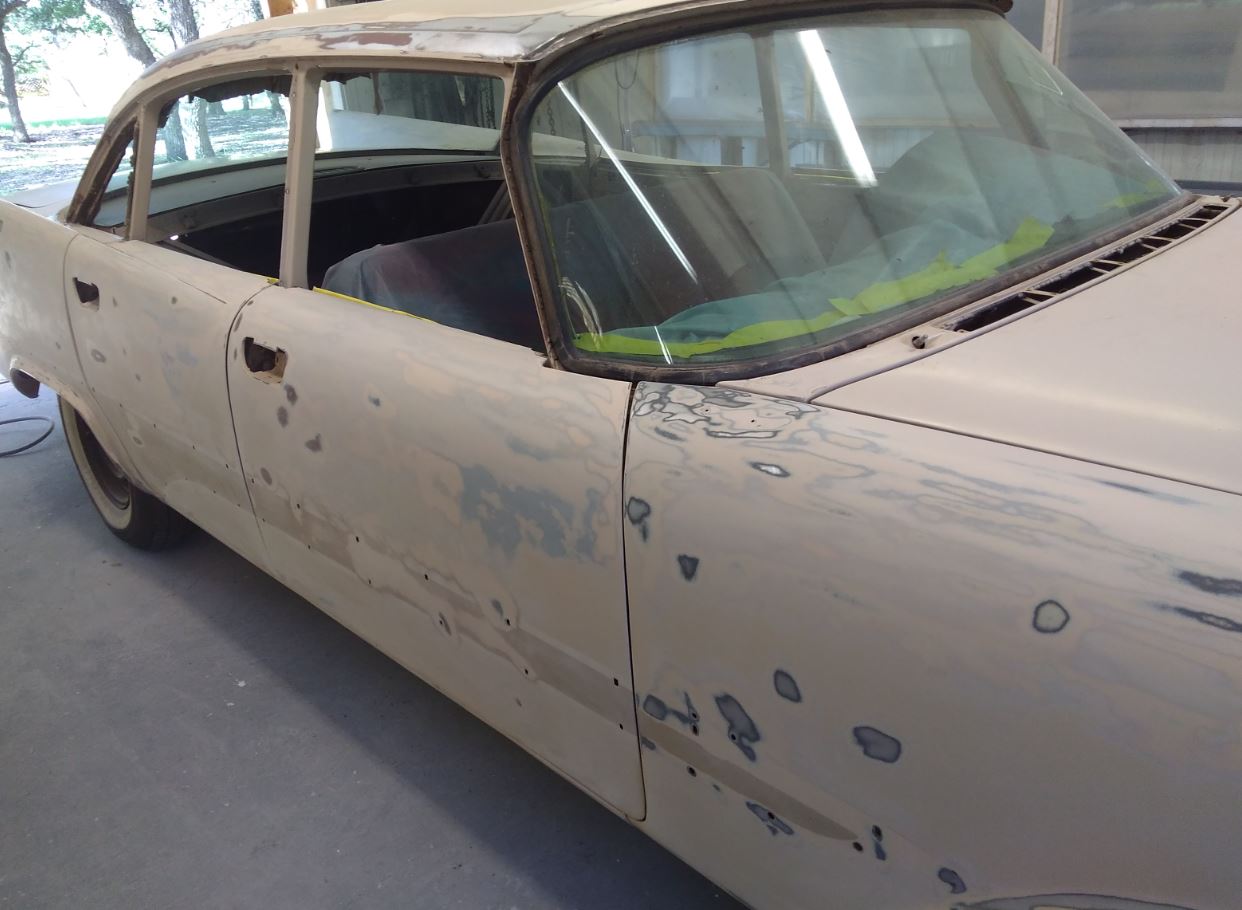
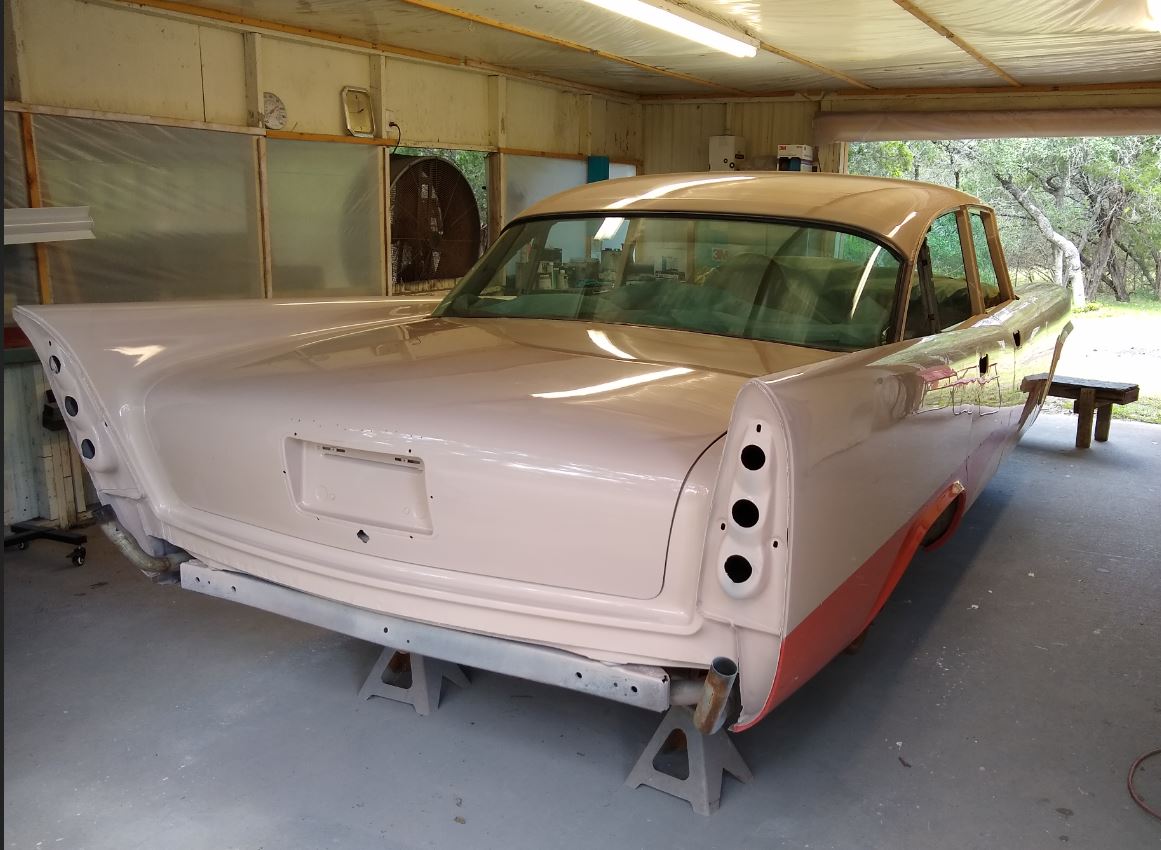
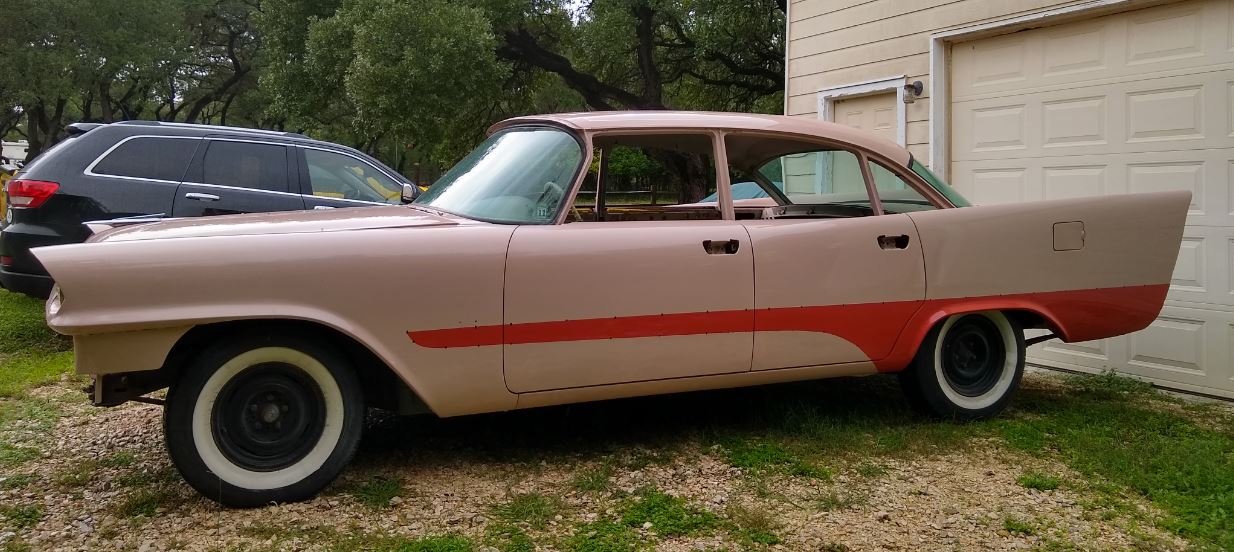
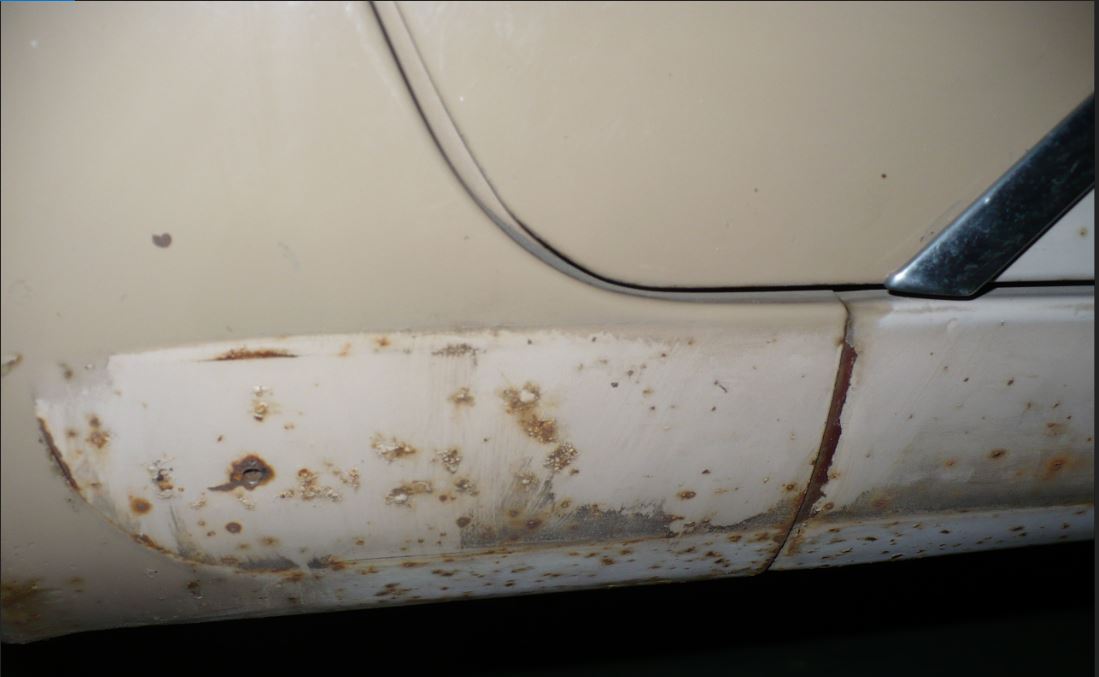
Location: San Antonio, TX | Ok, I know it doesn't really matter but it's got me curious on how this car was painted. I pulled off the ugly aftermarket rocker stainless which I never liked anyway. It's staying off by the way. And the dogleg makes it pretty obvious this car got it's color sweep later. How much later who knows. The dealer invoice clearly states color sweep. The sweep color is definitely not factory. And they painted the roof weird too. Ah well mystery lost in time.
 (rocker chrome.JPG) (rocker chrome.JPG)
 (doglegcolor.JPG) (doglegcolor.JPG)
 (sweep.JPG) (sweep.JPG)
 (invoice.JPG) (invoice.JPG)
 (roof.JPG) (roof.JPG)
Attachments
----------------
rocker chrome.JPG (29KB - 460 downloads)
doglegcolor.JPG (57KB - 432 downloads)
sweep.JPG (41KB - 455 downloads)
invoice.JPG (100KB - 434 downloads)
roof.JPG (34KB - 434 downloads)
|
|
| |
|
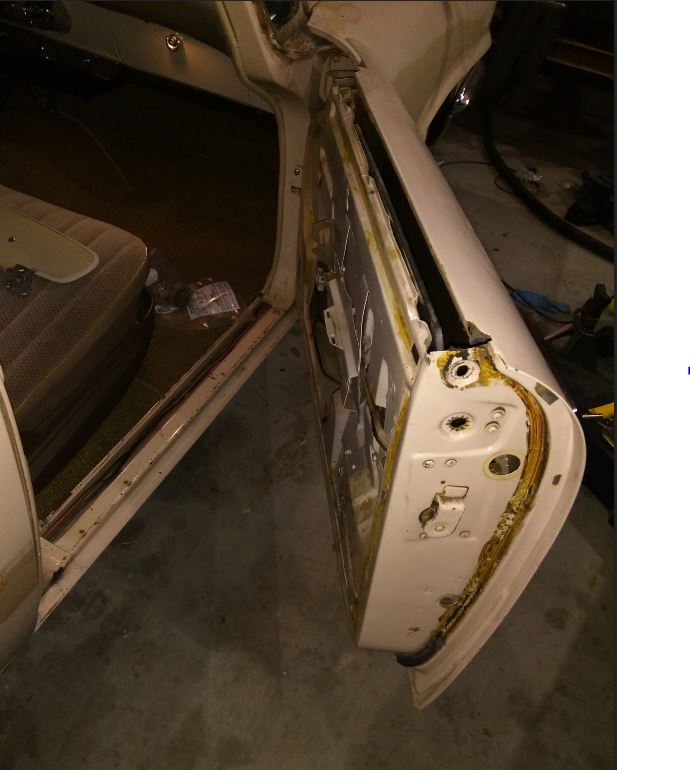
Elite Veteran
Posts: 964
Location: San Antonio, TX | coming along
 (doordecon.JPG) (doordecon.JPG)
Attachments
----------------
doordecon.JPG (64KB - 428 downloads)
|
|
| |
|
Extreme Veteran
Posts: 537
Location: Upstate NY | Looks great! |
|
| |
|
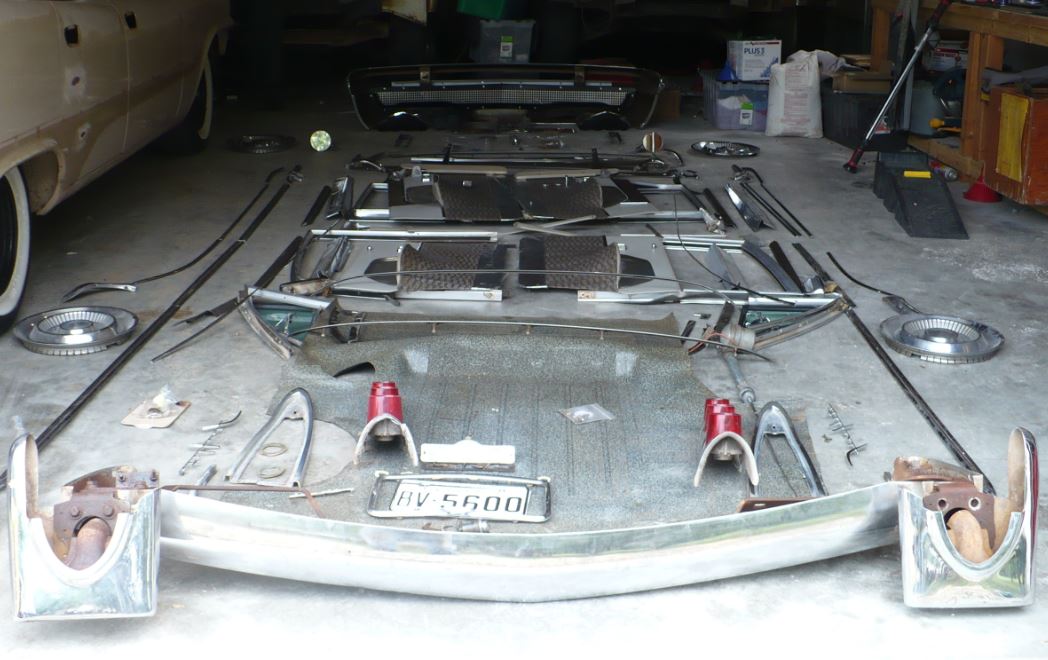
Elite Veteran
Posts: 964
Location: San Antonio, TX | Finally got everything off. Whew. Going to the paint shop on Monday.
 (to2.JPG) (to2.JPG)
 (alot.JPG) (alot.JPG)
Attachments
----------------
to2.JPG (89KB - 429 downloads)
alot.JPG (109KB - 447 downloads)
|
|
| |
|
Expert
Posts: 1505
Location: New Castle PA | Very nice way of lying out all the parts if you have the room. Car will be great, as you're doing good work! |
|
| |
|
Elite Veteran
Posts: 964
Location: San Antonio, TX | Progress...
Edited by macedon 2018-08-21 3:56 PM
 (sand.JPG) (sand.JPG)
 (sand2.JPG) (sand2.JPG)
Attachments
----------------
sand.JPG (56KB - 427 downloads)
sand2.JPG (110KB - 417 downloads)
|
|
| |
|
Elite Veteran
Posts: 964
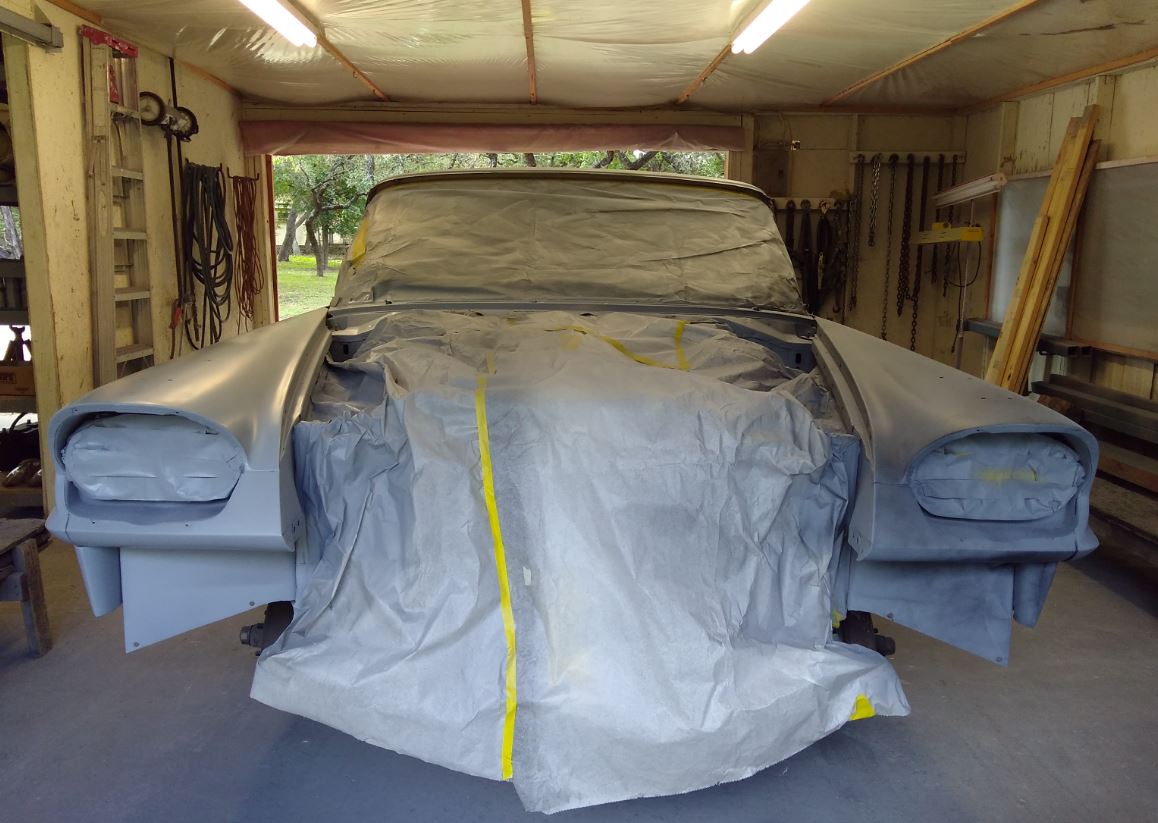
Location: San Antonio, TX | Primer... and more sanding
 (primer1.JPG) (primer1.JPG)
 (primer2.JPG) (primer2.JPG)
Attachments
----------------
primer1.JPG (113KB - 416 downloads)
primer2.JPG (127KB - 407 downloads)
|
|
| |
|
Expert
Posts: 3974
Location: DFW, TX | There's always more sanding!  |
|
| |
|
Elite Veteran
Posts: 964
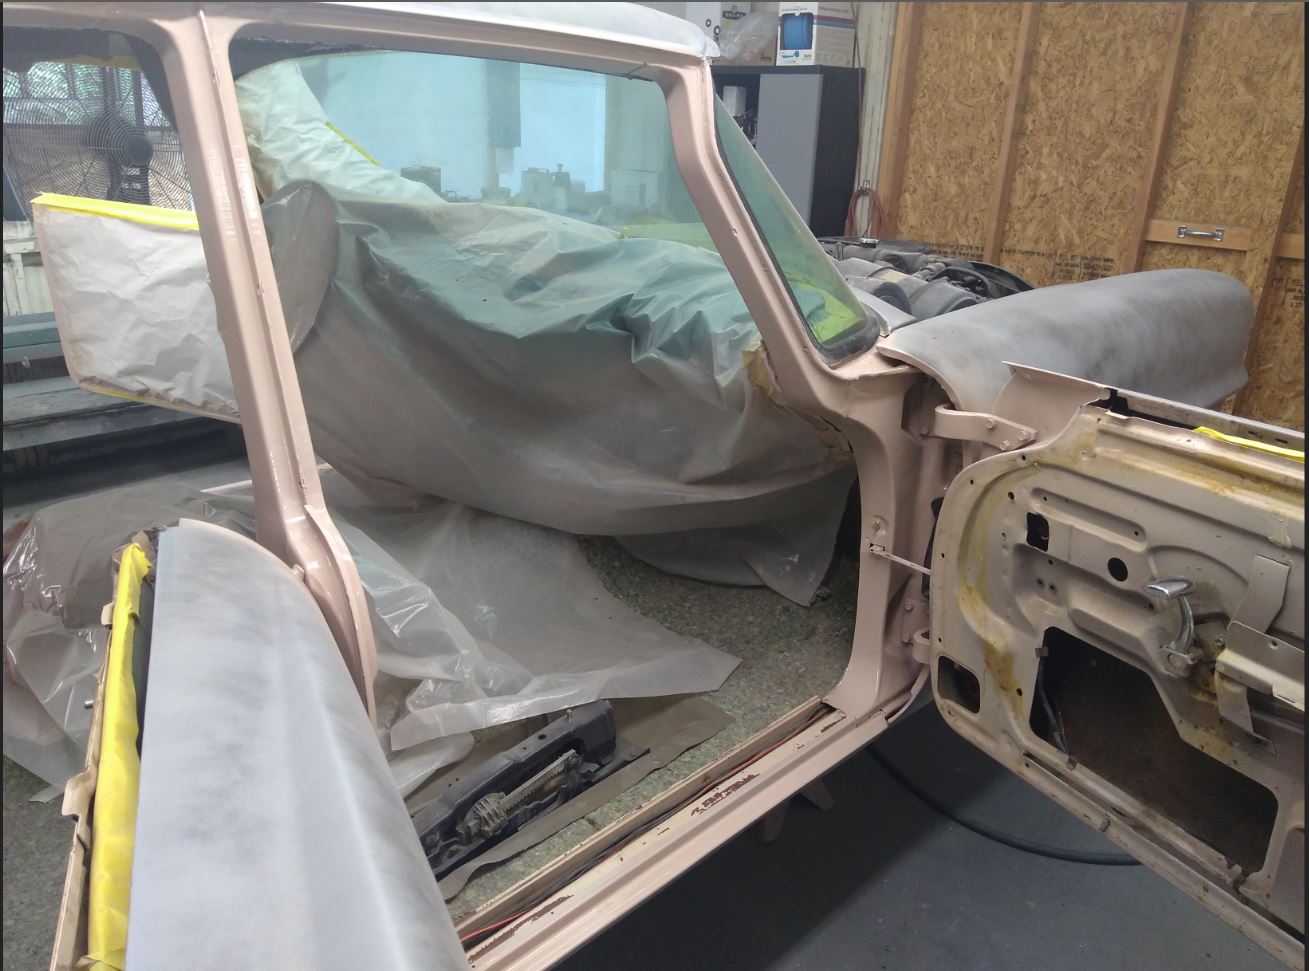
Location: San Antonio, TX | Door frames and edges so far
 (doorframe2.JPG) (doorframe2.JPG)
 (doorframes.JPG) (doorframes.JPG)
 (hood.JPG) (hood.JPG)
Attachments
----------------
doorframe2.JPG (163KB - 430 downloads)
doorframes.JPG (146KB - 403 downloads)
hood.JPG (109KB - 401 downloads)
|
|
| |
|
Elite Veteran
Posts: 964
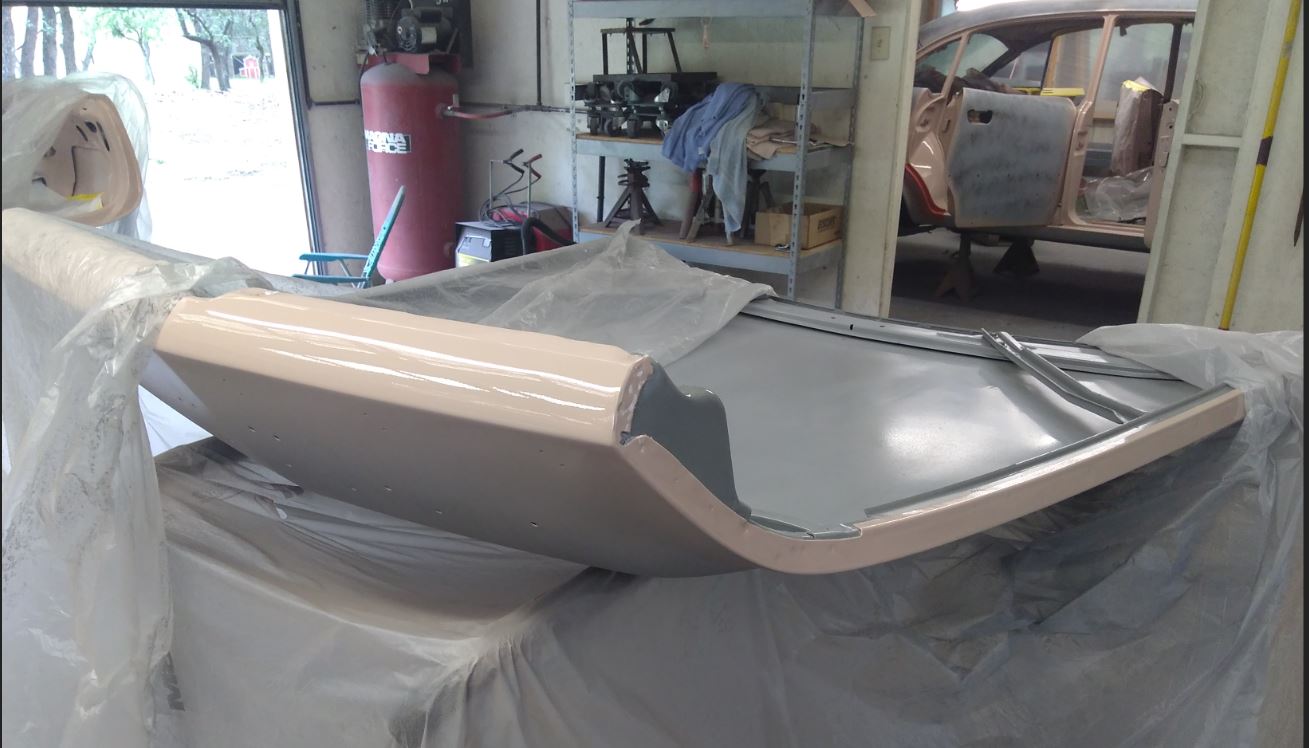
Location: San Antonio, TX | I wasn't certain certain Sahara Tan and Mandarin Rust would look great together. I am really happy with this color combo now!
 (color.JPG) (color.JPG)
 (color2.JPG) (color2.JPG)
Attachments
----------------
color.JPG (120KB - 401 downloads)
color2.JPG (148KB - 393 downloads)
|
|
| |
|
Expert
Posts: 3974
Location: DFW, TX | Outstanding! Car is looking awesome! |
|
| |
|
Expert
Posts: 1737
Location: Hay Lakes, Alberta, Canada | Looks great!
I have a '57 Chrysler parts car that colour combination, and it looks sharp, even as a pile of crumpled rust...
I have to say...the way you laid out the parts in your garage, makes it look like the body just vanished, and all the trim just fell to the floor suddenly! :D |
|
| |
|
Elite Veteran
Posts: 964
Location: San Antonio, TX | Put the deck lid and hood on today. Getting closer.
 (4oct18decklidon.JPG) (4oct18decklidon.JPG)
 (4oct18hoodon.JPG) (4oct18hoodon.JPG)
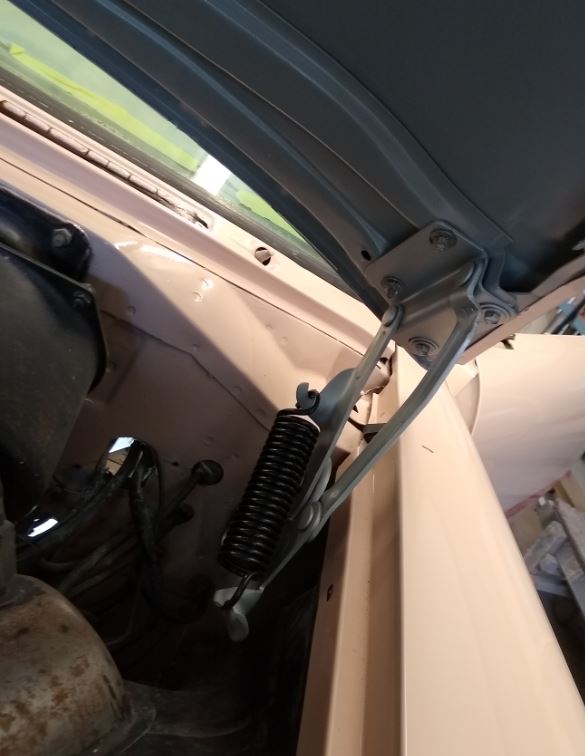 (4oct18hinge.JPG) (4oct18hinge.JPG)
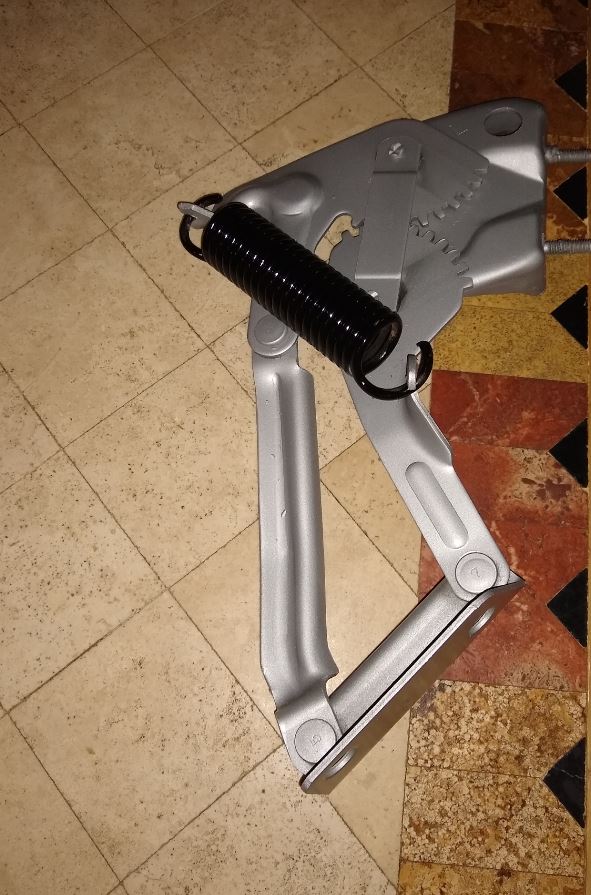 (4oct18hingeresto.JPG) (4oct18hingeresto.JPG)
Attachments
----------------
4oct18decklidon.JPG (129KB - 392 downloads)
4oct18hoodon.JPG (148KB - 387 downloads)
4oct18hinge.JPG (53KB - 396 downloads)
4oct18hingeresto.JPG (106KB - 405 downloads)
|
|
| |
|
Elite Veteran
Posts: 964
Location: San Antonio, TX | Oh well... too bad it couldn't have been a bright sunny day to show off the new paint. Got the sedan back today. Very pleased with the result. Now I'll start putting it all back together.
 (9oct18backhome.JPG) (9oct18backhome.JPG)
 (9oct18backhome2.JPG) (9oct18backhome2.JPG)
 (9oct18backhome3.JPG) (9oct18backhome3.JPG)
 (9oct18backhome4.JPG) (9oct18backhome4.JPG)
Attachments
----------------
9oct18backhome.JPG (86KB - 401 downloads)
9oct18backhome2.JPG (146KB - 397 downloads)
9oct18backhome3.JPG (213KB - 392 downloads)
9oct18backhome4.JPG (231KB - 384 downloads)
|
|
| |
|
Exner Expert 10K+
Posts: 10254
Location: So. Cal | Driving this car will make all of your days bright and sunny! Nice job. |
|
| |
|
Elite Veteran
Posts: 964
Location: San Antonio, TX | Yes indeed. Sun came out:)
 (9oct18ws.JPG) (9oct18ws.JPG)
Attachments
----------------
9oct18ws.JPG (274KB - 405 downloads)
|
|
| |
|
Board Moderator & Exner Expert 10K+
Posts: 13152
Location: Southern Sweden - Sturkö island | Very nice indeed! We're waiting for more pics of your progress - great work! |
|
| |
|
Expert
Posts: 1505
Location: New Castle PA | Looking GREAT, Dave! |
|
| |
|
Elite Veteran
Posts: 964
Location: San Antonio, TX | Baking in the sun
 (11oct2018sun.JPG) (11oct2018sun.JPG)
Attachments
----------------
11oct2018sun.JPG (188KB - 403 downloads)
|
|
| |
|
Exner Expert 10K+
Posts: 10254
Location: So. Cal | Good idea. It was really hot when I painted the firewall on my car, but I was surprised how long it took to fully cure. It was about 3-4 weeks before I felt it was ready to wash it without damage to the finish. But I used a polyurethane finish, which does take longer. Are you going to black out the lower fronts of those fenders? Edit: I take it back, I think the DeSoto needs body color there for continuity.
Edited by Powerflite 2018-10-11 2:56 PM
|
|
| |
|
Elite Veteran
Posts: 964
Location: San Antonio, TX | Yeah that shows a little around the bumper.
I don't normally put my cars out in the Texas sun on purpose. After looking at the picture I posted I went back out and covered up my dash
 (shows.JPG) (shows.JPG)
Attachments
----------------
shows.JPG (74KB - 394 downloads)
|
|
| |
|
Elite Veteran
Posts: 964
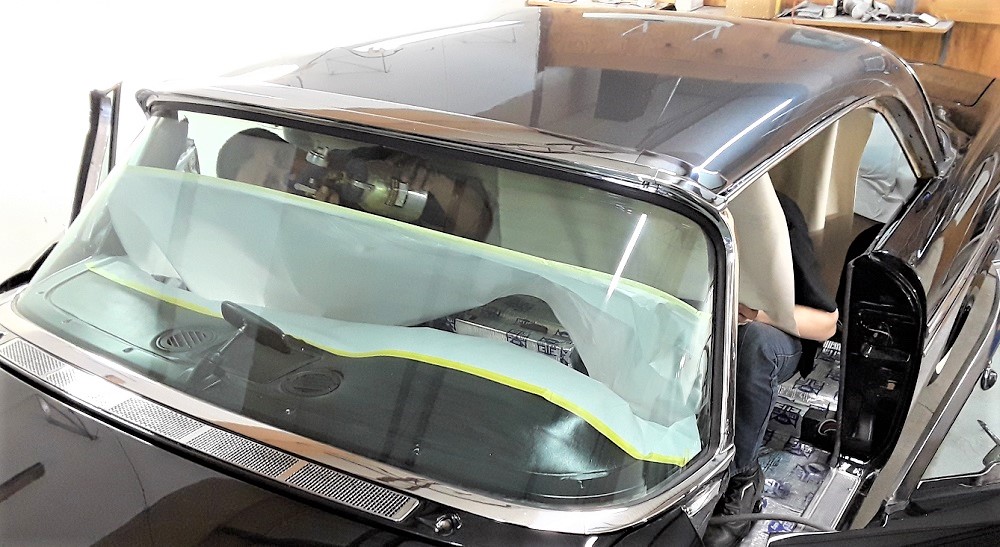
Location: San Antonio, TX | I was a little nervous about this procedure. I was very careful and it turned out well.
 (withcare.JPG) (withcare.JPG)
 (wentwell.JPG) (wentwell.JPG)
Attachments
----------------
withcare.JPG (55KB - 391 downloads)
wentwell.JPG (75KB - 404 downloads)
|
|
| |
|
Expert
Posts: 1505
Location: New Castle PA | Dave, as you know, I think you're doing a great job, and I know you're trying to be correct when you can. What made you decide to paint the mandarin rust on the front fenders? Not trying to be a PITA, just curious, because it wouldn't have been difficult to do the insert thing like the factory did. |
|
| |
|
Expert 5K+
Posts: 7599
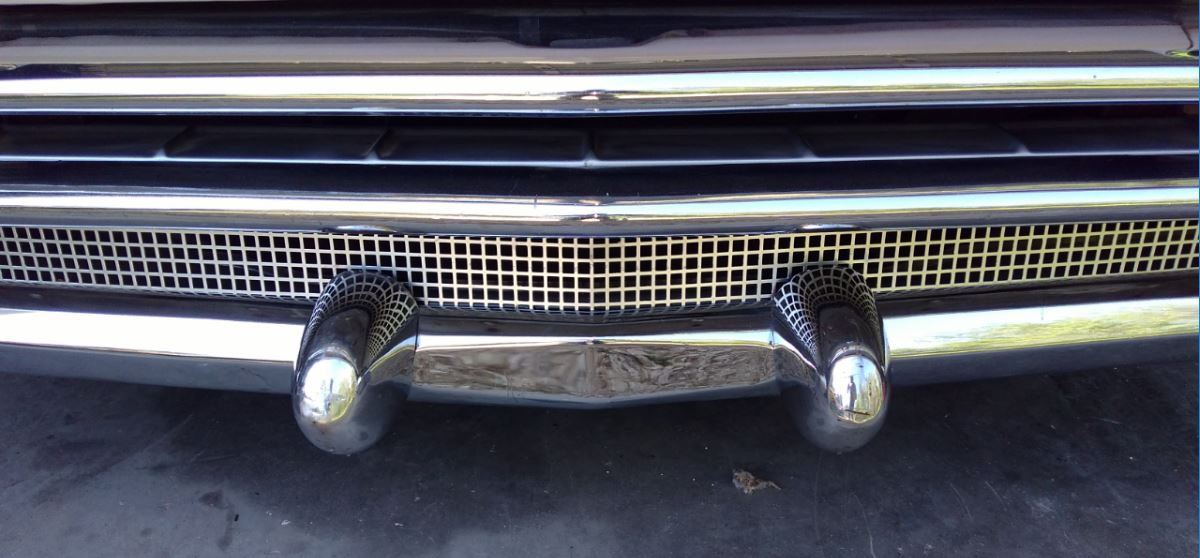
Location: northern germany | Wow, just that close up of the front fender trim, pure 50s art! I do not know what they were smoking back then, but it must have been good! |
|
| |
|

Elite Veteran
Posts: 1146
Location: CA | I wouldn't have painted and used the factory fender sheet metal inserts either.. they are a dirt and rust trap. The factory screwed up using those, but I understand the why behind it. |
|
| |
|
Expert
Posts: 3974
Location: DFW, TX | Agree. The "factory" did it that way because they were cheap and didn't want to spend the time to do the job correctly!
In my view, Dave has properly corrected what the factory did wrong. I bet he will also spend more than two seconds aligning the trim!  LOL LOL |
|
| |
|
Elite Veteran
Posts: 964
Location: San Antonio, TX | I guess because both my 57 DeSotos came from the factory as solid color cars. The sedan was XXX and the 4dr hdtp LLL. So I don't know what the insert thing is. Don't worry Ed I'm open to any and all suggestions. Especially from you. I might not take them all, but I will certainly consider them.
|
|
| |
|
Expert
Posts: 1226
Location: D-70199 Heslach | Here a picture of these fender inserts
 (1541.jpg) (1541.jpg)
Attachments
----------------
1541.jpg (94KB - 399 downloads)
|
|
| |
|
Elite Veteran
Posts: 964
Location: San Antonio, TX | 57burb - 2018-11-14 4:12 PM
I bet he will also spend more than two seconds aligning the trim! LOL
haha... you got that right
 (tail.JPG) (tail.JPG)
 (tail2.JPG) (tail2.JPG)
Attachments
----------------
tail.JPG (66KB - 372 downloads)
tail2.JPG (60KB - 384 downloads)
|
|
| |
|
Extreme Veteran
Posts: 537
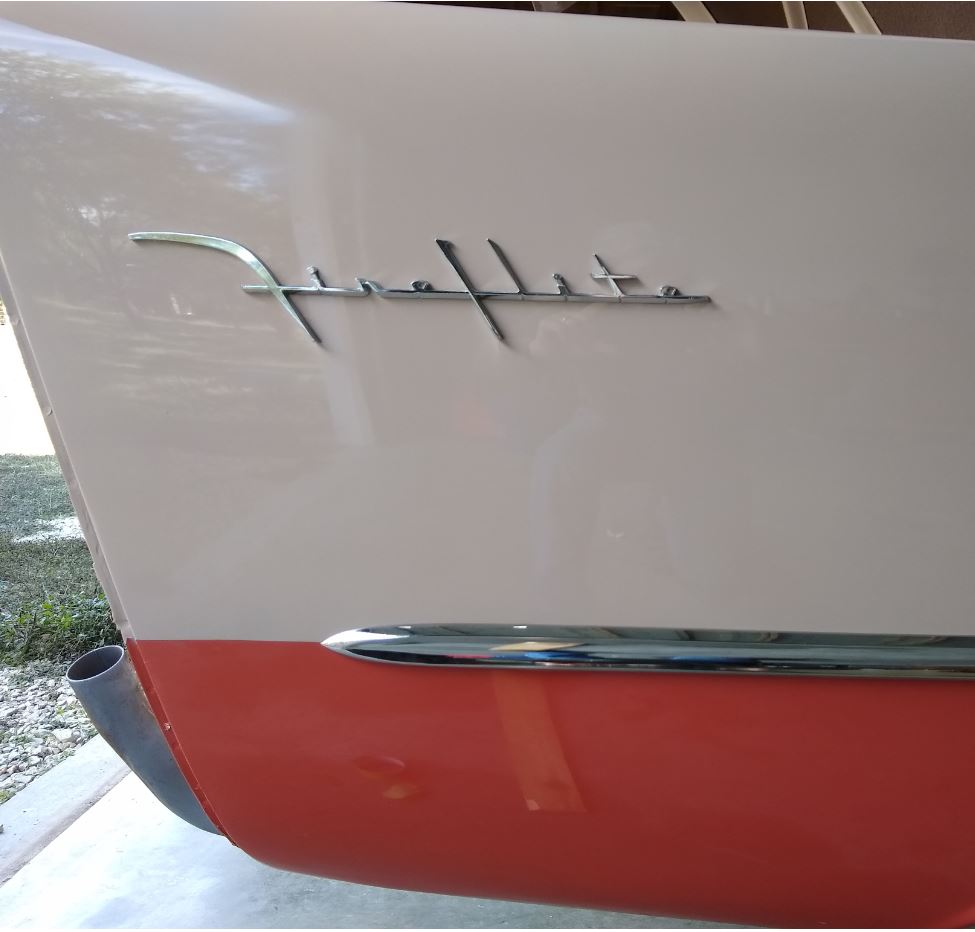
Location: Upstate NY | Looks really nice. Were your Fireflite emblems that clean or did you have the pits removed and rechromed? If so where, I need to do mine. |
|
| |
|
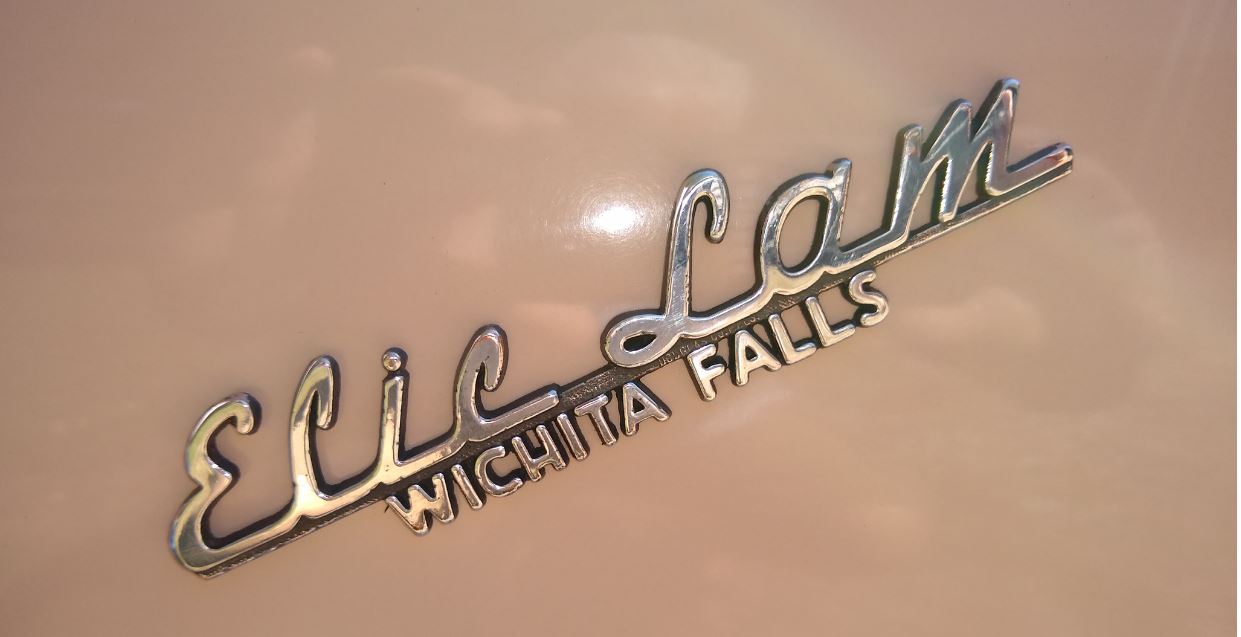
Elite Veteran
Posts: 964
Location: San Antonio, TX | Cleaned and polished. I have been very fortunate with this car. It was in Wichita Falls, Texas all it's life. Hardly any rust at all and the pot metal trim is pretty darn nice. The tail towers are the exception... rough, rough. |
|
| |
|
Elite Veteran
Posts: 964
Location: San Antonio, TX | Passenger side trim.
 (passpear.JPG) (passpear.JPG)
 (passpear2.JPG) (passpear2.JPG)
Attachments
----------------
passpear.JPG (284KB - 383 downloads)
passpear2.JPG (149KB - 374 downloads)
|
|
| |
|
Expert
Posts: 1226
Location: D-70199 Heslach | Dave, the result looks great !! |
|
| |
|
Elite Veteran
Posts: 964
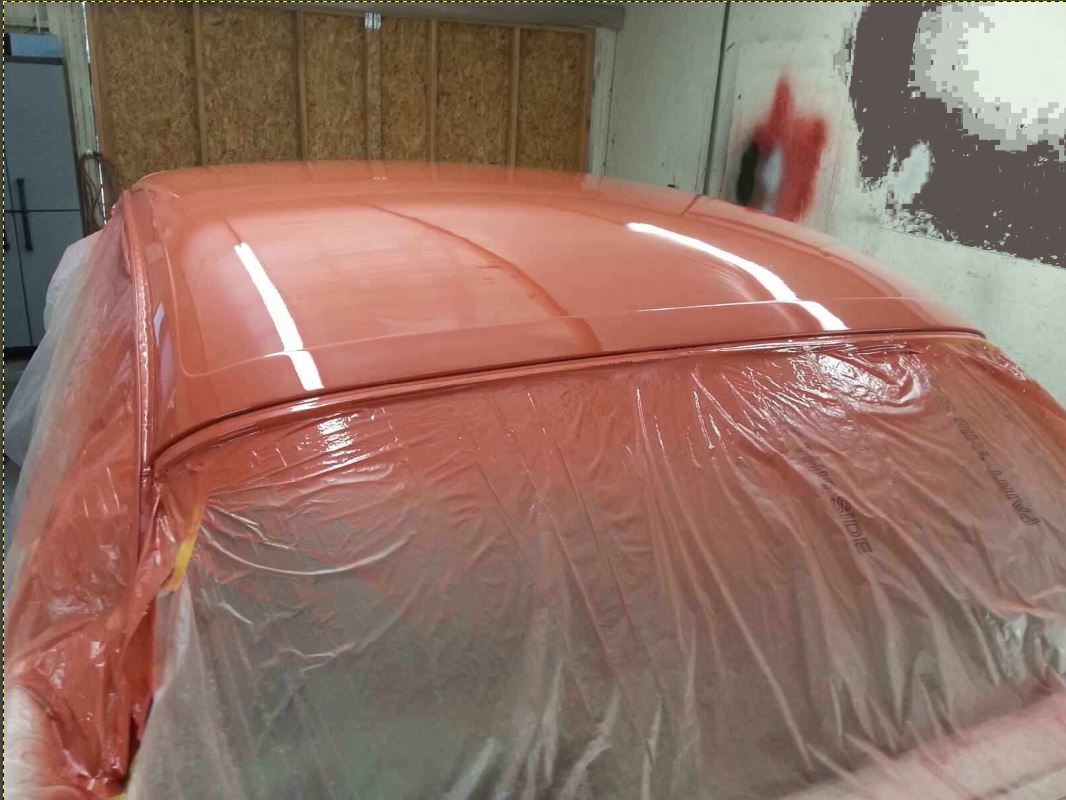
Location: San Antonio, TX | Update...
 (roof.JPG) (roof.JPG)
 (roof2.JPG) (roof2.JPG)
Attachments
----------------
roof.JPG (111KB - 363 downloads)
roof2.JPG (87KB - 391 downloads)
|
|
| |
|
Expert
Posts: 1226
Location: D-70199 Heslach | Yes Dave, the roof in Mandarin Rust looks much better.
Can't wait to see the complete car. |
|
| |
|
Elite Veteran
Posts: 964
Location: San Antonio, TX | Update
 (11302018a.JPG) (11302018a.JPG)
 (11302018b.JPG) (11302018b.JPG)
Attachments
----------------
11302018a.JPG (240KB - 377 downloads)
11302018b.JPG (218KB - 372 downloads)
|
|
| |
|
Board Moderator & Exner Expert 10K+
Posts: 13152
Location: Southern Sweden - Sturkö island | Sweet  |
|
| |
|
Expert
Posts: 3974
Location: DFW, TX | I had no issue with the paint before, but I do like the "rusty" roof on it now! Great job Dave, it's looking awesome. |
|
| |
|
Elite Veteran
Posts: 964
Location: San Antonio, TX | Thanks. Yeah I liked it with the Sahara Tan roof. I like the Mandarin Rust roof better. Looking forward to getting it back together. Still got lots of stainless to polish. Getting there though. |
|
| |
|
Exner Expert 10K+
Posts: 10627
Location: Lower Mainland BC | ToMopar - 2018-11-15 6:11 AM
Here a picture of these fender inserts
The fender inserts allowed the fender shop to produce fenders in the normal lower colours with out concern for the colour of the sweeps. The sweep inserts would be pre-painted in the sweep colours and then mated to the fenders at the appropriate time. They did that with 56 Dodges too with fender caps for the bit of saddle that flowed over the hood and down to the doors, over the read corner of the fenders.
Fender inserts courtesy of macedon:

Location for the fender inserts:

56 Dodge Fender Caps (courtesy of Dave N. (DepsilonD)
Edited by 56D500boy 2018-11-30 10:51 PM
 (FenderCap_1_small.jpg) (FenderCap_1_small.jpg)
 (FenderCap_2_small.jpg) (FenderCap_2_small.jpg)
Attachments
----------------
FenderCap_1_small.jpg (117KB - 375 downloads)
FenderCap_2_small.jpg (125KB - 382 downloads)
|
|
| |
|
Elite Veteran
Posts: 964
Location: San Antonio, TX | Progress...
 (17Jan2019.JPG) (17Jan2019.JPG)
Attachments
----------------
17Jan2019.JPG (174KB - 370 downloads)
|
|
| |
|
Expert
Posts: 1226
Location: D-70199 Heslach | Dave, like to follow your progress......
......and the mexican upholstery |
|
| |
|
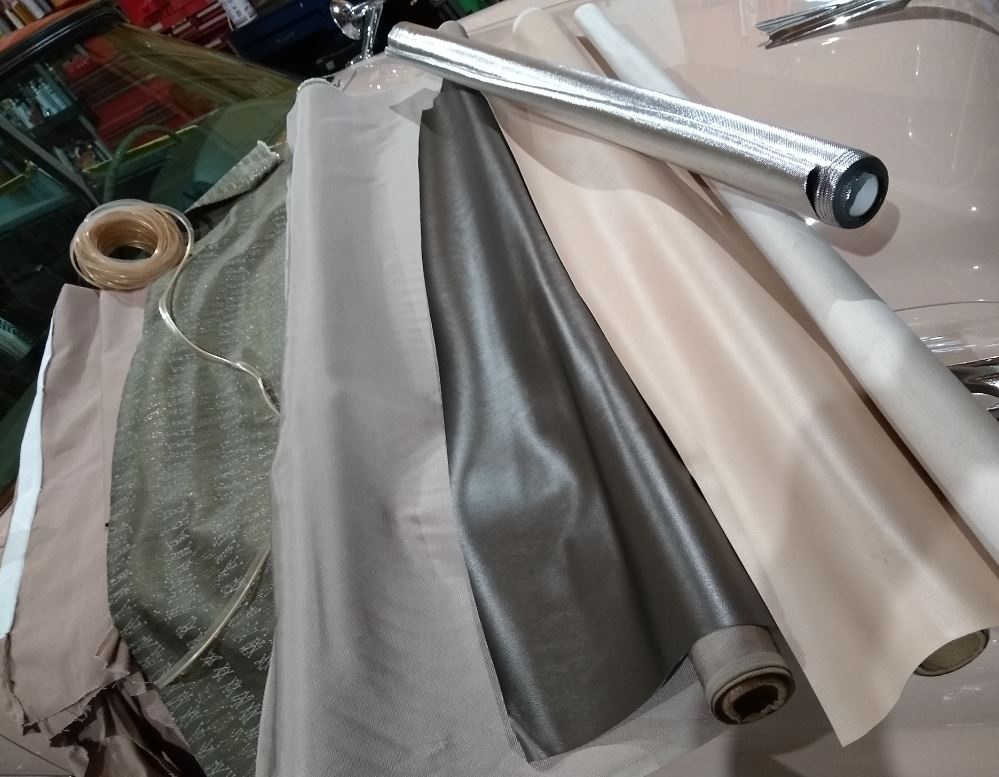
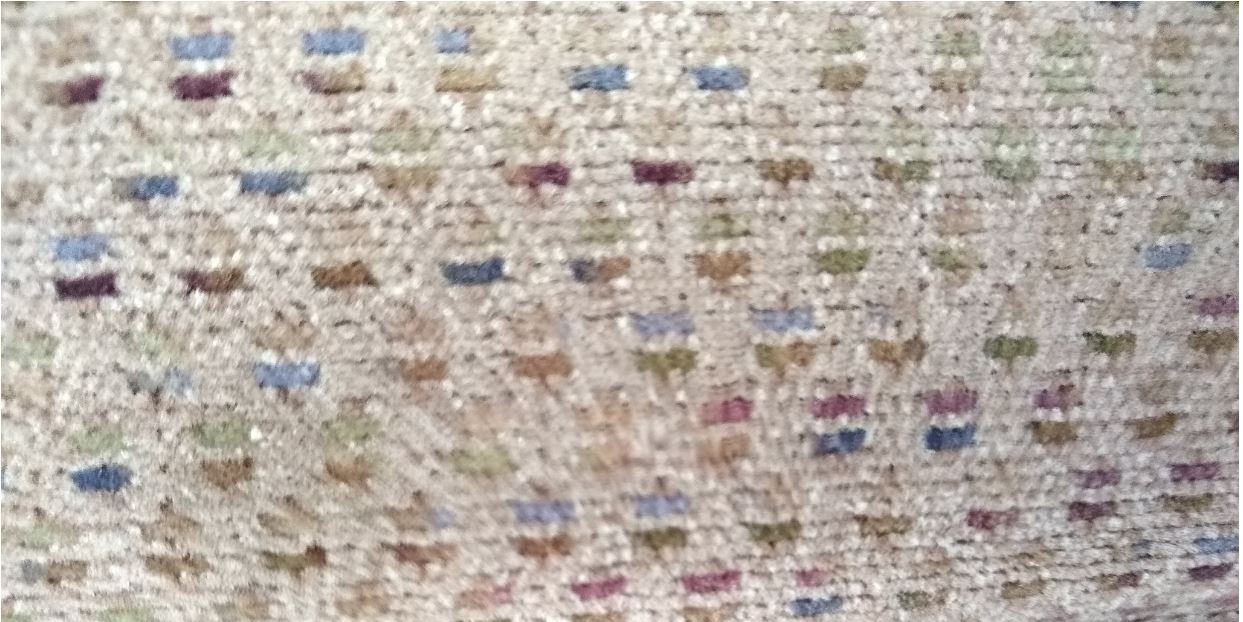
Elite Veteran
Posts: 964
Location: San Antonio, TX | Haha I know, right. Mexican blanket today... very close to original... someday. Hopefully soon.
 (upholstery material.JPG) (upholstery material.JPG)
Attachments
----------------
upholstery material.JPG (108KB - 369 downloads)
|
|
| |
|
Expert
Posts: 1737
Location: Hay Lakes, Alberta, Canada | ToMopar - 2019-01-18 12:27 AM
Dave, like to follow your progress......
......and the mexican upholstery
That was the optional DeSoto "Lineas de rayas" upholstery pattern. 
|
|
| |
|
Elite Veteran
Posts: 964
Location: San Antonio, TX | Not sure why the patterned fabric looks kinda green. It's definitely brown. |
|
| |
|
Elite Veteran
Posts: 964
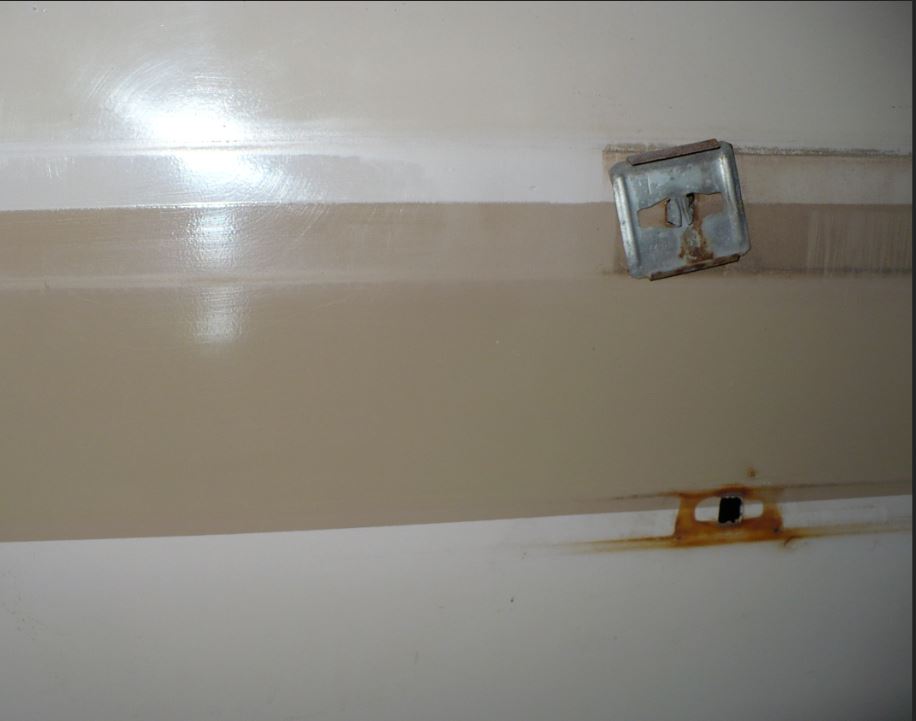
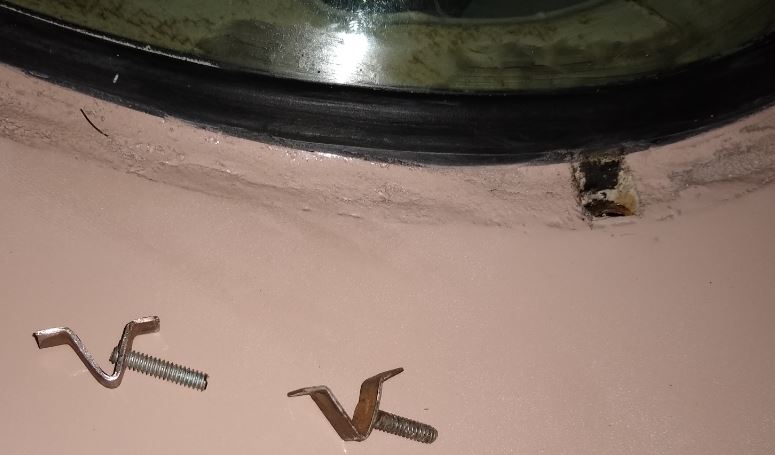
Location: San Antonio, TX | I had to fabricate some moulding clips for the back light bottom stainless piece. Several of mine had rusted. One of the few places I had to deal with any rust on this car. Original clip on right.
Edited by macedon 2019-02-02 9:57 AM
 (moulding clip.JPG) (moulding clip.JPG)
 (backlightmoulding.JPG) (backlightmoulding.JPG)
Attachments
----------------
moulding clip.JPG (42KB - 345 downloads)
backlightmoulding.JPG (107KB - 346 downloads)
|
|
| |
|
Elite Veteran
Posts: 964
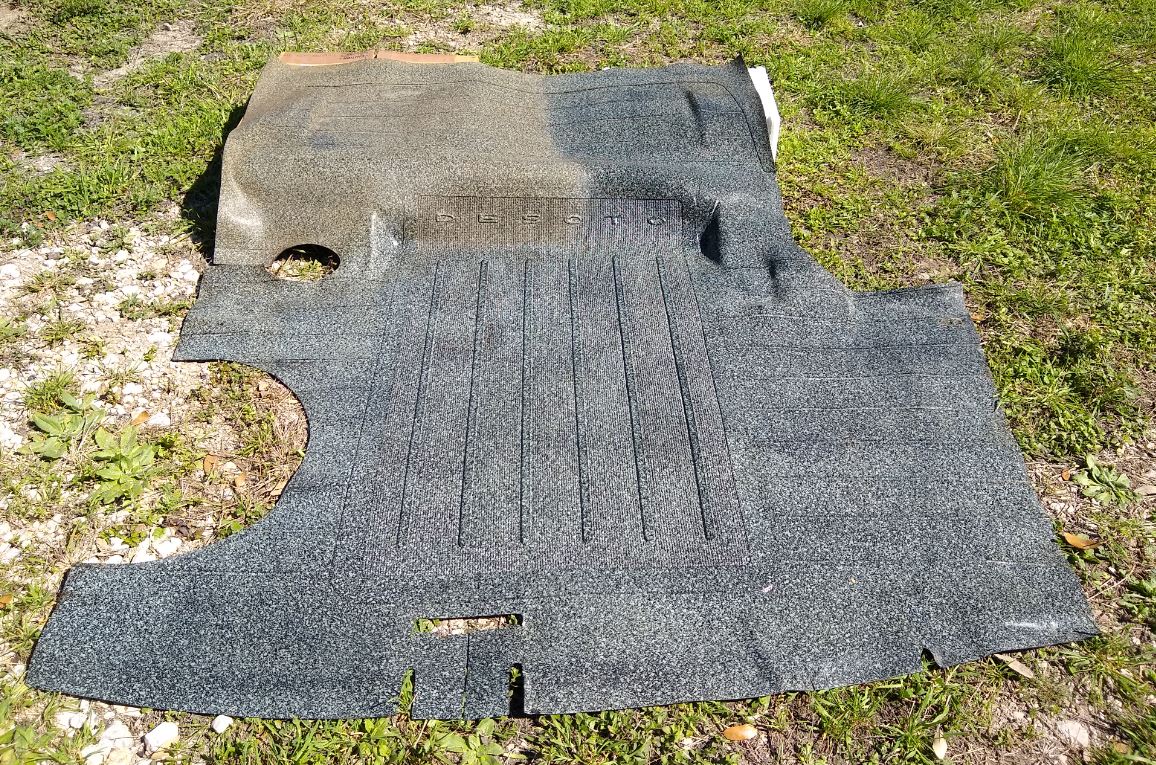
Location: San Antonio, TX | I'm very close to done with the trunk. Cleaned the mat today. The upper left is not cleaned yet and what it looked like before. Cleaned up pretty good for 60+ years of sitting in a trunk.
 (mat.JPG) (mat.JPG)
Attachments
----------------
mat.JPG (433KB - 352 downloads)
|
|
| |
|
Extreme Veteran
Posts: 537
Location: Upstate NY | You have no idea how lucky you are to have a trunk mat! I have only seen a few and they are not that good. It looks fantastic. Great job! |
|
| |
|
Expert
Posts: 3974
Location: DFW, TX | Dave, you're doing some outstanding work there! The trunk mat is incredible. Those clips are notorious for rusting; apparently the factory didn't bother to coat or paint them at all. If you run into any more issues with them, many of those clips are available from RJ&L: www.rjlautofasteners.com
Are you taking this car to the Roundup in April? |
|
| |
|
Expert
Posts: 3156
Location: NY & VT | Nice to see a 4 door getting this kind of love, not unusual in Sweden but very unusual here, great job! |
|
| |
|
Elite Veteran
Posts: 964
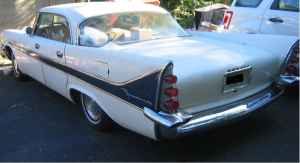
Location: San Antonio, TX | Cleaned out the trunk...
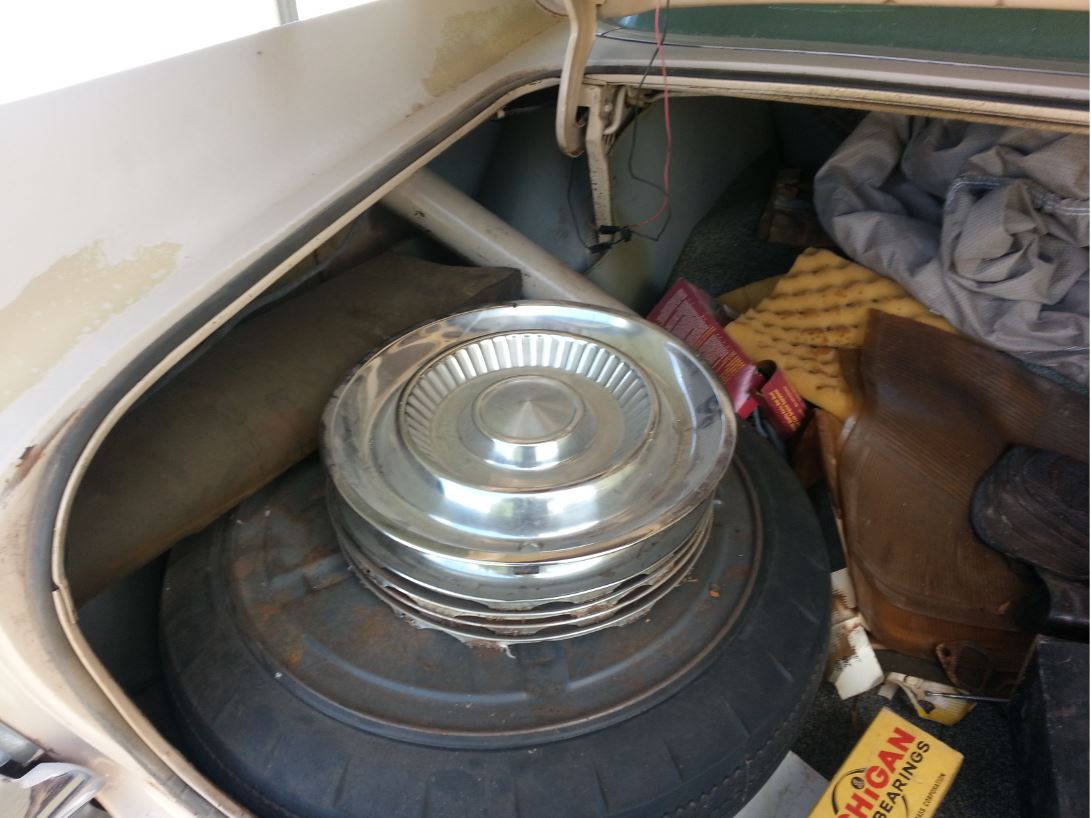 (trunkbeforea.JPG) (trunkbeforea.JPG)
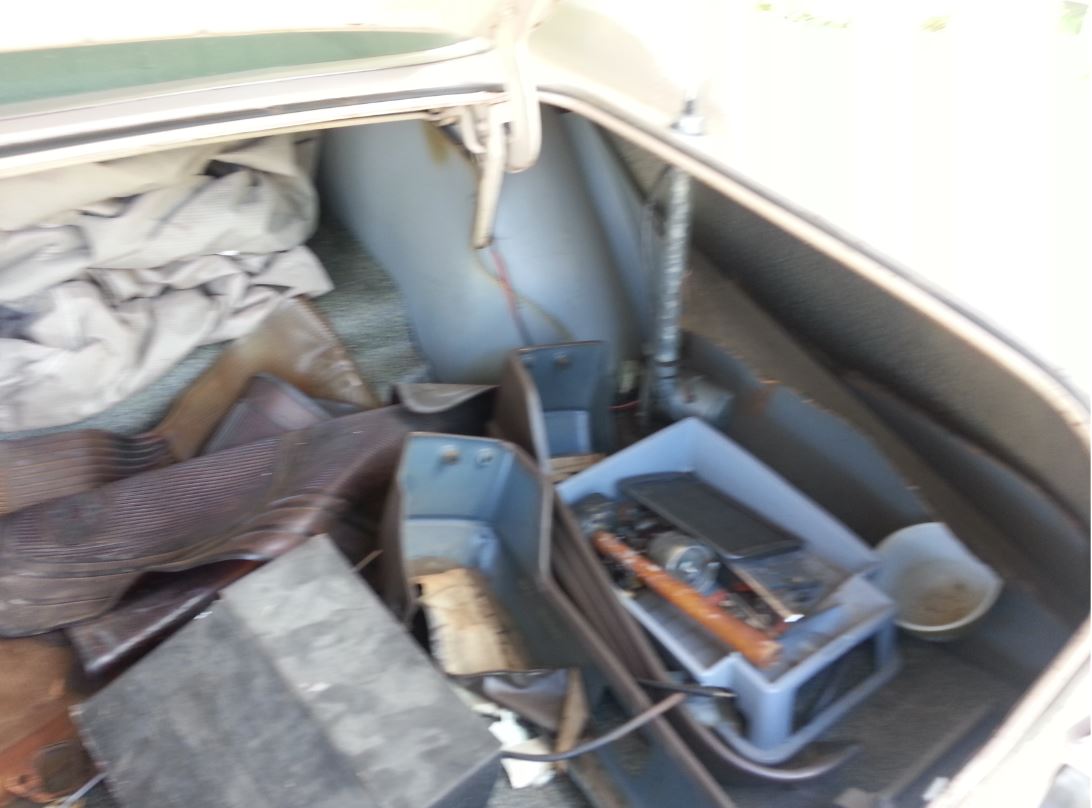 (trunkbeforeb.JPG) (trunkbeforeb.JPG)
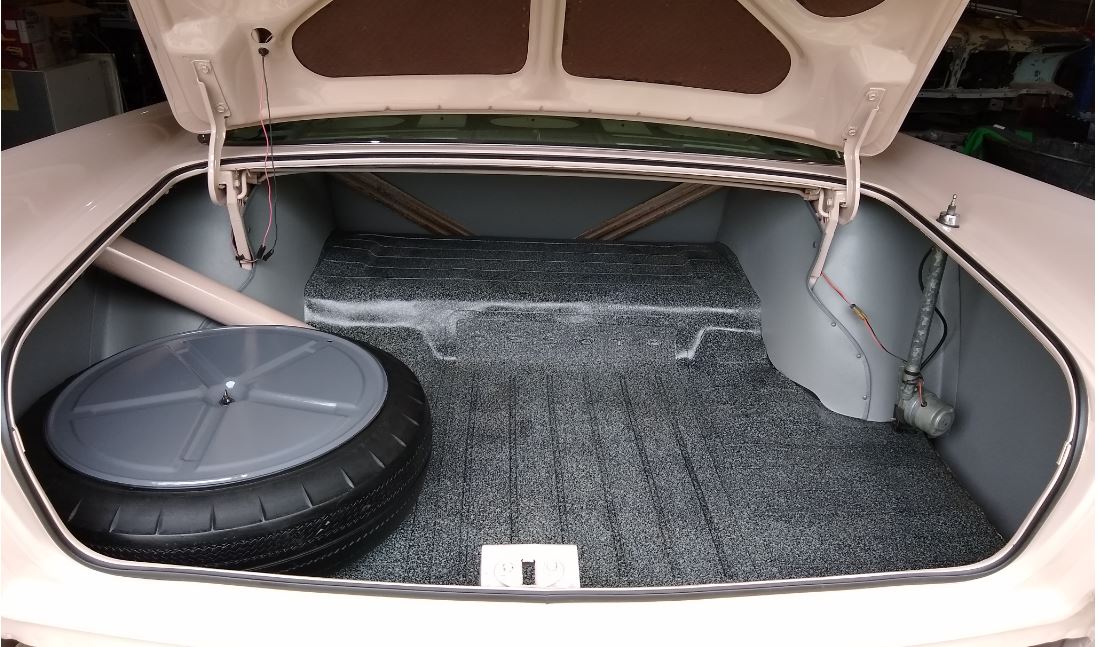 (trunk.JPG) (trunk.JPG)
Attachments
----------------
trunkbeforea.JPG (109KB - 420 downloads)
trunkbeforeb.JPG (86KB - 416 downloads)
trunk.JPG (140KB - 413 downloads)
|
|
| |
|
Exner Expert 10K+
Posts: 10254
Location: So. Cal | Where are you going to put all that stuff now?? |
|
| |
|
Elite Veteran
Posts: 964
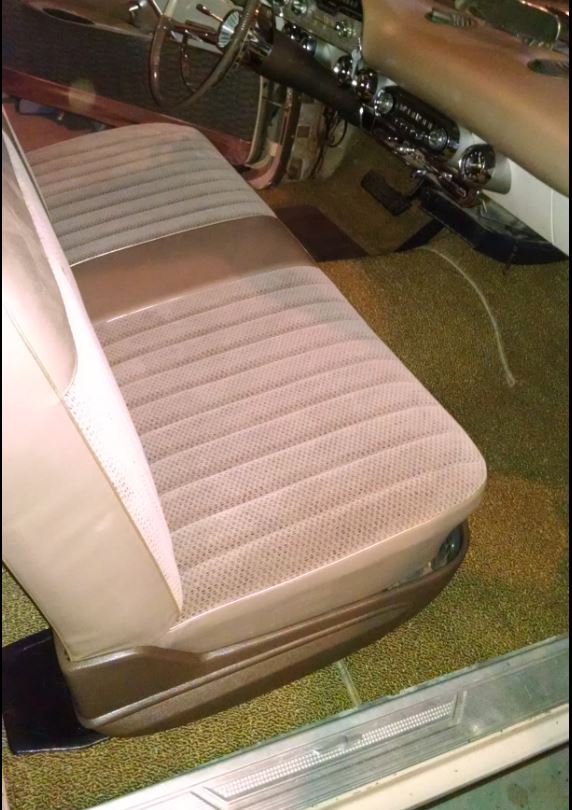
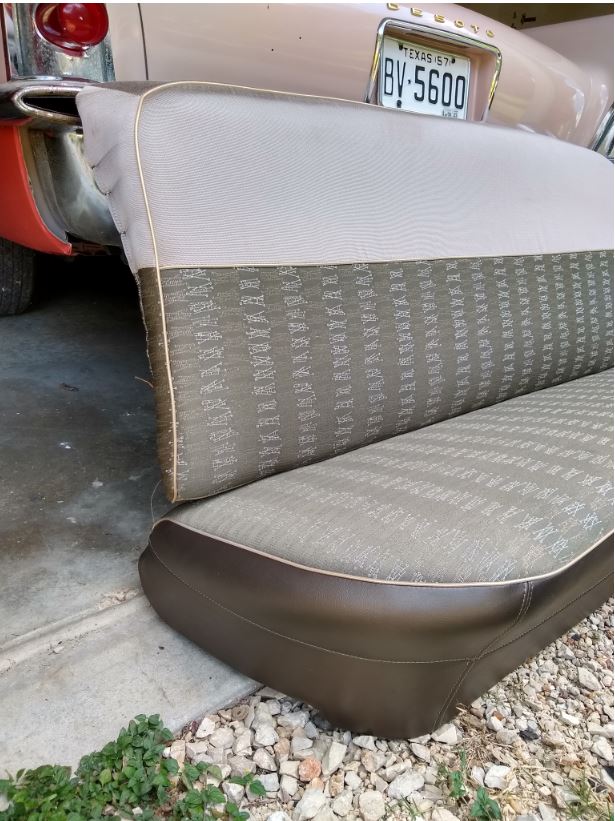
Location: San Antonio, TX | This is the front seat that was in the car when I got it. I always thought it was a high quality redo on the original frames. My upholstery guy thinks otherwise. He says it's factory. The frame looks quite a bit like my 4dr hdtp one. Hmmm... not sure. The frame has an ashtray socket on the back. But when I got it the material covered it and there was no ashtray. Hmmm...
Anyone recognize what it's from?
Edited by macedon 2019-04-04 4:44 PM
 (fseat.JPG) (fseat.JPG)
 (colorseat.JPG) (colorseat.JPG)
Attachments
----------------
fseat.JPG (146KB - 414 downloads)
colorseat.JPG (148KB - 417 downloads)
|
|
| |
|
Elite Veteran
Posts: 964
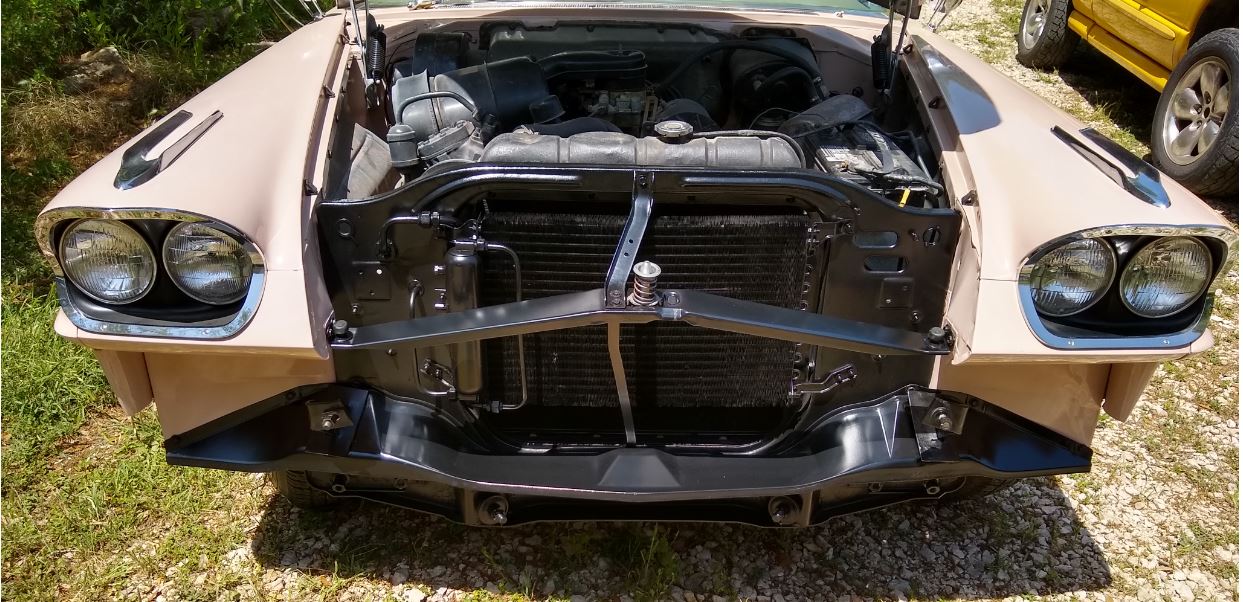
Location: San Antonio, TX | Latest. Still need to adjust the trim a little. Not a whole lot though.
Edited by macedon 2019-04-12 4:40 PM
 (blackfront.JPG) (blackfront.JPG)
 (hooddown.JPG) (hooddown.JPG)
Attachments
----------------
blackfront.JPG (195KB - 397 downloads)
hooddown.JPG (156KB - 417 downloads)
|
|
| |
|
Elite Veteran
Posts: 964
Location: San Antonio, TX | Rechroming isn't in the budget for this car. So I'll live with what I've got. At least for now anyhow.
 (bumperon.JPG) (bumperon.JPG)
Attachments
----------------
bumperon.JPG (225KB - 382 downloads)
|
|
| |
|
Expert
Posts: 3974
Location: DFW, TX | Absolutely beautiful. |
|
| |
|
Expert
Posts: 1505
Location: New Castle PA | I agree! One of the nicest sedans I know of... |
|
| |
|
Expert
Posts: 1226
Location: D-70199 Heslach | Yes, your taste in colors is nice
and you are much faster than me |
|
| |
|
Elite Veteran
Posts: 964
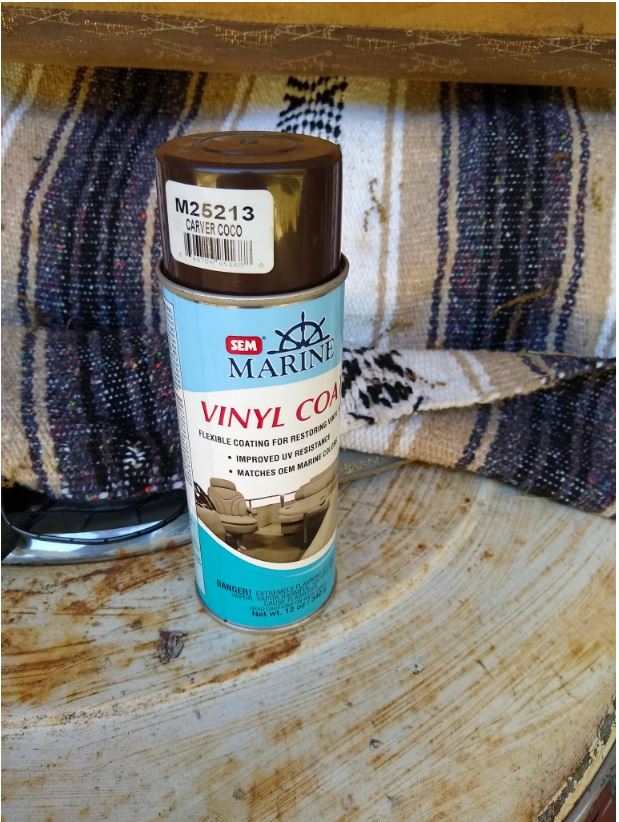
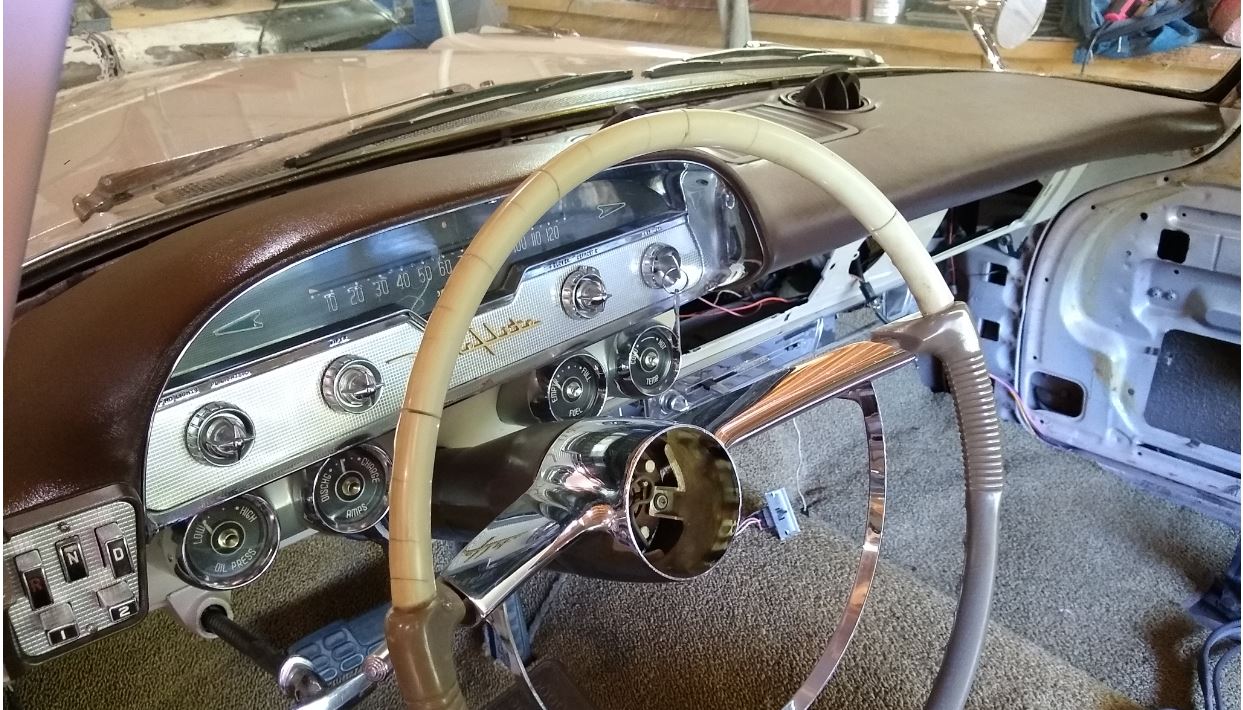
Location: San Antonio, TX | Well you know how it goes sometimes. One thing leads to another. I figured since I had it apart anyhow that I would go ahead and recolor the dash pad. I wanted to try for something closer to the original dark brown. To my eye the SEM 25213 Carver Coco was nice. I happy with the way it turned out. I used the SEM product. Several (like 5 or 6) coats as it goes on really thin. I also used the prep spray SEM 38343.
 (april7a (1).JPG) (april7a (1).JPG)
 (sem.JPG) (sem.JPG)
 (brown dash.JPG) (brown dash.JPG)
Attachments
----------------
april7a (1).JPG (200KB - 403 downloads)
sem.JPG (112KB - 401 downloads)
brown dash.JPG (210KB - 397 downloads)
|
|
| |
|
Elite Veteran
Posts: 964
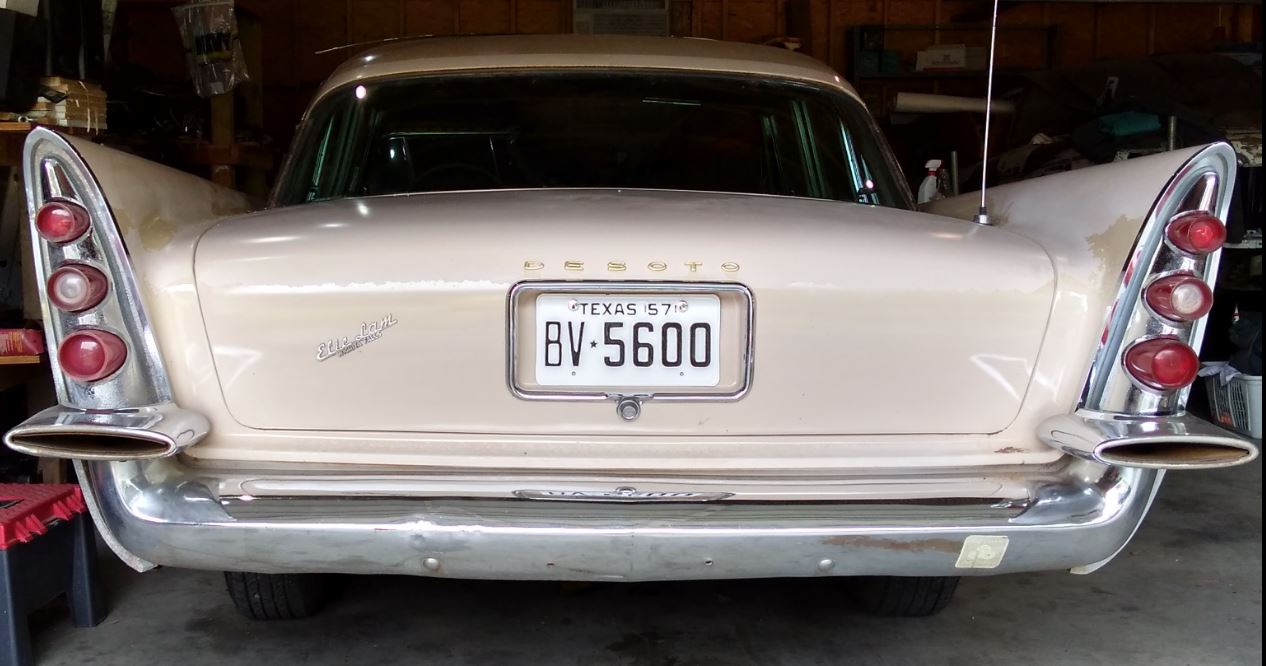
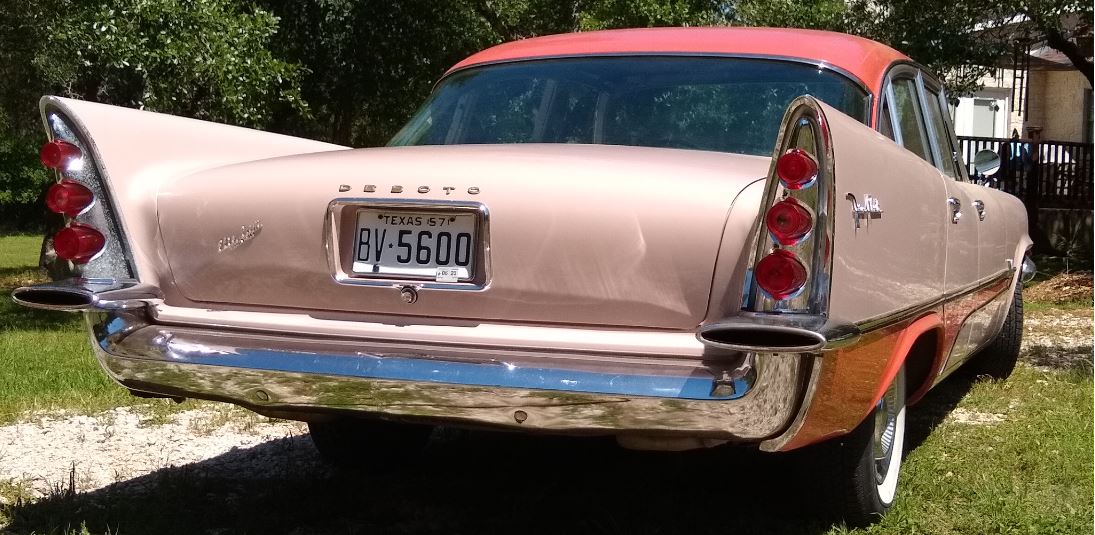
Location: San Antonio, TX | Tail is back on finally!
 (tailback.JPG) (tailback.JPG)
 (tail42719.JPG) (tail42719.JPG)
Attachments
----------------
tailback.JPG (138KB - 393 downloads)
tail42719.JPG (112KB - 369 downloads)
|
|
| |
|
Elite Veteran
Posts: 964
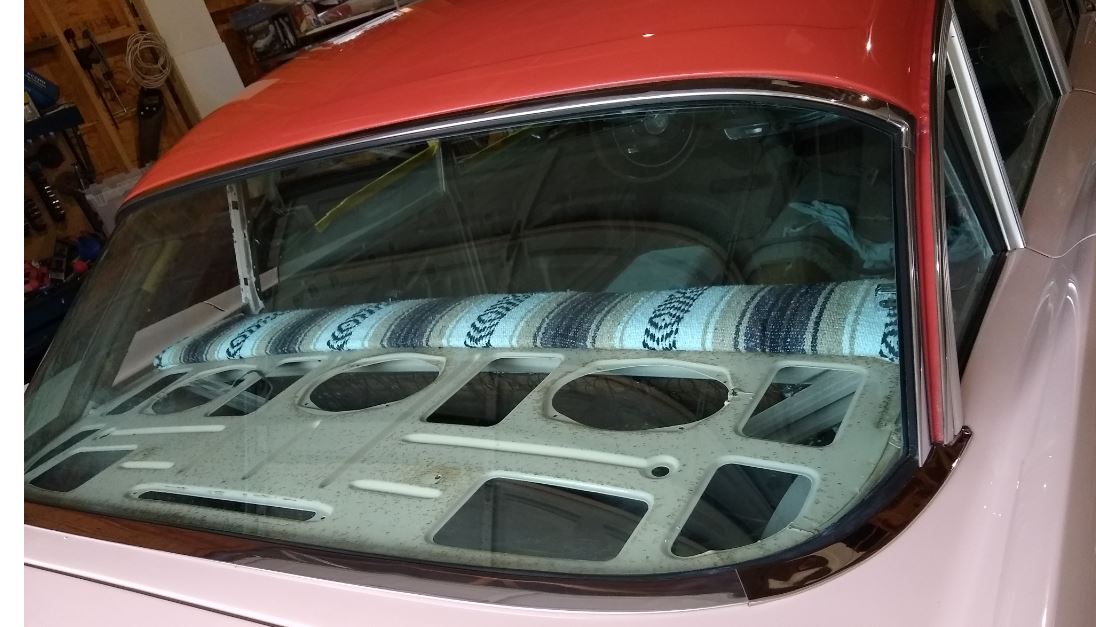
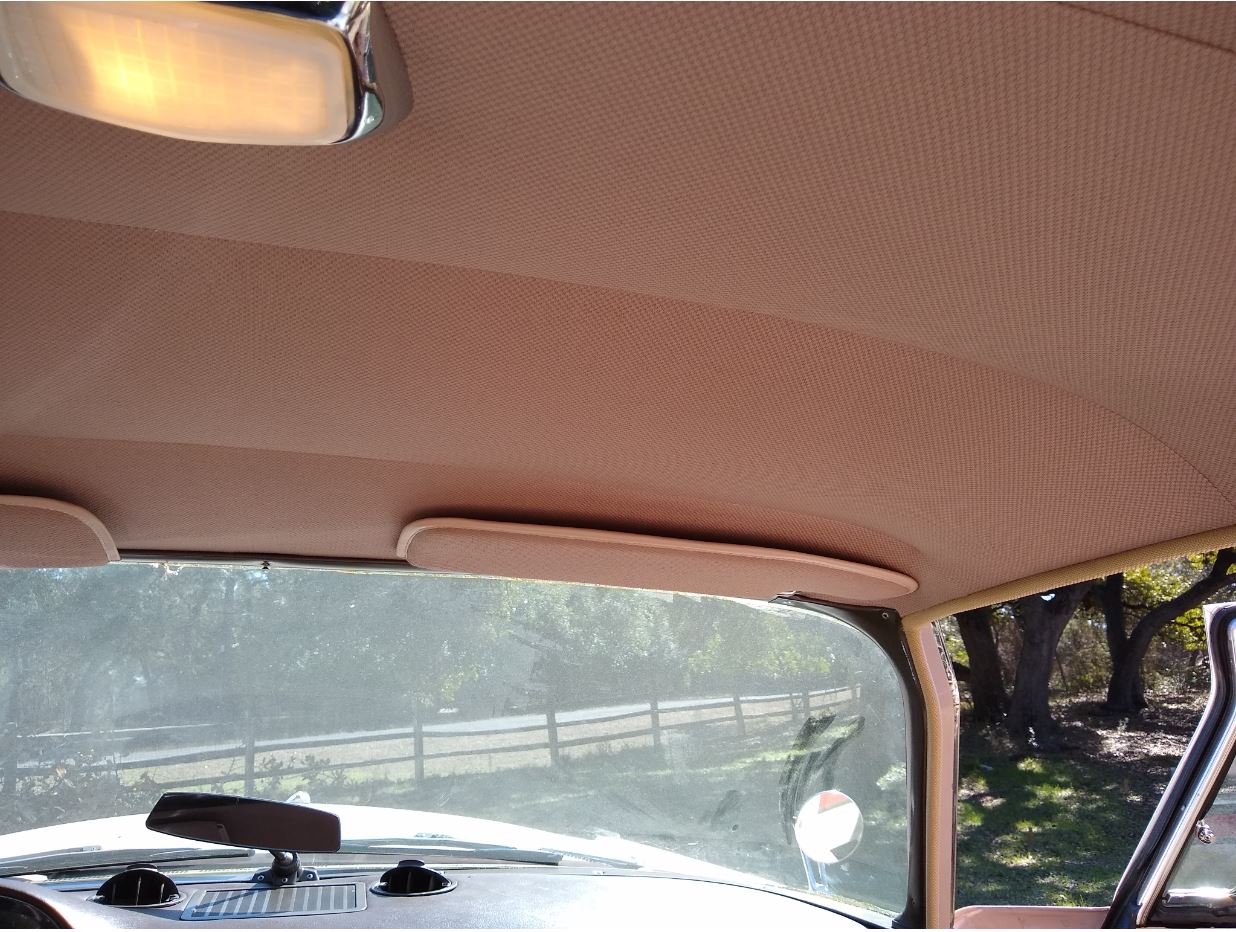
Location: San Antonio, TX | Ok, this has got to be my least favorite job. Headliner... argh. Now I suppose if I had done 50 or 100 of these it would be a breeze. But since this is only the 3rd one I've ever done I'm sure it's going to be a royal PITA. Yeah I'm whining, I know. Ugh, I just hate this job. I'll post the finished job... might be a few days and several dozen curses from now.
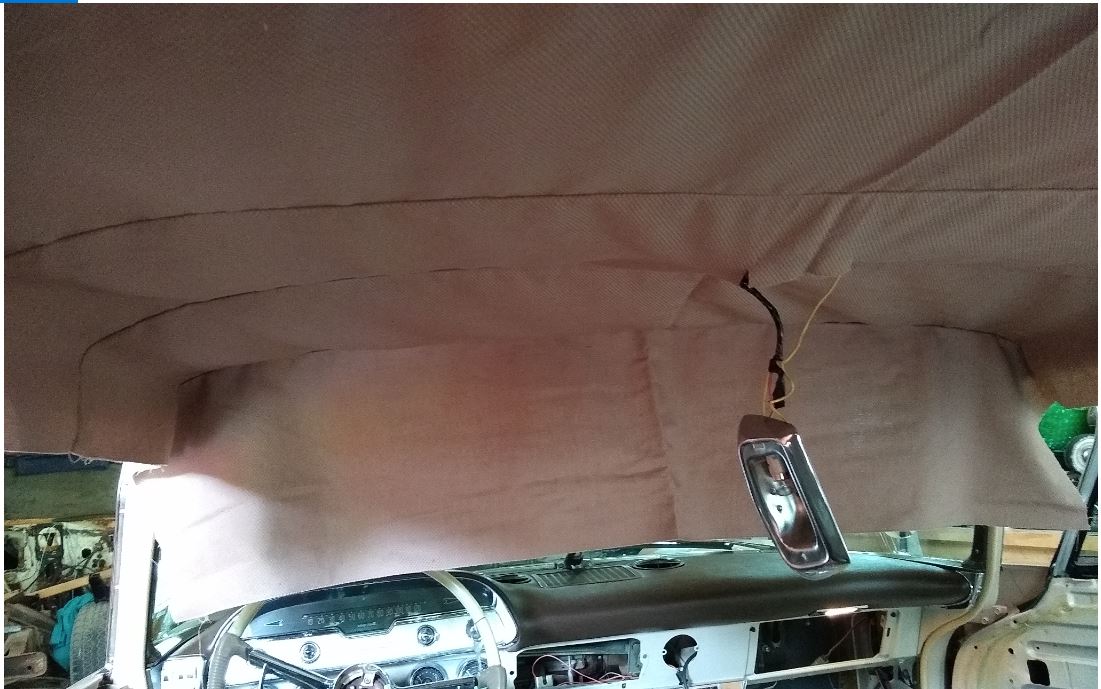 (headliner.JPG) (headliner.JPG)
Attachments
----------------
headliner.JPG (124KB - 384 downloads)
|
|
| |
|
Expert
Posts: 3974
Location: DFW, TX | I only farmed out four things - the chrome, the seat upholstery, the exhaust, and the headliner - and I'm glad I did!
It's a huge undertaking, but I know you'll do a great job!
 (20190320_133020.jpg) (20190320_133020.jpg)
Attachments
----------------
20190320_133020.jpg (204KB - 415 downloads)
|
|
| |
|
Expert
Posts: 1737
Location: Hay Lakes, Alberta, Canada | LOL! I'll send you mine after you finish with your headliner...it's one job I DO NOT look forward to doing. |
|
| |
|
Elite Veteran
Posts: 964
Location: San Antonio, TX | Just turned in the seats and materials to my upholstery shop. We went over the details and I gave them lots of pictures. It's a great shop with a strong reputation. Hope it all works out. If it does I'll have seats that look exceptionally close to factory. Now I just have to hold my breath for 4 - 6 weeks. |
|
| |
|
Expert
Posts: 1737
Location: Hay Lakes, Alberta, Canada | Until then...you have to drive it, sitting on a five gallon pail. :D |
|
| |
|
Elite Veteran
Posts: 964
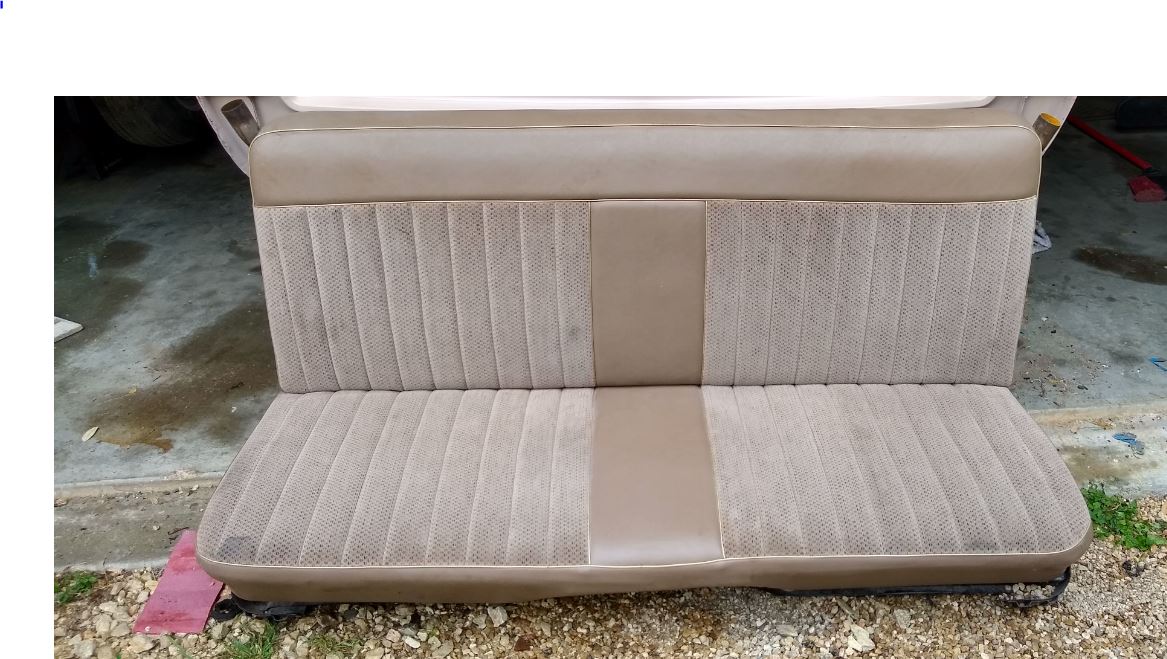
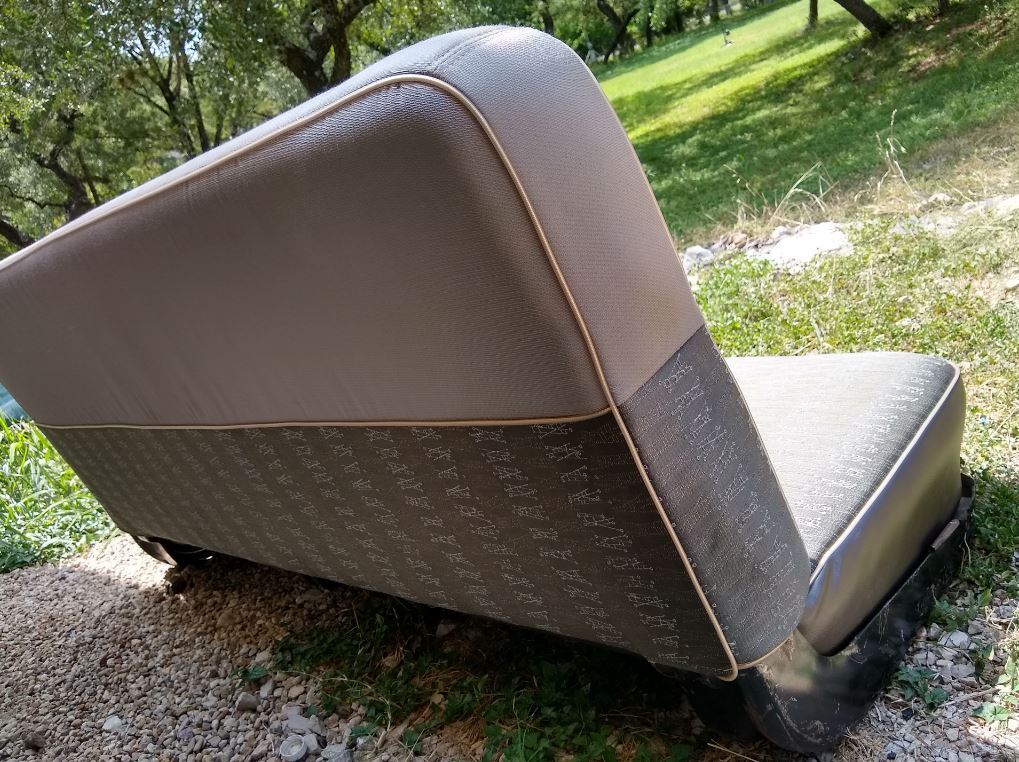
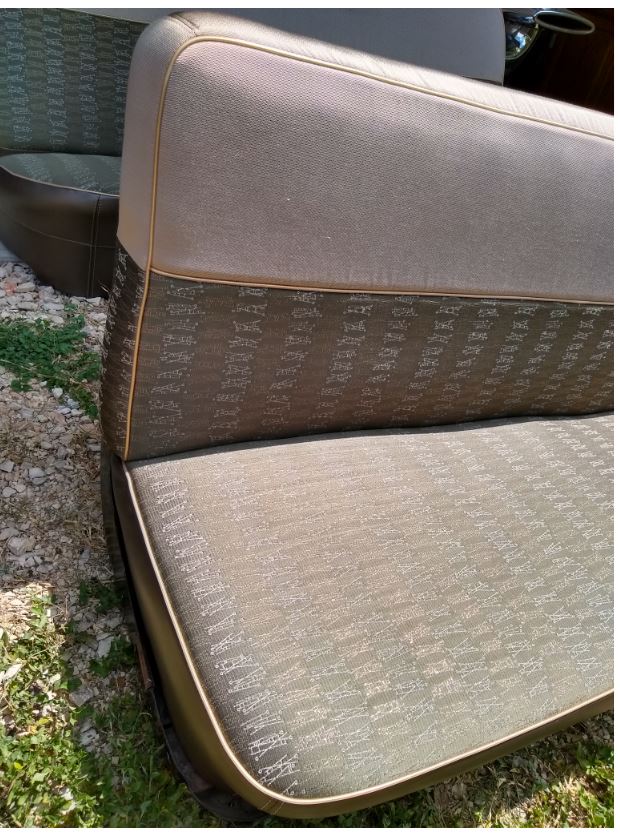
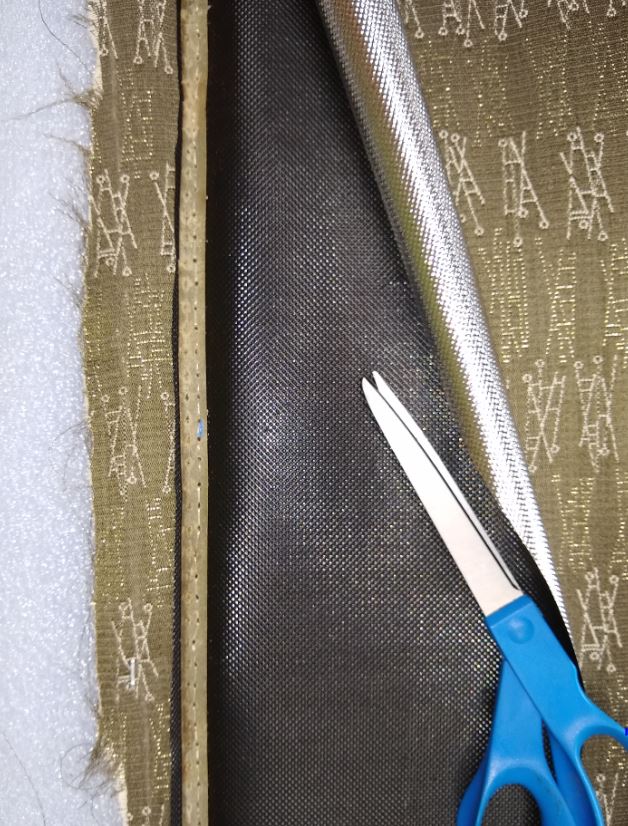
Location: San Antonio, TX | Yay! Got my seats back. I'm pretty happy. They did a nice job.
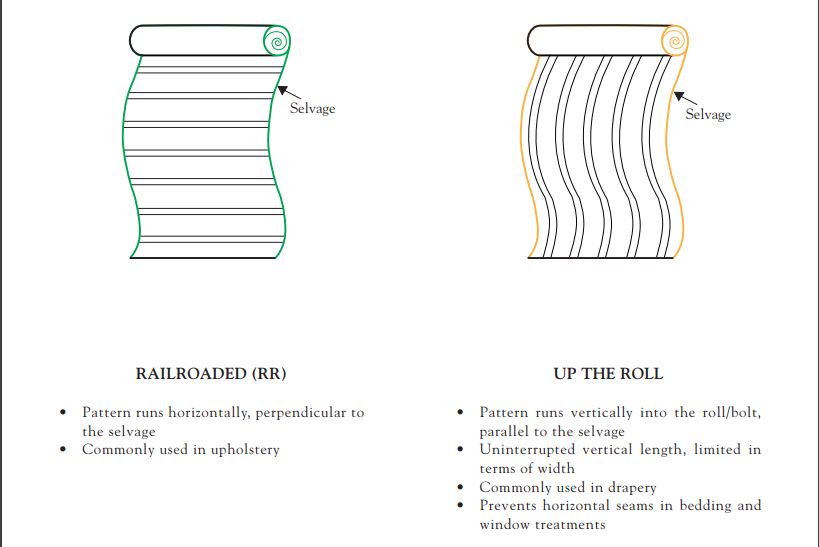
Hey Ed, they got the scissors going in the right direction. I was very, very specific about that. I think I know why you see it done the other direction sometimes. It takes more fabric to do it the right way. The scissors pattern is railroad vs. up the roll. I bought 4 yards which was just enough to do the seats and door panels.
Edited by macedon 2019-07-16 6:09 PM
 (seat07162019.JPG) (seat07162019.JPG)
 (seat07162019a.JPG) (seat07162019a.JPG)
 (seat07162019b.JPG) (seat07162019b.JPG)
 (rrvsup.JPG) (rrvsup.JPG)
Attachments
----------------
seat07162019.JPG (105KB - 359 downloads)
seat07162019a.JPG (189KB - 362 downloads)
seat07162019b.JPG (128KB - 365 downloads)
rrvsup.JPG (50KB - 356 downloads)
|
|
| |
|
Exner Expert 10K+
Posts: 10254
Location: So. Cal | Nice! SMS pulls through for the finish. |
|
| |
|
Elite Veteran
Posts: 964
Location: San Antonio, TX | Powerflite - 2019-07-16 4:05 PM
Nice! SMS pulls through for the finish.
I got the material from them quite a while ago. I can't believe it's been almost 18 months. Sheesh, time slips by.
It was a bit of a struggle with them originally shipping me the wrong material. It all got squared away after a bit. Certainly can't complain about the quality of the material though.
The shop here in San Antonio did a nice job. |
|
| |
|
Elite Veteran
Posts: 1155
Location: somerville mass | amazing!!!!!!!!! car looks like it just rolled off the assembly line!!!!!!!!! |
|
| |
|
Expert
Posts: 1505
Location: New Castle PA | REALLY nice job with EVERYTHING you've done on this. The car is incredible! |
|
| |
|
Expert
Posts: 1226
Location: D-70199 Heslach | macedon - 2019-07-16 10:22 PM
I got the material from them quite a while ago. I can't believe it's been almost 18 months. Sheesh, time slips by.
18 months only? Yes sometimes it takes longer as you expect.
Mine seat covers waiting approx 5 yrs until the going to the bench |
|
| |
|
Elite Veteran
Posts: 964
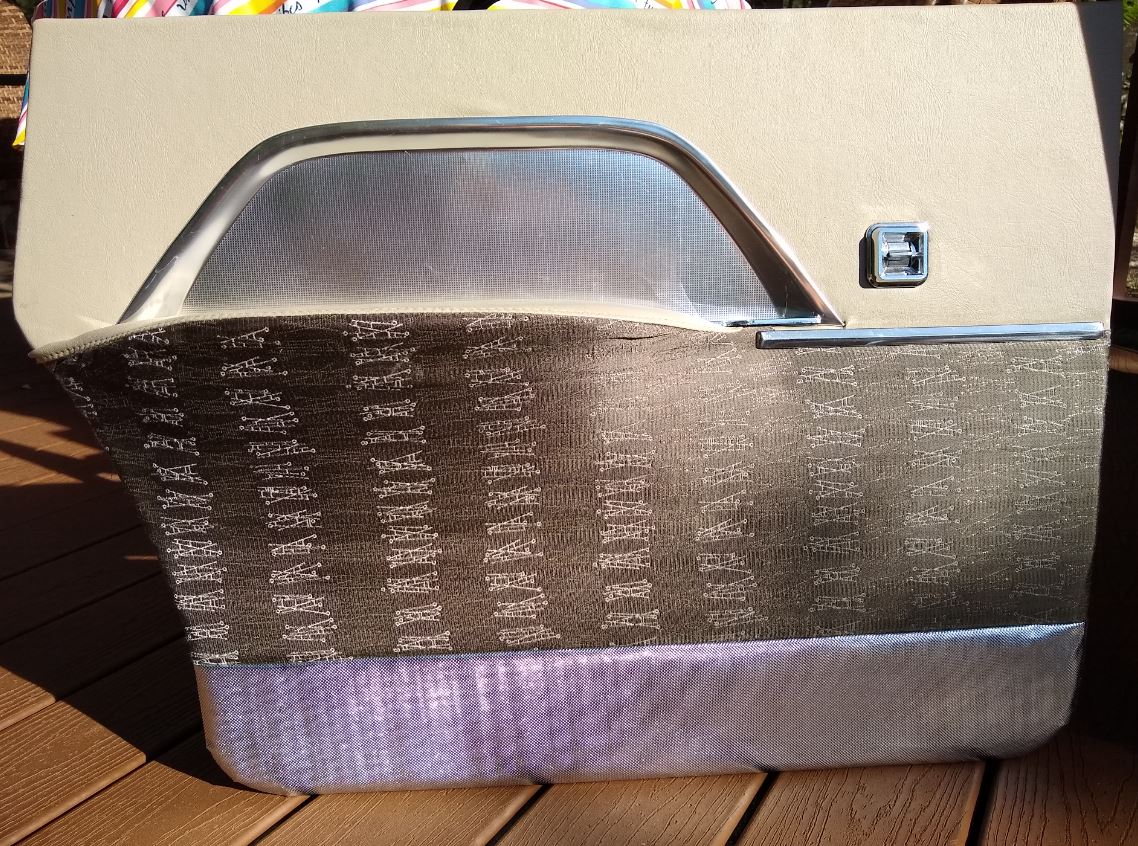
Location: San Antonio, TX | Door panels are a bit more challenging than I expected. Oh well, learned a lot on the first one. The next three will go quicker
 (lrpanel.JPG) (lrpanel.JPG)
 (llpanelup.JPG) (llpanelup.JPG)
Attachments
----------------
lrpanel.JPG (283KB - 371 downloads)
llpanelup.JPG (137KB - 353 downloads)
|
|
| |
|
Expert
Posts: 1505
Location: New Castle PA | Awesome. Dave!!! |
|
| |
|
Elite Veteran
Posts: 1155
Location: somerville mass | when its finished it will look like it rolled off the assembly line...add some " new car smell " for effect!!!!!!!!!!!!!!!!!!! wow! |
|
| |
|
Expert
Posts: 3974
Location: DFW, TX | Beautiful job! |
|
| |
|
Elite Veteran
Posts: 964
Location: San Antonio, TX | I used grow house foil I got on Amazon for the bottom of the door panels. It's not an exact match, but pretty darn close. It's not too expensive, it's heavy duty and most important it's readily available. Perhaps someone like SMS makes an exact match. Not sure, but I can imagine they charge more than what I found on Amazon
 (foil.JPG) (foil.JPG)
Attachments
----------------
foil.JPG (219KB - 332 downloads)
|
|
| |
|
Expert
Posts: 3974
Location: DFW, TX | That is a great idea! You have to be creative and resourceful with these cars. Are you able to use adhesives to get it to stay in position and lay flat? |
|
| |
|
Elite Veteran
Posts: 964
Location: San Antonio, TX | Been awhile, but I'm making progress
 (27jan2020headliner.JPG) (27jan2020headliner.JPG)
 (27jan2020headliner2.JPG) (27jan2020headliner2.JPG)
Attachments
----------------
27jan2020headliner.JPG (206KB - 333 downloads)
27jan2020headliner2.JPG (168KB - 307 downloads)
|
|
| |
|
Exner Expert 10K+
Posts: 10254
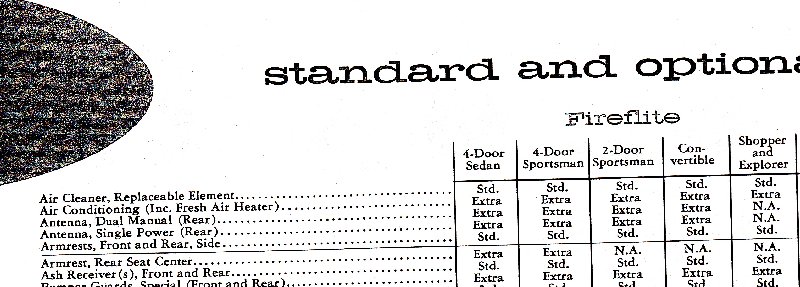
Location: So. Cal | It's disappointing to me that the Fireflite sedan doesn't have the dips in the middle of the seats like the coupes do. Even the 4dr hardtop New Yorker that I parted out had the dip in the front seat, and a foldable arm rest in the back seat - which is really cool! Why did they cheap out on the Fireflites, or was that an extra option you had to purchase? |
|
| |
|
Elite Veteran
Posts: 964
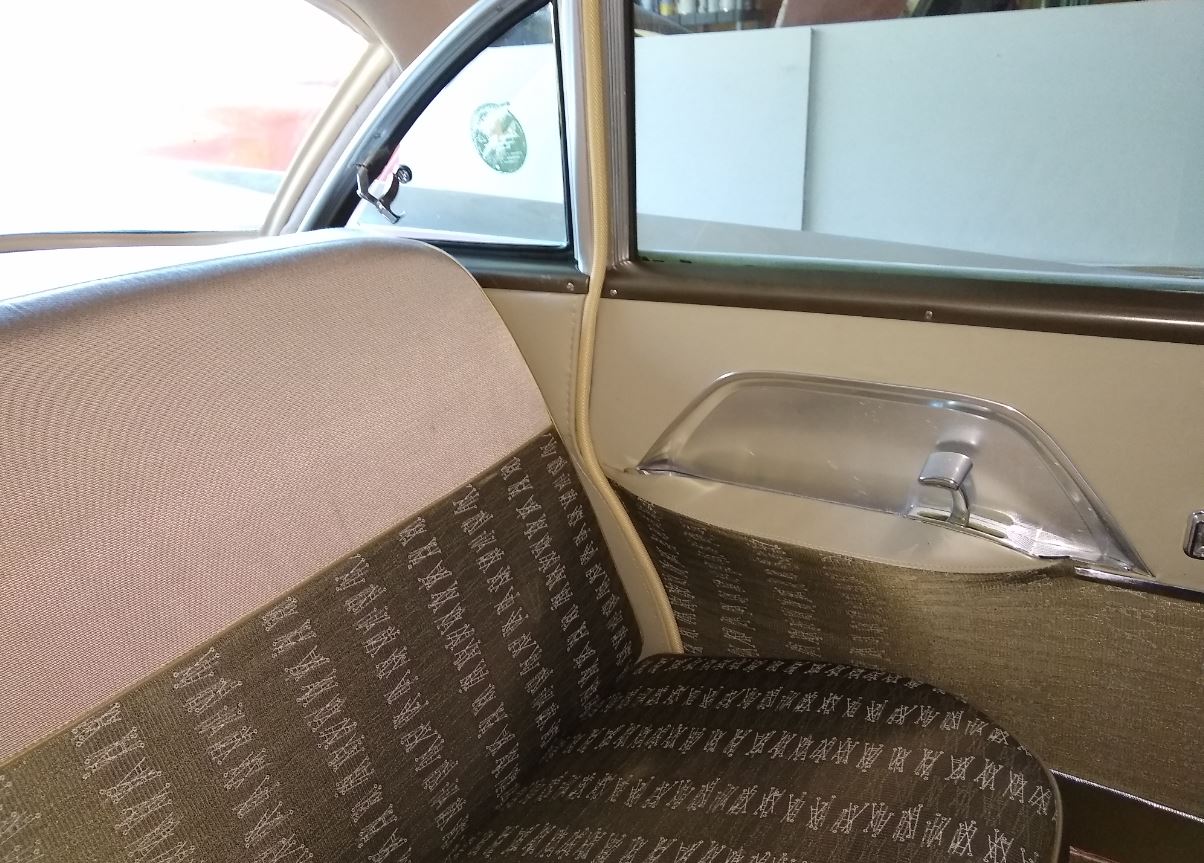
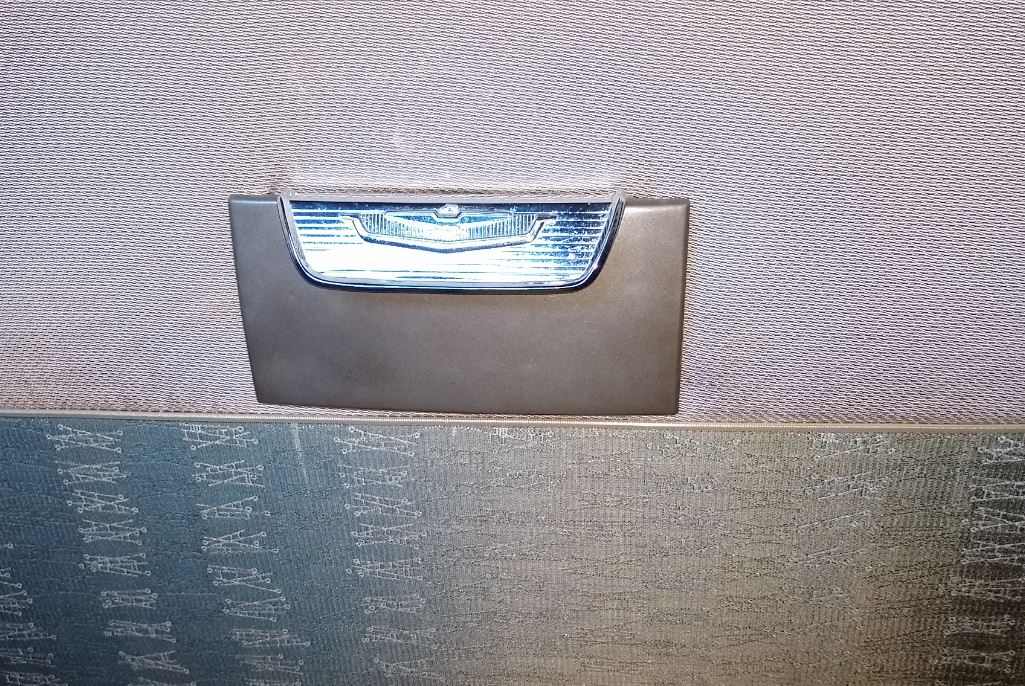
Location: San Antonio, TX | I've only seen one Fireflite sedan with an armrest in the rear seat. Apparently it was available as an option.
 (armrests.jpg) (armrests.jpg)
Attachments
----------------
armrests.jpg (73KB - 299 downloads)
|
|
| |
|
Expert
Posts: 3974
Location: DFW, TX | Incredible! Looks like an assembly line photo. Great job.
It's too late now, but the green NYer 4dr HT has the dipped seats and a rear arm rest. They were pretty nice as of a year ago.
 (2.jpg) (2.jpg)
 (6.jpg) (6.jpg)
Attachments
----------------
2.jpg (179KB - 307 downloads)
6.jpg (193KB - 308 downloads)
|
|
| |
|
Exner Expert 10K+
Posts: 10254
Location: So. Cal | I have them as well, but mine aren't in as good of shape, and I am using the front seat as part of a couch in my back yard. However....you would need to make sure that the 4dr hardtop rear seat will interchange with the sedan. I'm sure the front will. But I am sure you will want to use those beautiful new seats as is, at least until they wear out.
All that cursing seems to have worked out great on your headliner. You would be very welcome to come to my place and do some cursing at my cars too!
Edited by Powerflite 2020-01-28 12:26 PM
|
|
| |
|
Elite Veteran
Posts: 964
Location: San Antonio, TX | I might be interested in those seats. My 4dr hdtp 57 Fireflite has the dip of course, but no armrest. That's the yard in sunset, right? |
|
| |
|
Elite Veteran
Posts: 964
Location: San Antonio, TX | Yeah, headliners are definitely a PITA! I like the dip as well, but I'll have to wait till I put my 4dr hdtp Fireflite together. I think the dip seats would fit, but the tray in a sedan much deeper. You would have to make a custom. I'll leave that to another. |
|
| |
|
Elite Veteran
Posts: 964
Location: San Antonio, TX | A question from a while back. Are you able to use adhesives to get it to stay in position and lay flat?
I did it in a similar fashion to original. So you have a sewn in backing strip that you then fold the foil over. Gives that crisp line. I had to pre-drill and hand sew since I used hardboard instead of cardboard for my door panels . That's really tedious and slow.
Edited by macedon 2020-02-04 2:00 PM
 (backing.JPG) (backing.JPG)
Attachments
----------------
backing.JPG (137KB - 318 downloads)
|
|
| |
|
Exner Expert 10K+
Posts: 10254
Location: So. Cal | I'm confused. The strip is just sewn to the "scissors" material, the silver foil & maybe the foam backing, right? Or are you sewing it through the hardboard too? |
|
| |
|
Elite Veteran
Posts: 964
Location: San Antonio, TX | Sewn all the way through the hardboard. I had to pre-drill the hardboard to make it work. Factory original was sewn all the way through as well. But they were only going through cardboard. And I'm sure they had heavy duty sewing machine. |
|
| |
|
Elite Veteran
Posts: 964
Location: San Antonio, TX | Plugging away. Haven't built the front door panels yet... soon I hope. I was a little nervous about cutting the hole for the ashtray. I definitely measured twice
 (lrback.JPG) (lrback.JPG)
 (ashtray.JPG) (ashtray.JPG)
Attachments
----------------
lrback.JPG (193KB - 310 downloads)
ashtray.JPG (253KB - 317 downloads)
|
|
| |
|
Elite Veteran
Posts: 737
Location: Finland | Ahh ..what a amazing interior....be proud. |
|
| |
|
Expert
Posts: 3974
Location: DFW, TX | Incredible job, Dave! |
|
| |
|
Expert
Posts: 1737
Location: Hay Lakes, Alberta, Canada | Thanks for the tip about the mylar! I have ordered the same stuff for my '57. |
|
| |
|
Elite Veteran
Posts: 964
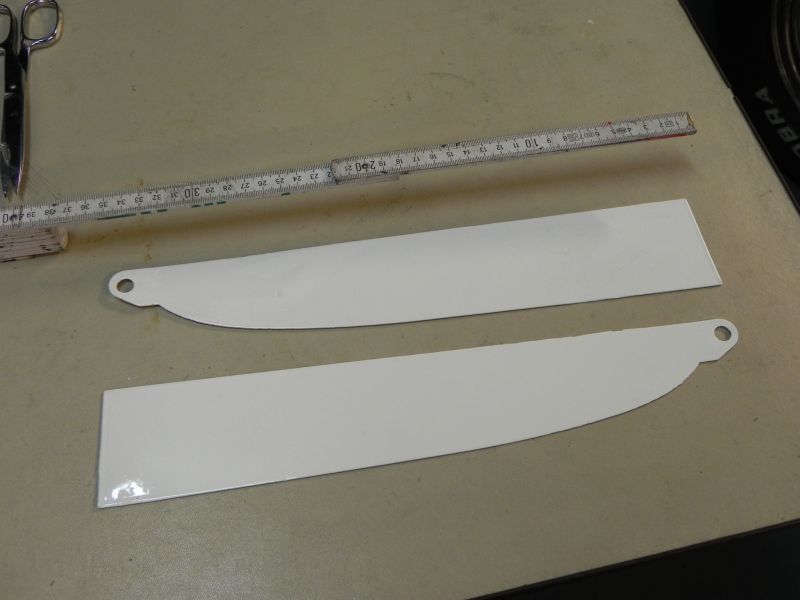
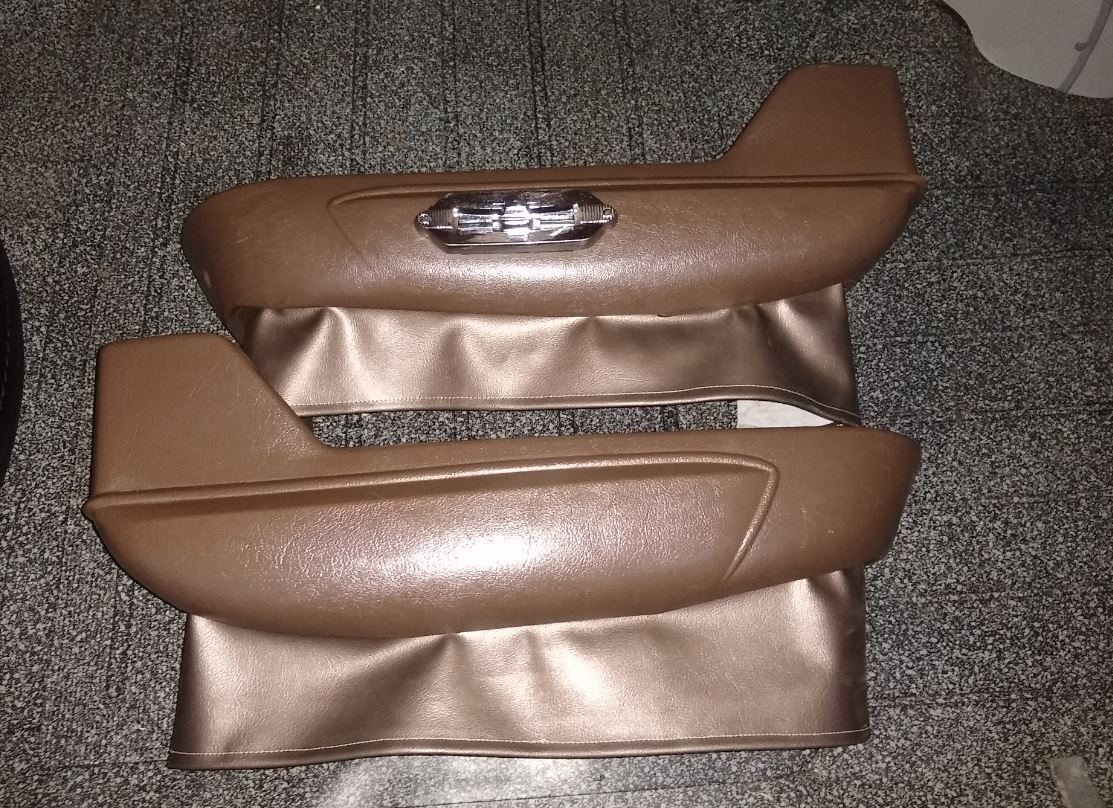
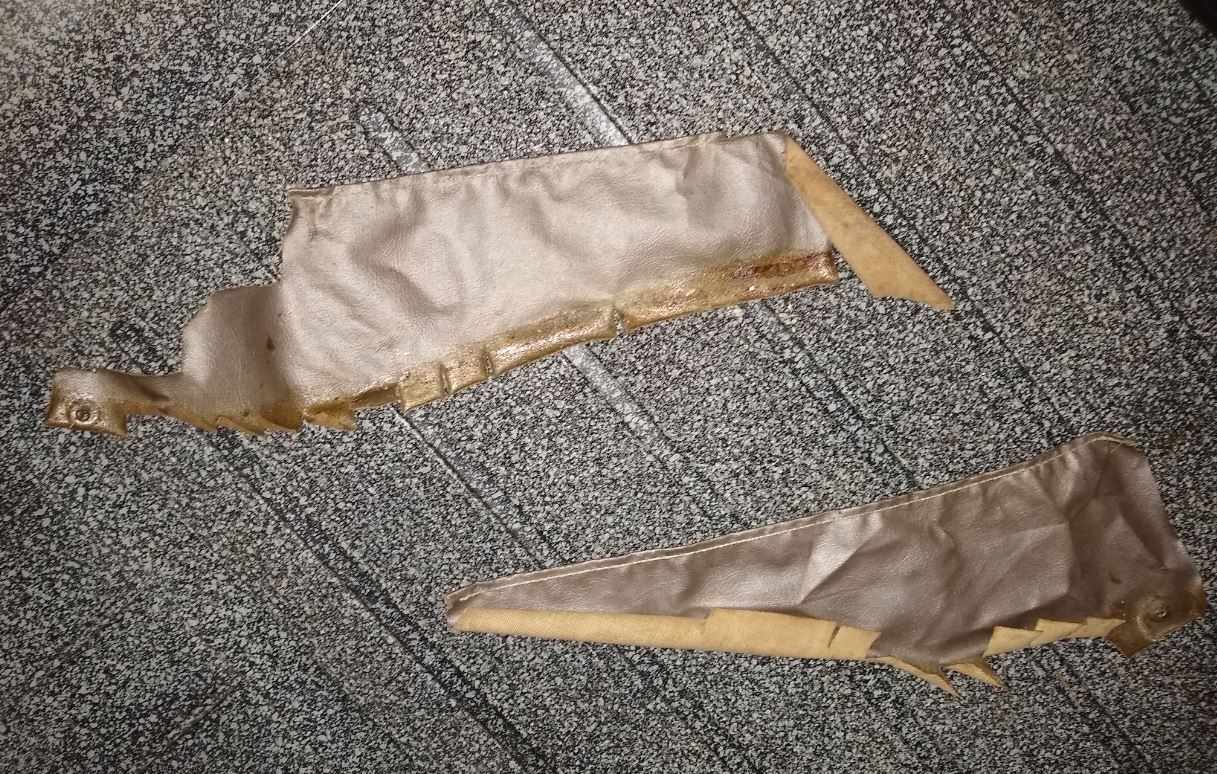
Location: San Antonio, TX | Absolutely. You're welcome.
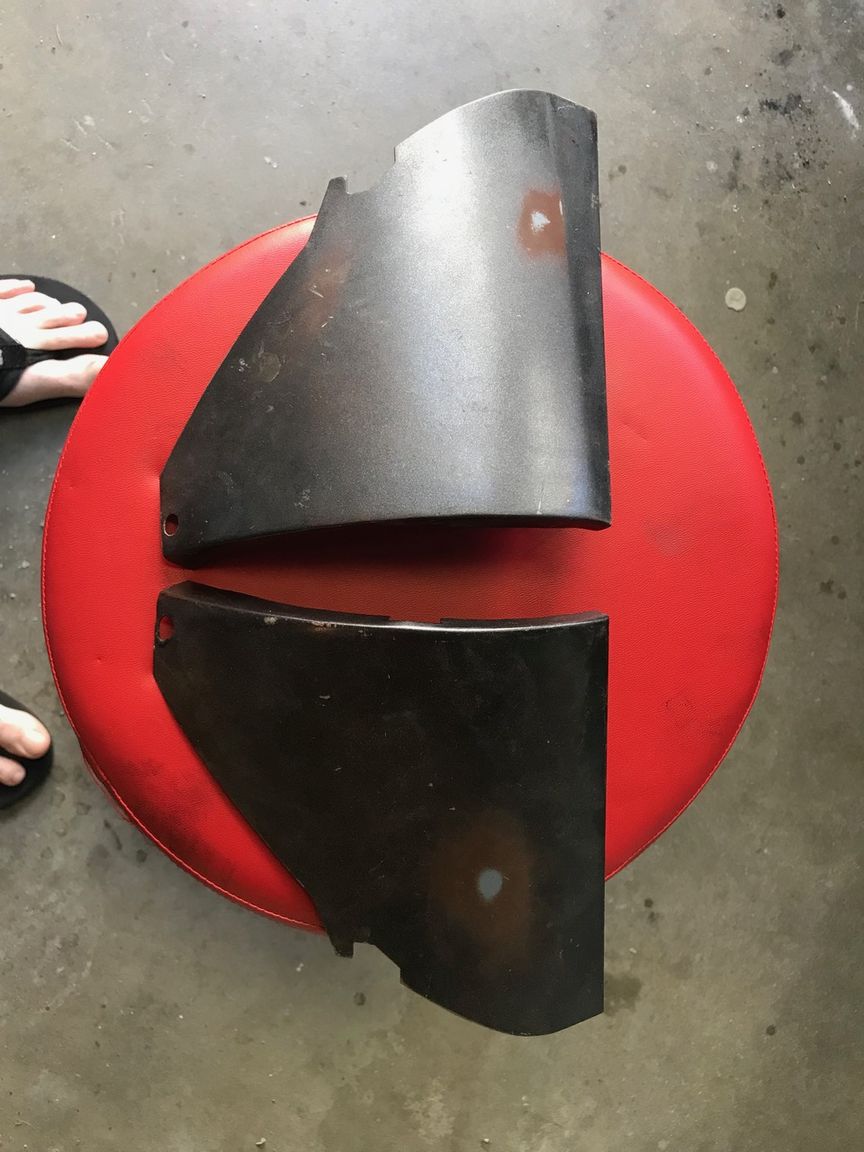
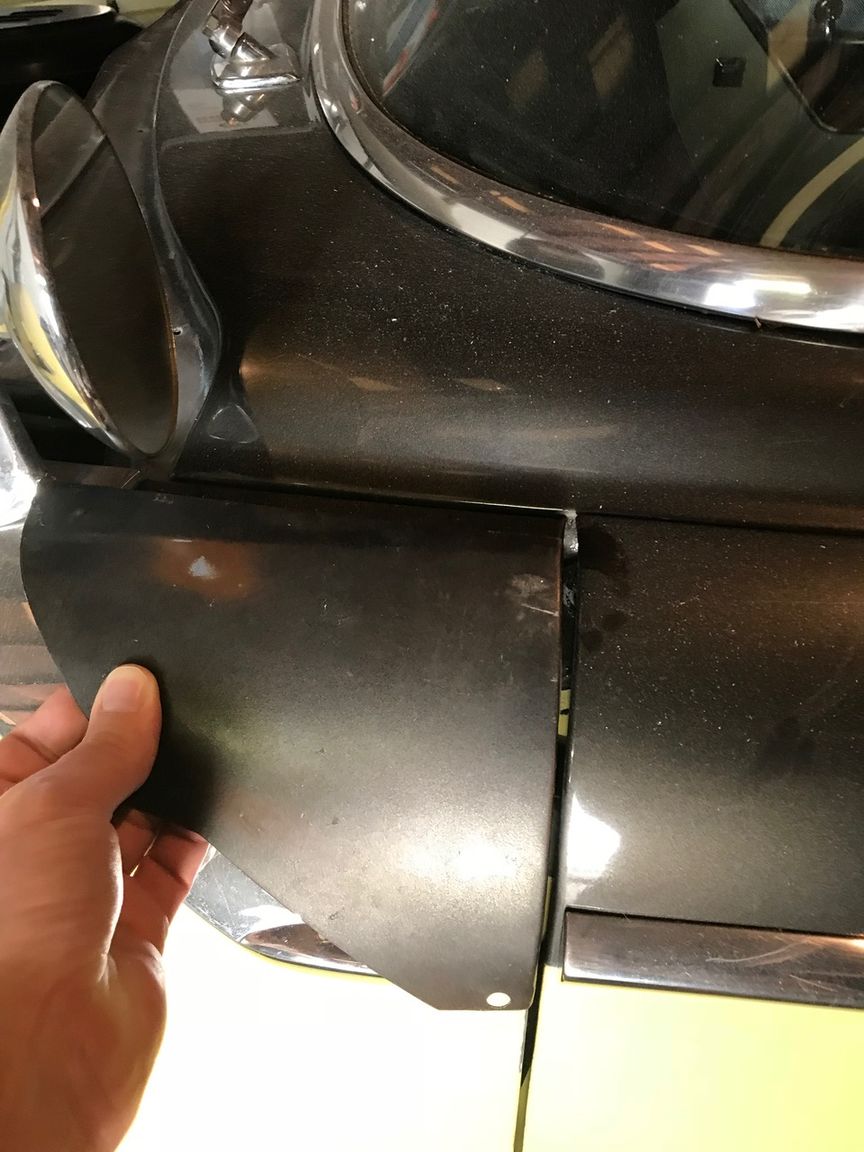
Just finished the new skirts for the power seat mechanism. The old ones were of course thrashed.
 (skirting.JPG) (skirting.JPG)
 (oldskirt.JPG) (oldskirt.JPG)
Attachments
----------------
skirting.JPG (256KB - 306 downloads)
oldskirt.JPG (370KB - 309 downloads)
|
|
| |
|
Elite Veteran
Posts: 964
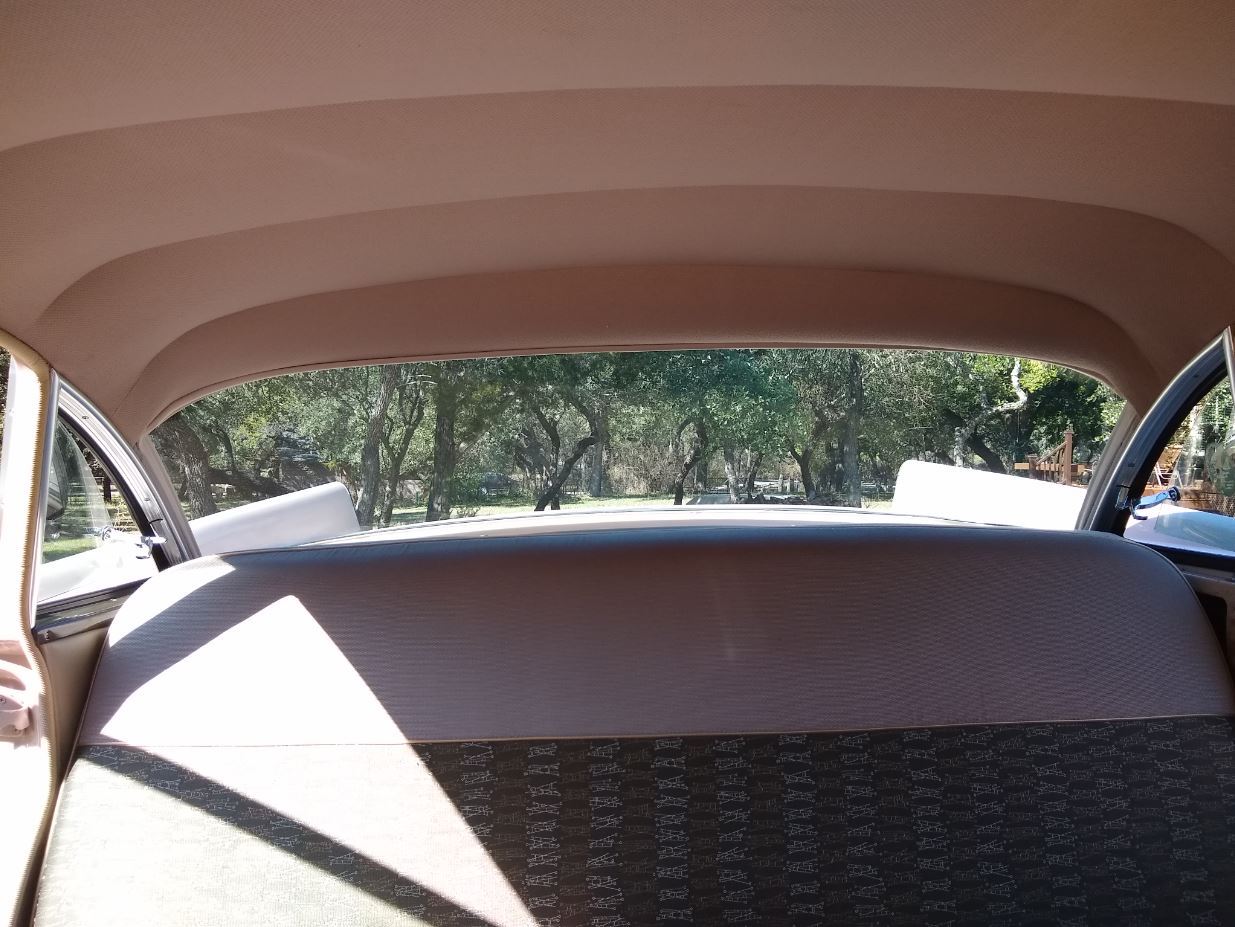
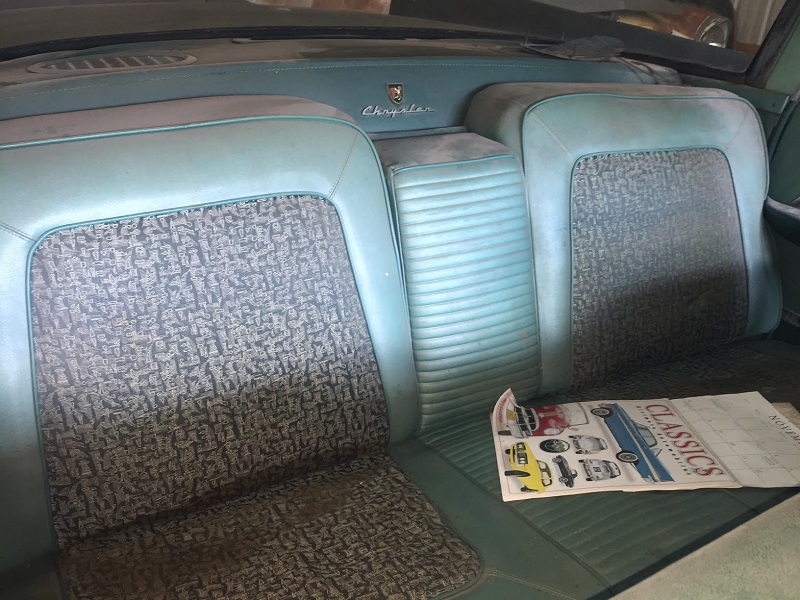
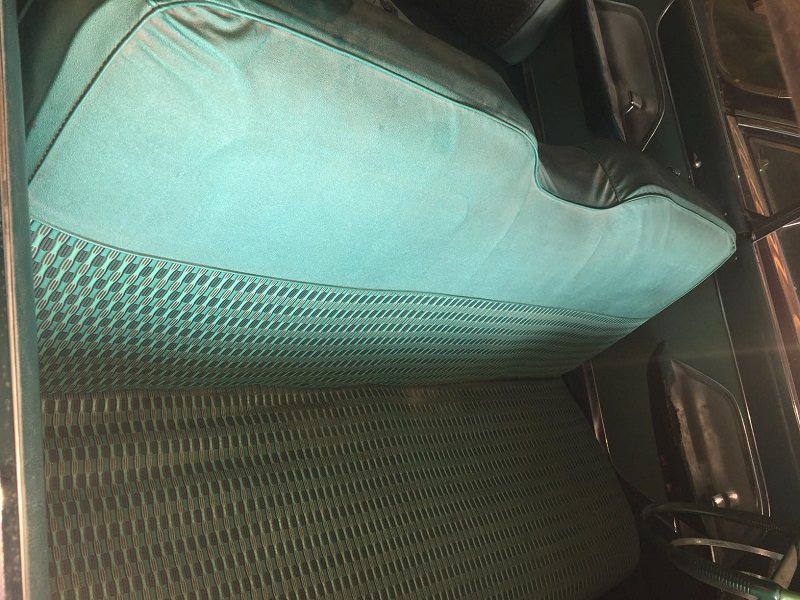
Location: San Antonio, TX | Installed
 (leftseat.JPG) (leftseat.JPG)
 (rightseat.JPG) (rightseat.JPG)
 (back.JPG) (back.JPG)
Attachments
----------------
leftseat.JPG (170KB - 323 downloads)
rightseat.JPG (263KB - 303 downloads)
back.JPG (176KB - 311 downloads)
|
|
| |
|
Expert
Posts: 1226
Location: D-70199 Heslach | Dave, that looks marvelous. Just sit in the Flite will be a pleasure |
|
| |
|
Elite Veteran
Posts: 964
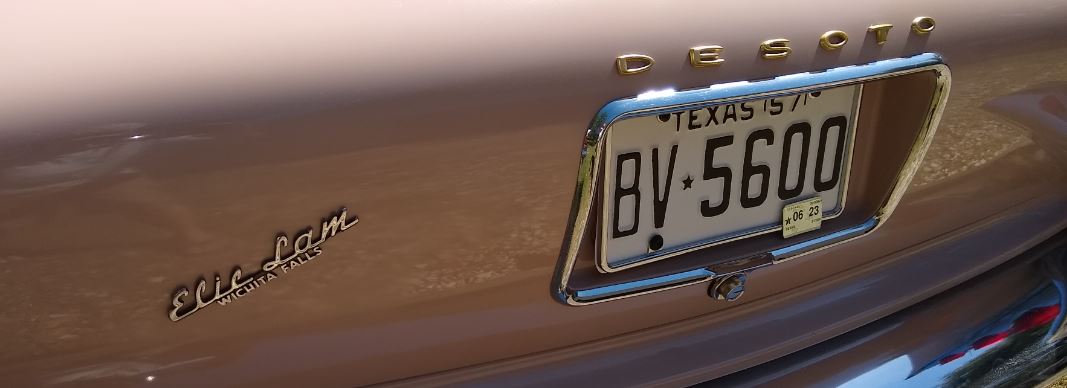
Location: San Antonio, TX | Polished up the dealer emblem. Gave it a wash.
 (dealer1.JPG) (dealer1.JPG)
 (dealer2.JPG) (dealer2.JPG)
 (april262020.JPG) (april262020.JPG)
Attachments
----------------
dealer1.JPG (52KB - 302 downloads)
dealer2.JPG (65KB - 291 downloads)
april262020.JPG (240KB - 285 downloads)
|
|
| |
|
Expert
Posts: 1226
Location: D-70199 Heslach | Dave,- any news on your Fireflite ? |
|
| |
|
Expert
Posts: 2164
| .
Hello. Could you post the picture of the cowl tag?
I just want to confirm my guessing:
PNT = 4RXR
TRM = 533 (or 534)
TR = None (Standard Equipment)
AG = 2
PS = 4
PB = 5
AH = 1
PW = 5
RM = None
SS = None
UC = 1 (Undercoating should be present, although it’s not visible)
SPL = None
CS = None (Standard Equipment)
BG = 3
A = None
B = None
C = None
Am I right?
|
|
| |
|
Expert
Posts: 1505
Location: New Castle PA | My guess: There's a 7 by the GG (glamour group) since that includes only the front bumper guards. A BG of 3 would be both front and rear bumper guards. Also, the PB power brakes would be a 9 not a 5. |
|
| |
|
Expert
Posts: 2164
| 57desoto - 2021-12-06 6:07 PM
My guess: There's a 7 by the GG (glamour group) since that includes only the front bumper guards. A BG of 3 would be both front and rear bumper guards. Also, the PB power brakes would be a 9 not a 5.
Besides the roof molding package, the glamour group includes the rear quarter stone shields – they are not present on this car.
Therefore I guessed the bumper guards only.
I’ve never seen rear bumper guards on the ’57 DeSotos; ’57 Chryslers did have. Do you have a picture of these?
Yes, you are right – the power brakes have coded 9, not 5; thanks for correction;
I also forgot the CS = 2; the color sweep was standard on Fireflite Sportsman Hardtops and Convertibles and wasn’t on Sedans…
|
|
| |
|
Expert
Posts: 1505
Location: New Castle PA | Here's a rear bumper guard for 1957 DeSoto.
 (rear_bumper_guard3.jpg) (rear_bumper_guard3.jpg)
Attachments
----------------
rear_bumper_guard3.jpg (9KB - 215 downloads)
|
|
| |
|
Expert
Posts: 2164
| .
Thanks for the picture. Will be waiting a cowl tag picture anyway. |
|
| |
|
Expert
Posts: 1226
Location: D-70199 Heslach | 57desoto - 2021-12-07 12:28 PM
Here's a rear bumper guard for 1957 DeSoto.
Is this rear quarter chrome molding the "rear bumper guard" ...... good to know |
|
| |
|
Expert
Posts: 1505
Location: New Castle PA | Yes, Tom... The rear bumper guard is a wide, heavy, chromed piece instead of the narrow potmetal/chrome piece usually called "pinchweld molding" that's on cars without rear bumper guards. |
|
| |
|
Elite Veteran
Posts: 964
Location: San Antonio, TX | PNT = XXX
TRM = 533
TR = None
AG = 1
PS = 4
PB = 9
AH = 1
PN = 5
RM = None
SS = None
UC = None
SPL = None
CS = 1
BG = None
A = None
B = None
C = None
I decided to paint it RXR. I really love that combo.
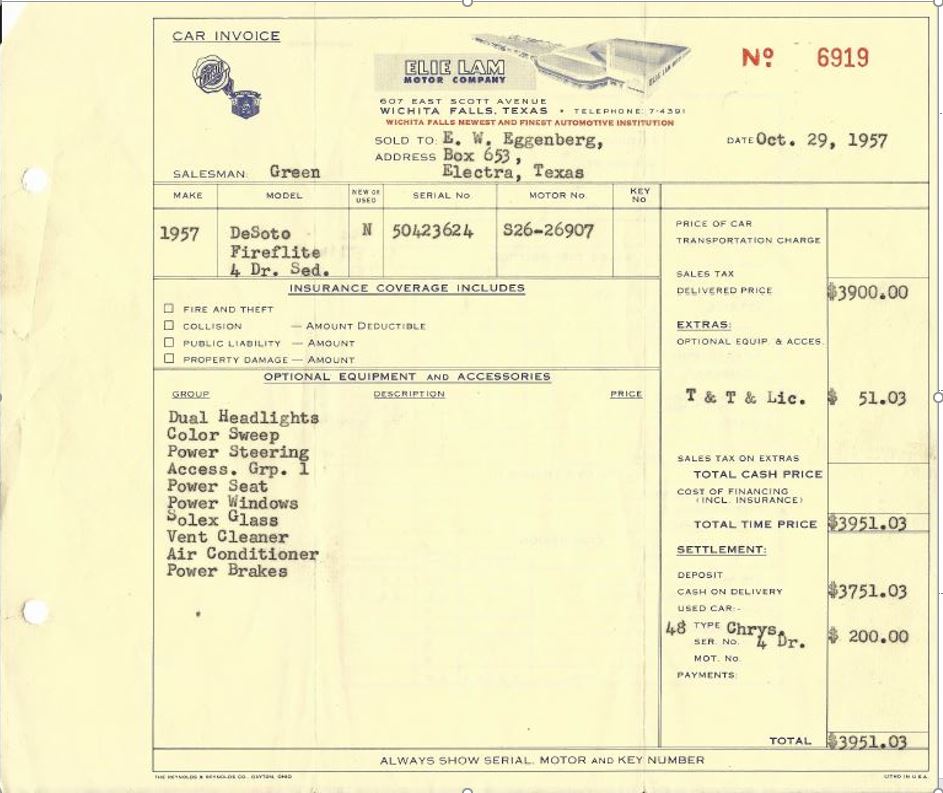
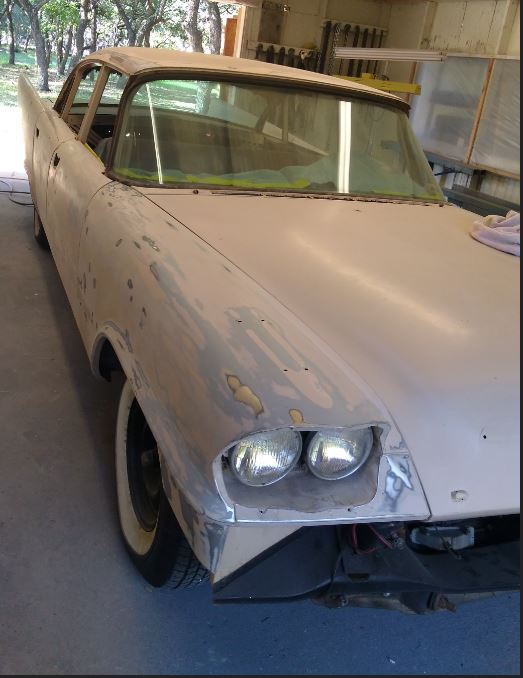
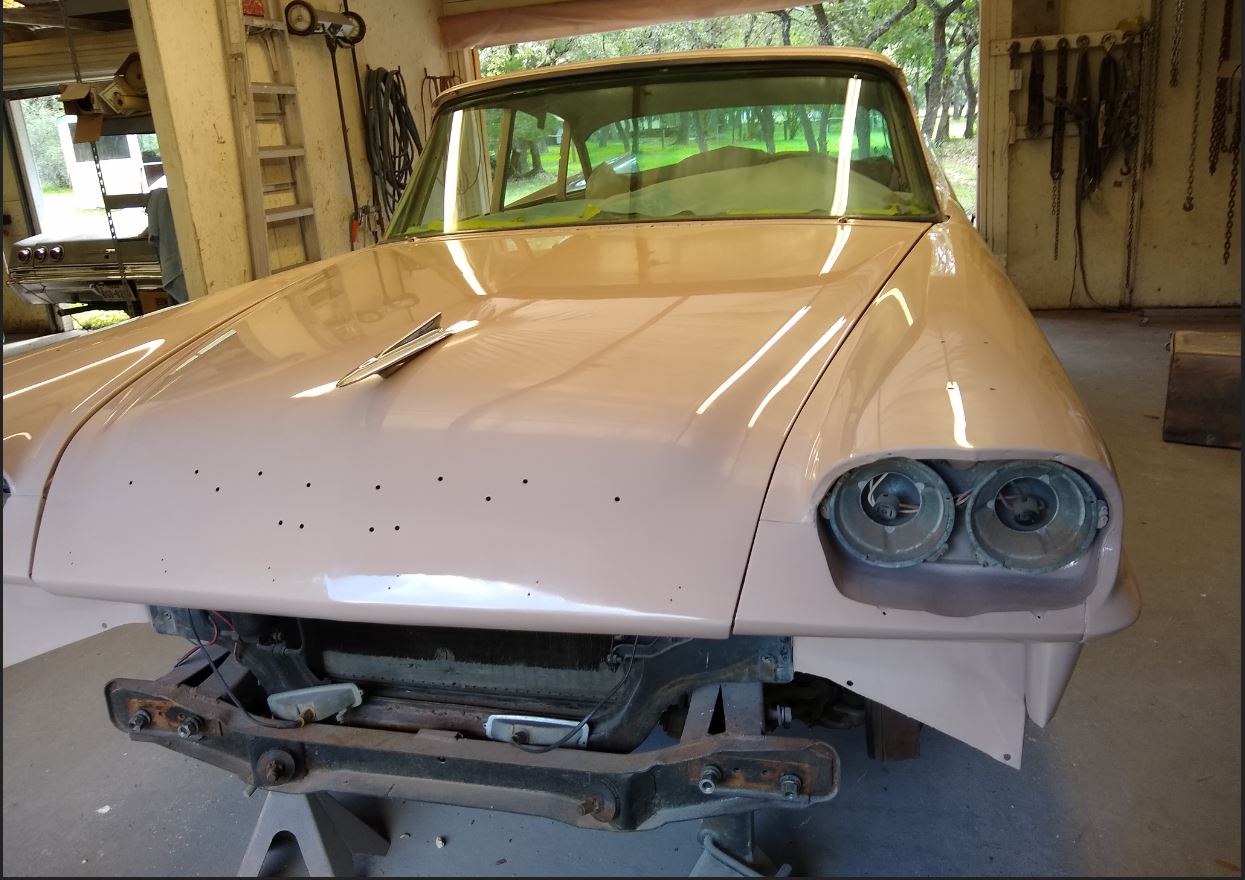
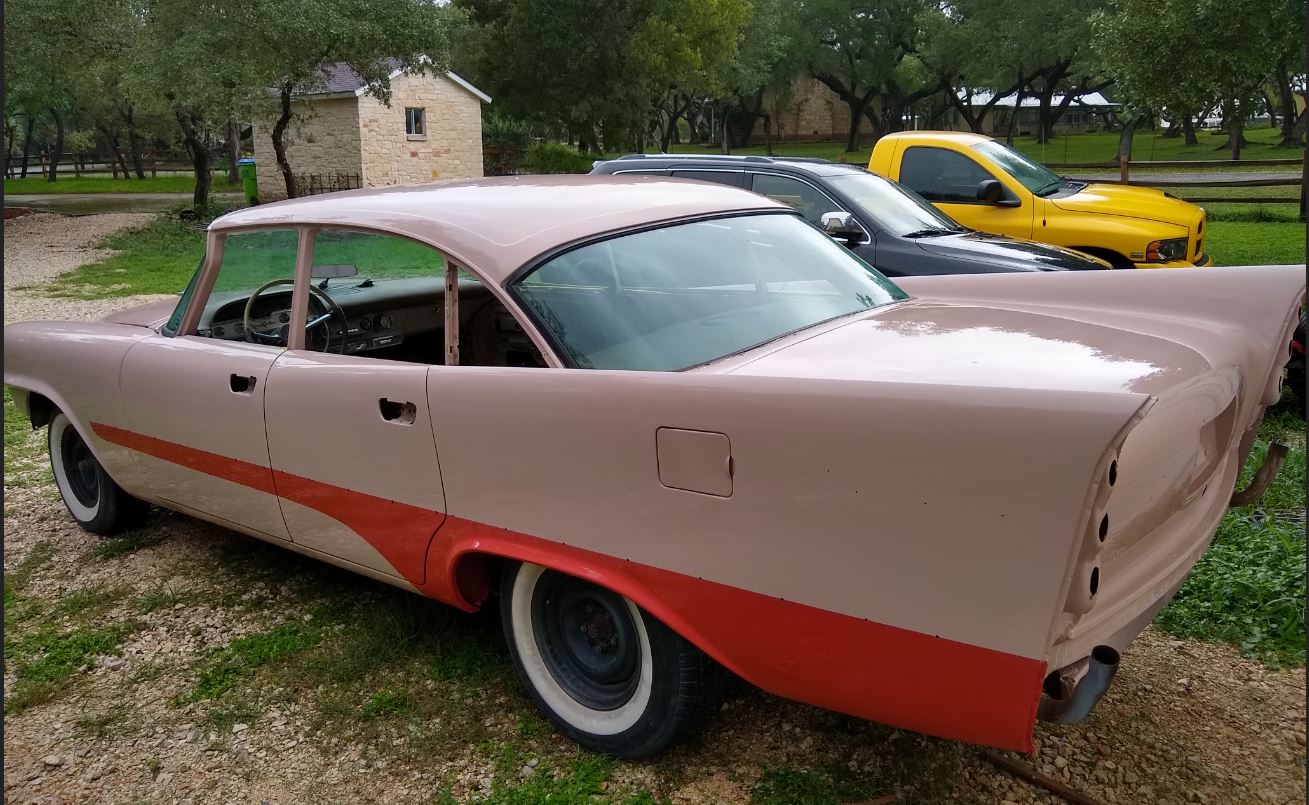
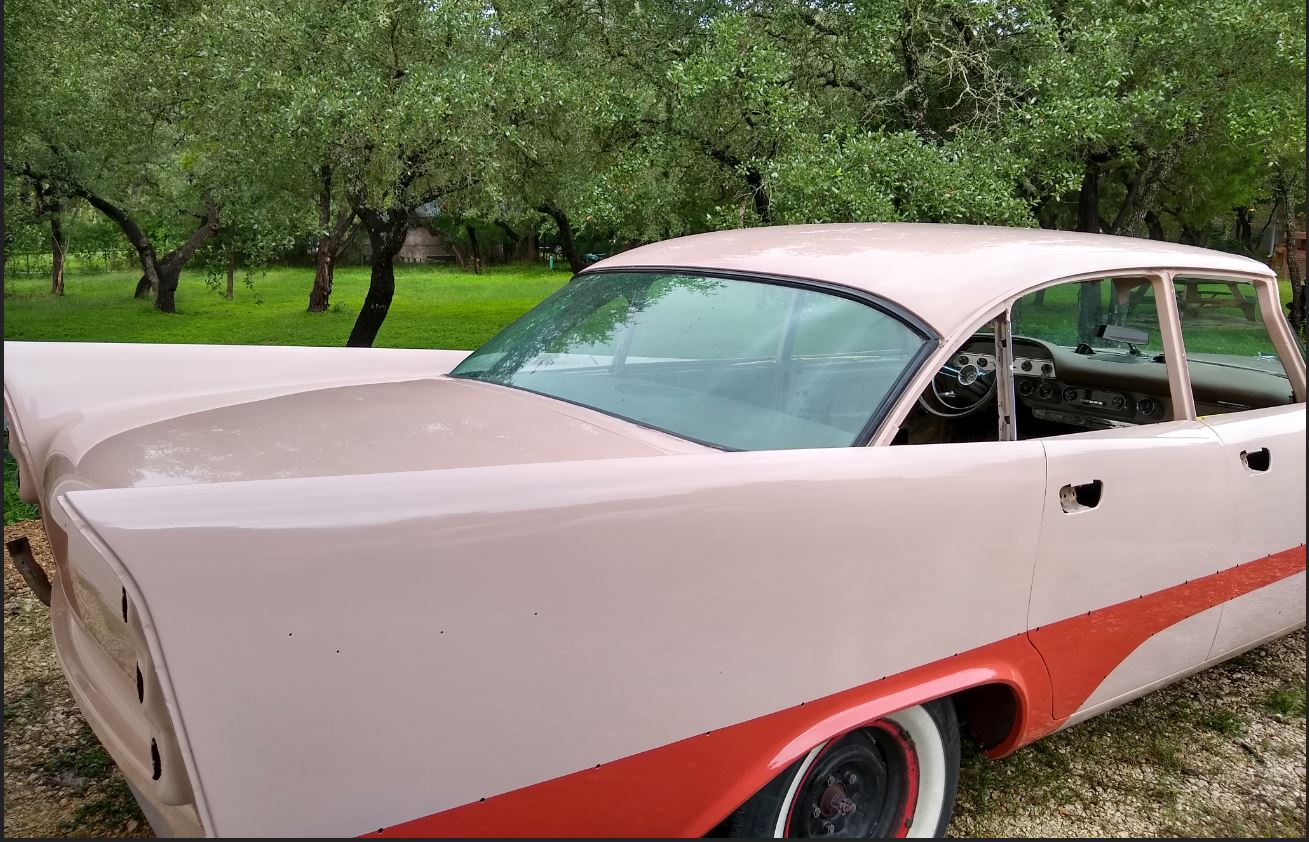
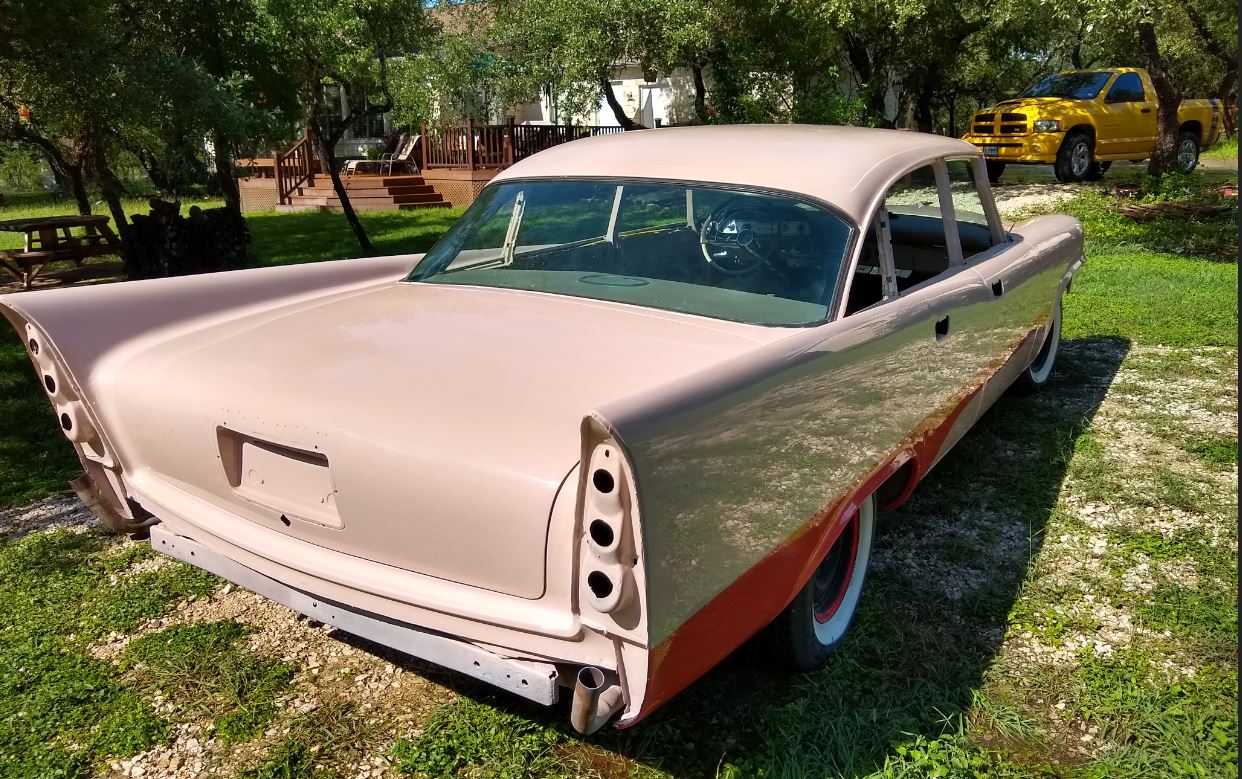
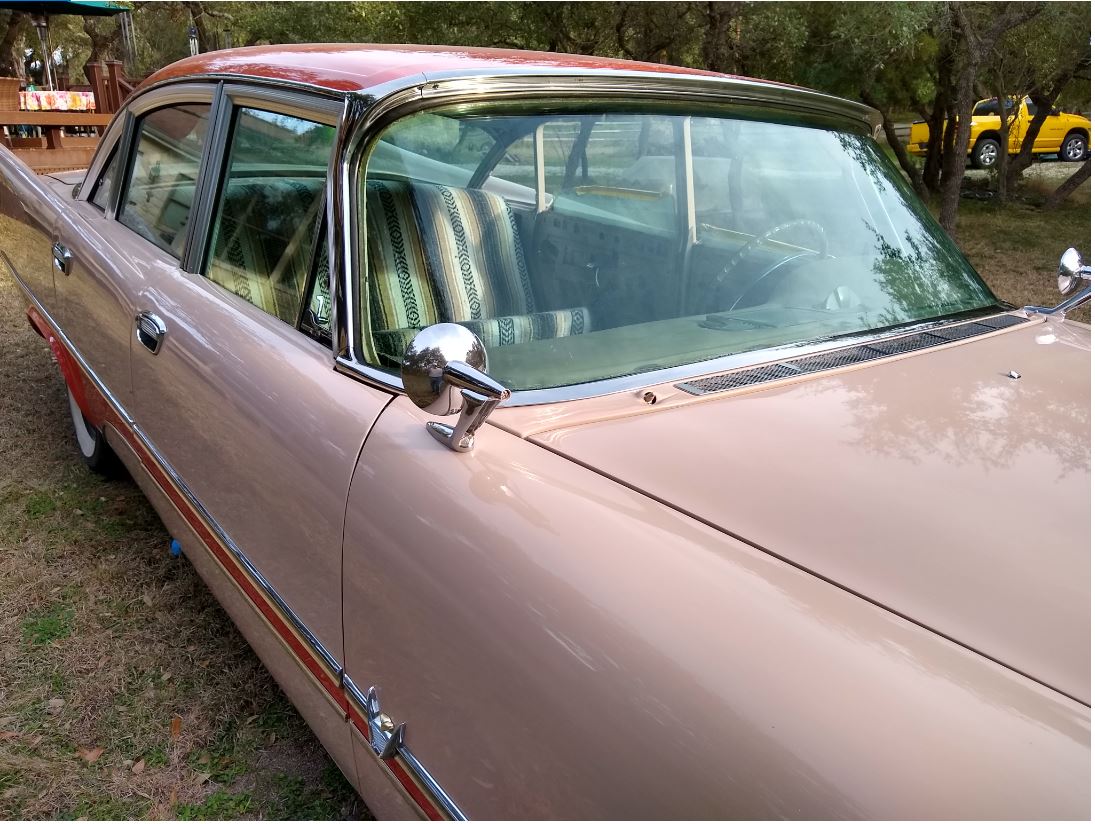
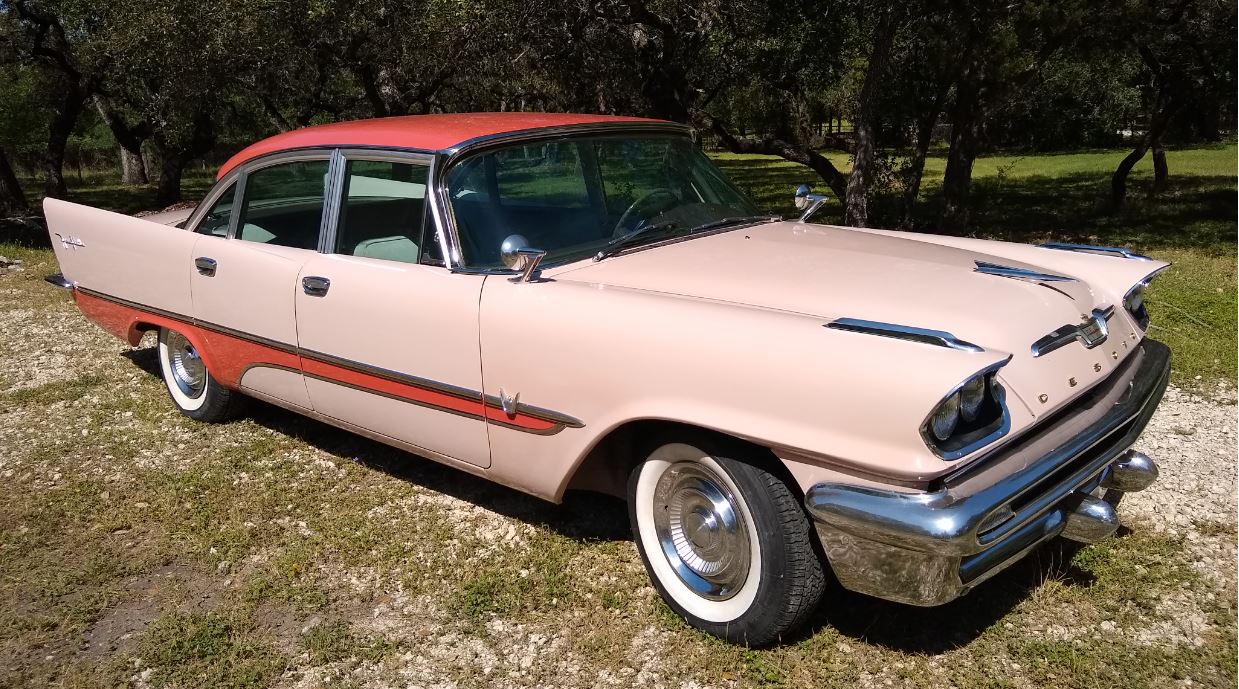
The history on the paint for this car is a little muddied. Here are a few pictures that show what it was like when I bought it. Obviously it was resprayed in it's life. The interesting part is that the dealer invoice says colorsweep. I added the front bumper guards.
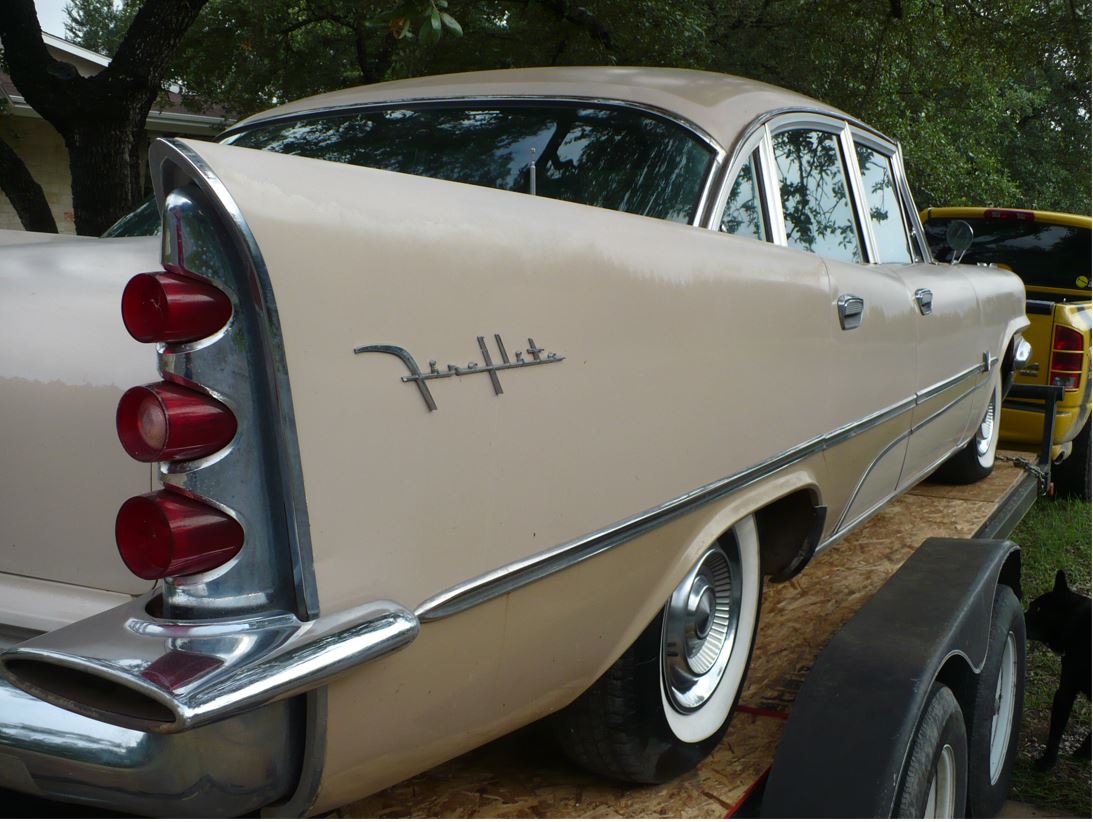 (camehome.JPG) (camehome.JPG)
 (dogleg.JPG) (dogleg.JPG)
 (invoice.JPG) (invoice.JPG)
Attachments
----------------
camehome.JPG (135KB - 212 downloads)
dogleg.JPG (57KB - 201 downloads)
invoice.JPG (100KB - 221 downloads)
|
|
| |
|
Elite Veteran
Posts: 964
Location: San Antonio, TX | It also has a power antenna. Originally I thought it was factory. Later I discovered a Dec 1961 date stamp on the motor. |
|
| |
|
Elite Veteran
Posts: 964
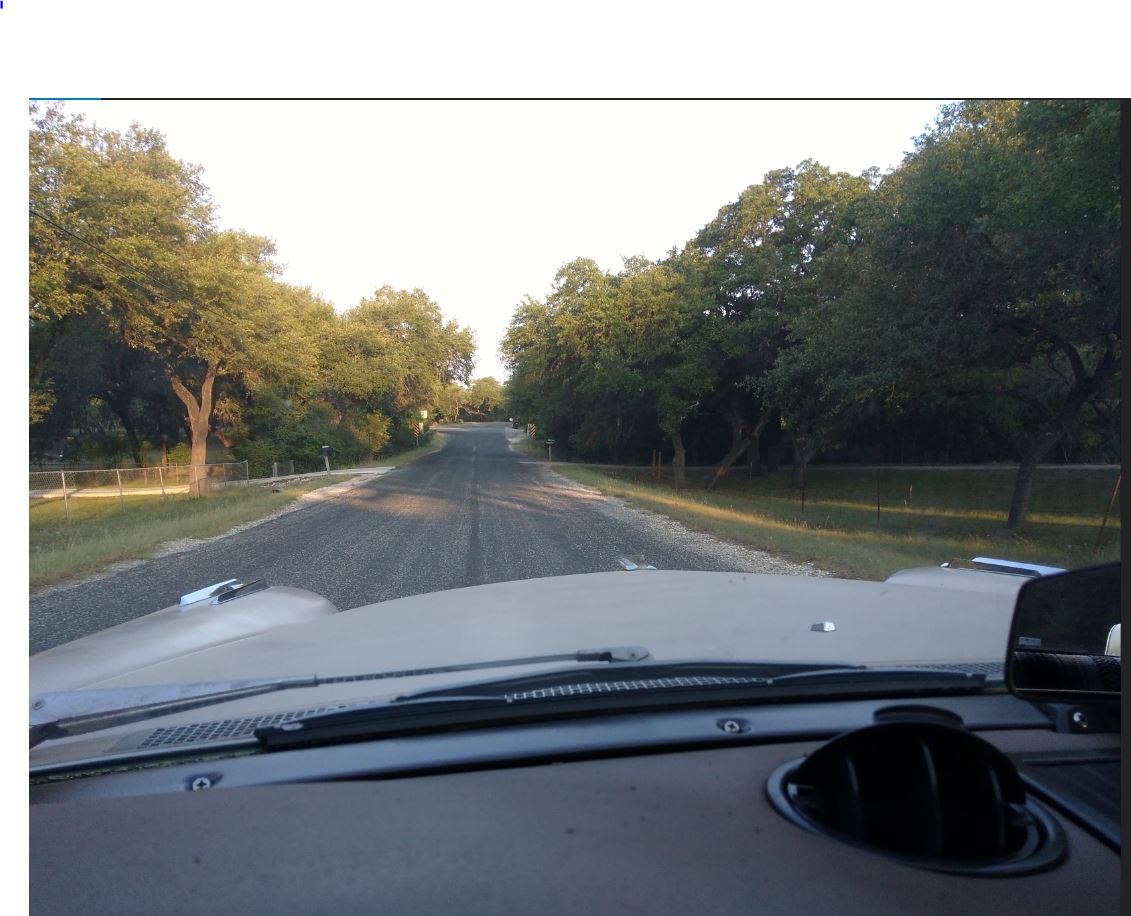
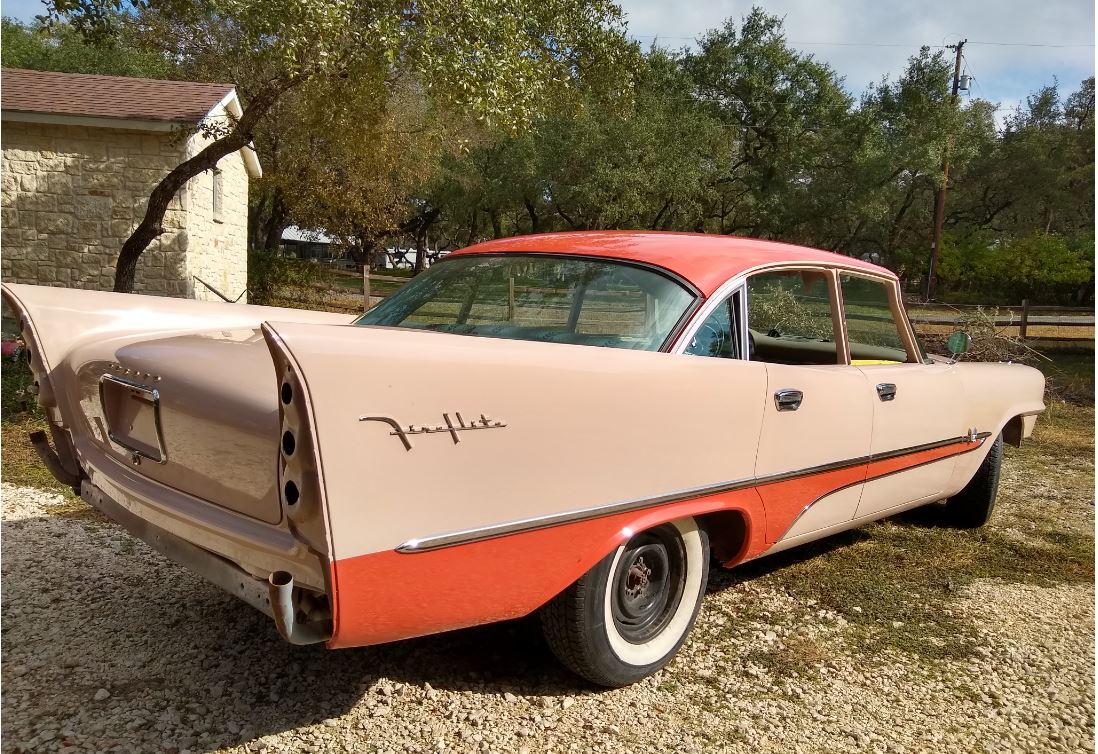
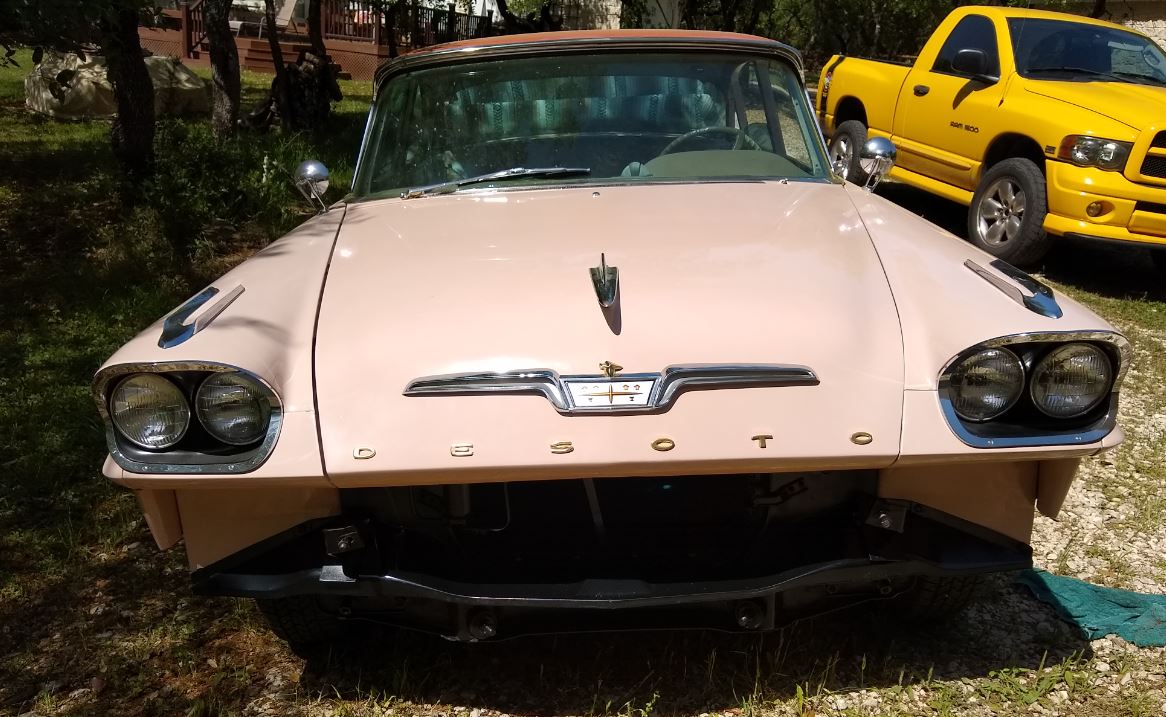
Location: San Antonio, TX | Took my sister and family for a ride this past Sunday. We had a blast.
 (famdesoto.JPG) (famdesoto.JPG)
Attachments
----------------
famdesoto.JPG (110KB - 218 downloads)
|
|
| |
|
Expert
Posts: 2164
| .
Originally scheduled Sahara Tan (XXX) single tone color scheme and Single Spear Side Molding (CS = 1);
But in the last moment customer ordered a dual molding – it is very interesting!
Firstly, the front bumper guards less rear quarter stone shields and roof moldings puzzled me, because they don’t come separately, as stated Edward (57desoto) – they included in Glamour Group only.
But the mystery is solved: you just added their on it.
|
|
| |
|
Elite Veteran
Posts: 964
Location: San Antonio, TX | More mystery. The car has stone shields. I had not put the right one back on yet. You can see it in the picture from when I brought it home. Once I get the RH stone shield polished up I'll install it. |
|
| |
|
Expert
Posts: 2164
| .
Maybe aftermarket option? Like a chrome sill moldings... |
|
| |
|
Expert
Posts: 1226
Location: D-70199 Heslach | macedon - 2021-12-08 5:18 PM
Took my sister and family for a ride this past Sunday. We had a blast.
It looks as all of you have fun with your ride :-) |
|
| |