|
|
Elite Veteran
Posts: 1112
 
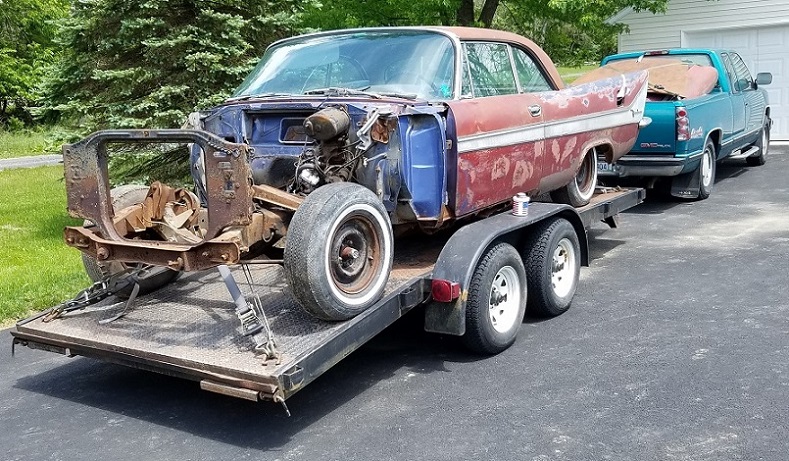
Location: Wild Wonderful | While checking out the Forward Look facebook page, I ran across this guy saying that he wanted to unload
this 1958 DeSoto 2 dr Ht. I remembered seeing this car a year before, when they first got it. They took apart
the front end, and removed the engine, to get it rebuilt. They also found a broken torsion bar. After that,
they just lost interest in it. So that is where I came in. So I drove eight and a half hours, one way, to pick it up.
I did not mind the trip one bit. It was nice to see that car in my rear view mirror all the way home. 
 (20170507_134131 (2).jpg) (20170507_134131 (2).jpg)
Attachments
----------------
 20170507_134131 (2).jpg (236KB - 569 downloads) 20170507_134131 (2).jpg (236KB - 569 downloads)
|
|
| |
|
Expert
Posts: 1295
     
Location: Nasco , SWEDEN | Awesome project      |
|
| |
|
Expert 5K+
Posts: 5006

| another Desoto?  |
|
| |
|
Expert 5K+
Posts: 9902
       
Location: Lower Mainland BC | Great find. 
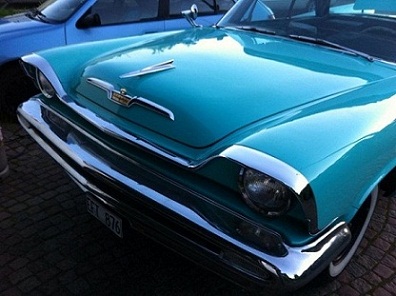
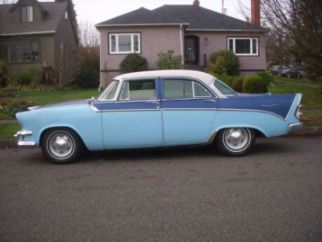
So something like these?
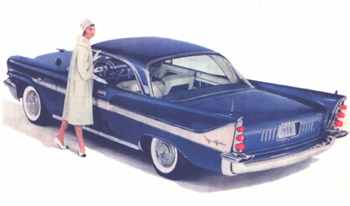 

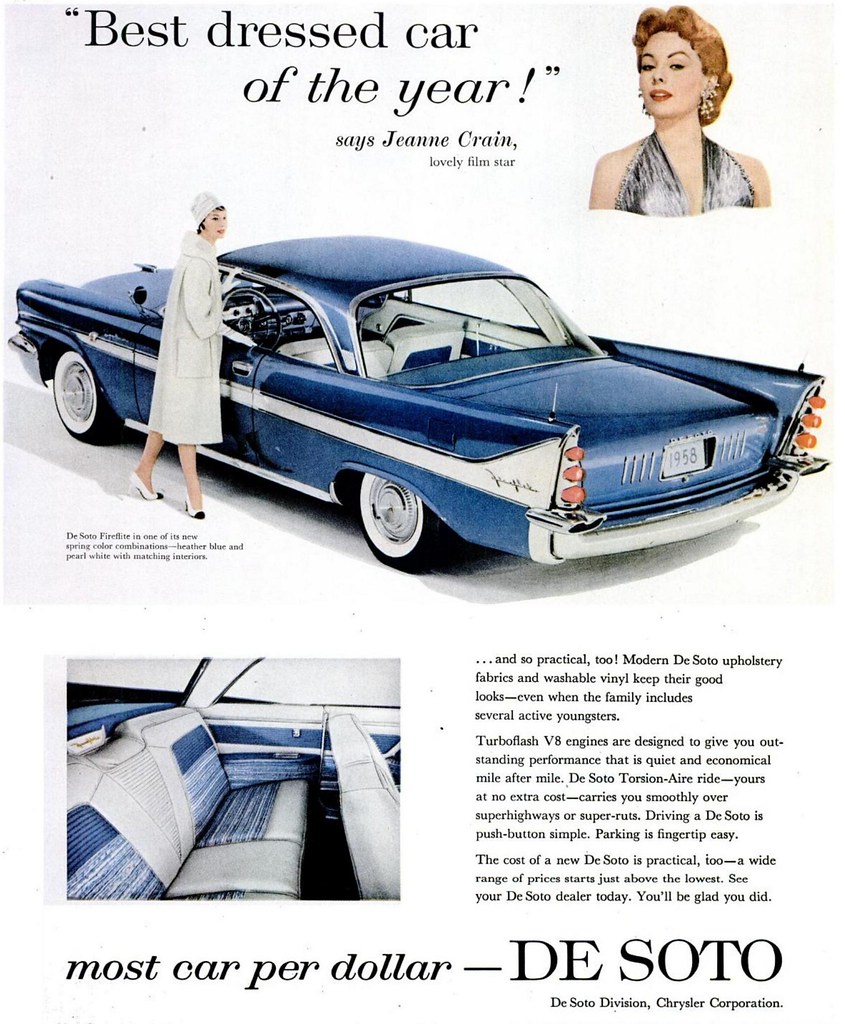 |
|
| |
|

Elite Veteran
Posts: 1112
 
Location: Wild Wonderful | Yes. And I think this was one of the first ones for spring.
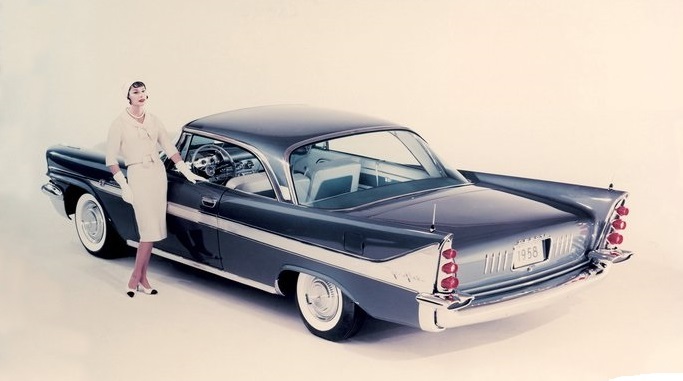 (spring1958.jpg) (spring1958.jpg)
Attachments
----------------
 spring1958.jpg (62KB - 563 downloads) spring1958.jpg (62KB - 563 downloads)
|
|
| |
|

Elite Veteran
Posts: 1112
 
Location: Wild Wonderful | A barn find a couple years ago.
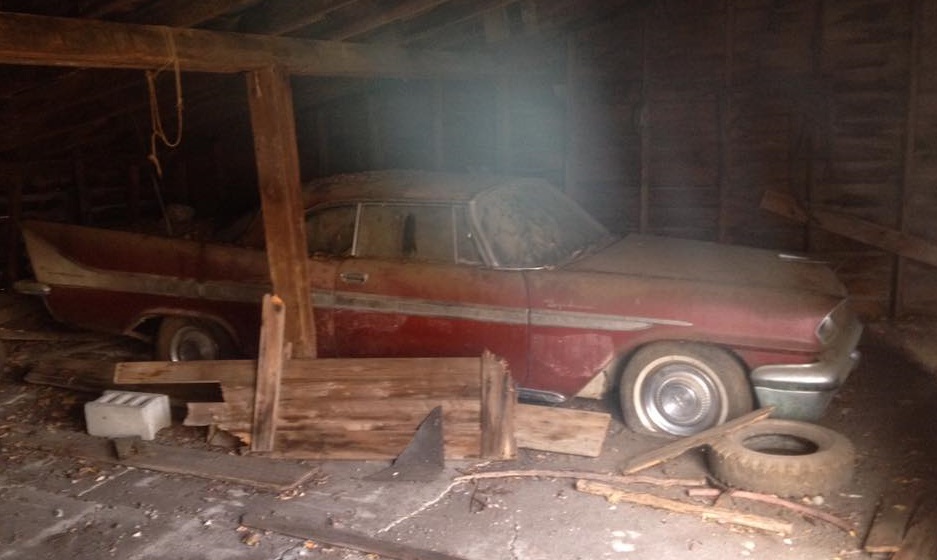 (barnfind58.jpg) (barnfind58.jpg)
Attachments
----------------
 barnfind58.jpg (111KB - 590 downloads) barnfind58.jpg (111KB - 590 downloads)
|
|
| |
|

Elite Veteran
Posts: 1159
   
Location: D-70199 Heslach | Congratulation to that finding |
|
| |
|

Elite Veteran
Posts: 1112
 
Location: Wild Wonderful | The code work.
SCH = 097
SEQ = 008
BDY = 432
ST = 2
PNT = XWW
TRM = 631
TR = 3
PB = 2
AH = 5
UC = 1
B = 4
Can you see it?
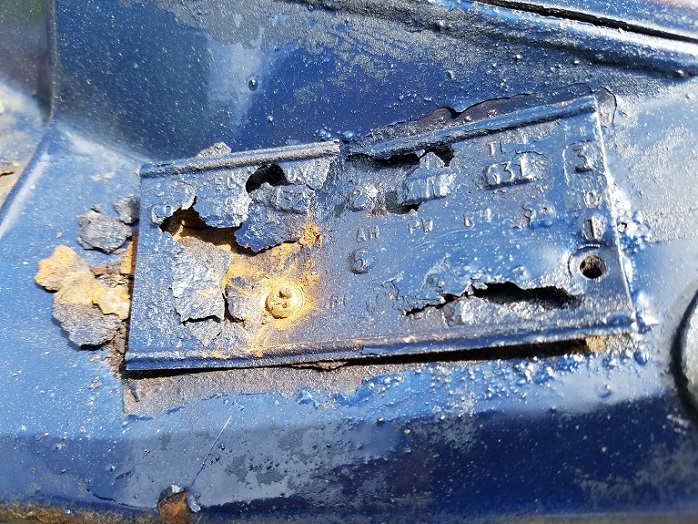 (dataplate58.jpg) (dataplate58.jpg)
Attachments
----------------
 dataplate58.jpg (231KB - 566 downloads) dataplate58.jpg (231KB - 566 downloads)
|
|
| |
|

Expert 5K+
Posts: 9666
      
Location: So. Cal | Really nice project. Those '58 spring specials really are special. I hope the rockers are in better shape than your old one. But at least you should be able to get this one done a lot quicker. |
|
| |
|

Elite Veteran
Posts: 1112
 
Location: Wild Wonderful | The rockers are a mess, but yes, they are better than the other one.
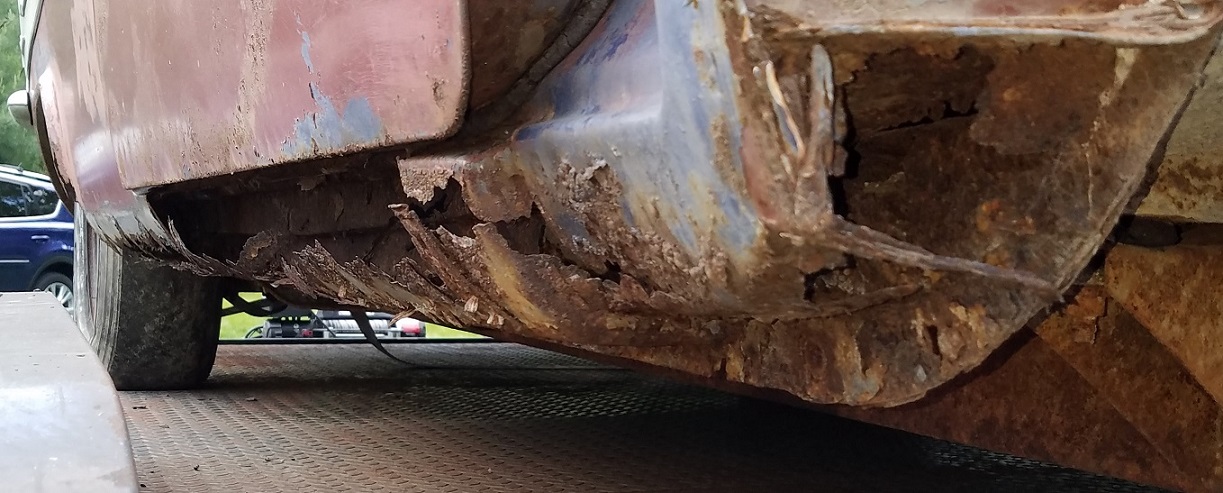 (rockabybaby.jpg) (rockabybaby.jpg)
Attachments
----------------
 rockabybaby.jpg (220KB - 550 downloads) rockabybaby.jpg (220KB - 550 downloads)
|
|
| |
|

Elite Veteran
Posts: 1112
 
Location: Wild Wonderful | Here is a factory mistake for ya. If you look real close, you can see there is an L-360 under the serial number.
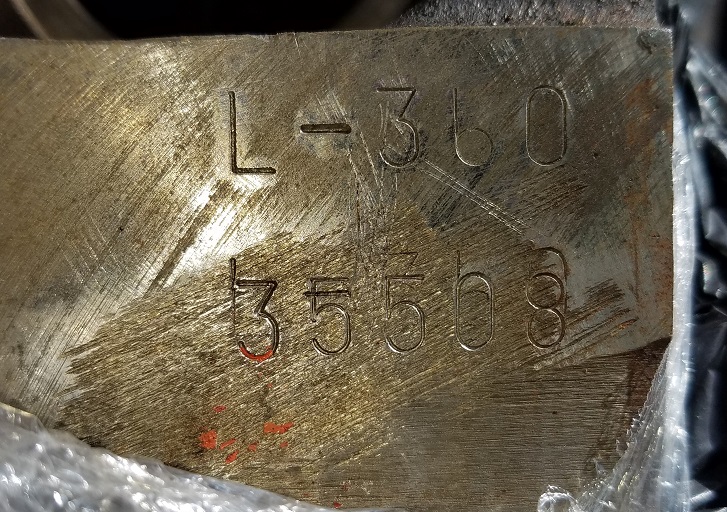 (20170507_164328.jpg) (20170507_164328.jpg)
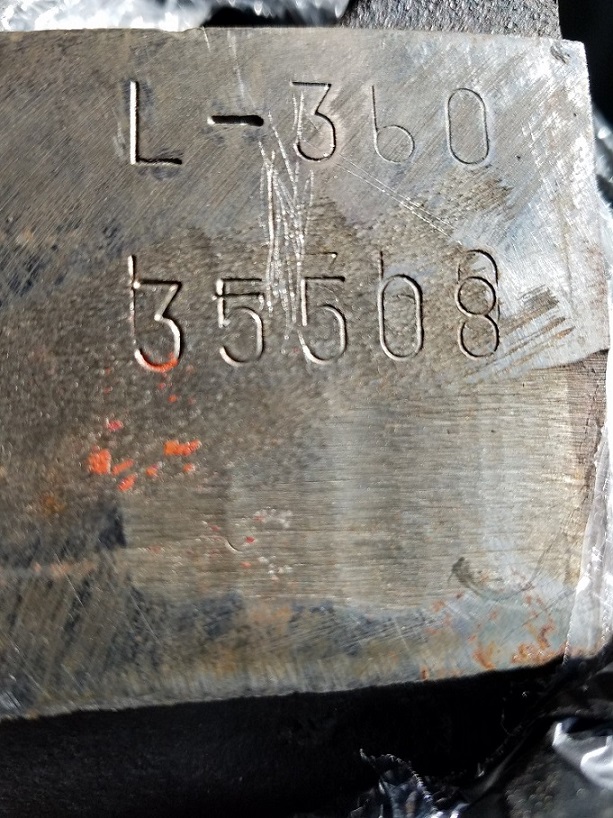 (20170507_164353.jpg) (20170507_164353.jpg)
Attachments
----------------
 20170507_164328.jpg (222KB - 549 downloads) 20170507_164328.jpg (222KB - 549 downloads)
 20170507_164353.jpg (220KB - 550 downloads) 20170507_164353.jpg (220KB - 550 downloads)
|
|
| |
|

Elite Veteran
Posts: 1112
 
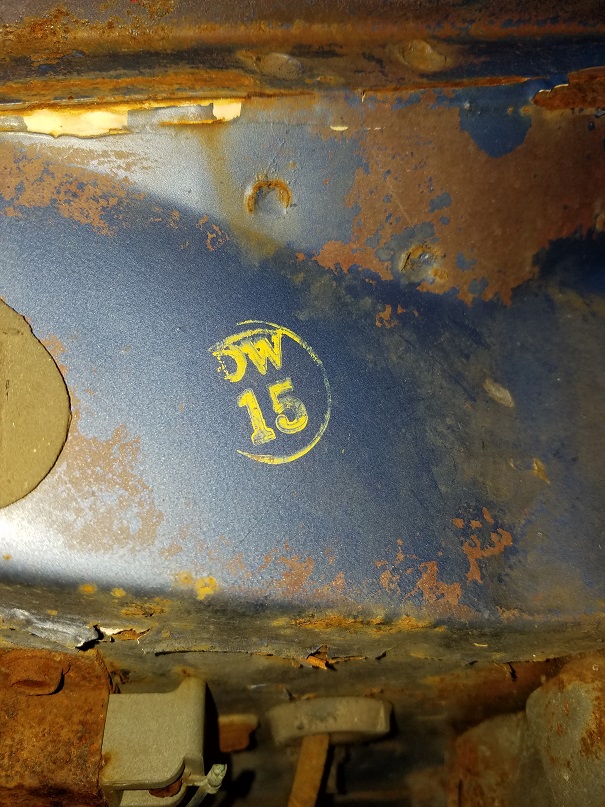
Location: Wild Wonderful | This was on top of the firewall, on the drivers side.
What does DW stand for?
Edited by 58DeSoDodge59 2017-05-14 12:30 AM
 (20170508_200421 (2).jpg) (20170508_200421 (2).jpg)
Attachments
----------------
 20170508_200421 (2).jpg (241KB - 556 downloads) 20170508_200421 (2).jpg (241KB - 556 downloads)
|
|
| |
|

Expert 5K+
Posts: 9666
      
Location: So. Cal | Looks like it maybe a Los Angeles built car - oh nevermind, I just realized that the DeSoto tags were a little different.
Since you were lucky enough to figure out what the tag says, you can get a new one made up from AG Backeast, among other places.
Edited by Powerflite 2017-05-14 10:07 AM
|
|
| |
|

Elite Veteran
Posts: 1112
 
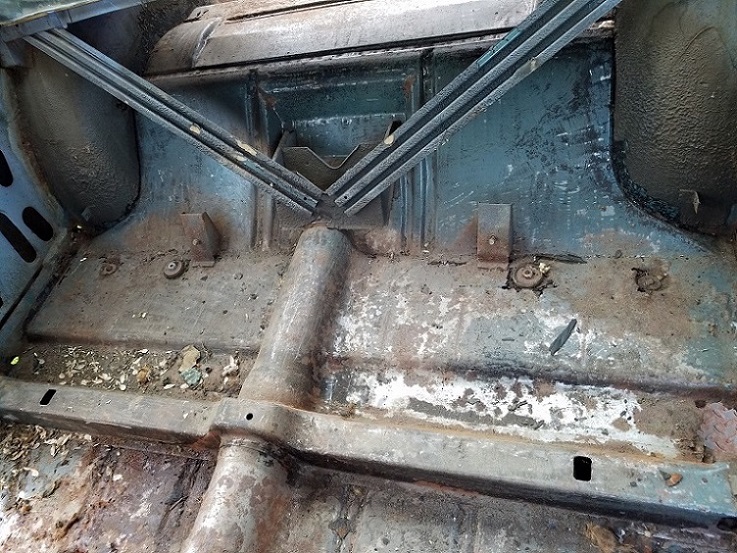
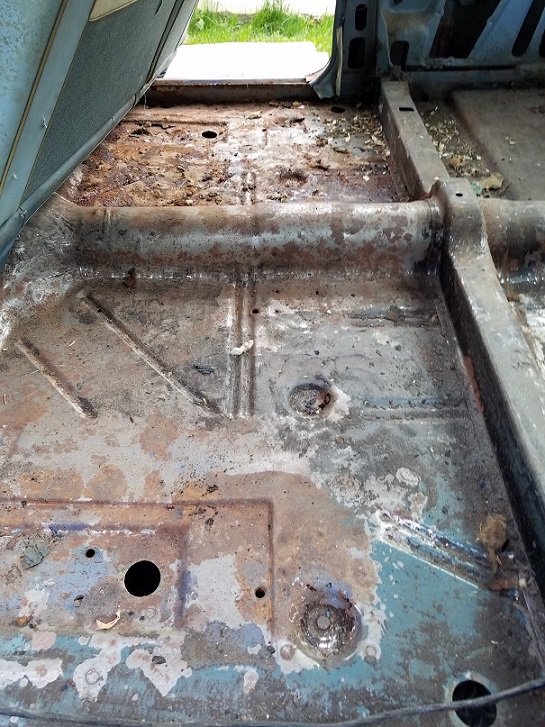
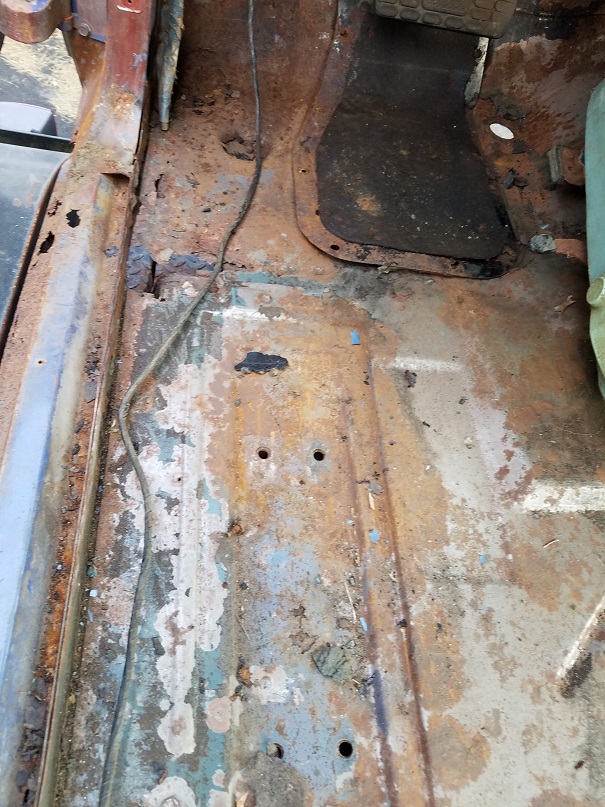
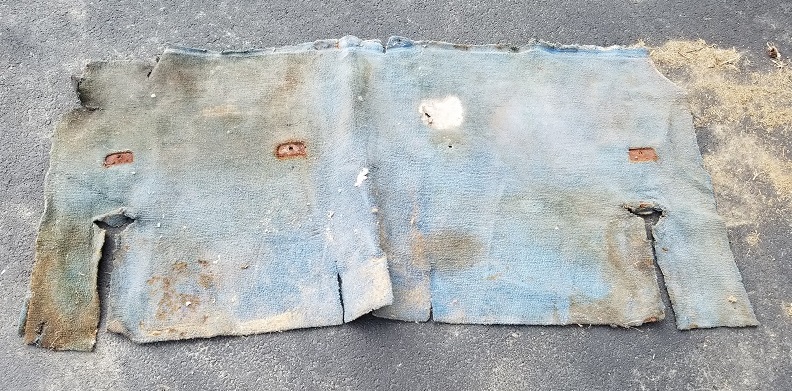
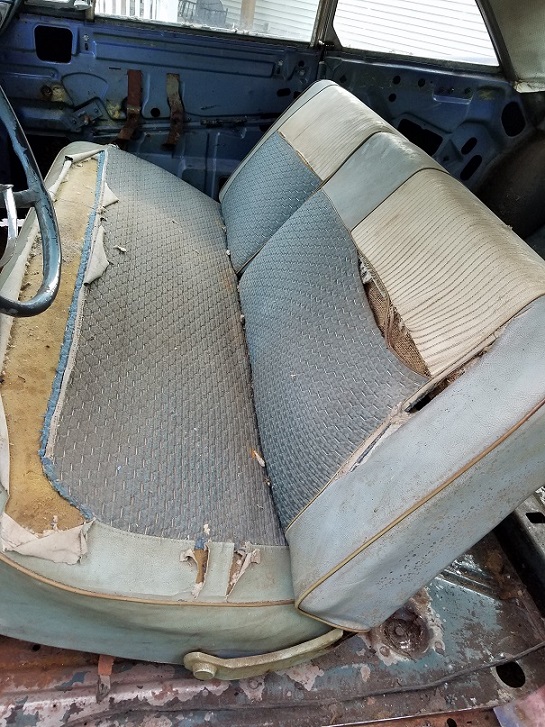
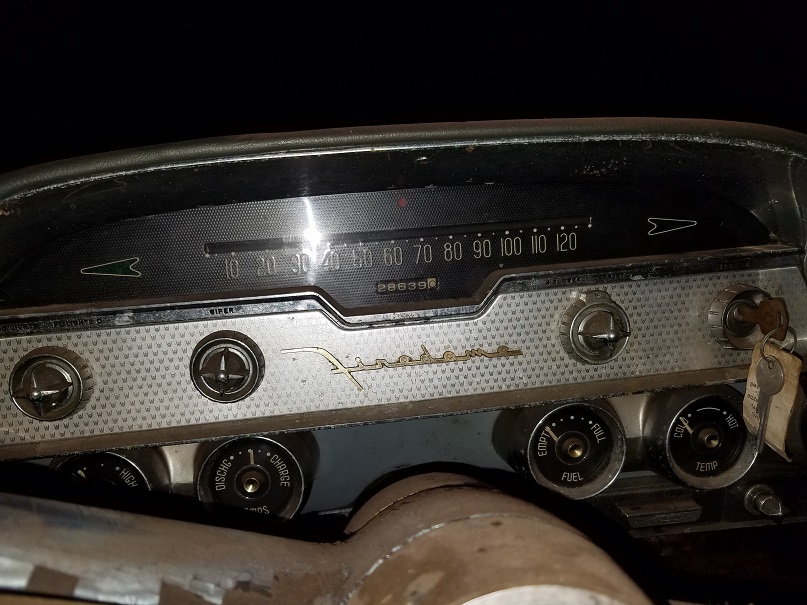
Location: Wild Wonderful | The inspectors mark, original trunk mat, original carpets and seat upholstery, original door panels. This is all new to me,
because I usually buy cars that have been rebuilt, recovered or just destroyed. The car is very interesting with all the
different things that I have found. I love this Heather Blue, it has a purple-ly tint to it.
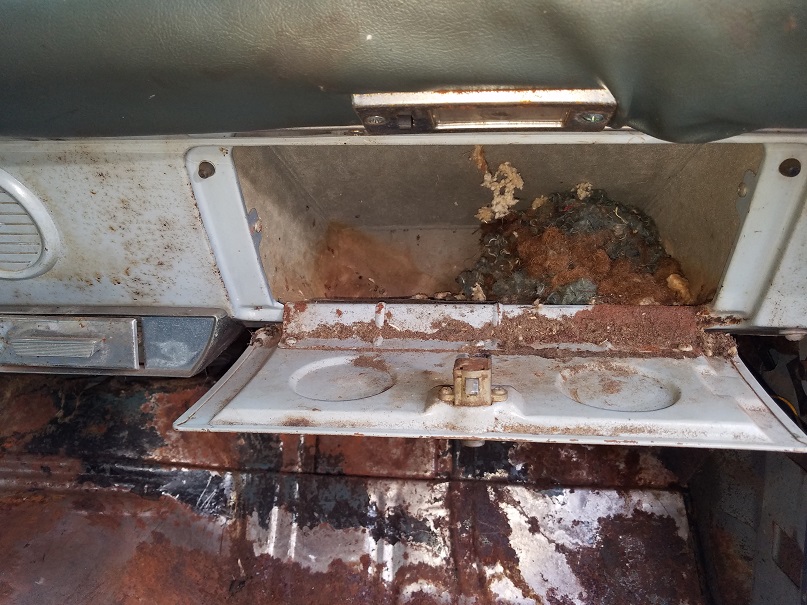
The passenger side floors are the worst, partly because there was a mouseketeer living in the glovebox, and they used
that side of the car as their toilet.
The trunk is nice. Someone bolted in a heavy duty plate on the inside, to hold up the gas tank supports. Nicely done.
 (20170507_184327 (2).jpg) (20170507_184327 (2).jpg)
 (20170507_184333 (2).jpg) (20170507_184333 (2).jpg)
 (20170507_184339 (2).jpg) (20170507_184339 (2).jpg)
 (20170507_184107 (2).jpg) (20170507_184107 (2).jpg)
 (20170507_184631.jpg) (20170507_184631.jpg)
 (20170507_192648 (2).jpg) (20170507_192648 (2).jpg)
 (20170507_225932 (3).jpg) (20170507_225932 (3).jpg)
Attachments
----------------
 20170507_184327 (2).jpg (242KB - 572 downloads) 20170507_184327 (2).jpg (242KB - 572 downloads)
 20170507_184333 (2).jpg (228KB - 590 downloads) 20170507_184333 (2).jpg (228KB - 590 downloads)
 20170507_184339 (2).jpg (246KB - 617 downloads) 20170507_184339 (2).jpg (246KB - 617 downloads)
 20170507_184107 (2).jpg (215KB - 564 downloads) 20170507_184107 (2).jpg (215KB - 564 downloads)
 20170507_184631.jpg (212KB - 592 downloads) 20170507_184631.jpg (212KB - 592 downloads)
 20170507_192648 (2).jpg (224KB - 543 downloads) 20170507_192648 (2).jpg (224KB - 543 downloads)
 20170507_225932 (3).jpg (186KB - 525 downloads) 20170507_225932 (3).jpg (186KB - 525 downloads)
|
|
| |
|
Veteran
Posts: 121

| Very nice find. Not sure if any of my parts will help, but I'm parting out a '57 4 door Windsor, and I have a lot of straight, rust free sheet metal. |
|
| |
|

Elite Veteran
Posts: 1112
 
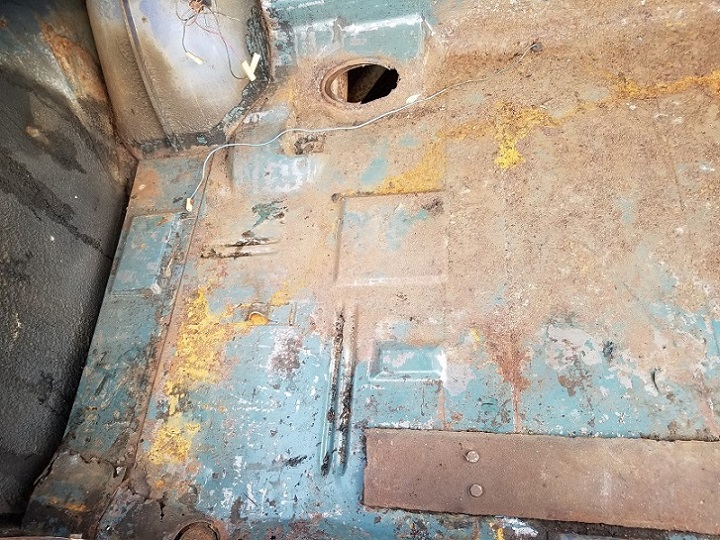
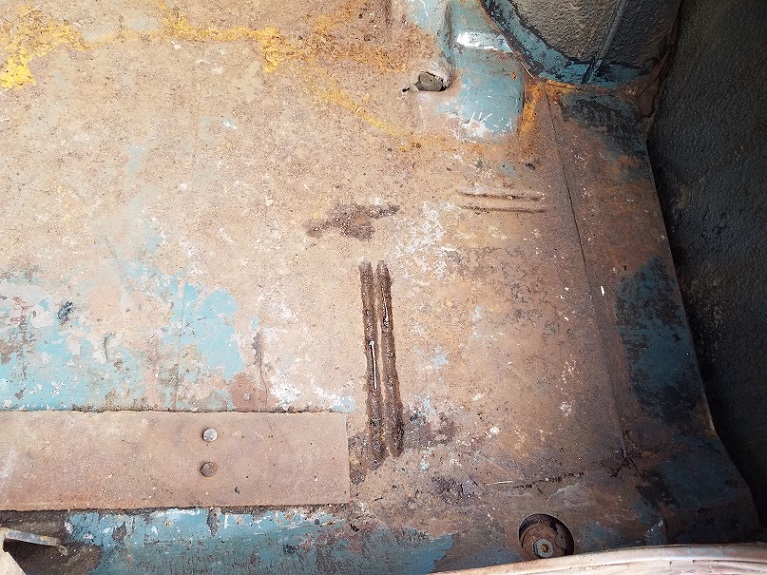
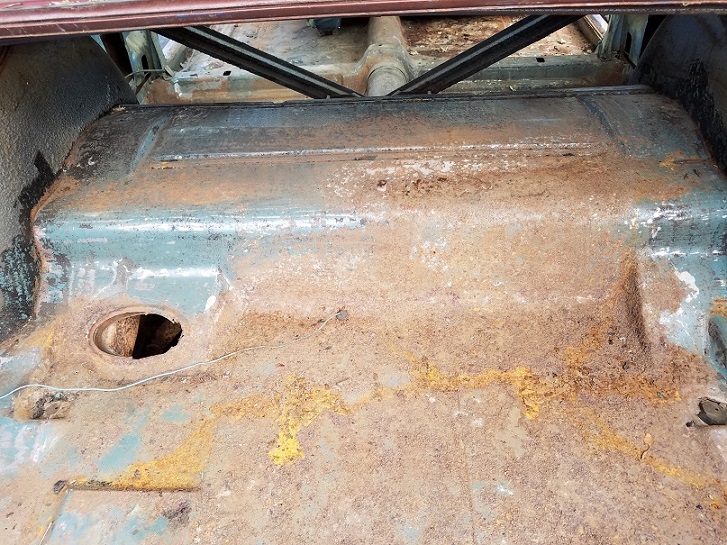
Location: Wild Wonderful | The trunk floor. Notice the plate for the gas tank supports.
 (20170507_184430 (2).jpg) (20170507_184430 (2).jpg)
 (20170507_184435 (2).jpg) (20170507_184435 (2).jpg)
 (20170507_184438 (2).jpg) (20170507_184438 (2).jpg)
Attachments
----------------
 20170507_184430 (2).jpg (237KB - 620 downloads) 20170507_184430 (2).jpg (237KB - 620 downloads)
 20170507_184435 (2).jpg (241KB - 596 downloads) 20170507_184435 (2).jpg (241KB - 596 downloads)
 20170507_184438 (2).jpg (244KB - 547 downloads) 20170507_184438 (2).jpg (244KB - 547 downloads)
|
|
| |
|
       
Location: The Mile High City | Good Heavens! What's in the glove box?  |
|
| |
|

Expert 5K+
Posts: 9666
      
Location: So. Cal | Have you seen the movie, "The Thing"? 
Edited by Powerflite 2017-05-14 5:44 PM
|
|
| |
|
Expert
Posts: 1737
    
Location: Hay Lakes, Alberta, Canada | Lol! One of my cars came with a similar "brace" installed in the trunk.
Please put your DeSoto back to the blue colour. 
|
|
| |
|

Elite Veteran
Posts: 1112
 
Location: Wild Wonderful | I gave my friendly Mouseketeers in the glove box an eviction notice.
I think that I will bevel the edges on that plate in the trunk, to make it more presentable.
And Yes, I will paint this car back to what it was, Heather Blue (or something close to it) with a white top.
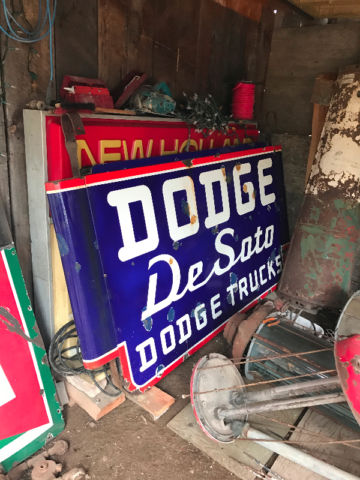
This is my newest sign. Not a reproduction, but the real thing, from a real dealership. I think it cool.
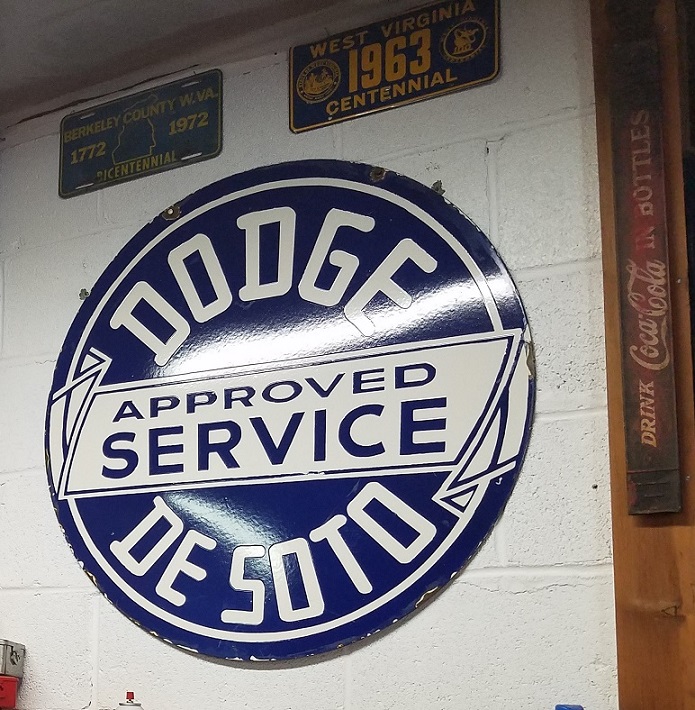 (DodgeDeSoto.jpg) (DodgeDeSoto.jpg)
Attachments
----------------
 DodgeDeSoto.jpg (243KB - 544 downloads) DodgeDeSoto.jpg (243KB - 544 downloads)
|
|
| |
|
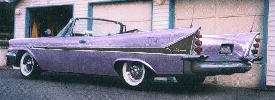
      
Location: Parts Unknown | Yes, that is Heather Blue. I saw it posted somewhere that someone
called it Haze Blue, but Heather Blue is much deeper and intense.
My DeSoto also has that inspector's stamp.
That data tag looks like the one that was on my Adventurer. About
as crunchy and useless as a saltine cracker ! Mine just crumbled into
unrecognizable flakes.
Hard to believe you have found TWO Spring Special coupes, and both
Firedomes at that ! What are the chances ? !!!
|
|
| |
|

Elite Veteran
Posts: 1112
 
Location: Wild Wonderful | The Data plate was so bad that I put some spray paint on it, to hold it together, before I removed it.
The Inspectors stamp is very nice. I need to preserve that.
Here is the inspectors signature. I have seen numbers and/or letters on this panel, but this is the
first time I have seen someone put five circles on it.
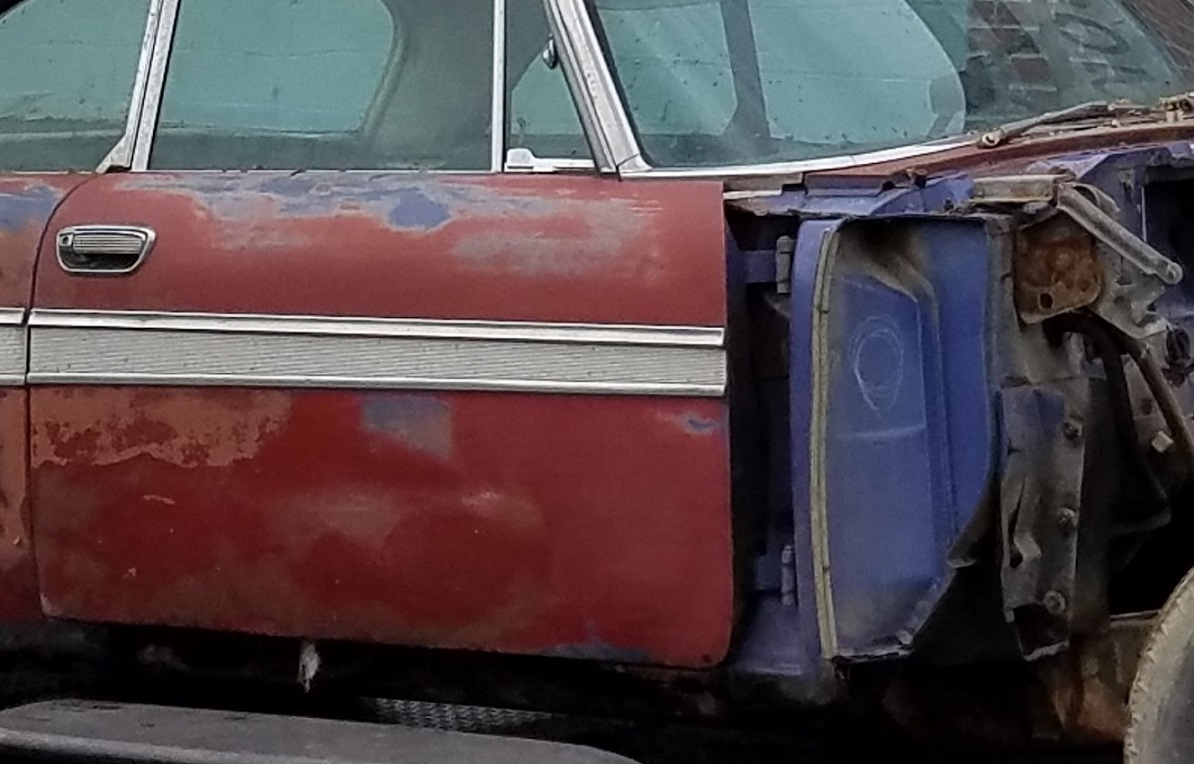 (20170506_105024 (2).jpg) (20170506_105024 (2).jpg)
Attachments
----------------
 20170506_105024 (2).jpg (232KB - 602 downloads) 20170506_105024 (2).jpg (232KB - 602 downloads)
|
|
| |
|

Elite Veteran
Posts: 1112
 
Location: Wild Wonderful | Doctor DeSoto - 2017-05-15 2:10 AM
Yes, that is Heather Blue. I saw it posted somewhere that someone
called it Haze Blue, but Heather Blue is much deeper and intense.
My DeSoto also has that inspector's stamp.
That data tag looks like the one that was on my Adventurer. About
as crunchy and useless as a saltine cracker ! Mine just crumbled into
unrecognizable flakes.
Hard to believe you have found TWO Spring Special coupes, and both
Firedomes at that ! What are the chances ? !!!
Yes, I remember our conversation about Heather and Haze, and weather or not it was a spring color.
I should have patted myself on the back, 'cause that's about the only time I was right about something.
This Spring Special just, kinda fell in my lap. I just happen to see a picture of it on Facebook, and the guy
said that he wanted to "unload it". I sent him a message, and he said make me an offer. We went back and
forth a couple of times, then finally agreed on a price. His wife said that was much better than the guy in
NH that only offered $800. I guess that I am the only fool out there, 'cause I paid MUCH more than that. |
|
| |
|

Elite Veteran
Posts: 1112
 
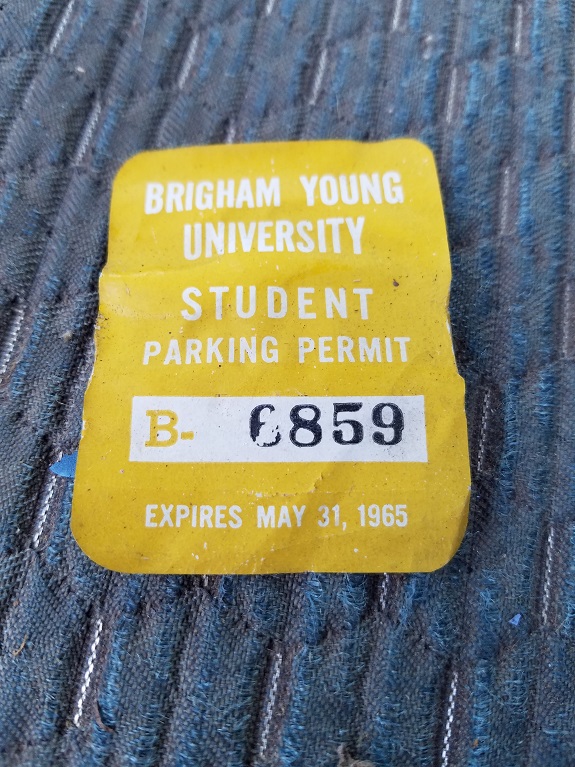
Location: Wild Wonderful | This car took a young man to college, from NY to UT, in the mid 60s. How many trips did he make?
 (BYU1965.jpg) (BYU1965.jpg)
Attachments
----------------
 BYU1965.jpg (231KB - 539 downloads) BYU1965.jpg (231KB - 539 downloads)
|
|
| |
|

Elite Veteran
Posts: 1112
 
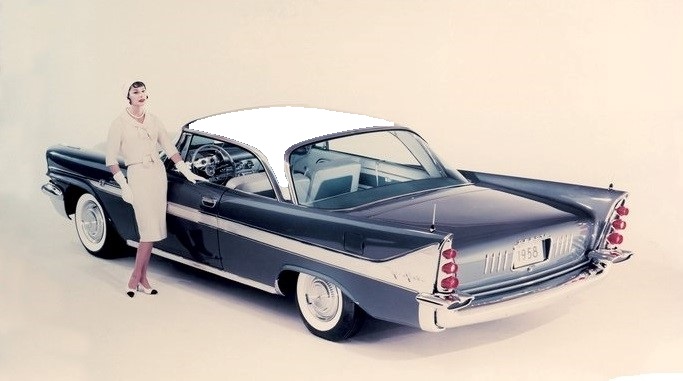
Location: Wild Wonderful | My version. Please forgive me, I don't have photoshop.
 (spring1958 (2).jpg) (spring1958 (2).jpg)
Attachments
----------------
 spring1958 (2).jpg (83KB - 578 downloads) spring1958 (2).jpg (83KB - 578 downloads)
|
|
| |
|

Expert 5K+
Posts: 9666
      
Location: So. Cal | You might go for a silver top to better match the side trim. Just a thought. |
|
| |
|

Elite Veteran
Posts: 1112
 
Location: Wild Wonderful | I actually like the tri-tone paint jobs, like the mid 50s.
And I think if the top is white, it will bring out the white wall tires more.
But yes, I see what you are saying.
To tell you the truth, I will be using a true (three stage) Pearl White that has a lot of silver in it. |
|
| |
|

Elite Veteran
Posts: 1112
 
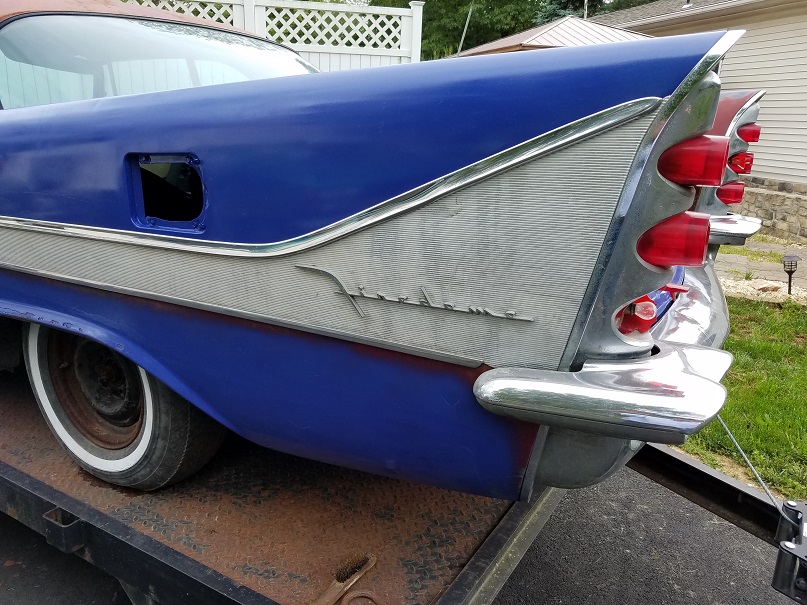
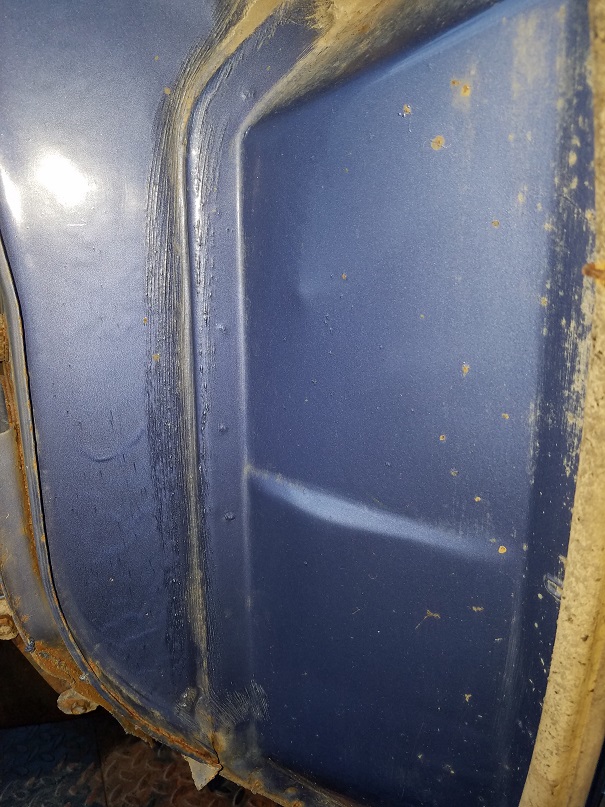
Location: Wild Wonderful | Royal Blue
 (royalblue.jpg) (royalblue.jpg)
 (firewallcolor.jpg) (firewallcolor.jpg)
Attachments
----------------
 royalblue.jpg (213KB - 551 downloads) royalblue.jpg (213KB - 551 downloads)
 firewallcolor.jpg (223KB - 591 downloads) firewallcolor.jpg (223KB - 591 downloads)
|
|
| |
|

Elite Veteran
Posts: 1112
 
Location: Wild Wonderful | Royal Blue 2
 (royalblue2.jpg) (royalblue2.jpg)
 (doorcolor.jpg) (doorcolor.jpg)
Attachments
----------------
 royalblue2.jpg (231KB - 531 downloads) royalblue2.jpg (231KB - 531 downloads)
 doorcolor.jpg (224KB - 595 downloads) doorcolor.jpg (224KB - 595 downloads)
|
|
| |
|
Expert
Posts: 3480
        
Location: Montreal, Canada | 58DeSoDodge59 - 2017-05-14 10:59 PM
I gave my friendly Mouseketeers in the glove box an eviction notice.
I think that I will bevel the edges on that plate in the trunk, to make it more presentable.
And Yes, I will paint this car back to what it was, Heather Blue (or something close to it) with a white top.
This is my newest sign. Not a reproduction, but the real thing, from a real dealership. I think it cool.
That is a wonderful sign! Probably from Canada, as the Dodge-DeSoto dealership association was typically Canadian (Dodge-DeSoto-Dodge Trucks and Chrysler-Plymouth-Fargo trucks). |
|
| |
|

Elite Veteran
Posts: 1112
 
Location: Wild Wonderful | soiouz - 2017-05-23 8:14 AM
58DeSoDodge59 - 2017-05-14 10:59 PM
I gave my friendly Mouseketeers in the glove box an eviction notice.
I think that I will bevel the edges on that plate in the trunk, to make it more presentable.
And Yes, I will paint this car back to what it was, Heather Blue (or something close to it) with a white top.
This is my newest sign. Not a reproduction, but the real thing, from a real dealership. I think it cool.
That is a wonderful sign! Probably from Canada, as the Dodge-DeSoto dealership association was typically Canadian (Dodge-DeSoto-Dodge Trucks and Chrysler-Plymouth-Fargo trucks ).
I was wondering why those signs are so rare. You hardly ever see them here in the states.
Do you see more of them up there?
I love that sign. It was only natural for me to get that particular style sign, because I
have a 59 DODGE and a 58 DESOTO, no Plymouths nor Chryslers. With the exception of
a 49 Chrysler Royal that my Grandfather gave to me. I was only thinking Forward Look.
|
|
| |
|

Expert
Posts: 3480
        
Location: Montreal, Canada | 58DeSoDodge59 - 2017-05-23 11:02 AM
soiouz - 2017-05-23 8:14 AM
58DeSoDodge59 - 2017-05-14 10:59 PM
I gave my friendly Mouseketeers in the glove box an eviction notice.
I think that I will bevel the edges on that plate in the trunk, to make it more presentable.
And Yes, I will paint this car back to what it was, Heather Blue (or something close to it) with a white top.
This is my newest sign. Not a reproduction, but the real thing, from a real dealership. I think it cool.
That is a wonderful sign! Probably from Canada, as the Dodge-DeSoto dealership association was typically Canadian (Dodge-DeSoto-Dodge Trucks and Chrysler-Plymouth-Fargo trucks ).
I was wondering why those signs are so rare. You hardly ever see them here in the states.
Do you see more of them up there?
I love that sign. It was only natural for me to get that particular style sign, because I
have a 59 DODGE and a 58 DESOTO, no Plymouths nor Chryslers. With the exception of
a 49 Chrysler Royal that my Grandfather gave to me. I was only thinking Forward Look.
They are rare here too, but I do see them from time to time, often at crazy high prices. Last one I saw was at a swap meet last summer and the guy wanted around 3500$.
I know of another one nailed to a barn in rural Quebec, but the guy does not want to sell, as it was a gift from one of his late friends and I respect that.
I you can afford it, this one is super nice too... but that price!!! Wow!
http://www.kijiji.ca/v-art-collectibles/banff-canmore/dodge-desoto-...
Edited by soiouz 2017-05-23 11:27 AM
|
|
| |
|

Elite Veteran
Posts: 1112
 
Location: Wild Wonderful | soiouz - 2017-05-23 11:21 AM
58DeSoDodge59 - 2017-05-23 11:02 AM
soiouz - 2017-05-23 8:14 AM
58DeSoDodge59 - 2017-05-14 10:59 PM
I gave my friendly Mouseketeers in the glove box an eviction notice.
I think that I will bevel the edges on that plate in the trunk, to make it more presentable.
And Yes, I will paint this car back to what it was, Heather Blue (or something close to it) with a white top.
This is my newest sign. Not a reproduction, but the real thing, from a real dealership. I think it cool.
That is a wonderful sign! Probably from Canada, as the Dodge-DeSoto dealership association was typically Canadian (Dodge-DeSoto-Dodge Trucks and Chrysler-Plymouth-Fargo trucks ).
I was wondering why those signs are so rare. You hardly ever see them here in the states.
Do you see more of them up there?
I love that sign. It was only natural for me to get that particular style sign, because I
have a 59 DODGE and a 58 DESOTO, no Plymouths nor Chryslers. With the exception of
a 49 Chrysler Royal that my Grandfather gave to me. I was only thinking Forward Look.
They are rare here too, but I do see them from time to time, often at crazy high prices. Last one I saw was at a swap meet last summer and the guy wanted around 3500$.
I know of another one nailed to a barn in rural Quebec, but the guy does not want to sell, as it was a gift from one of his late friends and I respect that.
Yeah, those 42 and 48 inch ones are big bucks. Mine is only 30 inches. It's all I can afford. |
|
| |
|

Elite Veteran
Posts: 1112
 
Location: Wild Wonderful | I would love to have that sign, but I can't afford it.
 ($_27 (1).JPG) ($_27 (1).JPG)
Attachments
----------------
 $_27 (1).JPG (49KB - 586 downloads) $_27 (1).JPG (49KB - 586 downloads)
|
|
| |
|

Elite Veteran
Posts: 1112
 
Location: Wild Wonderful | I touched up the lower part of this panel, with Royal Blue. It's pretty close to Heather Blue, but not close enough.
It needs some metallic and a little more purple.
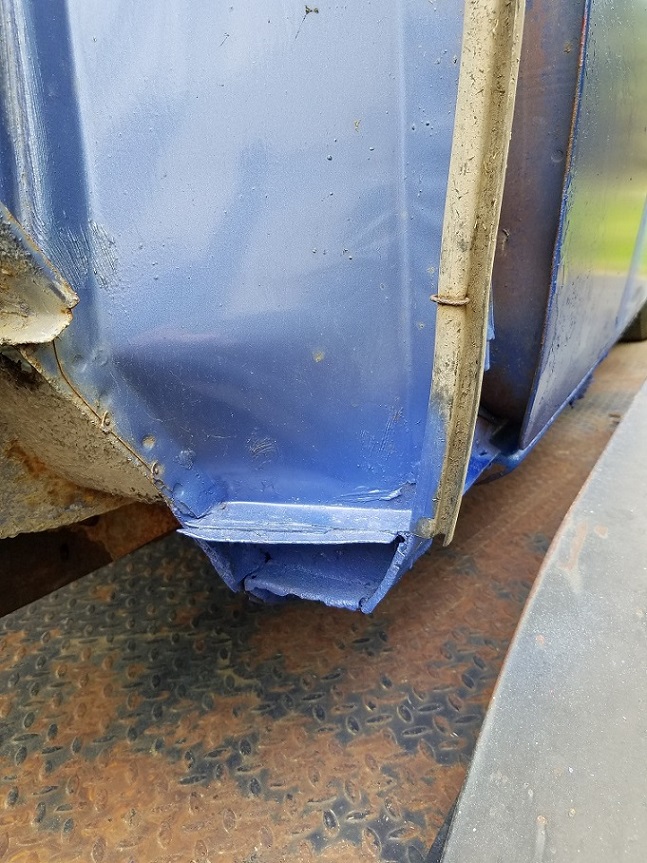 (touchup.jpg) (touchup.jpg)
Attachments
----------------
 touchup.jpg (247KB - 559 downloads) touchup.jpg (247KB - 559 downloads)
|
|
| |
|

Elite Veteran
Posts: 1112
 
Location: Wild Wonderful | From one trailer to another.
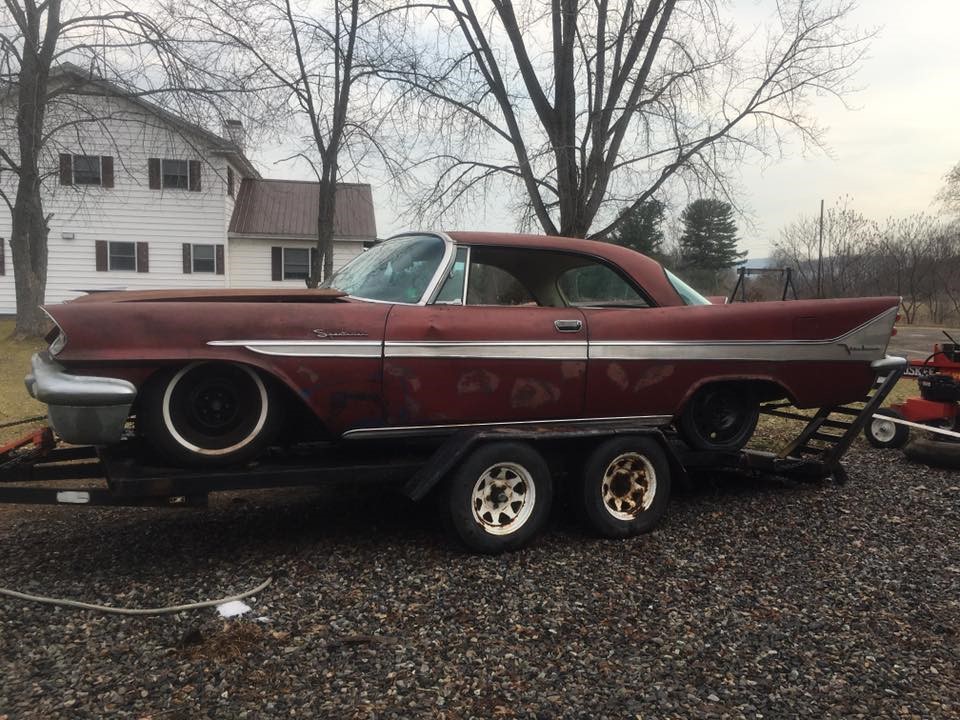 (beginning.jpg) (beginning.jpg)
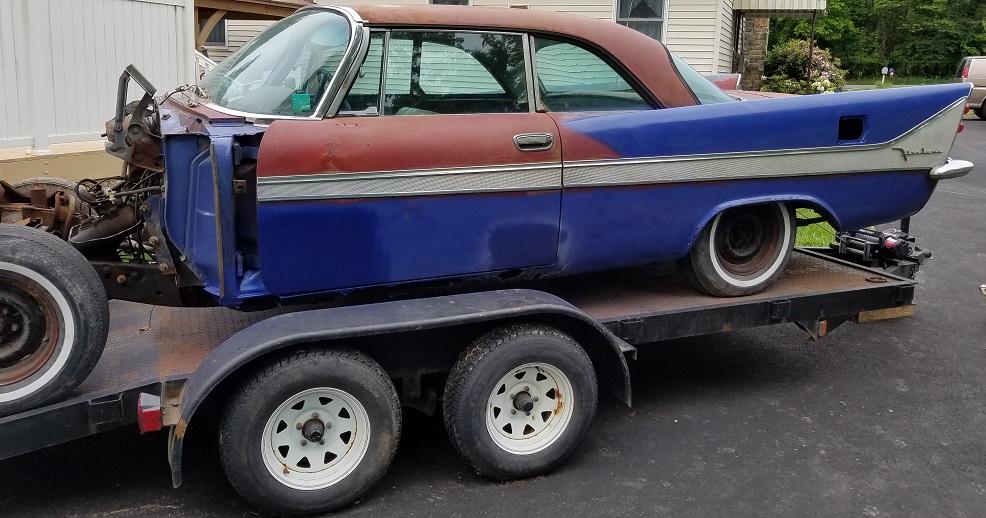 (begintwice.jpg) (begintwice.jpg)
Attachments
----------------
 beginning.jpg (234KB - 555 downloads) beginning.jpg (234KB - 555 downloads)
 begintwice.jpg (230KB - 600 downloads) begintwice.jpg (230KB - 600 downloads)
|
|
| |
|

Expert 5K+
Posts: 9666
      
Location: So. Cal | 58DeSoDodge59 - 2017-05-23 8:51 AM
I touched up the lower part of this panel, with Royal Blue. It's pretty close to Heather Blue, but not close enough.
It needs some metallic and a little more purple.
I agree. Not quite close enough. The purple hue really makes it unique. |
|
| |
|

Elite Veteran
Posts: 1112
 
Location: Wild Wonderful | Last inspection 1966.
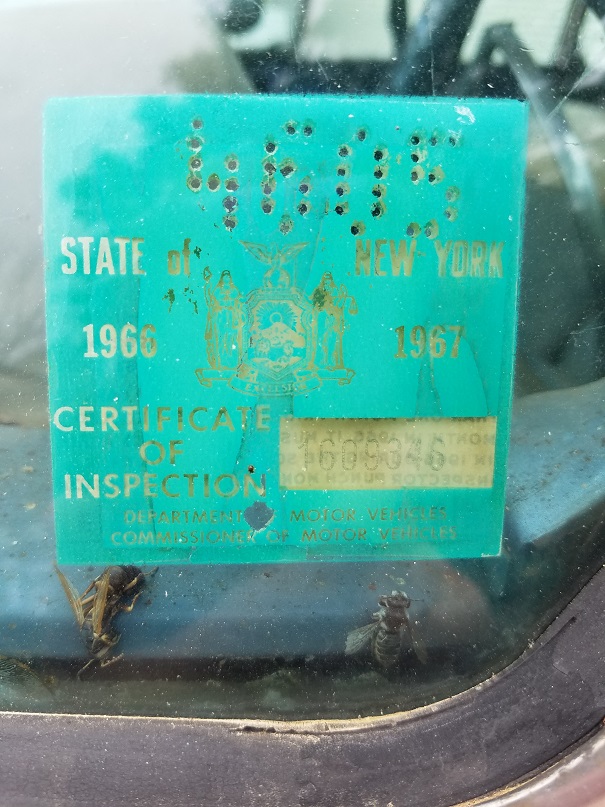 (inspect1966.jpg) (inspect1966.jpg)
Attachments
----------------
 inspect1966.jpg (212KB - 553 downloads) inspect1966.jpg (212KB - 553 downloads)
|
|
| |
|

Elite Veteran
Posts: 1112
 
Location: Wild Wonderful | I wish one of these was driveable.
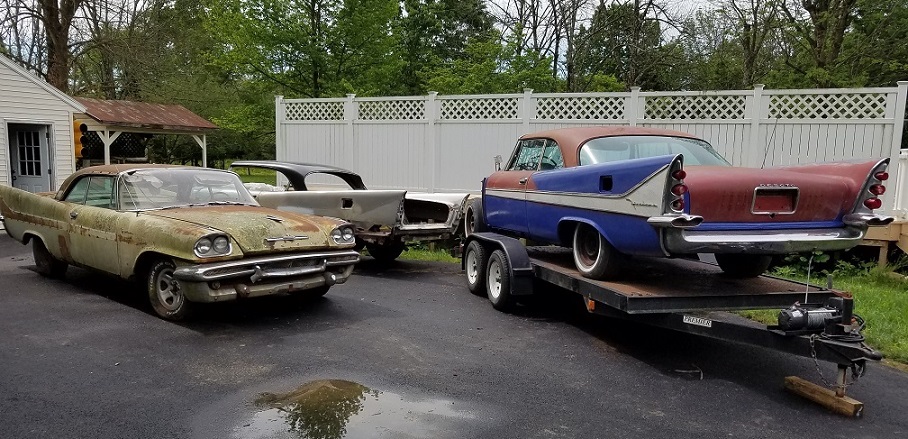 (358s.jpg) (358s.jpg)
Attachments
----------------
 358s.jpg (232KB - 553 downloads) 358s.jpg (232KB - 553 downloads)
|
|
| |
|
Expert 5K+
Posts: 5006

| showing off!  |
|
| |
|

Elite Veteran
Posts: 1112
 
Location: Wild Wonderful | Doctor DeSoto - 2017-05-15 2:10 AM
Yes, that is Heather Blue. I saw it posted somewhere that someone
called it Haze Blue, but Heather Blue is much deeper and intense.
My DeSoto also has that inspector's stamp.
That data tag looks like the one that was on my Adventurer. About
as crunchy and useless as a saltine cracker ! Mine just crumbled into
unrecognizable flakes.
Hard to believe you have found TWO Spring Special coupes, and both
Firedomes at that ! What are the chances ? !!!
Doc, does your inspector's stamp look exactly like mine? I am curious, because mine does not look like a
perfect circle, and I was wondering if they were made that way or is it just because they were moving fast
and just slapped it on there.? Double tapped, or hit crooked, whatever.?
Has anyone ever seen one of these stampers?
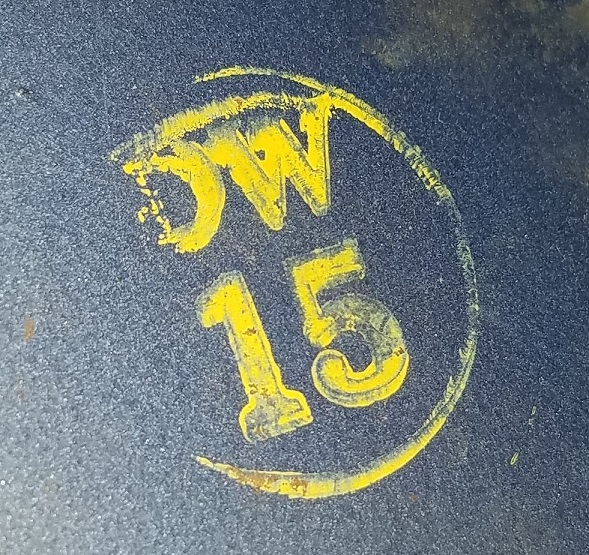 (inspector15.jpg) (inspector15.jpg)
Attachments
----------------
 inspector15.jpg (239KB - 510 downloads) inspector15.jpg (239KB - 510 downloads)
|
|
| |
|

Elite Veteran
Posts: 1112
 
Location: Wild Wonderful | mikes2nd - 2017-05-30 7:09 AM
showing off! :)
Just wishing all/or one of them were driveable. ' can't wait.  |
|
| |
|

Elite Veteran
Posts: 1112
 
Location: Wild Wonderful | Bumper extensions and exhaust ports.
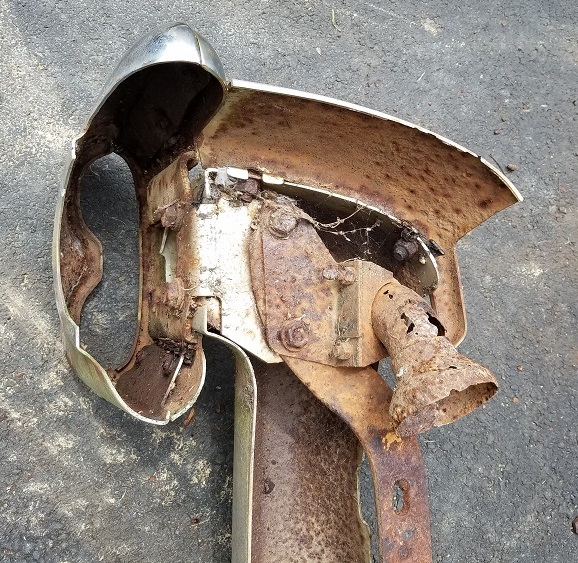 (extensions.jpg) (extensions.jpg)
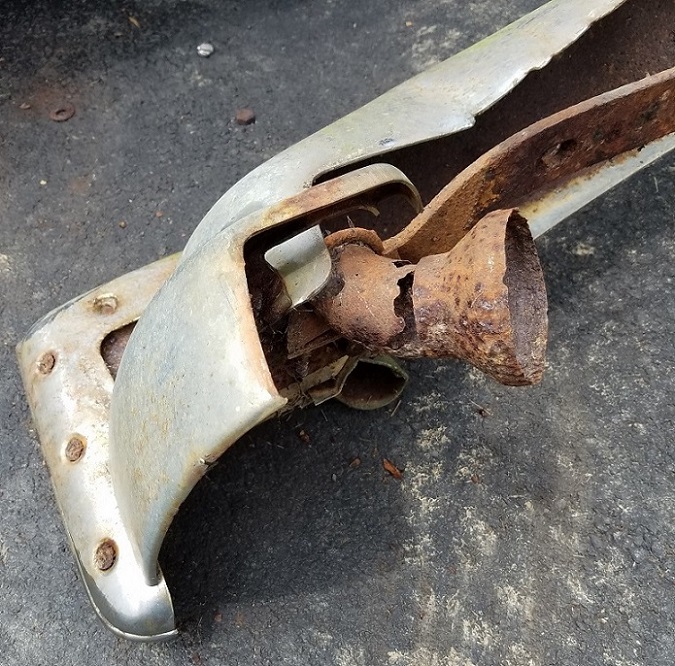 (extensions2.jpg) (extensions2.jpg)
 (extensions3.jpg) (extensions3.jpg)
Attachments
----------------
 extensions.jpg (230KB - 500 downloads) extensions.jpg (230KB - 500 downloads)
 extensions2.jpg (243KB - 650 downloads) extensions2.jpg (243KB - 650 downloads)
 extensions3.jpg (209KB - 528 downloads) extensions3.jpg (209KB - 528 downloads)
|
|
| |
|

      
Location: Parts Unknown | 58DeSoDodge59 - 2017-06-01 2:38 PM
Doc, does your inspector's stamp look exactly like mine? I am curious, because mine does not look like a
perfect circle, and I was wondering if they were made that way or is it just because they were moving fast
and just slapped it on there.? Double tapped, or hit crooked, whatever.?
Has anyone ever seen one of these stampers?
==================================
I will have a look and report back. As I recall, it was identical (maybe
the number was different ???)
The stamps were hand-carved from potatoes. My Kindergarten class
made some like this 50 years ago. 
|
|
| |
|

Elite Veteran
Posts: 1112
 
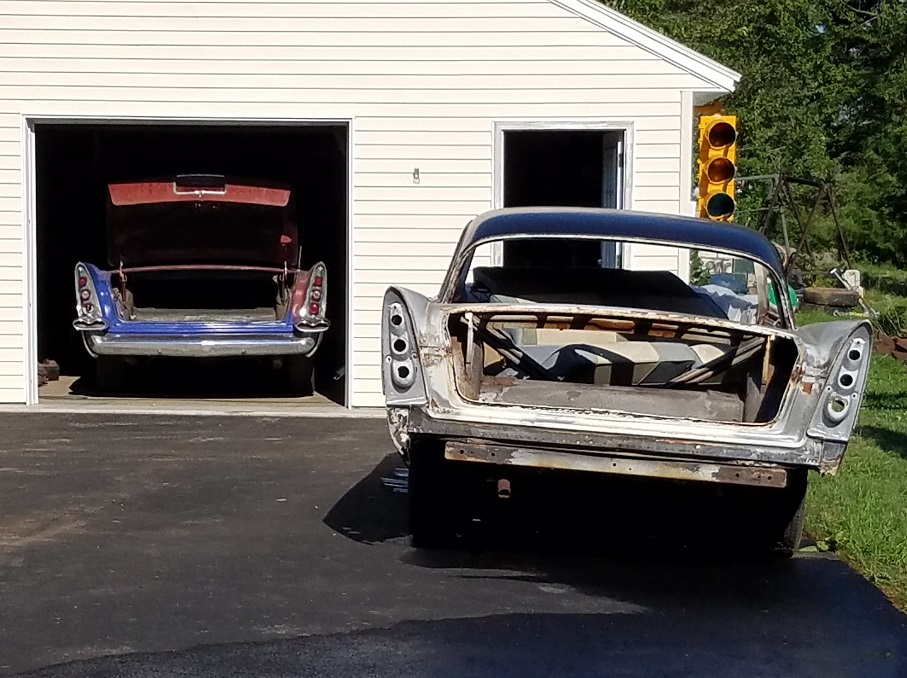
Location: Wild Wonderful | Well after two months I finally got the car in the garage. I had to cut down 28 dead trees in my back yard.
They got some kind of bug in them, so all my Ash trees died. Now I have 28 stumps to deal with.
 (inthegarage.jpg) (inthegarage.jpg)
Attachments
----------------
 inthegarage.jpg (224KB - 547 downloads) inthegarage.jpg (224KB - 547 downloads)
|
|
| |
|

Expert 5K+
Posts: 9666
      
Location: So. Cal | That's a lot of firewood!  It would be great if you had a wood burning stove to heat up the garage during the winter. Looks good in there. It would be great if you had a wood burning stove to heat up the garage during the winter. Looks good in there. |
|
| |
|

Elite Veteran
Posts: 1112
 
Location: Wild Wonderful | I gave all the wood away. I have a pellet stove in the garage. Still burning the scrap.
This car was in such good, original, condition that I was only going to do the minimum to it.
But it stinks so bad with rat pee. It is in the carpet, seats, glove box, headliner and even in
the firewall insulation. I have to replace it all.
|
|
| |
|

Elite Veteran
Posts: 1112
 
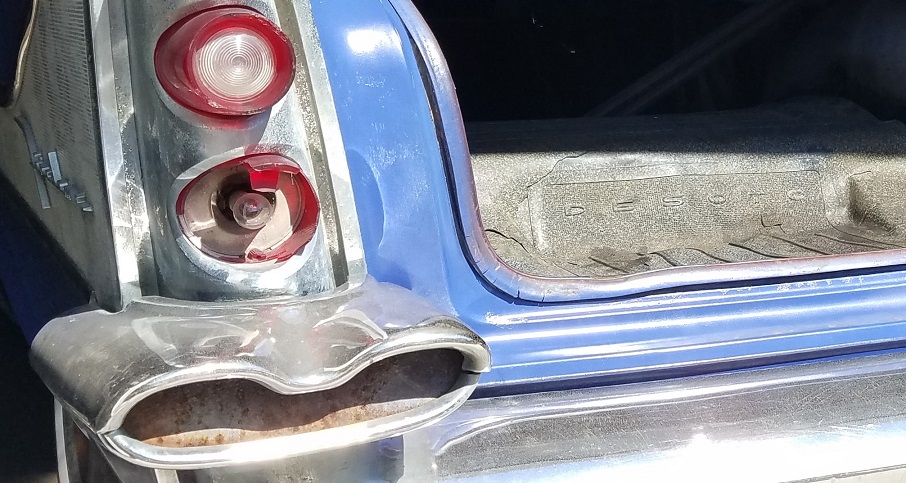
Location: Wild Wonderful | DESOTO
 (DESOTO.jpg) (DESOTO.jpg)
Attachments
----------------
 DESOTO.jpg (215KB - 506 downloads) DESOTO.jpg (215KB - 506 downloads)
|
|
| |
|
Expert 5K+
Posts: 5006

| emerald ash borer beetle, they killed all the ash trees in ohio... from China. Nothing can stop them.
You shouldn't move ash borer wood that's infested beyond your local quarantine area. More than likely your already wiped out.
I wonder if its okay to replant ash trees after an area is wiped out?
http://emeraldashborer.info/ |
|
| |
|

Elite Veteran
Posts: 1112
 
Location: Wild Wonderful | Wow. Look at the paint job on that bug. Emerald Ash Borer
 (M1242-7-lg.jpg) (M1242-7-lg.jpg)
Attachments
----------------
 M1242-7-lg.jpg (22KB - 472 downloads) M1242-7-lg.jpg (22KB - 472 downloads)
|
|
| |
|

Elite Veteran
Posts: 1112
 
Location: Wild Wonderful | 58DeSoDodge59 - 2017-08-02 11:24 PM
I gave all the wood away. I have a pellet stove in the garage. Still burning the scrap.
This car was in such good, original, condition that I was only going to do the minimum to it.
But it stinks so bad with rat pee. It is in the carpet, seats, glove box, headliner and even in
the firewall insulation. I have to replace it all.
The rats also made a nest in the frame. I have a big rust hole in the drivers side, rear section. |
|
| |
|

Elite Veteran
Posts: 1112
 
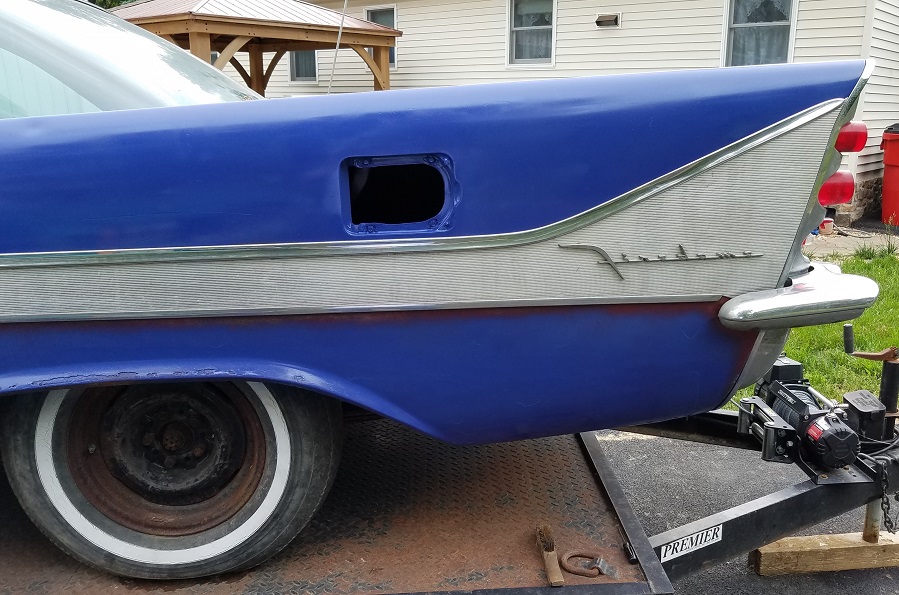
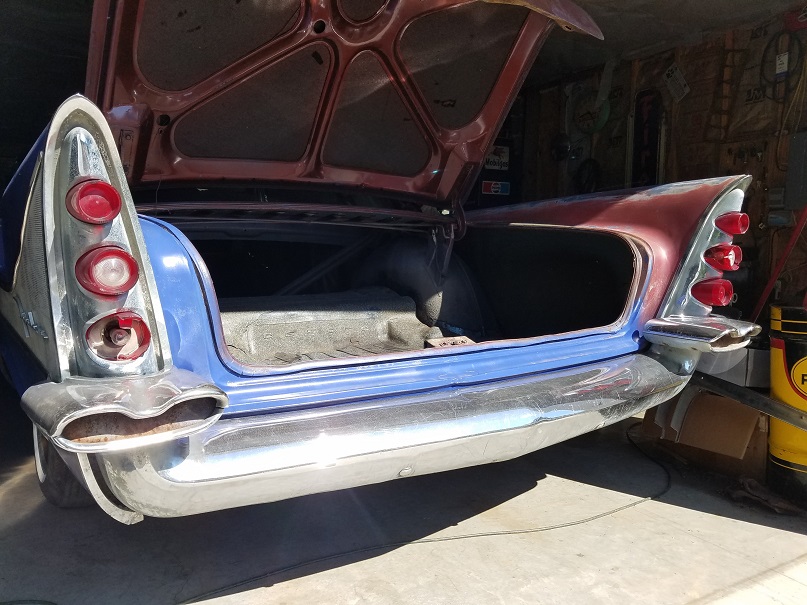
Location: Wild Wonderful | Whoever painted this car Bronze, did a real detailed job. They painted the door frames and inside the trunk.
 (58fins.jpg) (58fins.jpg)
Attachments
----------------
 58fins.jpg (200KB - 376 downloads) 58fins.jpg (200KB - 376 downloads)
|
|
| |
|
Elite Veteran
Posts: 1155
   
Location: somerville mass | your a desoto restorer sir? seems a lot of guys here
obsessed with desotos! dont forget the 1958 saleathon!
also... when cutting down trees , look for bees! and
beetles in spring special trim! (ah s**t - beetles! ) |
|
| |
|

Elite Veteran
Posts: 1112
 
Location: Wild Wonderful | moparsteve - 2017-08-03 10:01 AM
your a desoto restorer sir? seems a lot of guys here
obsessed with desotos! dont forget the 1958 saleathon!
also... when cutting down trees , look for bees! and
beetles in spring special trim! (ah s**t - beetles! )
After restoring my 59 Dodge, I wanted something even more rare, so I went with the 58 DeSoto.
If you have a 58 DeSoto, then you know about the Beyer Motors Sell-a-thon.
I picked up an old tire the other day, and gave it a toss. A swarm of bees came out of it. I got away clean, but I
must have just missed grabbing a hold of that nest.
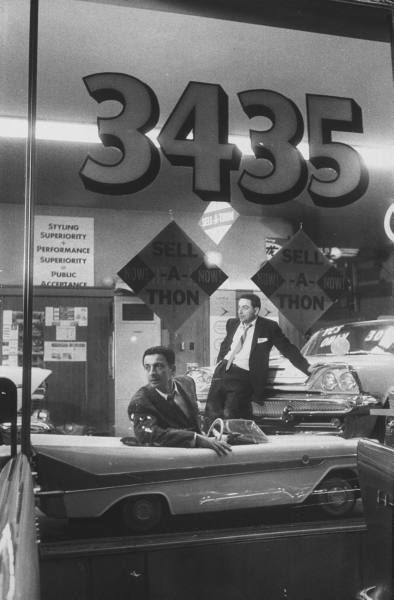 (sell-a-thon.jpg) (sell-a-thon.jpg)
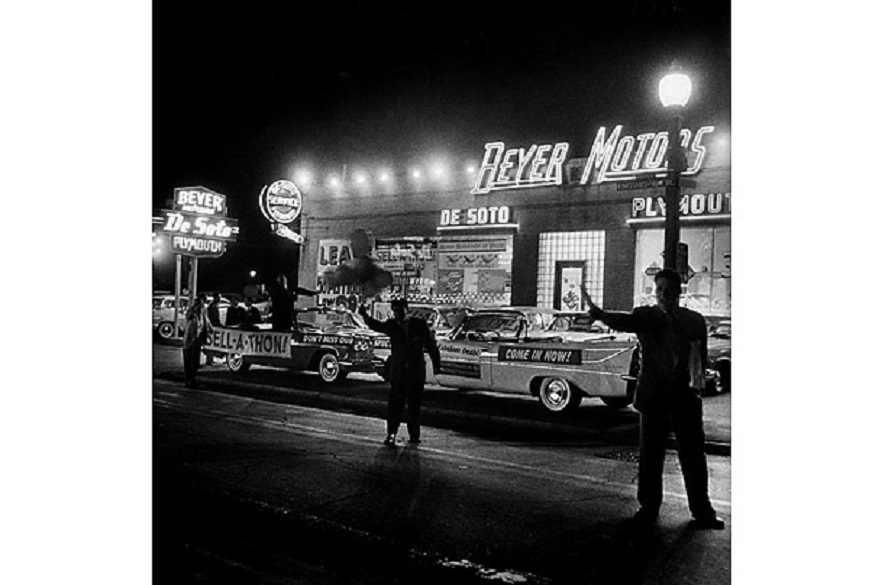 (sell-a-thon2.jpg) (sell-a-thon2.jpg)
Attachments
----------------
 sell-a-thon.jpg (31KB - 367 downloads) sell-a-thon.jpg (31KB - 367 downloads)
 sell-a-thon2.jpg (105KB - 401 downloads) sell-a-thon2.jpg (105KB - 401 downloads)
|
|
| |
|
Elite Veteran
Posts: 1155
   
Location: somerville mass | those guys would have made anyone a sweet deal on
a 58 firefliite or even an adventurer conv in the middle
of a recession... the eisehower recesion - which ended
in 1959. and they would have taken special orders -
hi - i noticed the ad on the new regal lancer - id like
one - but i want a convertible! |
|
| |
|

Expert
Posts: 3967
        
Location: DFW, TX | Are you looking for all the gas fill parts (door, filler tube, seals, etc)? I have some from a '57 Chrysler that are probably the same. I have a gas tank and straps, too. But I'm not sure I can mail a gas tank! :D
I like the color on your '58, what a cool car... |
|
| |
|

Elite Veteran
Posts: 1112
 
Location: Wild Wonderful | 57burb - 2017-08-04 12:40 AM
Are you looking for all the gas fill parts (door, filler tube, seals, etc)? I have some from a '57 Chrysler that are probably the same. I have a gas tank and straps, too. But I'm not sure I can mail a gas tank! :D
I like the color on your '58, what a cool car...
No Sir. I have all parts of this car. Thank you. |
|
| |
|

Elite Veteran
Posts: 1112
 
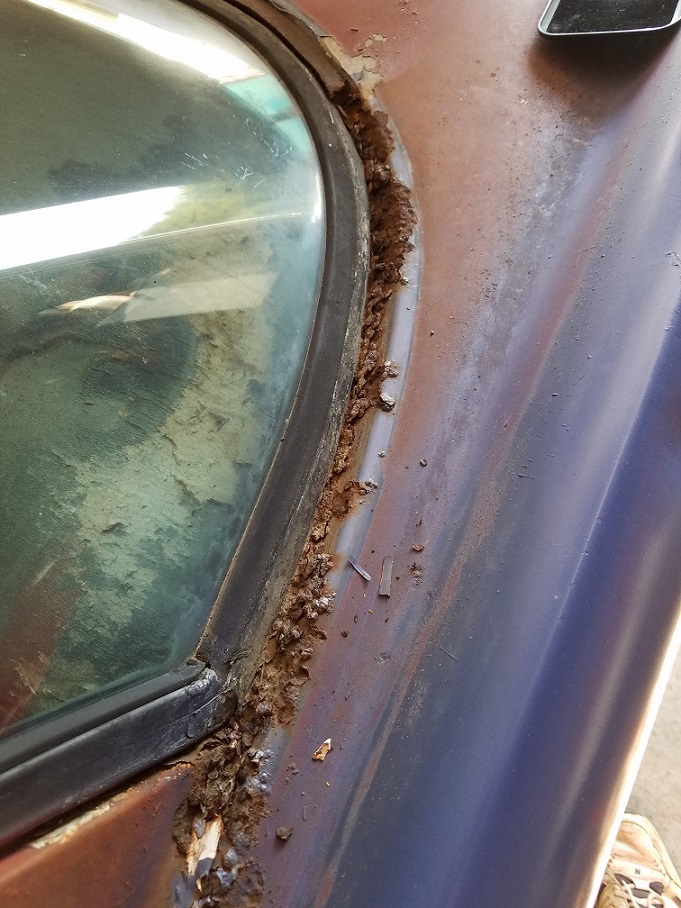
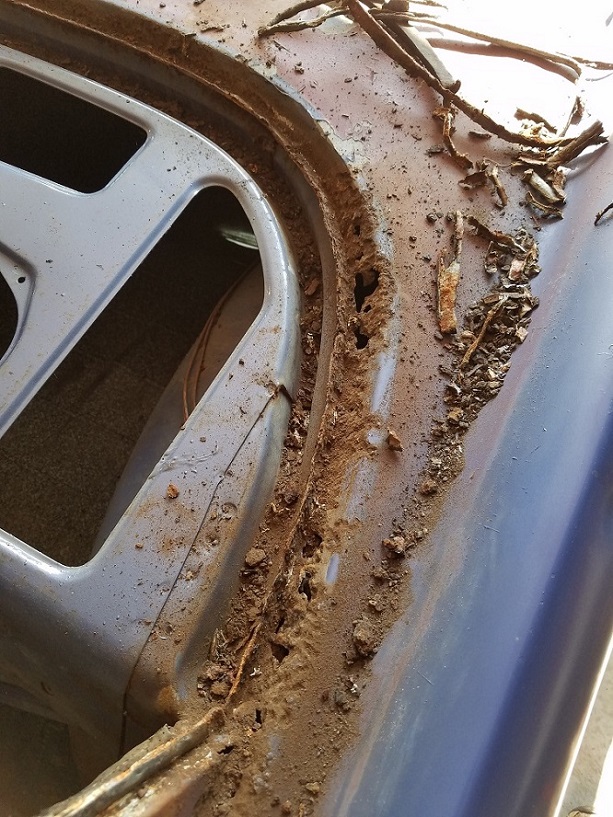
Location: Wild Wonderful | What I did to my Forward Look today. I noticed that the back window was not seated all the way, so
I removed the glass and cleaned out the track. This is what I was left with.
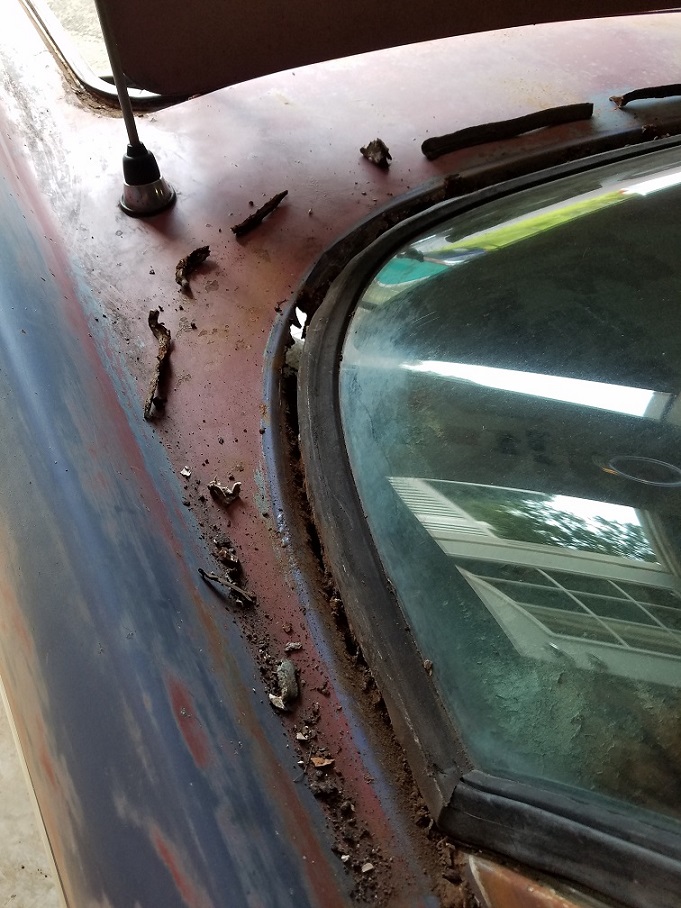 (withglass1.jpg) (withglass1.jpg)
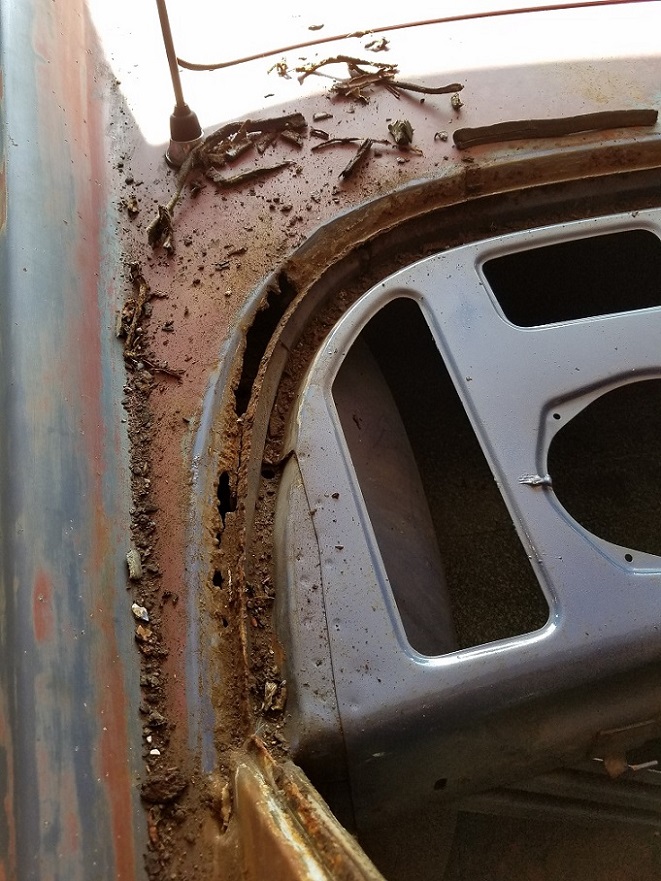 (withoutglass1.jpg) (withoutglass1.jpg)
 (withglass2.jpg) (withglass2.jpg)
 (withoutglass2.jpg) (withoutglass2.jpg)
Attachments
----------------
 withglass1.jpg (235KB - 386 downloads) withglass1.jpg (235KB - 386 downloads)
 withoutglass1.jpg (242KB - 372 downloads) withoutglass1.jpg (242KB - 372 downloads)
 withglass2.jpg (239KB - 358 downloads) withglass2.jpg (239KB - 358 downloads)
 withoutglass2.jpg (246KB - 346 downloads) withoutglass2.jpg (246KB - 346 downloads)
|
|
| |
|

Expert 5K+
Posts: 9902
       
Location: Lower Mainland BC | Oops.
 
Edited by 56D500boy 2017-08-05 8:08 PM
|
|
| |
|

Expert 5K+
Posts: 9902
       
Location: Lower Mainland BC | In fact you might want to place an order with me for this T-shirt:
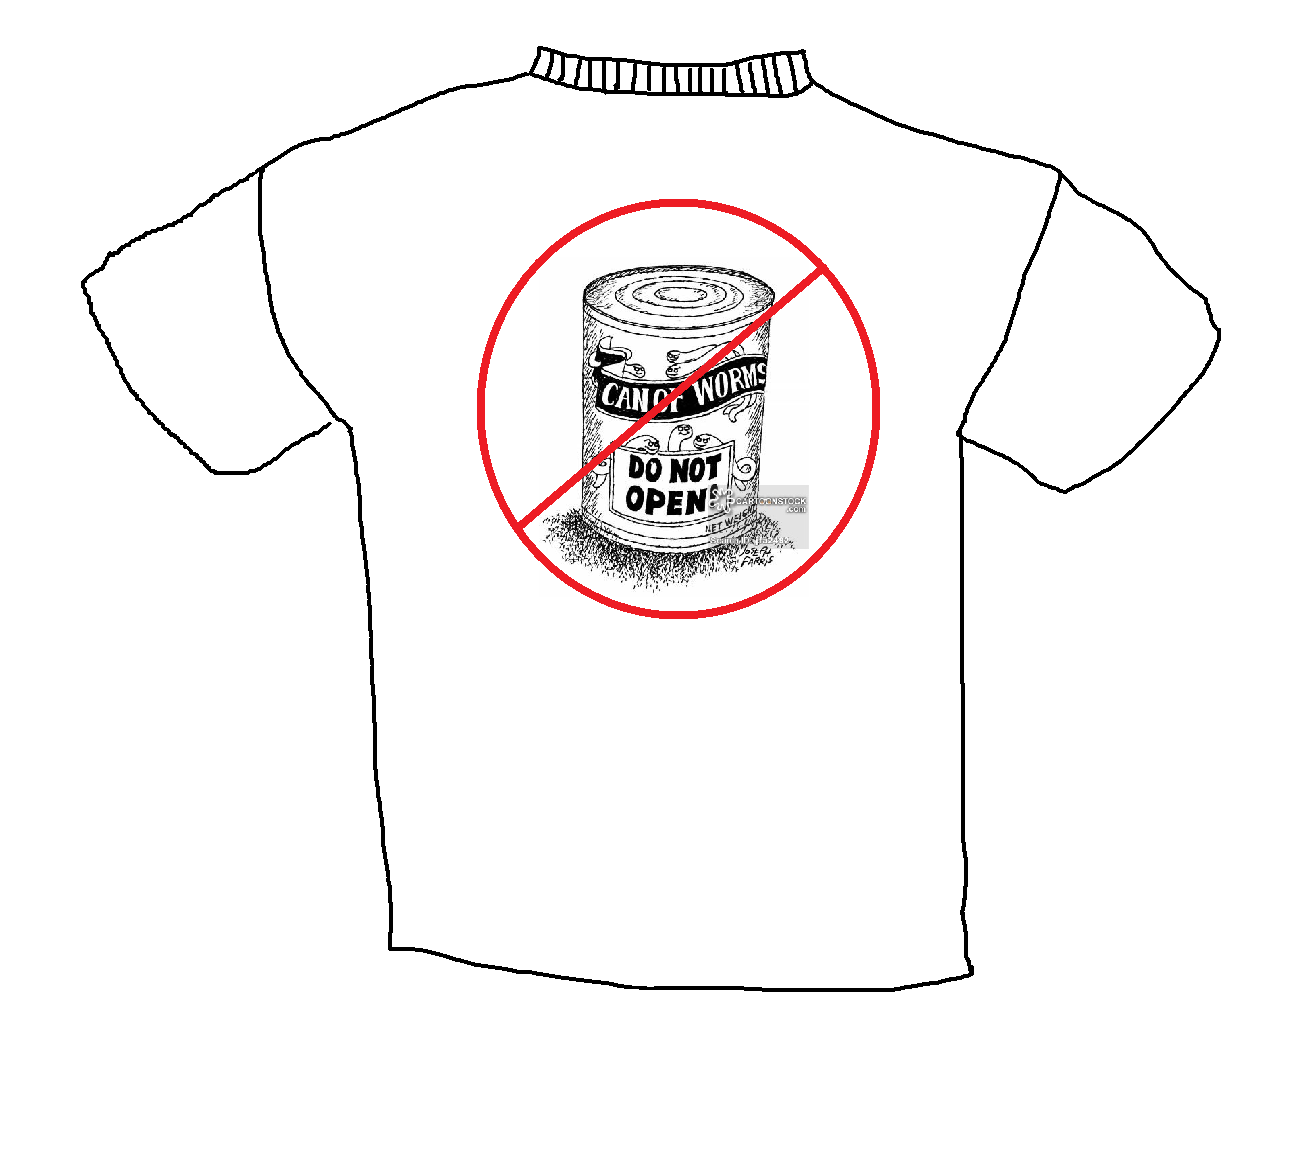 (CarRestorationDoNOTOpenThatCanOfWormsTShirt.png) (CarRestorationDoNOTOpenThatCanOfWormsTShirt.png)
Attachments
----------------
 CarRestorationDoNOTOpenThatCanOfWormsTShirt.png (132KB - 374 downloads) CarRestorationDoNOTOpenThatCanOfWormsTShirt.png (132KB - 374 downloads)
|
|
| |
|

Expert 5K+
Posts: 9666
      
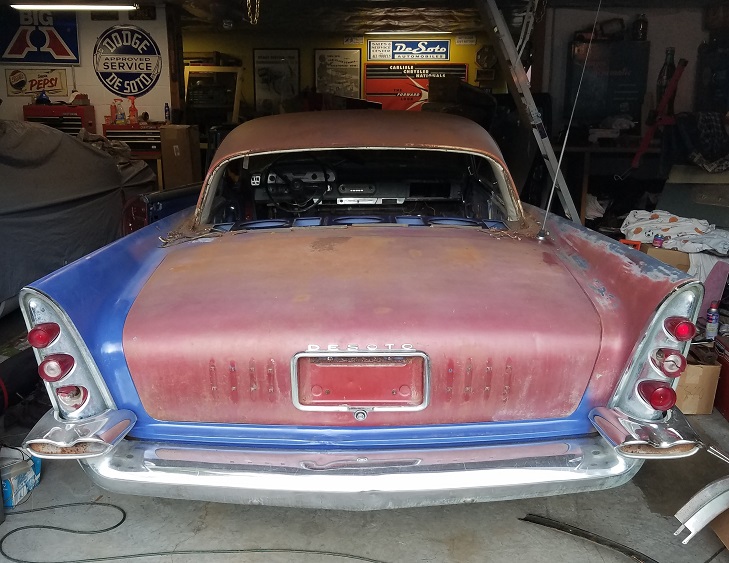
Location: So. Cal | Not too bad. Better than my New Yorker. I'm sure you can patch that up in no time. Is that an original power antenna? If so, can you show a picture of the switch for it on the dash? |
|
| |
|

Elite Veteran
Posts: 1112
 
Location: Wild Wonderful | 56D500boy - 2017-08-05 8:21 PM
In fact you might want to place an order with me for this T-shirt:
LOL I think everyone that restores cars is gonna need one of those shirts.
|
|
| |
|

Elite Veteran
Posts: 1112
 
Location: Wild Wonderful | Powerflite - 2017-08-05 10:06 PM
Not too bad. Better than my New Yorker. I'm sure you can patch that up in no time. Is that an original power antenna? If so, can you show a picture of the switch for it on the dash?
No that's not too bad. I think I can handle it.
Sorry, That is not a power antenna.
 (singleantenna.jpg) (singleantenna.jpg)
Attachments
----------------
 singleantenna.jpg (183KB - 342 downloads) singleantenna.jpg (183KB - 342 downloads)
|
|
| |
|

Elite Veteran
Posts: 1112
 
Location: Wild Wonderful | First of all, Thanks again Doc for saving those trunk lid bars a long time ago. They actually helped 2 cars.
I have one left over.
Does anyone know if these are the correct clips to hold those bars on the trunk? I noticed that all the
bars were at different levels. I figure that driving vibration makes them fall down, and possibly fall off.
How does one keep them straight?
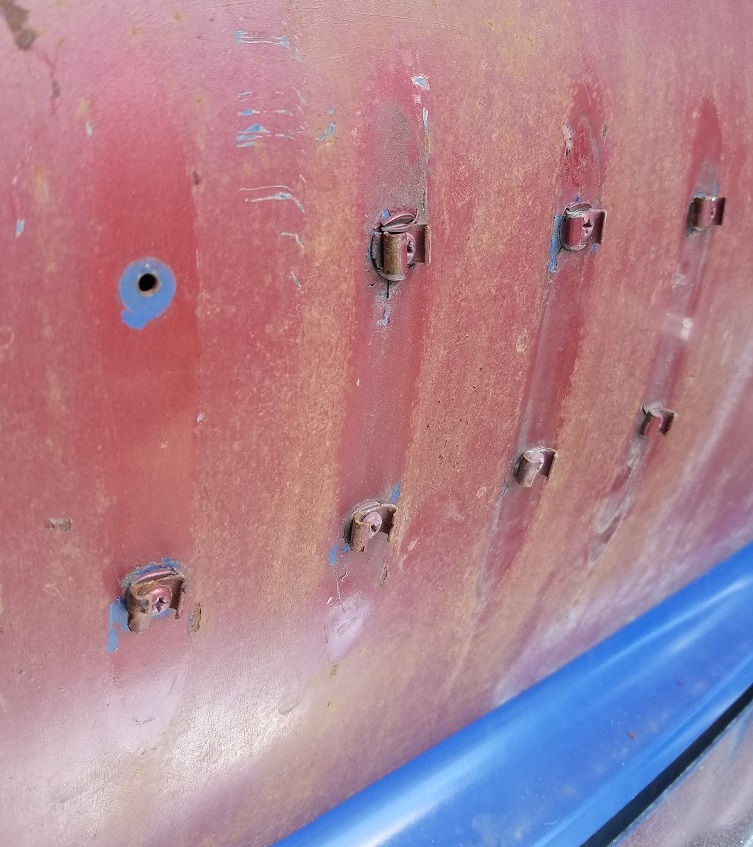 (trunkbarclips.jpg) (trunkbarclips.jpg)
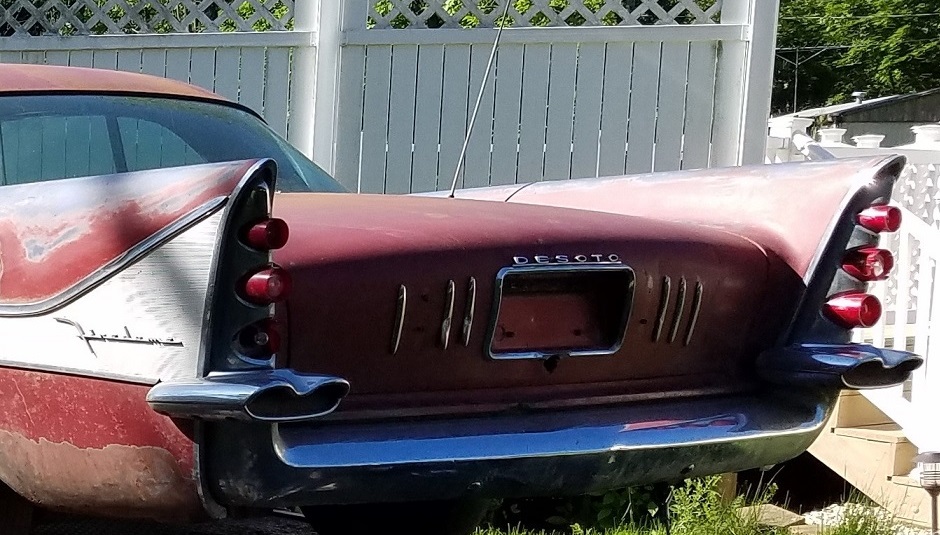 (trunkbars.jpg) (trunkbars.jpg)
Attachments
----------------
 trunkbarclips.jpg (237KB - 365 downloads) trunkbarclips.jpg (237KB - 365 downloads)
 trunkbars.jpg (229KB - 360 downloads) trunkbars.jpg (229KB - 360 downloads)
|
|
| |
|

Elite Veteran
Posts: 1112
 
Location: Wild Wonderful | This windshield seal must be a common problem, I have seen it a few times.
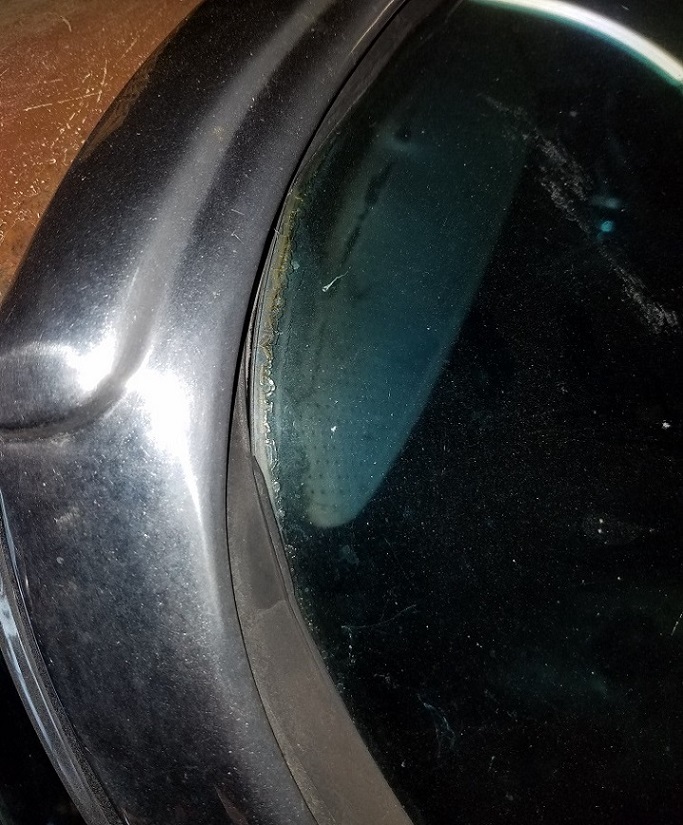 (seal.jpg) (seal.jpg)
Attachments
----------------
 seal.jpg (232KB - 365 downloads) seal.jpg (232KB - 365 downloads)
|
|
| |
|

Elite Veteran
Posts: 1112
 
Location: Wild Wonderful | Just for fun, I sanded the red off part of the top, just to get an idea of what it would look like with a white top.
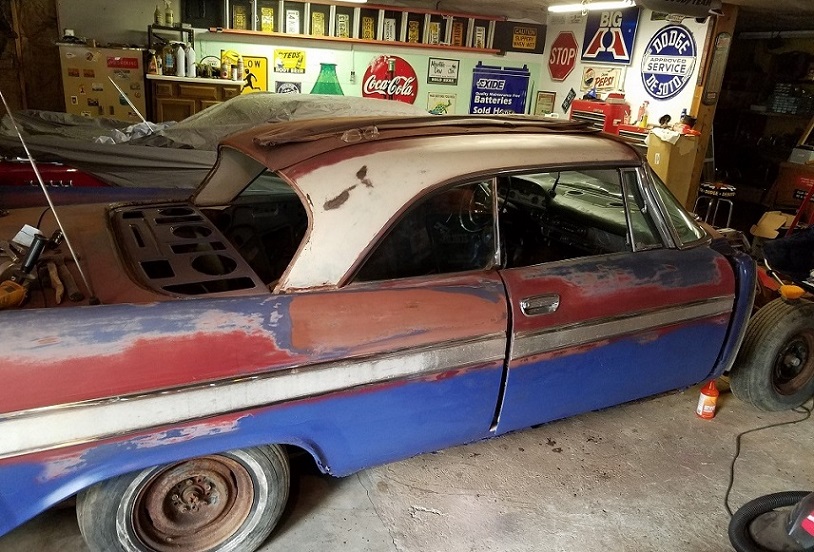 (whitetop.jpg) (whitetop.jpg)
Attachments
----------------
 whitetop.jpg (228KB - 366 downloads) whitetop.jpg (228KB - 366 downloads)
|
|
| |
|

Expert
Posts: 3967
        
Location: DFW, TX | 58DeSoDodge59 - 2017-08-08 2:12 PM
First of all, Thanks again Doc for saving those trunk lid bars a long time ago. They actually helped 2 cars.
I have one left over.
Does anyone know if these are the correct clips to hold those bars on the trunk? I noticed that all the
bars were at different levels. I figure that driving vibration makes them fall down, and possibly fall off.
How does one keep them straight?
The factory and dealer only cared about them looking good until the paperwork was signed. 
I suppose the clips were plenty strong to hold them in place when new. Over time, they will corrode and weaken, and then if the bars are removed that weakens the clips even more.
Maybe it makes sense to add a hole, near the top of where you want each bar to be, and add a clip there. That way even if all the clips are not perfectly tight, each bar will maintain its position vertically. |
|
| |
|

Elite Veteran
Posts: 1112
 
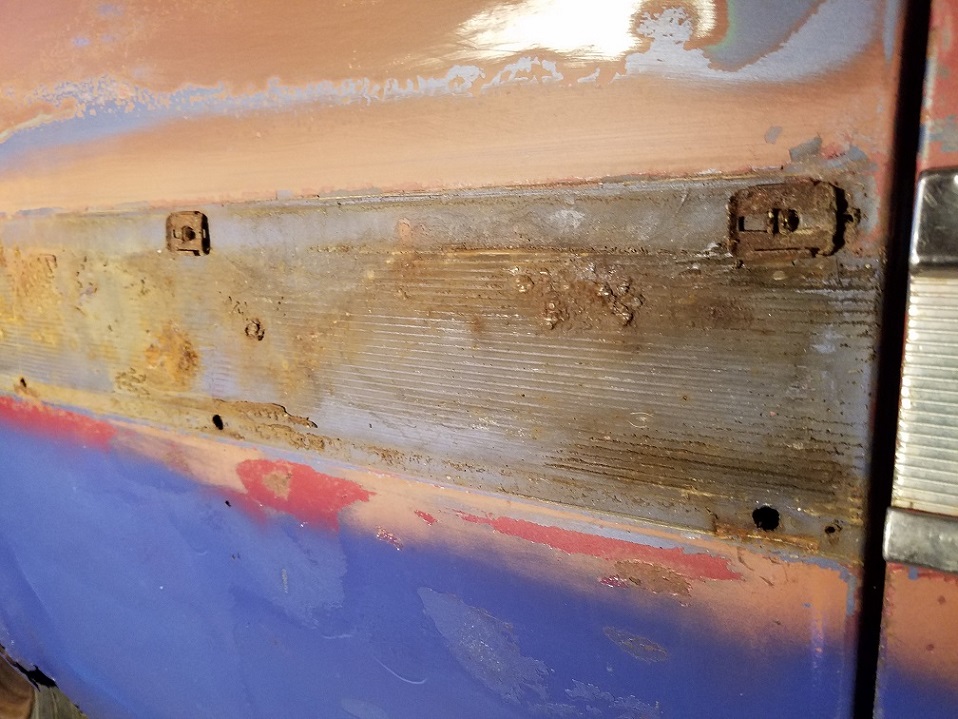
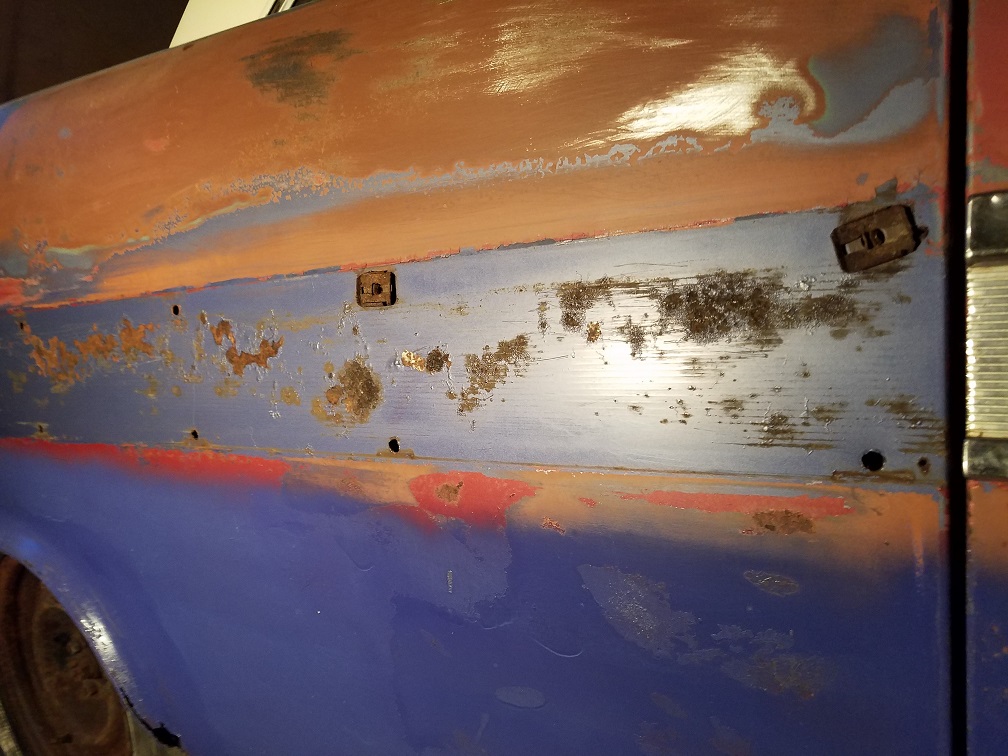
Location: Wild Wonderful | I removed the side trim. Lots of dirt and rust under there.
BTW, If anyone wanted to know if they painted the same body color under the sweep, here's your proof.
Edited by 58DeSoDodge59 2017-08-22 11:44 PM
 (dirtbehind.jpg) (dirtbehind.jpg)
 (rustbehind.jpg) (rustbehind.jpg)
Attachments
----------------
 dirtbehind.jpg (244KB - 365 downloads) dirtbehind.jpg (244KB - 365 downloads)
 rustbehind.jpg (249KB - 349 downloads) rustbehind.jpg (249KB - 349 downloads)
|
|
| |
|

Elite Veteran
Posts: 1112
 
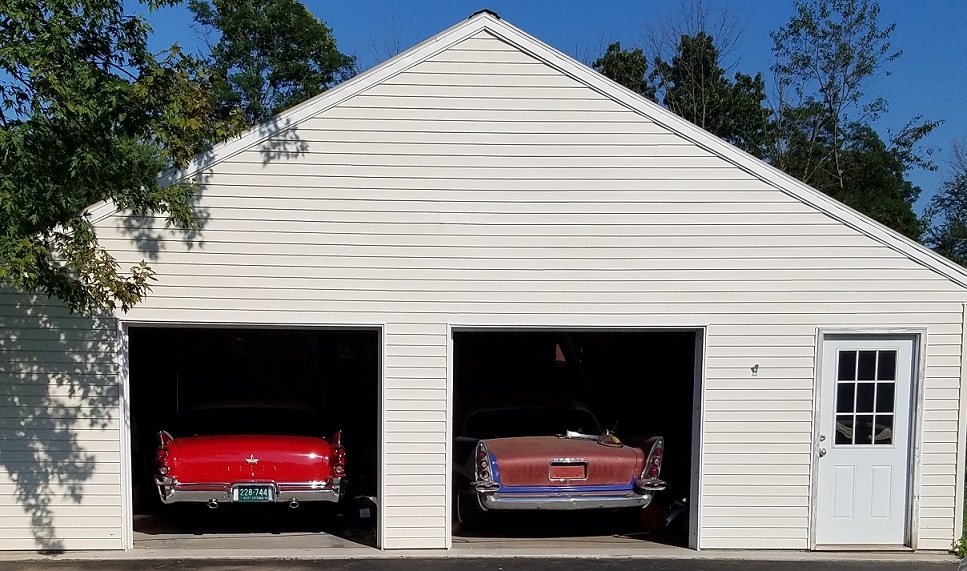
Location: Wild Wonderful | Ruby (on the left) or Heather (on the right) ?
 (choices.jpg) (choices.jpg)
Attachments
----------------
 choices.jpg (242KB - 369 downloads) choices.jpg (242KB - 369 downloads)
|
|
| |
|

Elite Veteran
Posts: 1112
 
Location: Wild Wonderful | I wanted to post a picture of each side, before I put my hands on it. It's going to get worse before it gets better.
 (sidedrivers (2).jpg) (sidedrivers (2).jpg)
 (sidepass (4).jpg) (sidepass (4).jpg)
Attachments
----------------
 sidedrivers (2).jpg (222KB - 352 downloads) sidedrivers (2).jpg (222KB - 352 downloads)
 sidepass (4).jpg (220KB - 352 downloads) sidepass (4).jpg (220KB - 352 downloads)
|
|
| |
|

       
Location: The Mile High City | Nice, Kurt! It is fun to see all the activity!  |
|
| |
|

Elite Veteran
Posts: 1112
 
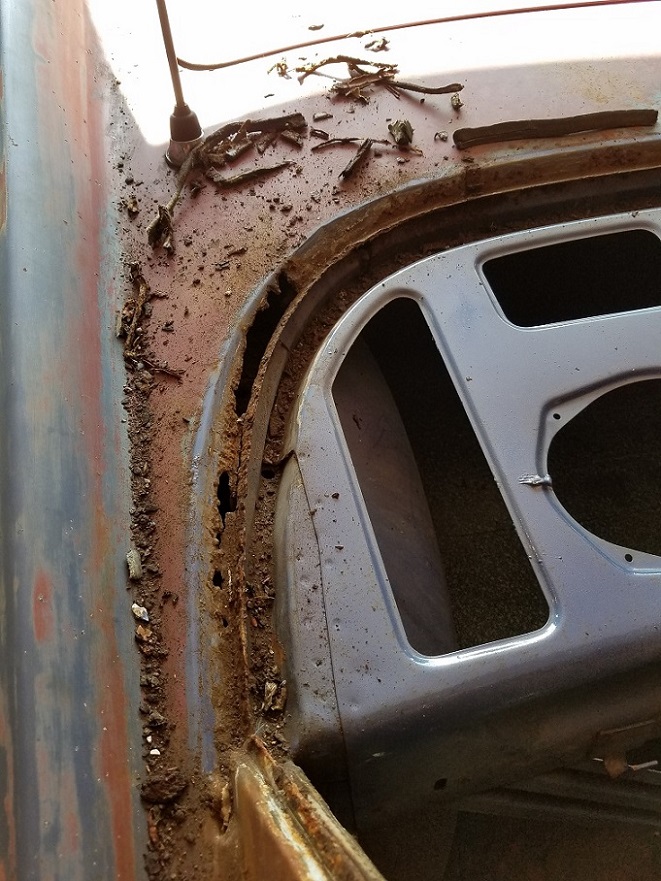
Location: Wild Wonderful | Before and after. Does anyone want to see my bad welding job?
 (withoutglass1.jpg) (withoutglass1.jpg)
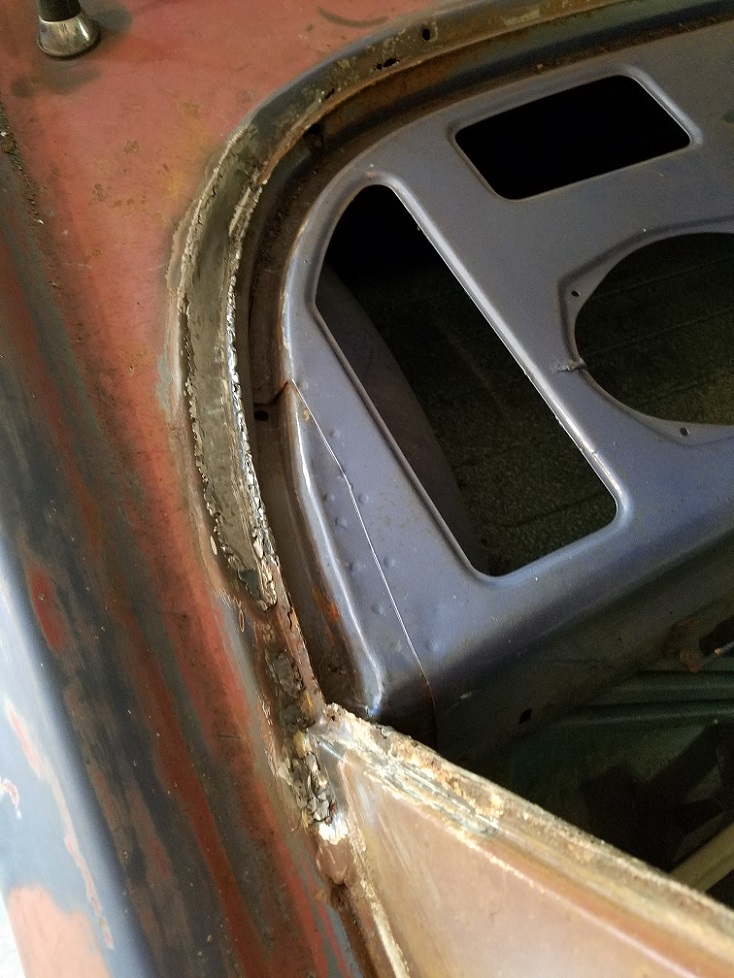 (weld.jpg) (weld.jpg)
Attachments
----------------
 withoutglass1.jpg (242KB - 340 downloads) withoutglass1.jpg (242KB - 340 downloads)
 weld.jpg (242KB - 334 downloads) weld.jpg (242KB - 334 downloads)
|
|
| |
|

       
Location: The Mile High City | I do! I do! Hey, at least your trunk won't flood when you wash the car!  |
|
| |
|

Elite Veteran
Posts: 1112
 
Location: Wild Wonderful | If you enjoyed what was in the glove box, then you should really enjoy what I
found in the head liner.
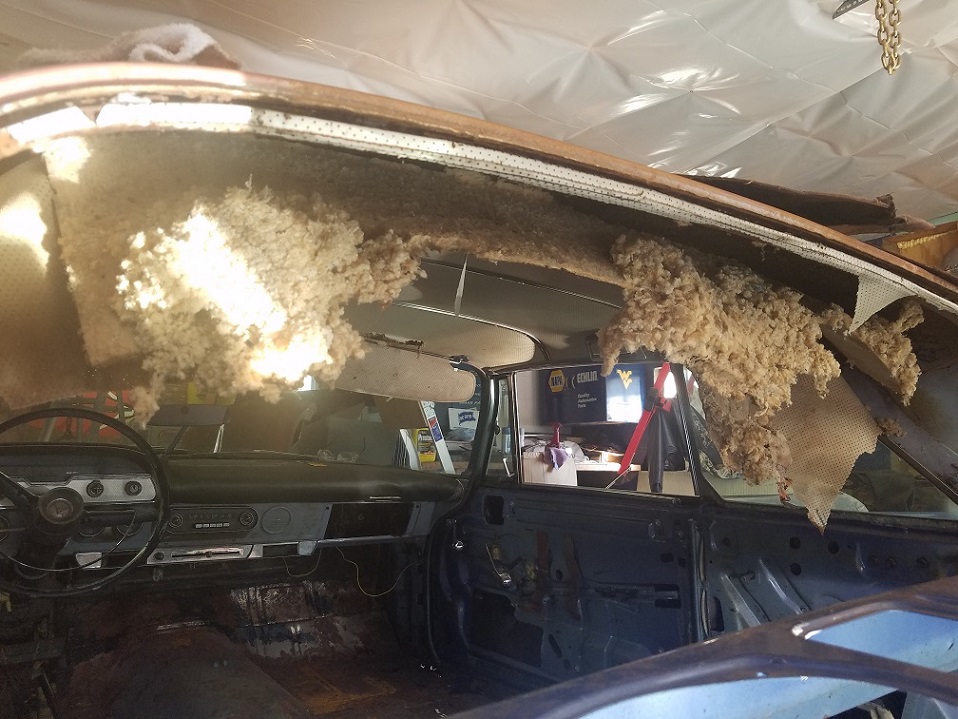 (20170903_163222 (2).jpg) (20170903_163222 (2).jpg)
Attachments
----------------
 20170903_163222 (2).jpg (246KB - 338 downloads) 20170903_163222 (2).jpg (246KB - 338 downloads)
|
|
| |
|
Elite Veteran
Posts: 1155
   
Location: somerville mass | so your going to restore it ? i suggest media blasting to find any
hidden rust / body damage ... and what color was it ? |
|
| |
|
Extreme Veteran
Posts: 537
 
Location: Upstate NY | I like the metallic green!!! Same happened here in northern NY with ash. it reminds me of dutch elm and the long boring bug that killed all the beautiful elm trees.
By the way, nice 58!!!! |
|
| |
|

Elite Veteran
Posts: 1112
 
Location: Wild Wonderful | Metallic green!!!??? Not for this car.
This is my patriotic car. It looks red, white and blue now, but it will be purpley blue, with a white top.
Heather will be pretty again.
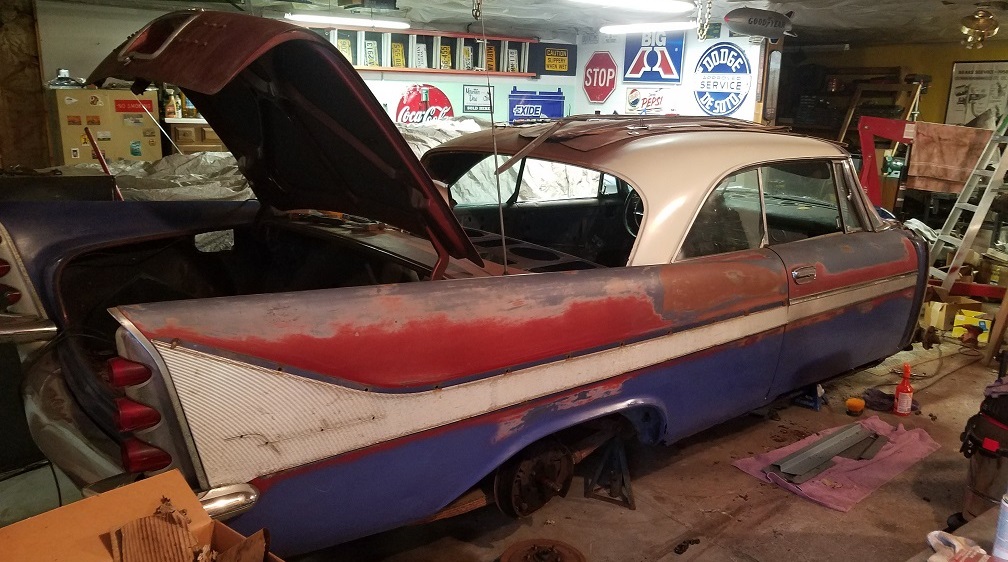 (patrioticcar.jpg) (patrioticcar.jpg)
Attachments
----------------
 patrioticcar.jpg (249KB - 334 downloads) patrioticcar.jpg (249KB - 334 downloads)
|
|
| |
|

Elite Veteran
Posts: 1112
 
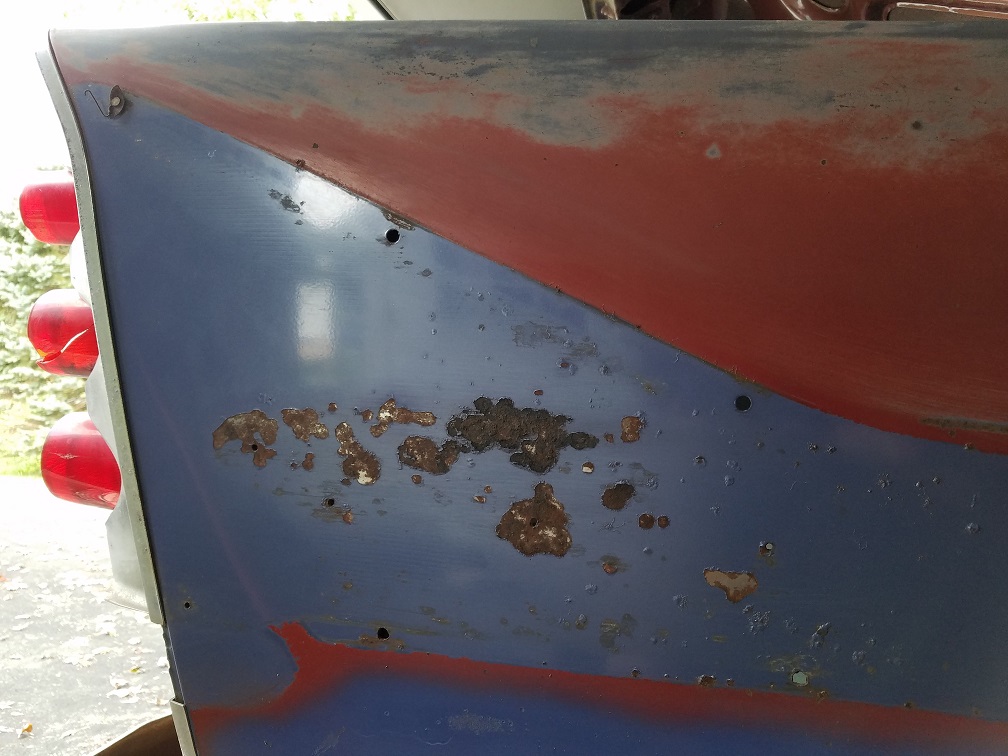
Location: Wild Wonderful | Ladies and gentlemen, this is what you get when you have an aluminum panel over painted metal
for almost 60 years.
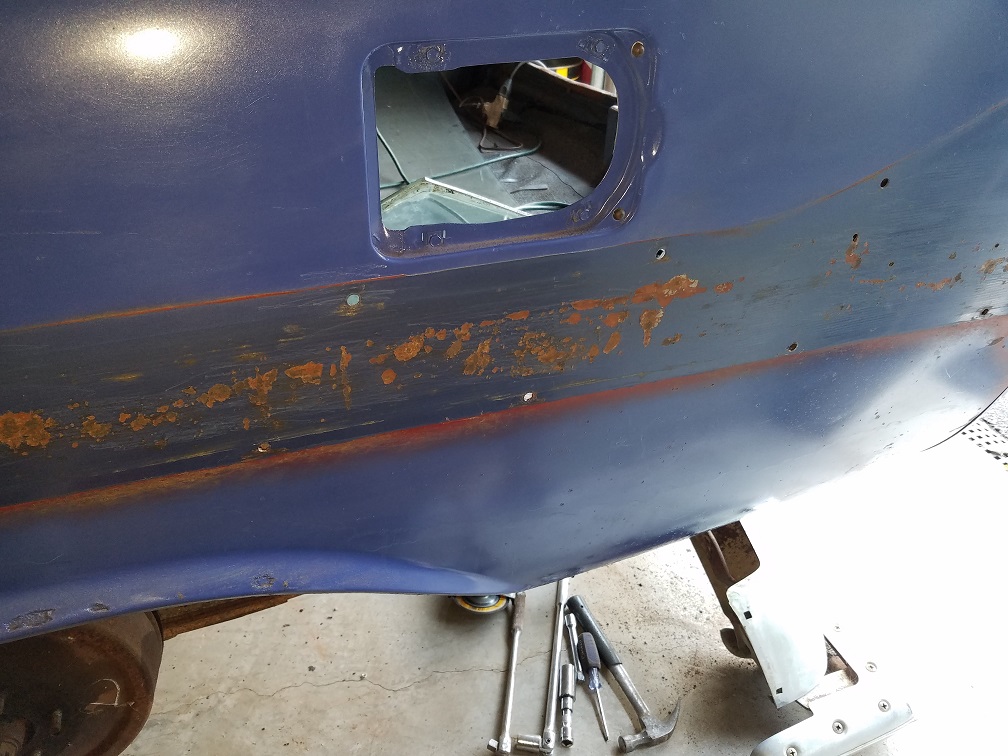 (20170917_123239 (2).jpg) (20170917_123239 (2).jpg)
 (20170917_120001 (2).jpg) (20170917_120001 (2).jpg)
Attachments
----------------
 20170917_123239 (2).jpg (241KB - 336 downloads) 20170917_123239 (2).jpg (241KB - 336 downloads)
 20170917_120001 (2).jpg (211KB - 339 downloads) 20170917_120001 (2).jpg (211KB - 339 downloads)
|
|
| |
|

Expert 5K+
Posts: 9902
       
Location: Lower Mainland BC | 58DeSoDodge59 - 2017-09-17 8:09 PM Ladies and gentlemen, this is what you get when you have an aluminum panel over painted metal
for almost 60 years.
On the upside, you won't have to make the body/paint perfect, just rust proof, in those areas. |
|
| |
|

Elite Veteran
Posts: 1112
 
Location: Wild Wonderful | 56D500boy - 2017-09-17 10:47 PM
58DeSoDodge59 - 2017-09-17 8:09 PM Ladies and gentlemen, this is what you get when you have an aluminum panel over painted metal
for almost 60 years.
On the upside, you won't have to make the body/paint perfect, just rust proof, in those areas.
Yes, and I bet a layer of body filler, for the pits, will help a little bit also. |
|
| |
|

Elite Veteran
Posts: 1112
 
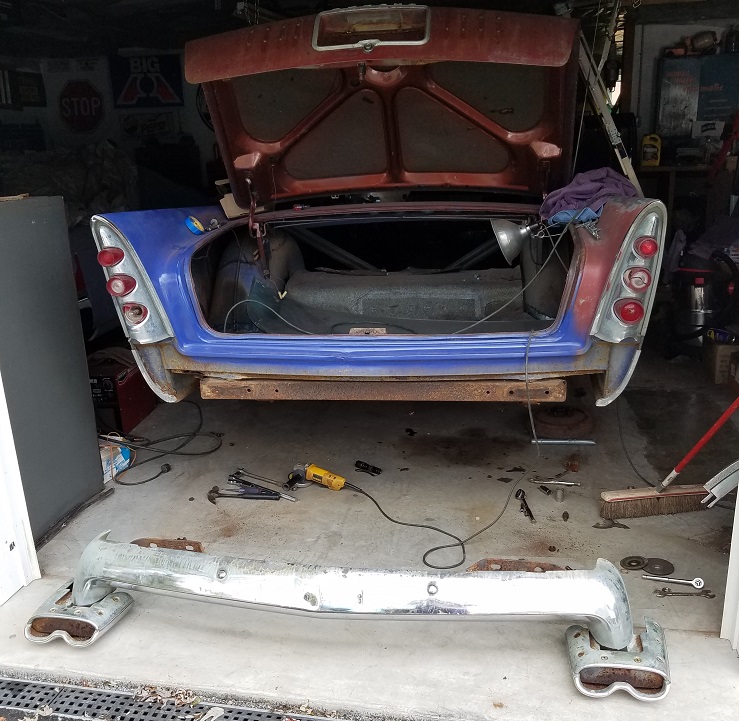
Location: Wild Wonderful | Removing the rear bumper. I was able to unscrew two bolts, but I had to cut off the other two.
 (20170917_115443 (2).jpg) (20170917_115443 (2).jpg)
Attachments
----------------
 20170917_115443 (2).jpg (219KB - 338 downloads) 20170917_115443 (2).jpg (219KB - 338 downloads)
|
|
| |
|

Expert 5K+
Posts: 9666
      
Location: So. Cal | Looks like you're moving right along. Nice. |
|
| |
|

Elite Veteran
Posts: 1112
 
Location: Wild Wonderful | Powerflite - 2017-09-18 10:09 AM
Looks like you're moving right along. Nice.
As they say, "Slow, but sure".
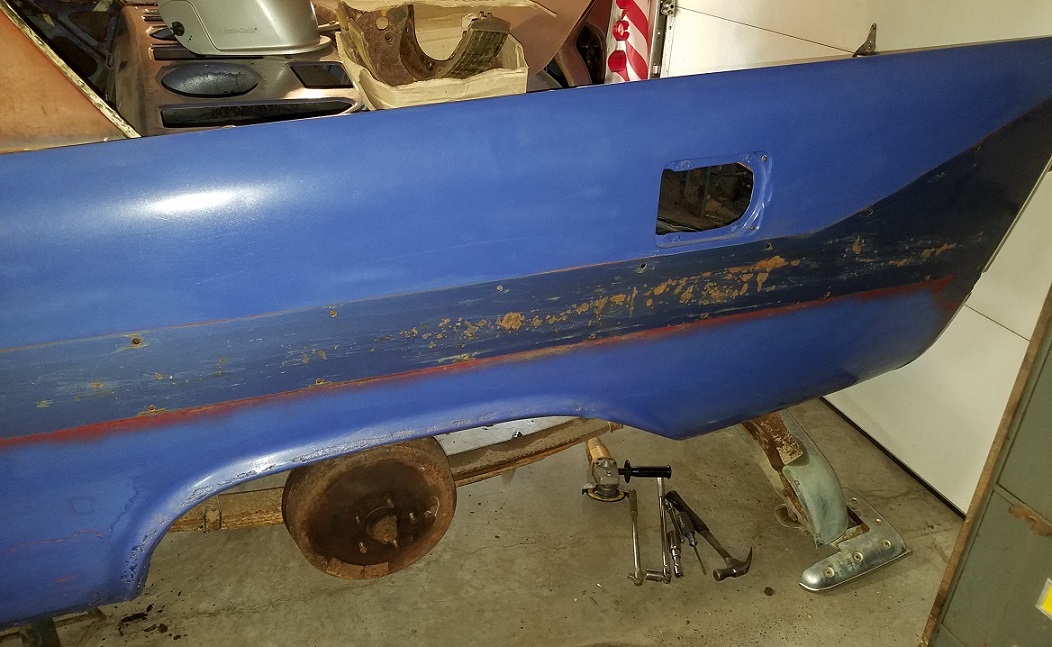
Check out this picture that I took the other day. It shows me that lighting is everything.
It shows a big contrast towards the back, but almost blends in at the flash. My personal
feeling is that they used too much metallic in the paint. When you put it in the sun, it almost
looks silver. I would rather see a richer, darker blue, like what we see at the back of this
picture and what we see in the original Ad.
 (colorsnlight.jpg) (colorsnlight.jpg)
Attachments
----------------
 colorsnlight.jpg (247KB - 345 downloads) colorsnlight.jpg (247KB - 345 downloads)
|
|
| |
|

Elite Veteran
Posts: 1112
 
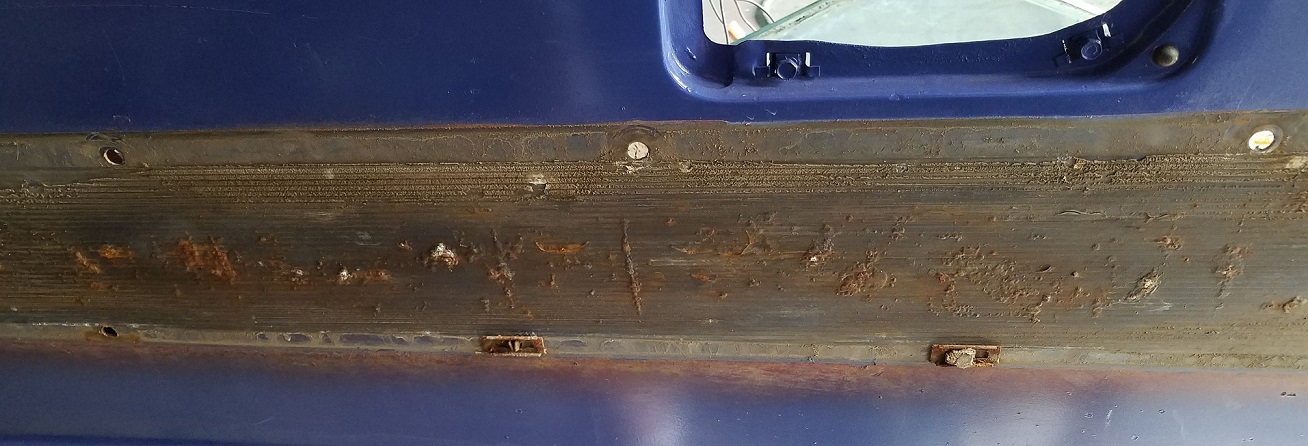
Location: Wild Wonderful | Almost 60 years of dirt.
 (60yrsdirt.jpg) (60yrsdirt.jpg)
Attachments
----------------
 60yrsdirt.jpg (232KB - 322 downloads) 60yrsdirt.jpg (232KB - 322 downloads)
|
|
| |
|

Expert 5K+
Posts: 9902
       
Location: Lower Mainland BC | 58DeSoDodge59 - 2017-09-23 12:37 PM
Almost 60 years of dirt.
That photo shows the small OE trim clips used to hold the side trim on.

I am guessing that the universal(ish) trim clips Auveco has in their Section 23 (starting on page 722 of 799) will work for you (in Canada these are sold by GENO):
https://www.auveco.com/download/catalog/auveco_catalog.pdf

Edited by 56D500boy 2017-09-23 12:54 PM
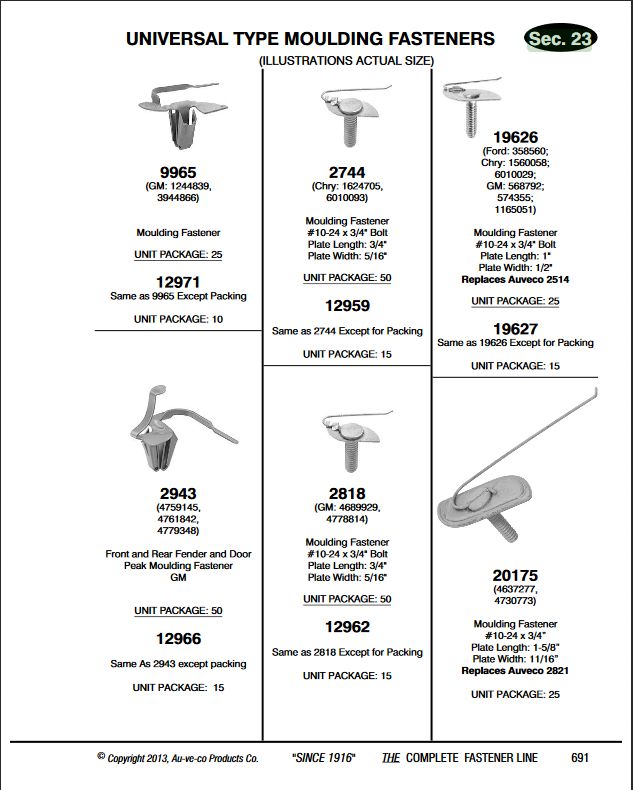 (AuvecoSec23_1.jpg) (AuvecoSec23_1.jpg)
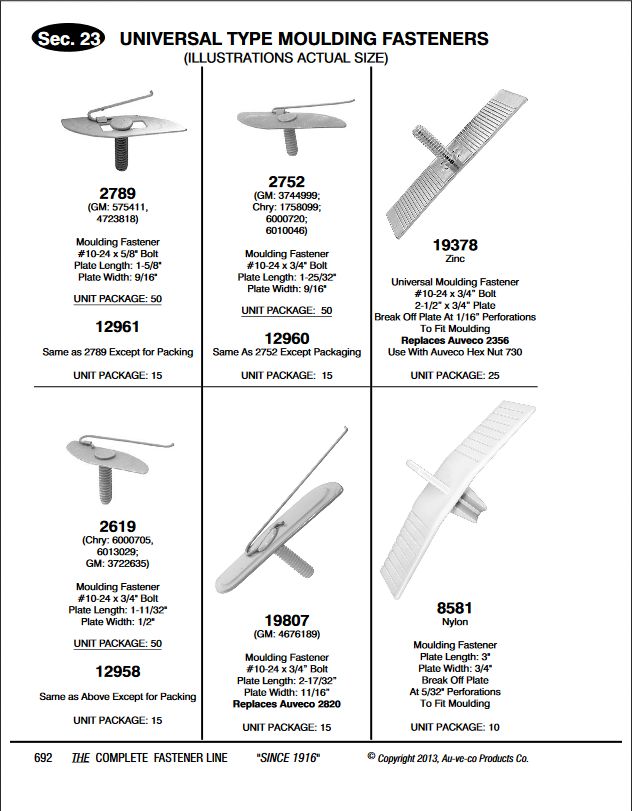 (AuvecoSec23_2.jpg) (AuvecoSec23_2.jpg)
Attachments
----------------
 AuvecoSec23_1.jpg (73KB - 317 downloads) AuvecoSec23_1.jpg (73KB - 317 downloads)
 AuvecoSec23_2.jpg (76KB - 337 downloads) AuvecoSec23_2.jpg (76KB - 337 downloads)
|
|
| |
|

Elite Veteran
Posts: 1112
 
Location: Wild Wonderful | Those universal type clips are used on the front fender and also the last one at the top of the
quarter panel.
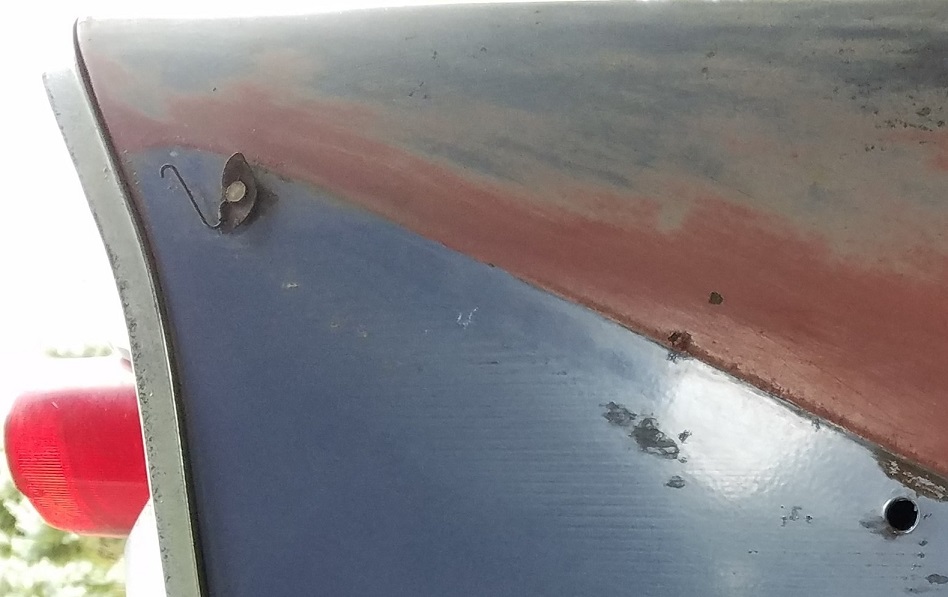 (uclip.jpg) (uclip.jpg)
Attachments
----------------
 uclip.jpg (147KB - 335 downloads) uclip.jpg (147KB - 335 downloads)
|
|
| |
|

Elite Veteran
Posts: 1112
 
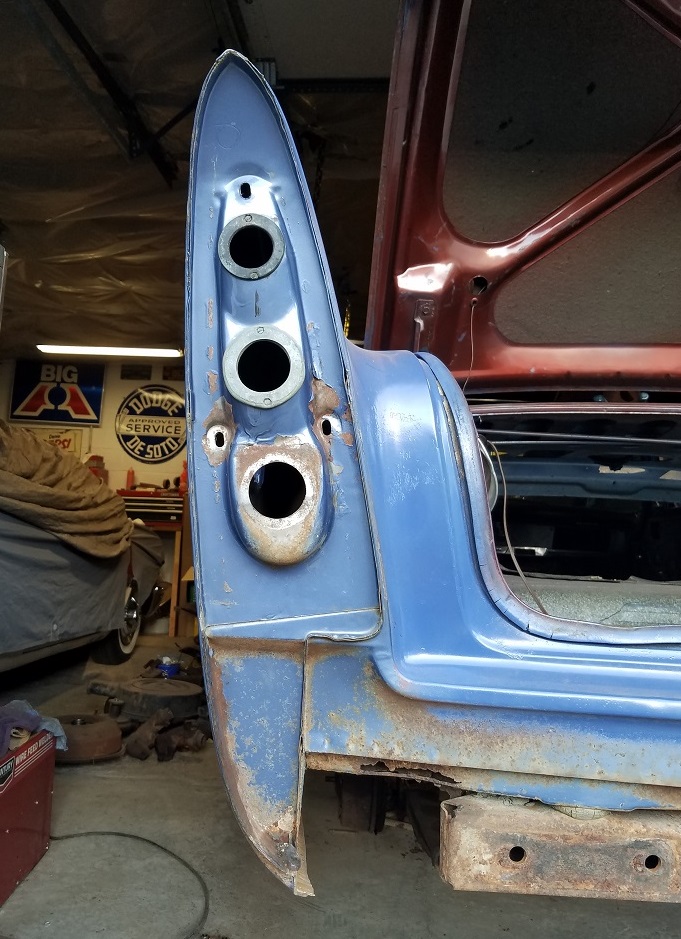
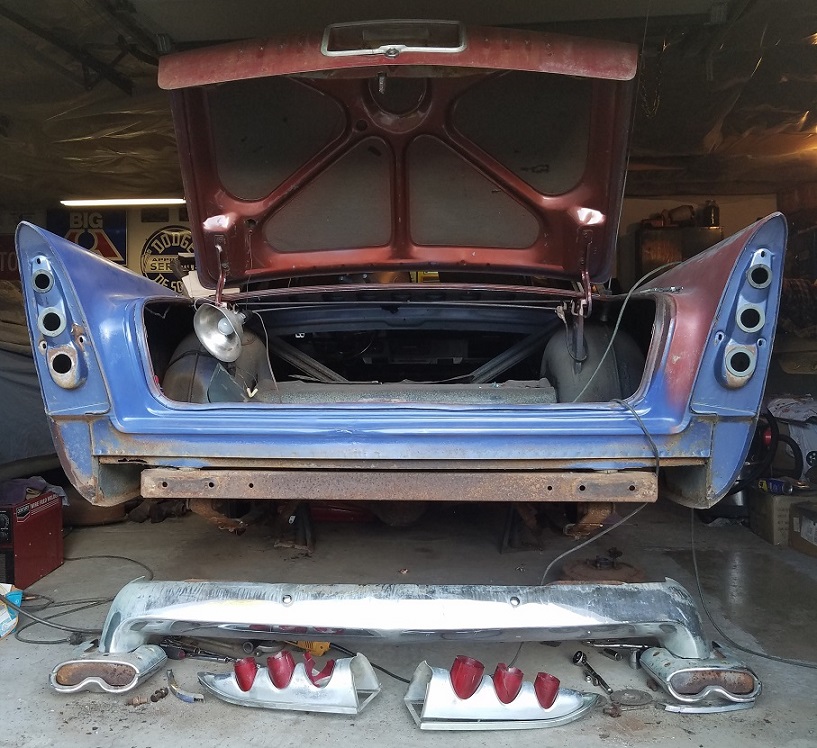
Location: Wild Wonderful | I am glad that I put the other car on hold so I could restore this one. This one allows me to see the
complete panels and all the little bends. That knowledge will help me when I weld together the
other Spring Special.
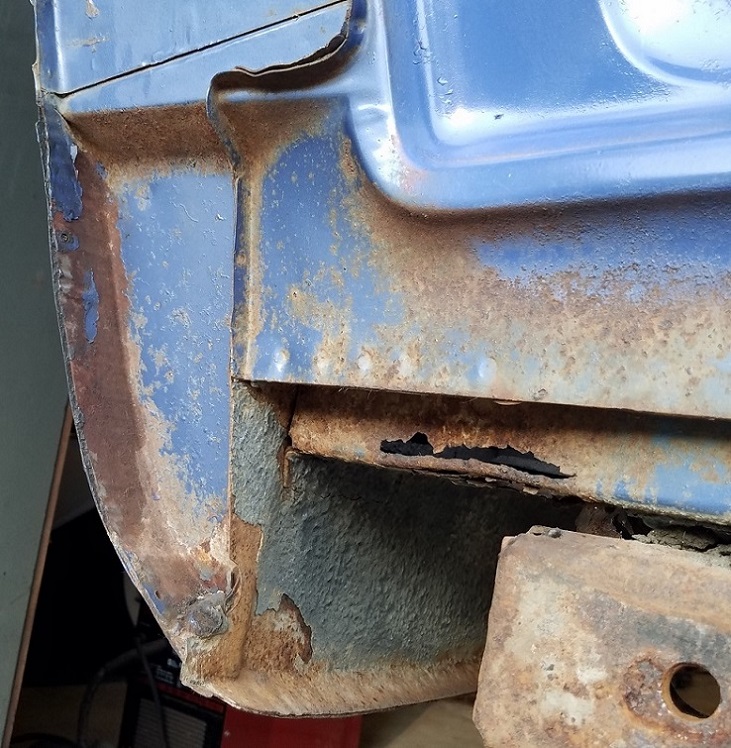 (undertail.jpg) (undertail.jpg)
 (lefttail.jpg) (lefttail.jpg)
 (notail.jpg) (notail.jpg)
Attachments
----------------
 undertail.jpg (242KB - 340 downloads) undertail.jpg (242KB - 340 downloads)
 lefttail.jpg (244KB - 315 downloads) lefttail.jpg (244KB - 315 downloads)
 notail.jpg (248KB - 331 downloads) notail.jpg (248KB - 331 downloads)
|
|
| |
|

Elite Veteran
Posts: 1112
 
Location: Wild Wonderful | Better
 (desotodoesbetter.jpg) (desotodoesbetter.jpg)
Attachments
----------------
 desotodoesbetter.jpg (123KB - 332 downloads) desotodoesbetter.jpg (123KB - 332 downloads)
|
|
| |
|

Elite Veteran
Posts: 1112
 
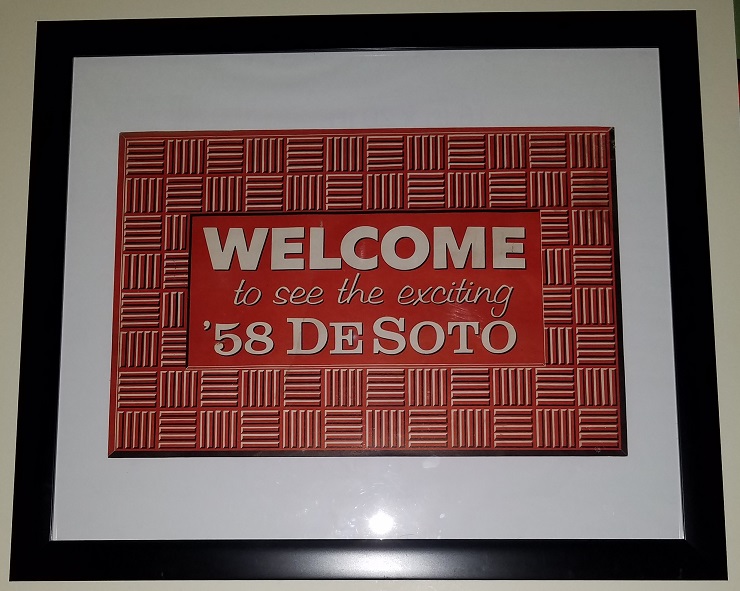
Location: Wild Wonderful | Welcome.
 (welcome.jpg) (welcome.jpg)
Attachments
----------------
 welcome.jpg (161KB - 333 downloads) welcome.jpg (161KB - 333 downloads)
|
|
| |
|

       
Location: The Mile High City | Nice work Kurt! Gosh, I love the look of the anodized trim on the spring specials, but what havoc it creates some 60 years later! Hey, NOBODY was building cars back then that they expected to last 60 years.
When you put it back though, the next 60 years will be a lot different as far as use and cleaning go. |
|
| |
|

Expert 5K+
Posts: 9666
      
Location: So. Cal | DeSoto does better with spring special. Plymouth, Dodge, DeSoto & Windsors had spring special deals in '58. Did the senior level Chryslers have anything different?
If I were you, I would protect the backside of your trim by painting it, maybe with clear. That will help it from oxidizing and thinning out. It might even help the dirt to flow out of that gap too. |
|
| |
|

       
Location: The Mile High City | Yes! Saratogas at the least had spring trim too, similar to the Windsor and De Soto trunk and rocker package.
The 300s and Imperials might have been above such shenanigans!
Edited by Lancer Mike 2017-09-26 4:04 PM
|
|
| |
|

Elite Veteran
Posts: 1112
 
Location: Wild Wonderful | Lancer Mike - 2017-09-26 1:11 PM
Nice work Kurt! Gosh, I love the look of the anodized trim on the spring specials, but what havoc it creates some 60 years later! Hey, NOBODY was building cars back then that they expected to last 60 years.
When you put it back though, the next 60 years will be a lot different as far as use and cleaning go.
60 years is a long time. I'm not even there yet.
One thing that I am sure they did not do back then was to wax the car before putting on this trim.
Doing something as minor as that will go a long way also. |
|
| |
|

Elite Veteran
Posts: 1112
 
Location: Wild Wonderful | Powerflite - 2017-09-26 2:16 PM
DeSoto does better with spring special. Plymouth, Dodge, DeSoto & Windsors had spring special deals in '58. Did the senior level Chryslers have anything different?
If I were you, I would protect the backside of your trim by painting it, maybe with clear. That will help it from oxidizing and thinning out. It might even help the dirt to flow out of that gap too.
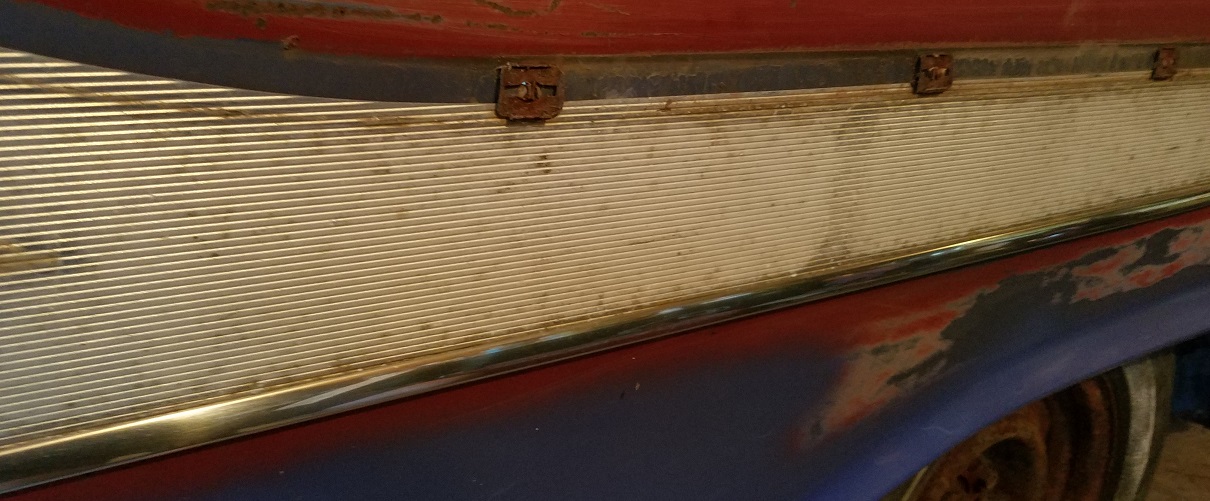
Actually, I was planning to put clear Lacquer on both sides of the trim.
Has anyone ever cleaned up aluminum trim like this before? It is a little corroded. I was planning on
taking a Brillo pad to it first, and then fine block sandpaper to the top of it. Any better ideas?
 (sssidetrim.jpg) (sssidetrim.jpg)
Attachments
----------------
 sssidetrim.jpg (235KB - 329 downloads) sssidetrim.jpg (235KB - 329 downloads)
|
|
| |
|

Expert 5K+
Posts: 9902
       
Location: Lower Mainland BC | 58DeSoDodge59 - 2017-09-27 6:56 PM
Actually, I was planning to put clear Lacquer on both sides of the trim.
Has anyone ever cleaned up aluminum trim like this before? It is a little corroded. I was planning on
taking a Brillo pad to it first, and then fine block sandpaper to the top of it. Any better ideas?
That would depend on what the original finish was (probably anodized (flat(ish) silver)). (??)
 |
|
| |
|

Elite Veteran
Posts: 1112
 
Location: Wild Wonderful | insert
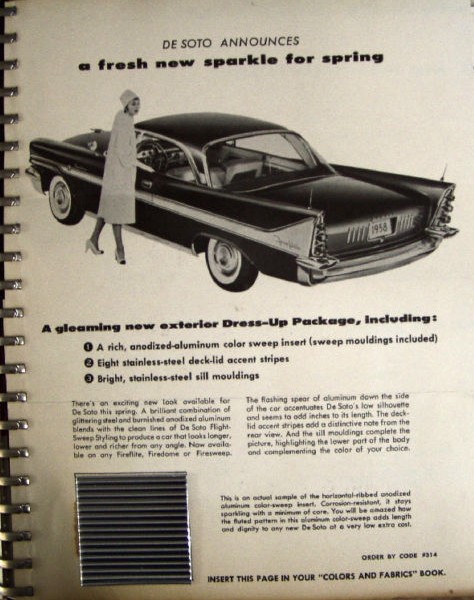 (Spring Trim Insert - Colors and Fabrics Book.jpg) (Spring Trim Insert - Colors and Fabrics Book.jpg)
Attachments
----------------
 Spring Trim Insert - Colors and Fabrics Book.jpg (78KB - 323 downloads) Spring Trim Insert - Colors and Fabrics Book.jpg (78KB - 323 downloads)
|
|
| |
|

       
Location: The Mile High City | Kurt, you might try a scotch-brite pad as opposed to brillo - a little more gentle and very effective! There's also lots of aluminum polishing compounds out there for a brilliant finish. |
|
| |
|

Elite Veteran
Posts: 1112
 
Location: Wild Wonderful | Dave and Mike , I see what you guys are saying. If I use the Scotch Brite pads, it should clean
up the Anodized-Aluminum and still keep the Anodized finish. If I use the Brillo pads, it will take
that finish off.
So if I lose the finish, I could polish the tops of the ribs. That would give me a shinier finish.
So the question is; Do I keep the Anodized finish, or do I polish it out and have a shinier finish?
Also, since I have two Spring Specials, Do I sand and polish the worst set, and try to save the better set? |
|
| |
|

Elite Veteran
Posts: 1112
 
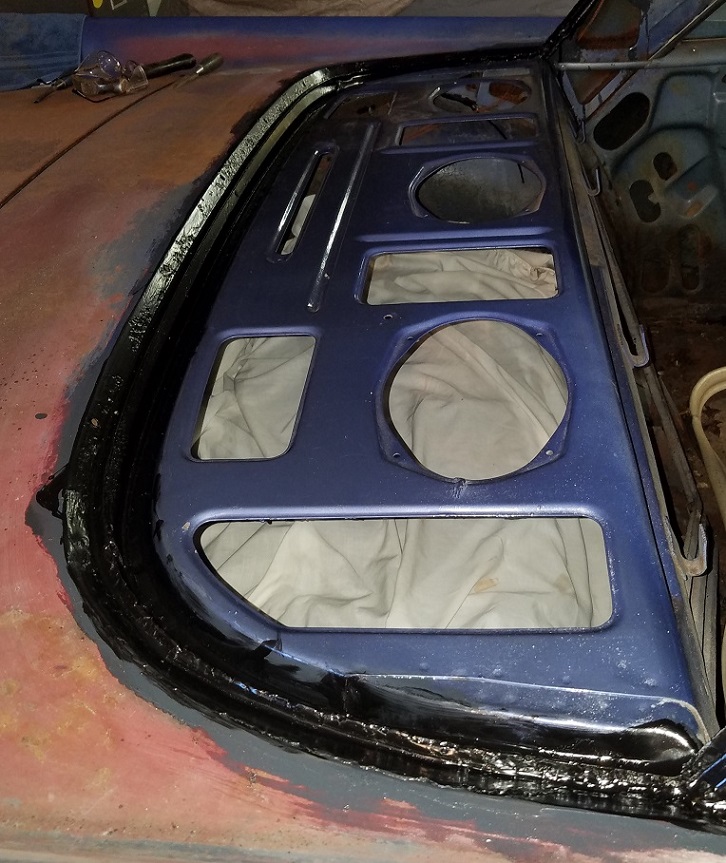
Location: Wild Wonderful | I finished up the welding on the rear window frame, and then painted it with POR15.
Edited by 58DeSoDodge59 2017-10-16 3:58 PM
 (POR15window.jpg) (POR15window.jpg)
Attachments
----------------
 POR15window.jpg (239KB - 315 downloads) POR15window.jpg (239KB - 315 downloads)
|
|
| |
|

Expert 5K+
Posts: 7400
     
Location: northern germany | 58DeSoDodge59 - 2017-10-16 3:56 PM
I finished up the welding on the rear window frame, and then painted it with POR15.
do you like that stuff? did they improve it? around 25 years ago i found out the hard way it only works on rusted surfaces. on bare metal without rust (sanded and degreased) you can pull it off like a skin when dry. so when you install the rear window you will easily damage the surface and make way for rust. i would have used a regular primer aplied with some heat to bake it on. |
|
| |
|
Expert 5K+
Posts: 5006

| im sold on Rust Bullet over Por15, I also top coat my rust bullet.
Ill let Bob explain
https://www.youtube.com/watch?v=I07ra5_c1sM
|
|
| |
|

Elite Veteran
Posts: 1112
 
Location: Wild Wonderful | 1960fury - 2017-10-16 4:10 PM
58DeSoDodge59 - 2017-10-16 3:56 PM
I finished up the welding on the rear window frame, and then painted it with POR15.
do you like that stuff? did they improve it? around 25 years ago i found out the hard way it only works on rusted surfaces. on bare metal without rust (sanded and degreased ) you can pull it off like a skin when dry. so when you install the rear window you will easily damage the surface and make way for rust. i would have used a regular primer aplied with some heat to bake it on.
I painted the bottom, frame and floors of my 59 Dodge with POR15. I have had no problems.
But I used their Degreaser and Metal Ready when I did it. |
|
| |
|

Elite Veteran
Posts: 1112
 
Location: Wild Wonderful |
Attaboy Bob.
Why was the POR15 not top coated with POR15 Top coat?
I will stick with POR15. Those test are always rigged anyway.
Edited by 58DeSoDodge59 2017-10-16 9:43 PM
|
|
| |
|

Elite Veteran
Posts: 1112
 
Location: Wild Wonderful | 
 (desotohappy.jpg) (desotohappy.jpg)
Attachments
----------------
 desotohappy.jpg (57KB - 399 downloads) desotohappy.jpg (57KB - 399 downloads)
|
|
| |
|
Expert 5K+
Posts: 5006

| 58DeSoDodge59 - 2017-10-16 5:31 PM Attaboy Bob. Why was the POR15 not top coated with POR15 Top coat? I will stick with POR15. Those test are always rigged anyway. this was a long time ago, dont think por15 had a top coat but the instruction say you should top coat, these were the same spec tests. Are you saying Rust Bullet cheated and didnt use the standardized test they stated they did? I have used both and Rust Bullet is the better product. It goes on with alot stronger adhesion and it has a thicker consistency. Por 15 flows a bit better but if you must do alot of scuffing roughing of the surface. It has a smoother single coat but I always top coat. |
|
| |
|

Elite Veteran
Posts: 1112
 
Location: Wild Wonderful | mikes2nd - 2017-10-16 10:16 PM
58DeSoDodge59 - 2017-10-16 5:31 PM Attaboy Bob. Why was the POR15 not top coated with POR15 Top coat? I will stick with POR15. Those test are always rigged anyway. this was a long time ago, dont think por15 had a top coat but the instruction say you should top coat, these were the same spec tests. Are you saying Rust Bullet cheated and didnt use the standardized test they stated they did? I have used both and Rust Bullet is the better product. It goes on with alot stronger adhesion and it has a thicker consistency. Por 15 flows a bit better but if you must do alot of scuffing roughing of the surface. It has a smoother single coat but I always top coat.
I'm saying that I don't trust anyone's testing. Let me buy the product and try it. If it works, I will stick with it.
If it doesn't, you will never hear from me again.
I painted my 59 Dodge back in 2001. I have not had a problem. No peeling, no rust bubbles, nothing coming apart.
Like you said, that test was done along time ago. POR15, like other companies, has made improvements and some
better products. Until I see a problem, I will stick with POR15.
Boy, I sound like a commercial. 
|
|
| |
|

Expert 5K+
Posts: 9666
      
Location: So. Cal | "You can't buy happiness, but you can buy a DeSoto...."
I really like that  Would make a good bumper sticker. Would make a good bumper sticker.
Edited by Powerflite 2017-10-17 4:09 PM
|
|
| |
|

Elite Veteran
Posts: 1112
 
Location: Wild Wonderful | Someone from Australia is selling those stickers on ebay. You can change the word DeSoto to whatever.
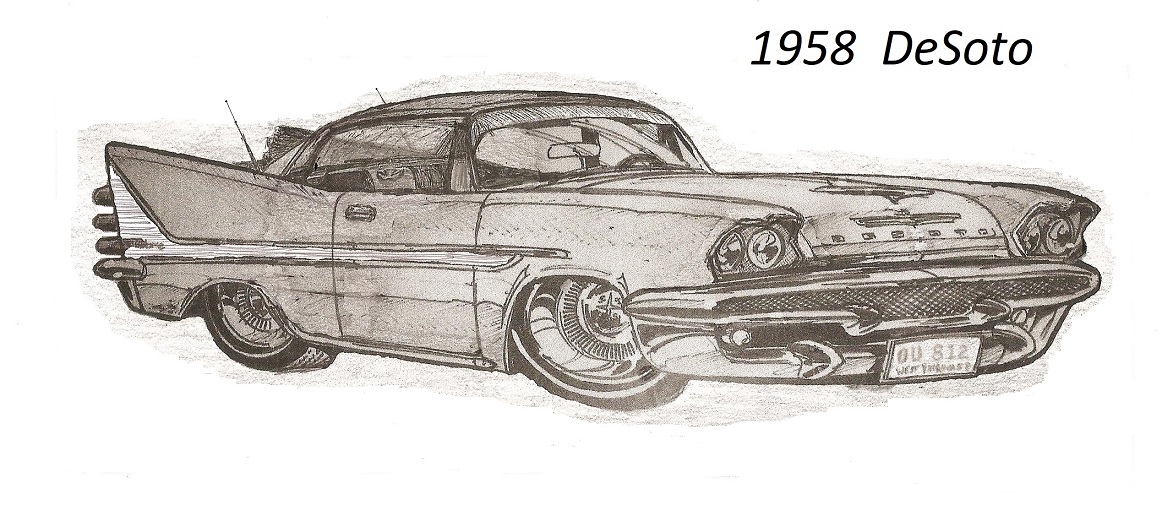
I was playing with some art works.
 (boughtdesoto1.jpg) (boughtdesoto1.jpg)
 (art (2).jpg) (art (2).jpg)
Attachments
----------------
 boughtdesoto1.jpg (234KB - 395 downloads) boughtdesoto1.jpg (234KB - 395 downloads)
 art (2).jpg (231KB - 396 downloads) art (2).jpg (231KB - 396 downloads)
|
|
| |
|

Elite Veteran
Posts: 1112
 
Location: Wild Wonderful | Solex on your new DeSoto
 (solexdesoto.jpg) (solexdesoto.jpg)
Attachments
----------------
 solexdesoto.jpg (222KB - 392 downloads) solexdesoto.jpg (222KB - 392 downloads)
|
|
| |
|

Elite Veteran
Posts: 1112
 
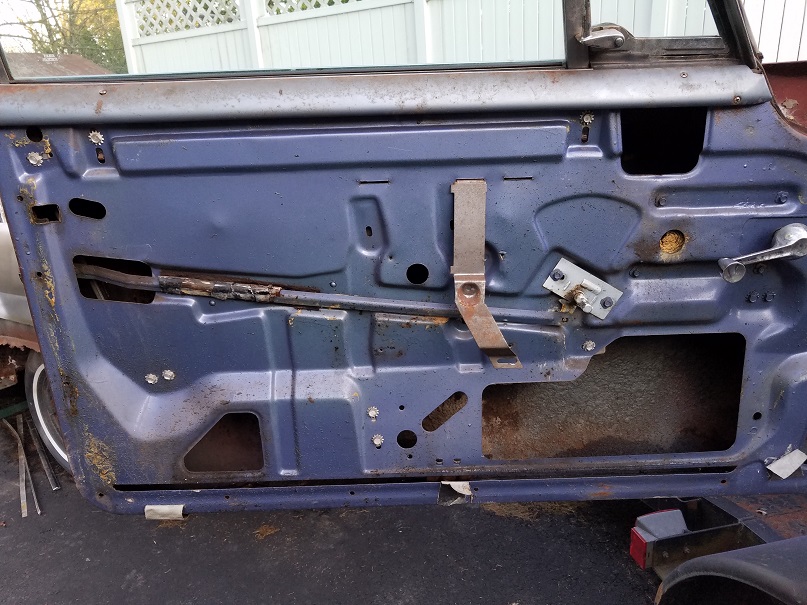
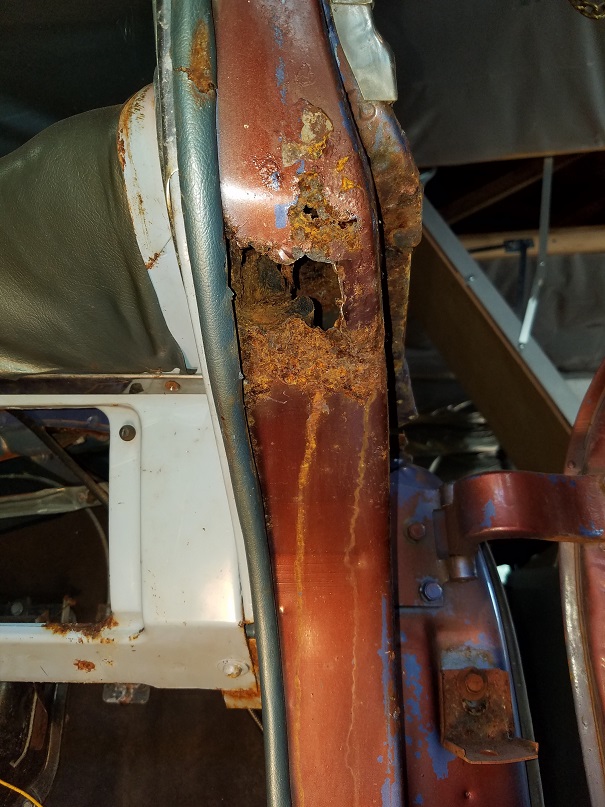
Location: Wild Wonderful | Those dam rats got into the passenger side door frame.
But why did DeSoto put rubber seals inside the frame?
 (doorframe.jpg) (doorframe.jpg)
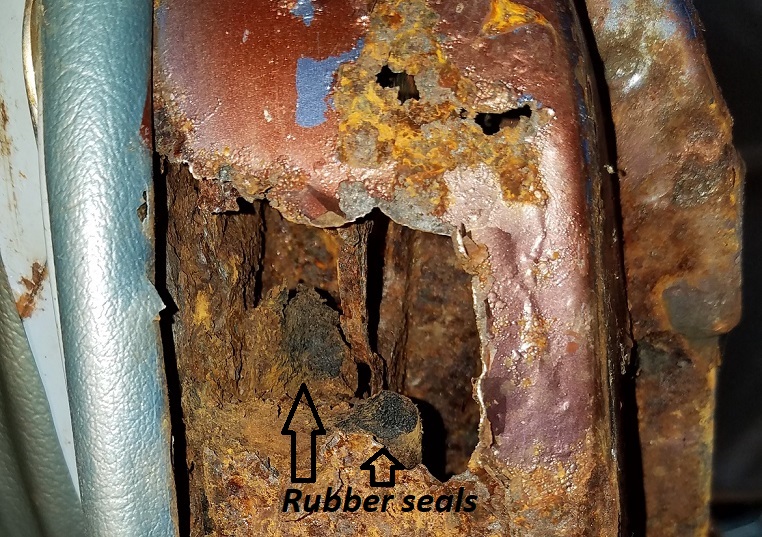 (20171015_124138.jpg) (20171015_124138.jpg)
Attachments
----------------
 doorframe.jpg (197KB - 378 downloads) doorframe.jpg (197KB - 378 downloads)
 20171015_124138.jpg (245KB - 380 downloads) 20171015_124138.jpg (245KB - 380 downloads)
|
|
| |
|
Expert 5K+
Posts: 5006

| that's seam sealant. they went nuts with the stuff in areas. unfortunately I looks like "pumice" and seems to retain water and cause more rust.
You can usually just pull out any seam sealant as there was always rust in the area since it never dried... horrible material and idea. Gm stuff from was not like this.
|
|
| |
|

Elite Veteran
Posts: 1112
 
Location: Wild Wonderful | That doesn't feel like sealant. That feels more like foam rubber. But your right, it does hold moisture. (Like a sponge).
Needless to say, I will be removing this stuff. |
|
| |
|

Elite Veteran
Posts: 1112
 
Location: Wild Wonderful | I took a piece of sandpaper to most, of each side of the car. Mostly to get the red paint off,
but also to see the dents and dings. The bottom part of the passenger side revealed a scrape
from the front of the door to the back wheel. The drivers side is full of dents on the upper
part. My guess is that these dents were caused by things falling on it in the garage/barn.
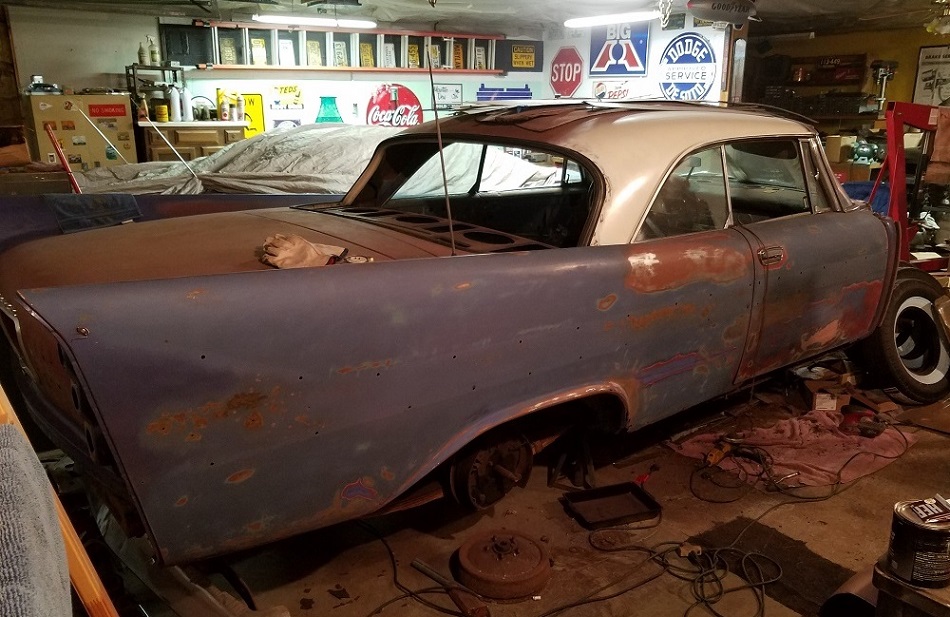 (car2.jpg) (car2.jpg)
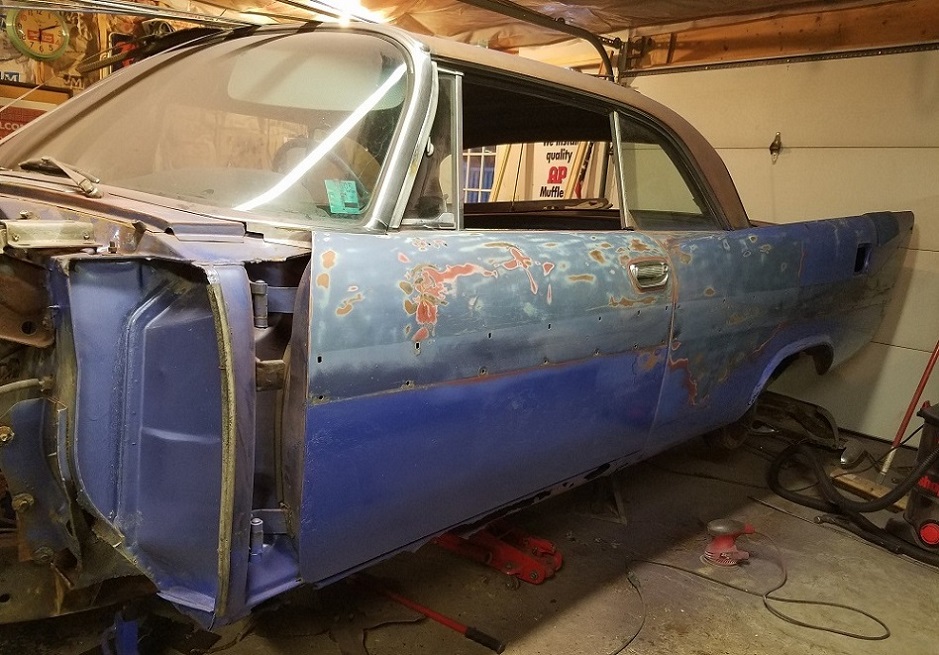 (car3.jpg) (car3.jpg)
Attachments
----------------
 car2.jpg (240KB - 393 downloads) car2.jpg (240KB - 393 downloads)
 car3.jpg (245KB - 382 downloads) car3.jpg (245KB - 382 downloads)
|
|
| |
|
Expert 5K+
Posts: 5006

| 58DeSoDodge59 - 2017-10-30 9:24 AM That doesn't feel like sealant. That feels more like foam rubber. But your right, it does hold moisture. (Like a sponge). Needless to say, I will be removing this stuff. actually the water runs through there, i think they route it down there from the upper window trim. i think thats why they seam seal this area. i would cut it open a bit, clean out what i can and pour rust bullet down there. im curious to see more inside there |
|
| |
|
Expert 5K+
Posts: 5006

| this is what I mean by SERIOUS design flaw in Chryslers "Seam sealant" in 1957... This was blobbed into the side of my drivers footwell... Seriously dude? just laying on top.
I mean rust was like "HECK YEAH my perfect home"... I'm never drying out!
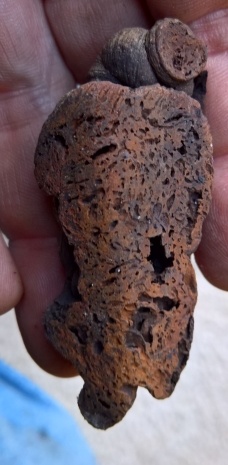 (seamsealantjoke.jpg) (seamsealantjoke.jpg)
Attachments
----------------
 seamsealantjoke.jpg (86KB - 386 downloads) seamsealantjoke.jpg (86KB - 386 downloads)
|
|
| |
|

Elite Veteran
Posts: 1112
 
Location: Wild Wonderful | Well, I got my new Title in my name, and I got the information back from FCA. This car
was sold new by Allen's Auto Service, 24 Oak Street, Eaton, Colorado. (Not by that place
in New York). It was built 6 days after the first day of Spring, on Wednesday, March 26th 1958.
It was not shipped until April 4th 1958. So it started life in CO. I don't know what happened
from '58 to '62, but after that, we know it spent 4 years going to Brigham Young University, in
Utah, by the stickers on the car. One says 1963, one says 1965, and the other 1966. The
last inspection sticker is from the state of New York, in 1966. The former owner said the
Torsion Bar was broken when he found it. You can tell by the way it is sitting on his trailer, that
this is true. So I guess that is why they parked it in that barn from '66 to 2016.
50 years in a barn.
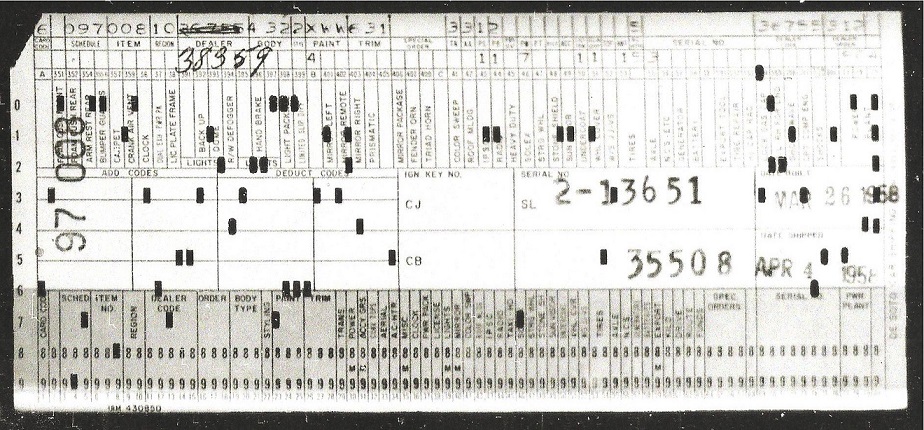 (ss58ibm.jpg) (ss58ibm.jpg)
Attachments
----------------
 ss58ibm.jpg (227KB - 384 downloads) ss58ibm.jpg (227KB - 384 downloads)
|
|
| |
|
   
Location: North Australia | Excellent detective work. Cool to see you pulling together the facts and the timelines, Mucho Interesting!. More history to come I expect?
Steve. |
|
| |
|

Elite Veteran
Posts: 1112
 
Location: Wild Wonderful | Is there anybody here that is with the National DeSoto Club?
I know that they have a list of DeSoto dealers on their website, but they do not show the
dealer number of each. I noticed that my IBM card shows a scratched out dealer, and
then a new one written in. I was wondering if they knew the original dealer that this car
was first intended to go to? Dealer number 36755. ? |
|
| |
|
Veteran
Posts: 145
 
| Check with Roadkillontheweb, he had the list on his website. I think that he compiled it originally. |
|
| |
|

Elite Veteran
Posts: 1112
 
Location: Wild Wonderful | Sanded the sides. Found a lot of dents in this side.
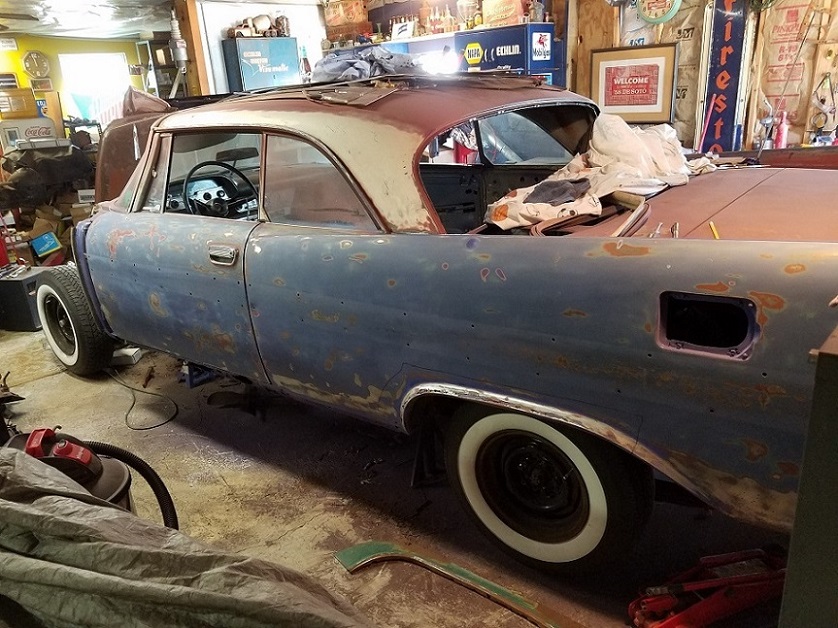 (heather.jpg) (heather.jpg)
Attachments
----------------
 heather.jpg (245KB - 353 downloads) heather.jpg (245KB - 353 downloads)
|
|
| |
|

Elite Veteran
Posts: 1112
 
Location: Wild Wonderful | What should be the plan of attack for this rust? I would like to get some paint on the wheel well. ?
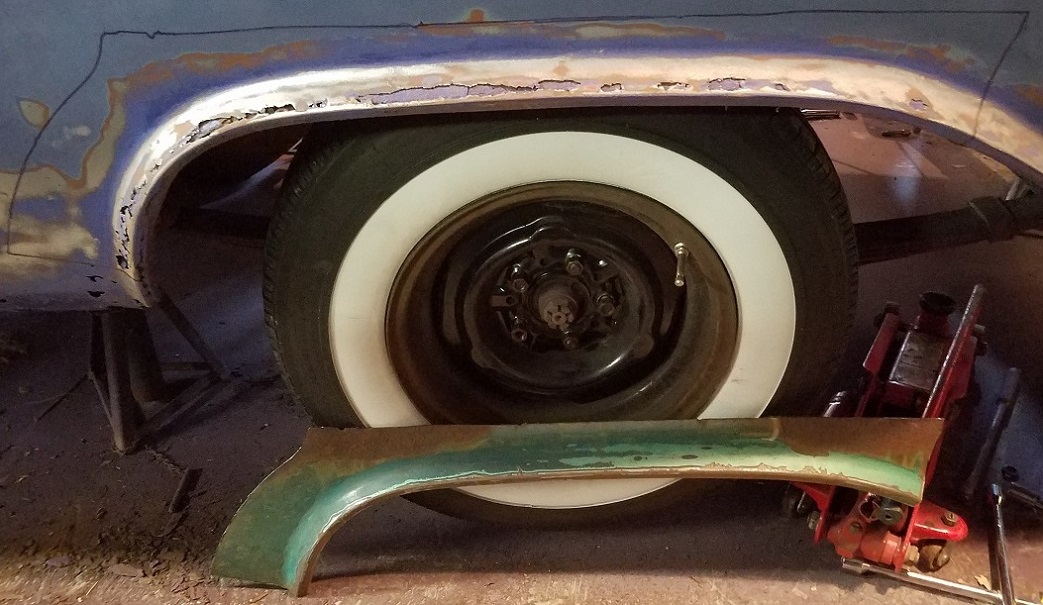 (bodywork.jpg) (bodywork.jpg)
Attachments
----------------
 bodywork.jpg (241KB - 372 downloads) bodywork.jpg (241KB - 372 downloads)
|
|
| |
|

Expert 5K+
Posts: 9666
      
Location: So. Cal | I would cut it OUTSIDE the bend of the wheel lip so that you are replacing very little metal. It is harder to clean up the weld that way because it is close to that bend, but it is MUCH less likely to warp on you there. You really don't want to have to deal with excess heat issues at this point in the panel. That's a really big panel and that would be a really big pain to try and fix.
Edited by Powerflite 2017-12-08 1:08 AM
|
|
| |
|

Expert 5K+
Posts: 7400
     
Location: northern germany | Powerflite - 2017-12-08 1:07 AM
I would cut it OUTSIDE the bend of the wheel lip so that you are replacing very little metal.
PLEASE, PLEASE, PLEASE follow that advise, you will be happy you did. by all means cut it OUTSIDE of the bend that gives stability. why replacing good OE sheet metal anyway? because the patch panel is shaped like this? i've seen it tousand times an i will never get it. |
|
| |
|

Elite Veteran
Posts: 1112
 
Location: Wild Wonderful | So maybe three little patches?
The dog leg in the front, then two little pieces?
 (patches.jpg) (patches.jpg)
Attachments
----------------
 patches.jpg (168KB - 355 downloads) patches.jpg (168KB - 355 downloads)
|
|
| |
|

Expert 5K+
Posts: 9666
      
Location: So. Cal | Breaking it up into sections like that can be beneficial to keep things under more control, but you can probably do it as one piece too if you feel confident with it. It would be nice to treat that last spot separately, but you need to really probe the metal between because it could be rotted too. If not, I would do it as a separate small patch. Also, Why do you want to go beyond the bend in the front? The metal doesn't really rust beyond the bend in that area. Stay on the outside of the bend. Down low, you have to go into the more flat area, but you want to minimize your exposure there as much as possible.
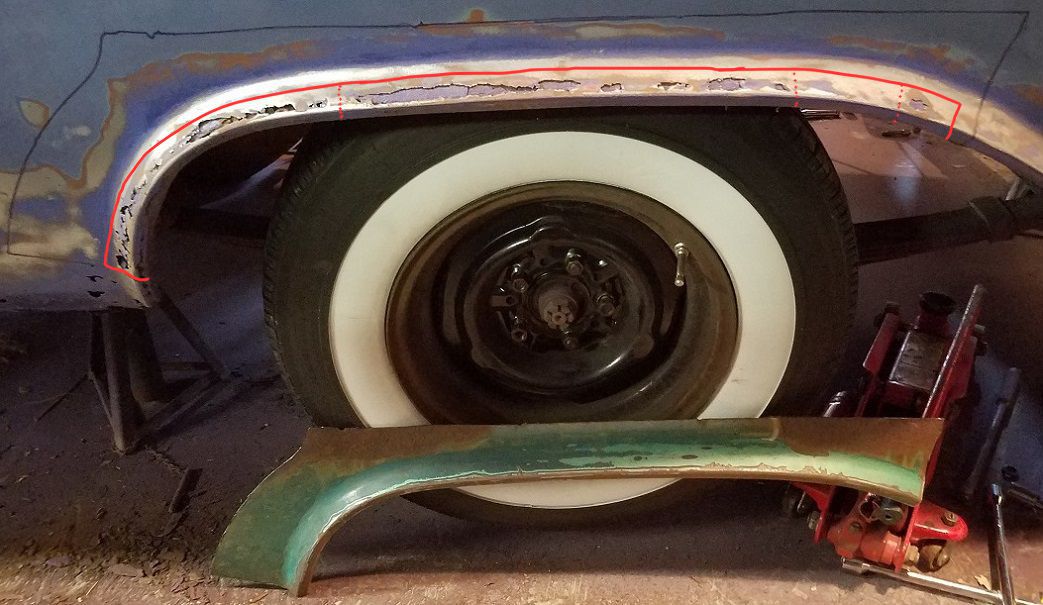 (bodywork.jpg) (bodywork.jpg)
Attachments
----------------
 bodywork.jpg (127KB - 375 downloads) bodywork.jpg (127KB - 375 downloads)
|
|
| |
|

Elite Veteran
Posts: 1112
 
Location: Wild Wonderful | That does make more sense, and that would be easier to do. And I think that I would like to
treat that last spot separately. The metal, in between there, is good. |
|
| |
|

Expert 5K+
Posts: 7400
     
Location: northern germany | 58DeSoDodge59 - 2017-12-08 10:37 AM
So maybe three little patches?
The dog leg in the front, then two little pieces?
if the spotweldet section where the inner and outer panels join are still good, yes, do it that way. i would. i always only replace the bad sections and try to keep the car as original as possible. needles to say, even if the risk of warping is greatly reduced that way, take yourself time and let it cool off in between. |
|
| |
|

Elite Veteran
Posts: 1112
 
Location: Wild Wonderful | Well, I opened another can of worms.
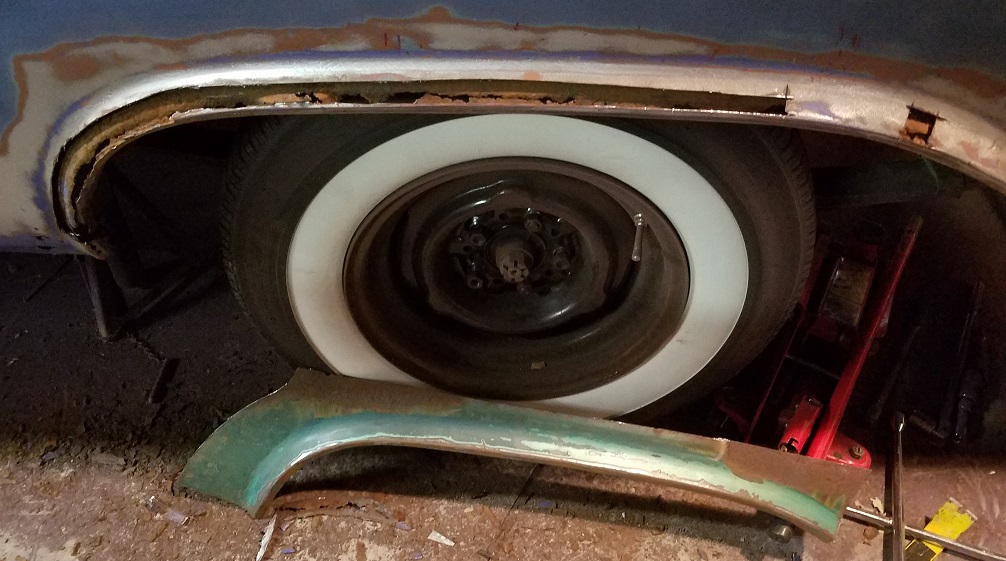 (cut.jpg) (cut.jpg)
Attachments
----------------
 cut.jpg (217KB - 356 downloads) cut.jpg (217KB - 356 downloads)
|
|
| |
|

Expert 5K+
Posts: 9666
      
Location: So. Cal | Yep, you need to fix the metal underneath first. But the good part is that you don't have to worry about making it perfectly straight under there. Also, you will want to drill out the spot welds along the bottom to replace that lower lip too, but you probably already know that. |
|
| |
|

Elite Veteran
Posts: 1112
 
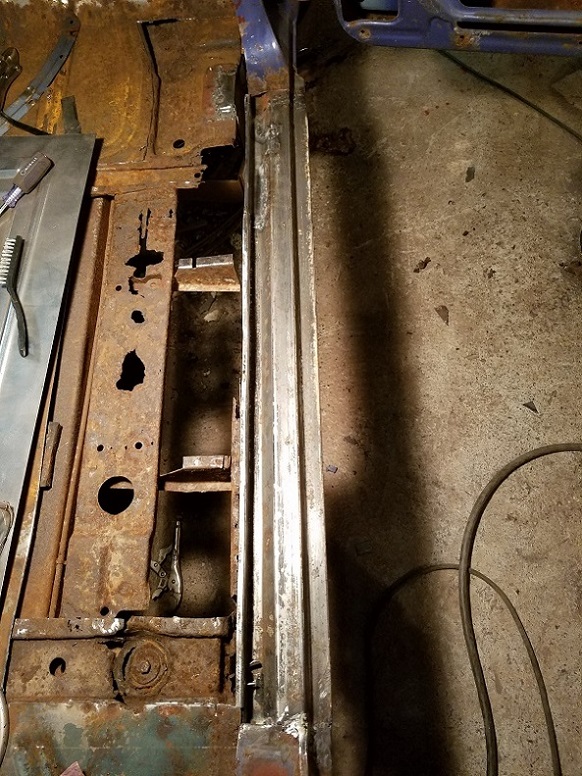
Location: Wild Wonderful | For some reason, I like jumping around.
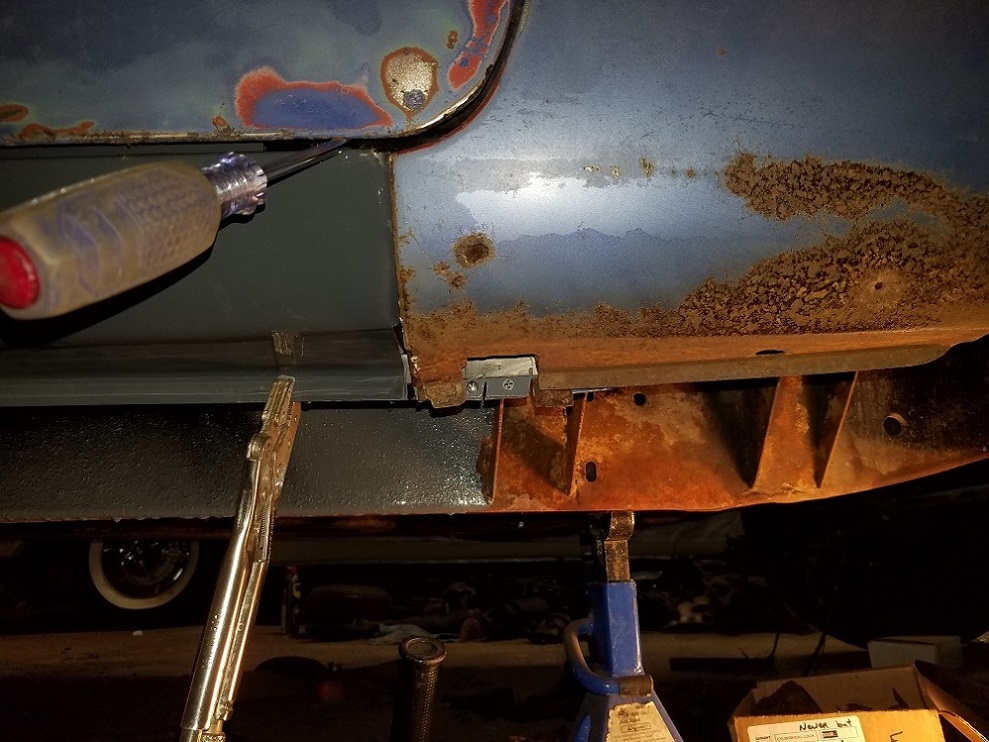
Before the wheel well, I was working on the passenger door sill. I am replacing one piece at
a time. I replaced the sill, now I am setting up to replace the inner rocker.
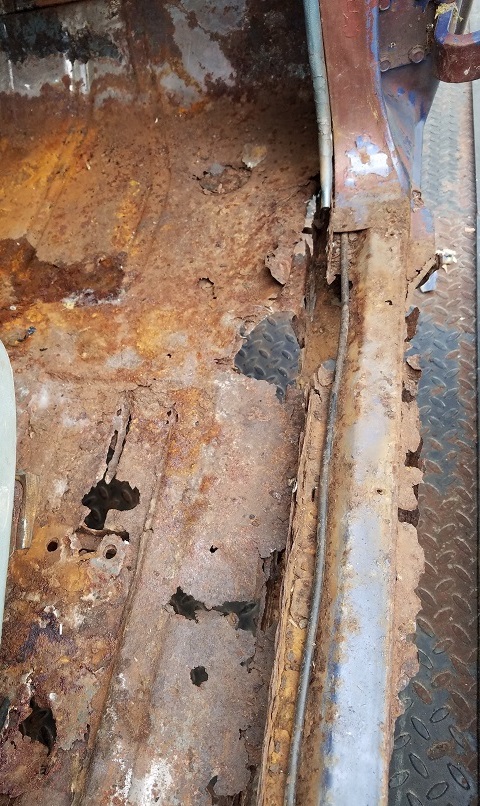 (sill1.jpg) (sill1.jpg)
 (sill4.jpg) (sill4.jpg)
Attachments
----------------
 sill1.jpg (236KB - 396 downloads) sill1.jpg (236KB - 396 downloads)
 sill4.jpg (237KB - 352 downloads) sill4.jpg (237KB - 352 downloads)
|
|
| |
|
Expert 5K+
Posts: 5006

| did you get some schott rockers yet? |
|
| |
|

Elite Veteran
Posts: 1112
 
Location: Wild Wonderful | Yep. I have a good set of extended rockers. |
|
| |
|

Expert 5K+
Posts: 9902
       
Location: Lower Mainland BC | 58DeSoDodge59 - 2017-10-18 5:52 PM
Someone from Australia is selling those stickers on ebay. You can change the word DeSoto to whatever.
Like this?
From this

to this?
Edited by 56D500boy 2017-12-17 2:58 PM
 (56DodgeHappiness.jpg) (56DodgeHappiness.jpg)
Attachments
----------------
 56DodgeHappiness.jpg (57KB - 344 downloads) 56DodgeHappiness.jpg (57KB - 344 downloads)
|
|
| |
|

Elite Veteran
Posts: 1112
 
Location: Wild Wonderful | inner
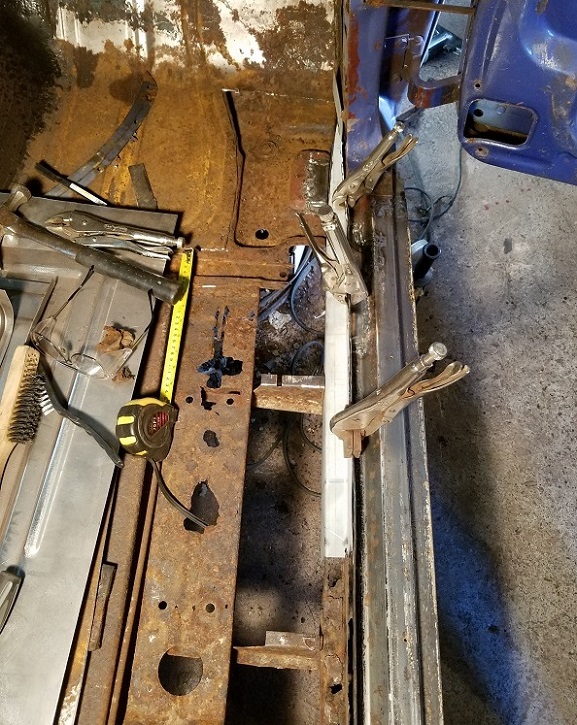 (innersill.jpg) (innersill.jpg)
Attachments
----------------
 innersill.jpg (249KB - 370 downloads) innersill.jpg (249KB - 370 downloads)
|
|
| |
|

Elite Veteran
Posts: 1112
 
Location: Wild Wonderful | Door frame.
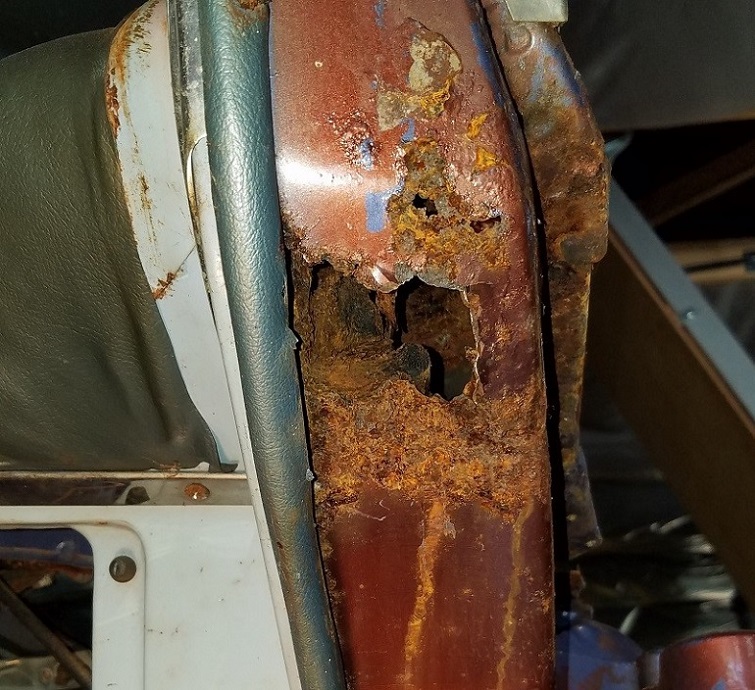 (b4cut.jpg) (b4cut.jpg)
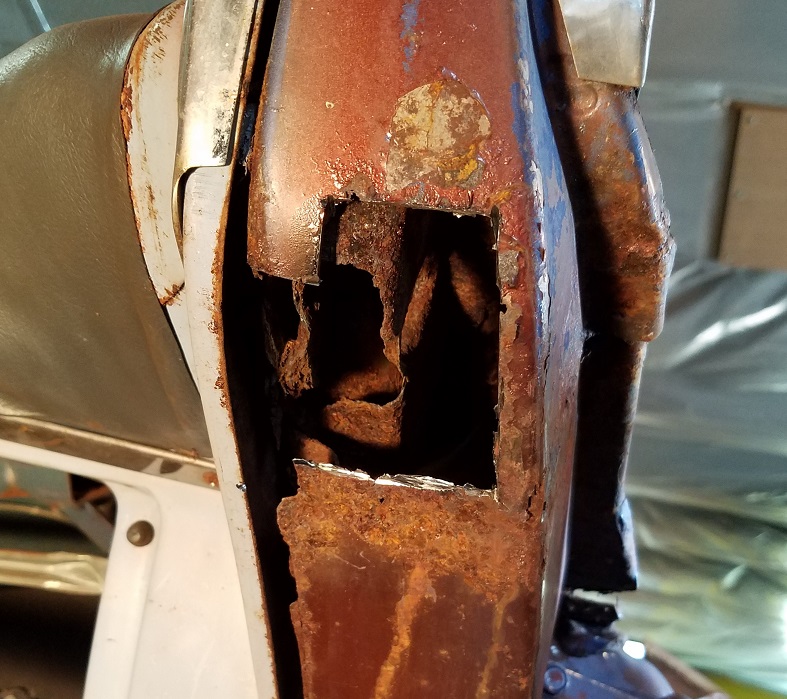 (b4weld.jpg) (b4weld.jpg)
Attachments
----------------
 b4cut.jpg (240KB - 349 downloads) b4cut.jpg (240KB - 349 downloads)
 b4weld.jpg (225KB - 345 downloads) b4weld.jpg (225KB - 345 downloads)
|
|
| |
|

Elite Veteran
Posts: 1112
 
Location: Wild Wonderful | First, the door sill. Second, the inner rocker. And now, the front seat brace.
Merry Christmas everybody.
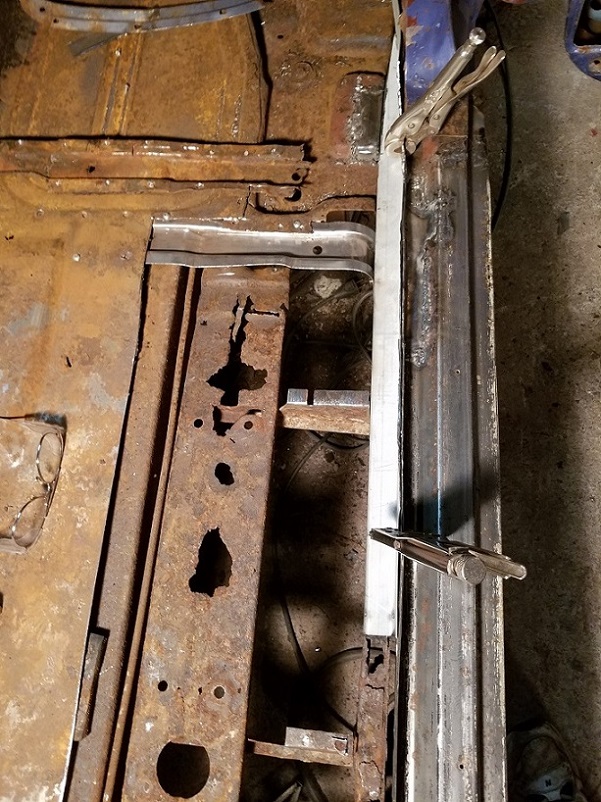 (thirditem.jpg) (thirditem.jpg)
Attachments
----------------
 thirditem.jpg (245KB - 358 downloads) thirditem.jpg (245KB - 358 downloads)
|
|
| |
|

Elite Veteran
Posts: 1112
 
Location: Wild Wonderful | The next piece of the inner rocker.
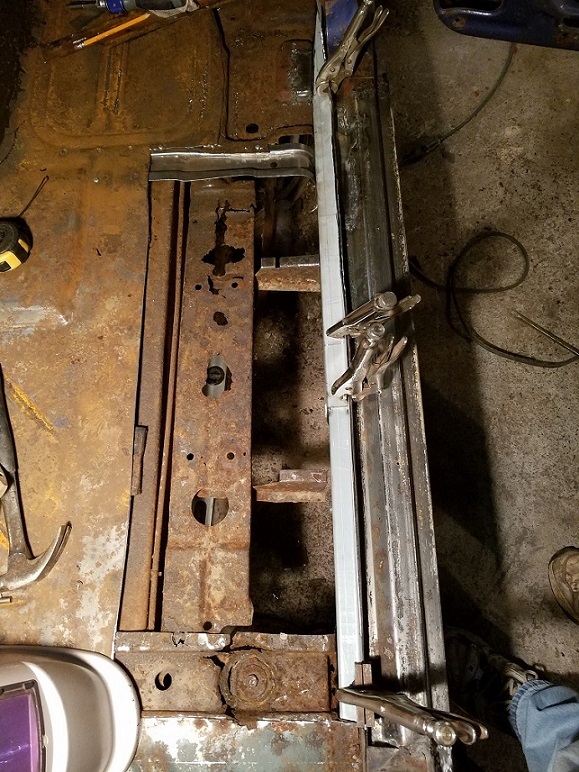 (nextstep.jpg) (nextstep.jpg)
Attachments
----------------
 nextstep.jpg (243KB - 334 downloads) nextstep.jpg (243KB - 334 downloads)
|
|
| |
|

Elite Veteran
Posts: 1112
 
Location: Wild Wonderful | I cut out for the floor sheet metal, at the beginning, then I marked and drilled the holes on the new panel,
for the floor braces. Now I put down that sheet metal and bolted the new braces to the bottom. This gave
me the exact position. I am screwing everything in place. Later I will take it all apart and paint it. Then, in
order to spot weld it, I will drill the spots. Welcome to 2018.
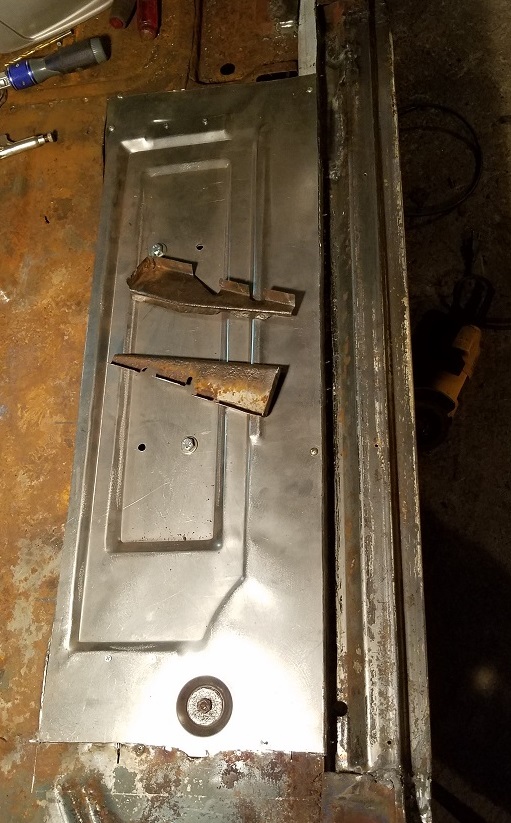 (sill8.jpg) (sill8.jpg)
Attachments
----------------
 sill8.jpg (190KB - 350 downloads) sill8.jpg (190KB - 350 downloads)
|
|
| |
|

Elite Veteran
Posts: 1112
 
Location: Wild Wonderful | I love a three day weekend.
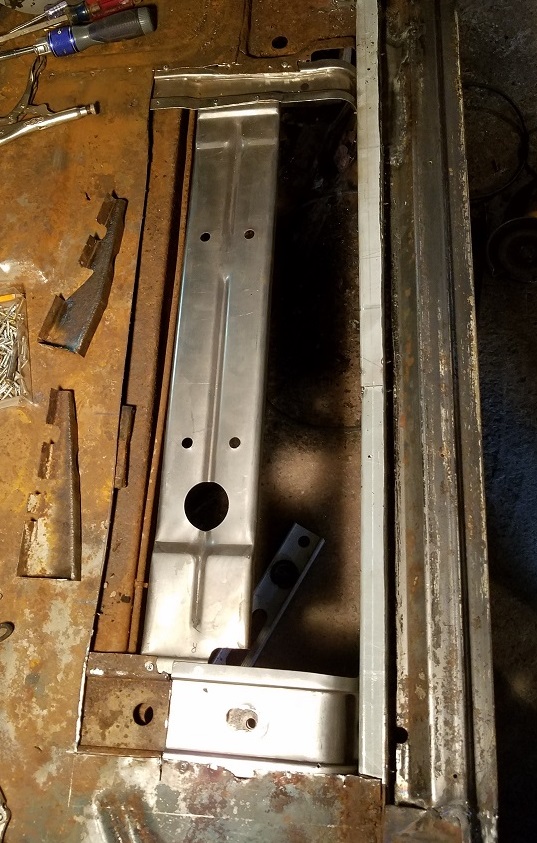 (sill9.jpg) (sill9.jpg)
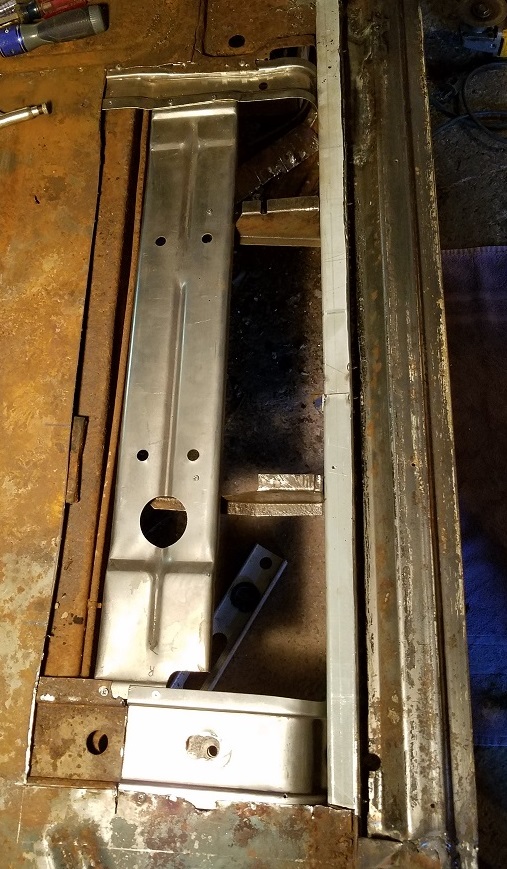 (sill10.jpg) (sill10.jpg)
Attachments
----------------
 sill9.jpg (219KB - 349 downloads) sill9.jpg (219KB - 349 downloads)
 sill10.jpg (221KB - 375 downloads) sill10.jpg (221KB - 375 downloads)
|
|
| |
|

Elite Veteran
Posts: 1112
 
Location: Wild Wonderful | Okay, I took it all apart.
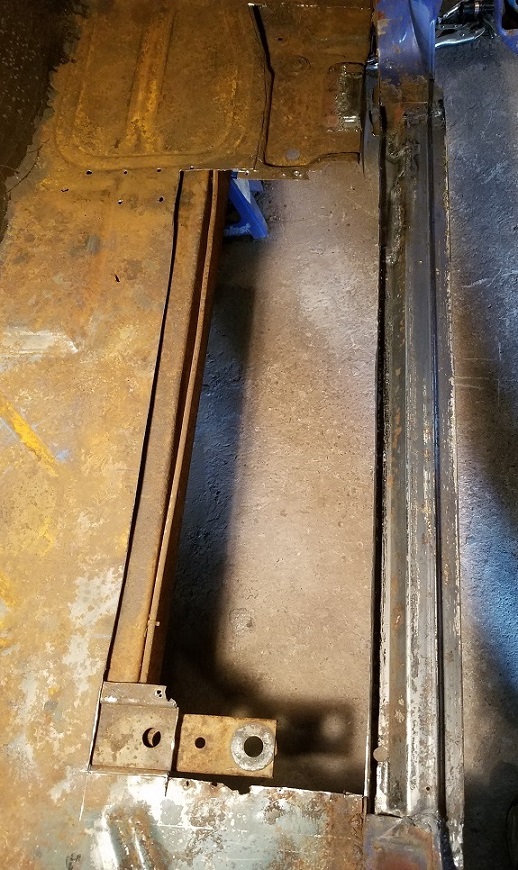 (sill11.jpg) (sill11.jpg)
Attachments
----------------
 sill11.jpg (241KB - 350 downloads) sill11.jpg (241KB - 350 downloads)
|
|
| |
|

Elite Veteran
Posts: 1112
 
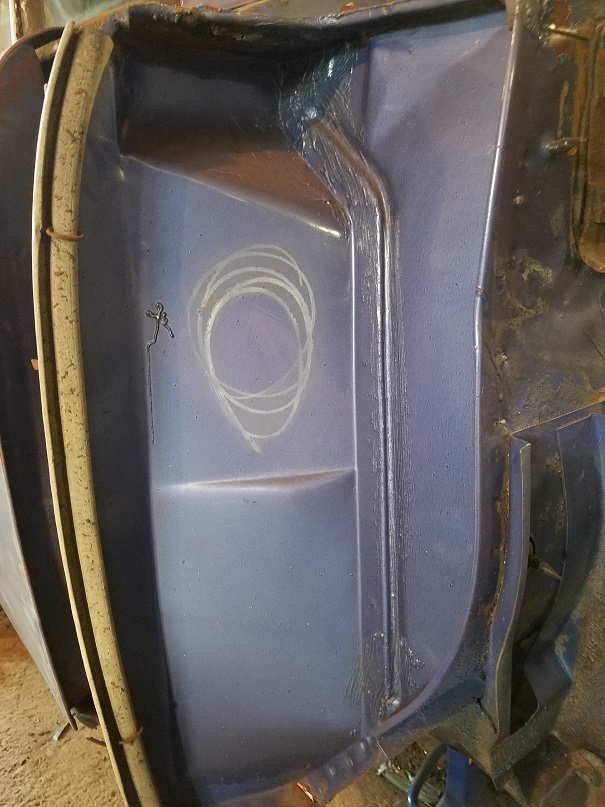
Location: Wild Wonderful | Hey guys, look what I found. This circle what made into the original paint, while it was still
fairly wet. What do you guys think?
 (inspectcircle.jpg) (inspectcircle.jpg)
Attachments
----------------
 inspectcircle.jpg (212KB - 367 downloads) inspectcircle.jpg (212KB - 367 downloads)
|
|
| |
|

Elite Veteran
Posts: 1112
 
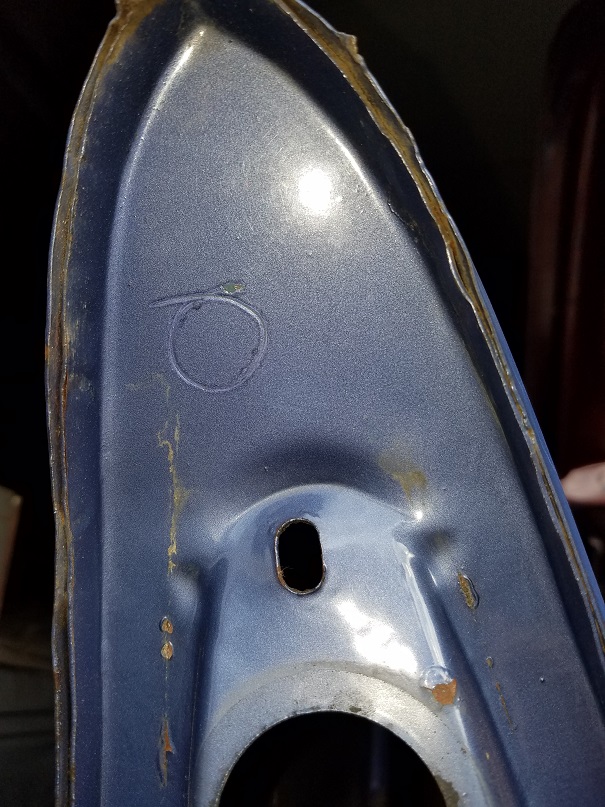
Location: Wild Wonderful | There are circles all over this car. The inspector must have been Orville Oliver.
 (circlehappy.jpg) (circlehappy.jpg)
 (inspectcircle.jpg) (inspectcircle.jpg)
Attachments
----------------
 circlehappy.jpg (193KB - 352 downloads) circlehappy.jpg (193KB - 352 downloads)
 inspectcircle.jpg (212KB - 355 downloads) inspectcircle.jpg (212KB - 355 downloads)
|
|
| |
|
Elite Veteran
Posts: 943
     
| Thanks for posting up all these photos of your restoration. I am going be doing almost the exact same repair to a '58 Desoto and it is very helpful to see how you did it, the fitment, etc. As for the circles, no idea...... |
|
| |
|
Expert 5K+
Posts: 5006

| you got your floor braces from Sweden? ebay? if you contact directly you can get a better deal?
not cheap but that's the stuff you need. I think the guy was playing with his "marks" that day, most of the time they are yellow/white or black "X"'s ive found.
Not sure what it mean but maybe the part/area was "done" in a certain area. doors had marks also probably after the hardware was in and tested, so a "loaded" door had an X on it.
|
|
| |
|

Elite Veteran
Posts: 1112
 
Location: Wild Wonderful | FINS! - 2018-01-13 1:54 PM
Thanks for posting up all these photos of your restoration. I am going be doing almost the exact same repair to a '58 Desoto and it is very helpful to see how you did it, the fitment, etc. As for the circles, no idea......
Garrett, Congratulations on finding a 58 DeSoto. Is that the Spring Special that was in
an out building in Texas? Is it the one that kids walked on and made big dents in the
hood and top? I am looking forward to seeing the restoration of it. What are your
plans for it? |
|
| |
|

Elite Veteran
Posts: 1112
 
Location: Wild Wonderful | mikes2nd - 2018-01-14 2:34 PM
you got your floor braces from Sweden? ebay? if you contact directly you can get a better deal?
not cheap but that's the stuff you need. I think the guy was playing with his "marks" that day, most of the time they are yellow/white or black "X"'s ive found.
Not sure what it mean but maybe the part/area was "done" in a certain area. doors had marks also probably after the hardware was in and tested, so a "loaded" door had an X on it.
Mike, I got the floor braces from FIN- land.
The circle... I think you're right, I think that one of the painters just decided to put his mark on the car.
What better place to put it than under the tail light housing. |
|
| |
|

Elite Veteran
Posts: 1112
 
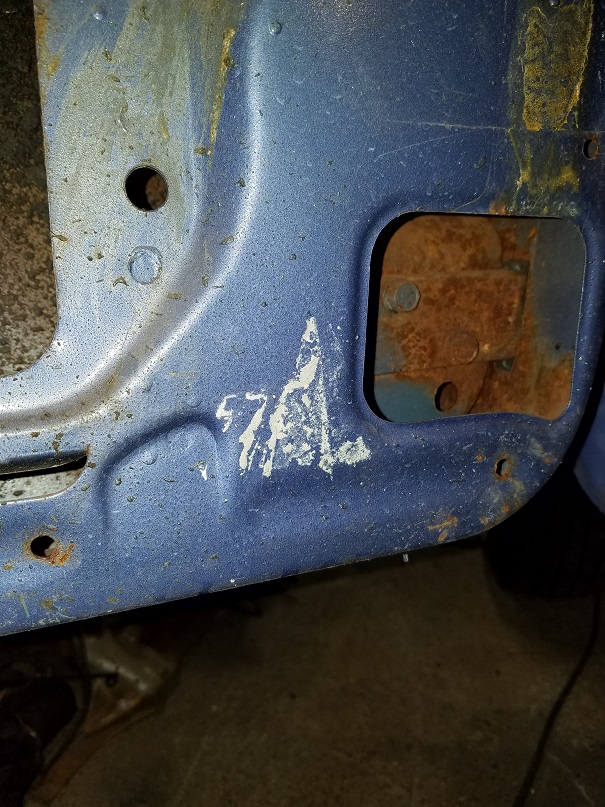
Location: Wild Wonderful | I was working on the passenger side of the car, and I looked over and saw this 57 on the drivers door.
Right beside it, it looks like a forward look emblem pointing up.  I think it is just glue residue from I think it is just glue residue from
the duct tape they used when they taped the plastic to the inside of the door. But it looks neat anyway.
 (57forwardlook.jpg) (57forwardlook.jpg)
Attachments
----------------
 57forwardlook.jpg (220KB - 347 downloads) 57forwardlook.jpg (220KB - 347 downloads)
|
|
| |
|

Elite Veteran
Posts: 1112
 
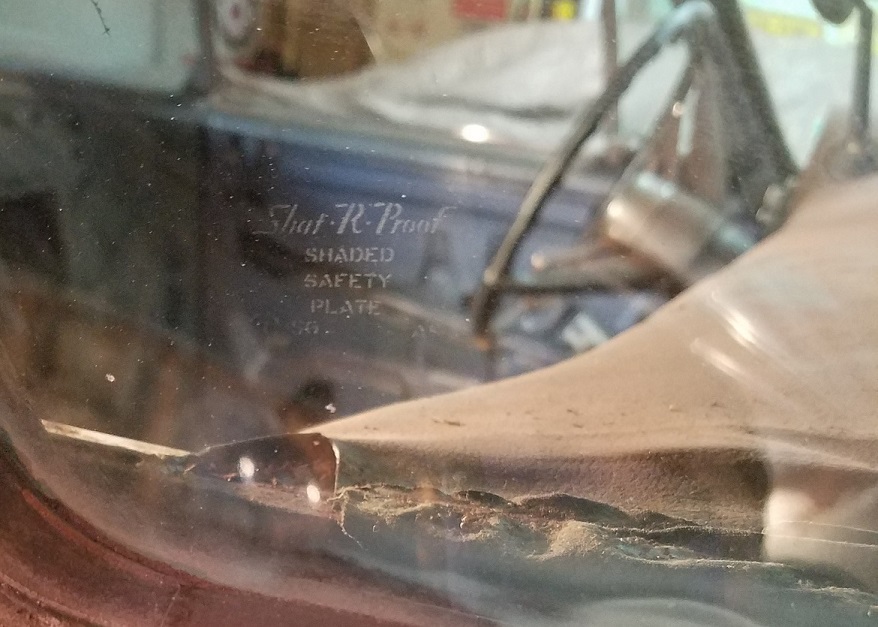
Location: Wild Wonderful | Okay, from 1958 to 1966, I found that the car had some body damage on the lower half,
so they touched up only the lower half of the paint. I wonder if that body damage caused
a crack in the windshield, because the windshield has been replaced also. At some point the
car was then painted that ugly red color. That red paint had some scratches in it, like it was
driven through some sticker bushes. When I removed the side moldings, they were already
bent, from someone removing them previously. Anyway, I would say that the red paint was
on there for at least three years before it was put in that barn. So I am thinking that the
parents of the college student bought the car, from a used car dealer, that painted the car red.

 (20180107_152817 (2).jpg) (20180107_152817 (2).jpg)
Attachments
----------------
 20180107_152817 (2).jpg (187KB - 339 downloads) 20180107_152817 (2).jpg (187KB - 339 downloads)
|
|
| |
|
Expert 5K+
Posts: 5006

| the guy on facebook is selling great looking floors |
|
| |
|

Elite Veteran
Posts: 1112
 
Location: Wild Wonderful | mikes2nd - 2018-01-18 11:38 PM
the guy on facebook is selling great looking floors
Yes. I have noticed. Does anybody have any feedback on them?
I don't need any for this car, but my other DeSoto will need some. |
|
| |
|

Elite Veteran
Posts: 1112
 
Location: Wild Wonderful | I welded the brackets in. I painted everything, but I taped off the edge of the sheet metal
where I will be welding the new piece to it.
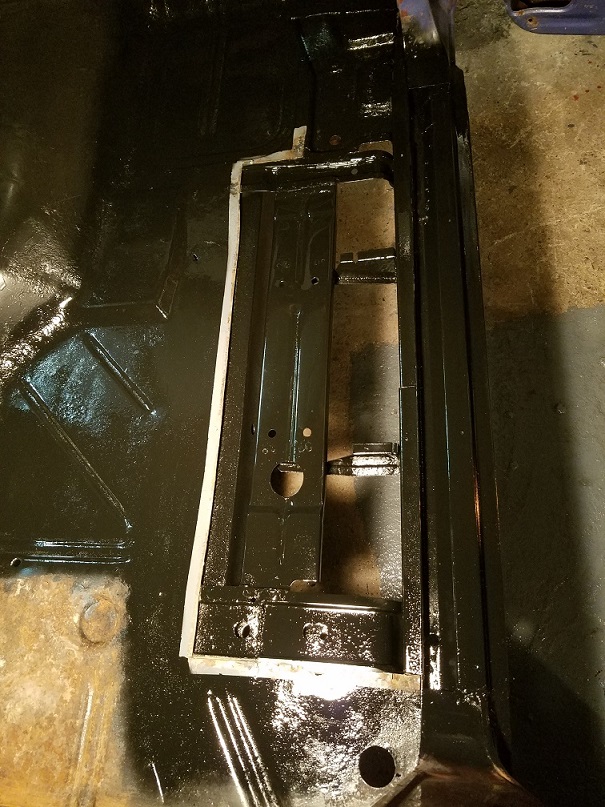 (sill12.jpg) (sill12.jpg)
Attachments
----------------
 sill12.jpg (217KB - 463 downloads) sill12.jpg (217KB - 463 downloads)
|
|
| |
|

Elite Veteran
Posts: 1112
 
Location: Wild Wonderful | Welded the panel on. I am starting to get pretty good at welding. 
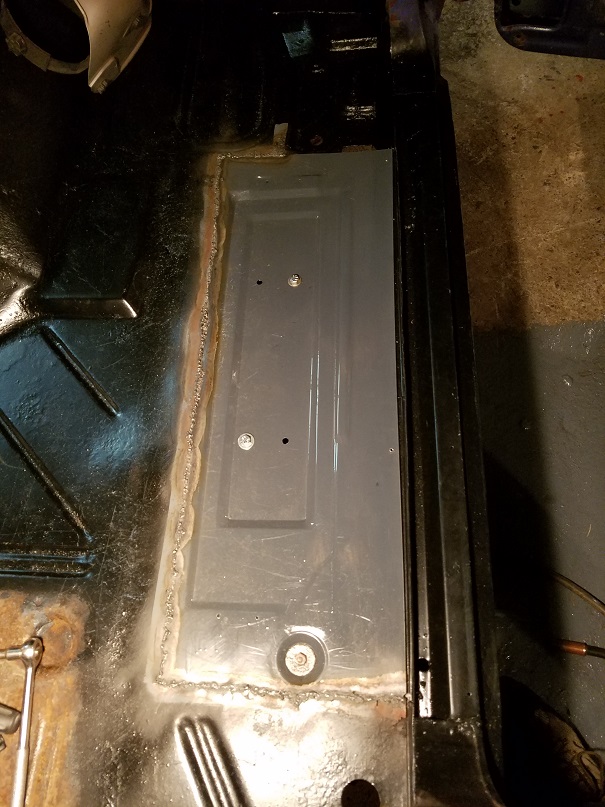 (sill13.jpg) (sill13.jpg)
Attachments
----------------
 sill13.jpg (173KB - 447 downloads) sill13.jpg (173KB - 447 downloads)
|
|
| |
|

Expert 5K+
Posts: 9666
      
Location: So. Cal | Nice job! |
|
| |
|

Elite Veteran
Posts: 1112
 
Location: Wild Wonderful | Working at night. I had the green light.
I'm a poet, and didn't know it.
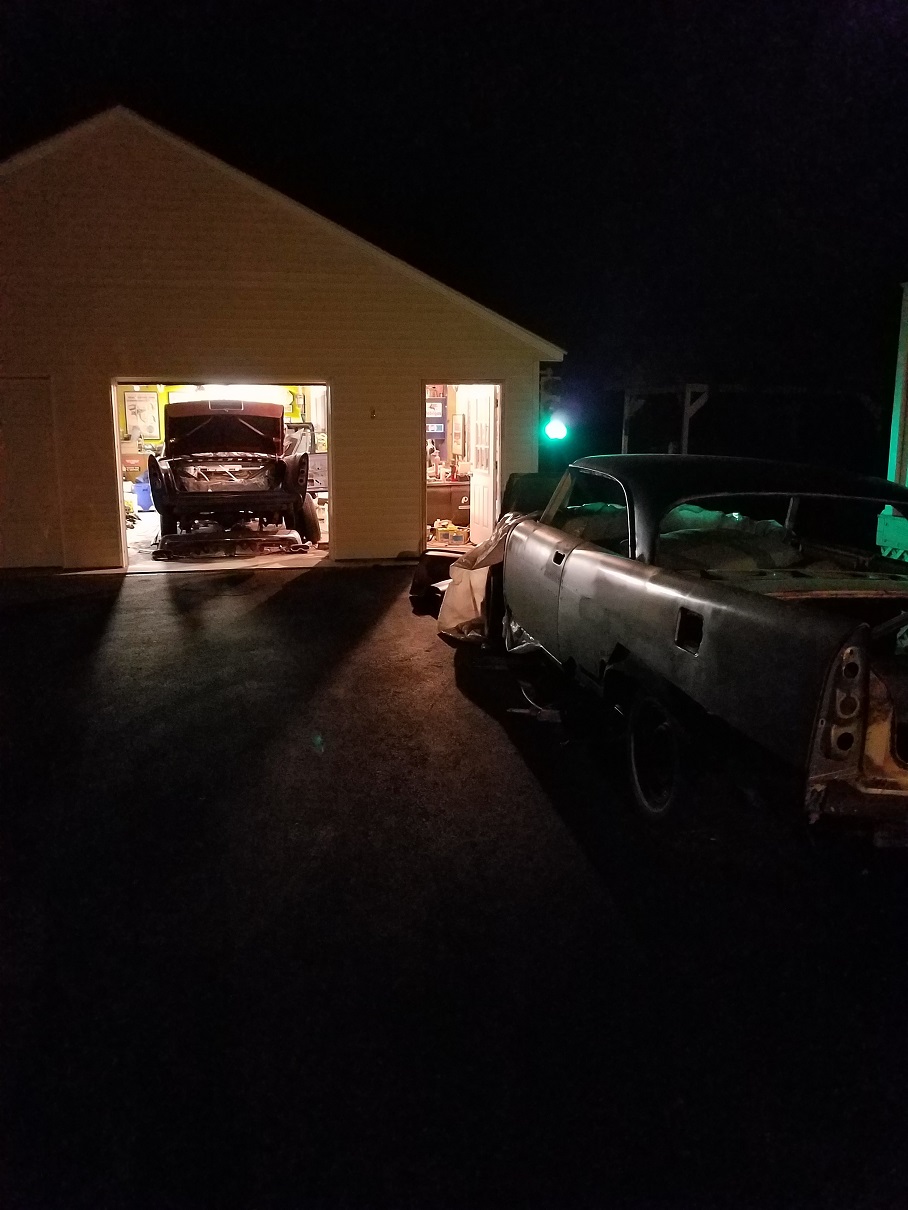 (nightwork.jpg) (nightwork.jpg)
Attachments
----------------
 nightwork.jpg (240KB - 437 downloads) nightwork.jpg (240KB - 437 downloads)
|
|
| |
|
Member
Posts: 31

Location: South Australia | This is a great tutorial on floor repair! The piece that you still have to weld in, where the body mount bolt goes through, did you have to fabricate a new piece or are patch panels available for this? The reason I ask is that I have a few body mount points where the top skin is somewhat pitted - just wondering what the fix is :-)
Keep up the good work! |
|
| |
|

Elite Veteran
Posts: 1112
 
Location: Wild Wonderful | Yes, they do make replacement panels for these floors. But nobody makes a really good/detailed panel.
The panels that they make are for the complete front floor section. I do not need that much, so I am
just going to fabricate a panel to cover this little area. I will probably cut an access hole for the
body mount. Then put one of those plastic plugs in the hole.
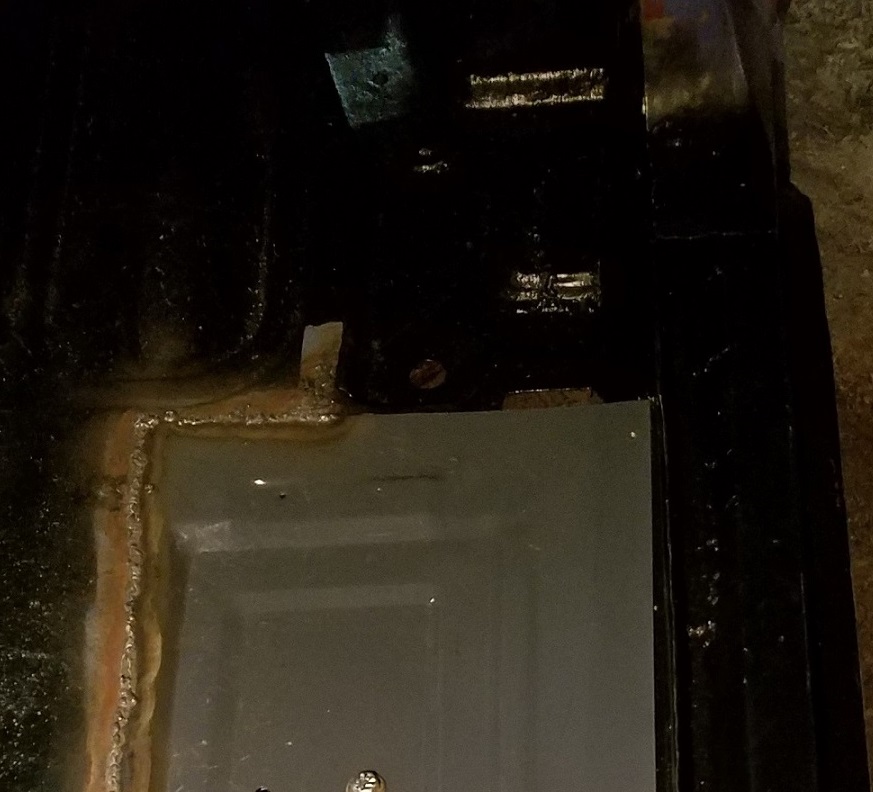 (sill14.jpg) (sill14.jpg)
Attachments
----------------
 sill14.jpg (166KB - 474 downloads) sill14.jpg (166KB - 474 downloads)
|
|
| |
|

Elite Veteran
Posts: 1112
 
Location: Wild Wonderful | One piece at a time.
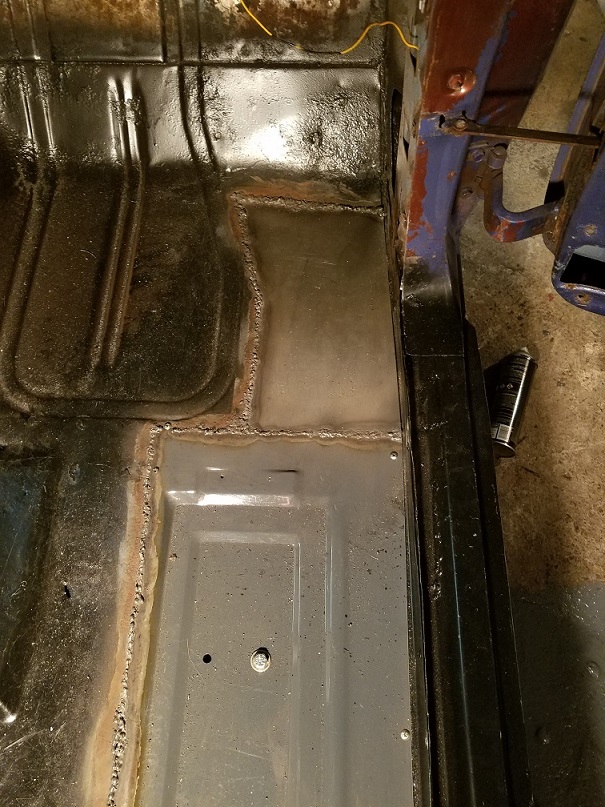 (sill15.jpg) (sill15.jpg)
Attachments
----------------
 sill15.jpg (242KB - 468 downloads) sill15.jpg (242KB - 468 downloads)
|
|
| |
|

Elite Veteran
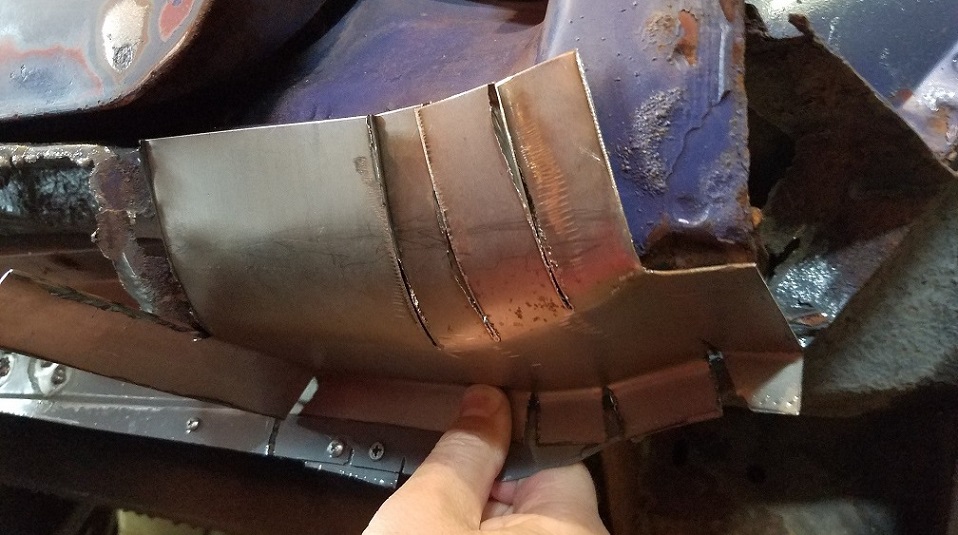
Posts: 1112
 
Location: Wild Wonderful | Time to move over to the outer rockers. I made myself an armadillo, for my DeSoto. 
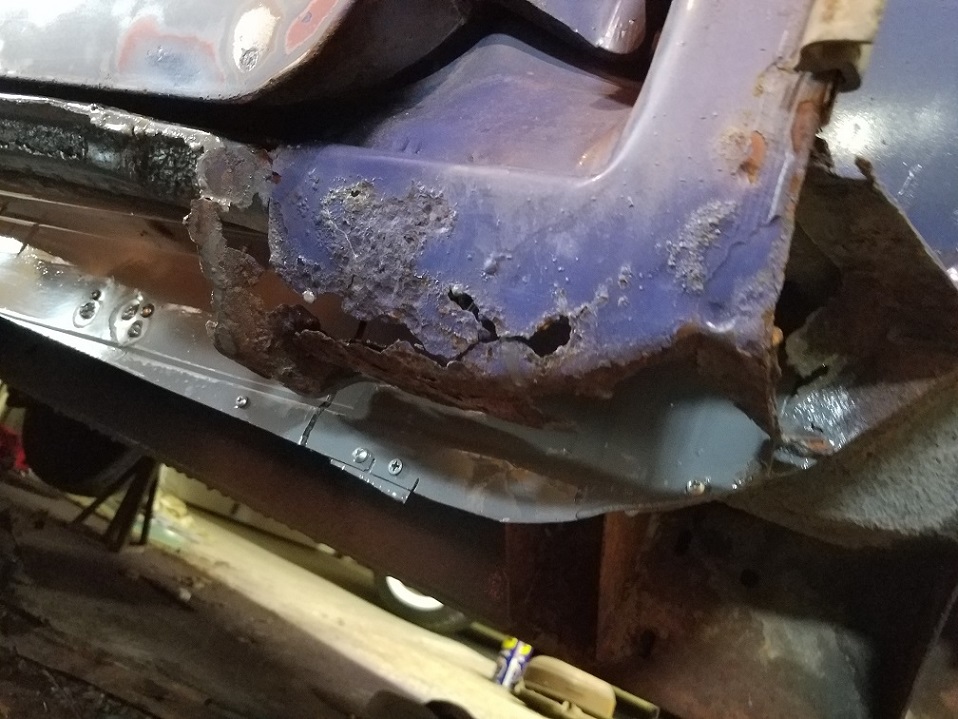 (outer1.jpg) (outer1.jpg)
 (armadillo.jpg) (armadillo.jpg)
 (outer2.jpg) (outer2.jpg)
Attachments
----------------
 outer1.jpg (232KB - 459 downloads) outer1.jpg (232KB - 459 downloads)
 armadillo.jpg (189KB - 479 downloads) armadillo.jpg (189KB - 479 downloads)
 outer2.jpg (196KB - 456 downloads) outer2.jpg (196KB - 456 downloads)
|
|
| |
|
Extreme Veteran
Posts: 537
 
Location: Upstate NY | Nice! What gauge is that? The repairs look good! |
|
| |
|

Elite Veteran
Posts: 1112
 
Location: Wild Wonderful | bbrasse1 - 2018-01-28 5:00 PM
Nice! What gauge is that? The repairs look good!
I think that is the metal that I bought from Lowes, so I think it is 22 gauge. |
|
| |
|
Expert 5K+
Posts: 5006

| find a local sheetmetal place, many will sell wholesale sheets. I got mine from Schotts.
Lowes stopped carrying the right gauge and they are too high priced and they only carry 16 and 22 gauge.
I think it was 18 gauge. |
|
| |
|

       
Location: The Mile High City | Very nice, Kurt! It is so much fun to see this project move along! I am impressed with how much you are doing yourself. Well done! |
|
| |
|

Elite Veteran
Posts: 1112
 
Location: Wild Wonderful | Thanks Mike. I appreciate it.
Here is the Armadillo clamped on. I wanted to cut off as little as possible from the car.
I will have to patch that hole up front.
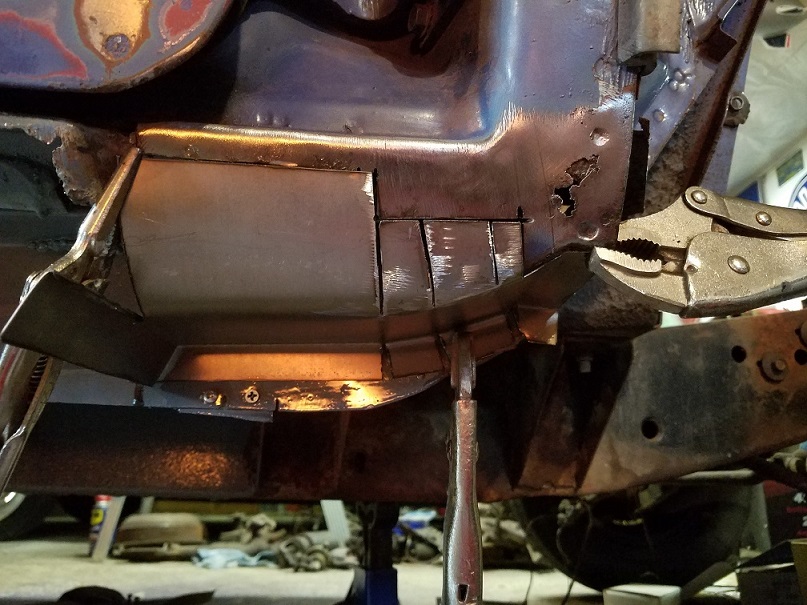 (outer3.jpg) (outer3.jpg)
Attachments
----------------
 outer3.jpg (205KB - 454 downloads) outer3.jpg (205KB - 454 downloads)
|
|
| |
|

Elite Veteran
Posts: 1112
 
Location: Wild Wonderful | Tacked in
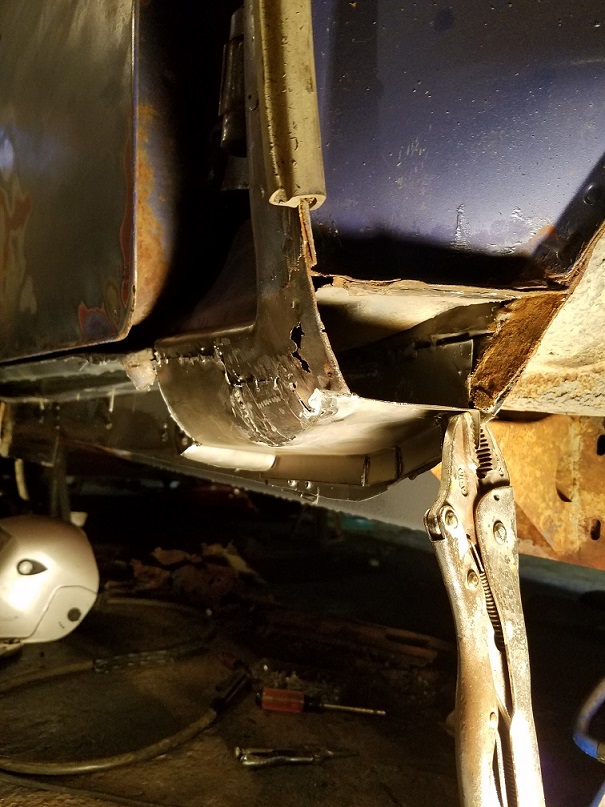 (outer4.jpg) (outer4.jpg)
Attachments
----------------
 outer4.jpg (191KB - 451 downloads) outer4.jpg (191KB - 451 downloads)
|
|
| |
|

Elite Veteran
Posts: 1112
 
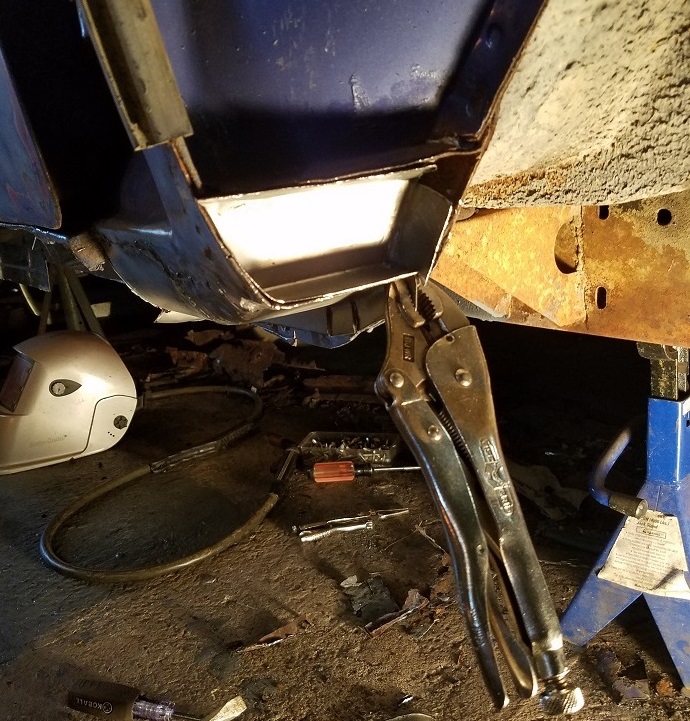
Location: Wild Wonderful | I tried to cut the front panel from one piece of metal. I missed the one corner. FYI, this area is not flat.
It sits at an angle. I might take this panel back out, make some adjustments, then flatten it again, so
I will have the pattern to make a few of them, for the other DeSotos here.
Edited by 58DeSoDodge59 2018-02-06 8:39 PM
 (outer5.jpg) (outer5.jpg)
Attachments
----------------
 outer5.jpg (243KB - 437 downloads) outer5.jpg (243KB - 437 downloads)
|
|
| |
|

Expert 5K+
Posts: 9666
      
Location: So. Cal | Cool, post up the pattern when you get it done. |
|
| |
|

Elite Veteran
Posts: 1112
 
Location: Wild Wonderful | I drilled out a couple of broken off bolts in one of the front fenders. I still need to drill out the
same ones on the other fender.
I bought this industrial light from a vendor at Carlisle, a couple years back. I rewired it, then put
a 100 watt bulb in it. I finally installed it the other day. Some days you just gotta do something goofy.
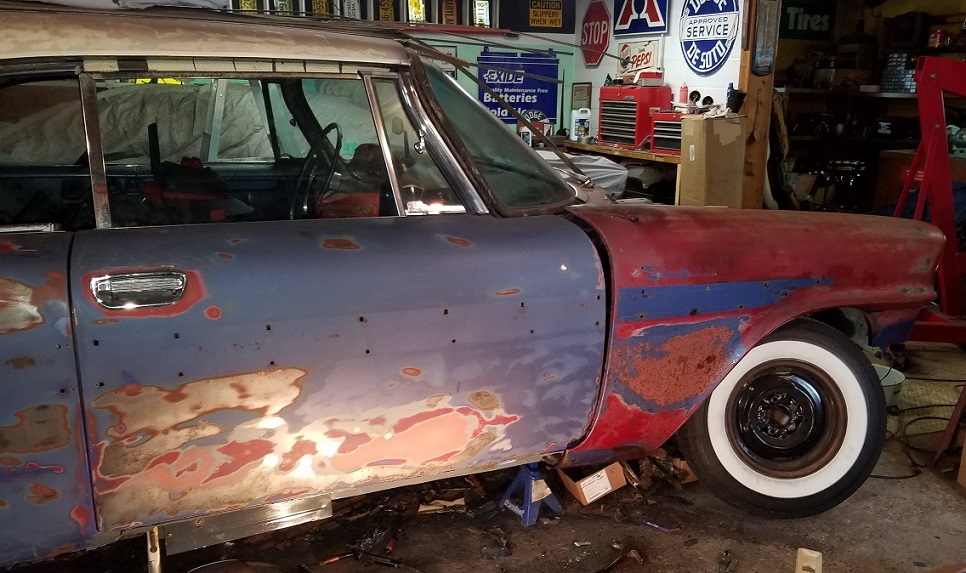 (fender.jpg) (fender.jpg)
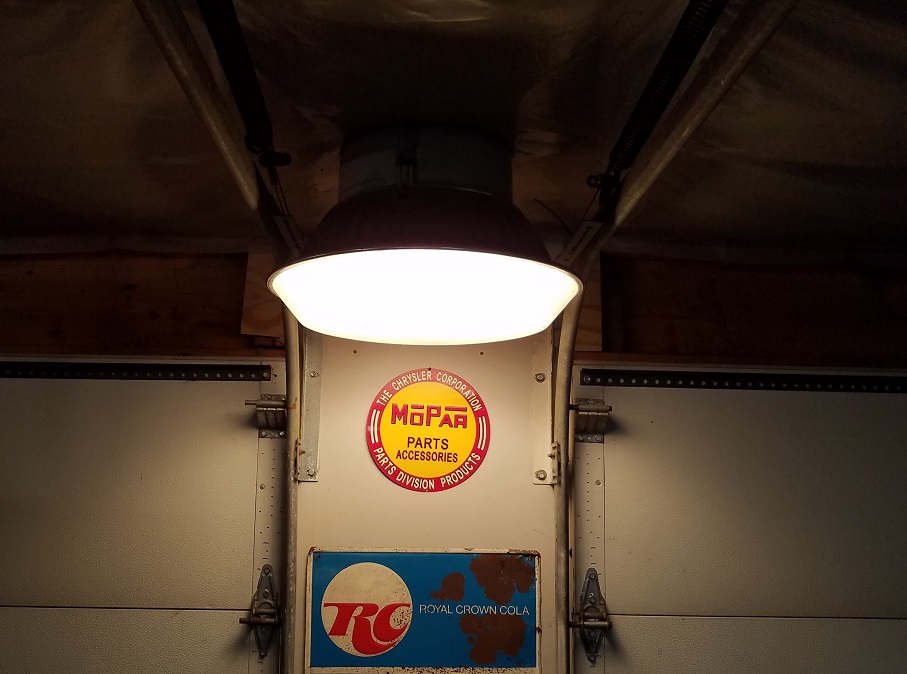 (industrial.jpg) (industrial.jpg)
Attachments
----------------
 fender.jpg (235KB - 426 downloads) fender.jpg (235KB - 426 downloads)
 industrial.jpg (167KB - 451 downloads) industrial.jpg (167KB - 451 downloads)
|
|
| |
|

Elite Veteran
Posts: 1112
 
Location: Wild Wonderful | I put the fender on, temporarily, to make sure the lower fender bolt area lines up correctly.
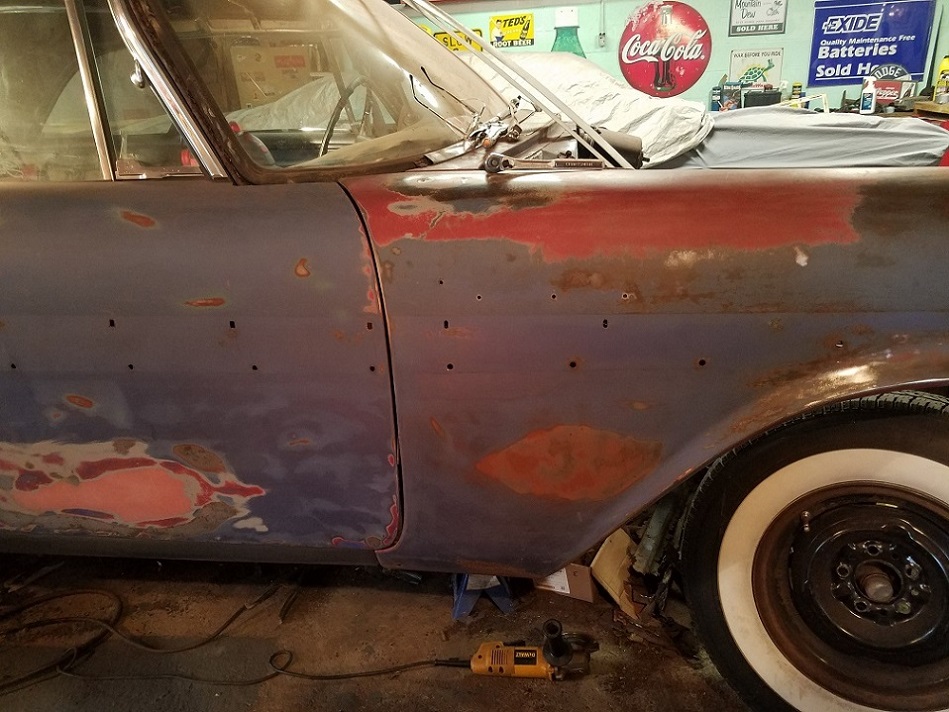 (outerfender.jpg) (outerfender.jpg)
 (outer6.jpg) (outer6.jpg)
Attachments
----------------
 outerfender.jpg (246KB - 440 downloads) outerfender.jpg (246KB - 440 downloads)
 outer6.jpg (245KB - 439 downloads) outer6.jpg (245KB - 439 downloads)
|
|
| |
|

Elite Veteran
Posts: 1112
 
Location: Wild Wonderful | My new Data Tag from A.G. Backeast.
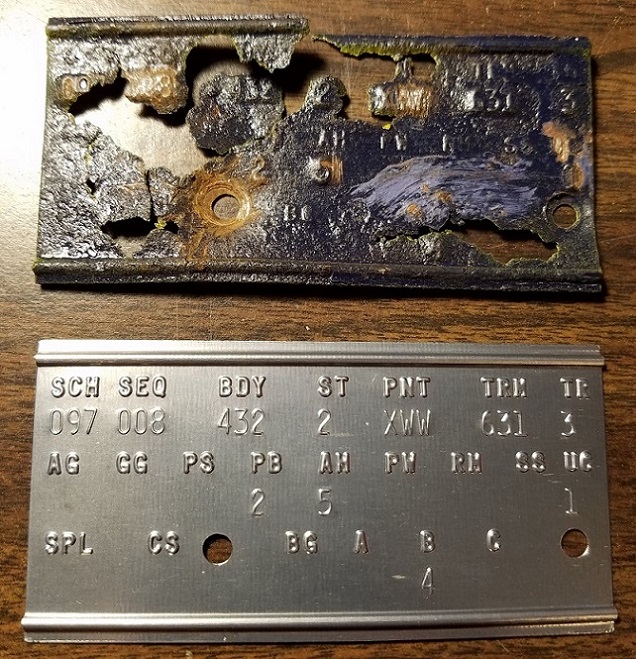 (bluewhitess.jpg) (bluewhitess.jpg)
Attachments
----------------
 bluewhitess.jpg (240KB - 431 downloads) bluewhitess.jpg (240KB - 431 downloads)
|
|
| |
|

Expert 5K+
Posts: 9666
      
Location: So. Cal | Nice! It's actually readable now.  |
|
| |
|

Expert
Posts: 3967
        
Location: DFW, TX | If you're looking for brakes and drivetrain parts for this car, you might take a look here: http://forwardlook.net/forums/forums/thread-view.asp?tid=68102
Not to gloat, but my body tag was in much better condition. I even got the steel to polish up a little! 
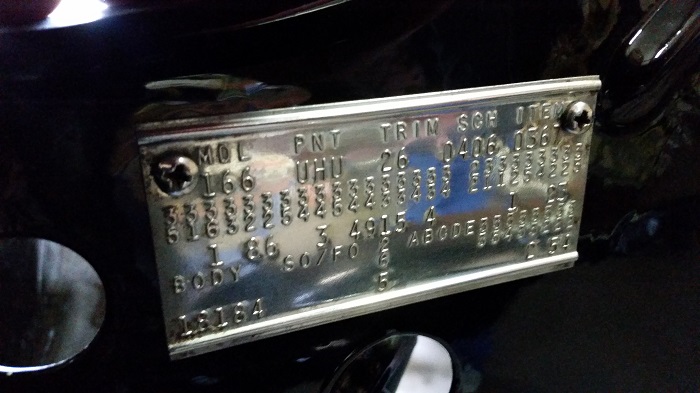 (20170304_112452.jpg) (20170304_112452.jpg)
Attachments
----------------
 20170304_112452.jpg (96KB - 422 downloads) 20170304_112452.jpg (96KB - 422 downloads)
|
|
| |
|

      
Location: Parts Unknown | What is the protocol for getting a new data tag from AG East ? I have no
need anymore, but spent years plexing about how I would make a correct
one for my old Adventurer ... it was quite literally a mat of rust scale where
it remained, and much of it was gone. There was no reading it. To make
matters worse, the VIN tag had fallen off the cowl during shipment, so I had
NOTHING to go off of. The car was a wrecking yard rescue, so there was no
title. I built up a set of codes, based on what I saw on the hulk, but never
tried to get a tag made. |
|
| |
|

Expert 5K+
Posts: 9666
      
Location: So. Cal | Kurt details it out for you on this thread.
http://forwardlook.net/forums/forums/thread-view.asp?tid=68098&post... |
|
| |
|

Elite Veteran
Posts: 1112
 
Location: Wild Wonderful | Doctor DeSoto - 2018-03-08 12:15 AM
What is the protocol for getting a new data tag from AG East ? I have no
need anymore, but spent years plexing about how I would make a correct
one for my old Adventurer ... it was quite literally a mat of rust scale where
it remained, and much of it was gone. There was no reading it. To make
matters worse, the VIN tag had fallen off the cowl during shipment, so I had
NOTHING to go off of. The car was a wrecking yard rescue, so there was no
title. I built up a set of codes, based on what I saw on the hulk, but never
tried to get a tag made.
I think that the only people that would be able to help you in that situation
is Chrysler Historical. But you would have to pay them a visit. You would have
to have a unique set of options on the car, to see if you could match it up with
something on their records. But even then, I doubt that they would release
that information to you. If you don't remember what the VIN is, I think you
are out of luck.

A.G. Backeast would still be able to make a Data Plate for you, with the info you have.
Edited by 58DeSoDodge59 2018-03-09 10:46 AM
|
|
| |
|

Elite Veteran
Posts: 1112
 
Location: Wild Wonderful | Powerflite - 2018-02-06 11:20 PM
Cool, post up the pattern when you get it done.
Here ya go. Some adjustments might need to be made. Remember, this area was mostly missing
on my car.
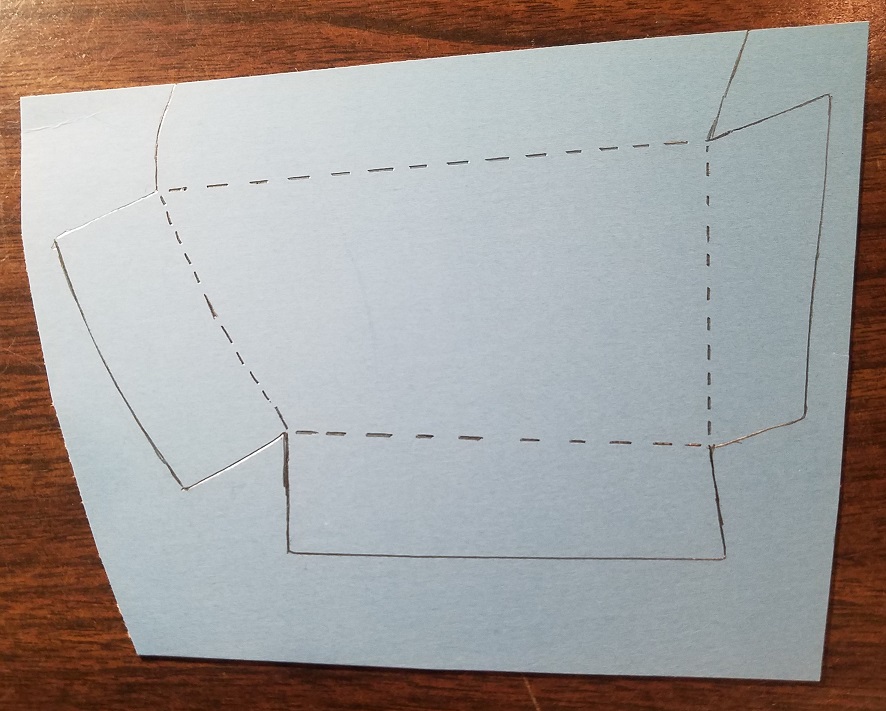 (rockercap1.jpg) (rockercap1.jpg)
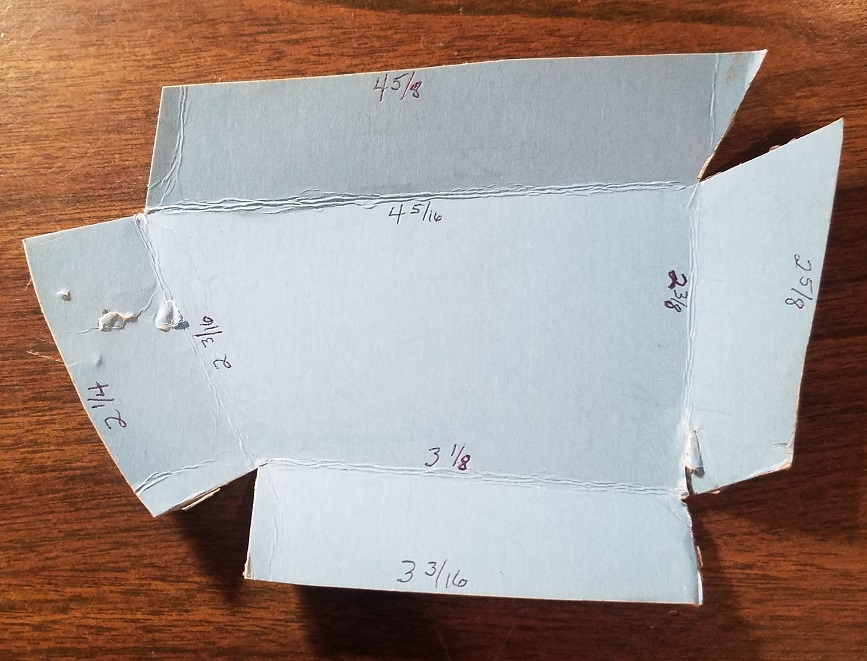 (rockercap2.jpg) (rockercap2.jpg)
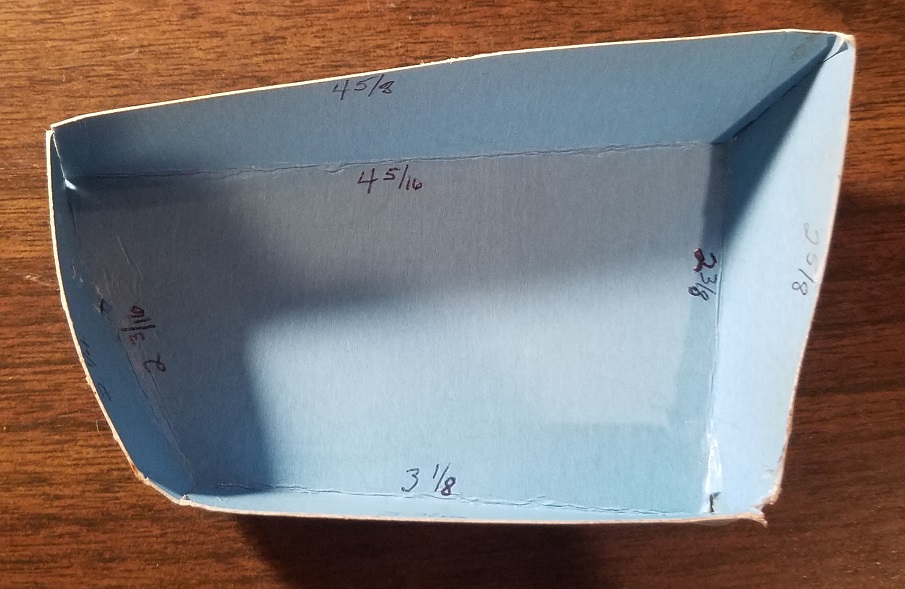 (rockercap3.jpg) (rockercap3.jpg)
Attachments
----------------
 rockercap1.jpg (201KB - 415 downloads) rockercap1.jpg (201KB - 415 downloads)
 rockercap2.jpg (214KB - 421 downloads) rockercap2.jpg (214KB - 421 downloads)
 rockercap3.jpg (191KB - 410 downloads) rockercap3.jpg (191KB - 410 downloads)
|
|
| |
|

Elite Veteran
Posts: 1112
 
Location: Wild Wonderful | Lip numbers.
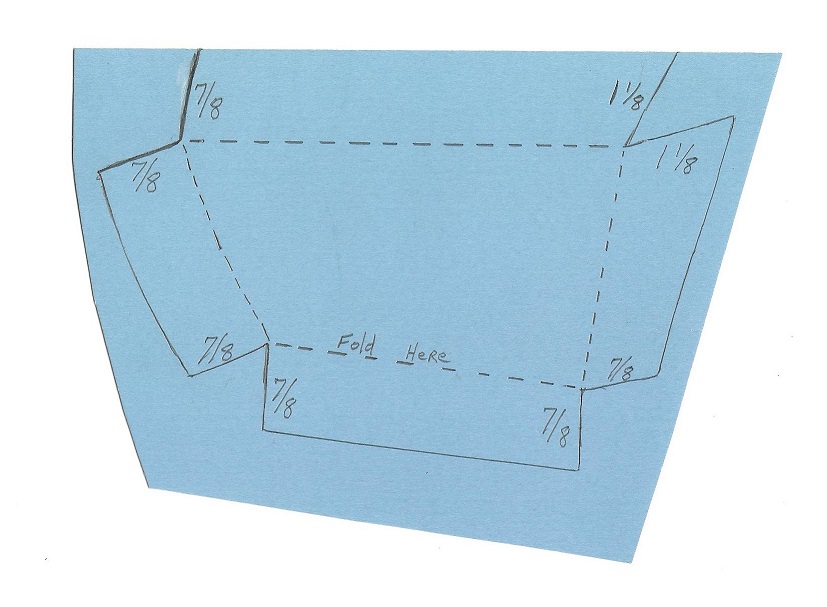 (rockercap0.jpg) (rockercap0.jpg)
Attachments
----------------
 rockercap0.jpg (133KB - 426 downloads) rockercap0.jpg (133KB - 426 downloads)
|
|
| |
|

Expert
Posts: 1737
    
Location: Hay Lakes, Alberta, Canada | Ok, I'm SO copying what you did, on my '57 Windsor. I saved all the pics. Thanks!! :p  |
|
| |
|

Expert 5K+
Posts: 9666
      
Location: So. Cal | Yes, thanks Kurt. Saves us some time. |
|
| |
|

Elite Veteran
Posts: 1112
 
Location: Wild Wonderful | I hope it works for ya all.
Let me know.
|
|
| |
|

Elite Veteran
Posts: 1112
 
Location: Wild Wonderful | outer rocker screwed on
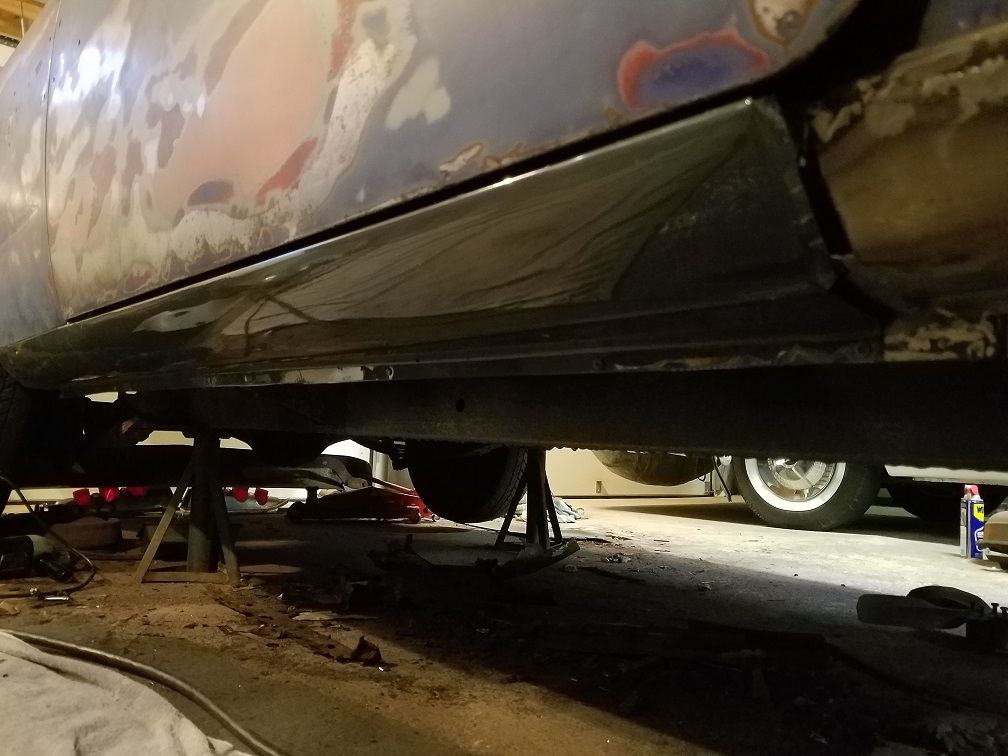 (outer7.jpg) (outer7.jpg)
 (outer8.jpg) (outer8.jpg)
Attachments
----------------
 outer7.jpg (220KB - 416 downloads) outer7.jpg (220KB - 416 downloads)
 outer8.jpg (246KB - 429 downloads) outer8.jpg (246KB - 429 downloads)
|
|
| |
|

Elite Veteran
Posts: 1112
 
Location: Wild Wonderful | The last two pictures, above, are Schotts panels RP53CE. They are 71 inches. They do not go all the way to
the lip on the rear wheelwell. If you want something that covers the complete rocker panel area, then order
RP53XCE. It is 73 inches. And it has a lip for the rear wheelwell. These are excellent panels.
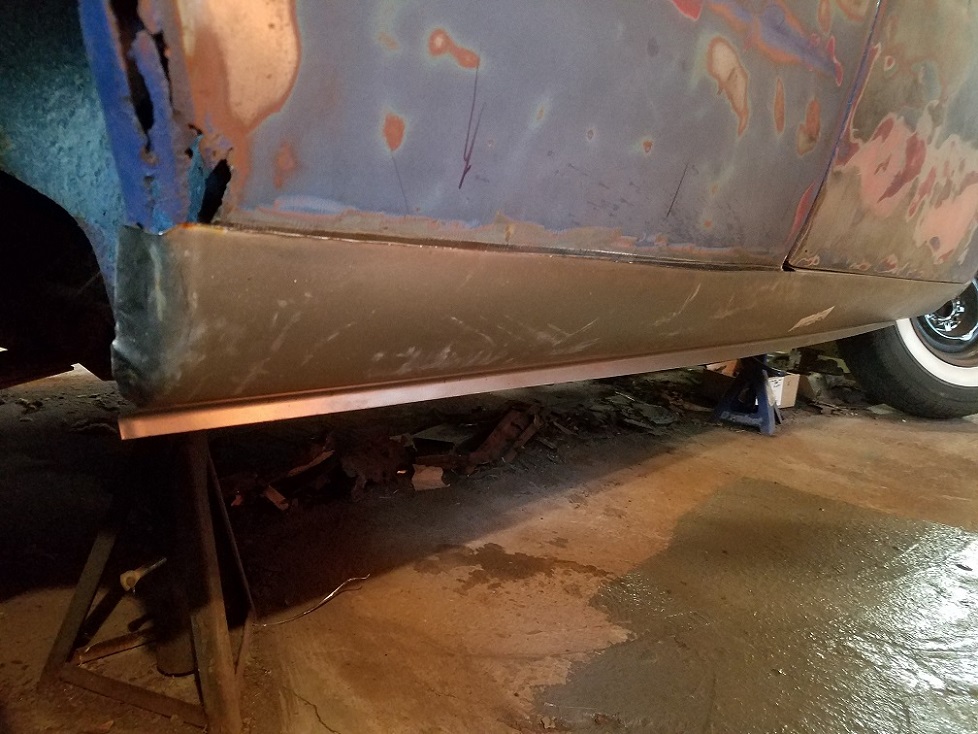 (schott1.jpg) (schott1.jpg)
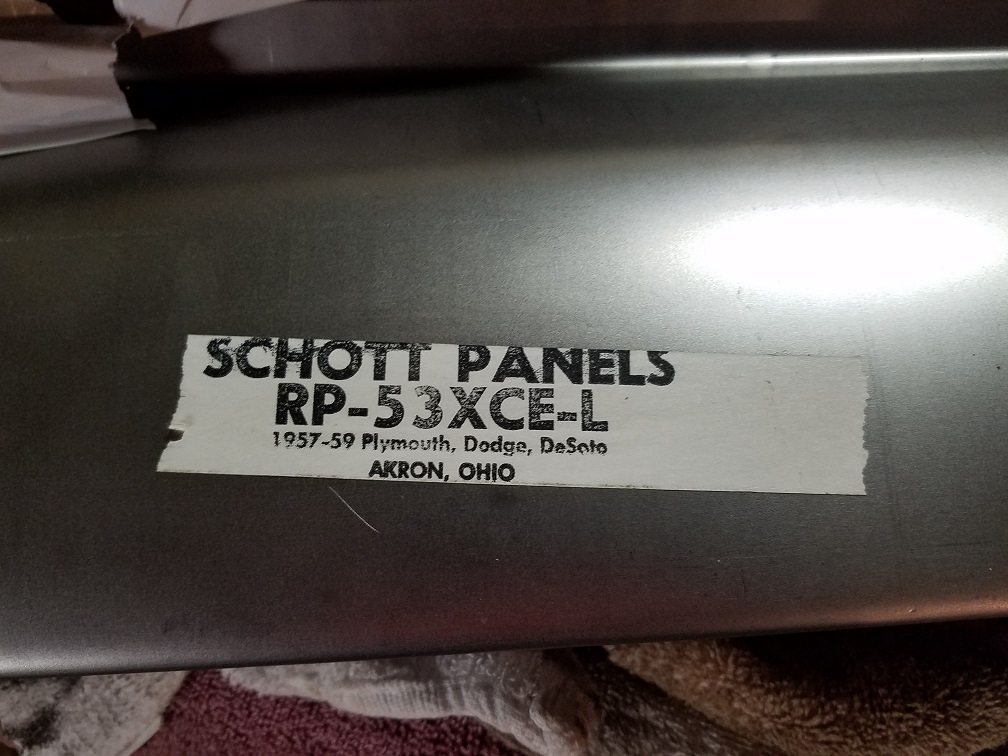 (schott.jpg) (schott.jpg)
Attachments
----------------
 schott1.jpg (242KB - 399 downloads) schott1.jpg (242KB - 399 downloads)
 schott.jpg (235KB - 414 downloads) schott.jpg (235KB - 414 downloads)
|
|
| |
|

Elite Veteran
Posts: 1112
 
Location: Wild Wonderful | My best lenses.
 (20180610_181035 (2).jpg) (20180610_181035 (2).jpg)
Attachments
----------------
 20180610_181035 (2).jpg (142KB - 406 downloads) 20180610_181035 (2).jpg (142KB - 406 downloads)
|
|
| |
|
Expert
Posts: 3155
    
Location: NY & VT | George Laurie repros these lenses in OZ, he's notoriously slow but usually comes thru in the end. I got stuff from him and quality was impeccable. |
|
| |
|

Elite Veteran
Posts: 1112
 
Location: Wild Wonderful | Thank you. Yes, I know all about George.
But I was just kidding about these being my best lenses.  I do have others. I do have others.
My favorite lens is the second one from the left. That is some fancy design.
Edited by 58DeSoDodge59 2018-06-13 3:03 PM
 (20180610_181035 (2).jpg) (20180610_181035 (2).jpg)
Attachments
----------------
 20180610_181035 (2).jpg (142KB - 429 downloads) 20180610_181035 (2).jpg (142KB - 429 downloads)
|
|
| |
|

Elite Veteran
Posts: 1112
 
Location: Wild Wonderful | I figured out how to keep those trunk bars from walking down the lid. I used these bolt on clips. I cut them
to the size I needed. Then I took a pair of needle nose pliers and bent the top edge inward, where these clips sit.
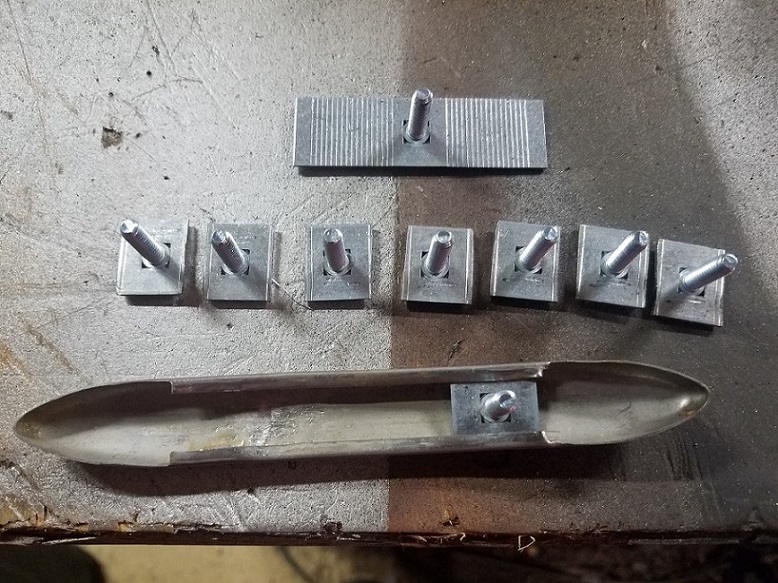 (sstrim2.jpg) (sstrim2.jpg)
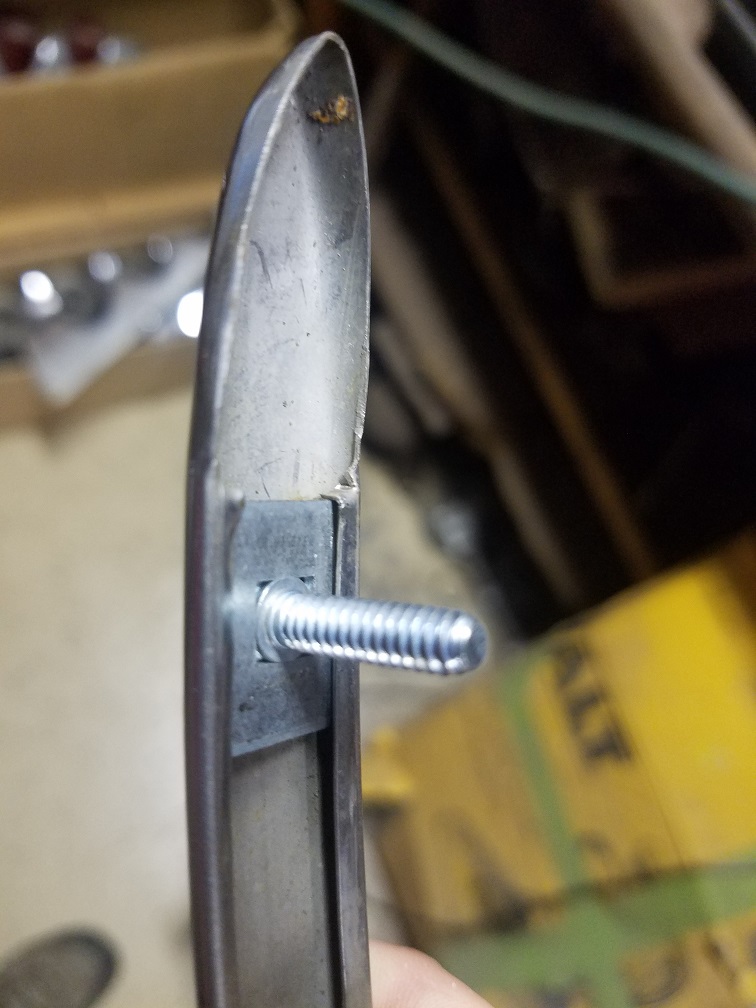 (sstrim.jpg) (sstrim.jpg)
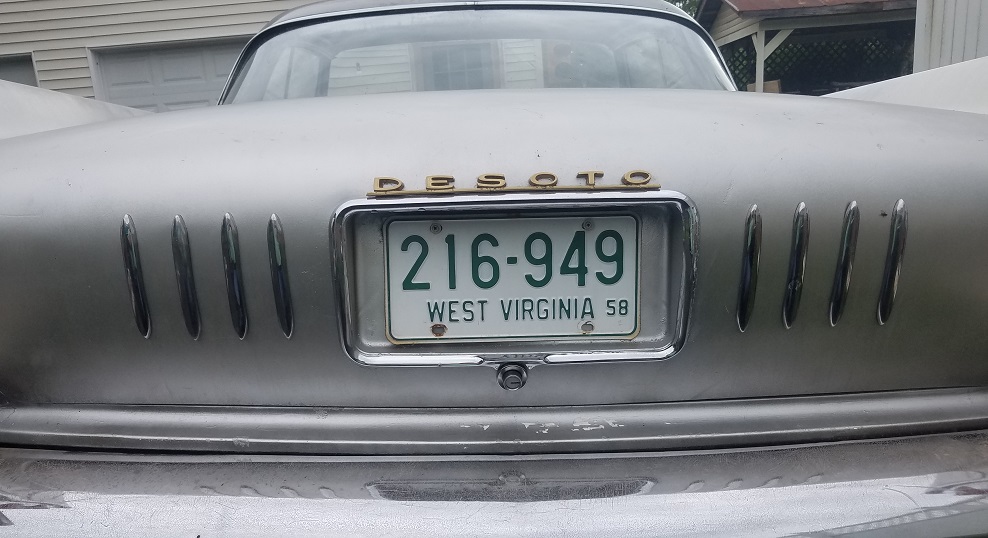 (trunkbars2.jpg) (trunkbars2.jpg)
Attachments
----------------
 sstrim2.jpg (237KB - 399 downloads) sstrim2.jpg (237KB - 399 downloads)
 sstrim.jpg (194KB - 390 downloads) sstrim.jpg (194KB - 390 downloads)
 trunkbars2.jpg (164KB - 401 downloads) trunkbars2.jpg (164KB - 401 downloads)
|
|
| |
|

       
Location: The Mile High City | Very nice, Kurt! I wonder what caused that lens to bleach like that? Good fix on the spring special bars! |
|
| |
|

Elite Veteran
Posts: 1112
 
Location: Wild Wonderful | Mike, The white parts of the lens is lifting away from the rest of it. It's like its peeling.
I guess it was not molded exactly correct. Maybe it did not have enough heat. So when the
sun baked it, it just started coming apart.
The lens with the bullet hole is interesting. The hole does not go all the way through. It's like
the bulb stopped the bullet. 
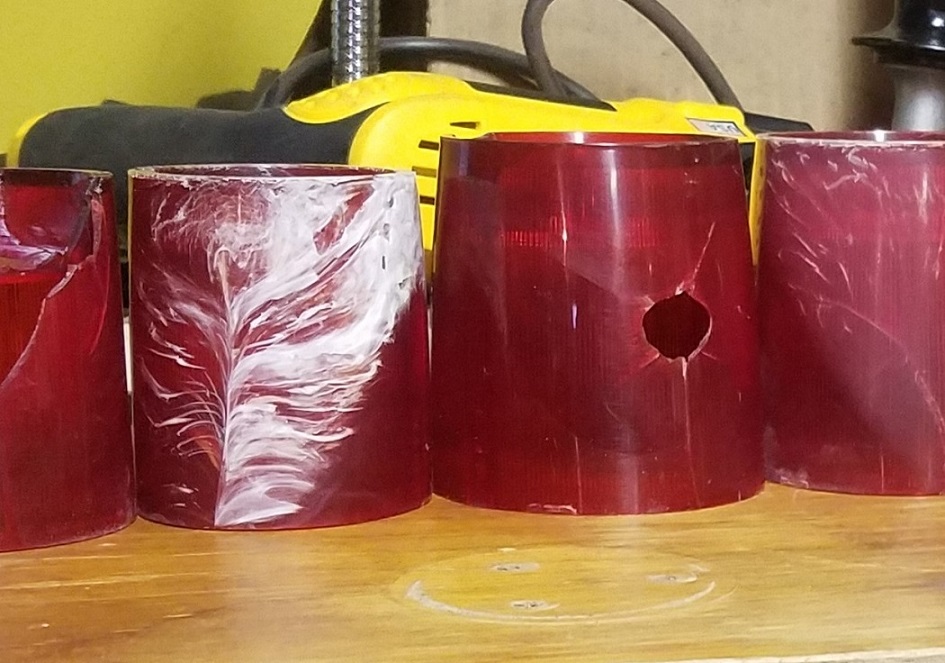 (designerlenses.jpg) (designerlenses.jpg)
Attachments
----------------
 designerlenses.jpg (213KB - 388 downloads) designerlenses.jpg (213KB - 388 downloads)
|
|
| |
|

Elite Veteran
Posts: 1112
 
Location: Wild Wonderful | Patiently waiting.
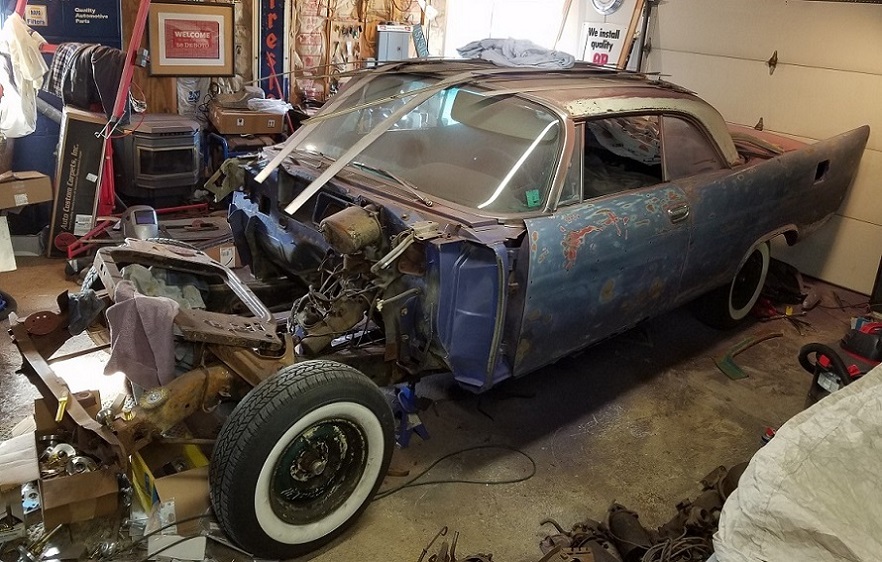 (waiting.jpg) (waiting.jpg)
Attachments
----------------
 waiting.jpg (245KB - 393 downloads) waiting.jpg (245KB - 393 downloads)
|
|
| |
|
Expert 5K+
Posts: 5006

| for what?  were not getting any younger here... were not getting any younger here...  |
|
| |
|

Elite Veteran
Posts: 1112
 
Location: Wild Wonderful | LOL
Well you won't have to get too much older. I estimate that I will get back to this car in the winter.
But first, I have to get this other car out of my driveway.
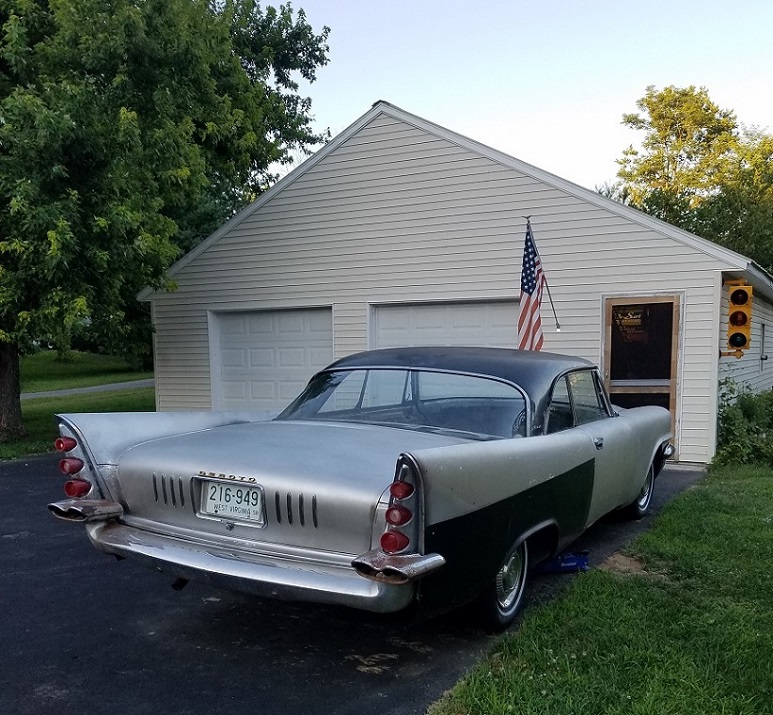 (allamerican.jpg) (allamerican.jpg)
Attachments
----------------
 allamerican.jpg (249KB - 387 downloads) allamerican.jpg (249KB - 387 downloads)
|
|
| |
|

Elite Veteran
Posts: 1112
 
Location: Wild Wonderful | Well, I pushed the car outside and washed it down, and also cleaned up the garage floor.
Now I'm ready for Phase 2.
Edited by 58DeSoDodge59 2018-10-21 10:29 PM
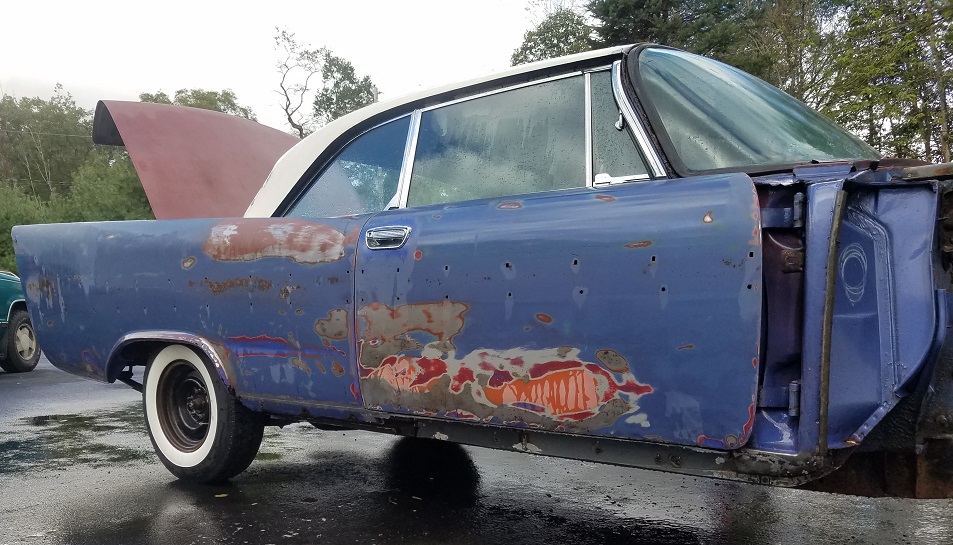 (phase2A.jpg) (phase2A.jpg)
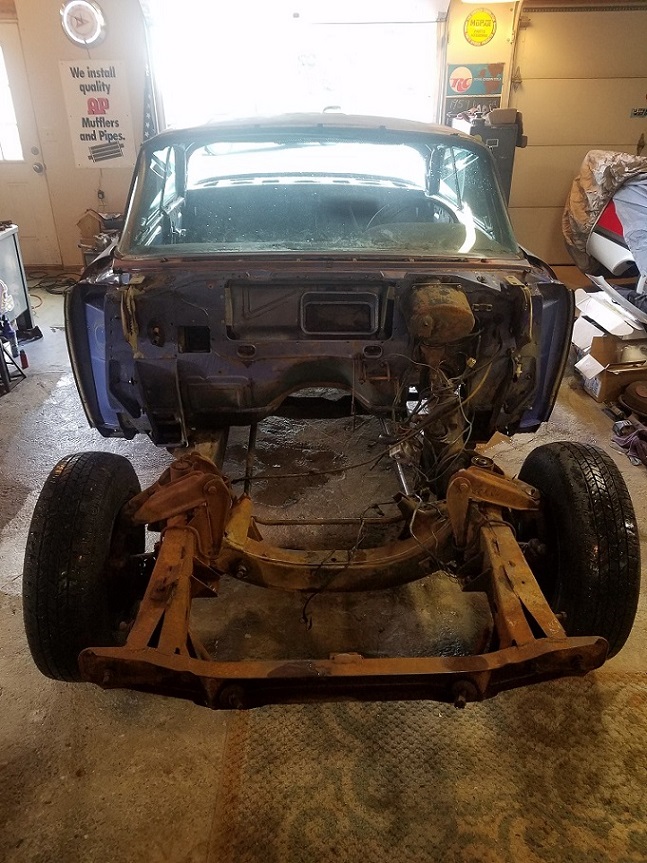 (phase2B.jpg) (phase2B.jpg)
Attachments
----------------
 phase2A.jpg (242KB - 352 downloads) phase2A.jpg (242KB - 352 downloads)
 phase2B.jpg (248KB - 365 downloads) phase2B.jpg (248KB - 365 downloads)
|
|
| |
|
Expert 5K+
Posts: 5006

| .. its a long fricking haul... but winter in the garage isn't a bad place to be as long as its warm 
|
|
| |
|

Elite Veteran
Posts: 1112
 
Location: Wild Wonderful | Do ya'all remember the brace that was installed in the trunk? Well I removed it to see why it was installed
in the first place. The metal looks like it was ripped. Maybe they used too much Leaded gas. 
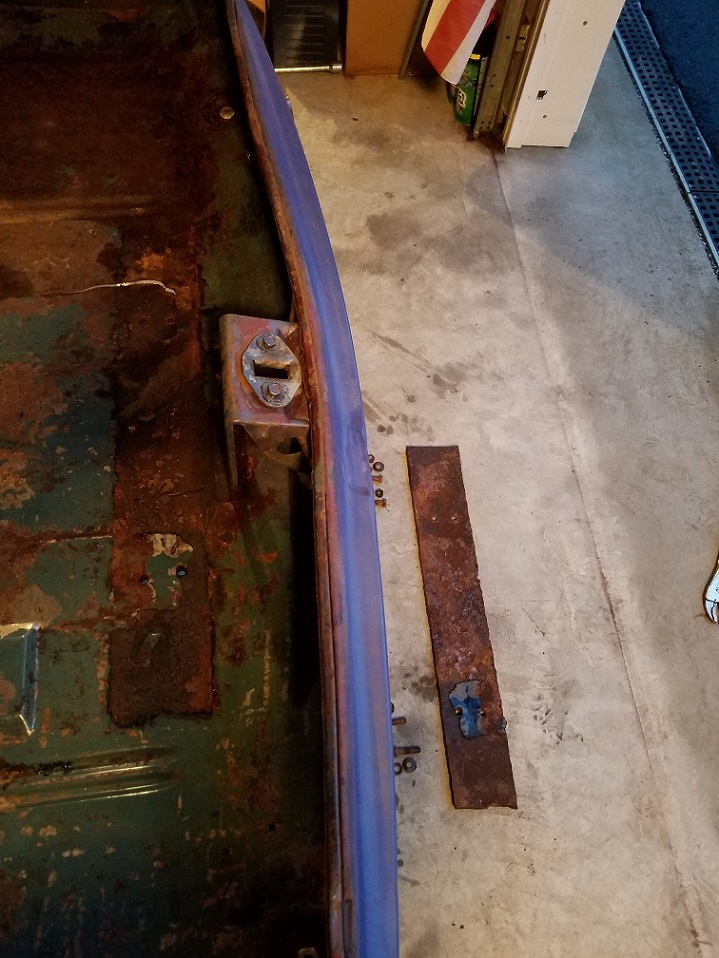 (tanksupport.jpg) (tanksupport.jpg)
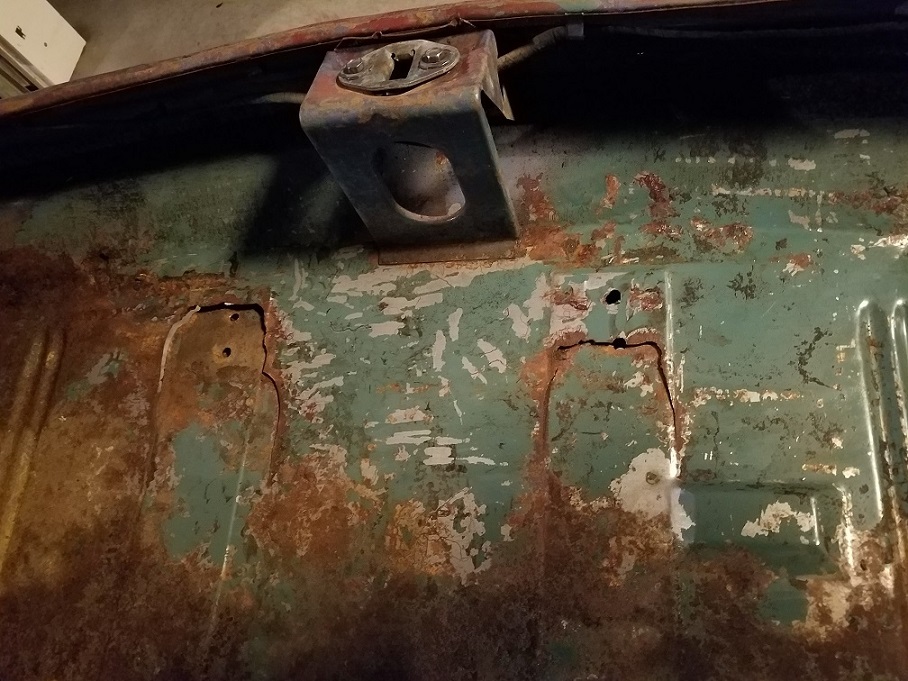 (floortank.jpg) (floortank.jpg)
Attachments
----------------
 tanksupport.jpg (236KB - 373 downloads) tanksupport.jpg (236KB - 373 downloads)
 floortank.jpg (249KB - 352 downloads) floortank.jpg (249KB - 352 downloads)
|
|
| |
|
Expert 5K+
Posts: 5006

| someone has been hauling with that car  |
|
| |
|

Elite Veteran
Posts: 1112
 
Location: Wild Wonderful | mikes2nd - 2018-10-28 11:12 PM
someone has been hauling with that car :)
Unless they hooked the trailer hitch to the gas tank straps, I don't think so.
Something pulled down on the gas tank. I never got a gas tank with this car, so I never got to see any damage. But
there is some body damage back there, so maybe they backed over someones bicycle and it caught the tank just right.
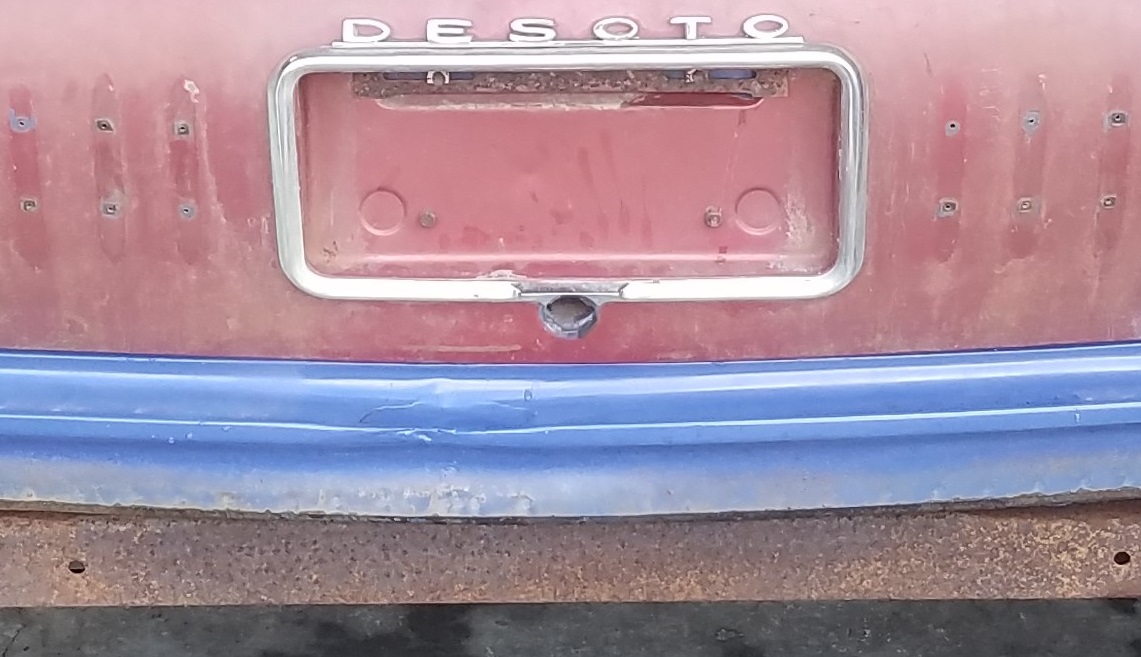 (damage1.jpg) (damage1.jpg)
Attachments
----------------
 damage1.jpg (211KB - 347 downloads) damage1.jpg (211KB - 347 downloads)
|
|
| |
|

Expert 5K+
Posts: 9666
      
Location: So. Cal | It's a common occurrence for the larger cars. I have 2 Chryslers with the same thing. I believe it happens because of a combination of tightening the straps too tight, and just having a very heavy tank going over old washboard roads. |
|
| |
|

Elite Veteran
Posts: 1112
 
Location: Wild Wonderful | Here is the big hole in my frame.
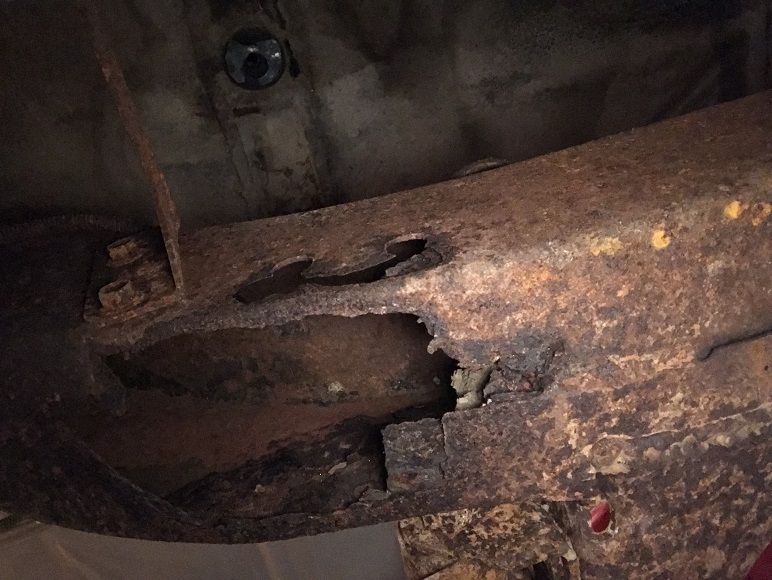 (framehole5.JPG) (framehole5.JPG)
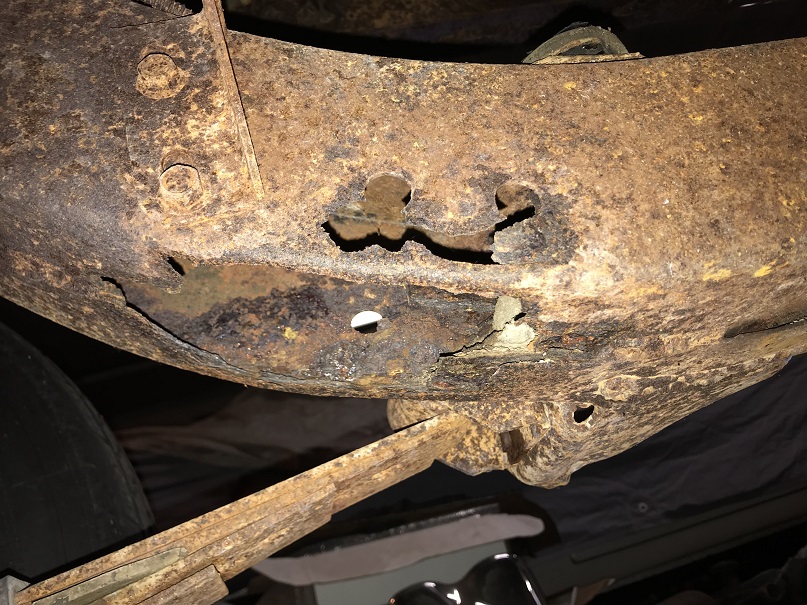 (framehole4.JPG) (framehole4.JPG)
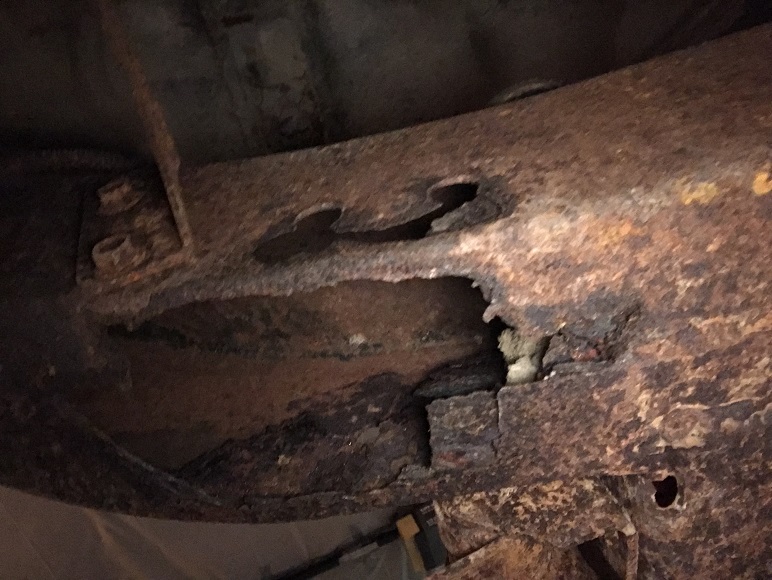 (framehole3.JPG) (framehole3.JPG)
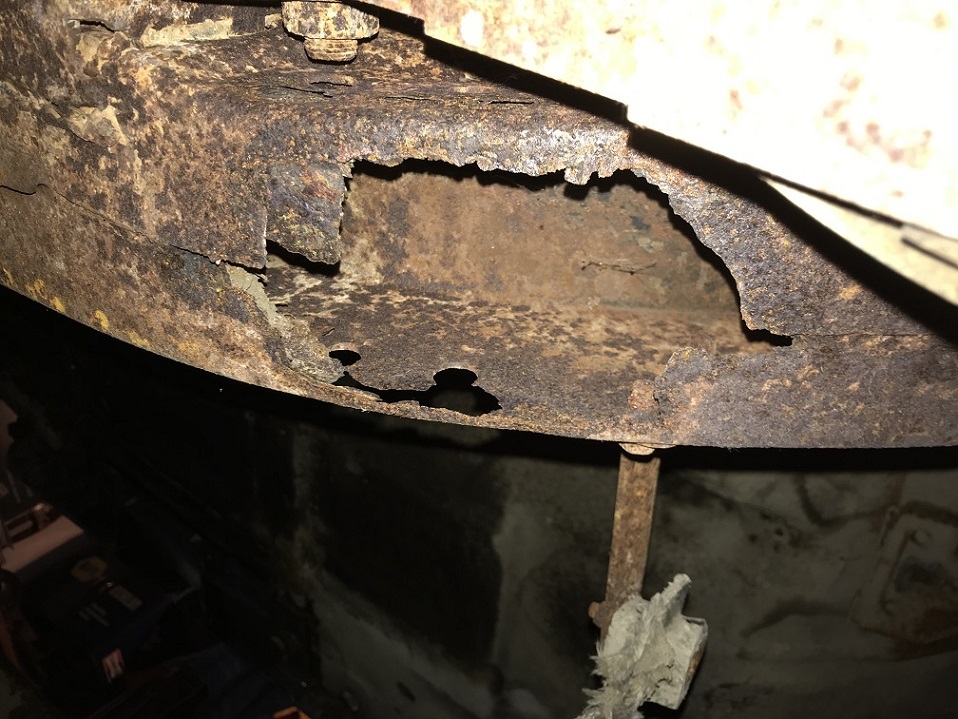 (framehole2.JPG) (framehole2.JPG)
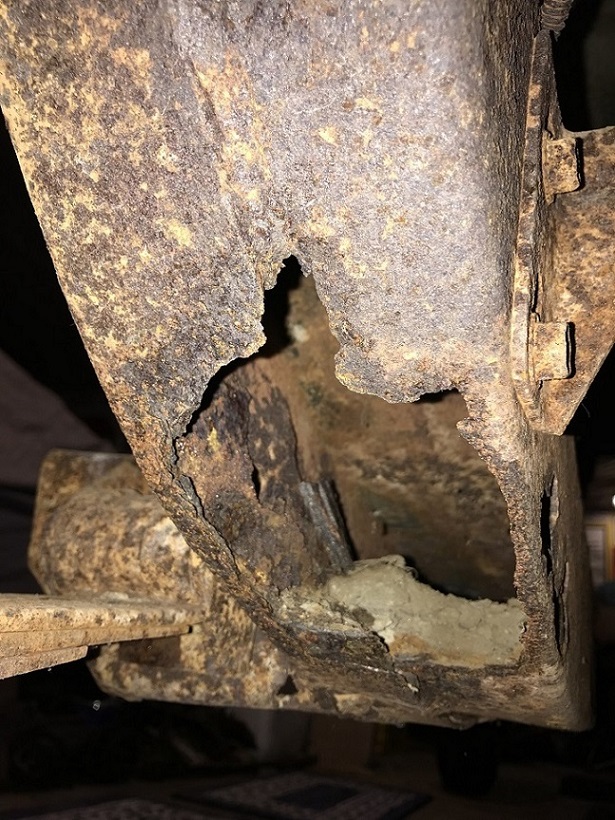 (framehole.JPG) (framehole.JPG)
Attachments
----------------
 framehole5.JPG (179KB - 327 downloads) framehole5.JPG (179KB - 327 downloads)
 framehole4.JPG (249KB - 339 downloads) framehole4.JPG (249KB - 339 downloads)
 framehole3.JPG (169KB - 332 downloads) framehole3.JPG (169KB - 332 downloads)
 framehole2.JPG (243KB - 337 downloads) framehole2.JPG (243KB - 337 downloads)
 framehole.JPG (241KB - 334 downloads) framehole.JPG (241KB - 334 downloads)
|
|
| |
|

Expert 5K+
Posts: 9666
      
Location: So. Cal | Wow, that's pretty bad. I have a frame I just scrapped. Did you want a piece of it before I give it away to the metal recyclers? |
|
| |
|
Expert 5K+
Posts: 5006

| Go get a frame off Benny |
|
| |
|

Elite Veteran
Posts: 1112
 
Location: Wild Wonderful | I do have a 59 Dodge frame that I can cut up. Would they be the same thickness/size for this area? |
|
| |
|

Elite Veteran
Posts: 1112
 
Location: Wild Wonderful | 
 (desotonspring.jpg) (desotonspring.jpg)
Attachments
----------------
 desotonspring.jpg (119KB - 415 downloads) desotonspring.jpg (119KB - 415 downloads)
|
|
| |
|

Elite Veteran
Posts: 1112
 
Location: Wild Wonderful | DeSoto in the Winter.
 (christmas1958.jpg) (christmas1958.jpg)
Attachments
----------------
 christmas1958.jpg (195KB - 414 downloads) christmas1958.jpg (195KB - 414 downloads)
|
|
| |
|

Elite Veteran
Posts: 1112
 
Location: Wild Wonderful | Since the frame is bad and needs repaired, I hung the body from the ceiling, so I can work on the frame easier.
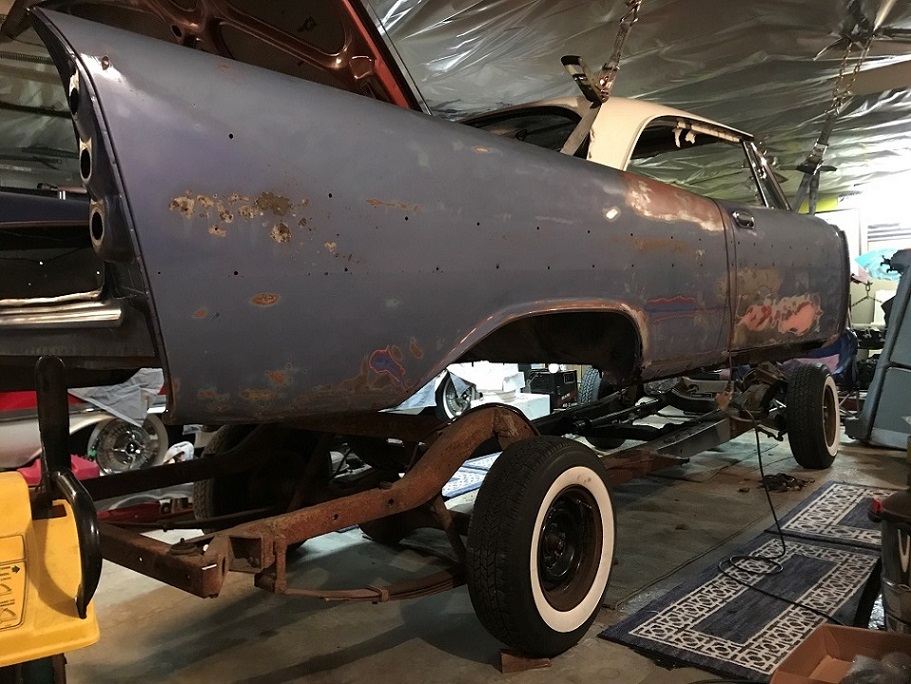 (hangtime.JPG) (hangtime.JPG)
Attachments
----------------
 hangtime.JPG (242KB - 470 downloads) hangtime.JPG (242KB - 470 downloads)
|
|
| |
|

Elite Veteran
Posts: 1112
 
Location: Wild Wonderful | I almost found a part number on the leaf spring. Anyway, since it got up to 60 degrees today, I pushed the
frame outside so I could clean it up. I sprayed in each one of the holes. I got a lot of dirt, rocks and one rats
nest out of it.
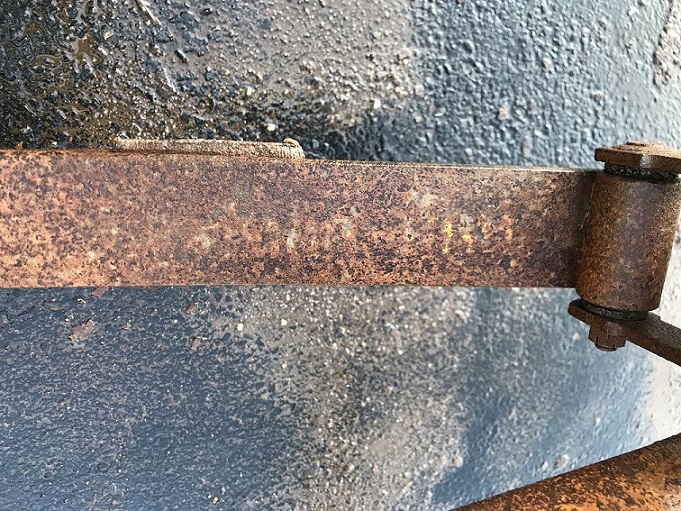 (almost.JPG) (almost.JPG)
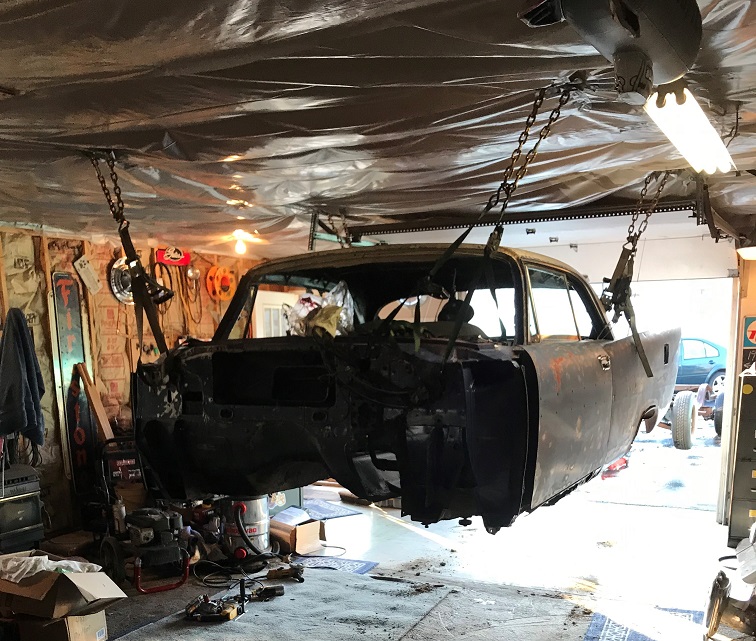 (beginin.JPG) (beginin.JPG)
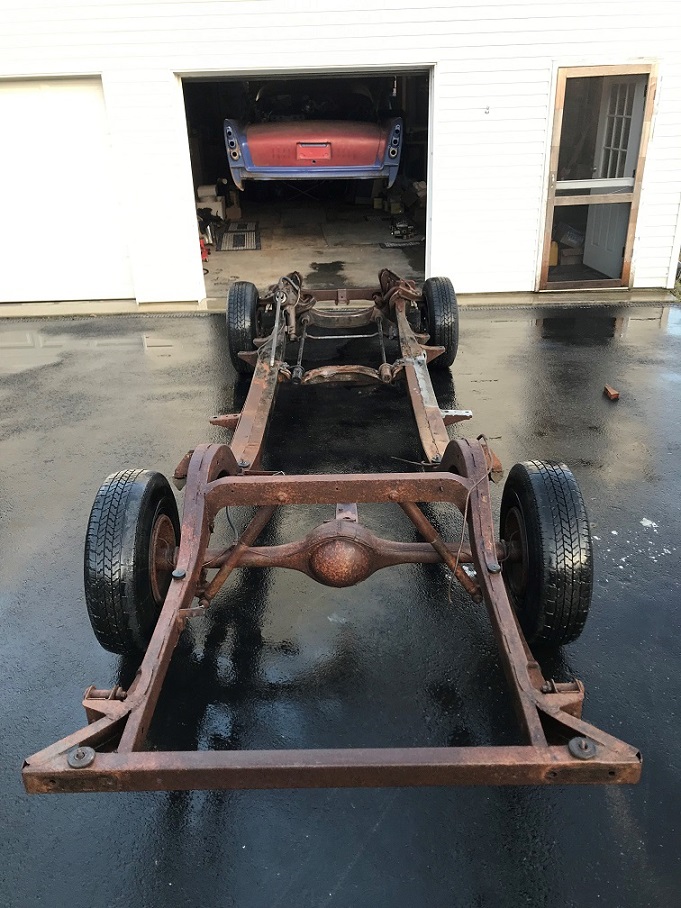 (chassis.JPG) (chassis.JPG)
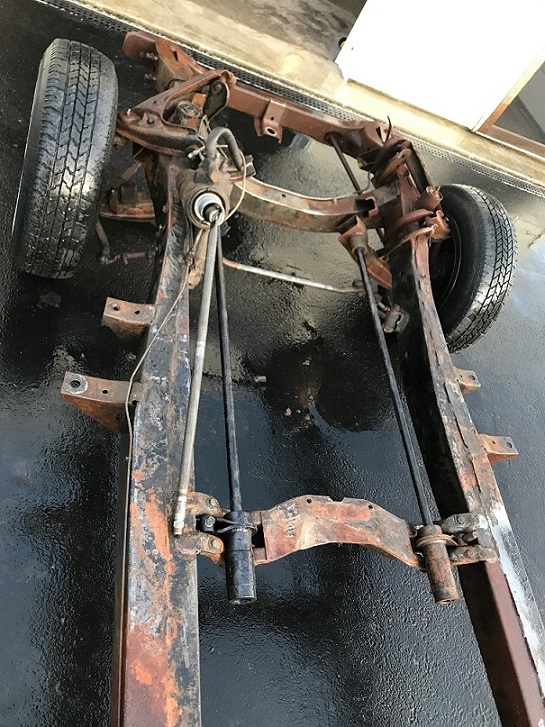 (delta.JPG) (delta.JPG)
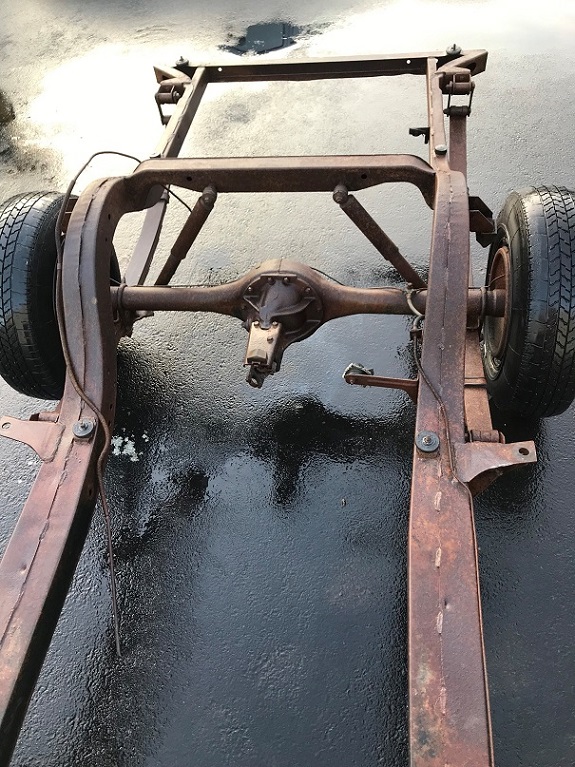 (eggy.JPG) (eggy.JPG)
Attachments
----------------
 almost.JPG (240KB - 407 downloads) almost.JPG (240KB - 407 downloads)
 beginin.JPG (239KB - 439 downloads) beginin.JPG (239KB - 439 downloads)
 chassis.JPG (247KB - 460 downloads) chassis.JPG (247KB - 460 downloads)
 delta.JPG (228KB - 433 downloads) delta.JPG (228KB - 433 downloads)
 eggy.JPG (240KB - 482 downloads) eggy.JPG (240KB - 482 downloads)
|
|
| |
|

Elite Veteran
Posts: 1112
 
Location: Wild Wonderful | As I was cleaning out the frame, I jacked up the front of it so the rats nest would go out the big hole.
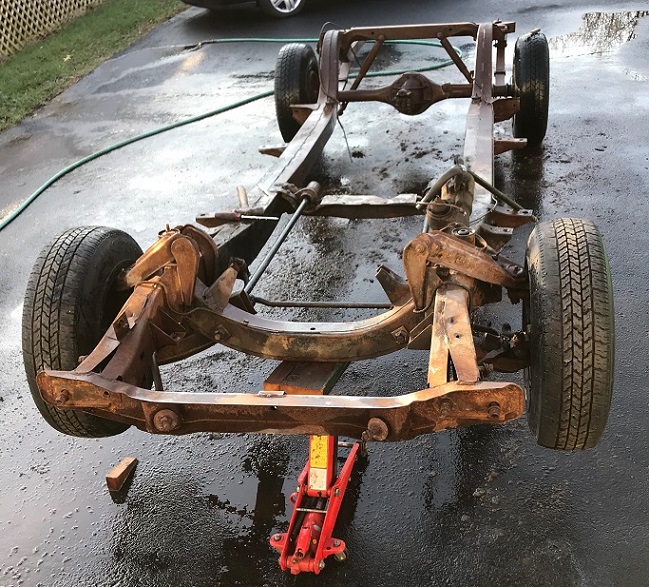 (framedrain.JPG) (framedrain.JPG)
Attachments
----------------
 framedrain.JPG (234KB - 413 downloads) framedrain.JPG (234KB - 413 downloads)
|
|
| |
|

Elite Veteran
Posts: 1112
 
Location: Wild Wonderful | Well Heck. I cut a section from a 59 Dodge frame, only to find out that it is a 1/2 inch smaller all
the way around. So I am going to need a section from a big Chrysler or DeSoto.
Nathan, Do you still have that frame?
Edited by 58DeSoDodge59 2018-12-23 6:49 PM
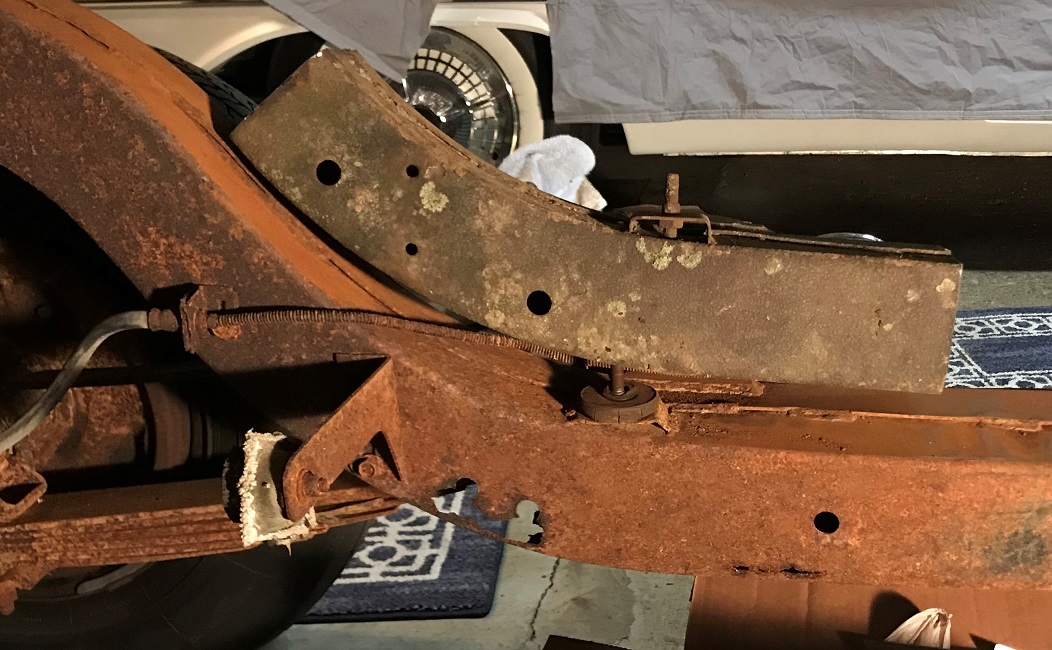 (framesec.JPG) (framesec.JPG)
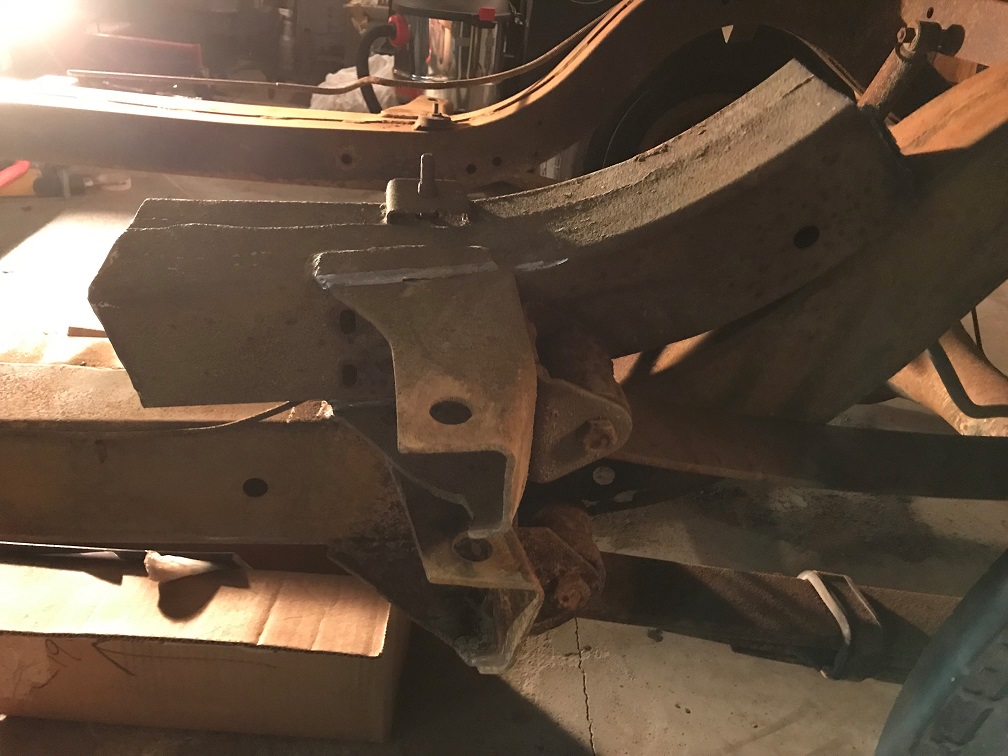 (framesect.JPG) (framesect.JPG)
Attachments
----------------
 framesec.JPG (281KB - 391 downloads) framesec.JPG (281KB - 391 downloads)
 framesect.JPG (218KB - 424 downloads) framesect.JPG (218KB - 424 downloads)
|
|
| |
|

Expert 5K+
Posts: 9666
      
Location: So. Cal | I do still have it, but I cut it up with a plasma cutter to fit into a truck bed, and I cut it right at the downturn where your largest rust spot is. Sorry, I didn't know you were going to want it.
However, I don't recommend that you weld in a whole new section like that anyway. You should just patch it in smaller pieces. Welds are never as strong as the original metal, and you should remove as little of the original frame as possible. So I recommend that you use the Dodge section you have and cut it up to patch up the rusted part. But don't cut out an entire frame section because it won't be as strong that way and you will risk it breaking apart in the future. If you insist on doing an entire section, you will need to weld braces over the sides of the welds to make them stronger. But if you just patch in the rusted parts, cutting away only the parts that are bad, you should be able to keep it looking stock without worrying about it's structural integrity. Just make sure the welds penetrate well and are set hotter than usual to ensure that. |
|
| |
|

Elite Veteran
Posts: 1112
 
Location: Wild Wonderful | No problem. Thanks anyway.
Yes. I was just going to cut away the rusty sections, like the bottom. And half way up the sides in some areas.
Removing only what is necessary. The problem is that the DeSoto frame is 5 inches across the bottom, but the
Dodge frame is only 4 1/2 inches. So, I would rather get a frame that is the correct size, so I don't have to
modify it to fit.
Does anybody have a big 1958 Chrysler or DeSoto frame section that they can send me? |
|
| |
|
Expert 5K+
Posts: 5006

| I would just weld the lower section.
if you weld it right it will be stronger 
Get a nice angled edge on both pieces and give it some room, turn the welder up and let er rip 
I spend 3 hours shoving a pressure sprayer hose up my old frame, finally got it spotless. Sprayed cavity wax inside the frame.
I guess a big chrysler is different than a dodge, smaller wheelbase calls for smaller frame.
|
|
| |
|

Elite Veteran
Posts: 1112
 
Location: Wild Wonderful | What the heck is cavity wax? |
|
| |
|
Expert 5K+
Posts: 5006

| search broke? 
Just an example.
https://www.kbs-coatings.com/Cavity-Wax.html
|
|
| |
|

Elite Veteran
Posts: 1112
 
Location: Wild Wonderful | Sorry. I did not do a search. I did not know that was a real thing. I thought you were just making stuff up.
Cavity wax sounds something like a new KY jelly. 
|
|
| |
|
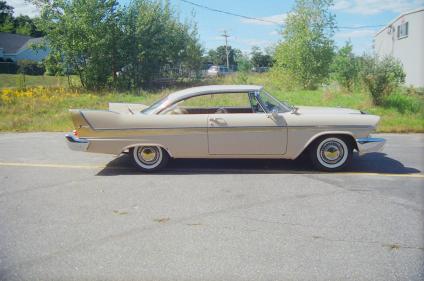
Expert
Posts: 1740
    
Location: Alaska | I believe that LPS3 will do the same job and is cheaper. we used it a lot in aircraft to prevent corrosion. |
|
| |
|
Expert 5K+
Posts: 5006

| Actually there are 100's of vendors. I just linked a quick search.
I went with 1 gallon of "undercoating in a can". Its black and goes on pretty thick and doesnt run so much.
https://www.amazon.com/TP-Tools-Undercoating-Flexible-TP-3043/dp/B07...
I have used like 10 different ones. Eastwood is overpriced also, fluidfilm is too runny.
Get a cheak undercoating sprayer with a wand off amazon, 59$ for a gallon.
https://petroleumservicecompany.com/undercoating-in-a-can/
|
|
| |
|

Expert 5K+
Posts: 9666
      
Location: So. Cal | My current frame section goes from the large rust area forward, and backward. If that can help you, I will send it to you if you pay the shipping. I can cut it as small as you like to save shipping cost. But my current cut does go through that major rust area. But if you weld the two parts together on both sides before you use them to patch, it would be strong that way. Just an option if you can't find another frame to cut. |
|
| |
|

Elite Veteran
Posts: 1112
 
Location: Wild Wonderful | Thanks Nathan, but I think that Wayne in Ohio is going to help me. I appreciate your help. |
|
| |
|

Elite Veteran
Posts: 1112
 
Location: Wild Wonderful | Okay, it is time to get back to work on this. And I am following all you guys that have a 58 DeSoto in the works.
I hope everyone gets a lot done on their cars this year. Maybe we can have a 58 reunion in 2020. 
When I got this car, I knew that I would be needing new door panels, so I ordered them back in Oct. 2017.
I finally got them this passed week. It will still be a long time before I get to the interior. I am working on the frame now.
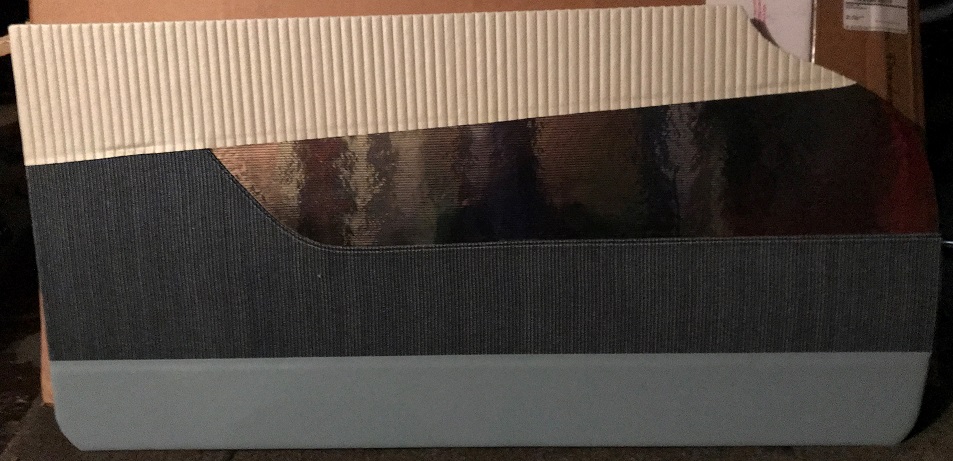 (frontside.JPG) (frontside.JPG)
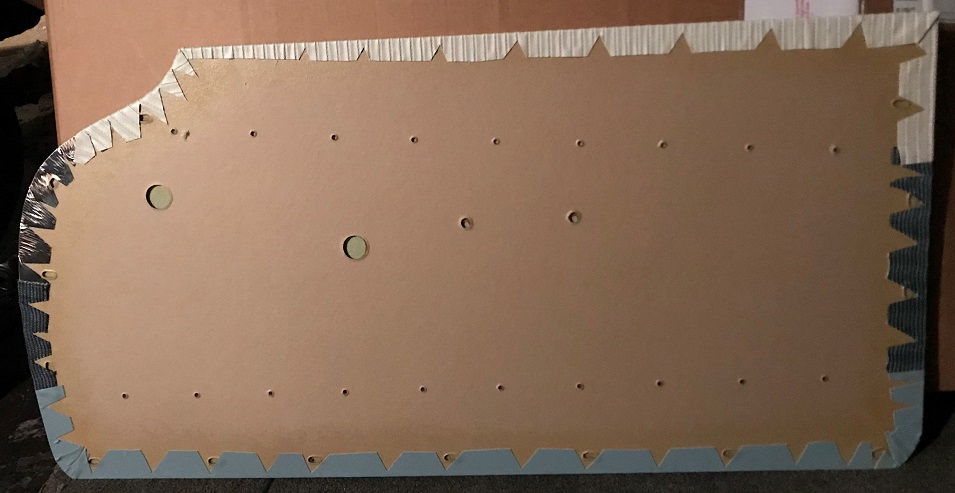 (holesbackside.JPG) (holesbackside.JPG)
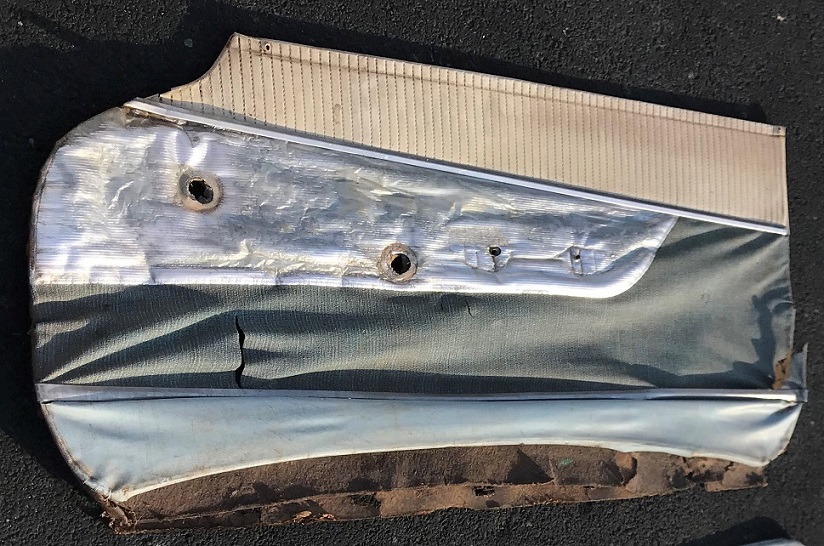 (passdoorbefore.JPG) (passdoorbefore.JPG)
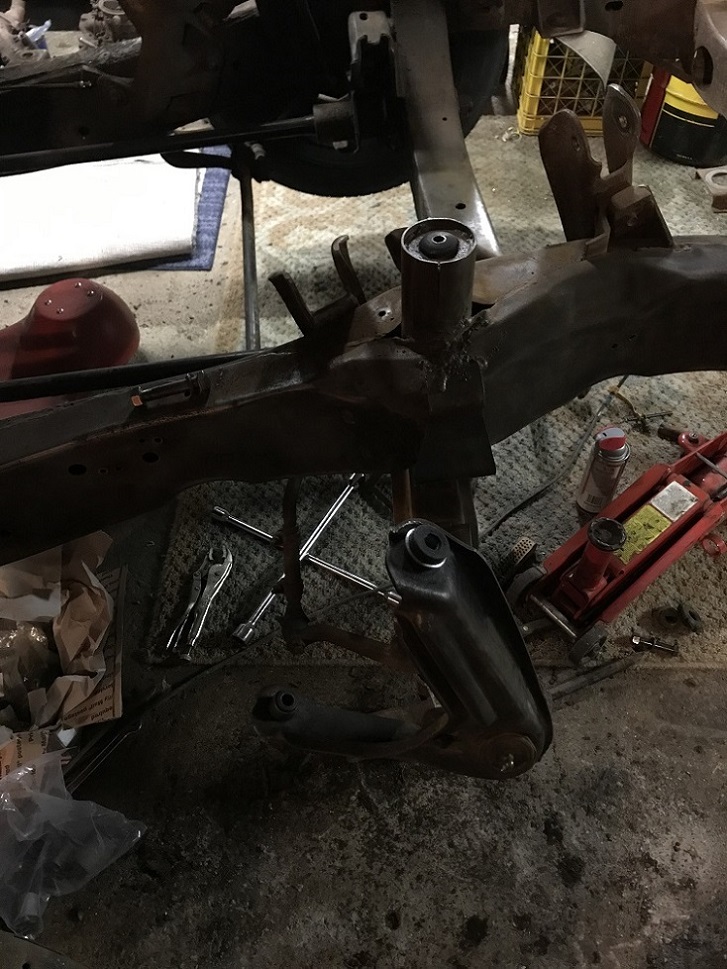 (newbushings.JPG) (newbushings.JPG)
Attachments
----------------
 frontside.JPG (187KB - 386 downloads) frontside.JPG (187KB - 386 downloads)
 holesbackside.JPG (135KB - 370 downloads) holesbackside.JPG (135KB - 370 downloads)
 passdoorbefore.JPG (239KB - 356 downloads) passdoorbefore.JPG (239KB - 356 downloads)
 newbushings.JPG (243KB - 368 downloads) newbushings.JPG (243KB - 368 downloads)
|
|
| |
|

Elite Veteran
Posts: 1112
 
Location: Wild Wonderful | I took the grill/screen off of the front bumper. I found two different styles of clips that were holding it on.
Which one is correct? Maybe both?
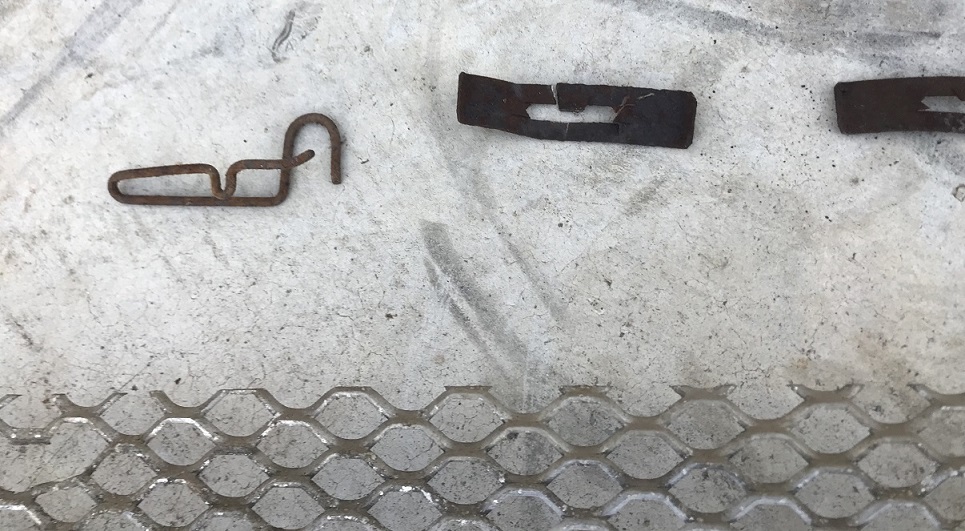 (grillclips.JPG) (grillclips.JPG)
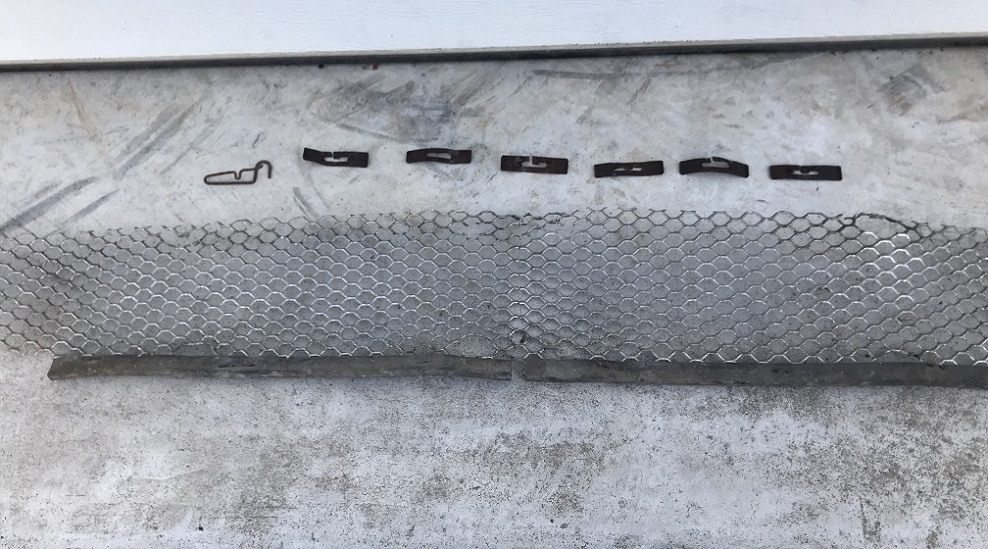 (grillclips2.JPG) (grillclips2.JPG)
Attachments
----------------
 grillclips.JPG (226KB - 364 downloads) grillclips.JPG (226KB - 364 downloads)
 grillclips2.JPG (241KB - 365 downloads) grillclips2.JPG (241KB - 365 downloads)
|
|
| |
|
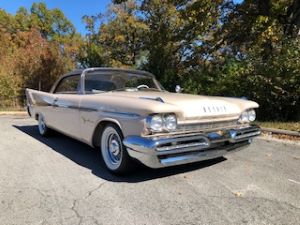
Expert
Posts: 2003

Location: Branson, MO | The flat ones are the only ones familiar to me.
|
|
| |
|

Expert 5K+
Posts: 9666
      
Location: So. Cal | I agree. Both of my '58 DeSoto grilles are held on with the flat metal versions. I don't have any of the spring clip types. |
|
| |
|

Elite Veteran
Posts: 1112
 
Location: Wild Wonderful | That wire/spring type clip is so perfectly made, if it is not original to the 58 model, maybe it is from
an earlier or later model. ?
Also, does anyone else have the rubber protection strips on the bottom of their grille, like this one?
 (grille.JPG) (grille.JPG)
Attachments
----------------
 grille.JPG (144KB - 346 downloads) grille.JPG (144KB - 346 downloads)
|
|
| |
|

      
Location: Parts Unknown | Not sure why you didn't just re-use those original door panels .....   
Nice to see someone else understand and work with SMS, rather than just bellyache
about them. They do awesome work. You just gotta put that wheel in motion when the
car is in teardown, so they'll be ready way before you need them.
|
|
| |
|

Elite Veteran
Posts: 1112
 
Location: Wild Wonderful | Doctor DeSoto - 2019-03-29 10:53 PM
Not sure why you didn't just re-use those original door panels .....   
Nice to see someone else understand and work with SMS, rather than just bellyache
about them. They do awesome work. You just gotta put that wheel in motion when the
car is in teardown, so they'll be ready way before you need them.
The only thing that I would like to bellyache about is the way they lie to you in their emails.
Don't tell me that they are in the final stage, and should be ready next month when you know it is
going to be another 10 months before they are done. Just tell me it will be 10 months. I'm a
big boy, I can take it. They got me all excited after 6 months telling me that they were in the final stage.
I'm sure they got  of my emails. of my emails.    |
|
| |
|
Expert 5K+
Posts: 5006

| does the squeaky wheel get the grease? If you hadn't emailed it might have been another two years? I know this stuff is all hand labor and a total pita... I swear im going to start making door panels... need the electro welder though  and it probably give you cancer and it probably give you cancer  I will probably just make mine like this https://www.youtube.com/watch?v=PYMZCg-uuOc
Edited by mikes2nd 2019-04-03 1:18 AM
|
|
| |
|

Elite Veteran
Posts: 1112
 
Location: Wild Wonderful | I cut out the rusty part of the frame.
I got the rest of the rats nest out of it.
Then I fitted a good piece of frame, (from a 57 Chrysler), to it.
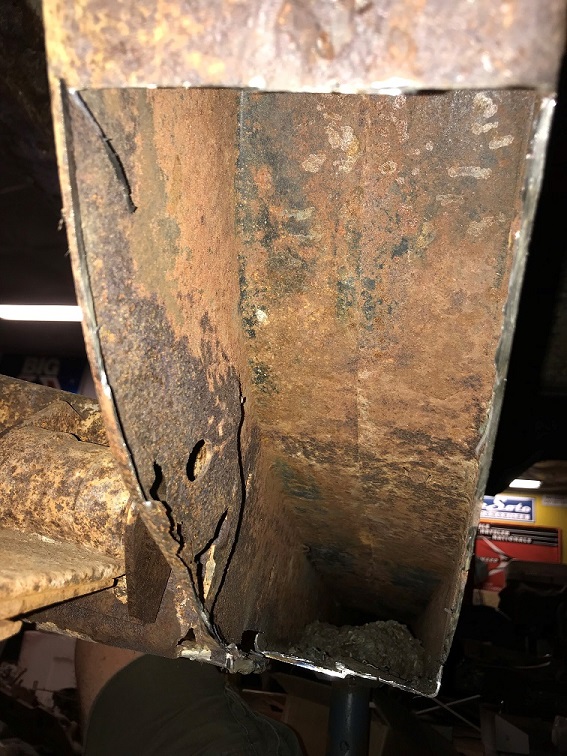 (ratsnframe.JPG) (ratsnframe.JPG)
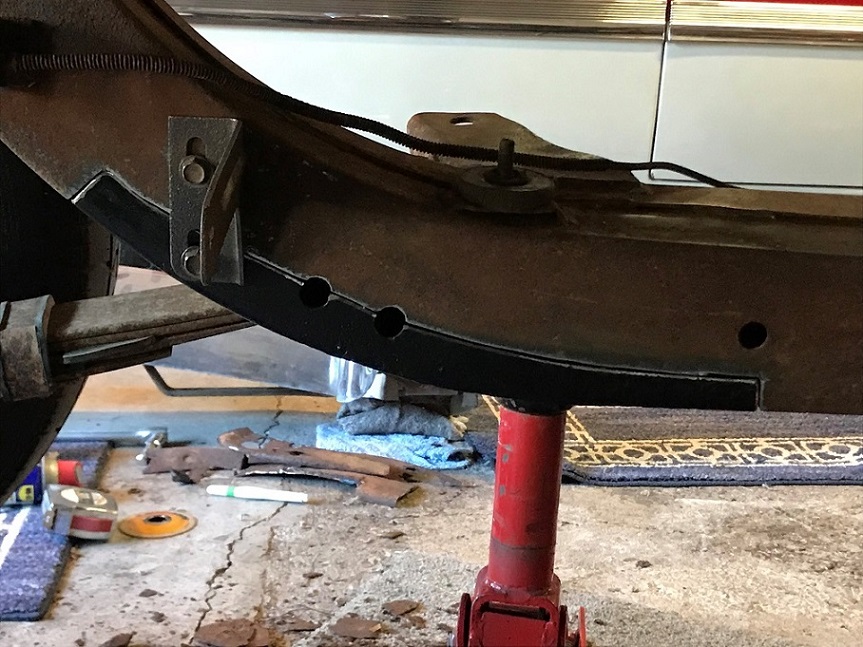 (fitting.JPG) (fitting.JPG)
Attachments
----------------
 ratsnframe.JPG (212KB - 321 downloads) ratsnframe.JPG (212KB - 321 downloads)
 fitting.JPG (233KB - 310 downloads) fitting.JPG (233KB - 310 downloads)
|
|
| |
|

Elite Veteran
Posts: 1112
 
Location: Wild Wonderful | Also, (with a little help), I found the engine number that is stamped on the frame.  
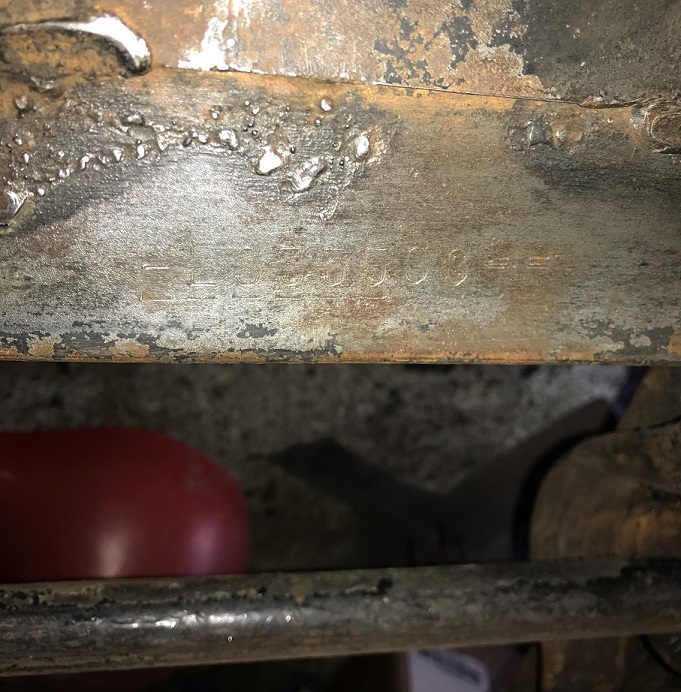 (engonframe.JPG) (engonframe.JPG)
Attachments
----------------
 engonframe.JPG (212KB - 309 downloads) engonframe.JPG (212KB - 309 downloads)
|
|
| |
|

Expert 5K+
Posts: 9666
      
Location: So. Cal | Perfect. That's how I would have done it too. Just use a lot of power to ensure you get good penetration. If you are concerned with strength in certain areas, you can plug weld another plate across the weld on the inside of the frame so it won't be visible when done. |
|
| |
|

Elite Veteran
Posts: 1112
 
Location: Wild Wonderful | This sign was displayed, starting, Dec. 15th 1957, in the Mobile gas stations.
 (IMG_0861 (2).JPG) (IMG_0861 (2).JPG)
Attachments
----------------
 IMG_0861 (2).JPG (185KB - 298 downloads) IMG_0861 (2).JPG (185KB - 298 downloads)
|
|
| |
|

Elite Veteran
Posts: 1112
 
Location: Wild Wonderful | This is why I have to replace the rear springs.
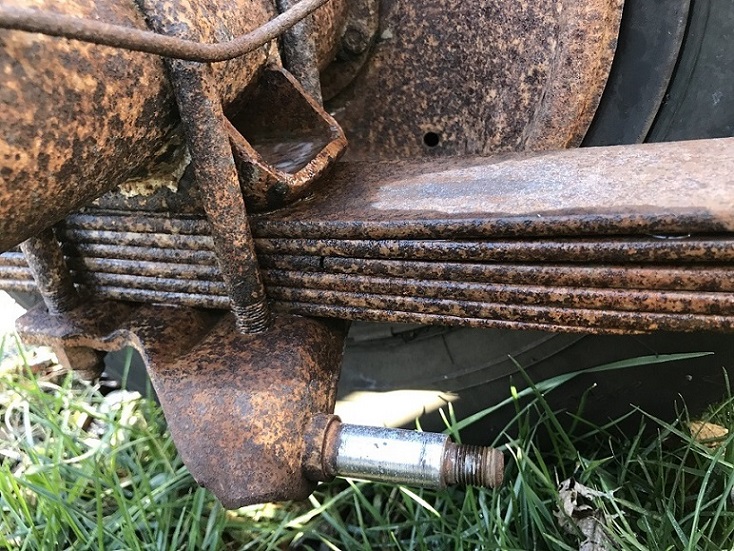 (numbers2.JPG) (numbers2.JPG)
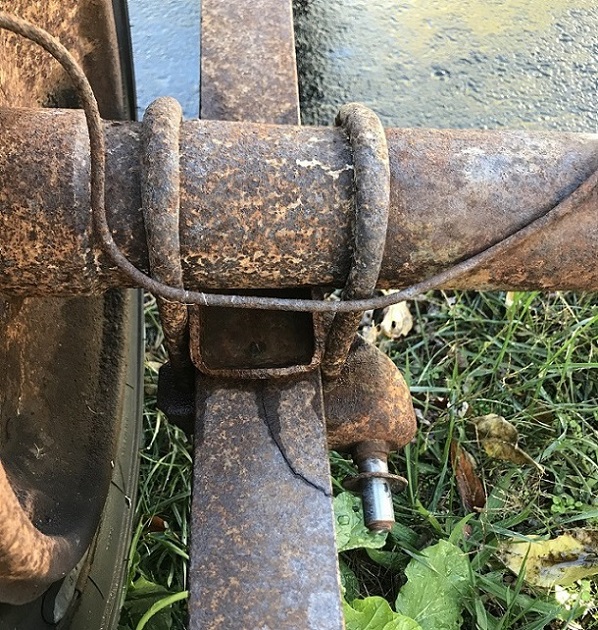 (numbers3.JPG) (numbers3.JPG)
Attachments
----------------
 numbers2.JPG (237KB - 307 downloads) numbers2.JPG (237KB - 307 downloads)
 numbers3.JPG (235KB - 292 downloads) numbers3.JPG (235KB - 292 downloads)
|
|
| |
|

Elite Veteran
Posts: 1112
 
Location: Wild Wonderful | We already know that the painters put their mark on this car. Now, the welders,
on the assembly line had some fun with it.
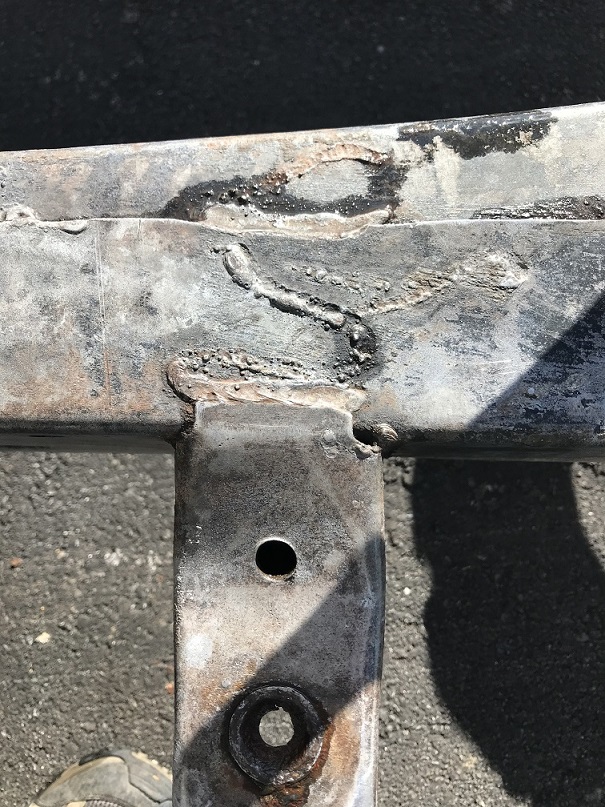 (numbers4.JPG) (numbers4.JPG)
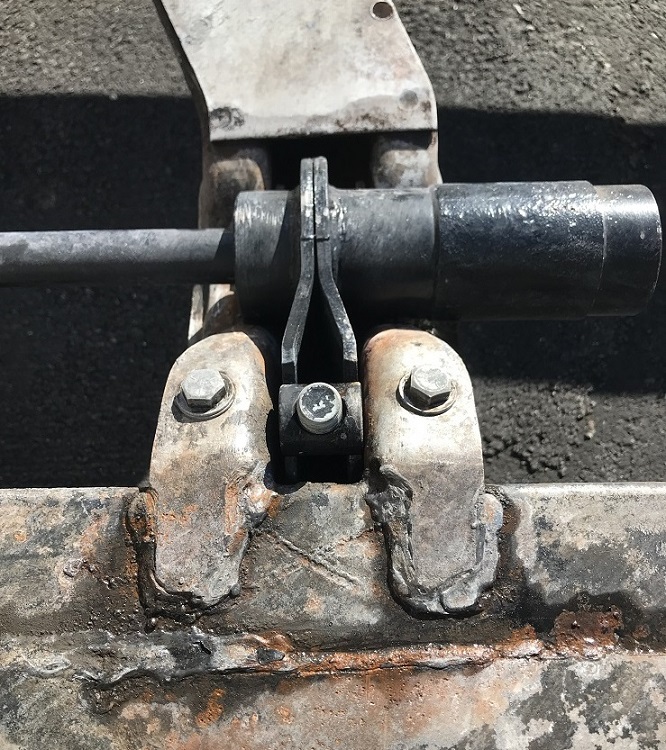 (numbers6.JPG) (numbers6.JPG)
Attachments
----------------
 numbers4.JPG (249KB - 288 downloads) numbers4.JPG (249KB - 288 downloads)
 numbers6.JPG (244KB - 294 downloads) numbers6.JPG (244KB - 294 downloads)
|
|
| |
|

Elite Veteran
Posts: 1112
 
Location: Wild Wonderful | I found some more numbers. 659 on the bracket.
And I found a painted on number, on the frame where I did the repair. I did not even see
it until I did some sanding and washed the frame. It says -1820338 ..... -57A .
Edited by 58DeSoDodge59 2019-10-27 7:56 PM
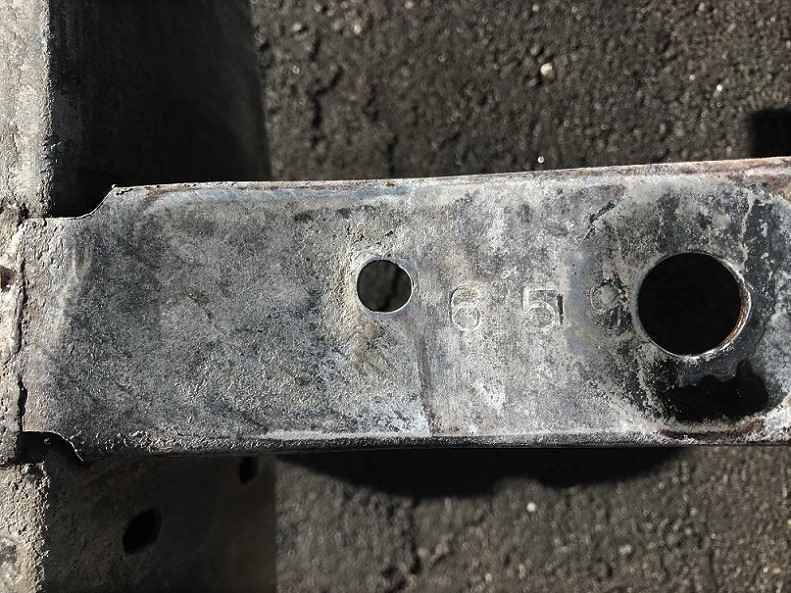 (numbers5.JPG) (numbers5.JPG)
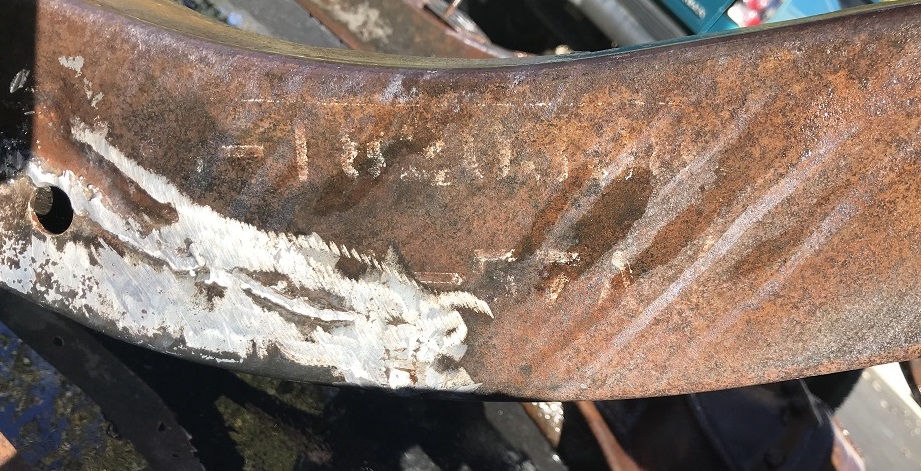 (numbers7.JPG) (numbers7.JPG)
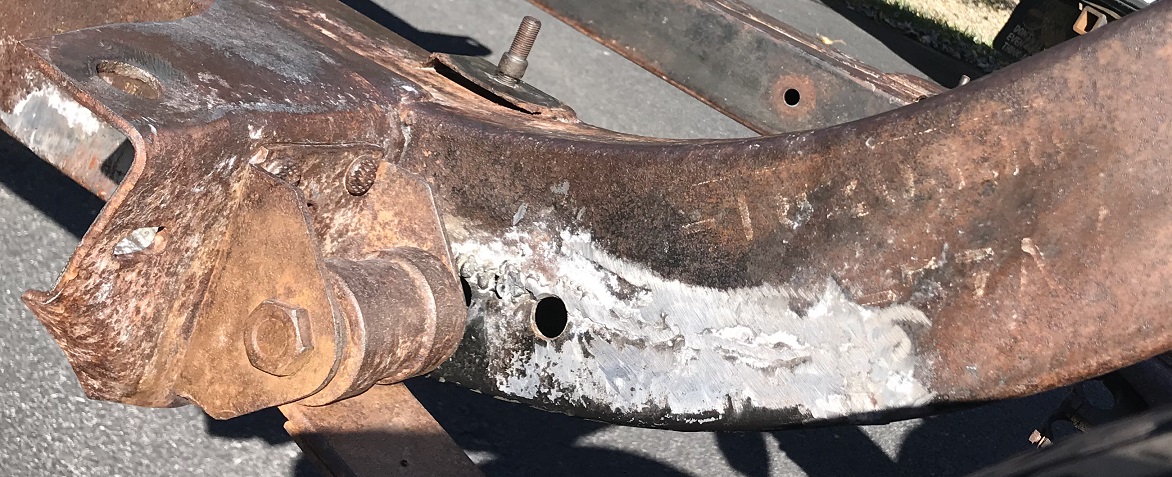 (numbers8.JPG) (numbers8.JPG)
Attachments
----------------
 numbers5.JPG (212KB - 347 downloads) numbers5.JPG (212KB - 347 downloads)
 numbers7.JPG (241KB - 293 downloads) numbers7.JPG (241KB - 293 downloads)
 numbers8.JPG (300KB - 302 downloads) numbers8.JPG (300KB - 302 downloads)
|
|
| |
|

Expert 5K+
Posts: 9666
      
Location: So. Cal | See if you can make out the letter in front of the number. Mine says "B" there. Also, the letter after the 57 date is "B". Maybe your's says "A" in both places or maybe it is a "B" and an "A". Your number is a little different from mine as well. Check and see if it might be the same or not. I suspect that they are really the same number.
Edited by Powerflite 2019-10-27 11:42 PM
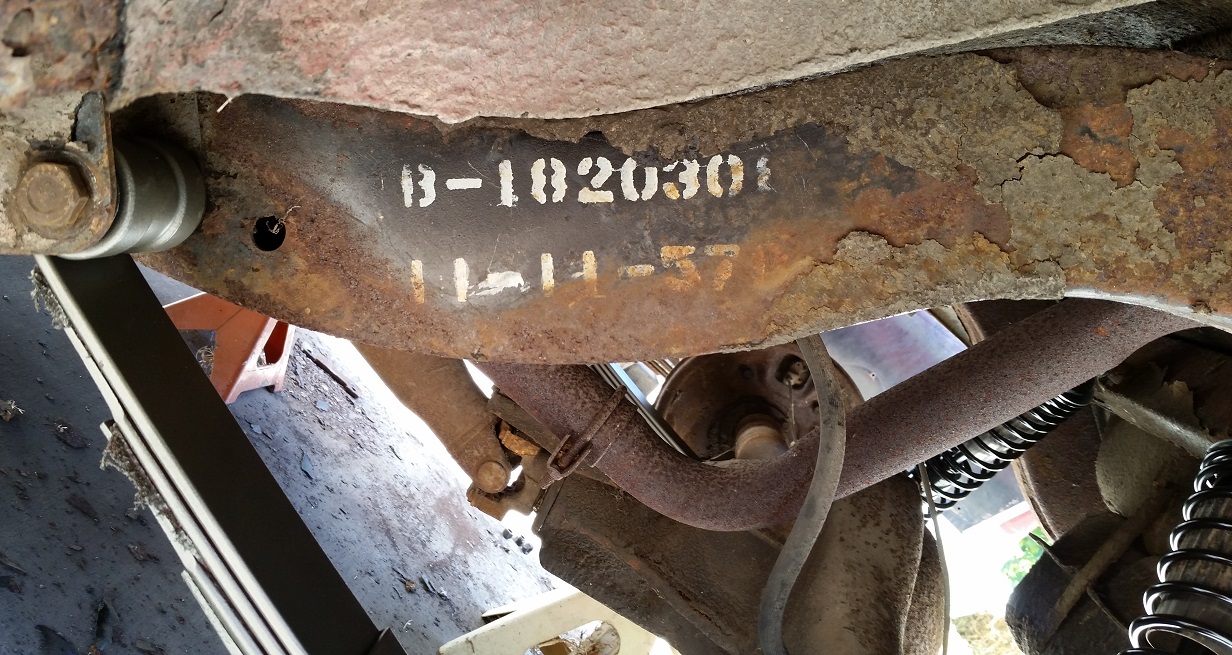 (DesotoFrameNo.jpg) (DesotoFrameNo.jpg)
Attachments
----------------
 DesotoFrameNo.jpg (370KB - 292 downloads) DesotoFrameNo.jpg (370KB - 292 downloads)
|
|
| |
|
Expert 5K+
Posts: 5006

| look 8 inches on top in front of the passenger torsion bar. the vin should be there. |
|
| |
|

Elite Veteran
Posts: 1112
 
Location: Wild Wonderful | I do believe it is a "B" in the front of the number. All you can really see is the lower curved section of the B.
And I missed the number by one digit. It reads B-1820308 .
For the date, I can see the top part of a straight line . So all I can read is 1 - 57 A .
Here is a different angle. Maybe you can see the ghost outline of the "B".
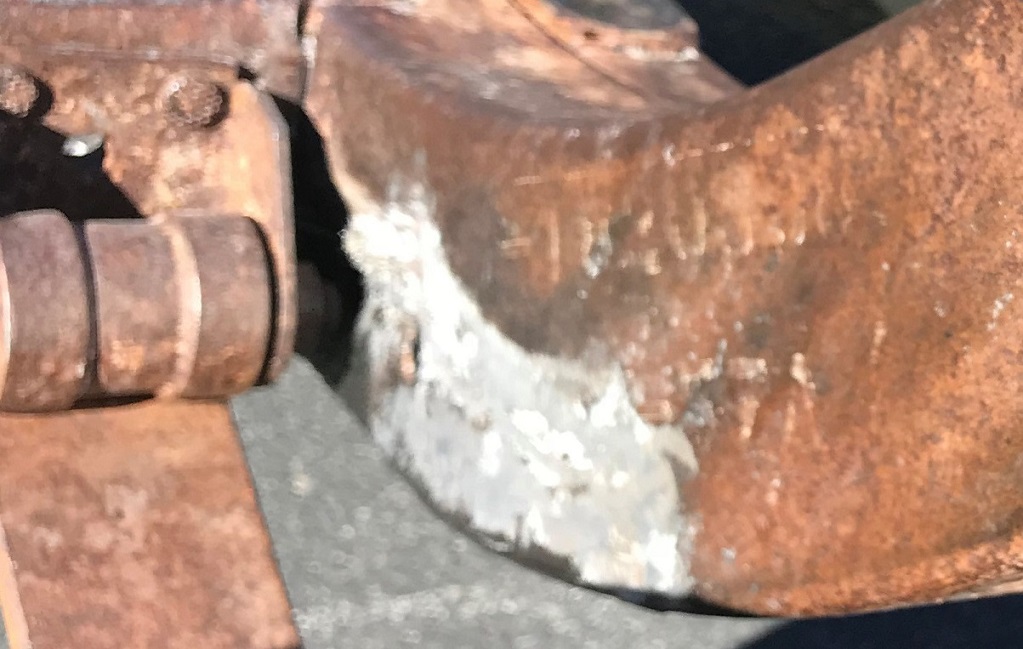 (numbers9.JPG) (numbers9.JPG)
Attachments
----------------
 numbers9.JPG (196KB - 292 downloads) numbers9.JPG (196KB - 292 downloads)
|
|
| |
|

Elite Veteran
Posts: 1112
 
Location: Wild Wonderful | mikes2nd - 2019-10-27 11:46 PM
look 8 inches on top in front of the passenger torsion bar. the vin should be there.
The only thing in that location is the engine number.
It reads LS35508 .
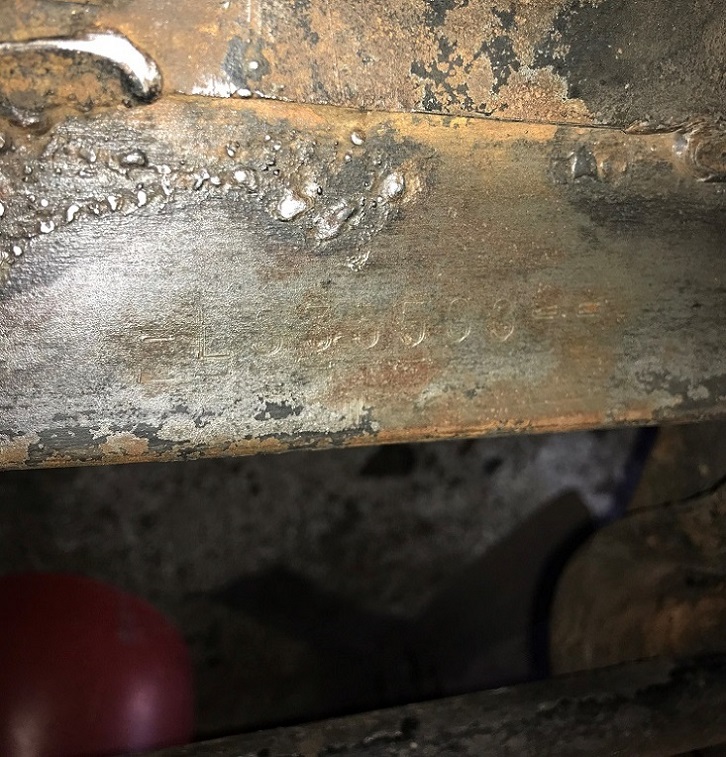 (numbers10.JPG) (numbers10.JPG)
Attachments
----------------
 numbers10.JPG (242KB - 303 downloads) numbers10.JPG (242KB - 303 downloads)
|
|
| |
|

Expert 5K+
Posts: 9666
      
Location: So. Cal | Yeah, I see the B on there. I wonder what they stand for. The one next to the date probably denotes an early or late shift, but I'm not sure what the B in front of the part number stands for. |
|
| |
|

Elite Veteran
Posts: 1159
   
Location: D-70199 Heslach | off topic
@ Nathan - on the picture above I can clearly see your new leaf spring
BTW my frame shows B-1675805 3-20-57A |
|
| |
|

Expert 5K+
Posts: 9666
      
Location: So. Cal | Thanks for the info Tom. A different part number for a wagon frame, as well as from a '57 model makes sense, but the mysterious "B" persists.
Yeah, those are the new springs I had made at the truck shop. |
|
| |
|
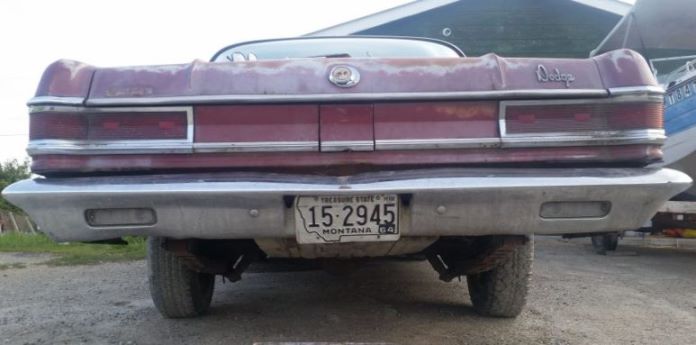
Extreme Veteran
Posts: 303
  
Location: Kalispell, MT USA | Is it B for Budd? Didn't they build frames for Chrysler back in the day? |
|
| |
|
Expert 5K+
Posts: 5006

| if the engine number is on the frame, you could find the vin right? |
|
| |
|

Expert 5K+
Posts: 6500
  
Location: Newark, Texas (Fort Worth) | Great car! Here is some info on paint, if you already have it, you can delete it: http://paintref.com/cgi-bin/colorcodedisplay.cgi?type=paint&paint=5...
http://paintref.com/cgi-bin/chipdisplay.cgi?year=1958&manuf=DeSoto&... |
|
| |
|

Elite Veteran
Posts: 1112
 
Location: Wild Wonderful | mikes2nd - 2019-10-30 4:27 PM
if the engine number is on the frame, you could find the vin right?
I don't think anyone has found the VIN on the frame of a 58 DeSoto. ?? If anyone has, I would like to see it.
|
|
| |
|
Elite Veteran
Posts: 653
   
Location: Finland | I have two vin numbers on my firedome 58 frame- but I have punched them myself since in Finland we have to get that done prior to registration. One number is required but I
punched two just for fun!
Edited by 22mafeja 2019-10-31 8:06 AM
|
|
| |
|
Elite Veteran
Posts: 1155
   
Location: somerville mass | pretty rough.... not many spring specials left hardly any parts cars to pick clean..john in calif..
drop dead goregous when done.. one on ebay not too long ago.. |
|
| |
|

Elite Veteran
Posts: 1112
 
Location: Wild Wonderful | The other side. Welded.
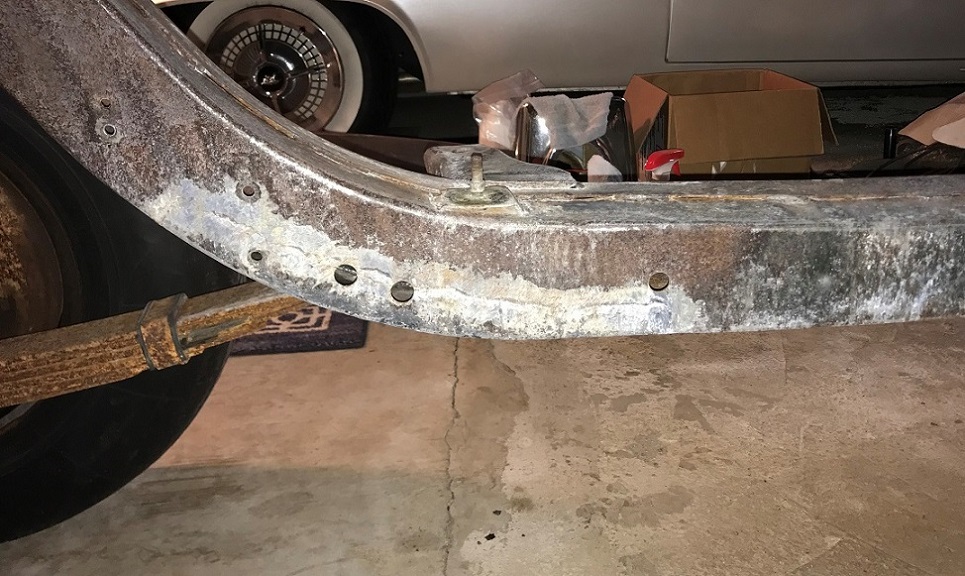 (newsection.JPG) (newsection.JPG)
Attachments
----------------
 newsection.JPG (243KB - 311 downloads) newsection.JPG (243KB - 311 downloads)
|
|
| |
|
Expert 5K+
Posts: 5006

| turned out great, |
|
| |
|

Elite Veteran
Posts: 1112
 
Location: Wild Wonderful | I painted the frame with POR15, and Tiecoat Primer. Ready for the final color.
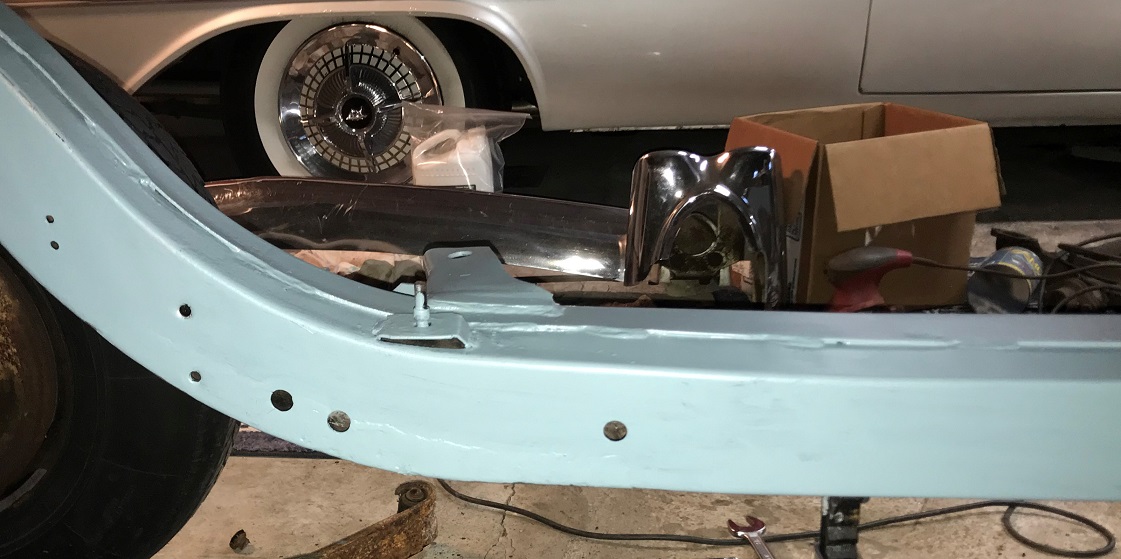 (IMG_0921 (2).JPG) (IMG_0921 (2).JPG)
Attachments
----------------
 IMG_0921 (2).JPG (197KB - 294 downloads) IMG_0921 (2).JPG (197KB - 294 downloads)
|
|
| |
|

Elite Veteran
Posts: 1112
 
Location: Wild Wonderful | Painted Chassis coat black.
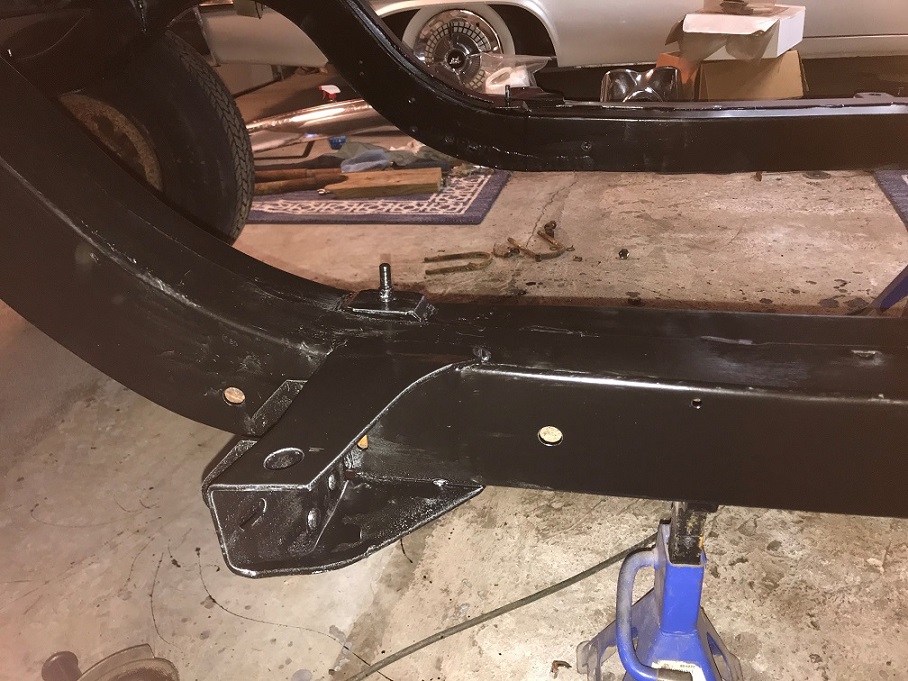 (framepaint.JPG) (framepaint.JPG)
Attachments
----------------
 framepaint.JPG (244KB - 270 downloads) framepaint.JPG (244KB - 270 downloads)
|
|
| |
|

Elite Veteran
Posts: 1112
 
Location: Wild Wonderful | Something different
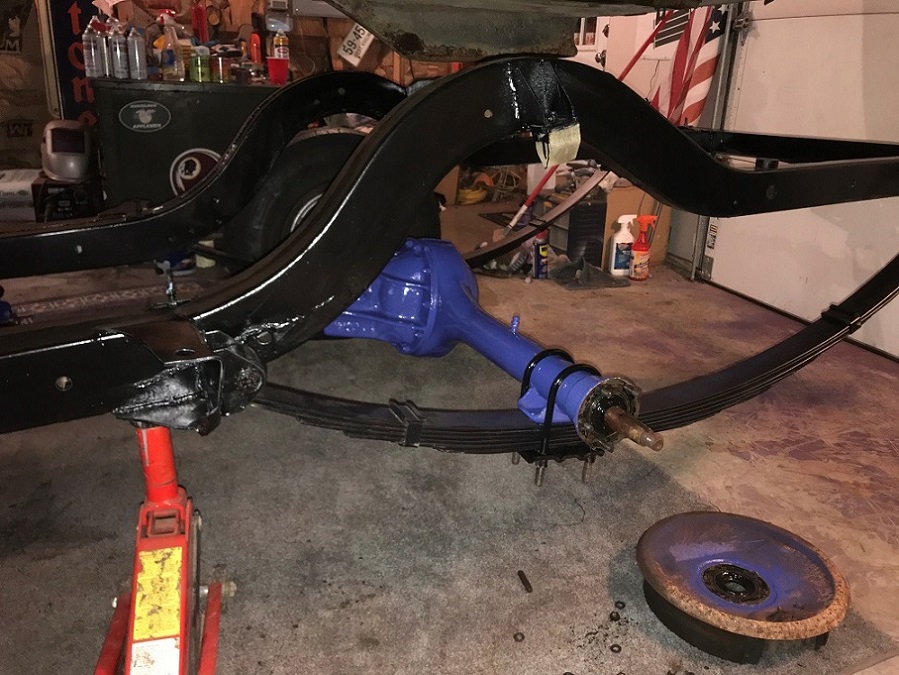 (differential.JPG) (differential.JPG)
Attachments
----------------
 differential.JPG (245KB - 262 downloads) differential.JPG (245KB - 262 downloads)
|
|
| |
|
Elite Veteran
Posts: 653
   
Location: Finland | Keep up the strong work! One day it is ready...
Thanks for sharing that mousesaurus nest in the glove box...it gets me to remember my own finds...mostly in the rear seat or on top of the headliner.
That picture explains always what this is about and why we do this - we are crazy people... |
|
| |
|

Elite Veteran
Posts: 1112
 
Location: Wild Wonderful | Thanks for the pep talk, Ralf.
Yeah, I guess we are all a little crazy, (my wife tells me that all the time).
Right now I am working on, installing disc brakes on the car.
Maybe I will get off of my lazy butt this weekend, and do some more work.
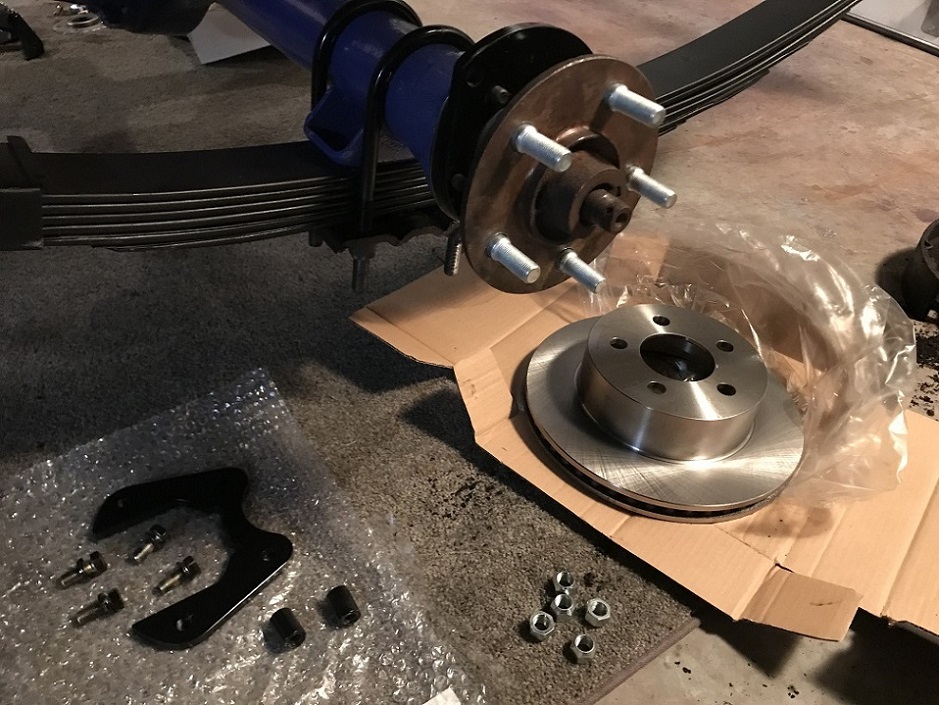 (rearbrakes.JPG) (rearbrakes.JPG)
Attachments
----------------
 rearbrakes.JPG (248KB - 354 downloads) rearbrakes.JPG (248KB - 354 downloads)
|
|
| |
|

Expert 5K+
Posts: 7400
     
Location: northern germany | 58DeSoDodge59 - 2019-10-28 7:41 PM
mikes2nd - 2019-10-27 11:46 PM
look 8 inches on top in front of the passenger torsion bar. the vin should be there.
The only thing in that location is the engine number.
It reads LS35508 .
So, against popular believe, there are indeed matching numbers engines for our cars? Does that apply for unitbodys too?
Great work, btw. |
|
| |
|

Expert 5K+
Posts: 9666
      
Location: So. Cal | In the '60's, the numbers that were put onto the frame were shipping order numbers. Those can only be traced back to the VIN & motor through the buildsheet. I'm not sure when they started doing that, but my '67 Barracuda is like that. Chrycoman discussed this on here before so if you look up the post he made about it, you can figure it out. |
|
| |
|

Elite Veteran
Posts: 1112
 
Location: Wild Wonderful | To install AAJ brakes on the rear.
Step 1 - Cut down the backing plate, so you can still use the seal.
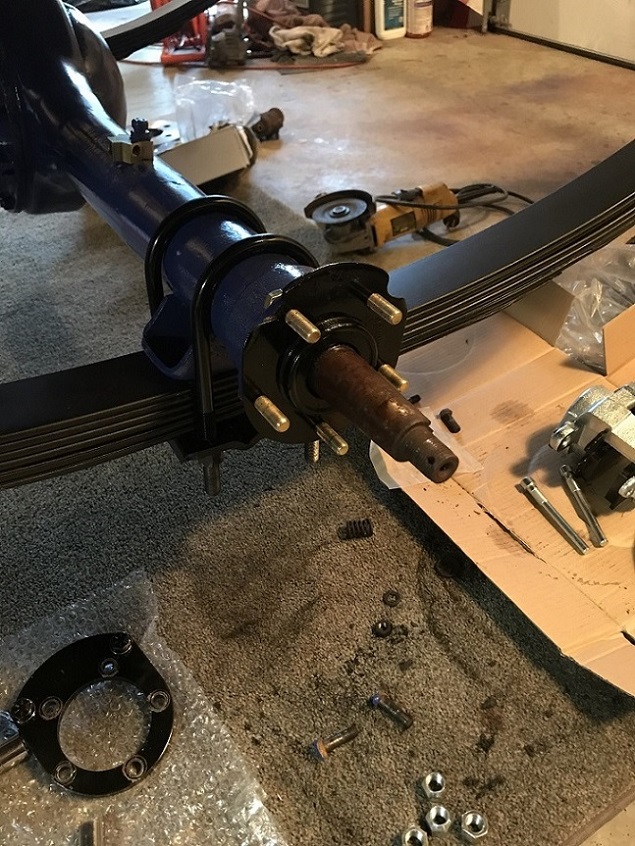 (IMG_02.JPG) (IMG_02.JPG)
Attachments
----------------
 IMG_02.JPG (247KB - 373 downloads) IMG_02.JPG (247KB - 373 downloads)
|
|
| |
|

Elite Veteran
Posts: 1112
 
Location: Wild Wonderful | Step 2 - Install plates as provided.
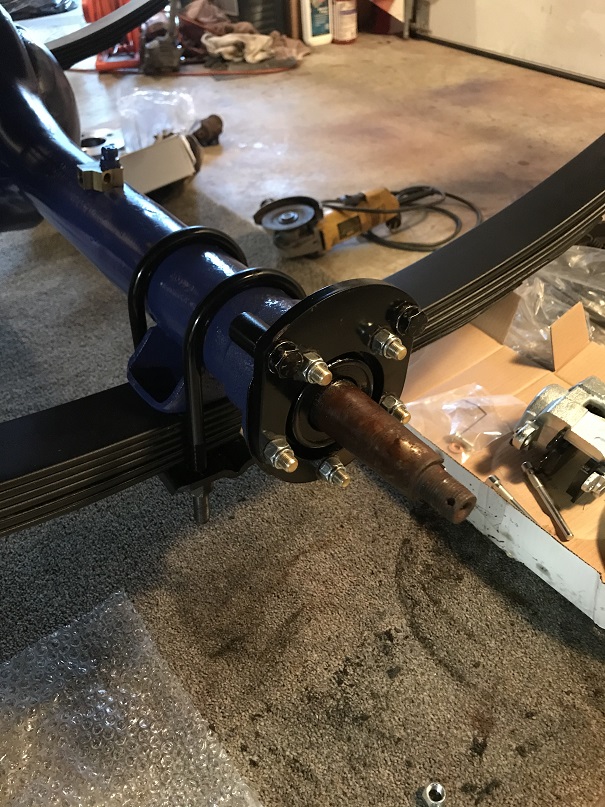 (IMG_03.JPG) (IMG_03.JPG)
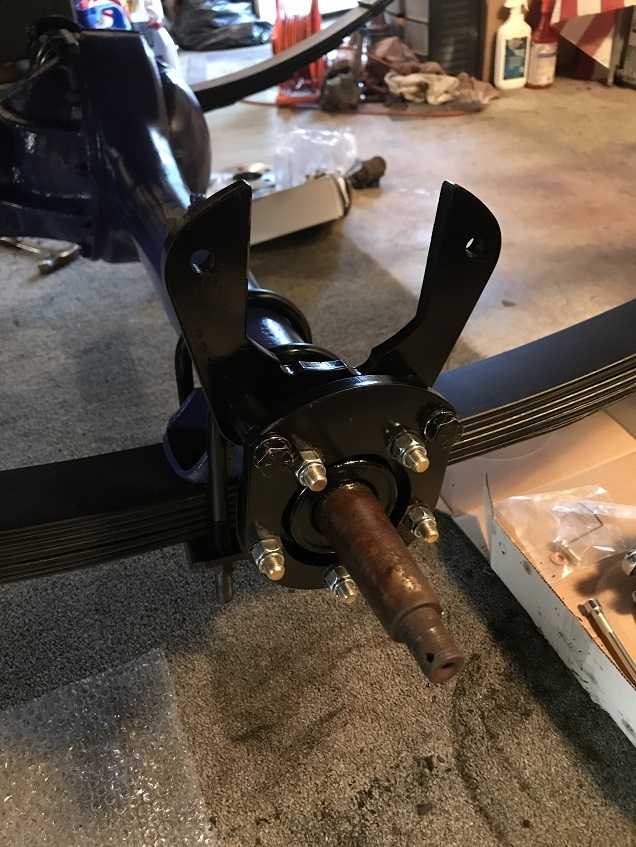 (IMG_04.JPG) (IMG_04.JPG)
Attachments
----------------
 IMG_03.JPG (228KB - 347 downloads) IMG_03.JPG (228KB - 347 downloads)
 IMG_04.JPG (218KB - 345 downloads) IMG_04.JPG (218KB - 345 downloads)
|
|
| |
|

Elite Veteran
Posts: 1112
 
Location: Wild Wonderful | Step 3 - Remove drum from the hub. Drill and install new studs (provided) into the hub.
Paint whatever color you want.
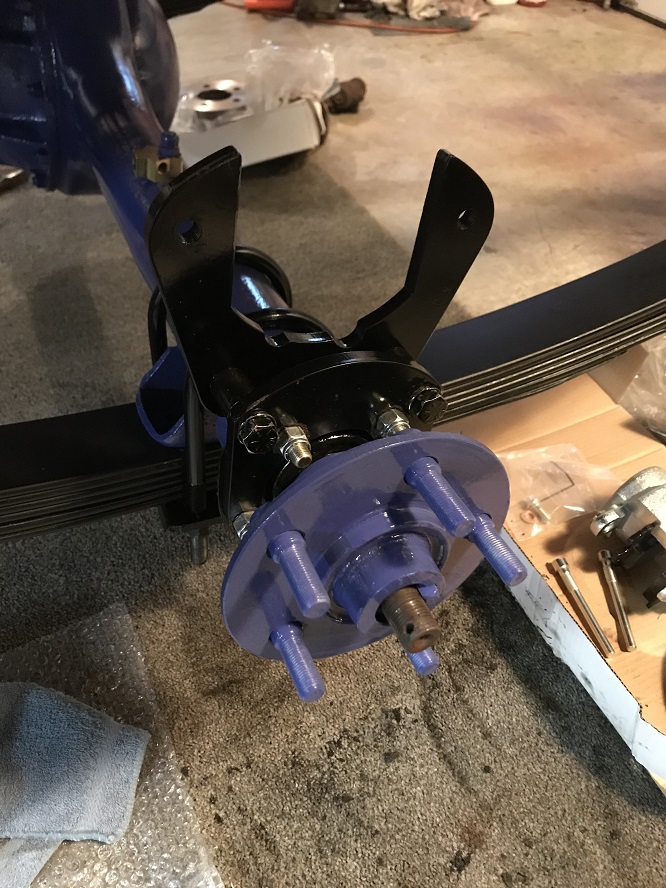 (IMG_05.JPG) (IMG_05.JPG)
Attachments
----------------
 IMG_05.JPG (236KB - 333 downloads) IMG_05.JPG (236KB - 333 downloads)
|
|
| |
|

Elite Veteran
Posts: 1112
 
Location: Wild Wonderful | Step 4 - Install new rotor and caliper with hub.
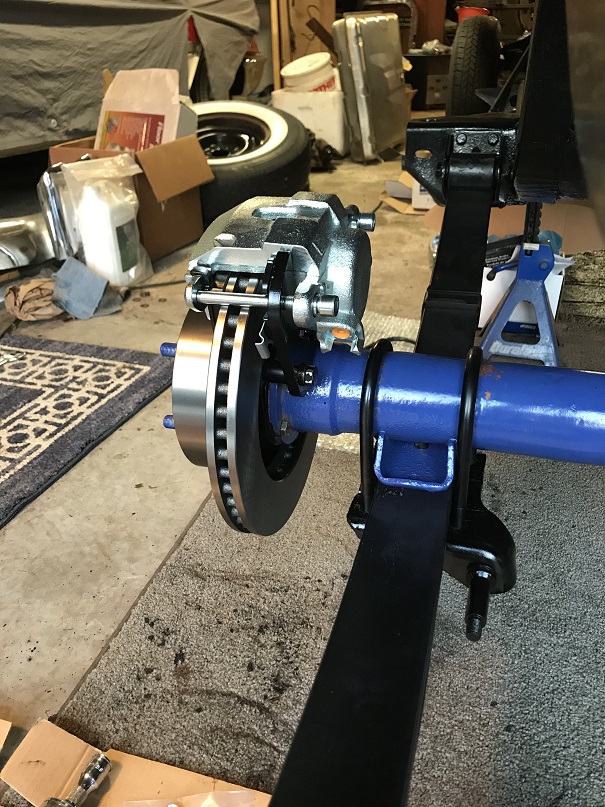 (IMG_07.JPG) (IMG_07.JPG)
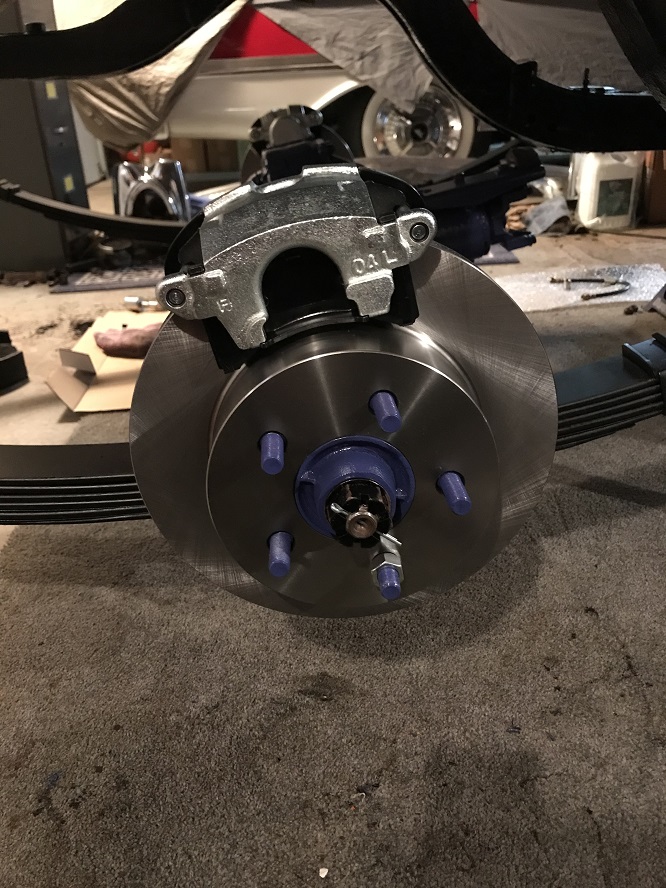 (IMG_08.JPG) (IMG_08.JPG)
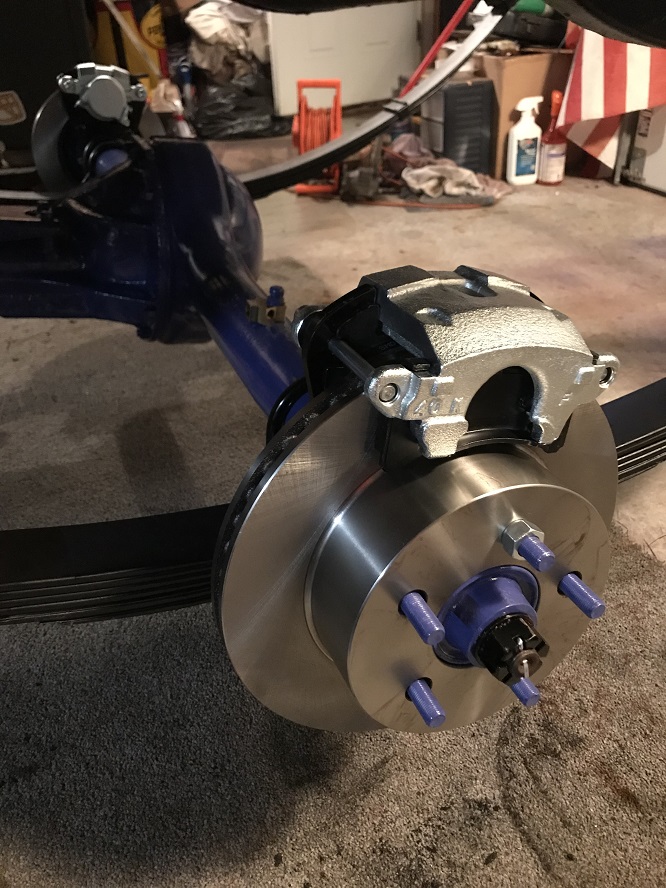 (IMG_09.JPG) (IMG_09.JPG)
Attachments
----------------
 IMG_07.JPG (239KB - 348 downloads) IMG_07.JPG (239KB - 348 downloads)
 IMG_08.JPG (244KB - 339 downloads) IMG_08.JPG (244KB - 339 downloads)
 IMG_09.JPG (231KB - 335 downloads) IMG_09.JPG (231KB - 335 downloads)
|
|
| |
|

Elite Veteran
Posts: 1112
 
Location: Wild Wonderful | These brakes fit nicely inside the original 14 inch wheels.
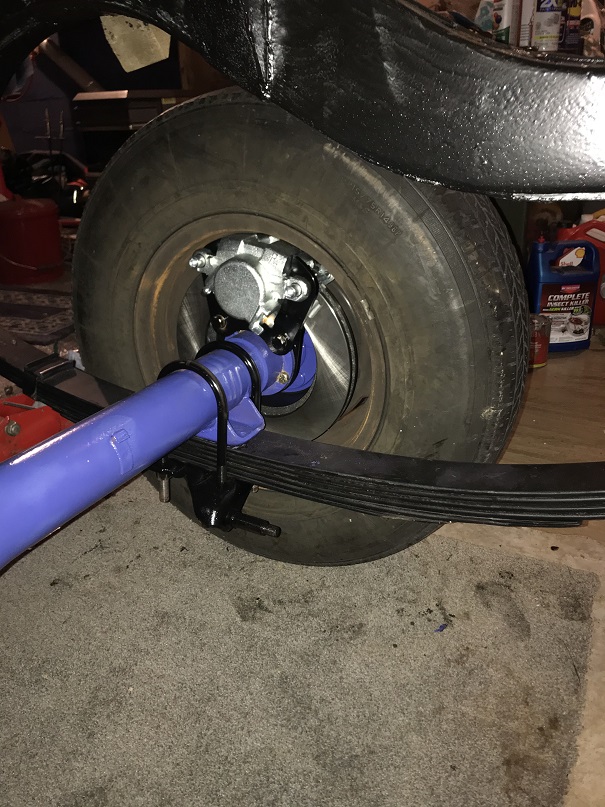 (IMG_10.JPG) (IMG_10.JPG)
Attachments
----------------
 IMG_10.JPG (213KB - 356 downloads) IMG_10.JPG (213KB - 356 downloads)
|
|
| |
|

Expert 5K+
Posts: 9666
      
Location: So. Cal | Thanks for the instructions. I will likely do this in the future on some of my cars as well. But that can't be right as you have them. The bleeders are upside down. You will need to rotate those brackets to get the bleeders pointing upward. |
|
| |
|

Elite Veteran
Posts: 1112
 
Location: Wild Wonderful | Of course you're right. It's just that I had all of the parts painted and ready, so I just put them on without
thinking about it, (or reading the instructions). I should have moved on to Step 5 - Hooking up the lines and
bleeding the brakes. I would have figured it out then. You know, on the original brakes, the wheel cylinder is
at the top-center. That's probably what I was thinking about.  |
|
| |
|

Elite Veteran
Posts: 1112
 
Location: Wild Wonderful | This is what they look like on my 59 Dodge.
It looks like I'm gonna haveta paint the calipers on this one.
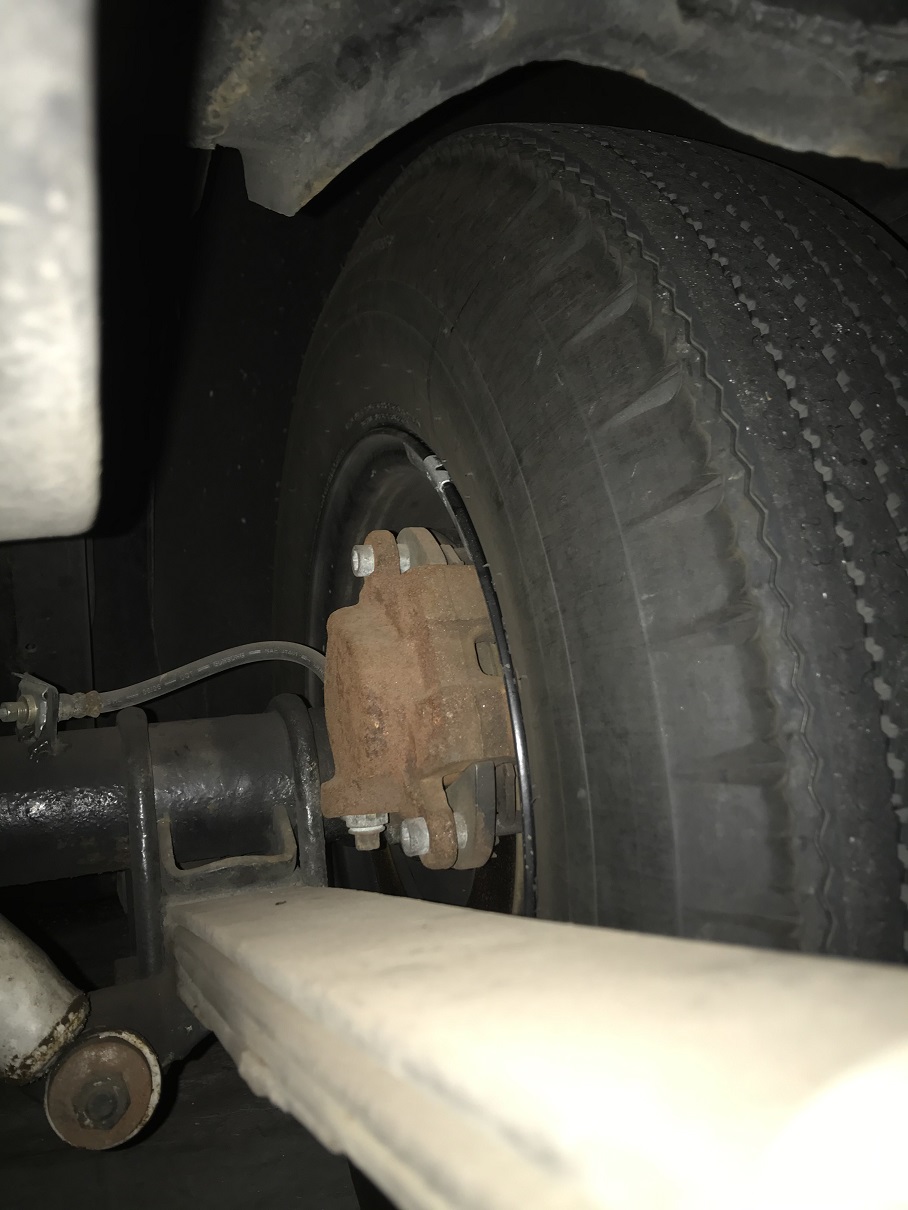 (IMG_1013.JPG) (IMG_1013.JPG)
Attachments
----------------
 IMG_1013.JPG (204KB - 342 downloads) IMG_1013.JPG (204KB - 342 downloads)
|
|
| |
|

Elite Veteran
Posts: 1112
 
Location: Wild Wonderful | Step 5 - Remove everything you just did, and install it correctly, as per the instructions.
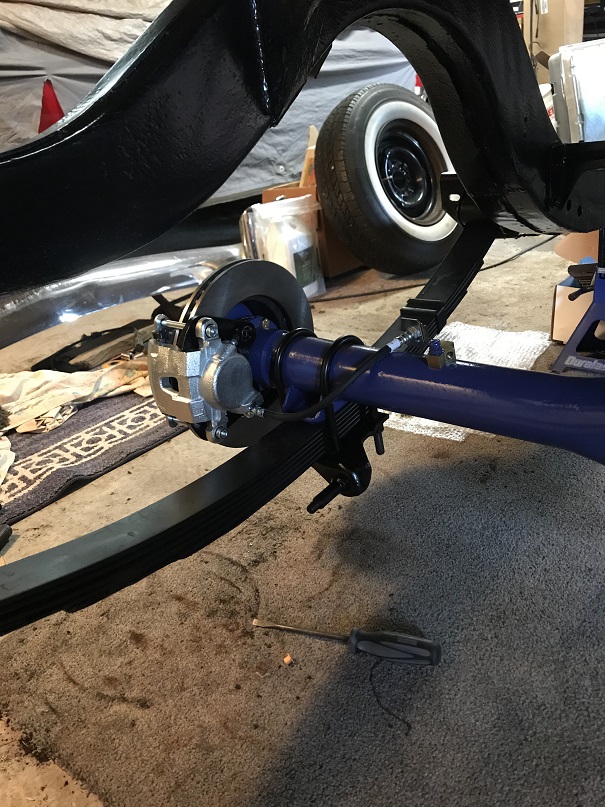 (IMG_1014.JPG) (IMG_1014.JPG)
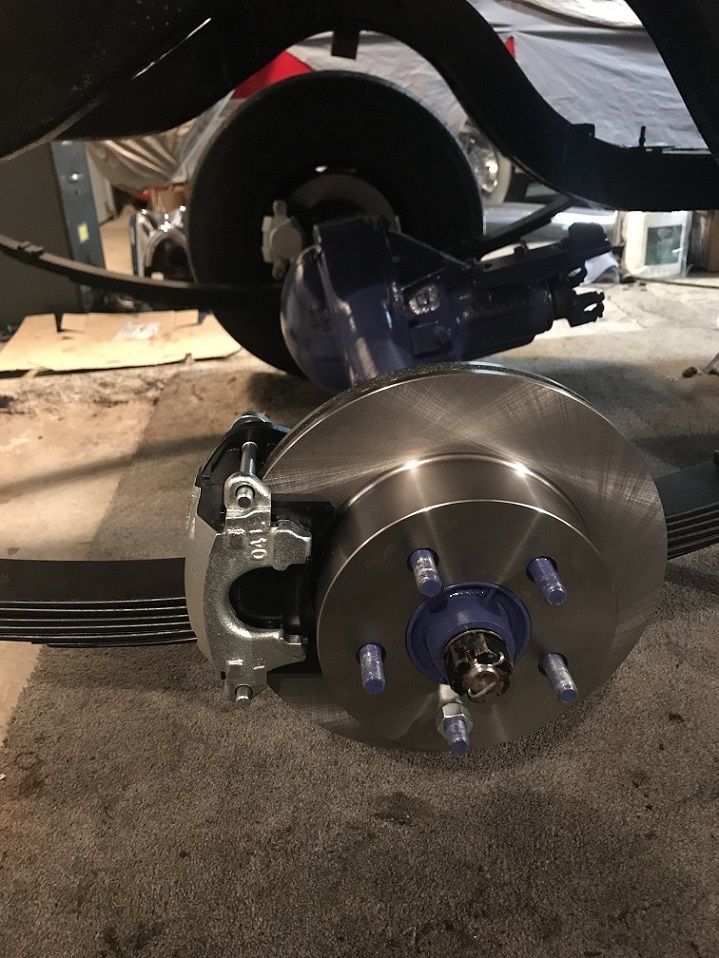 (IMG_1017.JPG) (IMG_1017.JPG)
Attachments
----------------
 IMG_1014.JPG (230KB - 333 downloads) IMG_1014.JPG (230KB - 333 downloads)
 IMG_1017.JPG (249KB - 374 downloads) IMG_1017.JPG (249KB - 374 downloads)
|
|
| |
|
Expert 5K+
Posts: 5006

| what do you use for a distribution block? with rear discs? Adjustable?
|
|
| |
|

Elite Veteran
Posts: 1112
 
Location: Wild Wonderful | mikes2nd - 2020-03-23 1:01 AM
what do you use for a distribution block? with rear discs? Adjustable?
Everything else in the brakes is the same as original. Same blocks, same single master cylinder.
If it's good enough for my 59 Dodge, then it will be good enough for this 58 DeSoto.
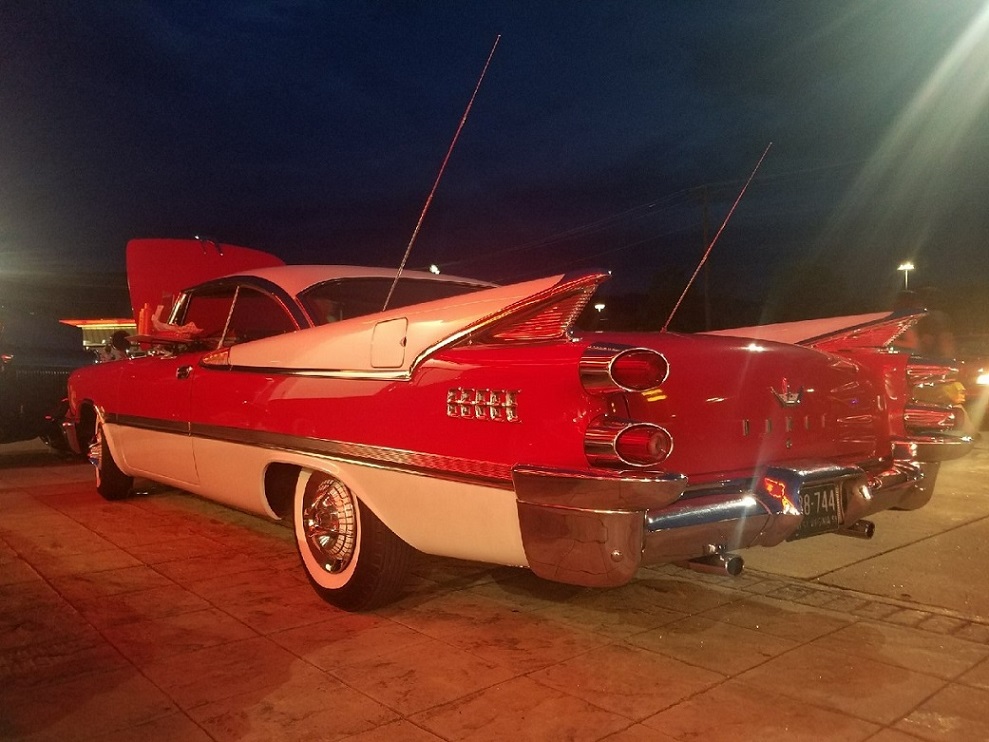 (rubyneon.jpg) (rubyneon.jpg)
Attachments
----------------
 rubyneon.jpg (219KB - 338 downloads) rubyneon.jpg (219KB - 338 downloads)
|
|
| |
|

Elite Veteran
Posts: 1112
 
Location: Wild Wonderful | Well, it's time to go work on my car.
 (IMG_1019.JPG) (IMG_1019.JPG)
Attachments
----------------
 IMG_1019.JPG (210KB - 353 downloads) IMG_1019.JPG (210KB - 353 downloads)
|
|
| |
|

Elite Veteran
Posts: 1112
 
Location: Wild Wonderful | A little bit of front end work.
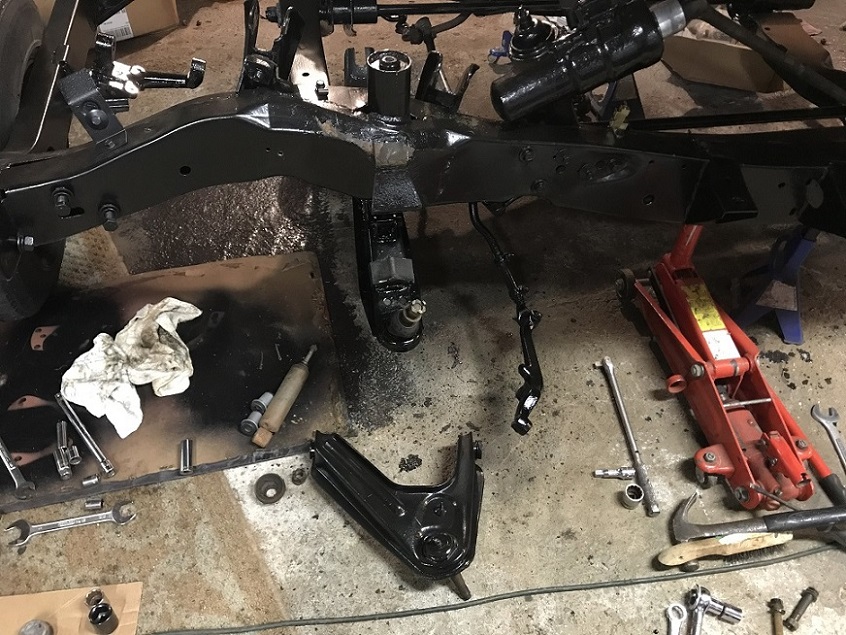 (IMG_1039.JPG) (IMG_1039.JPG)
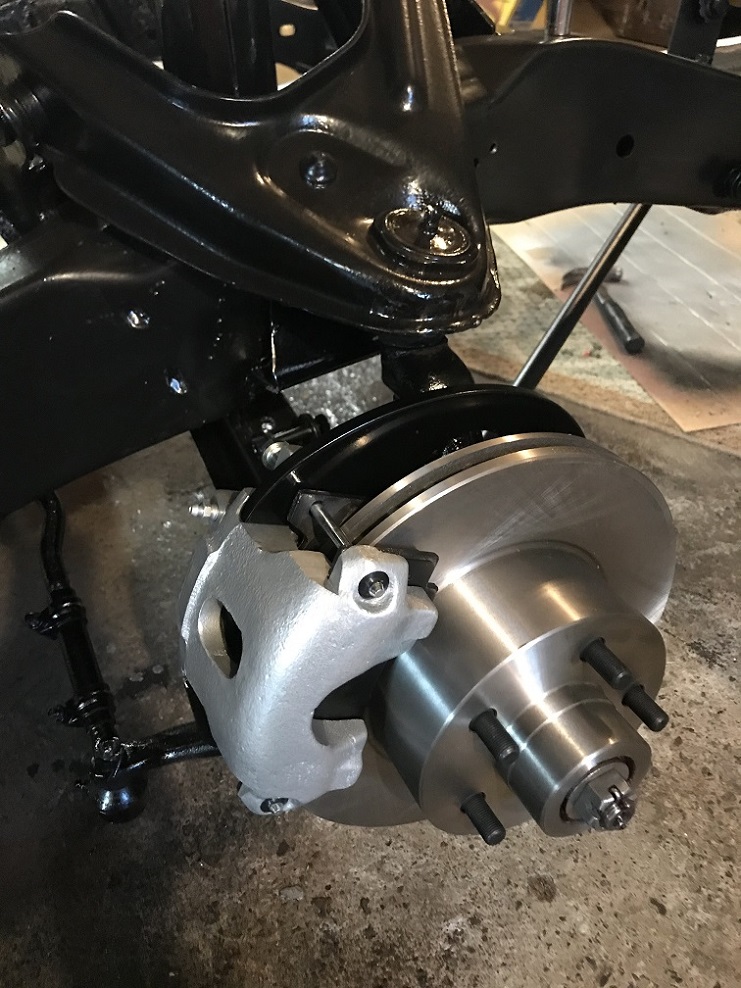 (IMG_1043.JPG) (IMG_1043.JPG)
Attachments
----------------
 IMG_1039.JPG (249KB - 335 downloads) IMG_1039.JPG (249KB - 335 downloads)
 IMG_1043.JPG (245KB - 333 downloads) IMG_1043.JPG (245KB - 333 downloads)
|
|
| |
|
Expert 5K+
Posts: 5006

| been there done that... its nice once its nice and clean.. |
|
| |
|

Elite Veteran
Posts: 1112
 
Location: Wild Wonderful | I love this Corona thing. It's like a really long vacation. It gives me a lot of time to work on this car.
It's time to start scraping the bottom of the body.
Edited by 58DeSoDodge59 2020-03-31 3:32 PM
|
|
| |
|

Expert 5K+
Posts: 9666
      
Location: So. Cal | I expected to see a lot more activity on here with everyone working on their projects, but I've been a little disappointed. Good to see you are taking advantage of it like I am. |
|
| |
|

Elite Veteran
Posts: 1112
 
Location: Wild Wonderful | My brand new leaf springs have such a big bow, that I can't even install my rear shocks. I had to put some
straps around them, but I still can't move them far enough to install the shocks. I can't wait to put the body
back on and put some weight in the trunk.
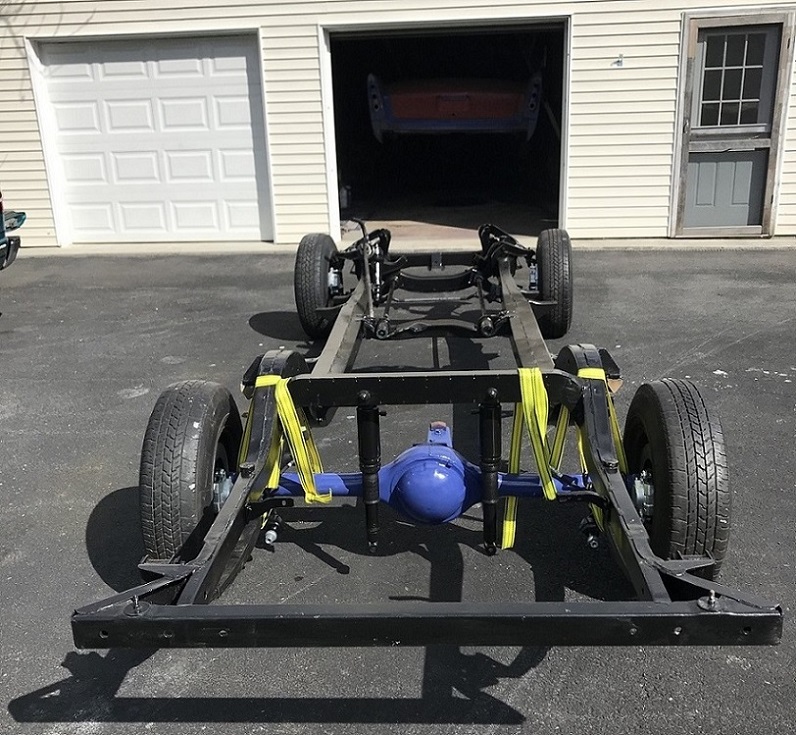 (IMG_1044.JPG) (IMG_1044.JPG)
Attachments
----------------
 IMG_1044.JPG (244KB - 330 downloads) IMG_1044.JPG (244KB - 330 downloads)
|
|
| |
|

Elite Veteran
Posts: 1112
 
Location: Wild Wonderful | I'm working on the bottom of the car. Scraping all of that undercoating off, so I can see where the rust is.
No, that body is not touching the floor.
Edited by 58DeSoDodge59 2020-04-07 9:44 PM
 (bottom.JPG) (bottom.JPG)
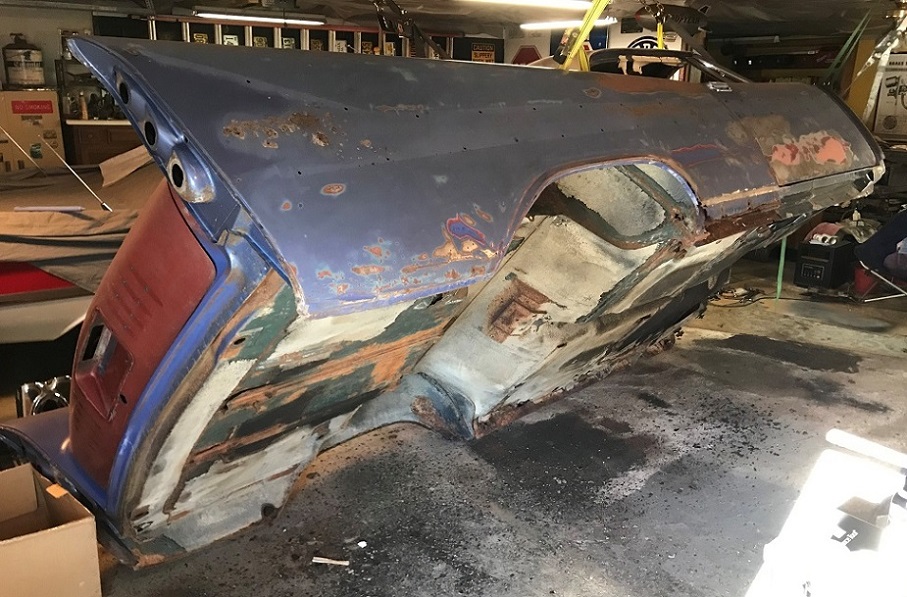 (bottom2.JPG) (bottom2.JPG)
Attachments
----------------
 bottom.JPG (248KB - 328 downloads) bottom.JPG (248KB - 328 downloads)
 bottom2.JPG (246KB - 335 downloads) bottom2.JPG (246KB - 335 downloads)
|
|
| |
|
Member
Posts: 10
| Looking good. If you gotta be quarantined, that's an awesome project to help pass the time! (although I have no doubt you'd be working on it regardless). Enjoying watching your progress. |
|
| |
|
Expert 5K+
Posts: 5006

| you sir are a madman  but it works but it works  |
|
| |
|
Elite Veteran
Posts: 653
   
Location: Finland | ..Aahh ..to see that body dangle in straps all rusty and dusty makes my chest all warm.....what a journey ahead.
Yes we have to think positive about the corona thing...of course easy to say until you get it yourself. |
|
| |
|

Expert 5K+
Posts: 9666
      
Location: So. Cal | I measured the hole spacing for the spring special trim on my trunk and came up with these measurements. Does this agree with what you have on your car? I have to replace my trunk lid so I want to be sure I get them back on in the right places.
 (58 DeSoto Spring Trim Hole Locations.jpg) (58 DeSoto Spring Trim Hole Locations.jpg)
Attachments
----------------
 58 DeSoto Spring Trim Hole Locations.jpg (30KB - 325 downloads) 58 DeSoto Spring Trim Hole Locations.jpg (30KB - 325 downloads)
|
|
| |
|

Elite Veteran
Posts: 1112
 
Location: Wild Wonderful | Nathan, Did you get your IBM card yet? I am anxious to know if it is really a spring special. It looks like somebody added these bars, for some bling. Here are the measurements my car has.
 (58 DeSoto Spring Trim Hole Locations.jpg) (58 DeSoto Spring Trim Hole Locations.jpg)
Attachments
----------------
 58 DeSoto Spring Trim Hole Locations.jpg (51KB - 332 downloads) 58 DeSoto Spring Trim Hole Locations.jpg (51KB - 332 downloads)
|
|
| |
|

Expert 5K+
Posts: 9666
      
Location: So. Cal | No, I haven't yet. I should though, but yes, I was thinking the same thing, that's why I asked you to check your measurements. The holes are far enough off that it seems likely to have been added. Thanks for your help. |
|
| |
|
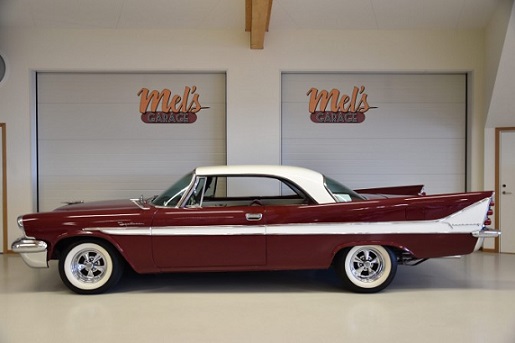
Member
Posts: 36

Location: Finland | 58DeSoDodge59 - 2020-03-06 5:00 AM
Thanks for the pep talk, Ralf.
Yeah, I guess we are all a little crazy, (my wife tells me that all the time).
Right now I am working on, installing disc brakes on the car.
Maybe I will get off of my lazy butt this weekend, and do some more work.
Is there available complete discbrake kit to use?
I've try find something (Front and rear) kits to my 58 Firesweep, but normaly those are builded by many different parts.
Because it's not so easy to find parts in Finland ... it's very expensive to buy parts just for testing.
Edited by MSS73 2022-03-09 4:36 PM
|
|
| |
|

Elite Veteran
Posts: 1112
 
Location: Wild Wonderful | MSS73 - 2022-03-09 4:35 PM
58DeSoDodge59 - 2020-03-06 5:00 AM
Thanks for the pep talk, Ralf.
Yeah, I guess we are all a little crazy, (my wife tells me that all the time).
Right now I am working on, installing disc brakes on the car.
Maybe I will get off of my lazy butt this weekend, and do some more work.
Is there available complete discbrake kit to use?
I've try find something (Front and rear ) kits to my 58 Firesweep, but normaly those are builded by many different parts.
Because it's not so easy to find parts in Finland ... it's very expensive to buy parts just for testing.
I do not know. I used AAJ brakes on this car.
Good luck to you. I hope you find what you need.
|
|
| |
|

Elite Veteran
Posts: 1112
 
Location: Wild Wonderful | Well guys, Life happened. I had to put this thing on hold for a while, but now I'm getting back to it.
Where was I ? Oh yeah, scraping the bottom and welding the rockers and wheel wells. |
|
| |
|

Elite Veteran
Posts: 1112
 
Location: Wild Wonderful | Inner rocker passenger side.
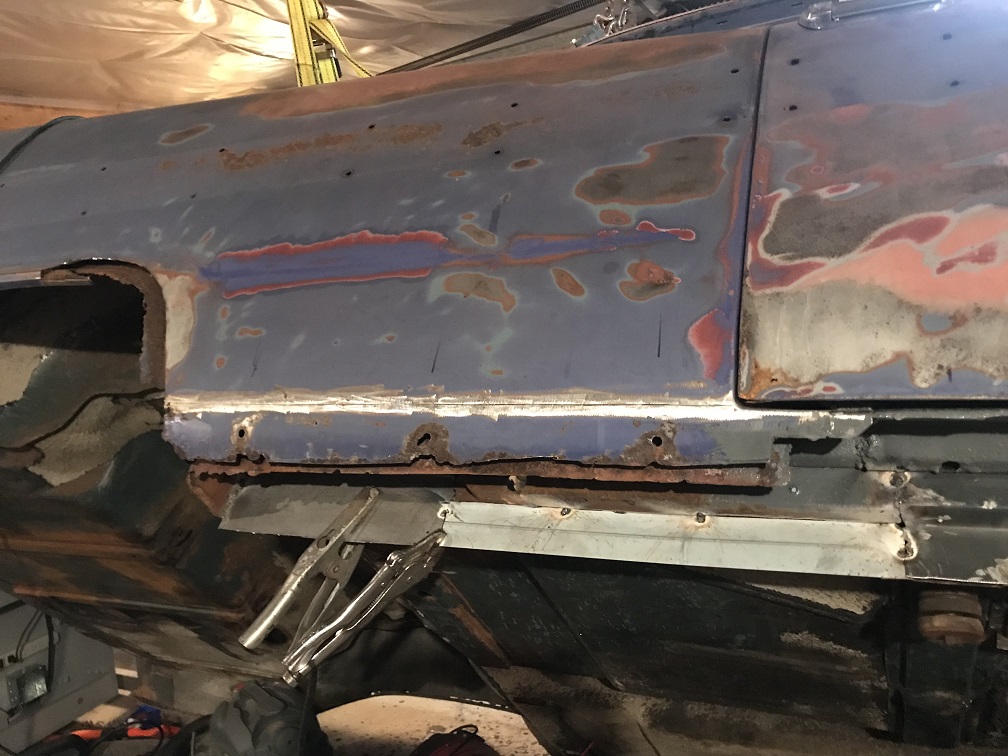 (IMG_2718.JPG) (IMG_2718.JPG)
Attachments
----------------
 IMG_2718.JPG (237KB - 74 downloads) IMG_2718.JPG (237KB - 74 downloads)
|
|
| |
|

Elite Veteran
Posts: 1112
 
Location: Wild Wonderful | Pass. wheelwell
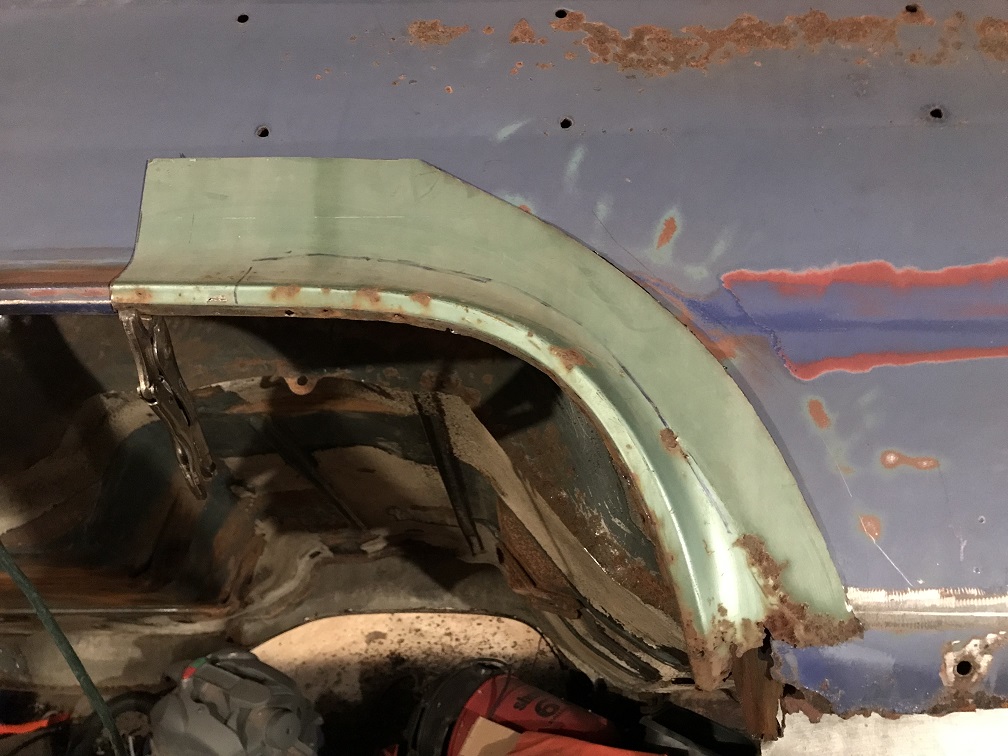 (outer9.JPG) (outer9.JPG)
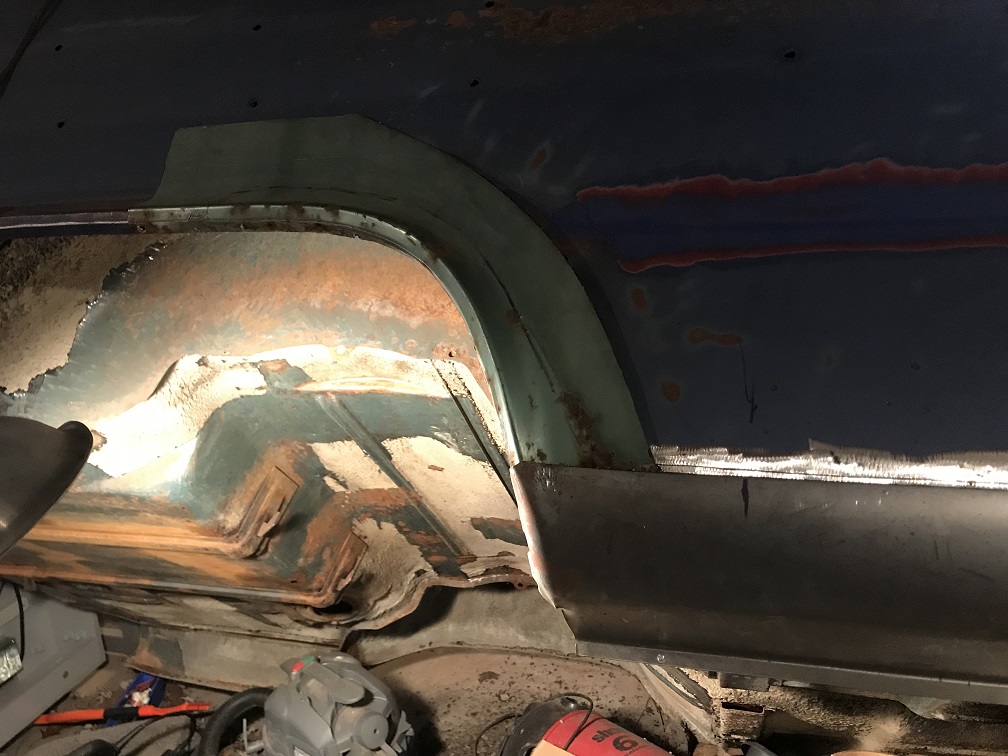 (outer10.JPG) (outer10.JPG)
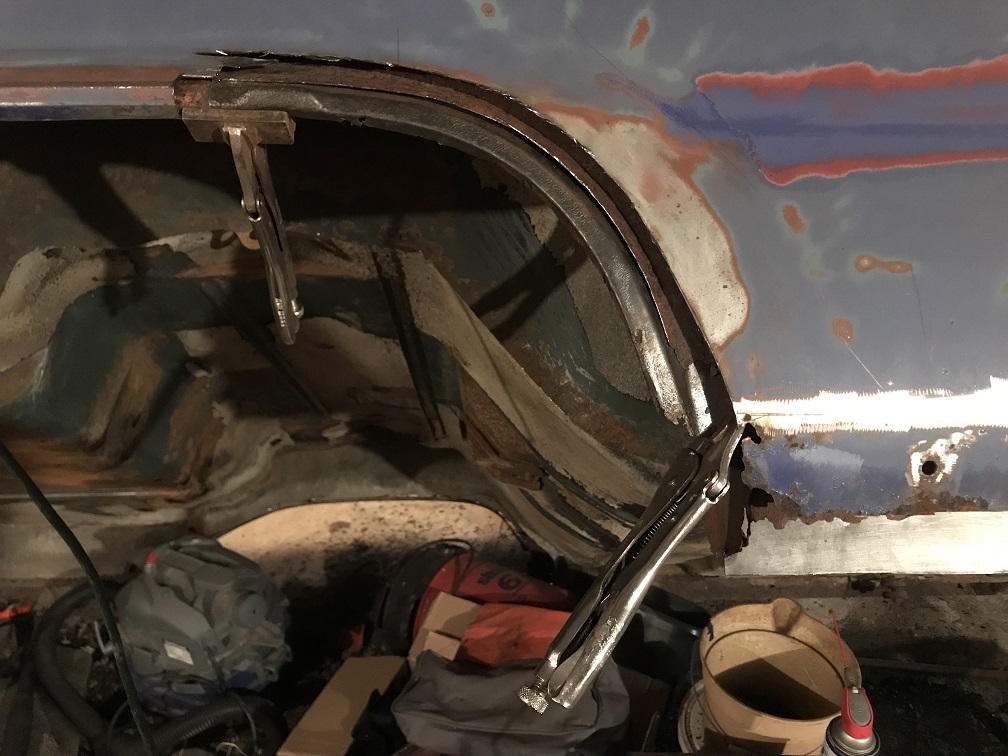 (outer11.JPG) (outer11.JPG)
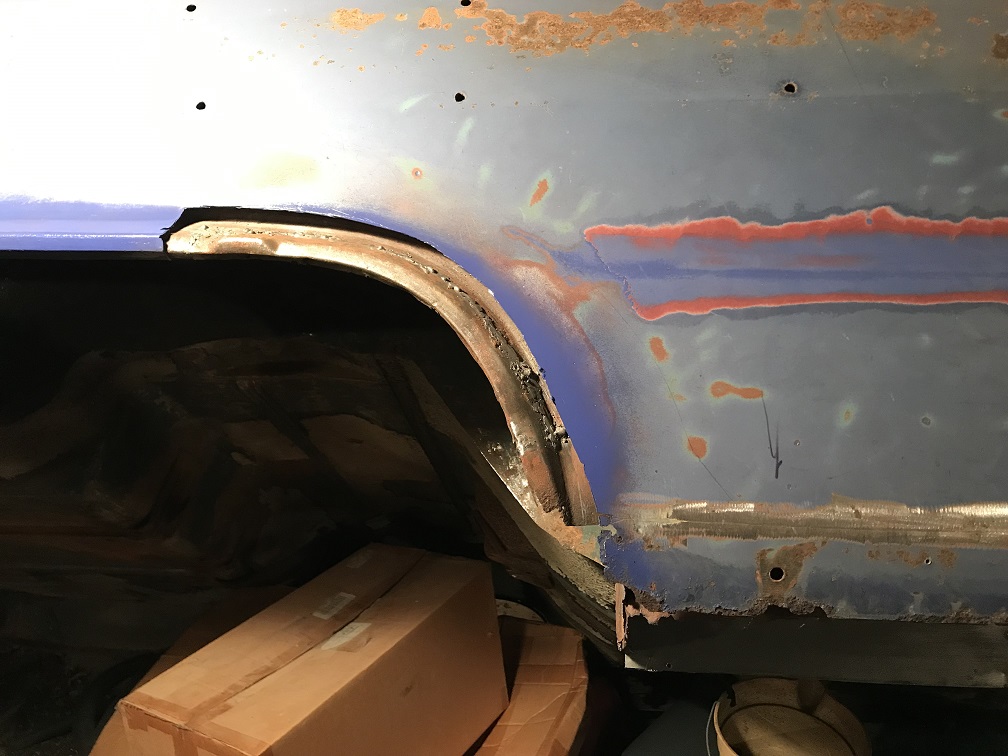 (outer12.JPG) (outer12.JPG)
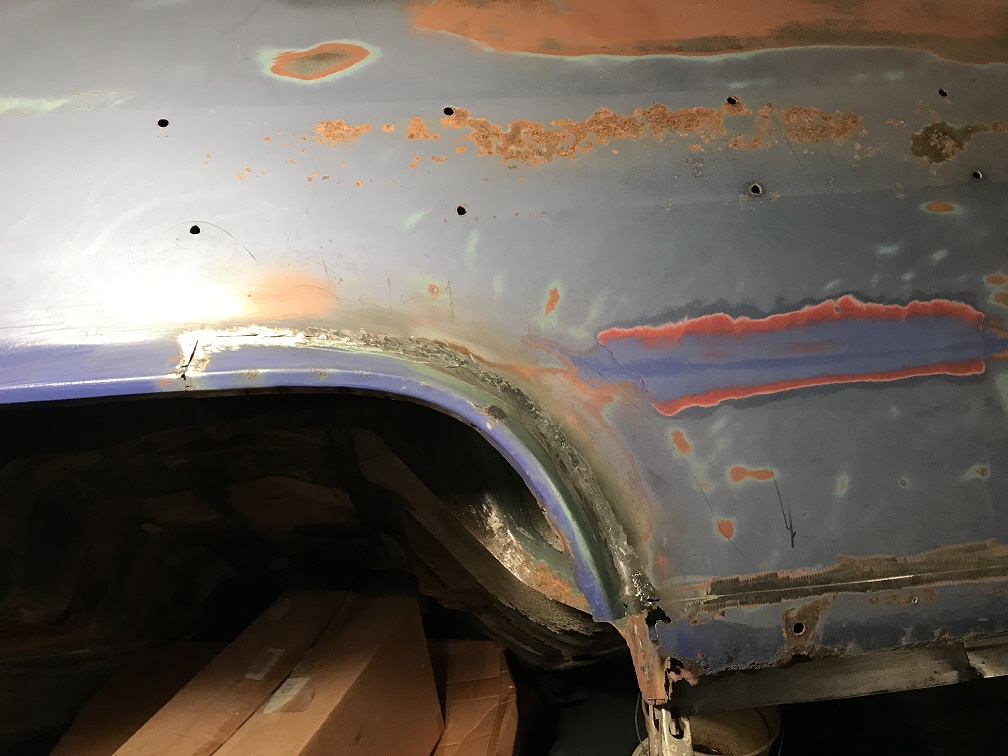 (outer13.JPG) (outer13.JPG)
Attachments
----------------
 outer9.JPG (229KB - 66 downloads) outer9.JPG (229KB - 66 downloads)
 outer10.JPG (230KB - 65 downloads) outer10.JPG (230KB - 65 downloads)
 outer11.JPG (228KB - 68 downloads) outer11.JPG (228KB - 68 downloads)
 outer12.JPG (190KB - 72 downloads) outer12.JPG (190KB - 72 downloads)
 outer13.JPG (196KB - 65 downloads) outer13.JPG (196KB - 65 downloads)
|
|
| |
|

Expert 5K+
Posts: 9666
      
Location: So. Cal | Nice job, that's great progress! Remember to paint inside the joints before you weld it back together as that will prevent rust from progressing there again. I just use red epoxy primer in there. |
|
| |
 Spring Special 58 DeSoto Firedome Sportsman
 Spring Special 58 DeSoto Firedome Sportsman