|
|

Expert
Posts: 2216
 
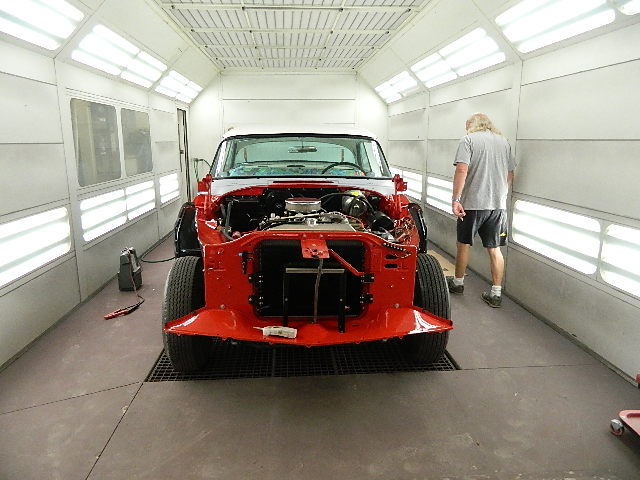
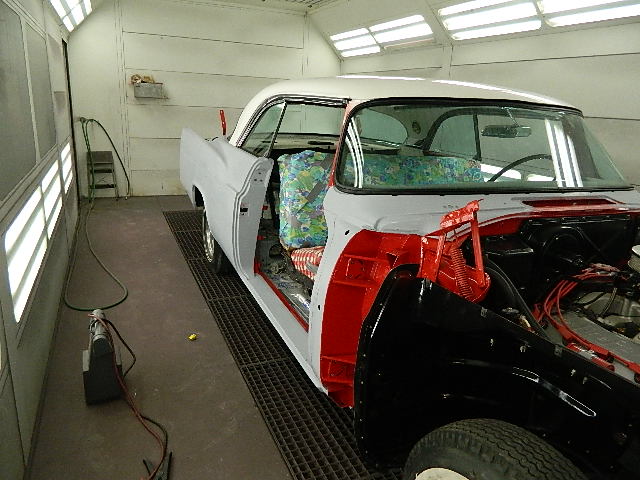
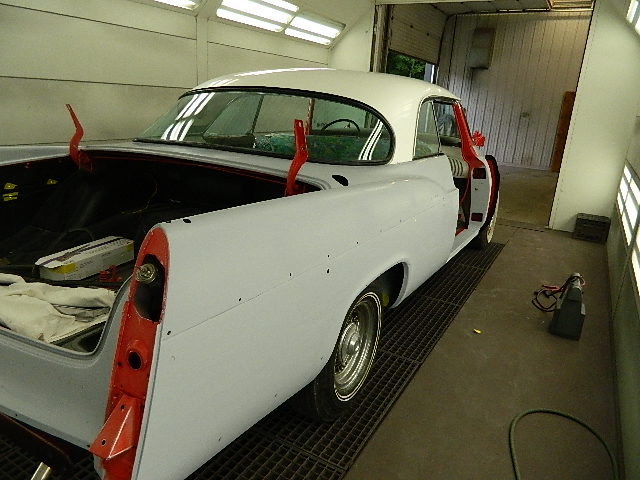
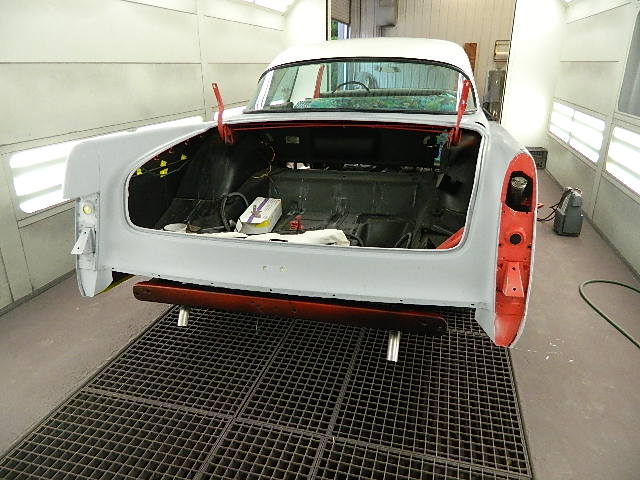
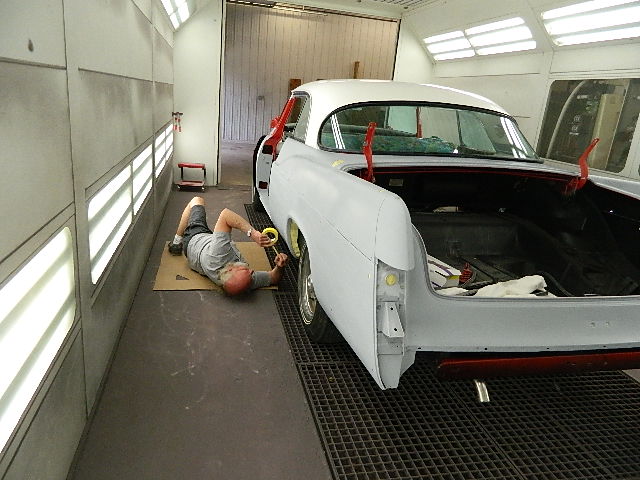
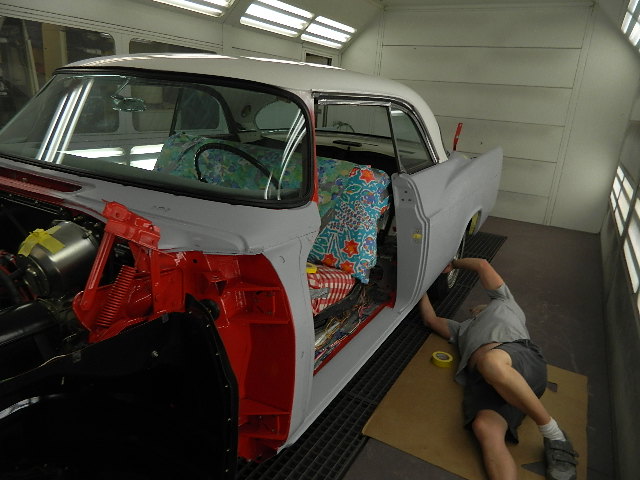
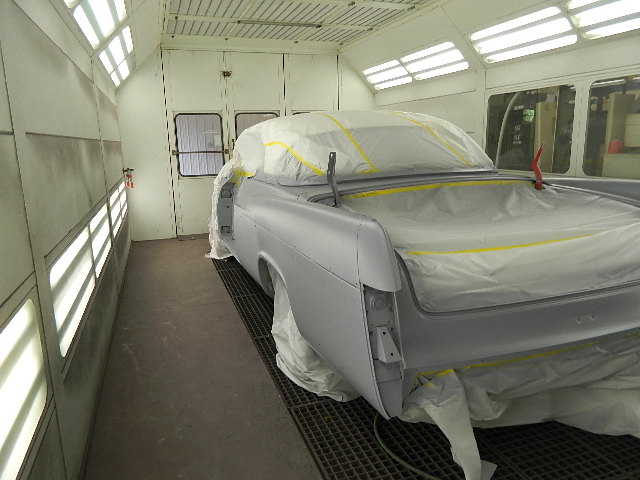
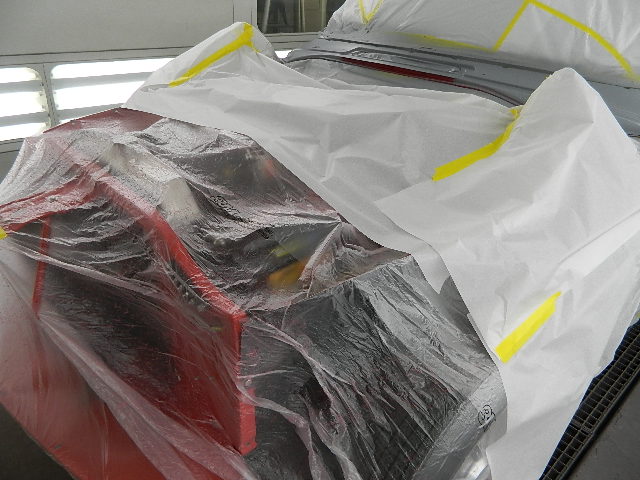
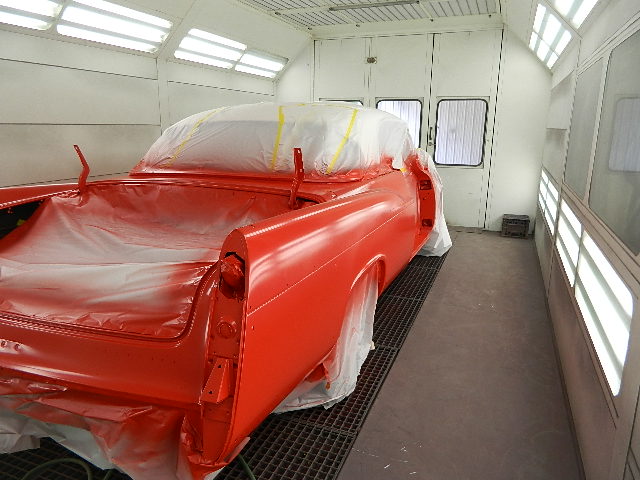
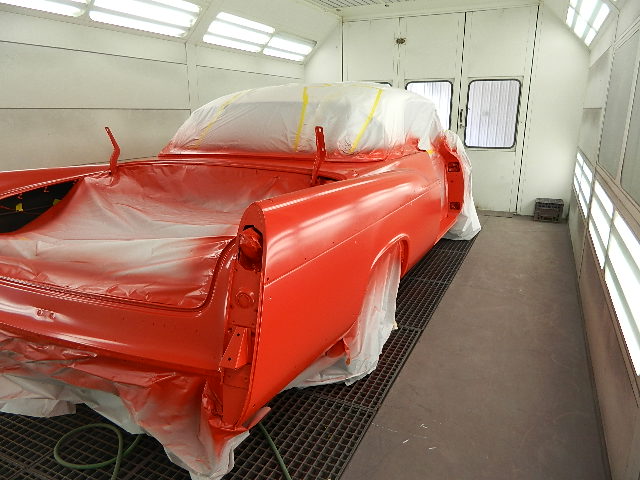
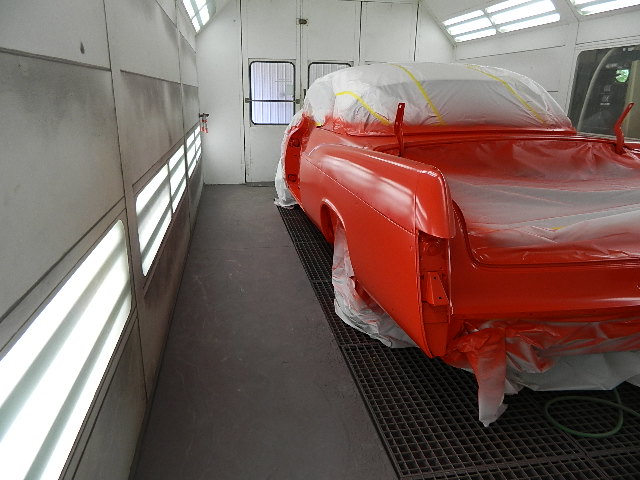
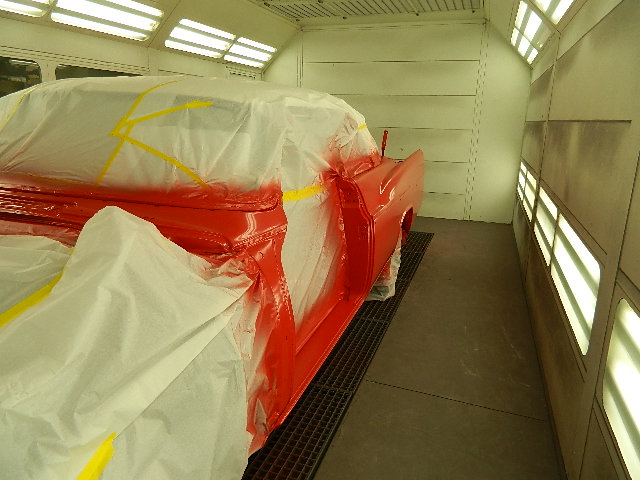
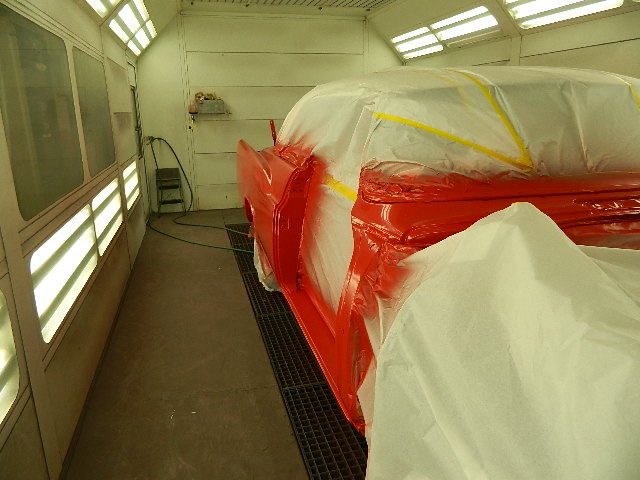
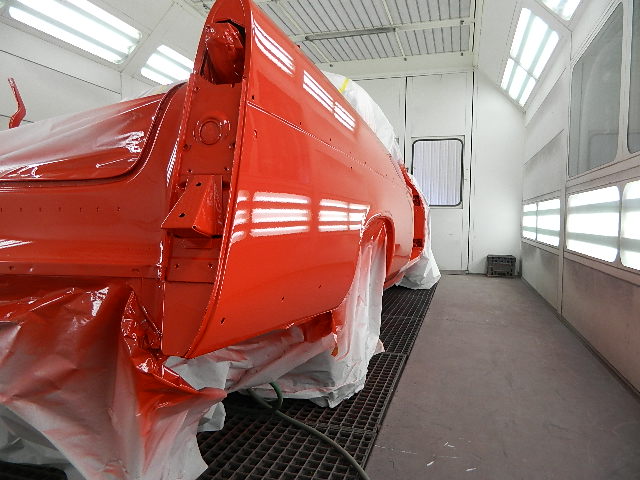
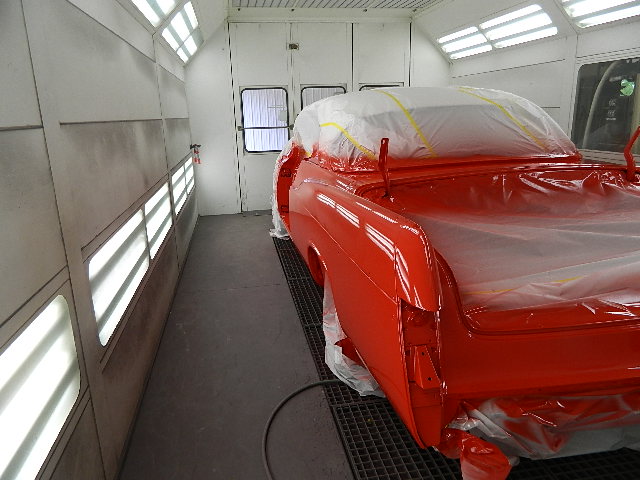
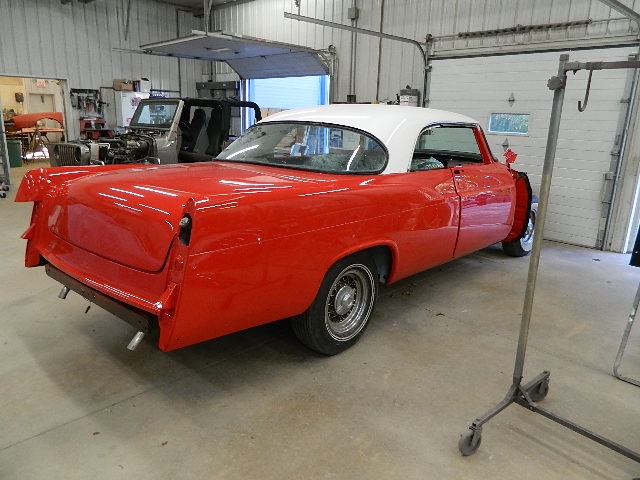
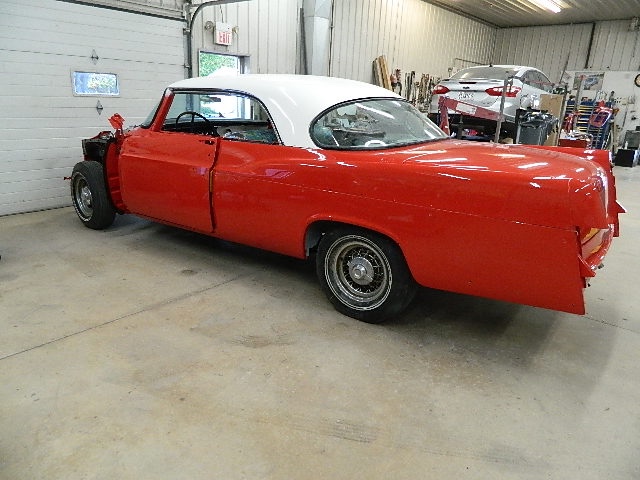
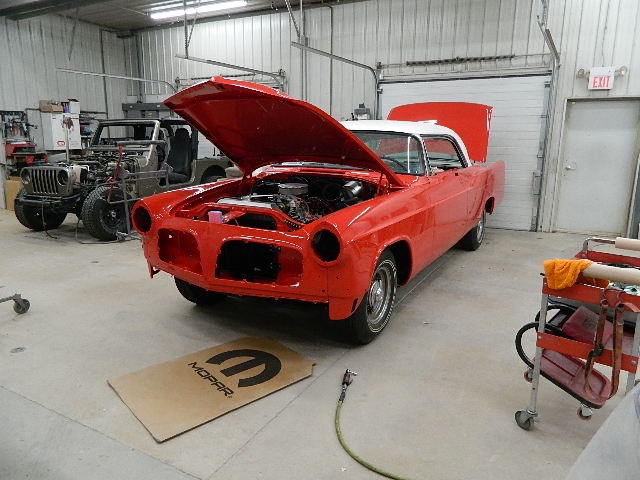
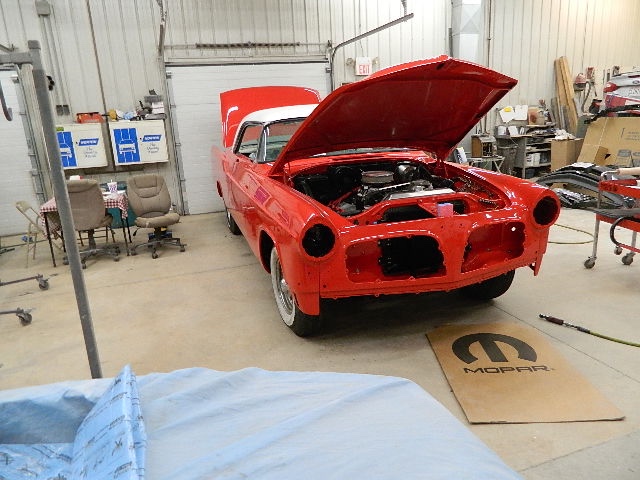
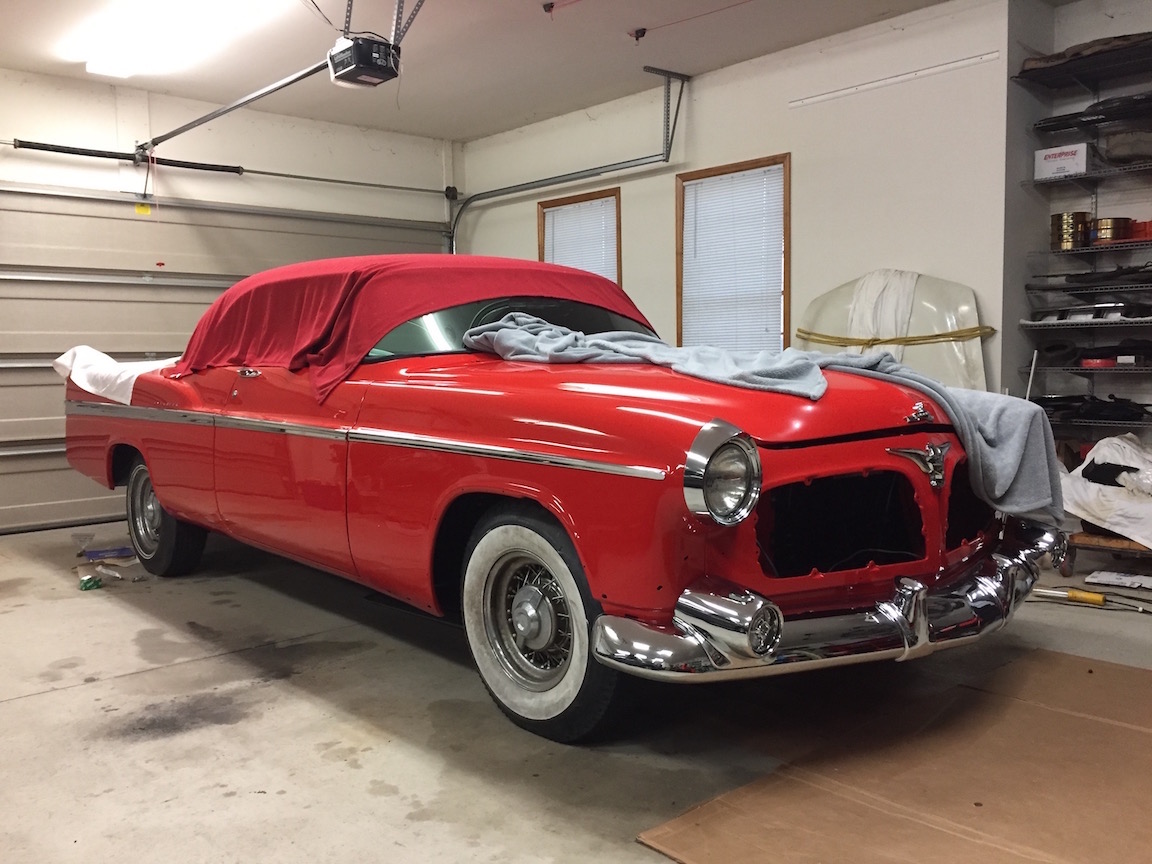
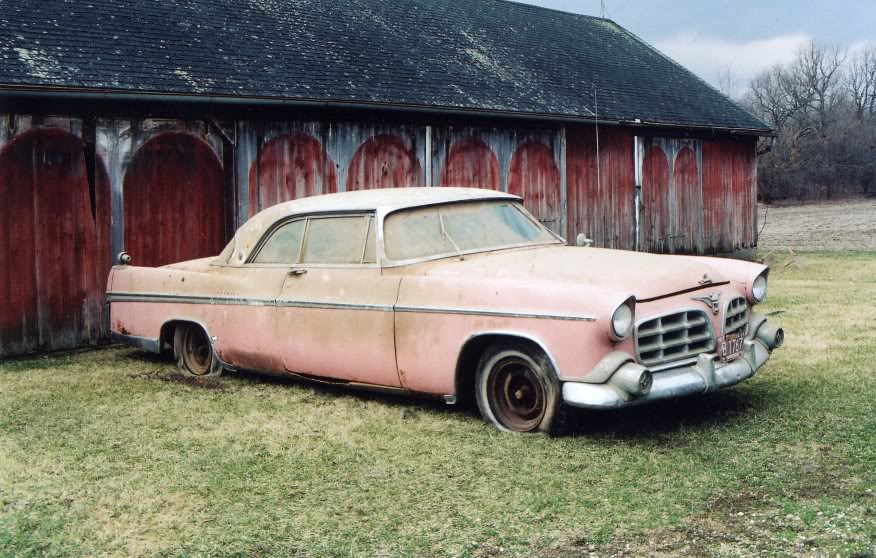
Location: Muskego, WI | I started working on this car in 2004 after it sat since 1965 on my grandfather's farm, and even though I've been a member on this forum for close to a decade I've not posted a whole lot about this car. Well today I received initial pictures from the body shop that's painting the car and it's time to start sharing. Car is "Fleet White" over "Tango Red" and it looks to be pretty straight. Much much more to come when I get the car home and finally start getting the last of the car together.
 (006.JPG) (006.JPG)
 (007.JPG) (007.JPG)
 (008.JPG) (008.JPG)
 (009.JPG) (009.JPG)
 (010.JPG) (010.JPG)
 (011.JPG) (011.JPG)
 (044.JPG) (044.JPG)
 (045.JPG) (045.JPG)
 (046.JPG) (046.JPG)
 (047.JPG) (047.JPG)
 (048.JPG) (048.JPG)
 (050.JPG) (050.JPG)
 (051.JPG) (051.JPG)
 (052.JPG) (052.JPG)
 (054.JPG) (054.JPG)
 (055.JPG) (055.JPG)
 (073.JPG) (073.JPG)
Attachments
----------------
 006.JPG (85KB - 692 downloads) 006.JPG (85KB - 692 downloads)
007.JPG (86KB - 721 downloads)
008.JPG (85KB - 715 downloads)
009.JPG (84KB - 704 downloads)
010.JPG (86KB - 743 downloads)
011.JPG (88KB - 697 downloads)
044.JPG (88KB - 752 downloads)
045.JPG (87KB - 708 downloads)
046.JPG (88KB - 713 downloads)
047.JPG (86KB - 742 downloads)
048.JPG (87KB - 726 downloads)
050.JPG (88KB - 695 downloads)
051.JPG (87KB - 720 downloads)
052.JPG (86KB - 717 downloads)
054.JPG (88KB - 717 downloads)
055.JPG (87KB - 721 downloads)
073.JPG (85KB - 703 downloads)
|
|
| |
|
Extreme Veteran
Posts: 350

Location: Wisconsin | Jon, it looks like you're making nice progress - I can't wait to see it up at Gus's when it's finished! Regarding your glass, did you have to replace the windshield in the car? If so, who was the source? |
|
| |
|
Expert
Posts: 2216
Location: Muskego, WI | Front and rear windshields are original. Make room at Gus' next to all those DeSotos! |
|
| |
|
Expert
Posts: 2216
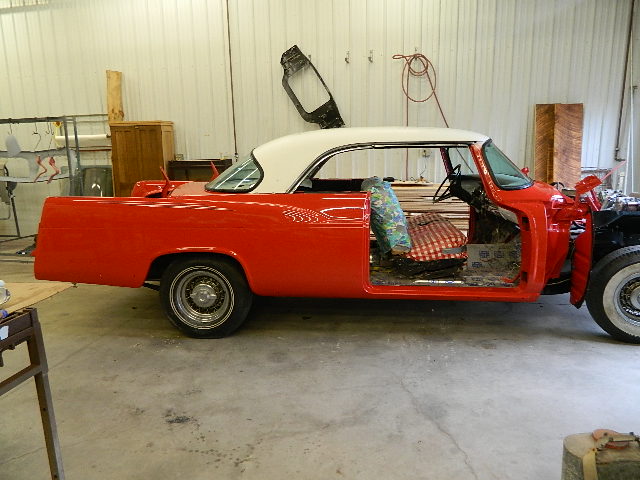
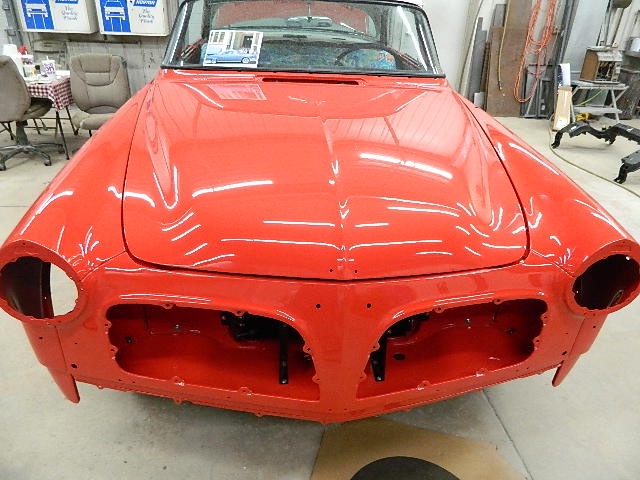
Location: Muskego, WI | Car body is sanded and buffed, as are doors and deck lid. The front clip should be done and back on the car in the next week or two!
 (thumb_011_1024.jpg) (thumb_011_1024.jpg)
 (thumb_013_1024.jpg) (thumb_013_1024.jpg)
Attachments
----------------
thumb_011_1024.jpg (108KB - 722 downloads)
thumb_013_1024.jpg (107KB - 702 downloads)
|
|
| |
|

Expert
Posts: 3973
 
Location: DFW, TX | Absolutely beautiful! Congratulations on your excellent progress. |
|
| |
|
Expert
Posts: 2007
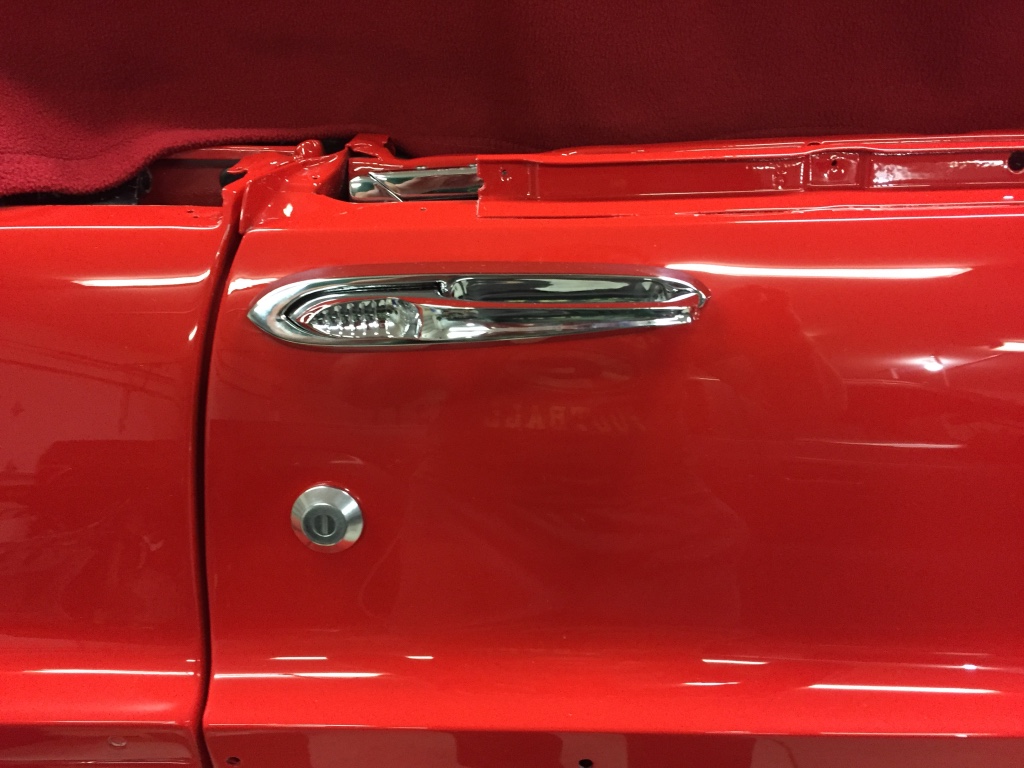
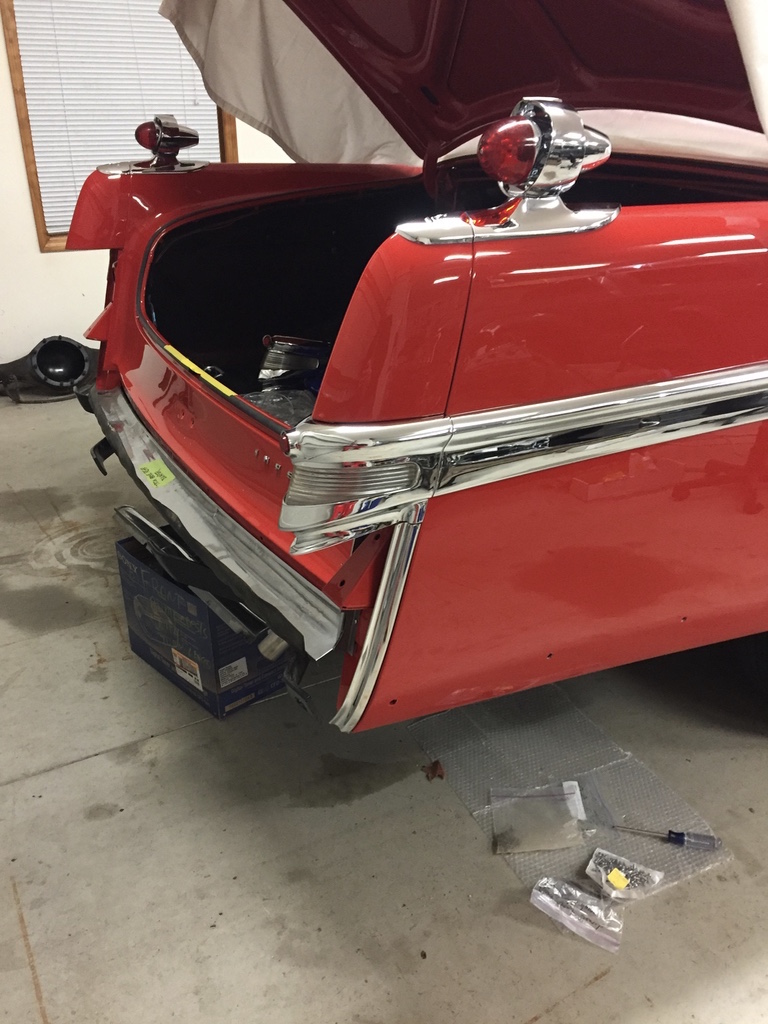
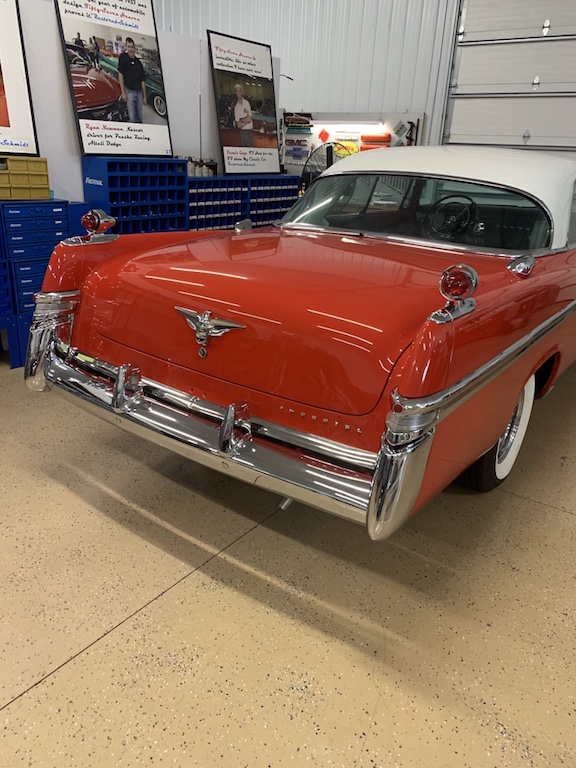
Location: Branson, MO | I didn't realize that the gas tank filler is under the right rear fender tip at least it looks like it in the pics. |
|
| |
|
Expert
Posts: 2216
Location: Muskego, WI | Correct, push a button concealed in the backup light housing and the quarter end hinges out of the way. |
|
| |
|
Expert
Posts: 2216
Location: Muskego, WI | I pick the car up this Friday!
 (thumb_jon 005_1024.jpg) (thumb_jon 005_1024.jpg)
 (thumb_jon 006_1024.jpg) (thumb_jon 006_1024.jpg)
 (thumb_jon 007_1024.jpg) (thumb_jon 007_1024.jpg)
Attachments
----------------
thumb_jon 005_1024.jpg (111KB - 738 downloads)
thumb_jon 006_1024.jpg (116KB - 752 downloads)
thumb_jon 007_1024.jpg (116KB - 713 downloads)
|
|
| |
|
Location: North Australia | This is getting serious now!
Steve |
|
| |
|
Expert
Posts: 2216
Location: Muskego, WI | Car came home two weeks ago, chipping away on trim and emblems. I try to do at leas one little item every night.
 (thumb_IMG_2260_1024.jpg) (thumb_IMG_2260_1024.jpg)
 (thumb_IMG_2268_1024.jpg) (thumb_IMG_2268_1024.jpg)
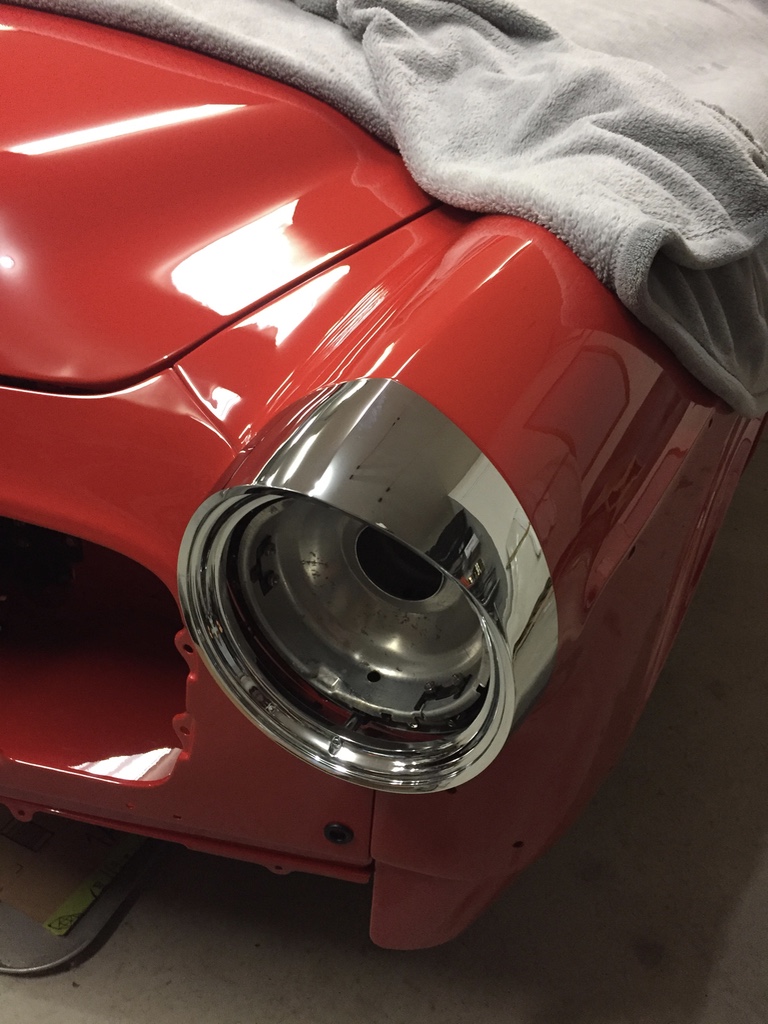 (thumb_IMG_2271_1024.jpg) (thumb_IMG_2271_1024.jpg)
 (thumb_IMG_2273_1024.jpg) (thumb_IMG_2273_1024.jpg)
 (thumb_IMG_2280_1024.jpg) (thumb_IMG_2280_1024.jpg)
Attachments
----------------
thumb_IMG_2260_1024.jpg (218KB - 715 downloads)
thumb_IMG_2268_1024.jpg (212KB - 710 downloads)
thumb_IMG_2271_1024.jpg (232KB - 730 downloads)
thumb_IMG_2273_1024.jpg (166KB - 712 downloads)
thumb_IMG_2280_1024.jpg (161KB - 709 downloads)
|
|
| |
|
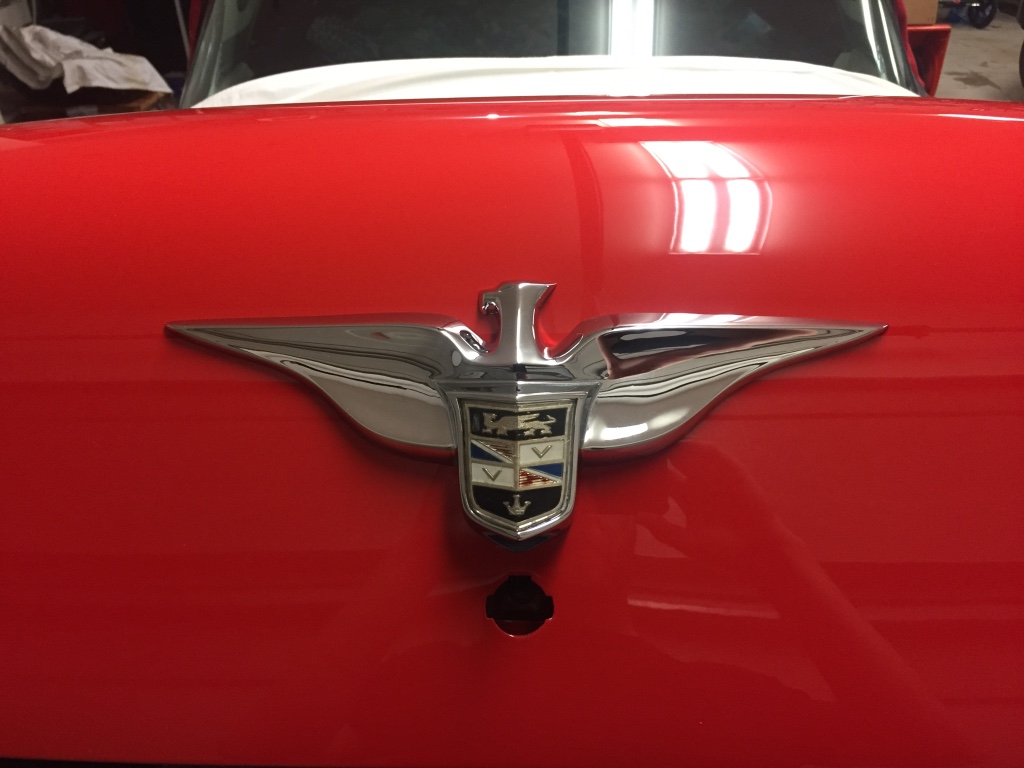
Expert
Posts: 2216
Location: Muskego, WI | If anyone knows where I can get a decent plastic emblem that goes in the center of the Imperial eagles please let me know! |
|
| |
|
Expert
Posts: 2216
Location: Muskego, WI | Some more progress. Just bought a pedestal mounted buffer, hope to get the stainless around the windshields done once I'm up and running. Also need to make some of my own trim fasteners, which should be fun  . Side trim, head lights, tail lights and front bumper assembly are on, although the bumper still needs adjusting. . Side trim, head lights, tail lights and front bumper assembly are on, although the bumper still needs adjusting.
Edited by jboymechanic 2017-12-18 11:49 PM
Attachments
----------------
Imperial Dec 2017.jpeg (243KB - 720 downloads)
|
|
| |
|
Expert
Posts: 2216
Location: Muskego, WI | Finally bit the bullet and tackled a big job; pulled the trans, bell housing and swapped torque converters. I mistakenly originally installed a 172 tooth 1957 torque converter in the car and the ring gear and starter have been eating each other since. That will all be over with now, the correct 146 tooth 1956 torque converter is now in place. I did this work with a trans jack with the car resting on two jack stands up front and the rear tires. I had to build a cradle to support the engine. Exhaust pipes and drive shaft had to come out. It was an awful job, I was under the car for about 11 hours today. Just need to do some small things to button it all back up, I glad to be through it. |
|
| |
|
Expert 5K+
Posts: 5152

| saw a whole emblem and housing sold for 40$ on ebay but it still needed restored plastic. maybe try emblem magic, hopefully they have one in stock?
Edited by mikes2nd 2018-04-01 9:11 AM
|
|
| |
|
Expert
Posts: 2216
Location: Muskego, WI | Time for a long overdue update. Starter and torque converter issue is done, I also have my external filter and cooler connected with -06 AN braided stainless steel lines. The first kit I installed had hair-line cracks in the filter housing casting, so it leaked transmission fluid when the engine was running. Seems like everything is two steps forward, 1 back with this car. Any way, that issue is resolved.
Car has brakes once again. Even though my new aluminum master cylinder was identical to the cast iron unit, the bore in the center of the piston was deeper so once again I had to modify my pushrod to fit. A little time on a lathe and a stud and coupling nut later I was in business. Again, more work than it should have been.
After the brakes we good, I mounted some Dodge Ram 16" wheels on the car just to see how large of a tire would fit. They fit, but are much larger than I would run on this car. This was also the first time the weight of the car was put on the new Eaton coil springs and guess what? No good, car dropped 2 to 3 inches below spec so yet again I have to redo something. No wonder I've been working on this car for 14 years, this is how EVERYTHING goes! Any way, I have ordered new coils from Coil Spring Specialties this time, we'll see what happens.
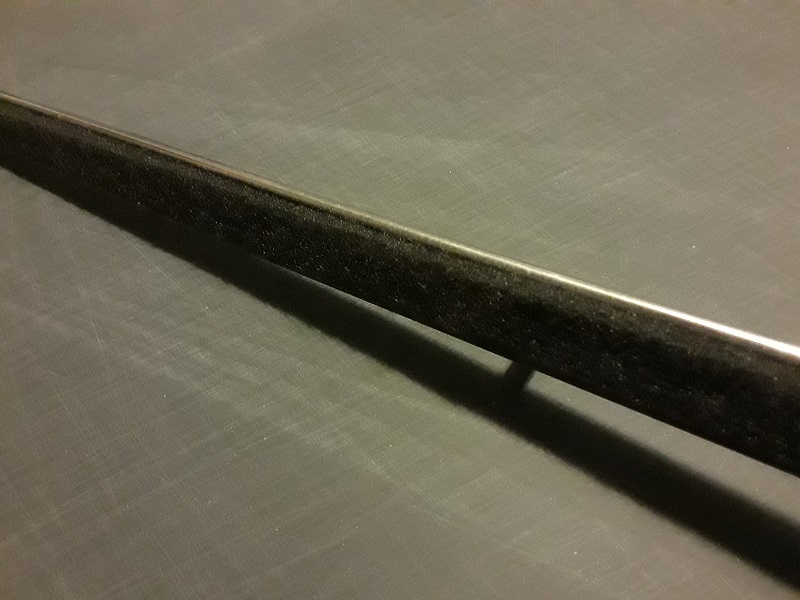
I've also been polishing stainless steel trim, there is a picture of one of my finished windshield visor pieces. I have gotten pretty good over the winter and spring.
Below are some updated pictures.
Edited by jboymechanic 2018-05-22 12:11 AM
 (Imperial Dec 2017.jpg) (Imperial Dec 2017.jpg)
 (thumb_IMG_2542_1024.jpg) (thumb_IMG_2542_1024.jpg)
 (thumb_IMG_2694_1024.jpg) (thumb_IMG_2694_1024.jpg)
 (thumb_IMG_2748_1024.jpg) (thumb_IMG_2748_1024.jpg)
 (thumb_IMG_2492_1024.jpg) (thumb_IMG_2492_1024.jpg)
Attachments
----------------
Imperial Dec 2017.jpg (241KB - 680 downloads)
thumb_IMG_2542_1024.jpg (259KB - 647 downloads)
thumb_IMG_2694_1024.jpg (261KB - 648 downloads)
thumb_IMG_2748_1024.jpg (268KB - 644 downloads)
thumb_IMG_2492_1024.jpg (212KB - 620 downloads)
|
|
| |
|
Location: North Australia | Jon, Is this your Grandpa's car? Man that car is nearly there and looking real good. Steve. |
|
| |
|
Expert
Posts: 2216
Location: Muskego, WI | Thanks Steve. Yes, this was my grandpa's car, he bought it used in 1960 and drove it until 1965 when he spun a rod bearing. Sat in the machine shed for 38 years before I rescued it in 2003. |
|
| |
|
Exner Expert 10K+
Posts: 10620
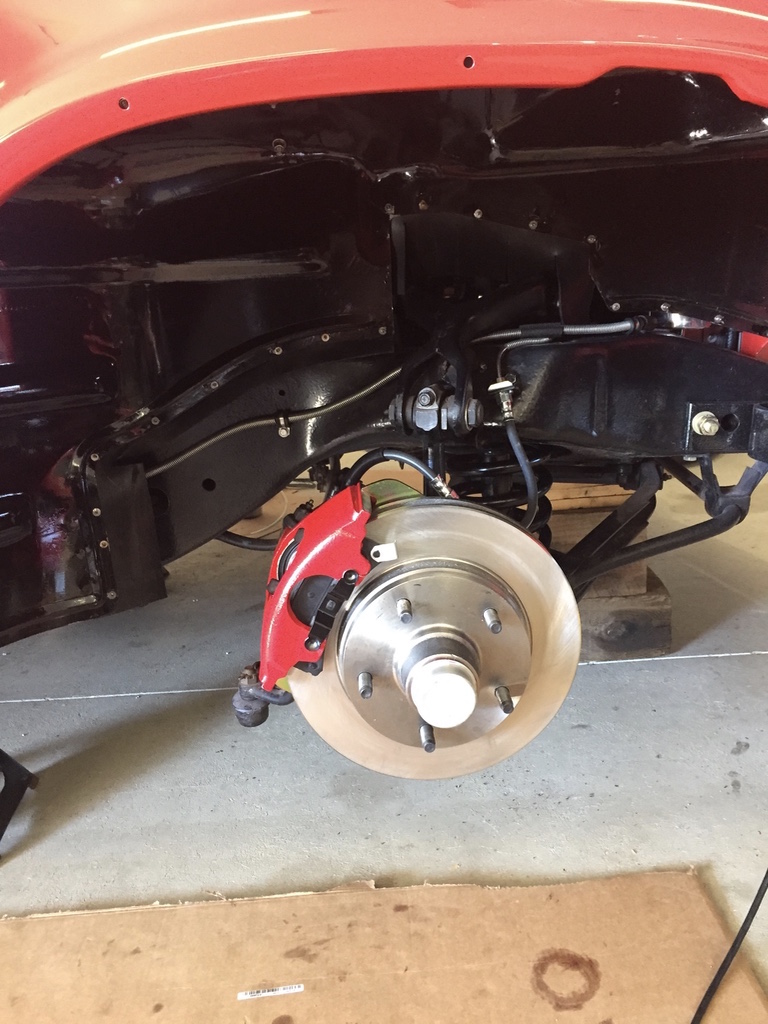
Location: Lower Mainland BC | Looking good. The stainless is crazy shiny. Yikes.
Question: What is the front disc brake package? Scarebird or AAJ?
 |
|
| |
|
Expert
Posts: 2216
Location: Muskego, WI | The Imperial's front disc setup is Scarebird. I purchased the calipers already powder coated red from rockauto (Power Stop part number S4299). The brackets are very well made and came plated in zinc chromate. |
|
| |
|
Expert
Posts: 2216
Location: Muskego, WI | New front coil springs from Coil Spring Specialties are now in the car, it sits level front to rear AND side to side for the first time in decades. I also replaced my rear axles so I have the same while hub pilot diameter at all four wheels, same as a 1994 to 2001 Dodge Ram 1500. Hope to replace the stock mufflers next, I have a set of Flow Master HP-2 mufflers. They are high flowing without being obnoxiously loud and are actually pretty close to the same overall geometry as the stock mufflers. |
|
| |
|
Expert
Posts: 2216
Location: Muskego, WI | Been working on cleaning up and finishing my wiring this winter, getting really close to finished. Under dash is good, now moving to the rear of the car. Everything works like it should other than my backup lights, I'm guess bad switch on my push buttons. I also ordered a new pair of 16" wire wheels, if they fit over the front disc brakes I'll order the other two and my white wall tires next. Hope to drive this thing this summer, finished or not. |
|
| |
|
Expert
Posts: 2216
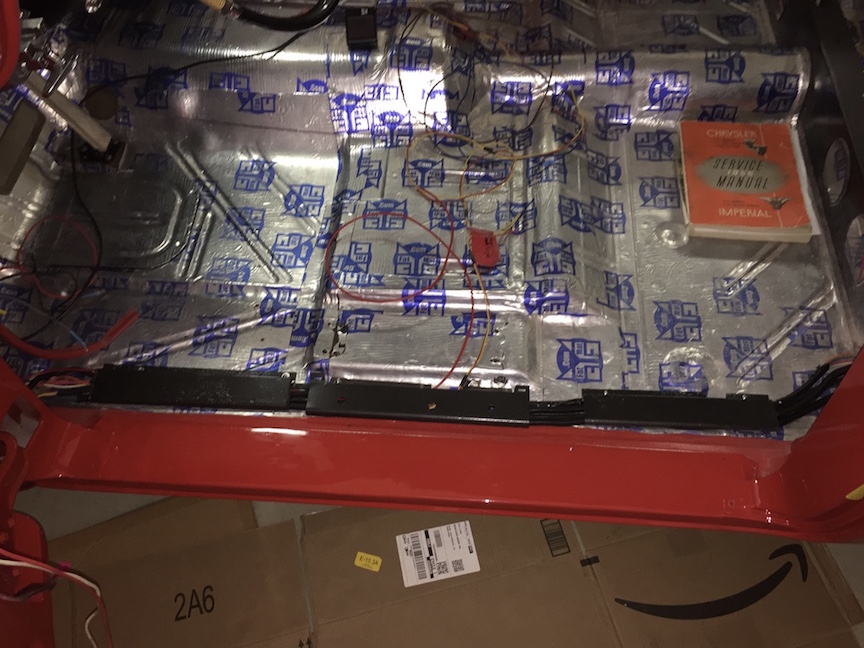
Location: Muskego, WI | Thanks to the members here that got me pictures and measurements for the wiring covers by the door sills. I crawled under the car and found that I had left the original screw holes in the floor for these plates, so I poked an awl up through the sound deadening material from underneath the car. From there, it was easy to determine which cover went where. I really appreciate the how clean the wiring is getting inside this car. Now working in the back seat and trunk area.
Also, I cancelled my wire wheel order from Wheel Vintiques, what an absolute waste of time they were. I ordered wheels 20 weeks ago, and I had been begging for an update. Finally got through to someone and they simply told me that they hadn't even started! I then called TruSpoke and provided all the same information and dimensions that I sent to WV. Salesman was helpful and said that their standard 15" wheel should clear my disc brakes as the back half of their wheel has updated geometry to clear calipers. Tracking # says wheels arrive tomorrow, so we shall see. If they fit, I intend to order some 820R15 Auburn Deluxe radials from diamondback tires next.
 (thumb_IMG_3623_1024.jpg) (thumb_IMG_3623_1024.jpg)
Attachments
----------------
thumb_IMG_3623_1024.jpg (220KB - 601 downloads)
|
|
| |
|
Location: North Australia | Howdy Jon, the manual in the car looks well thumbed!
On the tires, do you know the speed and load ratings for the Auburn Deluxe?
I like the look of the Auburn Premium range.
Man these tires are expensive, but they look good.
I want wide whites for my Imperial, but cant justify the money (yet!).
Your car will be looking the goods with the new wheels and tires , cant wait to see the pics.
Steve.
edit: check out this link from an Aussie tire supplier. http://www.classic-usa-cars.com/index1a.html
Edited by 60 Imp 2019-05-01 6:42 AM
|
|
| |
|
Expert
Posts: 2216
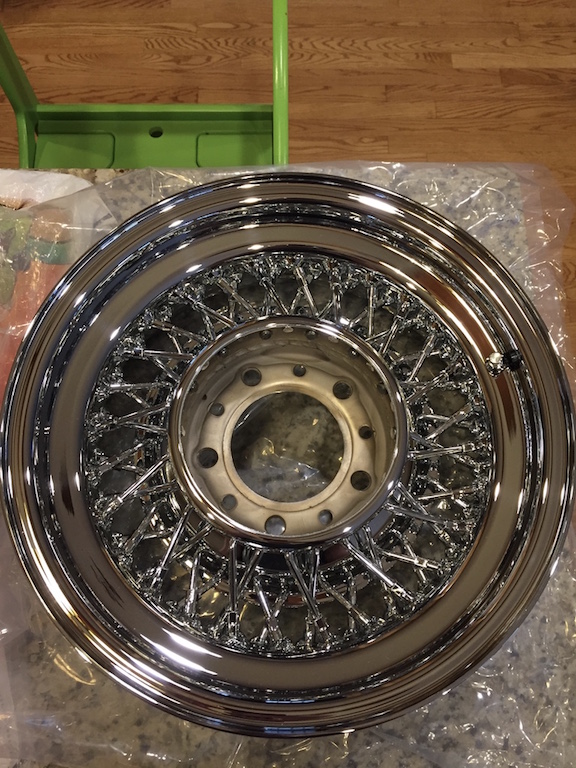
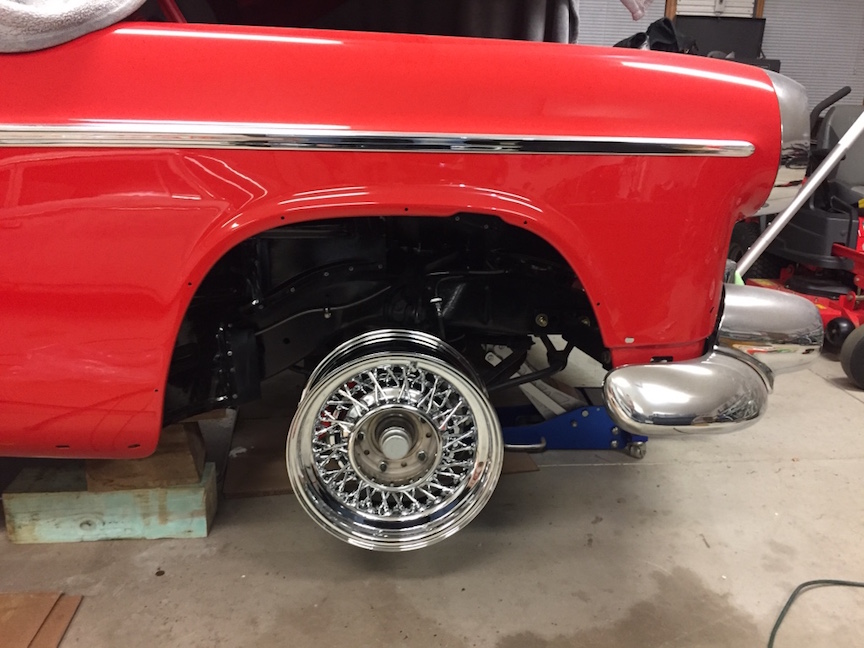
Location: Muskego, WI | I do not know the load rating for the Auburn Deluxes, but its on my list of questions. Here are some pictures of the wheels.
 (thumb_IMG_3625_1024.jpg) (thumb_IMG_3625_1024.jpg)
 (thumb_IMG_3634_1024.jpg) (thumb_IMG_3634_1024.jpg)
Attachments
----------------
thumb_IMG_3625_1024.jpg (242KB - 605 downloads)
thumb_IMG_3634_1024.jpg (190KB - 605 downloads)
|
|
| |
|
Extreme Veteran
Posts: 350
Location: Wisconsin | Can't wait to see it in person Jon! |
|
| |
|
Expert
Posts: 2216
Location: Muskego, WI | A very small victory, but I finally traced down my last wiring issue tonight. My issue with my passenger side blinker came down to a sloppy tail light bulb socket. Some additional polishing and careful squeezing with a pliers corrected the issue. At this point, I can't find a single electrical item that isn't working. |
|
| |
|
Location: North Australia | I wouldn't call that a 'very small victory'. Not on an Imperial 
When are you driving? Cant wait to see your pics.
Steve. |
|
| |
|
Expert
Posts: 2216
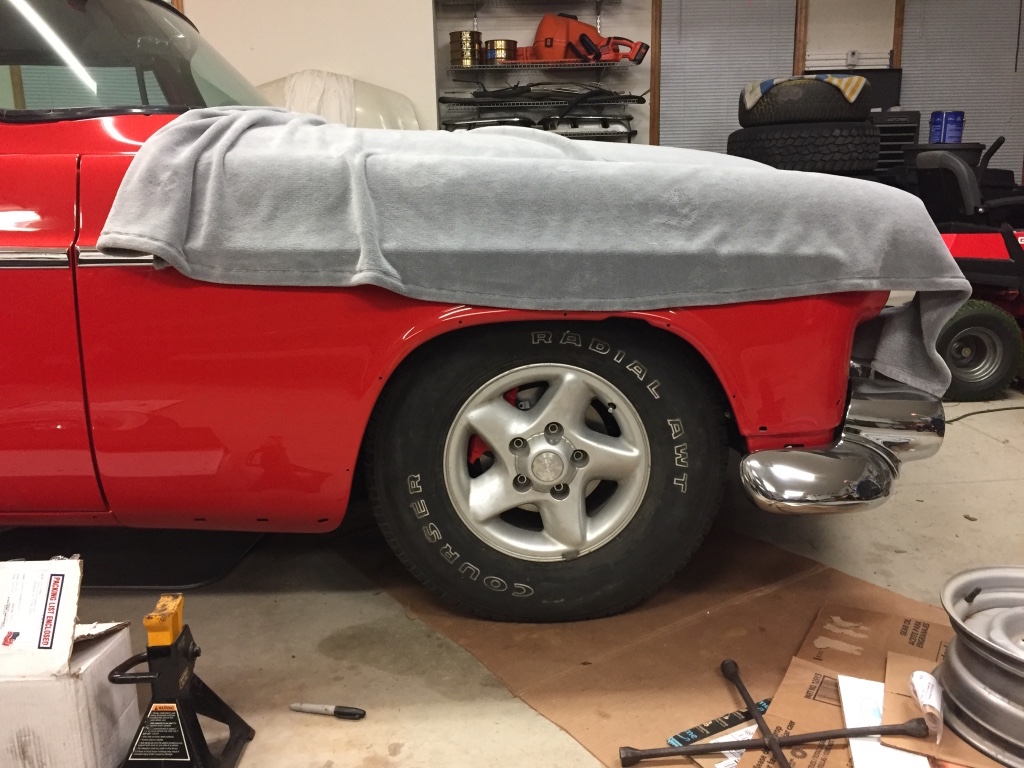
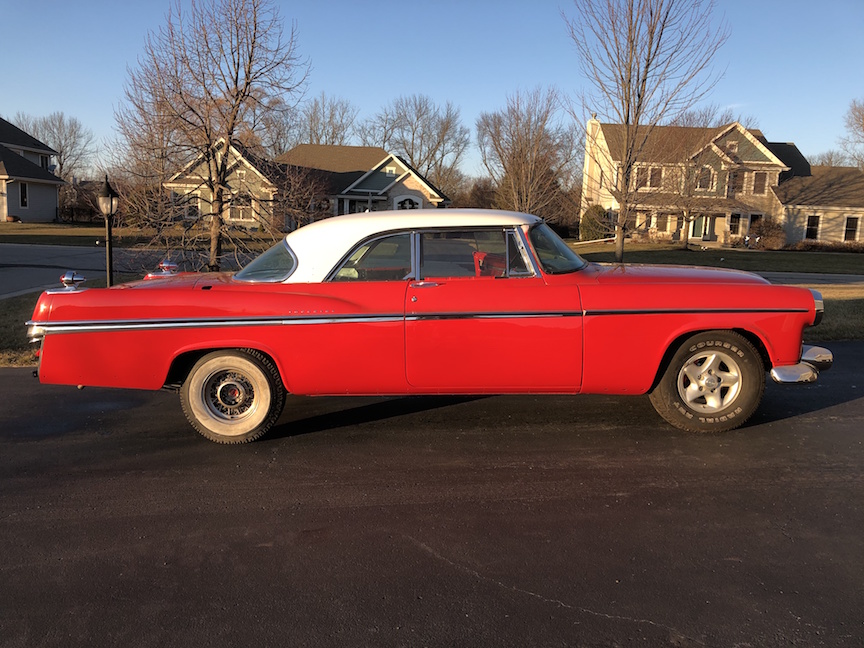
Location: Muskego, WI | Very lucky with the weather here around Christmas, exercised the Imperials transmission and brakes a little. Can't wait to get my white walls mounted to my new wire wheels!
 (IMG_0446.jpg) (IMG_0446.jpg)
Attachments
----------------
IMG_0446.jpg (255KB - 548 downloads)
|
|
| |
|
Veteran
Posts: 129
| Very nice! Can't wait to see it with the new wheels |
|
| |
|
Expert
Posts: 2216
Location: Muskego, WI | Ordered my white wall tires today from diamondback tires, 235/75R15 Auburn Premiums! |
|
| |
|

Exner Expert 10K+
Posts: 10249
Location: So. Cal | Good choice! |
|
| |
|
Expert
Posts: 3973
Location: DFW, TX | Excellent news. You've got so much into this car, it is time to start enjoying it! |
|
| |
|
Expert
Posts: 2216
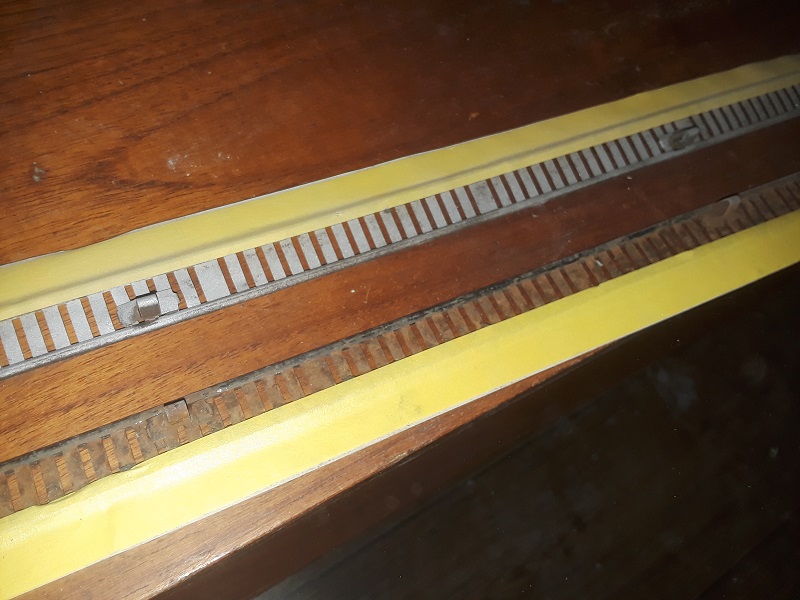
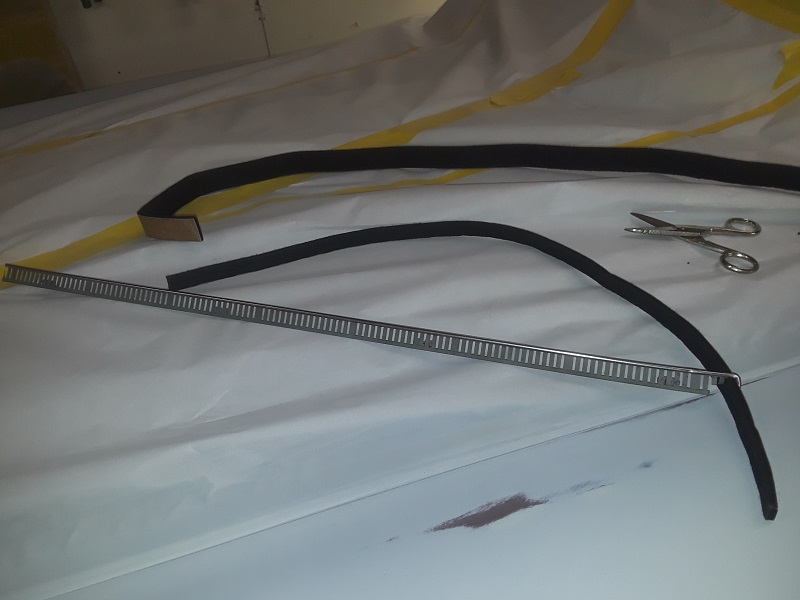
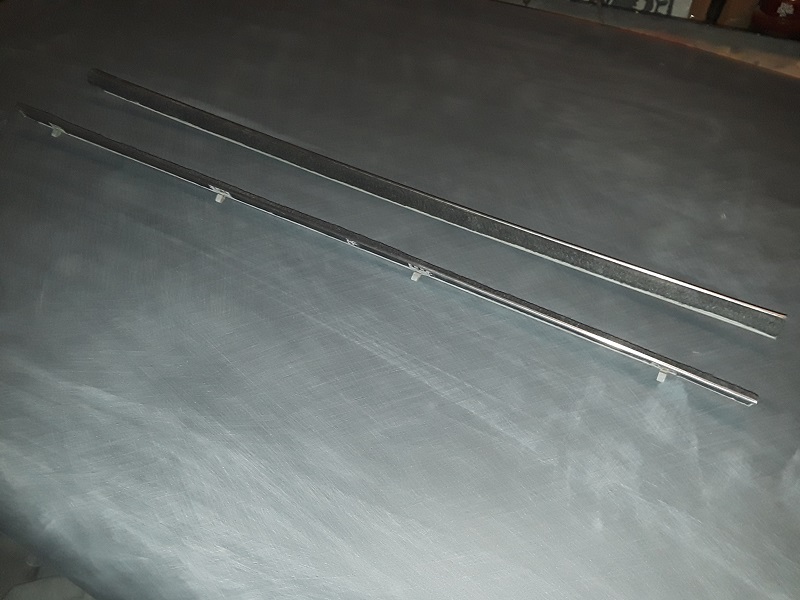
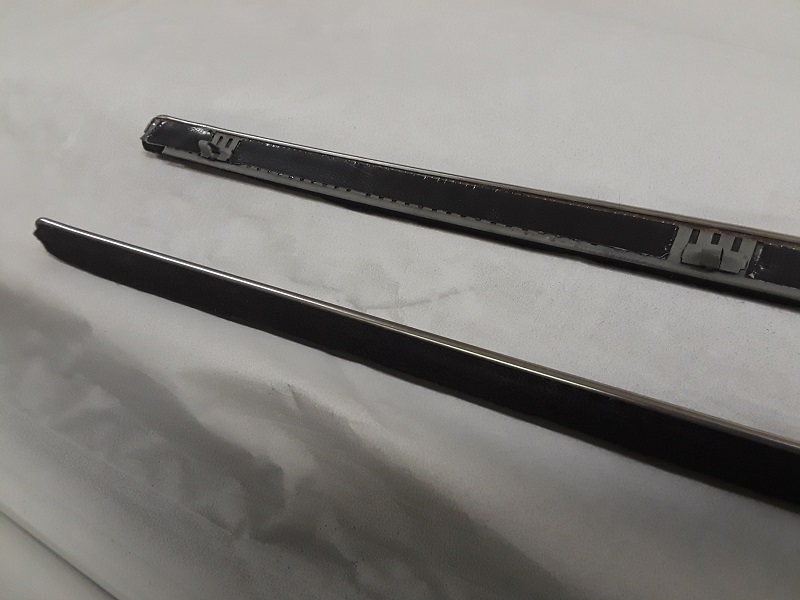
Location: Muskego, WI | Anyone know how to staple window cat whiskers to stainless trim? These were stapled from the factory, how can I secure my new whiskers to my trim? Is there a readily available (and affordable) stapler that will do the job? How have others done this? Any help is appreciated.
Edited by jboymechanic 2020-04-23 12:02 AM
 (thumb_IMG_0890_1024.jpg) (thumb_IMG_0890_1024.jpg)
 (thumb_IMG_0891_1024.jpg) (thumb_IMG_0891_1024.jpg)
 (thumb_IMG_0892_1024.jpg) (thumb_IMG_0892_1024.jpg)
Attachments
----------------
thumb_IMG_0890_1024.jpg (200KB - 578 downloads)
thumb_IMG_0891_1024.jpg (192KB - 562 downloads)
thumb_IMG_0892_1024.jpg (200KB - 547 downloads)
|
|
| |
|
Exner Expert 10K+
Posts: 10249
Location: So. Cal | If you want to staple it, drill tiny holes through it and insert the staples at the right locations. Otherwise, you may be able to get away with epoxying it to the trim using JB weld and clamping it tight for a couple of days to wait for it to fully cure. |
|
| |
|
Exner Expert 10K+
Posts: 10620
Location: Lower Mainland BC | .
I am guessing that the factory stapler was pressurized air-powered that there is nothing likely available to the public that would work. 1/8" aluminum pop rivets worked for me (on a sedan door and window frame)
http://www.forwardlook.net/forums/forums/thread-view.asp?tid=65605&...
 |
|
| |
|
Elite Veteran
Posts: 737
Location: Finland | I tried to drill and attach home made staples made of wire but I noticed it was almost impossible to get them tight enough . The staples didn`t sink in enough , we all know what happens
when glass and iron touch each other. I use very small alu pop rivets 2,5 mm diameter and so far none has come loose. |
|
| |
|
Expert
Posts: 3973
Location: DFW, TX | On my Chrysler, I did the inners and outers differently.
The inners were pretty straightforward. I didn't bother trying to use the staples the factory used, because there is nothing I have that will push a staple through a piece of 10 gauge steel. I drilled holes through the new felt strips, and through the upper steel part of the door panel, and pop riveted them in place. Pretty easy.
The outers were tricky, because the factory used special clips to hold these to the door and to the quarter panel. Drilling and pop-riveting wasn't an option because there wasn't any space for a drill or a rivet gun.
So I carefully took apart the originals, scraped all the old felt material off them, taped off the stainless belt, and sandblasted the steel and etch primed them. Then I took some adhesive-backed 1" felt trim I got on Amazon, trimmed it in half lengthwise, and stuck it to my strips. Then flipped them over, and used strips of Gorilla Tape on the opposite side. This allowed the adhesive from the felt and the adhesive from the tape to stick together through the small spaces in the strip, and lock the felts into place.
It cost about ten bucks and has held up for two years without any issues so I'm calling it a victory. 
 (20190118_210758 (2).jpg) (20190118_210758 (2).jpg)
 (20190128_204418.jpg) (20190128_204418.jpg)
 (20190128_215822.jpg) (20190128_215822.jpg)
 (20190129_180325.jpg) (20190129_180325.jpg)
 (20190129_180435.jpg) (20190129_180435.jpg)
 (20190129_180626.jpg) (20190129_180626.jpg)
Attachments
----------------
20190118_210758 (2).jpg (196KB - 502 downloads)
20190128_204418.jpg (152KB - 535 downloads)
20190128_215822.jpg (101KB - 522 downloads)
20190129_180325.jpg (133KB - 540 downloads)
20190129_180435.jpg (150KB - 500 downloads)
20190129_180626.jpg (118KB - 531 downloads)
|
|
| |
|
Expert
Posts: 2216
Location: Muskego, WI | Thanks for all the info guys, I'm gathering info myself as well. Below is a very detailed thread from a Studebaker forum, not sure if I will rivet or use small screws. Guess it will depend on how much room I have to work with.
https://forum.studebakerdriversclub.com/forum/your-studebaker-forum/...
|
|
| |
|
Expert
Posts: 2216
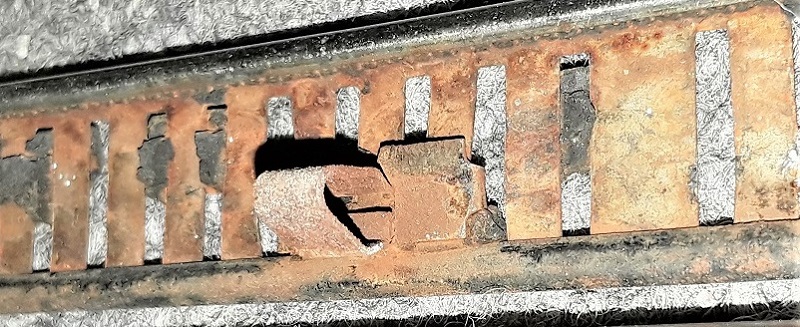
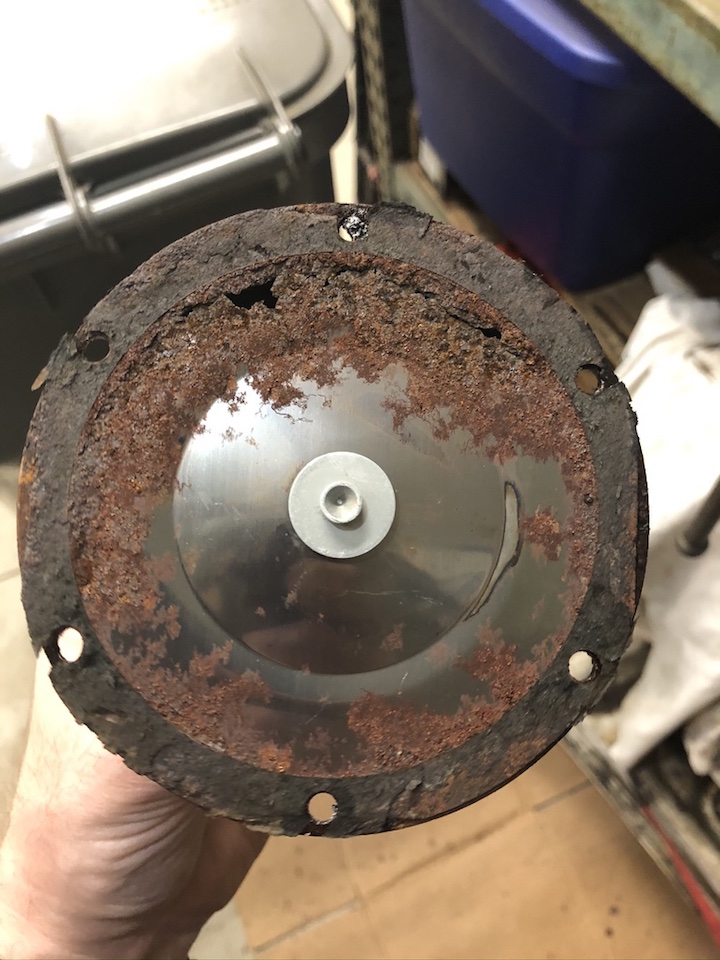
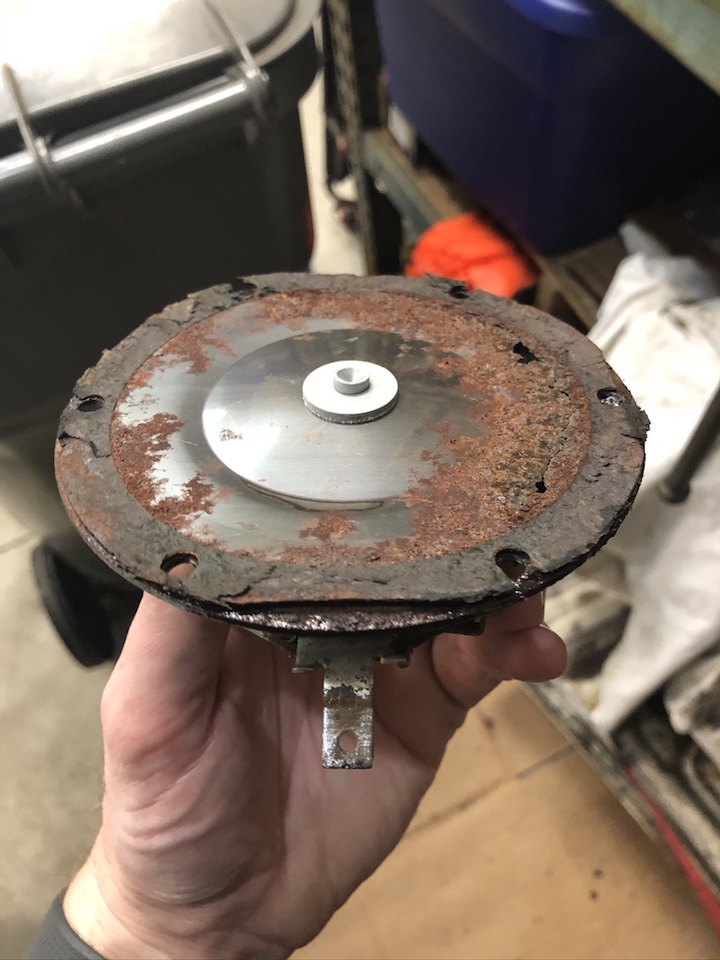
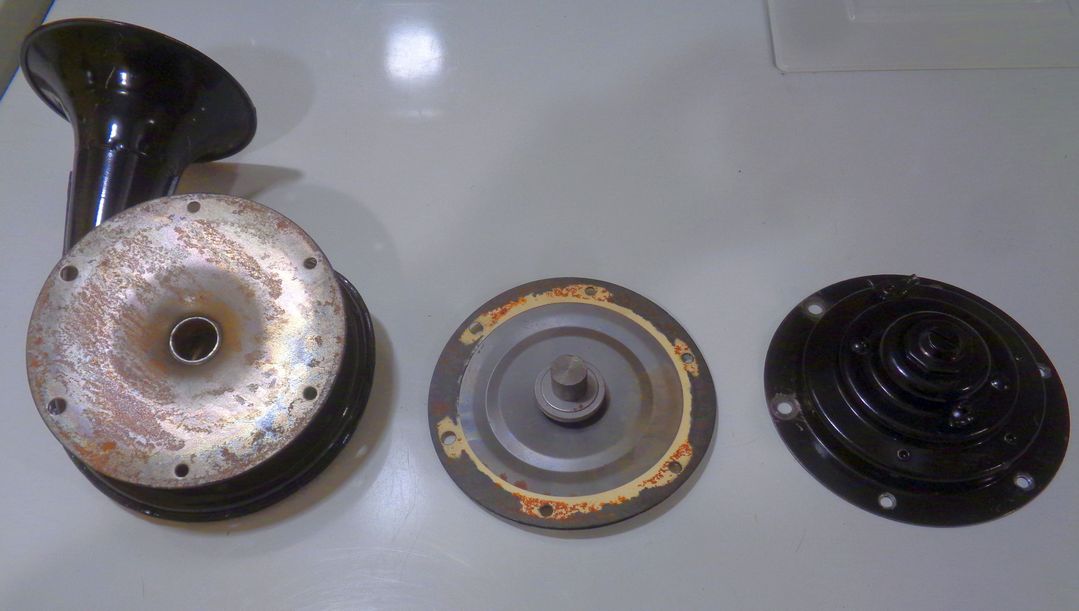
Location: Muskego, WI | Been working on my Imperial horns, I was able to get the high-low horns working and sounding right. The "trumpet" horn made sound, but it sounded awful and tonight I found out why. Have you ever seen a horn rot out like this?
Edited by jboymechanic 2020-05-11 11:54 PM
 (thumb_IMG_0973_1024.jpg) (thumb_IMG_0973_1024.jpg)
 (thumb_IMG_0974_1024.jpg) (thumb_IMG_0974_1024.jpg)
Attachments
----------------
thumb_IMG_0973_1024.jpg (225KB - 518 downloads)
thumb_IMG_0974_1024.jpg (193KB - 516 downloads)
|
|
| |
|
Exner Expert 10K+
Posts: 10620
Location: Lower Mainland BC | .
So you have the tri-tone horn system? I wonder how much is the same at the hi/low horns. I probably have some parts left from my horn fixing DIY.
In this thread:
http://www.forwardlook.net/forums/forums/thread-view.asp?tid=68724&...
|
|
| |
|
Expert
Posts: 2216
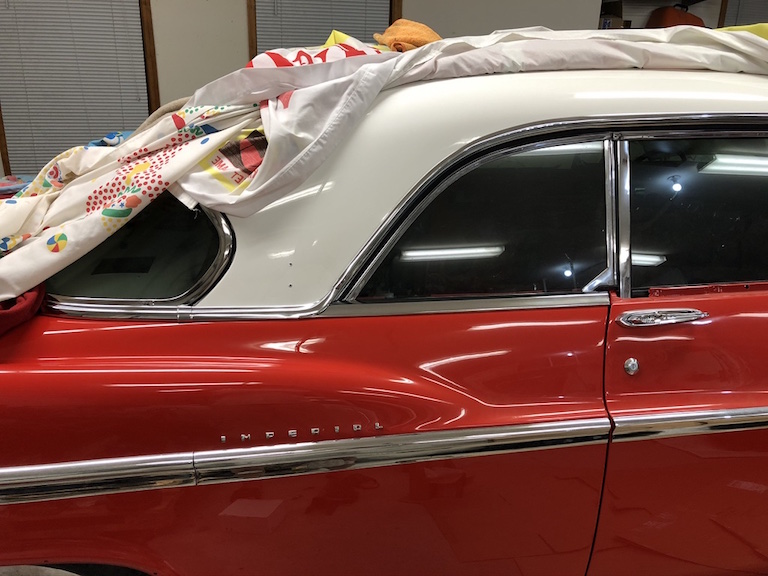
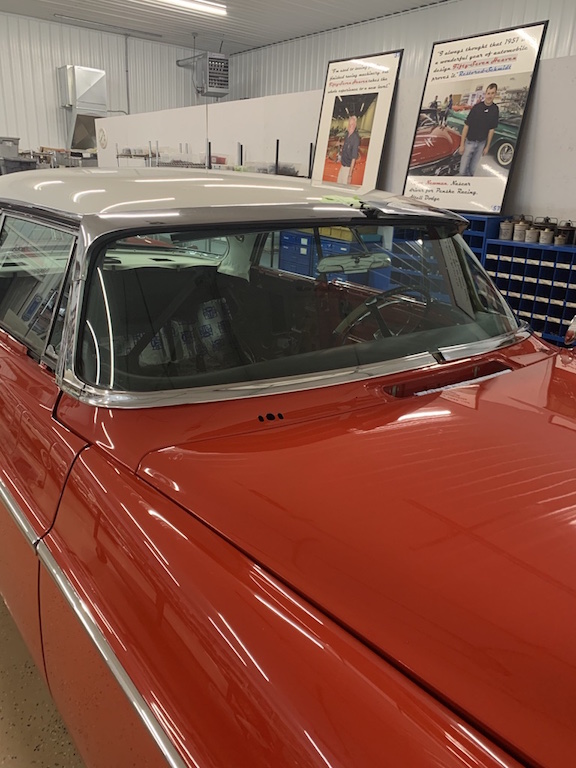
Location: Muskego, WI | Horns are restored, tuned and in the car. Now I'm getting back onto trim progress. The belt line trim around the rear windshield is on, just need to adjust and install the center piece. Next I'll polish and install the rain gutter trim.
 (thumb_IMG_1158_1024.jpg) (thumb_IMG_1158_1024.jpg)
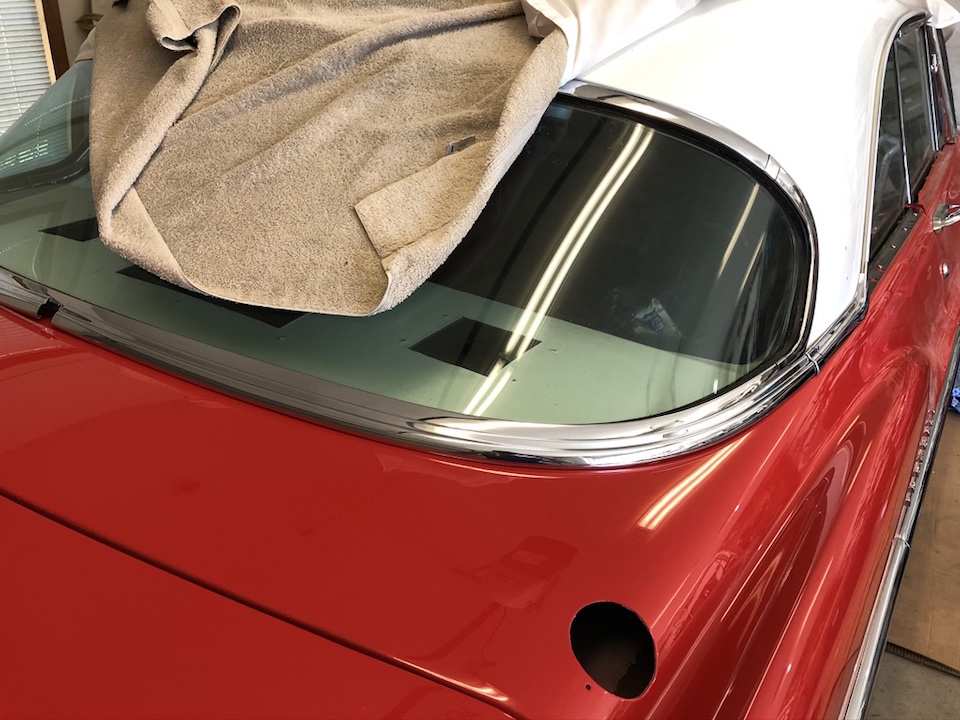 (thumb_IMG_1159_1024.jpg) (thumb_IMG_1159_1024.jpg)
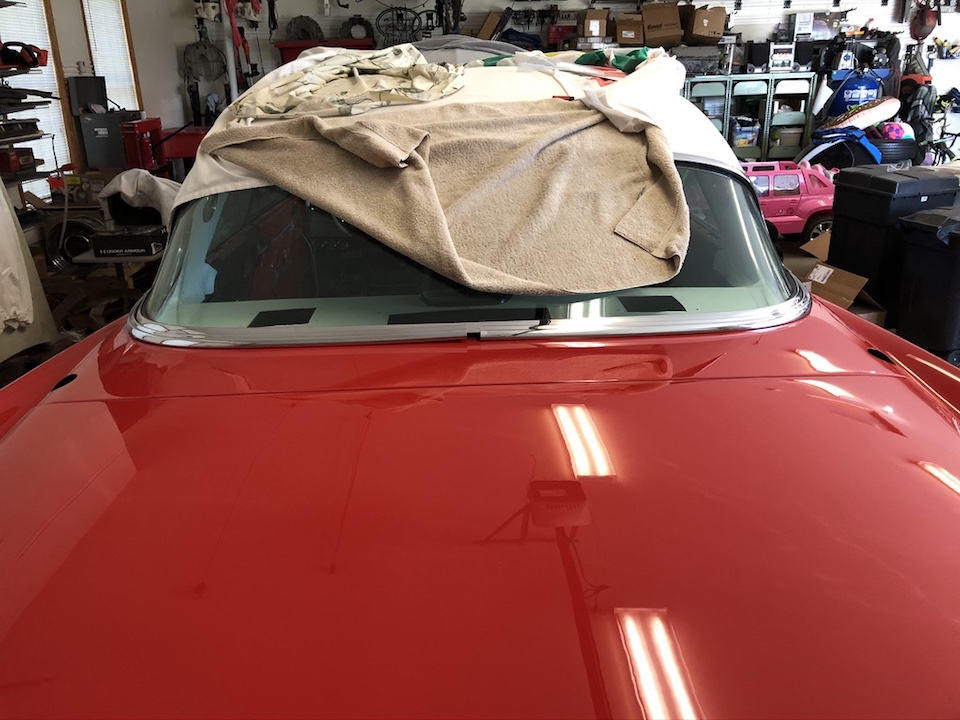 (thumb_IMG_1160_1024.jpg) (thumb_IMG_1160_1024.jpg)
 (thumb_IMG_1161_1024.jpg) (thumb_IMG_1161_1024.jpg)
Attachments
----------------
thumb_IMG_1158_1024.jpg (205KB - 488 downloads)
thumb_IMG_1159_1024.jpg (235KB - 504 downloads)
thumb_IMG_1160_1024.jpg (220KB - 492 downloads)
thumb_IMG_1161_1024.jpg (199KB - 523 downloads)
|
|
| |
|
Veteran
Posts: 129
| Very nice work. I love your car! |
|
| |
|
Exner Expert 10K+
Posts: 10620
Location: Lower Mainland BC | .
Congrats on the progress. Your stainless is fantastic. 
Question: Does that short joining piece just clip over the other two pieces?
 |
|
| |
|
Expert
Posts: 2163
| .
Is that Cloud White over Regimental Red (code 147) or Cloud White over Geranium Red (code 143) paint?
|
|
| |
|
Expert
Posts: 2216
Location: Muskego, WI | Thanks for the comments, trying to regain some momentum on putting this car together. I’ve been polishing the stainless myself, luckily most of it is very straight. The trim below the rear windshield is an often missing piece, the trim piece itself has the stud welded to it and it bolts to the body. You access all the trim fasteners from in the trunk or back seat in really inconvenient locations.
Car was originally Cloud White over Desert Rose, but I’ve replaced the Desert Rose with Tango Red. Paint is base-clear, which I kind of regret now that I’ve put a few minor scratches in her here and there. |
|
| |
|
Expert
Posts: 2216
Location: Muskego, WI | Rain gutter trim has been polished and installed on both sides. These aren't perfectly straight, but they're good enough for me.
 (thumb_IMG_1190_1024.jpg) (thumb_IMG_1190_1024.jpg)
 (thumb_IMG_1188_1024.jpg) (thumb_IMG_1188_1024.jpg)
 (thumb_IMG_1189_1024.jpg) (thumb_IMG_1189_1024.jpg)
Attachments
----------------
thumb_IMG_1190_1024.jpg (130KB - 490 downloads)
thumb_IMG_1188_1024.jpg (198KB - 479 downloads)
thumb_IMG_1189_1024.jpg (203KB - 512 downloads)
|
|
| |
|
Elite Veteran
Posts: 737
Location: Finland | You have all the clean and rewarding work ahead , lucky you!
This looks to be one of the finest Imperial 56 restorations ever. |
|
| |
|
Expert
Posts: 2216
Location: Muskego, WI | Finally found a shop that knew how to mount and balance tubed tires on wire wheels. Now I need to get them cleaned up and on the car.
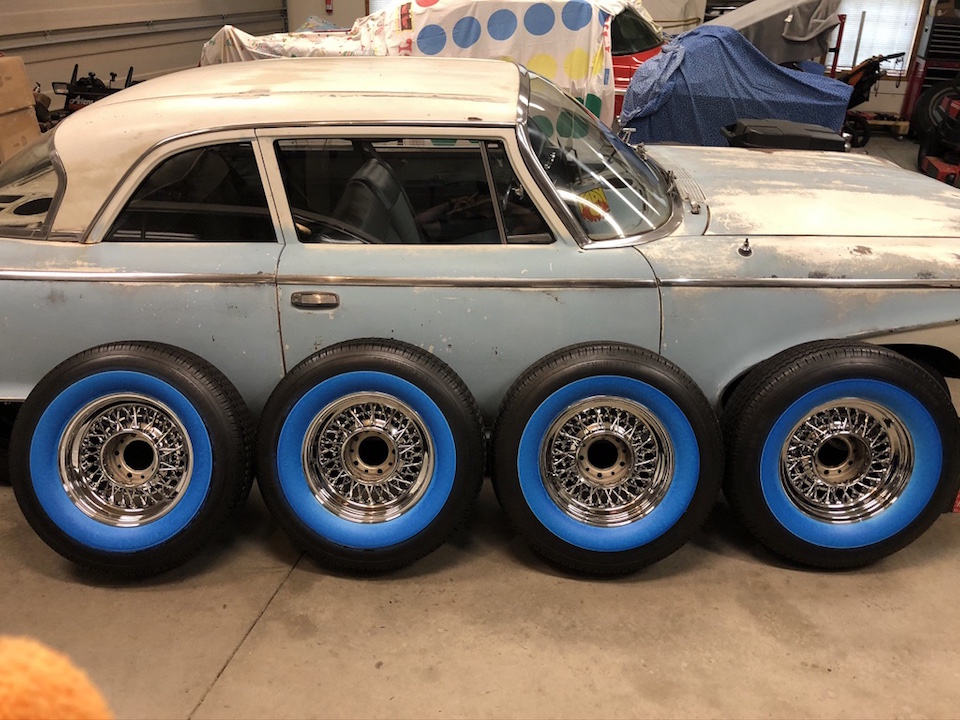 (thumb_IMG_1224_1024.jpg) (thumb_IMG_1224_1024.jpg)
Attachments
----------------
thumb_IMG_1224_1024.jpg (276KB - 490 downloads)
|
|
| |
|
Expert
Posts: 2216
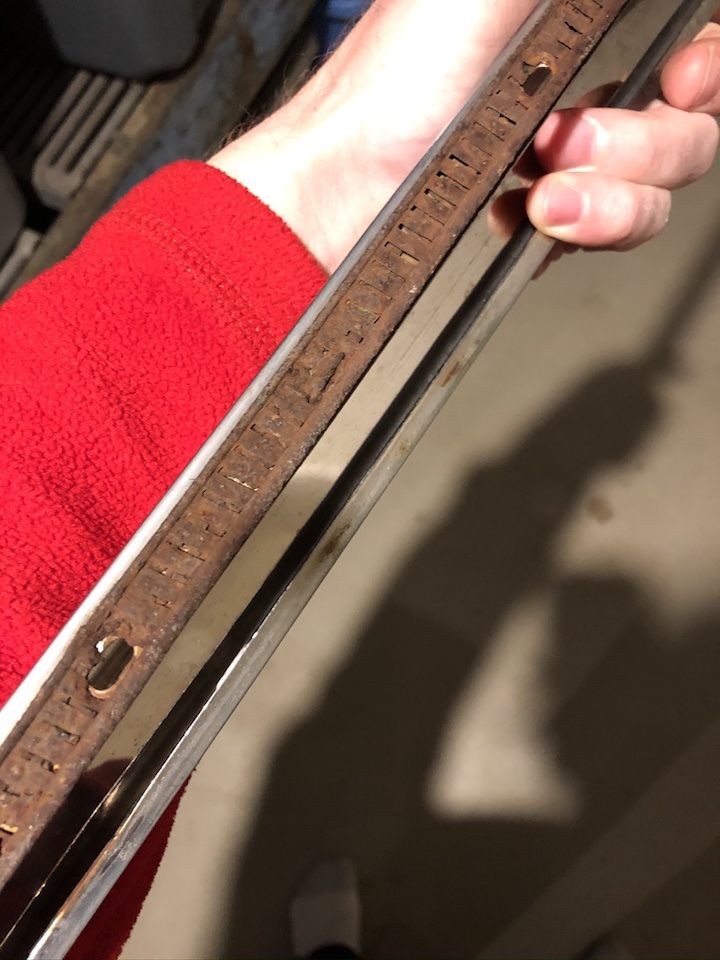
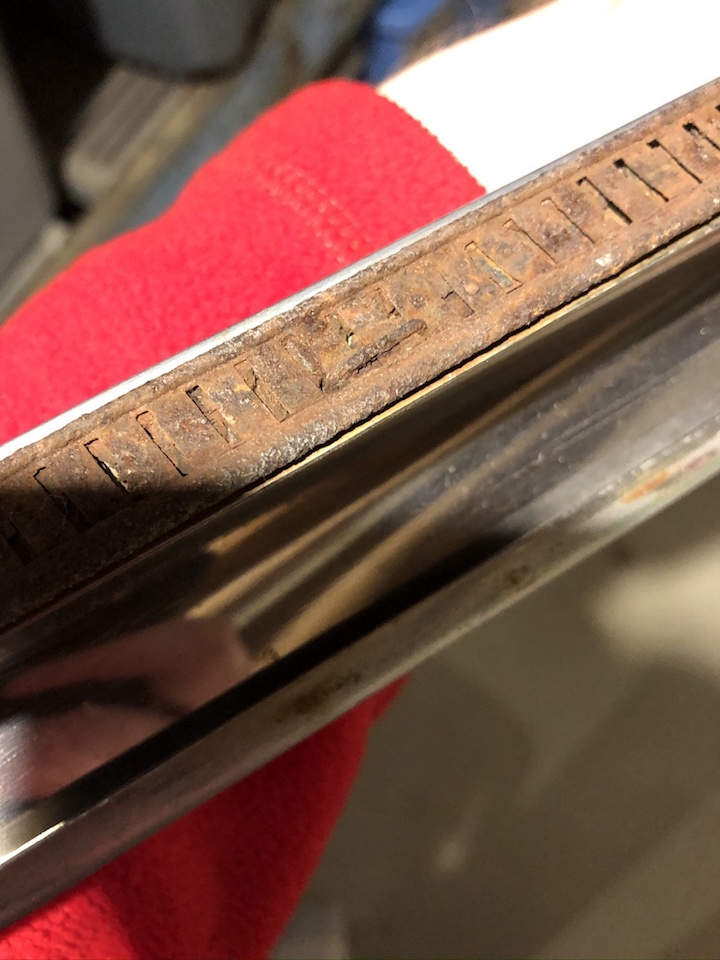
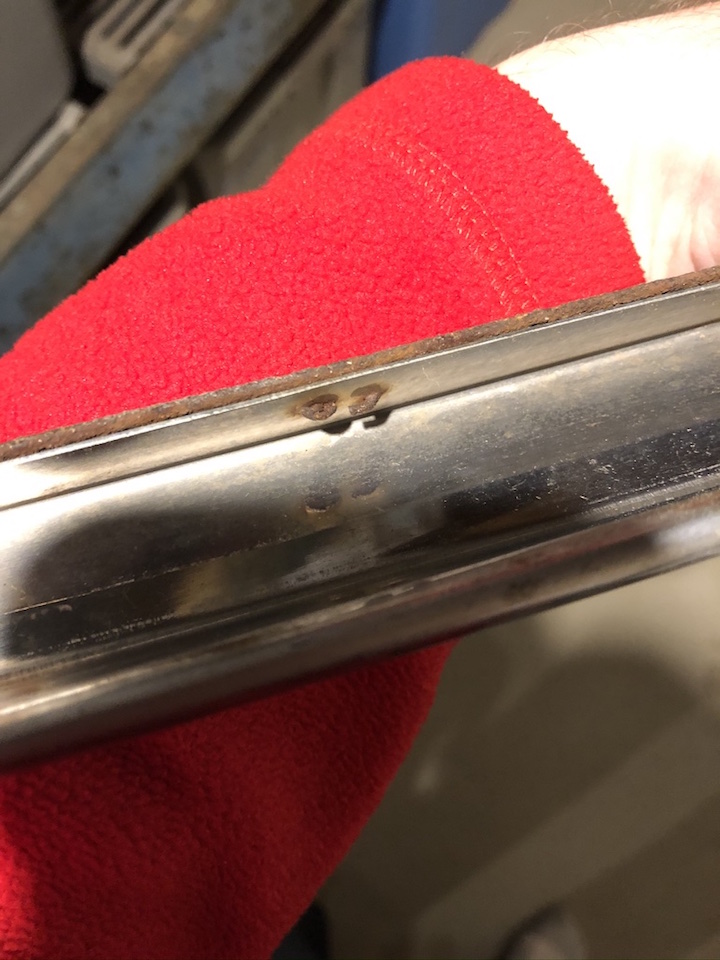
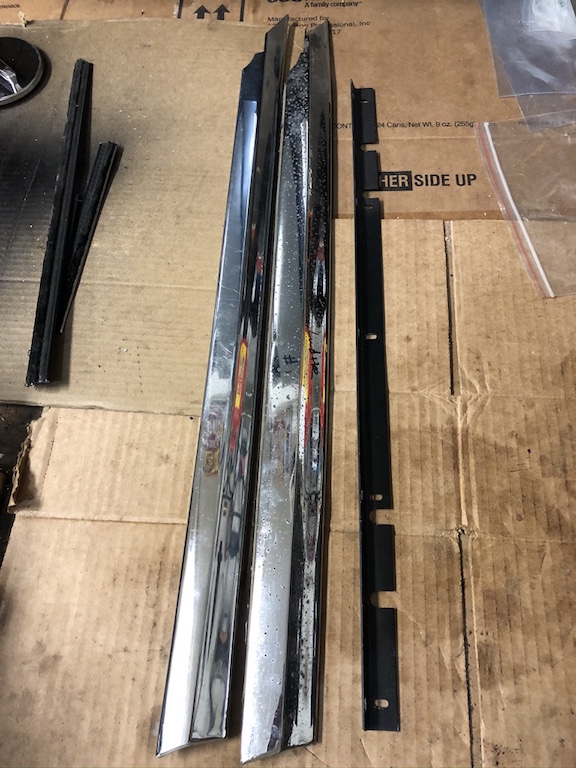
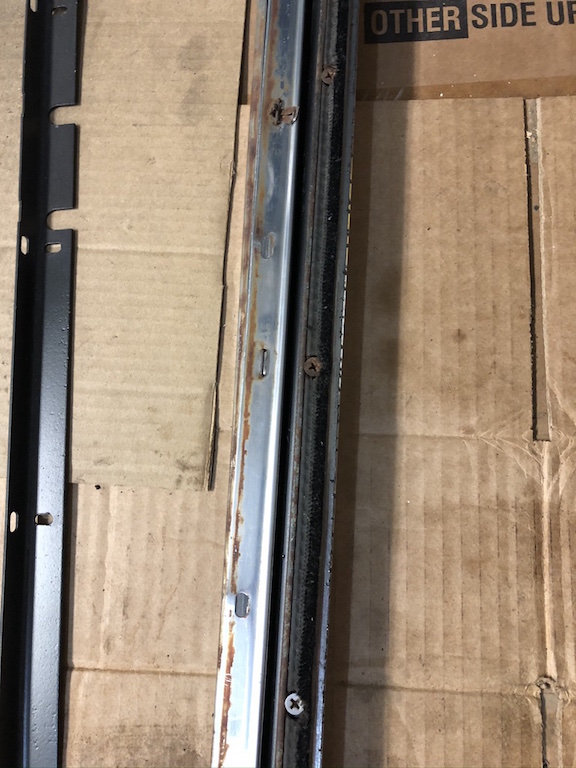
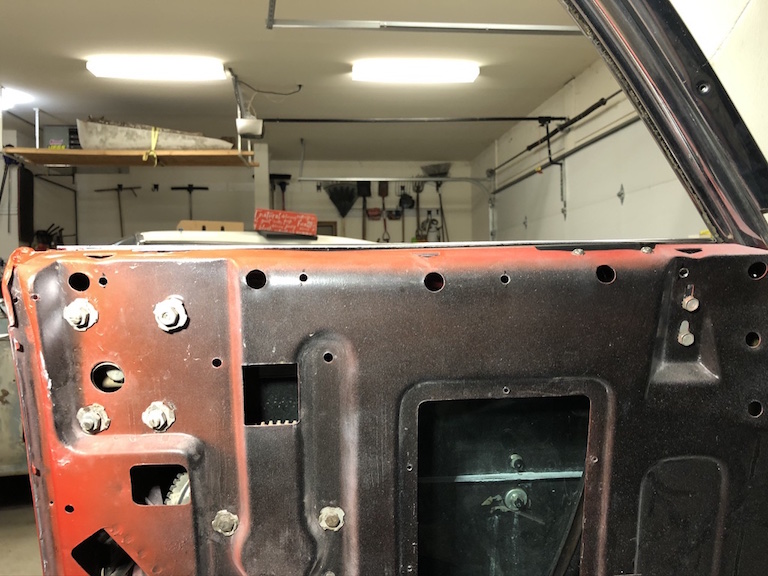
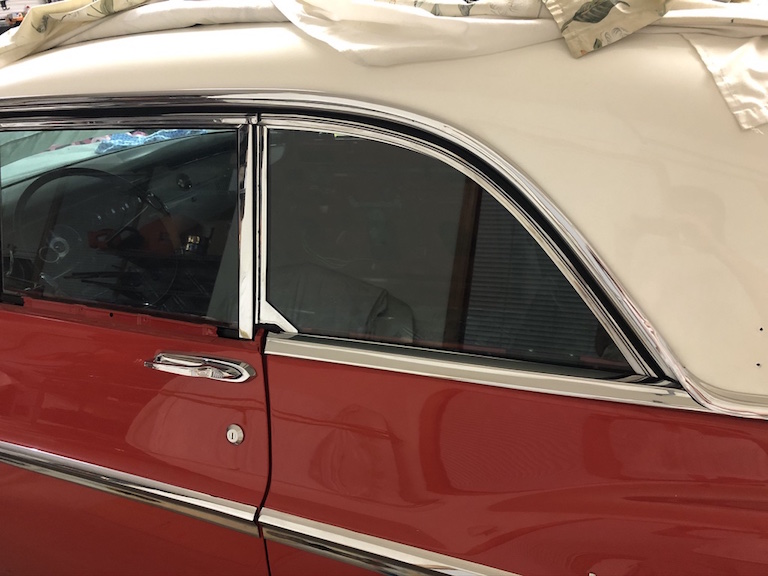
Location: Muskego, WI | Making progress on the stainless trim. The "belt line" trim adjacent to the rear quarter windows are now in. Originally on this car, these pieces were pot metal. Mine were badly pitted and finding good ones that aren't pitted or broken is difficult. I got some stainless ones that came of a 1955 imperial, but apparently the mounting bracket bolt pattern is different (for what reason, I don't know). Any way, I had to drill new access holes on the inside of the car so I could screw in the screws that attach the trim to the brackets. After a surprising amount of effort, these pieces are on the car. Below are pictures of the two types of trim, the holes I had to drill (small ones) versus the factory access holes (big ones) in the car and the end result.
Next I'll do the door top pieces, which were stainless on my car and survived in good shape. Those should go more quickly (famous last words).
 (thumb_IMG_1252_1024.jpg) (thumb_IMG_1252_1024.jpg)
 (thumb_IMG_1254_1024.jpg) (thumb_IMG_1254_1024.jpg)
 (thumb_IMG_1255_1024.jpg) (thumb_IMG_1255_1024.jpg)
 (thumb_IMG_1247_1024.jpg) (thumb_IMG_1247_1024.jpg)
 (thumb_IMG_1256_1024.jpg) (thumb_IMG_1256_1024.jpg)
Attachments
----------------
thumb_IMG_1252_1024.jpg (192KB - 480 downloads)
thumb_IMG_1254_1024.jpg (168KB - 467 downloads)
thumb_IMG_1255_1024.jpg (171KB - 467 downloads)
thumb_IMG_1247_1024.jpg (128KB - 455 downloads)
thumb_IMG_1256_1024.jpg (153KB - 470 downloads)
|
|
| |
|
Expert
Posts: 2216
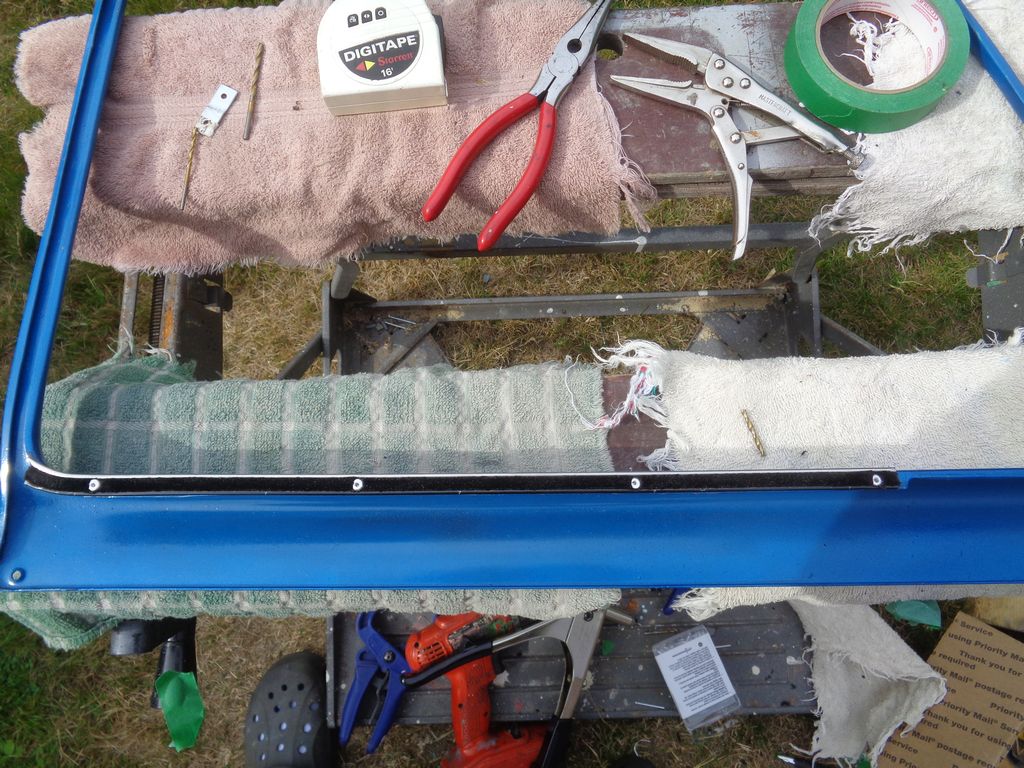
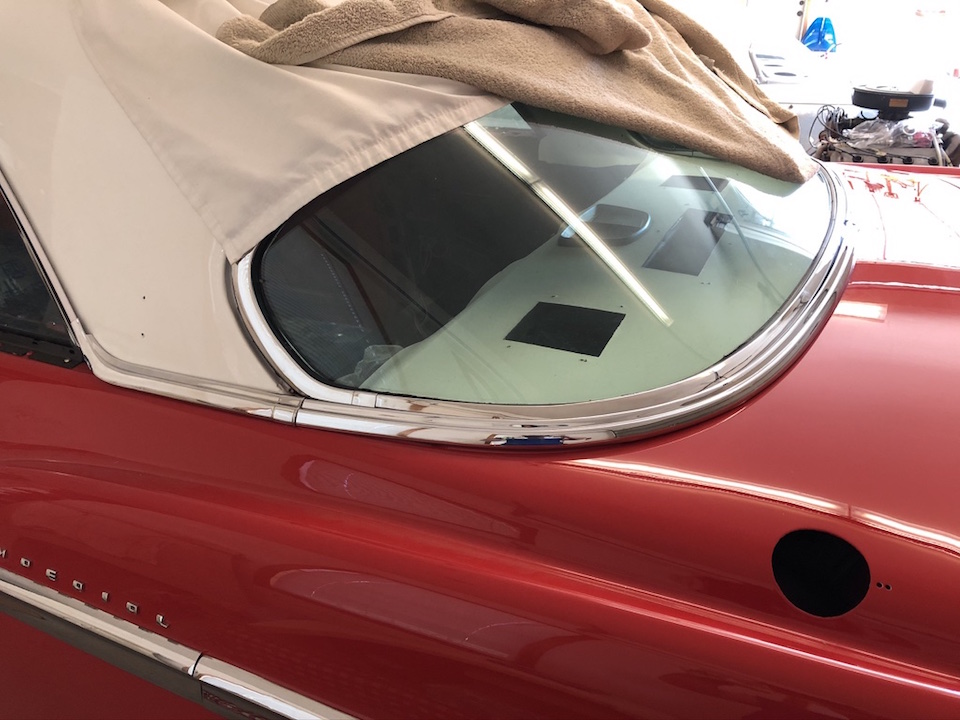
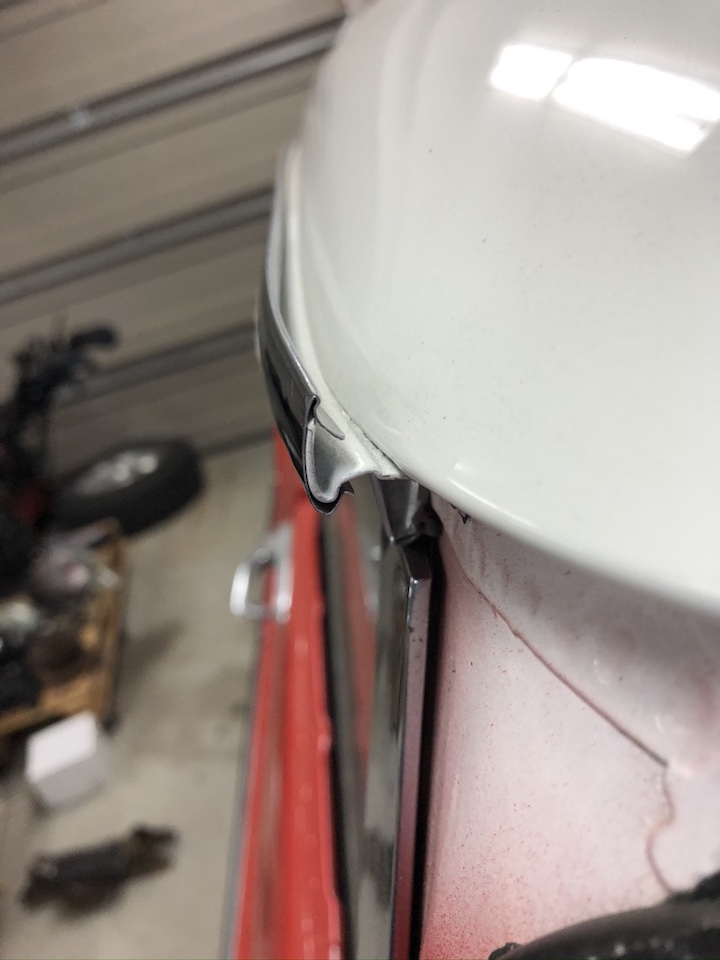
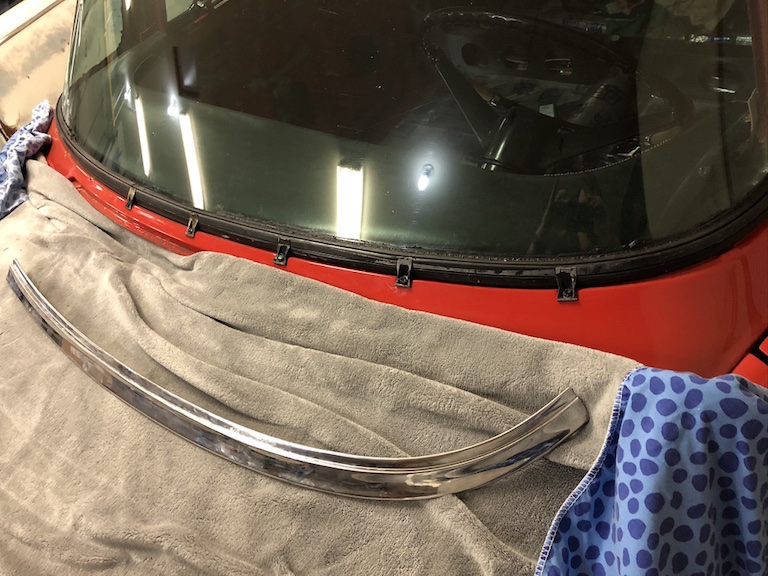
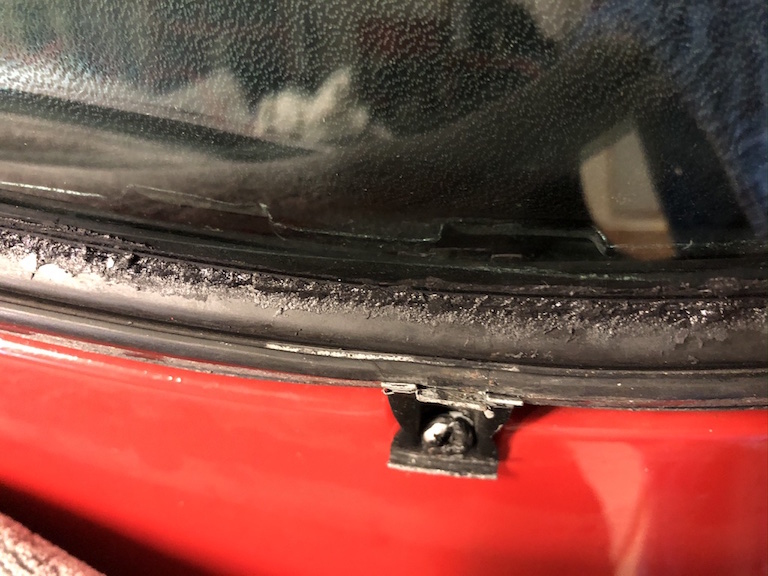
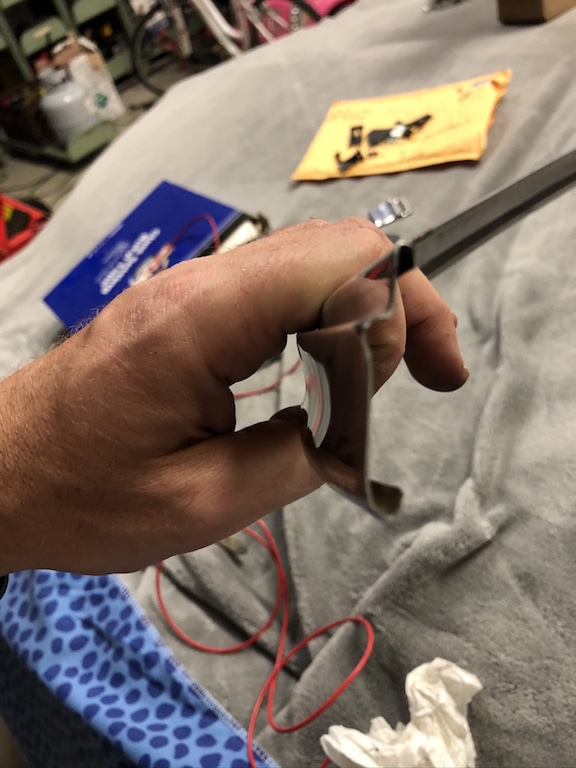
Location: Muskego, WI | I'm having a hell of a time installing the trim at the bottom of the front windshield. The top of the stainless hooks into a groove in the windshield gasket and the bottom is supposed to snap over the clips that are screwed to the body. I've been using a wire to spread the groove in the gasket so I can hook the stainless in there, but I just cannot get the bottom of the trim to pop over the clips. Any one have any experience with this type of trim? Any tips? I worked on this piece for 2 hours tonight and didn't get anywhere!
 (thumb_IMG_1363_1024.jpg) (thumb_IMG_1363_1024.jpg)
 (thumb_IMG_1364_1024.jpg) (thumb_IMG_1364_1024.jpg)
 (thumb_IMG_1365_1024.jpg) (thumb_IMG_1365_1024.jpg)
Attachments
----------------
thumb_IMG_1363_1024.jpg (191KB - 435 downloads)
thumb_IMG_1364_1024.jpg (166KB - 455 downloads)
thumb_IMG_1365_1024.jpg (140KB - 442 downloads)
|
|
| |
|
Elite Veteran
Posts: 737
Location: Finland | I think this stage of a restoration is a nightmare. Whatever car I have restored (ford , gm, mopar) it has always been difficult to get the rear and front glass stainless to sit properly.
Especially the type with the pocket in which the stainlee should slide. I have glued , made own clips etc... |
|
| |
|
Expert
Posts: 3973
Location: DFW, TX | On my '57, there were specific clip shapes needed for every location. I think the lower windshield used three different clips. Are yours all the same? If not, re-check the position.
Also, would it be possible to install the trim over the clip side first, then use a tool to get the gasket under the other side?
It is nerve wracking working on top of fresh paint, and I bet your lower back is a little sore too. Part of the fun!
Edited by 57burb 2020-09-24 8:54 AM
|
|
| |
|
Expert
Posts: 2216
Location: Muskego, WI | As far as I can tell, all of the clips appear to be universal across the front of the car. I actually used some fasteners from a '57/'58 Chrysler for my rear windshield trim, I did have to do some grinding to them but the worked well. I might try something similar here, but the original clips are extremely hard to find for this car. Glad to know that at least it's not just me... |
|
| |
|
Expert
Posts: 2216
Location: Muskego, WI | This car is going to a resto shop, Vintage Vehicles, in May or June 2021. I've messed around long enough, this car needs to get done and I'm just not the guy to do it. Hope to have it buttoned up within 12 months of dropping it off. |
|
| |
|
Expert
Posts: 2216
Location: Muskego, WI | Change of plans. Vintage Vehicles isn't restoring any more, so now the car is on it's way to Bob Schmidt's shop in Little Chute, WI. He and his crew picked up my car, trim and parts today and he thinks he should be able to finish it up an just a few months. Been a long time coming. |
|
| |
|
Expert
Posts: 2216
Location: Muskego, WI | First update from Bob Schmidt.
Car is cleaned up significantly, front bumper has been lined up and all front bumper and grill area trim has been installed. Currently working on straightening and cleaning up the rest of the stainless steel. He's coming for the interior this Friday. Pictures are direct from Bob today.
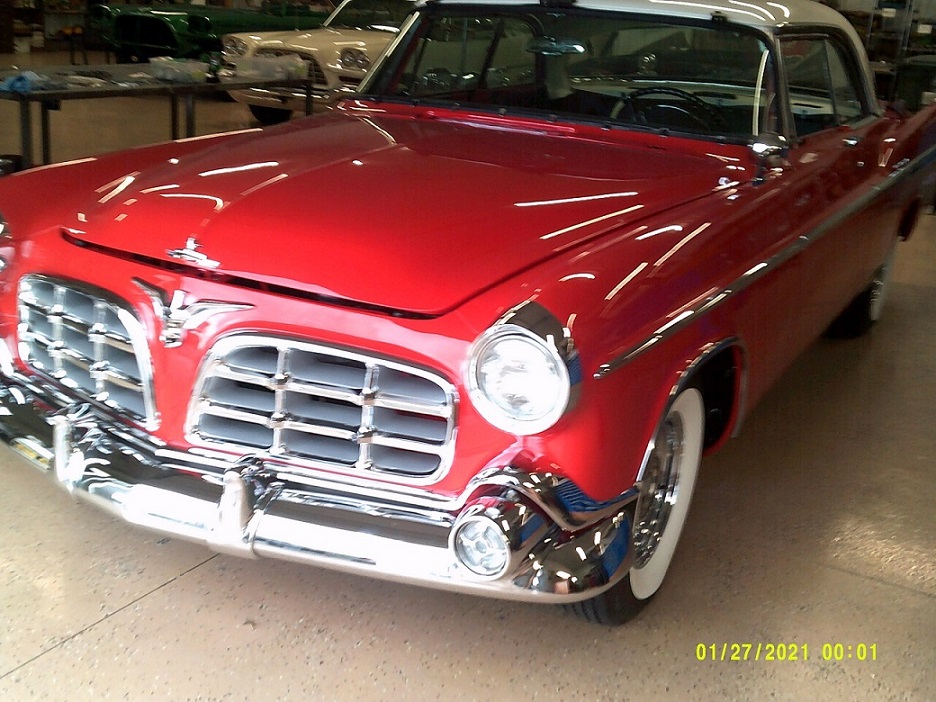 (Front Driver Corner March 2021.jpg) (Front Driver Corner March 2021.jpg)
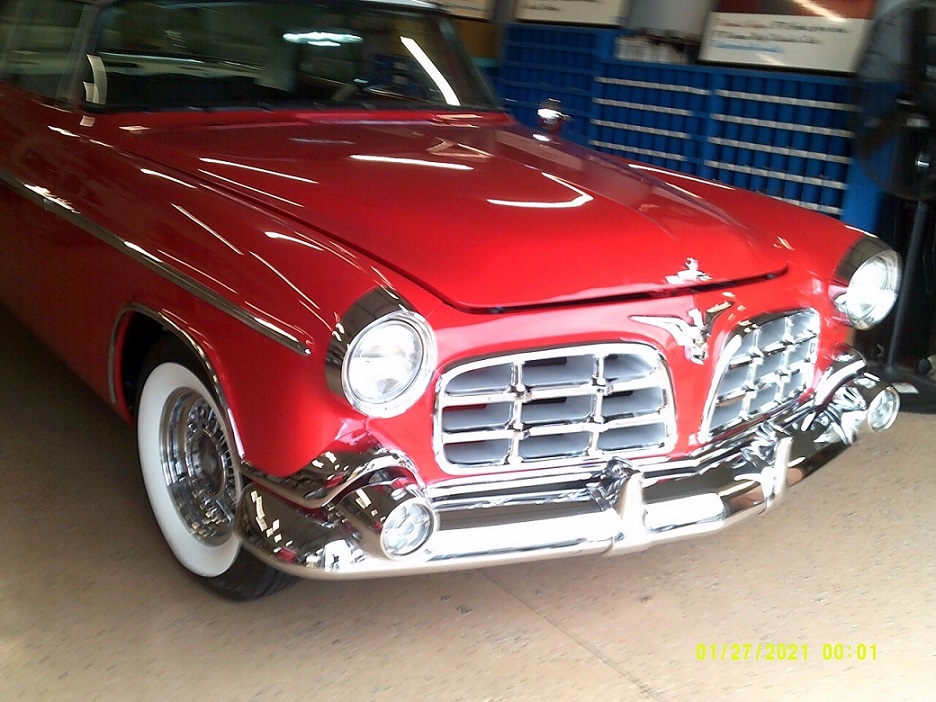 (Front Pass Corner March 2021.jpg) (Front Pass Corner March 2021.jpg)
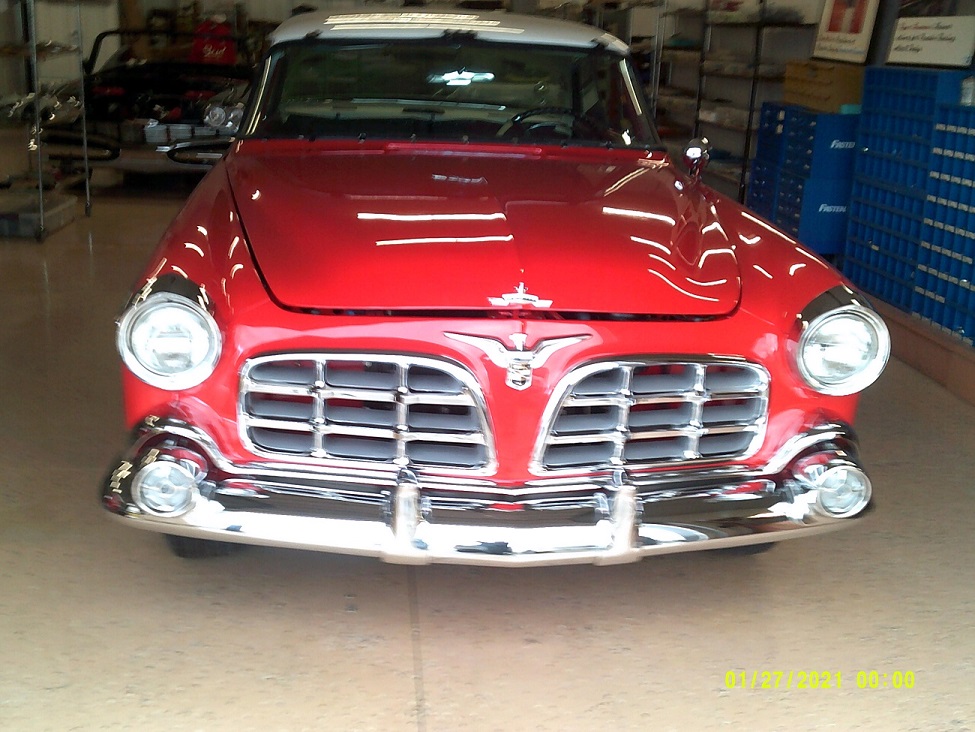 (Grill March 2021.jpg) (Grill March 2021.jpg)
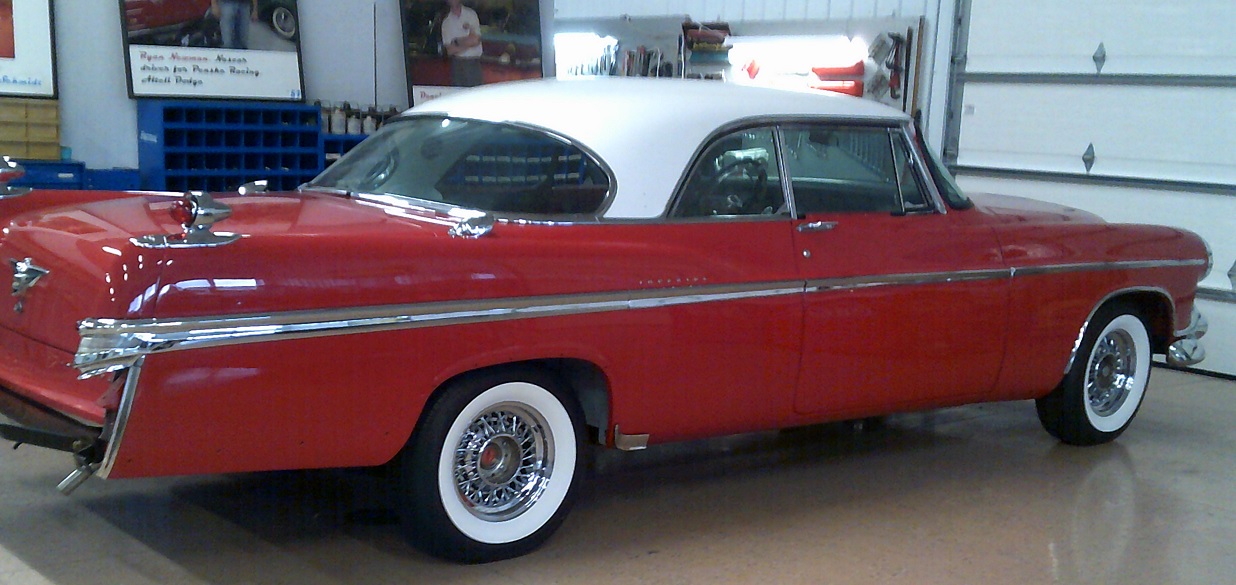 (Pass Side March 2021.jpg) (Pass Side March 2021.jpg)
Attachments
----------------
Front Driver Corner March 2021.jpg (244KB - 404 downloads)
Front Pass Corner March 2021.jpg (234KB - 412 downloads)
Grill March 2021.jpg (241KB - 411 downloads)
Pass Side March 2021.jpg (213KB - 421 downloads)
|
|
| |
|
Expert
Posts: 2216
Location: Muskego, WI | Bob had one of his guys come this morning and get the rest of my parts and my entire interior. Seems to be moving along very well, hope to have more updated pictures soon. |
|
| |
|
Expert
Posts: 2216
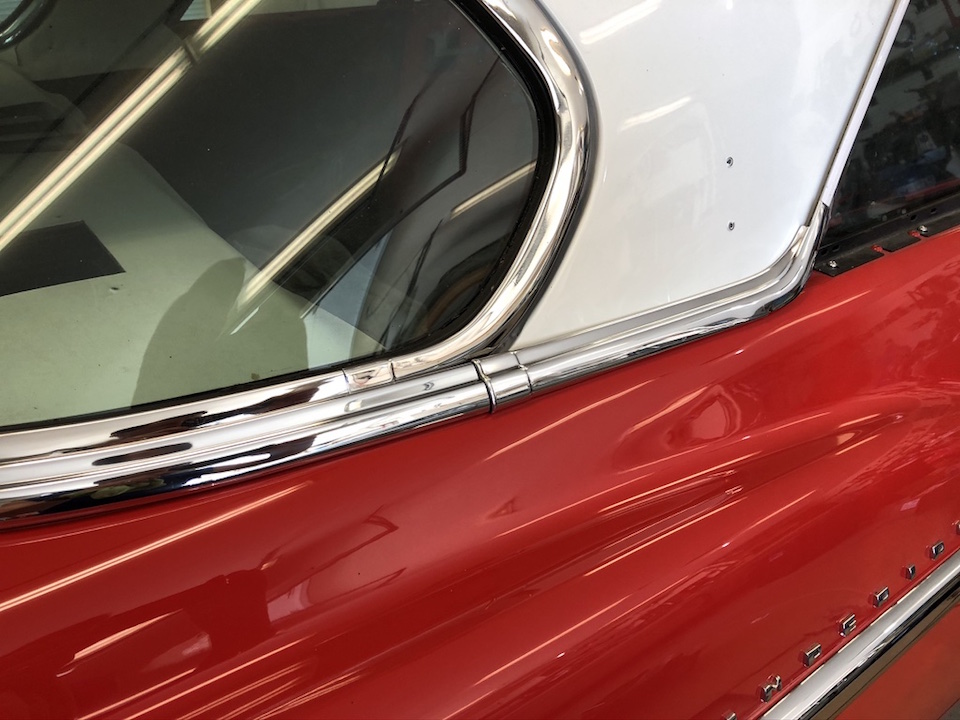
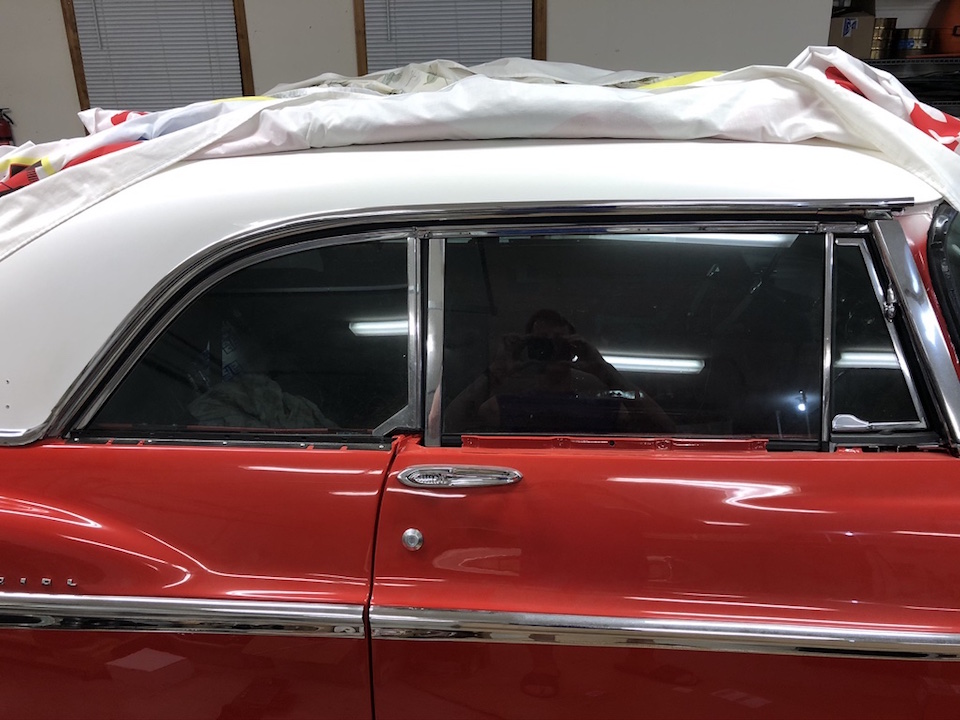
Location: Muskego, WI | Couple more pictures today. Stainless trim is on around the front windshield and the rear bumper is together and on the car. Really starting to look incredible!
 (thumb_IMG_1828_1024.jpg) (thumb_IMG_1828_1024.jpg)
 (thumb_IMG_1827_1024.jpg) (thumb_IMG_1827_1024.jpg)
Attachments
----------------
thumb_IMG_1828_1024.jpg (161KB - 412 downloads)
thumb_IMG_1827_1024.jpg (195KB - 403 downloads)
|
|
| |
|
Exner Expert 10K+
Posts: 10249
Location: So. Cal | Wow, looking really great! |
|
| |
|
Expert
Posts: 3973
Location: DFW, TX | Jon, your Imperial is turning out amazing! |
|
| |
|
Expert
Posts: 2216
Location: Muskego, WI | Thank you Nathan, Danny, I'm very grateful to have landed in Bob's shop. Great group of guys, very pleased with quality and rate of progress. |
|
| |
|
Expert
Posts: 2216
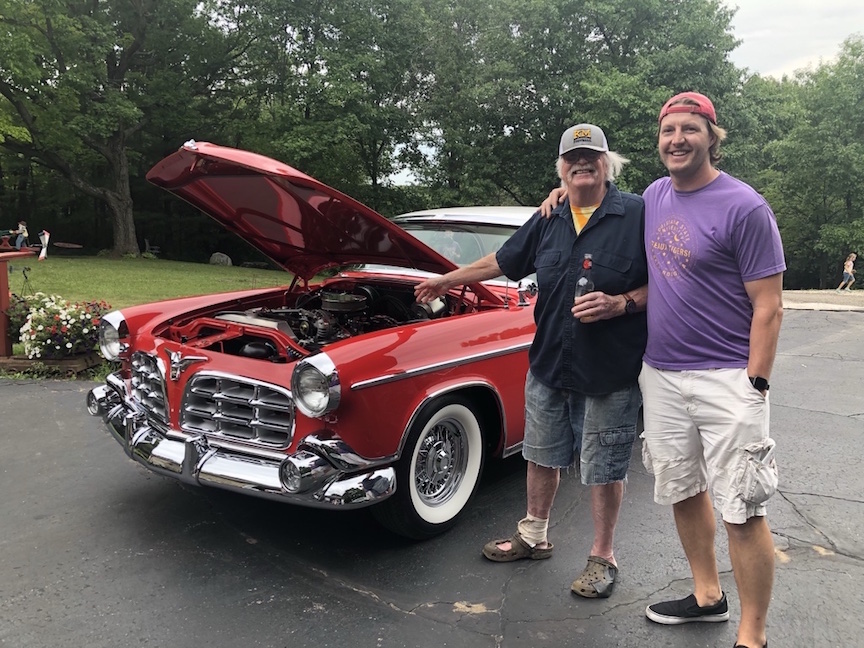
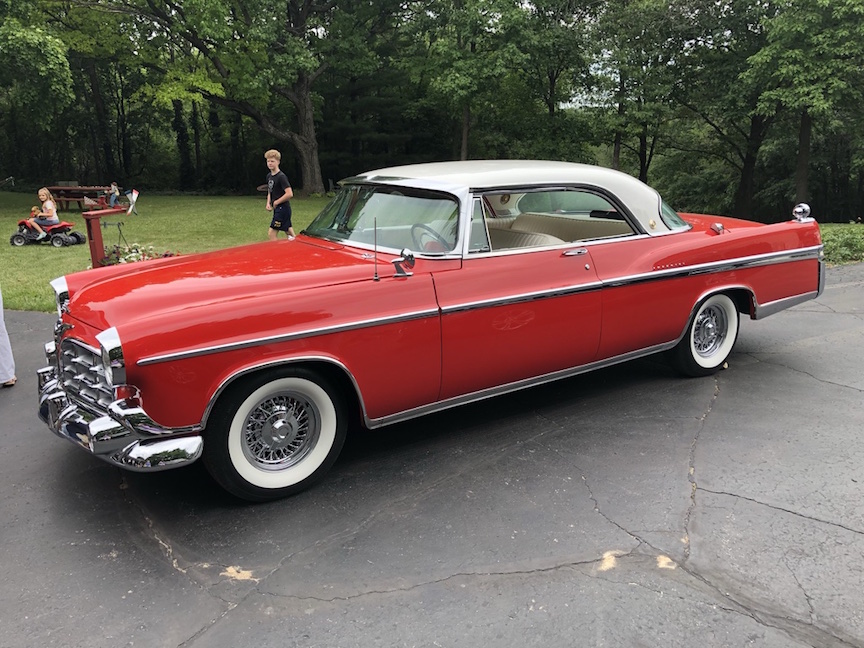
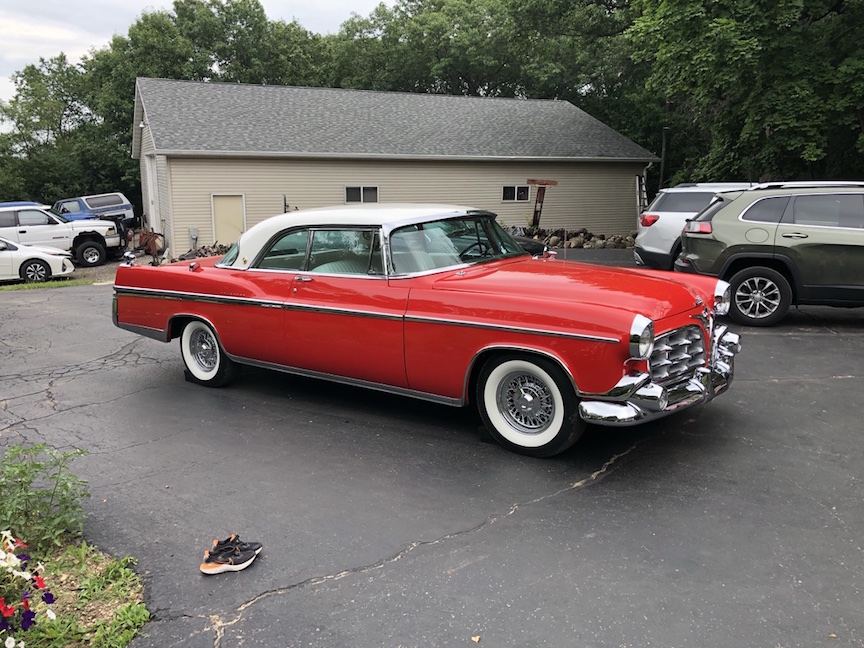
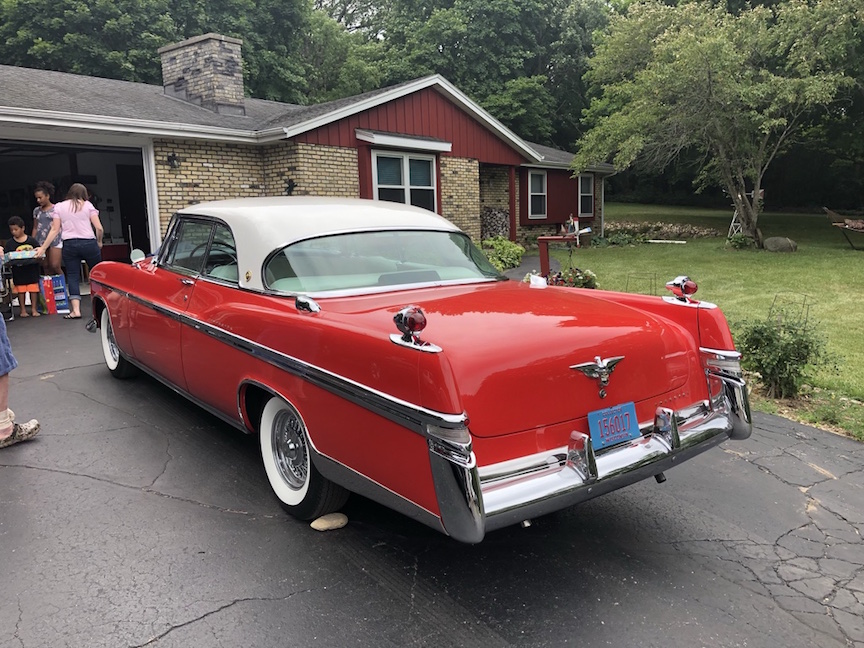
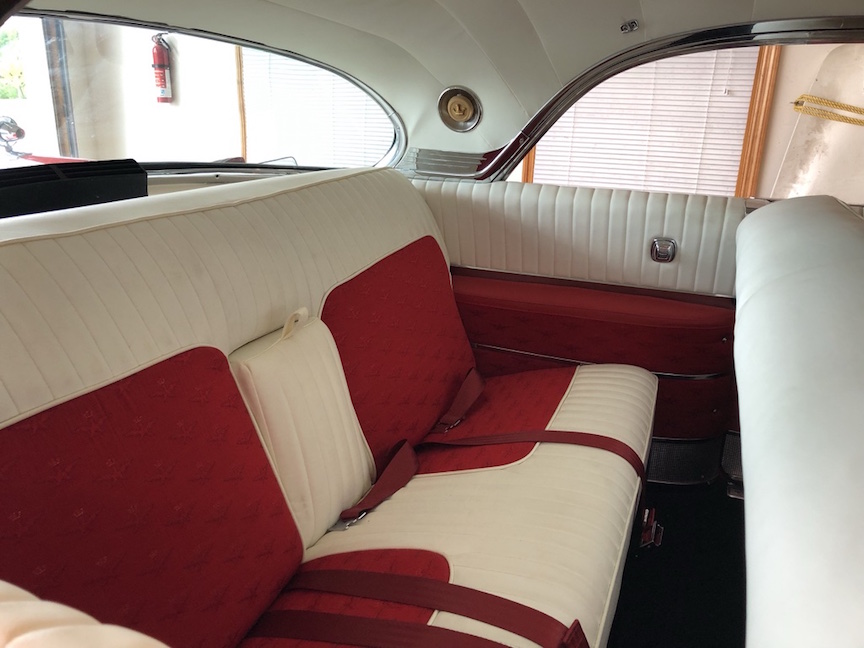
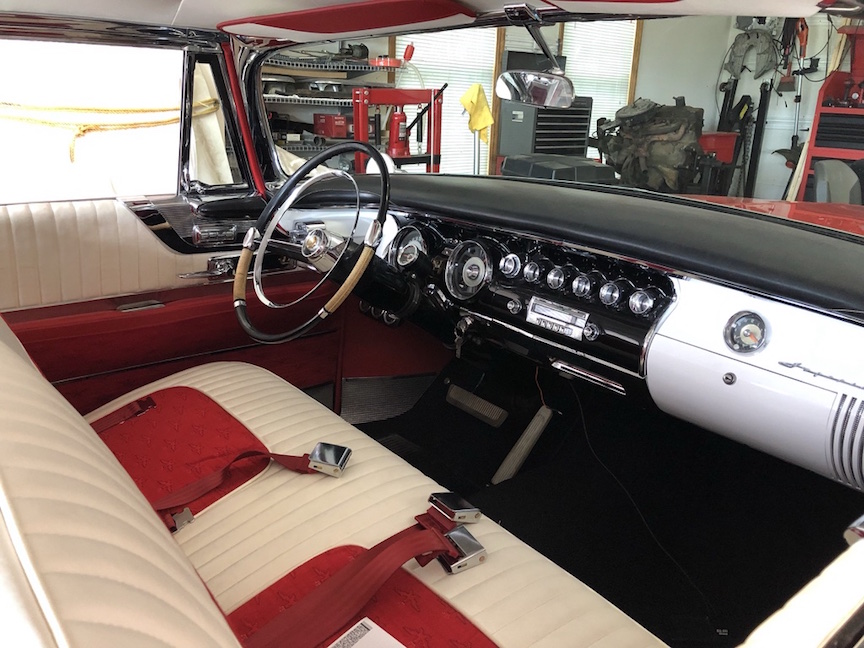
Location: Muskego, WI | This weekend I finally achieved one of my life long dreams; to drive my grandfather's restored 1956 Imperial coupe. Hard to believe I started this back in the fall of 2004 and that I used to pretend to drive it back in the late 1980s, what journey it has been. Surprised my dad for a ride on his 75th birthday, what a great day our family had with it. A huge thank you to Bob Schmidt and his guys for finally getting this over the hump for me.
There are very minor things that still need to be done, like installing the windshield washer nozzles, but I'm at 75 miles and counting!
Edited by jboymechanic 2021-07-13 12:07 AM
 (thumb_IMG_2314_1024.jpg) (thumb_IMG_2314_1024.jpg)
 (thumb_IMG_2307_1024.jpg) (thumb_IMG_2307_1024.jpg)
 (thumb_IMG_2308_1024.jpg) (thumb_IMG_2308_1024.jpg)
 (thumb_IMG_2310_1024.jpg) (thumb_IMG_2310_1024.jpg)
 (thumb_IMG_2244_1024.jpg) (thumb_IMG_2244_1024.jpg)
 (thumb_IMG_2245_1024.jpg) (thumb_IMG_2245_1024.jpg)
Attachments
----------------
thumb_IMG_2314_1024.jpg (274KB - 346 downloads)
thumb_IMG_2307_1024.jpg (258KB - 342 downloads)
thumb_IMG_2308_1024.jpg (260KB - 332 downloads)
thumb_IMG_2310_1024.jpg (272KB - 334 downloads)
thumb_IMG_2244_1024.jpg (144KB - 336 downloads)
thumb_IMG_2245_1024.jpg (216KB - 333 downloads)
|
|
| |
|
Exner Expert 10K+
Posts: 10249
Location: So. Cal | Congratulations, you have a really nice Imperial. The red/white color on it is very striking too. |
|
| |
|
Location: North Australia | Wow, I am impressed, congratulations Jon. That is something to be proud of. The 56 is one of the best looking Forward Look cars in my opinion. Well done. Steve. |
|
| |
|
Expert
Posts: 2216
Location: Muskego, WI | Thanks gents, I'm extremely happy with the end result. However, if I could do it all over again I would have left it pink. |
|
| |
|
Exner Expert 10K+
Posts: 10249
Location: So. Cal | Do you have a before picture? I don't think I've ever seen it. |
|
| |
|
Expert
Posts: 3973
Location: DFW, TX | Car came out just beautiful, Jon! Man the '56 Imperial is a good-looking car and the color combination on yours is striking. Great job.
Powerflite - 2021-07-14 1:58 AM
Do you have a before picture? I don't think I've ever seen it.
I'm pretty sure that's it in his avatar. |
|
| |
|
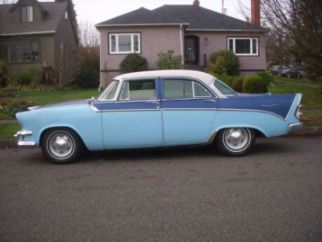
Expert
Posts: 2216
Location: Muskego, WI | Here is a larger picture of the Imperial the day I pulled it out of its resting place in the old machine shed. Sat in that barn immediately behind the car from 1965 until March 2003. It was dug out of the ground (as it had sunk in considerably, but not resting on the frame thankfully) and moved into a newer pole barn until I started disassembly in the fall of 2004.
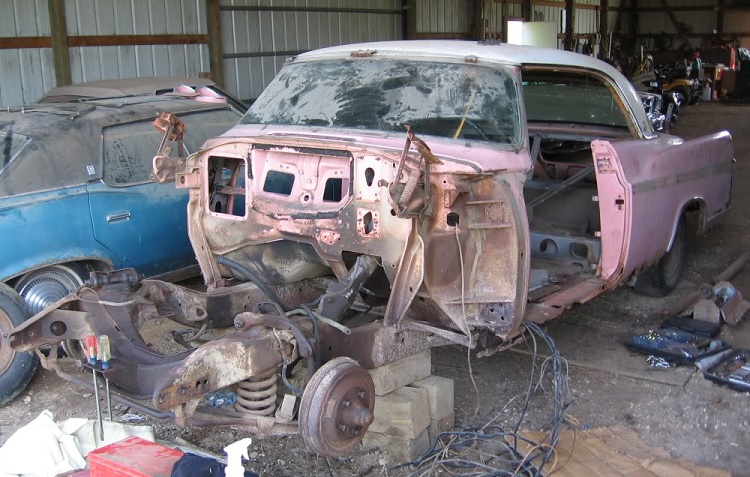
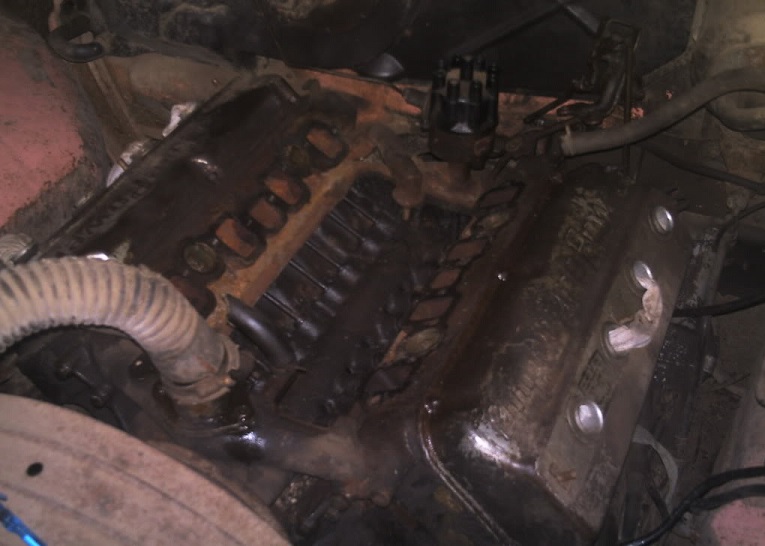
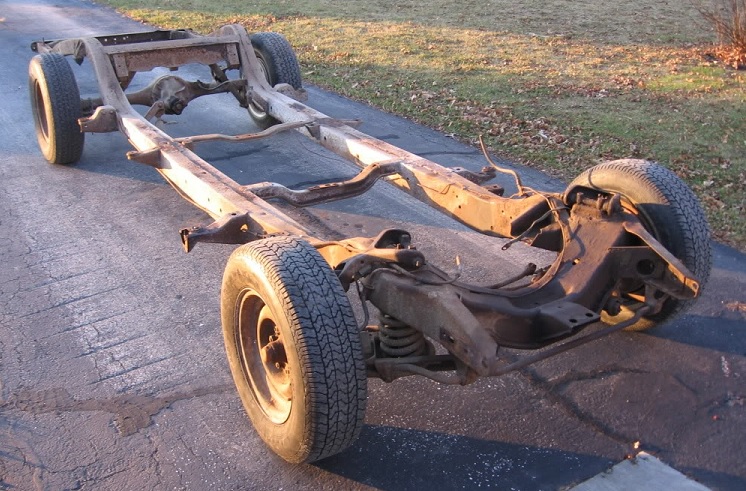
Also some pictures of the break-down process, check out the before and after cleaning picture of the hemi. There was so much racoon poop on the engine that the entire valley cover rotted away and the middle of the motor was full of poop. Pretty amazing that I was even able to salvage this block.
Edited by jboymechanic 2021-07-14 11:58 AM
 (Thebeginning.jpg) (Thebeginning.jpg)
 (Front clip removed 1.jpg) (Front clip removed 1.jpg)
 (Hemi 2.jpg) (Hemi 2.jpg)
 (Hemi 4.jpg) (Hemi 4.jpg)
 (Chassis tear down 2.jpg) (Chassis tear down 2.jpg)
Attachments
----------------
Thebeginning.jpg (144KB - 335 downloads)
Front clip removed 1.jpg (157KB - 329 downloads)
Hemi 2.jpg (108KB - 332 downloads)
Hemi 4.jpg (93KB - 332 downloads)
Chassis tear down 2.jpg (181KB - 330 downloads)
|
|
| |
|
Exner Expert 10K+
Posts: 10249
Location: So. Cal | Thanks for the pictures. It's come a long way to where it is now. I can imagine that 354 is a lot of fun. |
|
| |
|
Exner Expert 10K+
Posts: 10620
Location: Lower Mainland BC | jboymechanic - 2018-05-23 7:54 PM
The Imperial's front disc setup is Scarebird. I purchased the calipers already powder coated red from rockauto (Power Stop part number S4299). The brackets are very well made and came plated in zinc chromate.
That is interesting. I contacted Scarebird earlier this week and they told me that they had nothing for 1956 Chryslers. I realize that Imperials are different than Chryslers but I have to wonder how different the brackets really are. Do you have any photos of the installation process (especially the brackets before you added the calipers and rotors) that got you to this point (your photo below)
Beautiful restoration job BTW (as others have said) 

Edited by 56D500boy 2021-11-03 5:27 PM
|
|
| |
|
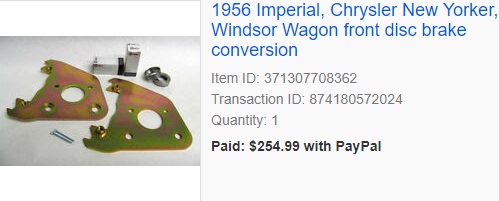
Expert
Posts: 2216
Location: Muskego, WI | The kit was very simple, I bought it back in 2016. Scarebird was selling the kits through ebay at the time, here is a picture of the actual kit from my ebay account.
 (Scarebird kit.jpg) (Scarebird kit.jpg)
Attachments
----------------
Scarebird kit.jpg (31KB - 276 downloads)
|
|
| |
|
Exner Expert 10K+
Posts: 10620
Location: Lower Mainland BC | jboymechanic - 2021-11-05 11:36 AM
The kit was very simple, I bought it back in 2016. Scarebird was selling the kits through ebay at the time, here is a picture of the actual kit from my ebay account.
Thanks Jon. This is going to be fun. I sent the photo above with the kit installed on your 56 Imperial Coupe to Scarebird and asked what the kit was (after they previously said that they didn't have any 56 Chrysler kits). Mark at Scarebird replied that whatever you did with what appeared to be one of their kits, it was a "bodge" (a modification) and he couldn't recommend it.
I am going to send him the photo of your 2016 eBay Scarebird kit to see why he would call it a "bodge". I sure he will back pedal on his comment.
Dave F. |
|
| |
|
Extreme Veteran
Posts: 339
Location: California/Wisconsin | Beautiful results! Thanks for sharing. Hope to see it at Iola or an appropriate Wisconsin show soon. Great work and colors. |
|
| |
|
Expert
Posts: 2216
Location: Muskego, WI | Getting the Imperial ready for season #2 back on the road. I've swapped out my rear gears from 3.23 to 2.76, I also repacked the rear axle bearings while the axles were out. I have about 750 miles on the car so far and everything looks great in the rear end.
I had a pretty significant power steering fluid leak from the steering gear at the end of last season, the cause was a very hard, original seal at the output (pitman arm) shaft. I used a "blind hole" seal puller to get the old one out and made a custom aluminum seal installing tool to get the new one in the bore and around the output shaft. I also had a few coolant leaks from the water cross-over and the water pump, I addressed these with new gasket, sealer and a new water pump. Everything is dry so far.
I'm currently working on getting my driveshaft addressed as I had a shimmy, going to get my rear pinion yoke and TF trans yoke "in phase" and go to a single piece drive shaft (it will actually be two pieces since it will have to contain a slip yoke, but there will be no carrier bearing or center u-joint). |
|
| |
|
Expert
Posts: 2216
Location: Muskego, WI | Update: I did update my drive shaft, but it is still two pieces. The tunnel was too tight to allow the larger OD that a single piece drive shaft would have required. My drive shaft now has the following u-joint sizes from front to rear: 1310, 1310 and 7260. My carrier barrier is now the same as most half ton rear wheel drive domestic pickup trucks, so everything is very available. I no longer have a shimmy in the 15 to 20 mph range.
In addition to the drive shaft and gear changes, I've re-set my initial timing from about 2* to about 9*. I've driven another 200 miles since, overall fuel economy has improved from 9.0 mpg to 11.3 mpg. |
|
| |
|
Expert
Posts: 2216
Location: Muskego, WI | I just hit 2000 miles with the Imperial, everything is still working great. I have a few minor things to address yet, but mostly just enjoying the car. Typical fuel economy is now between 14 and 15 mpg after some additional adjustments to my TBI. |
|
| |