|
|
Extreme Veteran
Posts: 444
 
Location: Victoria, AUSTRALIA | I copied some of this from a earlier post in a general discuss section
as this project has officially started I will post updates
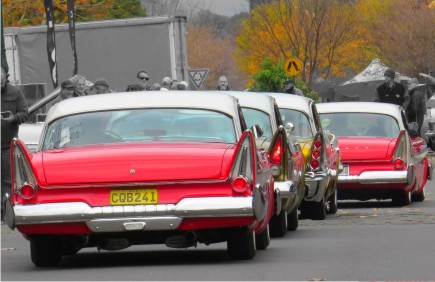
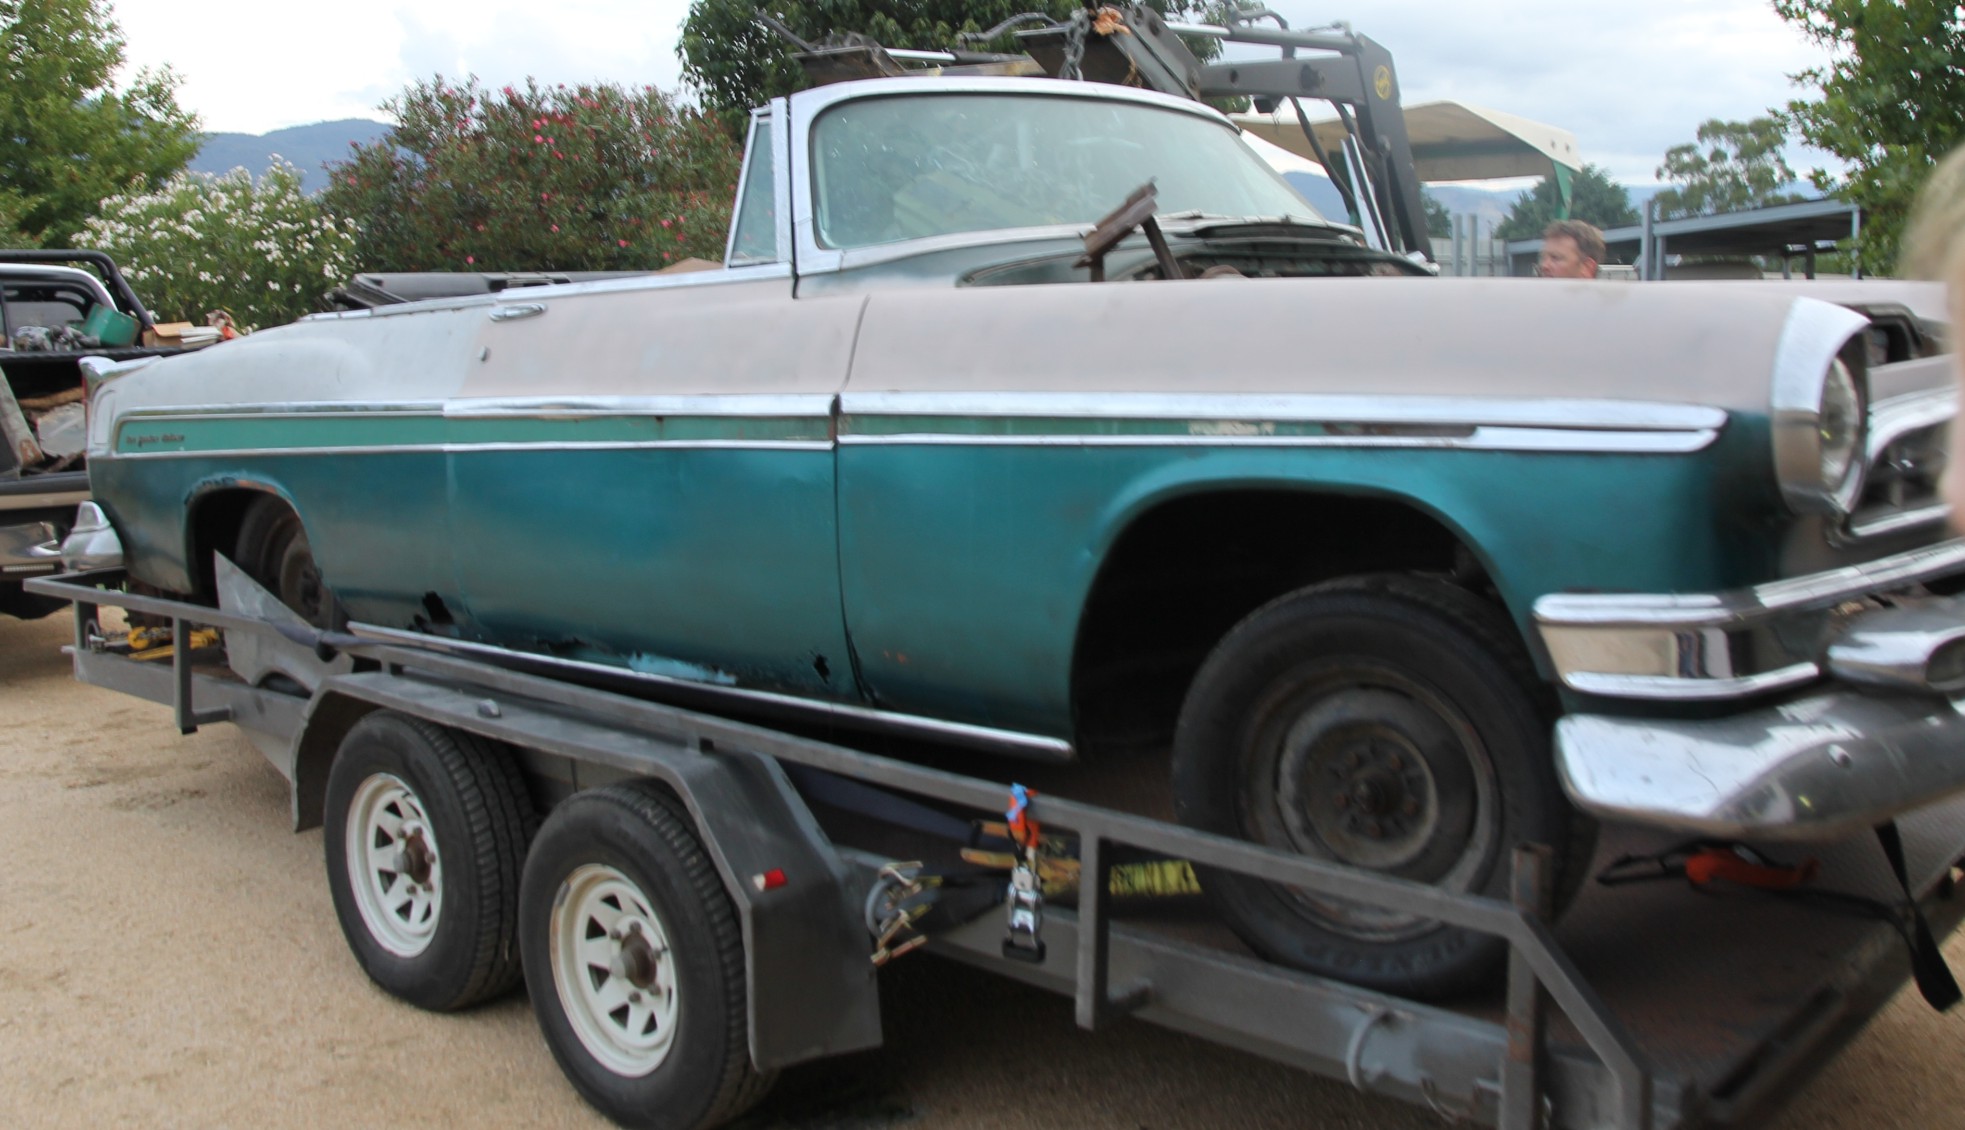
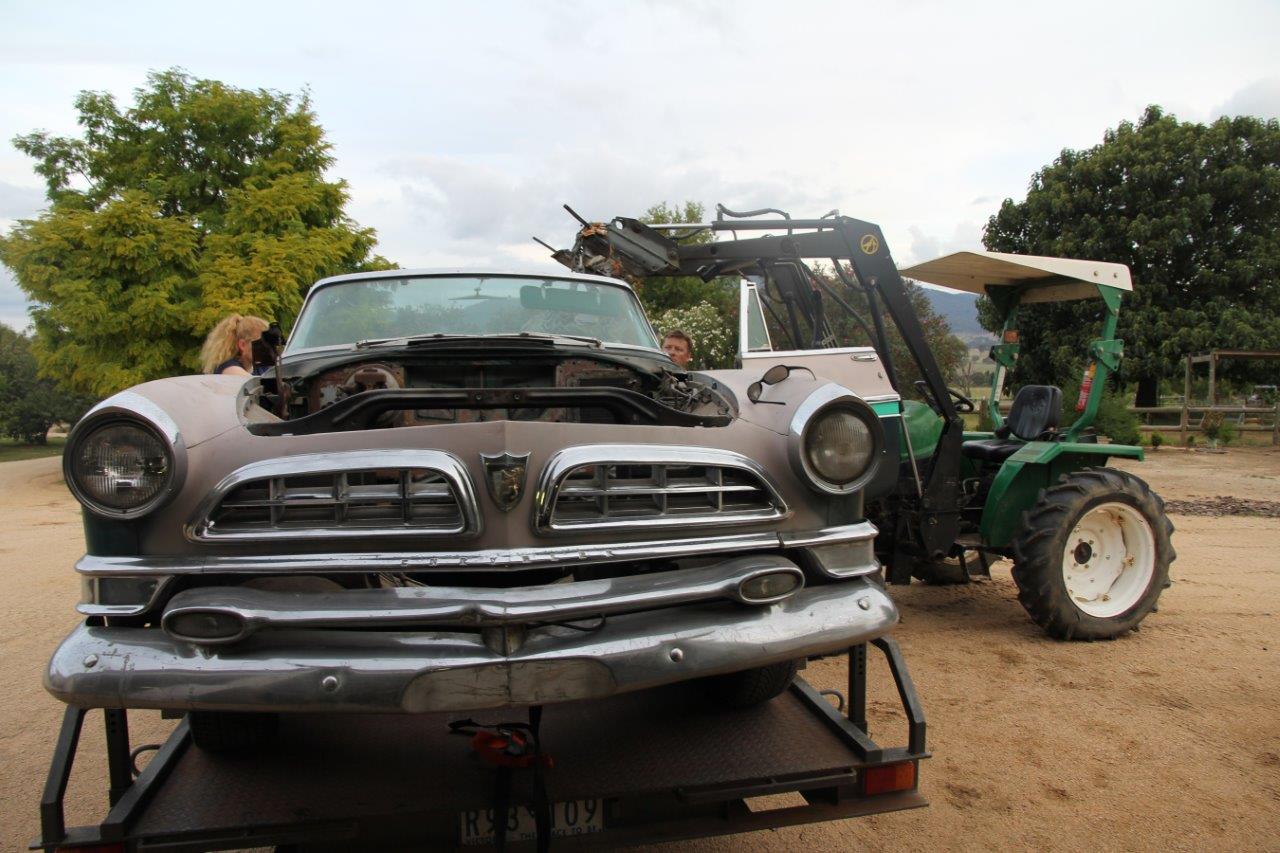
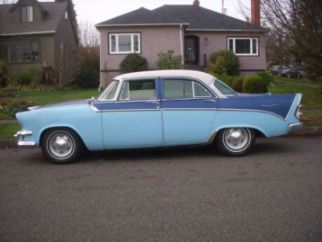
The Vin is N5529718 which I gather is a New Yorker 55 in sequence 29718.
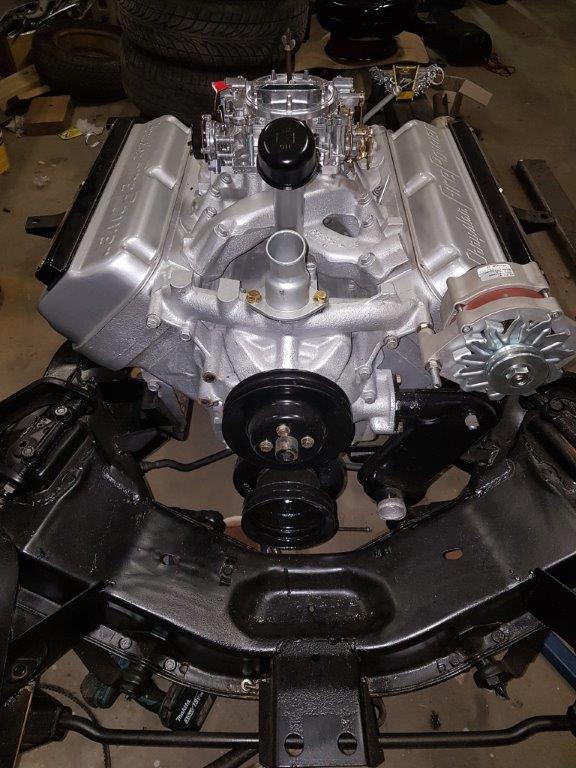
The engine number is NE5612949 - this is a bit of a mystery as this is a 56' 354 hemi
The engine and trans ( powerflite ) have already been rebuilt but not started.
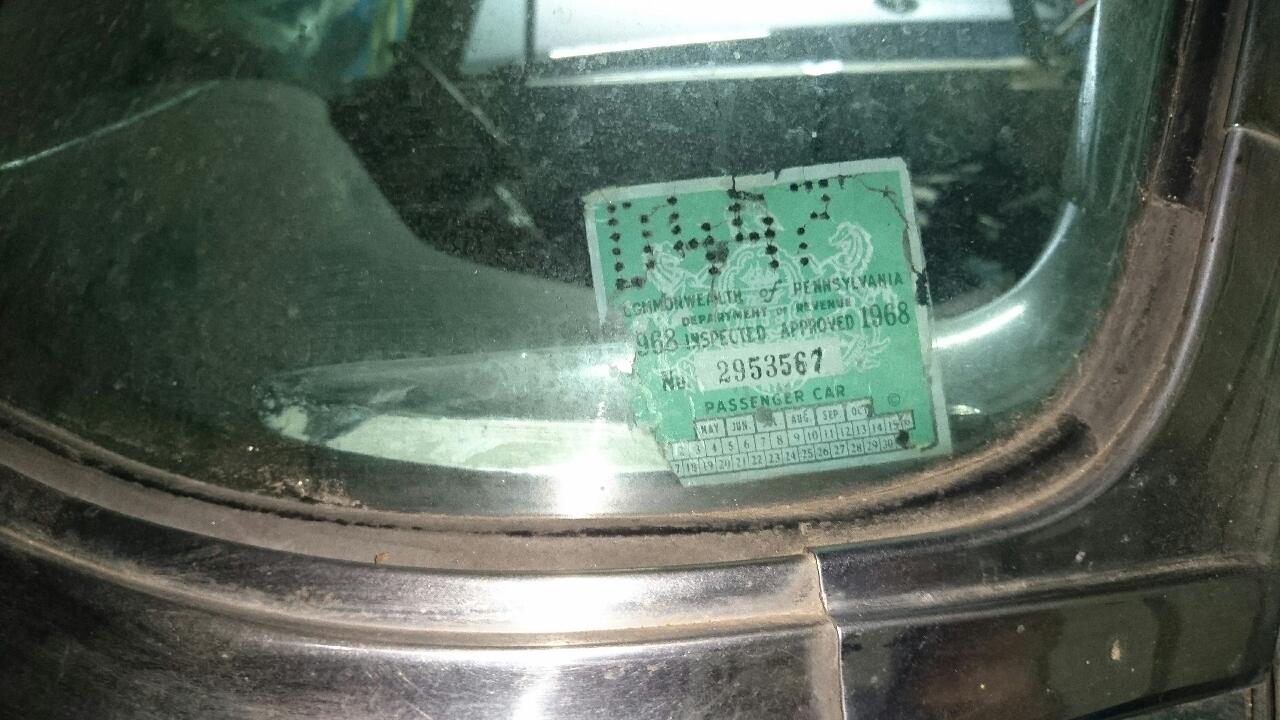
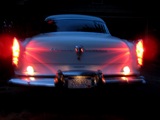
Originally Jade Green - Left hand drive from Commonwealth of Pennsylvania and windscreen tag expired 31st Jul 1968
I contacted the chrysler historical society and got the original information, colours, etc
and even bought the correct green cloth.
I'm not a huge fan of green but as I work on it I like it more and more
I dont know the history of the Chrysler in Australia but was told its been in Australia for 25 + years by the previous owner ( importer )
converted the dash to RHD which was a hatchet job
I have purchased a LHD dash, steering column with steering box so I can convert back which is the plan
luckily the previous persons have kept the sections cutout of the firewall so I can weld them back in
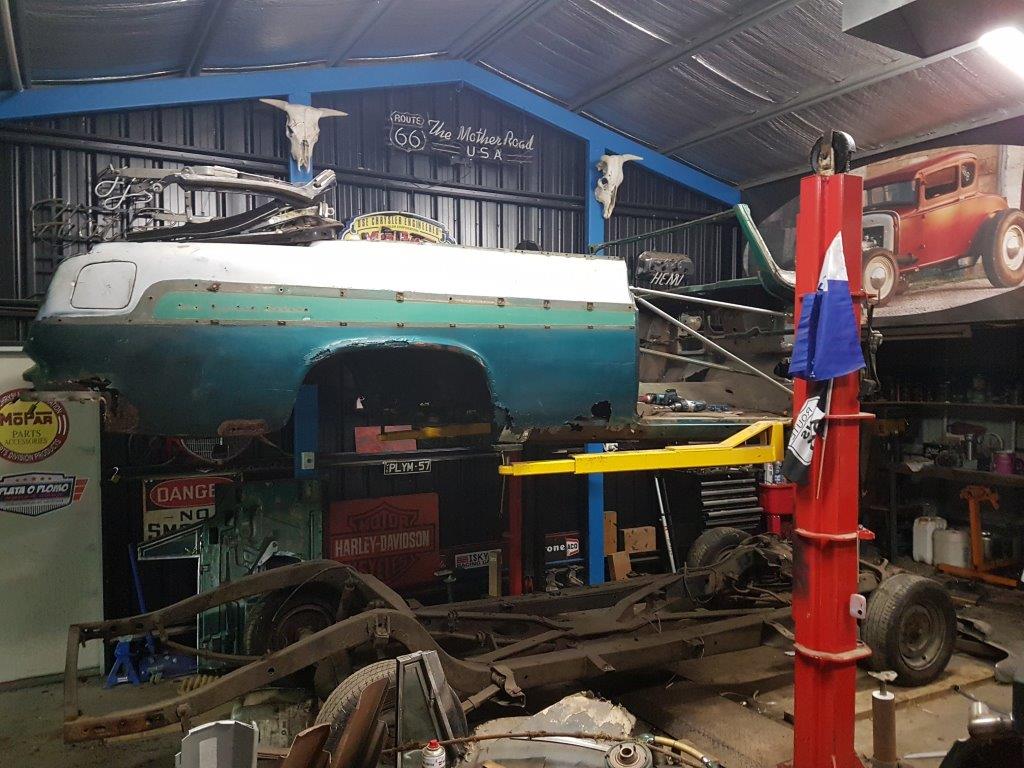
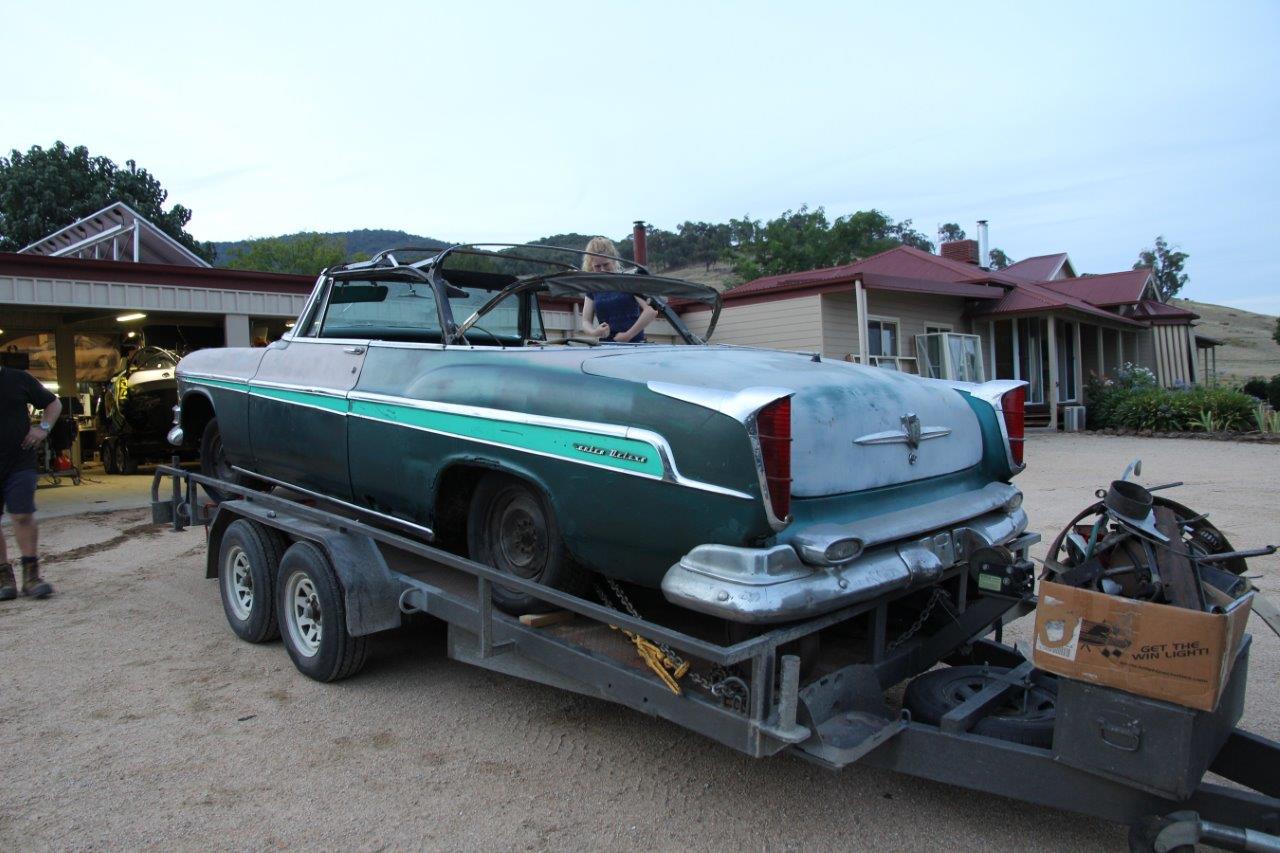
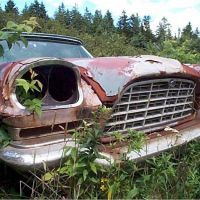
Its a big job, has a lot of rust in sections and other parts and really nice.
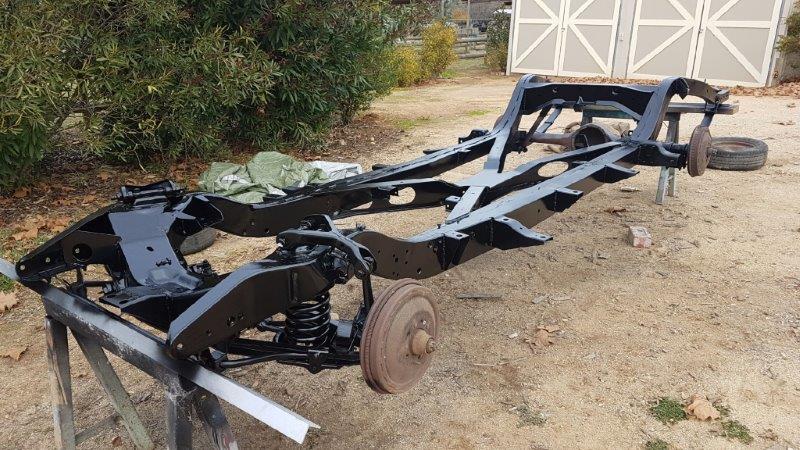
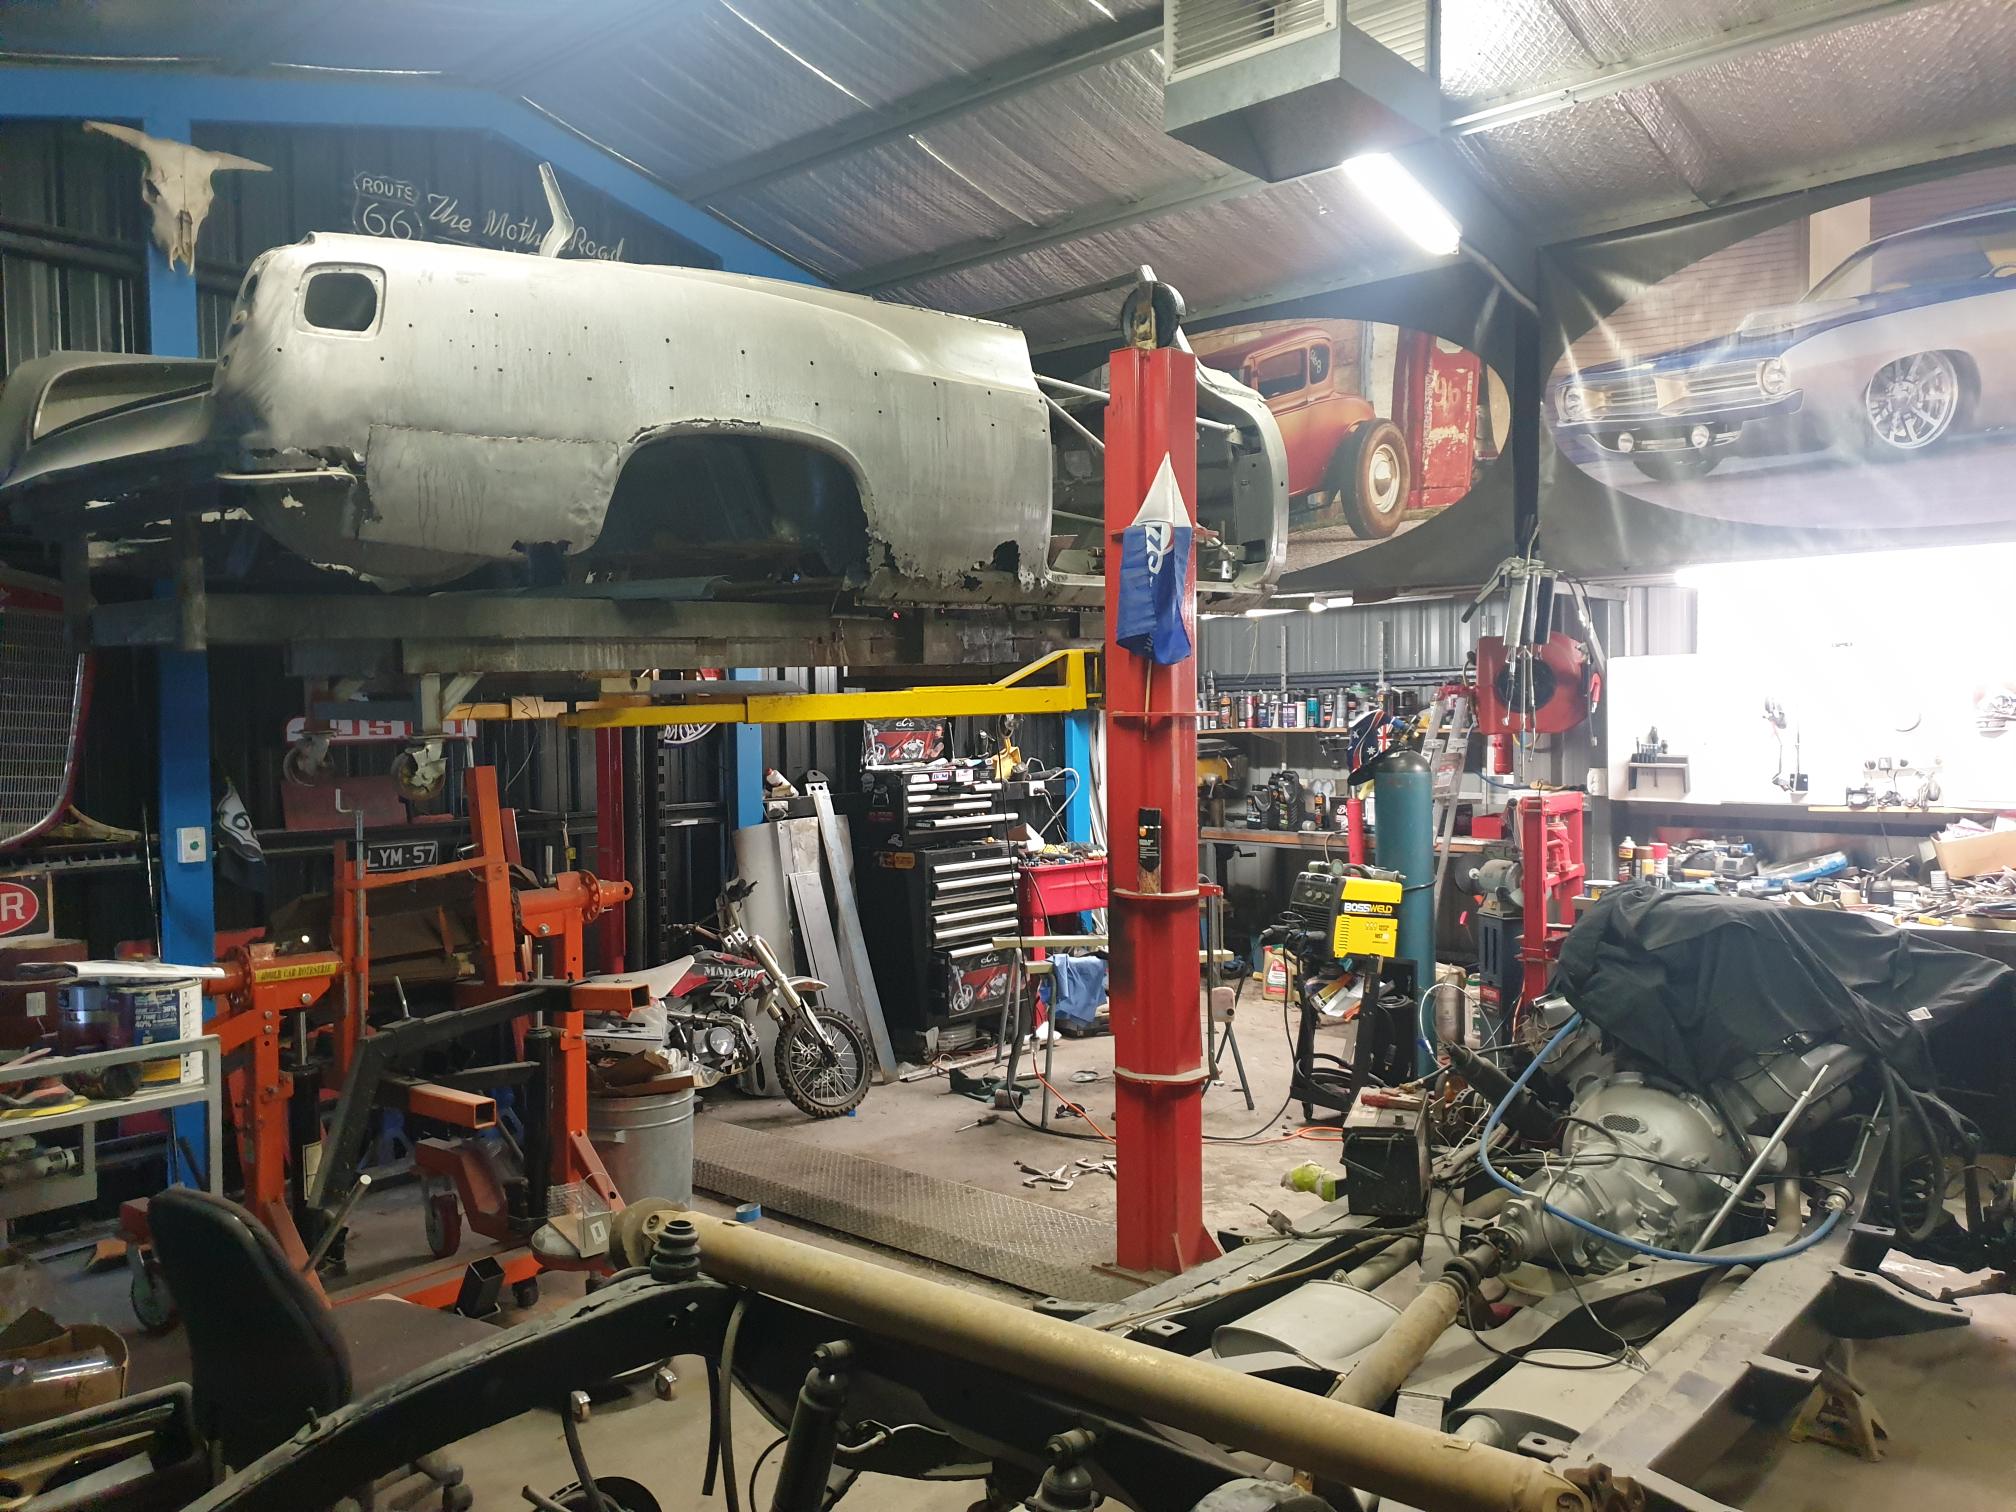
I finally separated the chassis and body last night so
these 2 main parts can go off on there different paths
The chassis is going to be soda blasted then I will POR it black
The body I want to submerg in rust / paint removal tank - which a business does close by
its is water based solution and seals the steel once done
The engine is 20" over and never been fired I can see the new piston tops now the spark plug hole
so once the chassis is painted I will bolt up the motor / trans and they can sit for a while
The body will once back from being dunked will start on the repairs
Seat frames stripped have been powder coated and ready for Trimmers
let the fun begin!!!
 (1955 Chrysler 2.jpg) (1955 Chrysler 2.jpg)
 (DSC_7703.JPG) (DSC_7703.JPG)
 (20180423_213704_resized.jpg) (20180423_213704_resized.jpg)
 (20180423_213932_resized.jpg) (20180423_213932_resized.jpg)
 (55 2_resized.jpg) (55 2_resized.jpg)
 (55 3_resized.jpg) (55 3_resized.jpg)
Attachments
----------------
 1955 Chrysler 2.jpg (360KB - 464 downloads) 1955 Chrysler 2.jpg (360KB - 464 downloads)
DSC_7703.JPG (129KB - 477 downloads)
20180423_213704_resized.jpg (157KB - 433 downloads)
20180423_213932_resized.jpg (137KB - 454 downloads)
55 2_resized.jpg (161KB - 454 downloads)
55 3_resized.jpg (146KB - 435 downloads)
|
|
| |
|

Expert 5K+
Posts: 9666
  
Location: So. Cal | Nice project. I like the green combo too. Original '55-'56 convertibles don't turn up very often. A 354 is gonna feel better than the 331 anyway, and it won't look any different, so all is good. |
|
| |
|
Expert
Posts: 2196
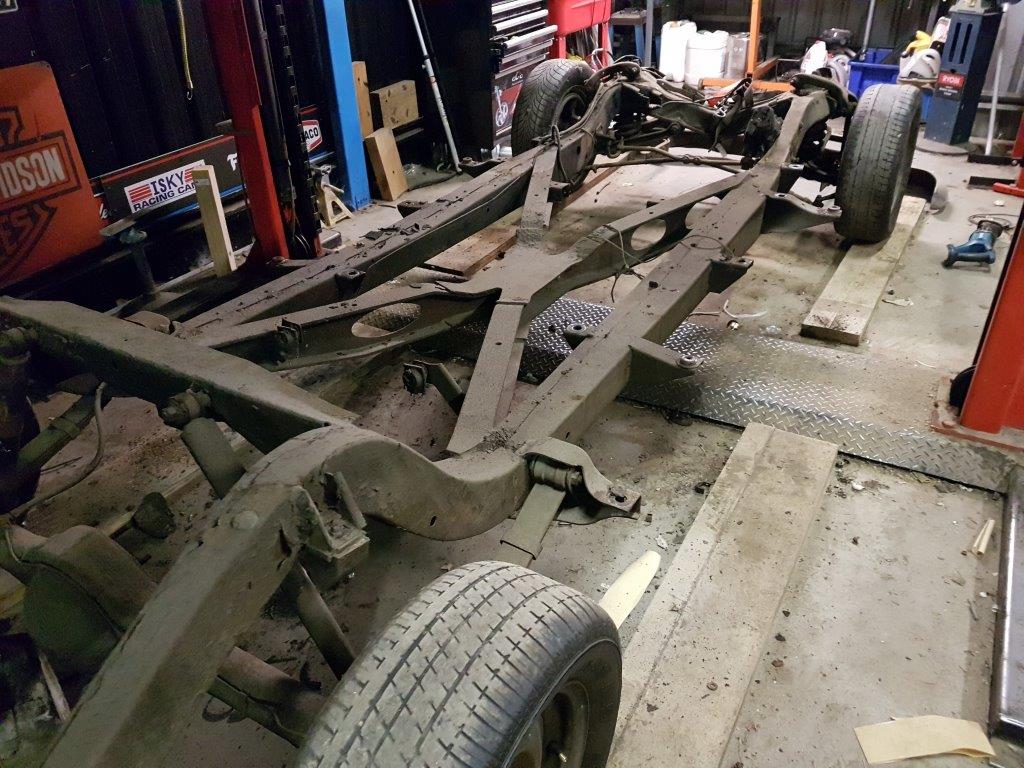
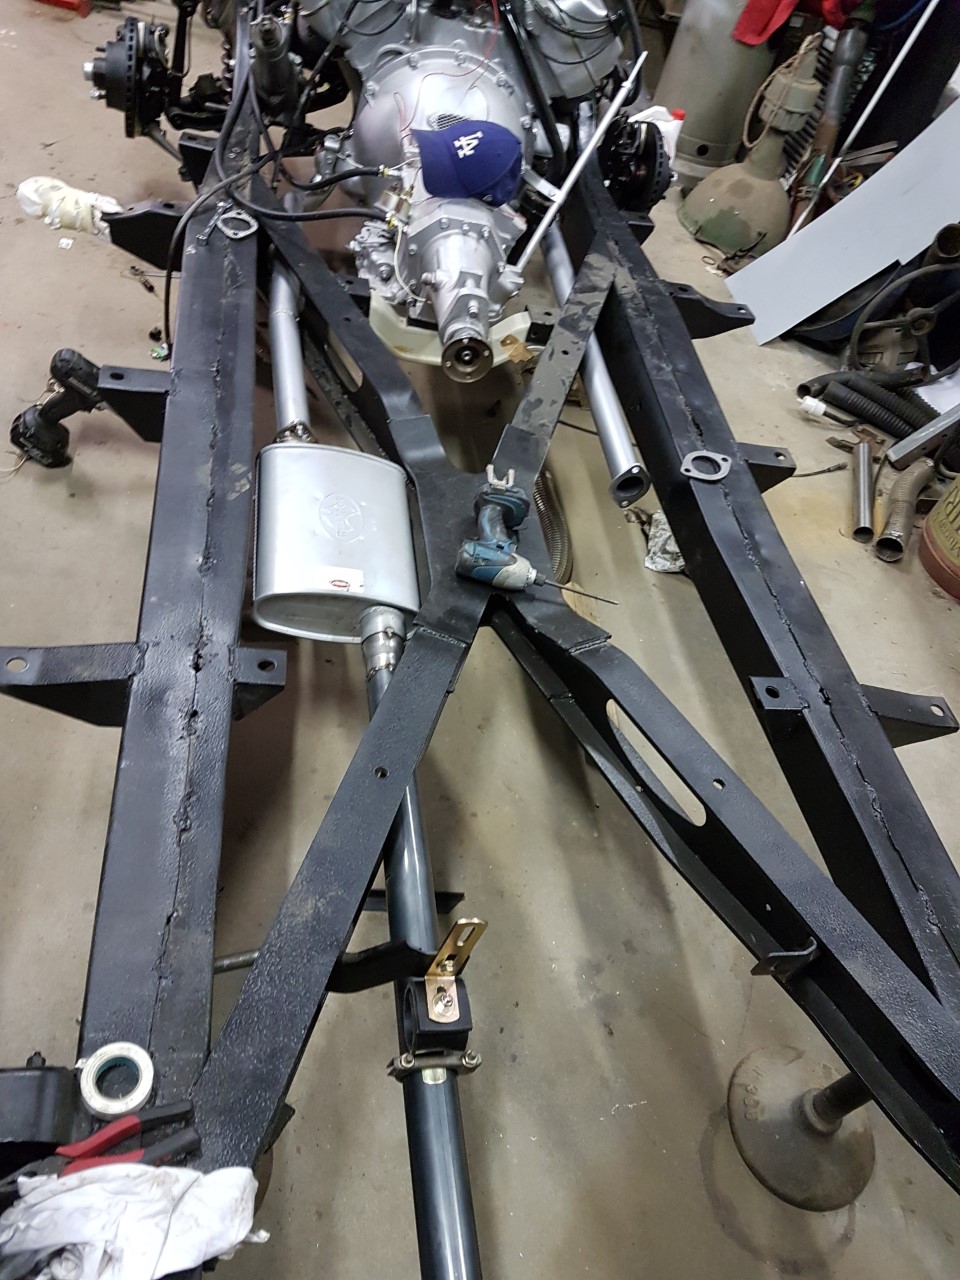
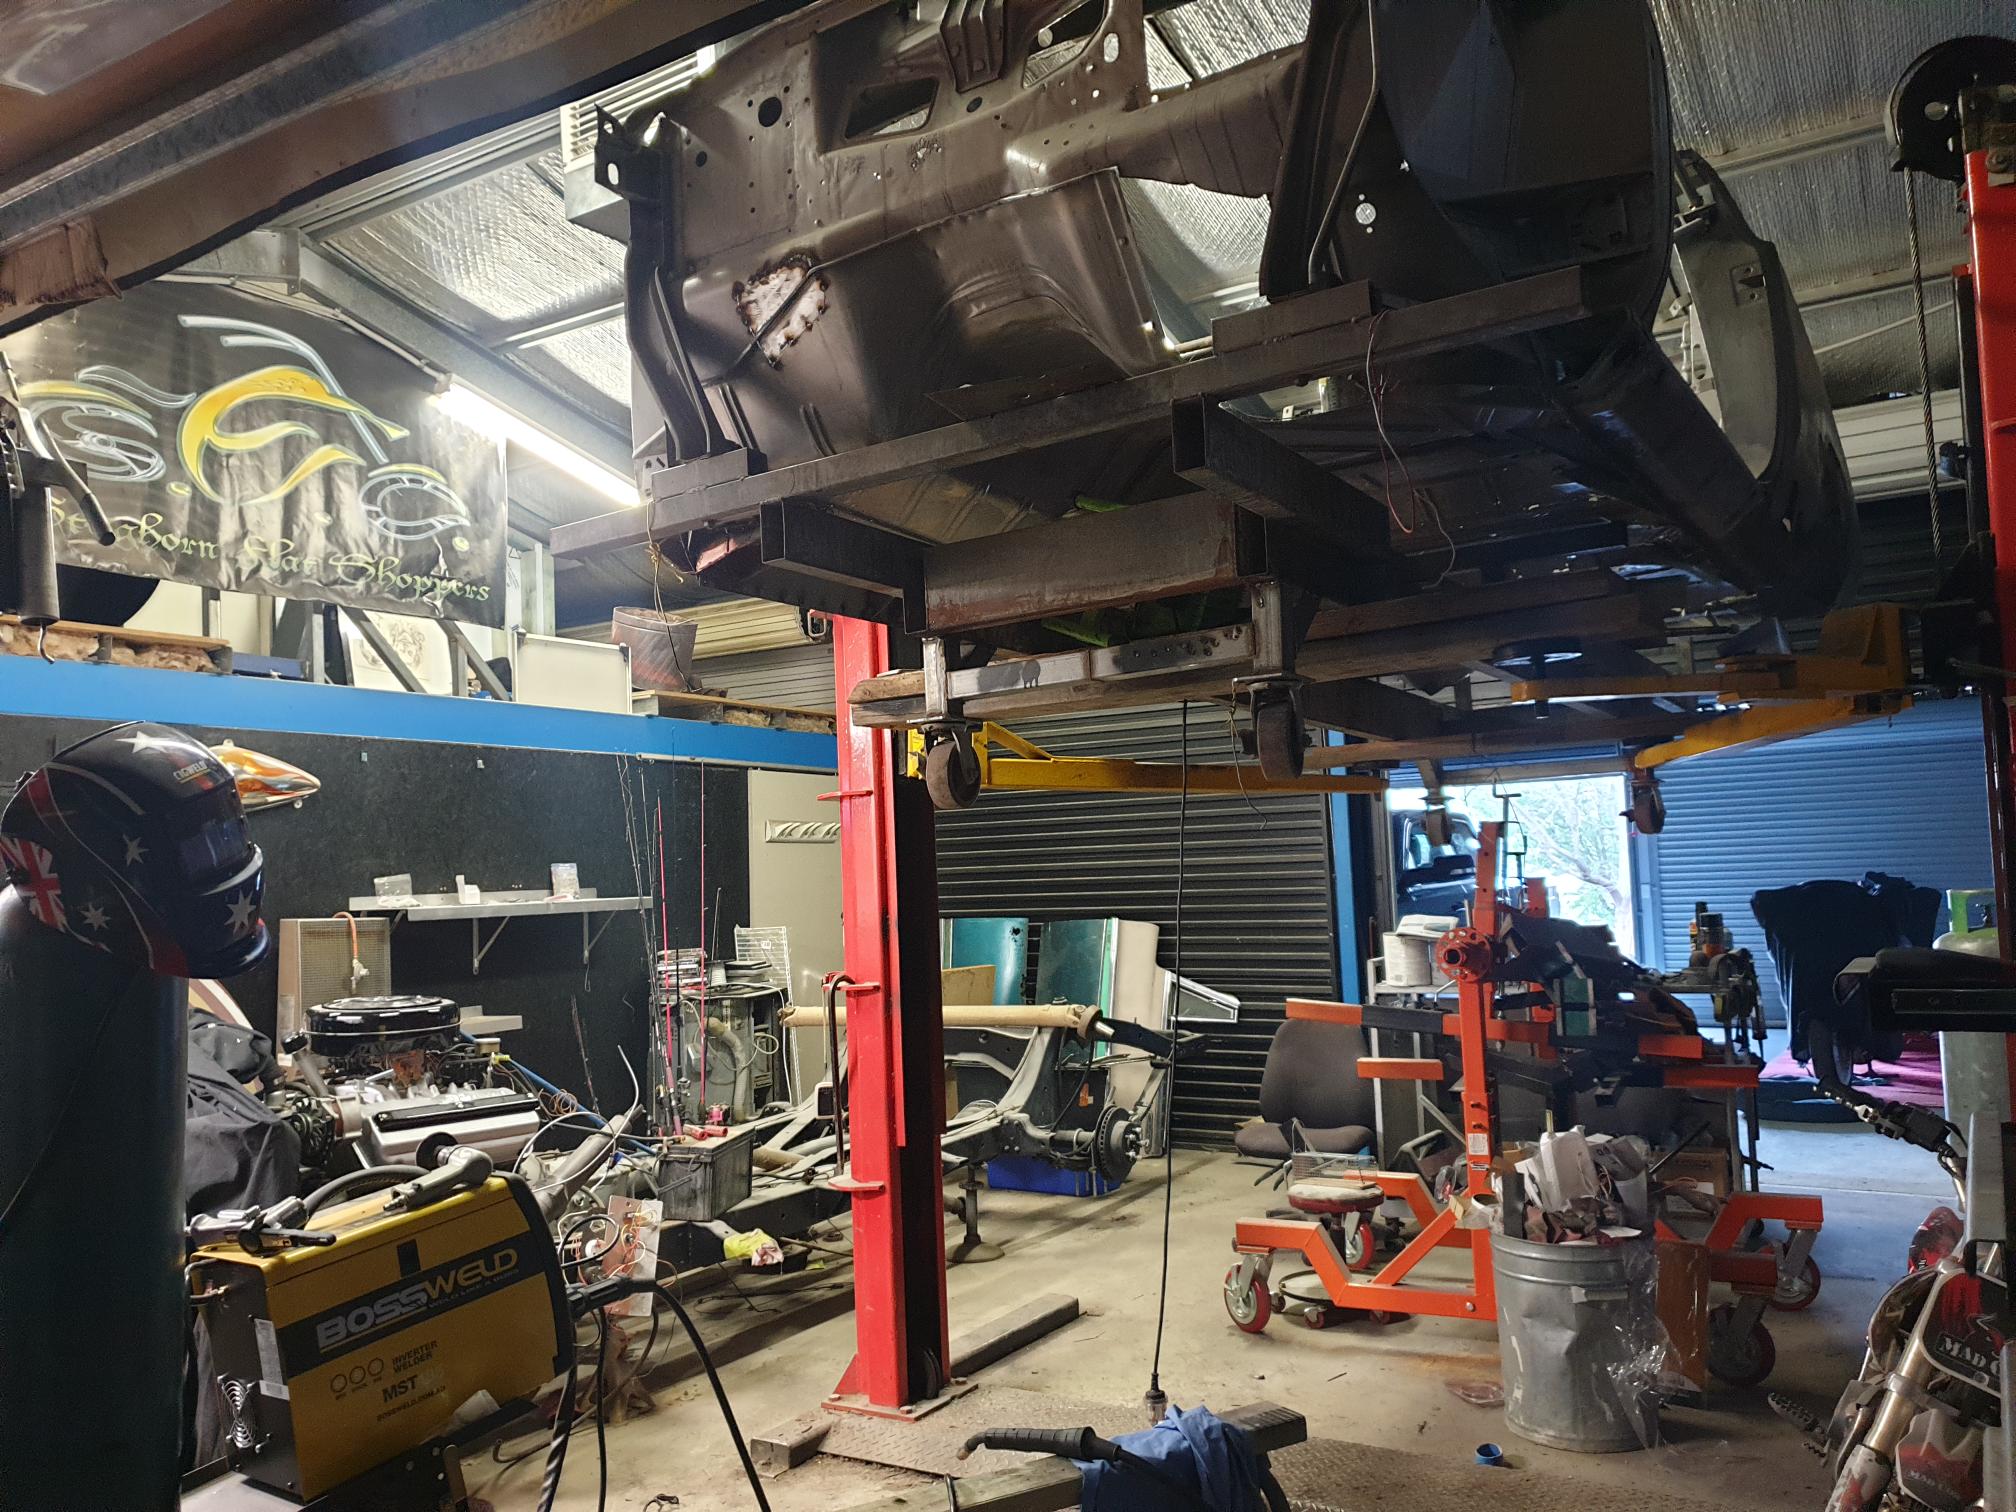
Location: Muskego, WI | I love how Chrysler put those huge X members in the convertible frames as if the standard, fully boxed frame wasn't already rigid enough. Really cool project, very rare car. |
|
| |
|
Extreme Veteran
Posts: 444
Location: Victoria, AUSTRALIA | funny you say that the "X" part material thickness is crazy - bridge "I" beam type thick 
and its cool is had holes for the exhaust |
|
| |
|
Expert 5K+
Posts: 9902
Location: Lower Mainland BC | jboymechanic - 2018-04-23 11:18 PM
I love how Chrysler put those huge X members in the convertible frames as if the standard, fully boxed frame wasn't already rigid enough. Really cool project, very rare car.
Agree.
I think you could win a bar bet based on suggesting that convertibles were heavier than say, two door hardtops. Most people would assume that because they removed the roof, the convertible has to be lighter than the coupe. Not so Virginia. That massive X-member more than makes up for the weight lost when the roof is deleted.
Not sure if the data books list the weights to back this up. 
: |
|
| |
|
Expert 5K+
Posts: 9666
Location: So. Cal | Not to mention all the hydraulics and mechanism for the convertible roof which isn't that light. |
|
| |
|

Location: Under the X in Texas | And the convertible frame significantly lowers the center of gravity of the car. That was why Carl Kiekhaefer did frame swaps in his '56 race cars: lower CG as well as added rigidity. For his '57 Road America competition models, he specified the convertible frame in two hardtops AND had the factory do the engine compartment cradle frame full welded instead of stitch welded AND had boxing plates installed at the factory in both the front and rear C-channel cross members. There were many reasons Kiekhaefer dominated NASCAR.
|
|
| |
|
Extreme Veteran
Posts: 444
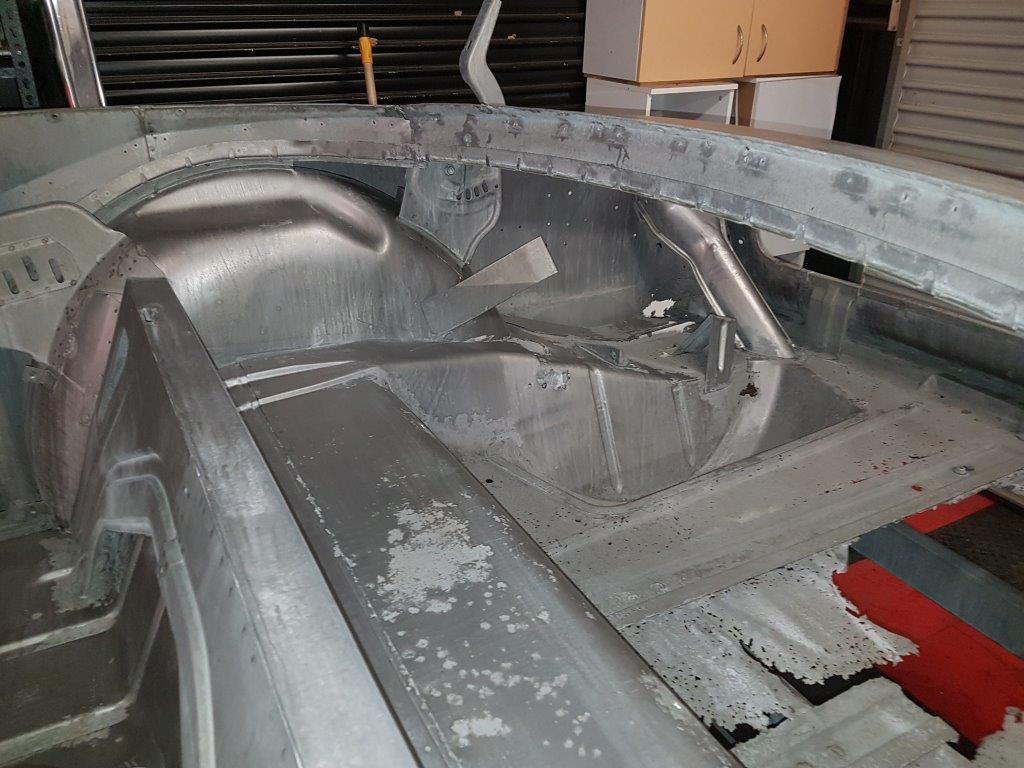
Location: Victoria, AUSTRALIA | update
just got the body back from a complete submerged stripping process. Its an alkaline chemical cleaning solution
removes all old paint, filler, rust. its great to see what I have to deal with now. it does treat the steel so it does not rust straight away again
I will epoxy prime the body then get started, big job but its only steel and I have plenty of time 
will send images of the chassis, its been stripped painted and has the motor and tranny back in
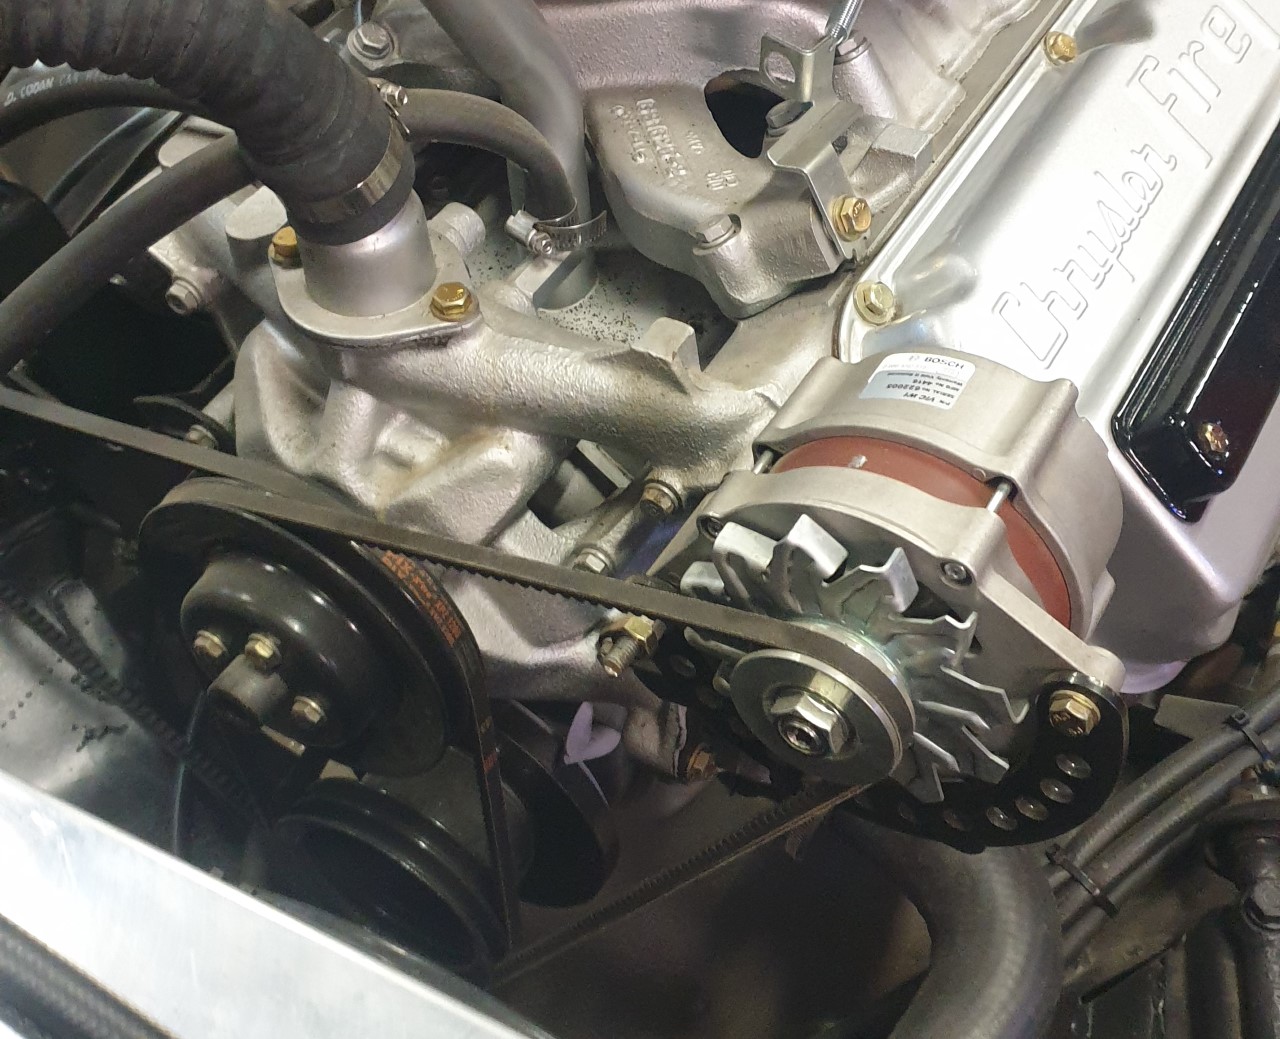
Front end has Disc Brakes and converting the generator / pump to an alternator and GM style pump
from now its all down hill - there is no backwards from today
Attachments
----------------
Resized_20180911_140530_1536639126096.jpeg (289KB - 427 downloads)
Resized_20180911_140522_1536639126140.jpeg (224KB - 446 downloads)
|
|
| |
|
Extreme Veteran
Posts: 444
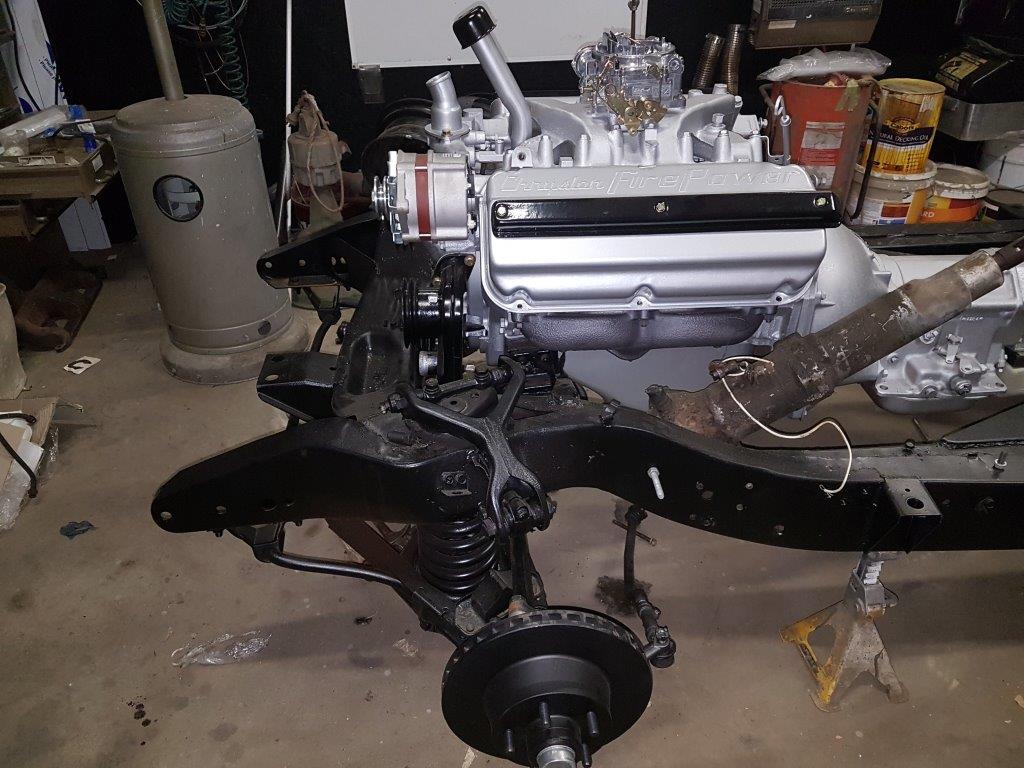
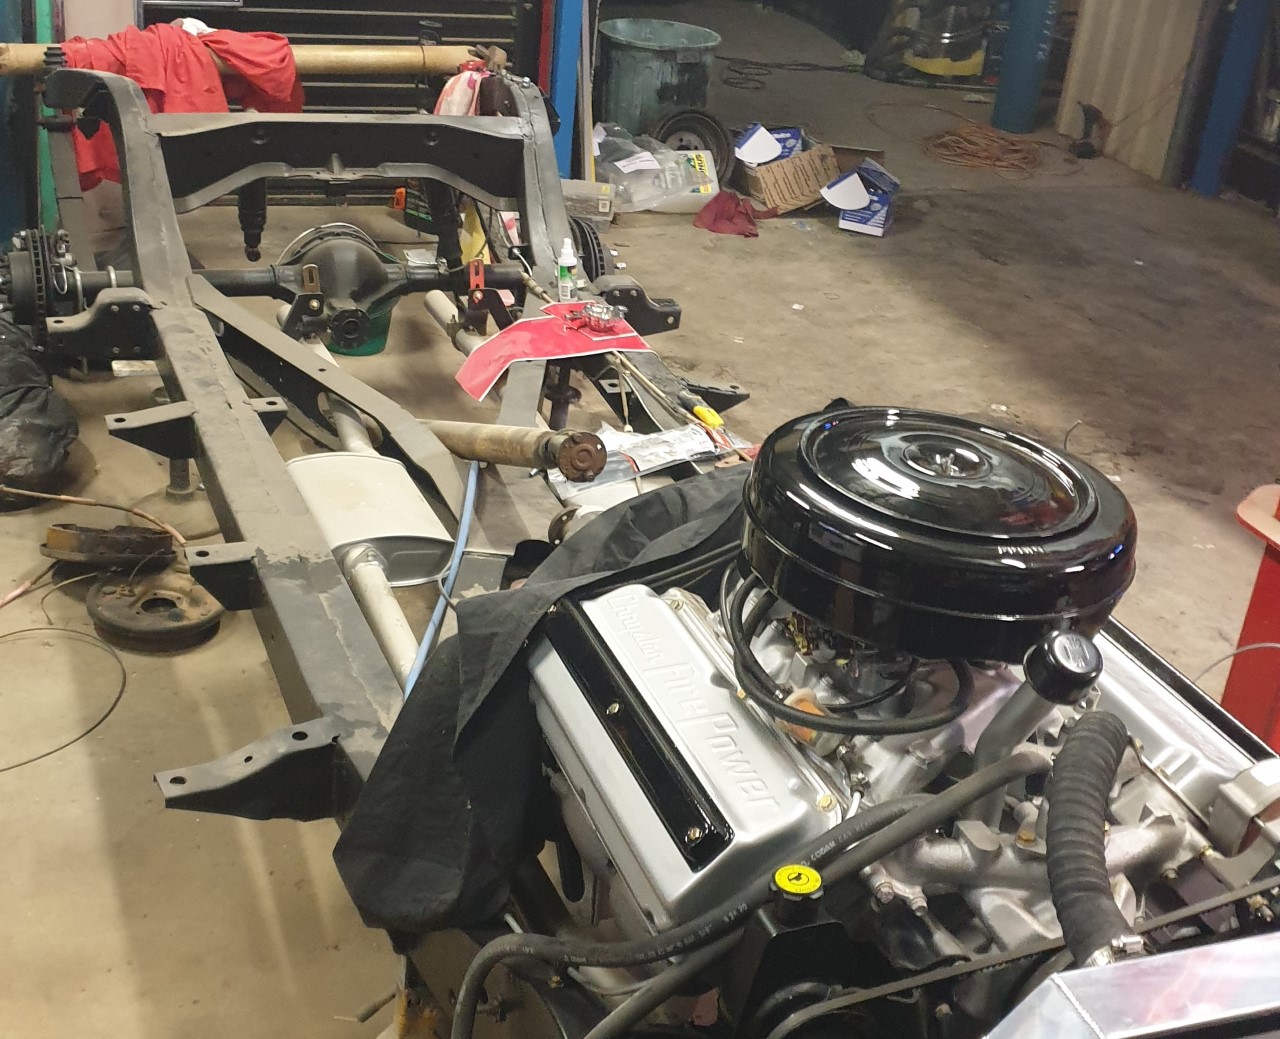
Location: Victoria, AUSTRALIA | The frame was stripped and painted in a satin black
frame was in really good condition
painted the engine and trans which had previously been rebuilt and not fired
looking down spark plug hole can see new pistons .020
will show picks of motor in frame tomorrow
 (Resized_20180603_131858.jpg) (Resized_20180603_131858.jpg)
Attachments
----------------
Resized_20180724_071130_1936.jpeg (437KB - 429 downloads)
Resized_20180618_214209.jpeg (246KB - 434 downloads)
Resized_20180618_214219.jpeg (267KB - 445 downloads)
Resized_20180603_131858.jpg (108KB - 419 downloads)
|
|
| |
|
Location: North Australia | Nice work Knighty! Cant wait to see more pics. That chassis looks awesome. It looks like it weighs a ton. I saw this car for sale (ages ago) and thought it was a good deal for such a rare car. How are you going to do the brakes?
Steve
Edited by 60 Imp 2018-09-17 1:04 AM
|
|
| |
|
Expert 5K+
Posts: 5006
| holy mackerel that's a ton of work.
Worth it yes... Converts are super rare and in the end even worth the money to restore...
Cant believe one even exists down under. |
|
| |
|
Extreme Veteran
Posts: 444
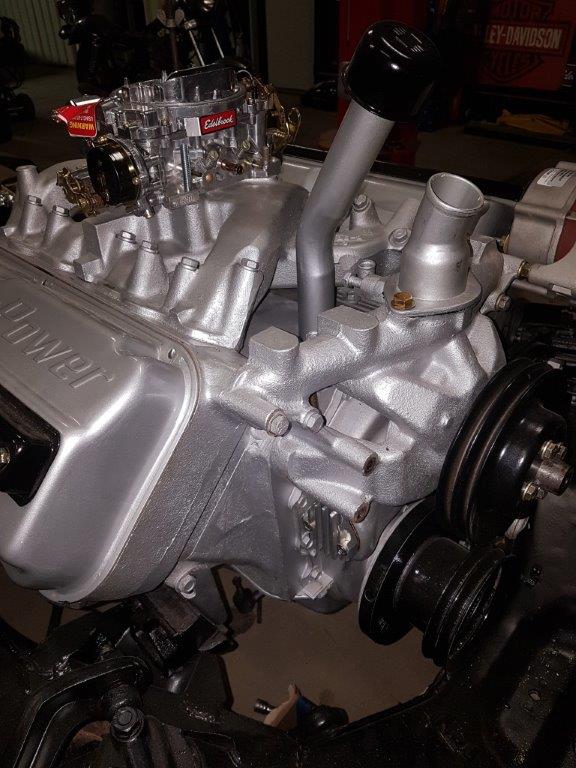
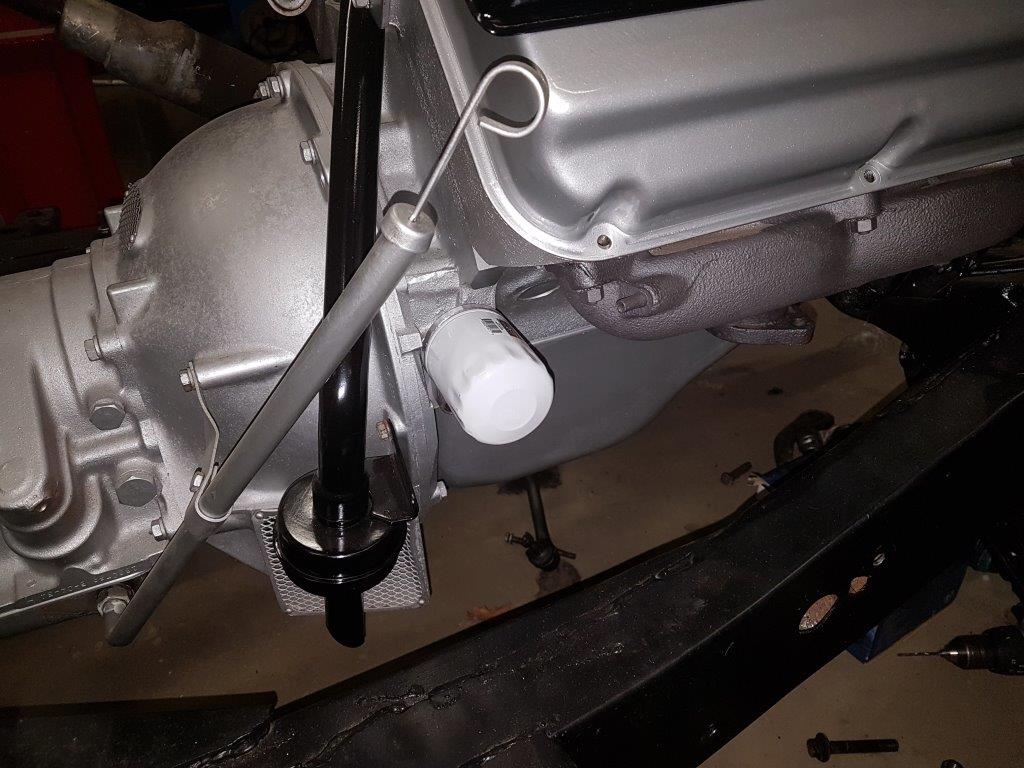
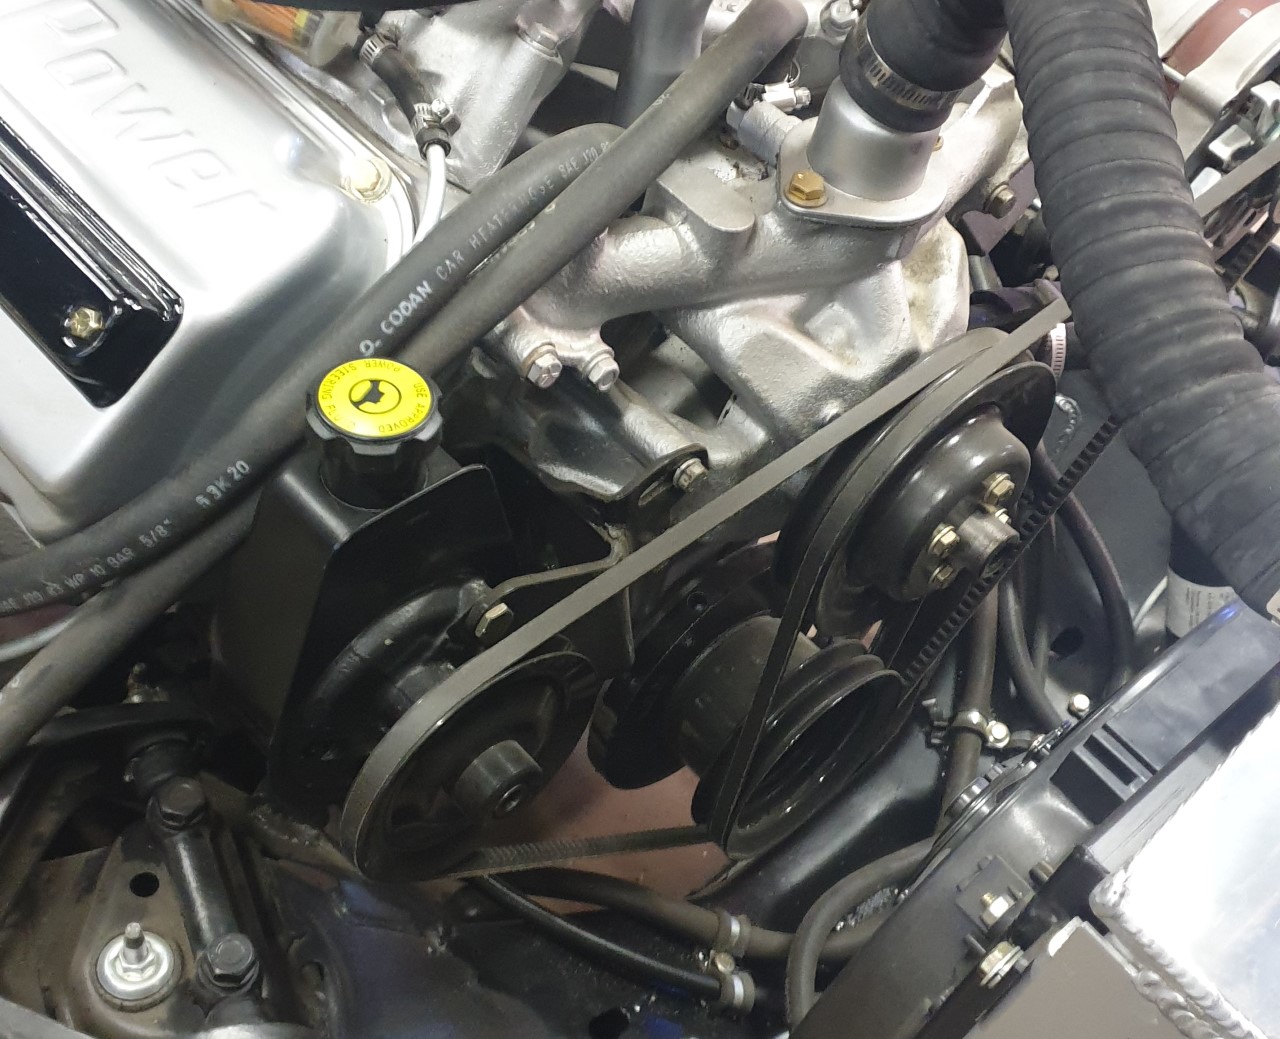
Location: Victoria, AUSTRALIA | The engine I fitted a spin on oil filter and fuel pump block off ( will run electric pump )
also in the process of fitting a Alternator and new style Power steering pump.
I haven;t finished it yet but the oil bath filter will be modified to take element filter.
New 1406 Edelbrock carb is going on
The Brakes I purchased an adaptor kit to fit common ford front Rotors
and GM PBR Bracket calipers
 (20180917_193738_resized.jpg) (20180917_193738_resized.jpg)
 (20180917_193819_resized.jpg) (20180917_193819_resized.jpg)
 (20180917_193840_resized.jpg) (20180917_193840_resized.jpg)
 (20180917_193858_resized.jpg) (20180917_193858_resized.jpg)
Attachments
----------------
20180917_193738_resized.jpg (86KB - 424 downloads)
20180917_193819_resized.jpg (128KB - 420 downloads)
20180917_193840_resized.jpg (80KB - 427 downloads)
20180917_193858_resized.jpg (115KB - 443 downloads)
|
|
| |
|
Extreme Veteran
Posts: 444
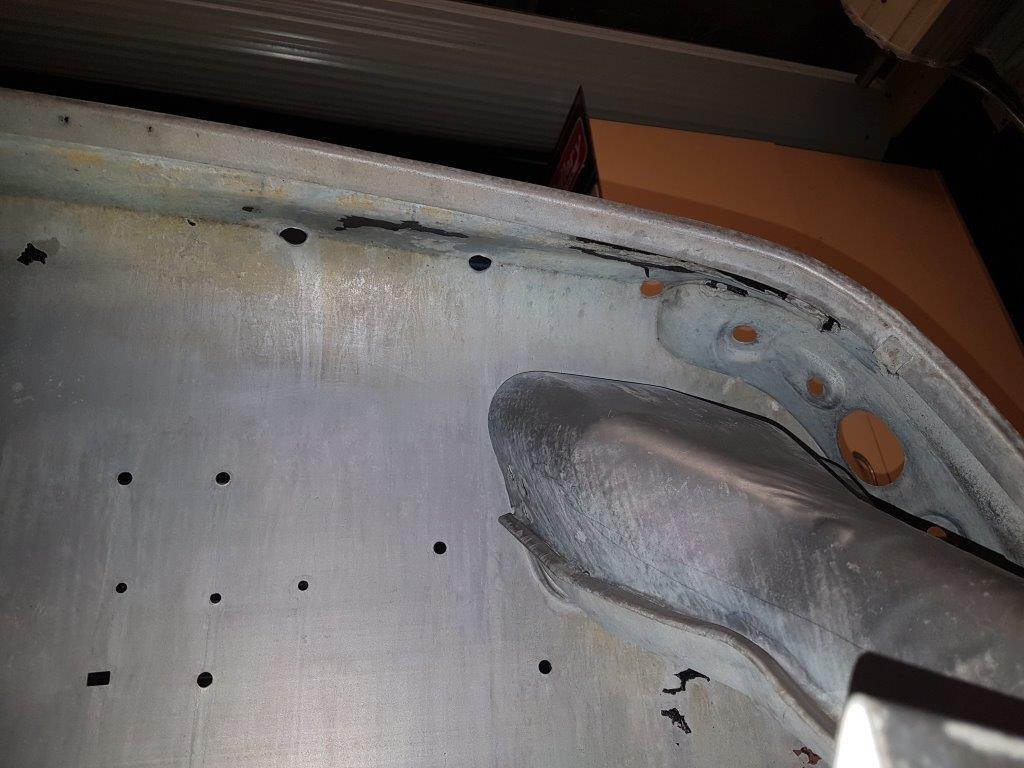
Location: Victoria, AUSTRALIA | The Alkaline body submersion while it was costly,
in the long run not really, this has saved hours and hours also $$ on paint stripper
and in places I could never reach so for a car like this, any really that have had a bad life
is the way to go,
 (20180917_193357_resized.jpg) (20180917_193357_resized.jpg)
 (20180917_193410_resized.jpg) (20180917_193410_resized.jpg)
 (20180917_193436_resized.jpg) (20180917_193436_resized.jpg)
 (20180917_193417_resized.jpg) (20180917_193417_resized.jpg)
Attachments
----------------
20180917_193357_resized.jpg (131KB - 427 downloads)
20180917_193410_resized.jpg (122KB - 431 downloads)
20180917_193436_resized.jpg (97KB - 421 downloads)
20180917_193417_resized.jpg (116KB - 423 downloads)
|
|
| |
|
Expert
Posts: 1730
Location: Michigan | Tim did all those parts arrive safely? I sold you the convertible parts I had for the project. Glad to see them going to use! |
|
| |
|
Extreme Veteran
Posts: 444
Location: Victoria, AUSTRALIA | Hey Mark, sorry for the late reply, yep sure did, with the parts to be rechromed / repaired / repolished LOL
will come in handy for sure thank you
Fired up the Hemi this week will post more images later Chassis is almost done ready to start the body
hope all is well
|
|
| |
|
Expert
Posts: 1730
Location: Michigan | indeed! please post pictures or video on youtube. love to see progress. its inspiring when it's cold as hell here and you dont want to work outside |
|
| |
|
Extreme Veteran
Posts: 444
Location: Victoria, AUSTRALIA | been a bit slow on the resto.
since this photo I have the exhaust system run to the diff
The power steering and alternator are all connected and I have ran the cam in
with excellent oil pressure - I used a drill to pre-oil the engine first.
I have a spin on oil filter in use as well
The stock air cleaner I modified to use a standard paper filter and
drill holes in the back and underneath.
I have to get a drive shaft made to suit the trans / diff combo.
I 'm not used the transmission "E" brake I will use that
probably a trunion ball joint tranny end and normal uni joint at diff.
the front and rear are all disc brakes now
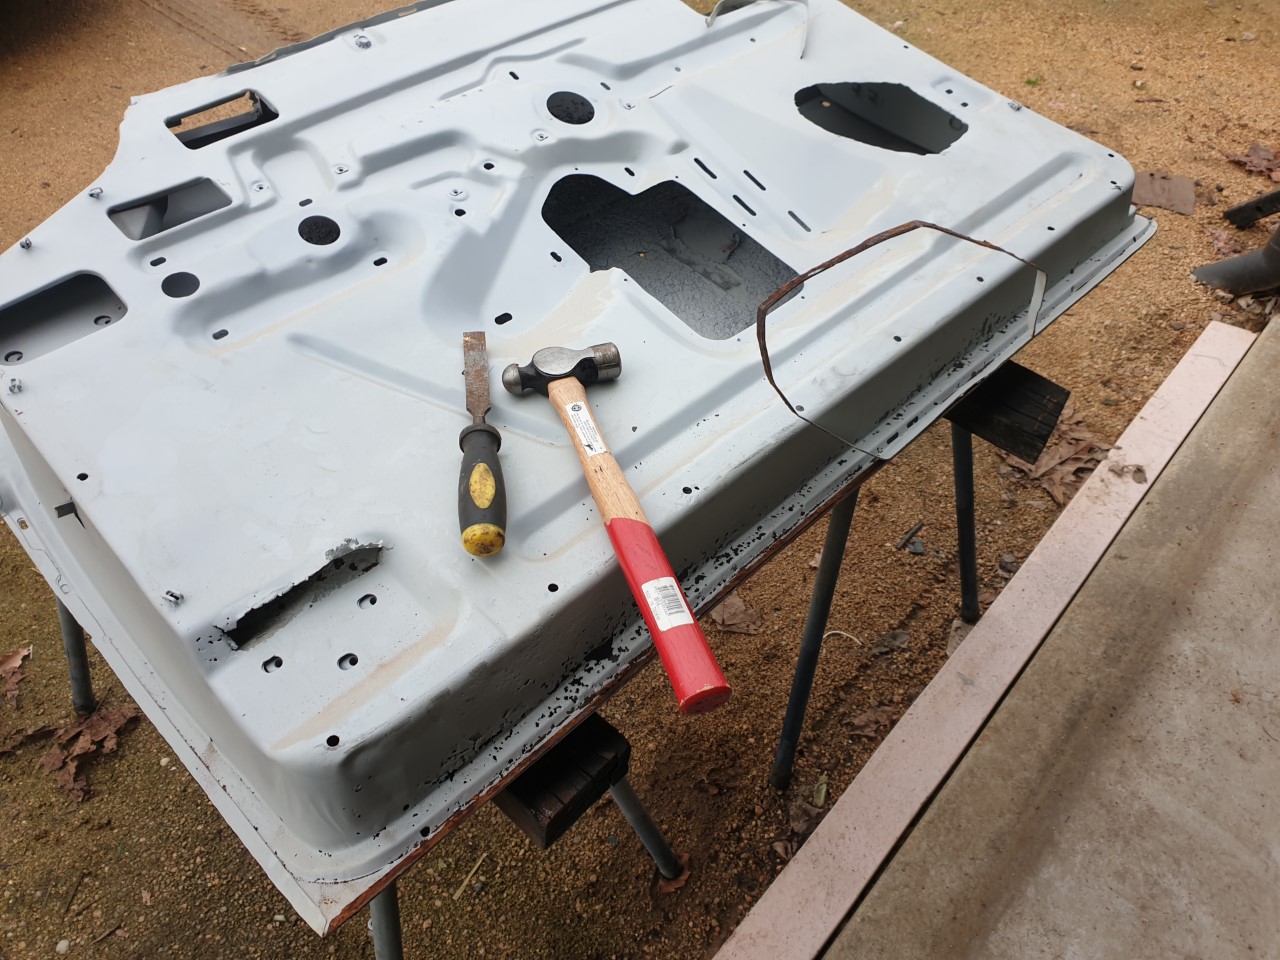
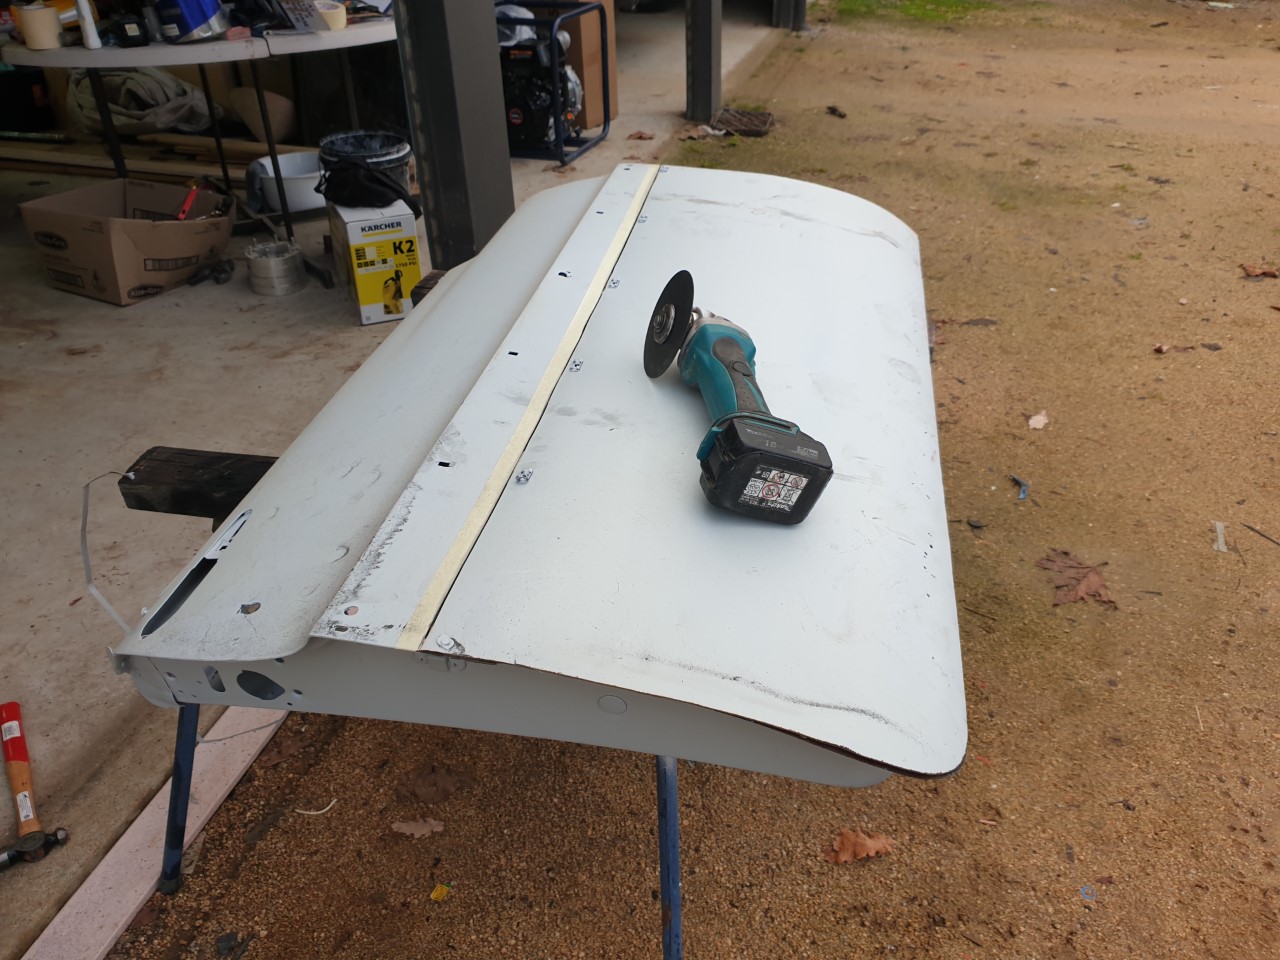
then I started on the doors. I cut the bottom half door skins off and sill get some new skins folded
The bottoms of the doors need to be replaced also.
Good doors are hard to find not rusty but in the overall scheme of things the doors are the easy part
will post more in the following weeks
 (thumbnail_20190109_215507.jpg) (thumbnail_20190109_215507.jpg)
 (thumbnail_20200328_225005.jpg) (thumbnail_20200328_225005.jpg)
 (thumbnail_20200328_225010.jpg) (thumbnail_20200328_225010.jpg)
 (thumbnail_20200328_225020.jpg) (thumbnail_20200328_225020.jpg)
 (thumbnail_20200328_225024.jpg) (thumbnail_20200328_225024.jpg)
 (thumbnail_20200815_170939.jpg) (thumbnail_20200815_170939.jpg)
 (thumbnail_20200815_171656.jpg) (thumbnail_20200815_171656.jpg)
Attachments
----------------
thumbnail_20190109_215507.jpg (288KB - 329 downloads)
thumbnail_20200328_225005.jpg (360KB - 336 downloads)
thumbnail_20200328_225010.jpg (291KB - 342 downloads)
thumbnail_20200328_225020.jpg (273KB - 351 downloads)
thumbnail_20200328_225024.jpg (312KB - 331 downloads)
thumbnail_20200815_170939.jpg (295KB - 342 downloads)
thumbnail_20200815_171656.jpg (258KB - 319 downloads)
|
|
| |
|
Location: North Australia | Bloody good one Knighty. Keep the updates coming, you might have the only one in OZ? Steve. |
|
| |
|
Extreme Veteran
Posts: 444
Location: Victoria, AUSTRALIA | Hey Steve
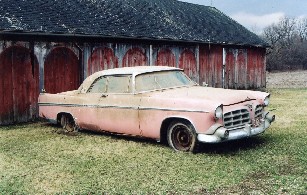
thanks for the comment, I have seen 1 other. It was teal and white for sale justcars or something, I tried to contact the seller just to talk but got no response
I said I would never do another rare car again but here I am, a sucker for punishment I guess |
|
| |
|
Expert
Posts: 1730
Location: Michigan | Glad to see the progress!
|
|
| |
|
Expert
Posts: 1890
| .
Hello Tim.
I’m interested in decoding 1955-56 Chrysler cowl tags and have some results.
Here the link:
http://www.forwardlook.net/forums/forums/thread-view.asp?tid=74258&...
Judging to the serial number your car was built in Detroit.
Can you post your cowl tag picture please?
It maybe consist the unknown optional codes.
Thanks.
|
|
| |
|
Extreme Veteran
Posts: 444
Location: Victoria, AUSTRALIA | Thanks Mark
tk
|
|
| |
|
Extreme Veteran
Posts: 444
Location: Victoria, AUSTRALIA | HI Igor
I don't think I have a cowl tag, I will check at home in the box of parts
I did order a build sheet from Chrysler which was great which showed all the options the vehicle came with |
|
| |
|
Member
Posts: 27
| That my friend is going to be one awesome rare New Yorker! Keep up the good work! |
|
| |
|
Extreme Veteran
Posts: 444
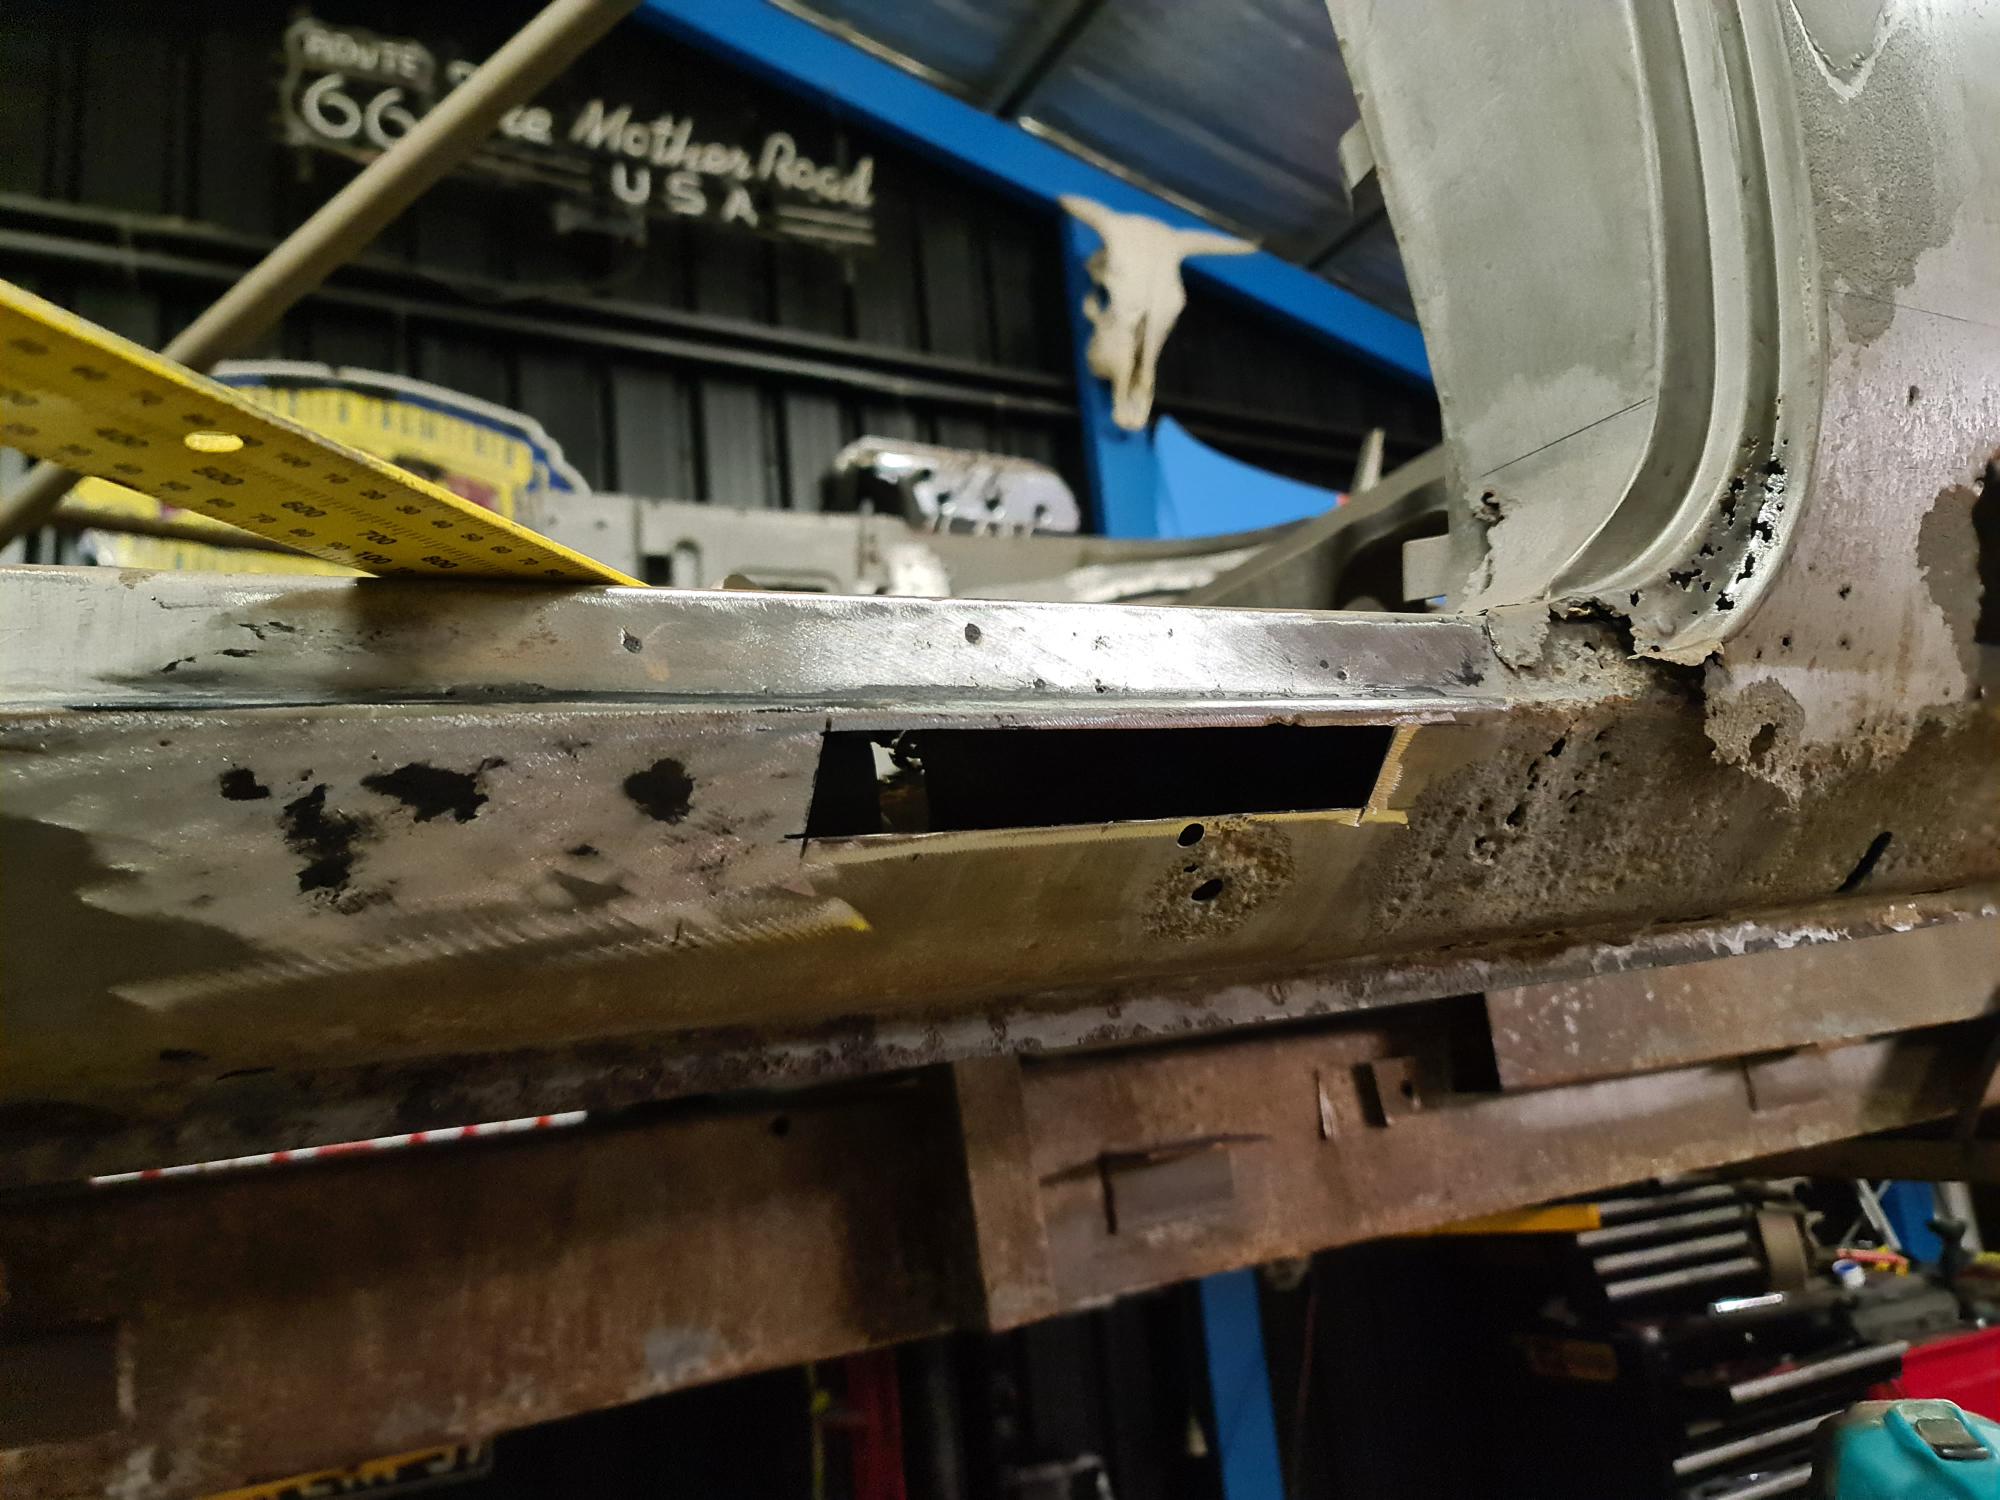
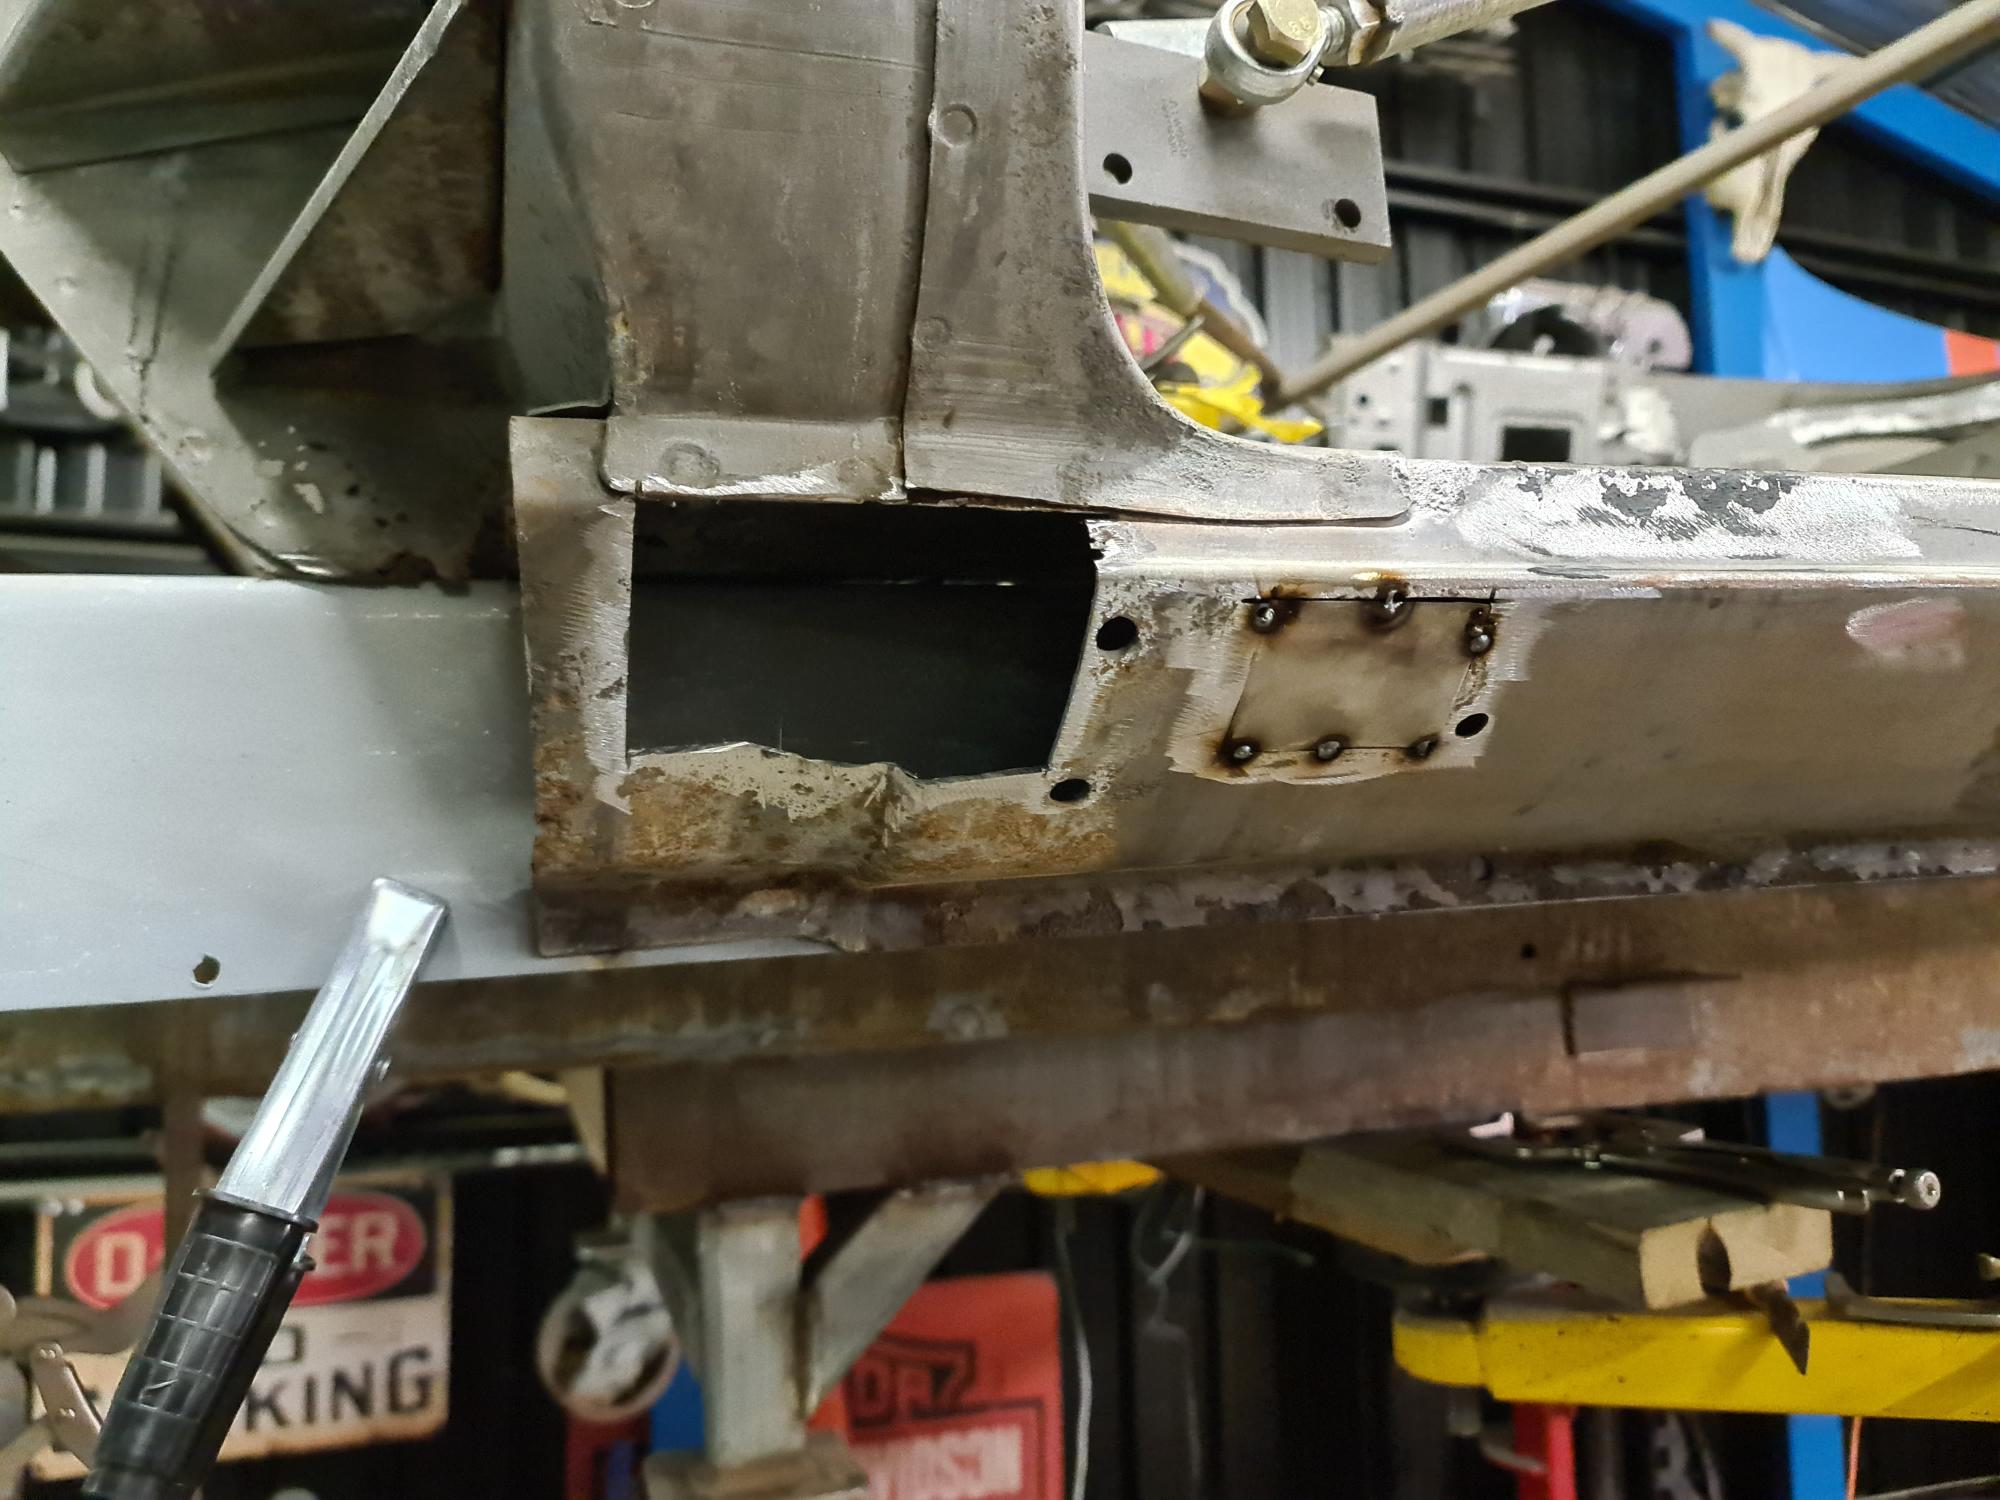
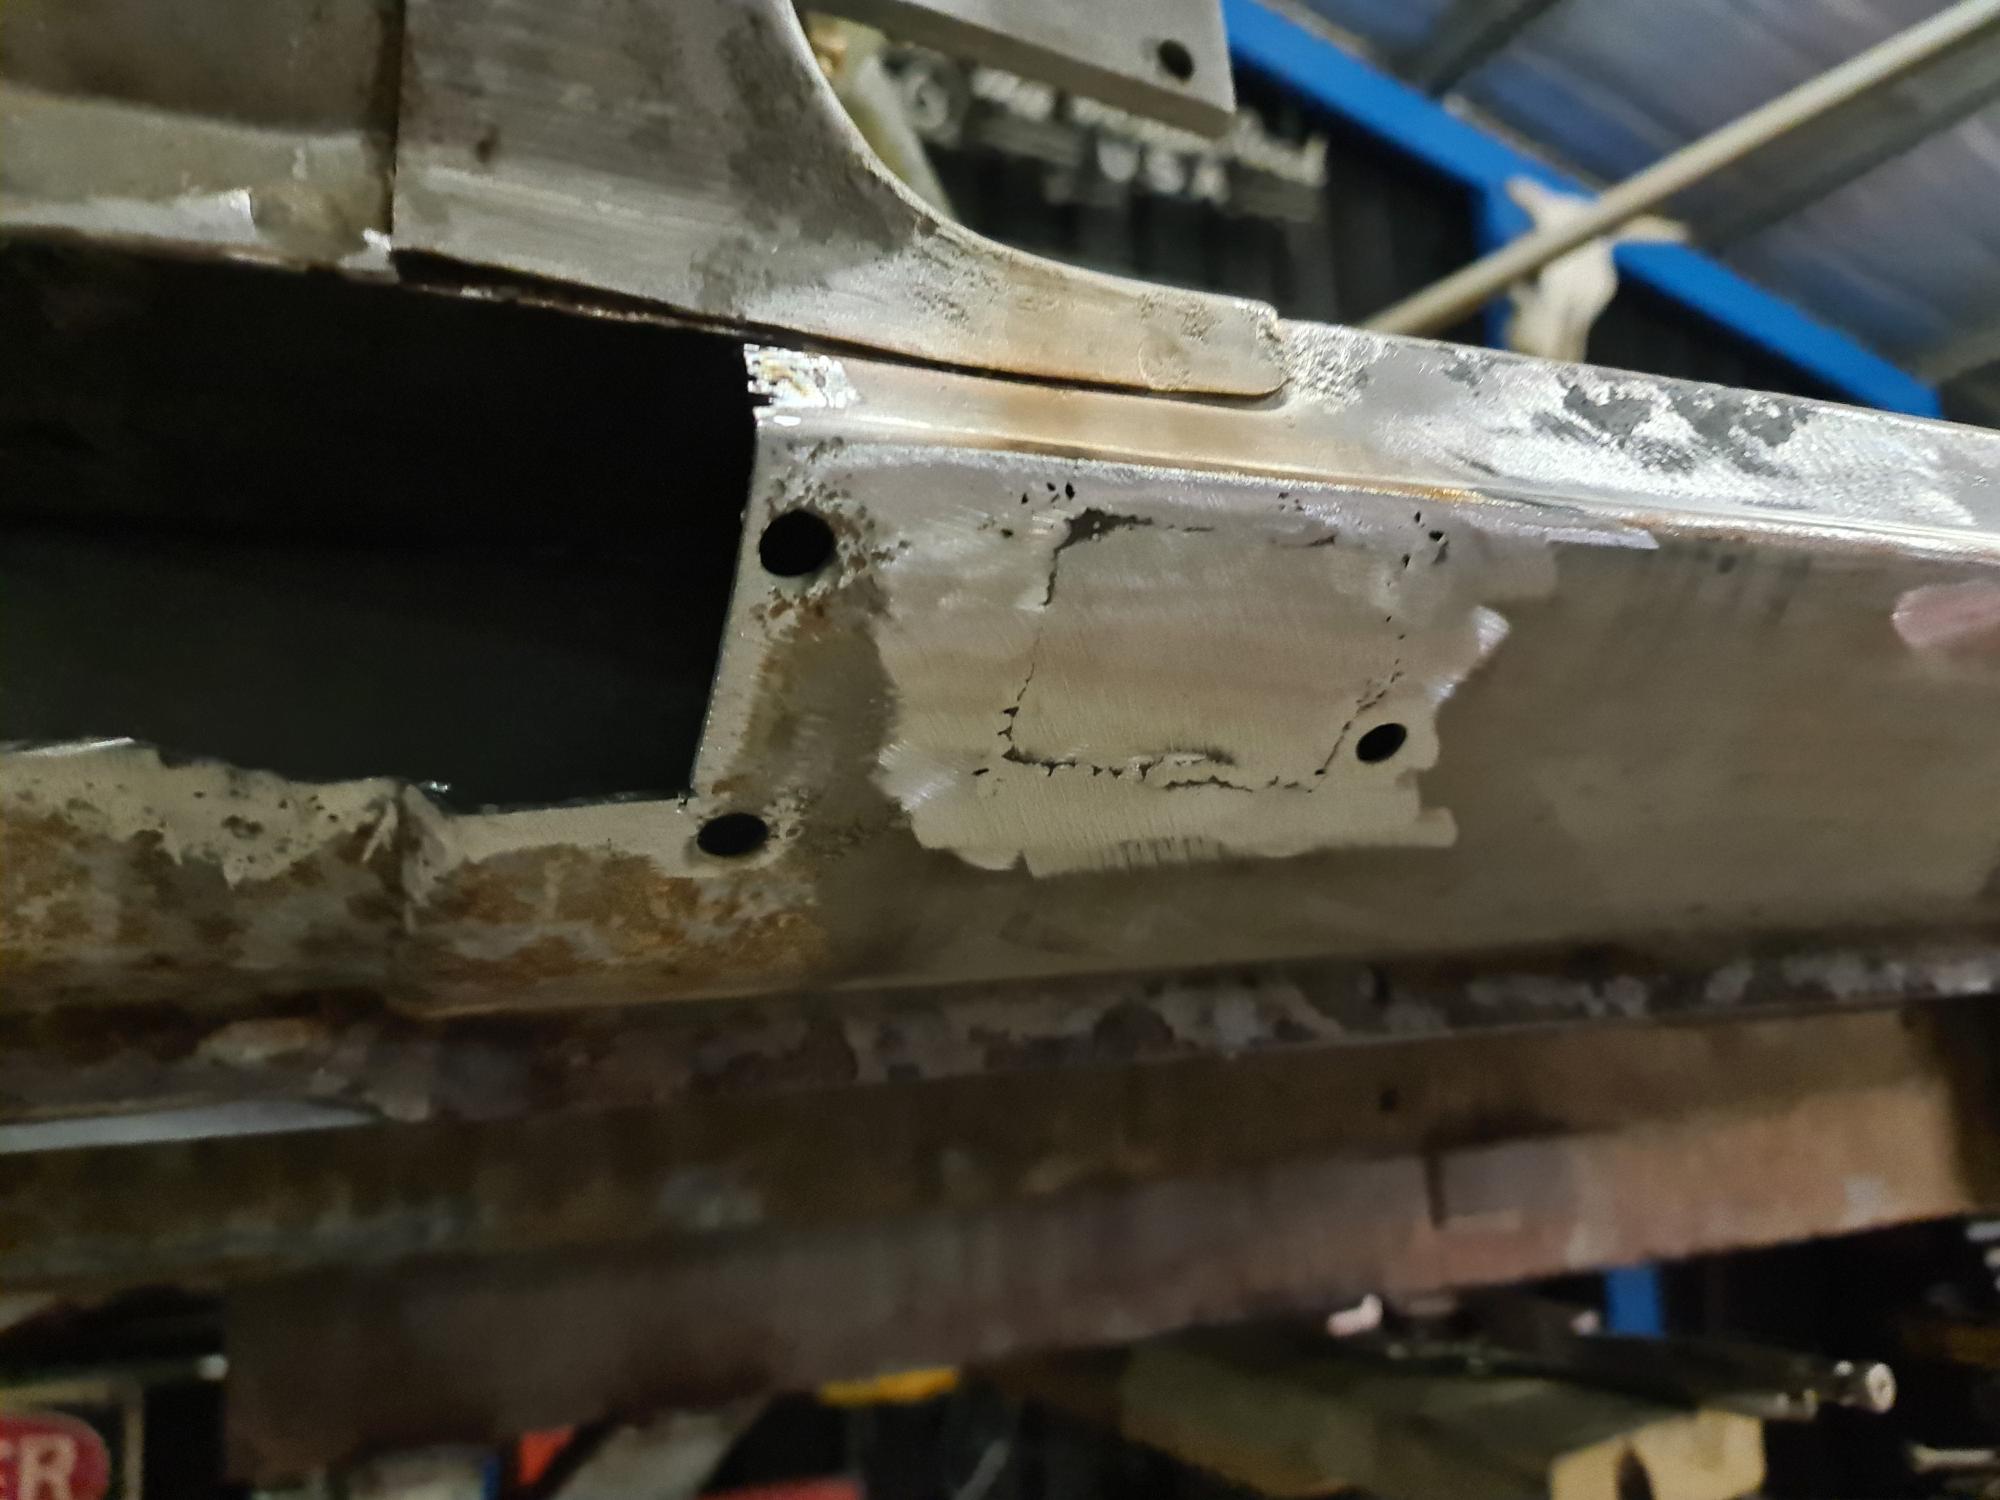
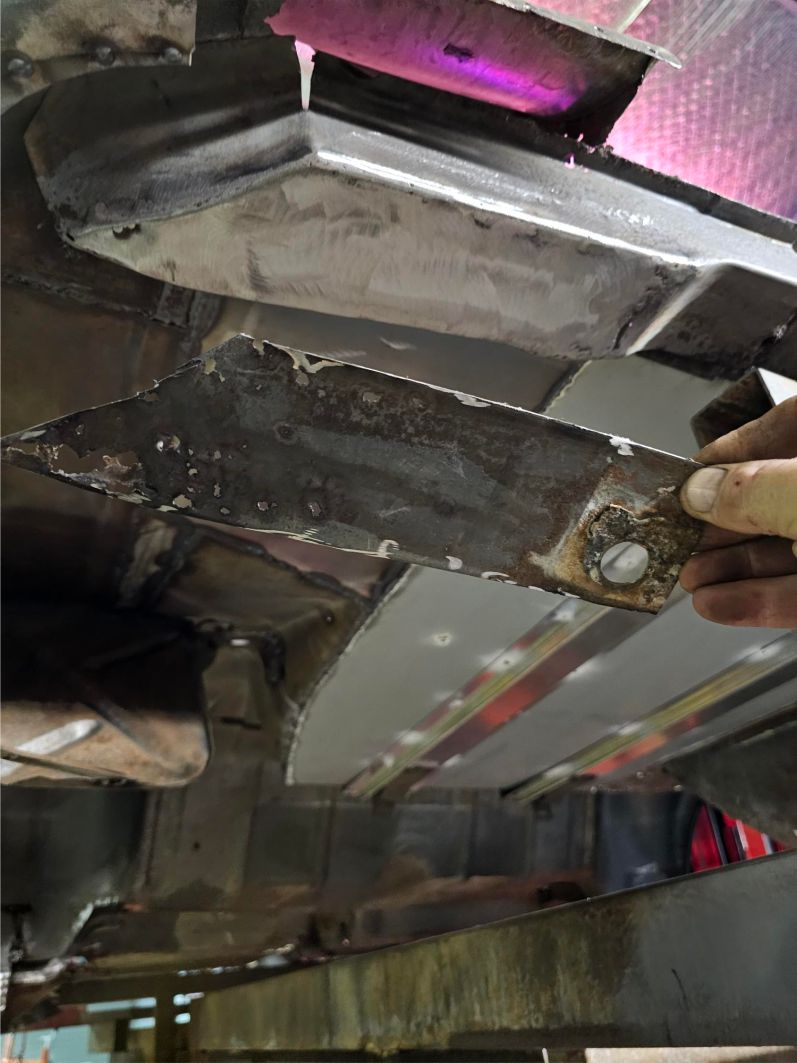
Location: Victoria, AUSTRALIA | bit slow on the updates everyone, I have 1 x door ready and same side inner rocker replaced.
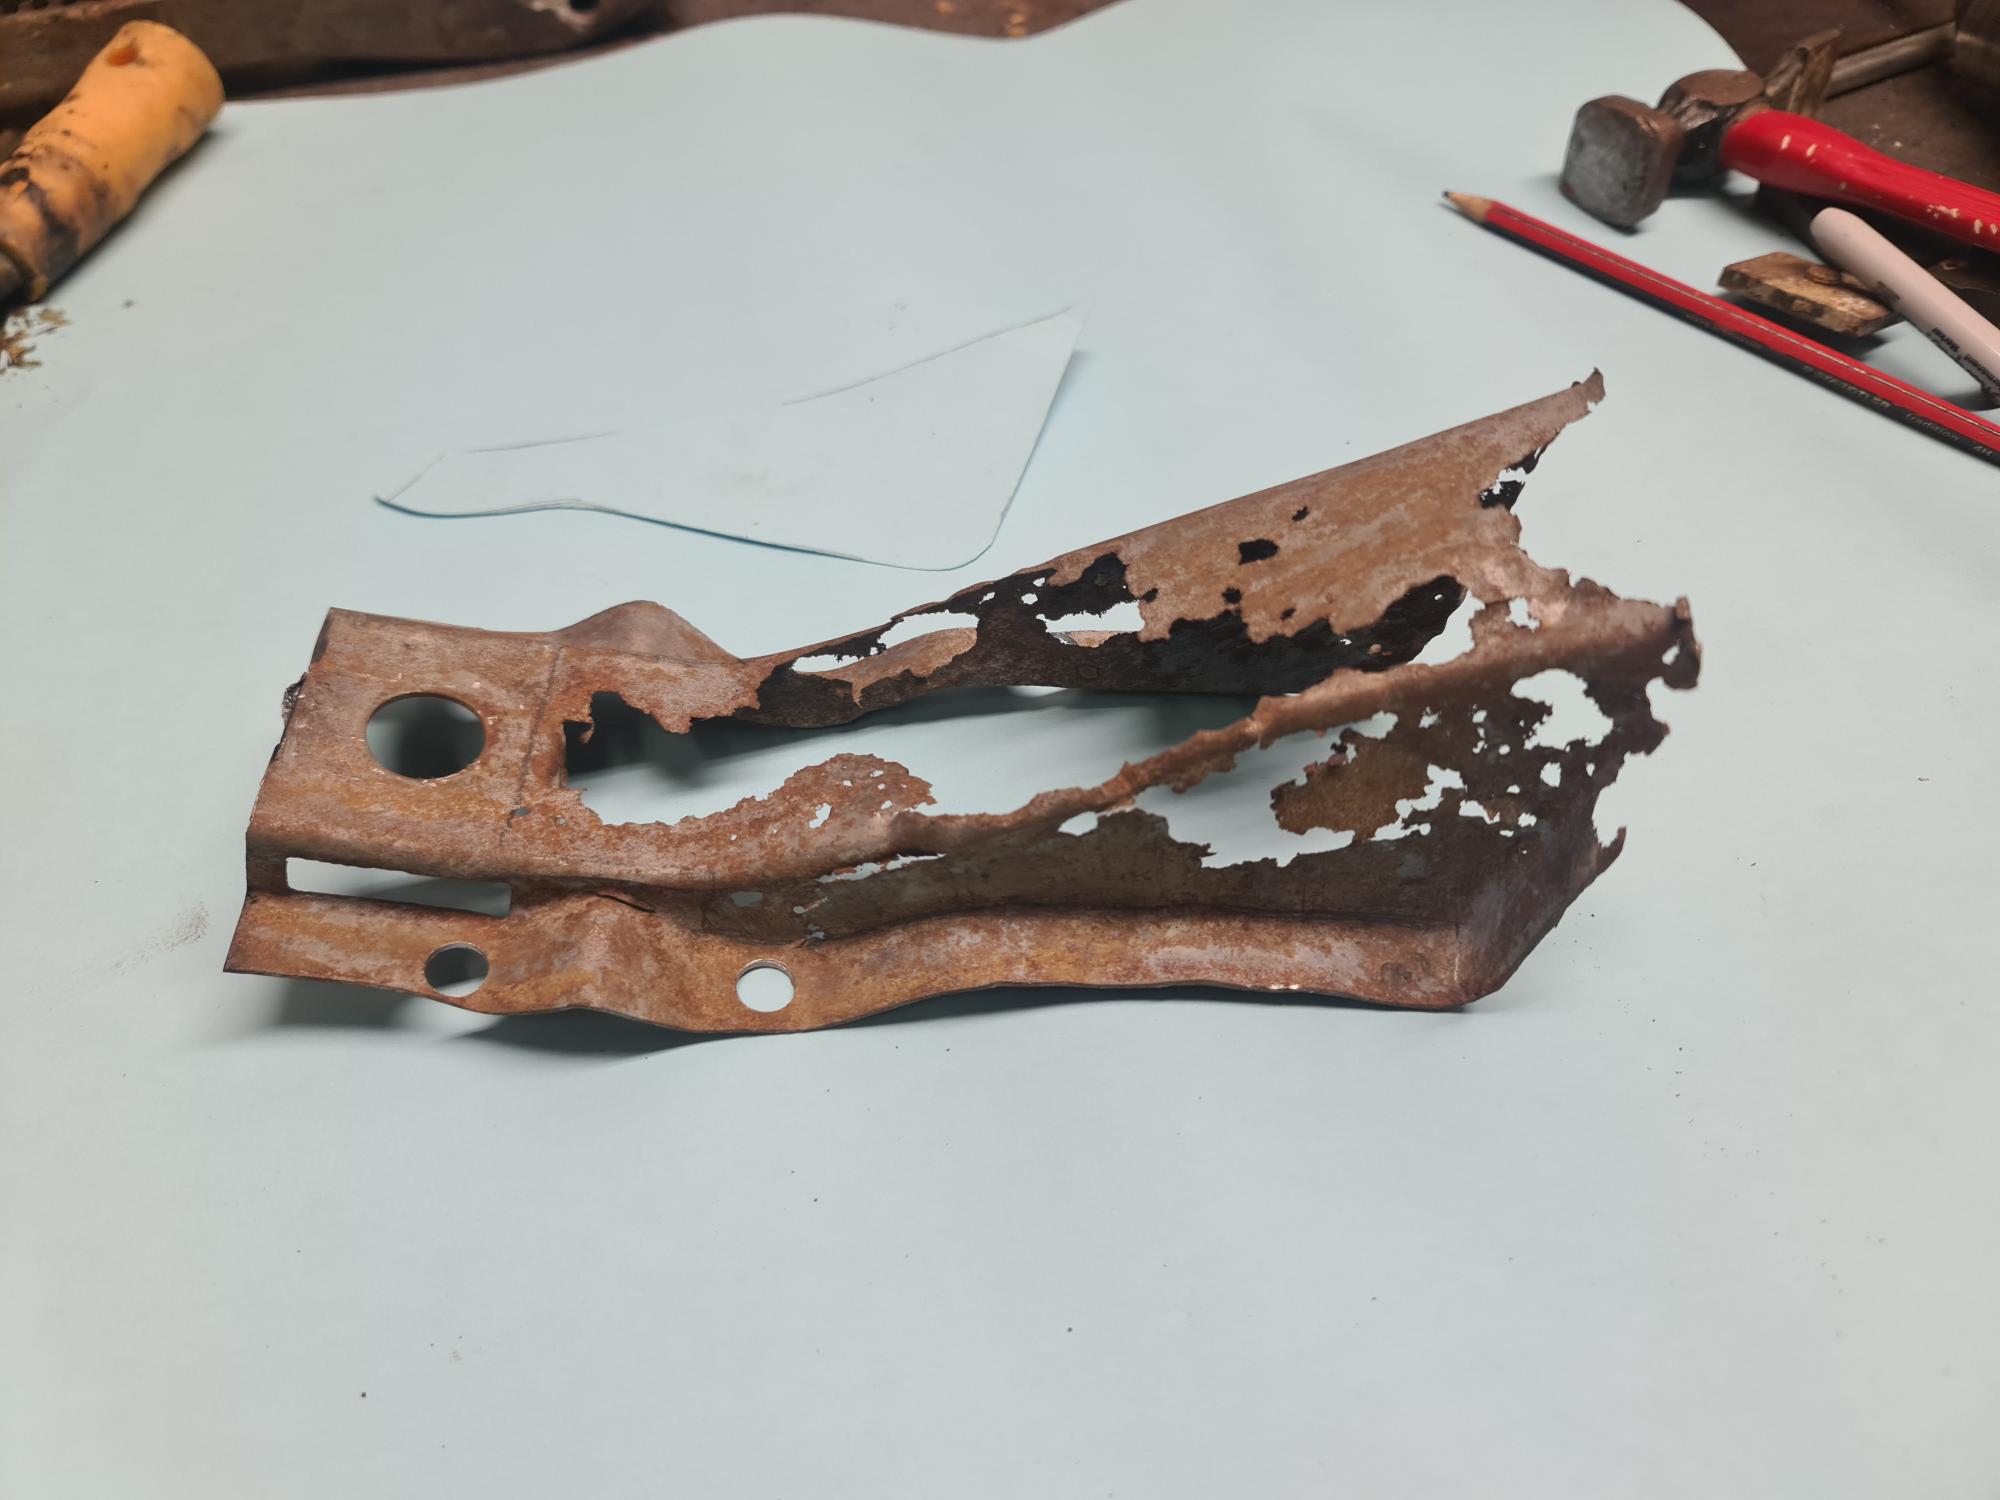
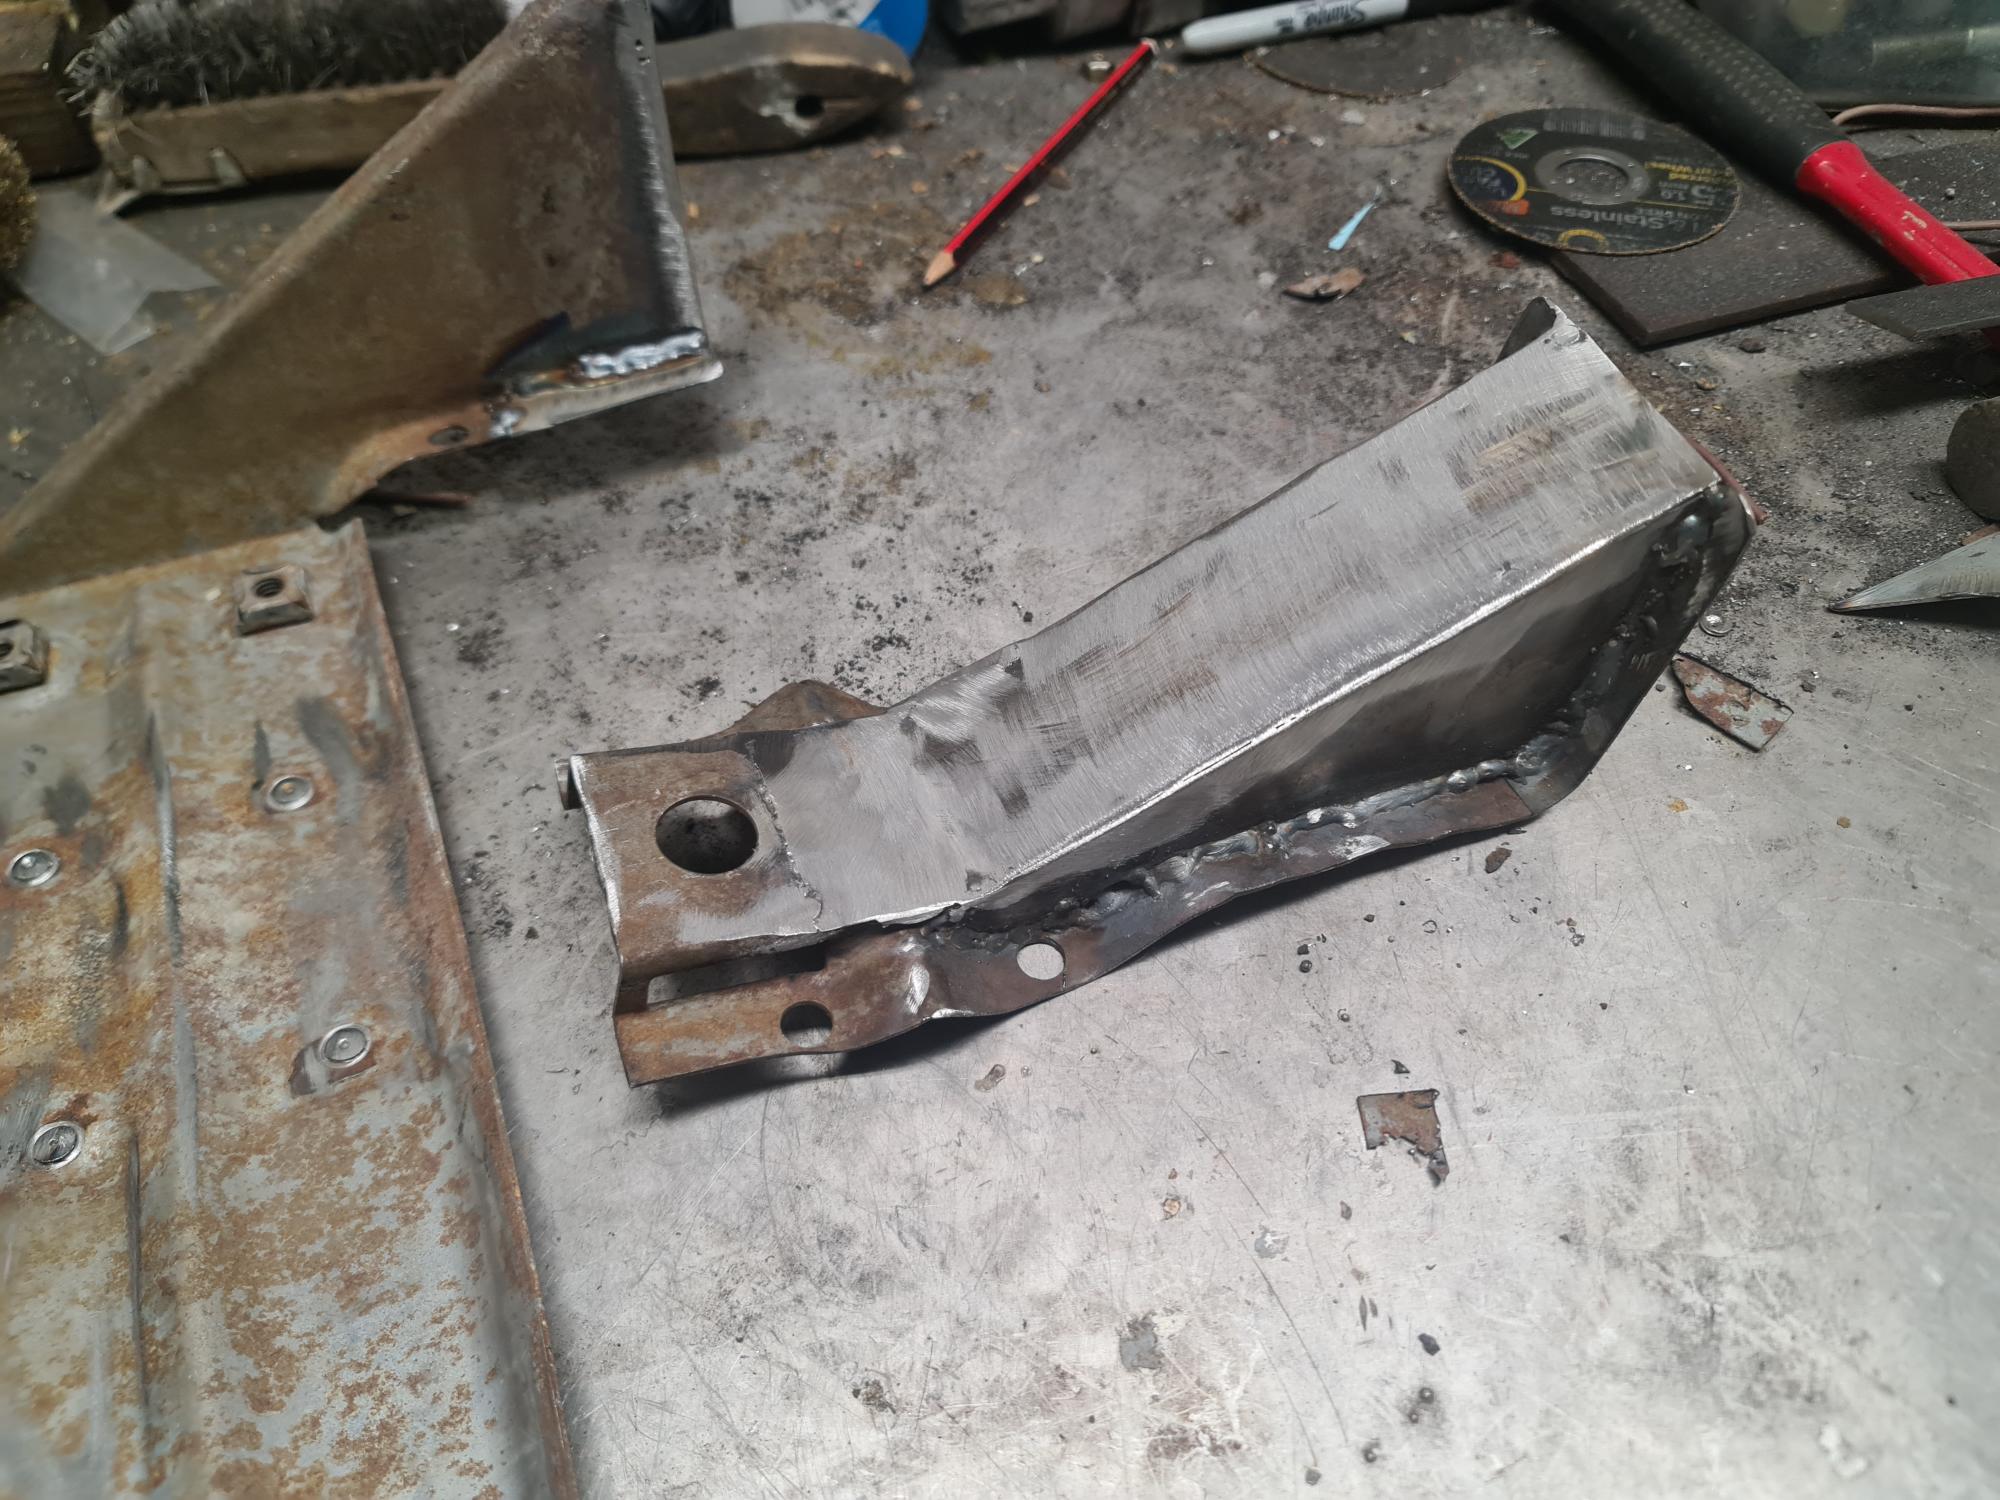
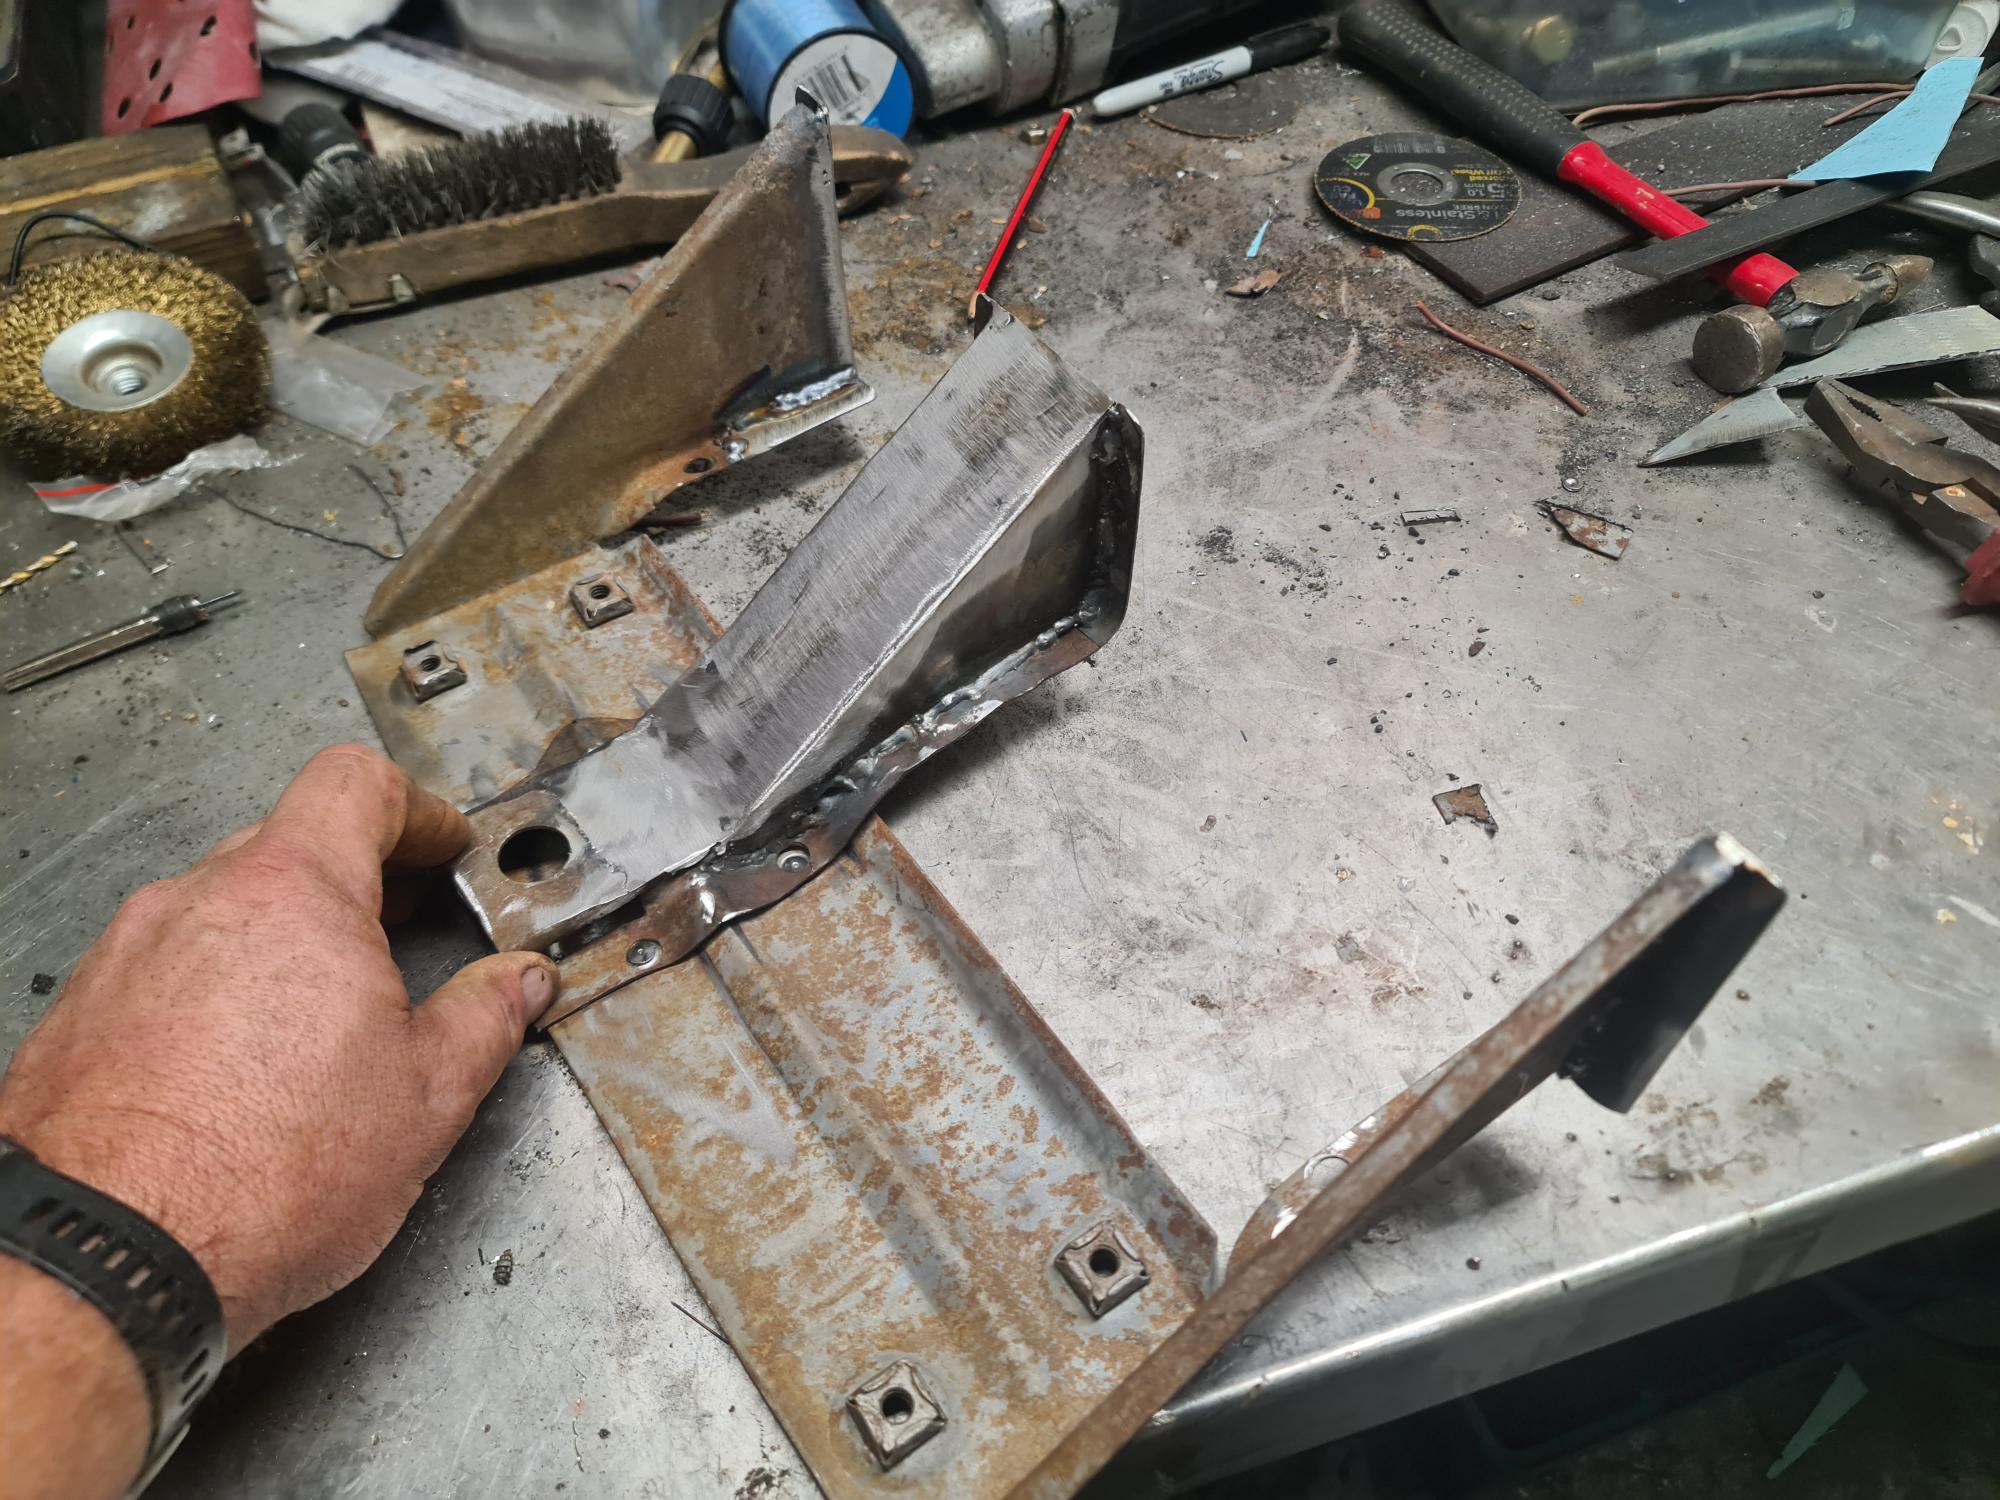
I had to fabricate a new body mount and repair the existing one. its slow going but I don't spend a massive amount of time on it.
I run my own business and have other things on the go so , its more therapy for me to go in the shed and work on the 55.
I will attached a picture of the door. By the way, I'm not a welder, paint beater, painter or mechanic by trade. I am signmaker, so I get to dable in all sorts of things
but I believe anybody can do anything if they have the right mind set, look, listen and practice. At the end of the day, I'm not saving anyones life like a heart surgeon,
or protecting people in our community / country, thank you for what you do. what Im doing is nothing compared to them im just repairing an old car that hopfully one day will
be driven on our roads again.
I hope to get back into it again and post for stuff
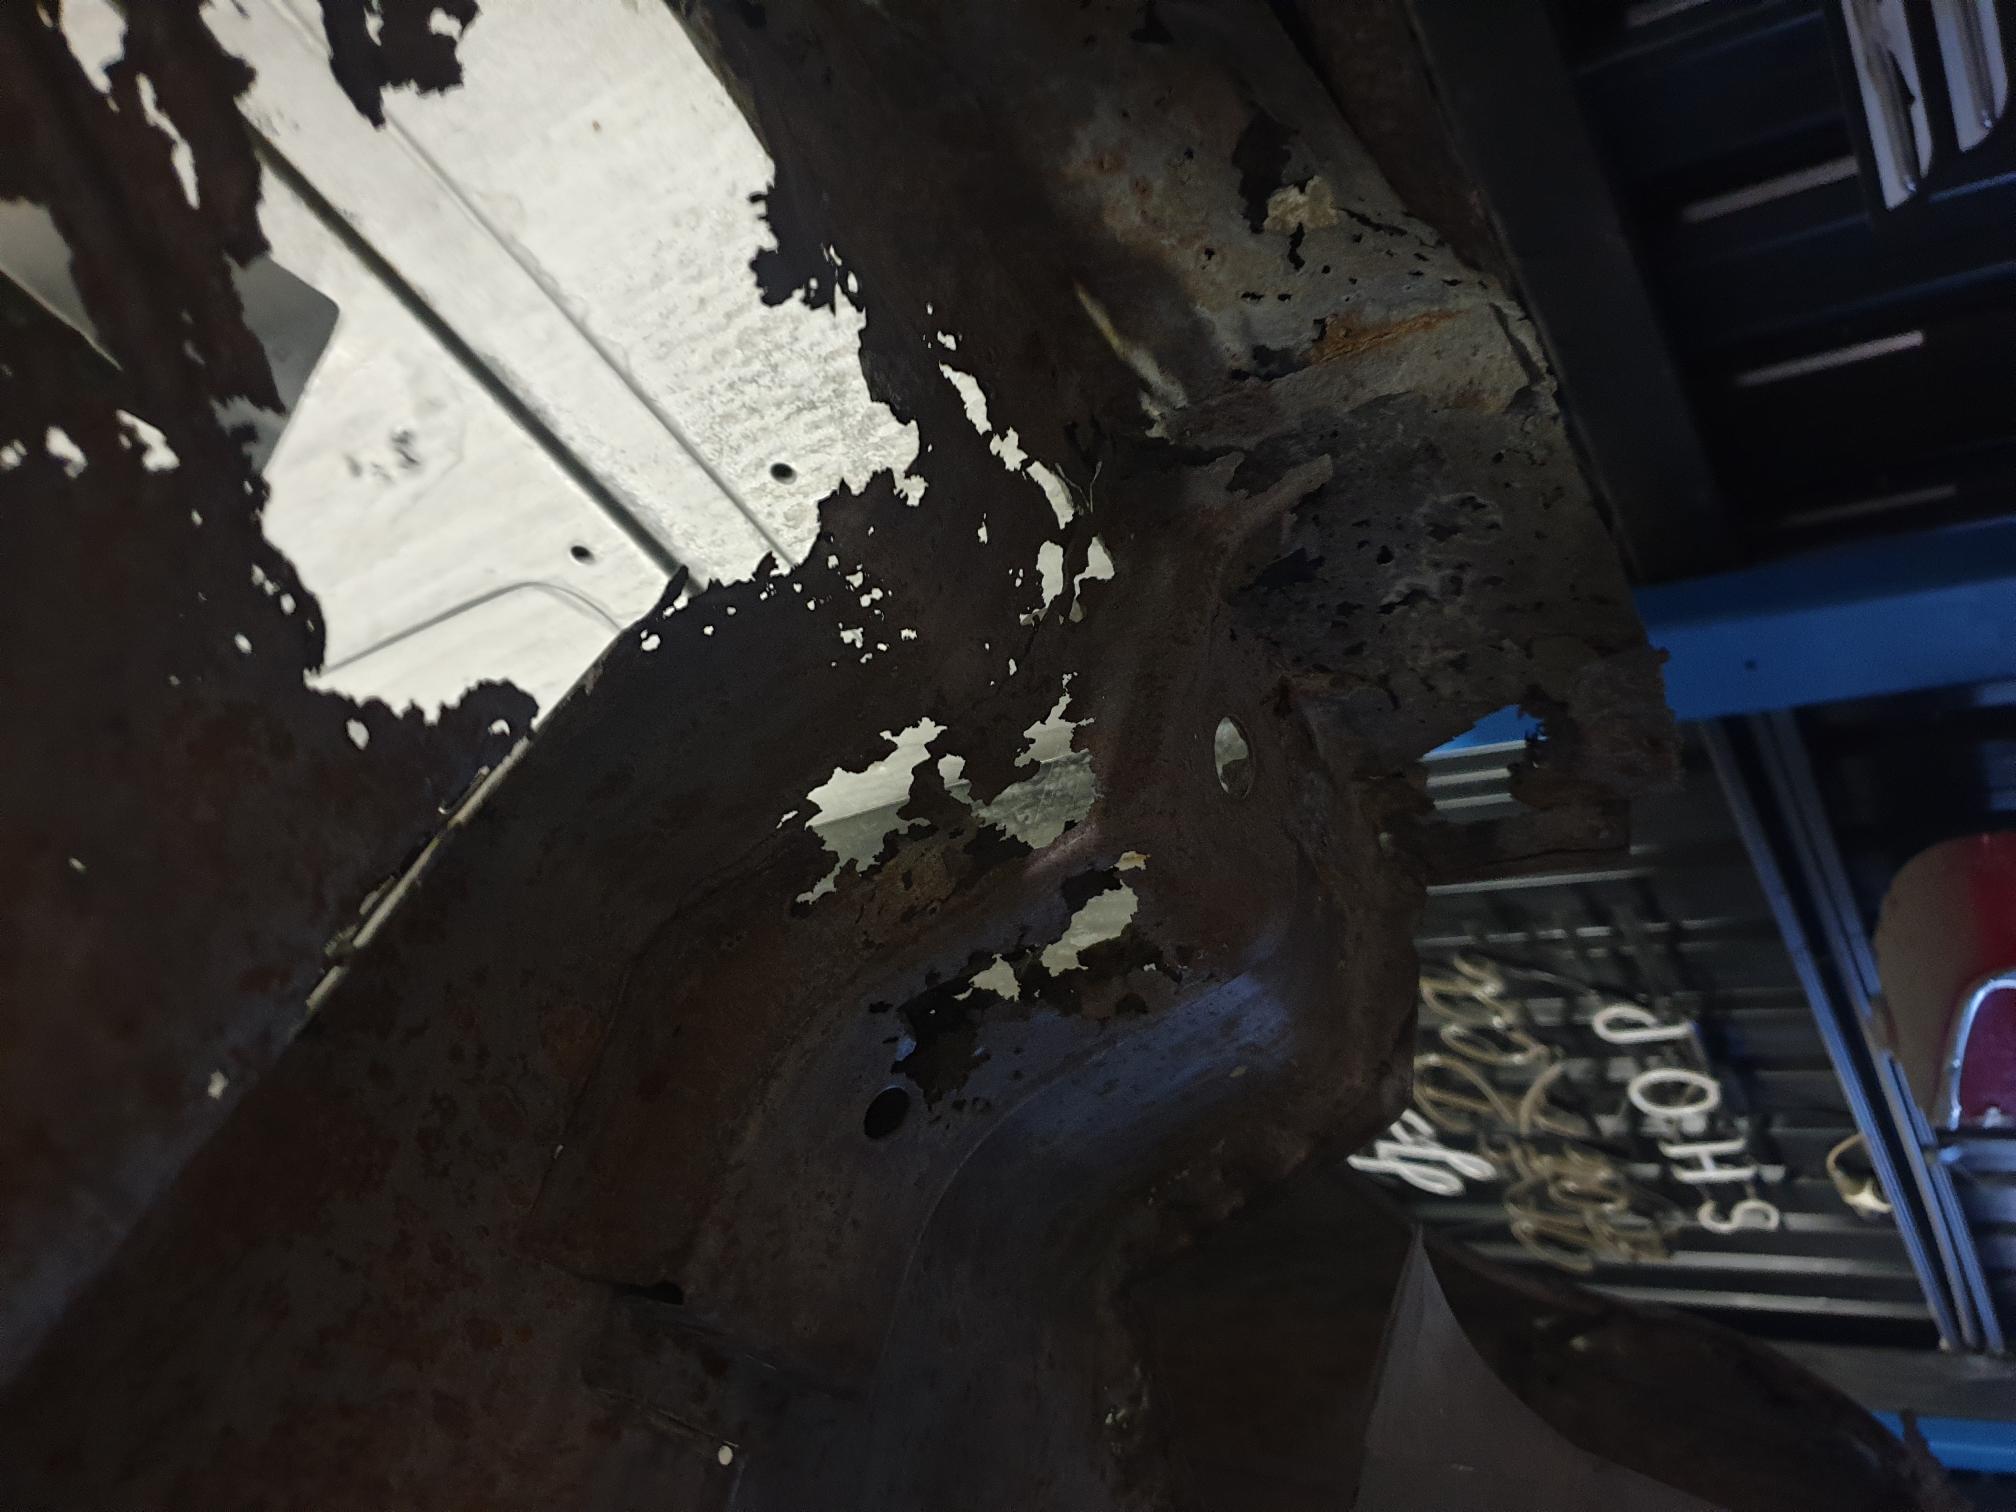
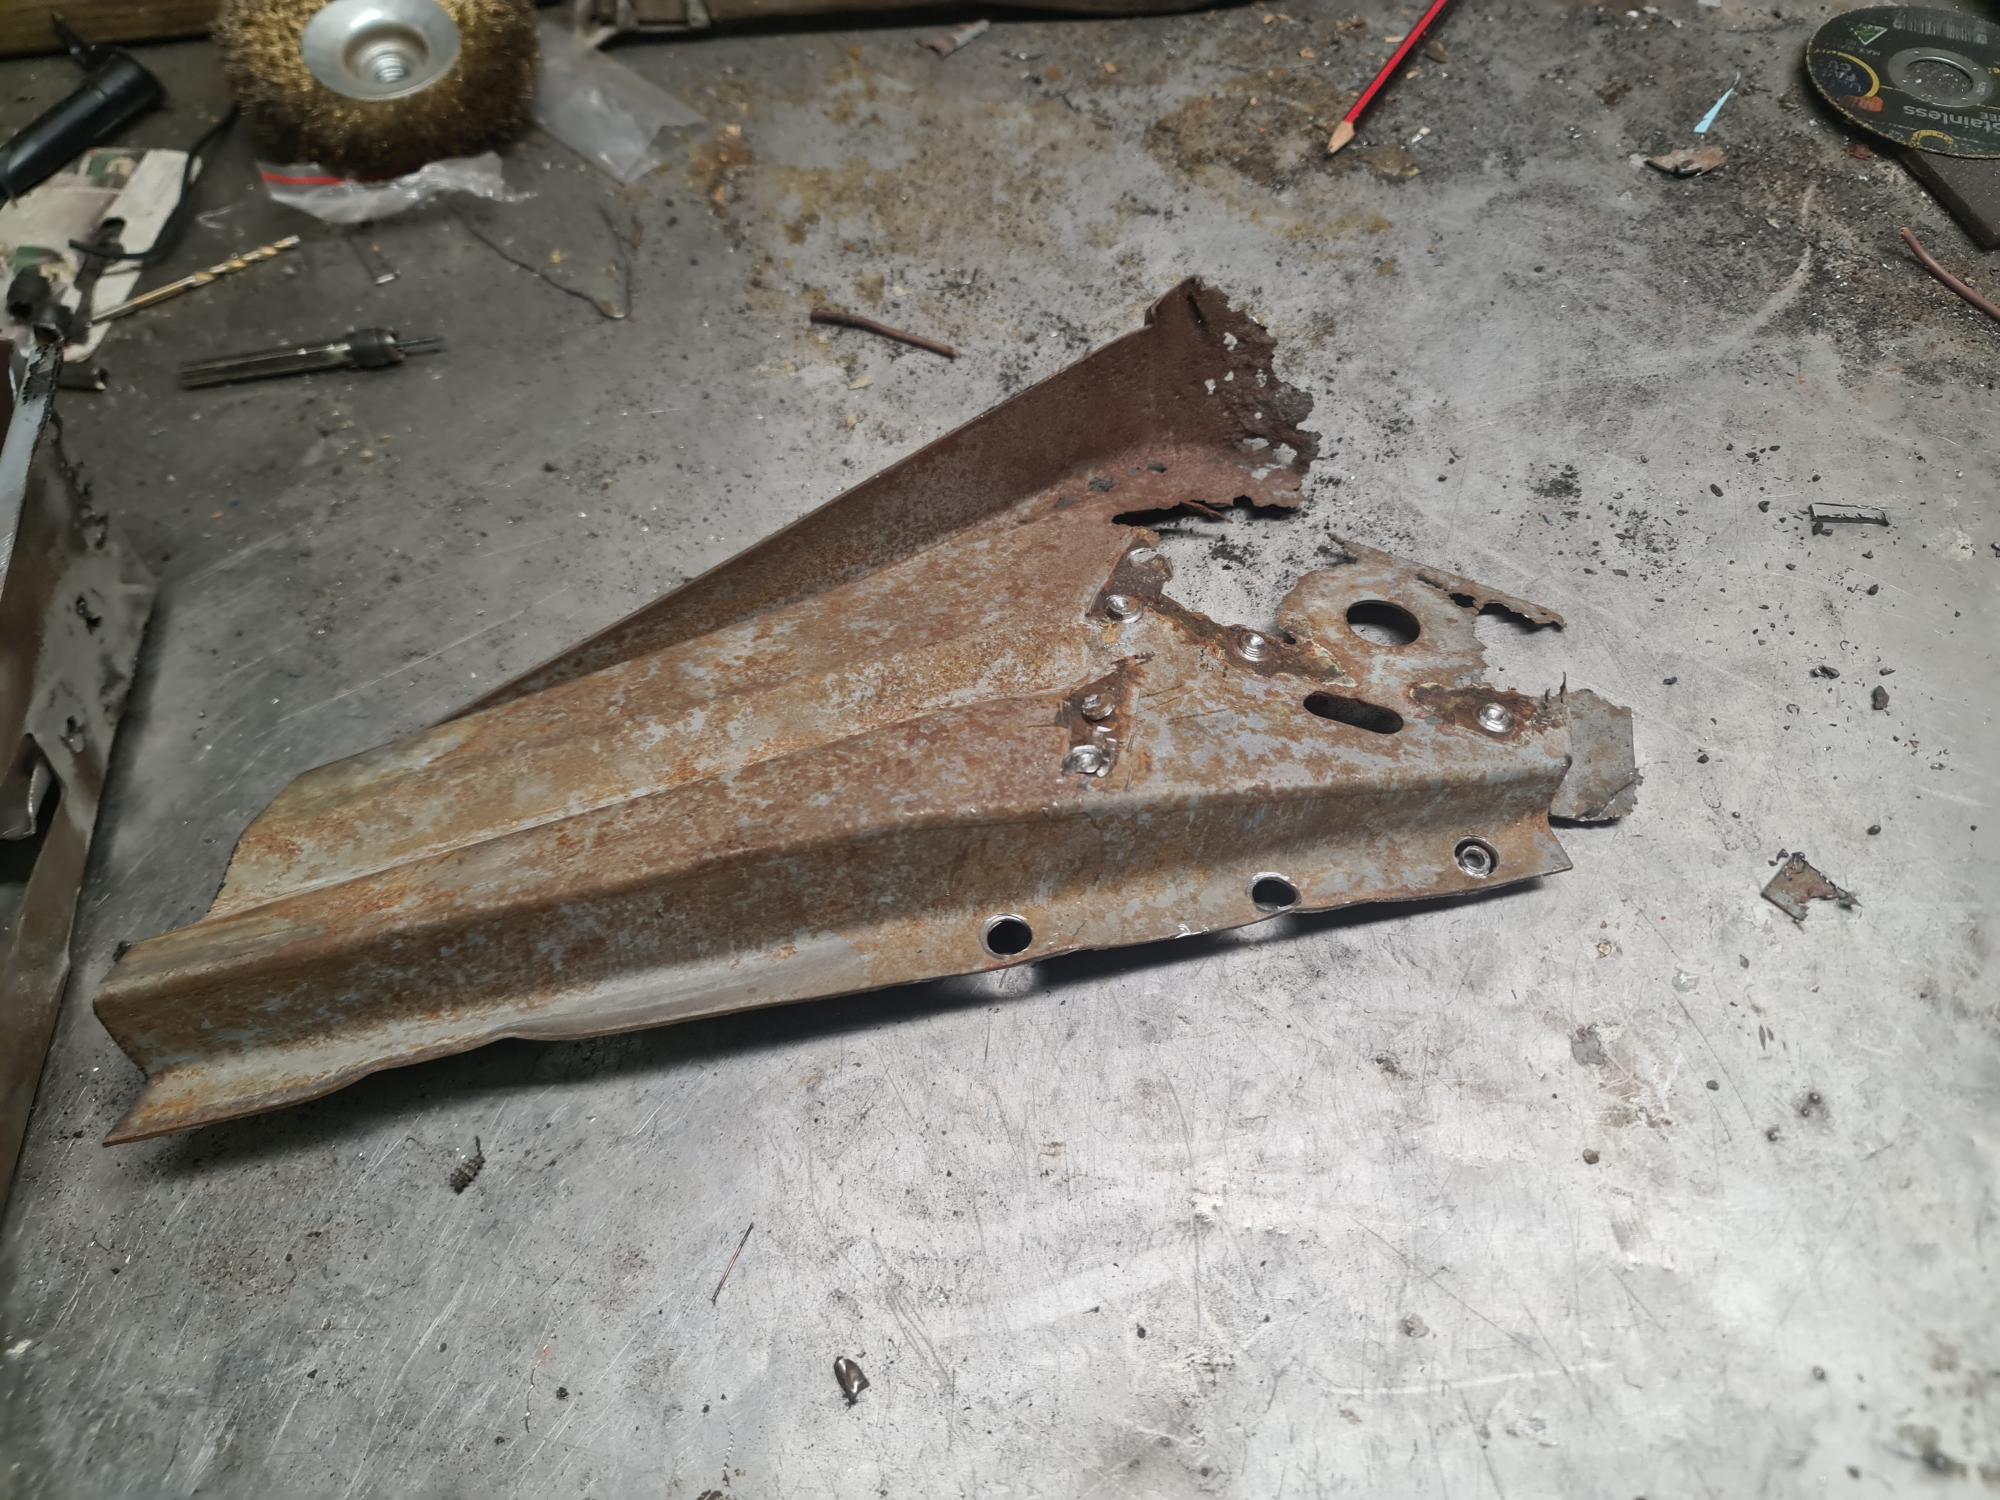
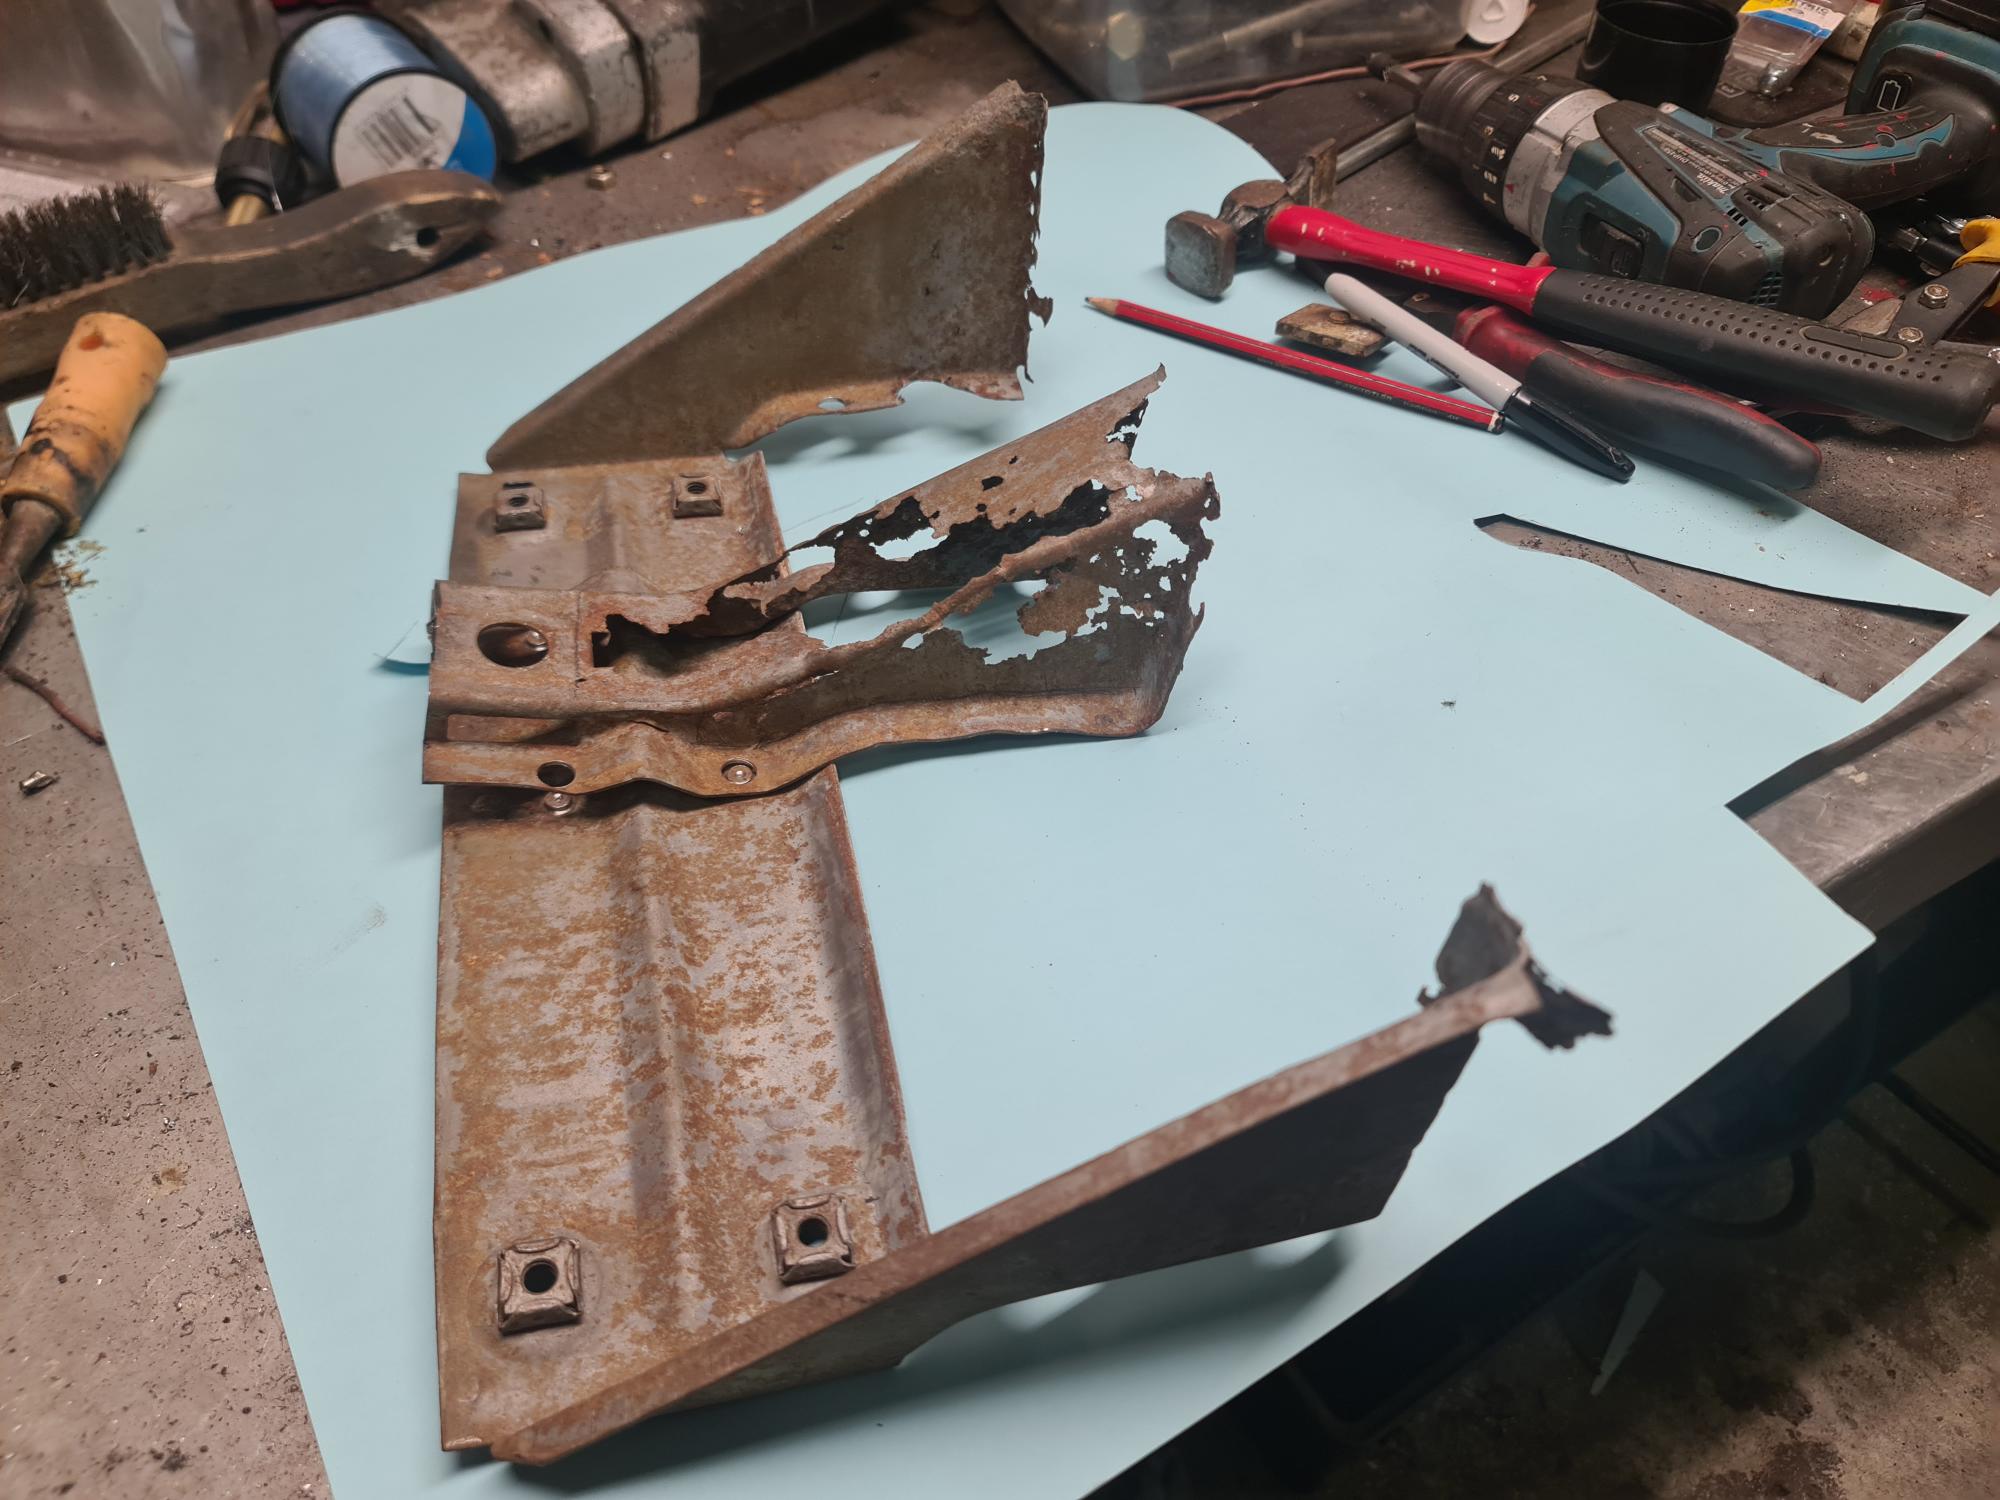
Its hard to look at the poor ol 55 looks a bit like swiss cheese,
If I stand underneath and look over it I get overwelmed, but when you focus on a section its that that bad 
I drilled out the spot welds and removed the existing mounts from the rotted inner rocker, then remove the inder rocker cutting at the join in the floor
leaving the outer rocker in place. It only ha a few sections ot be replaced, not the whole out rocker
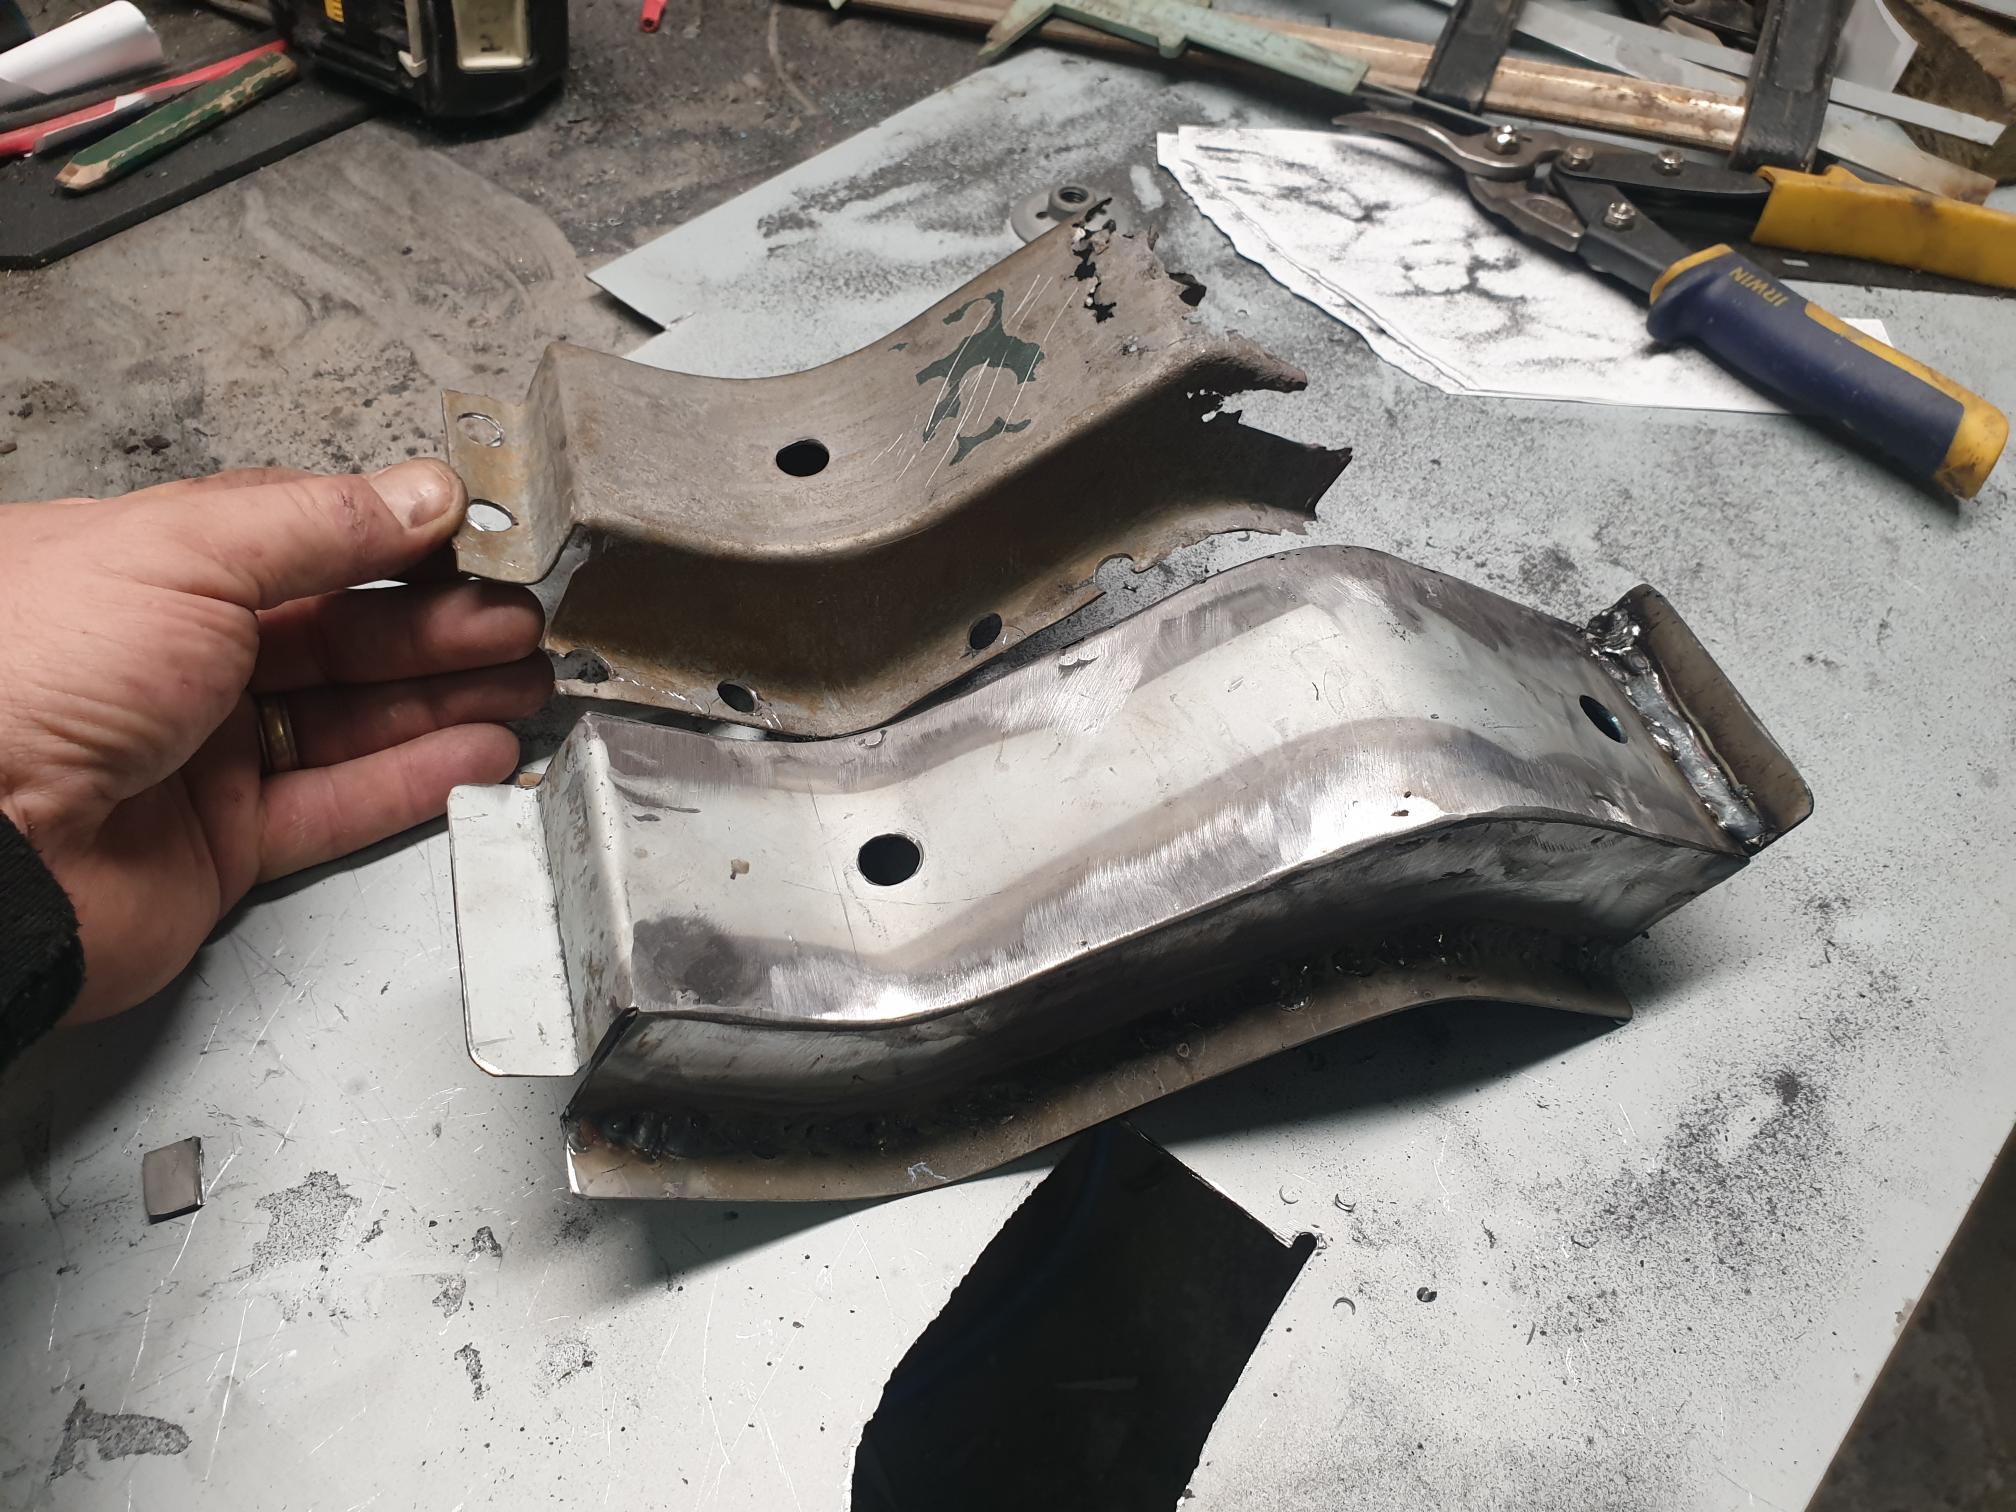
at the front there is 2 x fabricated brackets on top of each other, all the brackets need some kind of repair which I have done
fitted a new folded inner rocker then refit the floor mounts again, lining up with the old spot welds. I have only welded the brace / mountsto the inner rocker
I will replace sections of the floor and weld from the top down into the braces later.
My plan is the get the inner and outer rockers done first then put the 55 on my rotisserie
to do the rest
 (20210908_172643.jpg) (20210908_172643.jpg)
 (20210908_172725.jpg) (20210908_172725.jpg)
 (old body mount whats left of it.jpg) (old body mount whats left of it.jpg)
 (will repair the old one.jpg) (will repair the old one.jpg)
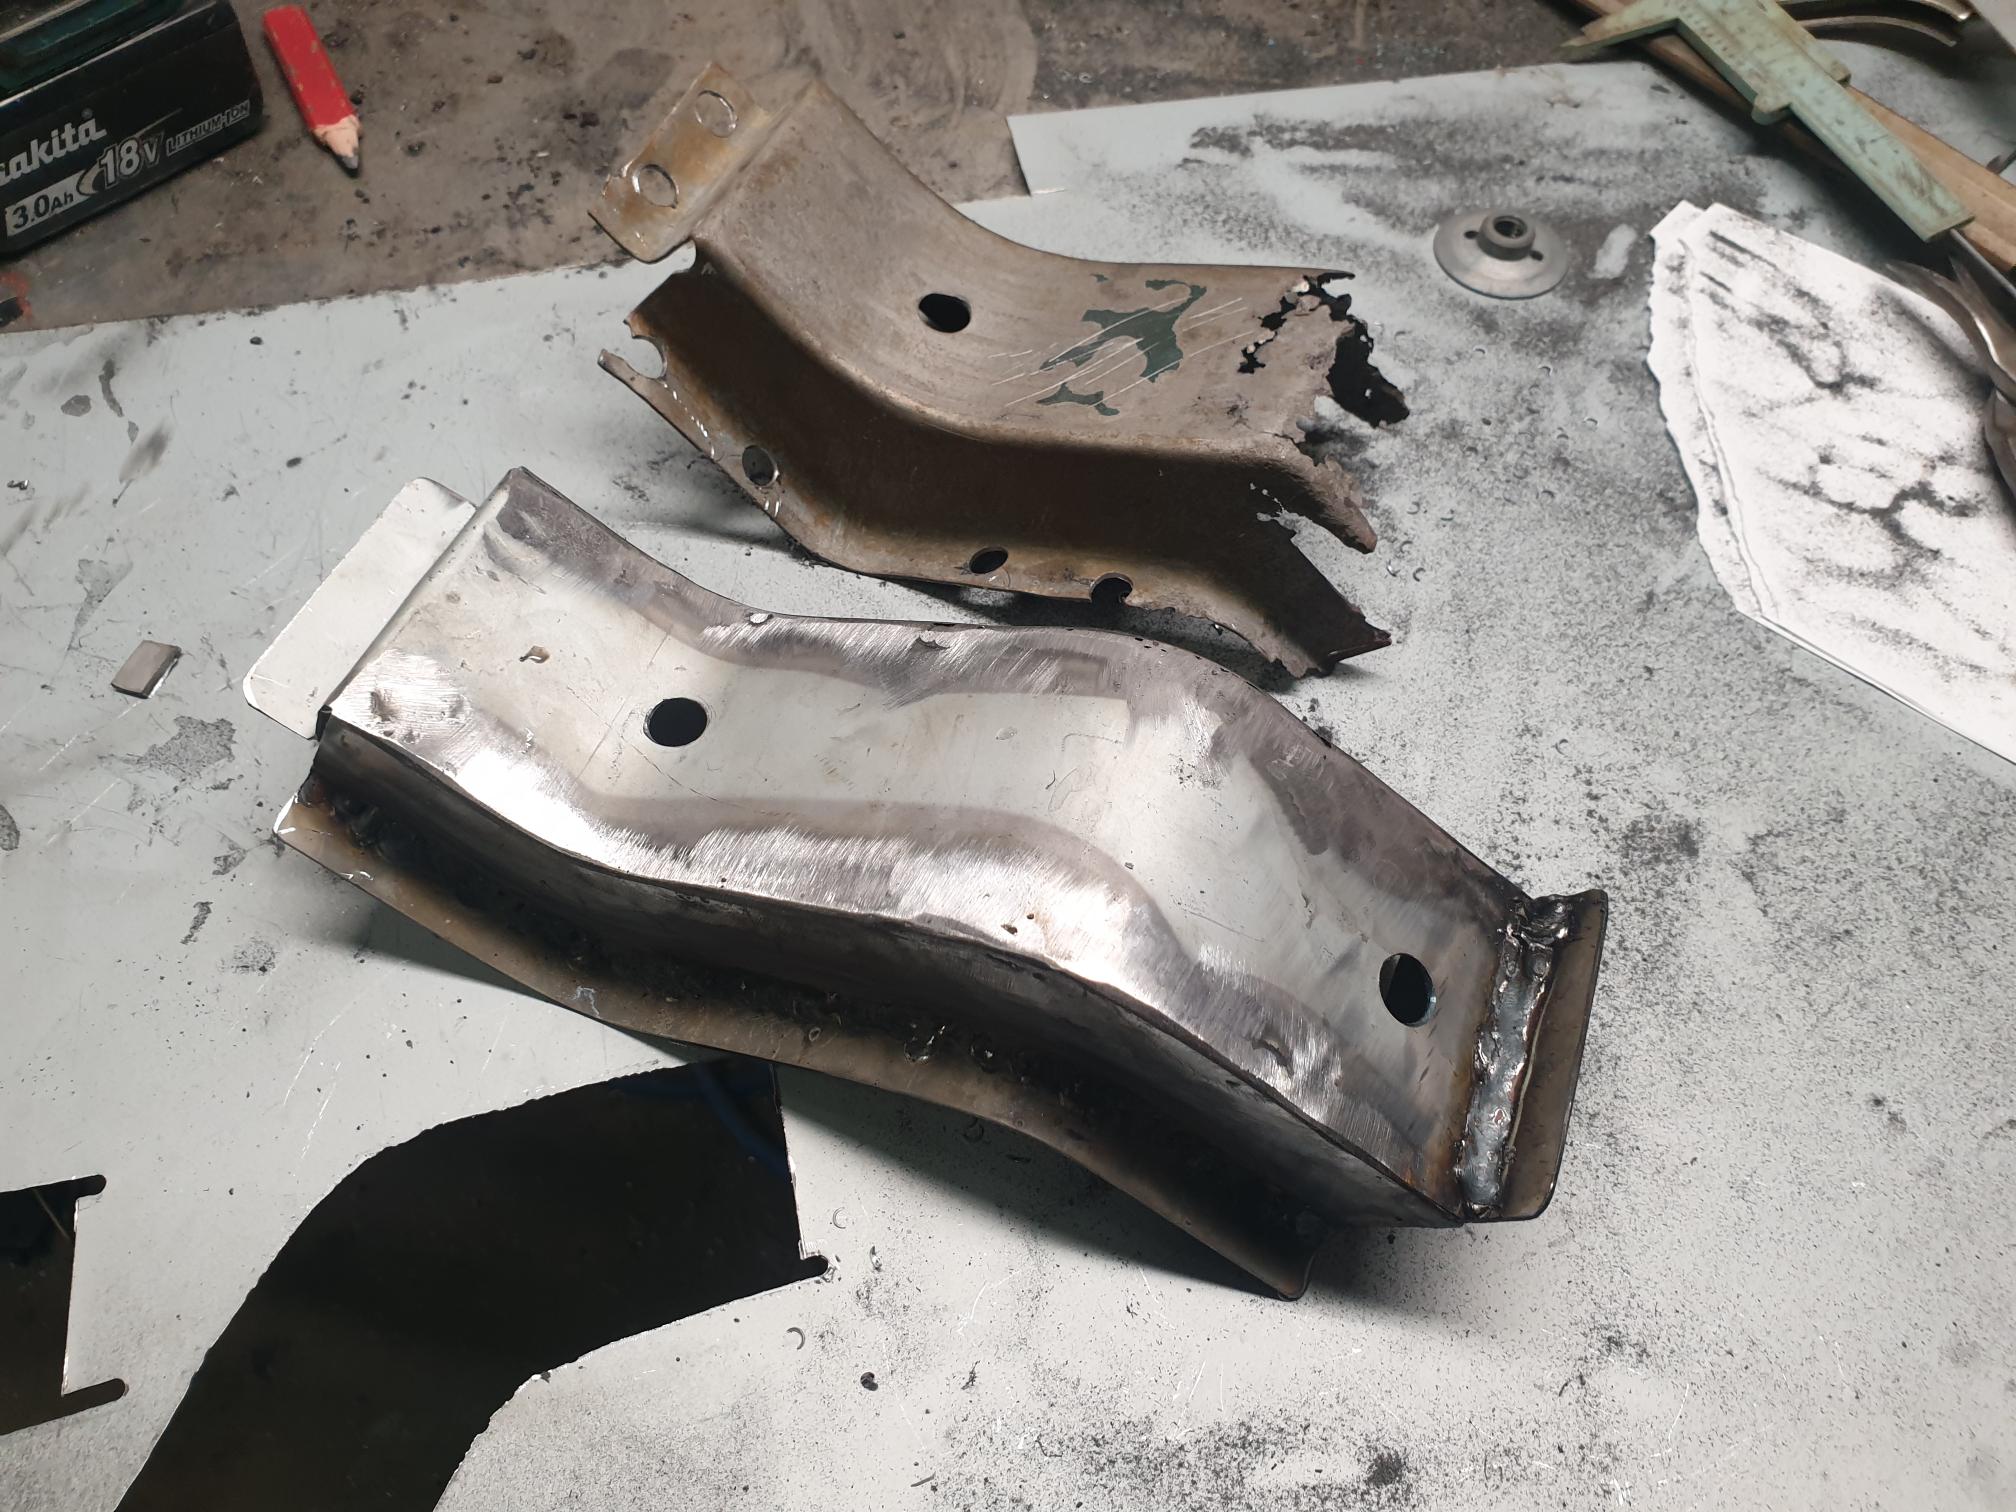 (New body mount and old one to match.jpg) (New body mount and old one to match.jpg)
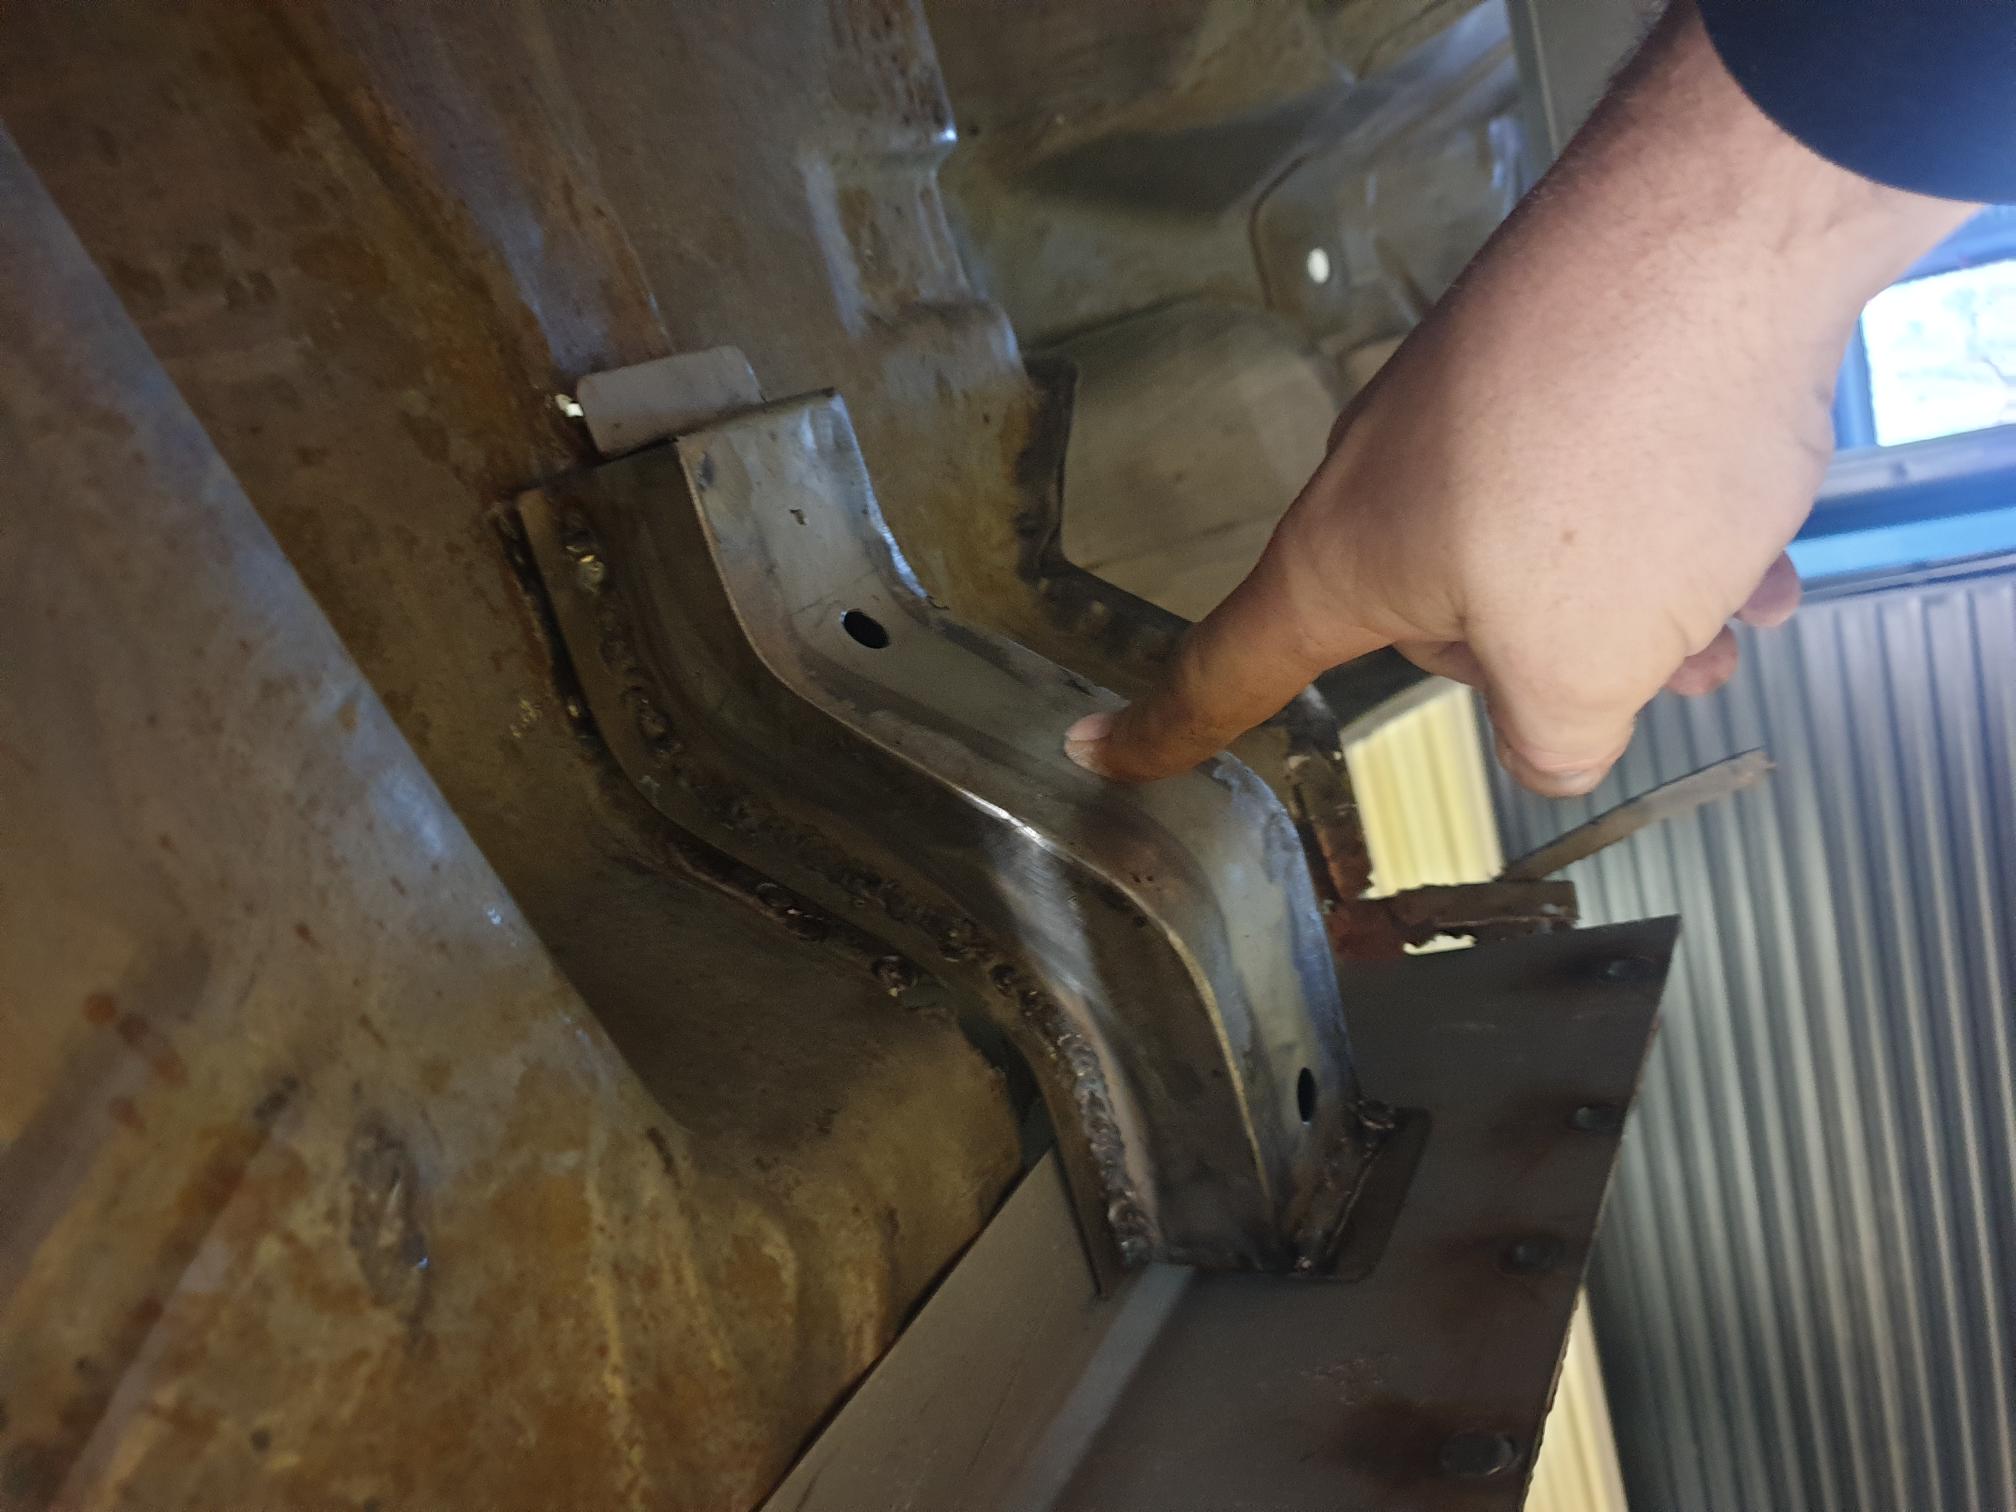 (location for body mount.jpg) (location for body mount.jpg)
 (Passenger side front mount copper weld thru primer.jpg) (Passenger side front mount copper weld thru primer.jpg)
 (Passenger side inner rocker.jpg) (Passenger side inner rocker.jpg)
 (Passenger side rear of inner rocker.jpg) (Passenger side rear of inner rocker.jpg)
 (repair to seat mount brace.jpg) (repair to seat mount brace.jpg)
Attachments
----------------
20210908_172643.jpg (413KB - 154 downloads)
20210908_172725.jpg (466KB - 154 downloads)
old body mount whats left of it.jpg (207KB - 160 downloads)
will repair the old one.jpg (384KB - 163 downloads)
New body mount and old one to match.jpg (388KB - 151 downloads)
location for body mount.jpg (204KB - 153 downloads)
Passenger side front mount copper weld thru primer.jpg (236KB - 155 downloads)
Passenger side inner rocker.jpg (292KB - 149 downloads)
Passenger side rear of inner rocker.jpg (279KB - 156 downloads)
repair to seat mount brace.jpg (210KB - 151 downloads)
|
|
| |
|
Location: North Australia | Good work Man.
One step at a time. Pretty soon you wont be able to see the roof of the shed from underneath!
Keen to see more updates.
Steve.
|
|
| |
|
Extreme Veteran
Posts: 444
Location: Victoria, AUSTRALIA | Been slow going, I have had a lot on and now finally back to doing a bit on the 55'
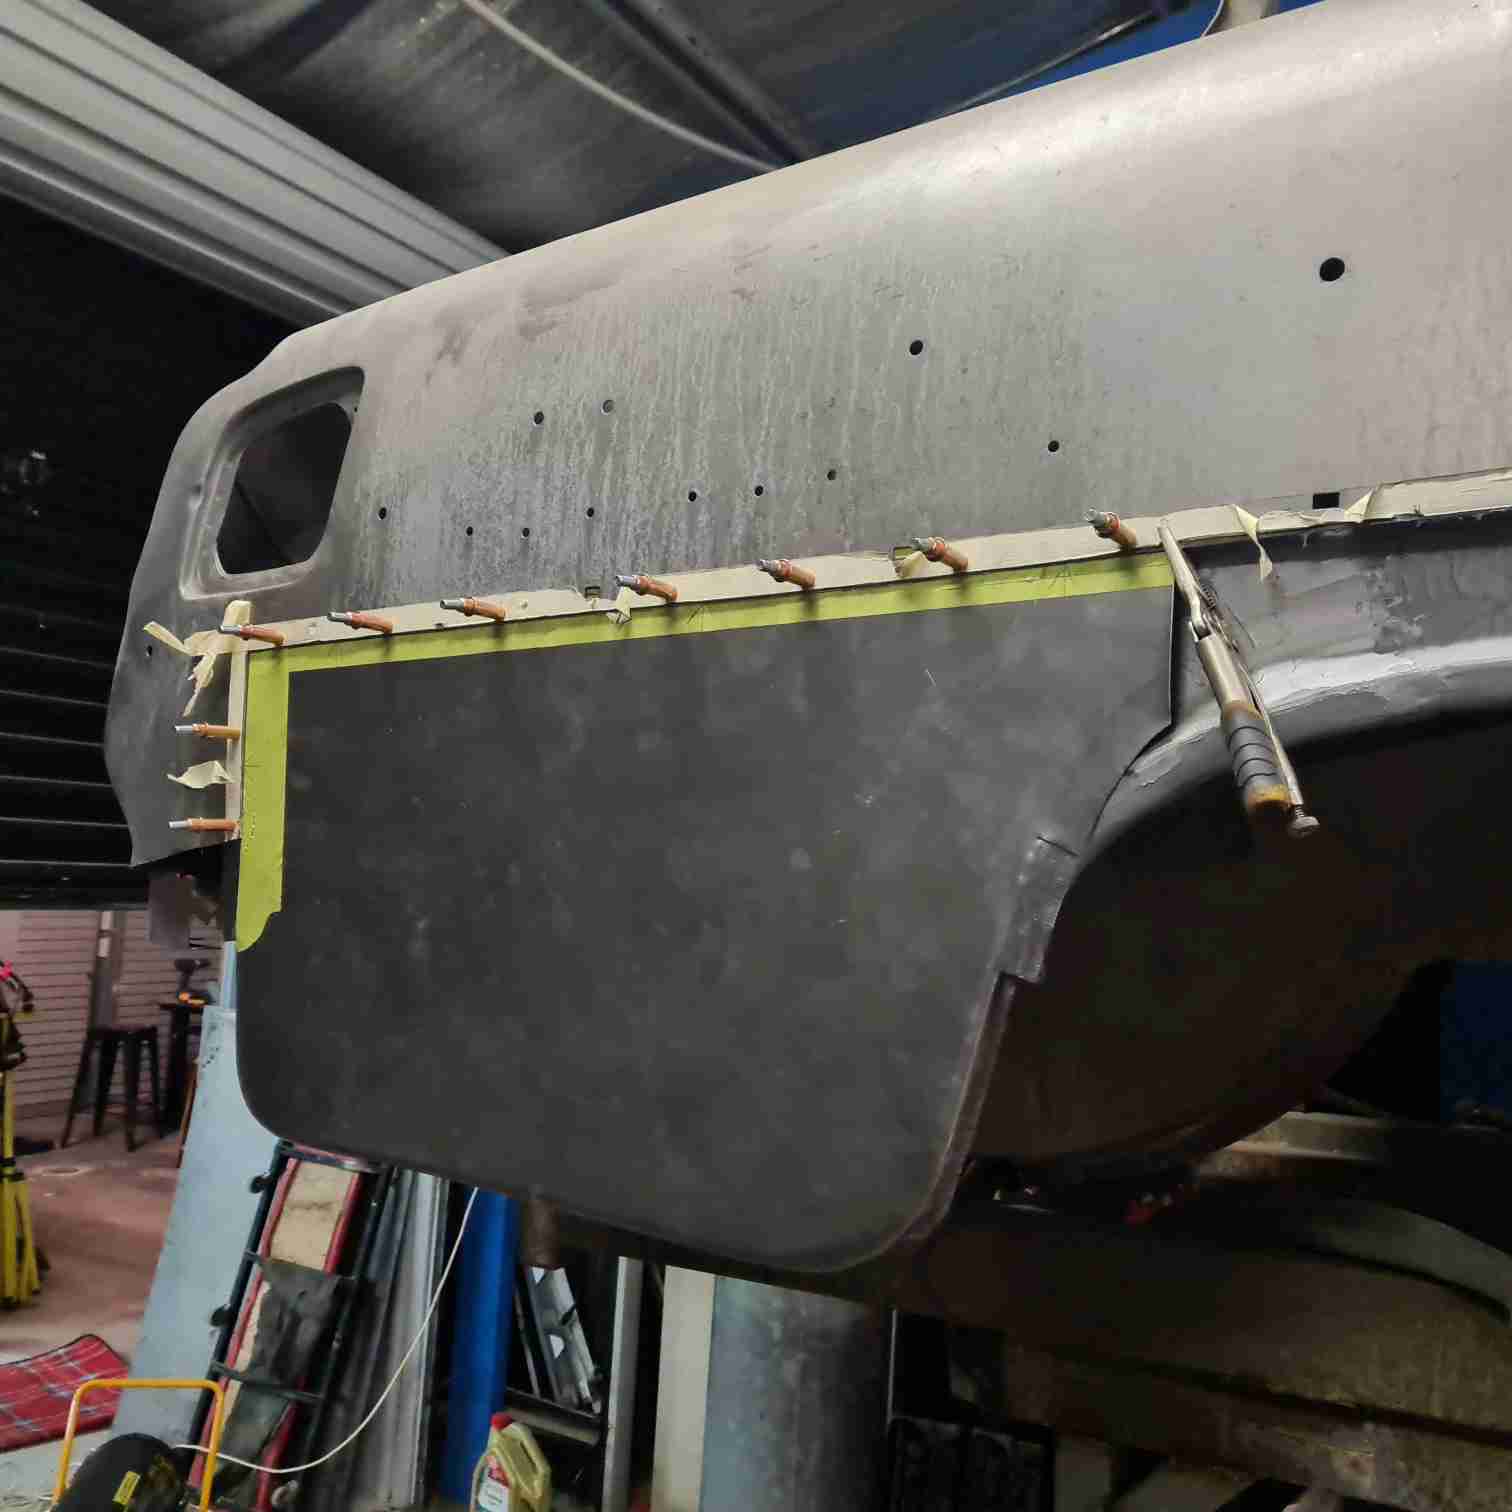
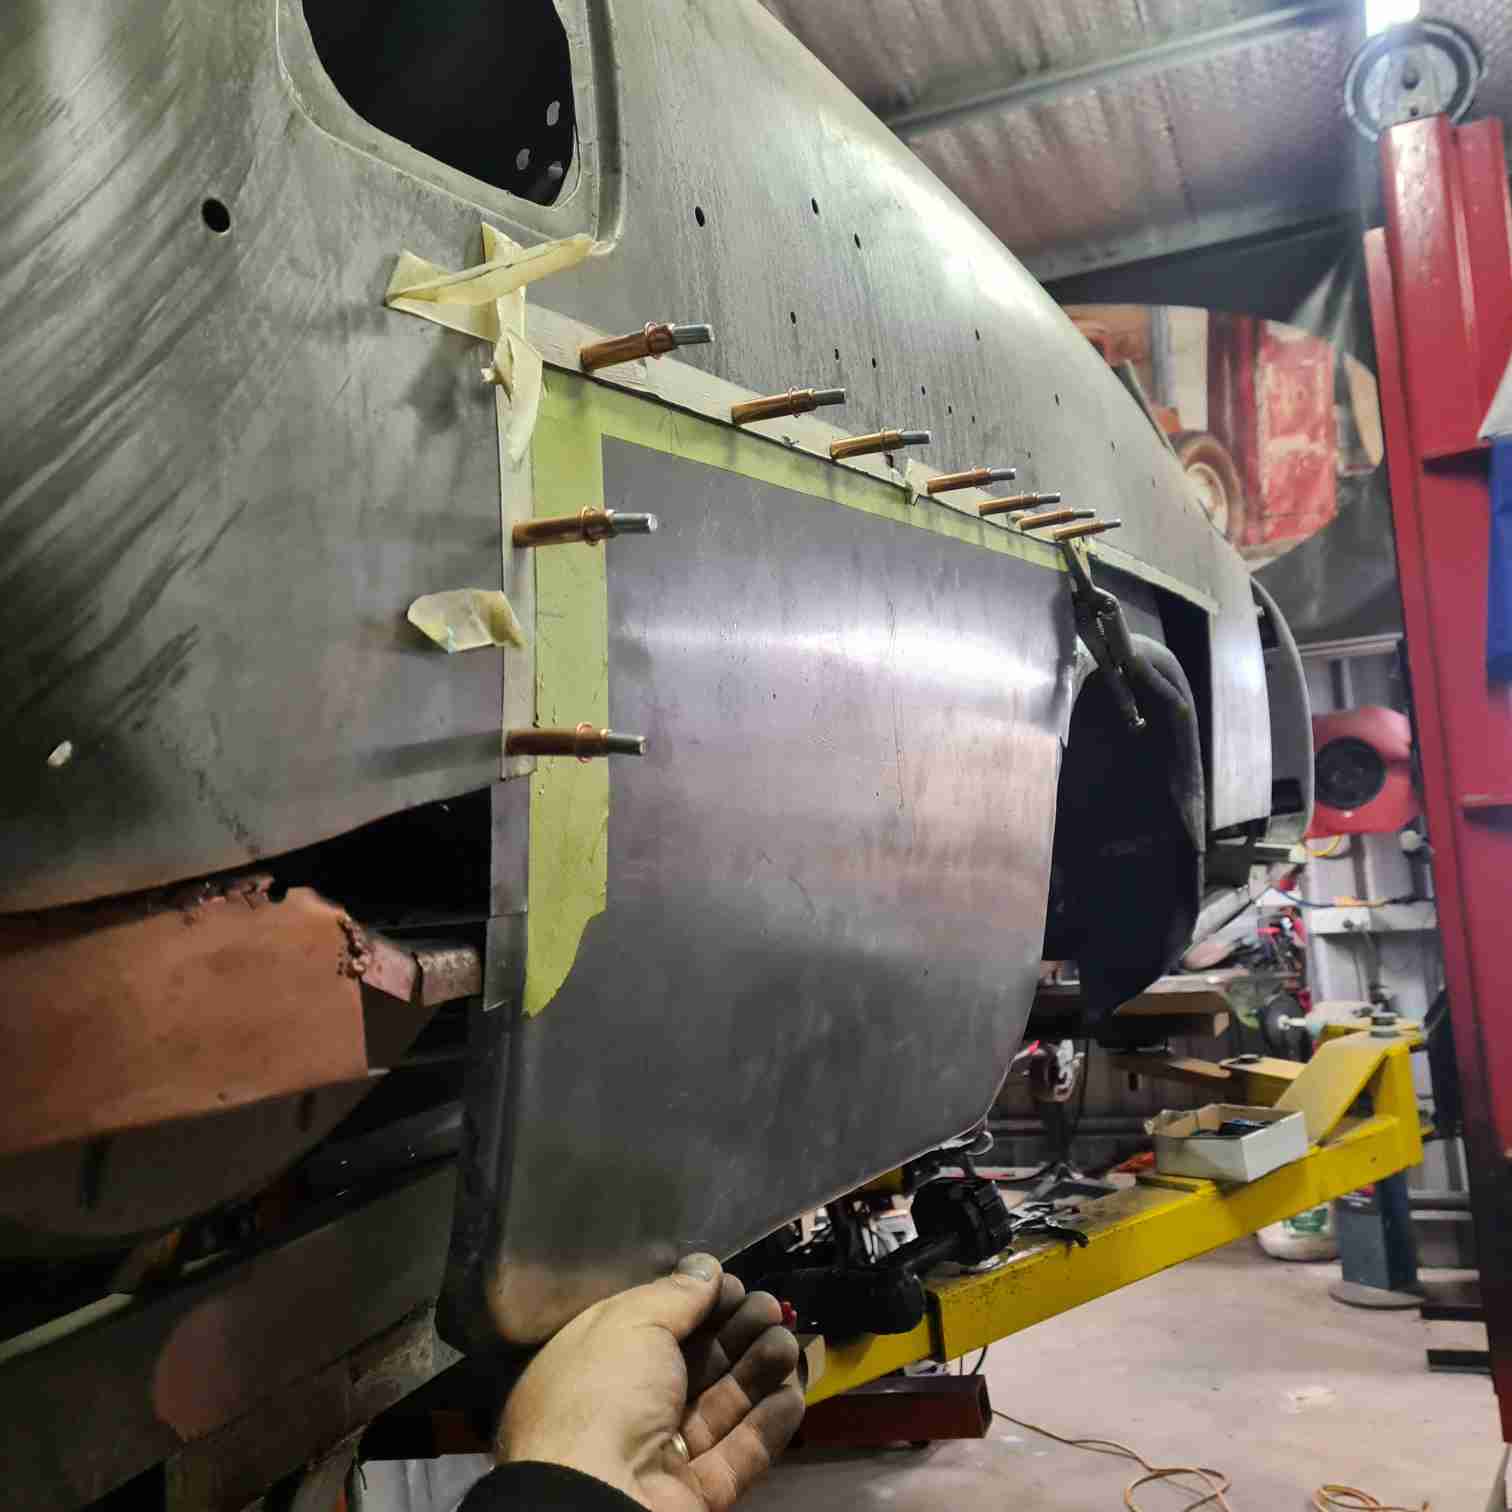
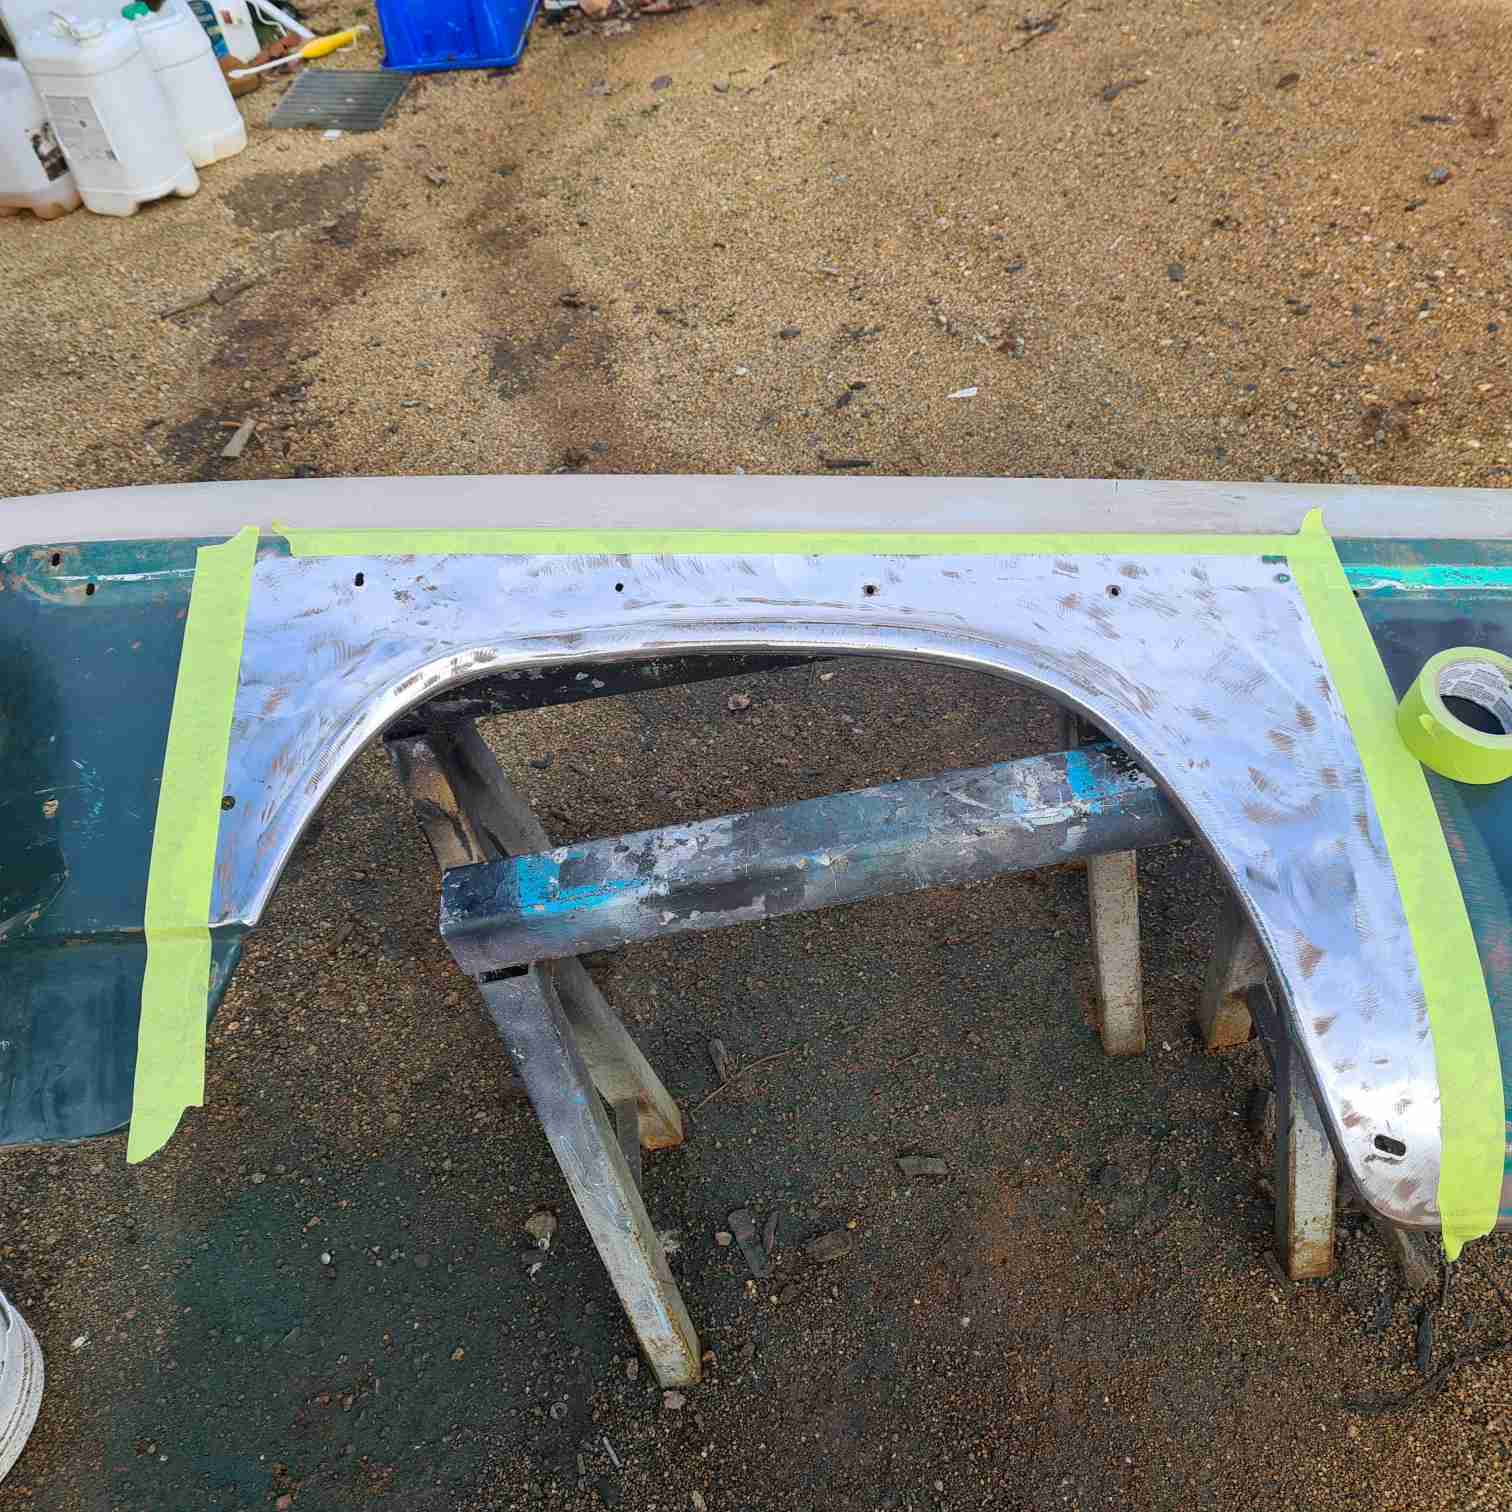
The Passenger side Rocker inners are done and outer I will work on with the panel rear 1/4 panels
I hand made the lower rear 1/4 panel section from a tracing of what was left and checked with the other
side which is toast as well. I use "clecko's to hold the new panel in place
so then I could make the inner panel to suit, welded that in there and sealed it up
then welded on the new panel. The wheel arch lip is what was bugging me how I was going to make all this.
I have 2 newer fenders as my originals are rusted out, so I though if I use the opposite side fender
looking on photoshop they look pretty close. they do fit but the rear arches are a lot wider so I cut it in half
and you have to rotate the panels to fit the best.
My thought and plan is to get the rockers fixed and panels in place and once the strength is back in
I can put on a rotisserie I have to finish it off and get in all the hard places.
I wish there was patch panels for these cars, we be sooo much easier than hand forming
which mind you this is my first go at it. watched a lot of youtube videos!!
 (panel in position.jpg) (panel in position.jpg)
 (panel in position 2.jpg) (panel in position 2.jpg)
 (inner panel.jpg) (inner panel.jpg)
 (sacrifice a fender.jpg) (sacrifice a fender.jpg)
 (front fender are more narrow.jpg) (front fender are more narrow.jpg)
 (close the gap.jpg) (close the gap.jpg)
Attachments
----------------
panel in position.jpg (69KB - 102 downloads)
panel in position 2.jpg (78KB - 102 downloads)
inner panel.jpg (76KB - 101 downloads)
sacrifice a fender.jpg (178KB - 93 downloads)
front fender are more narrow.jpg (90KB - 94 downloads)
close the gap.jpg (97KB - 148 downloads)
|
|
| |
|

Expert
Posts: 3396
Location: Chestertown, NY ( near Lake George) | Holy cow, what a project. Glad my sedan was pretty solid! |
|
| |
|
Extreme Veteran
Posts: 444
Location: Victoria, AUSTRALIA | Got a bit more done during the week
just have to finish welding in the panel above
the rocker and then hand make the door corner
section. I have the old one cutout, its pretty complicated
but still doable.
Then I will turn the car around and start the other side.
Once the rockers are all done I plan to put it on my rotisserie
|
|
| |
|
Extreme Veteran
Posts: 444
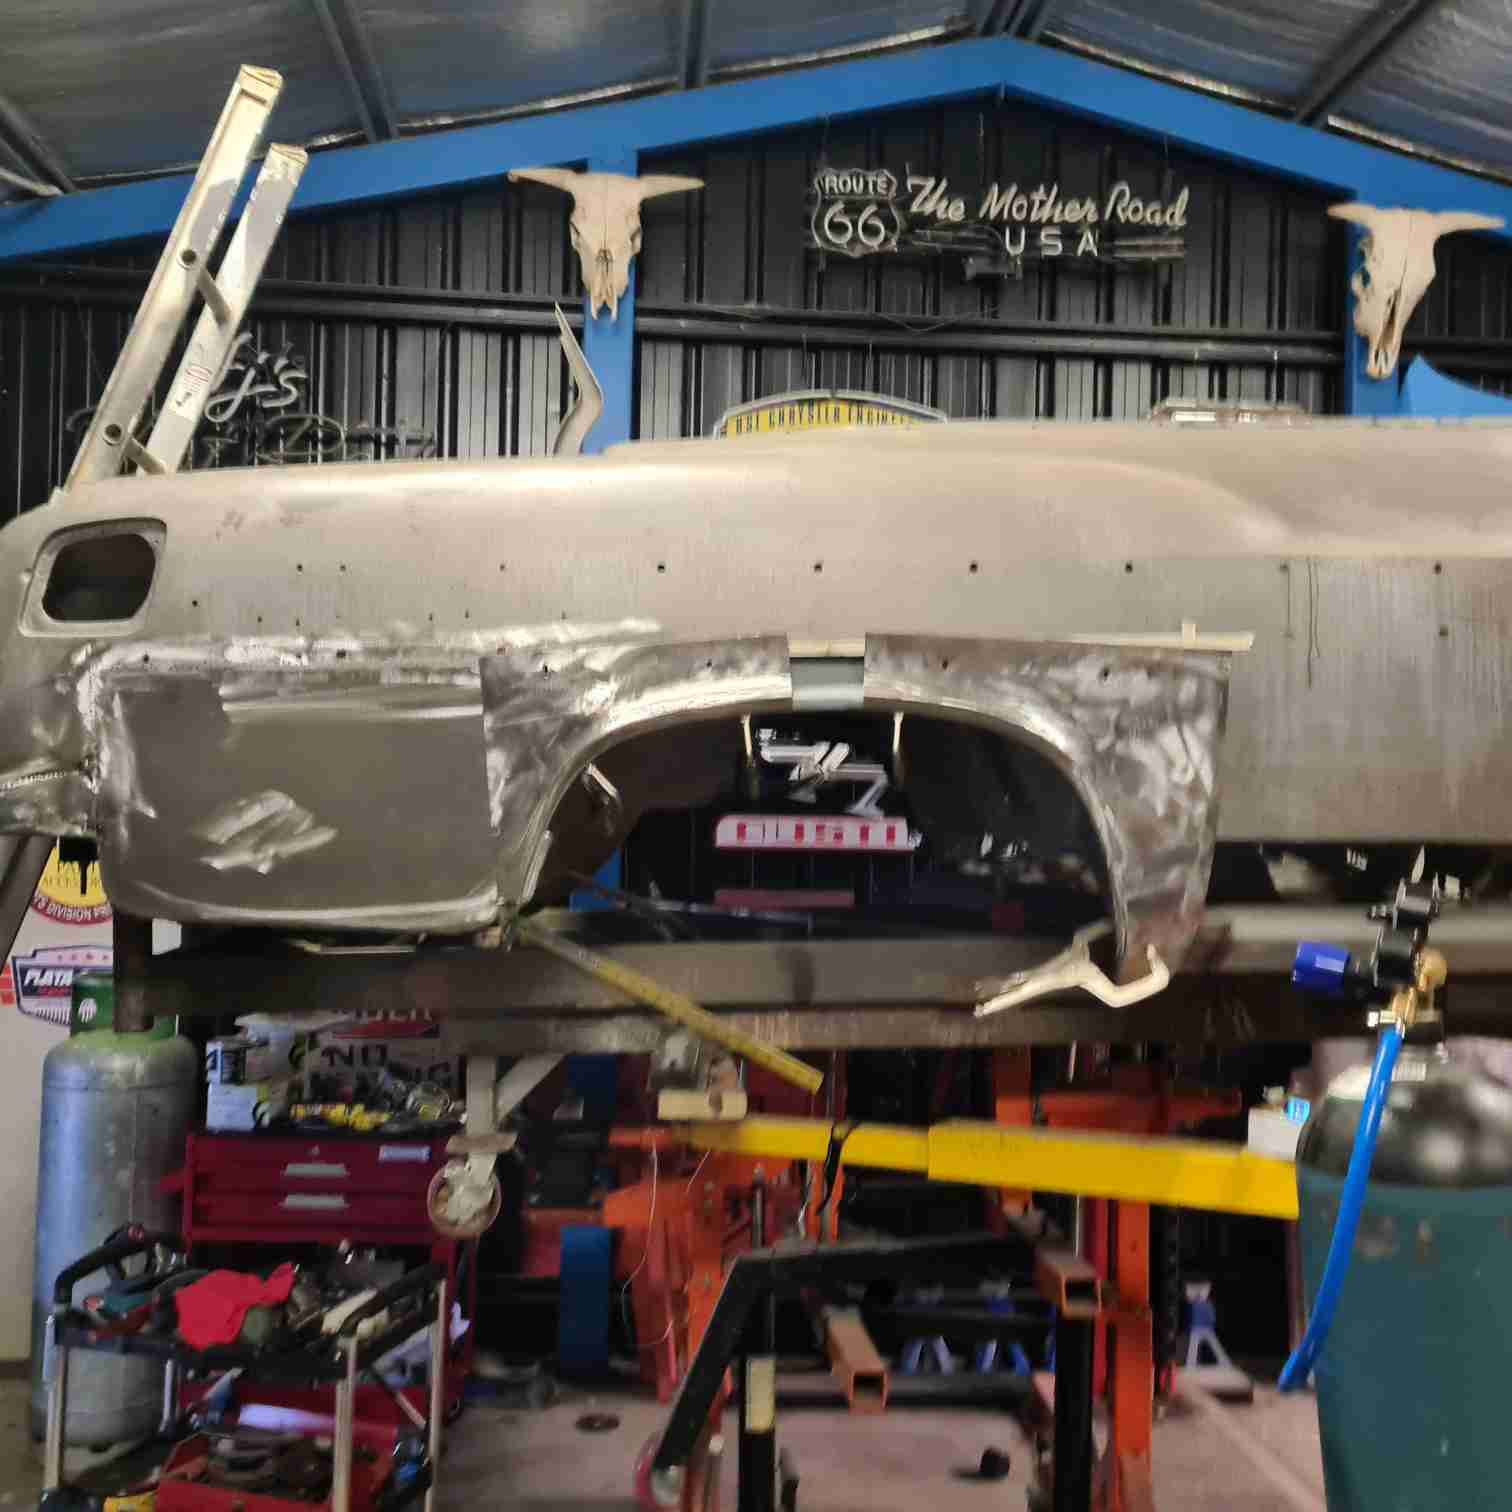
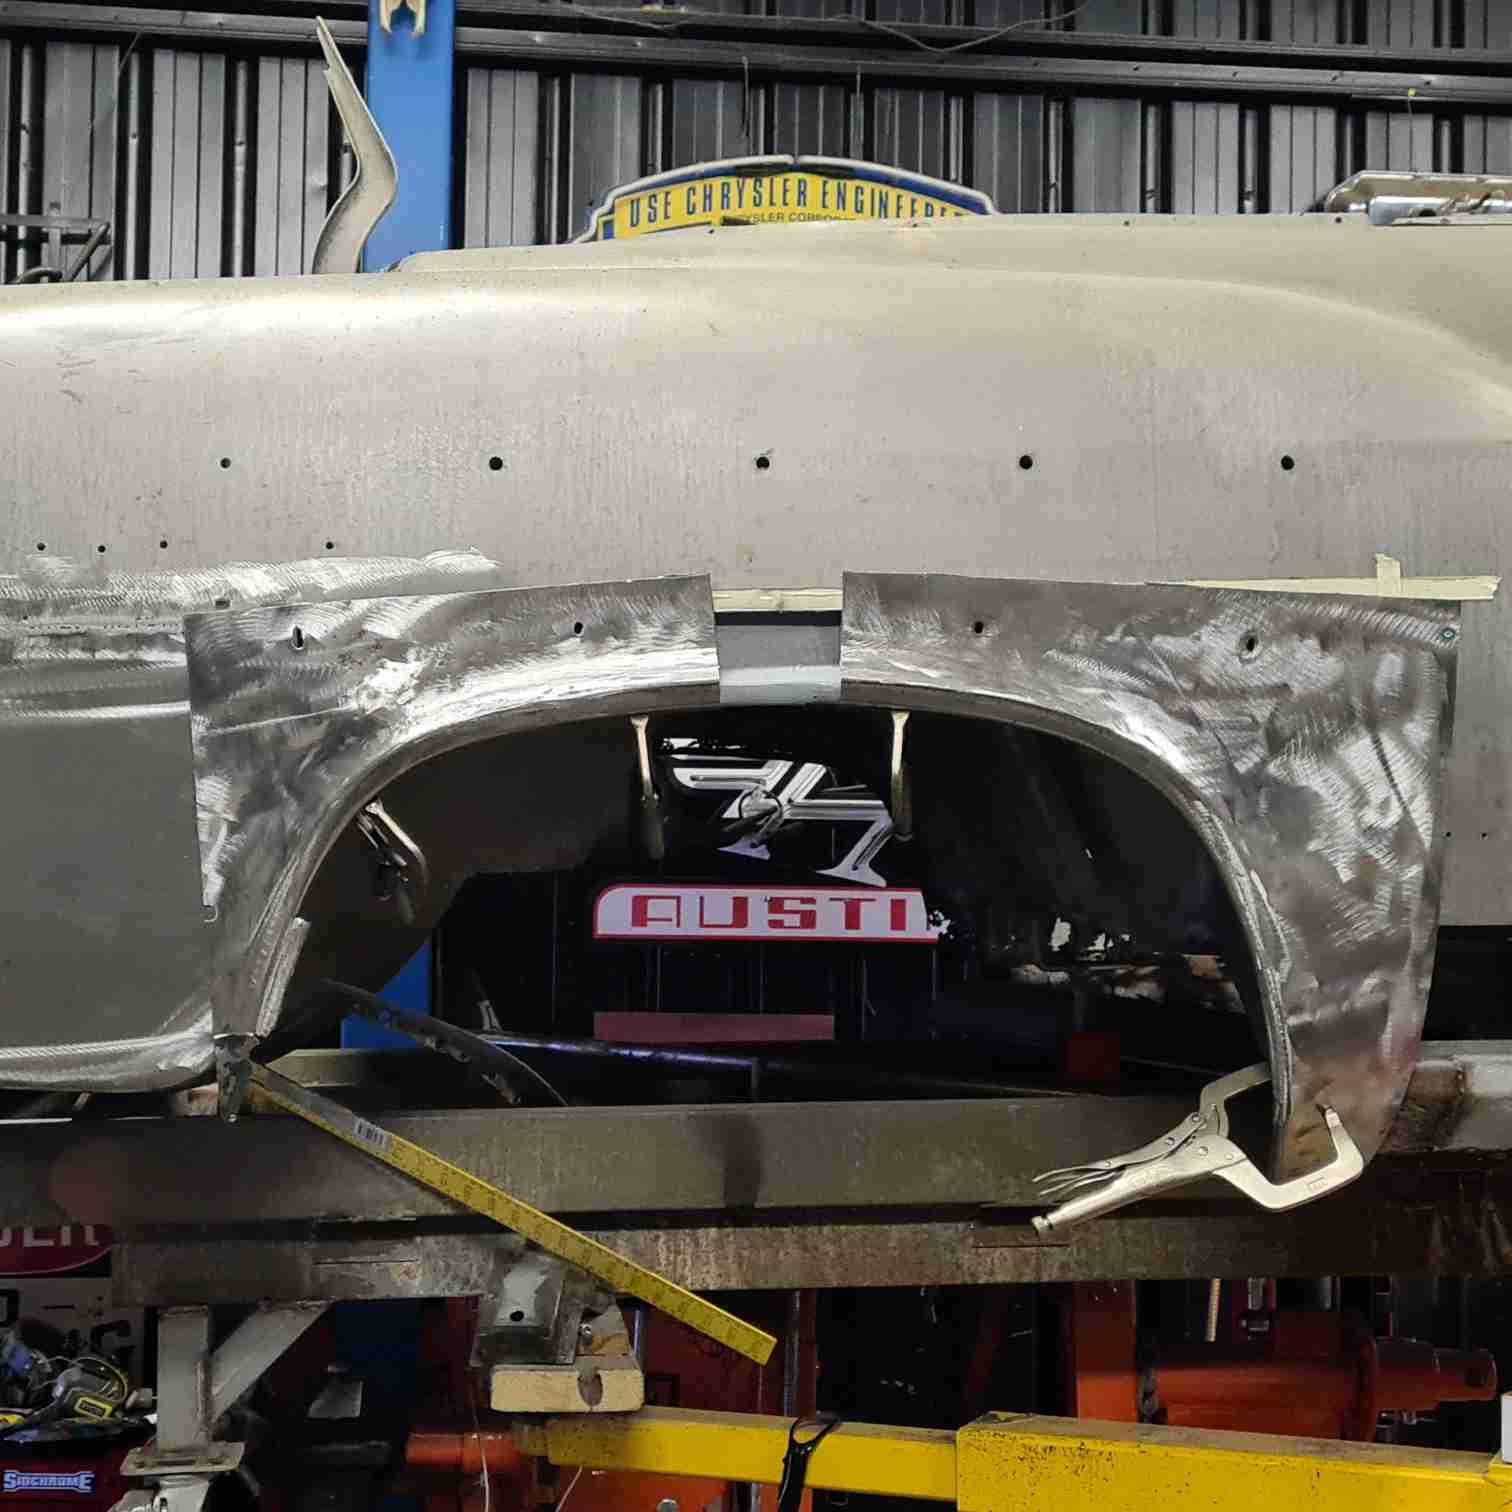
Location: Victoria, AUSTRALIA | The centre section the cut fender worked out ok
once on a the rotisserie will be easier to get into all the tight spots and finish off the welds, grinding.
I don't want to take it off the steel base until its strong enough spin around.
 (20220814_165020.jpg) (20220814_165020.jpg)
 (20220814_165016.jpg) (20220814_165016.jpg)
 (20220814_165022.jpg) (20220814_165022.jpg)
Attachments
----------------
20220814_165020.jpg (115KB - 80 downloads)
20220814_165016.jpg (99KB - 80 downloads)
20220814_165022.jpg (102KB - 83 downloads)
|
|
| |
|
Extreme Veteran
Posts: 444
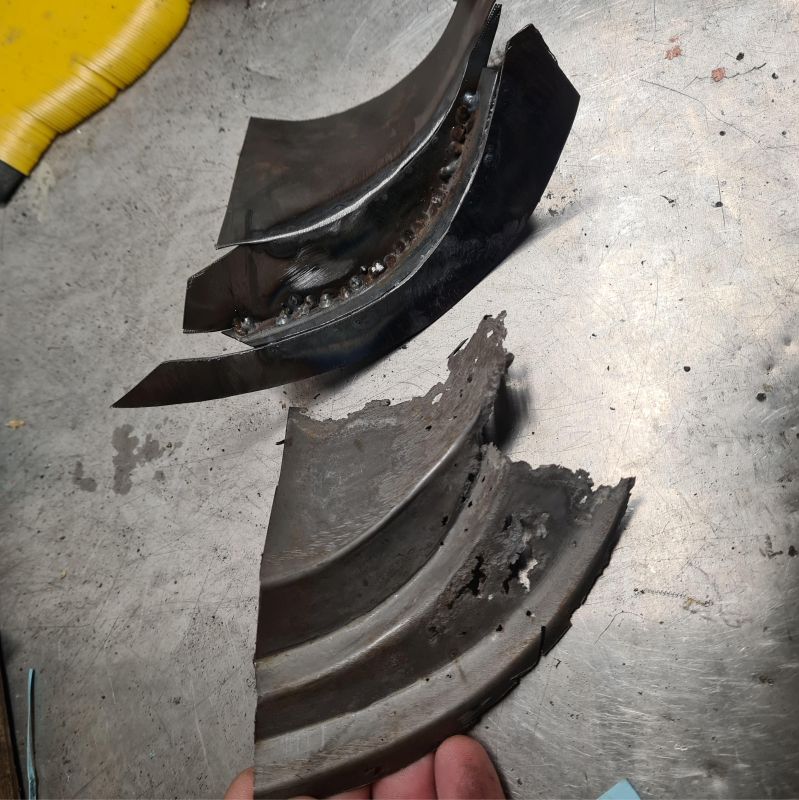
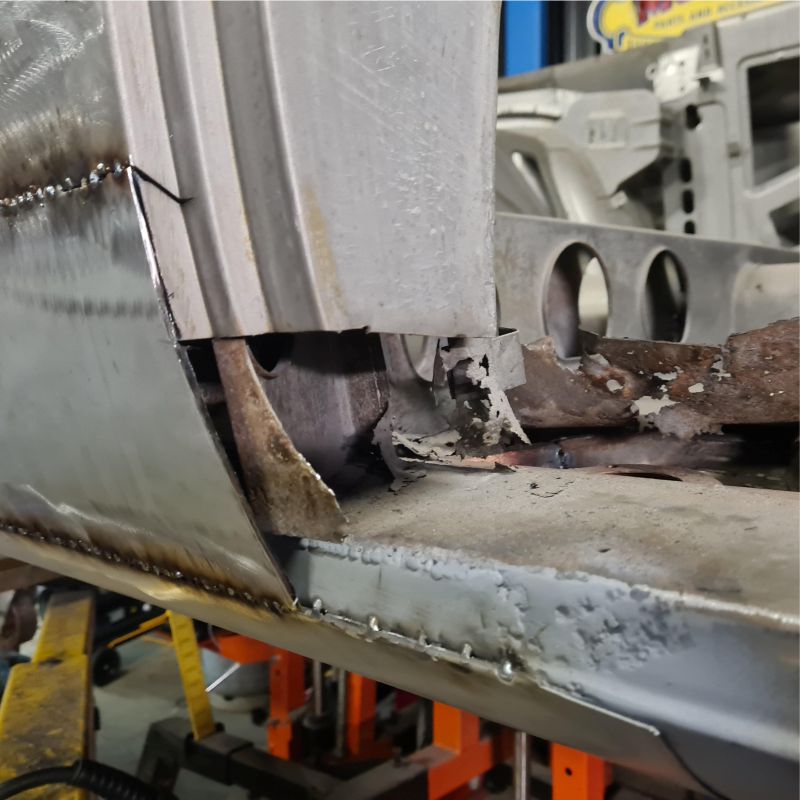
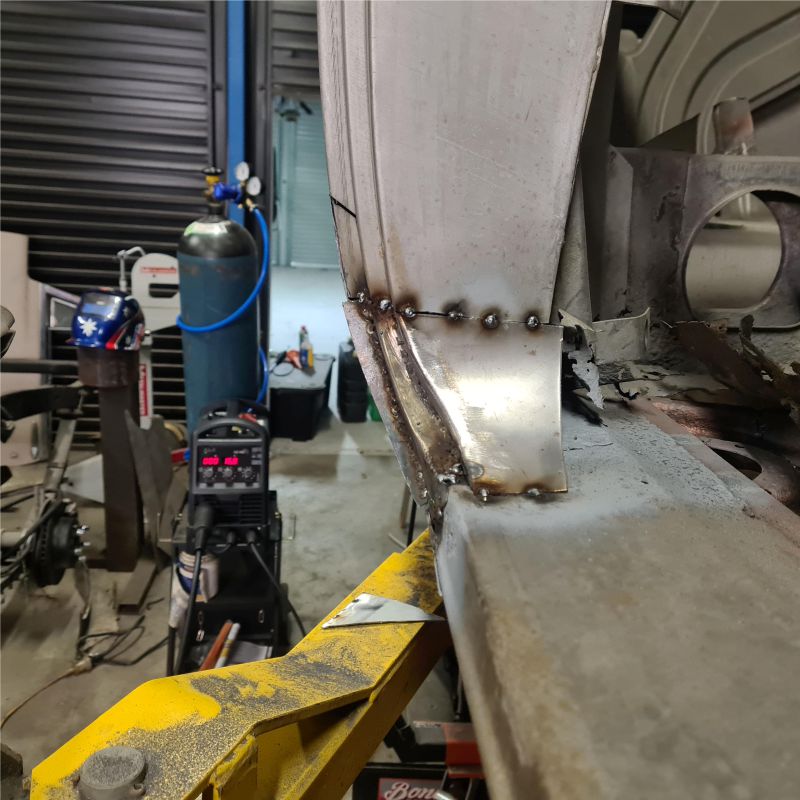
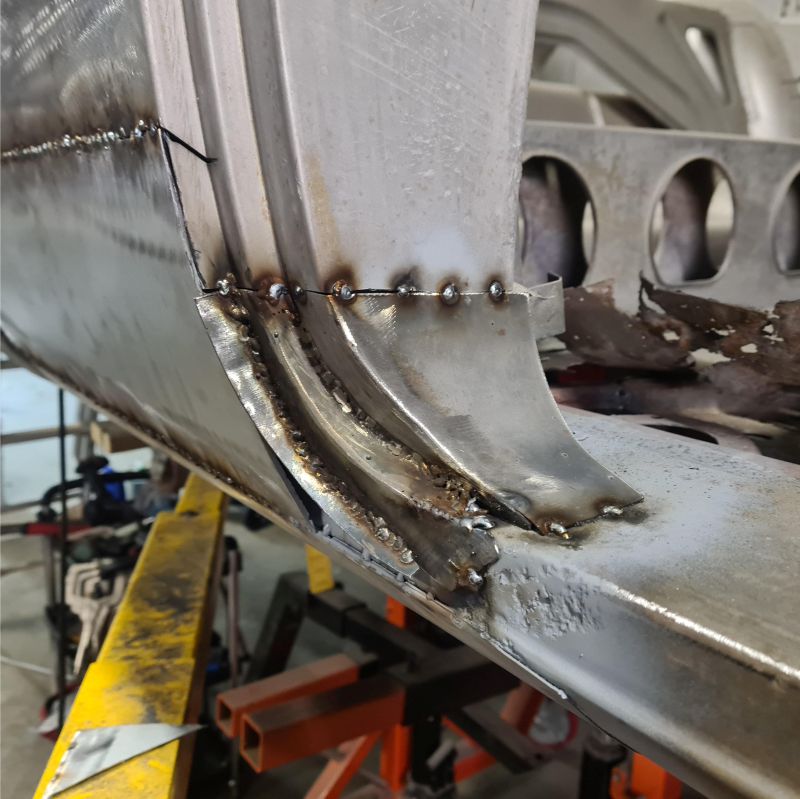
Location: Victoria, AUSTRALIA | Worked on the lower door jamb corner
cut pieces of cardboard to match the rusty piece
then weld together, It looks rough now but once all welded in
and ground down it will be nice.
I use weld thru primer in the hidden sections before welding in the new pieces
they are primed on the back side too
luckily the drivers side corner is not as bad as this 
 (5.jpg) (5.jpg)
 (4.jpg) (4.jpg)
 (3.jpg) (3.jpg)
 (2.jpg) (2.jpg)
 (1.jpg) (1.jpg)
Attachments
----------------
5.jpg (137KB - 82 downloads)
4.jpg (126KB - 77 downloads)
3.jpg (90KB - 84 downloads)
2.jpg (103KB - 85 downloads)
1.jpg (98KB - 79 downloads)
|
|
| |
|
Expert 5K+
Posts: 9666
Location: So. Cal | Looks like a good solution for that compound curve if you don't have a good original to use. Keep up the good work! |
|
| |
|
Extreme Veteran
Posts: 444
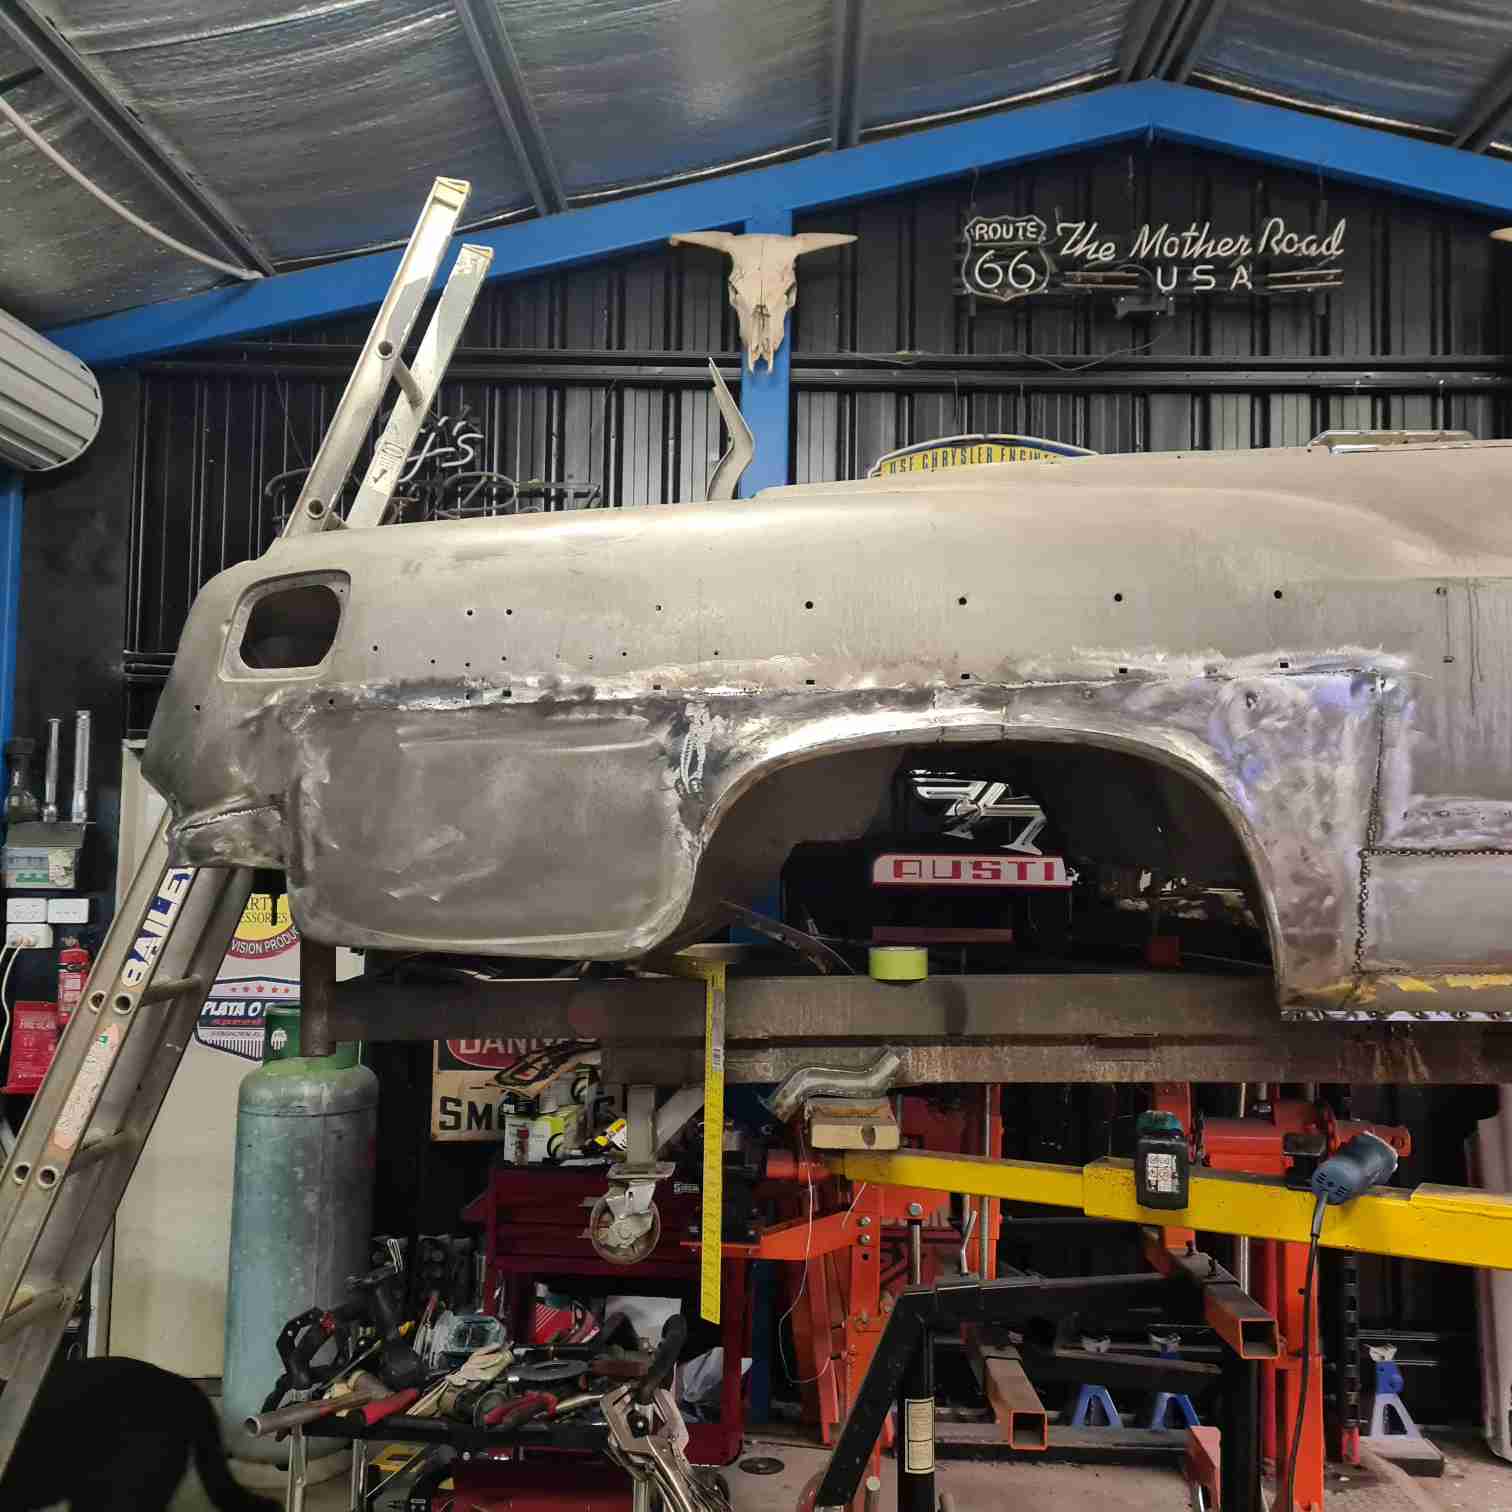
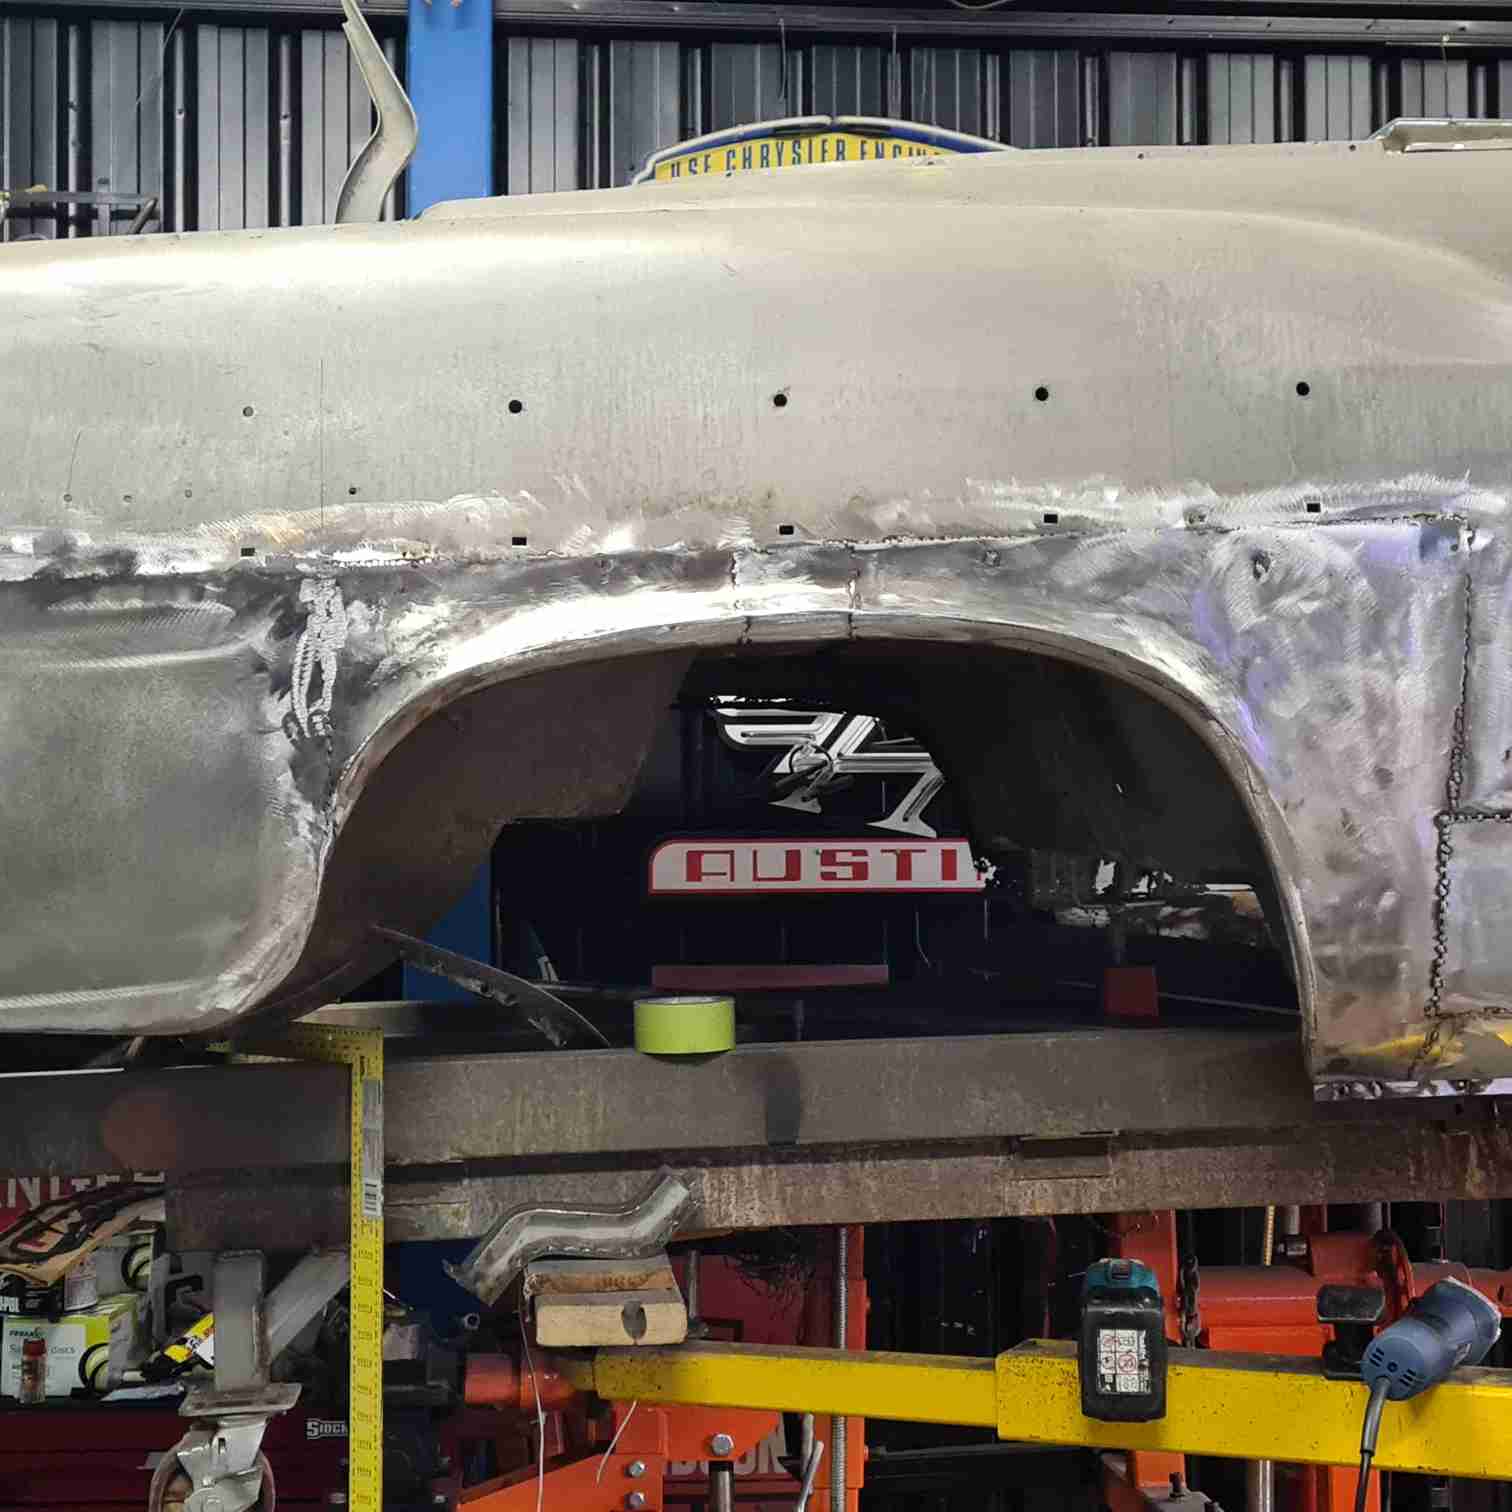
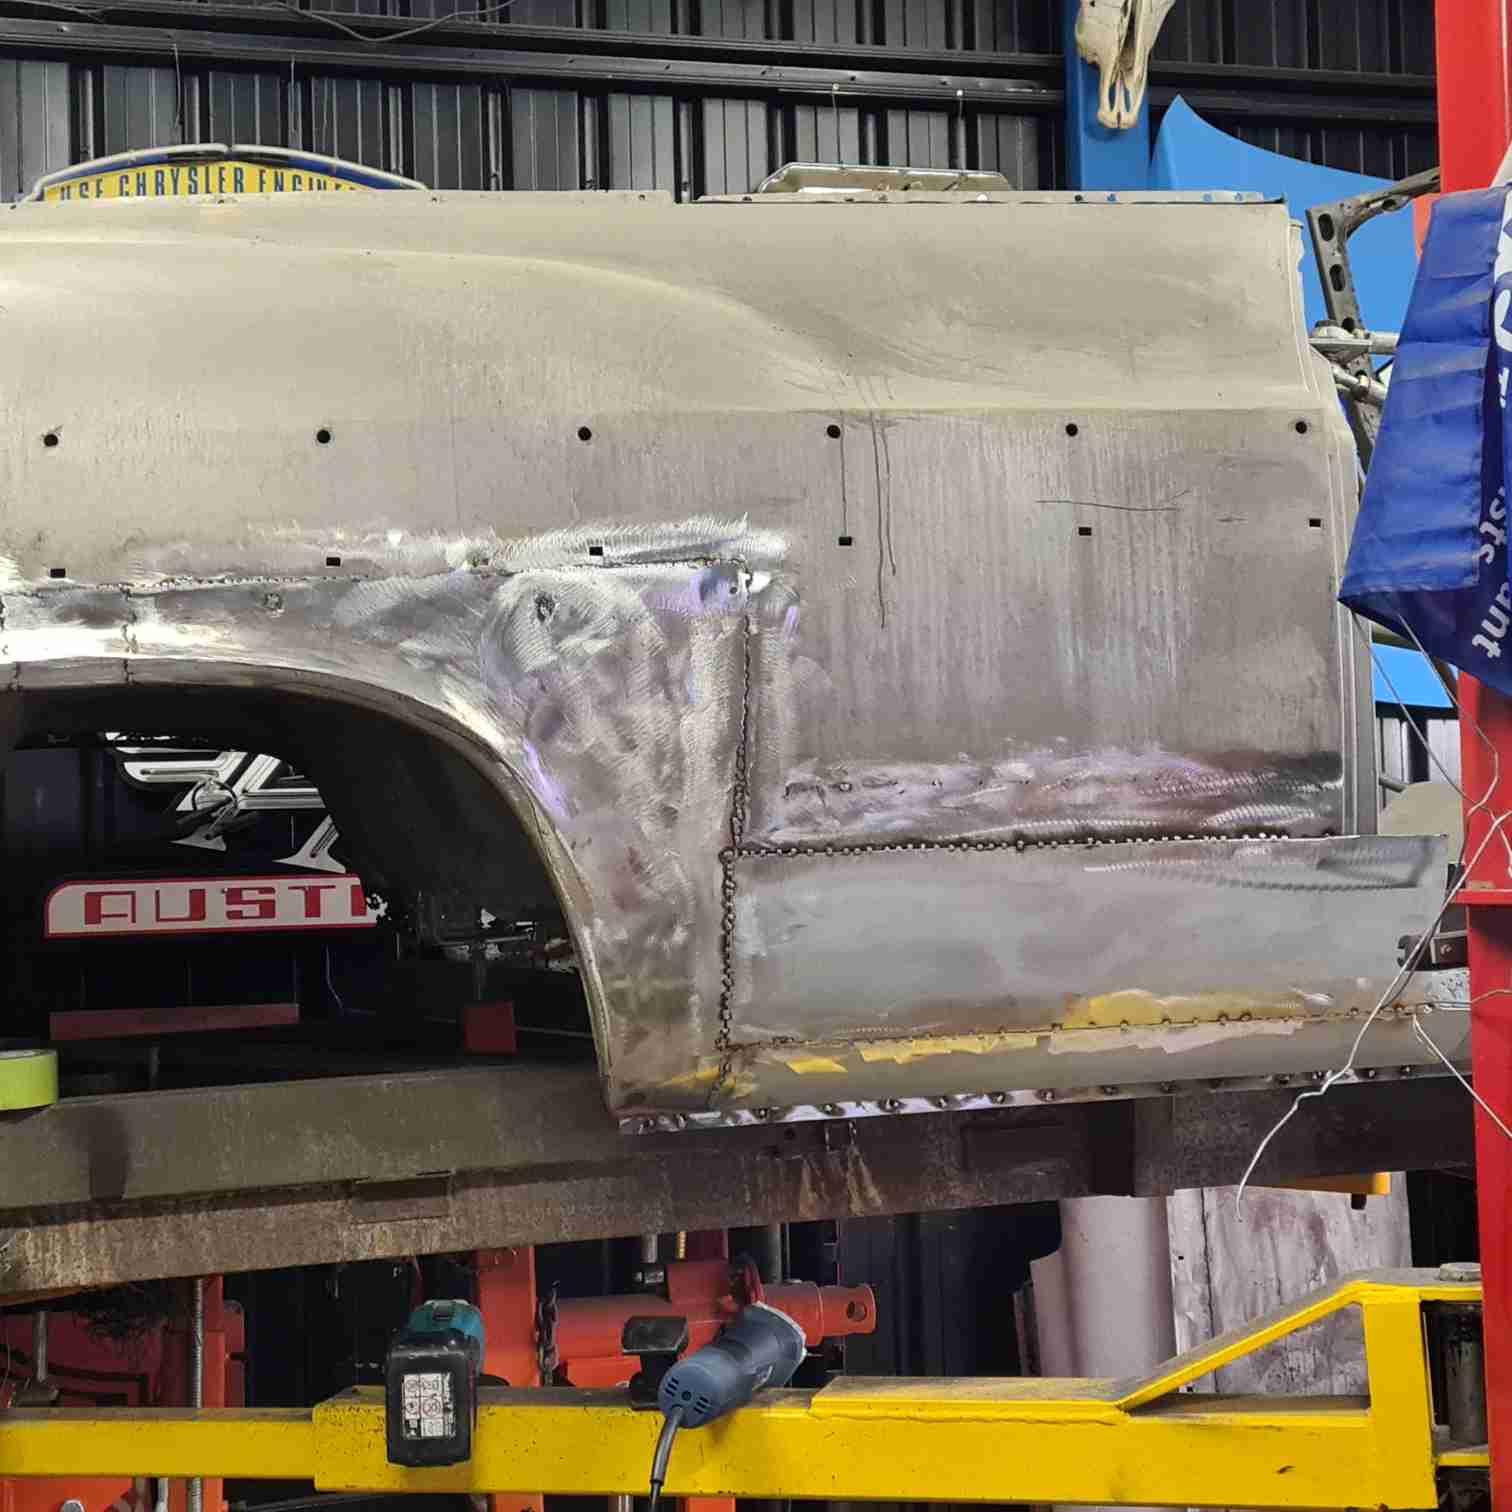
Location: Victoria, AUSTRALIA | Bit more work on the 55
Passenger side inner and outer rockers and rear 1/4 is finished
onto the drivers side, starting from the front is finish to the back of the door jamb
The inner rocker panel is welded in inner rocker to floor braces is all finish and in
onto the rear 1/4 panel which is a pain. Once the sides are done
I will start on the truck floor and rear section under truck lid latch area.
then I will be happy to put it on my rotisserie as the work I add to it its getting stronger and stronger.
the braces from the inner rockers to the floor braces have to be either fully made or sections replaced
 (20230330_213113.jpg) (20230330_213113.jpg)
 (20230323_210340.jpg) (20230323_210340.jpg)
 (20230322_211438.jpg) (20230322_211438.jpg)
 (20230323_205543.jpg) (20230323_205543.jpg)
 (20230330_213110.jpg) (20230330_213110.jpg)
 (20230330_213810.jpg) (20230330_213810.jpg)
 (20230323_205550.jpg) (20230323_205550.jpg)
 (20230322_211431.jpg) (20230322_211431.jpg)
 (20230501_214336.jpg) (20230501_214336.jpg)
 (20230613_205453.jpg) (20230613_205453.jpg)
 (20230618_163222.jpg) (20230618_163222.jpg)
 (20230430_154514.jpg) (20230430_154514.jpg)
Attachments
----------------
20230330_213113.jpg (299KB - 46 downloads)
20230323_210340.jpg (403KB - 50 downloads)
20230322_211438.jpg (151KB - 46 downloads)
20230323_205543.jpg (367KB - 47 downloads)
20230330_213110.jpg (268KB - 47 downloads)
20230330_213810.jpg (194KB - 47 downloads)
20230323_205550.jpg (394KB - 47 downloads)
20230322_211431.jpg (268KB - 46 downloads)
20230501_214336.jpg (308KB - 45 downloads)
20230613_205453.jpg (272KB - 46 downloads)
20230618_163222.jpg (459KB - 57 downloads)
20230430_154514.jpg (365KB - 46 downloads)
|
|
| |
|
Extreme Veteran
Posts: 444
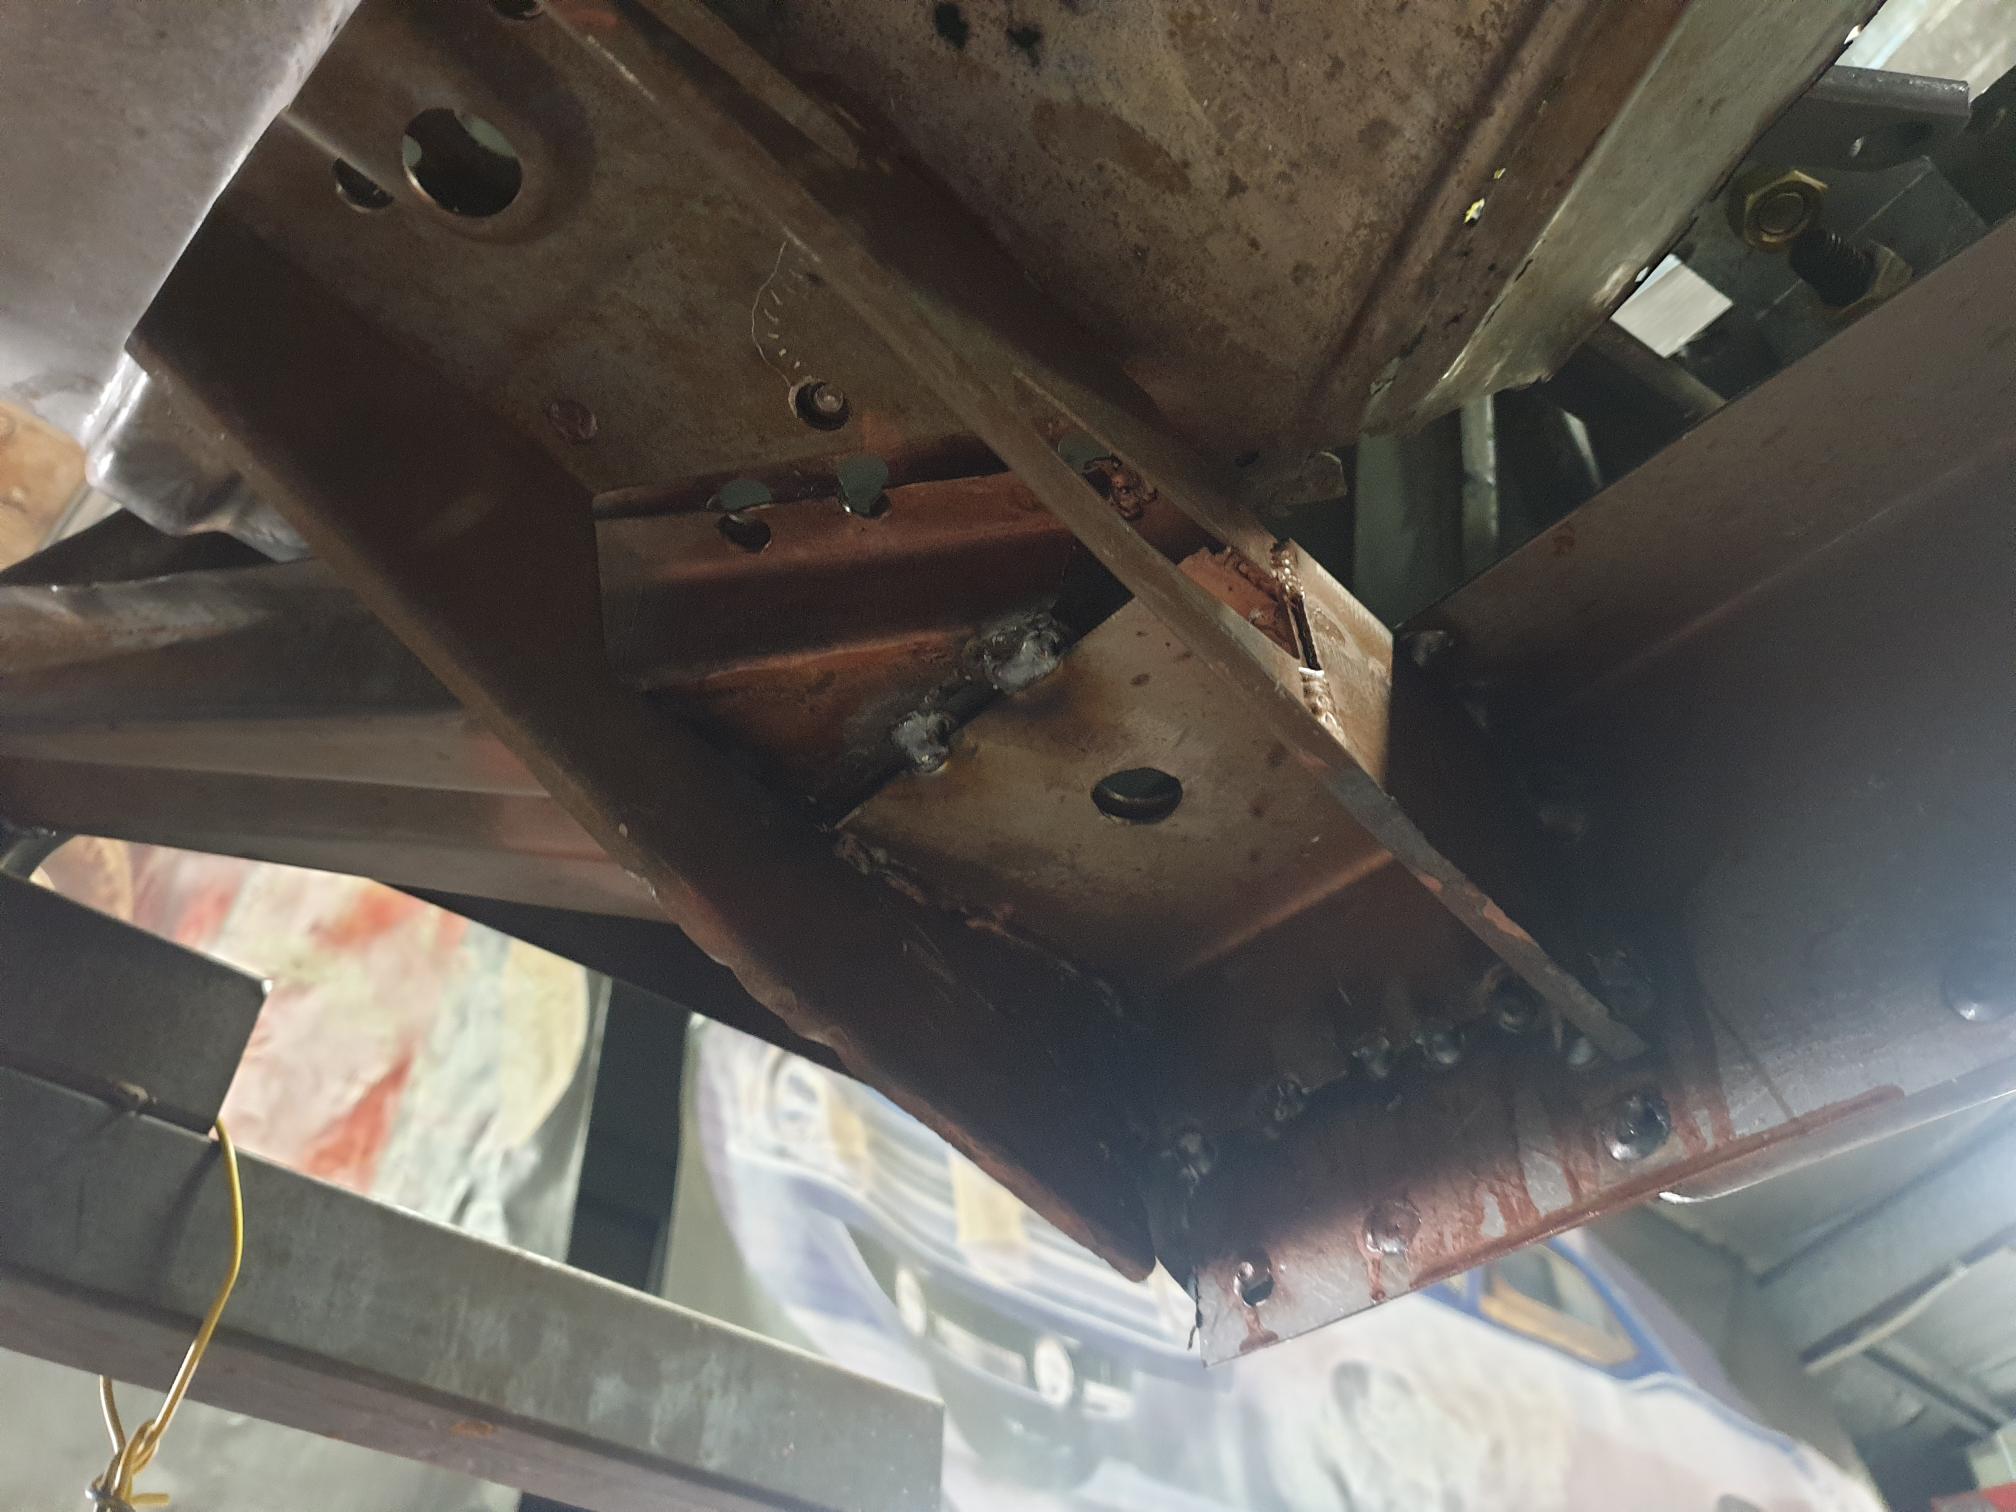
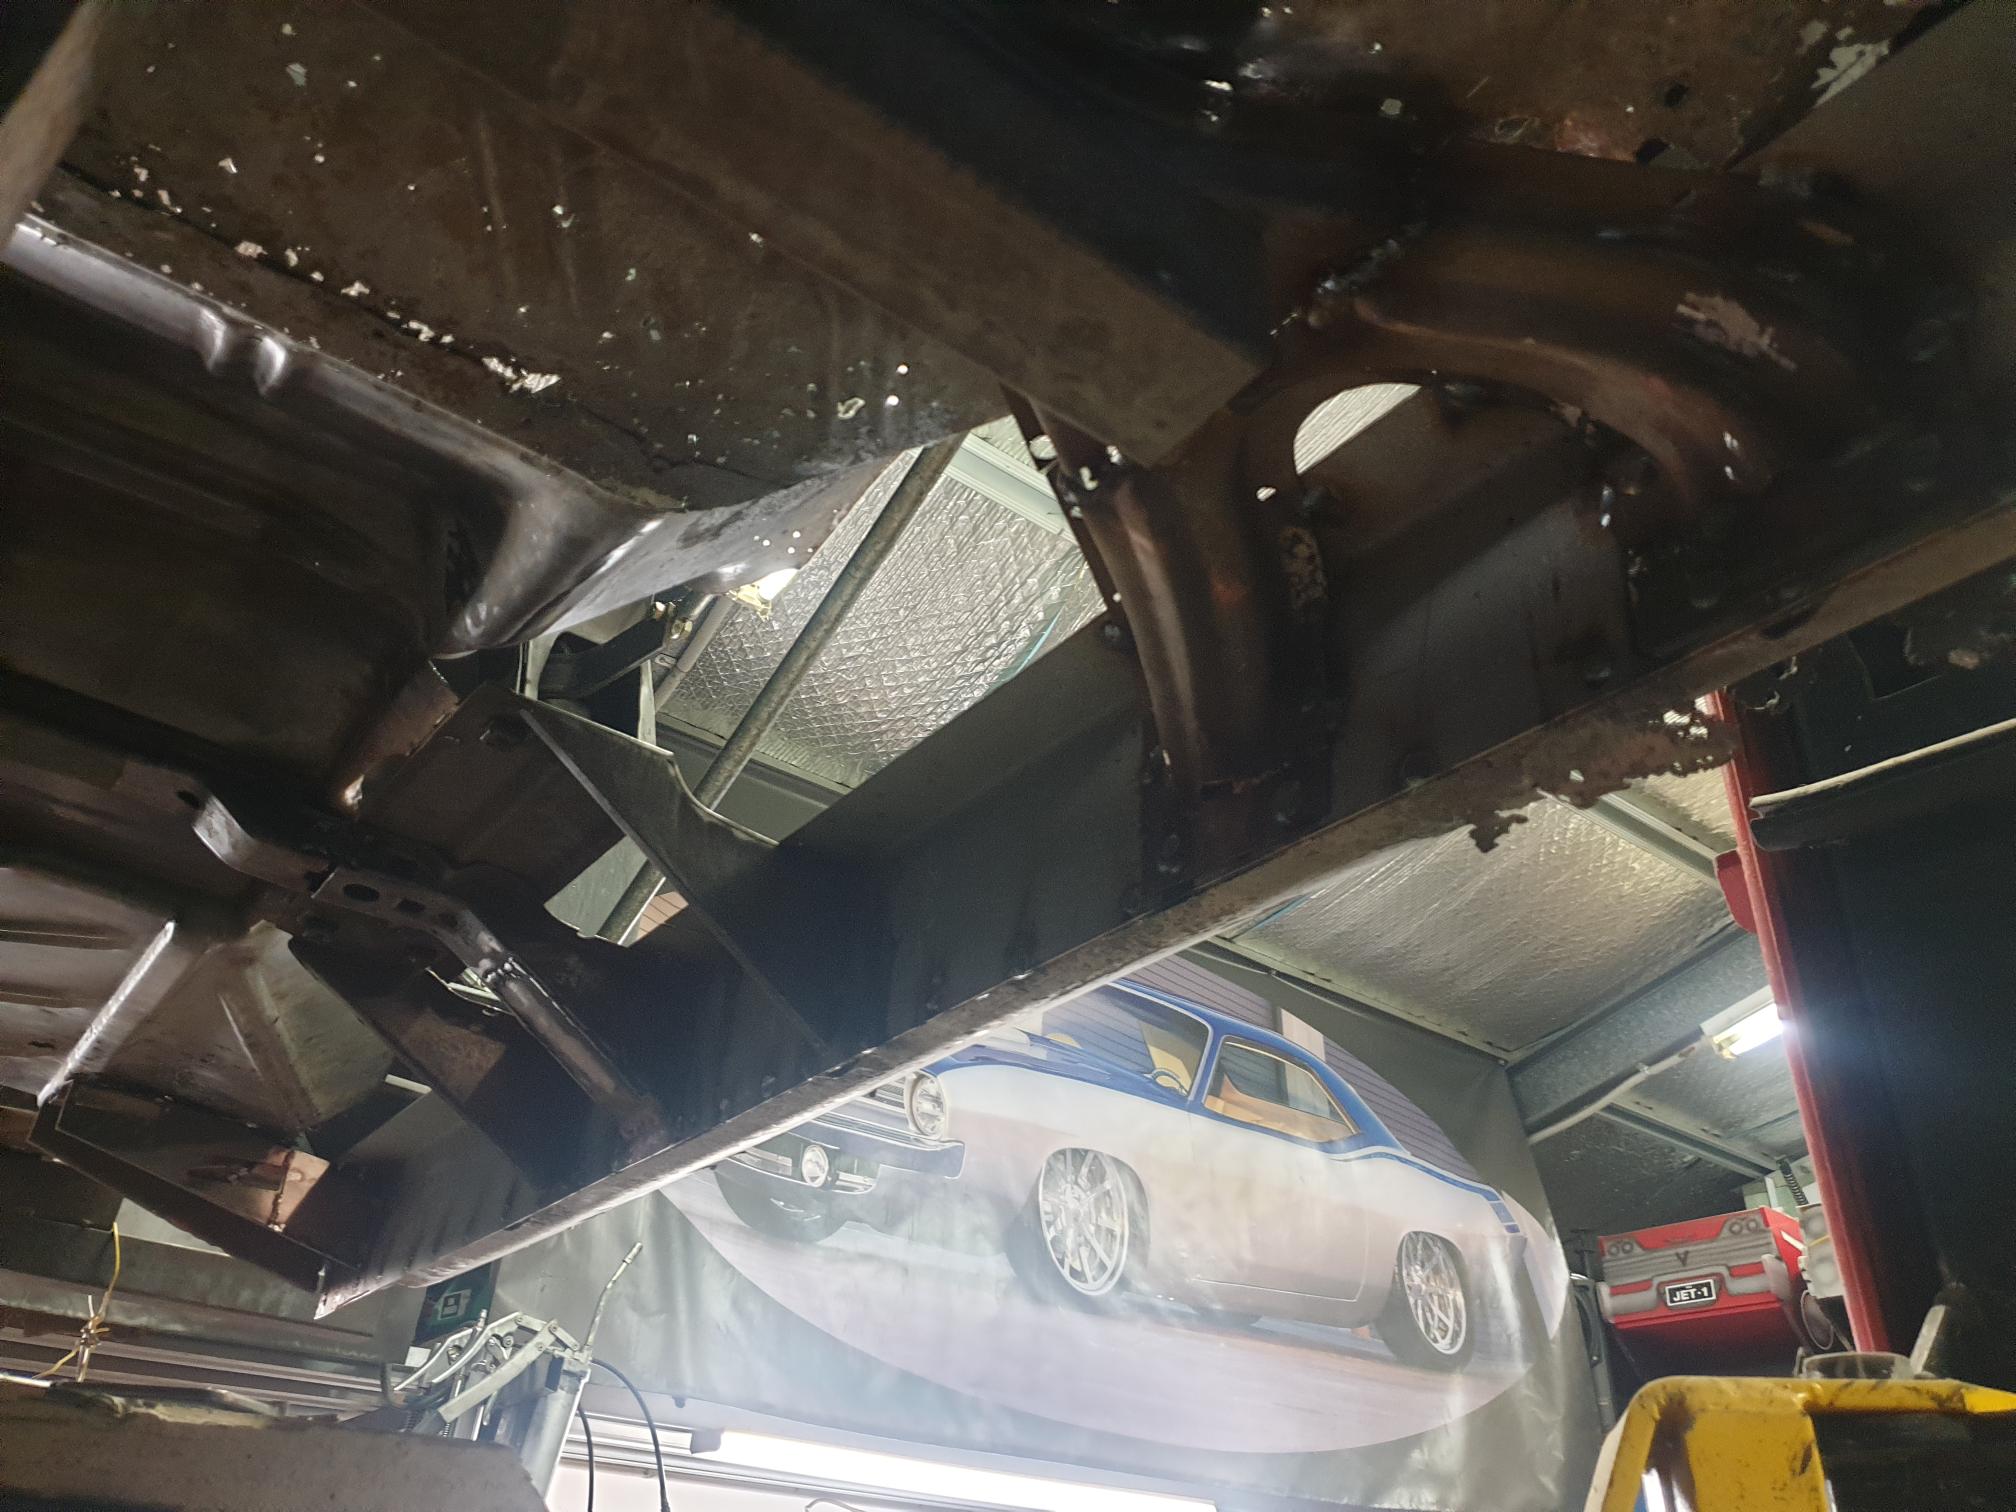
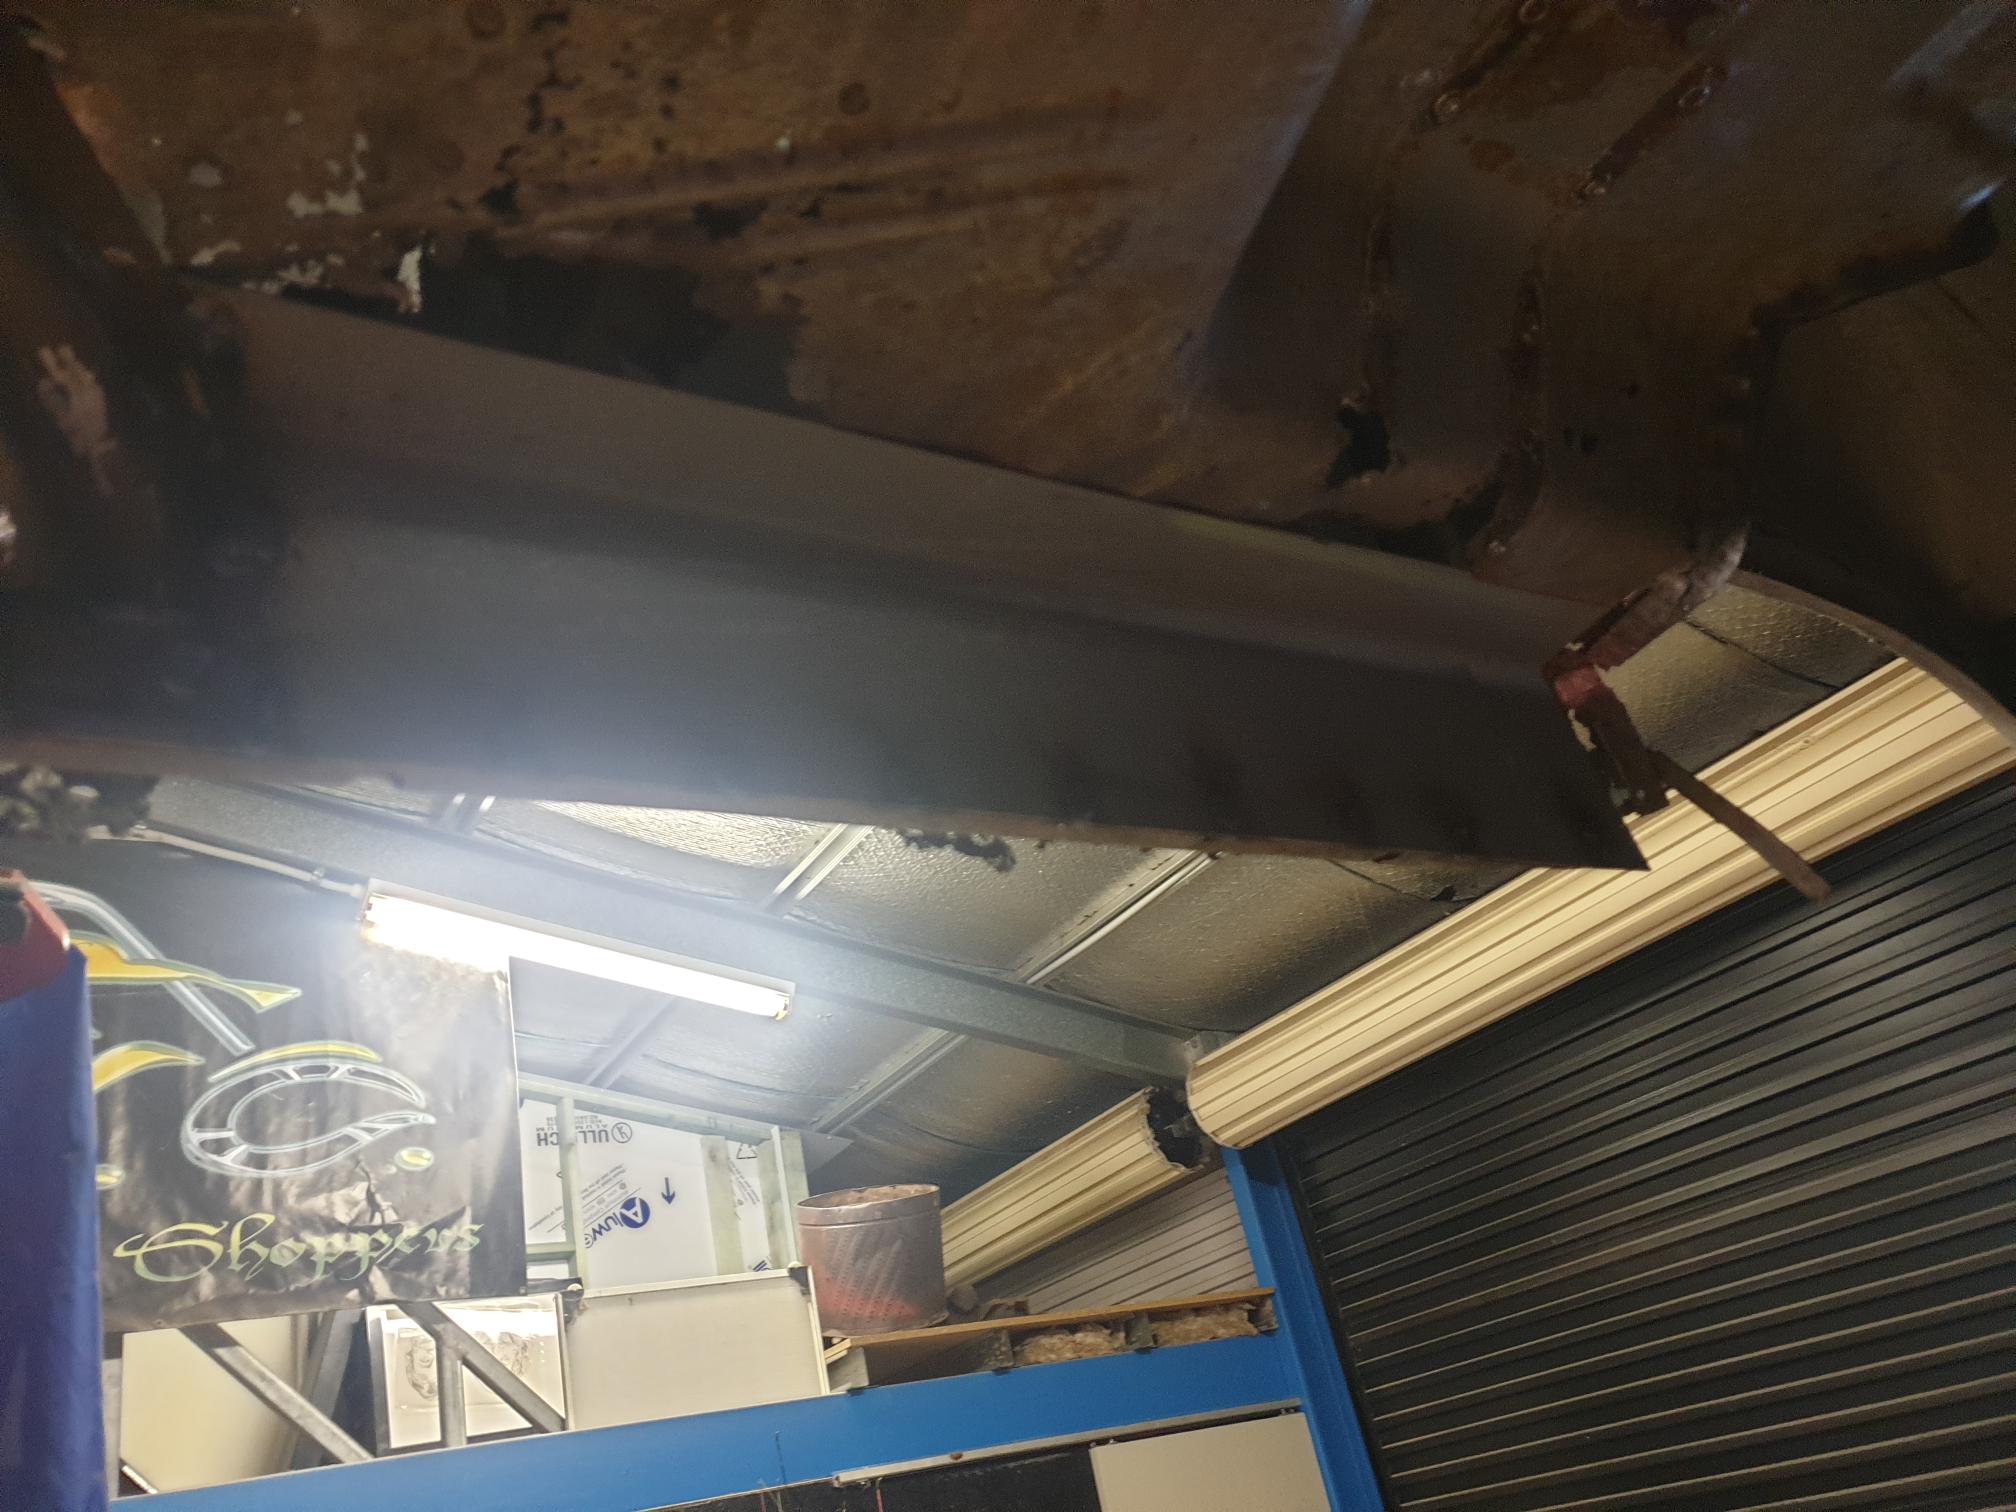
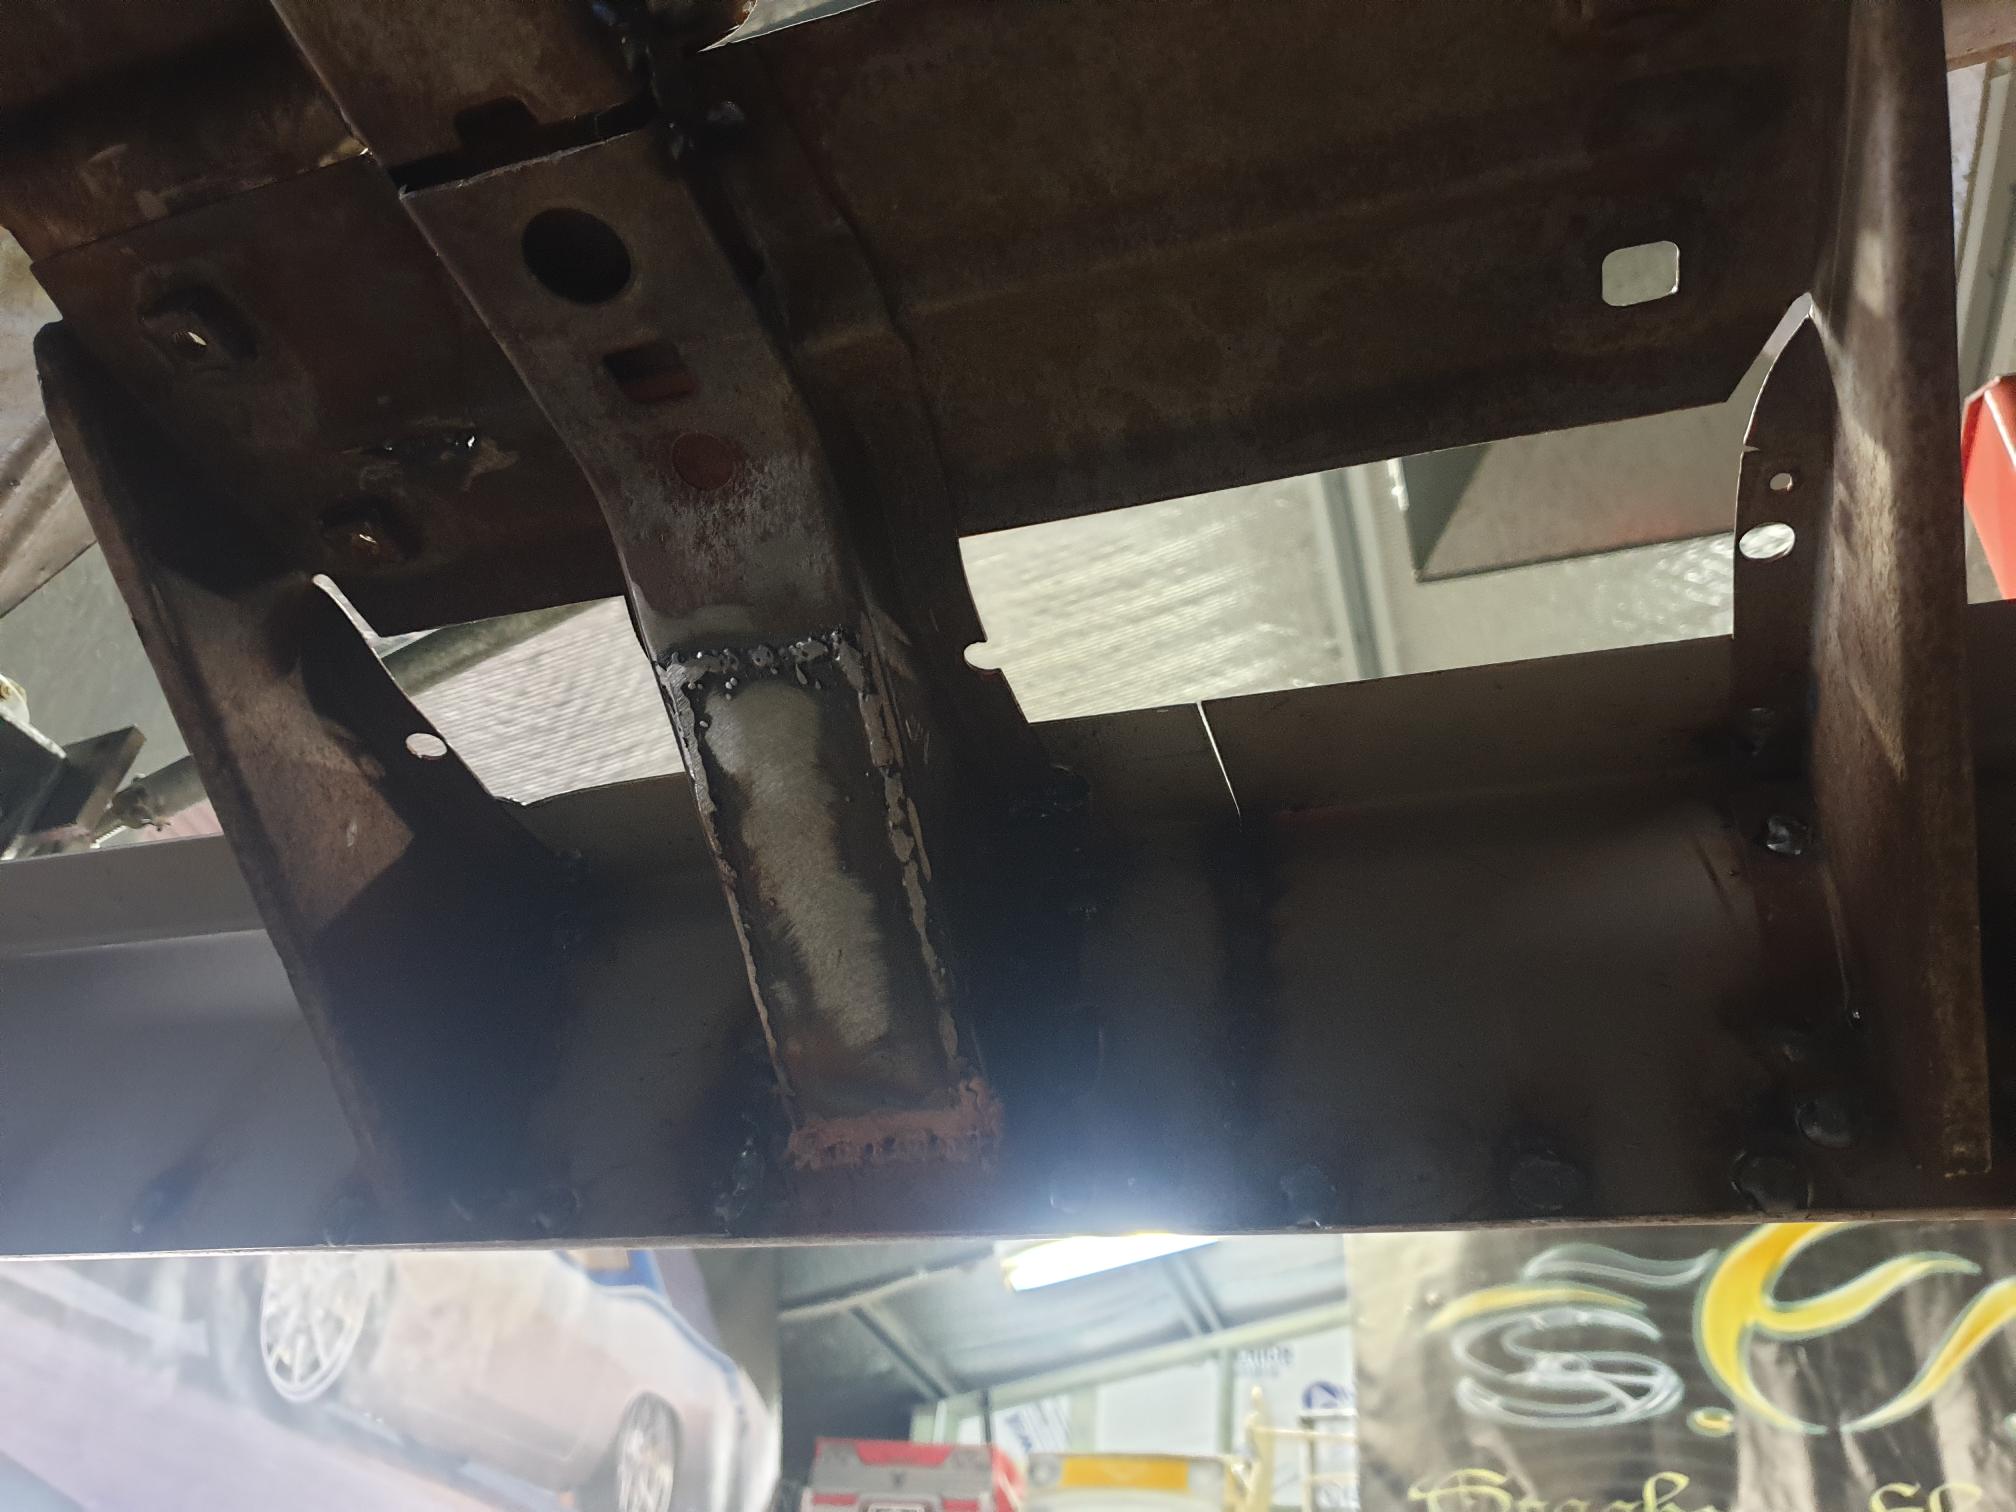
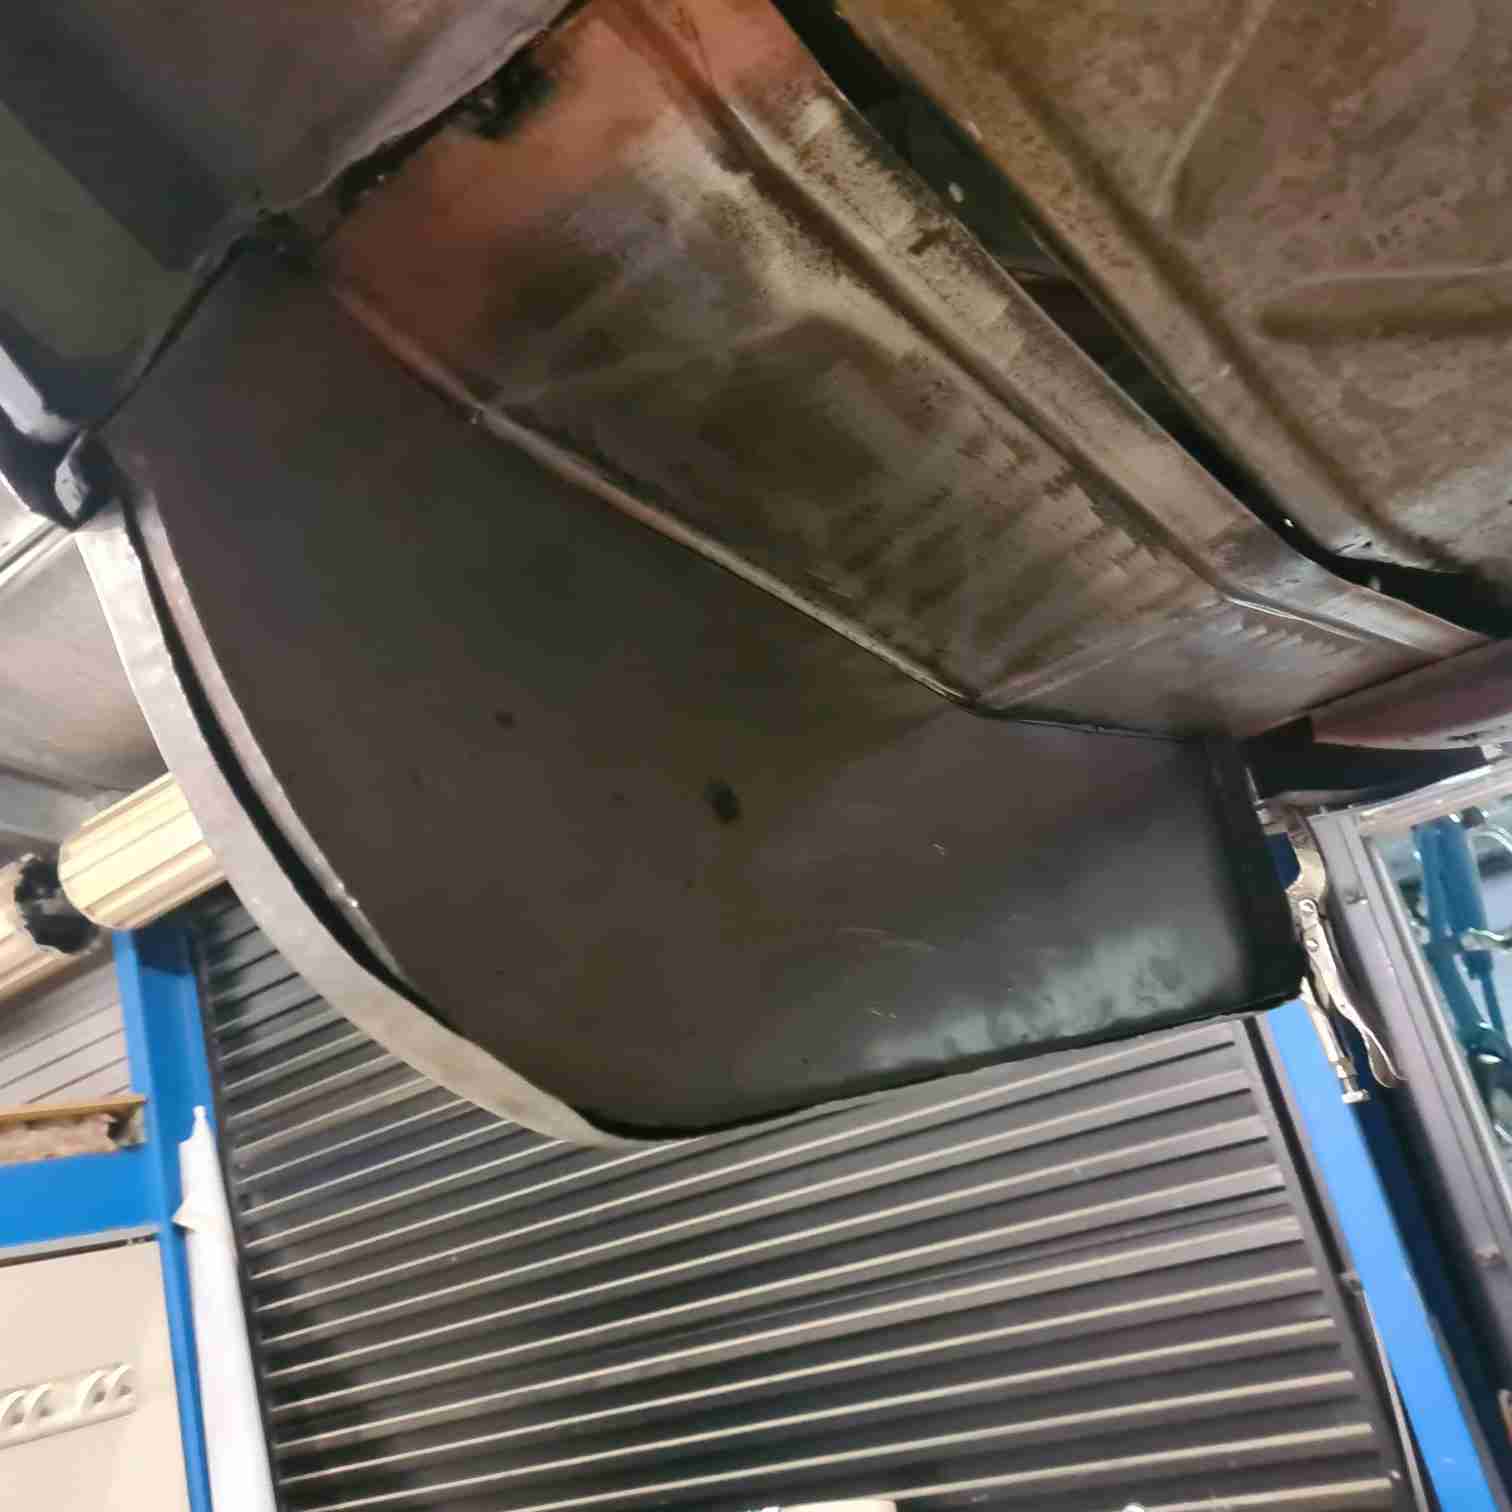
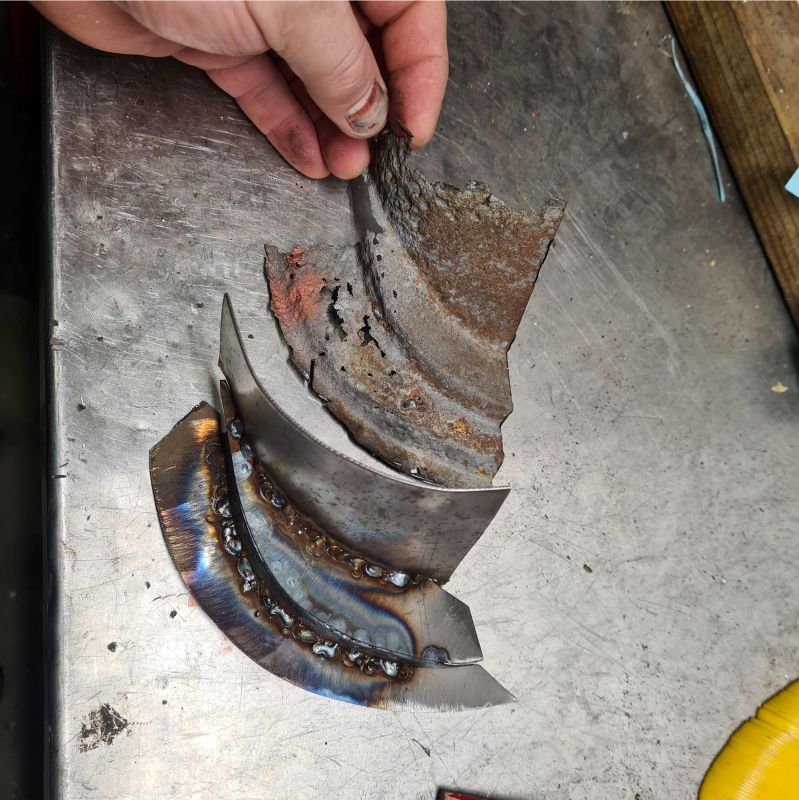
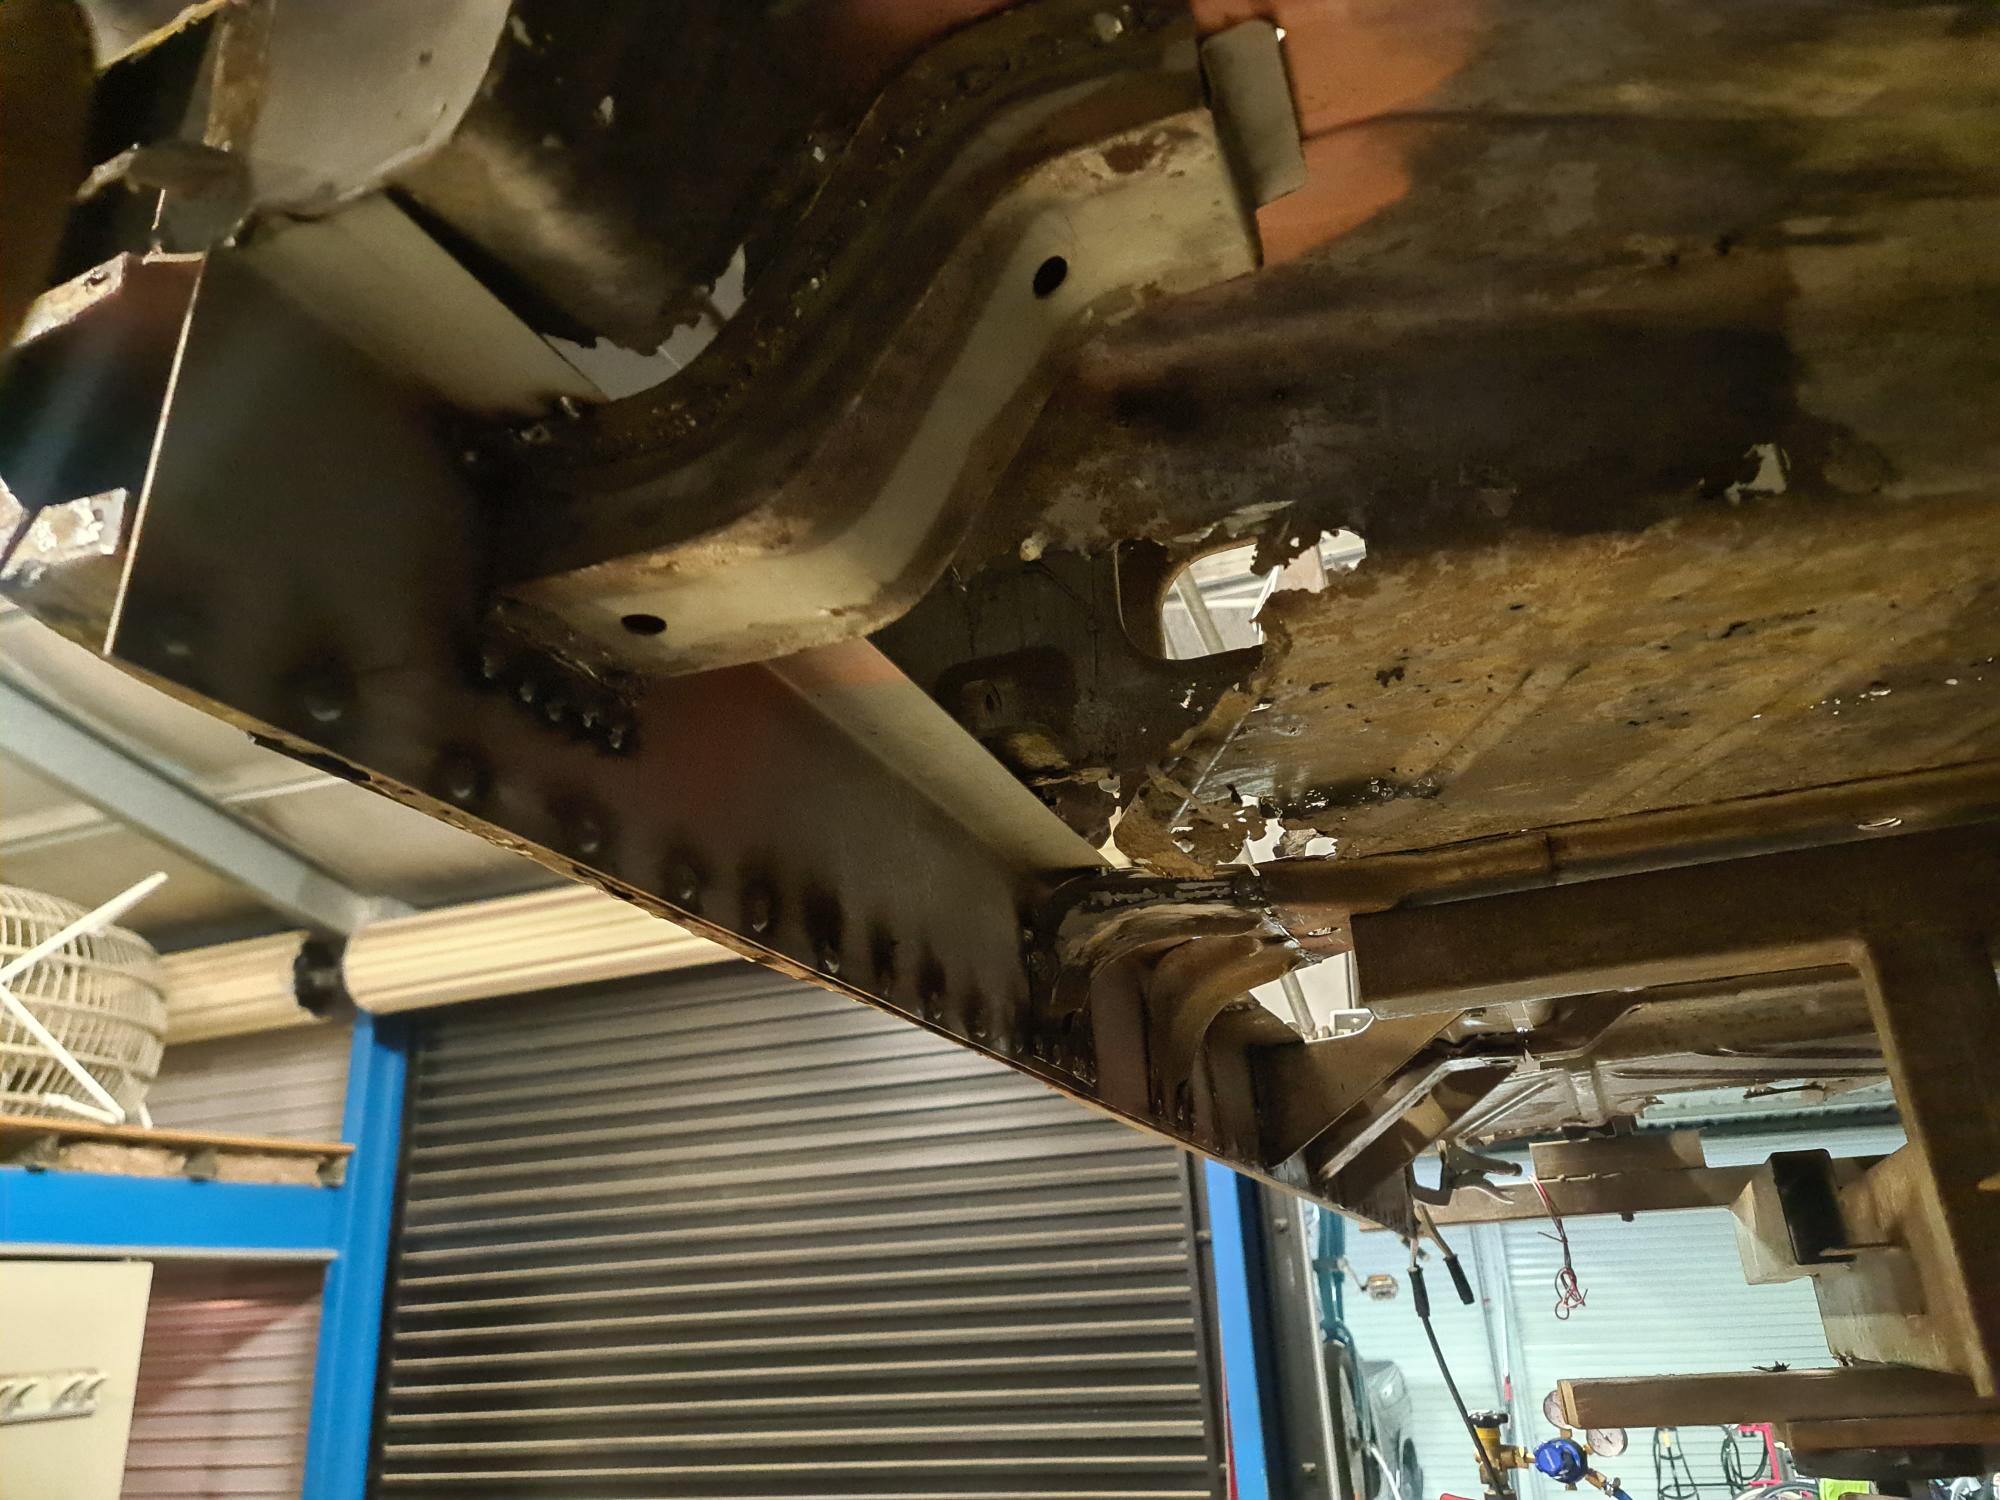
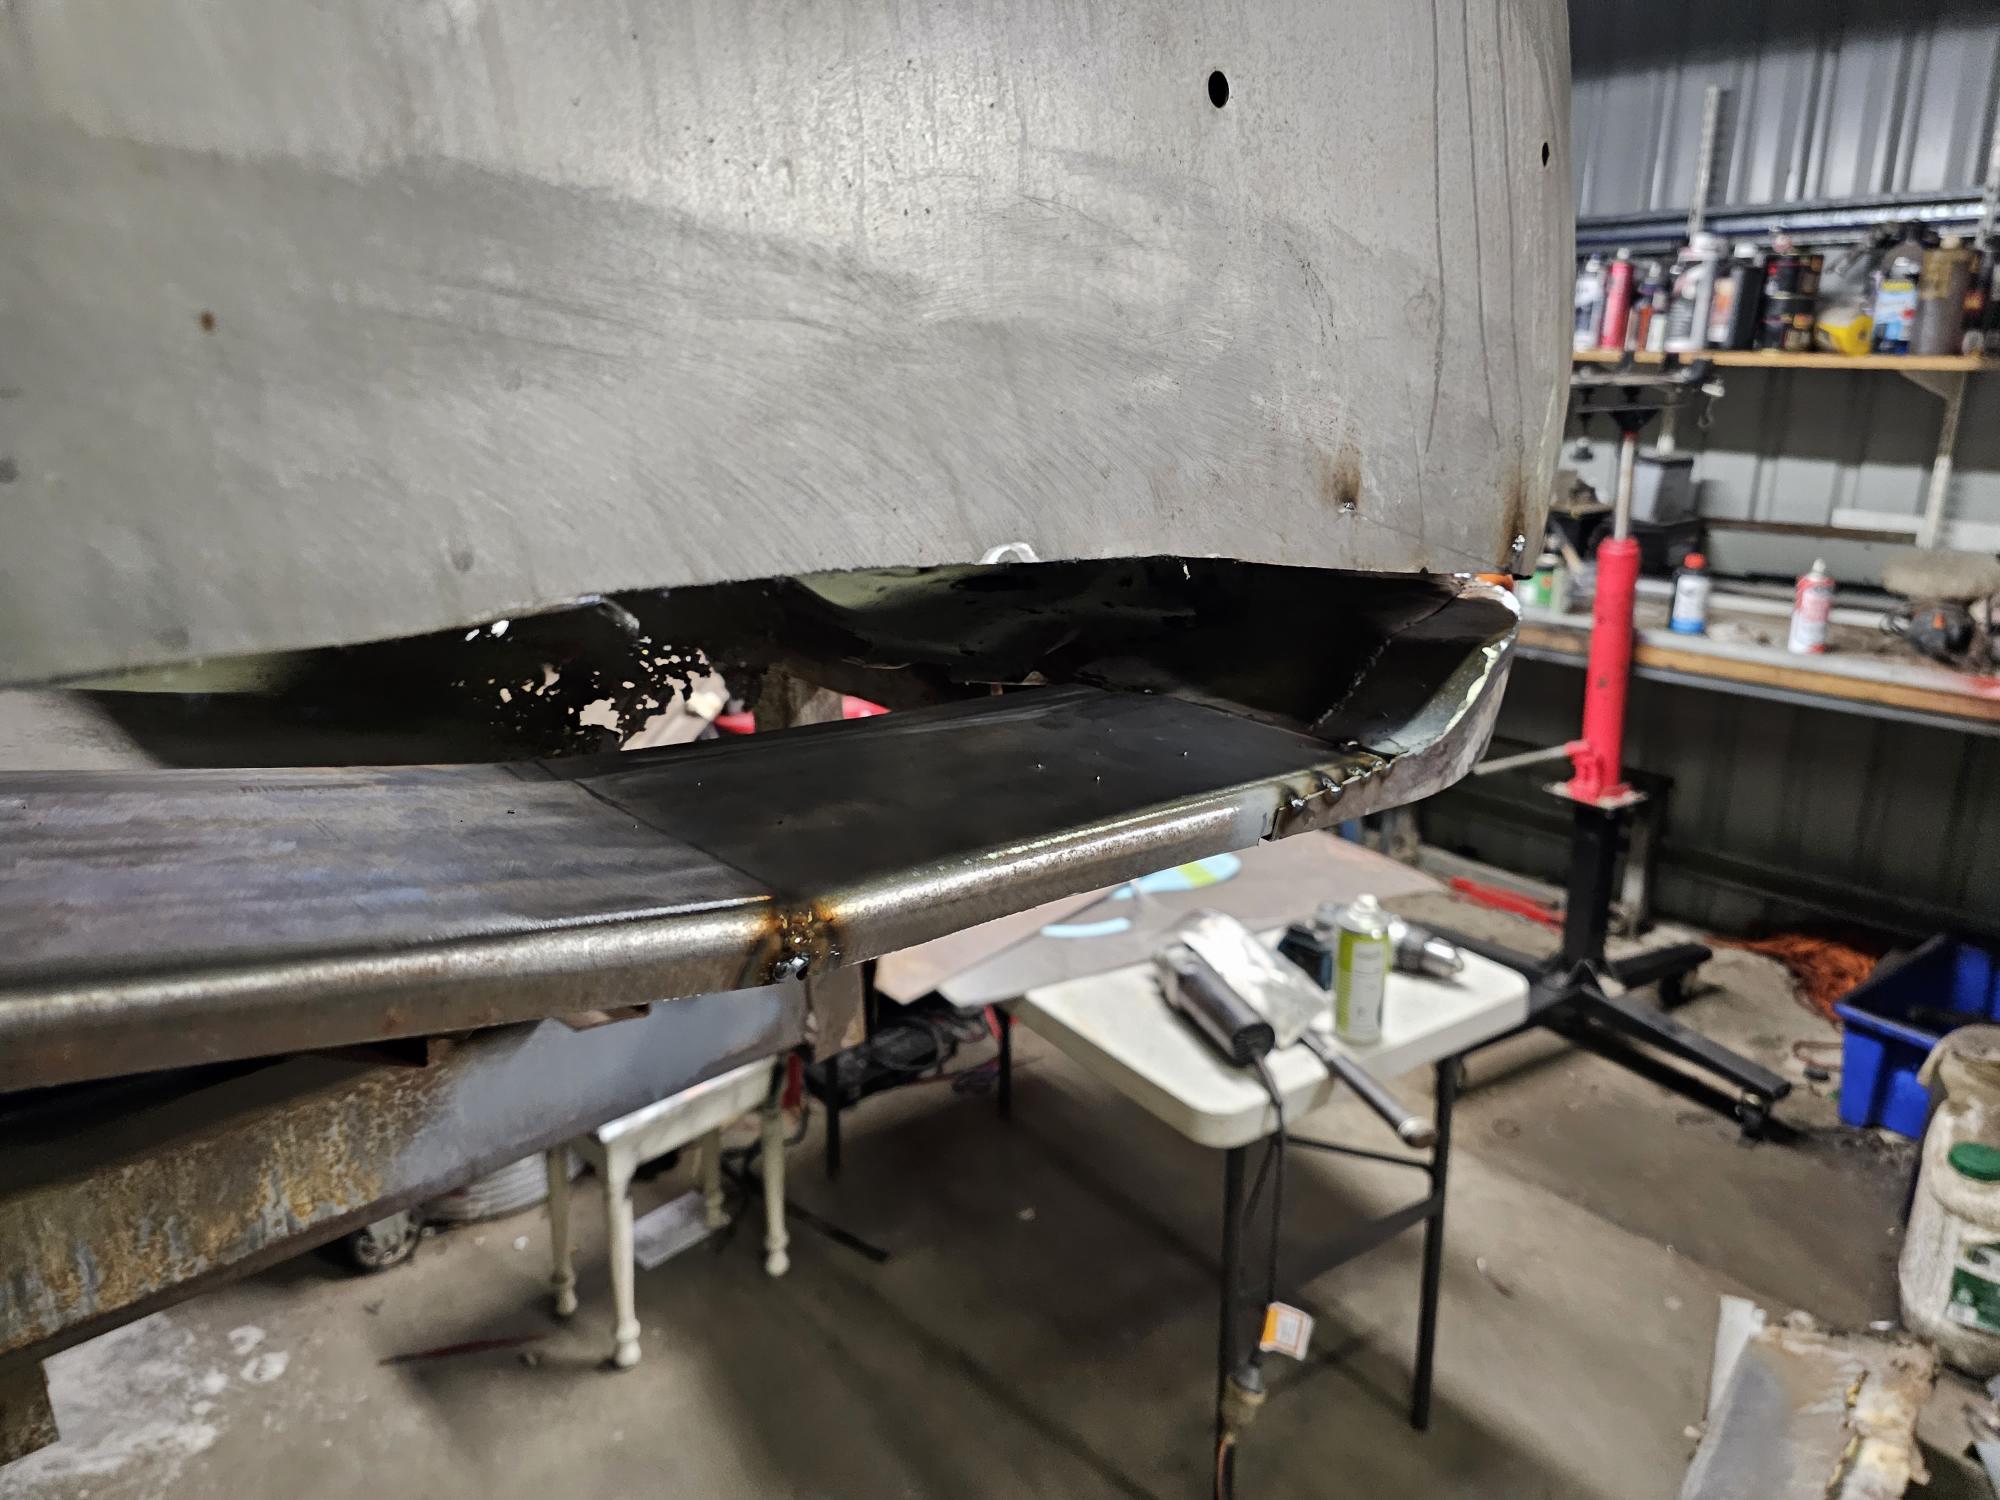
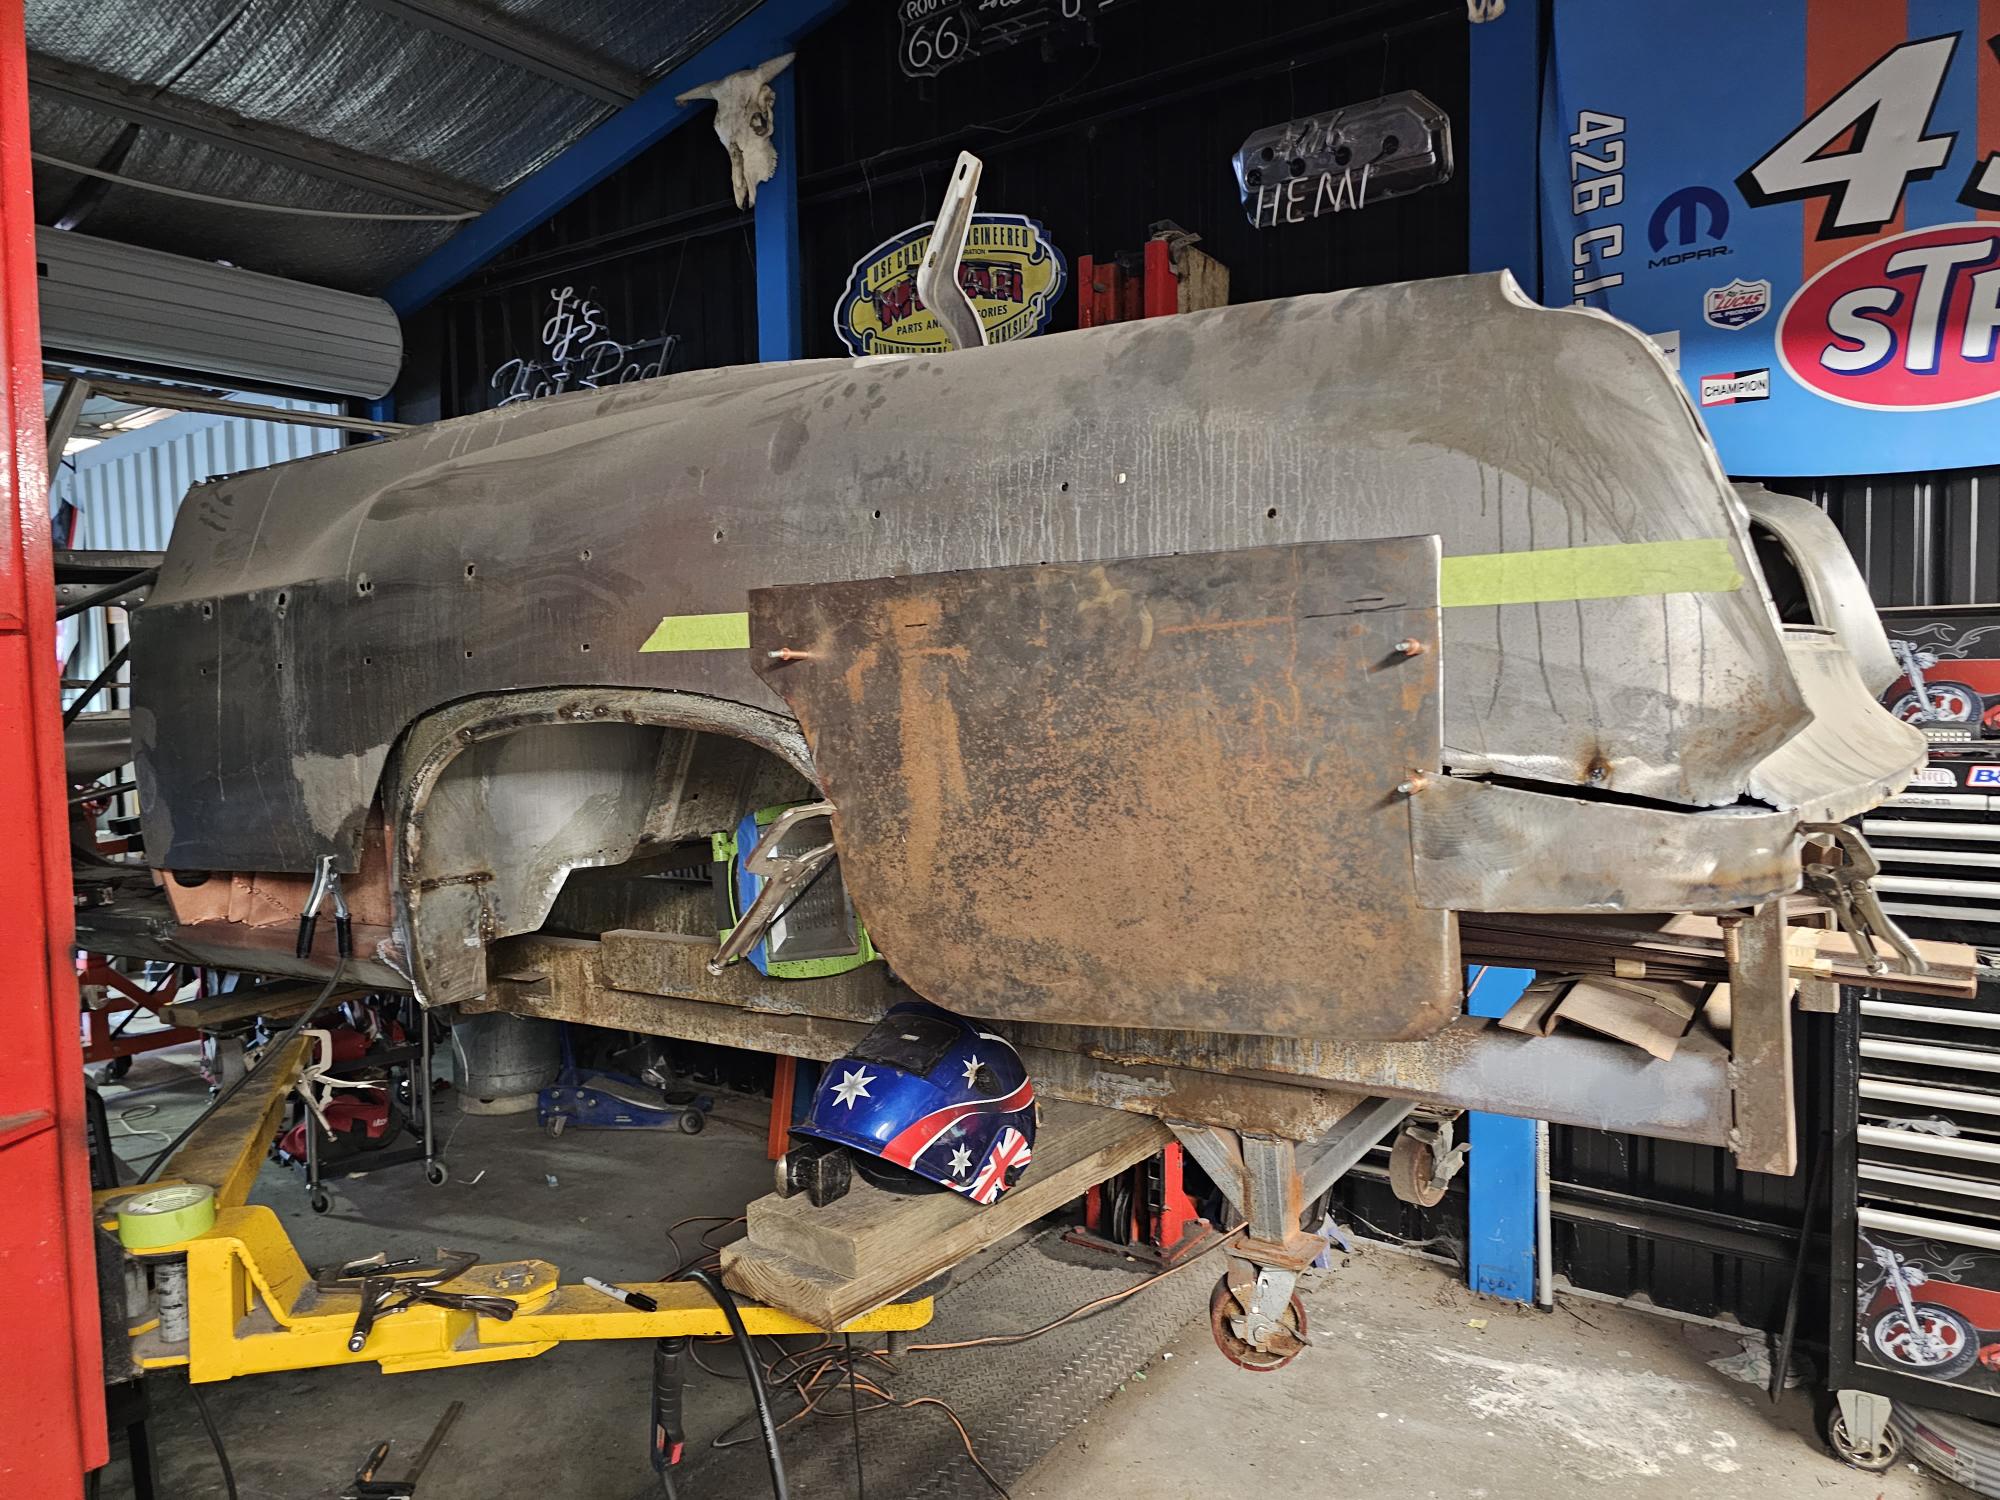
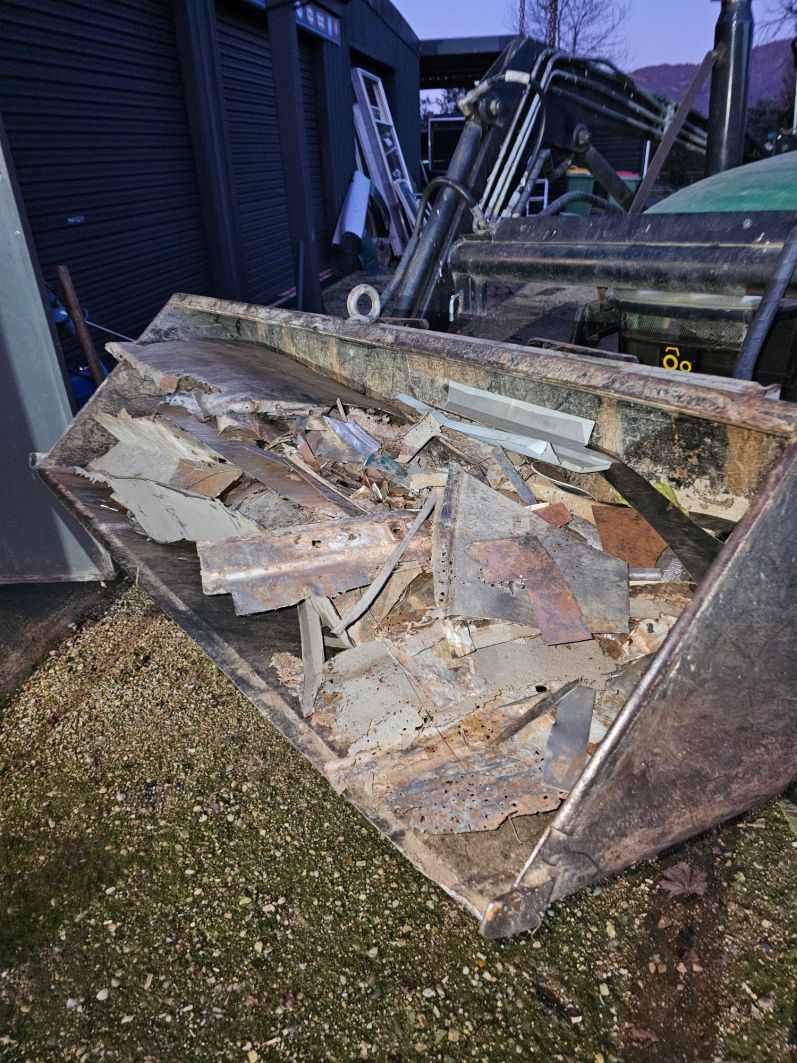
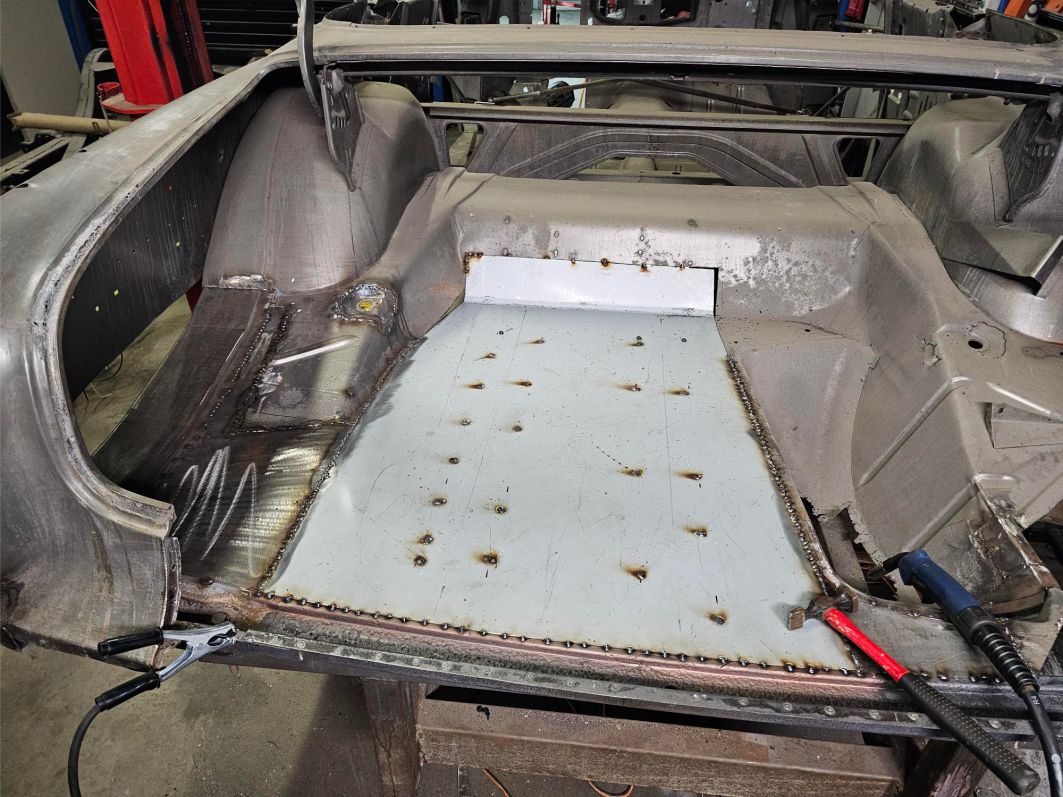
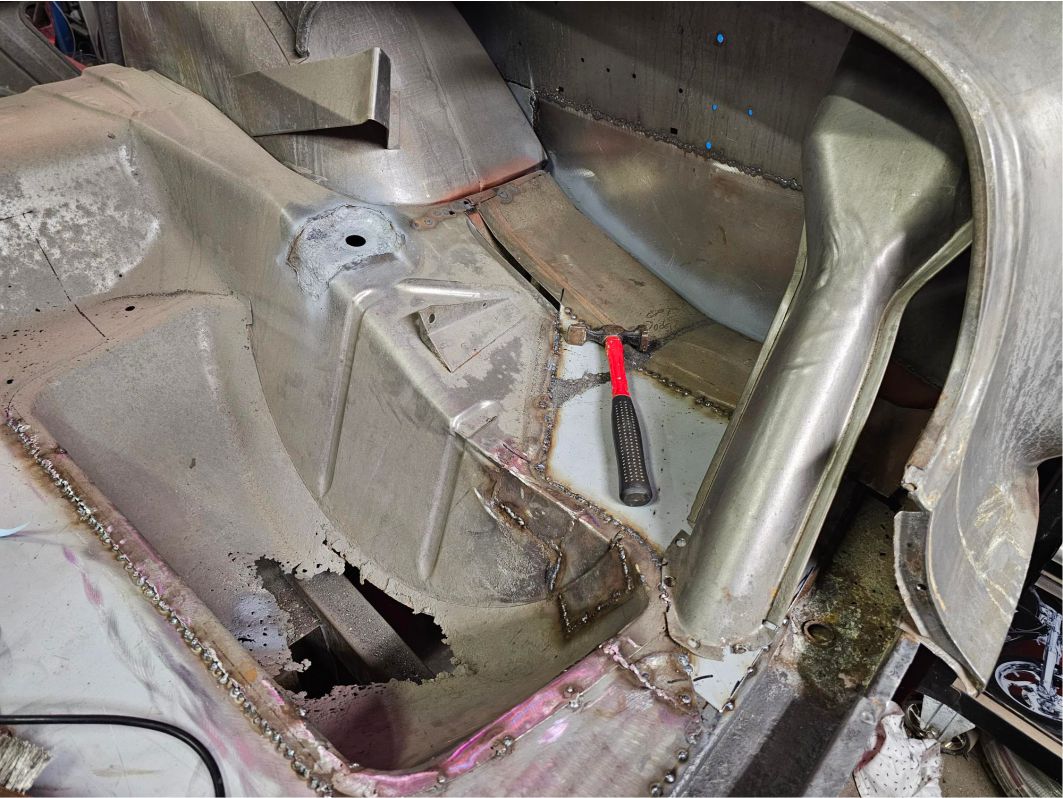
Location: Victoria, AUSTRALIA | Bit more work on the 55. I stopped on the drivers side rear 1/4 for a bit. was getting a little tired of it so started on the trunk floor.
I had been keeping all the old steel cutout of the car, ended up having to chuck it out it was piling up to much and I filled a small front end loader bucket with
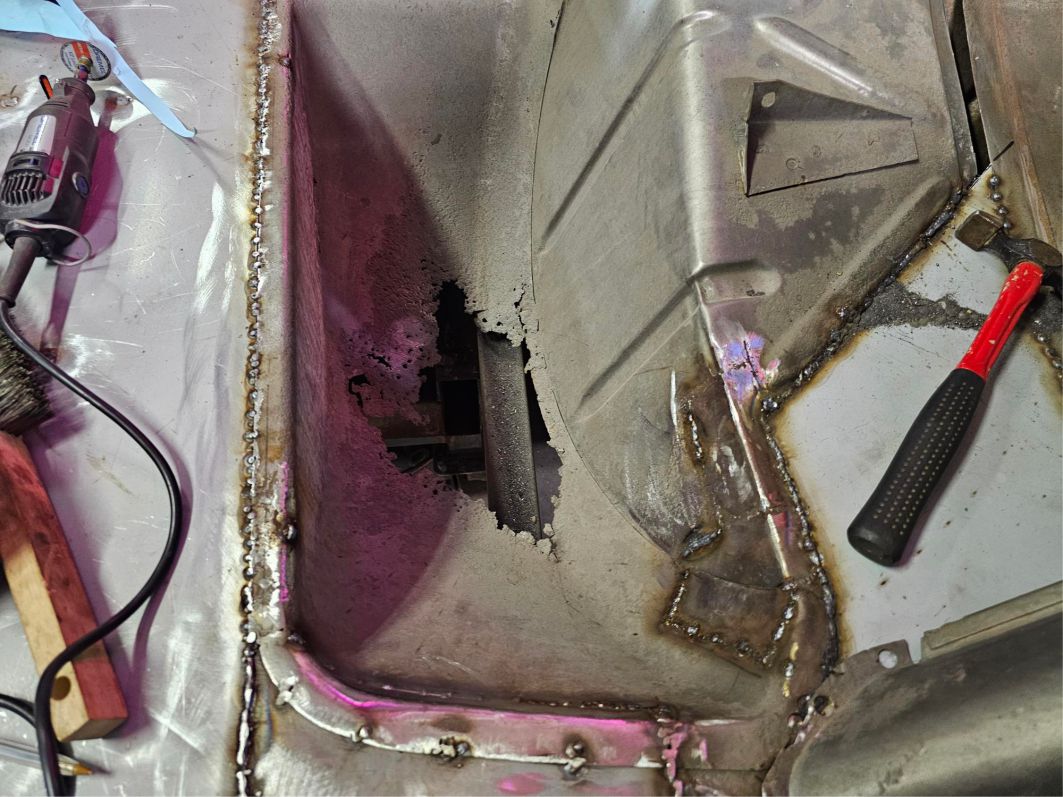
the old steel cutout. I removed the rear panel were the truck lid meets at the latch. I ad to remove to be able to get to the steel on the under side.
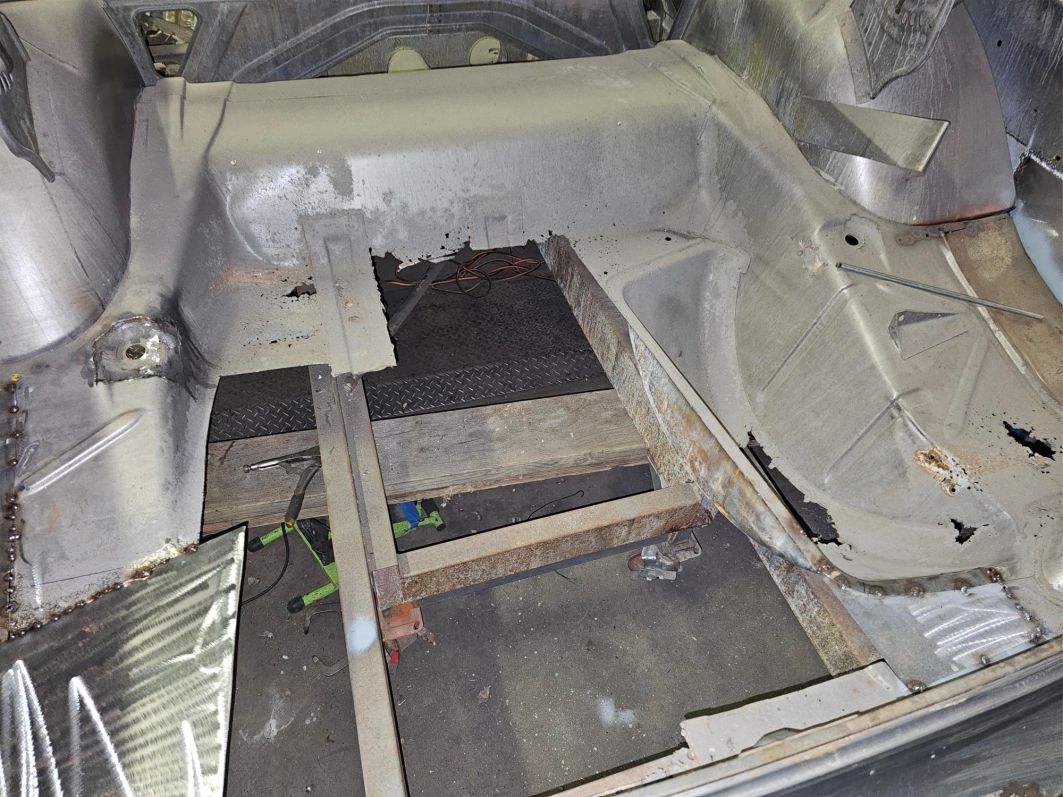
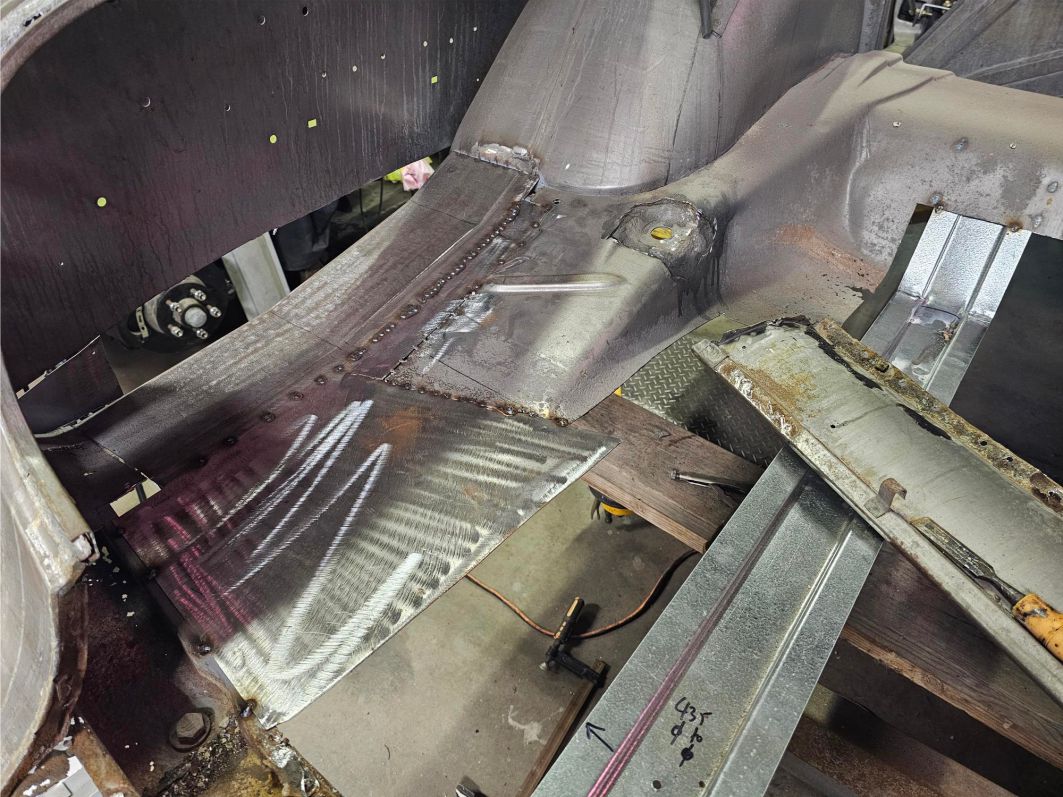
I am trying to keep as much of the original steel if its in ok condition so its a lot of patchwork, but its working. once I Epoxy, seam seal and texture coat the sheet metal it will be fine.
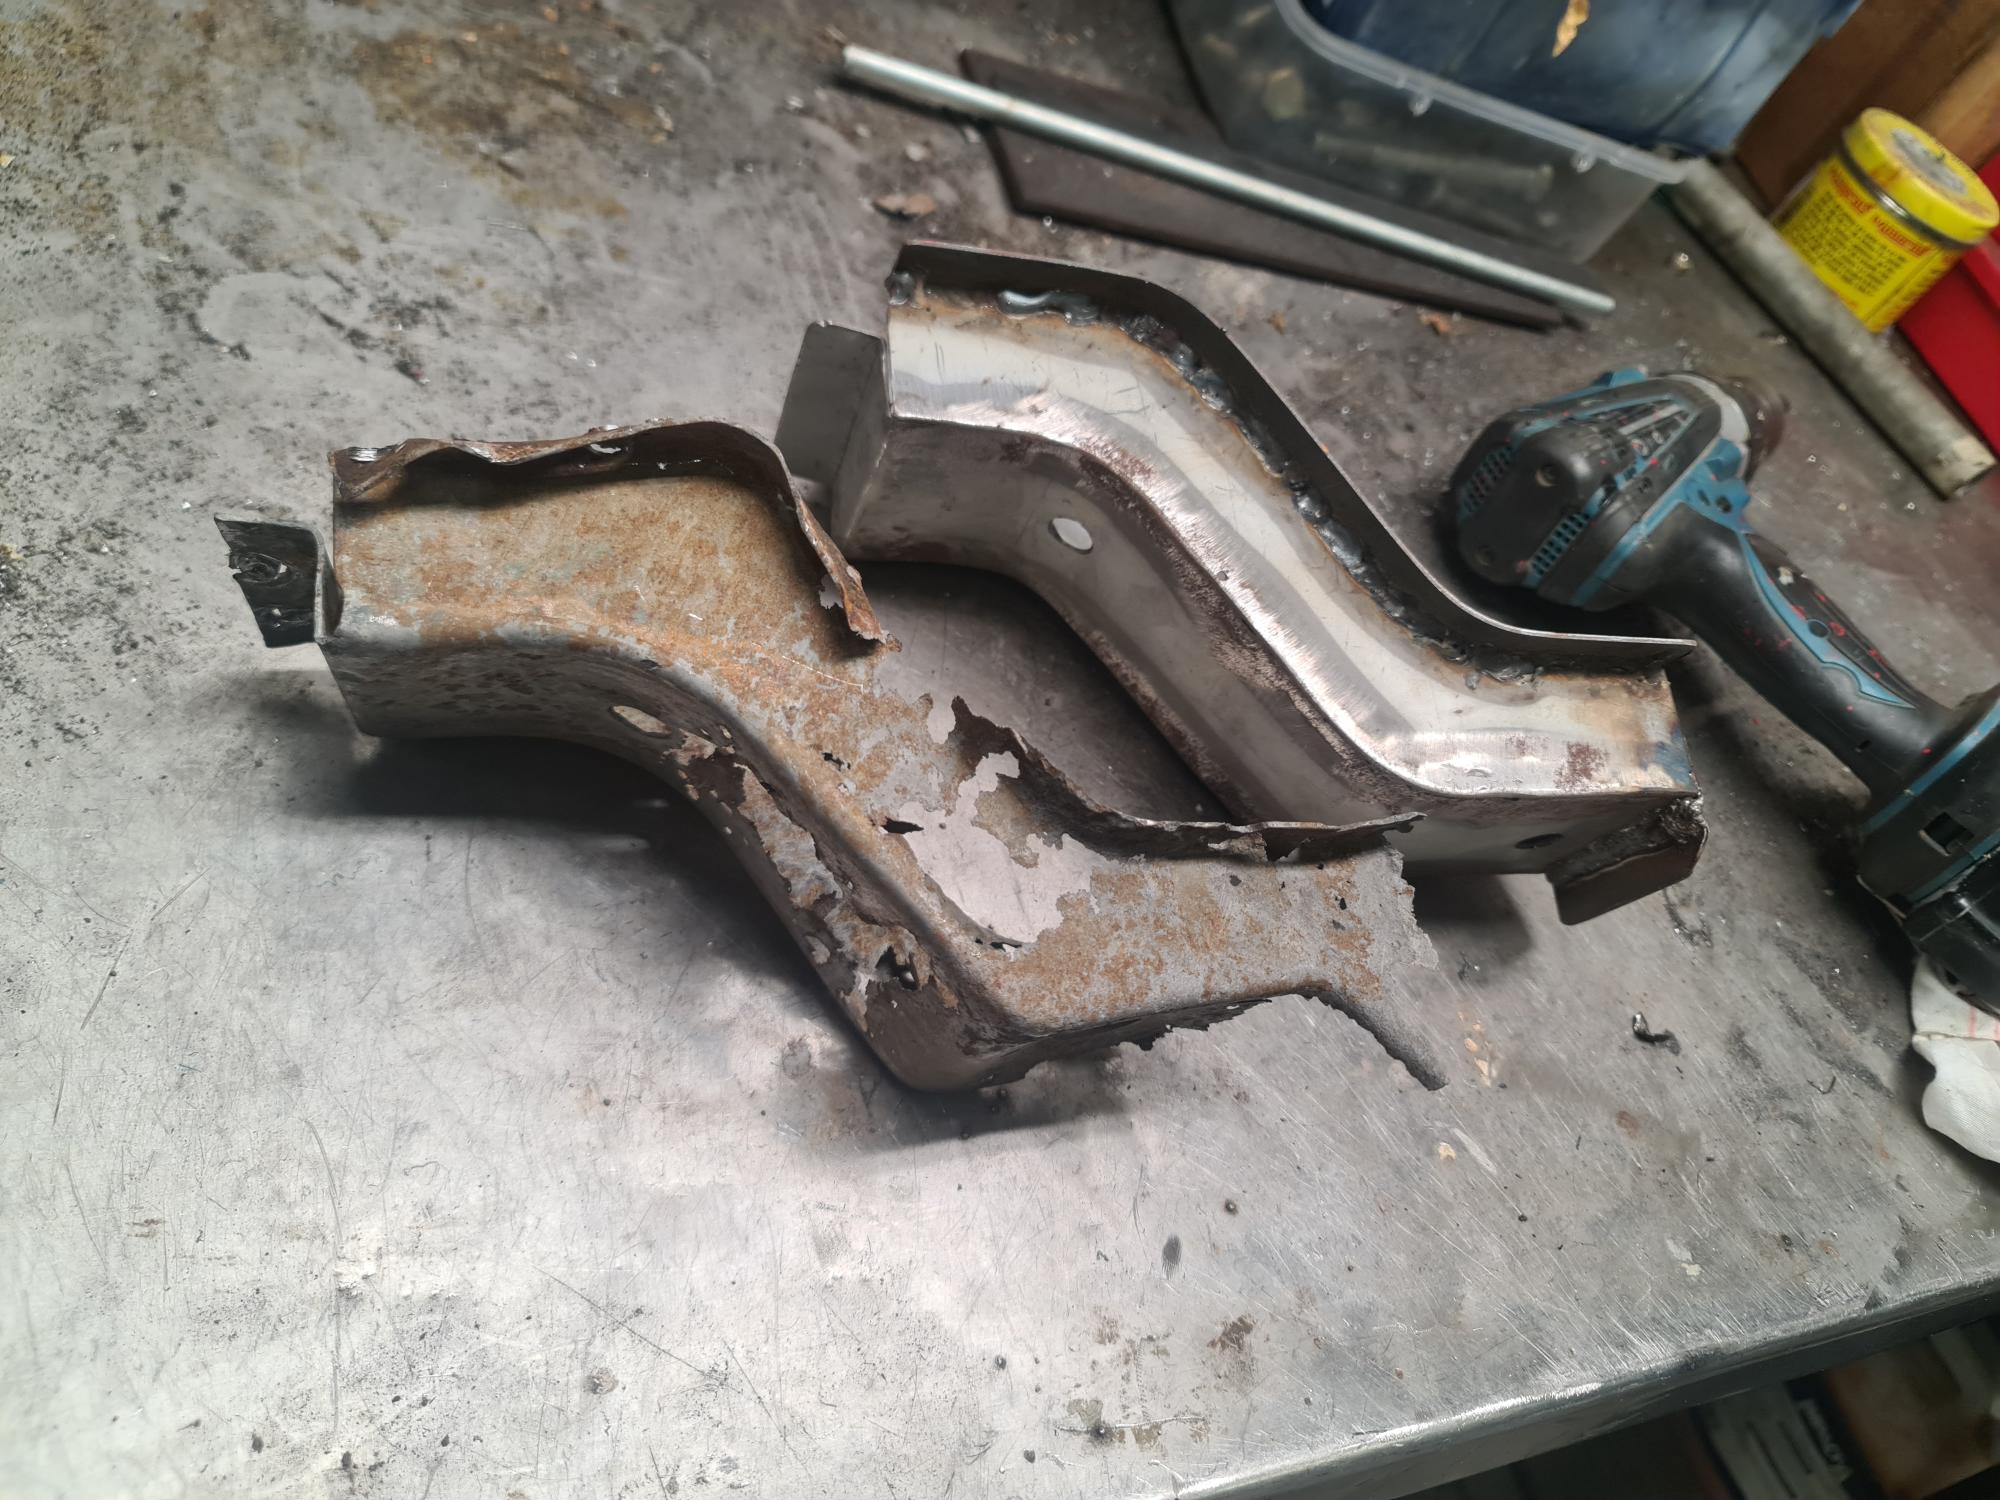
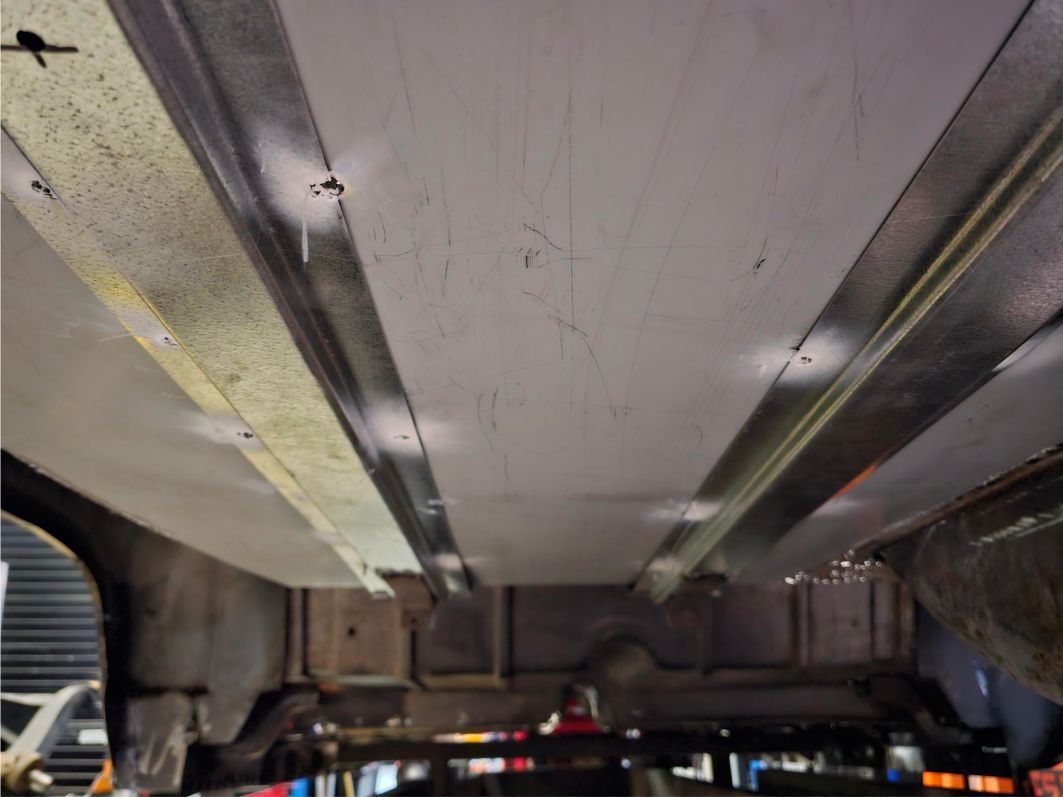
The gas tank braces I made from Galvanised sheet folded up and tacked into place. These have a slot at the front and a bolt at the back for the straps to mount the tank.
The gas filler tube removal was a pain, without damaging the rear 1/4 panel. At the back there is 2 x locations the body mounts to the frame. this is the current mounting point
for the body on my temporary frame, these sections have to be cutout and replaced before the inner trunk floor is finished. the photos shop the left side down and the right side to be done.
The spare wheel well is going to be tricky but I have made paper templates for this should be ok.
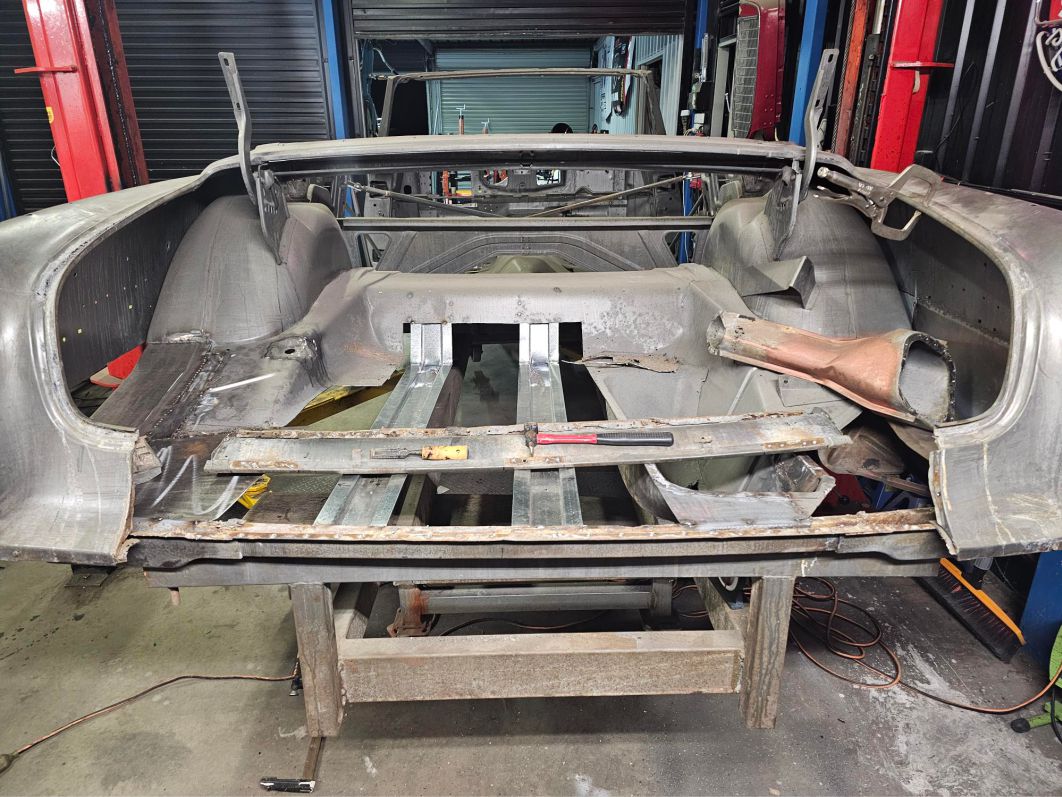
Plan is to finish the trunk floor, refit the rear panel and gas filler tube. move back on the left rear 1/4 panel
once this is finish the body is strong from front to back with the rockers all done, then I will put on my rotisserie, then finish welding and grinding all joins.
Slow going but still enjoying it, will be more exciting when I start metal prepping and epoxy priming
|
|
| |
|
Extreme Veteran
Posts: 444
Location: Victoria, AUSTRALIA | . |
|
| |
|
Extreme Veteran
Posts: 444
Location: Victoria, AUSTRALIA | .
 (Untitled-1.jpg) (Untitled-1.jpg)
 (2.jpg) (2.jpg)
 (3.jpg) (3.jpg)
 (4.jpg) (4.jpg)
 (5.jpg) (5.jpg)
 (6.jpg) (6.jpg)
 (7.jpg) (7.jpg)
 (8.jpg) (8.jpg)
 (9.jpg) (9.jpg)
Attachments
----------------
Untitled-1.jpg (234KB - 40 downloads)
2.jpg (177KB - 41 downloads)
3.jpg (186KB - 36 downloads)
4.jpg (196KB - 34 downloads)
5.jpg (179KB - 37 downloads)
6.jpg (93KB - 44 downloads)
7.jpg (177KB - 39 downloads)
8.jpg (164KB - 35 downloads)
9.jpg (112KB - 33 downloads)
|
|
| |
|
Elite Veteran
Posts: 653
Location: Finland | Keep up the good work! This was not a project for the shy but you are getting it done. I would test fit the deck lid very carefully before I would weld it completely. |
|
| |
|
Extreme Veteran
Posts: 444
Location: Victoria, AUSTRALIA | Thanks Ralf, yes will do that for sure thank you |
|
| |