|
|
Extreme Veteran
Posts: 453
 
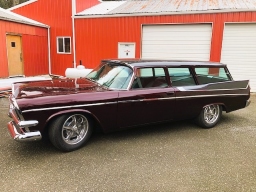
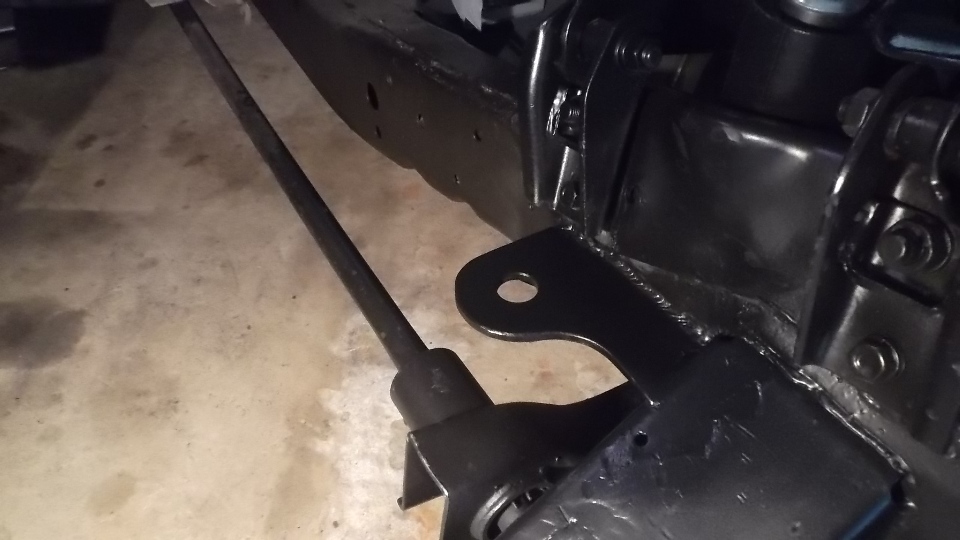
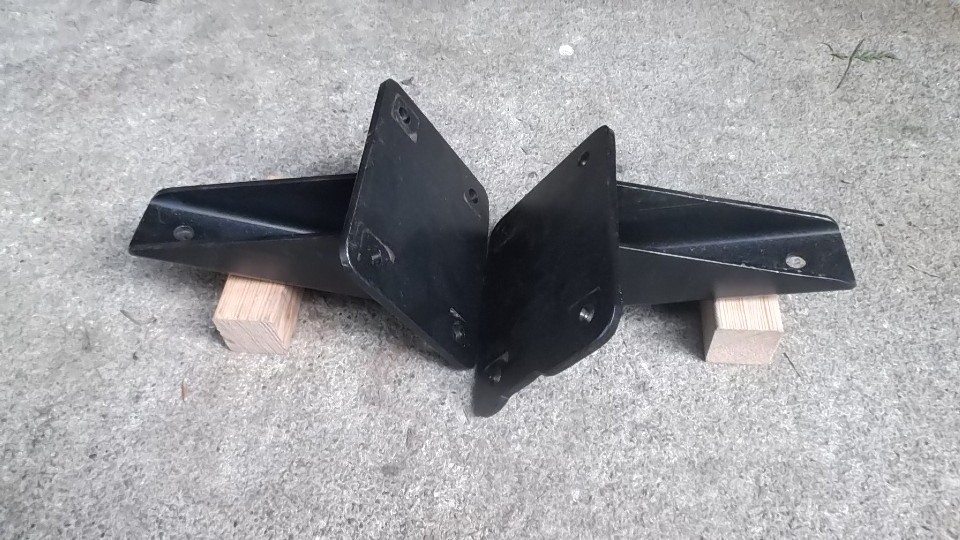
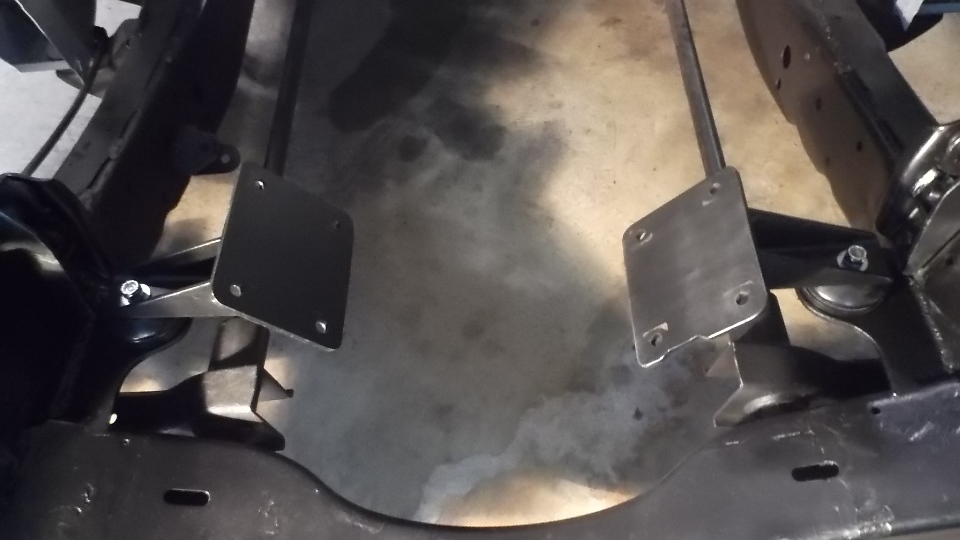
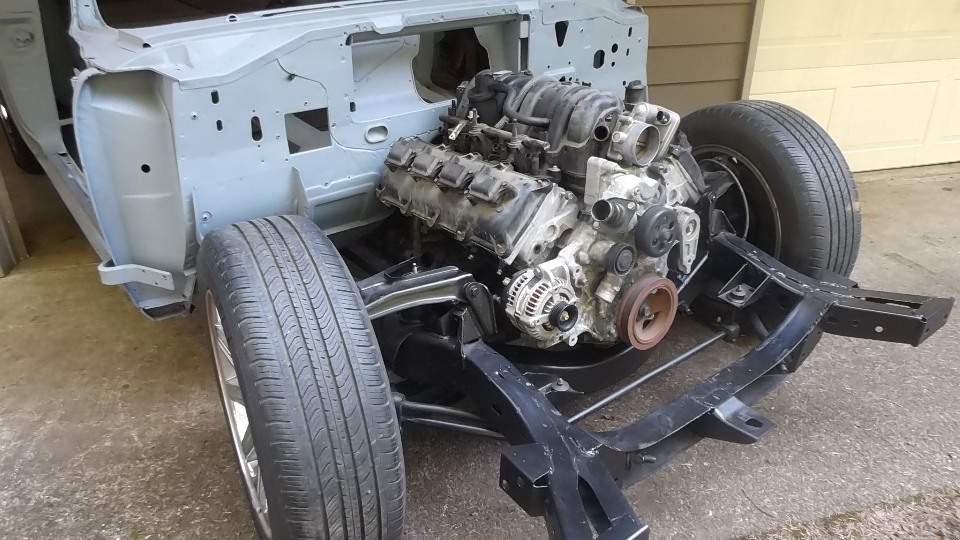
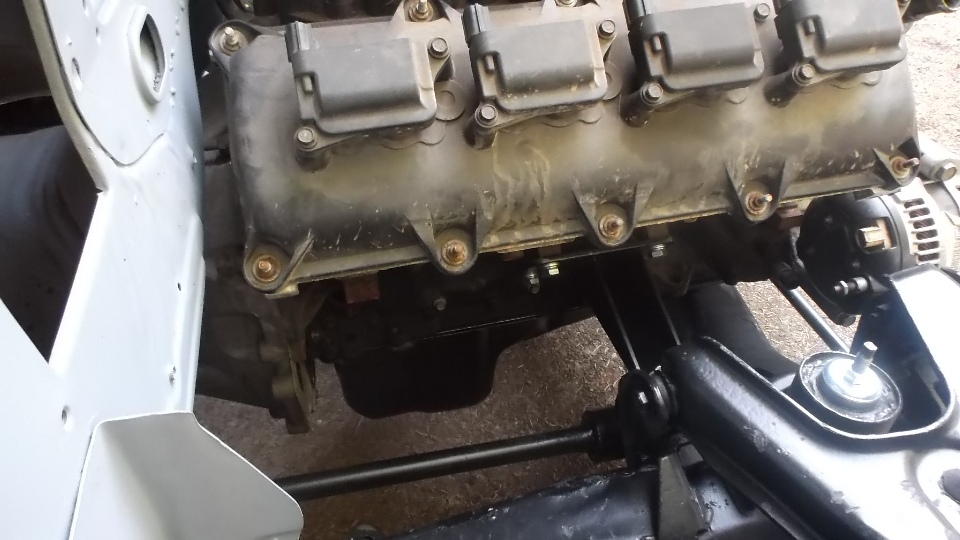
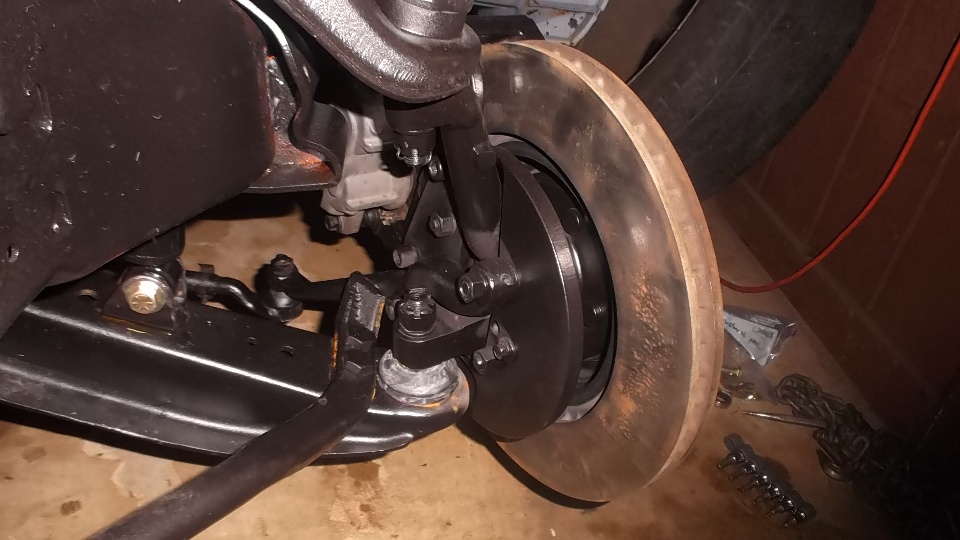
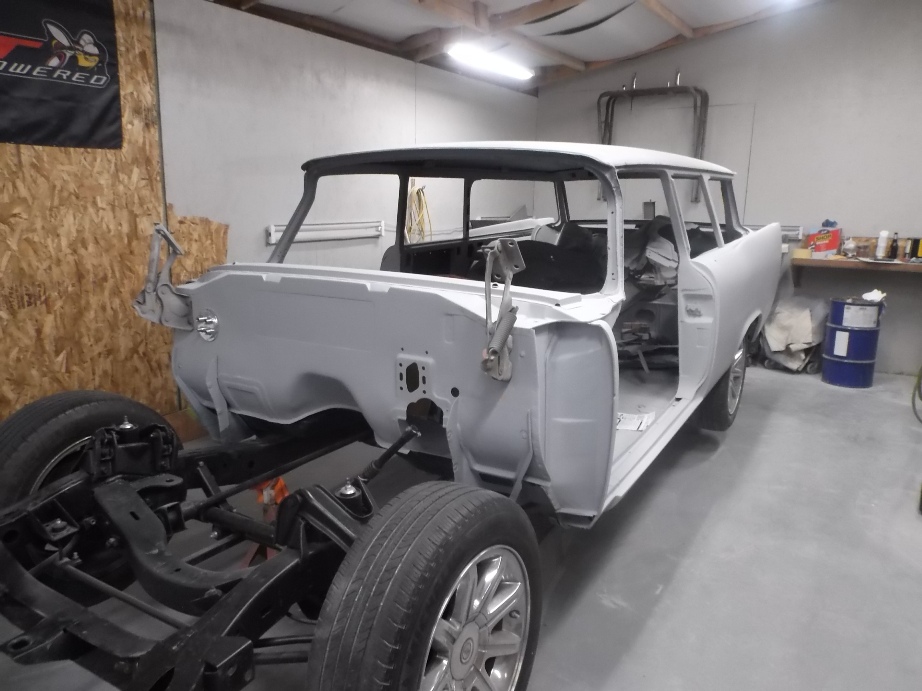
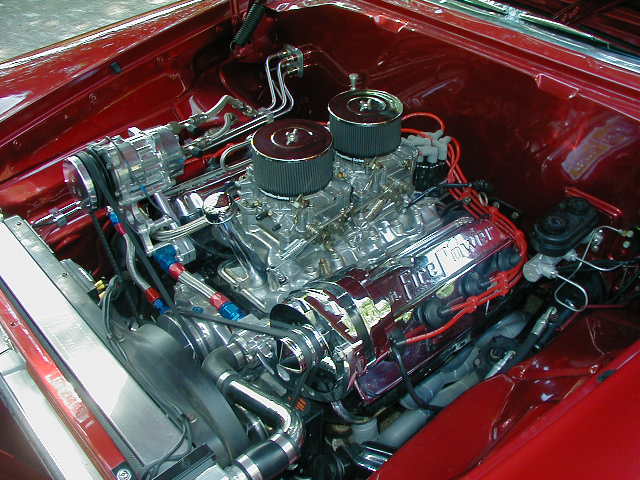
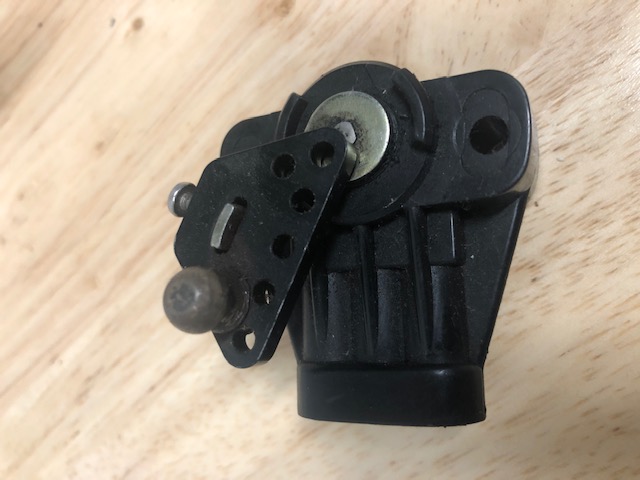
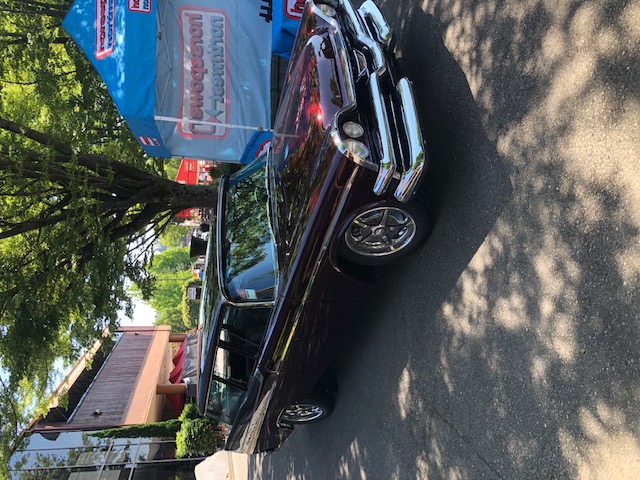
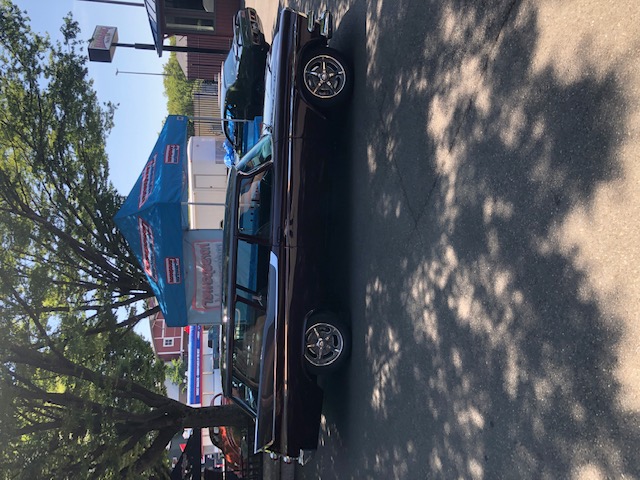
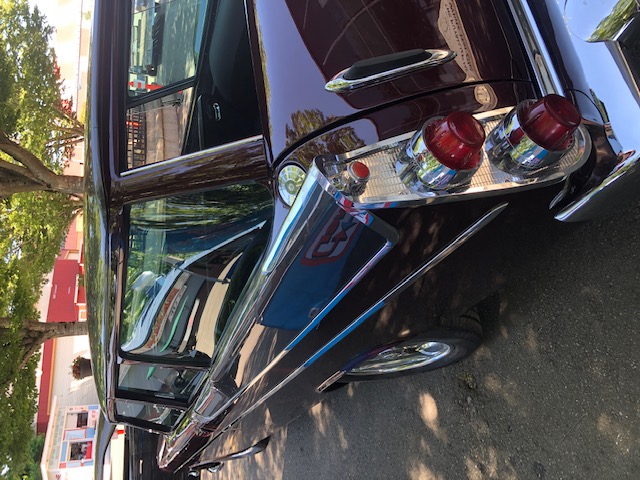
Location: McCleary WA | I have posted some pics under "Members rides" but thought maybe I should start a thread here as it is going to be considerably modified. I purchased an '06 Chrysler 300C at an insurance auction as a donor. So far I have installed the independent rearend, the 14" front disc brakes (on the '57 spindles), and just finished making the transmission and motor mounts for the Gen III hemi and 5-speed automatic. The trans crossmember was installed backwards, notched to clear, and reinforced. I was going to use Trans-Dapt motor mounts, but they have what I consider a design flaw - they need to both be offset 5/8" to the right in order to compensate for the block bolts being 1 1/4" farther back on the RH side. Since they refused to acknowledge the problem or make me a modified set, I just copied their design with the appropriate modification. The frame mounts are gusseted on the rear which doesn't show in the photo. I installed a MoPar rear-sump oil pan in order to clear the Chrysler 300 AWD power rack and pinion which is the next task. It will mount on a removable cradle to make engine removal easier as things will be rather tight down there. The stock Chrysler exhaust manifolds appear to line up nicely, pointing between the frame and torsion bars. I plan to use the Chrysler master cylinder assembly, complete with power adjustable brake and throttle positioning. I originally had planned to use the factory navigation and 6-CD player, but not sure if they will work without a computer tie-in.
It's a slow process as I work alone and am nearing 70, but being retired really helps.
Edited by Darryl T 2019-04-02 1:02 AM
 (4-1-19 001-1.JPG) (4-1-19 001-1.JPG)
 (4-1-19 009-1.JPG) (4-1-19 009-1.JPG)
 (4-1-19 013-1.JPG) (4-1-19 013-1.JPG)
 (4-1-19 015-1.JPG) (4-1-19 015-1.JPG)
 (4-1-19 021-1.JPG) (4-1-19 021-1.JPG)
 (4-1-19 023-1.JPG) (4-1-19 023-1.JPG)
 (028-3.JPG) (028-3.JPG)
Attachments
----------------
 4-1-19 001-1.JPG (186KB - 911 downloads) 4-1-19 001-1.JPG (186KB - 911 downloads)
4-1-19 009-1.JPG (194KB - 912 downloads)
4-1-19 013-1.JPG (184KB - 929 downloads)
4-1-19 015-1.JPG (174KB - 901 downloads)
4-1-19 021-1.JPG (189KB - 923 downloads)
4-1-19 023-1.JPG (206KB - 960 downloads)
028-3.JPG (185KB - 977 downloads)
|
|
| |
|
  
Location: North Australia | Good on ya mate. Some neat fabrication going on there. I will be watching for your updates, you do some nice work. I liked looking at your Convertible job too. You are a true enthusiast! I am going to take a guess, you are a tradesman? Steve
Edited by 60 Imp 2019-04-02 8:02 AM
|
|
| |
|

Expert
Posts: 3834
Location: NorCal | Nice work. How is the oil filter clearance? I've heard this a problem with Gen III Hemi swaps. |
|
| |
|
Extreme Veteran
Posts: 453
Location: McCleary WA | 60 Imp - 2019-04-02 I am going to take a guess, you are a tradesman? Steve
Not really. 40 years behind a desk as an environmental engineer. But a hot rodder since I was 14, having hand built a lot of cars from 32 Fords to DeLoreans. |
|
| |
|
Extreme Veteran
Posts: 453
Location: McCleary WA | 57chizler - 2019-04-02 10:37 AM
How is the oil filter clearance? I've heard this a problem with Gen III Hemi swaps.
I have a MoPar angled filter adapter. I haven't tried it yet but it is supposed to be the cure. |
|
| |
|
Exner Expert 10K+
Posts: 10621

Location: Lower Mainland BC | Darryl T - 2019-04-02 10:58 AM
Not really. 40 years behind a desk as an environmental engineer. But a hot rodder since I was 14, having hand built a lot of cars from 32 Fords to DeLoreans.
Hello. I was an environmental engineer for 38 years. Retired in 2010. Worked for Associated Engineering for the last 20 years 1990-2010. Mostly solid waste and biosolids management. Worked with US people from Brown and Caldwell, CH2M Hill and Tetra Tech on various projects.
 |
|
| |
|
Veteran
Posts: 129
| I like! Looking fwd to updates on this build. I'm putting a 5.7/NAG1 in a 58 plymouth, it's interesting to see how others concurred obstacles I've run across. I like the rearend idea, wish I'd thought to do that to mine. Good luck! |
|
| |
|
Extreme Veteran
Posts: 453
Location: McCleary WA | Darryl T - 2019-04-01 9:50 PM
I installed a MoPar rear-sump oil pan in order to clear the Chrysler 300 AWD power rack and pinion which is the next task. It will mount on a removable cradle to make engine removal easier as things will be rather tight down there.
I thought for posterity I should update that statement. The rear sump oil pan did not work out, so I went with a Moroso mid-sump pan. The rack required the fabrication of shorter steering arms, out of 1" square stock, due to its shorter travel and the stock arms hitting the 18" wheels/tires. |
|
| |
|
Extreme Veteran
Posts: 453
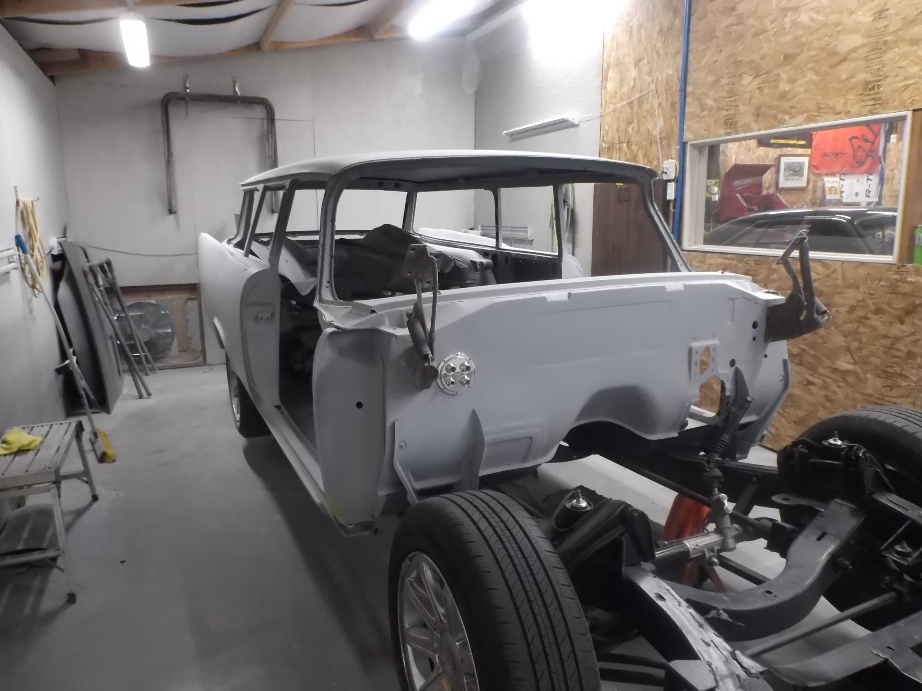
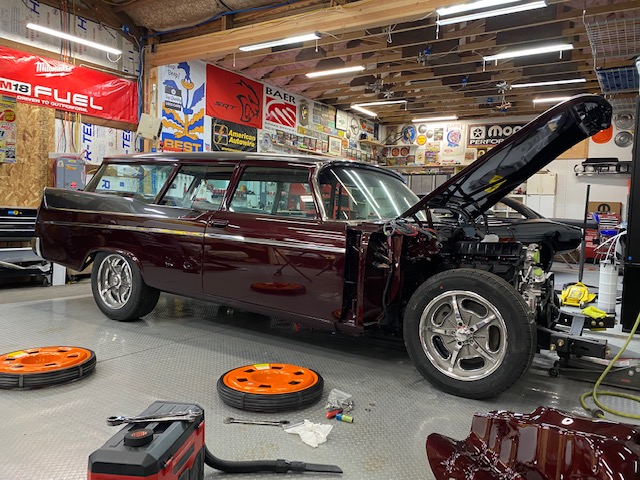
Location: McCleary WA | After selling this project in August and re-purchasing it last month, it is now in a body shop getting the rockers and lower rear quarters replaced, as well as getting the firewall, hood, and tailgate "cleaned up" with all extraneous holes filled. Plans as of now include upgrading the 5.7 to a 6.4 SRT8 engine, and hopefully retaining the pushbutton shift. Stay tuned.... |
|
| |
|
Regular
Posts: 75
| What are your plans on retaining the push button shifter?
My plan is to use an A-518(46RH) with the push button cable adapter from AandA transmissions. I have all of the parts, haven't mocked it up yet, but I'm getting close.
Also, I found that the Mopar Performance Hemi wiring harness requires a momentary starter switch, which is exactly what our Neutral push button does, so it should be easy to hook that up. |
|
| |
|
Extreme Veteran
Posts: 453
Location: McCleary WA | Current plan is to use the system from Powertrain Control Solutions, which is specifically designed for the Chrysler NAG1 transmission and others. The button pad will replace the original pushbutton assembly. While not what you are probably looking for, it is a street rod and not a restoration so I'm not hung up on a totally original look. See powertraincontrolsolutions.com. I will probably use a modern pushbutton starter switch, or use an original key switch from a manual trans '57 Dodge which I believe includes a start position. The idea is a tasteful integration of original design with modern function and electronics. |
|
| |
|

Exner Expert 10K+
Posts: 10251
Location: So. Cal | You could mount that button pad behind the original push buttons to have them actuate the button pad. As long as the change in position isn't too convoluted, you should be able to make that work. That's what I would probably do. |
|
| |
|
Extreme Veteran
Posts: 453
Location: McCleary WA | Darryl T - 2020-03-05 11:40 AM
After selling this project in August and re-purchasing it last month, it is now in a body shop getting the rockers and lower rear quarters replaced, as well as getting the firewall, hood, and tailgate "cleaned up" with all extraneous holes filled. Plans as of now include upgrading the 5.7 to a 6.4 SRT8 engine, and hopefully retaining the pushbutton shift. Stay tuned....
Update - body work is almost done, including cleaning up the firewall and eliminating the cold air plenum behind it to make more room under the dash for a/c. The 2006 Chrysler 5.7 hemi turned out to have a bad piston, so I looked for an SRT8 engine and even considered a Hellcat, but ended up getting a really good deal on a 7,000 mile 2019 5.7 hemi. At nearly 71 I decided the Hellcat was probably overkill......
Edited by Darryl T 2020-07-08 12:09 AM
|
|
| |
|
Exner Expert 10K+
Posts: 10251
Location: So. Cal | Good choice. Having that much excess power is overrated. |
|
| |
|
Extreme Veteran
Posts: 453
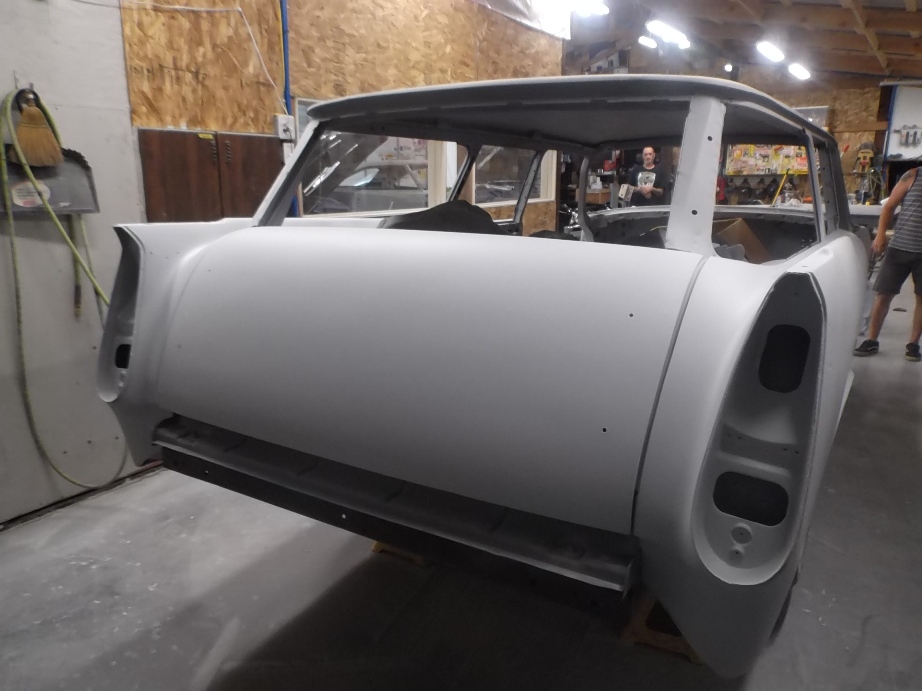
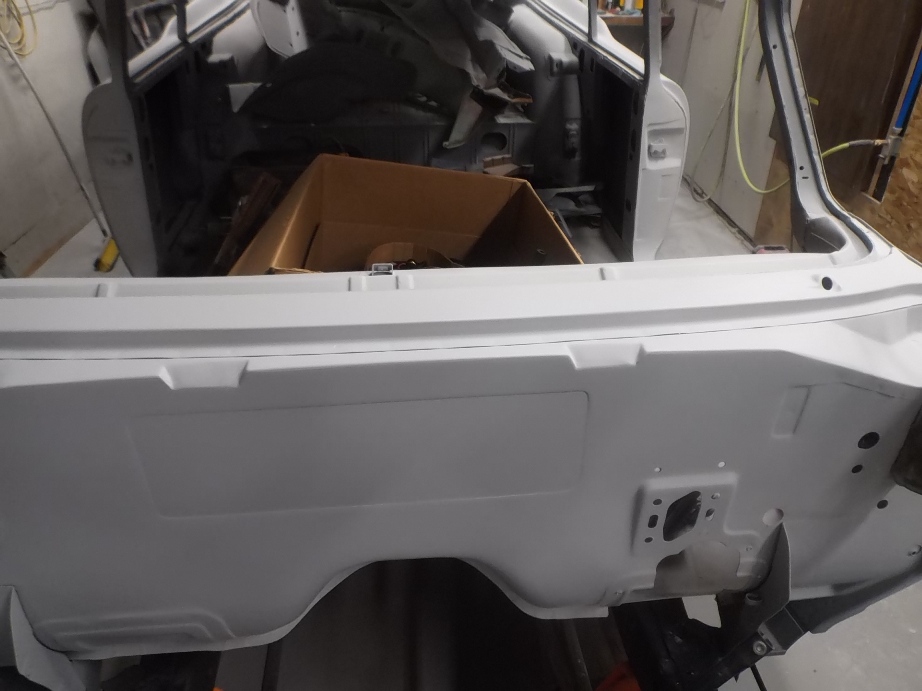
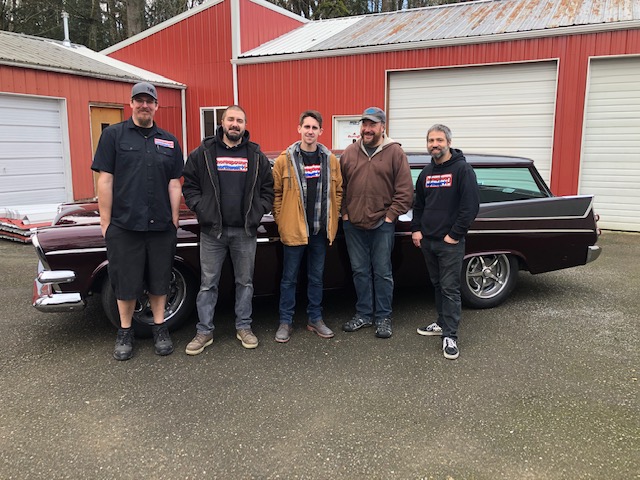
Location: McCleary WA | Took the 2019 5.7 hemi and 5-speed trans up to the shop (Horsepower Northwest in Bremerton, WA) today. Had to make a decision - bring the car home and try to do more of the mechanical work myself, or leave it in the capable hands of a pro. Its still there. The work Aaron Porter has done so far is top notch, so it made sense to just let him continue. All rust repair is done, plus the tailgate and firewall cleaned up. See if you can spot another subtle change.
Thought I would add a few photos.
 (7-16-20 0011.JPG) (7-16-20 0011.JPG)
 (7-16-20 0012.JPG) (7-16-20 0012.JPG)
 (7-16-20 0013.JPG) (7-16-20 0013.JPG)
 (7-16-20 0014.JPG) (7-16-20 0014.JPG)
 (7-16-20 0015.JPG) (7-16-20 0015.JPG)
Attachments
----------------
7-16-20 0011.JPG (220KB - 784 downloads)
7-16-20 0012.JPG (230KB - 798 downloads)
7-16-20 0013.JPG (222KB - 788 downloads)
7-16-20 0014.JPG (199KB - 778 downloads)
7-16-20 0015.JPG (201KB - 813 downloads)
|
|
| |
|
Exner Expert 10K+
Posts: 10621
Location: Lower Mainland BC | Darryl T - 2020-07-16 3:34 PM All rust repair is done, plus the tailgate and firewall cleaned up. See if you can spot another subtle change.
Besides the heater delete and the "port" for some aftermarket A/C/Heating system? (Vintage Air?) Or the rack and pinion steering?

Edited by 56D500boy 2020-07-16 7:31 PM
|
|
| |
|
Extreme Veteran
Posts: 453
Location: McCleary WA | A/C is from Restomod Air - the biggest and best we could find. And good catch on the power R&P. But that isn't it. Hint - it's in the last photo. |
|
| |
|

Expert
Posts: 3599
Location: Blythewood, SC | No cowl vent. |
|
| |
|
Extreme Veteran
Posts: 453
Location: McCleary WA | 57plymouth - 2020-07-17 5:16 AM
No cowl vent.
You win the prize. With the heater removed and A/C added, and the air plenum behind the firewall no longer needed, we decided to eliminate it. That really uncluttered the cowl. Not everyone's choice but it works here. |
|
| |
|
Expert
Posts: 3834
Location: NorCal | My '57 NY was done the same. The A/C box wouldn't clear the wiper motor so the wipers were converted to cable-drive with the motor located behind the right kick panel.
 (P5150101.jpg) (P5150101.jpg)
Attachments
----------------
P5150101.jpg (63KB - 759 downloads)
|
|
| |
|
Extreme Veteran
Posts: 453
Location: McCleary WA | Very nice. Can I ask what brand of cable operated wipers you used? I bought a kit on Ebay but the quality is marginal at best. It looked exactly like one selling for twice as much, too. Years ago I used an original cable system out of a Jag or Morris Minor and it worked great. |
|
| |
|
Expert
Posts: 3834
Location: NorCal | I dunno, the installation was done before I purchased the car. The cable-drive wiper travel was a lot less than factory but I never drove it in the rain. |
|
| |
|
Extreme Veteran
Posts: 453
Location: McCleary WA | 57chizler - 2020-07-19 2:38 PM
The cable-drive wiper travel was a lot less than factory but I never drove it in the rain.
On most cable-drive setups the travel is adjustable at the motor by moving the pin the cable is fastened to. |
|
| |
|

Veteran
Posts: 293
Location: WA/USA | The fire wall really cleans up when you don't have all the stock stuff penetrating it. Looks great. |
|
| |
|
Extreme Veteran
Posts: 453
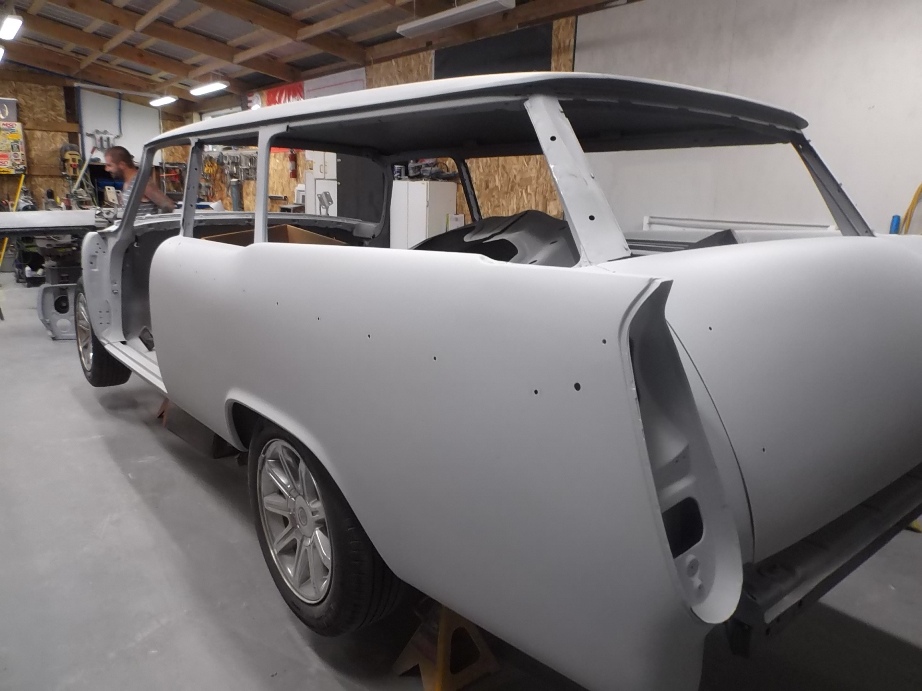
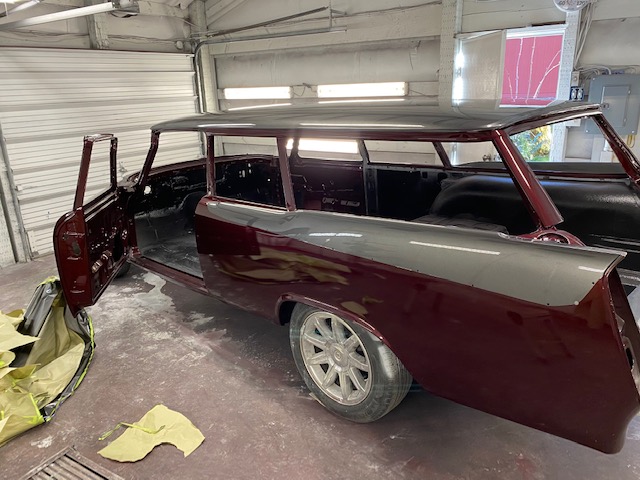
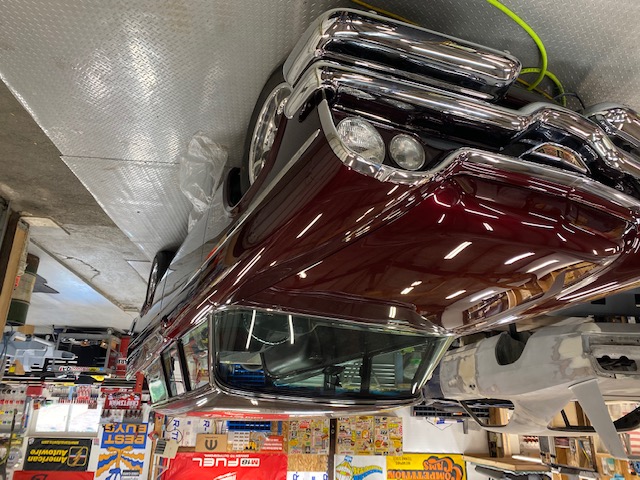
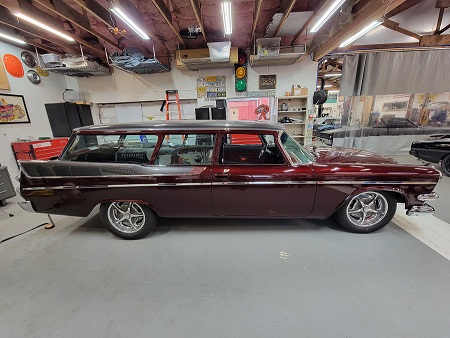
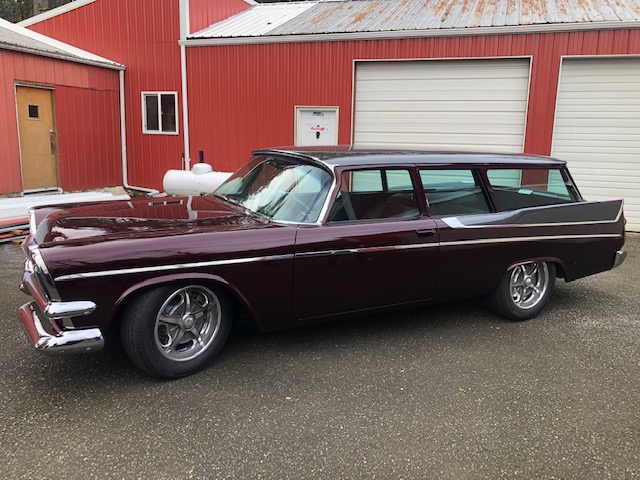
Location: McCleary WA | I thought it was time for an update. Body and paint are done, still needs to be color sanded and buffed. That shine is straight out of the gun. Next it comes home where I will install the glass, chrome, and stainless trim; then back to the shop for wiring and plumbing, most likely including 2 fuel tanks, one in the stock location and a mirror image one on the other side, filled via cross-over pipe like a C5 Corvette. Stay tuned.
 (new paint 008.jpg) (new paint 008.jpg)
Attachments
----------------
new paint 008.jpg (103KB - 613 downloads)
|
|
| |
|
Expert
Posts: 3599
Location: Blythewood, SC | Very nice color combination! |
|
| |
|
Extreme Veteran
Posts: 453
Location: McCleary WA | Windshield and curved side glass are installed. Brought it home, have most of the chrome and stainless on. Finished the power door locks - super easy - and now working on the one-piece door glass. This is the fun stuff for an old hotrodder...
 (IMG_0186.JPG) (IMG_0186.JPG)
Attachments
----------------
IMG_0186.JPG (114KB - 569 downloads)
|
|
| |
|

Expert
Posts: 3974
Location: DFW, TX | Wagon is coming along NICE, Darryl! |
|
| |
|
Member
Posts: 18
Location: Atlanta, GA | The exterior looks great so far. Nice job! |
|
| |
|
Extreme Veteran
Posts: 453
Location: McCleary WA | Back to the pro shop today for wiring and plumbing, radiator, gas tank(s), and interior, Yes, the ugly wheels are just rollers and will soon be replaced.
 (8-30-21 004.1.jpg) (8-30-21 004.1.jpg)
Attachments
----------------
8-30-21 004.1.jpg (207KB - 490 downloads)
|
|
| |
|
Expert
Posts: 3834
Location: NorCal | Darryl T - 2021-08-30 6:49 PM
Yes, the ugly wheels are just rollers and will soon be replaced.
Glad to hear that. Can't wait to see the finished project...I'm green with envy. |
|
| |
|
Extreme Veteran
Posts: 380
Location: Kennewick Wa | 2 thumbs up!! Just sorry l don't have more... |
|
| |
|
Veteran
Posts: 112
| can I ask where you got the new weather stripping and how the stainless and body moldings are held on? We just got my great grandmothers 2 door 1957 Dodge and I want to pull the molding off and give it a good buffing to try and save the patina of the car while still giving it a little shine but I want to make sure I can get the clips to hold the molding back on and be able to remove it safely so I don't bend or break the clips. |
|
| |
|

Elite Veteran
Posts: 916
Location: Peoples Republic of Oregon | Very nice project. You have done well! |
|
| |
|
Extreme Veteran
Posts: 453
Location: McCleary WA | resq302 - 2021-11-11 7:30 PM
can I ask where you got the new weather stripping and how the stainless and body moldings are held on? We just got my great grandmothers 2 door 1957 Dodge and I want to pull the molding off and give it a good buffing to try and save the patina of the car while still giving it a little shine but I want to make sure I can get the clips to hold the molding back on and be able to remove it safely so I don't bend or break the clips.
Weatherstripping came from a variety of sources. Much was purchased from Gary Goers while he was still in business, and unfortunately some of that, the door seals and tailgate window channels, was incorrect and unusable. His successor, Quirey Quality Design, was able to provide the correct door seals. Other sources of generic weatherstripping and seals were Restoration Specialties; Rubber the Right Way; J&J Auto Fabrics; Rock Auto; Steele Rubber Products; and Metro Molded Parts. The sliding windows alone used a combination of seals from 4 different sources as no one offers the correct seals for them.
As for the stainless molding clips, the front fender moldings are mostly threaded clips withs nuts if I remember correctly, with the rest being spring clips. Remove them carefully to protect the stainless, but figure on replacing the clips with new ones. You can find suitable clips on ebay or from sources like Fasteners Plus; Restoration Specialties; Clips and Fasteners; and Midwest Musclecar Specialties. Google or duckduckgo is your friend here. Quirey also has the special clips for the windshield molding.
Edited by Darryl T 2021-11-12 3:29 PM
|
|
| |
|
Veteran
Posts: 112
| awesome ! Thank you Darryl ! I know the weather stripping that goes into the window channel around the passenger side door glass is completely shot and got the floor and seat wet when I washed the 30 years of dust off the car when we got it home. Looking to keep it dry. lol |
|
| |
|
Extreme Veteran
Posts: 453
Location: McCleary WA | resq302 - 2021-11-12 7:43 PM
awesome ! Thank you Darryl ! I know the weather stripping that goes into the window channel around the passenger side door glass is completely shot and got the floor and seat wet when I washed the 30 years of dust off the car when we got it home. Looking to keep it dry. lol
Quirey (814-509-6410) should have that, under the Goers part number C11A. As a side note, since my car is non-stock I opted for Steele #70-2821-60 lip seals for the outer top edge of the door/glass seal and tailgate glass rather than the stock fuzzies. Worked much better and looks modern. |
|
| |
|
Veteran
Posts: 112
| Awesome. Thank you again. |
|
| |
|
Extreme Veteran
Posts: 453
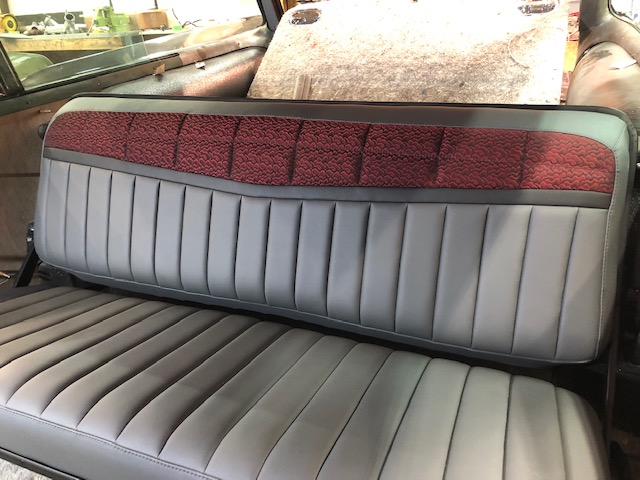
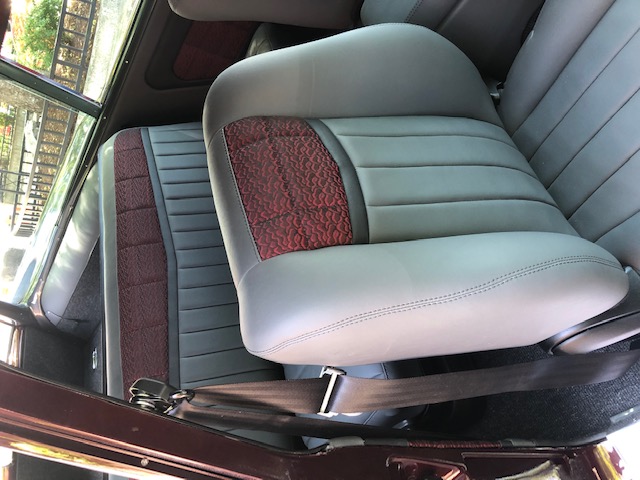
Location: McCleary WA | Getting started on the upholstery. Found a young guy who is really sharp and very eager. He has all of the sound deadening in - floor, roof, inside the doors and 1/4 panels, firewall - and has the seats and door panels laid out. Check out the back seat.
 (seat 005.JPG) (seat 005.JPG)
Attachments
----------------
seat 005.JPG (93KB - 385 downloads)
|
|
| |
|
Extreme Veteran
Posts: 380
Location: Kennewick Wa | SHARP!! |
|
| |
|
Extreme Veteran
Posts: 471
Location: Ohio | Darryl T - 2022-01-20 6:39 PM
Getting started on the upholstery. Found a young guy who is really sharp and very eager. He has all of the sound deadening in - floor, roof, inside the doors and 1/4 panels, firewall - and has the seats and door panels laid out. Check out the back seat.
Darryl.
The rear seat looks excellent.
What are the plans for the rear wheelhouse covering in the rear cargo area ?
Always interested in ideas from other wagon owners on what to use for the rear cargo area.
As you're aware the original "vinoleum" material used by the factory used a di-electric process to make ribbed patterns and formed so that it fit the wheelhouse curvature, then glued in place. The covering is almost always damaged, impossible to remove / save or find nice replacements !!
Is the upholstery shop making a pattern to create a custom covering for the rear wheelhouse / cargo area?
Are you planning to use all vinyl ?
Or a combination of vinyl and carpet ?
Any pictures / info you can share would be appreciated.
Chas
Edited by Space Trukin Wagon 2022-01-21 12:14 PM
|
|
| |
|
Extreme Veteran
Posts: 453
Location: McCleary WA | The upholsterer is considering several approaches. The big concern is how to include the bump-out for the seat catch. It will be vinyl stretched over dense pad and will have 4-6" of wool carpet at the bottom. Since it is a street rod and not a restoration we are free to do what works and looks best. Pictures will be posted when we get to that point. |
|
| |
|
Extreme Veteran
Posts: 453
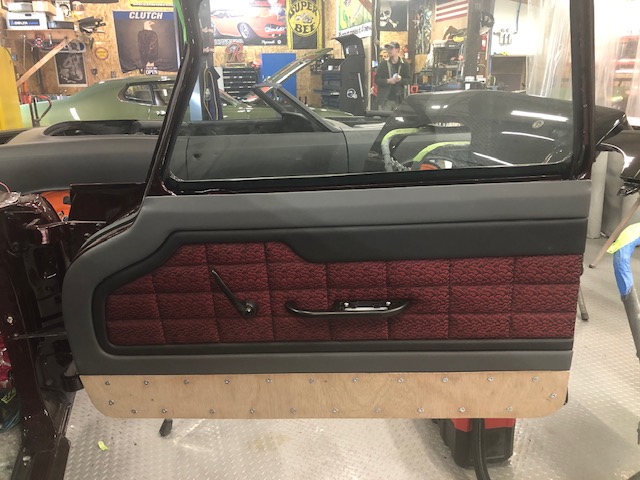
Location: McCleary WA | Making a little more progress. Bottom of door panel will be dark gray wool carpet. Wiring is coming along; new dual stainless steel fuel tanks arrived; ordering Speedhut gauges. Planning to debut at Goodguys in Puyallup in July, but probably won't be quite finished.
 (wgn dr panel.JPG) (wgn dr panel.JPG)
Attachments
----------------
wgn dr panel.JPG (94KB - 380 downloads)
|
|
| |
|
Extreme Veteran
Posts: 515
Location: Invermere B.C. Canada - Rocky Mountains | LOOKS GREAT ! |
|
| |
|
Veteran
Posts: 293
Location: WA/USA | Upholstery looks unique and great. I really like it. |
|
| |
|
Extreme Veteran
Posts: 453
Location: McCleary WA | Coronet_Jeff - 2020-03-12 3:40 AM
What are your plans on retaining the push button shifter?
My plan is to use an A-518(46RH) with the push button cable adapter from AandA transmissions. I have all of the parts, haven't mocked it up yet, but I'm getting close.
Also, I found that the Mopar Performance Hemi wiring harness requires a momentary starter switch, which is exactly what our Neutral push button does, so it should be easy to hook that up.
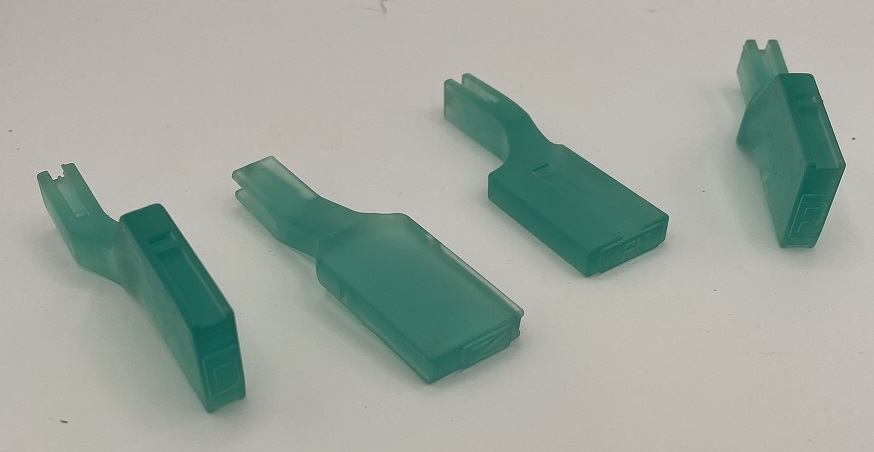
Here's a little teaser - we had a set of Powerflite push buttons made on a 3-D printer, since they have the large bottom button horizontal, and replaced LOW with P for Park. They will go on an NOS Powerflite shifter to active a positional switch which will work with the Powertrain Control Solutions setup. They are engineering that part for us. Starting will be via a modern "push to start" button located where the key switch was.
 (IMG_5448.jpg) (IMG_5448.jpg)
Attachments
----------------
IMG_5448.jpg (64KB - 361 downloads)
|
|
| |
|
Expert
Posts: 3599
Location: Blythewood, SC | Darryl T - 2022-04-19 8:30 PM
Coronet_Jeff - 2020-03-12 3:40 AM
What are your plans on retaining the push button shifter?
My plan is to use an A-518(46RH) with the push button cable adapter from AandA transmissions. I have all of the parts, haven't mocked it up yet, but I'm getting close.
Also, I found that the Mopar Performance Hemi wiring harness requires a momentary starter switch, which is exactly what our Neutral push button does, so it should be easy to hook that up.
Here's a little teaser - we had a set of Powerflite push buttons made on a 3-D printer, since they have the large bottom button horizontal, and replaced LOW with P for Park. They will go on an NOS Powerflite shifter to active a positional switch which will work with the Powertrain Control Solutions setup. They are engineering that part for us. Starting will be via a modern "push to start" button located where the key switch was.
I'd like to see the details on that conversion when you get to assembling it. |
|
| |
|

Regular
Posts: 59
Location: League City, TX | Keep us updated on the shifter, I thought about doing something similar.
I already have a newer 727, but may swap in a 518. I've been thinking bout changing the mechanical throw of the buttons and relabeling them.
I'd like to go from:
R N D
1 2
To:
P R N
D L
Edited by BlueGhost 2022-04-20 11:42 AM
|
|
| |
|
Extreme Veteran
Posts: 453
Location: McCleary WA | This is the rotary switch that will link to the shifter and control the NAG1 5-speed trans. I don't know its source other than it was provided by Powertrain Control Solutions who are designing all of the electronics. We consider it one of the coolest features of the project, and one that no one will ever notice.
 (shifter switch.JPG) (shifter switch.JPG)
Attachments
----------------
shifter switch.JPG (58KB - 345 downloads)
|
|
| |
|
Regular
Posts: 59
Location: League City, TX | Darryl T - 2022-04-21 1:57 PM
This is the rotary switch that will link to the shifter and control the NAG1 5-speed trans. I don't know its source other than it was provided by Powertrain Control Solutions who are designing all of the electronics. We consider it one of the coolest features of the project, and one that no one will ever notice.
Very cool, guess it will work like the gear selector knobs on the Ram trucks. |
|
| |
|
Extreme Veteran
Posts: 453
Location: McCleary WA | Right, and since PCS works with Mercedes and Chrysler products it just may be from one of them. The good part is they are prototyping some new systems on my car and another in the same shop so the cost to me is negligible. |
|
| |
|
Extreme Veteran
Posts: 453
Location: McCleary WA | 57chizler - 2021-08-31 11:44 AM
Darryl T - 2021-08-30 6:49 PM
Yes, the ugly wheels are just rollers and will soon be replaced.
Glad to hear that. Can't wait to see the finished project...I'm green with envy.
I think these 18" Schott wheels look a little better.
 (wheels on.jpg) (wheels on.jpg)
Attachments
----------------
wheels on.jpg (143KB - 360 downloads)
|
|
| |
|
Expert
Posts: 3599
Location: Blythewood, SC | Much better! |
|
| |
|
Expert
Posts: 3834
Location: NorCal | Taste in wheels is in the eye of the beholder...I'd say it's about a tossup. First disappointment in your build. |
|
| |
|
Extreme Veteran
Posts: 453
Location: McCleary WA | Front wheel is missing its center cap in this photo. When installed the lug nuts are covered, which was the goal and not easy to find. I've been building street rods for 57 years and have a pretty good idea what I want, but to each their own. If you liked those plastic covered stock Chrysler 300C wheels I'll make you a good deal on them |
|
| |
|
Extreme Veteran
Posts: 453
Location: McCleary WA | Getting ready for the speedwagon's debut at the Puyallup Goodguys show in two weeks. Not quite finished as the radiator is behind schedule and the fuel tanks are not installed yet, but it is looking good. The 5-speed NAG1 trans is operated by a modified Powerflite shifter with "P" for Park, the custom gauges are in place, and the interior is looking great; 14" disc brakes, independent rear end, power R&P steering, power adjustable brake and throttle pedals; power windows and locks; vent windows eliminated; and lots of other subtle touches most people will never notice. Horsepower Northwest is doing a great job.
Edited by Darryl T 2022-07-08 9:31 PM
 (7-8-22.2.jpg) (7-8-22.2.jpg)
Attachments
----------------
7-8-22.2.jpg (139KB - 322 downloads)
|
|
| |
|
Expert
Posts: 3834
Location: NorCal | Need more pics...inside, under. |
|
| |
|
Expert
Posts: 3974
Location: DFW, TX | It is looking absolutely sensational. Can't wait to see more. |
|
| |
|
Extreme Veteran
Posts: 453
Location: McCleary WA | Here are some more photos, taken at Goodguys. Unfortunately, it ended up being in the shade, so the color doesn't pop like when in the sun. The paint quality is incredible. It will sit lower in the back when the 200 lbs of fuel tanks and $200 worth of gas are on board.
Edited by Darryl T 2022-07-21 8:23 PM
 (Goodguys 22.5.JPG) (Goodguys 22.5.JPG)
 (Goodguys 22.6.JPG) (Goodguys 22.6.JPG)
 (Goodguys 22.8.JPG) (Goodguys 22.8.JPG)
 (Goodguys 22.9.JPG) (Goodguys 22.9.JPG)
 (Goodguys 22.10.JPG) (Goodguys 22.10.JPG)
 (Goodguys 22.11.JPG) (Goodguys 22.11.JPG)
 (Goodguys 22.12.JPG) (Goodguys 22.12.JPG)
Attachments
----------------
Goodguys 22.5.JPG (128KB - 316 downloads)
Goodguys 22.6.JPG (143KB - 300 downloads)
Goodguys 22.8.JPG (122KB - 313 downloads)
Goodguys 22.9.JPG (89KB - 334 downloads)
Goodguys 22.10.JPG (76KB - 353 downloads)
Goodguys 22.11.JPG (129KB - 325 downloads)
Goodguys 22.12.JPG (118KB - 328 downloads)
|
|
| |
|
Veteran
Posts: 112
| looks awesome ! very nice job. Might you have any spare parts that you'd be willing to sell? We also have a 57 2 door Dodge Suburban that my great grandmother bought new. |
|
| |
|
Exner Expert 10K+
Posts: 10251
Location: So. Cal | I love how you've kept it classy looking. It looks really nice. I'm not a fan of consoles. They remind me of everything I dislike about newer cars, but I can appreciate the comfort of a bucket seat. I really like how you have installed 3 point belts in the front. I hope you added the mounts for 3 point belts in the rear too? If you or the next owner wants to actually transport kids or others in the car. |
|
| |
|
Veteran
Posts: 293
Location: WA/USA | This turned out really nice. I wasn't into the color combo at first, but the interior brought it all together. I really like your steering wheel choice - up to date, but also a classic look.
Hope to see it around and get an up close, detailed look at it. |
|
| |
|
Extreme Veteran
Posts: 453
Location: McCleary WA | resq302 - 2022-07-21 11:23 PM
Might you have any spare parts that you'd be willing to sell? We also have a 57 2 door Dodge Suburban that my great grandmother bought new.
I think I already sold you some parts. Let me know what you need, I have a lot. PM works, or email. |
|
| |
|
Extreme Veteran
Posts: 453
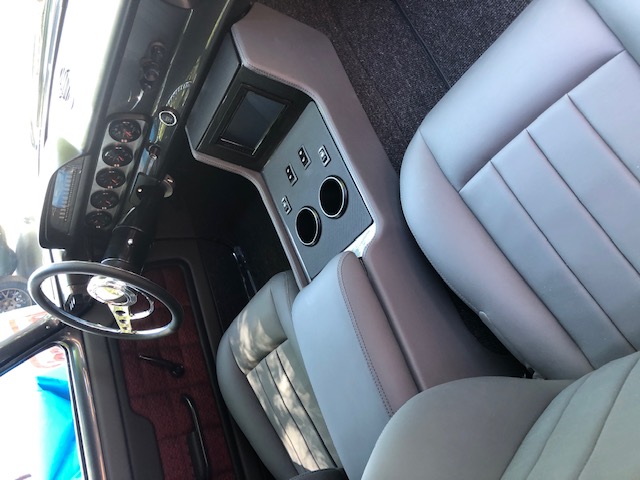
Location: McCleary WA | Powerflite - 2022-07-22 9:23 AM
I'm not a fan of consoles. They remind me of everything I dislike about newer cars, but I can appreciate the comfort of a bucket seat. I really like how you have installed 3 point belts in the front. I hope you added the mounts for 3 point belts in the rear too? .
In addition to its obvious functions, the console provides a place to hide the electronics for the 2019 hemi and automatic trans controls - they are bulky. As for the seat belts, note the retractors are inside of the door posts and unseen - you don't have to trip over them to get in the back seat. The upholsterer tucked the ends under the seats as he ran out of time to properly attach them at the bottom of the door post, which will get done next week. The back seat will have 3 sets of lap belts but unfortunately no shoulder ones. With the sliding windows there was no practical place to attach them. I doubt the seat will get used much anyway. |
|
| |
|
Extreme Veteran
Posts: 453
Location: McCleary WA | AceS - 2022-07-22 10:21 AM
Hope to see it around and get an up close, detailed look at it.
It will be at Goodguys in Puyallup all weekend - come see it. I even can provide a free pass to the first who asks.  |
|
| |
|
Regular
Posts: 59
Location: League City, TX | Great seeing this one finished. It's very similar to what I have planned for my 2 door Plymouth Suburban. |
|
| |
|
Extreme Veteran
Posts: 453
Location: McCleary WA | Almost finished - should have home by Christmas!
 (11-29-22.jpg) (11-29-22.jpg)
Attachments
----------------
11-29-22.jpg (75KB - 279 downloads)
|
|
| |
|
Extreme Veteran
Posts: 453
Location: McCleary WA | The Speedwagon came home today after 2 years and 9 months in the pro shop. What a great ride home - 80 felt just as smooth as 60, and this was on backroads not freeways. Hats off to the MoPar experts at Horsepower Northwest in Bremerton WA for a job well done.
 (12.15.22-2.JPG) (12.15.22-2.JPG)
 (12.15.22-3.JPG) (12.15.22-3.JPG)
Attachments
----------------
12.15.22-2.JPG (123KB - 299 downloads)
12.15.22-3.JPG (113KB - 282 downloads)
|
|
| |
|
Expert
Posts: 3599
Location: Blythewood, SC | Beautiful car. I'd like to see more photos in the sun to do the paint color more justice. |
|
| |
|
Expert 5K+
Posts: 5152
| needs whitewalls is that all stock setup suspension? just huge rims? looks like the front is tight |
|
| |
|
Extreme Veteran
Posts: 453
Location: McCleary WA | mikes2nd - 2022-12-16 3:46 PM
is that all stock setup suspension? just huge rims? looks like the front is tight
The rear suspension is 2006 Chrysler 300C IRS. The front is stock with 14" Chrysler disc brakes and 18" Schott wheels. It's close but doesn't rub. Rides and drives very well. |
|
| |
|
Extreme Veteran
Posts: 453
Location: McCleary WA | 57plymouth - 2022-12-16 3:36 AM
I'd like to see more photos in the sun to do the paint color more justice.
So would I. Maybe next spring? |
|
| |
|
Regular
Posts: 68
Location: Springfield, MO | Did the Vintage Aire get mounted on the passenger side? |
|
| |
|
Expert
Posts: 3974
Location: DFW, TX | Amazing job, a tastefully updated wagon built for the road. I love this thing. |
|
| |
|
Extreme Veteran
Posts: 453
Location: McCleary WA | chstrumpetdude - 2022-12-19 7:12 AM
Did the Vintage Aire get mounted on the passenger side?
We used Restomod Air, on the passenger side. I moved the wiper motor to the driver's side, which wasn't that difficult. We also flattened the firewall inside, by removing the stock air plenum. Ended up with a pretty small glove box, but it is still useable. |
|
| |
|

Expert
Posts: 3112
Location: N.W. Fla. | Darryl T - 2022-05-05 12:46 PM
Front wheel is missing its center cap in this photo. When installed the lug nuts are covered, which was the goal and not easy to find. I've been building street rods for 57 years and have a pretty good idea what I want, but to each their own. If you liked those plastic covered stock Chrysler 300C wheels I'll make you a good deal on them :) I'd go for Cragar SS myself... |
|
| |
|
Extreme Veteran
Posts: 453
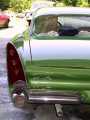
Location: McCleary WA | First car show, first trophy (Best Mopar) today. Took away a little of the pain of getting backed into by an old codger (my age) a week ago on its first long trip, 300 miles down into Oregon and back. Amazing the damage a trailer hitch on a Ford F-250 can do - about $10k worth. Waiting to see what his Country Mutual insurance will do. If there are problems my Grundy coverage will step in I'm sure. Car builder refused to repair it ("We don't do insurance work") so will most likely be going to the shop that painted my convertible, but they are booked up until Fall. |
|
| |
|
Veteran
Posts: 293
Location: WA/USA | Argh. Sorry to hear about the collision... after all that time and effort. |
|
| |
|
Extreme Veteran
Posts: 453
Location: McCleary WA | Fifth car show today and third trophy - Best MoPar, Best in Show, and Best Modified, all with a caved-in door and quarter panel. As stated before we don't do this for trophies, but it is gratifying to get recognition from your peers for all your hard work. And it is fun educating the general public - "I didn't know Dodge ever made a two-door wagon" is second to "Oh no, how did that happen?" The car was built to be a driver not a show car, but that part took a decidedly bad turn May 13. It will go in the shop this fall and emerge as good as new. |
|
| |
|
Regular
Posts: 52
Location: Finland | Hello Darryl! The original Dodge centerling is 22" between inner tie rod ends. The same dimension in the 300C rack is 25". Does this effect notably to the steering geometry? Thanks!
Jouni |
|
| |
|
Exner Expert 10K+
Posts: 10621
Location: Lower Mainland BC | Darryl T - 2023-07-09 3:51 PMAnd it is fun educating the general public - "I didn't know Dodge ever made a two-door wagon"
I had forgotten (or missed) the damage back in May. Hope you can get it fixed soon.
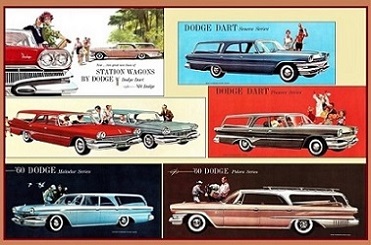
As for the public and educating them about 2 dr 57 Dodge wagons, you might want to save, print and laminate this and keep it in the car.
https://www.lov2xlr8.no/brochures/dodge/57dg1/bilder/7.jpg
|
|
| |
|
Extreme Veteran
Posts: 453
Location: McCleary WA | JouniK - 2023-12-11 11:04 AM
Hello Darryl! The original Dodge centerling is 22" between inner tie rod ends. The same dimension in the 300C rack is 25". Does this effect notably to the steering geometry? Thanks!
Jouni
I made new steering arms for the spindles out of 1" steel bar which are shorter and match the specs of the rack donor 300C AWD, plus shortened the rack slightly on each end. The arms were designed to provide proper Ackerman alignment. It drives great. |
|
| |
|
Extreme Veteran
Posts: 453
Location: McCleary WA | 56D500boy - 2023-12-11 3:36 PM
Darryl T - 2023-07-09 3:51 PMAnd it is fun educating the general public - "I didn't know Dodge ever made a two-door wagon"
I had forgotten (or missed ) the damage back in May. Hope you can get it fixed soon.
As for the public and educating them about 2 dr 57 Dodge wagons, you might want to save, print and laminate this and keep it in the car.
https://www.lov2xlr8.no/brochures/dodge/57dg1/bilder/7.jpg
At shows I usually have an original wagon dealer brochure laying on the tailgate for showing to those who say "I didn't know Dodge made a 2-door wagon".
And it finally goes into the shop for repair this afternoon. I was able to get a replacement door and quarter panel section from Big M, and a new rocker panel from Rocker King.
For the record, my Grundy insurance paid immediately with no hassle, and will go after the other guy's company for reimbursement. I can't say enough about Grundy's coverage. They even cover late models, with my Corvette and Harley costing about half of what they were previously.
Edited by Darryl T 2023-12-12 2:23 PM
|
|
| |
|

Elite Veteran
Posts: 1146
Location: CA | That's a good lookin' wagon there! |
|
| |
|
Expert
Posts: 3834
Location: NorCal | Darryl T - 2023-12-12 11:20 AM
And it finally goes into the shop for repair this afternoon. I was able to get a replacement door and quarter panel section from Big M, and a new rocker panel from Rocker King.
For the record, my Grundy insurance paid immediately with no hassle, and will go after the other guy's company for reimbursement. I can't say enough about Grundy's coverage. They even cover late models, with my Corvette and Harley costing about half of what they were previously.
Got any pics of the damage? |
|
| |
|
Extreme Veteran
Posts: 453
Location: McCleary WA | 57chizler - 2023-12-16 9:47 AM
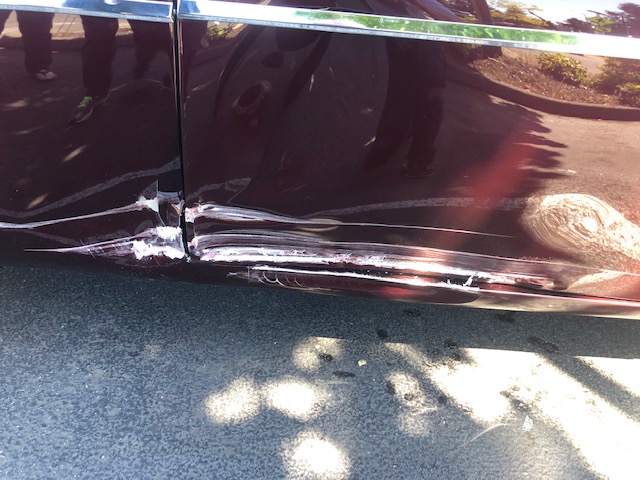
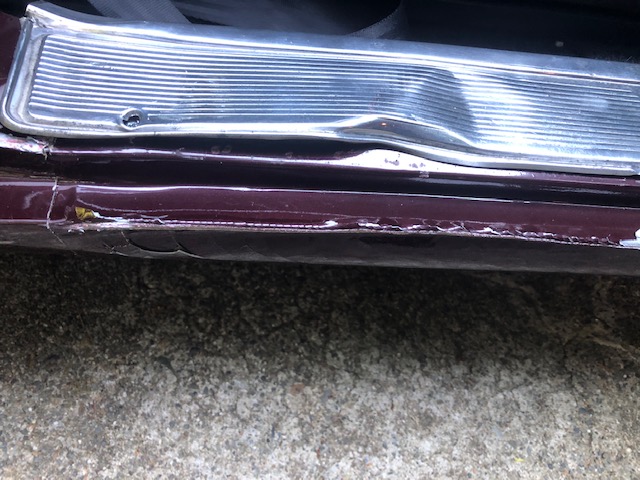
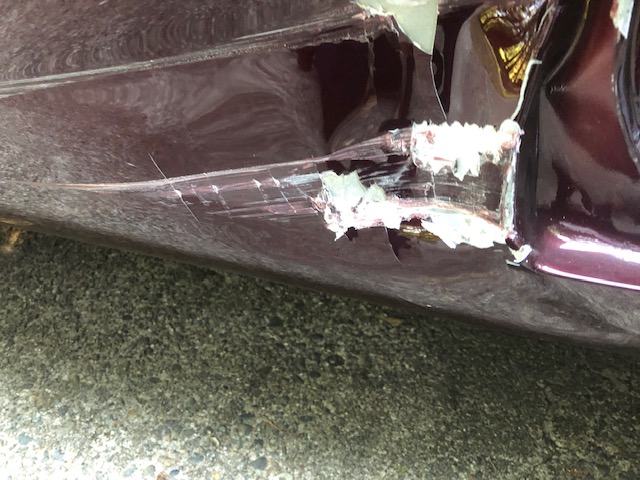
Got any pics of the damage?
I have resisted posting pics of the damage as they could affect the future value of the car, but I guess that ship has sailed. Hard to believe this happened on its first road trip. Almost $21k in damage, and that is open-ended if exceeded. As I said Grundy has been great to deal with.
 (wreck 5-13-23.5.JPG) (wreck 5-13-23.5.JPG)
 (wreck 5-13-23.6.JPG) (wreck 5-13-23.6.JPG)
 (wreck 5-13-23.7.JPG) (wreck 5-13-23.7.JPG)
Attachments
----------------
wreck 5-13-23.5.JPG (103KB - 196 downloads)
wreck 5-13-23.6.JPG (107KB - 200 downloads)
wreck 5-13-23.7.JPG (105KB - 207 downloads)
|
|
| |
|
Extreme Veteran
Posts: 453
Location: McCleary WA | Darryl T - 2022-12-15 4:45 PM
Hats off to the MoPar experts at Horsepower Northwest in Bremerton WA for a job well done.
I need to add a footnote to that statement. As with all projects I expected a few issues to arise, but the number I'm dealing with is beyond reason. Non-functioning A/C (4 attempts to charge, new hoses); a high-end alarm system that was installed despite non-compatibility with the can-bus wiring system they used (most of its wiring was not even installed); lights including hazard that only function with the ignition on; radio that won't pick up even local stations; a 1/2" p/s hose on a 3/8" nipple that leaked all over everything; one torsion bar set 2" higher than the other; etc. Most of these I have fixed myself as they refused to stand by their work. They said it was because I told them I was running low on funds but ignored the fact that I had already paid to have that stuff done correctly. And the icing on the cake was their refusal to fix the crash damage when they were the best possibility to match the paint.
Bottom line is, I don't want to be on record as recommending their work. I do not. |
|
| |
|
Expert
Posts: 3834
Location: NorCal |
Reading about your collision reminded me of a poster I have on my shop wall, bottom right shows a guy going ballistic after a delivery truck rams his lead sled Merc.
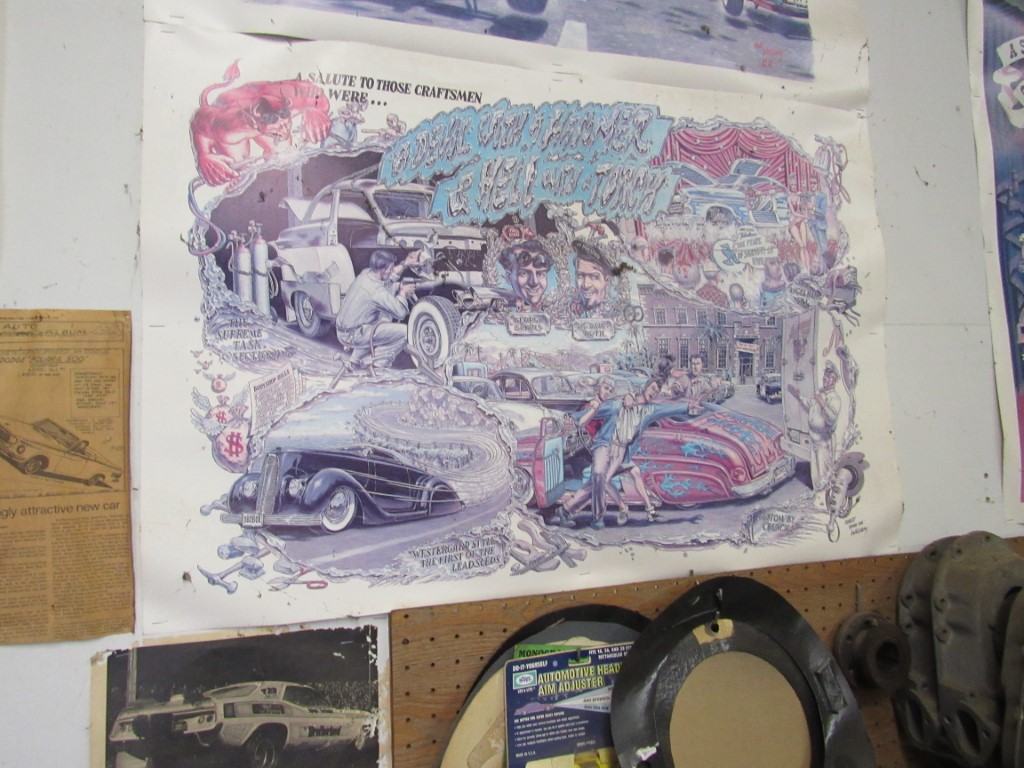 (Crash.JPG) (Crash.JPG)
Attachments
----------------
Crash.JPG (205KB - 192 downloads)
|
|
| |
|
Extreme Veteran
Posts: 453
Location: McCleary WA | Despite a few choice words yelled while still in the car, I was surprisingly calm when confronting the other driver. He was elderly (like me), very apologetic, and readily admitted his fault. And that it was his second accident in a week. Life goes on, it's just a car after all. But he is probably lucky the built-in holster was empty..... |
|
| |
|
Elite Veteran
Posts: 737
Location: Finland | Those collision damage pictures are really hurtful to watch...sorry to say but that repair really requires a bodyshop with skills. |
|
| |
|
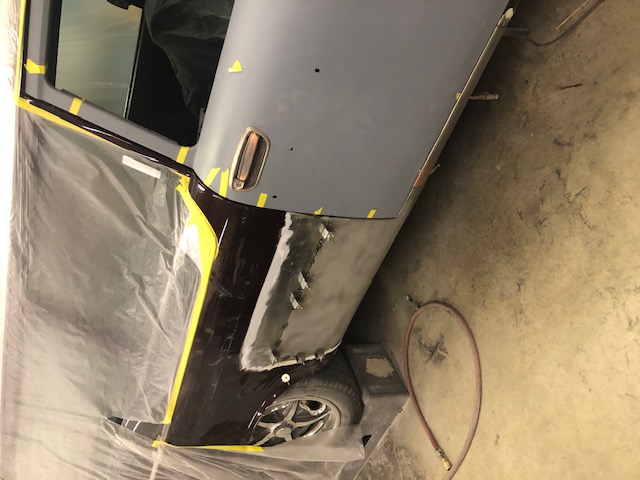
Extreme Veteran
Posts: 453
Location: McCleary WA | I think this shop qualifies. They painted my '57 convertible which turned out incredibly nice. Replacement door and quarter panel section came from Big M and a new rocker panel from Rocker King. My polisher has already repaired the sill plate.
 (1-18-24.JPG) (1-18-24.JPG)
Attachments
----------------
1-18-24.JPG (74KB - 201 downloads)
|
|
| |
|
Extreme Veteran
Posts: 453
Location: McCleary WA | Brought it home today. Color match by Customs Northwest, who painted my '57 Dodge convertible, is amazingly good. I still have to reassemble the door and reinstall the s/s moldings and front bumpers, but at least it is home. I chose to do that instead of the shop because I've done it so much by now. No point in making the insurance bill even higher.
 (home again 4.16.24.JPG) (home again 4.16.24.JPG)
Attachments
----------------
home again 4.16.24.JPG (138KB - 155 downloads)
|
|
| |
|
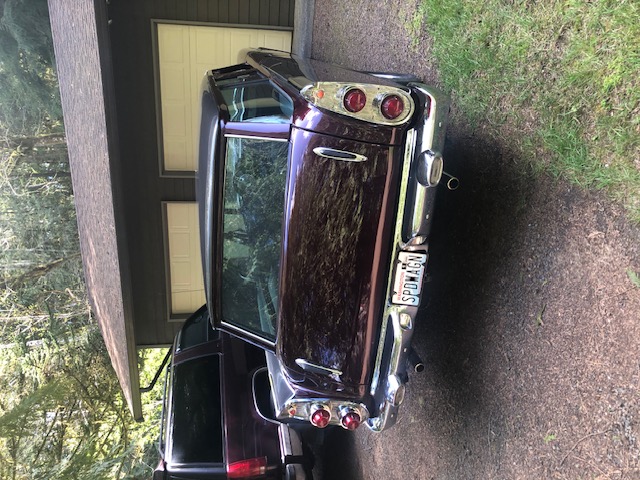
Extreme Veteran
Posts: 453
Location: McCleary WA | I'll add a side view once the s/s trim and front bumpers are reinstalled. Anyone notice something different in this rear view? I used Plymouth backup lights and bumper guards so that I could use all 4 taillights for increased visibility at night. |
|
| |
|
Exner Expert 10K+
Posts: 10621
Location: Lower Mainland BC | Darryl T - 2024-04-18 10:32 AM
I'll add a side view once the s/s trim and front bumpers are reinstalled. Anyone notice something different in this rear view? I used Plymouth backup lights and bumper guards so that I could use all 4 taillights for increased visibility at night.
Good idea. I like more taillights whenever possible.
Very subtle.
 (57Dodge2drWagonWithPlymouthWagonBackUpLights_DarrylT.jpg) (57Dodge2drWagonWithPlymouthWagonBackUpLights_DarrylT.jpg)
Attachments
----------------
57Dodge2drWagonWithPlymouthWagonBackUpLights_DarrylT.jpg (121KB - 166 downloads)
|
|
| |
|
Expert
Posts: 3834
Location: NorCal | Darryl T - 2024-04-18 10:32 AM
I'll add a side view once the s/s trim and front bumpers are reinstalled. Anyone notice something different in this rear view? I used Plymouth backup lights and bumper guards so that I could use all 4 taillights for increased visibility at night.
Aha, always wondered why the bumper guards have those funky snap-in plugs.
 (CIMG0450.JPG) (CIMG0450.JPG)
Attachments
----------------
CIMG0450.JPG (190KB - 182 downloads)
|
|
| |
|
Extreme Veteran
Posts: 453
Location: McCleary WA | 57chizler - 2024-04-19 9:47 AM
Aha, always wondered why the bumper guards have those funky snap-in plugs.
Actually, the bumper guards themselves are the same, but their brackets are different (to accommodate the light) as is their bolt spacing. Since I couldn't find two good Plymouth guards I had to convert one Dodge guard by welding in a Plymouth bracket before re-chroming, plus had to modify the holes in the bumper. But it gave me the look I wanted.
Edited by Darryl T 2024-04-21 7:51 PM
|
|
| |
|
Extreme Veteran
Posts: 453
Location: McCleary WA | Darryl T - 2024-04-18 10:32 AM
I'll add a side view once the s/s trim and front bumpers are reinstalled.
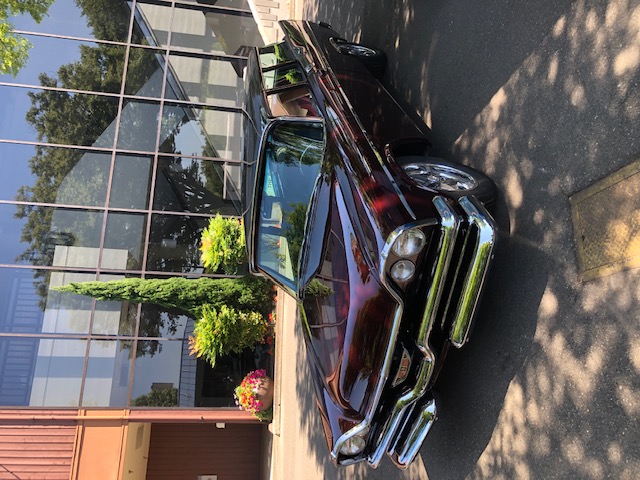
As promised, below. Went to our first show yesterday, good day even though we got caught in the rain. First time it has been wet in many years (I don't wash it, just use Griot's spray cleaner so far).
 (5.17.24.1.JPG) (5.17.24.1.JPG)
 (5.17.24.2.JPG) (5.17.24.2.JPG)
Attachments
----------------
5.17.24.1.JPG (151KB - 167 downloads)
5.17.24.2.JPG (154KB - 157 downloads)
|
|
| |
|
Extreme Veteran
Posts: 453
Location: McCleary WA | We have over 3,500 miles on the wagon now and it is a blast to drive. I had new exhaust installed as the first shop ran it under the center crossmember where it dragged on every speed bump it met. I also had it electronically tuned to eliminate the extra-rich warm-up cycle. We had hoped to take a long trip in it this fall but that is looking less likely due to family commitments.
If anyone is interested, I got talked into doing a podcast video while at the 3,000+ car Puyallup WA Goodguys car show 7/26. The main reason I do these shows is to expose the public and other car owners to our FWL cars and try to educate them a bit. If I had a dollar for every time I heard "I didn't know Dodge made a two-door wagon" I could have paid for this project. Check out https://www.youtube.com/watch?v=wbUxUXvYajA . You can skip forward to 22:45 for the relevant part. BTW we picked up trophy #12 last week, another Best in Show.
Also recently posted was a video interview with the new owner of my '57 Dodge hemi convertible. You can watch it at https://www.youtube.com/watch?v=LmP_GFlZMUM and enjoy the lack of knowledge of both the interviewer and owner. "Coronet Custom Royal Lancer" is not how I described it... The comments are interesting.
|
|
| |
|
Expert
Posts: 3834
Location: NorCal |
So, you found it in Sacramento...what year was that? I'm located in Sacramento county. |
|
| |
|
Extreme Veteran
Posts: 453
Location: McCleary WA | I bought it 11/9/17 in Nicholaus, north of Sacramento. I had followed it on Craigslist for some time, as it seemed to be moving around the greater Bay area (which may just be due to my unfamiliarity with that area). |
|
| |
|
Expert
Posts: 3834
Location: NorCal |
Might be the one I saw advertised (not on Craigslist) as being in Lincoln which is right next door to Nicolas. Owner never answered my e-mails.
Oh well, it turned out a lot better than it would have under my ownership. |
|
| |
|
Extreme Veteran
Posts: 453
Location: McCleary WA | That was partly why it took so long for me to close a deal on it - despite being advertised it was difficult to get a response, which made me wary. And yes, at one point I believe the ad said Lincoln. John at Big M was aware of it and had been asked to do some work on it. |
|
| |
|
Regular
Posts: 94
Location: Oklahoma | Looks like the same interviewer of your old convertible just did a story on a '57 2 door wagon
https://www.youtube.com/watch?v=NT2hhQhWiAQ
|
|
| |
|
Extreme Veteran
Posts: 453
Location: McCleary WA | Thanks for that link, I hadn't seen it. At least these folks were more aware of what they had than the convert owner was. That makes 5 other 2-door wagons that I am aware of, one (yellow and white) I saw in MN and 3 I've seen online. I'm sure there are a few more, but not many. |
|
| |