|
|

Expert 5K+
Posts: 9904
   
Location: Lower Mainland BC | .
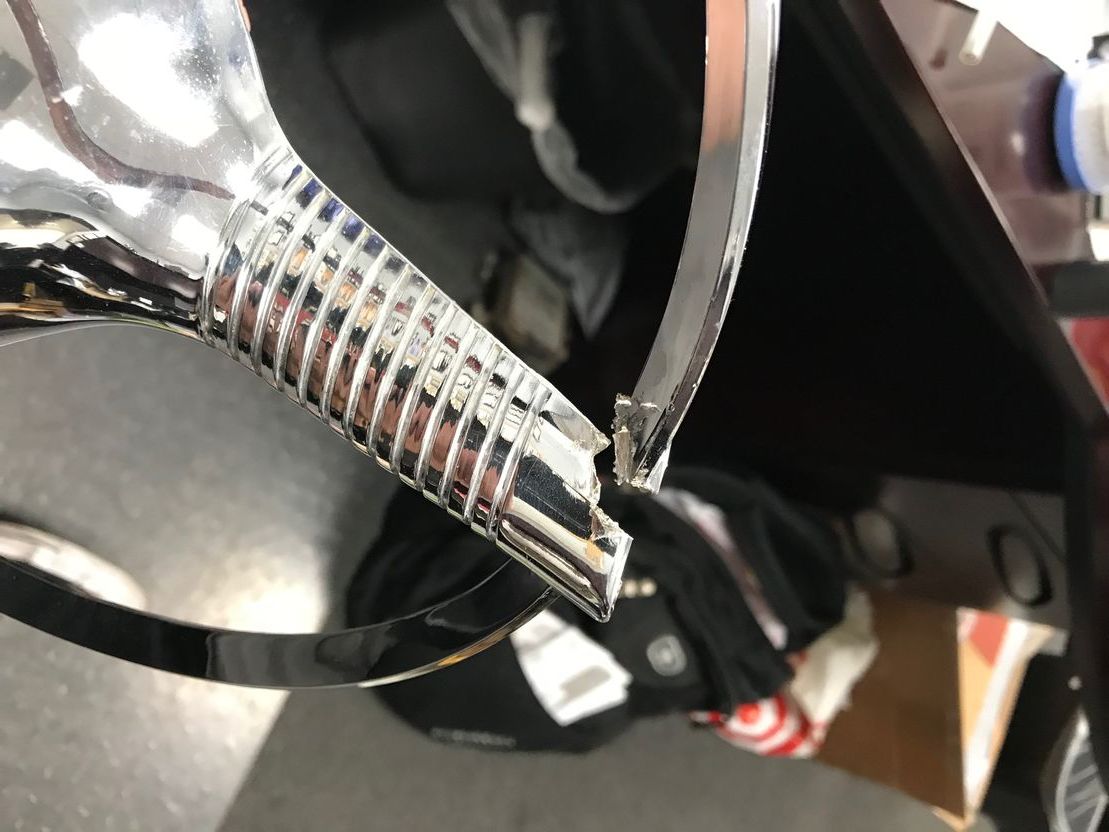
Previously I have attempted to fix a 55/56 Plymouth horn ring with Muggy Weld. It worked(ish) but the US Postal Service tested the weld and it was found wanting.  
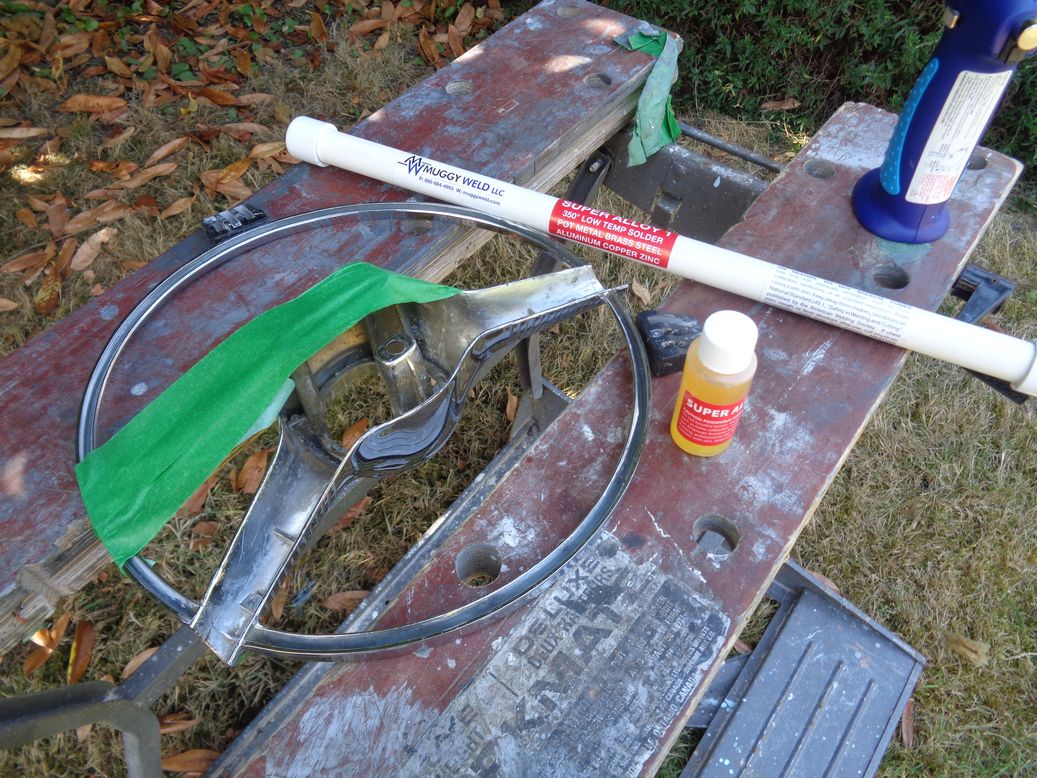
After my second (or third) try "not bad"  : :
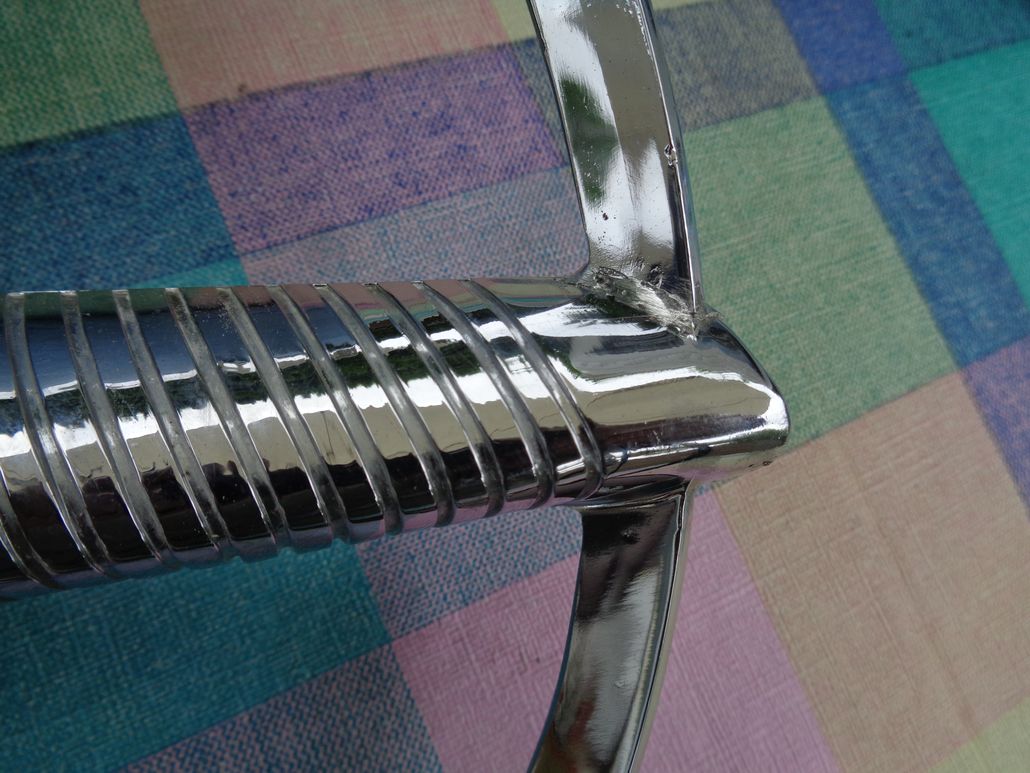
After the USPS go through with it :
This thread: http://www.forwardlook.net/forums/forums/thread-view.asp?tid=69374&...
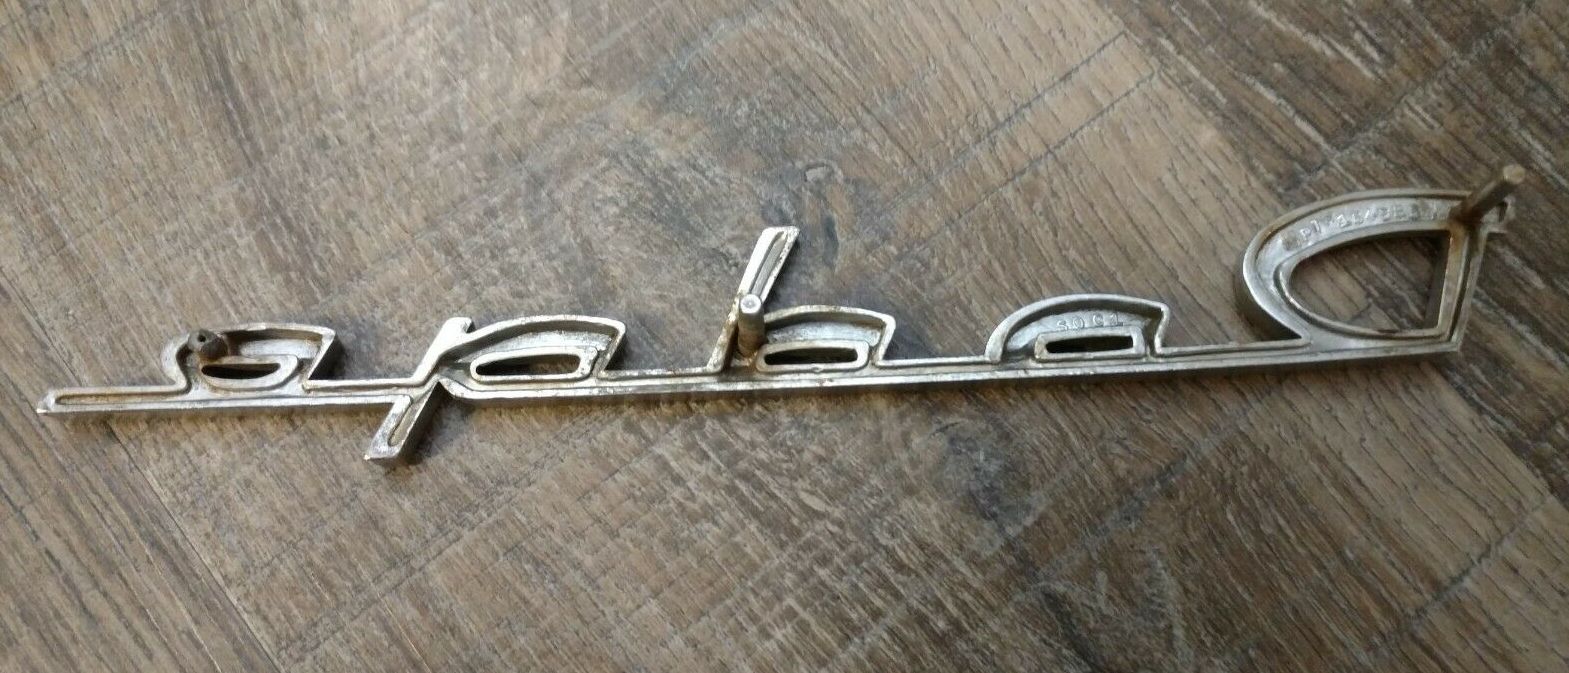
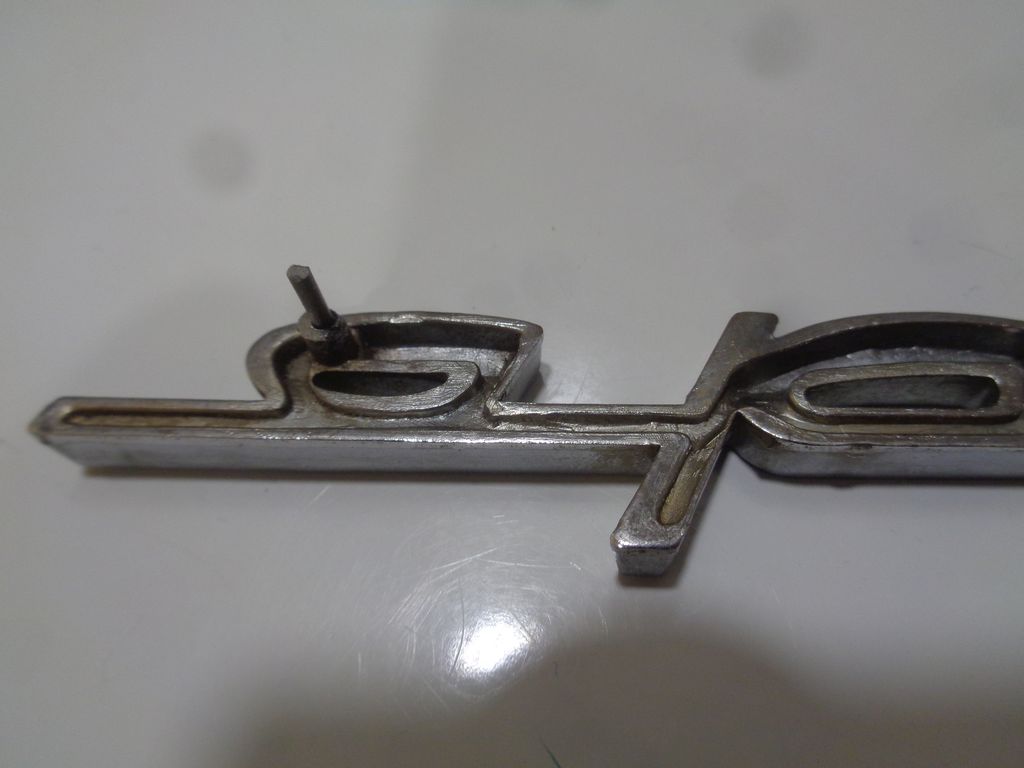
I recently found a very nice 55/56 Dodge Script Logo on eBay with very little if any pitting so I snapped it up. Not sure if I noticed one of the pins on the back was missing/broken. Regardless, the quality of the rest of the logo was good enough to ignore that issue and hope that I can fix it.
Seeing that I still have the Muggy Weld stuff, I am going to try to fix the broken pin. I see that the pin was hollow so there is a chance to use the hole to reinforce the addition of a new pin. (On the back of the "e" in Dodge):
Open to suggestions (as usual) 
This is what I have to work with:
Edited by 56D500boy 2019-09-14 7:23 PM
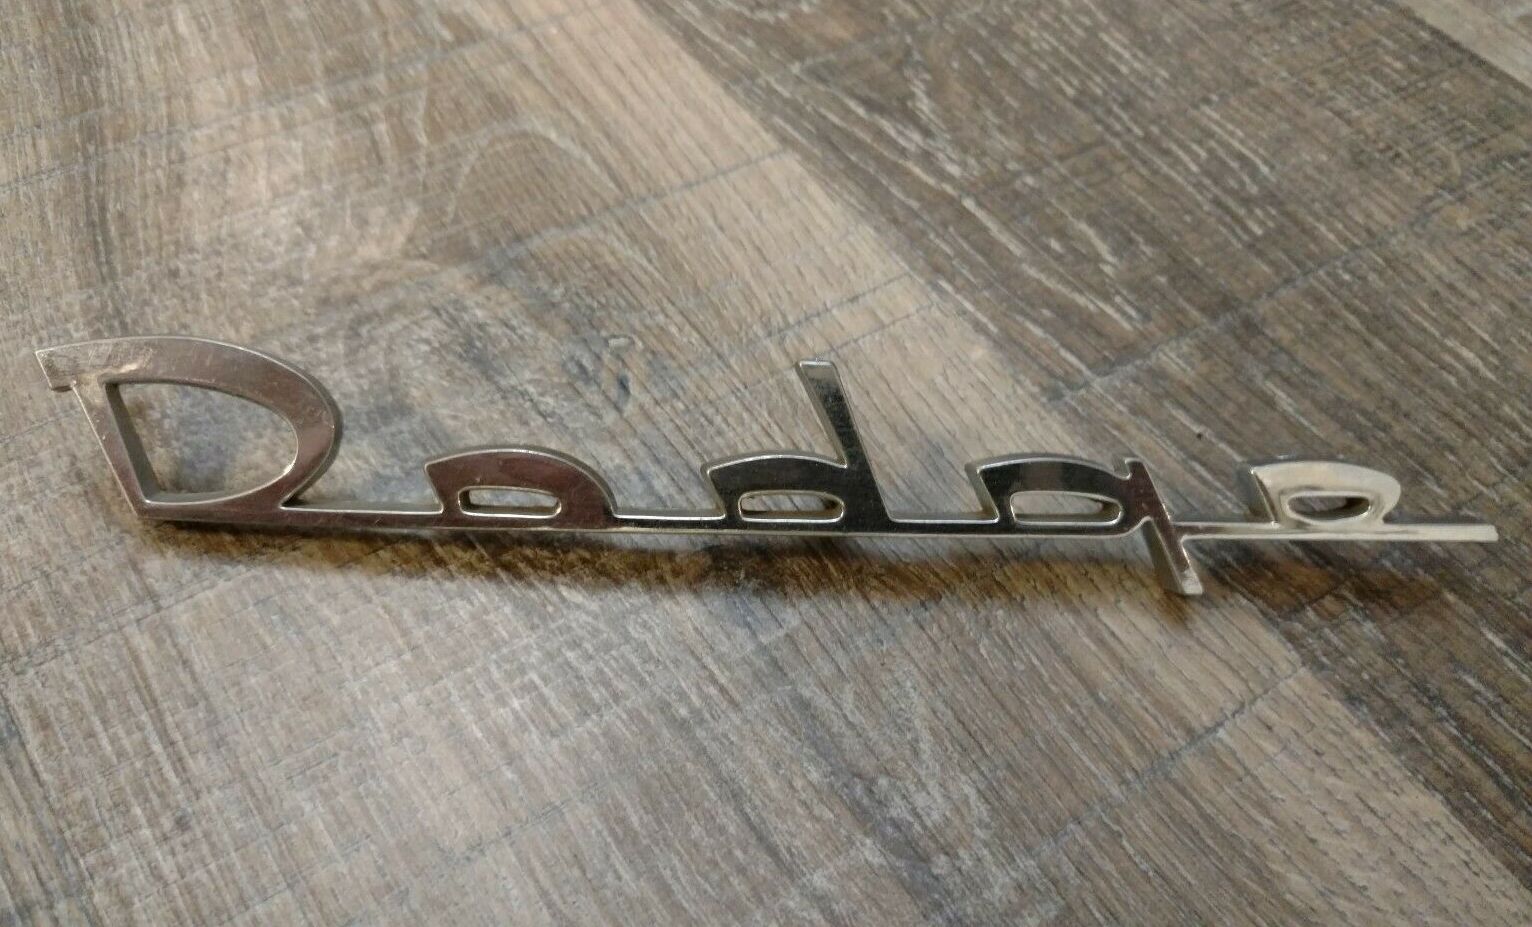 (eBayDodgeScriptLogo_Front.jpg) (eBayDodgeScriptLogo_Front.jpg)
 (eBayDodgeScriptLogo_Back.jpg) (eBayDodgeScriptLogo_Back.jpg)
Attachments
----------------
 eBayDodgeScriptLogo_Front.jpg (210KB - 85 downloads) eBayDodgeScriptLogo_Front.jpg (210KB - 85 downloads)
eBayDodgeScriptLogo_Back.jpg (190KB - 94 downloads)
|
|
| |
|
Expert 5K+
Posts: 9904
Location: Lower Mainland BC | Not wanting to start a new project (converting a NOS "Model A" Jubilee horn into a 56 Dodge Jubilee horn), I decided to go back to the Dodge Script issue (broken stud/pin) to see if I could make some progress there.
That I did.
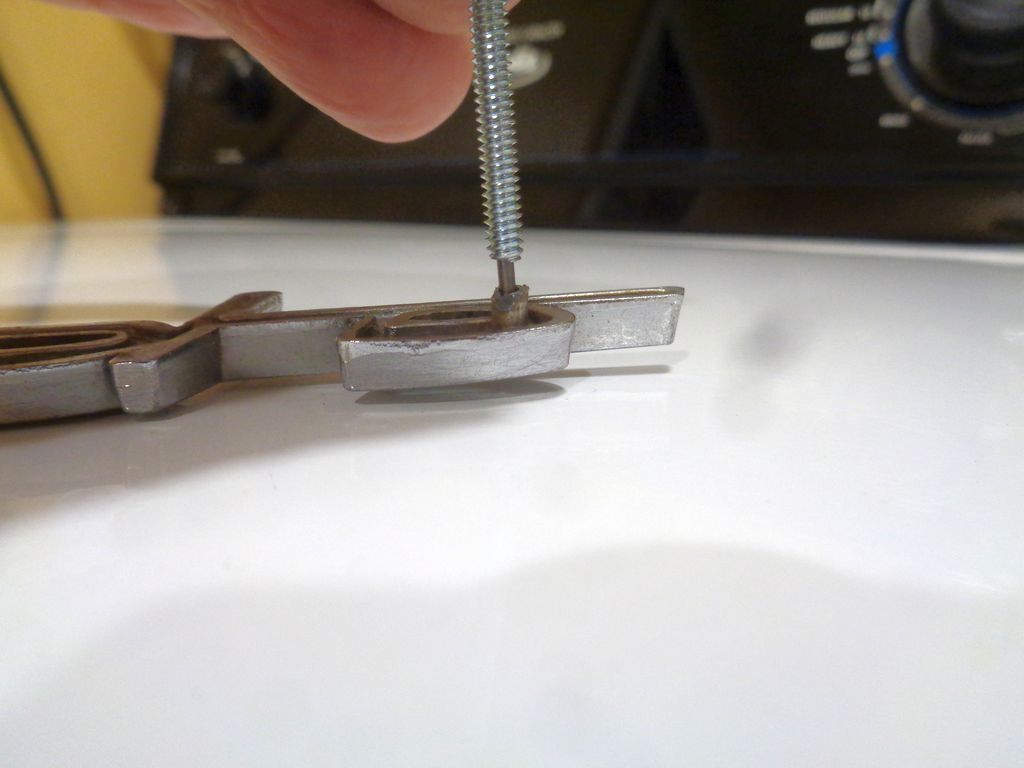
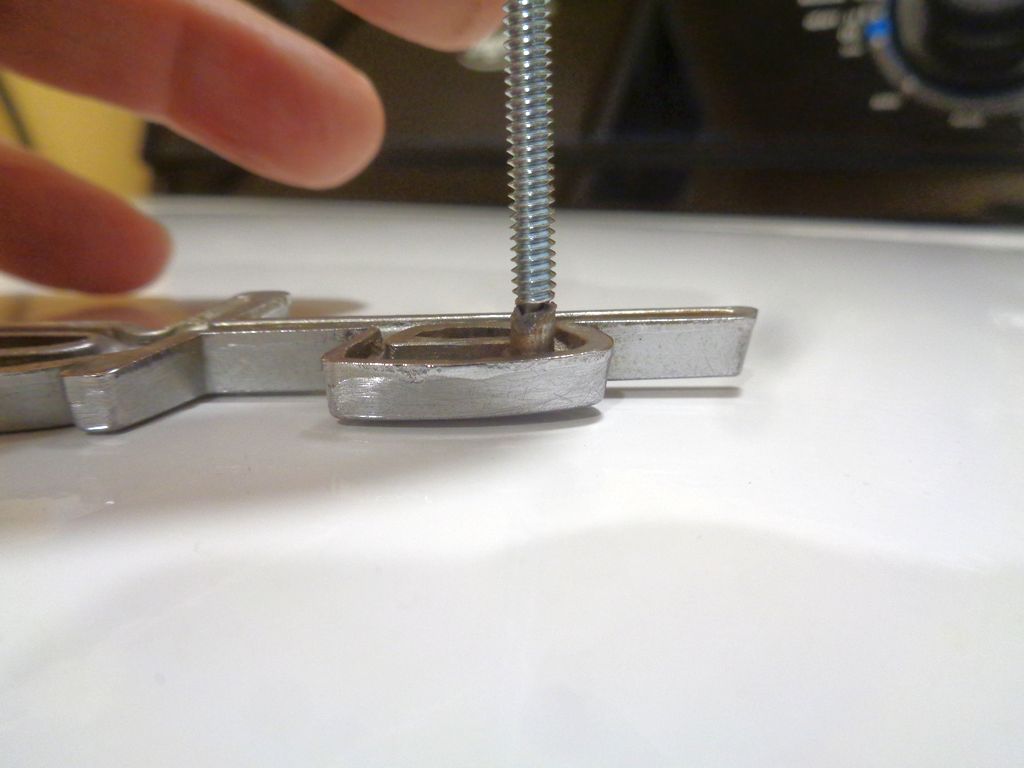
First thing was I checked the size of the stud against yhr 8-32 and 6-32 machine screws which I have on hand and decided that the closest size was the 6-32. Then I decided to see if I could drill out the machine screw so I could use a guide pin to hrlp connect/align the machine screw with the broken stud/pin on the script logo.
I put the 6-32 machine screw in a vise with the flat end up and I started drilling with a 3/64 drill bit. I was lucky enough to get the bit started close (enough) to the centre of the end of the machine screw. I went slow and was able to get in about 3/16" in without breaking the bit (almost a first). Then I switched to a 1/16" bit and went in a total of about 5/16". Went surprisingly well.
Then I used the same 1/16" bit and drilled into the broken stud using the existing hole in the stud as the starting point. Went in about 3/16 or so. Then I used my Dremel to create a flat square top for the machine screw to land on.
I couldn't find a small brad nail so I sacrificed the 1/16" bit and cut a guide pin about 3/8" long with my Dremel. Might need to be a bit longer.
I trialed the guide pin in the script logo stud and the 6-32 machine screw. Looks like it will work well enough.
If I didn't have the Muggy Weld, I think I would try epoxy or regular solder. However, I do have the Muggy Weld so that will be the next step. Maybe tomorrow.
Photos from this afternoon (took about 30 minutes total):
Edited by 56D500boy 2019-09-18 1:21 AM
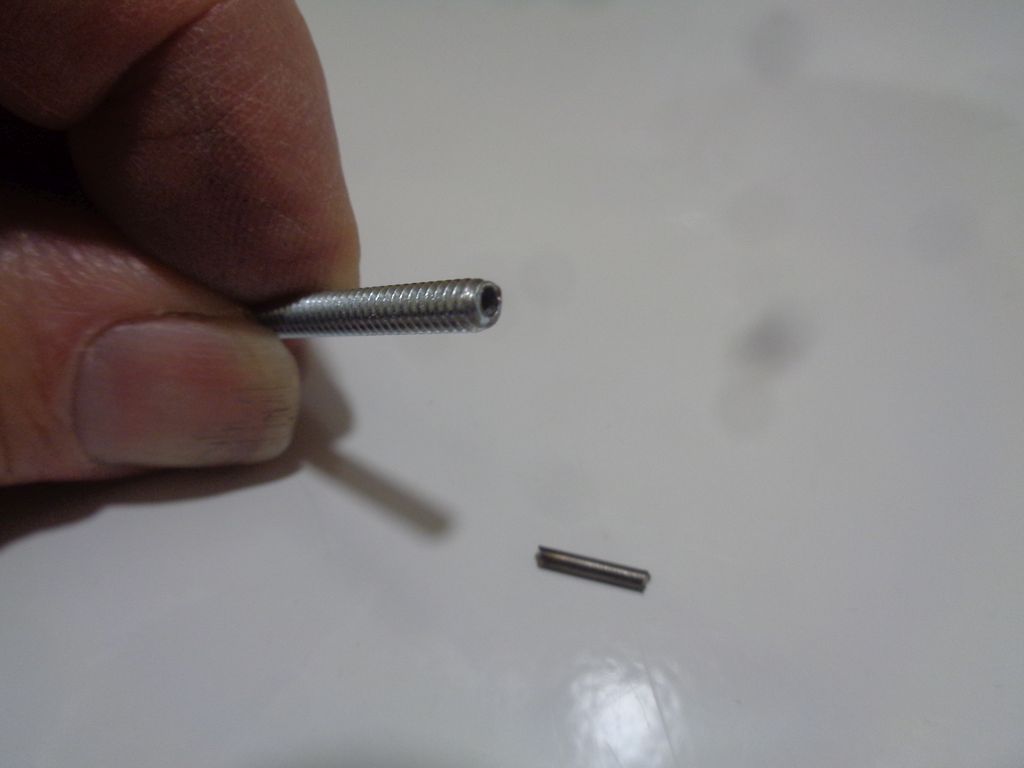 (DrillingOutA6_32MachineScrew_showingGuidePin.jpg) (DrillingOutA6_32MachineScrew_showingGuidePin.jpg)
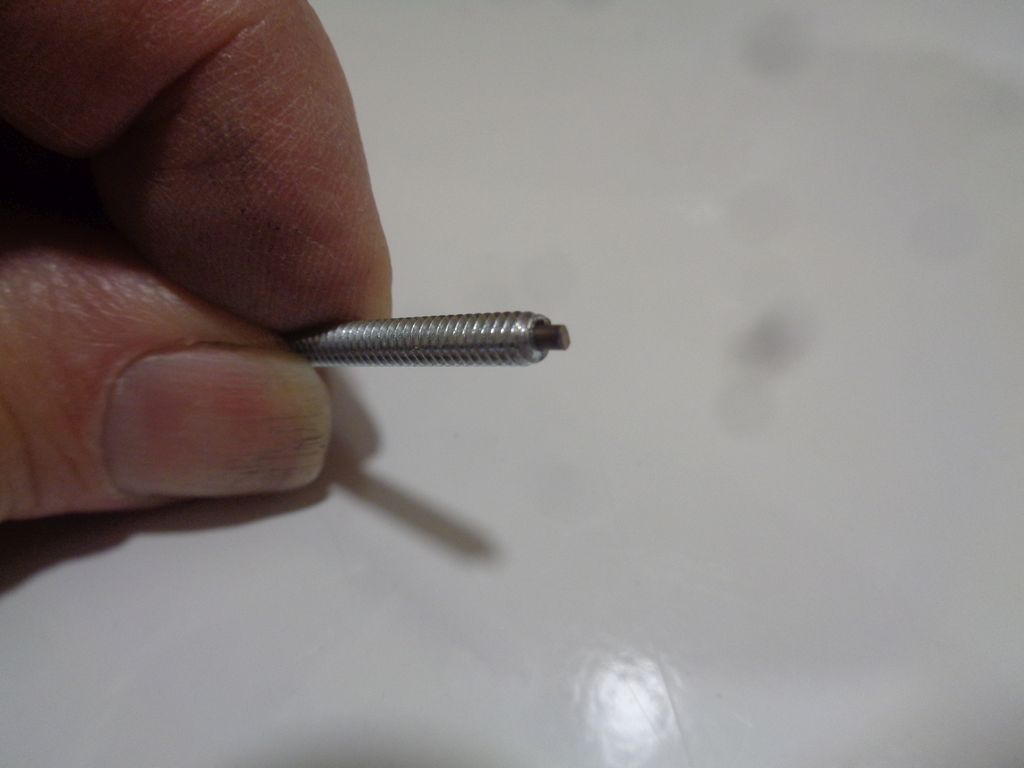 (DrillingOutA6_32MachineScrew_WithGuidePinInserted.jpg) (DrillingOutA6_32MachineScrew_WithGuidePinInserted.jpg)
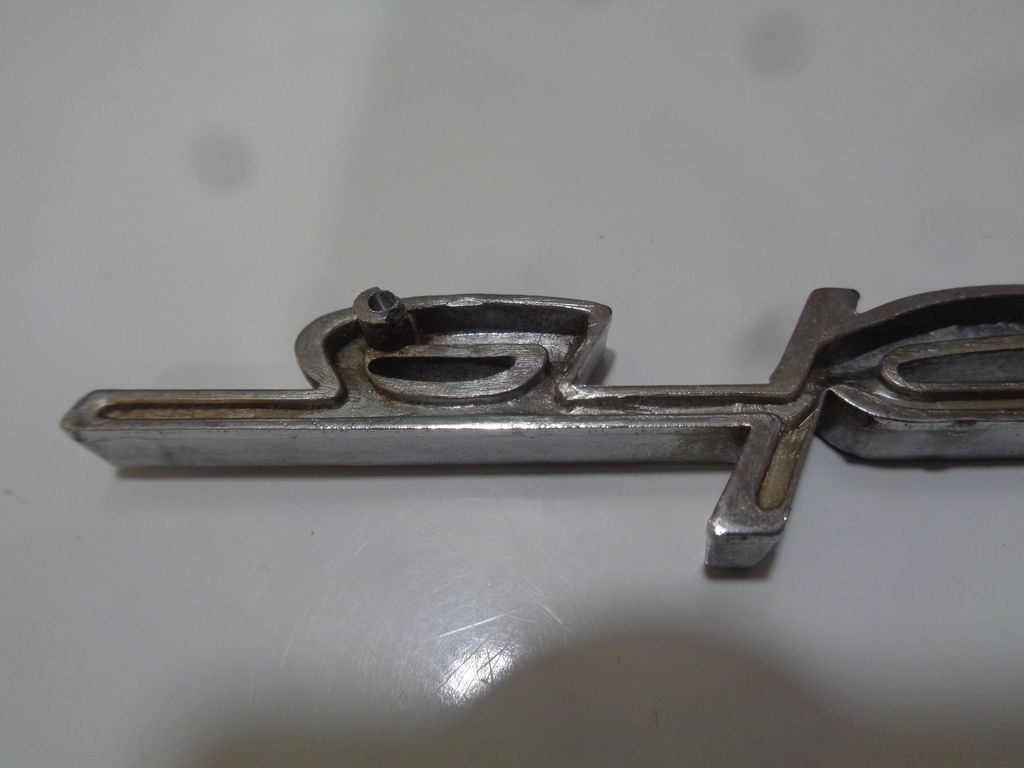 (DrillingOutTheBrokenPin.jpg) (DrillingOutTheBrokenPin.jpg)
 (DrillingOutTheBrokenPin_AddingAGuidePin.jpg) (DrillingOutTheBrokenPin_AddingAGuidePin.jpg)
 (InsertingDrilled6_32MachineScrewOverGuidePinInBrokenStud.jpg) (InsertingDrilled6_32MachineScrewOverGuidePinInBrokenStud.jpg)
 (InsertingDrilled6_32MachineScrewOverGuidePinInBrokenStud_FullInsertion.jpg) (InsertingDrilled6_32MachineScrewOverGuidePinInBrokenStud_FullInsertion.jpg)
Attachments
----------------
DrillingOutA6_32MachineScrew_showingGuidePin.jpg (49KB - 83 downloads)
DrillingOutA6_32MachineScrew_WithGuidePinInserted.jpg (53KB - 100 downloads)
DrillingOutTheBrokenPin.jpg (64KB - 83 downloads)
DrillingOutTheBrokenPin_AddingAGuidePin.jpg (64KB - 87 downloads)
InsertingDrilled6_32MachineScrewOverGuidePinInBrokenStud.jpg (69KB - 92 downloads)
InsertingDrilled6_32MachineScrewOverGuidePinInBrokenStud_FullInsertion.jpg (72KB - 105 downloads)
|
|
| |
|
Expert 5K+
Posts: 5006
| good stuff, its hard to do real precise work with the mugglyweld. I kind of blast it on and it takes a ton of time taking it down slowly.
just rip the pins off fill up the back with muggyweld or some other filler, and 3m double sided tape it on
|
|
| |
|
Expert 5K+
Posts: 9904
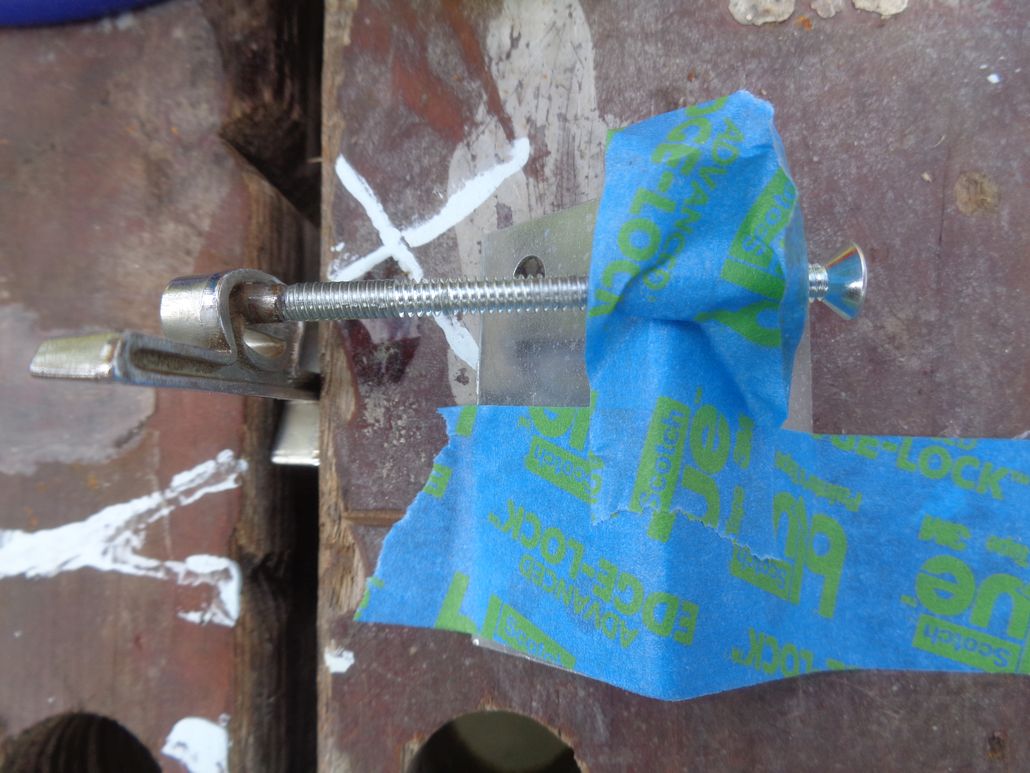
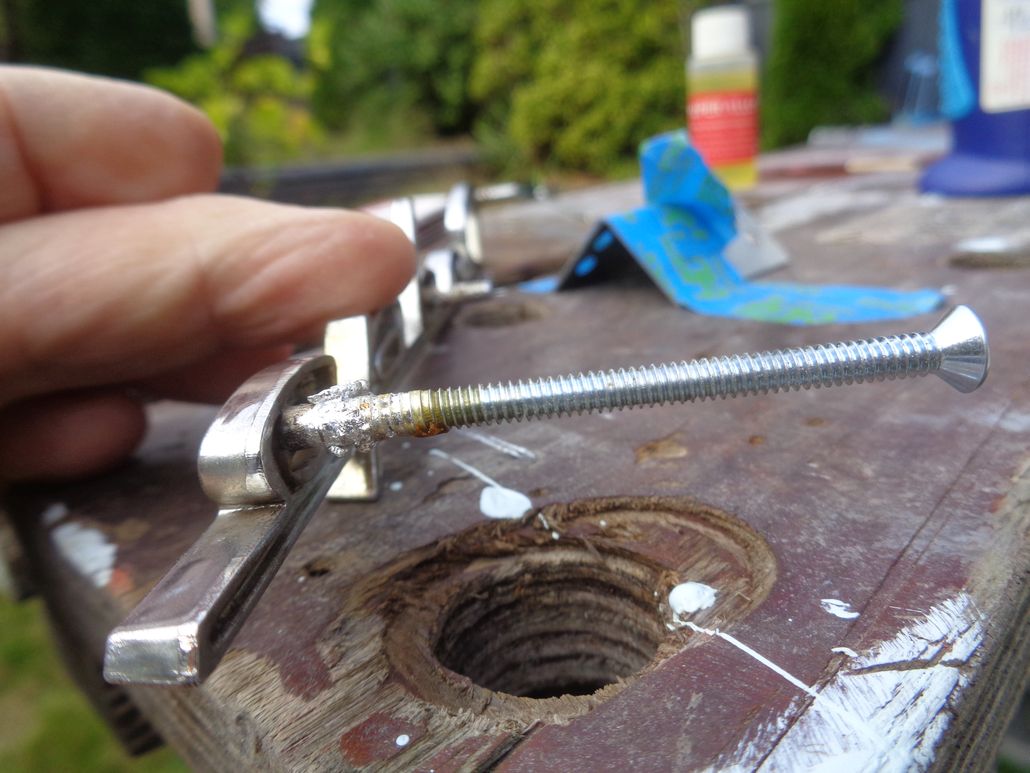
Location: Lower Mainland BC | Okay. Today was yesterday's tomorrow and while I was waiting for door sill paint to dry, I set up the Script Logo, the 6-32 machine screw and the internal pin made from a 1/16" drill bit.
I put the script in the vice (Black and Decker Workmate) and adjust the height so the 6-32 machine screw rested nice and square on an angle bracket that I had in the workshop. Then I put Muggy Weld flux on the joint and up the wazzoo where the sun don't shine. Then I fired up my wife's kitchen torch and heated the fluxed area until the flux was brown and bubbling. Then I applied the Muggy Weld rod. Went reasonable well (or so I thought).
As I was trimming off the excess "weld" (really a type of solder), I noticed that the heat had bubbled the chrome on the pot metal (WTH!!??) Oh my.
I used my Dremel for the initial trimming and then a metal file. I supported the joint well but even doing that, it broke at the joint. Oh my.
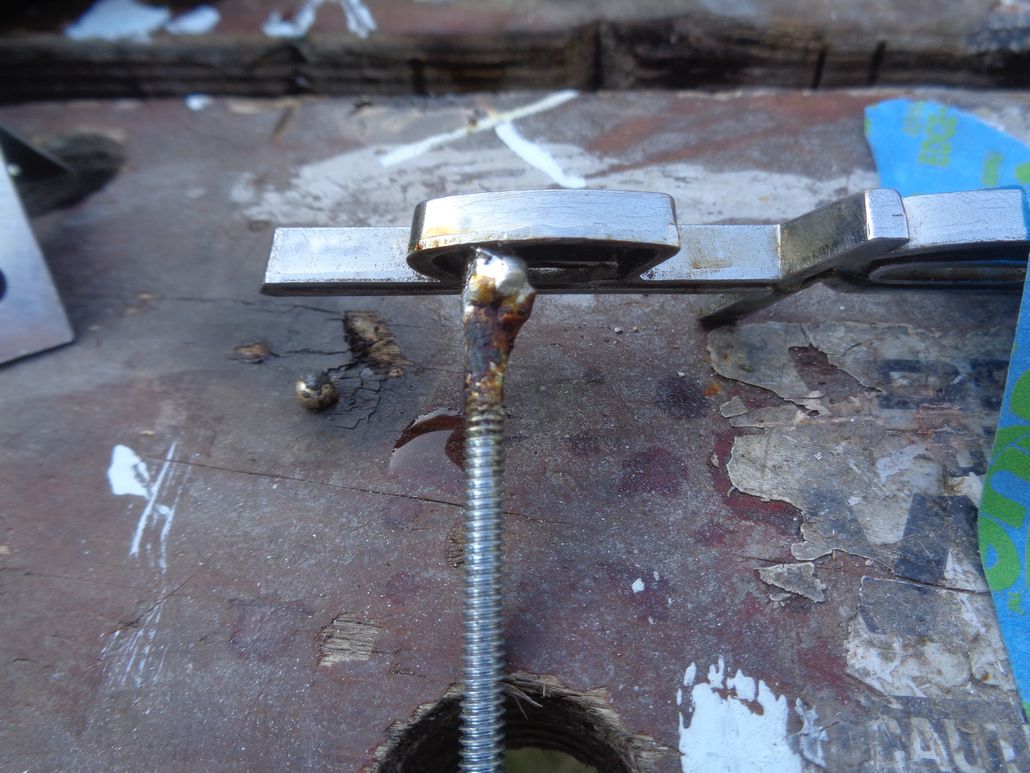
So after a few minutes of cursing, I got the machine screw and script back together for another try. This time I made sure that there was flux up the script pin's hole. Then I taped it back in place on the Workmate and tried again. This time I wasn't worried about being pretty. (In fact the result was ugg-a-lee).
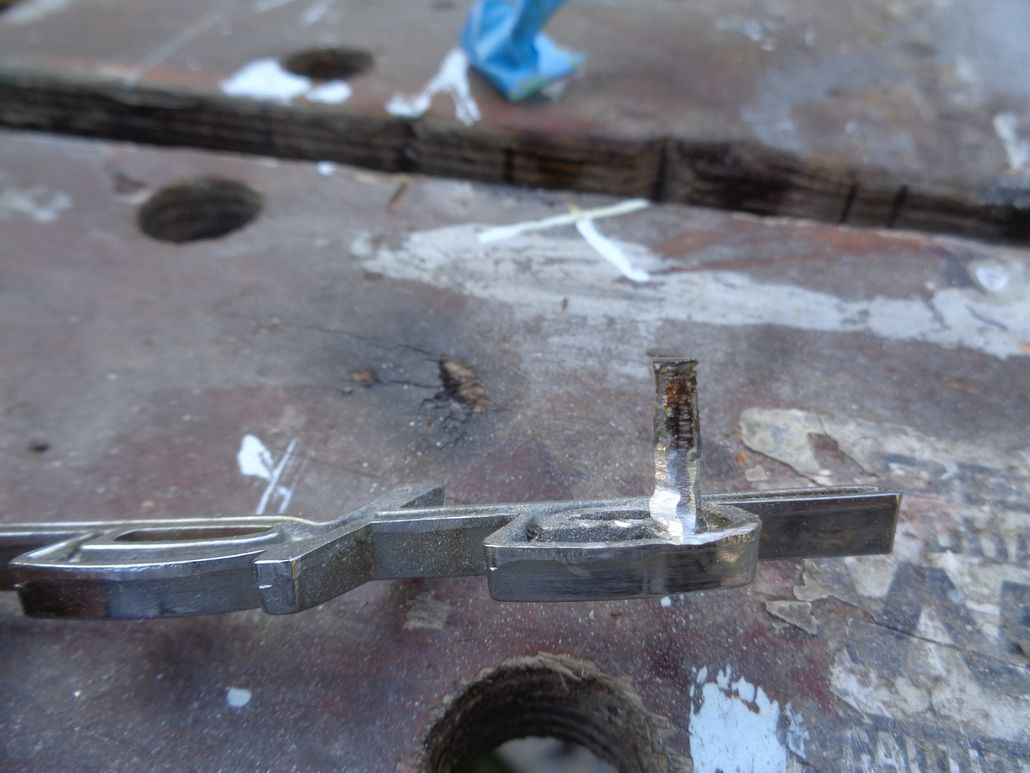
When things cooled, I trimmed the excess off with the Dremel. I did not use the file this time. When I was happy(ish), I cut the 6-32 machine screw to about the same total length as the OE pins on the script logo.
I had thought that I would use a 6-32 die on the end result but I'm not confident that the "weld" will hold enough to withstand the torque of the die as it is turned down over the 6-32 threads and then into the Muggy Weld.
A bit depressing to be honest. I bought the script because the chrome was nice, no pits. Now it has some bubbles.
Oh my.
Photos:
 (SettingUPToUseTheMuggyWeld_1.jpg) (SettingUPToUseTheMuggyWeld_1.jpg)
 (SettingUPToUseTheMuggyWeld_2.jpg) (SettingUPToUseTheMuggyWeld_2.jpg)
 (AfterTheFirstGoWithMuggyWeld.jpg) (AfterTheFirstGoWithMuggyWeld.jpg)
 (AfterTheSecondGoWithMuggyWeld.jpg) (AfterTheSecondGoWithMuggyWeld.jpg)
 (AfterTheSecondGoWithMuggyWeld_AfterTrimmingWithDremel_1.jpg) (AfterTheSecondGoWithMuggyWeld_AfterTrimmingWithDremel_1.jpg)
 (AfterTheSecondGoWithMuggyWeld_AfterTrimmingWithDremel_2.jpg) (AfterTheSecondGoWithMuggyWeld_AfterTrimmingWithDremel_2.jpg)
Attachments
----------------
SettingUPToUseTheMuggyWeld_1.jpg (135KB - 96 downloads)
SettingUPToUseTheMuggyWeld_2.jpg (128KB - 89 downloads)
AfterTheFirstGoWithMuggyWeld.jpg (123KB - 106 downloads)
AfterTheSecondGoWithMuggyWeld.jpg (149KB - 110 downloads)
AfterTheSecondGoWithMuggyWeld_AfterTrimmingWithDremel_1.jpg (114KB - 84 downloads)
AfterTheSecondGoWithMuggyWeld_AfterTrimmingWithDremel_2.jpg (122KB - 86 downloads)
|
|
| |