|
|
Elite Veteran
Posts: 649
  
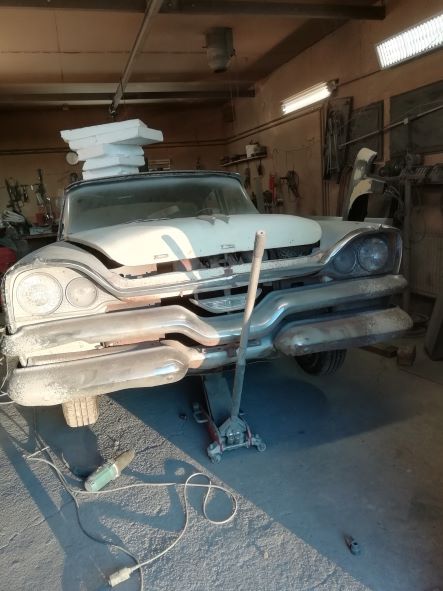
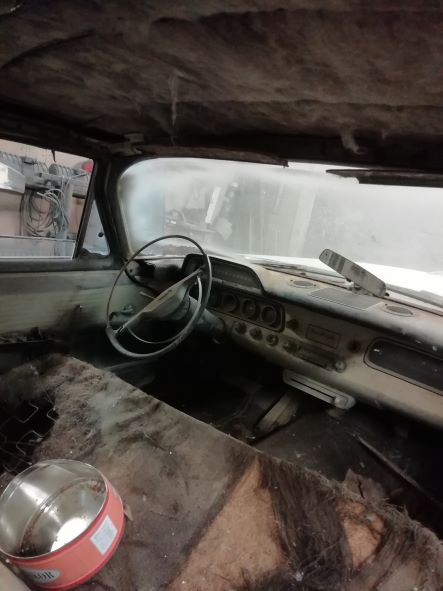
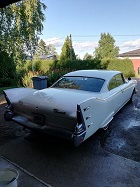
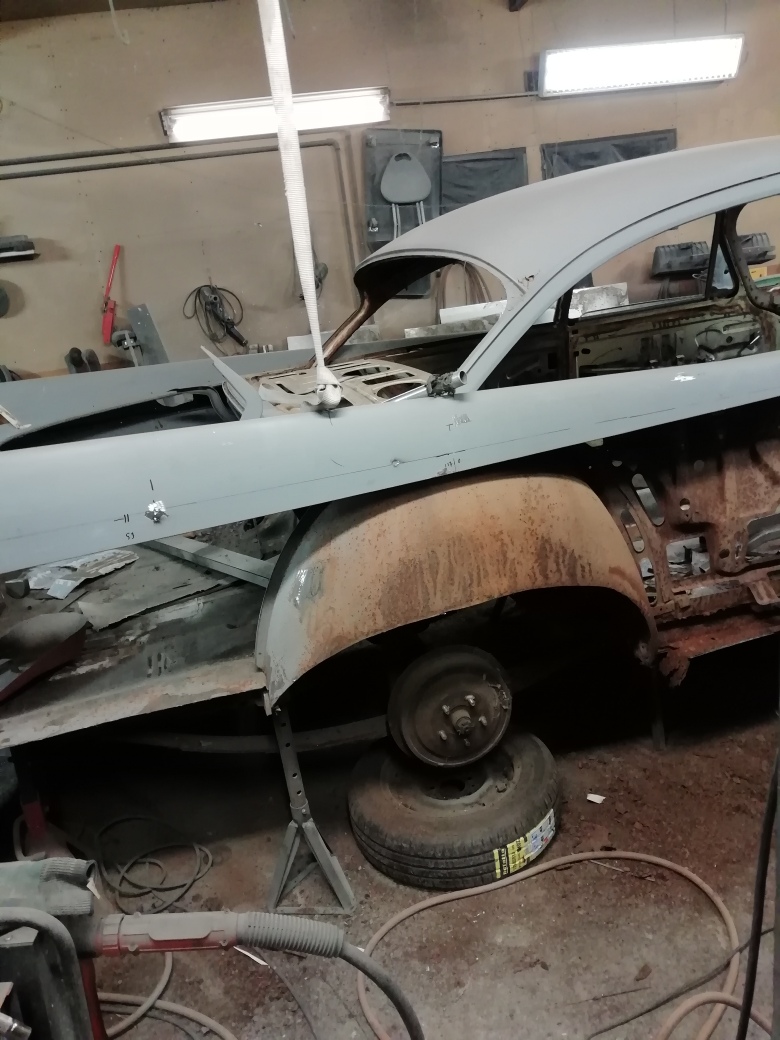
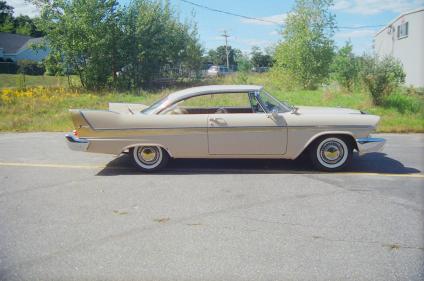
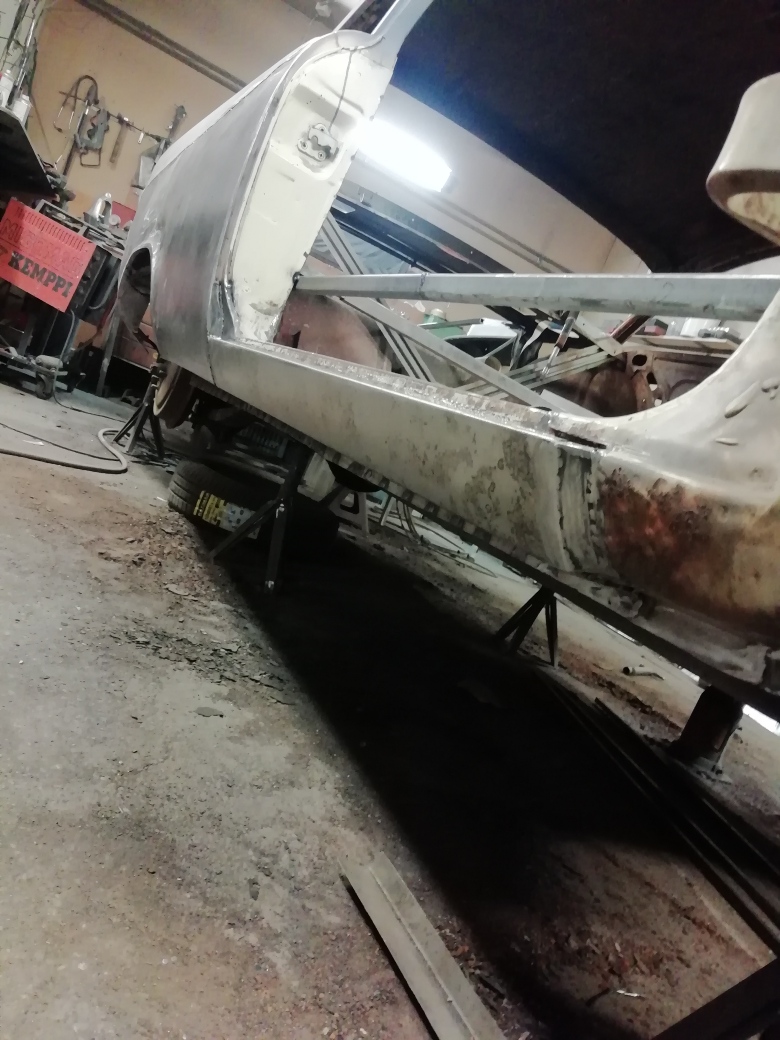
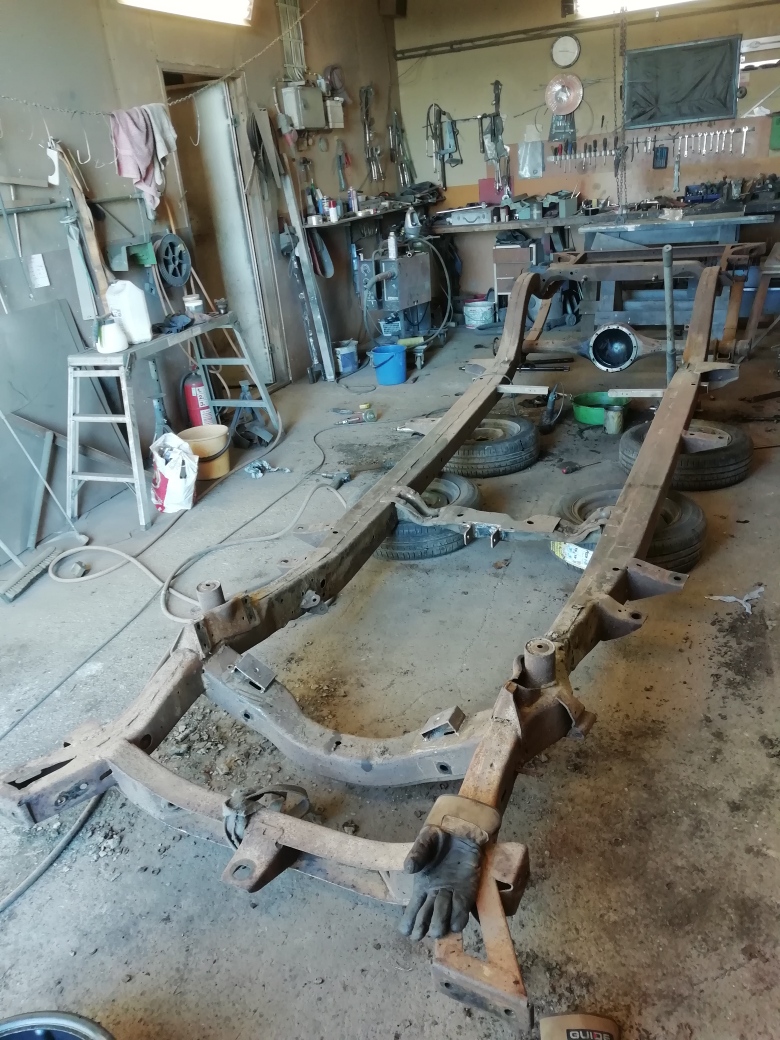
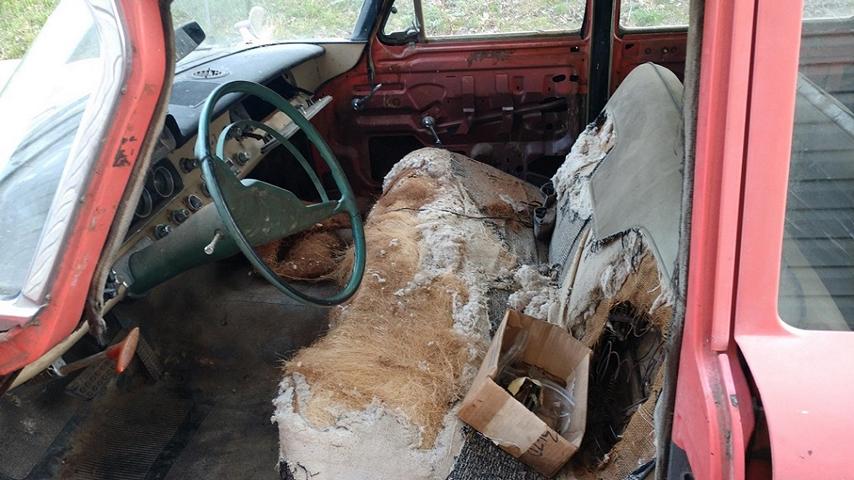
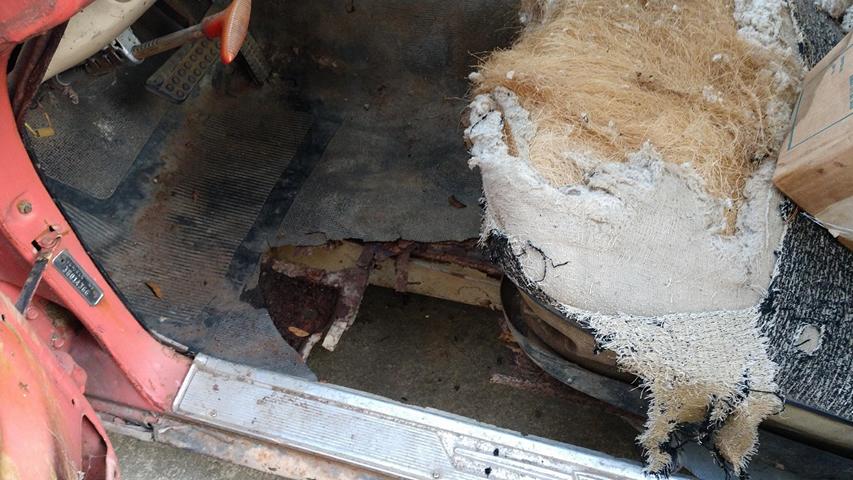
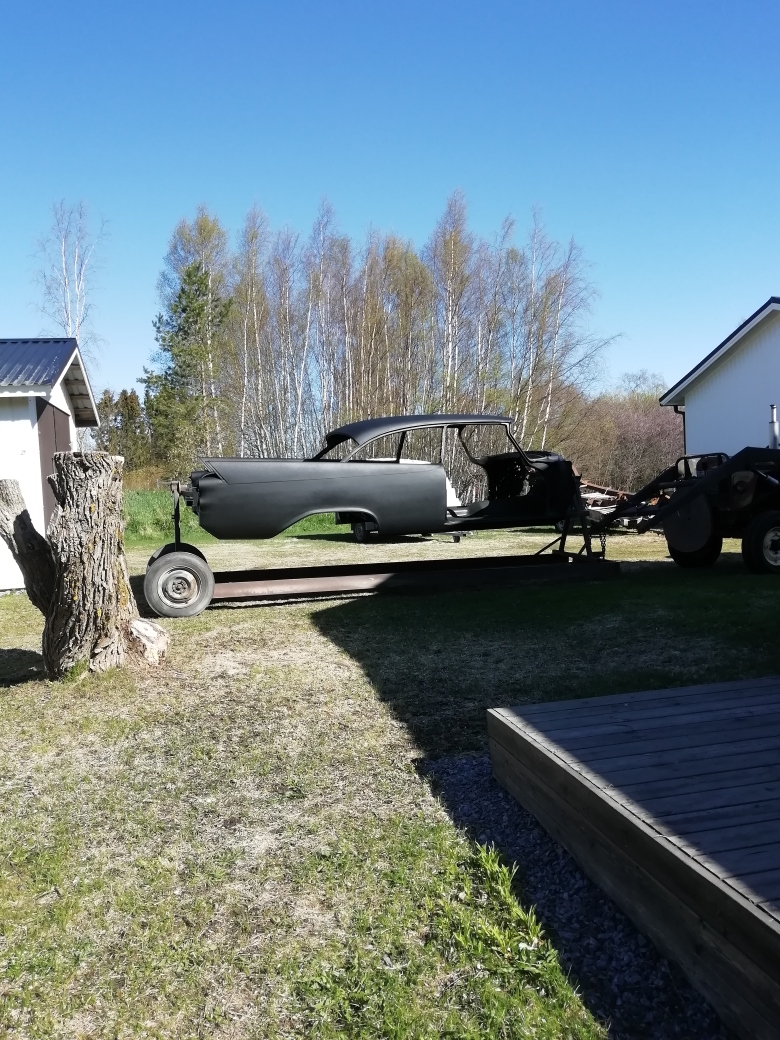
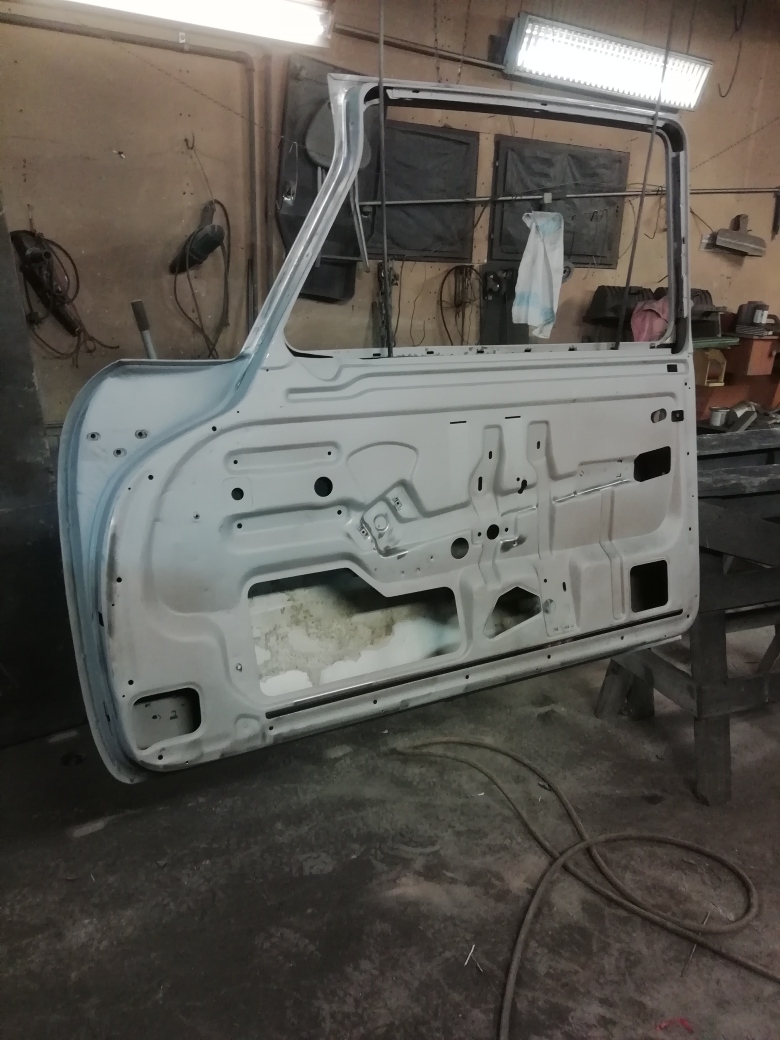
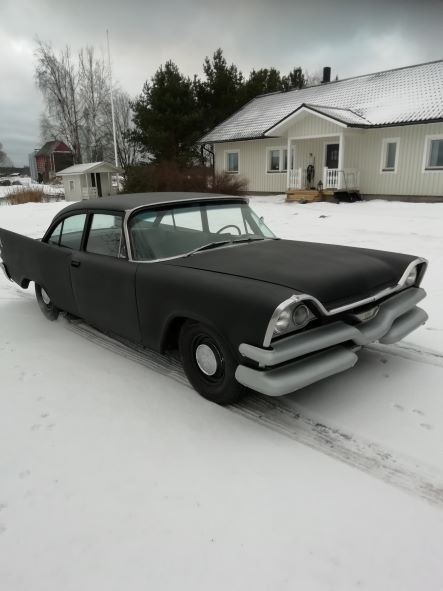
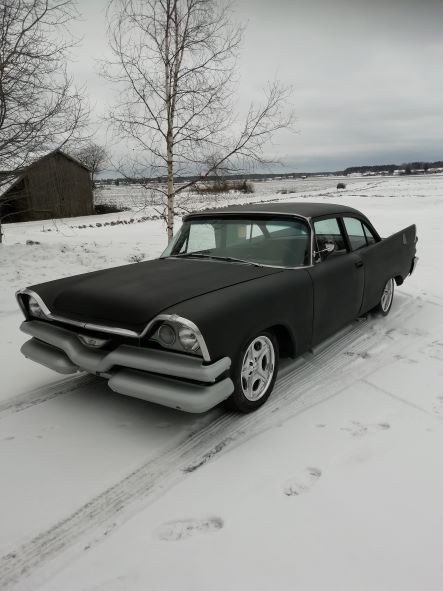
Location: Finland | I thought I had retired from this kind of crazy stuff....here we go again..it needs everything.
I haven`decided yet what I will build...probably not original driveline and absolutely not a lot of money to be used on interior and chrome etcetera...
Would be interesting to try to go as cheap as possible. But these are just my first thoughts...
Edited by 22mafeja 2021-11-10 10:21 AM
 (IMG_20211108_090701_resized_20211108_063239244 fwl.jpg) (IMG_20211108_090701_resized_20211108_063239244 fwl.jpg)
 (IMG_20211108_090556_resized_20211108_063240529 fwl.jpg) (IMG_20211108_090556_resized_20211108_063240529 fwl.jpg)
 (IMG_20211107_170040_resized_20211108_063241394 fwl.jpg) (IMG_20211107_170040_resized_20211108_063241394 fwl.jpg)
Attachments
----------------
 IMG_20211108_090701_resized_20211108_063239244 fwl.jpg (46KB - 220 downloads) IMG_20211108_090701_resized_20211108_063239244 fwl.jpg (46KB - 220 downloads)
IMG_20211108_090556_resized_20211108_063240529 fwl.jpg (37KB - 206 downloads)
IMG_20211107_170040_resized_20211108_063241394 fwl.jpg (12KB - 208 downloads)
|
|
| |
|
Elite Veteran
Posts: 649
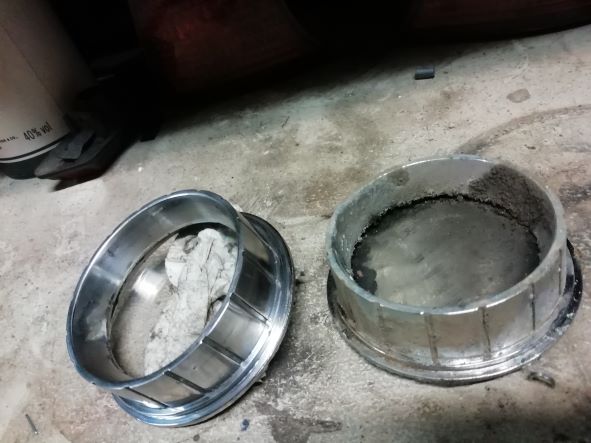
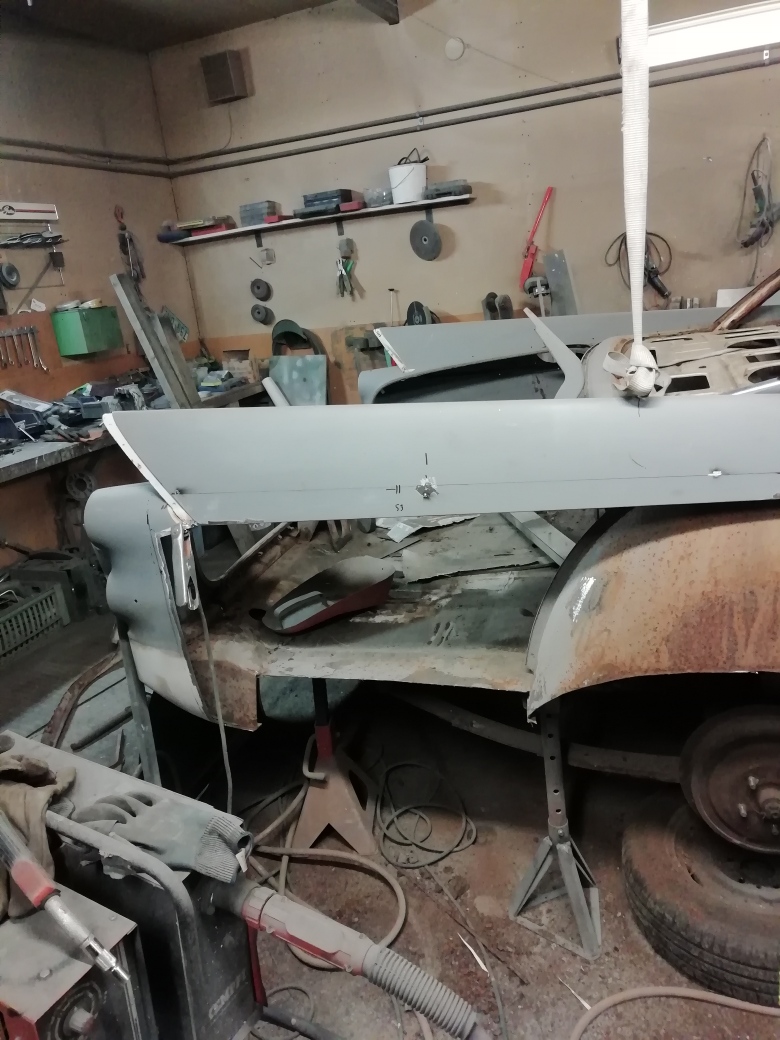
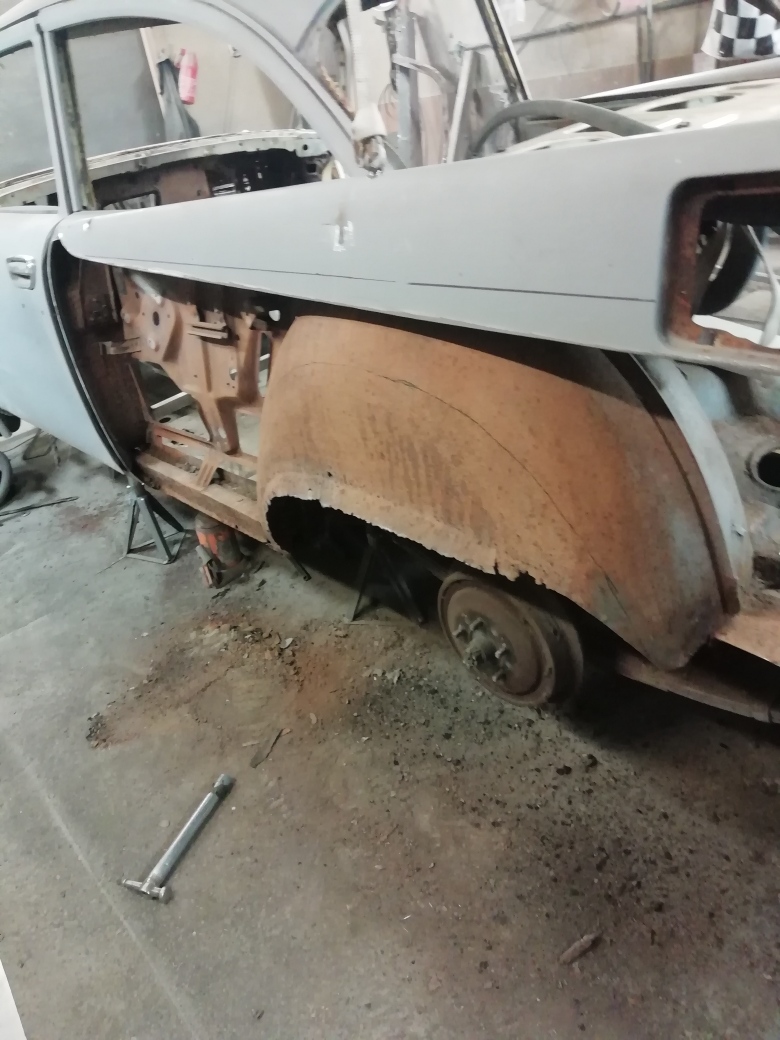
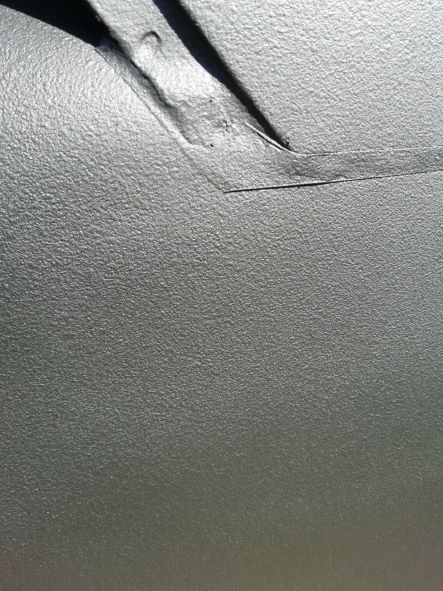
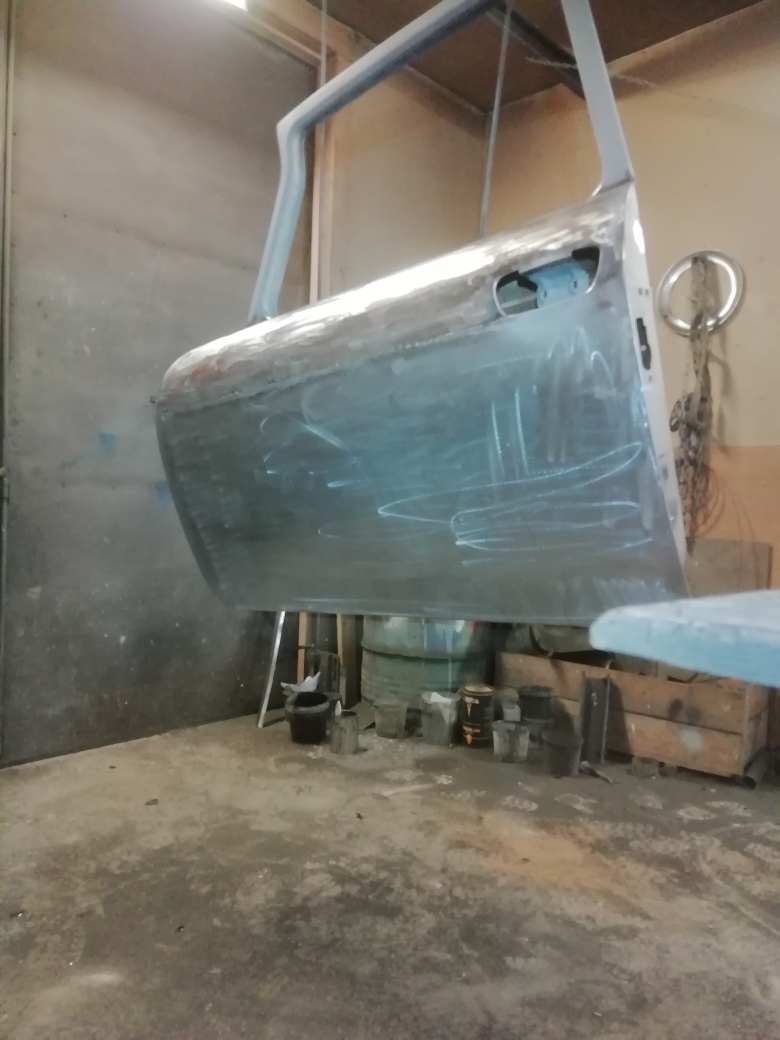
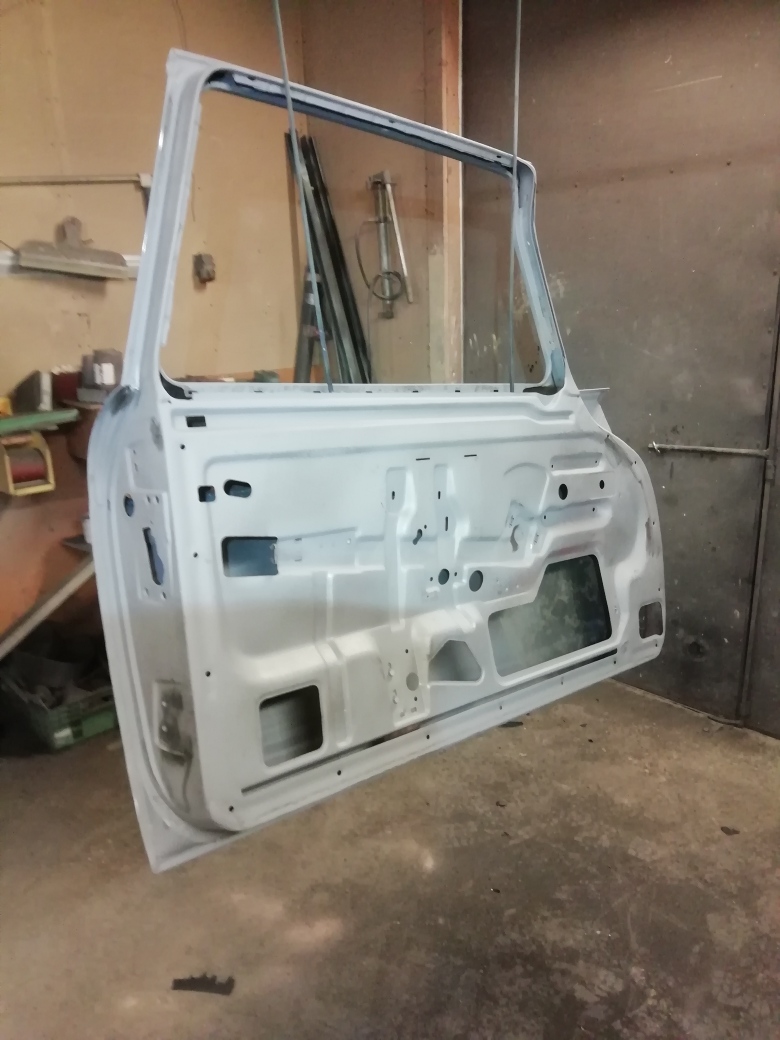
Location: Finland | Now one item on this car is cleaned...this must have stood for decades.
Edited by 22mafeja 2021-11-14 1:00 AM
 (IMG_20211111_093739_resized_20211111_093817691 fwl.jpg) (IMG_20211111_093739_resized_20211111_093817691 fwl.jpg)
Attachments
----------------
IMG_20211111_093739_resized_20211111_093817691 fwl.jpg (42KB - 219 downloads)
|
|
| |
|
Veteran
Posts: 129
Location: Finland | Nice project you are getting into, can`t wait to see how it turns out! What drivetrain is there in it now? |
|
| |
|
Elite Veteran
Posts: 649
Location: Finland | I bought it without driveline so everything is wide open..probably will it be LA 318 or 360 with auto trans. All black exterior and interior....maybe.... |
|
| |
|
Elite Veteran
Posts: 649
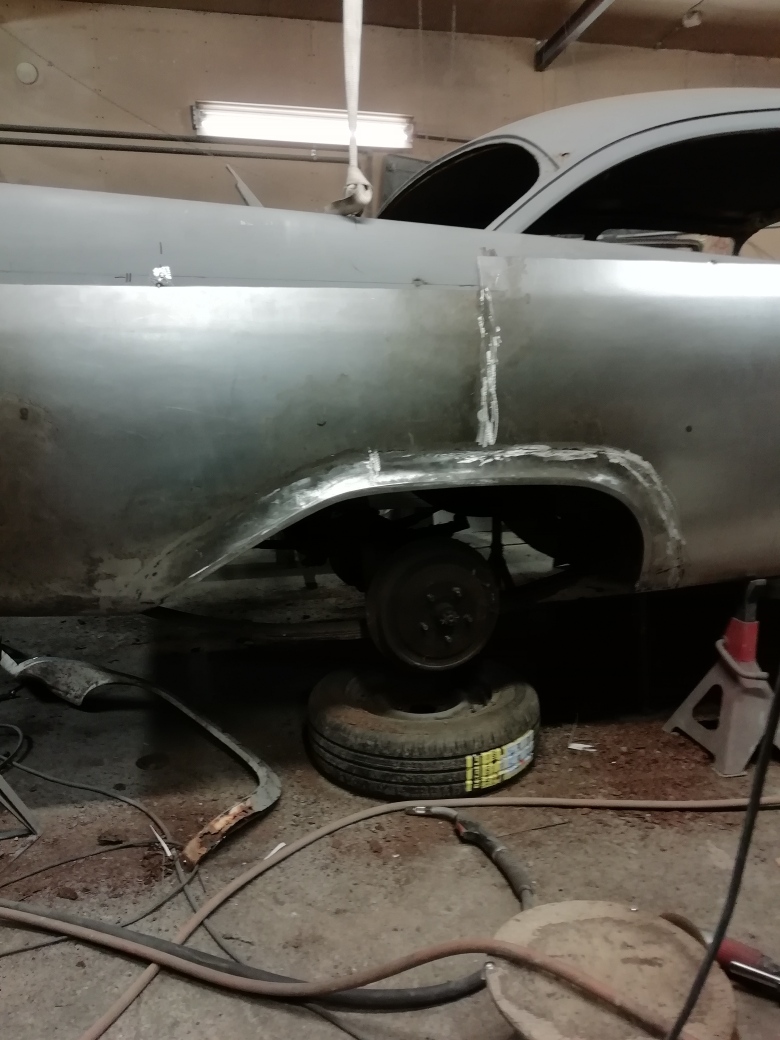
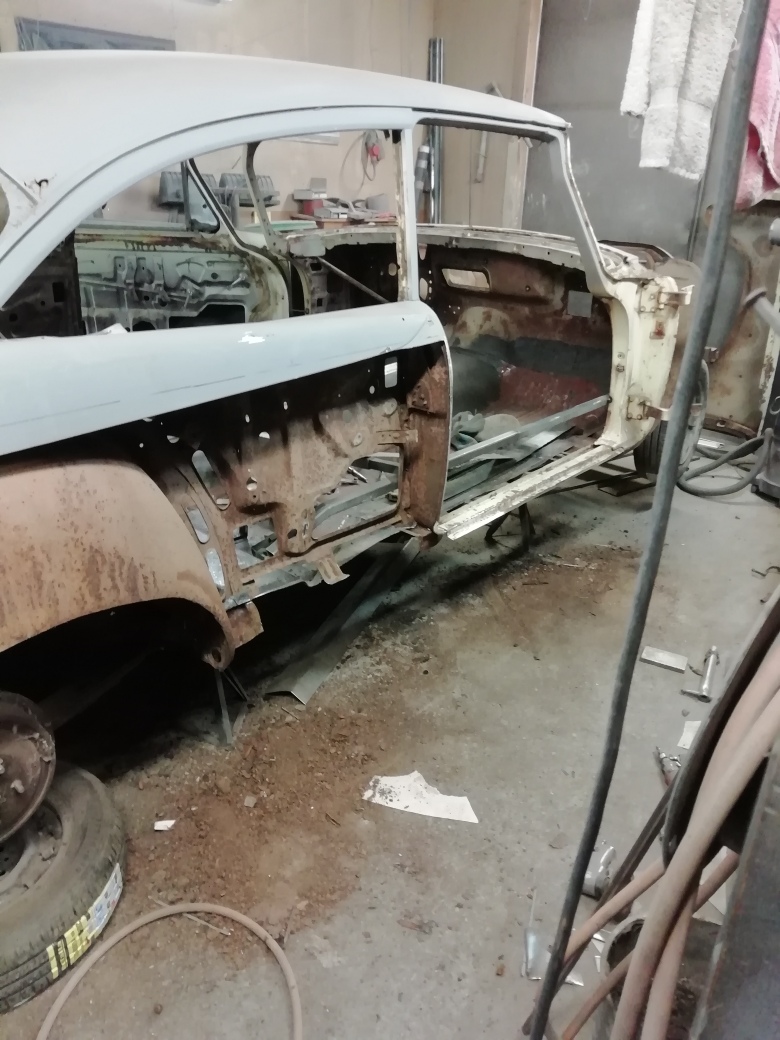
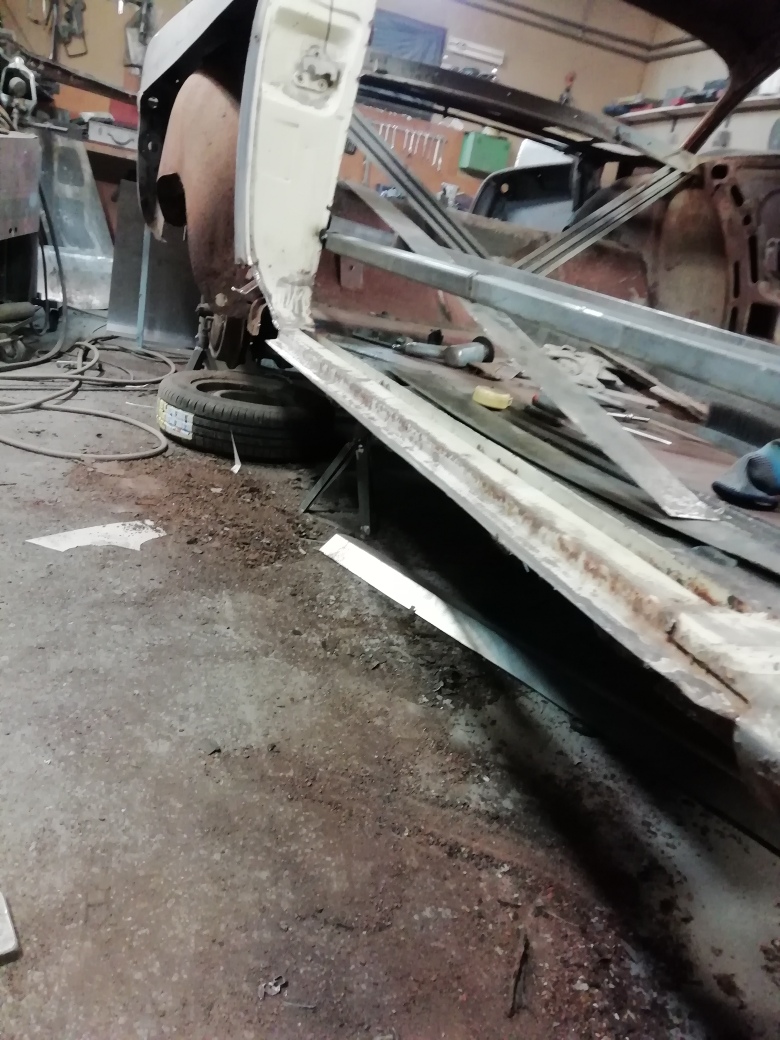
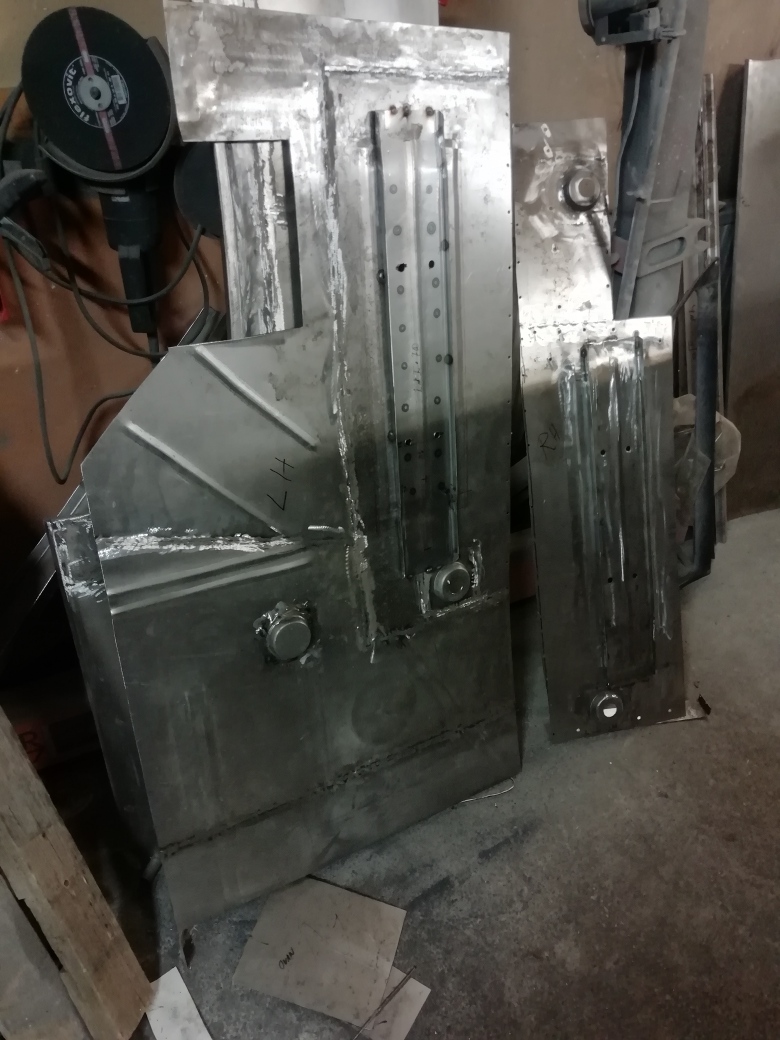
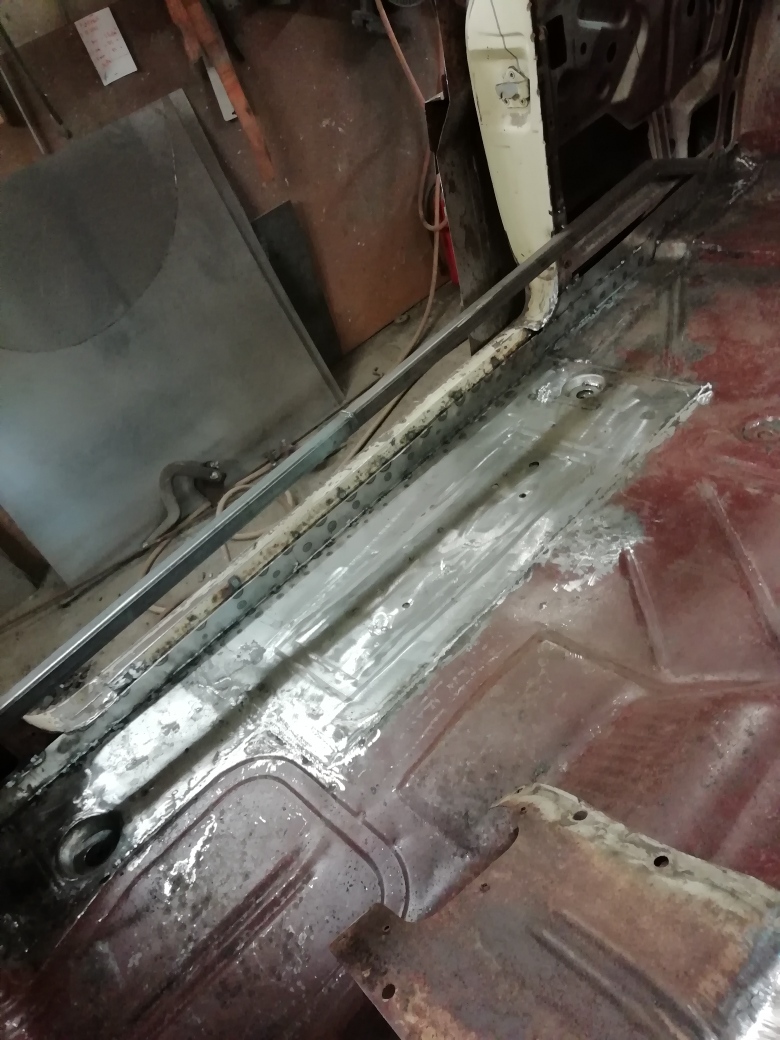
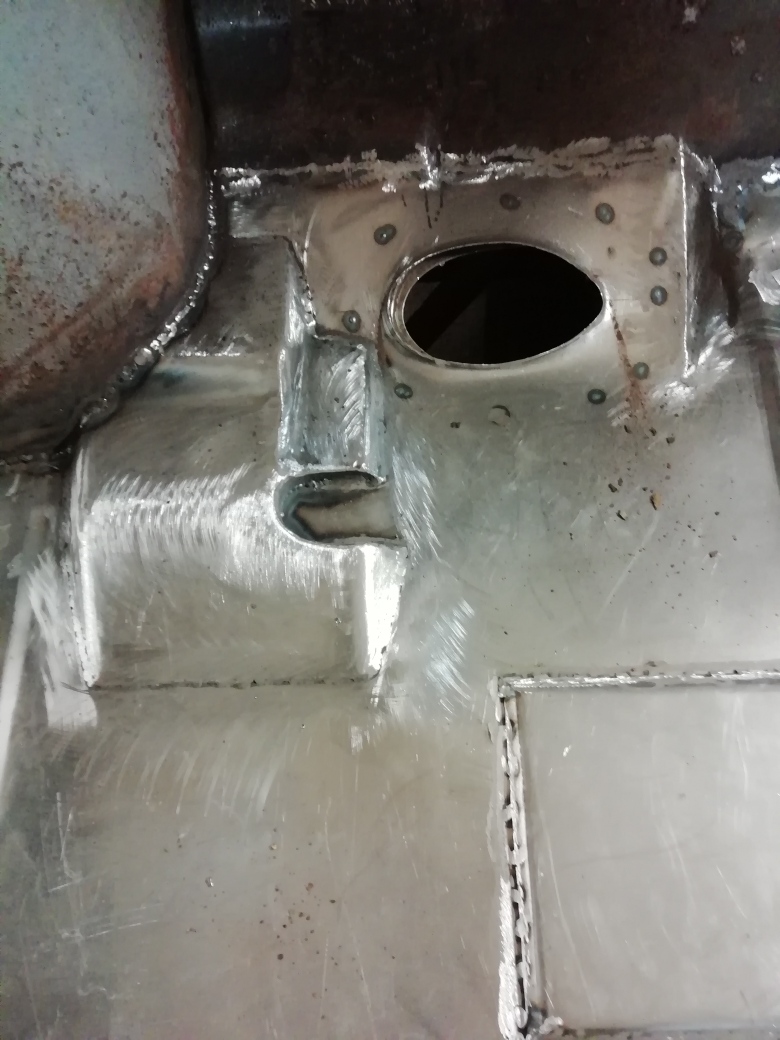
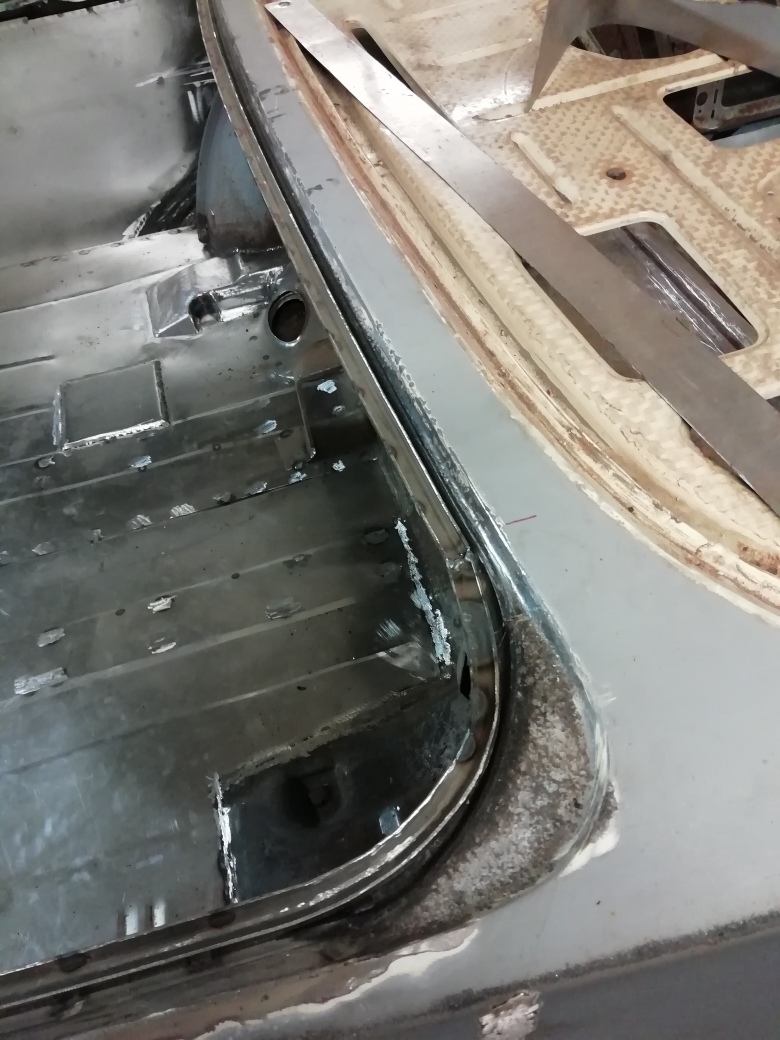
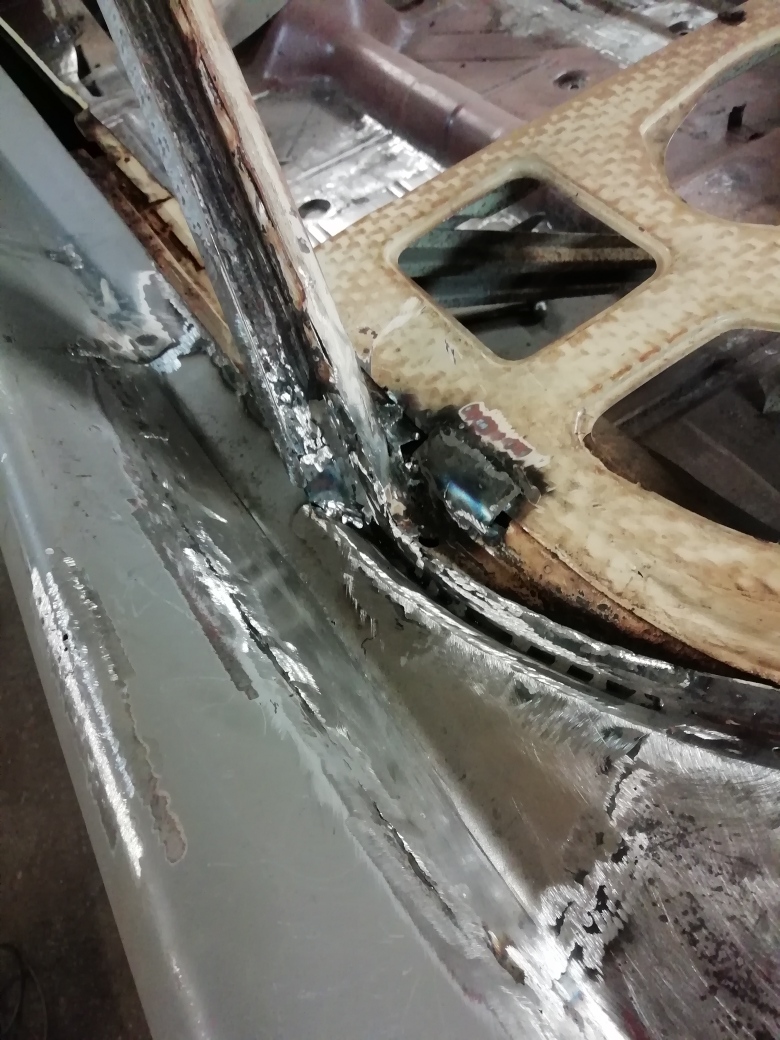
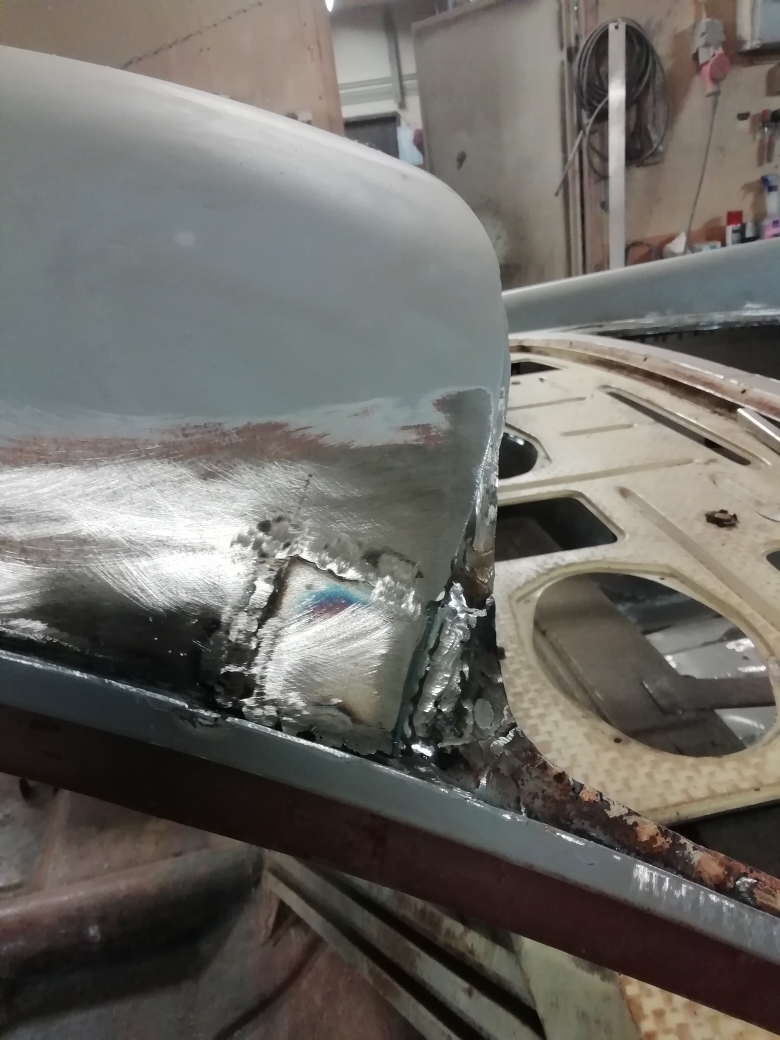
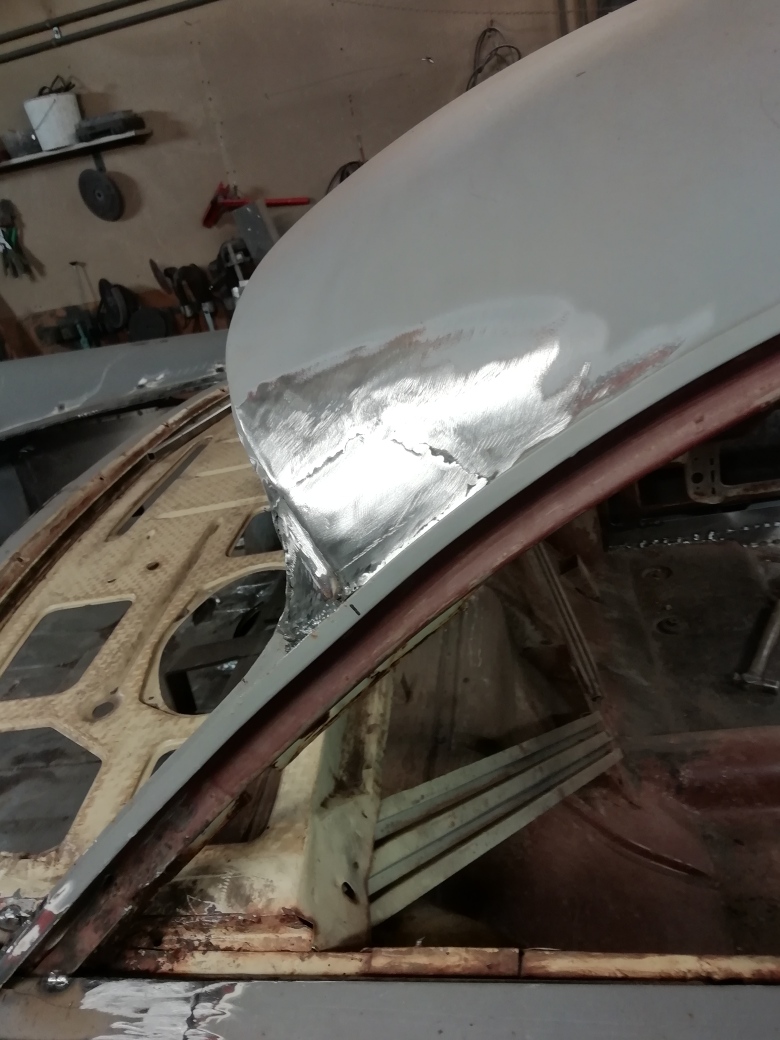
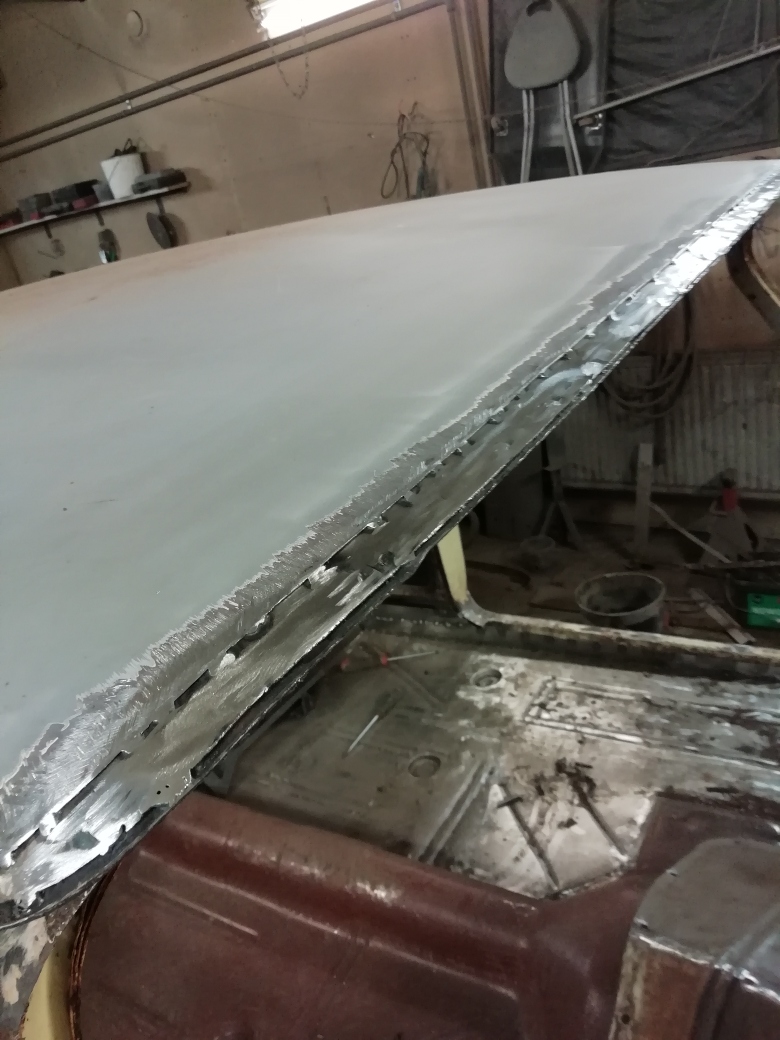
Location: Finland | Now the bodywork has begun. Although it isn`t that badly rusted I am still going to replace both quarter panels up to the fin joint. The door skin is going to be replaced up to the handles.
I am going to try to save the front fenders with one large patch behind the wheel-
The reason for me to change so much is that the surface sheet metal is badly dented, dinged, banged etc.
I am fabricating these parts myself
Of course are all floors and rocker panels going to be fabricated also.
I am going to make it very stiff and strong using minimum 1,2mm sheet metal.
I am definitely going to simplify some things since this is not going to be a number 1 or 2 original gem. The engine is a 318 LA and 904 tf.
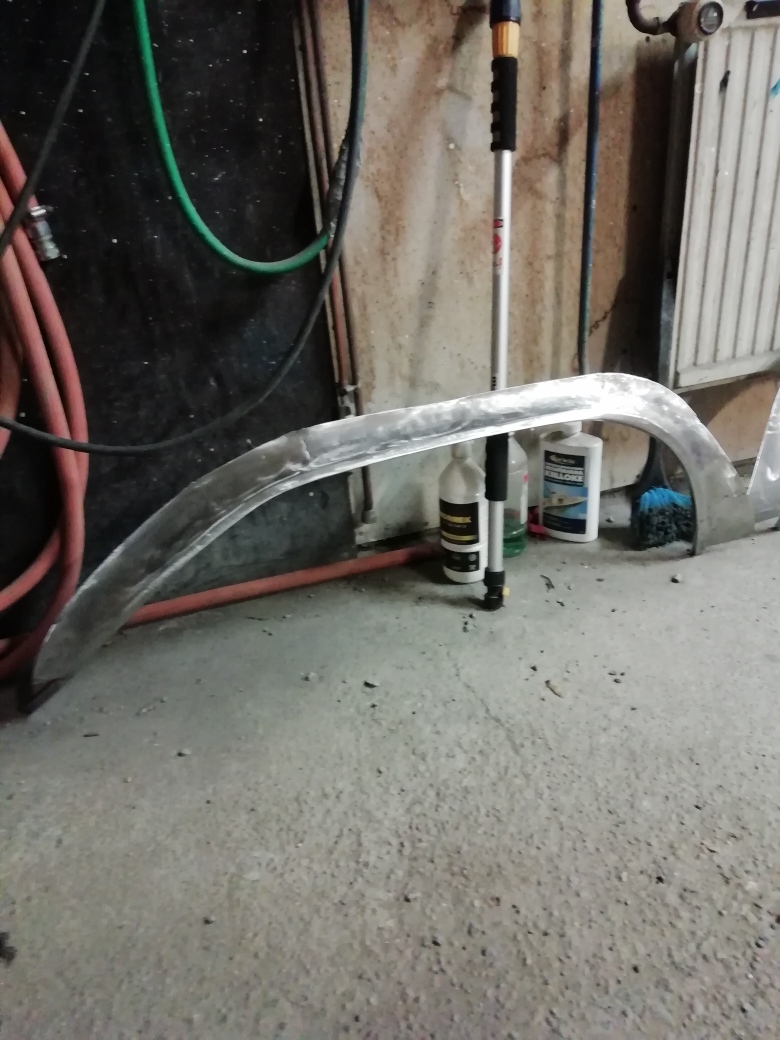
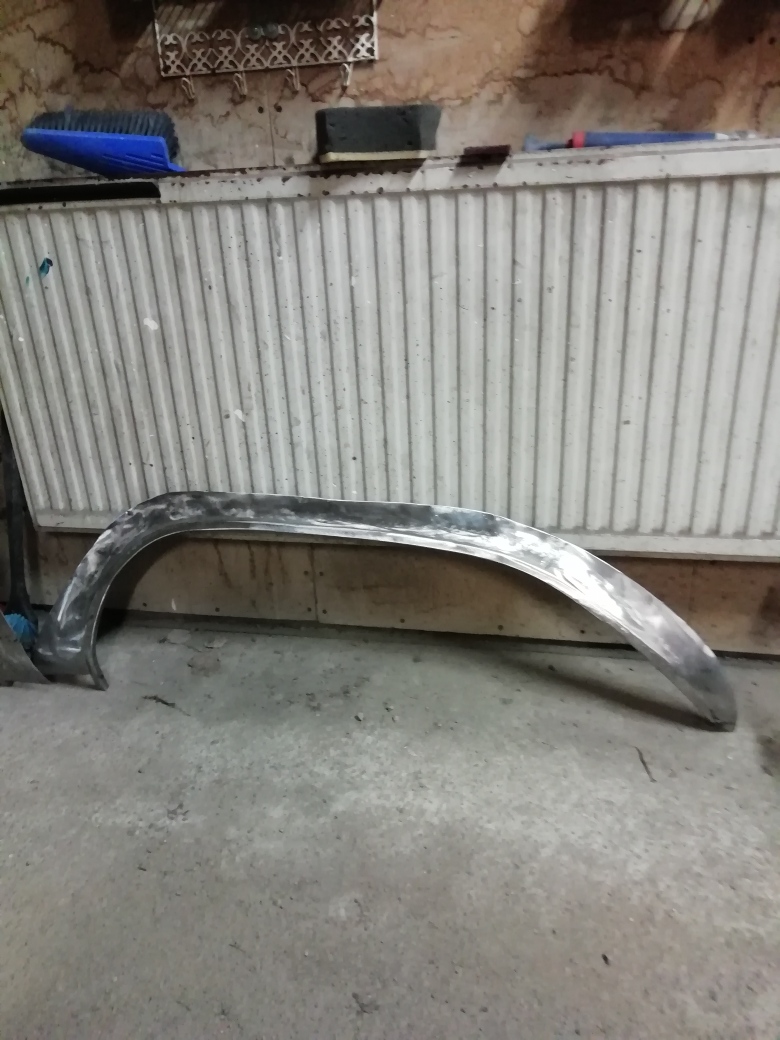
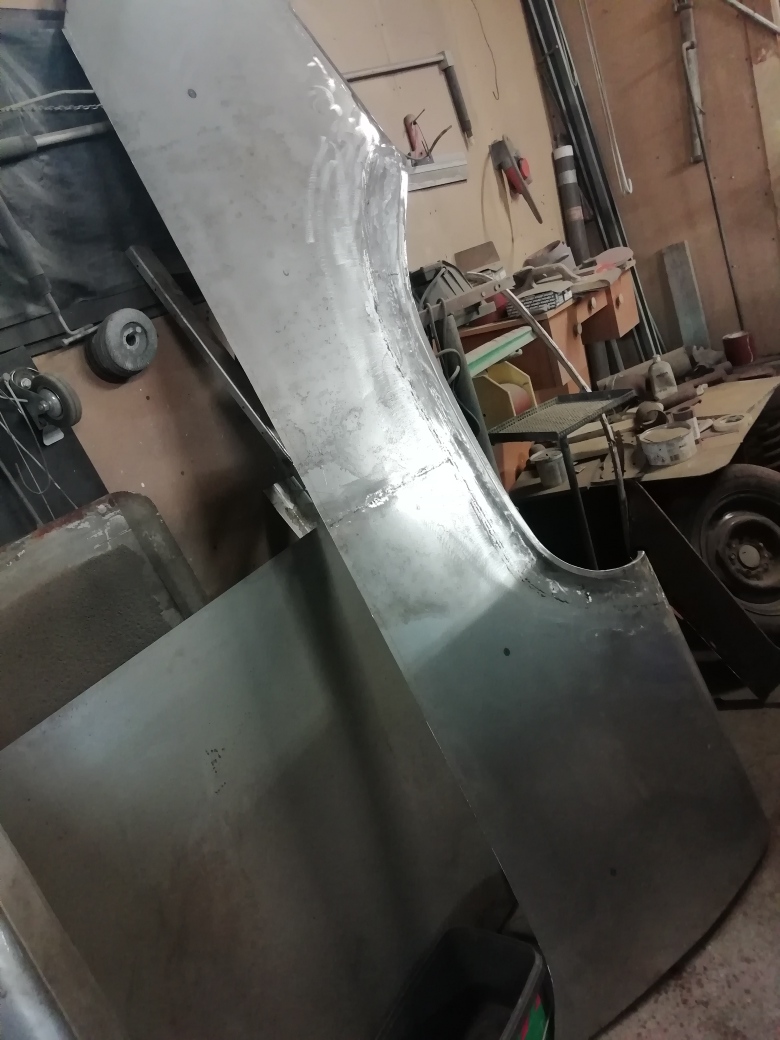
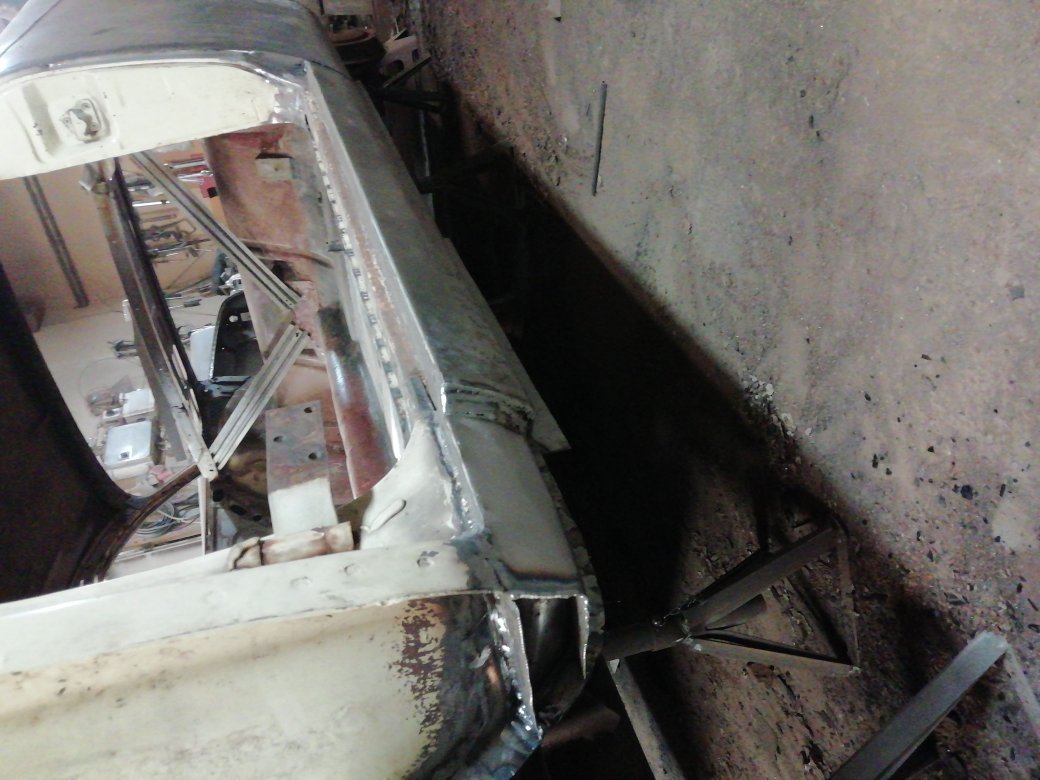
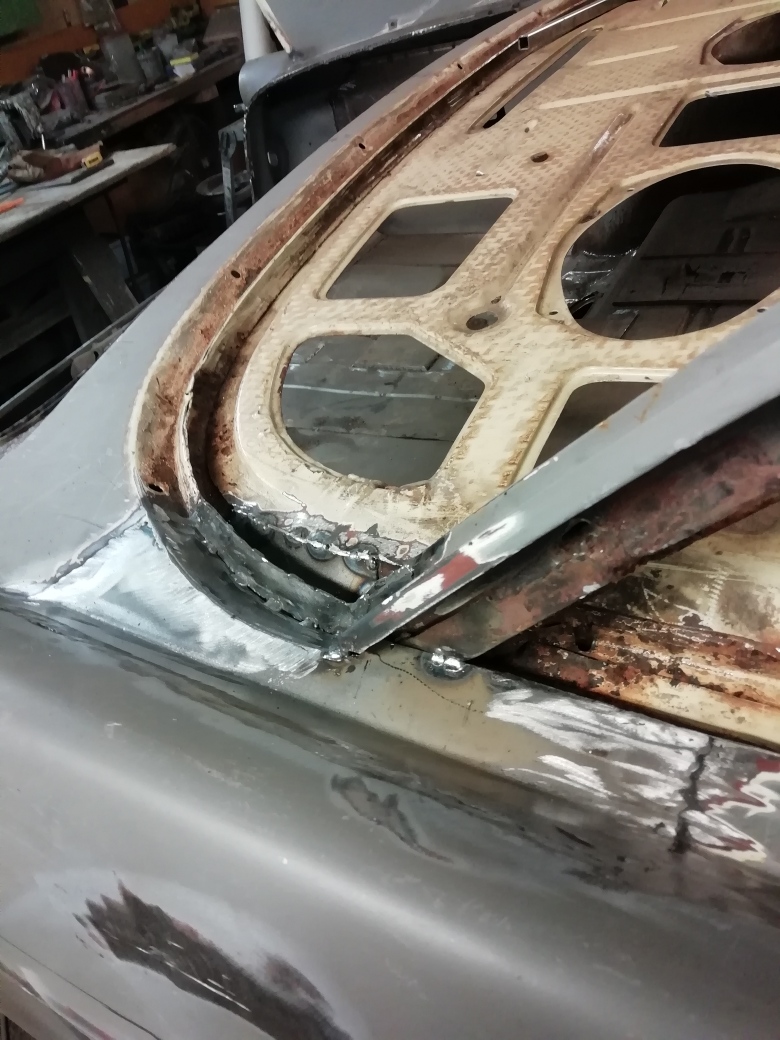
The rear wheel arches are imo the most difficult parts on the bodywork.
They got finished today. Took almost 10 hours per side to make. The lip is made of 15x15x1,5 mm to get some stiffness to it.
Edited by 22mafeja 2022-01-24 8:00 AM
 (IMG_20220124_083720_resized_20220124_022918696.jpg) (IMG_20220124_083720_resized_20220124_022918696.jpg)
 (IMG_20220124_131122_resized_20220124_022918205.jpg) (IMG_20220124_131122_resized_20220124_022918205.jpg)
 (IMG_20220124_131114_resized_20220124_022918455.jpg) (IMG_20220124_131114_resized_20220124_022918455.jpg)
 (IMG_20220124_131141_resized_20220124_022917942.jpg) (IMG_20220124_131141_resized_20220124_022917942.jpg)
Attachments
----------------
IMG_20220124_083720_resized_20220124_022918696.jpg (230KB - 185 downloads)
IMG_20220124_131122_resized_20220124_022918205.jpg (274KB - 179 downloads)
IMG_20220124_131114_resized_20220124_022918455.jpg (266KB - 178 downloads)
IMG_20220124_131141_resized_20220124_022917942.jpg (269KB - 193 downloads)
|
|
| |
|
Regular
Posts: 62
Location: arizona | Awesome project. Those patches look really nice, do you have anymore exterior shots? ???? |
|
| |
|

Expert 5K+
Posts: 9650
 
Location: So. Cal | That's an amazing job making those wheel arches. If you were closer to me, I would like to come learn how you did it. |
|
| |
|
Expert
Posts: 1906

Location: Ontario, Canada | Nice job! Now to get the inners to fit and blend in!
|
|
| |
|
Elite Veteran
Posts: 1157
Location: D-70199 Heslach | 22mafeja - 2022-01-24 12:54 PM
The rear wheel arches are imo the most difficult parts on the bodywork.
They got finished today. Took almost 10 hours per side to make. The lip is made of 15x15x1,5 mm to get some stiffness to it.
10 hours.....mine looks after a week worse than yours |
|
| |
|
Elite Veteran
Posts: 649
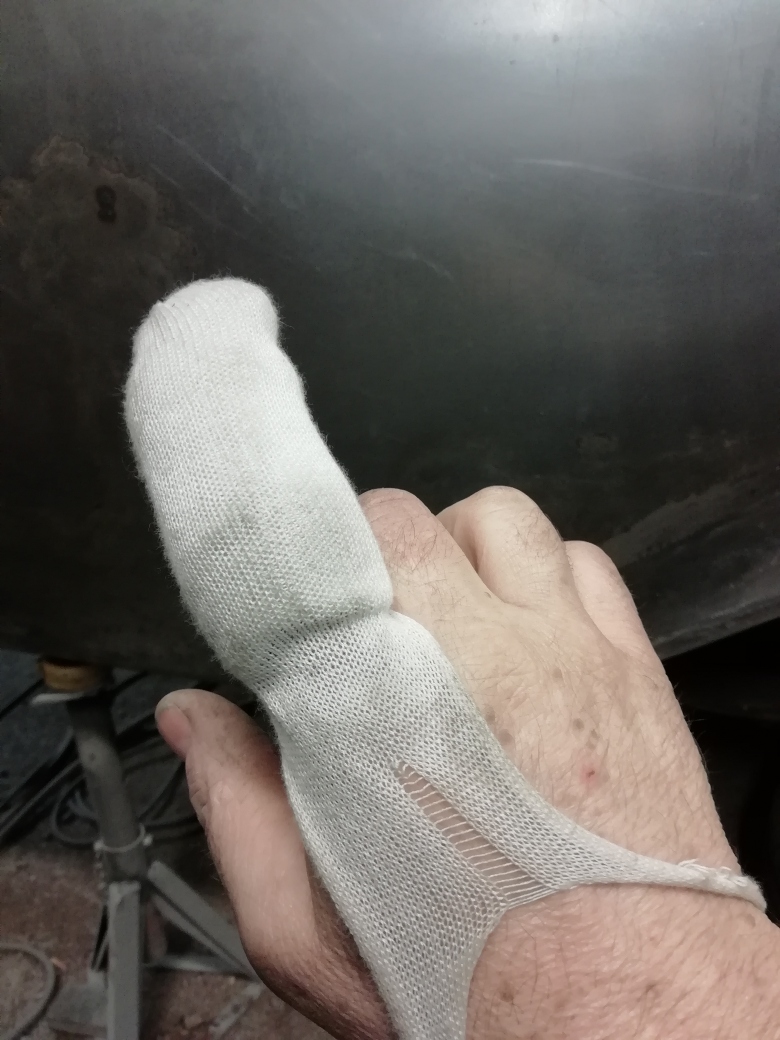
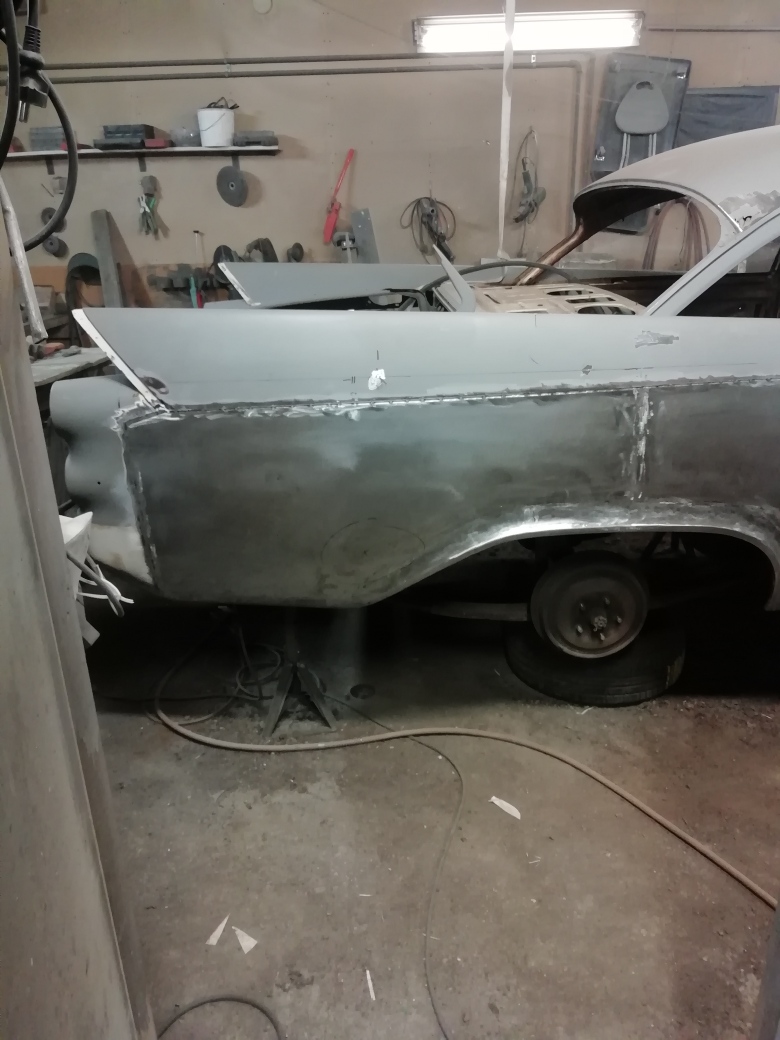
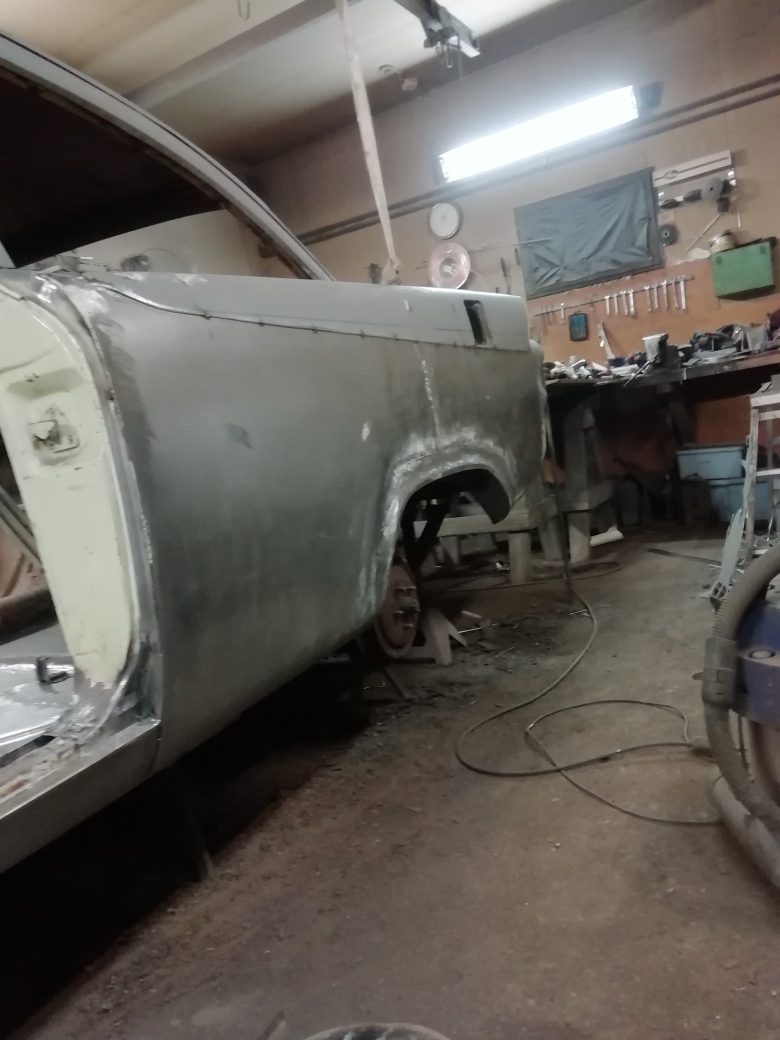
Location: Finland | This is so much fun...my big finger is slowing me down some now...the angle grinder took a chunk of it..
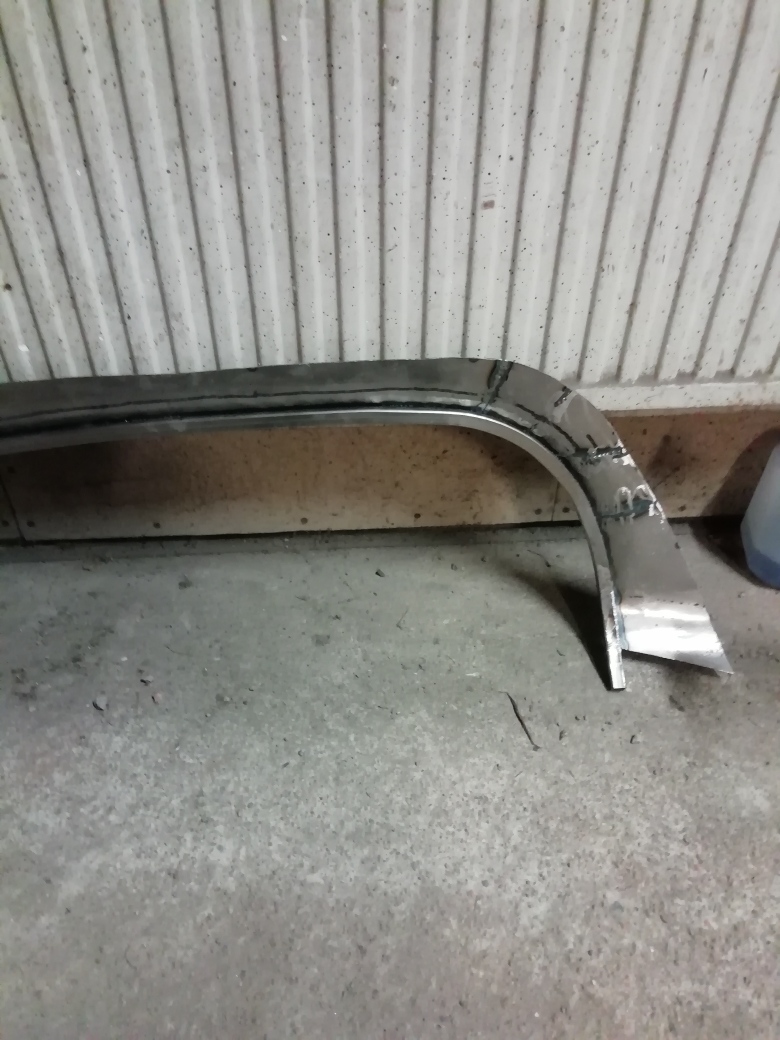
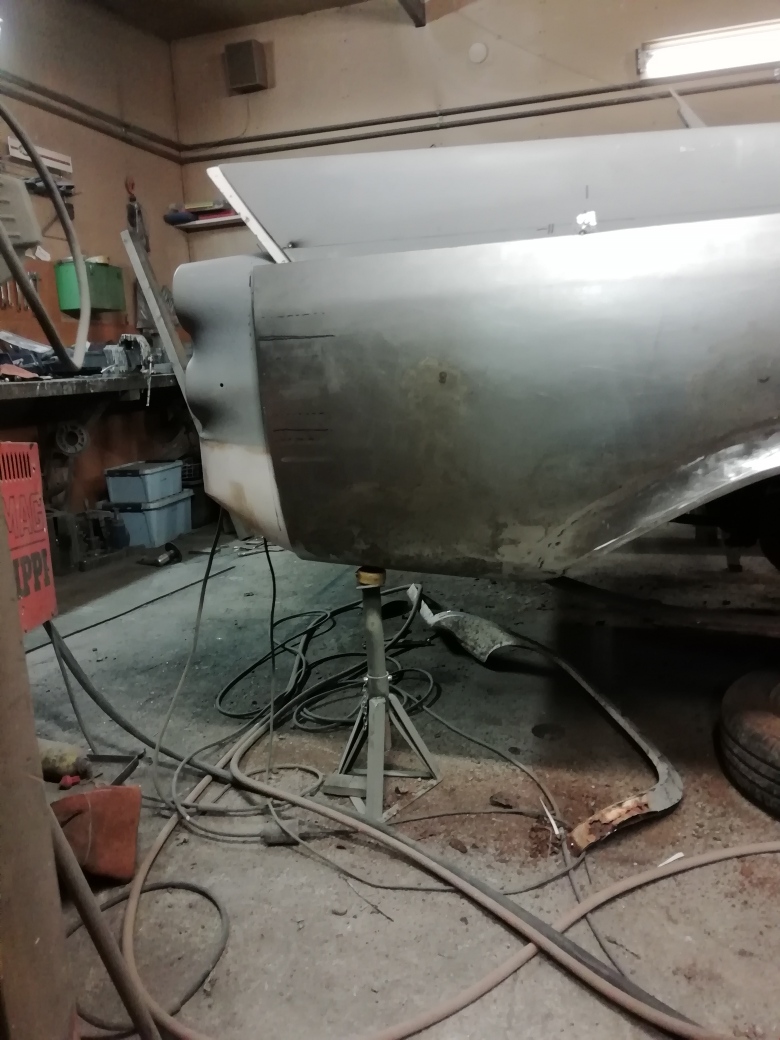
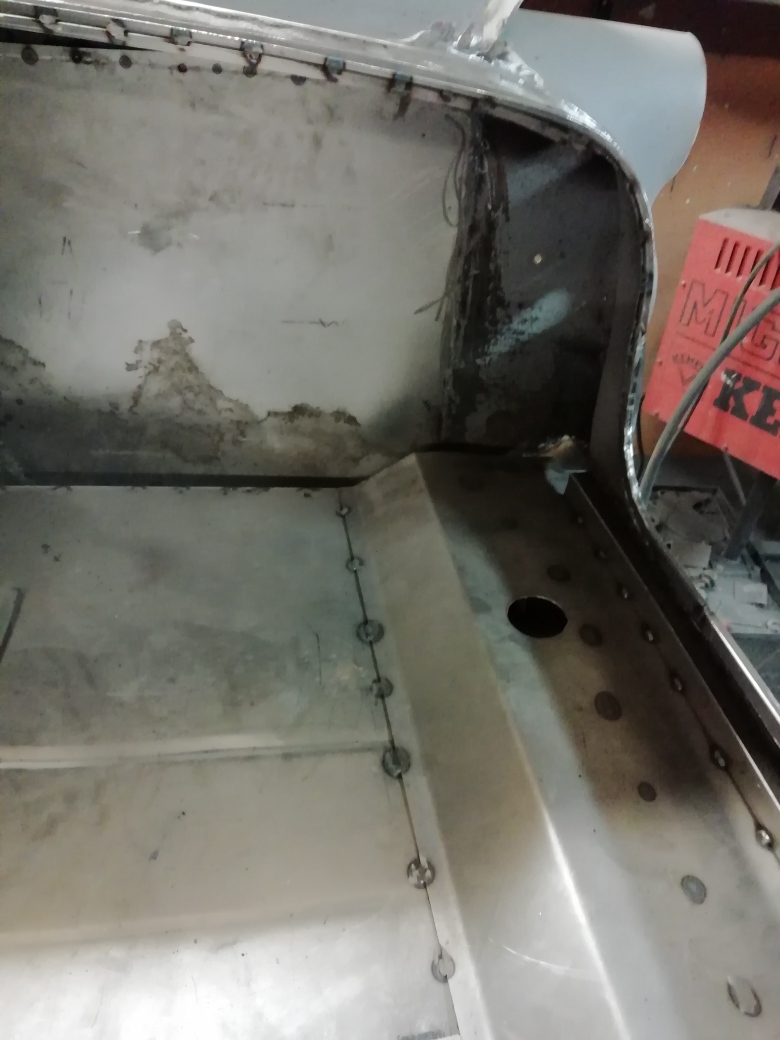
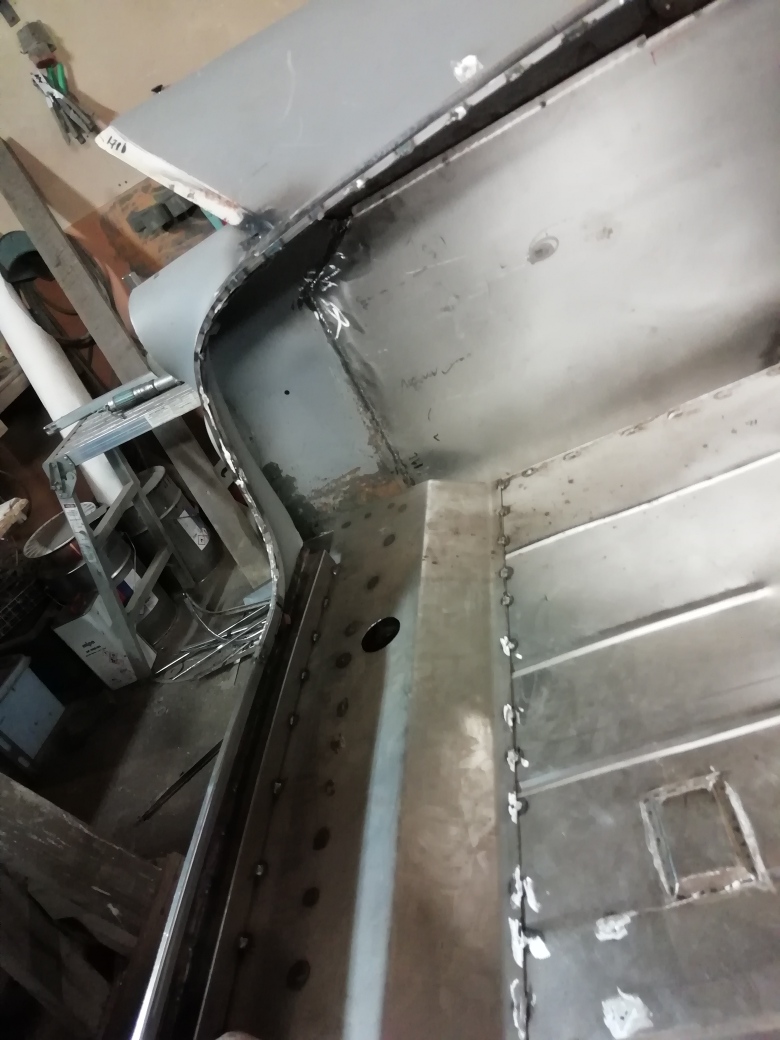
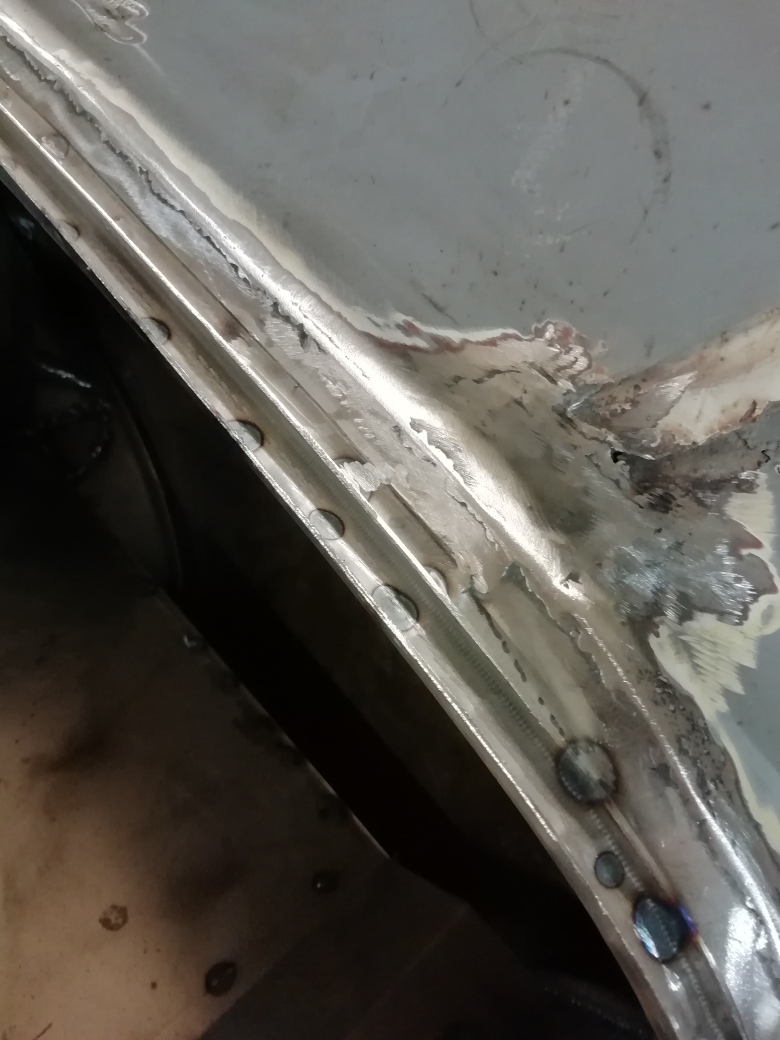
I decided to make the whole right side at the same time. The quarter is not finished but so far I am pleased with.
The floor supports on this side are usable.
Edited by 22mafeja 2022-02-02 9:19 AM
 (IMG_20220201_142813_resized_20220202_034634660.jpg) (IMG_20220201_142813_resized_20220202_034634660.jpg)
 (IMG_20220201_142819_resized_20220202_034634418.jpg) (IMG_20220201_142819_resized_20220202_034634418.jpg)
 (IMG_20220201_142855_resized_20220202_034634154.jpg) (IMG_20220201_142855_resized_20220202_034634154.jpg)
 (IMG_20220202_092523_resized_20220202_034633899.jpg) (IMG_20220202_092523_resized_20220202_034633899.jpg)
 (IMG_20220202_092533_resized_20220202_034633652.jpg) (IMG_20220202_092533_resized_20220202_034633652.jpg)
 (IMG_20220202_153403_resized_20220202_034633406.jpg) (IMG_20220202_153403_resized_20220202_034633406.jpg)
 (IMG_20220202_153423_resized_20220202_034633122.jpg) (IMG_20220202_153423_resized_20220202_034633122.jpg)
Attachments
----------------
IMG_20220201_142813_resized_20220202_034634660.jpg (248KB - 180 downloads)
IMG_20220201_142819_resized_20220202_034634418.jpg (258KB - 177 downloads)
IMG_20220201_142855_resized_20220202_034634154.jpg (295KB - 180 downloads)
IMG_20220202_092523_resized_20220202_034633899.jpg (250KB - 178 downloads)
IMG_20220202_092533_resized_20220202_034633652.jpg (295KB - 186 downloads)
IMG_20220202_153403_resized_20220202_034633406.jpg (267KB - 175 downloads)
IMG_20220202_153423_resized_20220202_034633122.jpg (300KB - 175 downloads)
|
|
| |
|
Expert
Posts: 1740
Location: Alaska | OOPS! I am sure most of us could share stories of our mishaps. |
|
| |
|
Location: North Australia | OOF! I been dealing with a catfish spike from fishing 10 days ago......
I vote get a 354 and 3 speed and make a clone of one of these.
https://www.hemmings.com/stories/article/1957-dodge-coronet-d-501
Steve. |
|
| |
|
Elite Veteran
Posts: 649
Location: Finland | Floors have got some attention....
 (IMG_20220207_150355_resized_20220207_031820991.jpg) (IMG_20220207_150355_resized_20220207_031820991.jpg)
 (IMG_20220207_150411_resized_20220207_031820669.jpg) (IMG_20220207_150411_resized_20220207_031820669.jpg)
Attachments
----------------
IMG_20220207_150355_resized_20220207_031820991.jpg (275KB - 180 downloads)
IMG_20220207_150411_resized_20220207_031820669.jpg (270KB - 179 downloads)
|
|
| |
|
Expert 5K+
Posts: 9650
Location: So. Cal | That's really smart to weld them together before going into the car, so you can clean up all the welds first. |
|
| |
|
Elite Veteran
Posts: 649
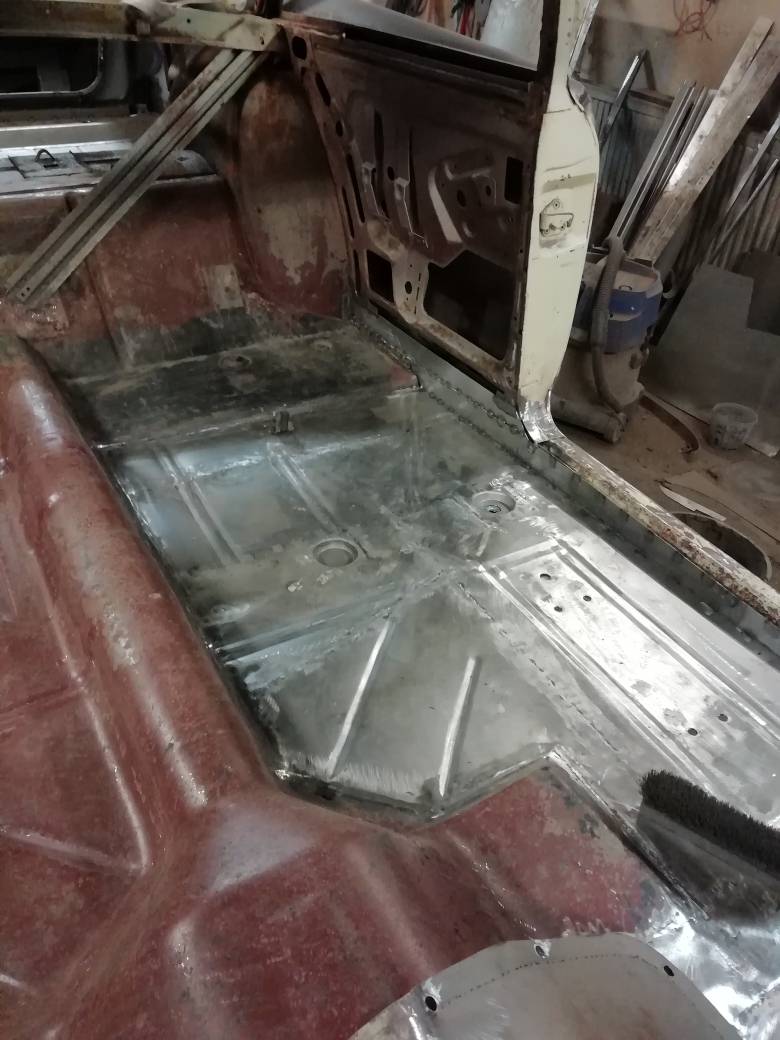
Location: Finland | Yes it is much nicer to weld and grind standing at the workbench compared to the monkey work on your back on the floor...
I would have made these two floor patches out of one piece but the limitations of my bead roller is dictating how big patches I can make.
The floors are not going to be 100% original as somebody might have noticed..but rather similar. |
|
| |
|
Expert 5K+
Posts: 9650
Location: So. Cal | I usually plug weld the large braces to the sheet metal instead of spot welding. The reason is that I like to epoxy primer both sides before welding in place. Then mark the locations where the holes are and remove the primer in those spots. Then plug weld together. This way, most of the panels are protected between the joint. I don't know how much better it will survive this way, but it seems like it would help. |
|
| |
|
Elite Veteran
Posts: 649
Location: Finland | That is the proper way to do things.
Actually I always plug weld since I have no spot welder. If both plates are bare and new I just weld them together without primer. I f there is rust on one or both sides I
brush crc rust stop on and hope for the best. First I brush away the majority of the rust. |
|
| |
|
Veteran
Posts: 129
Location: Finland | Lookin good! Nice work. |
|
| |
|

Veteran
Posts: 281
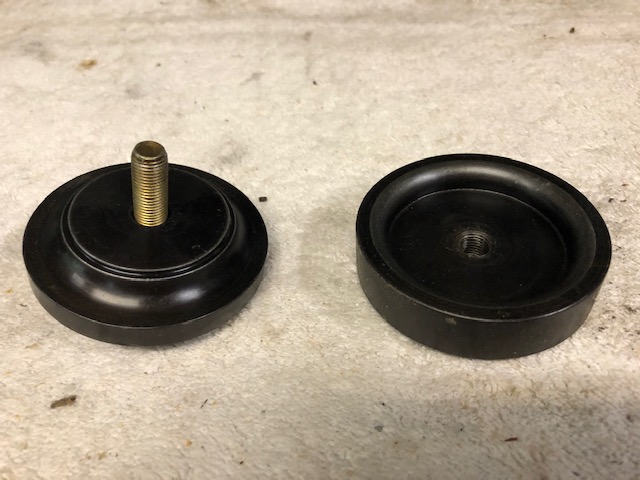
Location: WA/USA | Curious - What did you make your body mount cups out of for the floor pan?
I just wrapped up floors, trunk pan, quarters, and rockers on my 57 Club Coupe. Still have to do the bottoms of the doors, but I'm getting close to being done with rust. |
|
| |
|
Elite Veteran
Posts: 649
Location: Finland | I happened to have the cups on the shelf. The were pressed in molds many years ago and the molds are long gone , these were the last ones. |
|
| |
|
Elite Veteran
Posts: 649
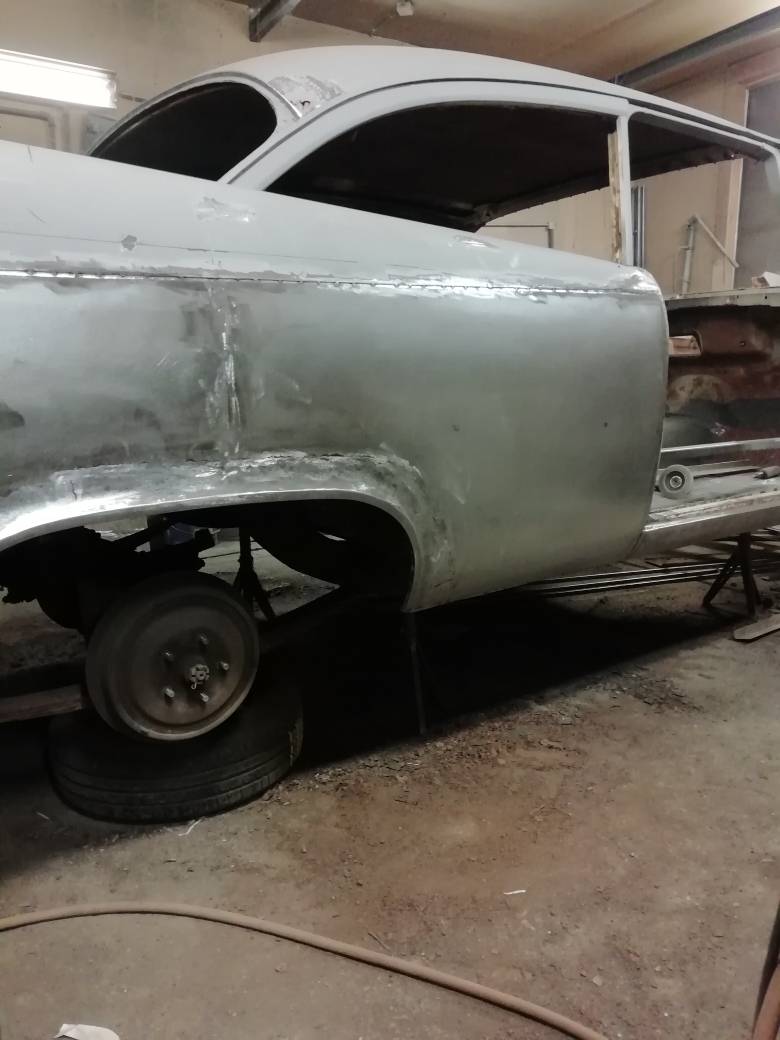
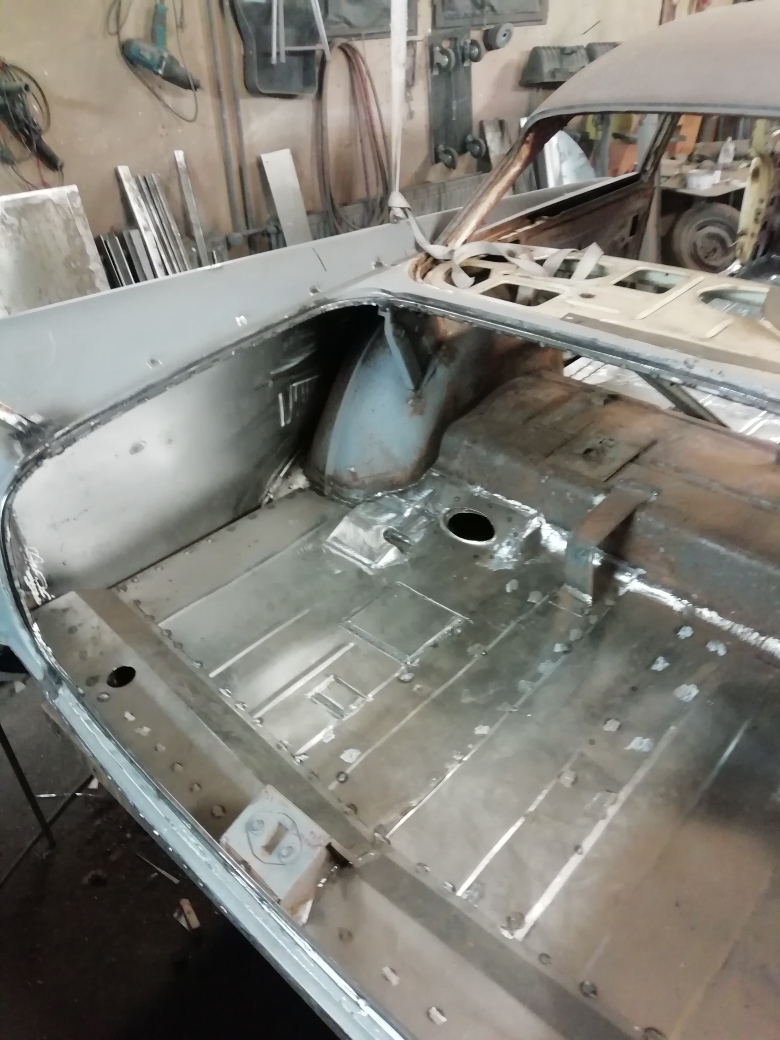
Location: Finland | One side done , one to go! It is going faster now since I have all parts done allready.
 (IMG_20220216_155723_resized_20220216_041031756.jpg) (IMG_20220216_155723_resized_20220216_041031756.jpg)
 (IMG_20220216_155734_resized_20220216_041031526.jpg) (IMG_20220216_155734_resized_20220216_041031526.jpg)
 (IMG_20220216_155759_resized_20220216_041031274.jpg) (IMG_20220216_155759_resized_20220216_041031274.jpg)
 (IMG_20220216_155809_resized_20220216_041031024.jpg) (IMG_20220216_155809_resized_20220216_041031024.jpg)
 (IMG_20220216_155831_resized_20220216_041030783.jpg) (IMG_20220216_155831_resized_20220216_041030783.jpg)
 (IMG_20220216_155919_resized_20220216_041030522.jpg) (IMG_20220216_155919_resized_20220216_041030522.jpg)
Attachments
----------------
IMG_20220216_155723_resized_20220216_041031756.jpg (231KB - 170 downloads)
IMG_20220216_155734_resized_20220216_041031526.jpg (239KB - 172 downloads)
IMG_20220216_155759_resized_20220216_041031274.jpg (299KB - 165 downloads)
IMG_20220216_155809_resized_20220216_041031024.jpg (271KB - 184 downloads)
IMG_20220216_155831_resized_20220216_041030783.jpg (270KB - 184 downloads)
IMG_20220216_155919_resized_20220216_041030522.jpg (237KB - 173 downloads)
|
|
| |
|
Expert 5K+
Posts: 9650
Location: So. Cal | Looks good! |
|
| |
|
Expert 5K+
Posts: 5006
| f man, shoulda got some donor quarters..
Oh your in F'ing finland...
|
|
| |
|
Elite Veteran
Posts: 649
Location: Finland | In Finland you can forget about usable donor quarters. If I would find one in us then the shipping plus 30% fees for customs and taxes would make it too pricy for my wallet.
Since I am retired since six years I have the time and will to fabricate new parts. For me it is more important to not have soft spots anywhere on the car than that every
inch of the car is as it came from the production line.
When you fabricate from sheet metal you can start as soon as the project arrives , I couldn`t wait for months or years for parts like some fellows.
|
|
| |
|

Board Moderator & Exner Expert 10K+
Posts: 13045
Location: Southern Sweden - Sturkö island | In short, that´s Finnish Sisu, wounded, bleeding and still making good work!
Keep it up and keep us posted, soon the spring is here…… |
|
| |
|
Veteran
Posts: 281
Location: WA/USA | You work fast for being "retired". I got a 1 year head start on you and I think you'll be caught up to me in less than half the time.
|
|
| |
|
Elite Veteran
Posts: 649
Location: Finland | Fast as a snail...I do 3-4 hours every day (almost) so there is some small progress going on all the time. |
|
| |
|
Elite Veteran
Posts: 649
Location: Finland | Some progress..
 (IMG_20220323_120849_resized_20220323_123106039.jpg) (IMG_20220323_120849_resized_20220323_123106039.jpg)
 (IMG_20220323_120910_resized_20220323_123105764.jpg) (IMG_20220323_120910_resized_20220323_123105764.jpg)
 (IMG_20220323_120921_BURST001_COVER_resized_20220323_123105524.jpg) (IMG_20220323_120921_BURST001_COVER_resized_20220323_123105524.jpg)
 (IMG_20220323_120932_resized_20220323_123105042.jpg) (IMG_20220323_120932_resized_20220323_123105042.jpg)
 (IMG_20220323_121001_resized_20220323_123104505.jpg) (IMG_20220323_121001_resized_20220323_123104505.jpg)
 (IMG_20220323_121011_resized_20220323_123104254.jpg) (IMG_20220323_121011_resized_20220323_123104254.jpg)
 (IMG_20220323_121022_resized_20220323_123103988.jpg) (IMG_20220323_121022_resized_20220323_123103988.jpg)
 (IMG_20220323_121030_resized_20220323_123103734.jpg) (IMG_20220323_121030_resized_20220323_123103734.jpg)
 (IMG_20220323_121046_resized_20220323_123103472.jpg) (IMG_20220323_121046_resized_20220323_123103472.jpg)
 (IMG_20220323_121126_resized_20220323_123103189.jpg) (IMG_20220323_121126_resized_20220323_123103189.jpg)
Attachments
----------------
IMG_20220323_120849_resized_20220323_123106039.jpg (309KB - 162 downloads)
IMG_20220323_120910_resized_20220323_123105764.jpg (298KB - 163 downloads)
IMG_20220323_120921_BURST001_COVER_resized_20220323_123105524.jpg (129KB - 158 downloads)
IMG_20220323_120932_resized_20220323_123105042.jpg (226KB - 162 downloads)
IMG_20220323_121001_resized_20220323_123104505.jpg (279KB - 156 downloads)
IMG_20220323_121011_resized_20220323_123104254.jpg (243KB - 160 downloads)
IMG_20220323_121022_resized_20220323_123103988.jpg (204KB - 174 downloads)
IMG_20220323_121030_resized_20220323_123103734.jpg (231KB - 166 downloads)
IMG_20220323_121046_resized_20220323_123103472.jpg (228KB - 159 downloads)
IMG_20220323_121126_resized_20220323_123103189.jpg (258KB - 150 downloads)
|
|
| |
|
Elite Veteran
Posts: 649
Location: Finland | The bodywork is about done now except for the doors and front fenders. About 220 hours on this car so far..
 (IMG_20220328_155647_resized_20220328_102031283.jpg) (IMG_20220328_155647_resized_20220328_102031283.jpg)
 (IMG_20220328_155627_resized_20220328_102031007.jpg) (IMG_20220328_155627_resized_20220328_102031007.jpg)
 (IMG_20220328_155701_resized_20220328_102030747.jpg) (IMG_20220328_155701_resized_20220328_102030747.jpg)
 (IMG_20220328_155720_resized_20220328_102030477.jpg) (IMG_20220328_155720_resized_20220328_102030477.jpg)
 (IMG_20220328_155731_resized_20220328_102030143.jpg) (IMG_20220328_155731_resized_20220328_102030143.jpg)
Attachments
----------------
IMG_20220328_155647_resized_20220328_102031283.jpg (325KB - 159 downloads)
IMG_20220328_155627_resized_20220328_102031007.jpg (258KB - 161 downloads)
IMG_20220328_155701_resized_20220328_102030747.jpg (251KB - 160 downloads)
IMG_20220328_155720_resized_20220328_102030477.jpg (306KB - 159 downloads)
IMG_20220328_155731_resized_20220328_102030143.jpg (294KB - 158 downloads)
|
|
| |
|
Board Moderator & Exner Expert 10K+
Posts: 13045
Location: Southern Sweden - Sturkö island | Great Ralf, keep up the good work and keep us posted |
|
| |
|
Elite Veteran
Posts: 649
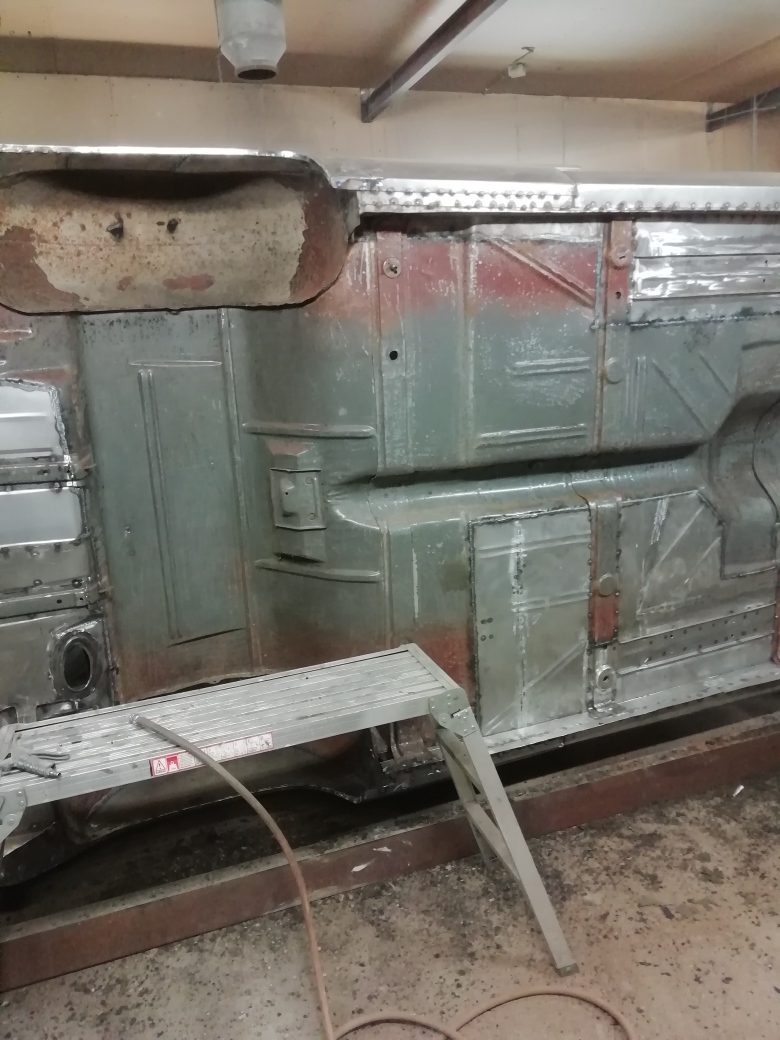
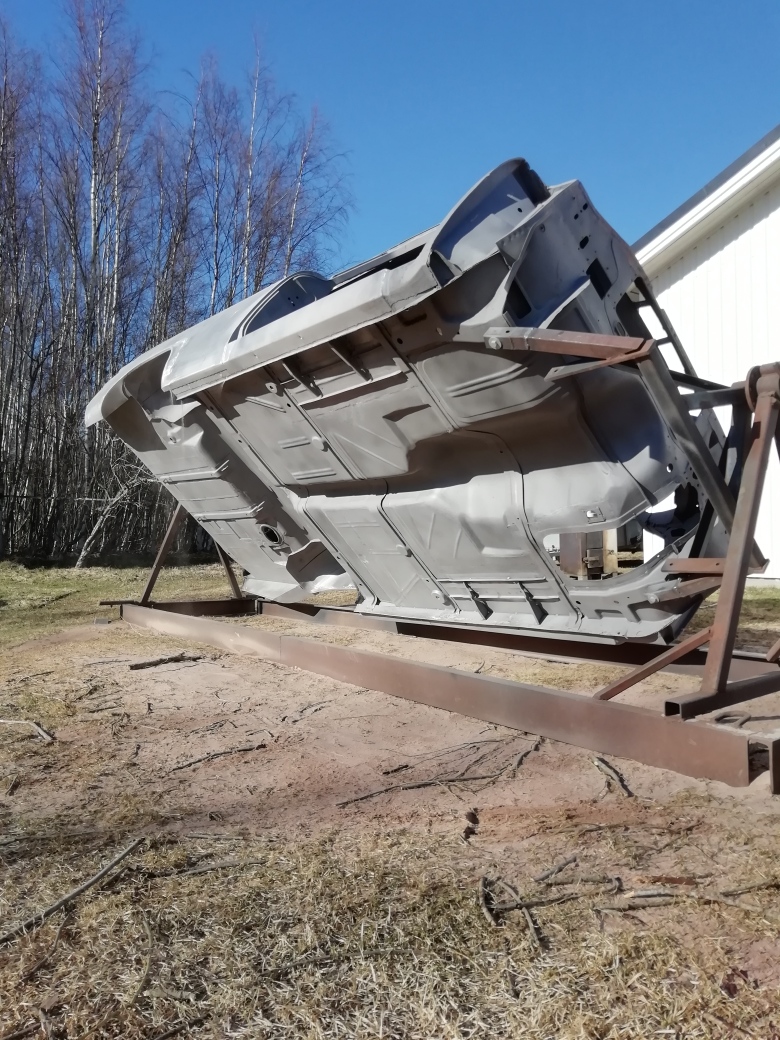
Location: Finland | Now it`s up in the rotisserie...only the fun work left....
Here you can observe how the underside is painted from the factory. The red is overspray on the grey/blue ish components paint.
 (IMG_20220330_162902_resized_20220330_104159079.jpg) (IMG_20220330_162902_resized_20220330_104159079.jpg)
Attachments
----------------
IMG_20220330_162902_resized_20220330_104159079.jpg (293KB - 150 downloads)
|
|
| |
|
Elite Veteran
Posts: 1157
Location: D-70199 Heslach | It looks as it could be ready this season |
|
| |
|
Elite Veteran
Posts: 649
Location: Finland | Nah...when the summer season begins I spend a lot of time at my sea cottage so I need probably a full year from now to get it finished.
These days I wait for the sandblasting guy to arrive, we have about -10 degrees celsius at nights so the blasting works well at the mornings. |
|
| |
|
Elite Veteran
Posts: 649
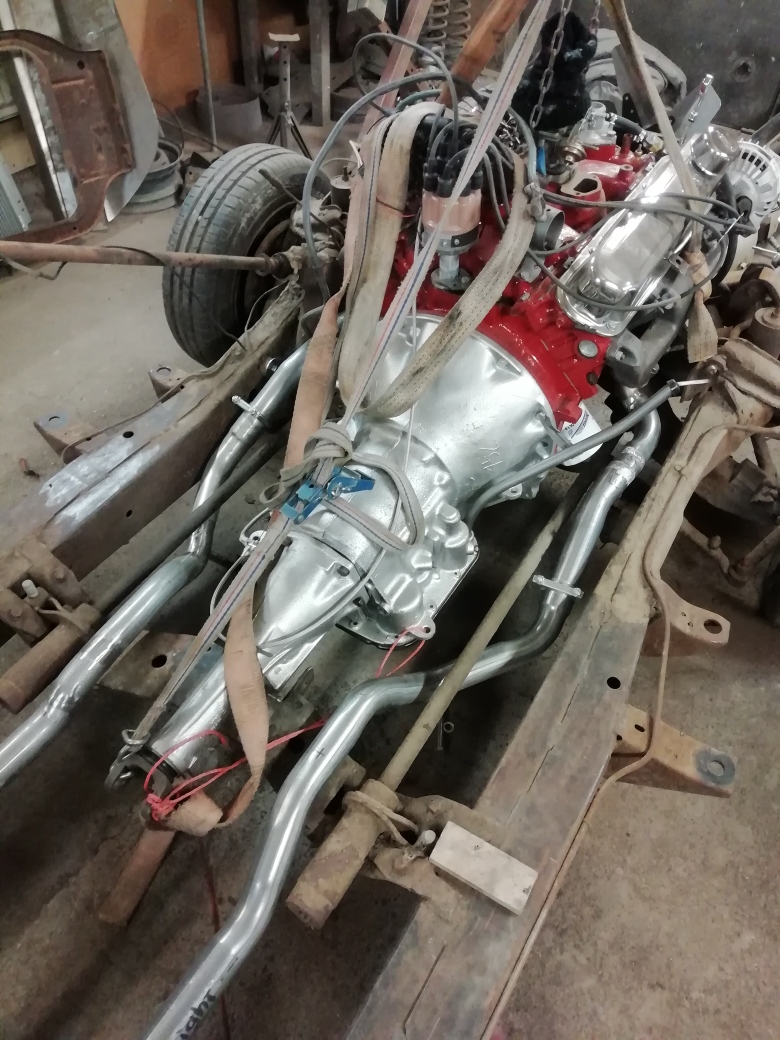
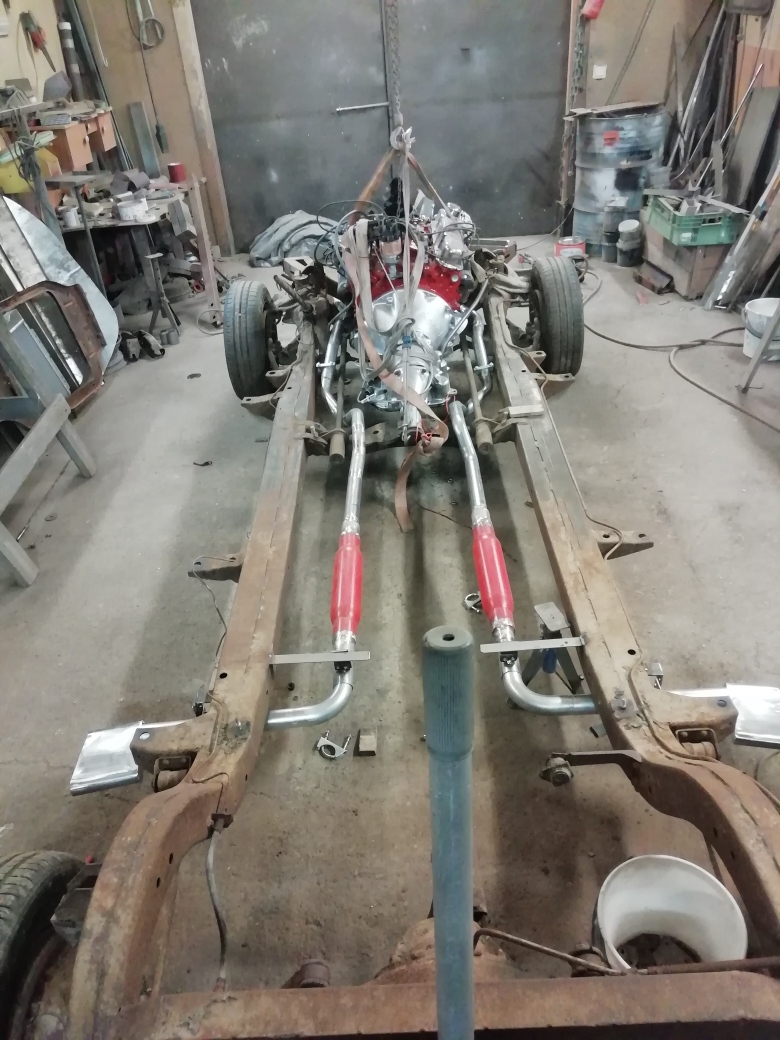
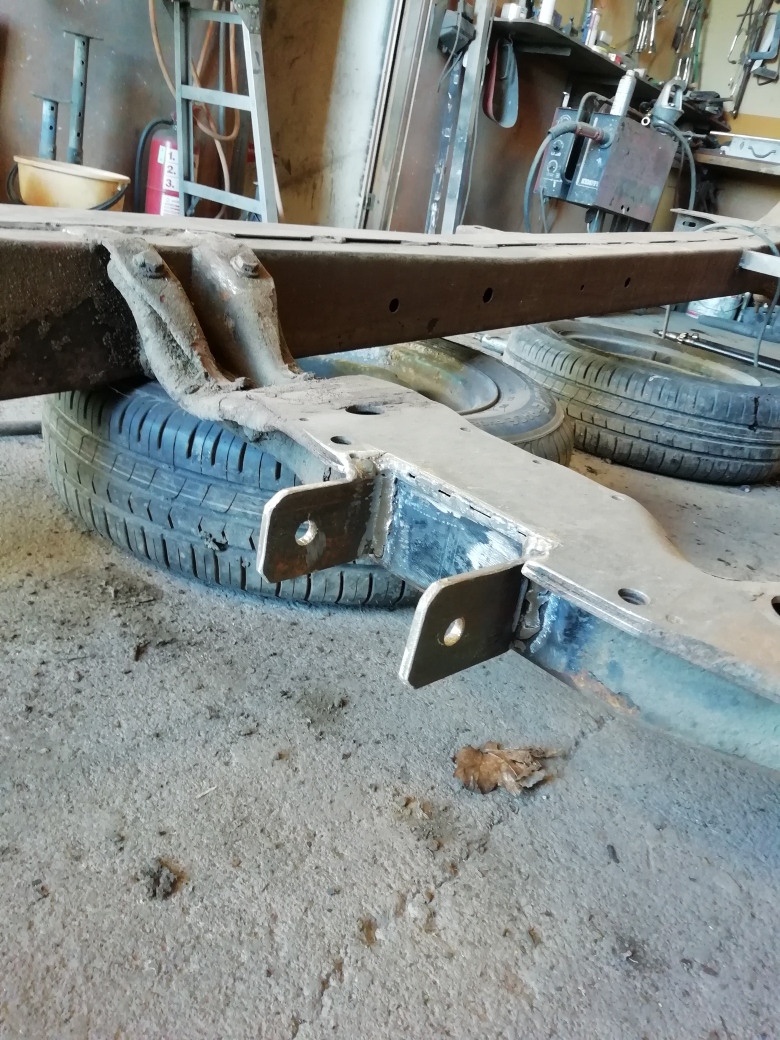
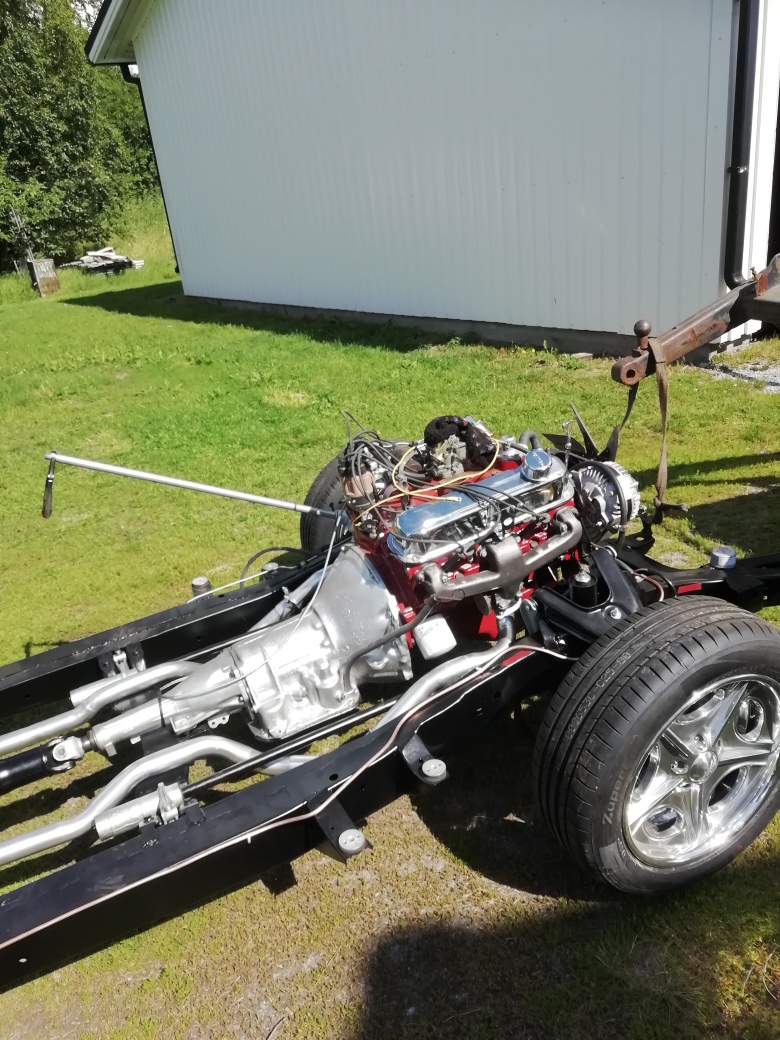
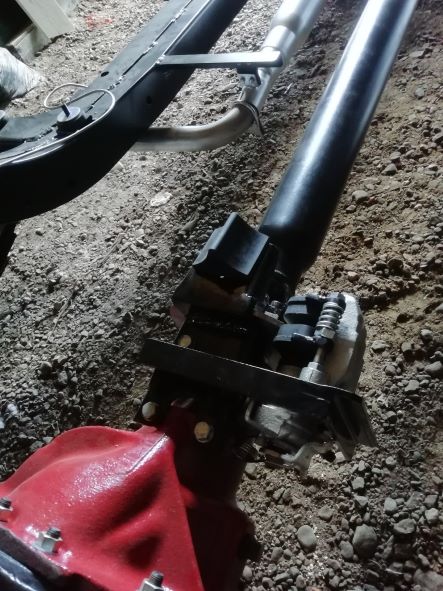
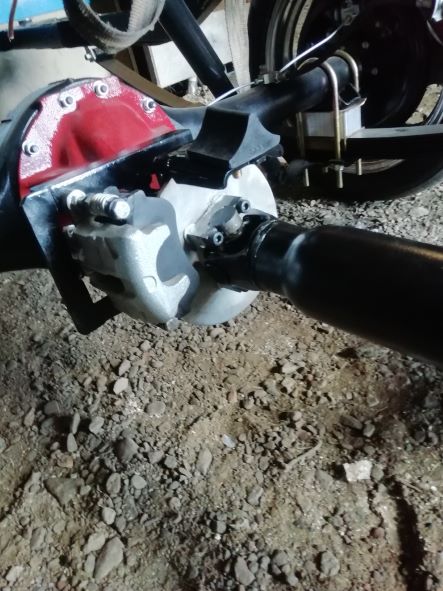
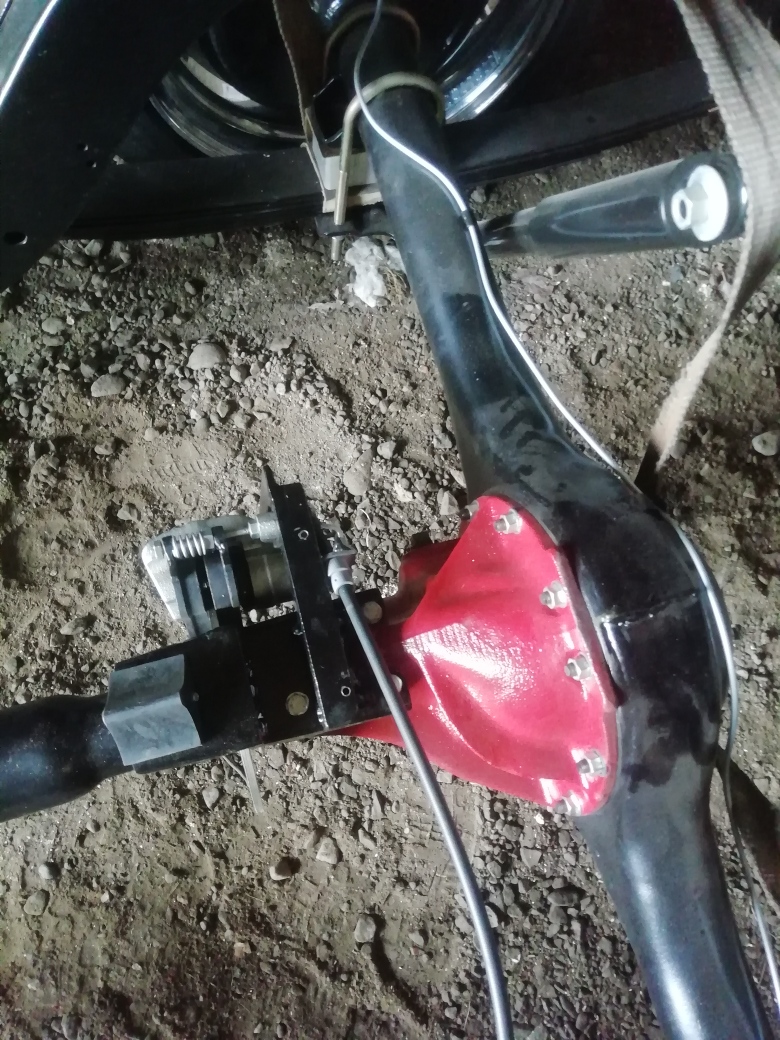
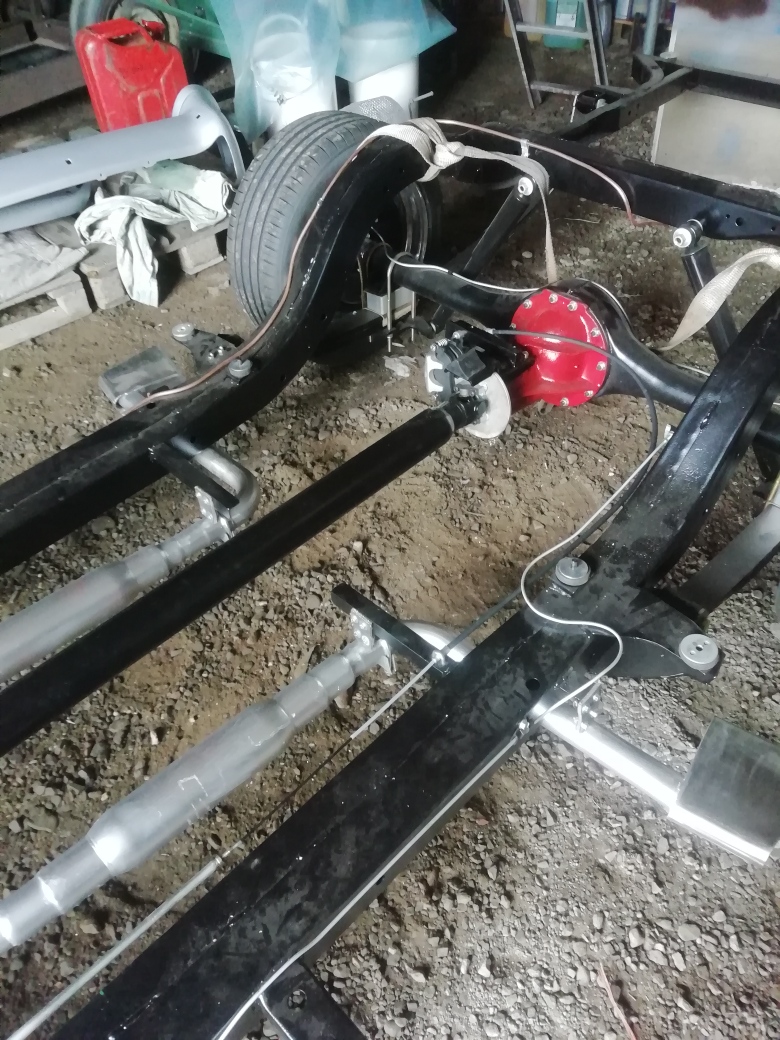
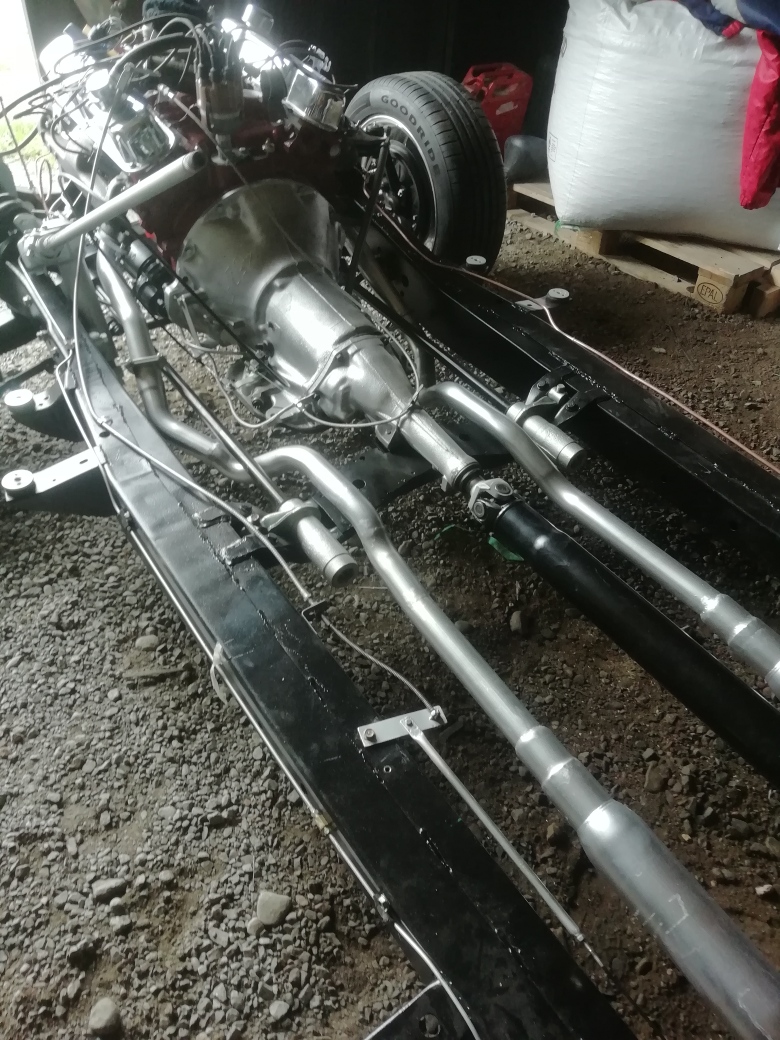
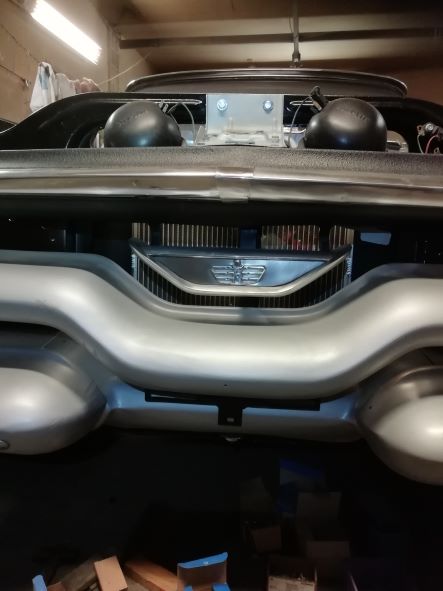
Location: Finland | I am still waiting for the blasted sand blasting man...had to move on to the frame. I have done a thing or three..
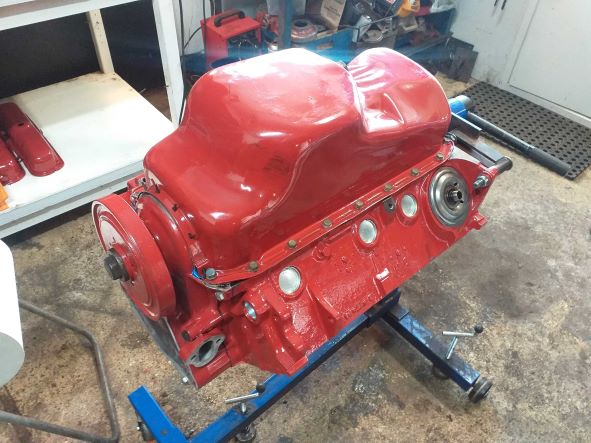
Engine 318LA +tf 904 got new engine mount frame brackets
The propellershaft got done from two shafts I had. The original was about one foot short.
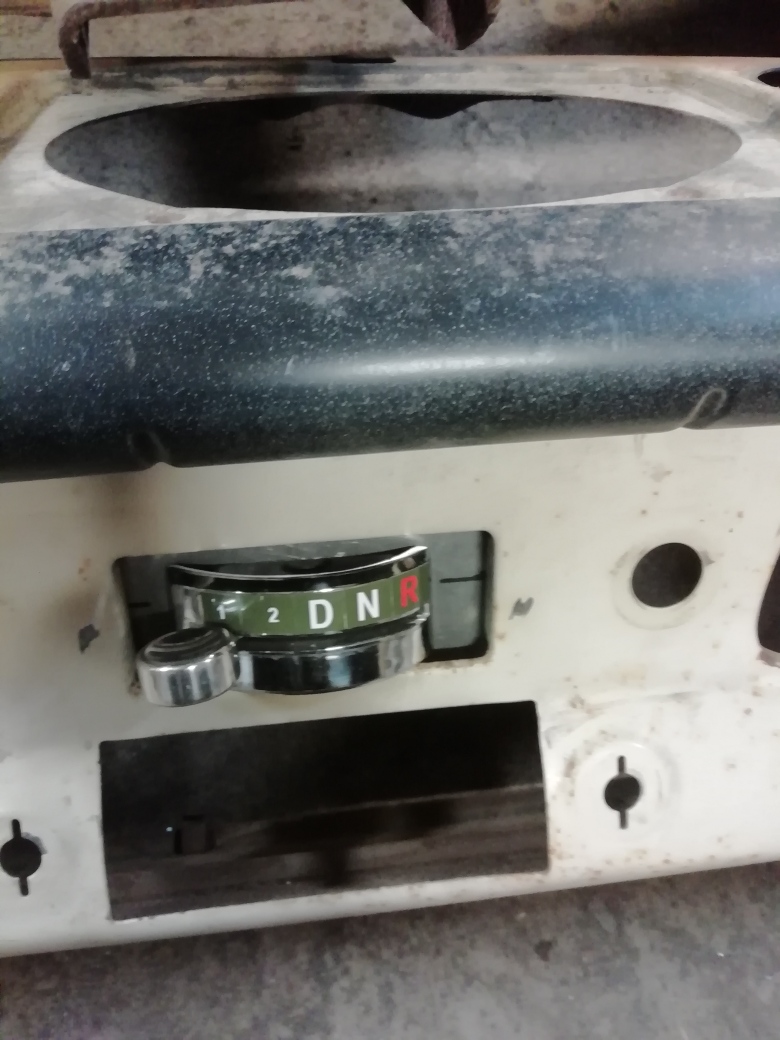
The pushbutton unit is replaced with a Dodge 1956 Overdrive actuator. I went looking for something usable on my shelves and noticed that this was giving a decent
stroke. I had to accept that I can`t use the 1 position.
The exhaust system is ready...I am going to try to have the tips out in front of the rear wheels
 (IMG_20220420_110454_resized_20220421_110753073.jpg) (IMG_20220420_110454_resized_20220421_110753073.jpg)
 (IMG_20220420_110510_1_resized_20220421_110752815.jpg) (IMG_20220420_110510_1_resized_20220421_110752815.jpg)
 (IMG_20220421_160343_resized_20220421_110752564.jpg) (IMG_20220421_160343_resized_20220421_110752564.jpg)
 (IMG_20220421_160450_resized_20220421_110752017.jpg) (IMG_20220421_160450_resized_20220421_110752017.jpg)
Attachments
----------------
IMG_20220420_110454_resized_20220421_110753073.jpg (366KB - 126 downloads)
IMG_20220420_110510_1_resized_20220421_110752815.jpg (327KB - 136 downloads)
IMG_20220421_160343_resized_20220421_110752564.jpg (306KB - 133 downloads)
IMG_20220421_160450_resized_20220421_110752017.jpg (317KB - 132 downloads)
|
|
| |
|
Elite Veteran
Posts: 649
Location: Finland | Pushbutton delete...and ashtray delete..
 (IMG_20220422_171623_resized_20220423_093920675.jpg) (IMG_20220422_171623_resized_20220423_093920675.jpg)
 (IMG_20220423_074423_resized_20220423_093920419.jpg) (IMG_20220423_074423_resized_20220423_093920419.jpg)
Attachments
----------------
IMG_20220422_171623_resized_20220423_093920675.jpg (242KB - 130 downloads)
IMG_20220423_074423_resized_20220423_093920419.jpg (232KB - 125 downloads)
|
|
| |
|
Extreme Veteran
Posts: 427
Location: McCleary WA | AceS - 2022-02-09 9:41 AM
Curious - What did you make your body mount cups out of for the floor pan?
I used replacement floor pans in my wagon, and the body mount cups were only half as deep as they should be. I picked up this dimple die and easily made them deeper. I can loan it to anyone needing it.
 (floor cup die.JPG) (floor cup die.JPG)
Attachments
----------------
floor cup die.JPG (84KB - 137 downloads)
|
|
| |
|
Elite Veteran
Posts: 649
Location: Finland | My best friend the great sand blasting guy visited me and this was the result.
 (IMG_20220424_173419_resized_20220424_082917117.jpg) (IMG_20220424_173419_resized_20220424_082917117.jpg)
Attachments
----------------
IMG_20220424_173419_resized_20220424_082917117.jpg (437KB - 143 downloads)
|
|
| |
|
Elite Veteran
Posts: 649
Location: Finland | The body is epoxy painted and top coated with Mipa Protector structure paint (Raptor like) inside and under. I must say I liked it A LOT... It is so durable... and easy to spray on.
The fame is getting shaved today and soon I have to call the blasting man again..
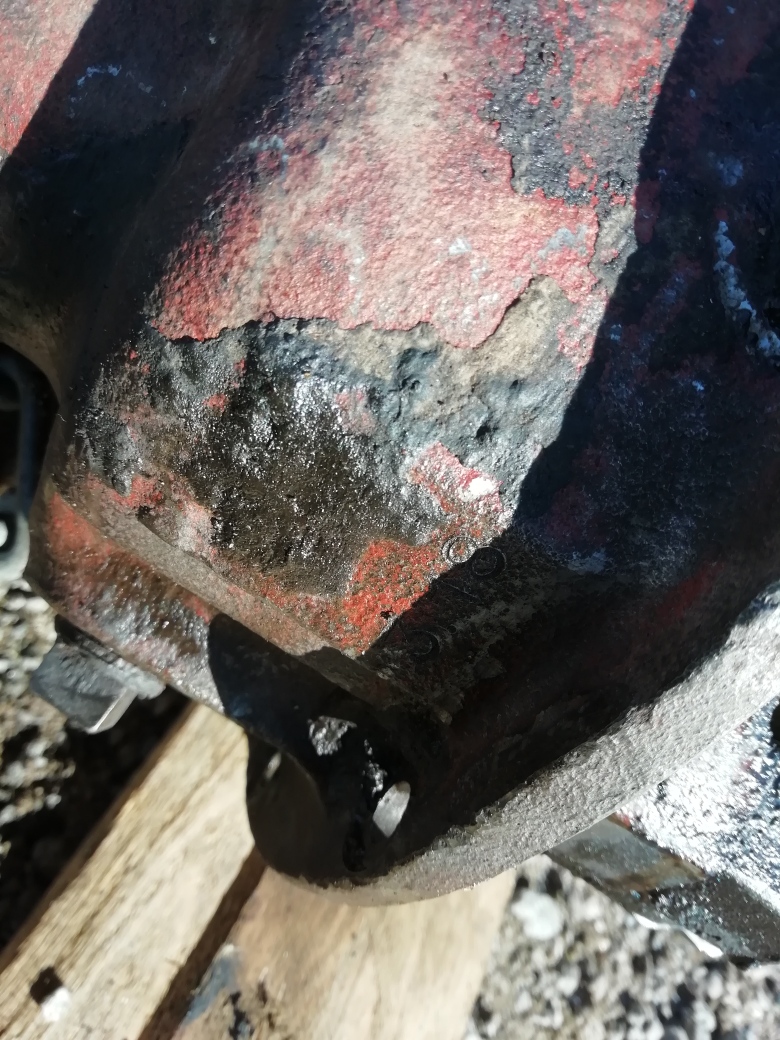
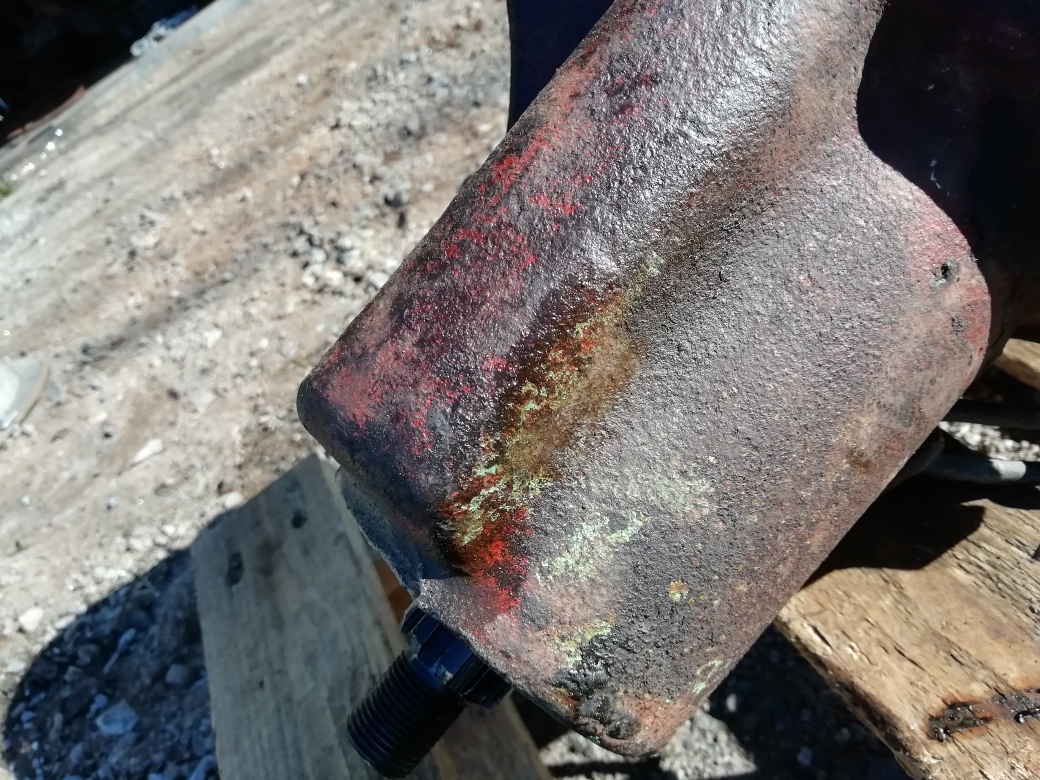
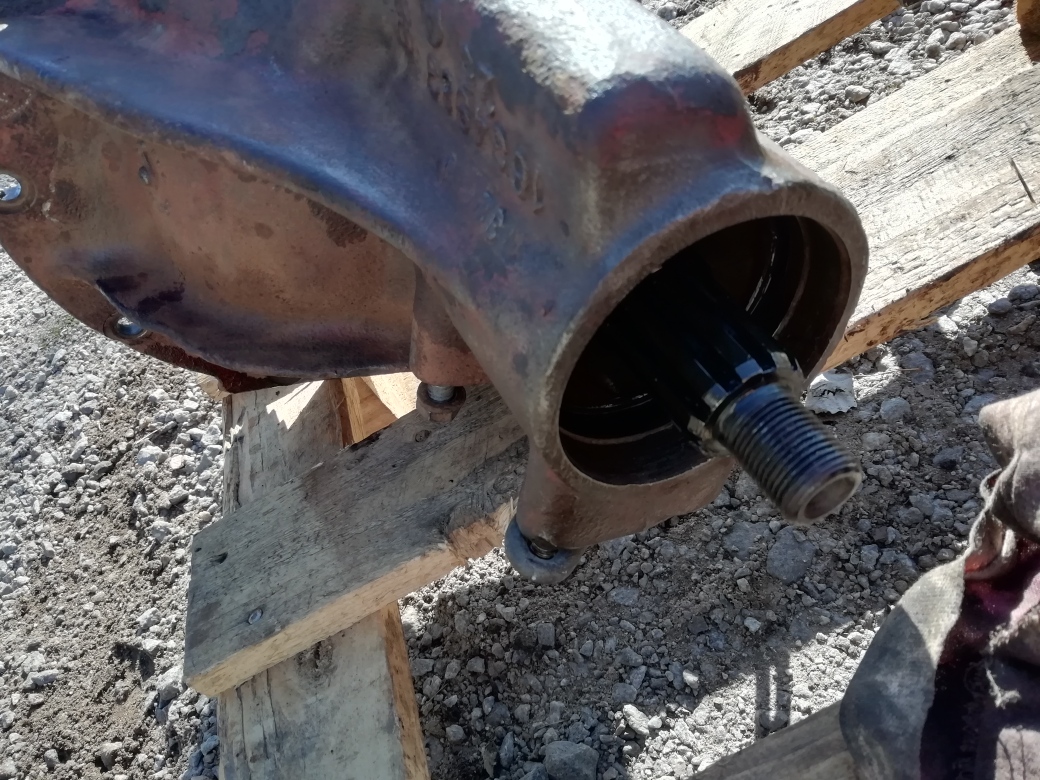
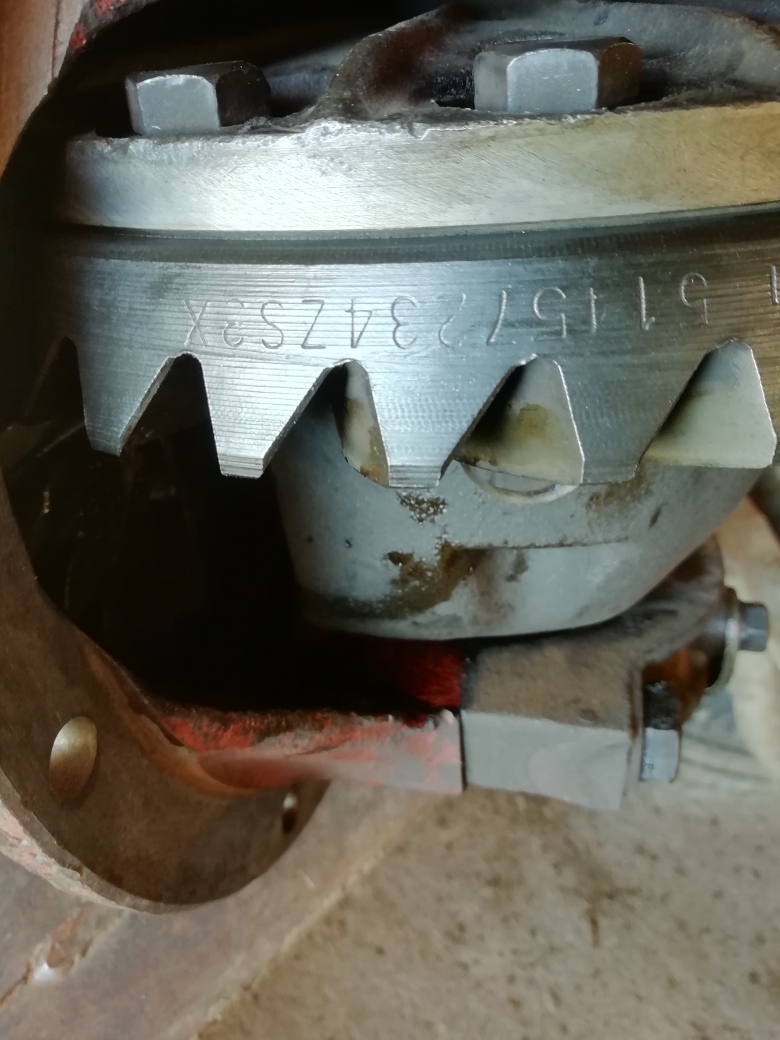
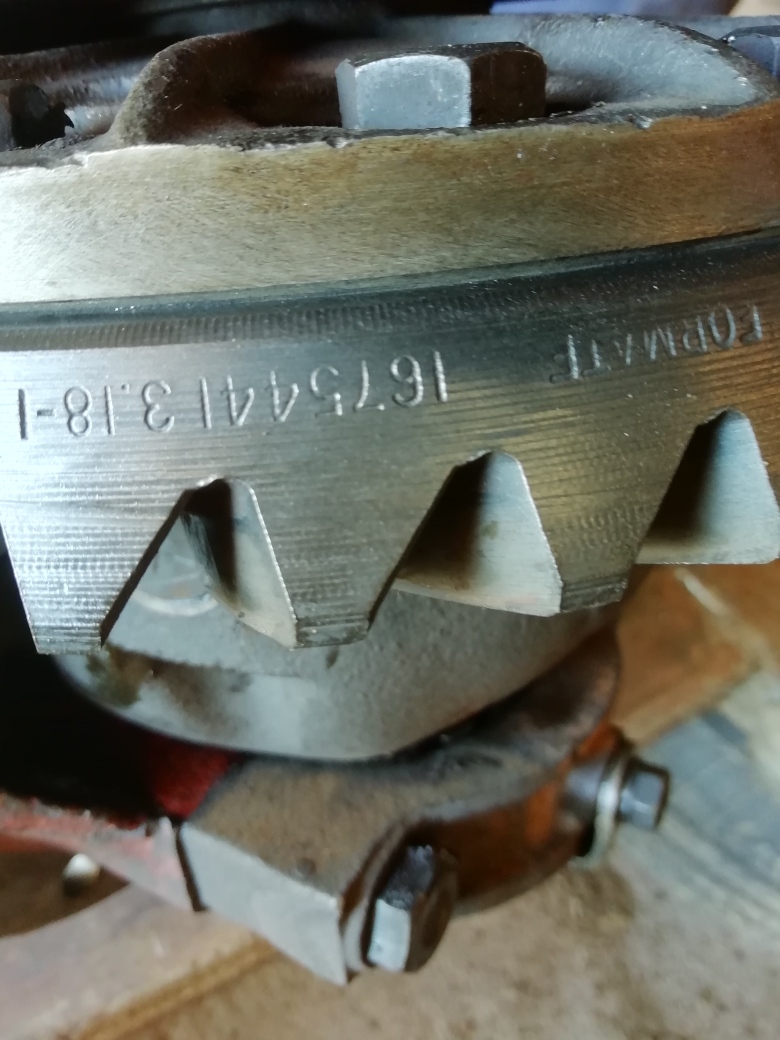
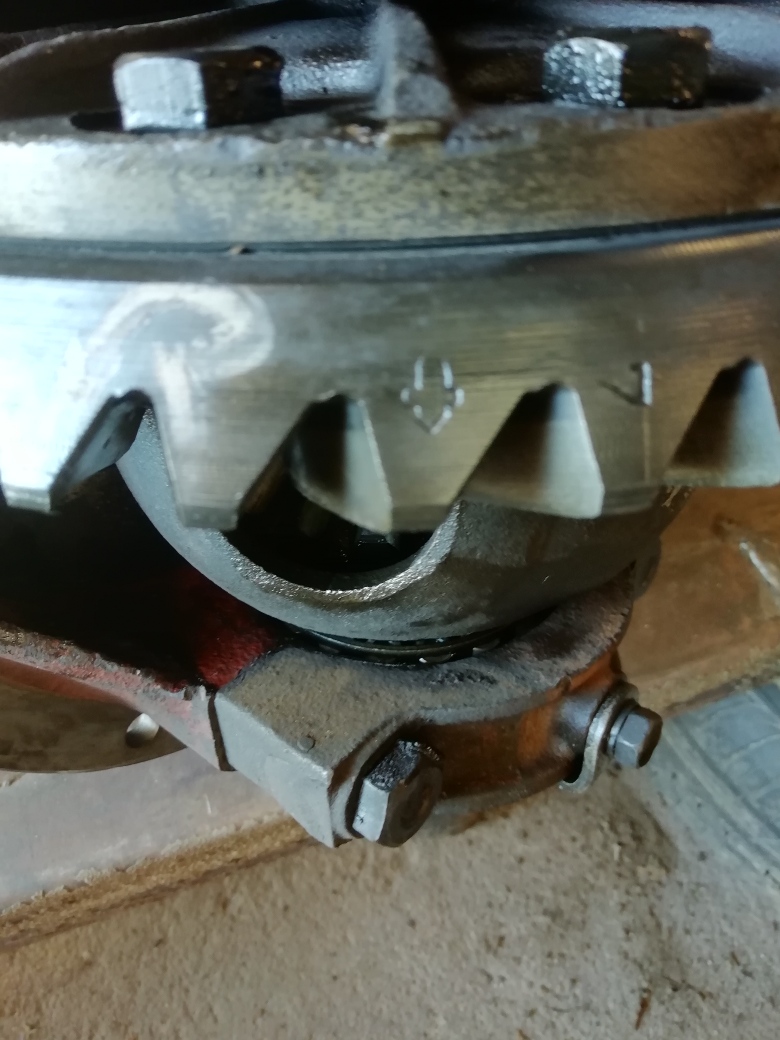
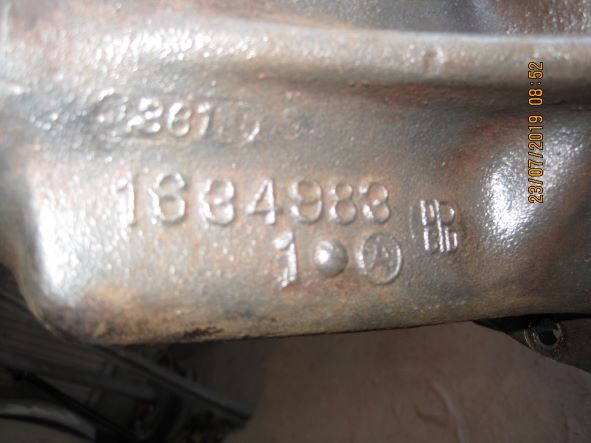
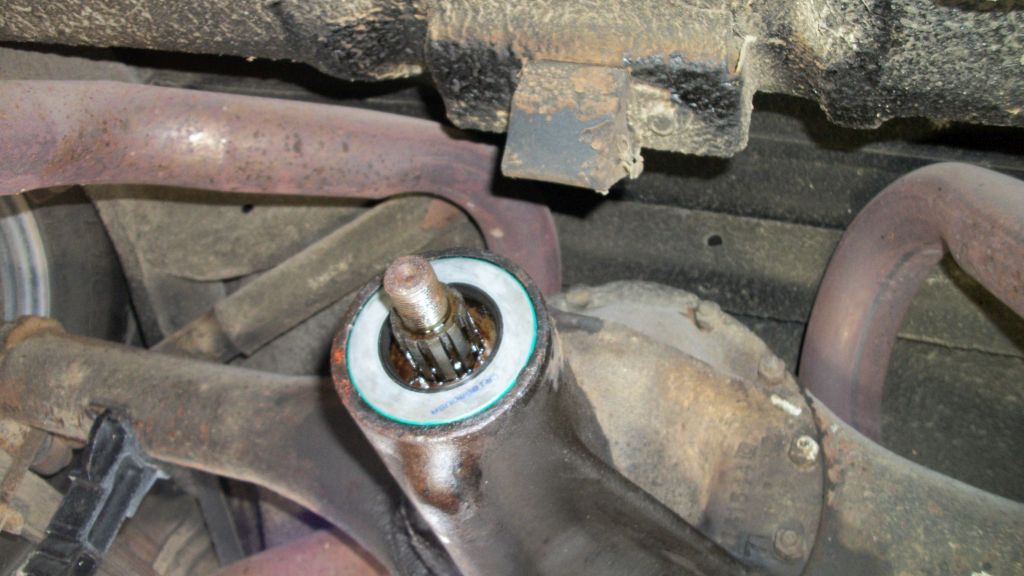
The rear end is a 1634983 with 3,18 ratio, Green paint on the snout of the carrier.
The pinion seal is id 1,875 and od 3,09 (3,105?) with 0,57" width at od and 0,79" at id. I have read so much about 741 and 741 and "the older" 1634983 which is neither.
I have understood that pinion size should be 1 3/8 for 741 and 1 3/4 for 742. The 489 has 1,875" pinion like this one but I think it came not until 1969?
Interesting...isn`t there anybody out there who knows?
 (IMG_20220504_092010_resized_20220504_093453122.jpg) (IMG_20220504_092010_resized_20220504_093453122.jpg)
 (IMG_20220504_092029_resized_20220504_093452873.jpg) (IMG_20220504_092029_resized_20220504_093452873.jpg)
 (IMG_20220504_092040_resized_20220504_093452591.jpg) (IMG_20220504_092040_resized_20220504_093452591.jpg)
 (IMG_20220504_092044_resized_20220504_093452301.jpg) (IMG_20220504_092044_resized_20220504_093452301.jpg)
 (IMG_20220504_092053_resized_20220504_093452021.jpg) (IMG_20220504_092053_resized_20220504_093452021.jpg)
 (IMG_20220504_092159_resized_20220504_093451712.jpg) (IMG_20220504_092159_resized_20220504_093451712.jpg)
 (IMG_20220504_104104_resized_20220504_025947008.jpg) (IMG_20220504_104104_resized_20220504_025947008.jpg)
 (IMG_20220504_104115_resized_20220504_025946758.jpg) (IMG_20220504_104115_resized_20220504_025946758.jpg)
 (IMG_20220504_104121_resized_20220504_025946512.jpg) (IMG_20220504_104121_resized_20220504_025946512.jpg)
 (IMG_20220504_104127_resized_20220504_025946253.jpg) (IMG_20220504_104127_resized_20220504_025946253.jpg)
Attachments
----------------
IMG_20220504_092010_resized_20220504_093453122.jpg (404KB - 121 downloads)
IMG_20220504_092029_resized_20220504_093452873.jpg (282KB - 134 downloads)
IMG_20220504_092040_resized_20220504_093452591.jpg (397KB - 128 downloads)
IMG_20220504_092044_resized_20220504_093452301.jpg (425KB - 125 downloads)
IMG_20220504_092053_resized_20220504_093452021.jpg (415KB - 125 downloads)
IMG_20220504_092159_resized_20220504_093451712.jpg (422KB - 128 downloads)
IMG_20220504_104104_resized_20220504_025947008.jpg (247KB - 125 downloads)
IMG_20220504_104115_resized_20220504_025946758.jpg (268KB - 128 downloads)
IMG_20220504_104121_resized_20220504_025946512.jpg (265KB - 132 downloads)
IMG_20220504_104127_resized_20220504_025946253.jpg (248KB - 121 downloads)
|
|
| |
|
Elite Veteran
Posts: 649
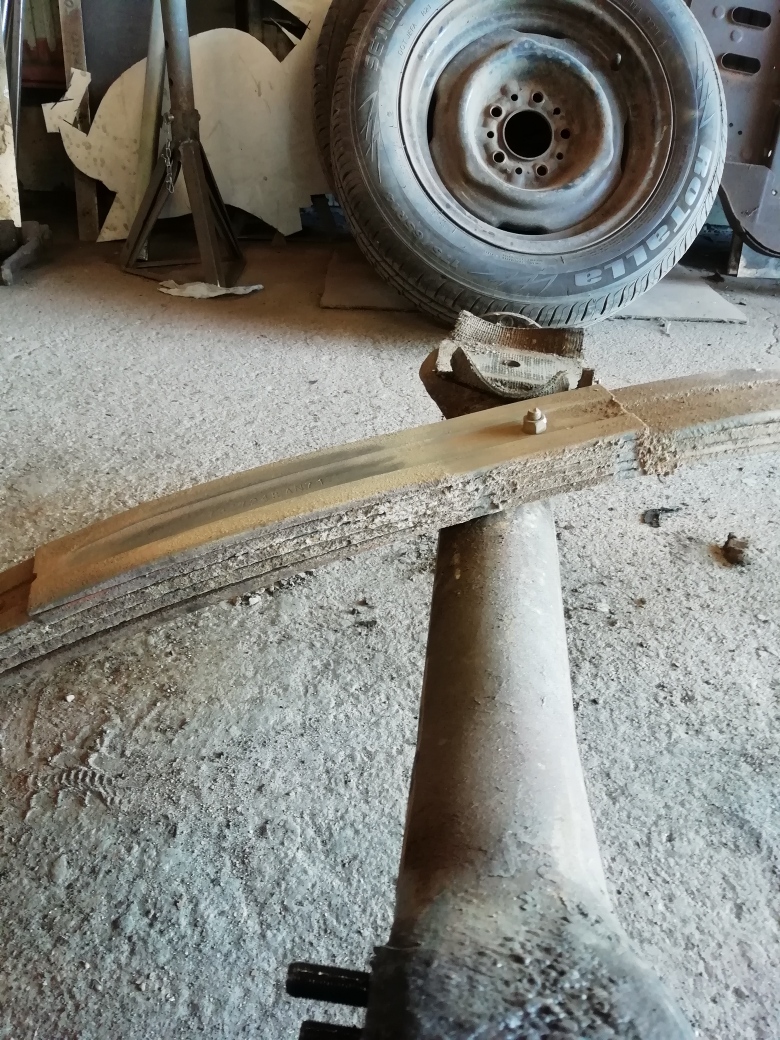
Location: Finland | Five leafs...
 (IMG_20220505_090327_resized_20220505_095050064.jpg) (IMG_20220505_090327_resized_20220505_095050064.jpg)
 (IMG_20220505_090324_resized_20220505_095049763.jpg) (IMG_20220505_090324_resized_20220505_095049763.jpg)
 (IMG_20220505_090308_resized_20220505_095049161.jpg) (IMG_20220505_090308_resized_20220505_095049161.jpg)
 (IMG_20220505_090253_resized_20220505_095048898.jpg) (IMG_20220505_090253_resized_20220505_095048898.jpg)
Attachments
----------------
IMG_20220505_090327_resized_20220505_095050064.jpg (393KB - 124 downloads)
IMG_20220505_090324_resized_20220505_095049763.jpg (465KB - 130 downloads)
IMG_20220505_090308_resized_20220505_095049161.jpg (288KB - 131 downloads)
IMG_20220505_090253_resized_20220505_095048898.jpg (282KB - 128 downloads)
|
|
| |
|
Board Moderator & Exner Expert 10K+
Posts: 13045
Location: Southern Sweden - Sturkö island | Nice work, I like your creativity - keep it up! |
|
| |
|
Expert
Posts: 1889
| .
Could you post the cowl tag picture? |
|
| |
|

Expert
Posts: 3967
Location: DFW, TX | Awesome work! So nice to see a complete restoration. I really like your shifter, very creative! |
|
| |
|
Elite Veteran
Posts: 649
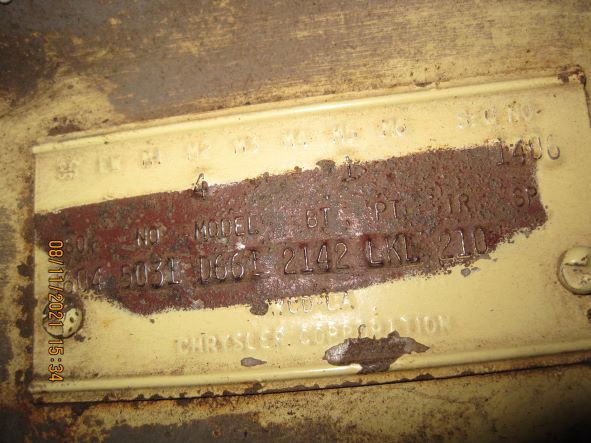
Location: Finland | Cowl plate..
 (frwl dodge coronet data plate x.JPG) (frwl dodge coronet data plate x.JPG)
Attachments
----------------
frwl dodge coronet data plate x.JPG (54KB - 130 downloads)
|
|
| |
|
Expert
Posts: 1889
| .
Wow! This is LA-built car! Thanks a bunch, Ralf!
M2 = 4 = 334 = Appearance Accessory Group: Rear Quarter Stone Shields, Deluxe Steering Wheel, Standard Wheel Covers
M5 = 1 = 401 = Undercoating
SO = 0604 = Scheduled on June 4, 1957
NO = 5031 = 31th car built that day
MODEL = D661 = 1957 Dodge Coronet V8
BT = 2142 = Dodge (2), V8 325CID 2BBL 245HP Engine (1), Coronet V8 (4), 2 Door Sedan (2)
PT = LKL = Paint Scheme – Deluxe Two Tones:
Glacier White – Roof Color
Sunshine Yellow – Upper Body Color
Glacier White – Lower Body Color
Glacier White – Fins Color
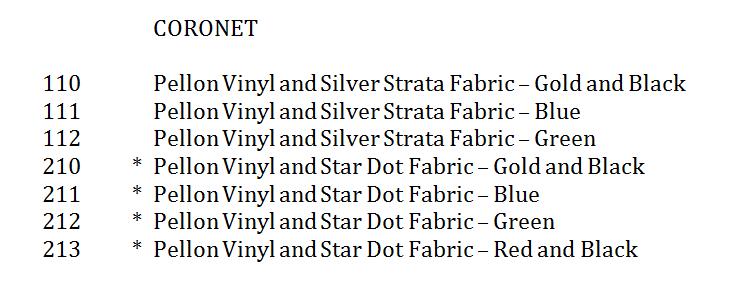
TR = 210 = Gold Pellon Vinyl and Black Star Dot Fabric – that’s a Coronet Custom Trim, (Standard would be coded as 110)
Does the car have factory power steering or power brakes?
 |
|
| |
|
Elite Veteran
Posts: 649
Location: Finland | No power equipment. The wheel covers are the full wheel sized...I don`t know if that means deluxe and the povery caps are the standard ones...
Edited by 22mafeja 2022-05-08 2:58 AM
|
|
| |
|
Expert
Posts: 1740
Location: Alaska | You asked about the different sized differentials. I will do my best to answer hopefully without too many mistakes. The 741 used a 1 3/8"" pinion, the 742 used a 1 3/4" pinion and the 489 used a 1 7/8" tapered pinion. These are progressively stronger. Chrysler first used the 8 3/4" diff in 57 AKA 741 with a different casting number. In 58, the first year for limited slip it was the 742 but also with a different casting number. Both of these were used into the early 70s. The 489 was first used in the late 60s in the higher performance cars. All of these are interchangeable but you have make sure the axle length is correct. |
|
| |
|
Expert 5K+
Posts: 9650
Location: So. Cal | In terms of axle length, only the sure grip differentials from the forwardlook years are interchangeable with the later years. Early open gears have a 1/4" shorter thrust pin in them for use with the longer axles, so they aren't strictly interchangeable. However, these early gears swap well into later axles that have green bearings in them. Green bearings tend to place the axles too far inward, requiring you to remove the thrust pin. But using the early gears, that's not an issue because of how short the thrust pin is. |
|
| |
|
Elite Veteran
Posts: 649
Location: Finland | Yes so i believed too. But how can this axle have 1 7/8" pinion? That is the question...The 1634983 isn`t rare, I have had at least two cars with it. |
|
| |
|

Expert
Posts: 3775
Location: NorCal | The large stem (1 3/4") casting number is usually 1634985, the last digit in the pics above look like the mold was faulty ?? The small stem (1 5/8") is 1820657; both were discontinued around 1964 in favor of the 2070742 and 2070741. The 1 7/8" pinion was introduced in '68 with casting number 2881489. |
|
| |
|
Expert
Posts: 1889
| 22mafeja - 2022-05-08 2:53 AM
No power equipment. The wheel covers are the full wheel sized...I don`t know if that means deluxe and the povery caps are the standard ones...
Ralf:
First two pictures shows trim code 110; the second ones are the trim code 210 (Custom Trim);
Last picture helps to identify the wheel covers: left – standard, right – deluxe (spinners)…
 (Trim 110 (1).JPG) (Trim 110 (1).JPG)
 (Trim 110 (2).JPG) (Trim 110 (2).JPG)
 (Trim 210 (1).JPG) (Trim 210 (1).JPG)
 (Trim 210 (2).JPG) (Trim 210 (2).JPG)
 (Wheel Covers.jpg) (Wheel Covers.jpg)
Attachments
----------------
Trim 110 (1).JPG (72KB - 137 downloads)
Trim 110 (2).JPG (81KB - 125 downloads)
Trim 210 (1).JPG (69KB - 127 downloads)
Trim 210 (2).JPG (72KB - 132 downloads)
Wheel Covers.jpg (147KB - 133 downloads)
|
|
| |
|
Expert
Posts: 1889
| .
1957 Dodge Coronet Trim Codes Availability:
Standard and Custom (with asterisks)
 (1.jpg) (1.jpg)
Attachments
----------------
1.jpg (47KB - 145 downloads)
|
|
| |
|
Elite Veteran
Posts: 649
Location: Finland | I can assure you it is a very clear 1634983 as well as the one on my 58 Firedome was. Have I perhaps misunderstood the measuring of a pinion ? When I measure the yoke stem it is 1 7/8"...
that is the inner diameter of the pinion seal.
 (IMG_3442x.JPG) (IMG_3442x.JPG)
Attachments
----------------
IMG_3442x.JPG (34KB - 137 downloads)
|
|
| |
|
Expert 5K+
Posts: 9899
Location: Lower Mainland BC | 22mafeja - 2022-05-08 2:42 PM. Have I perhaps misunderstood the measuring of a pinion ? When I measure the yoke stem it is 1 7/8"...
that is the inner diameter of the pinion seal.
The pinion seal for a 55-57 Dodge was 663 602 which crosses to an SKF 18880 which has an inner diameter of 1.875" (1 7/8")
https://www.rockauto.com/en/parts/skf,18880,differential+pinion+seal...
https://www.rockauto.com/en/moreinfo.php?pk=1837032&jsn=3
REFERENCE: http://www.forwardlook.net/forums/forums/thread-view.asp?tid=69669&...

Edited by 56D500boy 2022-05-08 6:34 PM
|
|
| |
|
Elite Veteran
Posts: 649
Location: Finland | That`s a very good thread Dave , it tells me I have the same pinion seal as your 56 D500. |
|
| |
|
Expert 5K+
Posts: 9899
Location: Lower Mainland BC | 22mafeja - 2022-05-08 9:17 PM
That`s a very good thread Dave , it tells me I have the same pinion seal as your 56 D500.
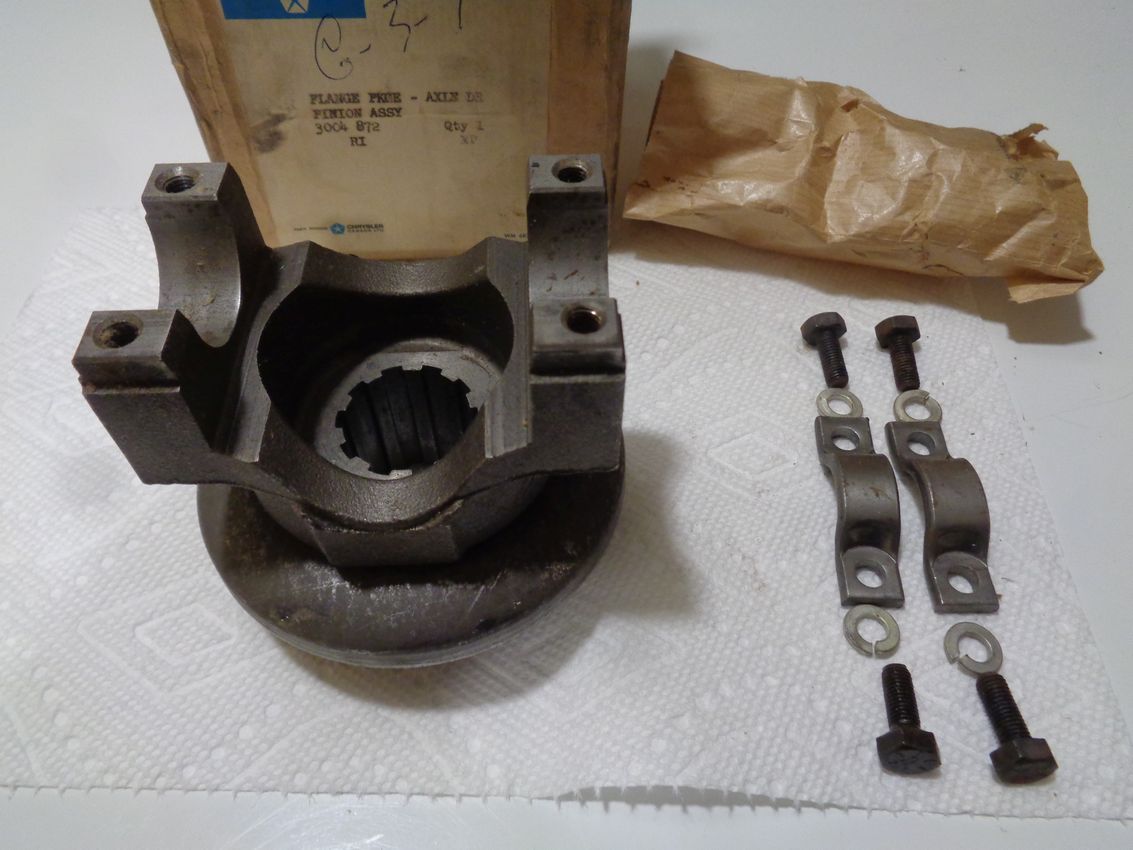
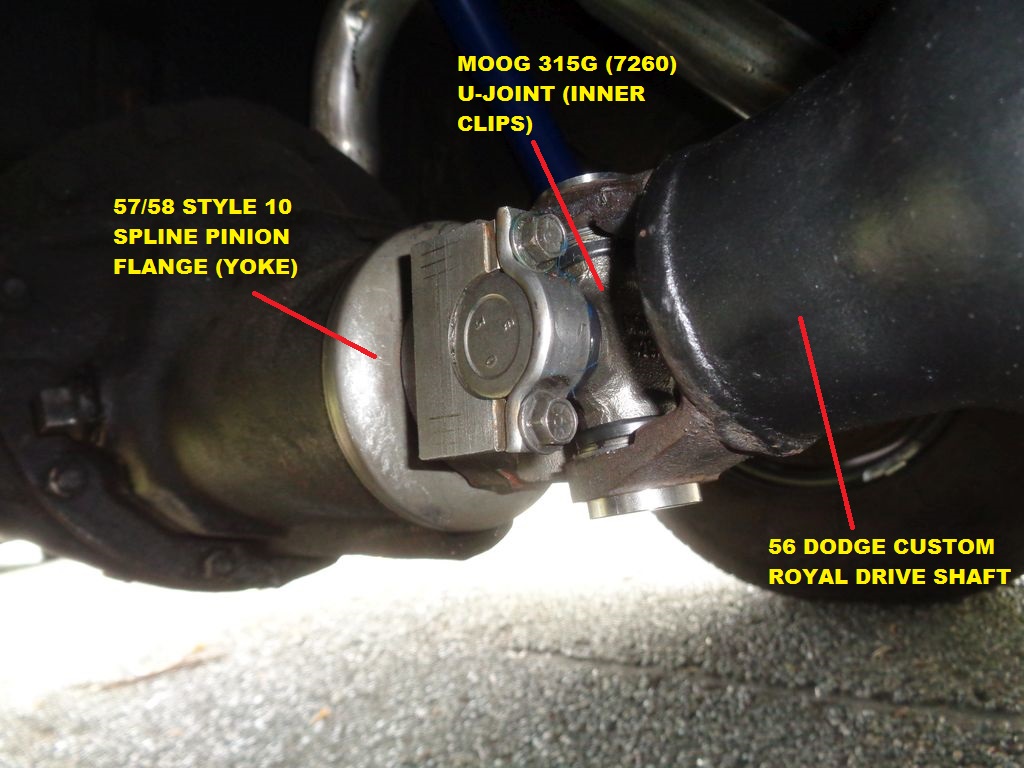
That is true. However, I think the main point of that thread was to point out that a 1958 Dodge Pinion, PN 1828 644, which also crossed up to a much later flange, i.e. a 3004 872. Supposedly the same thing as a 58 Dodge 1826 644, just a newer NOS PN. I will call it an 1828 644 to be consistent. Both it and the 57 1738 748 seem to have the same key dimensions, i.e. the distance from the 10 spline end of the flange to the "bottom" of the U-joint bearing cap seat.
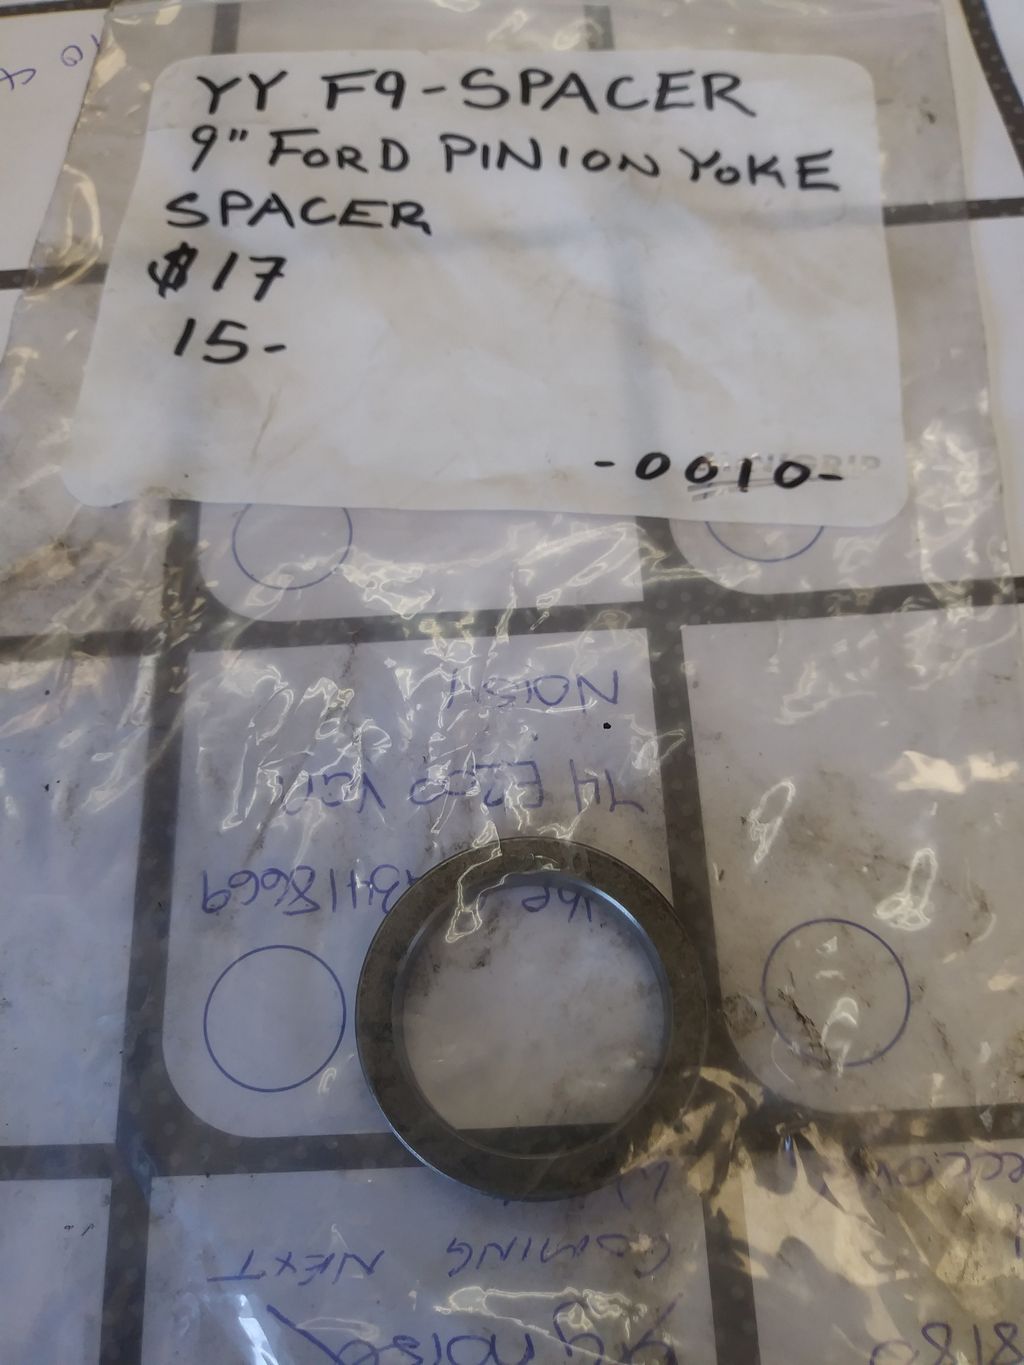
Using the 1828 644 allows you to go with a "modern" U-joint, like a MOOG 315G, provided that you use a Ford Pinion spacer when installing the pinion.
 |
|
| |
|
Elite Veteran
Posts: 649
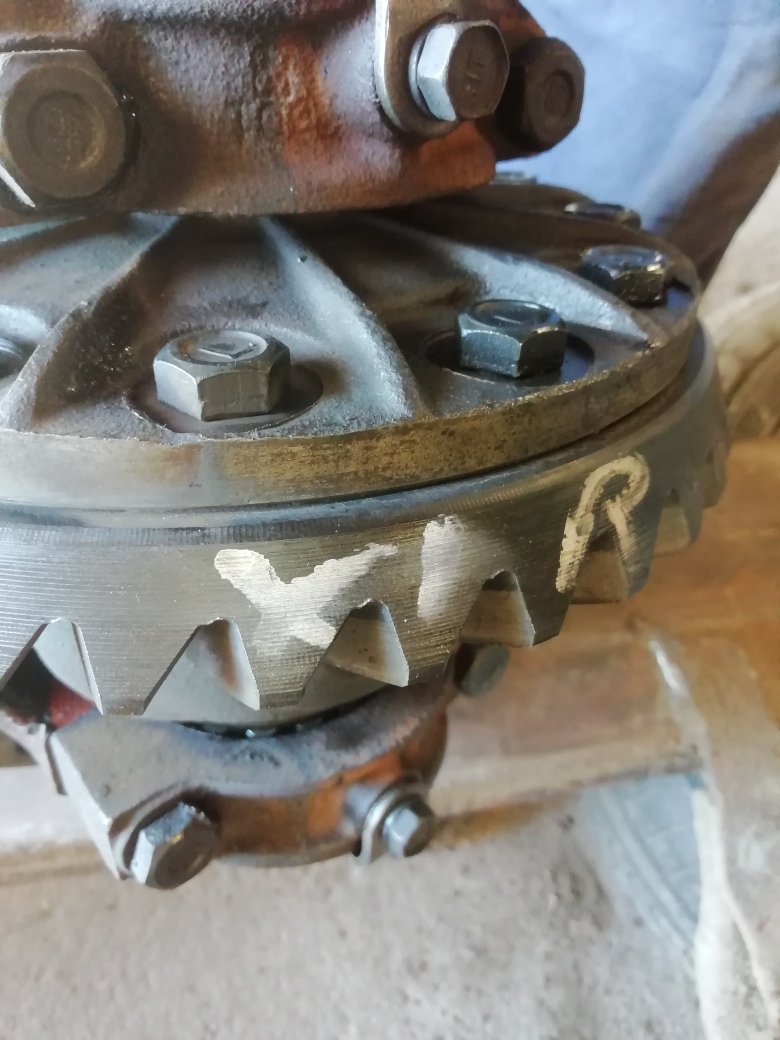
Location: Finland | Now I have compared the two pinions on 741 and 742 rear ends with my 1634983. As some guys already know the 1634983 pinion is quite slender without a step in diameter for the inner
bearing looking just like the 741. This is a fact.
I made new pads between the leafs and could save all the retainers after some repairs. My grandpas 100 year old powerbelt supplied the raw material for the pads. I think it was balate
and that is quality I would say.
I am going to paint the body shell on tuesday and I can`t wait for the sound of the jaws dropping...surprise, surprise...
Edited by 22mafeja 2022-05-16 9:04 AM
 (IMG_20220516_081853_resized_20220516_034039001xx.jpg) (IMG_20220516_081853_resized_20220516_034039001xx.jpg)
Attachments
----------------
IMG_20220516_081853_resized_20220516_034039001xx.jpg (80KB - 133 downloads)
|
|
| |
|
Elite Veteran
Posts: 649
Location: Finland | Goose bumps..this is structure paint. No side moldings, matte silver bumpers on this car. I have done many original restorations so I decided to do this last one
a little differently. These are only cars after all...
Edited by 22mafeja 2022-05-18 11:21 AM
 (IMG_20220518_100410_resized_20220518_055954926.jpg) (IMG_20220518_100410_resized_20220518_055954926.jpg)
 (IMG_20220518_101016_resized_20220518_055954570xx.jpg) (IMG_20220518_101016_resized_20220518_055954570xx.jpg)
Attachments
----------------
IMG_20220518_100410_resized_20220518_055954926.jpg (469KB - 134 downloads)
IMG_20220518_101016_resized_20220518_055954570xx.jpg (70KB - 136 downloads)
|
|
| |
|
Expert 5K+
Posts: 9650
Location: So. Cal | You have been amazingly quick on this build. I hope to be as active as you are when I finally retire.
My lancer is painted with a texture on it, but it's just primer with a tint. Then they put clear coat over it. Now the clear coat is starting to peel and I'm left with bare tinted primer. Fortunately, it doesn't rain much here, otherwise I would be concerned about it. |
|
| |
|
Elite Veteran
Posts: 649
Location: Finland | This paint is polyurethane with 2k hardener and it gets incredibly tough and durable. It is close to u-pols raptor. |
|
| |
|
Elite Veteran
Posts: 649
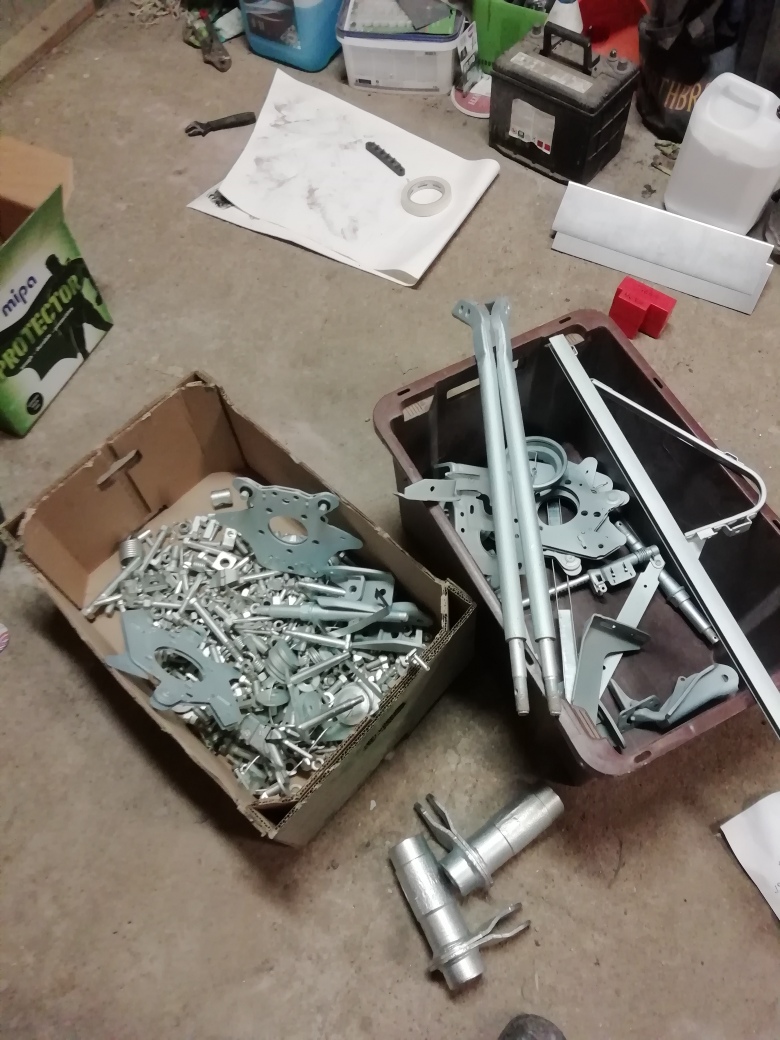
Location: Finland | A couple of parts have been re zinked..80 pounds. Takes a while before every item has found its place..
Edited by 22mafeja 2022-05-18 11:38 PM
 (IMG_20220518_151102_resized_20220518_055954306.jpg) (IMG_20220518_151102_resized_20220518_055954306.jpg)
Attachments
----------------
IMG_20220518_151102_resized_20220518_055954306.jpg (273KB - 135 downloads)
|
|
| |
|
Elite Veteran
Posts: 649
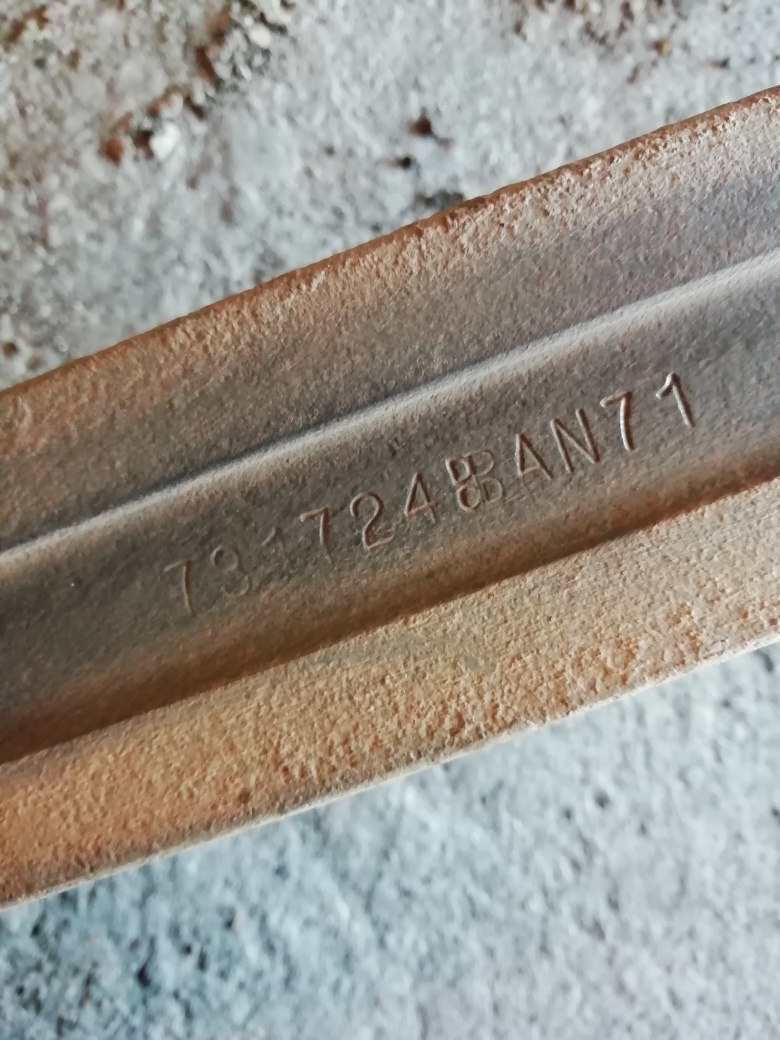
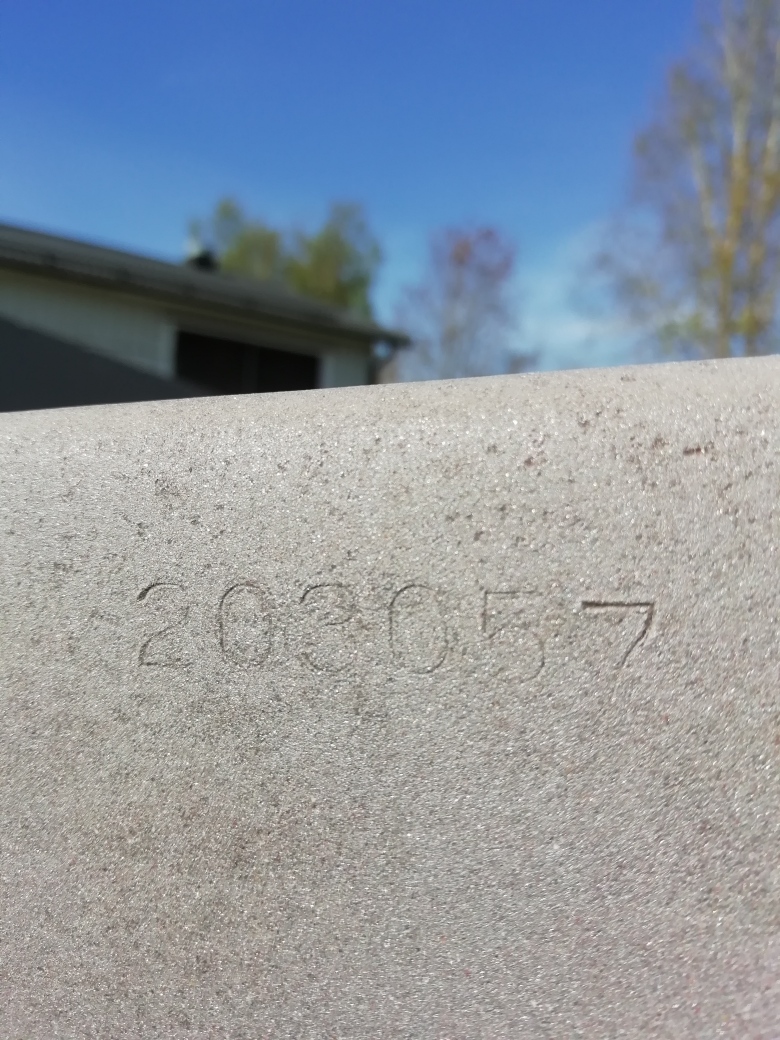
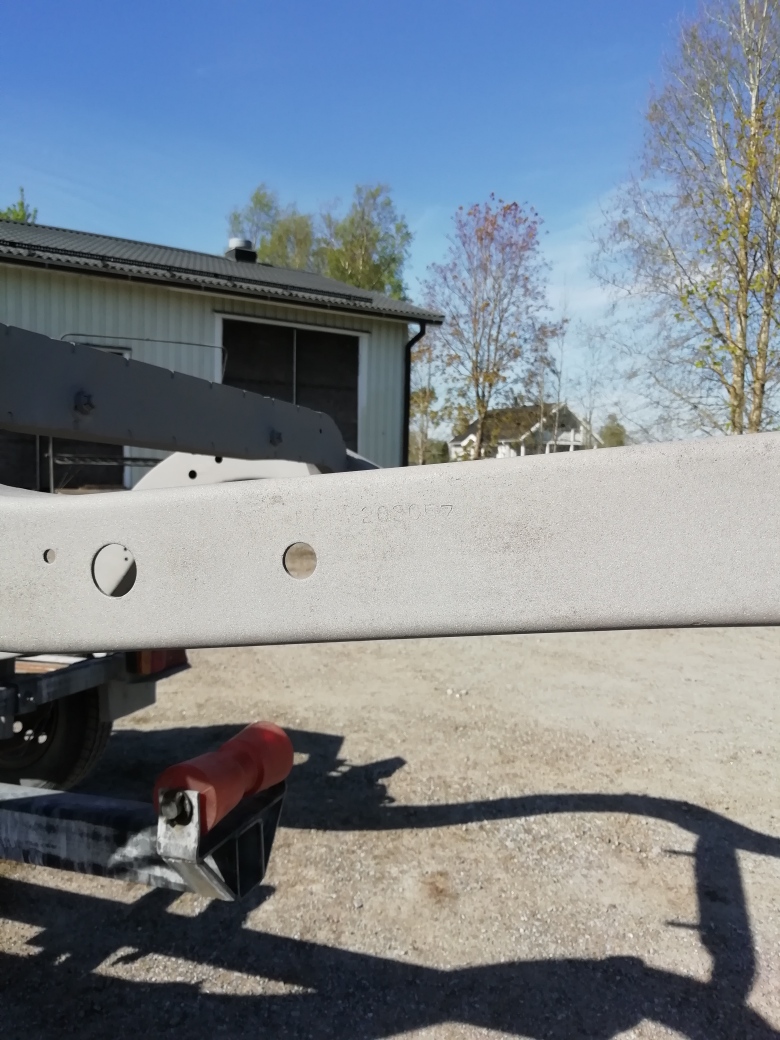
Location: Finland | Finally got the frame blasted. I examined it carefully and found the number 203057 on the left frame beam behind the rear axle . Suppose 57 is the year but 2030 I have no clue...
 (IMG_20220524_164231_resized_20220524_065124877.jpg) (IMG_20220524_164231_resized_20220524_065124877.jpg)
 (IMG_20220524_164238_resized_20220524_065124636.jpg) (IMG_20220524_164238_resized_20220524_065124636.jpg)
Attachments
----------------
IMG_20220524_164231_resized_20220524_065124877.jpg (379KB - 141 downloads)
IMG_20220524_164238_resized_20220524_065124636.jpg (315KB - 133 downloads)
|
|
| |
|
Expert 5K+
Posts: 9650
Location: So. Cal | That should correlate to your motor number. Check the motor to see what it says. |
|
| |
|
Elite Veteran
Posts: 649
Location: Finland | Unfortunately that motor is missing....a 318LA is going to fill that vacancy.
Would that original motor number have been KDS-2030 then ? |
|
| |
|
Expert 5K+
Posts: 9650
Location: So. Cal | Yes, probably, though I don't know much about '57 Dodges. |
|
| |
|
Elite Veteran
Posts: 649
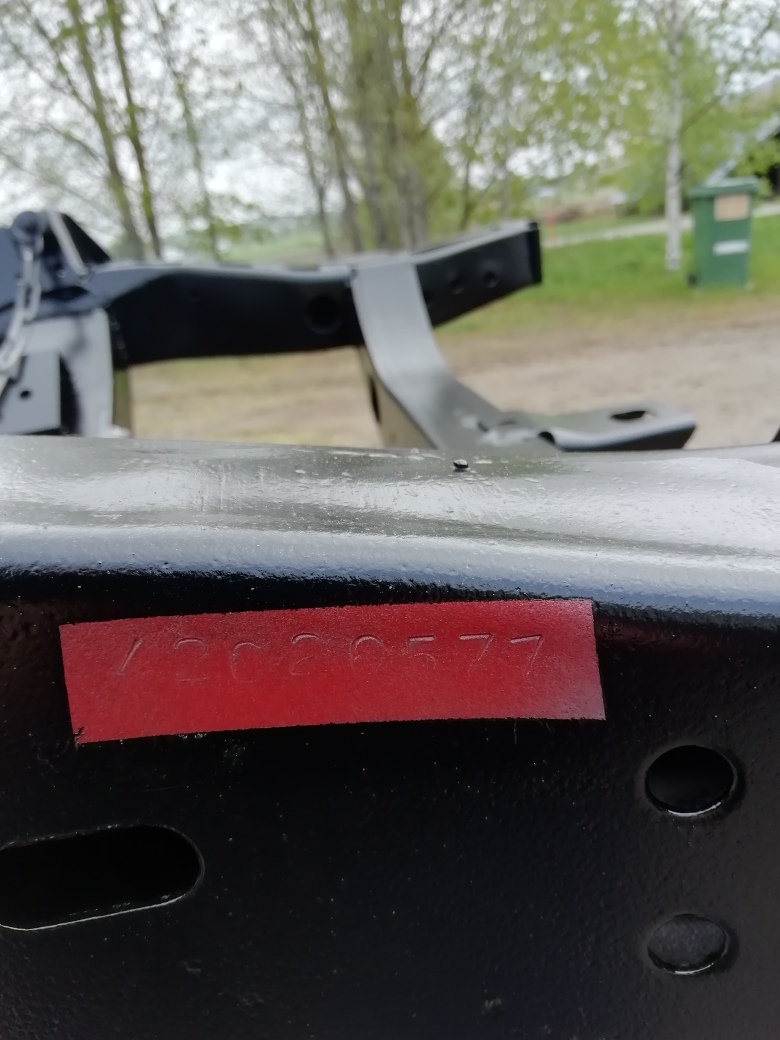
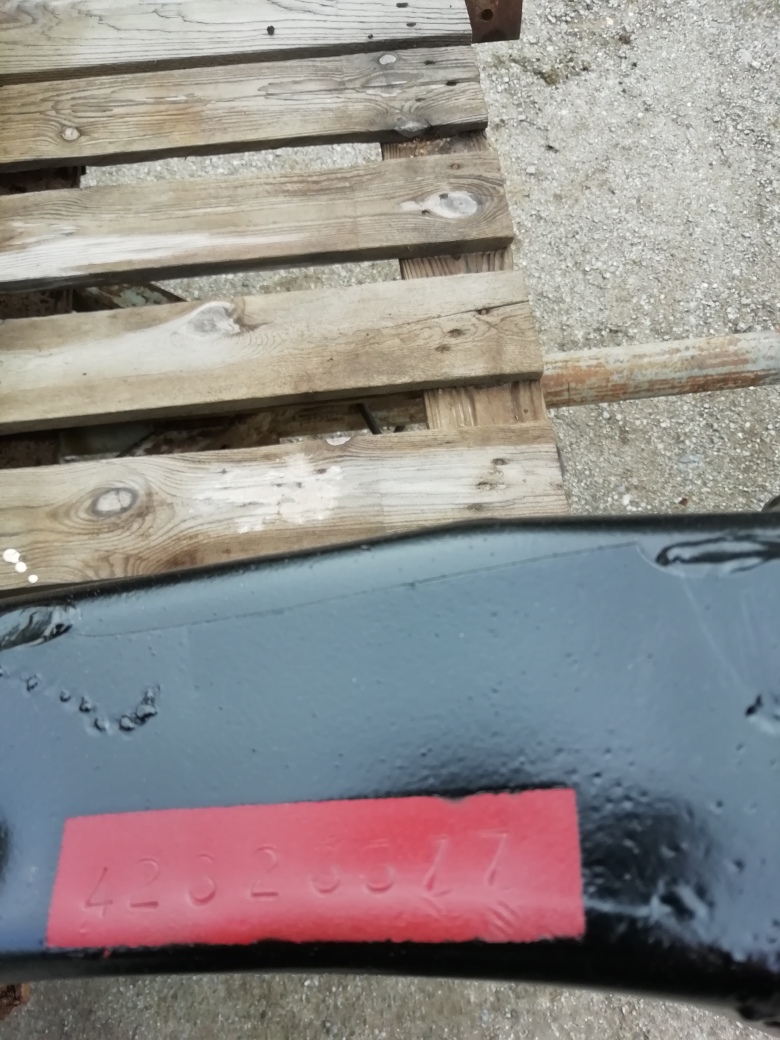
Location: Finland | The frame is finished in epoxy..
The red areas are where I have stamped the VIN , to be sure on two locations. In Finland the law requires a stamped VIN number.
Edited by 22mafeja 2022-05-27 12:18 AM
 (IMG_20220526_105445_resized_20220527_070616766.jpg) (IMG_20220526_105445_resized_20220527_070616766.jpg)
 (IMG_20220526_105451_resized_20220527_070616172.jpg) (IMG_20220526_105451_resized_20220527_070616172.jpg)
 (IMG_20220526_105436_resized_20220527_070615886.jpg) (IMG_20220526_105436_resized_20220527_070615886.jpg)
Attachments
----------------
IMG_20220526_105445_resized_20220527_070616766.jpg (215KB - 127 downloads)
IMG_20220526_105451_resized_20220527_070616172.jpg (269KB - 124 downloads)
IMG_20220526_105436_resized_20220527_070615886.jpg (367KB - 132 downloads)
|
|
| |
|
Elite Veteran
Posts: 649
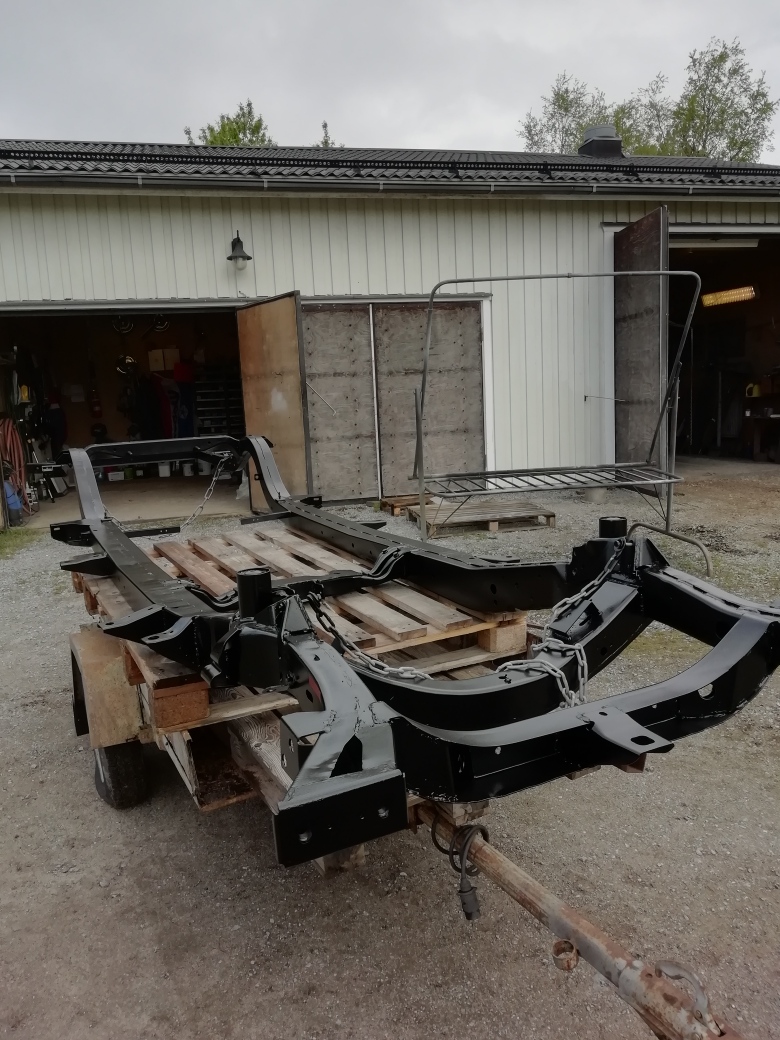
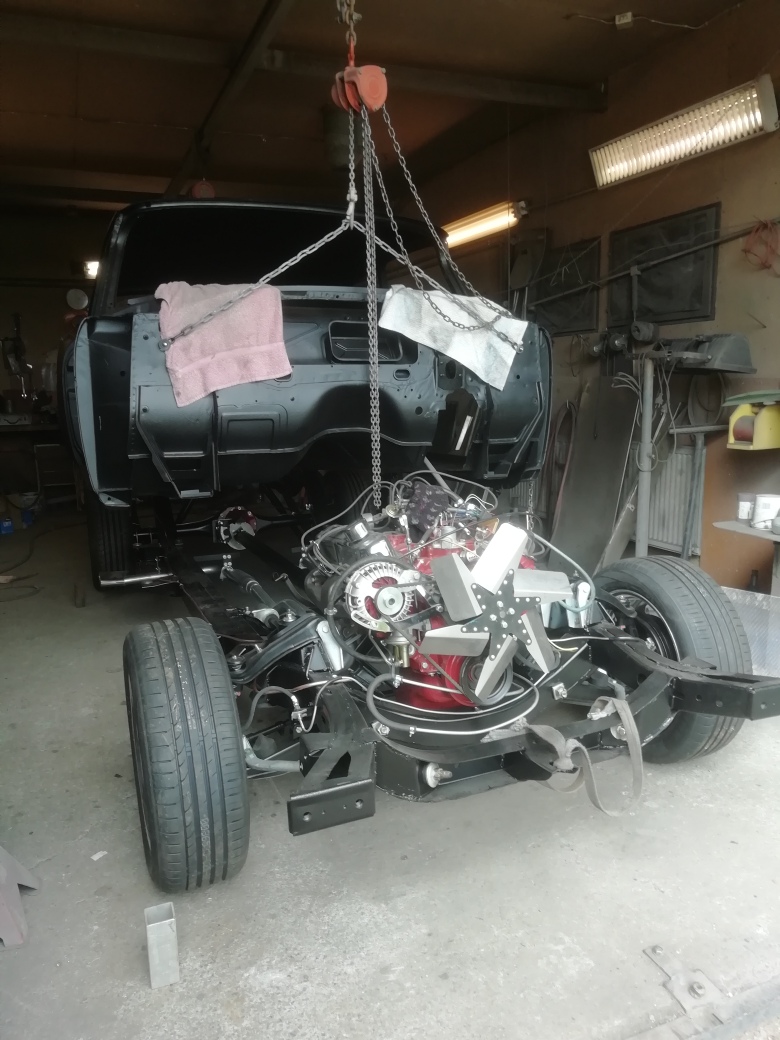
Location: Finland | The chassis is soon ready. Next week will the engine and transmission get installed.
 (IMG_20220623_132939_resized_20220623_081523502.jpg) (IMG_20220623_132939_resized_20220623_081523502.jpg)
 (IMG_20220623_132957_resized_20220623_081523252.jpg) (IMG_20220623_132957_resized_20220623_081523252.jpg)
 (IMG_20220623_133009_resized_20220623_081522979.jpg) (IMG_20220623_133009_resized_20220623_081522979.jpg)
 (IMG_20220623_133020_resized_20220623_081522682.jpg) (IMG_20220623_133020_resized_20220623_081522682.jpg)
 (IMG_20220623_133038_resized_20220623_081522333.jpg) (IMG_20220623_133038_resized_20220623_081522333.jpg)
Attachments
----------------
IMG_20220623_132939_resized_20220623_081523502.jpg (301KB - 129 downloads)
IMG_20220623_132957_resized_20220623_081523252.jpg (226KB - 124 downloads)
IMG_20220623_133009_resized_20220623_081522979.jpg (263KB - 127 downloads)
IMG_20220623_133020_resized_20220623_081522682.jpg (300KB - 123 downloads)
IMG_20220623_133038_resized_20220623_081522333.jpg (258KB - 130 downloads)
|
|
| |
|
Elite Veteran
Posts: 649
Location: Finland | Wheels..
 (IMG_20220624_113323_resized_20220624_060147294.jpg) (IMG_20220624_113323_resized_20220624_060147294.jpg)
Attachments
----------------
IMG_20220624_113323_resized_20220624_060147294.jpg (299KB - 129 downloads)
|
|
| |
|
Elite Veteran
Posts: 649
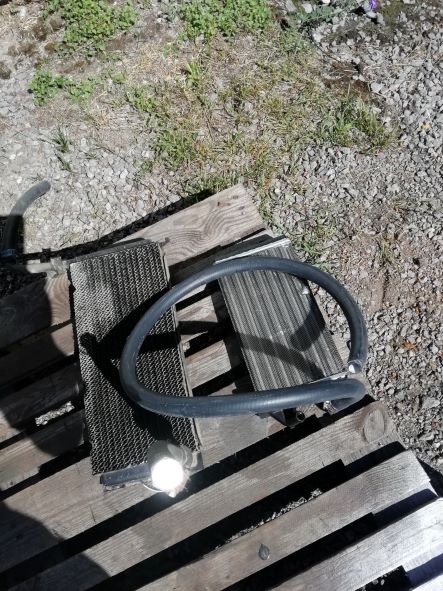
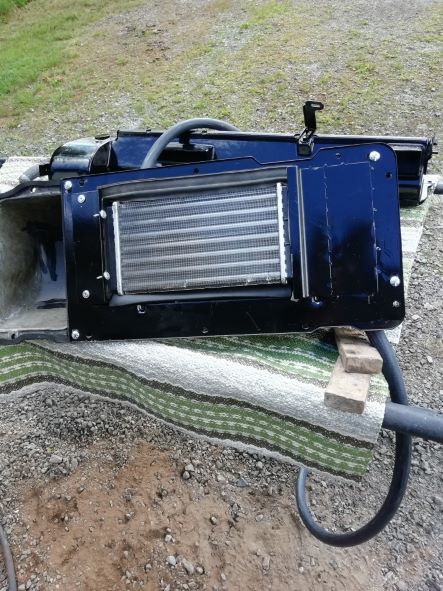
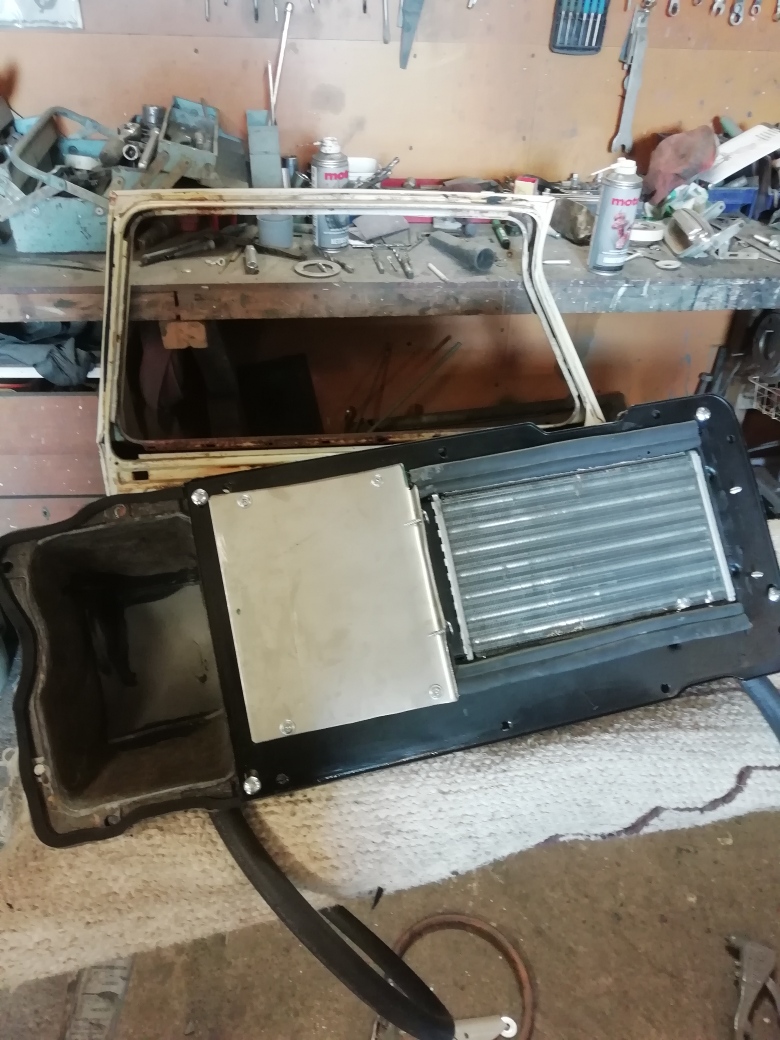
Location: Finland | Before...after...hmm the pictures got loaded in wrong order so now it looks like I first repaired them and then broke them...
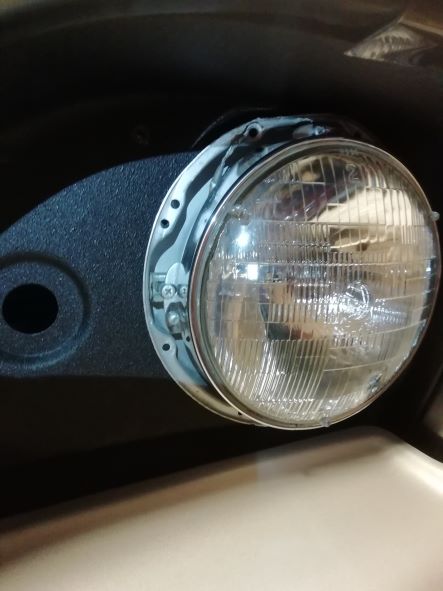
The pictures show the 25 usd core I fitted into the model 705 heater housing...I just could not pay the price of a correct core...darned pirates.
Edited by 22mafeja 2022-07-14 7:20 AM
 (IMG_20220714_093356_resized_20220714_095227732.jpg) (IMG_20220714_093356_resized_20220714_095227732.jpg)
 (IMG_20220713_161349_resized_20220714_095228007 fwl.jpg) (IMG_20220713_161349_resized_20220714_095228007 fwl.jpg)
Attachments
----------------
IMG_20220714_093356_resized_20220714_095227732.jpg (346KB - 120 downloads)
IMG_20220713_161349_resized_20220714_095228007 fwl.jpg (80KB - 120 downloads)
|
|
| |
|
Elite Veteran
Posts: 649
Location: Finland | The chassis is getting ready soon...
 (IMG_20220714_121016_resized_20220714_020906687.jpg) (IMG_20220714_121016_resized_20220714_020906687.jpg)
 (IMG_20220714_120952_resized_20220714_020907276.jpg) (IMG_20220714_120952_resized_20220714_020907276.jpg)
 (IMG_20220714_112004_resized_20220714_020908207.jpg) (IMG_20220714_112004_resized_20220714_020908207.jpg)
 (IMG_20220714_111953_resized_20220714_020908474fwl.jpg) (IMG_20220714_111953_resized_20220714_020908474fwl.jpg)
 (IMG_20220714_113454_resized_20220714_020907572fwl.jpg) (IMG_20220714_113454_resized_20220714_020907572fwl.jpg)
Attachments
----------------
IMG_20220714_121016_resized_20220714_020906687.jpg (367KB - 127 downloads)
IMG_20220714_120952_resized_20220714_020907276.jpg (341KB - 120 downloads)
IMG_20220714_112004_resized_20220714_020908207.jpg (380KB - 117 downloads)
IMG_20220714_111953_resized_20220714_020908474fwl.jpg (89KB - 116 downloads)
IMG_20220714_113454_resized_20220714_020907572fwl.jpg (76KB - 113 downloads)
|
|
| |
|
Elite Veteran
Posts: 649
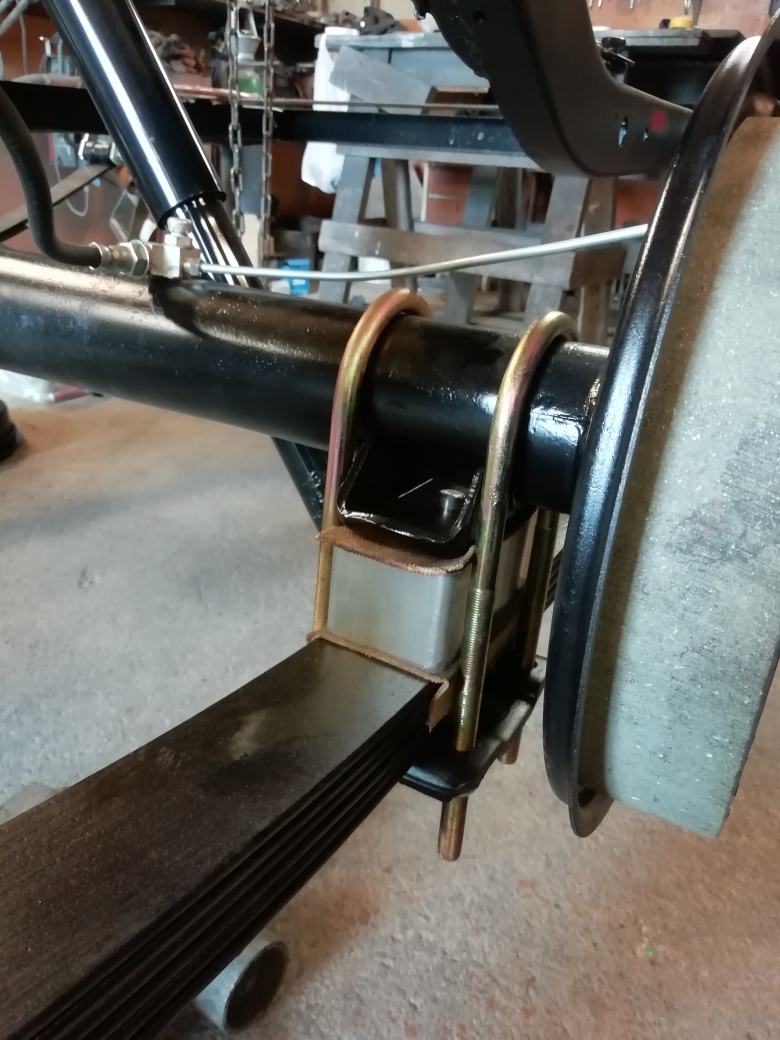
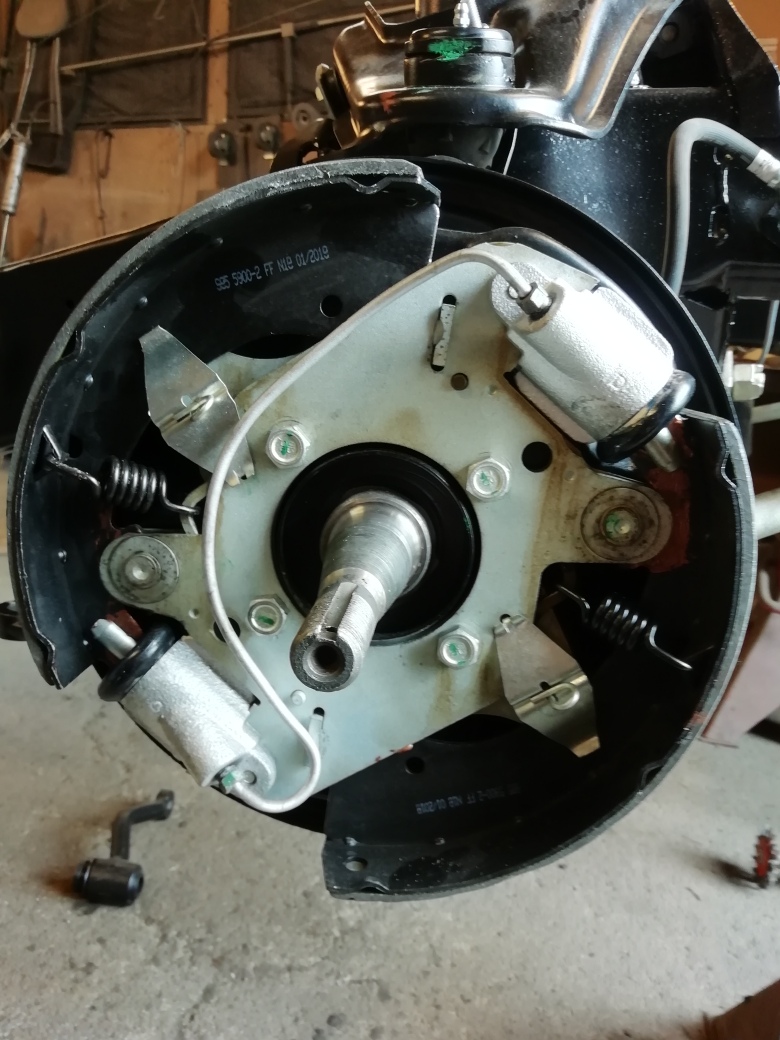
Location: Finland | My parking brake is progressing. It might even be good...I am going to connect the original cable to it.
 (IMG_20220714_163020_resized_20220714_044954092fwl.jpg) (IMG_20220714_163020_resized_20220714_044954092fwl.jpg)
 (IMG_20220714_162959_resized_20220714_044954417fwl.jpg) (IMG_20220714_162959_resized_20220714_044954417fwl.jpg)
Attachments
----------------
IMG_20220714_163020_resized_20220714_044954092fwl.jpg (75KB - 123 downloads)
IMG_20220714_162959_resized_20220714_044954417fwl.jpg (63KB - 127 downloads)
|
|
| |
|
Elite Veteran
Posts: 649
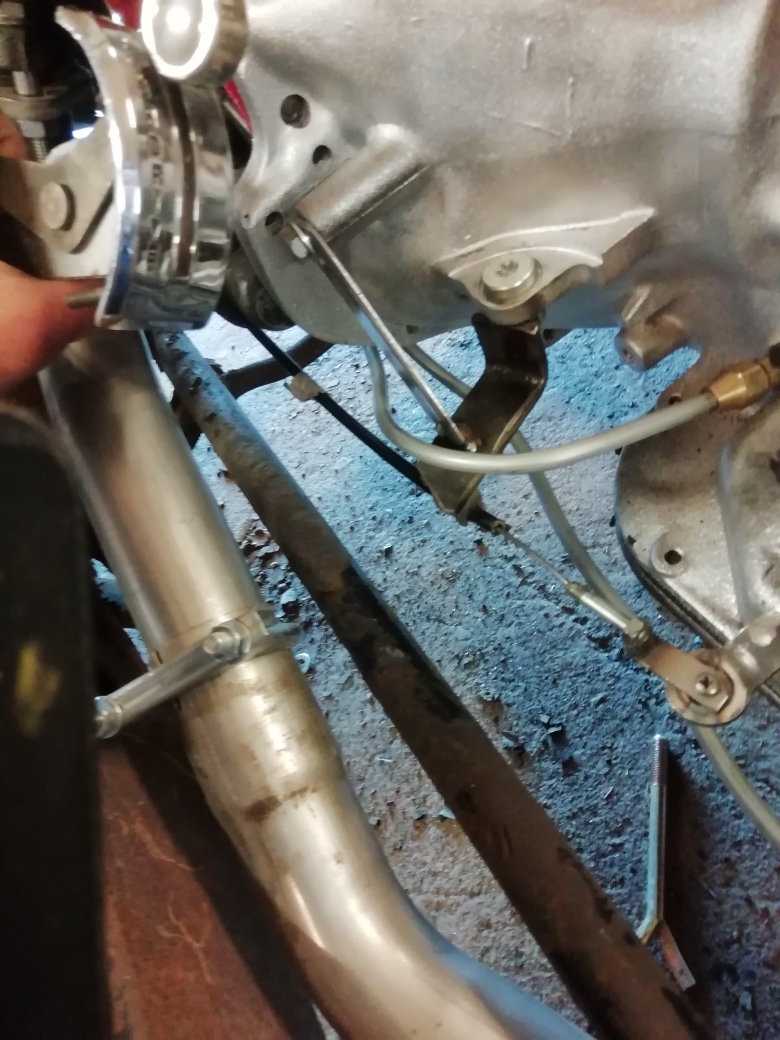
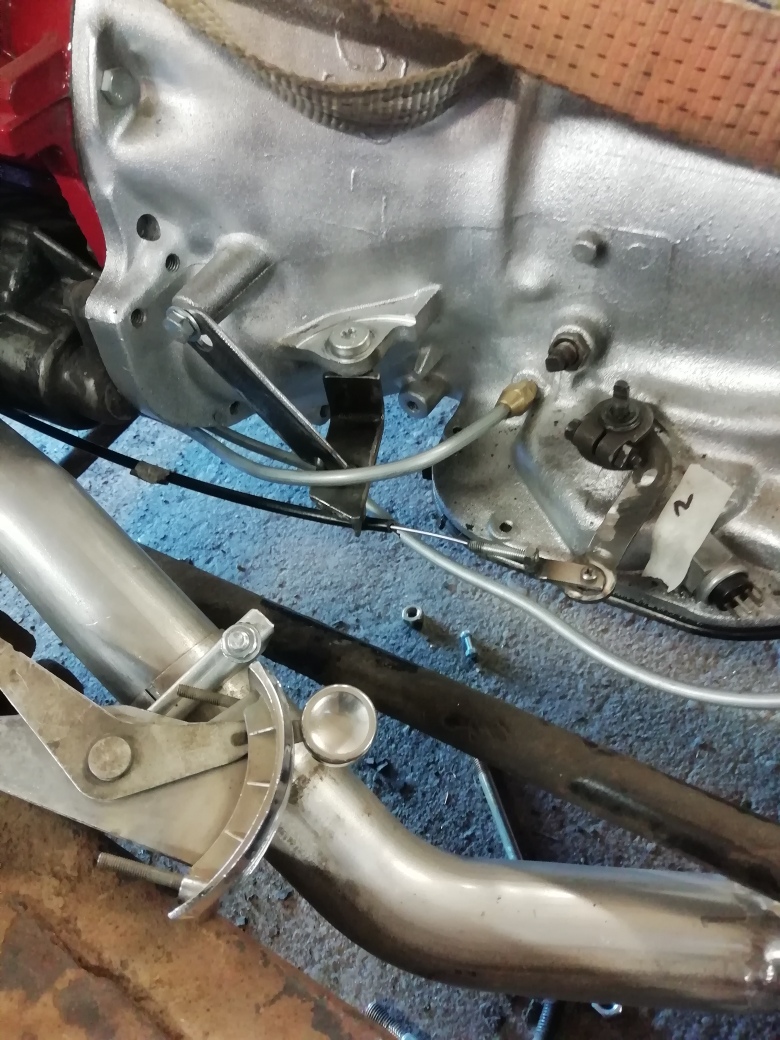
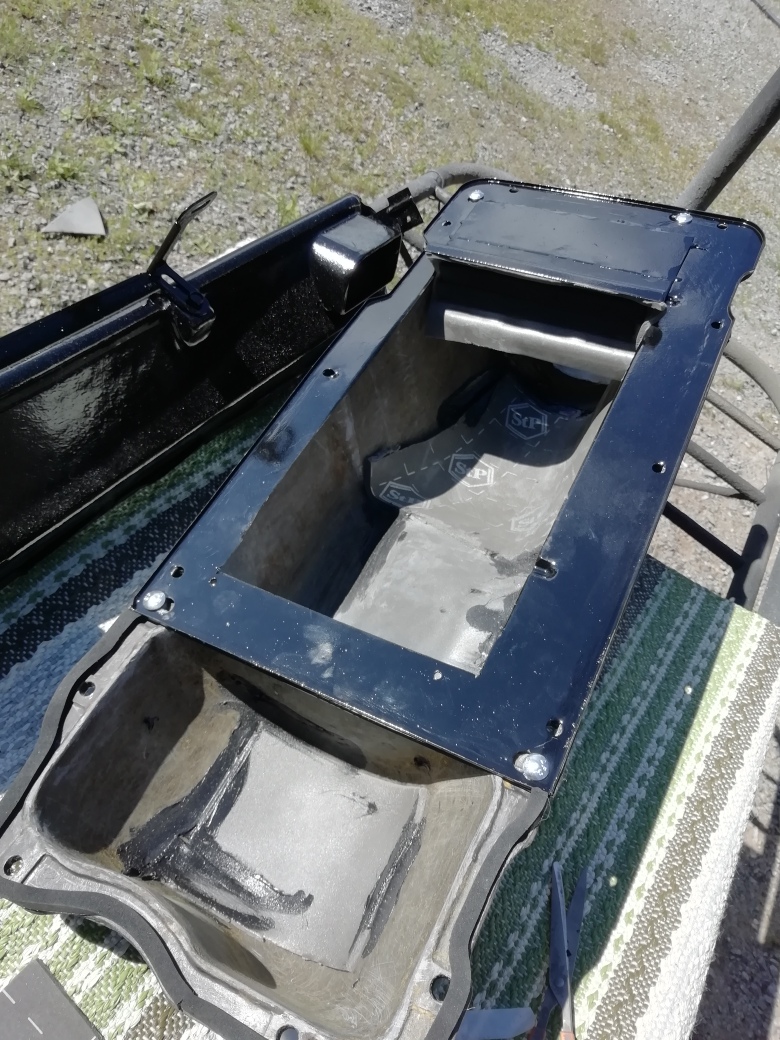
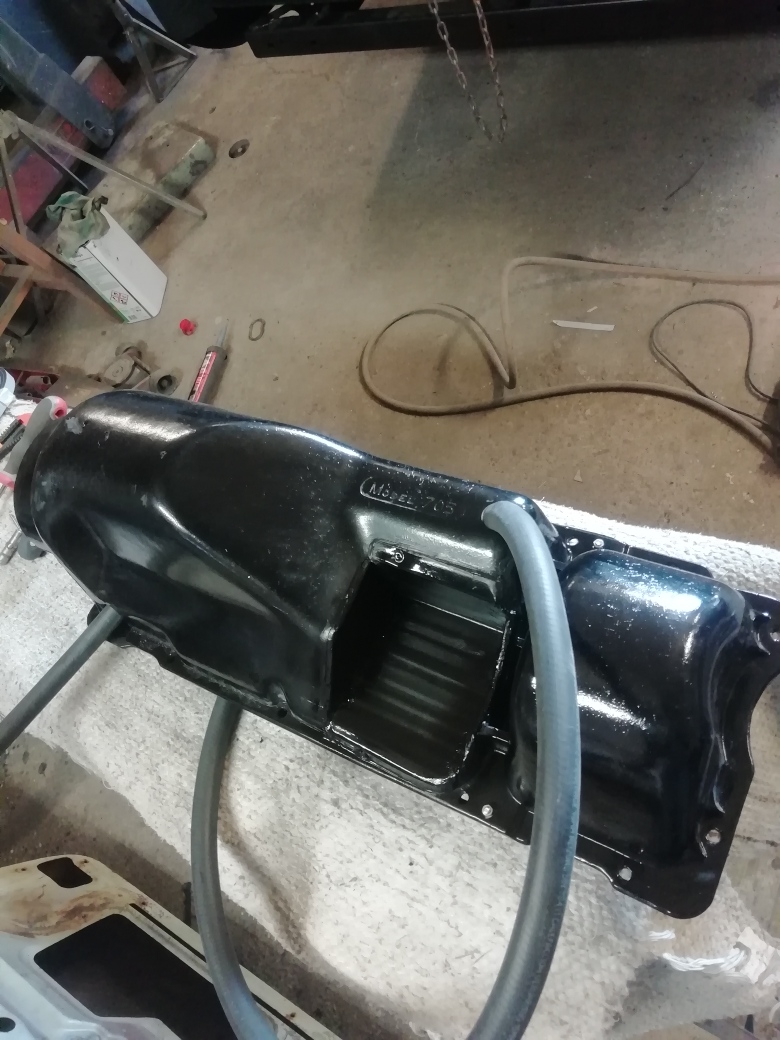
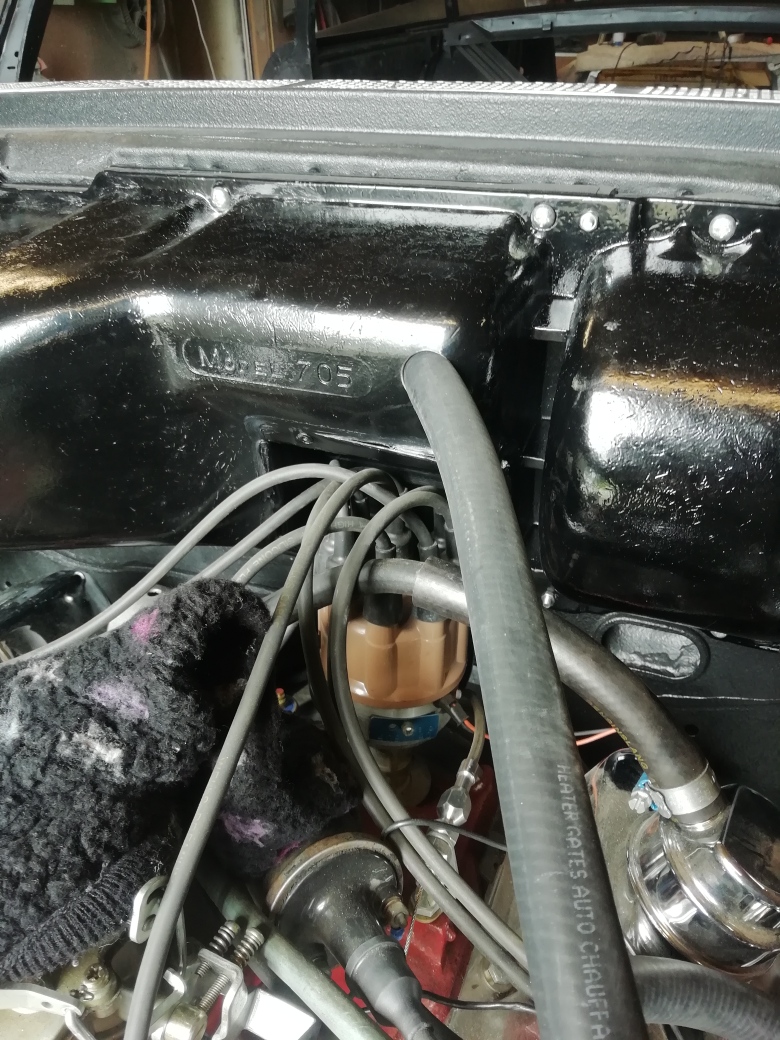
Location: Finland | The heater box was ready with the core inside but I didn`t dare attach it to the firewall before re marrying the body and the chassis. Thus I have installed a LA 318 and TF904
and it should be room enough. I have the right oil pan and 15mm between the crossbeam and the pan. Ouch...I had to take a big chunk of the heater box for the original sized distributor.
The engine angle is almost zero so I had no other option.
The parking brake cable system seems to work nicely now , I am a little concerned about what happens if I apply the e brake hard when the car is rolling..it might
bend then.
 (IMG_20220716_133558_resized_20220718_021435057.jpg) (IMG_20220716_133558_resized_20220718_021435057.jpg)
 (IMG_20220716_133609_resized_20220718_021434779.jpg) (IMG_20220716_133609_resized_20220718_021434779.jpg)
 (IMG_20220716_133615_resized_20220718_021434496.jpg) (IMG_20220716_133615_resized_20220718_021434496.jpg)
 (IMG_20220716_151223_resized_20220718_021434265.jpg) (IMG_20220716_151223_resized_20220718_021434265.jpg)
 (IMG_20220718_105955_resized_20220718_021434008.jpg) (IMG_20220718_105955_resized_20220718_021434008.jpg)
 (IMG_20220718_110257_resized_20220718_021433766.jpg) (IMG_20220718_110257_resized_20220718_021433766.jpg)
 (IMG_20220718_140318_resized_20220718_021433493.jpg) (IMG_20220718_140318_resized_20220718_021433493.jpg)
 (IMG_20220718_140326_resized_20220718_021433195.jpg) (IMG_20220718_140326_resized_20220718_021433195.jpg)
Attachments
----------------
IMG_20220716_133558_resized_20220718_021435057.jpg (427KB - 119 downloads)
IMG_20220716_133609_resized_20220718_021434779.jpg (420KB - 121 downloads)
IMG_20220716_133615_resized_20220718_021434496.jpg (412KB - 125 downloads)
IMG_20220716_151223_resized_20220718_021434265.jpg (258KB - 119 downloads)
IMG_20220718_105955_resized_20220718_021434008.jpg (305KB - 112 downloads)
IMG_20220718_110257_resized_20220718_021433766.jpg (296KB - 114 downloads)
IMG_20220718_140318_resized_20220718_021433493.jpg (418KB - 118 downloads)
IMG_20220718_140326_resized_20220718_021433195.jpg (361KB - 122 downloads)
|
|
| |
|
Expert 5K+
Posts: 9650
Location: So. Cal | You couldn't mount the engine further forward? The distributor location isn't much different between the LA 318 and the stock motor. |
|
| |
|
Elite Veteran
Posts: 649
Location: Finland | Well I got one fingertip in between the oil pan and the cross beam..the block is a 1983 one with a 1964-69 passenger car pan ..that is what I have been told.
Edited by 22mafeja 2022-07-20 4:22 AM
 (LA 318 oljetrrrgfwl.jpg) (LA 318 oljetrrrgfwl.jpg)
Attachments
----------------
LA 318 oljetrrrgfwl.jpg (59KB - 121 downloads)
|
|
| |
|
Elite Veteran
Posts: 649
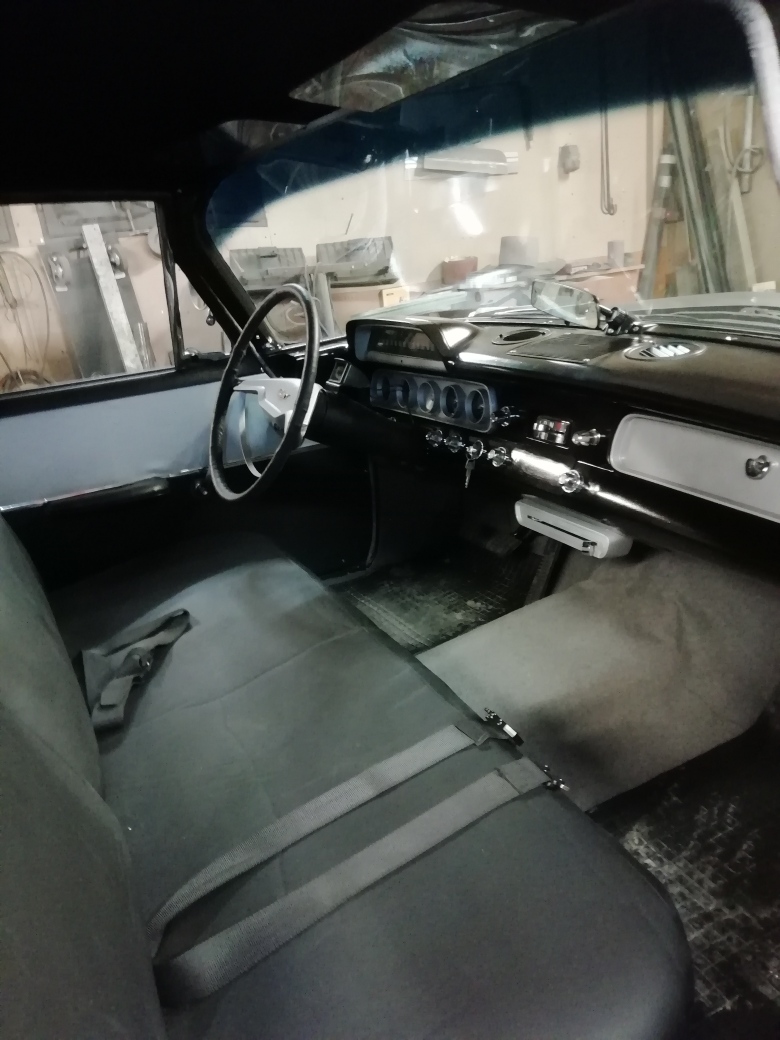
Location: Finland | Very little has been done lately but:
-dash is completed with steering column
-wiring is gone through and everything electrical works
-engine bay is completed , almost...
-engine installation is ok
-the new handbrake is installed but not fully tested
-the custom made gear selector is adjusted and works nicely!
-the new and cheap heater core and valve are working nicely as it seems
-the headliner is repaired (new from newstalgiaparts on ebay) and installed
The line pressure of the tf904 is lost....bought a fully repaired transmission but we got unlucky. The seller is taking full responsibility fot it
so he is sending a refurbished valve body as next step. |
|
| |
|
Elite Veteran
Posts: 649
Location: Finland | Windshield and rear glass got installed.....this is a some sticky business. I put one 310ml tube of butyl sealing compound per each glass. I have learned that
only too much is enough if you want a (almost)water tight car.
The clips were made of stainless sheet metal . The seals were made of universal rubber seal with locking strip. Worked nicely.
Edited by 22mafeja 2022-10-14 3:25 PM
 (IMG_20221011_131658_resized_20221014_080350295.jpg) (IMG_20221011_131658_resized_20221014_080350295.jpg)
 (IMG_20221014_160854_resized_20221014_080349941.jpg) (IMG_20221014_160854_resized_20221014_080349941.jpg)
Attachments
----------------
IMG_20221011_131658_resized_20221014_080350295.jpg (251KB - 90 downloads)
IMG_20221014_160854_resized_20221014_080349941.jpg (399KB - 88 downloads)
|
|
| |
|
Elite Veteran
Posts: 649
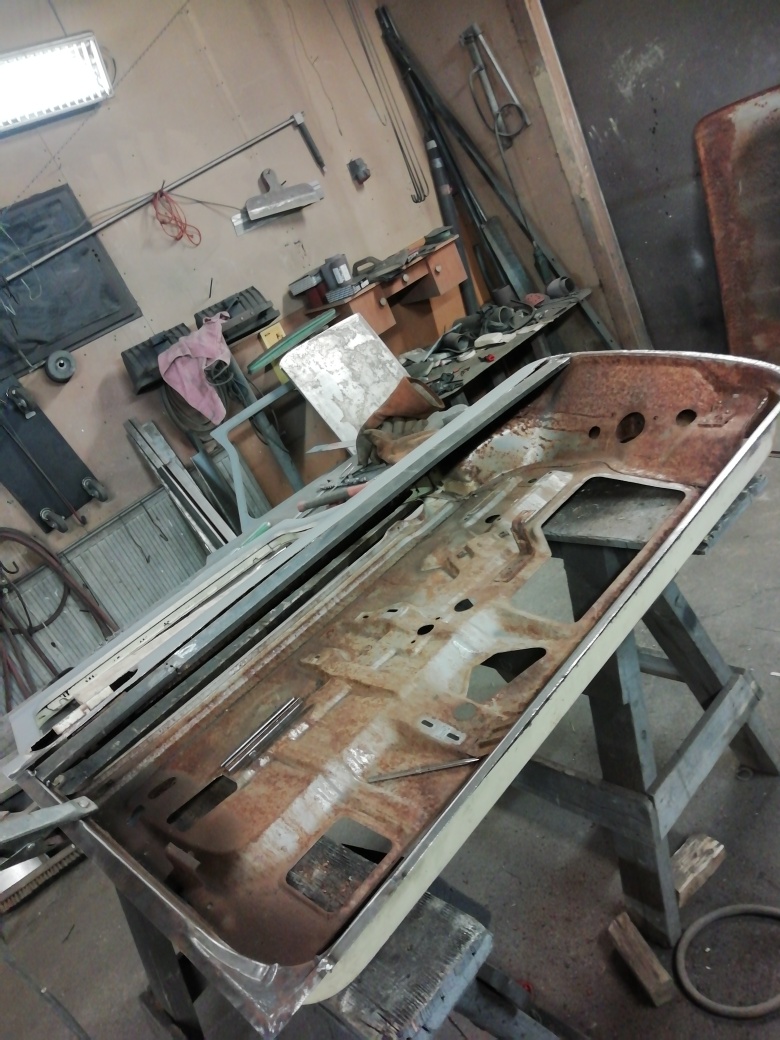
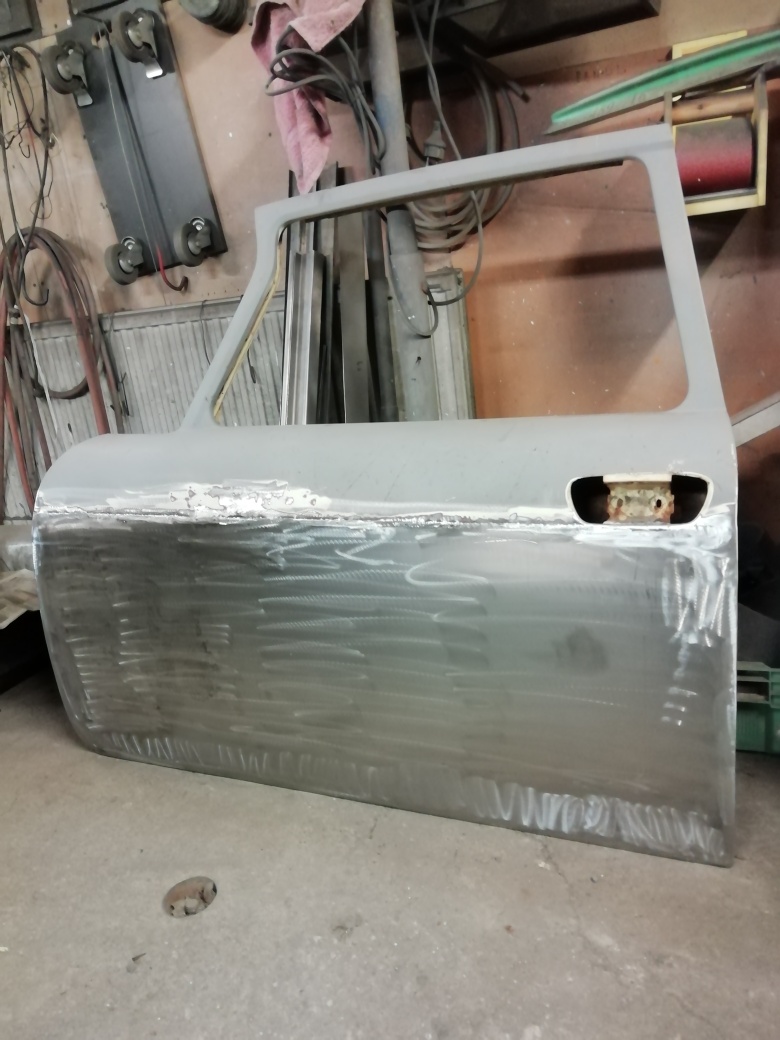
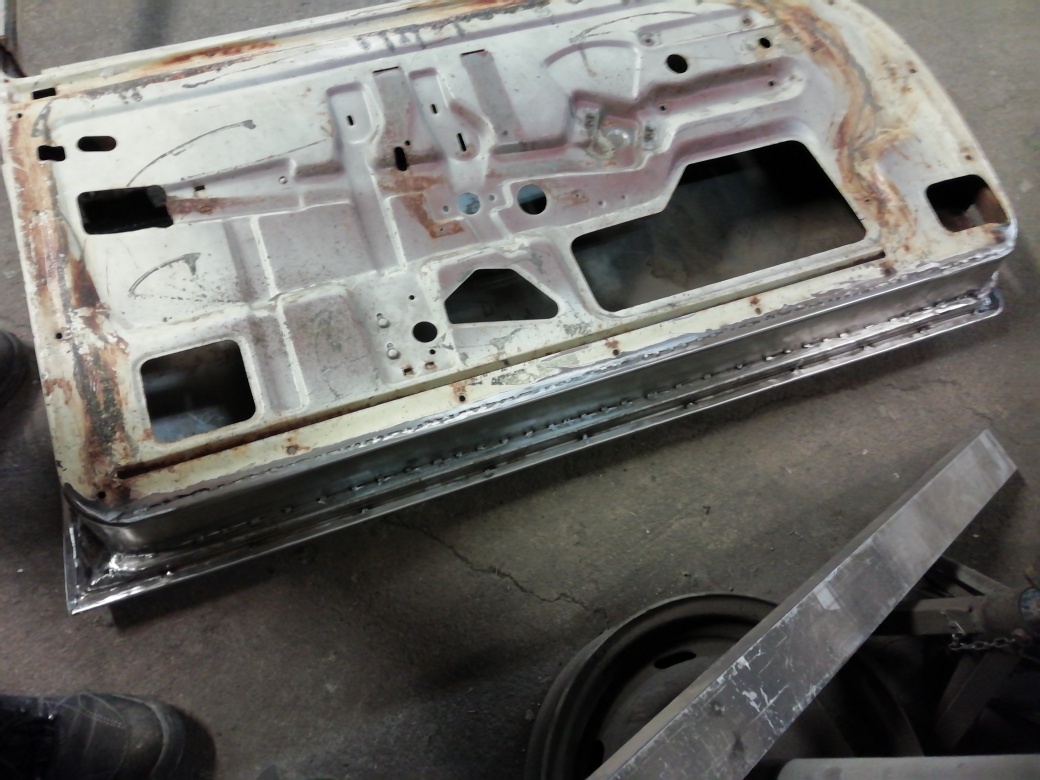
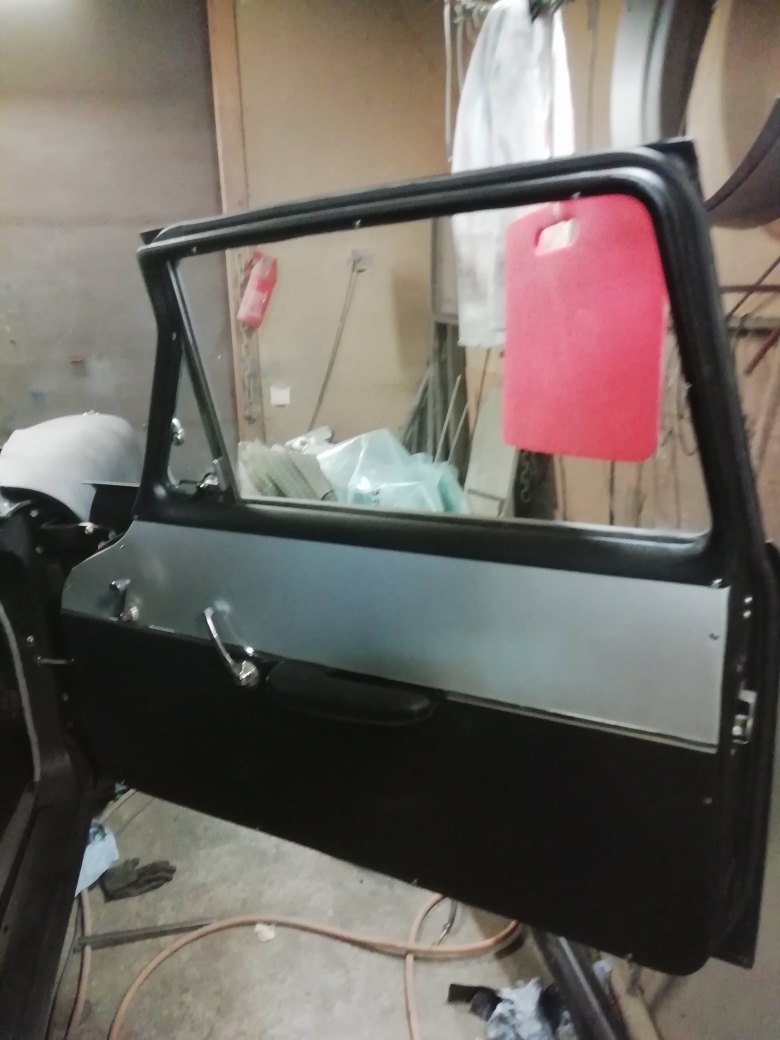
Location: Finland | The doors are getting some new sheet metal..
One done and tomorrow is the other ready too.
The skins were too banged and streched and rusted to be used. Better to make completely new skins and edges.
Only with the skins away you get to the rust between the triple sheet metal flange. And it is there even on very fine specimens...
The hefty flat bar is removed after the long seam is welded.
 (IMG_20221108_163007_resized_20221108_064159024.jpg) (IMG_20221108_163007_resized_20221108_064159024.jpg)
 (IMG_20221108_163034_resized_20221108_064158804.jpg) (IMG_20221108_163034_resized_20221108_064158804.jpg)
 (IMG_20221108_163055_resized_20221108_064158540.jpg) (IMG_20221108_163055_resized_20221108_064158540.jpg)
Attachments
----------------
IMG_20221108_163007_resized_20221108_064159024.jpg (270KB - 87 downloads)
IMG_20221108_163034_resized_20221108_064158804.jpg (194KB - 84 downloads)
IMG_20221108_163055_resized_20221108_064158540.jpg (233KB - 80 downloads)
|
|
| |
|
Expert 5K+
Posts: 9899
Location: Lower Mainland BC | .
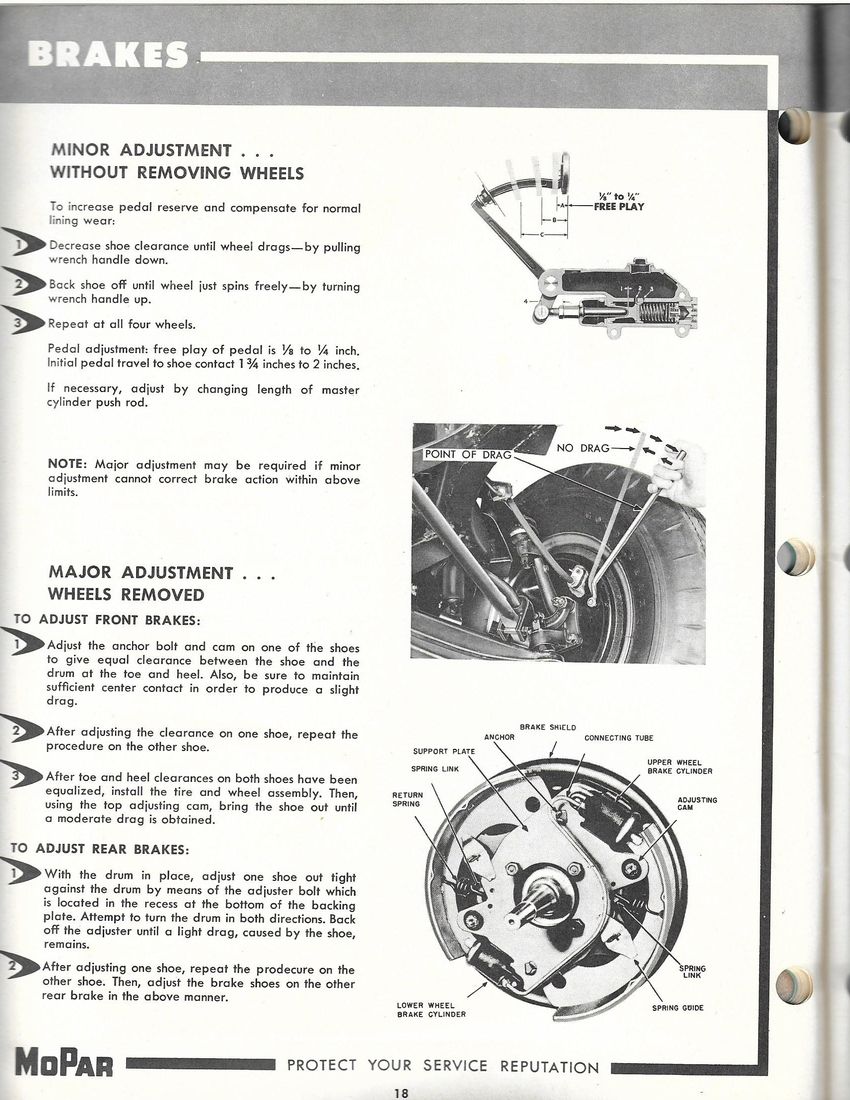
Ralf: All excellent work, as usual. Looking good. 
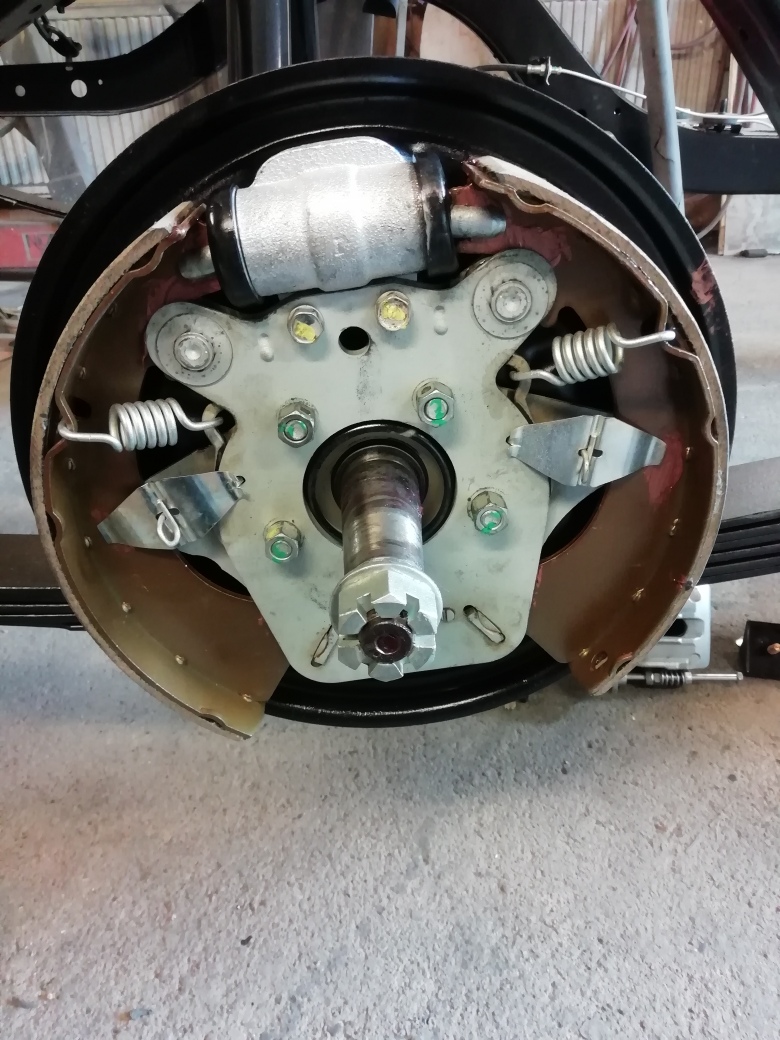
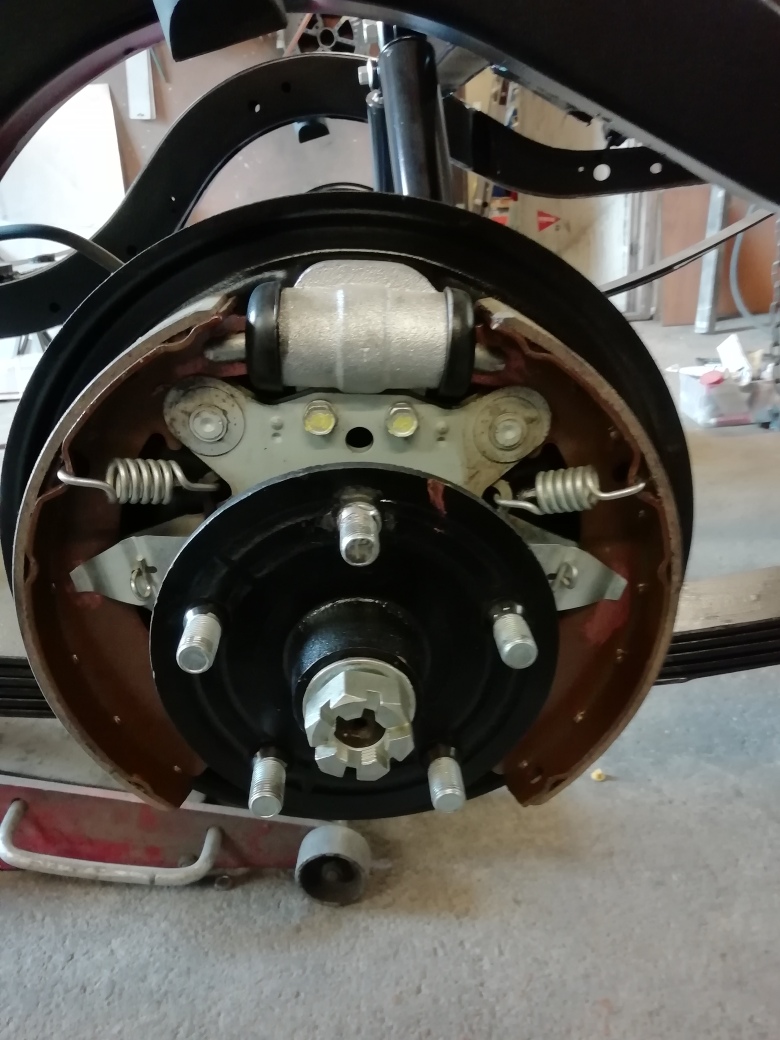
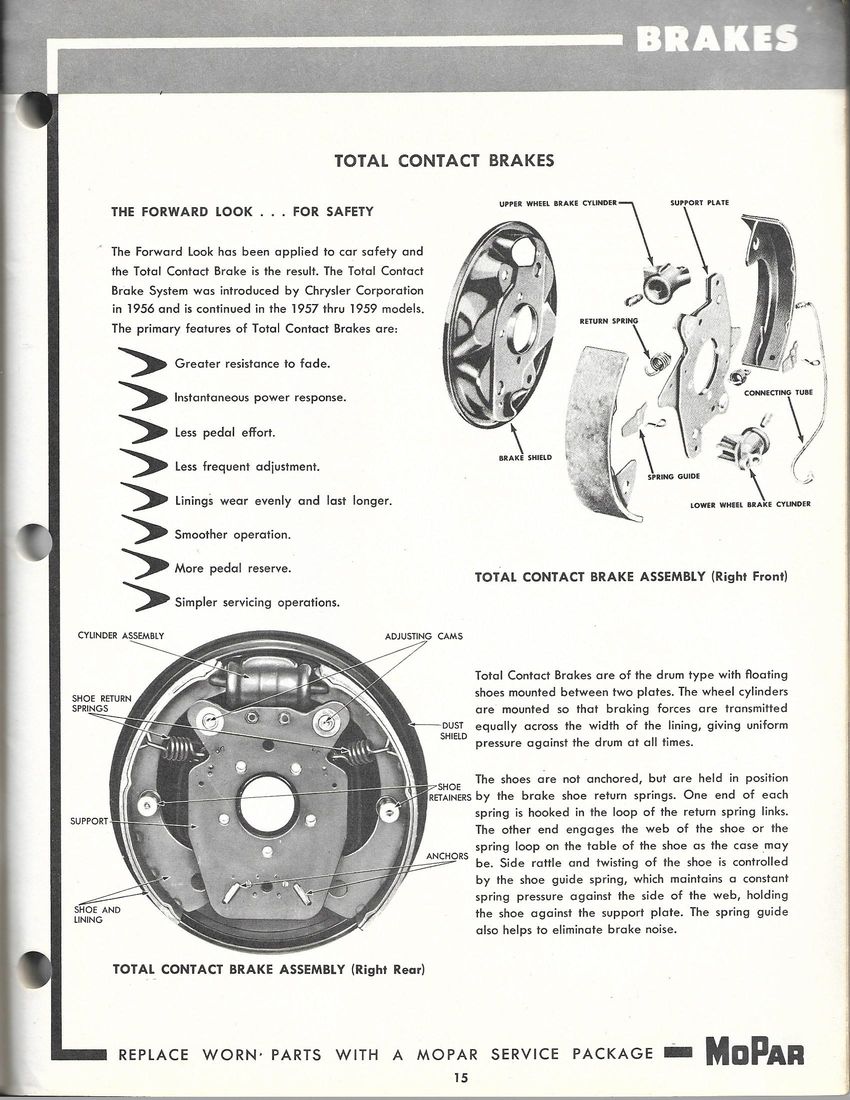
One thing that I noticed today/missed before was how you have attached the brake shoe return springs on your front brakes. While I think your rear brake return springs are correctly attached to the loops on the shoes, I think that it wrong for the front brakes. I believe that the front return springs should be attached to the hole in the web, not the loops.
I don't want to be critical but I don't want you to have a brake issue either (sorry):
Yours:

Mine:

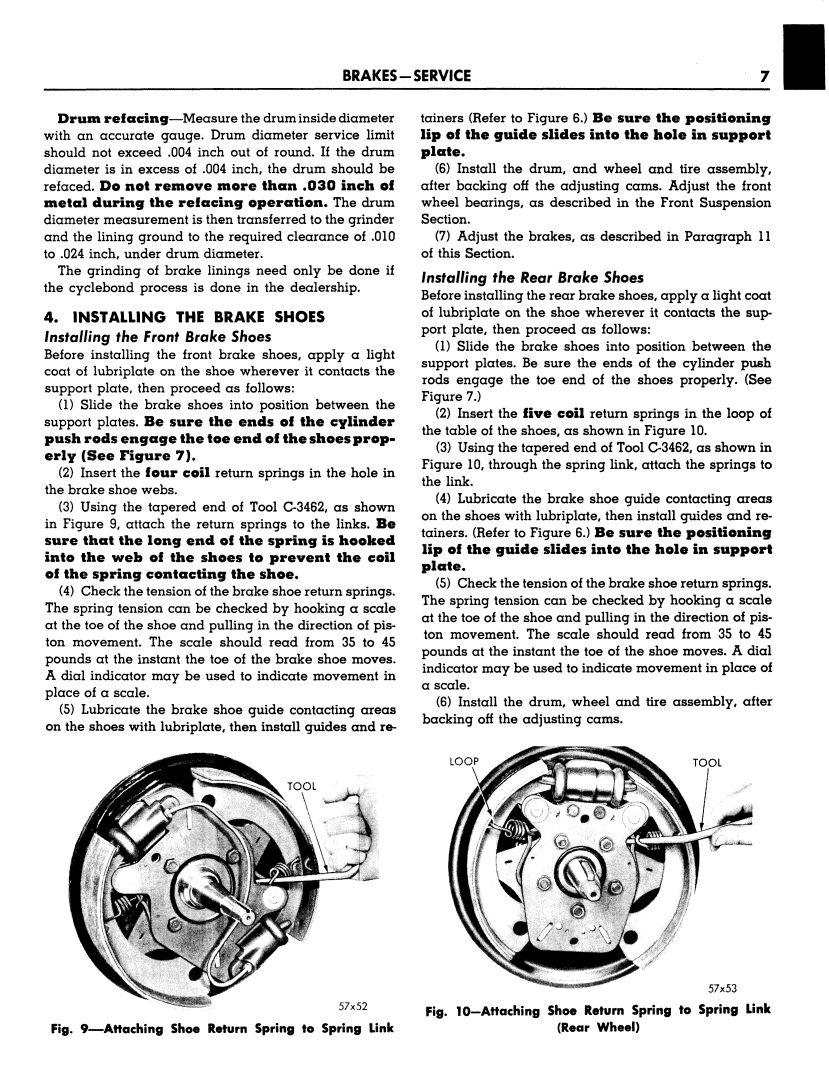
What the factory says:
Edited by 56D500boy 2022-11-08 7:29 PM
 (ReplacementPartsAndServiceGuide_Pg18.jpg) (ReplacementPartsAndServiceGuide_Pg18.jpg)
 (ReplacementPartsAndServiceGuide_Pg15.jpg) (ReplacementPartsAndServiceGuide_Pg15.jpg)
 (ReplacementPartsAndServiceGuide_Pg16.jpg) (ReplacementPartsAndServiceGuide_Pg16.jpg)
Attachments
----------------
ReplacementPartsAndServiceGuide_Pg18.jpg (186KB - 84 downloads)
ReplacementPartsAndServiceGuide_Pg15.jpg (163KB - 72 downloads)
ReplacementPartsAndServiceGuide_Pg16.jpg (198KB - 75 downloads)
|
|
| |
|
Elite Veteran
Posts: 649
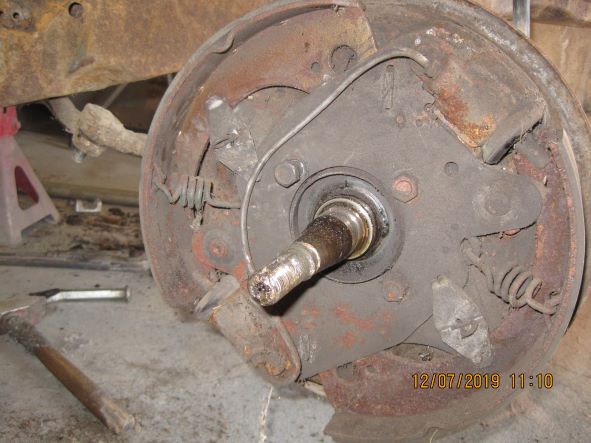
Location: Finland | Thanks Dave, I appreciate that you told me what you noticed. However they seem to have hooked the springs both ways on the front axle.
I didn`t find the pics I took of the Coronet front brakes before I disassembled them but the ones I took of the Desoto 58 front brakes says so.
This proves at least that it doesn`t disturb the function of the brakes.
You have eagle eyes Dave!
 (IMG_3438 fwl.JPG) (IMG_3438 fwl.JPG)
Attachments
----------------
IMG_3438 fwl.JPG (49KB - 75 downloads)
|
|
| |
|
Expert 5K+
Posts: 9899
Location: Lower Mainland BC | .
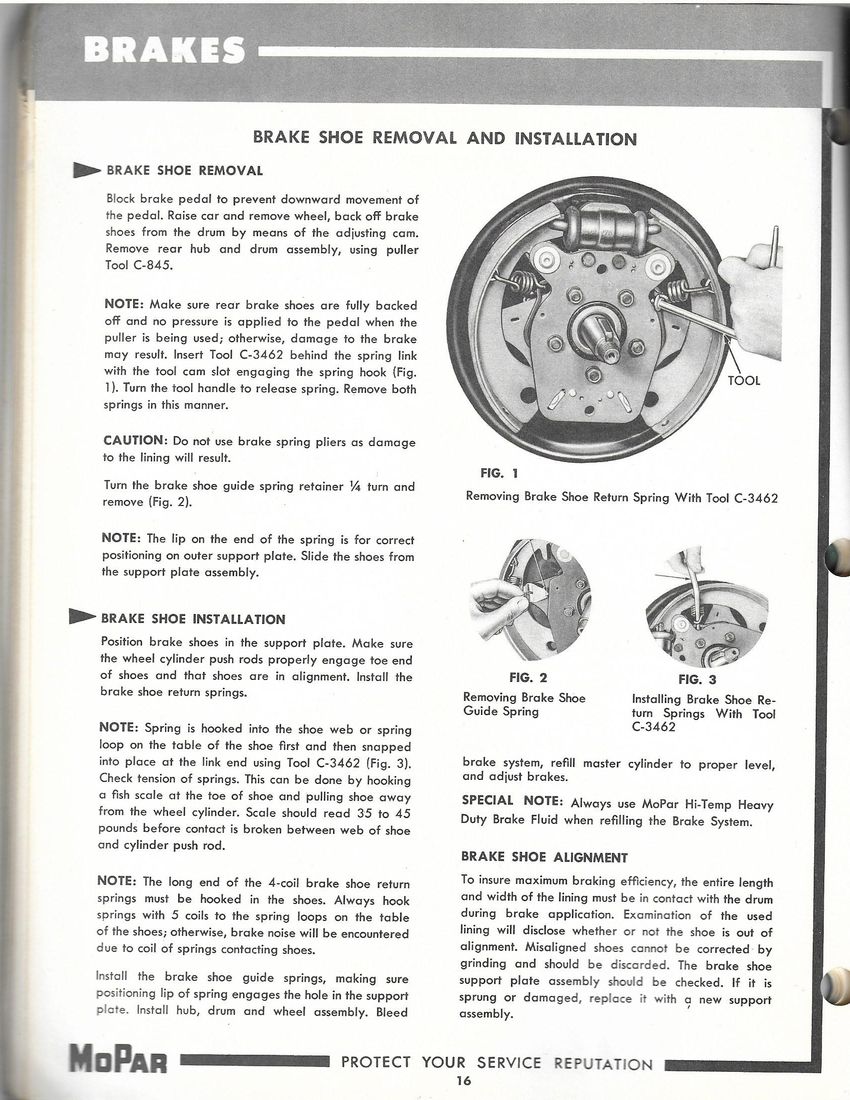
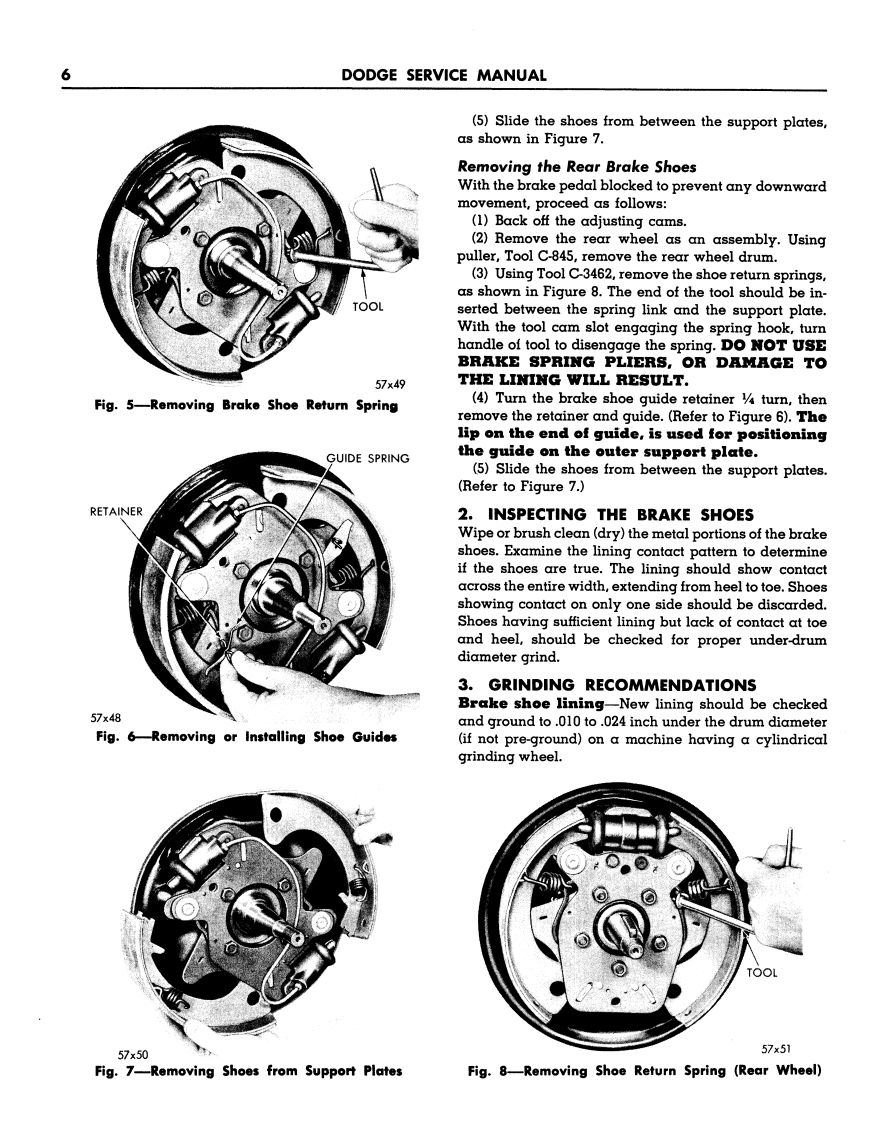
Ralf: The 57 Dodge Center Plane/Total Contact brake return springs are different front and rear in the number of coils *AND* their attachment points.
The fronts have springs with 4 coils that are attached to the web of the shoes. (You have springs with 5 coils attached to the loops, not the webs)
The rears have springs with 5 coils that are attached to the loops on the edge of the shoes. (You're good on the rears)
From the 57 Dodge Factory Service Manual (FSM), pgs 6 and 7
(I just want you to be safe (and not sorry) )
Edited by 56D500boy 2022-11-10 10:51 AM
 (57DodgeServiceManual_Brakes_pg6.jpg) (57DodgeServiceManual_Brakes_pg6.jpg)
 (57DodgeServiceManual_Brakes_pg7.jpg) (57DodgeServiceManual_Brakes_pg7.jpg)
Attachments
----------------
57DodgeServiceManual_Brakes_pg6.jpg (215KB - 80 downloads)
57DodgeServiceManual_Brakes_pg7.jpg (236KB - 81 downloads)
|
|
| |
|

Expert 5K+
Posts: 8947
Location: WHEELING,WV.>>>HOME OF WWVA | really nice work goin on |
|
| |
|
Elite Veteran
Posts: 649
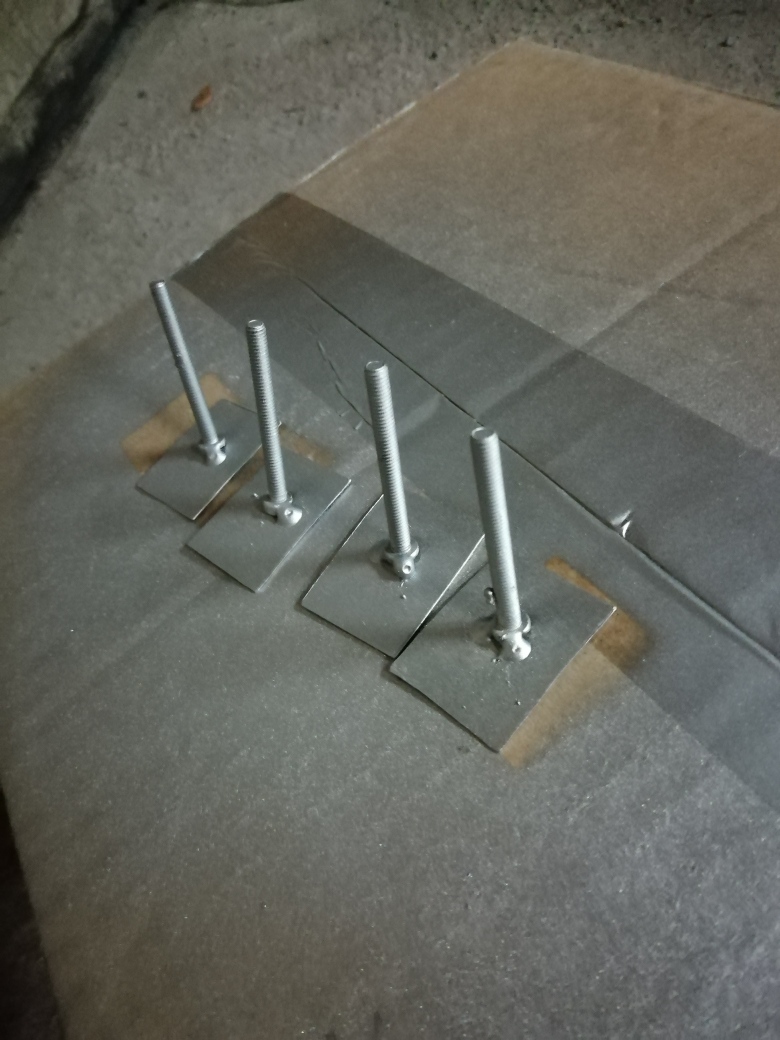
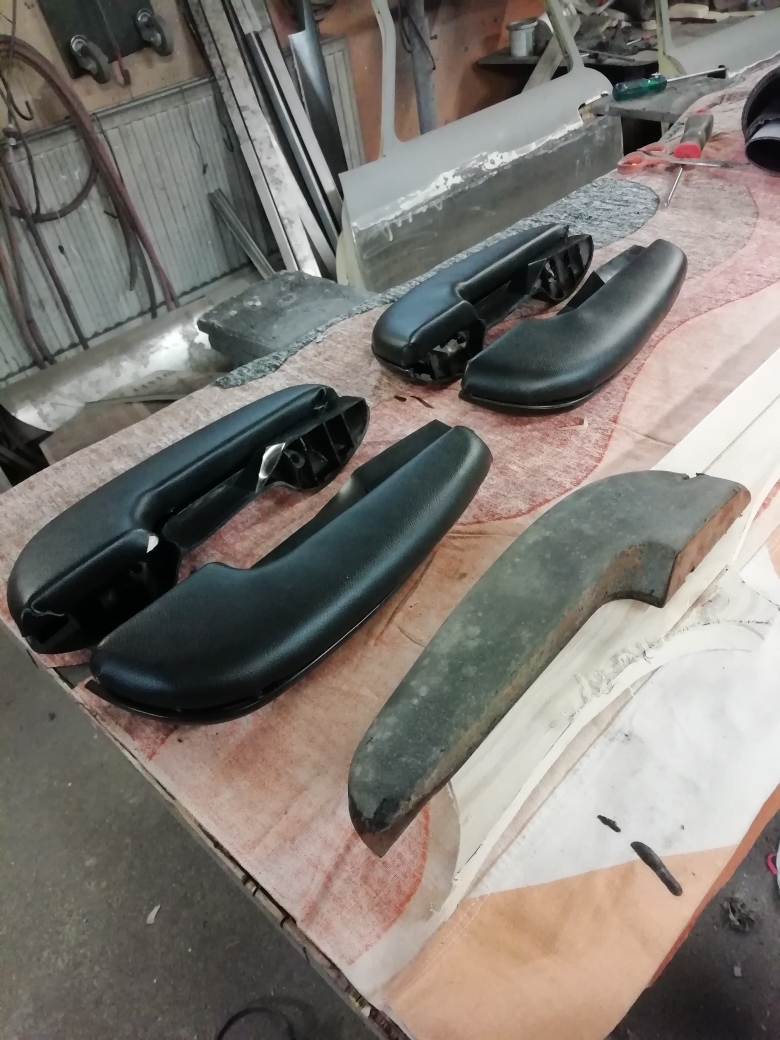
Location: Finland | Yesterday I made the armrests. Notice that I made the pads out of solid wood! Outrageous....suck on that purists....just joking 
It took a full hour to make the wooden pieces. This way I could staple the vinyl on the under side...don`t trust glue...
Edited by 22mafeja 2022-11-11 3:17 AM
 (IMG_20221111_090912_resized_20221111_101052349.jpg) (IMG_20221111_090912_resized_20221111_101052349.jpg)
Attachments
----------------
IMG_20221111_090912_resized_20221111_101052349.jpg (321KB - 79 downloads)
|
|
| |
|
Expert 5K+
Posts: 8947
Location: WHEELING,WV.>>>HOME OF WWVA | i did something similar but glued dense rubber to the wood , covered with leather---------------------------------later |
|
| |
|
Elite Veteran
Posts: 649
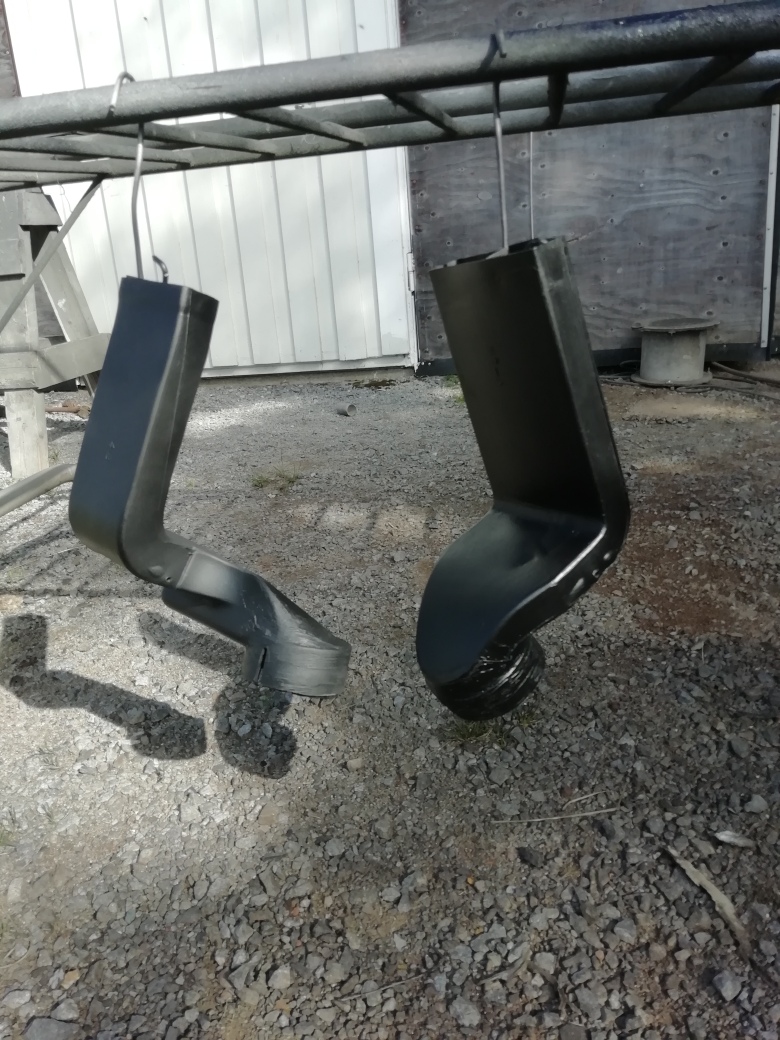
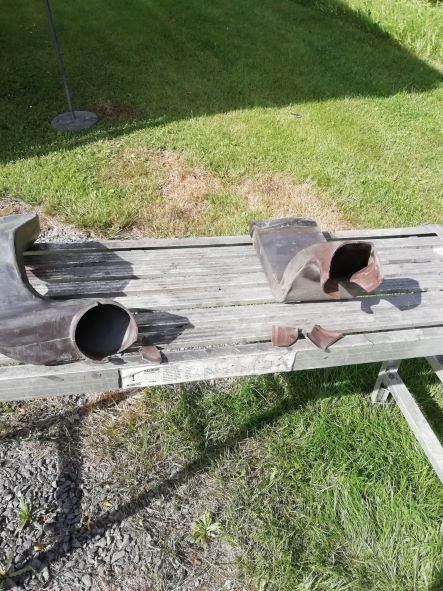
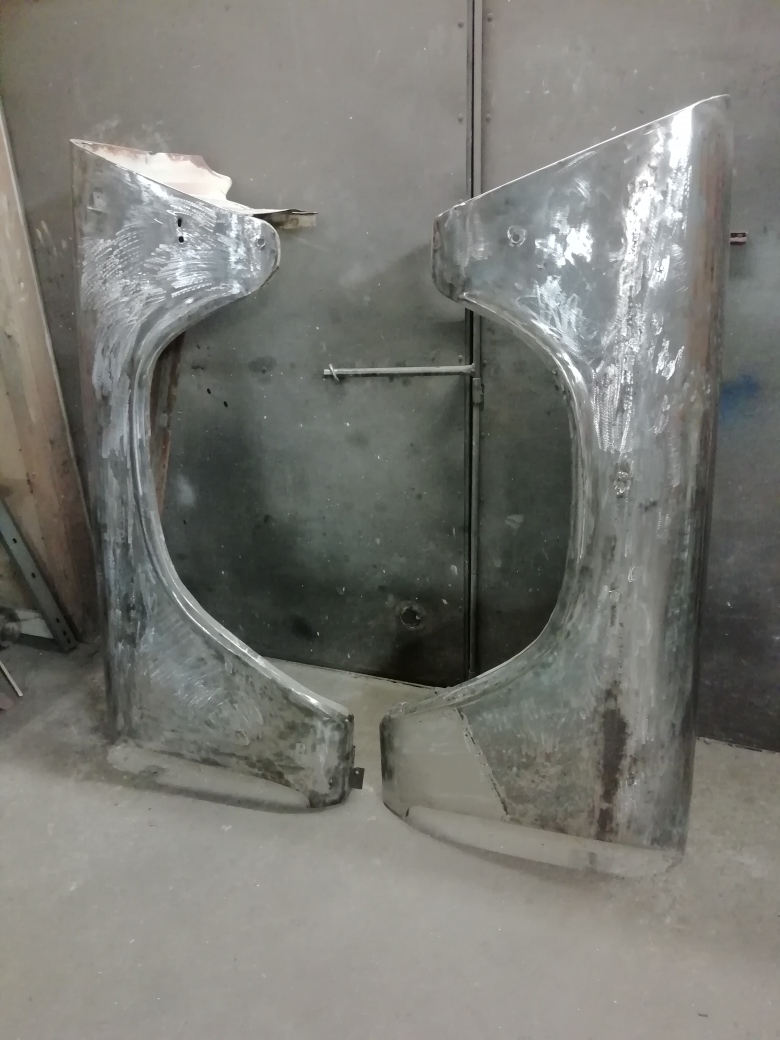
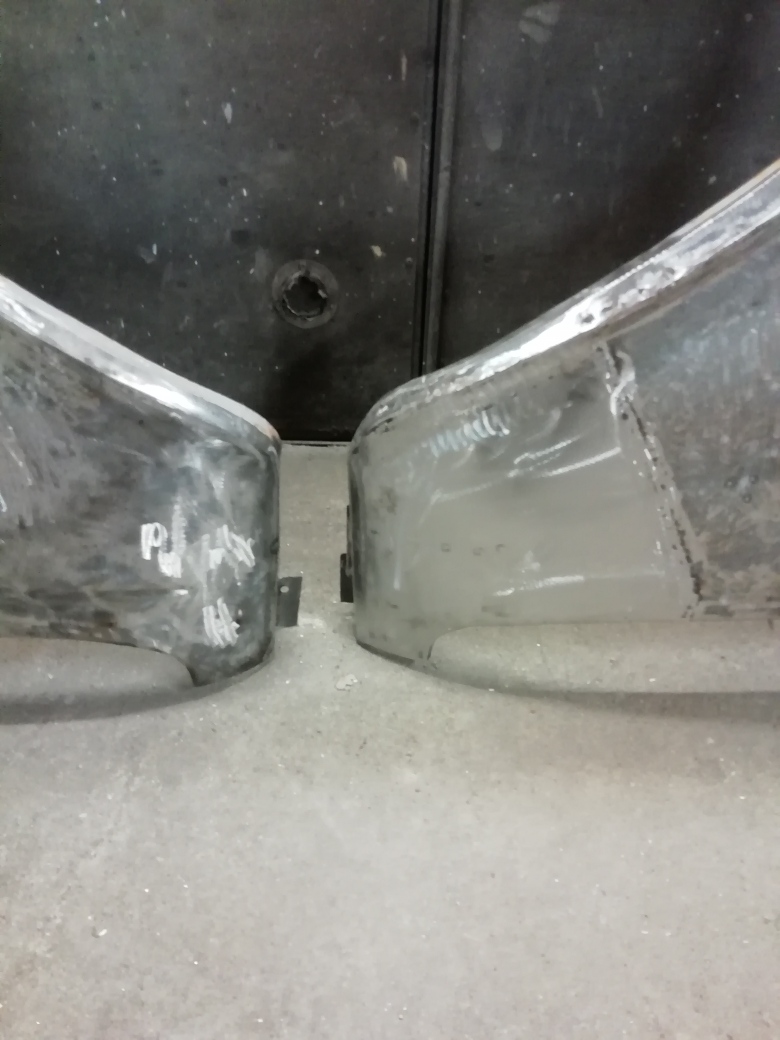
Location: Finland | Doors are sand blasted and epoxy primed Also all the seat frames and springs. The front fenders are at the blasting shop.
The front fenders were deep rusted where the mouldings had been. It is impossible to get rid of all rust so I use CRC Rust Remover and then Rust Sealer before the epoxy. This
seems to get the job done. Sandblasting the outside of the fenders is out of the question.
 (IMG_20221115_120151_resized_20221116_075620467.jpg) (IMG_20221115_120151_resized_20221116_075620467.jpg)
 (IMG_20221115_120205_resized_20221116_075620244.jpg) (IMG_20221115_120205_resized_20221116_075620244.jpg)
 (IMG_20221116_160656_resized_20221116_075619953.jpg) (IMG_20221116_160656_resized_20221116_075619953.jpg)
 (IMG_20221116_160723_resized_20221116_075619712.jpg) (IMG_20221116_160723_resized_20221116_075619712.jpg)
 (IMG_20221116_160734_resized_20221116_075619405.jpg) (IMG_20221116_160734_resized_20221116_075619405.jpg)
Attachments
----------------
IMG_20221115_120151_resized_20221116_075620467.jpg (229KB - 61 downloads)
IMG_20221115_120205_resized_20221116_075620244.jpg (198KB - 70 downloads)
IMG_20221116_160656_resized_20221116_075619953.jpg (323KB - 69 downloads)
IMG_20221116_160723_resized_20221116_075619712.jpg (214KB - 76 downloads)
IMG_20221116_160734_resized_20221116_075619405.jpg (226KB - 70 downloads)
|
|
| |
|
Elite Veteran
Posts: 649
Location: Finland | Some progress...
 (IMG_20221220_091442_resized_20221221_105221686fwl.jpg) (IMG_20221220_091442_resized_20221221_105221686fwl.jpg)
 (IMG_20221220_091418_resized_20221221_105223652fwl.jpg) (IMG_20221220_091418_resized_20221221_105223652fwl.jpg)
 (IMG_20221221_082125fwl.jpg) (IMG_20221221_082125fwl.jpg)
 (IMG_20221221_082106_resized_20221221_105220621fwl.jpg) (IMG_20221221_082106_resized_20221221_105220621fwl.jpg)
Attachments
----------------
IMG_20221220_091442_resized_20221221_105221686fwl.jpg (33KB - 75 downloads)
IMG_20221220_091418_resized_20221221_105223652fwl.jpg (34KB - 63 downloads)
IMG_20221221_082125fwl.jpg (41KB - 64 downloads)
IMG_20221221_082106_resized_20221221_105220621fwl.jpg (33KB - 62 downloads)
|
|
| |
|
Expert 5K+
Posts: 9650
Location: So. Cal | Looking good Ralf. That silver paint will save you a lot of $$. |
|
| |
|
Elite Veteran
Posts: 649
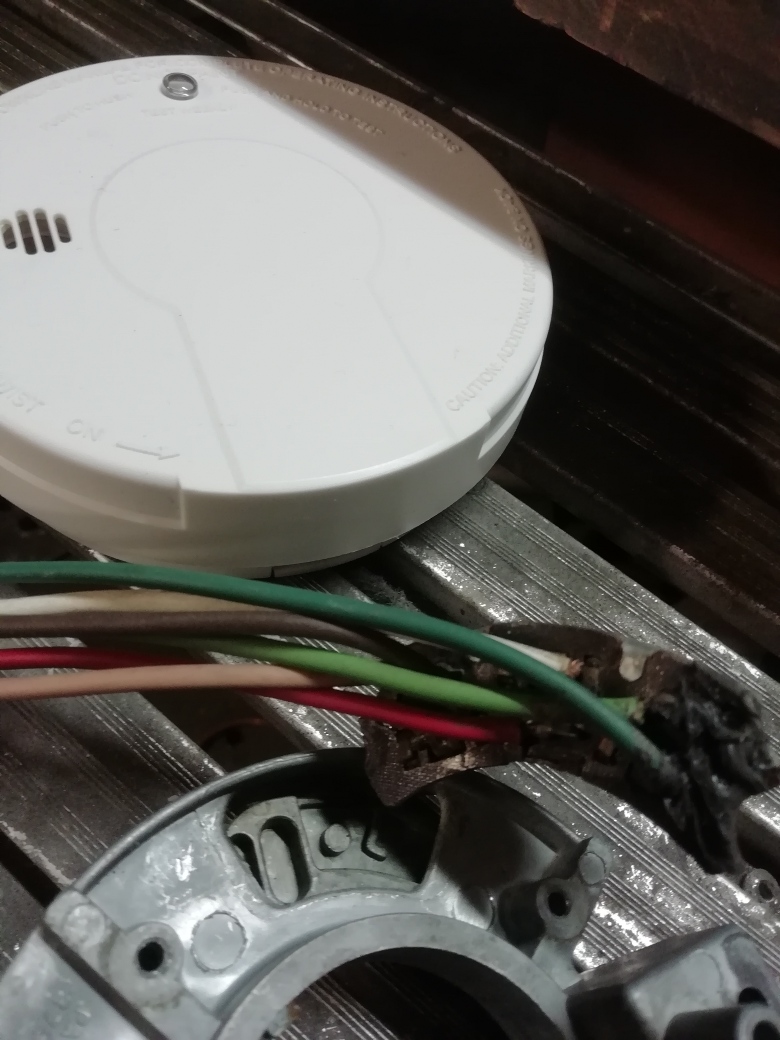
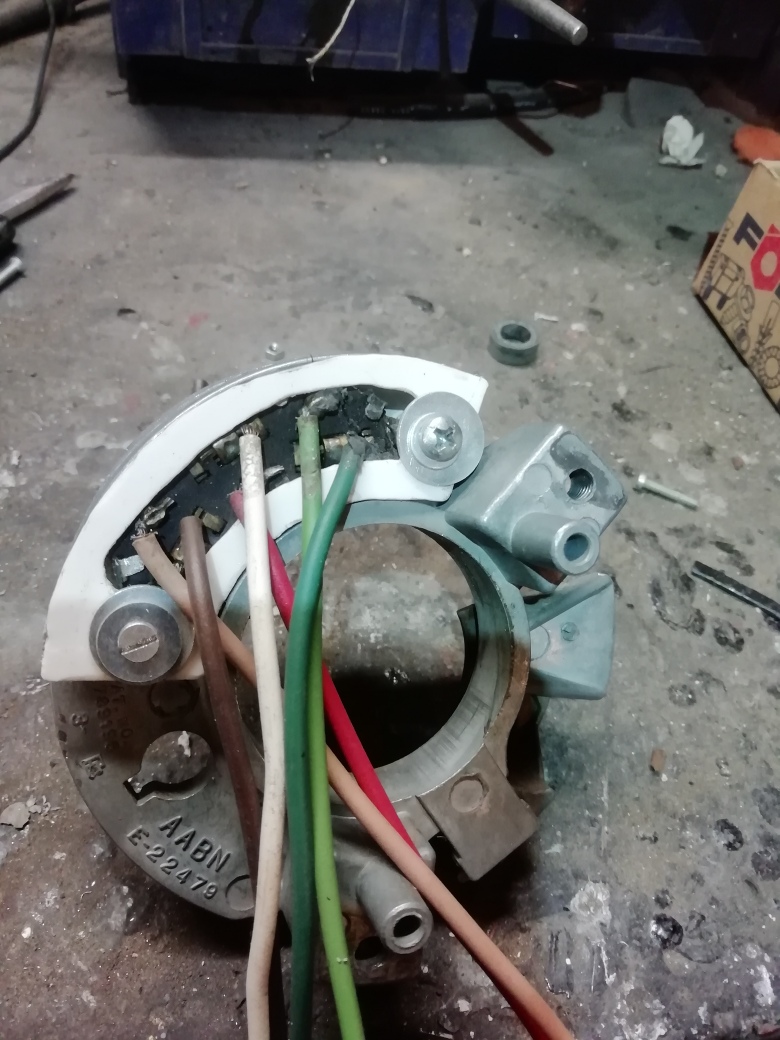
Location: Finland | I had earlier repaired the turn signal switch which had both ears broke off...First it was functional but after some time it started to malfunction now and then.
I checked the cost for a new one and indeed it would cost about 300usd including all costs ...nono..
An old fire detector caught my attention since I know they are made of undestructible plastic.
It was a little tricky but doable to make a lid on the switch. Before I was finished I had to solder on two wire which fell of during the work.
Not beautiful but working for zero usd..
 (IMG_20230104_143813_resized_20230106_071436014.jpg) (IMG_20230104_143813_resized_20230106_071436014.jpg)
 (IMG_20230105_083304_resized_20230106_071435751.jpg) (IMG_20230105_083304_resized_20230106_071435751.jpg)
Attachments
----------------
IMG_20230104_143813_resized_20230106_071436014.jpg (240KB - 60 downloads)
IMG_20230105_083304_resized_20230106_071435751.jpg (256KB - 61 downloads)
|
|
| |
|
Board Moderator & Exner Expert 10K+
Posts: 13045
Location: Southern Sweden - Sturkö island | Creative thinking Ralf, I really like your approach to problems |
|
| |
|
Expert 5K+
Posts: 9650
Location: So. Cal | Nice, I'm really amazed you could get that to work. |
|
| |
|
Elite Veteran
Posts: 649
Location: Finland | For me it`s really rewarding to make these kind of crazy repairs since I have Parkinsons Disease since about five years back.
Feels good to be able to still do things with my hands. So far the overall condition is pretty good. |
|
| |
|
Board Moderator & Exner Expert 10K+
Posts: 13045
Location: Southern Sweden - Sturkö island | Keep it up Ralf, most probably your work will help you stay in good condition. |
|
| |
|
Elite Veteran
Posts: 649
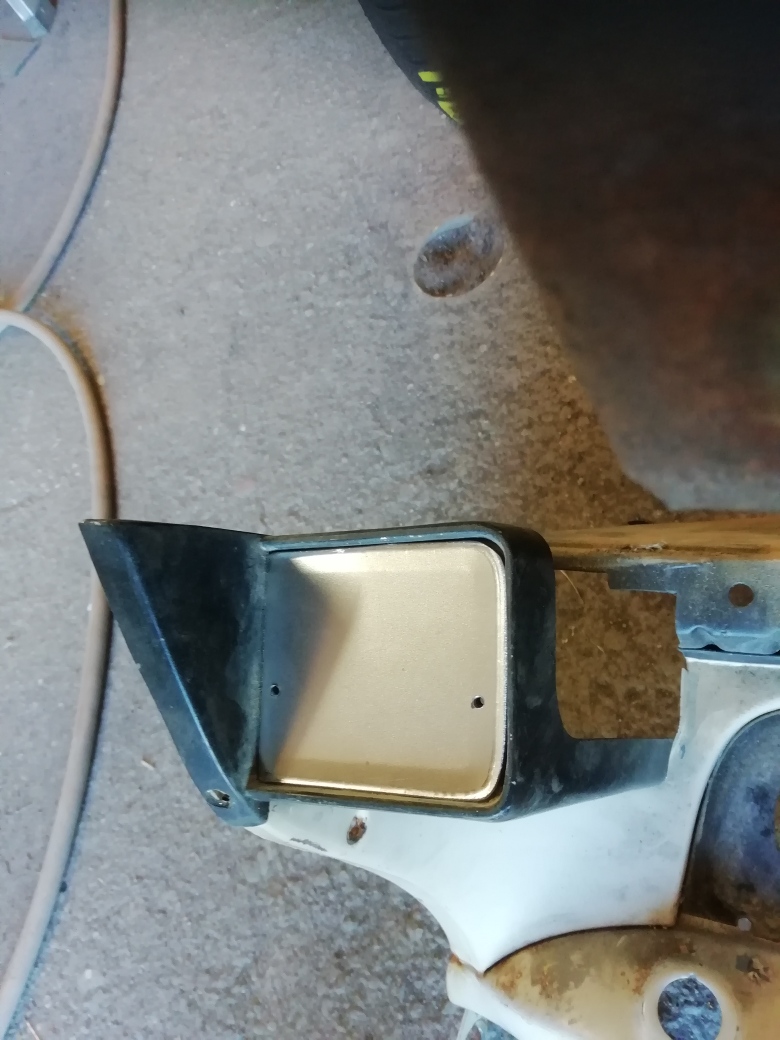
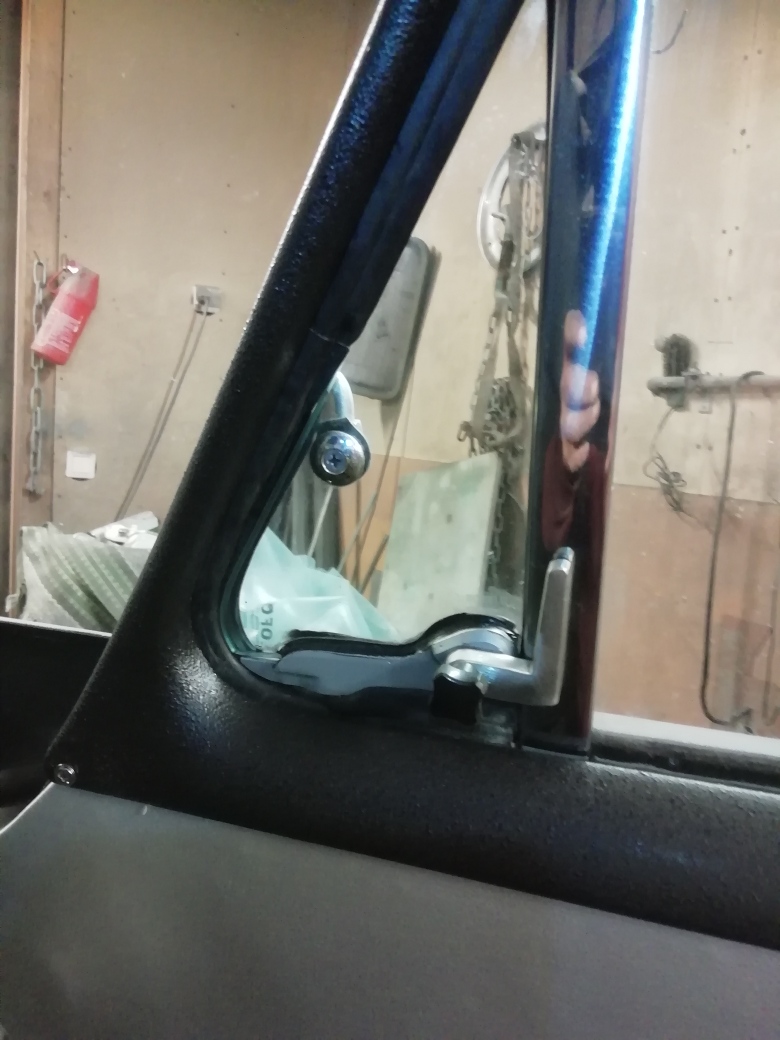
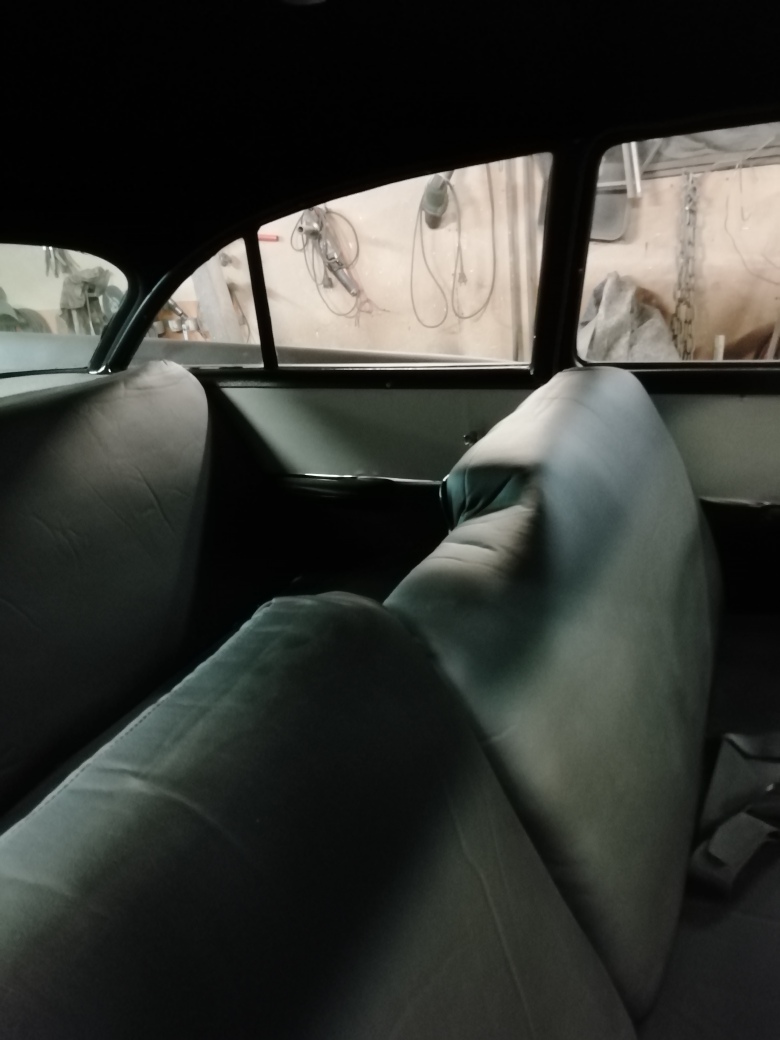
Location: Finland | The interior is finished (almost). The seat skins are modified standard van bench covers. Absolutely no show standard...
I had two broke vent window frames and two useless locking levers.
This is how I solved that after I stumbled over a stainless 10mm scrap piece....functional.
 (IMG_20230108_163422_resized_20230108_075415651.jpg) (IMG_20230108_163422_resized_20230108_075415651.jpg)
 (IMG_20230108_163433_resized_20230108_075415401.jpg) (IMG_20230108_163433_resized_20230108_075415401.jpg)
 (IMG_20230108_163443_resized_20230108_075415133.jpg) (IMG_20230108_163443_resized_20230108_075415133.jpg)
 (IMG_20230108_163501_resized_20230108_075414861.jpg) (IMG_20230108_163501_resized_20230108_075414861.jpg)
Attachments
----------------
IMG_20230108_163422_resized_20230108_075415651.jpg (218KB - 56 downloads)
IMG_20230108_163433_resized_20230108_075415401.jpg (210KB - 58 downloads)
IMG_20230108_163443_resized_20230108_075415133.jpg (240KB - 60 downloads)
IMG_20230108_163501_resized_20230108_075414861.jpg (142KB - 53 downloads)
|
|
| |
|
Elite Veteran
Posts: 649
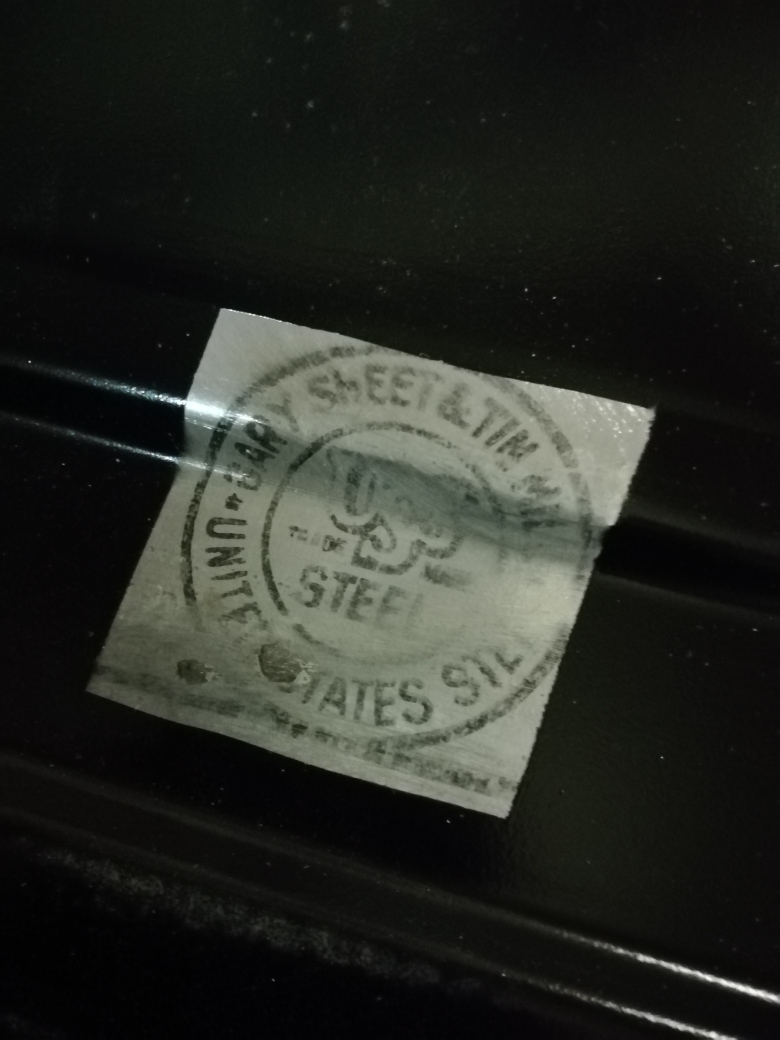
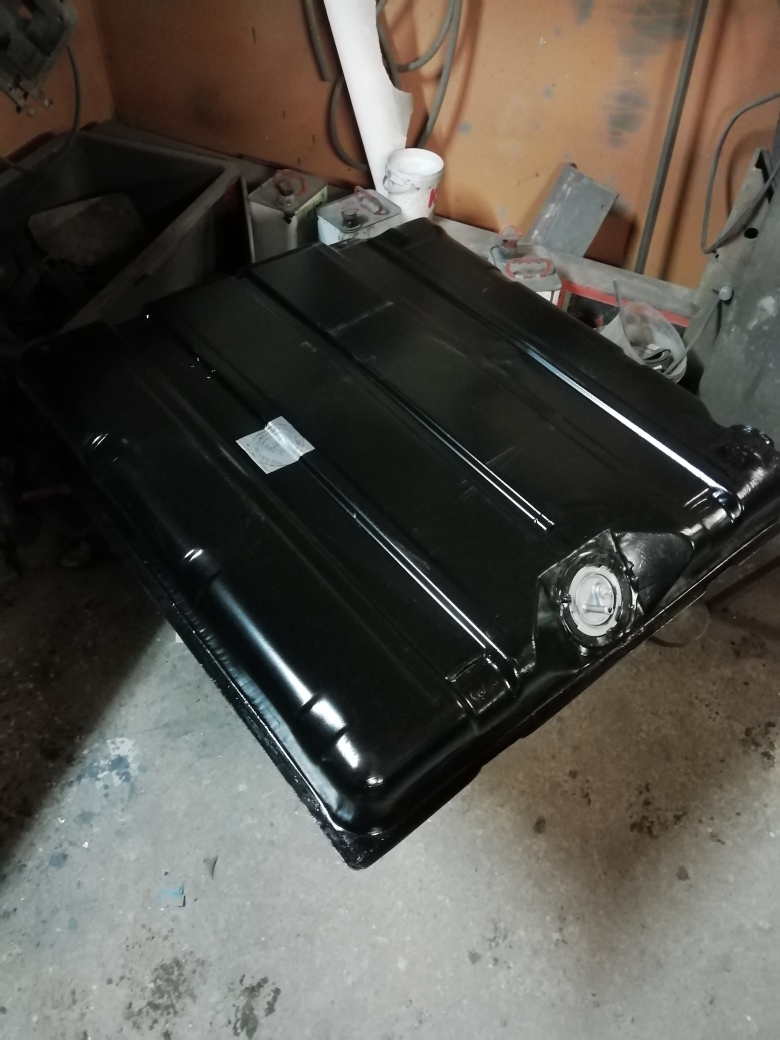
Location: Finland | Quality USS fuel tank from 1957...amazingly rust free also inside....
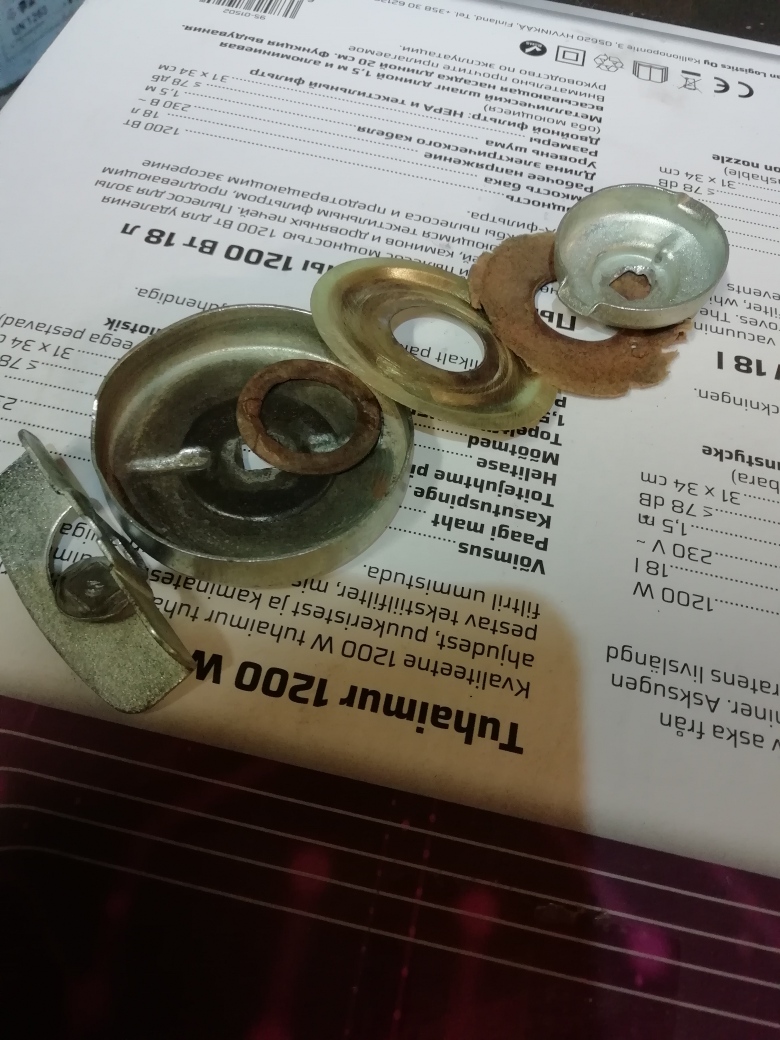
I have never made an autopsy on a vented fuel cap before..easy to drill away the center rivet and put new gasket paper pieces. The rivet was replaced with a 1/4" bolt.
Edited by 22mafeja 2023-01-15 8:00 AM
 (IMG_20230110_105857_resized_20230115_024533817.jpg) (IMG_20230110_105857_resized_20230115_024533817.jpg)
 (IMG_20230110_105906_resized_20230115_024533597.jpg) (IMG_20230110_105906_resized_20230115_024533597.jpg)
 (IMG_20230111_153805_resized_20230115_024533296.jpg) (IMG_20230111_153805_resized_20230115_024533296.jpg)
Attachments
----------------
IMG_20230110_105857_resized_20230115_024533817.jpg (189KB - 62 downloads)
IMG_20230110_105906_resized_20230115_024533597.jpg (209KB - 60 downloads)
IMG_20230111_153805_resized_20230115_024533296.jpg (305KB - 58 downloads)
|
|
| |
|
Expert 5K+
Posts: 9899
Location: Lower Mainland BC | .
Ralf: Lucky you with the gas tank. Looks in great shape.
As for the gas cap, did that rivet have a hole in it (in the middle) by chance?
IF so, that was the vent hole and your bolt isn't allowing air into the tank as the fuel is consumed by the engine = vacuum in the tank, tank implodes (slowly) and/or your engine get starved of fuel because of fuel pump can't suck against a vacuum.
I hope that I am wrong.
https://autorestorer.com/articles/do_i_need_a_vented_gas_cap-147
https://www.ebay.com/itm/134374478849?hash=item1f4957d401:g:Qv0AAOSw...
Edited by 56D500boy 2023-01-15 12:06 PM
|
|
| |
|
Elite Veteran
Posts: 649
Location: Finland | It had a solid rivet. The air /fumes are traveling through those small channels pressed in both lower and upper end of the cap so you won`t have to worry.. |
|
| |
|
Elite Veteran
Posts: 649
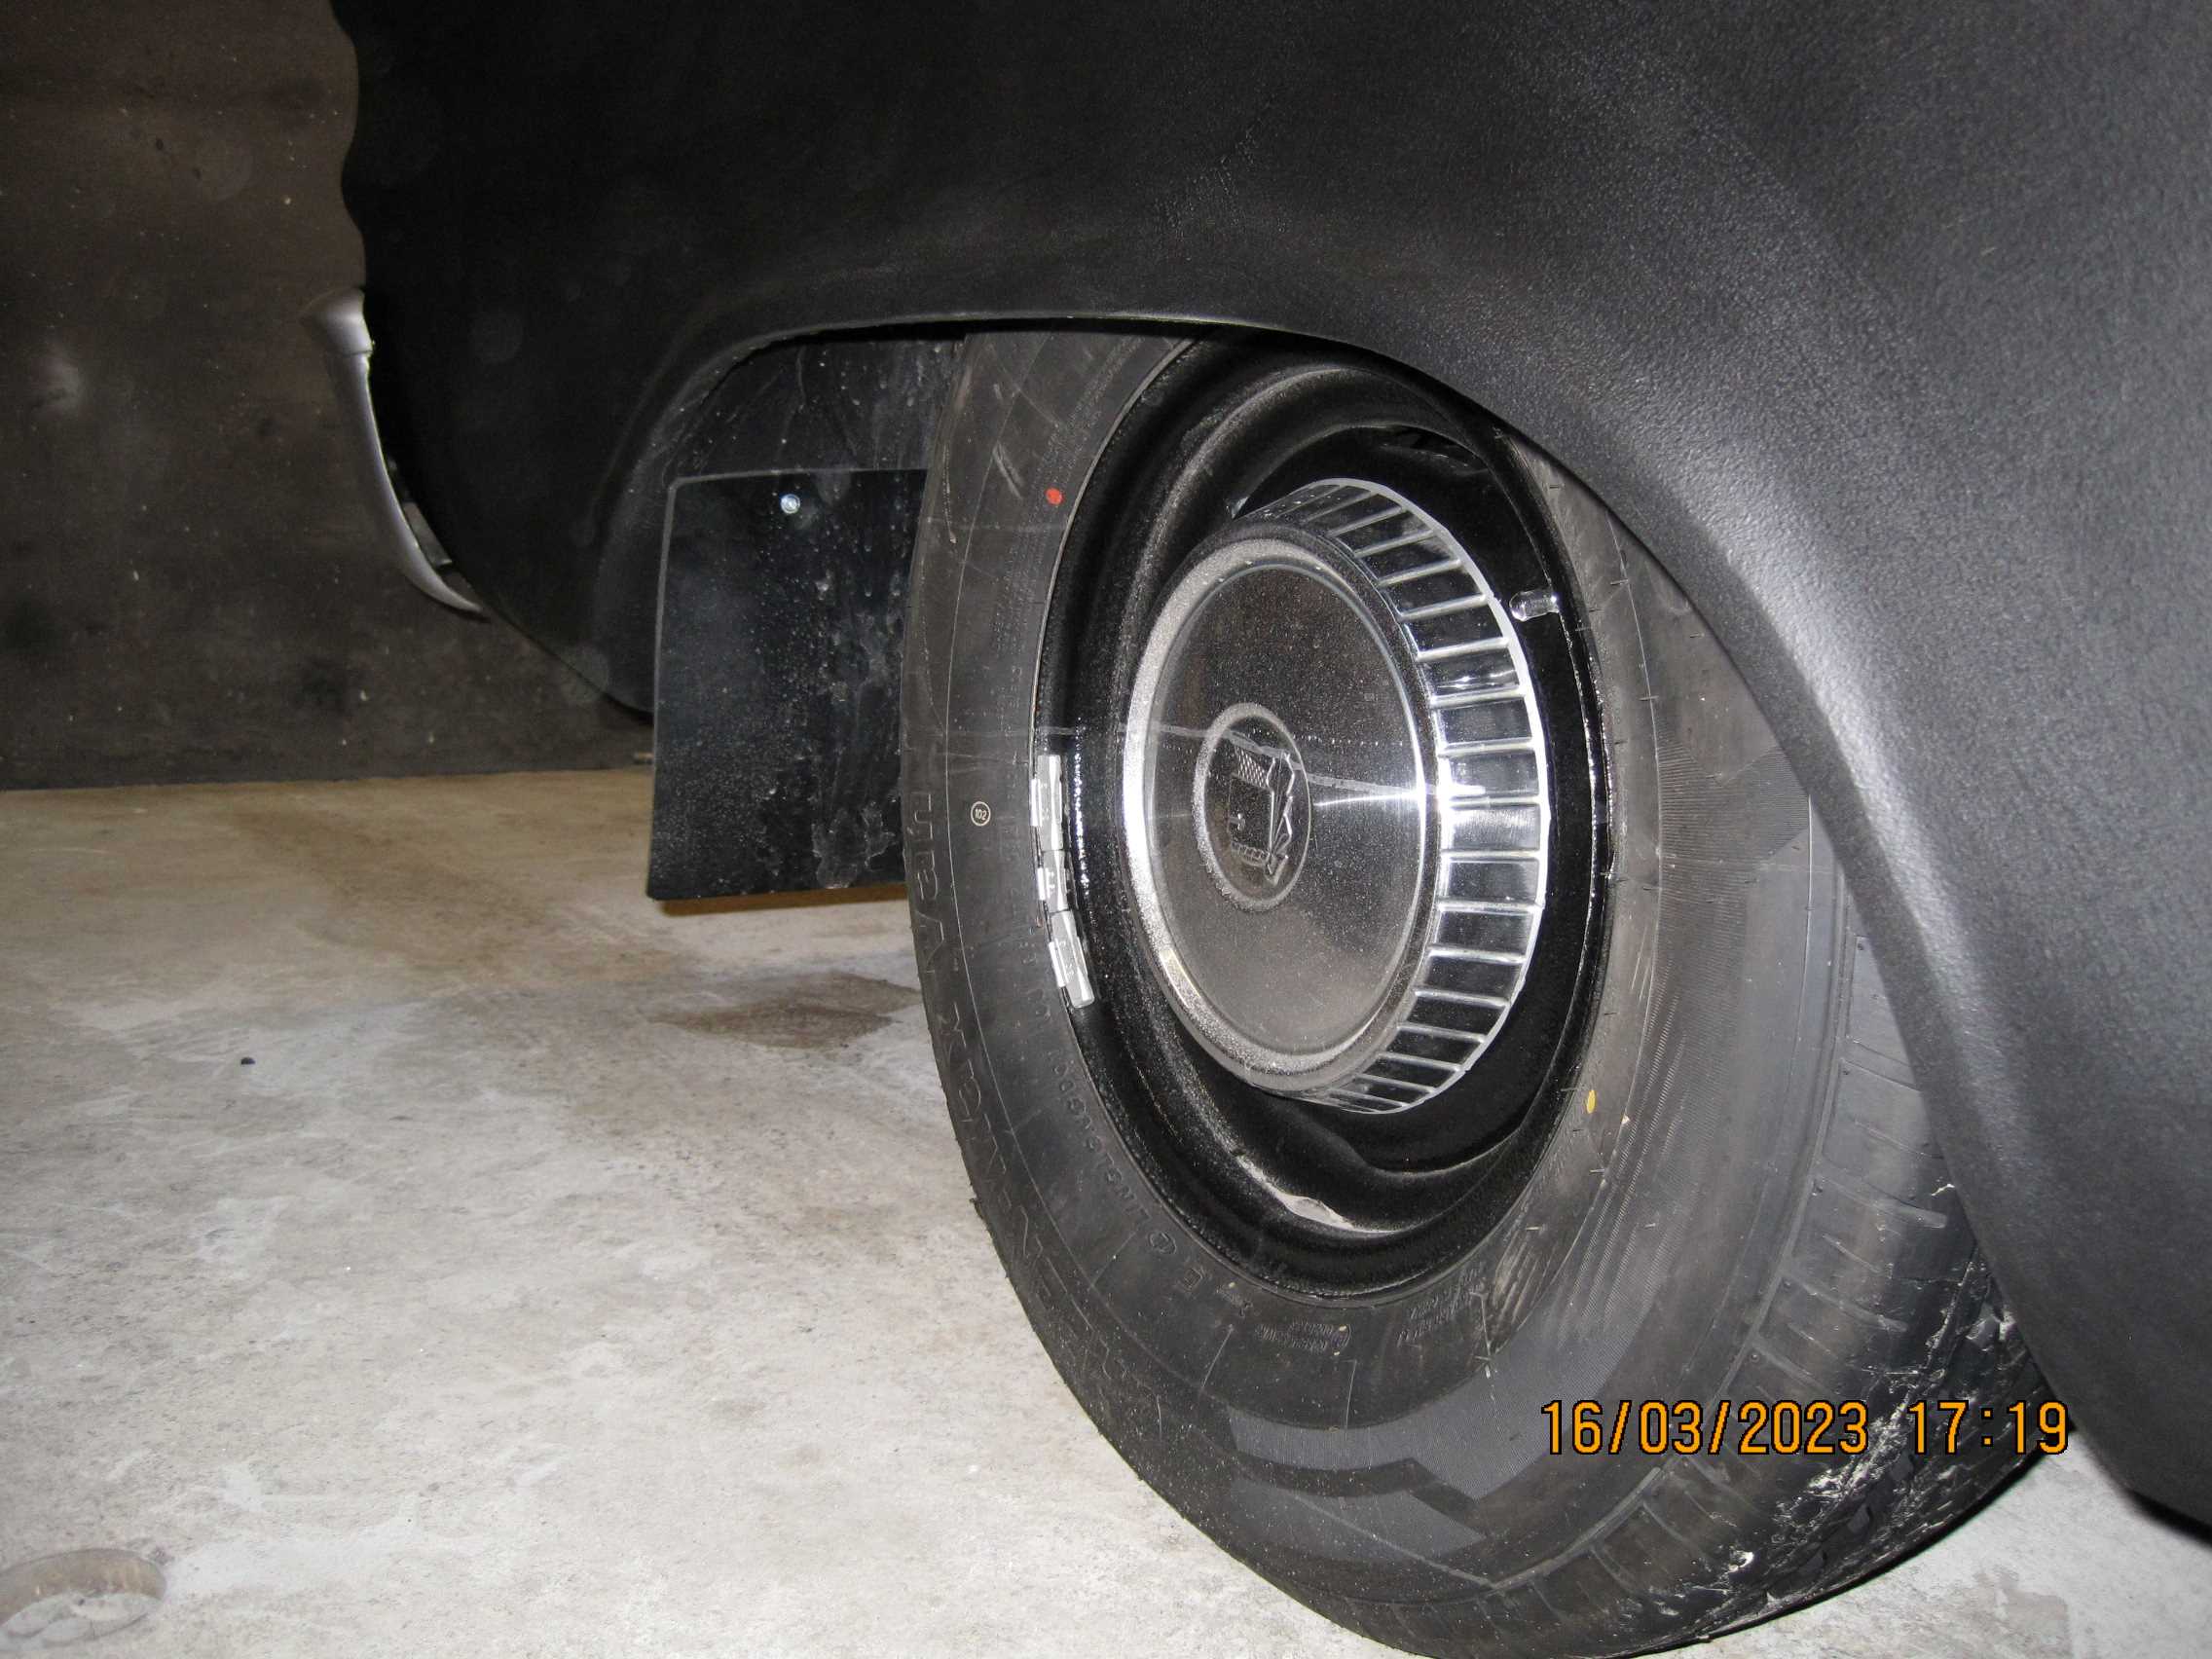
Location: Finland | Which wheels to choose?
 (IMG_20230123_103730 (1)fwl.jpg) (IMG_20230123_103730 (1)fwl.jpg)
 (IMG_20230123_103700 (1)fwl.jpg) (IMG_20230123_103700 (1)fwl.jpg)
Attachments
----------------
IMG_20230123_103730 (1)fwl.jpg (32KB - 58 downloads)
IMG_20230123_103700 (1)fwl.jpg (40KB - 61 downloads)
|
|
| |
|
Board Moderator & Exner Expert 10K+
Posts: 13045
Location: Southern Sweden - Sturkö island | Dog dish wheels if I may give my opinion. Probably better on the road, more Batmobile |
|
| |
|
Elite Veteran
Posts: 649
Location: Finland | Yes I think likewise Sven...it is so el cheapo with my home made poverty caps..... |
|
| |
|
Veteran
Posts: 281
Location: WA/USA | I had a lot of fun following this. You have some skills, and the results have helped me decide some of the directions that I'm going on my own Club Coupe build.... so, thank you.
Congratulations, and enjoy! |
|
| |
|
Elite Veteran
Posts: 649
Location: Finland | Nice to hear... |
|
| |
|
Elite Veteran
Posts: 649
Location: Finland | Now my Batmobile is roadworthy and has passed the Finnish Motor Vehicle Inspection. So now I am waiting for the Finnish "IRS" to estimate how much it will cost me to registrate this car in Finland.
This is very very useful since it takes at least one month and the sum will be about 15 e and the minimi charge is 20e!!
Authorities at their very best!
I thus have to wait one month before I get the plates on.
Now I have driven some with contemporary plates and to my pleasure I think all the "improvements" I have made work pretty well. The disc brake emergency brake is a little weak but sufficient imo.
The half sized heater core I took from a newer car is also satisfactory.
The gearshift lever located at the place of the ashtray is working well.
The car is really drivable, the brakes are good , and without power brakes it has kind of ALB , you have to really stomp on te pedal to get them locked.
I really like the steering, it goes steadily and straight with the 215/80-14 tyres. I haven`t tried the bling wheels on the road yet...
|
|
| |
|
Elite Veteran
Posts: 649
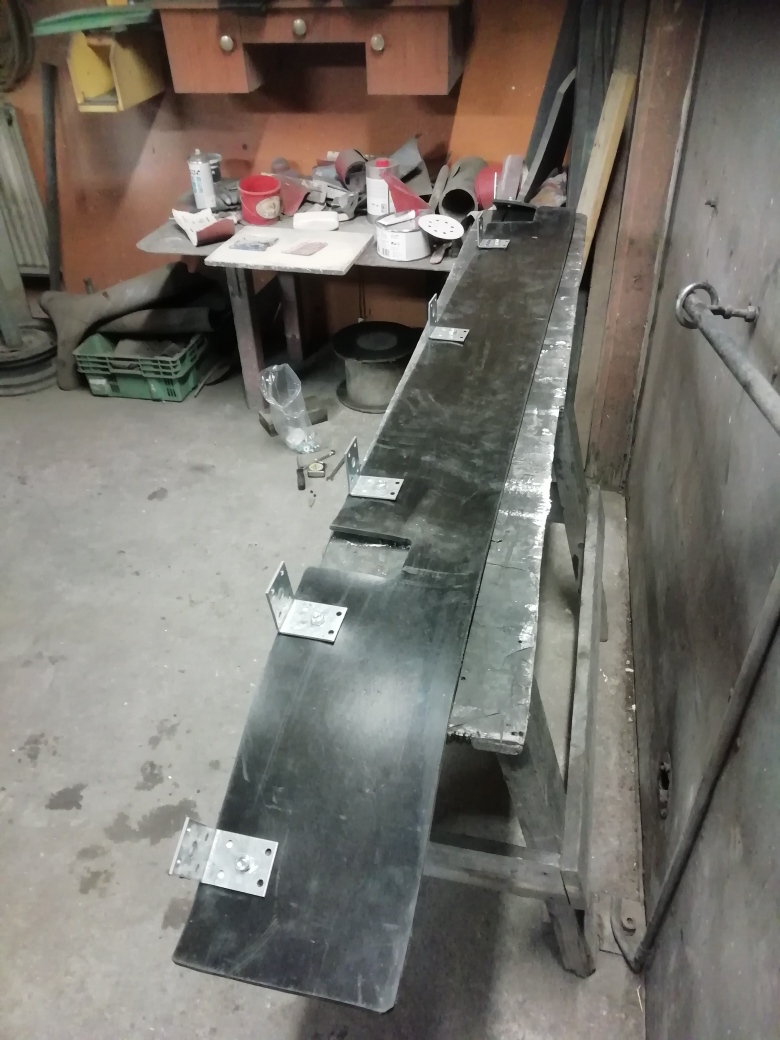
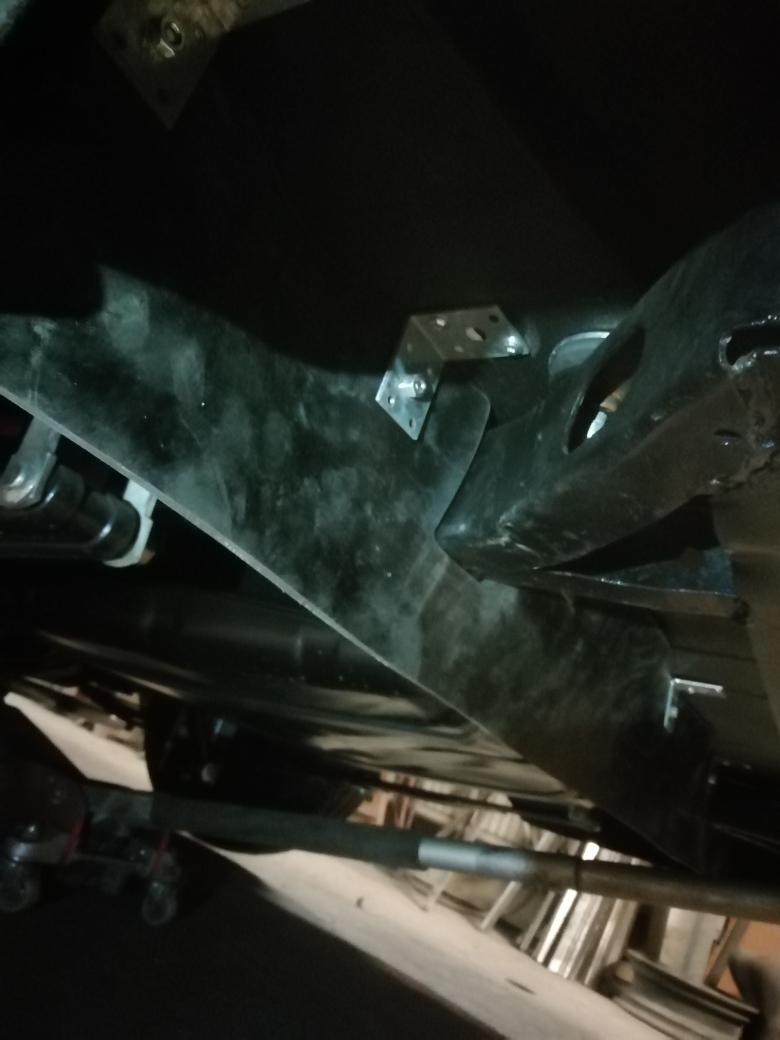
Location: Finland | I hate when the rear bumper and frame beam are filled with mud when I get surprised by a shower.
I made a kingsize flap like on imperial 57-59 of 5mm rubber. You can hardly see it.
 (IMG_20230219_100103_resized_20230220_041042432.jpg) (IMG_20230219_100103_resized_20230220_041042432.jpg)
 (IMG_20230220_091616_resized_20230220_041042225.jpg) (IMG_20230220_091616_resized_20230220_041042225.jpg)
 (IMG_20230220_091600_resized_20230220_041041966.jpg) (IMG_20230220_091600_resized_20230220_041041966.jpg)
Attachments
----------------
IMG_20230219_100103_resized_20230220_041042432.jpg (268KB - 69 downloads)
IMG_20230220_091616_resized_20230220_041042225.jpg (192KB - 74 downloads)
IMG_20230220_091600_resized_20230220_041041966.jpg (240KB - 74 downloads)
|
|
| |
|
Board Moderator & Exner Expert 10K+
Posts: 13045
Location: Southern Sweden - Sturkö island | That's agood idea Ralf, I might do that as well.
I've mounted mud flaps, front and rear wheels. |
|
| |
|
Elite Veteran
Posts: 649
Location: Finland | Yes Sven , mudflaps might not be beautiful but imo necessary. I am also making flaps behind all four wheels and maybe around the headlight buckets.
Edited by 22mafeja 2023-02-20 1:14 PM
|
|
| |
|
Expert 5K+
Posts: 9650
Location: So. Cal | If you drive in the mud, a tight fitting shield in back of the headlight buckets, positioned so that the mud would slide out of the fender, would be very smart; probably the most important place to put one. Getting mud in the rear frame is annoying, but easily cleaned out. |
|
| |
|
Elite Veteran
Posts: 649
Location: Finland | Well Nathan I can tell you that our mud/clay here on the Finnish Osterbotten plains is Not easily removed since the dirt roads are built on old sea bottoms so to get it entirely
washed away is a disgustful task! |
|
| |
|
Elite Veteran
Posts: 649
Location: Finland | Now I have five mudflaps on the car!
They work well , it is less snow baked under the car after a spin now!
 (IMG_4034fwl.jpg) (IMG_4034fwl.jpg)
 (IMG_4051fwl.jpg) (IMG_4051fwl.jpg)
Attachments
----------------
IMG_4034fwl.jpg (295KB - 70 downloads)
IMG_4051fwl.jpg (346KB - 70 downloads)
|
|
| |
|
Elite Veteran
Posts: 649
Location: Finland | Now I have experienced that the return springs are really crutial.
I had bought a front brake kit including the springs and didn`t compare then to the old ones (stupid) so the new ones were 6 -coil springs compared to the original 4-coils.
The new ones could only use the wrong attaching point.
Everything was ok until it wasn`t. The brake shoes must have seized so the brakes stayed on and when they released suddenly the pedal slammed to the floor. This happened in my garage so no danger was imminent. Then I could not get the system bleeded no man..
When I had tried everything trice I stared at the springs for a while. I assure you that the brake shoes and the center plate were de graded and smooth and greased.
The problem was solved as soon as I swapped the springs to the right kind of springs.
What did you write Dave...better safe than sorry...oh yes so true.. |
|
| |
|
Expert 5K+
Posts: 9899
Location: Lower Mainland BC | Ralf: Sorry to hear about your brake shoe return spring issue. I don't know why the return springs and the spring attachment points are different front and rear for the early center plane brakes but they were/are.
You dodged a bullet, which is a good thing.
Nice job on the mud flaps by the way. I was hand washing my 94 V8 Audi wagon yesterday (16 C and sunny). It has factory mud flaps front and rear and I thought about your car and its new flaps, helping to keep crap out from under the body.
They work.
Edited by 56D500boy 2023-03-19 10:43 AM
|
|
| |
|
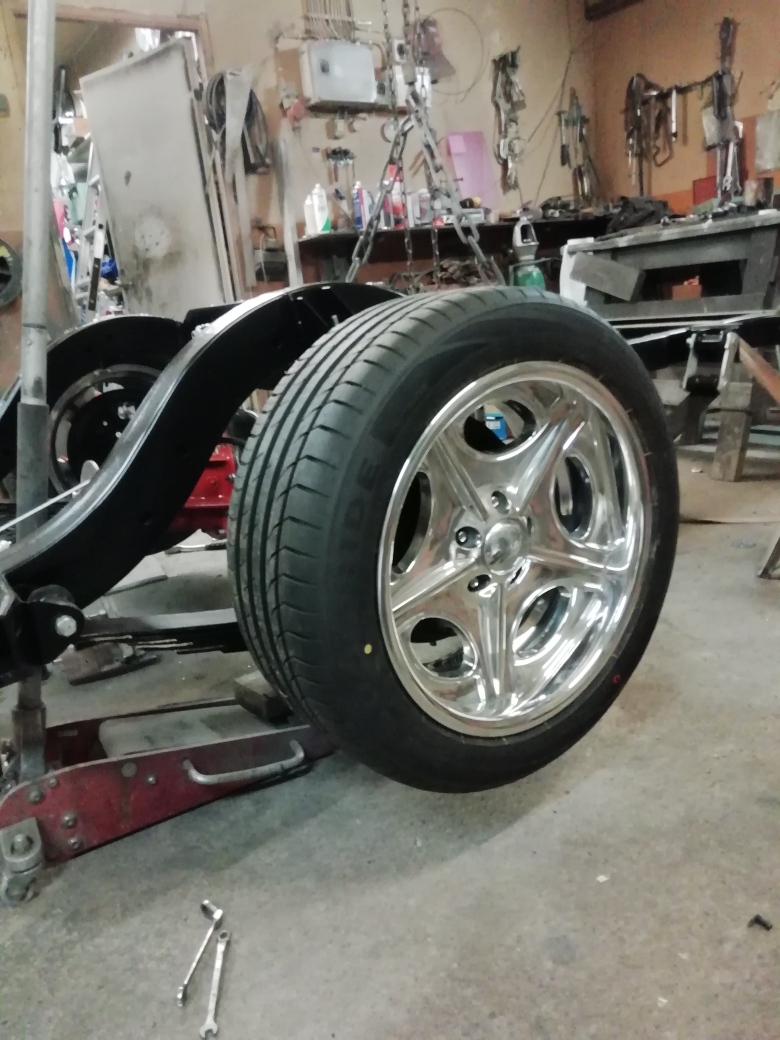
Elite Veteran
Posts: 649
Location: Finland | Now I have the 17" Boyds wheels on. I was afraid that it would be bad for the driveability but to my surprise it still goes straight and is steady. |
|
| |
|
Expert 5K+
Posts: 9650
Location: So. Cal | I think those Boyd's wheels would look better if you painted the inner web either black or silver - just to give it some variation in color. You could try it out on photoshop and see how you like it. |
|
| |
|
Elite Veteran
Posts: 649
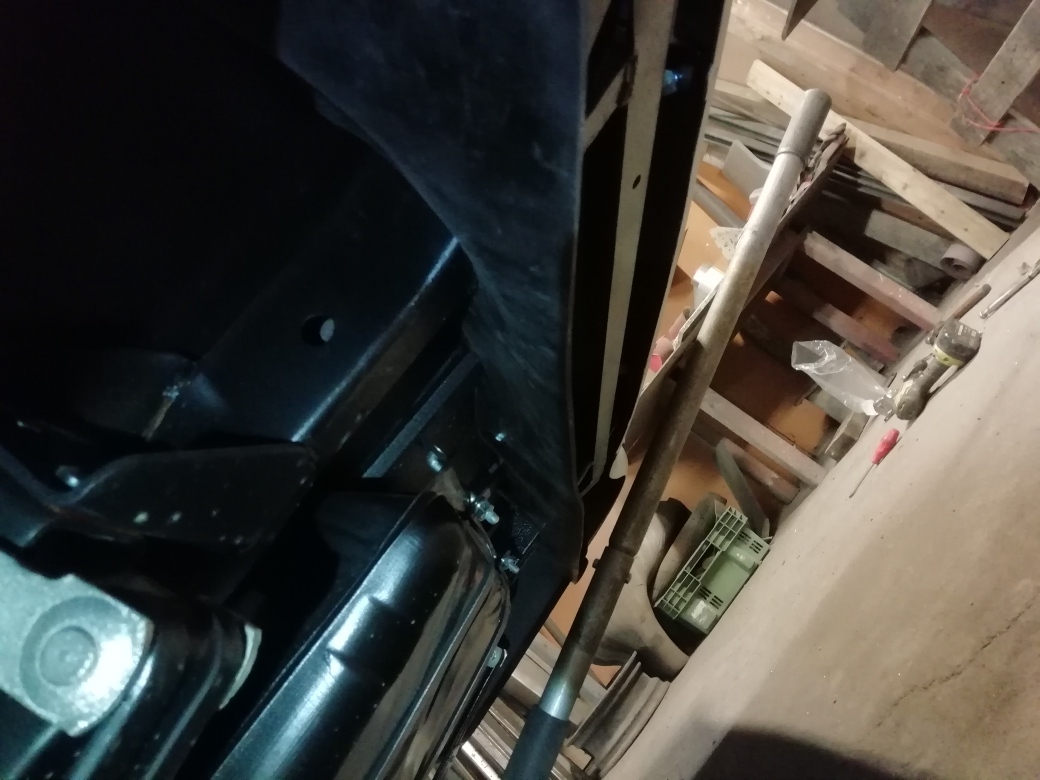
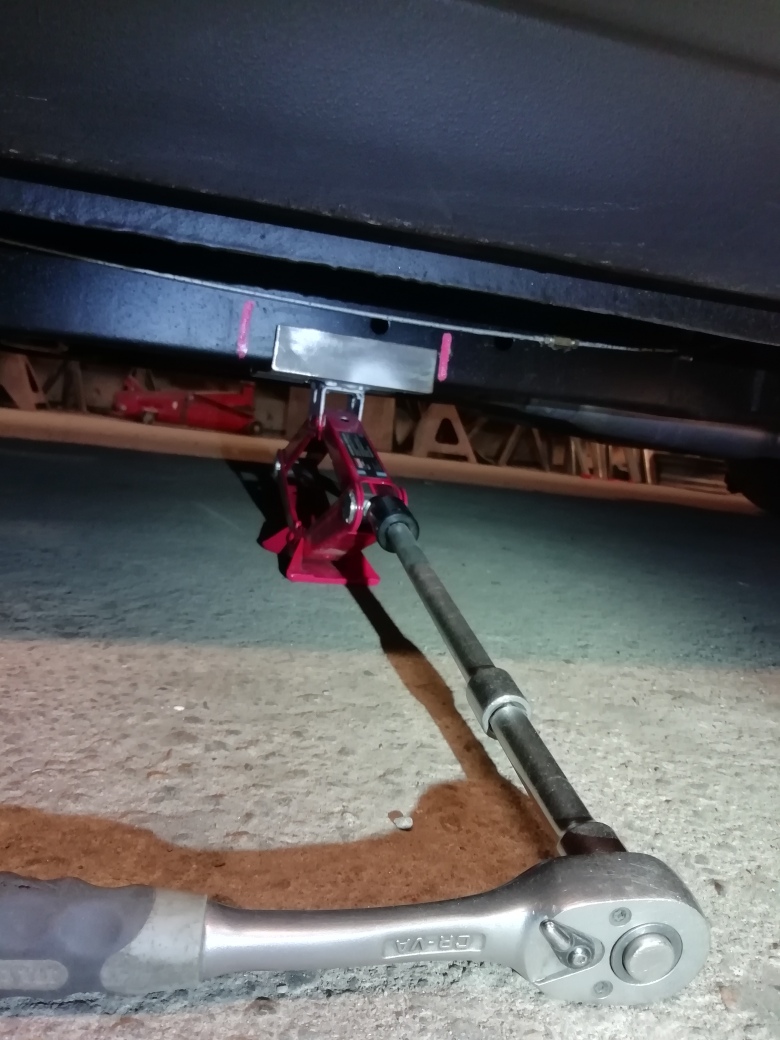
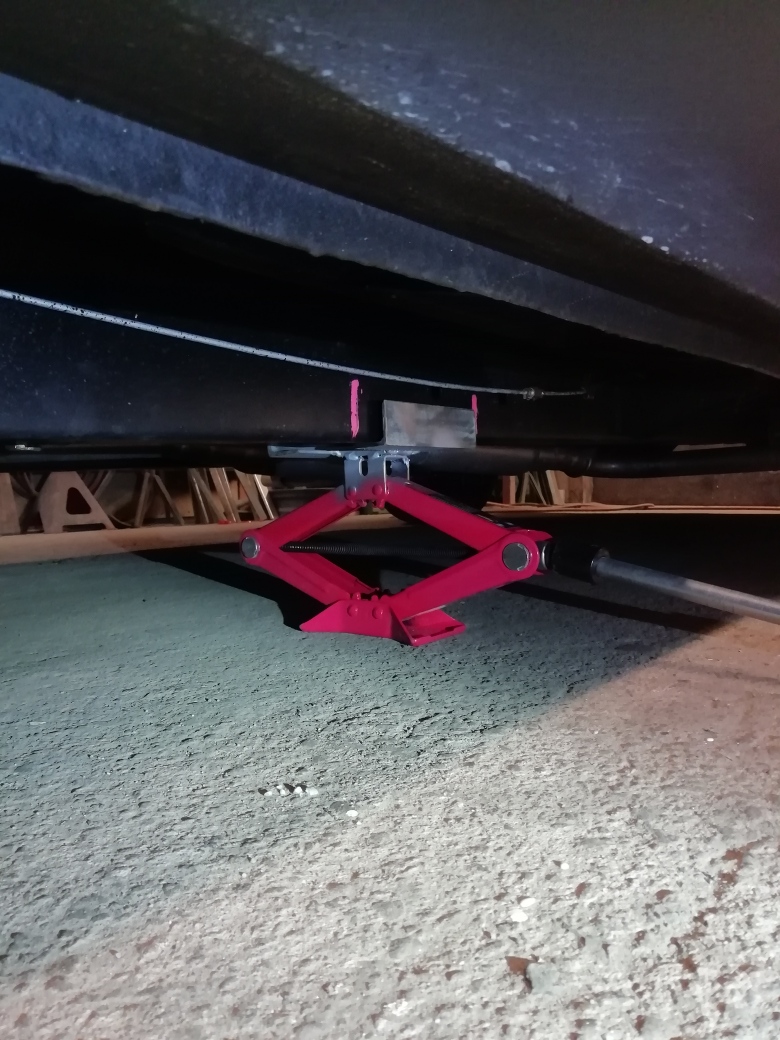
Location: Finland | Now I have correct ride height on the car. Goodbye lowering blocks ,now it goes clear off any crazy road bumps..
I don`t know how you fellows have prepared for the flat tyre we all have ahead?
I have had a scissor jack in the trunk and a couple of hefty plywood pieces. No NO I will never use a factory jack , they are dangerous and gives the a unwanted patina to the car in many cases..
Today I improved the scissor jack so it fits and stays on the wanted place under the main frame rail. I marked the frame on both sides where to put the jack so it will lift two wheels at the same time.
It is important that the scisssor jack is as low as possible and strong enough. Mine is 1000kg and is easily lifting the Coronet.
 (IMG_20230823_160034_resized_20230823_042124484.jpg) (IMG_20230823_160034_resized_20230823_042124484.jpg)
 (IMG_20230823_160056_resized_20230823_042124167.jpg) (IMG_20230823_160056_resized_20230823_042124167.jpg)
Attachments
----------------
IMG_20230823_160034_resized_20230823_042124484.jpg (234KB - 55 downloads)
IMG_20230823_160056_resized_20230823_042124167.jpg (314KB - 50 downloads)
|
|
| |
|
Elite Veteran
Posts: 649
Location: Finland | Now I have accepted that it was a mistake to paint the car with flat black urethane textured paint. Everybody dislikes it... I think the appearance is special and
not so bad...BUT it is hopeless to keep decent...period.
If a little bird takes a cr.p on it while you see it and asap wipes away the spot and cleans it with a wet rag you`d think it would be ok. Nope the area you cleaned and wiped dry
is forever visible! This goes for both Raptor and Mipa Protectot...This stuff is durable but but clearly it belongs on the underside of cars..
This winter I am sanding down it. Don`t know yet if I am going for full gloss or satin but it will get an acrylic finish . I am going to assemble all the original side trim and
ornaments. |
|
| |
|
Veteran
Posts: 281
Location: WA/USA | Well, I like it!
Maintenance of flat black (any black) is certainly a pain. I have two flat black cars, and any water or dirt spotting means wiping down the entire car if you want it to look uniform. If you really like the flat, my understanding is that a two stage paint with flat clear on top is easier to maintain the appearance. I may give that a try on my current project (still undecided). |
|
| |
|
Expert 5K+
Posts: 5006
| wrap it if you cant paint it, these cars are easy to wrap I think. I wrapped my roof and fins.
the flat wrap would probably be better for cleaning |
|
| |
|
Elite Veteran
Posts: 649
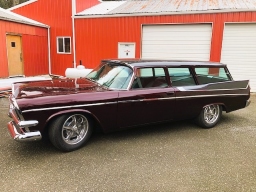
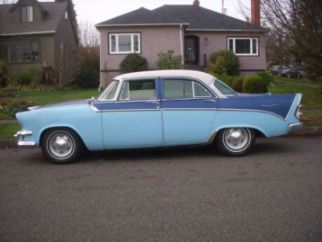
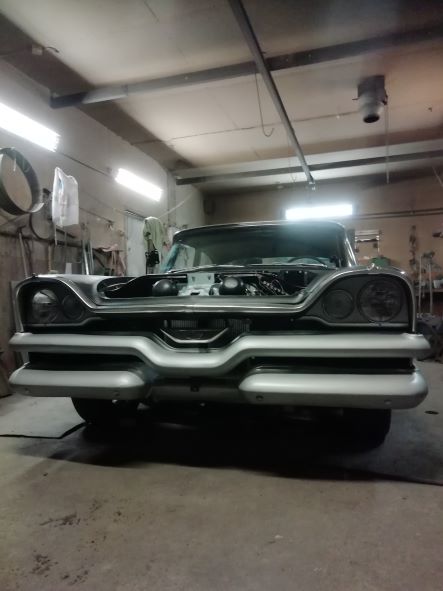
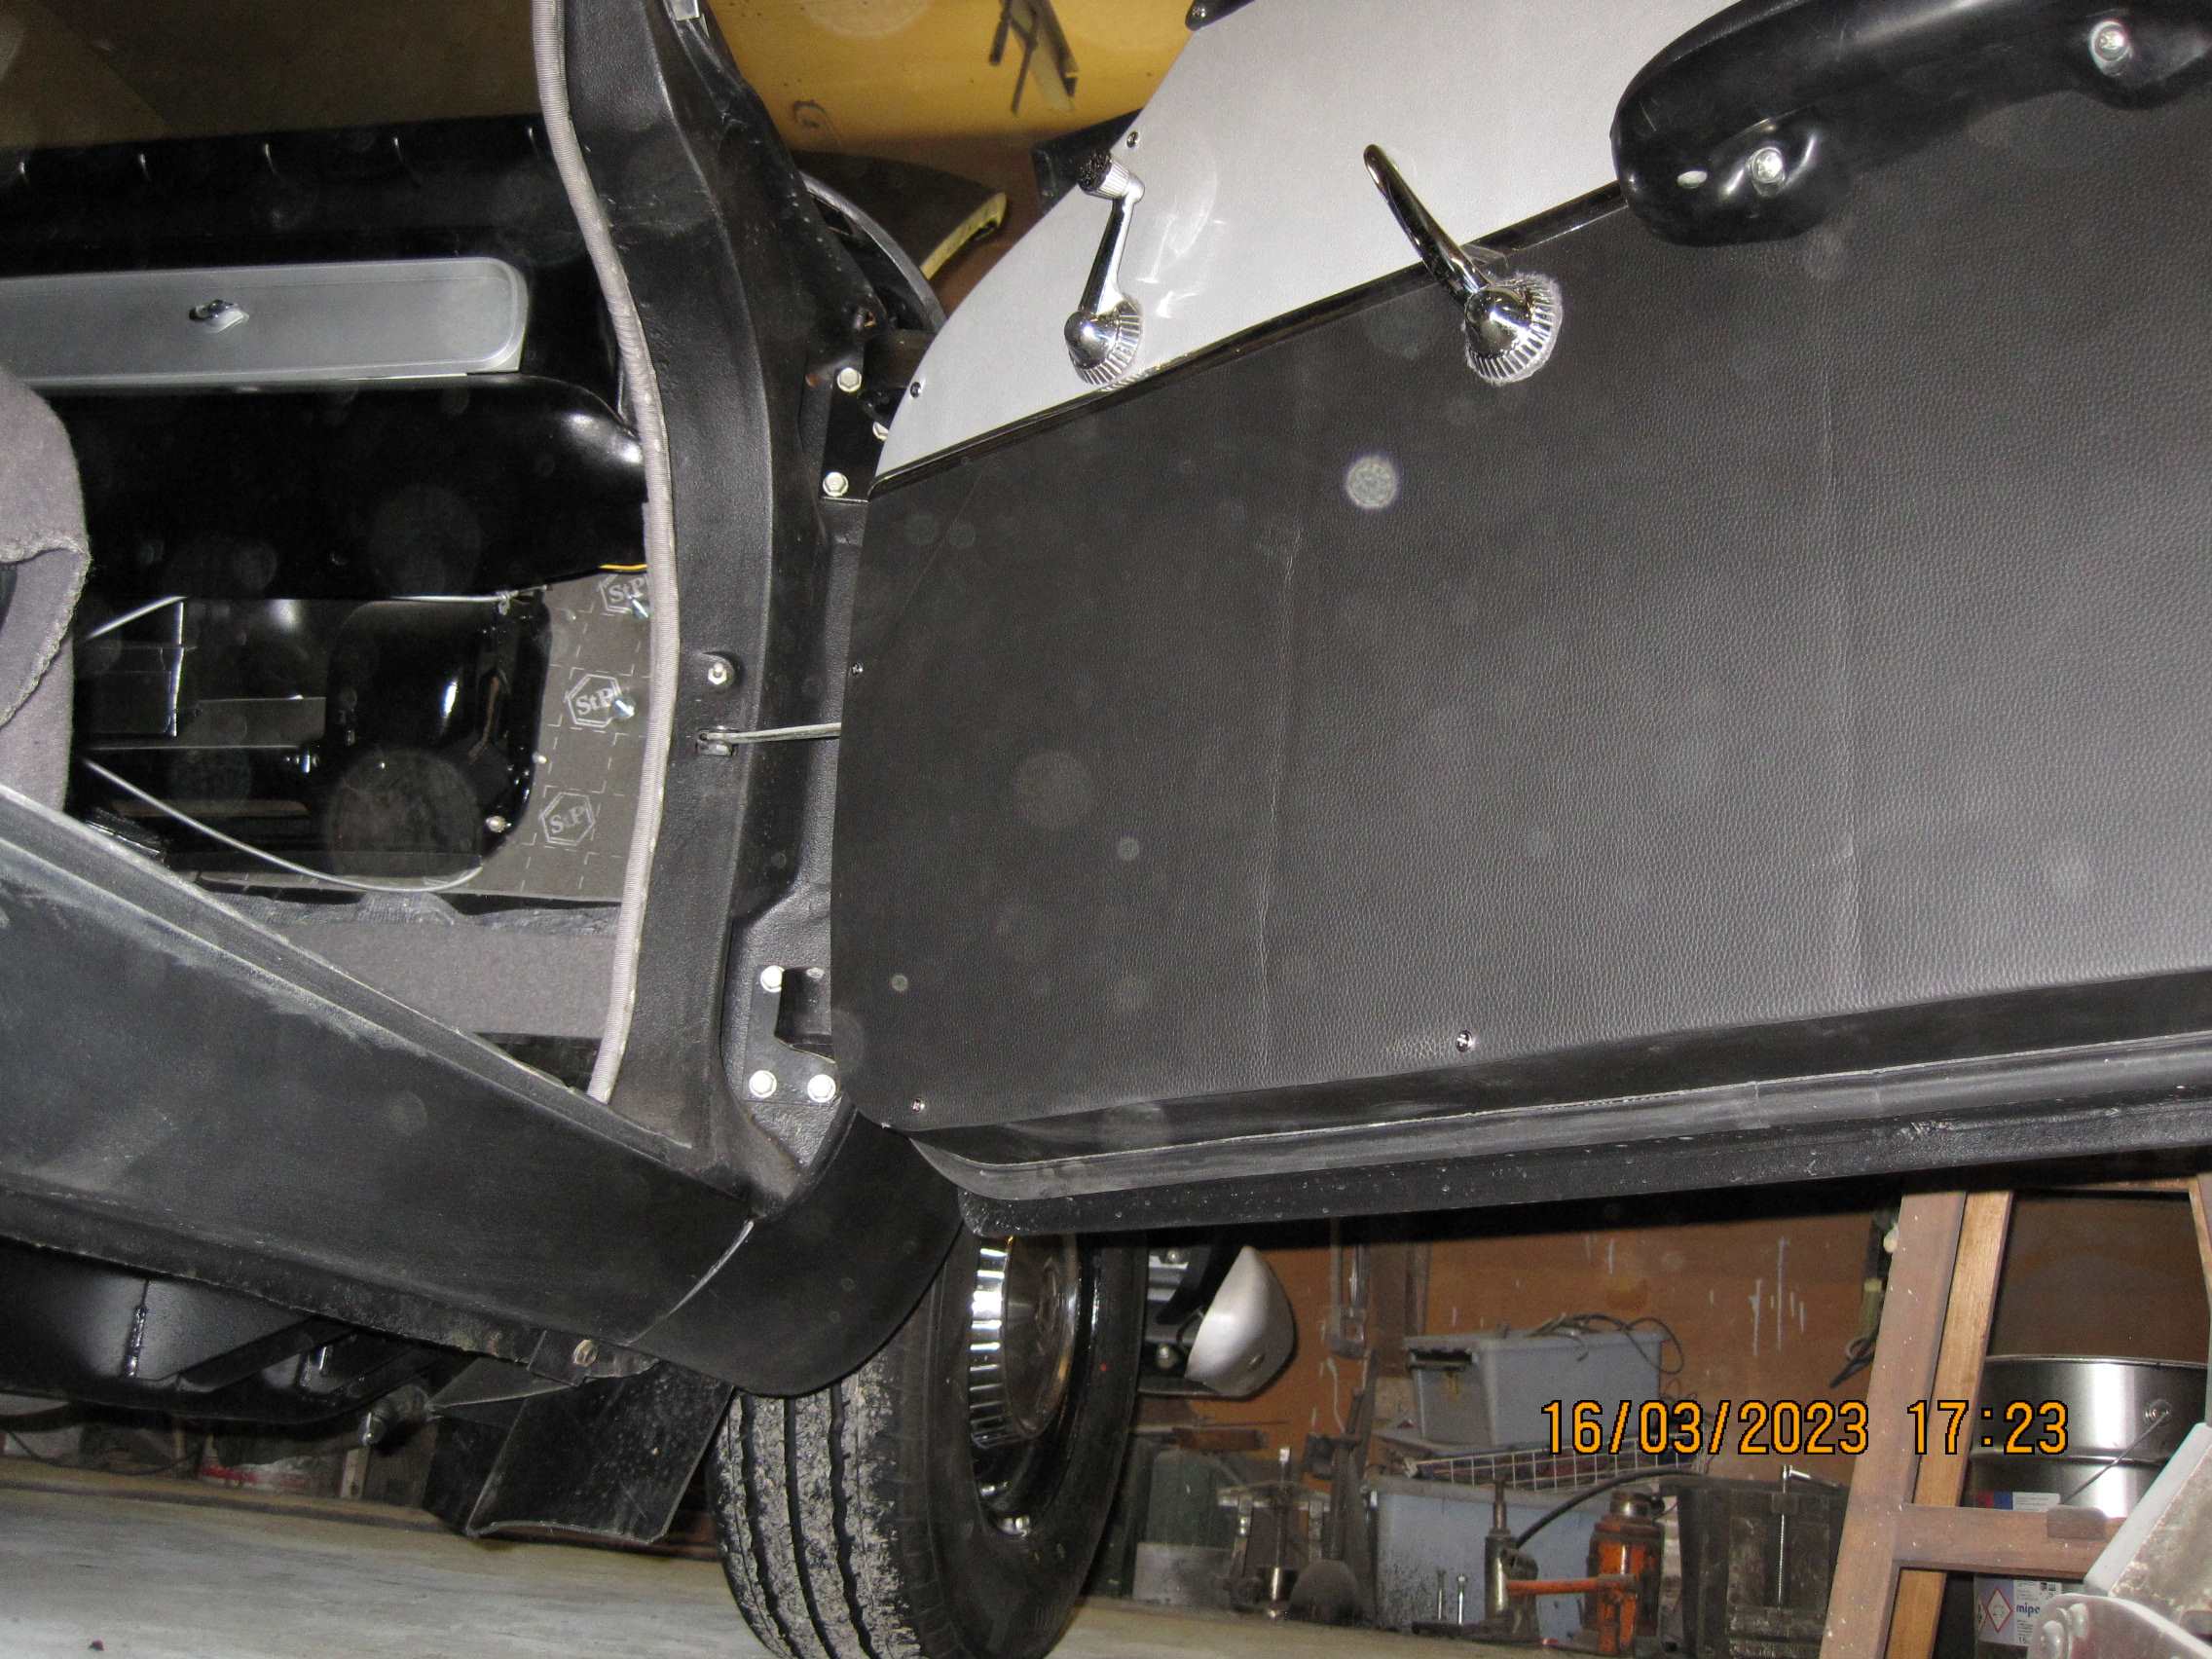
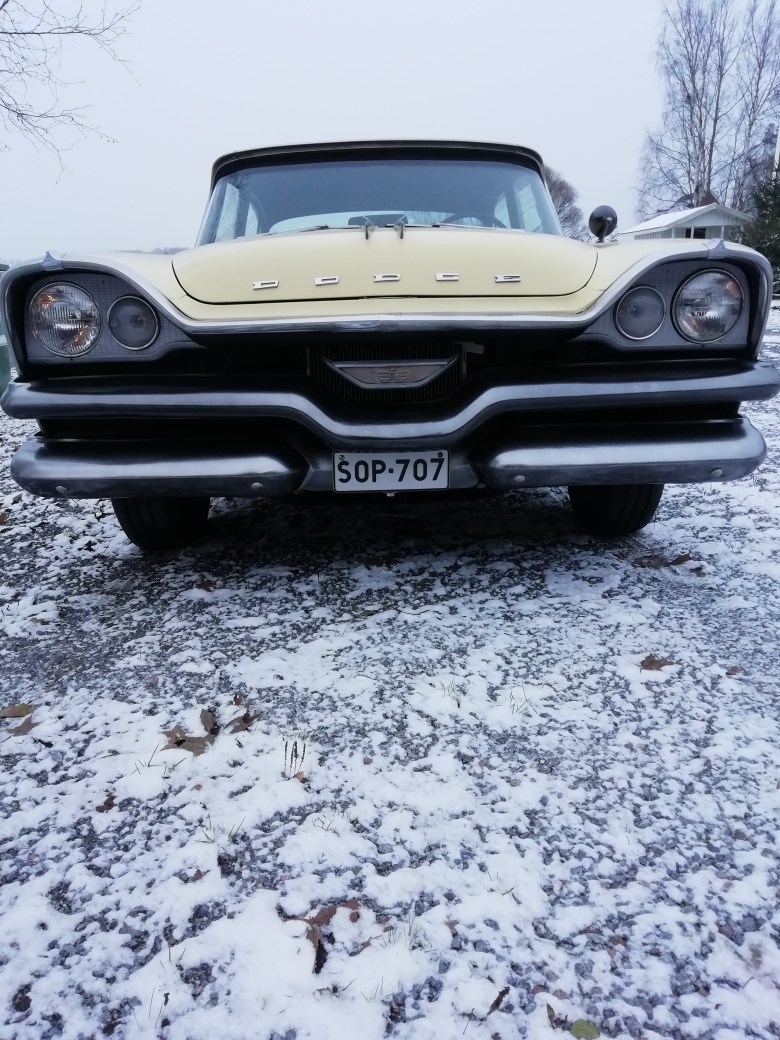
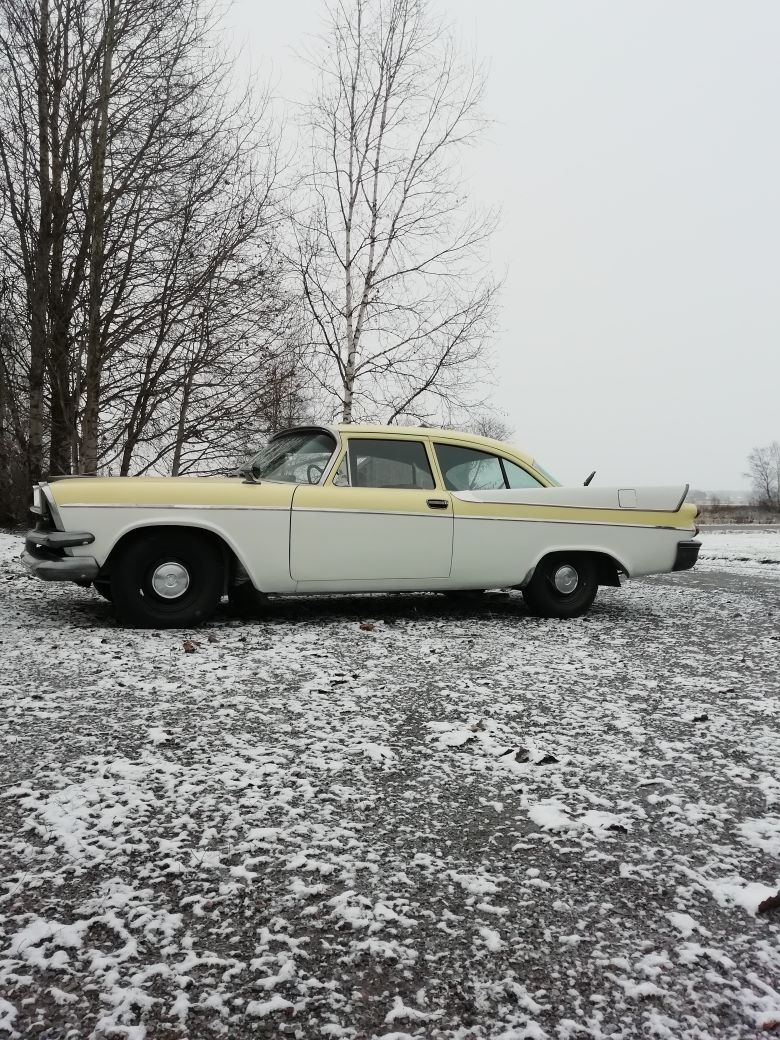
Location: Finland | Now it`s done ,it is about the original colors. Still a little rough surface...kind of sixties garage finish.....
 (IMG_20231111_152750_resized_20231111_040243251 fwl.jpg) (IMG_20231111_152750_resized_20231111_040243251 fwl.jpg)
 (IMG_20231111_152809_resized_20231111_040242638 fwl.jpg) (IMG_20231111_152809_resized_20231111_040242638 fwl.jpg)
 (IMG_20231111_152759_resized_20231111_040242953 fwl.jpg) (IMG_20231111_152759_resized_20231111_040242953 fwl.jpg)
 (IMG_20231111_152830_resized_20231111_040242234 fwl.jpg) (IMG_20231111_152830_resized_20231111_040242234 fwl.jpg)
Attachments
----------------
IMG_20231111_152750_resized_20231111_040243251 fwl.jpg (250KB - 34 downloads)
IMG_20231111_152809_resized_20231111_040242638 fwl.jpg (199KB - 34 downloads)
IMG_20231111_152759_resized_20231111_040242953 fwl.jpg (242KB - 35 downloads)
IMG_20231111_152830_resized_20231111_040242234 fwl.jpg (242KB - 33 downloads)
|
|
| |
|
Board Moderator & Exner Expert 10K+
Posts: 13045
Location: Southern Sweden - Sturkö island | Nice, sweet ride |
|
| |