| The Forward Look Network | ||
| ||
 '55 Plaza Suburban arrives today '55 Plaza Suburban arrives todayJump to page : < ... 3 4 5 6 7 8 9 10 11 12 > Now viewing page 9 [50 messages per page] | View previous thread :: View next thread |
| Forward Look NON-Technical Discussions -> 1955-1961 Forward Look MoPar General Discussion | Message format |
| 71charger_fan |
| ||
Elite Veteran Posts: 667    Location: Frederick, MD | I have a pair of armrests, but am not where they're supposed to attach as Plazas (at least my Plaza) didn't come with armrests. | ||
| |||
| 56D500boy |
| ||
Expert 5K+ Posts: 9900   Location: Lower Mainland BC | 71charger_fan - 2018-06-03 9:23 AM I have a pair of armrests, but am not where they're supposed to attach as Plazas (at least my Plaza) didn't come with armrests. Not sure if you've posted a photo of one of your doors with the inner door panel off, but I am guessing the location of the screw receivers is already marked or even punched out. If it isn't punched out you would have to open a rectangular slot (2 actually). Then the next trick is creating the armrest screw receiver clips which fit in those slots. If possible, the receiver clips could be cannibalized off any 55-56 Plymouth or Dodge (or probably Desoto or Chrysler). Somebody with a 2dr sedan (or wagon), e.g. Nathan (Powerflite) might be able to measure location(s) for the slots if your door is not already punched. Some photos (of my right rear door that needed some anti-rust conditioning) and the clips, etc.: Edited by 56D500boy 2018-06-03 10:30 AM (56DodgeDoorArmrestAttachmentDetail.jpg) (56DodgeDoorArmrestAttachmentDetail_2.jpg) (56DodgeDoorArmrestAttachmentDetail_3.jpg) Attachments ----------------  56DodgeDoorArmrestAttachmentDetail.jpg (81KB - 467 downloads) 56DodgeDoorArmrestAttachmentDetail_2.jpg (175KB - 460 downloads) 56DodgeDoorArmrestAttachmentDetail_3.jpg (186KB - 457 downloads) 56DodgeDoorArmrestAttachmentDetail.jpg (81KB - 467 downloads) 56DodgeDoorArmrestAttachmentDetail_2.jpg (175KB - 460 downloads) 56DodgeDoorArmrestAttachmentDetail_3.jpg (186KB - 457 downloads) | ||
| |||
| 71charger_fan |
| ||
Elite Veteran Posts: 667 Location: Frederick, MD | So, I've been going round and round trying to get the fuel gauge working. Had 12.36 volts at the gauge, but nothing at the sender. Continuity was fine on both leads going to the sender, so I added a ground to the sender and still nothing. I pulled the gauge and sender and tested them straight from the battery according to the FSM. The needle didn't move. So, I grabbed the original gauge, filed the points in the gauge, and hooked it up. It worked. So, I filed the points in the NOS gauge, hooked it up, and it worked. Who knew there were points in a fuel gauge? (Plaza Fuel Gauges.jpg) (Plaza Fuel Gauge Testing Original.jpg) (Plaza Fuel Gauge Testing NOS.jpg) Attachments ---------------- Plaza Fuel Gauges.jpg (62KB - 469 downloads) Plaza Fuel Gauge Testing Original.jpg (105KB - 454 downloads) Plaza Fuel Gauge Testing NOS.jpg (104KB - 460 downloads) | ||
| |||
| 56D500boy |
| ||
Expert 5K+ Posts: 9900 Location: Lower Mainland BC | Wow. I am holding a 56 Dodge fuel gauge in my hand and I must be blind. I can't see any points. You know that isn't the right battery for your car right? (In terms of location of the 12V terminals that is).  | ||
| |||
| 71charger_fan |
| ||
Elite Veteran Posts: 667 Location: Frederick, MD | I tried putting the battery in the other way but the negative cable was too short. It was cheaper to flip the battery around than buy a longer ground cable. | ||
| |||
| 71charger_fan |
| ||
Elite Veteran Posts: 667 Location: Frederick, MD | "I am holding a 56 Dodge fuel gauge in my hand and I must be blind. I can't see any points. " The points are only on the wagon gauge. They may exist because they didn't use fuses at the time. They may function as a circuit breaker. | ||
| |||
| Powerflite |
| ||
Expert 5K+ Posts: 9654 Location: So. Cal | Most likely those points are used as a crude voltage regulator. That is what allows the gauge to run on either supply voltage. Mopar vehicles in the '60's used this same technology to provide an average 5 volt supply to their gauges. Edited by Powerflite 2018-06-05 7:45 PM | ||
| |||
| Old Ray |
| ||
Extreme Veteran Posts: 507 Location: Invermere B.C. Canada - Rocky Mountains | Powerflite - 2018-06-05 5:43 PM Most likely those points are used as a crude voltage regulator. What he said ! | ||
| |||
| 71charger_fan |
| ||
Elite Veteran Posts: 667 Location: Frederick, MD | I got one of the last two panels covered today then ran out of staples. (php6g9UHEPM.jpg) (phpaukf3MPM.jpg) Attachments ---------------- php6g9UHEPM.jpg (129KB - 465 downloads) phpaukf3MPM.jpg (107KB - 459 downloads) | ||
| |||
| 71charger_fan |
| ||
Elite Veteran Posts: 667 Location: Frederick, MD | Today, my wife covered the last interior panel and I installed it. Now, I need to do something about the rear seat armrests and the cargo load floor. (Plaza Interior Panel Rear Left.jpg) (Plaza Interior Panel Rear Left (2).jpg) Attachments ---------------- Plaza Interior Panel Rear Left.jpg (92KB - 453 downloads) Plaza Interior Panel Rear Left (2).jpg (92KB - 448 downloads) | ||
| |||
| 71charger_fan |
| ||
Elite Veteran Posts: 667 Location: Frederick, MD | Went to today's Mopar show at Mason Dixon Dragway. That was a mistake. (phpWe9oEgAM.jpg) (phpBGZ9gdAM.jpg) Attachments ---------------- phpWe9oEgAM.jpg (80KB - 509 downloads) phpBGZ9gdAM.jpg (105KB - 447 downloads) | ||
| |||
| 71charger_fan |
| ||
Elite Veteran Posts: 667 Location: Frederick, MD | I decided to take a swing at carpeting the load floor. I had to clean up the edges as there was a little rust and some pinholes. So, I sealed them up with a combination of POR15 and POR putty. Then, I went around the edges with masking tape and filled in with masking paper. Then, I put the pattern on some indoor/outdoor carpet I picked up at a local discount store. The color of the carpet was supposed to be charcoal, but it seems more blue. I may buy different carpet and switch it out. For the time being, it's much better than the bare blue-painted steel. (Plaza load floor.jpg) (Plaza load floor (2).jpg) (Plaza load floor (3).jpg) (Plaza load floor (4).jpg) (Plaza carpet pattern.jpg) Attachments ---------------- Plaza load floor.jpg (79KB - 437 downloads) Plaza load floor (2).jpg (75KB - 460 downloads) Plaza load floor (3).jpg (95KB - 476 downloads) Plaza load floor (4).jpg (93KB - 466 downloads) Plaza carpet pattern.jpg (76KB - 434 downloads) | ||
| |||
| 71charger_fan |
| ||
Elite Veteran Posts: 667 Location: Frederick, MD | Measuring and cutting the padding would have been easier without the assistance of my Great Pyrenees. (Plaza carpet padding.jpg) (Plaza carpet pad.jpg) (Plaza carpet pattern (2).jpg) (Plaza carpet load floor.jpg) Attachments ---------------- Plaza carpet padding.jpg (82KB - 436 downloads) Plaza carpet pad.jpg (95KB - 464 downloads) Plaza carpet pattern (2).jpg (86KB - 443 downloads) Plaza carpet load floor.jpg (91KB - 437 downloads) | ||
| |||
| Old Ray |
| ||
Extreme Veteran Posts: 507 Location: Invermere B.C. Canada - Rocky Mountains | Looks great.....thank you for posting. (can't wait). | ||
| |||
| 71charger_fan |
| ||
Elite Veteran Posts: 667 Location: Frederick, MD | I think I finally found a spring for the driver side wiper arm that will hold the blade against the window. (php8cZlnuPM.jpg) Attachments ---------------- php8cZlnuPM.jpg (98KB - 440 downloads) | ||
| |||
| 71charger_fan |
| ||
Elite Veteran Posts: 667 Location: Frederick, MD | I started on the rear seat armrest tops. The last vestige of the smell of mice. (Plaza rear seat arm rest tops.jpg) (Plaza rear seat arm rest tops (2).jpg) Attachments ---------------- Plaza rear seat arm rest tops.jpg (101KB - 450 downloads) Plaza rear seat arm rest tops (2).jpg (110KB - 438 downloads) | ||
| |||
| 71charger_fan |
| ||
Elite Veteran Posts: 667 Location: Frederick, MD | Today, I continued working on the rear seat arm rests. (Plaza rear seat arm rest tops (3).jpg) (Plaza rear seat arm rest tops (4).jpg) (Plaza rear seat arm rest tops (5).jpg) (Plaza rear seat arm rest tops (6).jpg) (Plaza rear seat arm rest tops (7).jpg) Attachments ---------------- Plaza rear seat arm rest tops (3).jpg (90KB - 449 downloads) Plaza rear seat arm rest tops (4).jpg (81KB - 426 downloads) Plaza rear seat arm rest tops (5).jpg (74KB - 423 downloads) Plaza rear seat arm rest tops (6).jpg (82KB - 425 downloads) Plaza rear seat arm rest tops (7).jpg (86KB - 424 downloads) | ||
| |||
| 71charger_fan |
| ||
Elite Veteran Posts: 667 Location: Frederick, MD | Finished up the rear seat arm rests today. (phpsGJoHMPM.jpg) (php7y2LtMPM.jpg) (phpxsZ4E0PM.jpg) (phpeLSyuQPM.jpg) (php0LTDsFPM.jpg) Attachments ---------------- phpsGJoHMPM.jpg (90KB - 433 downloads) php7y2LtMPM.jpg (66KB - 420 downloads) phpxsZ4E0PM.jpg (97KB - 430 downloads) phpeLSyuQPM.jpg (87KB - 419 downloads) php0LTDsFPM.jpg (81KB - 411 downloads) | ||
| |||
| 71charger_fan |
| ||
Elite Veteran Posts: 667 Location: Frederick, MD | Today, I decided to put some fresh oil in the engine for Carlisle weekend as sludge is still working its way loose from years of neglect. When I pulled out the oil filter, I stuck my finger down in the canister and felt probably a good inch of sludge in the bottom. So, I disconnected the inlet and outlet lines, removed the canister and cleaned it out. The worst of what was in the bottom was like Play Doh when it's just about hard. I scooped that out with a worn screwdriver and wiped it out thoroughly. I reassembled everything and decided to go for a short drive. Almost as soon as I left the driveway, the filter cover gasket let go and there's about 2 quarts of fresh 10w-30 making a stripe on the street. I took the canister off the engine again and also removed the drain line and cleared that with brake cleaner. I put it all back together with an NOS USA-made Hastings filter instead of the made-in-Turkey Fram and it all seems fine now. What a mess. | ||
| |||
| Old Ray |
| ||
Extreme Veteran Posts: 507 Location: Invermere B.C. Canada - Rocky Mountains | Hum. 10w-30 is probably a good flushing oil but I wonder if a slightly heavier oil for summer heat and long trips would be better? | ||
| |||
| 71charger_fan |
| ||
Elite Veteran Posts: 667 Location: Frederick, MD | Made it up and back twice. Only used a quart of oil per day. I really have to do something about the leak where the oil filter drain goes back into the block. Two qts in just over 300 miles is excessive. Especially when it doesn't seem to be burning any. I'll probably replace the hard lines to the oil filter with braided lines to the filter can be emptied at oil changes without disconnecting anything. | ||
| |||
| 71charger_fan |
| ||
Elite Veteran Posts: 667 Location: Frederick, MD | On the drives up and back to Carlisle I was thrilled at how comfortable the seats were. I really dumb-lucked into a great combination of materials that provided a firm but comfortable cushion and the cloth seating surfaces are so much more comfortable in the heat than the vinyl was. | ||
| |||
| 71charger_fan |
| ||
Elite Veteran Posts: 667 Location: Frederick, MD | At Carlisle, I bought a clutch rod grommet/bellows from one of the vendors that looked like it would fit the '55. Today, I decided to find out. It was a surprisingly good fit. Color me happy. I smeared a good amount of Permatex Black around it on the engine side. (phpNtN2ORPM.jpg) (phpTScjUIPM.jpg) (phpw8yoJ5PM.jpg) Attachments ---------------- phpNtN2ORPM.jpg (75KB - 414 downloads) phpTScjUIPM.jpg (102KB - 454 downloads) phpw8yoJ5PM.jpg (114KB - 422 downloads) | ||
| |||
| 71charger_fan |
| ||
Elite Veteran Posts: 667 Location: Frederick, MD | My NOS headpipe and tailpipe arrived today. I'm still looking for a muffler. In the meantime, I'll slip in a glasspack of the right length. (phplwOSNSPM.jpg) Attachments ---------------- phplwOSNSPM.jpg (83KB - 397 downloads) | ||
| |||
| 56D500boy |
| ||
Expert 5K+ Posts: 9900 Location: Lower Mainland BC | 71charger_fan - 2018-07-27 3:25 PM My NOS headpipe and tailpipe arrived today. I'm still looking for a muffler. In the meantime, I'll slip in a glasspack of the right length. Back in the day (1967-72) when I was in high school and university with my 55 Canadian Dodge with the "big" 25 inch long head Canadian 251 cu in flat-head six, I ran a Thrush (straight through, perforated center core) muffler. I sounded great (mostly) - might have been a little bit of "drone" on the highway, but I liked it. Loved the throaty sound of the straight six. What makes me kick my butt now is I never converted the exhaust manifold to duals. Not necessarily Fenton but just a cut and weld job would have been in my budget. Fenton: 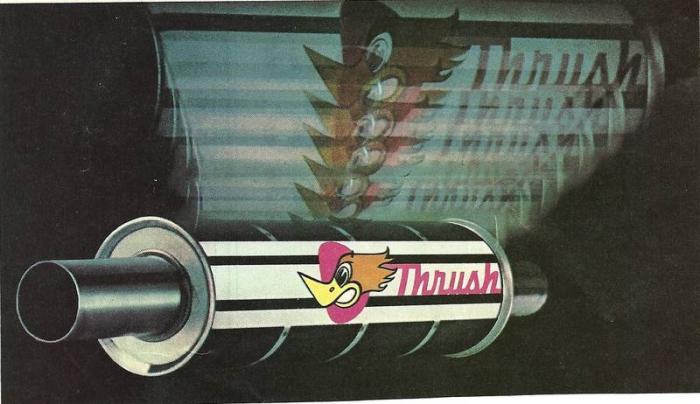 | ||
| |||
| 71charger_fan |
| ||
Elite Veteran Posts: 667 Location: Frederick, MD | I put the new pipes in today. However, I didn't realize that the tailpipe was 2" but necked down to 1.75" going into the muffler. So, tomorrow morning I'll run to NAPA and pick up the appropriate adapter and finish it up. (phpoCM937PM.jpg) (phpFVWkjoPM.jpg) Attachments ---------------- phpoCM937PM.jpg (99KB - 413 downloads) phpFVWkjoPM.jpg (107KB - 414 downloads) | ||
| |||
| 71charger_fan |
| ||
Elite Veteran Posts: 667 Location: Frederick, MD | Today, I picked up a 41946 reducer at NAPA and finished up the exhaust installation. | ||
| |||
| 71charger_fan |
| ||
Elite Veteran Posts: 667 Location: Frederick, MD | Two u-joint kits arrived today. (phpFBJOq2PM.jpg) (php4kUJa1PM.jpg) Attachments ---------------- phpFBJOq2PM.jpg (76KB - 396 downloads) php4kUJa1PM.jpg (96KB - 406 downloads) | ||
| |||
| 71charger_fan |
| ||
Elite Veteran Posts: 667 Location: Frederick, MD | The odometer in my car didn't work. I had purchased a spare dash panel but didn't know the condition of that speedometer. I took it to Carlisle and handed it over to D&M Restoration on Saturday and asked for repair only just to ensure the speedometer and odometer were working. I also asked them to set the odometer to match the reading of the one in the car. I cost me $200 to have them rebuild the speedometer, repaint the needle, reset the odometer, and give it a general clean up. I had it back by the very next Friday. (Plaza speedometer.jpg) Attachments ---------------- Plaza speedometer.jpg (78KB - 409 downloads) | ||
| |||
| 71charger_fan |
| ||
Elite Veteran Posts: 667 Location: Frederick, MD | Today, I decided to deal with switching the hard lines to and from the oil filter to flexible braided lines. This way, I can undo the filter when I do an oil change and pour it out. That way, all that dirty oil won't stay behind in the system as it does now. Unfortunately, as soon as I got everything apart, a thunderstorm blew in. So, maybe tomorrow. (phpt4bgfzPM.jpg) Attachments ---------------- phpt4bgfzPM.jpg (154KB - 398 downloads) | ||
| |||
| 71charger_fan |
| ||
Elite Veteran Posts: 667 Location: Frederick, MD | I installed the braided oil lines to and from the filter. Where the fittings go into the block made for an extremely tight fit for the starter, but I got it in. I reused the 45-degree drain fitting, but I think I'll need to take that apart as that one is leaking. It was leaking before, but I hoped thread sealant would allow me to reuse it without issue. I'll have to dig around in Ebay and try to find new 45-degree fittings. I do have one more new 90-degree fitting and if I have too much trouble finding a 45, I'll use that. (php8TyGvEPM.jpg) (phpseWqwaPM.jpg) (phpOuHufePM.jpg) (php7Wfu7PPM.jpg) (phpBgcZdCPM.jpg) Attachments ---------------- php8TyGvEPM.jpg (116KB - 380 downloads) phpseWqwaPM.jpg (165KB - 392 downloads) phpOuHufePM.jpg (128KB - 391 downloads) php7Wfu7PPM.jpg (107KB - 399 downloads) phpBgcZdCPM.jpg (61KB - 376 downloads) | ||
| |||
| 71charger_fan |
| ||
Elite Veteran Posts: 667 Location: Frederick, MD | A couple of different style 45-degree adapters arrived in today's mail. One of these, likely the black one, should be the ticket for finally stopping the oil leak where the filter drain enters the block. (phpwHkQZpPM.jpg) (phpg4vEVtPM.jpg) Attachments ---------------- phpwHkQZpPM.jpg (114KB - 374 downloads) phpg4vEVtPM.jpg (79KB - 372 downloads) | ||
| |||
| 71charger_fan |
| ||
Elite Veteran Posts: 667 Location: Frederick, MD | I finally had a chance to fix the leaking oil return fitting. Unfortunately, there wasn't enough room to use the 45-degree AN fitting. I had to use one of the 45-degree brass NPT fittings and an NPT to AN-03 straight adapter. (phpEiHx1DAM.jpg) Attachments ---------------- phpEiHx1DAM.jpg (97KB - 367 downloads) | ||
| |||
| 71charger_fan |
| ||
Elite Veteran Posts: 667 Location: Frederick, MD | I found a parking lamp lens that, while not NOS, is in better shape than what was on the car. (phpRjAS7GPM.jpg) Attachments ---------------- phpRjAS7GPM.jpg (71KB - 382 downloads) | ||
| |||
| 71charger_fan |
| ||
Elite Veteran Posts: 667 Location: Frederick, MD | I had maybe 400 summer miles on my last oil change. So, I drained the oil. For the first time, no sludge came out. Looks like I've finally got the engine flushed out. | ||
| |||
| 71charger_fan |
| ||
Elite Veteran Posts: 667 Location: Frederick, MD | I misunderstood the Ebay listing. I thought I was buying an NOS turn signal lens, what I got was an NOS lens and an NOS housing. Not bad for $41. (phpaVJhVeAM.jpg) (phpXOoa1LAM.jpg) Attachments ---------------- phpaVJhVeAM.jpg (126KB - 377 downloads) phpXOoa1LAM.jpg (104KB - 357 downloads) | ||
| |||
| Powerflite |
| ||
Expert 5K+ Posts: 9654 Location: So. Cal | That's a great score. I like those a lot better than the '56 version. I am considering swapping mine out for those. | ||
| |||
| 71charger_fan |
| ||
Elite Veteran Posts: 667 Location: Frederick, MD | Replaced the speedometer in the 1955 Plymouth Plaza with the one from my parts stash that I had repaired. After 2 years of ownership, I finally have a working odometer and a steady speedometer needle. (phpFGkYgfPM.jpg) (phpIitBwDPM.jpg) (phpcwRSNfPM.jpg) Attachments ---------------- phpFGkYgfPM.jpg (71KB - 364 downloads) phpIitBwDPM.jpg (64KB - 361 downloads) phpcwRSNfPM.jpg (88KB - 357 downloads) | ||
| |||
| 71charger_fan |
| ||
Elite Veteran Posts: 667 Location: Frederick, MD | I had someone on another forum express interest in buying the wagon. I went through everything I have spent on the car and realized I was into in for somewhere above $18,000. I was quite surprised. I would have guessed somewhere between $12,500 and $14,000. As I didn't believe the car to be worth $18K, I offered it to him for $15K. He passed as it was more than he wanted to spend. | ||
| |||
| 71charger_fan |
| ||
Elite Veteran Posts: 667 Location: Frederick, MD | Tried to run errands in the wagon today. It wouldn't start. The fuel filter was dry and wasn't filling. So, a dive into the parts stash for a fuel pump was in order. (phpUhmGnDAM.jpg) Attachments ---------------- phpUhmGnDAM.jpg (127KB - 357 downloads) | ||
| |||
| 71charger_fan |
| ||
Elite Veteran Posts: 667 Location: Frederick, MD | Today, the weather finally cooperated and allowed me to work in the driveway to switch out the fuel pump. Not sure if the old one is worth keeping to rebuild it or if I should just trash it. (phpqiaU2cAM.jpg) Attachments ---------------- phpqiaU2cAM.jpg (129KB - 348 downloads) | ||
| |||
| 56D500boy |
| ||
Expert 5K+ Posts: 9900 Location: Lower Mainland BC | 71charger_fan - 2018-12-18 1:28 PM Not sure if the old one is worth keeping to rebuild it or if I should just trash it. The repair kit for the 55-56 Plymouth 6 cyl fuel pump is 1450 023. There is one for sale on the internet: https://www.gumtree.com.au/s-ad/albert-park/engine-engine-parts-tran...   | ||
| |||
| 71charger_fan |
| ||
Elite Veteran Posts: 667 Location: Frederick, MD | he wants $50, I'm still finding complete pumps for that. Thanks for the part number. Gives me something else to search for. Wonder what Carter's number was for this kit | ||
| |||
| 71charger_fan |
| ||
Elite Veteran Posts: 667 Location: Frederick, MD | After changing out the fuel pump, a few days ago I decided to run errands in it but she refused to start. There's spark and fuel to the carb. I had too many other things to do to mess with it. I'm guessing either a stuck float or clogged needle and seat. It may be time to finally spend the money and get a new carb. | ||
| |||
| 71charger_fan |
| ||
Elite Veteran Posts: 667 Location: Frederick, MD | I took advantage of an unseasonably warm day to switch the carb. However, by the time I got the carb on and fished a wire for the choke, it was late, getting dark, and getting cold. Now, there's snow on the way. So, it's up to Mother Nature when I get around to trying an initial fire up. (Plaza New Carb.jpg) (Plaza New Carb (2).jpg) (Plaza New Carb (3).jpg) (Plaza New Carb (4).jpg) (Plaza New Carb (5).jpg) (Plaza New Carb (6).jpg) (Plaza New Carb (7).jpg) (Plaza New Carb (8).jpg) (Plaza New Carb (9).jpg) Attachments ---------------- Plaza New Carb.jpg (100KB - 343 downloads) Plaza New Carb (2).jpg (90KB - 337 downloads) Plaza New Carb (3).jpg (127KB - 338 downloads) Plaza New Carb (4).jpg (102KB - 331 downloads) Plaza New Carb (5).jpg (94KB - 337 downloads) Plaza New Carb (6).jpg (91KB - 328 downloads) Plaza New Carb (7).jpg (91KB - 338 downloads) Plaza New Carb (8).jpg (89KB - 345 downloads) Plaza New Carb (9).jpg (80KB - 325 downloads) | ||
| |||
| 71charger_fan |
| ||
Elite Veteran Posts: 667 Location: Frederick, MD | I needed a timing chain and gears. Finding American-made timing components for the Plymouth flathead is doable, but not easy. Fortunately, I saw the P24 stamped on the engine before I tracked down the parts as the timing chains changed for '55. (phps8BhdcPM.jpg) (phpfVpDb0PM.jpg) (phpKmiSqAPM.jpg) Attachments ---------------- phps8BhdcPM.jpg (81KB - 300 downloads) phpfVpDb0PM.jpg (79KB - 323 downloads) phpKmiSqAPM.jpg (122KB - 319 downloads) | ||
| |||
| 71charger_fan |
| ||
Elite Veteran Posts: 667 Location: Frederick, MD | The forecast for snow today missed the mark by a mile and it was sunny and reasonably warm (for February). So, I went outside to eye up how big a job the timing chain was going to be. I didn't see any way to do it without pulling the radiator. So, it can wait. | ||
| |||
| Powerflite |
| ||
Expert 5K+ Posts: 9654 Location: So. Cal | Let me know how well that carburetor works out. | ||
| |||
| 71charger_fan |
| ||
Elite Veteran Posts: 667 Location: Frederick, MD | Yesterday, I finally got that elusive combination of a warm, dry day where I wasn't babysitting. So, out to the driveway to try and get the wagon started. I pulled the fuel line off of the carb and put it in a plastic bottle then hit the starter. No gas in the bottle. So, on the off chance my swap meet fuel filter was defective, I swapped in a clear plastic one and hit the starter again. When I saw the plastic one start to fill with fuel, I put the hose back on the carb and it started right up. Just when I thought I'd fixed it, it died. No fuel coming from the accelerator pump, so I checked again and realized it wasn't pumping fuel. So, then I thought the "new" fuel pump I'd installed must have already gone bad, so I swapped it with another NOS one I had on hand. Still no fuel flow. Then, I did what, in hindsight, I should have done in the first place and pushed some compressed air through the line until I heard the fuel tank bubble. Hooked everything back up and it started right up and ran. Now, I'm thinking I need to drop the fuel tank and send it off to get it cleaned out and coated. (phpAZGuKrAM.jpg) Attachments ---------------- phpAZGuKrAM.jpg (104KB - 303 downloads) | ||
| |||
| 71charger_fan |
| ||
Elite Veteran Posts: 667 Location: Frederick, MD | I took it out on Sunday and just drove it around and around the area near my house. I put about 10 to 12 miles on it. It drives nicely and I can definitely feel (and hear) a difference with the 2-bbl at WOT. Otherwise, other than having a working choke, it feels about the same as it did with the 1-bbl once warmed up. I'm pretty happy no longer having an oil-bath air cleaner. | ||
| |||
| Jump to page : < ... 3 4 5 6 7 8 9 10 11 12 > Now viewing page 9 [50 messages per page] |
| Search this forum Printer friendly version E-mail a link to this thread |
| (Delete all cookies set by this site) | |


