| The Forward Look Network | ||
| ||
 Anatomy of a 56 Dodge Dash Light Rheostat/Switch Anatomy of a 56 Dodge Dash Light Rheostat/SwitchJump to page : 1 Now viewing page 1 [50 messages per page] | View previous thread :: View next thread |
| Forward Look Technical Discussions -> Electrical, Battery and Charging | Message format |
| 56D500boy |
| ||
Expert 5K+ Posts: 9900     Location: Lower Mainland BC | I decided to replace my dash light switch today while I was waiting for the Tremclad Gray Rust paint to dry in the half of the trunk I did yesterday. (I guess I really gooped in on thick). Anyway, I removed the existing switch and found the switch that I had purchased from a forum member. I decided that my switch was in better shape than the one I bought BUT I did not know how either worked. I did probe it with my ohm meter but things weren't consistent. So I decided to take the purchased one apart to see if I could figure it out to renovate my switch. Taking apart the switch involves bending three tangs from the metal portion as they fit over the porcelain part. Then the switch basically explodes because of the compression spring that is used to maintain the contact between the power in terminal and the power out terminal (via the coiled wire variable resistance). Below is a listing of the parts as I discovered them and what (I think) they do: 1. Adjustment knob - held to the switch shaft with an allen set screw that takes a 3/32" allen key 2. 5/8" nut that holds the switch to the dash 3. The metal portion of the switch, complete with the three tangs that were mentioned and internal stops 4. The compression spring that helps to maintain electrical contact between Item 7 and Item 8 5. Phenolic spacer to electrically isolate the metal portion of the switch from the electrical portion of the switch . Also takes the compression from the small end of the spring 6. Similar spacer but with holes to locate Item 7 the central contact point 7. The central contact point, fits into Item 6 8. The main electrical part of the switch, porcelain with round pin terminal for the red input wire Item 11 (only hot in Park and Headlights ON), threaded post terminal for the black out put wire, central contact points and wound wire variable resistance to provide the dimming action. 9. The black output wire with ring terminal 10. Nut to hold the output wire to the threaded post on Item 8 (missing: small lock washer) 11. Red input wire (only hot in Park and Headlights ON) With that knowledge I cleaned my existing switch contacts without taking it apart (using 400 grit sandpaper and some DeOxit (equivalent). Seemed to work. I got variable ohms as expected and an ON/OFF position. UPDATE: It was getting dark so I put the car away (and tested the newly renovated OE dimmer switch). Works fine but light for the Oil Pressure/Coolant temp isn't working despite a new Type 57 bulb.  The speedometer illumination is fine with the old bulb and the Ammeter/Fuel gauge light is working with a new bulb. The speedometer illumination is fine with the old bulb and the Ammeter/Fuel gauge light is working with a new bulb.  Edited by 56D500boy 2017-10-08 11:06 PM (AnatomyOfA56DodgeDashLightSwitch_Annotated.jpg) (56DodgeLightingCircuitDiagram_1_small.jpg) Attachments ----------------  AnatomyOfA56DodgeDashLightSwitch_Annotated.jpg (103KB - 177 downloads) 56DodgeLightingCircuitDiagram_1_small.jpg (180KB - 195 downloads) AnatomyOfA56DodgeDashLightSwitch_Annotated.jpg (103KB - 177 downloads) 56DodgeLightingCircuitDiagram_1_small.jpg (180KB - 195 downloads) | ||
| |||
| 56D500boy |
| ||
Expert 5K+ Posts: 9900 Location: Lower Mainland BC | 56D500boy - 2017-10-08 8:46 PM UPDATE: It was getting dark so I put the car away (and tested the newly renovated OE dimmer switch). Works fine but light for the Oil Pressure/Coolant temp isn't working despite a new Type 57 bulb. The speedometer illumination is fine with the old bulb and the Ammeter/Fuel gauge light is working with a new bulb. While I was out painting the inside of the trunk (and waiting for it to dry), I checked that oil pressure/coolant temp light (with its new Type 57 bulb). Not sure what the issue was (if any) but I pulled the bulb holder out and grounded it against something under the dash with the headlight switch in PARK and the bulb lit up. (??!!). So I just stuck the bulb holder back in and made sure it was seated. Seemed to do the trick. (Ish). BUT now I am NOT impressed by the amount of light that those type 57s put out even with the dimmer adjusted to max output. Therefore, I hoping to be pointed at something with more candle power than those little wienies. Anybody? | ||
| |||
| DepsilonD |
| ||
Elite Veteran Posts: 792  Location: Buena Park, CA | Nice work Dave. I wonder if switching to LED bulbs on the dash lights would help with the brightness? | ||
| |||
| 56D500boy |
| ||
Expert 5K+ Posts: 9900 Location: Lower Mainland BC | DepsilonD - 2017-10-10 11:13 AM Nice work Dave. I wonder if switching to LED bulbs on the dash lights would help with the brightness? That is what I was thinking too. I went looking locally yesterday after picking up my spray bombs of Code 20 1977 Chevy (heaven forbid!) Light Blue (good match to the 1956 Dodge Wedgewood blue). The major FLAPS I went to (Lordco) has some LED bulbs but not the equivalent of a Type 57, i.e. a BA92 (9 mm Bayonet, single contact) like these (two different styles, the one on the right is supposedly the one I would want): 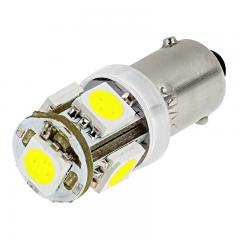 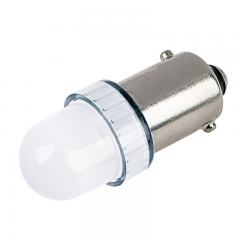 REFERENCE: https://www.superbrightleds.com/cat/led-vehicle-replacement-bulbs/fi... | ||
| |||
| rebel |
| ||
Extreme Veteran Posts: 309 Location: Western Colorado | Dave, I looked in my bulb specification book and the 1895 bulbs are the same as the 57 but the 1895 is heavy duty with an average life of 2000 hours. Since I have some of each of these bulbs, I took a spare socket and hooked it up to a battery to see if the 1895 bulbs "appear" brighter, even though they are rated at 2 CP just like the 57 bulbs. They do seem a "little" brighter, but not a lot more than the 57 bulbs. The longer life might be beneficial. You might want to try one, just to see if it will help. Bob | ||
| |||
| Jump to page : 1 Now viewing page 1 [50 messages per page] |
| Search this forum Printer friendly version E-mail a link to this thread |
| (Delete all cookies set by this site) | |


