| The Forward Look Network | ||
| ||
 Towards an OE look Tach for a 56 Dodge Towards an OE look Tach for a 56 DodgeJump to page : 1 Now viewing page 1 [50 messages per page] | View previous thread :: View next thread |
| Forward Look Technical Discussions -> Body, Glass, Interior and Trim | Message format |
| 56D500boy |
| ||
Expert 5K+ Posts: 9903     Location: Lower Mainland BC | Inspired by a tach installed by Dave Homstad (as shown below), I have decided to try to develop an OE-look 2" twin gauge pod to sit above the steering column with the left side of the twin pod holding a voltmeter and the right side holding a 2" tach (so I don't over rev my dear old D500 engine). To this end, I've now purchased a NOS 1626 901 bezel and lens unit as a starting point. When I picked the NOS bezel up today I realized that it's literally just the plastic part and the plated steel rings, no housing. So I've now purchased a used 55/56 Plymouth gauge housing to gut and create the rear part of a pod. Not sure about the front, i.e. whether I will need a metal "blind" to mimic the dash - or not. Interesting that the lens of the OE gauges actually acts as a magnifying glass and that the "chrome" button is actually an integral part of the lens and is back-painted with the "chrome". Here are the pertinent photos of the starting point of this project. The first one is courtesy of Dave Homstad and his 56 Dodge Custom Royal Lancer (Dave used his old clock housing to mount a 2" tach) Edited by 56D500boy 2018-02-15 6:33 PM (DHomstads2inchDashTach.jpg) (NOS1626901_55_56InstrumentBezelAndLens.jpg) (TempAndFuelGauge_Front.jpg) (TempAndFuelGauge_Back.jpg) Attachments ----------------  DHomstads2inchDashTach.jpg (236KB - 222 downloads) NOS1626901_55_56InstrumentBezelAndLens.jpg (149KB - 240 downloads) TempAndFuelGauge_Front.jpg (23KB - 228 downloads) TempAndFuelGauge_Back.jpg (21KB - 225 downloads) DHomstads2inchDashTach.jpg (236KB - 222 downloads) NOS1626901_55_56InstrumentBezelAndLens.jpg (149KB - 240 downloads) TempAndFuelGauge_Front.jpg (23KB - 228 downloads) TempAndFuelGauge_Back.jpg (21KB - 225 downloads) | ||
| |||
| 56D500boy |
| ||
Expert 5K+ Posts: 9903 Location: Lower Mainland BC | In an older related thread "Was there really a 56 D-500 tachometer?" Nathan (Powerflite) replied: Powerflite - 2017-01-03 4:50 PM I have one of those Fury Tachs that I purchased to put into my Savoy dash, but I am not sure I want to cut that big of a hole there, and dealing with the sender is a pain. For your Dodge, it seems that a column or dash mounted tach is what you want anyway, and it wouldn't require a special sender for it. So I would recommend that approach. You have a clock in your dash that most people find to be pretty useless in the days of cell phones and ipods, and hard to keep oiled & working. You could convert that into a tachometer. That would be pretty cool. The Plymouth and DeSoto used a clock that mounted on top of the dash that could be turned into a pretty neat tach too. Dave H. has already gone down that road (converting the clock location to a Tach). Looks good but not exactly line of sight. I purchased a used gauge pod to convert/modify to combo voltmeter and tachometer, attached to the steering column. I will be using nominal 2" gauges, perhaps from Autometer, maybe something like these:   Or these ones from VDO: 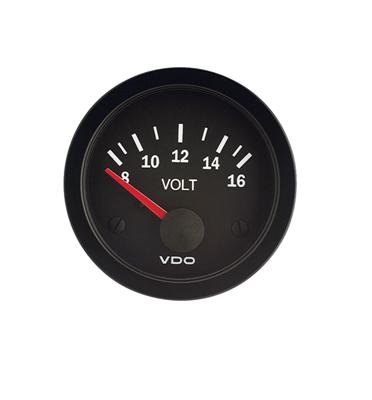 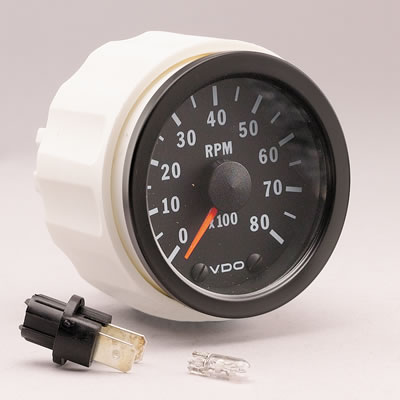 (I am open to suggestions if somebody has some) Sitting in a two gauge pod, something like this: Edited by 56D500boy 2018-03-03 8:27 PM (MockUpOfOETwoGaugePodOnSteeringColumnForVoltMeterAndSmallTach.jpg) Attachments ---------------- MockUpOfOETwoGaugePodOnSteeringColumnForVoltMeterAndSmallTach.jpg (160KB - 238 downloads) | ||
| |||
| GaryS |
| ||
Expert Posts: 1207  Location: Ponder, TX | New Vintage has some styles that look quite retro. They will also make custom faces for their gauges, though the price is a bit stiff. They are good folks to deal with and they respond quickly by email. The two console gauges in my '64 Valiant are the ones with custom bezels I made from plastic plumbing pipe and then chrome plated. http://newvintageusallc.mybigcommerce.com/ Edited by GaryS 2018-03-03 10:05 PM (Radio and Console.JPG) Attachments ---------------- Radio and Console.JPG (121KB - 222 downloads) | ||
| |||
| 56D500boy |
| ||
Expert 5K+ Posts: 9903 Location: Lower Mainland BC | GaryS - 2018-03-03 9:49 PM New Vintage has some styles that look quite retro. They will also make custom faces for their gauges, though the price is a bit stiff. They are good folks to deal with and they respond quickly by email. Gary: Thanks for the lead. I like their gauges but I can't find a 2 1/16" tach in any of their product lines. I do like a couple of their 2 1/16" Voltmeters because the needle base is centered and would hide nicely under the "chrome" button of the OE bezel. 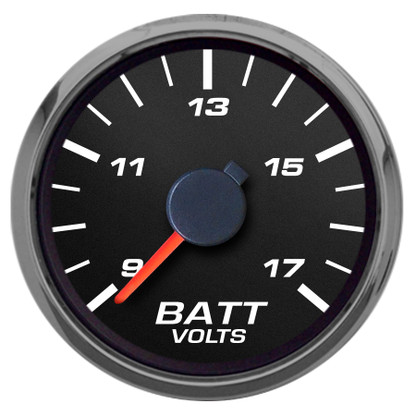  | ||
| |||
| sermey |
| ||
Expert Posts: 1208 Location: SWITZERLAND | Dave, you did a big progress in the quality of all your attachments, nice to look at - my compliments. - SERGE - | ||
| |||
| 56D500boy |
| ||
Expert 5K+ Posts: 9903 Location: Lower Mainland BC | I contacted Autometer the other day to see what they recommended. The answer that they came back with was to try playing with their Custom Gauge website: http://www.ampcustomshop.com/gallery Which I did. Changed the default gauges to 2 1/16" and Voltmeter and Tach. Here are two of the possibilities that I created (neither is real close to the OE 56 Dodge gauges). Cost would be $272 or $277 for the pair. Edited by 56D500boy 2018-03-06 11:16 PM (56DodgeGaugesWithCustomAutoMeterInBritGreenlAntiqueNumbersSilverBezel.jpg) (56DodgeGaugesWithCustomAutoMeterInFlatBlackDialAntiqueNumbersSilverBezel.jpg) Attachments ---------------- 56DodgeGaugesWithCustomAutoMeterInBritGreenlAntiqueNumbersSilverBezel.jpg (244KB - 266 downloads) 56DodgeGaugesWithCustomAutoMeterInFlatBlackDialAntiqueNumbersSilverBezel.jpg (241KB - 227 downloads) | ||
| |||
| DepsilonD |
| ||
Elite Veteran Posts: 792  Location: Buena Park, CA | I've got a connection that can possibly make you a decal that will replicate the exact look of the Dodge gauges but will be set up for whatever tach you use. I am pretty sure he is in Canada if I am remembering correctly. And if the gauge is too small, maybe the same decal could hide whatever you use to fill the space. Just a thought. https://premiumdashdecals.com Dave Edited by DepsilonD 2018-03-07 1:52 PM | ||
| |||
| 56D500boy |
| ||
Expert 5K+ Posts: 9903 Location: Lower Mainland BC | I got back in touch with AutoMeter regarding finding a center-pivot (or "full sweep") voltmeter for the "custom shop". Found one and played a bit using a "Brit Green" face, beige needle and beige markers. Printed on heavy photo paper and cut the resulting gauge images and tried them in the old gauge cluster that I bought. See below. Probably not good enough to warrant the US$382 for the two gauges (Ouch).  I think that I like the flat black face better. I'll try that one tomorrow. PS: I will be using a NOS bezel with perfect chrome and scratch-free lenses - eventually.  Edited by 56D500boy 2018-03-07 9:01 PM (AutoMeterCustomGaugeMockUpInOld2GaugeClusterForSizeCheck.jpg) Attachments ---------------- AutoMeterCustomGaugeMockUpInOld2GaugeClusterForSizeCheck.jpg (191KB - 241 downloads) | ||
| |||
| 56D500boy |
| ||
Expert 5K+ Posts: 9903 Location: Lower Mainland BC | 56D500boy - 2018-03-07 8:58 PM I got back in touch with AutoMeter regarding finding a center-pivot (or "full sweep") voltmeter for the "custom shop". Found one and played a bit using a "Brit Green" face, beige needle and beige markers. Printed on heavy photo paper and cut the resulting gauge images and tried them in the old gauge cluster that I bought. See below. Probably not good enough to warrant the US$382 for the two gauges (Ouch). I think that I like the flat black face better. I'll try that one tomorrow. PS: I will be using a NOS bezel with perfect chrome and scratch-free lenses - eventually. I contacted Autometer again and asked them: "I have gone through the custom shop but what I came up with was $380 for the two gauges. That seems too much. The fall back is either a white face or a black face set, full sweep center-pivot voltmeter and tachometer both in 52 mm (2 1/16") and from the same gauge series. I can't seem to find a matching pair. I am crazy?" They replied this AM with "Unfortunately, the reason they are expensive is the full sweep volt gauge. The motor they use in them is what we call our Digital Stepper Motor. Which is our top of the line meter. I do not make a full sweep volt gauge in any of the series I make a tach that small. So as far as I know, the custom shop will be your only option. " Hmm...so either I go cheap and ugly (black face, Arial font, red pointer) off the shelf or I go back to the custom shop. Which I did. I printed the "final" one off and put those and yesterday's trials in my new NOS bezel with unscratched lenses and nice and shiny chrome rings. The first two below are yesterday's trials with the full sweep voltmeter. About $382 for the pair. The third and last one uses a "normal" 90 degree sweep voltmeter which helped to bring the price down to $272 with green LED edge lighting (not shown in the print out - I forgot to turn the edge lighting "ON" before I printed on heavy matte photo paper). Might be the winner. Edited by 56D500boy 2018-03-08 9:30 PM (AutoMeterCustomGreenFaceRoundTicksFullSweepVoltAndRPM_382dollars.jpg) (AutoMeterCustomFlatBlackFaceDartTicksFullSweepVoltAndRPM_372dollars.jpg) (AutoMeterCustomFlatBlackFaceRoundTicks90degSweepVoltAndRPM_272dollars.jpg) Attachments ---------------- AutoMeterCustomGreenFaceRoundTicksFullSweepVoltAndRPM_382dollars.jpg (159KB - 211 downloads) AutoMeterCustomFlatBlackFaceDartTicksFullSweepVoltAndRPM_372dollars.jpg (156KB - 221 downloads) AutoMeterCustomFlatBlackFaceRoundTicks90degSweepVoltAndRPM_272dollars.jpg (141KB - 219 downloads) | ||
| |||
| 56D500boy |
| ||
Expert 5K+ Posts: 9903 Location: Lower Mainland BC | Here's the flat black face, round "ticks", 90 deg sweep Voltmeter and 0-7K Tach mock-up in the car. Edited by 56D500boy 2018-03-10 9:19 PM (AutoMeterCustomFlatBlackFaceRoundTicks90degSweepVoltAndRPM_272dollarsInTheCarMockup.jpg) Attachments ---------------- AutoMeterCustomFlatBlackFaceRoundTicks90degSweepVoltAndRPM_272dollarsInTheCarMockup.jpg (152KB - 207 downloads) | ||
| |||
| GaryS |
| ||
Expert Posts: 1207 Location: Ponder, TX | I like those. Perfect is expensive, but those are nice. I suspect the only things that would make anyone question the installation are the AutoMeter name and possibly the lighting method. If you can shape and paint the shell to match and complement the dash, they might be mistaken for a dealer installed option by anyone not expert in FL models. | ||
| |||
| 56D500boy |
| ||
Expert 5K+ Posts: 9903 Location: Lower Mainland BC | GaryS - 2018-03-11 11:06 AM I like those. Perfect is expensive, but those are nice. I suspect the only things that would make anyone question the installation are the AutoMeter name and possibly the lighting method. If you can shape and paint the shell to match and complement the dash, they might be mistaken for a dealer installed option by anyone not expert in FL models. I've contacted John Fowlie at Big M and asked to purchase a section of 55/56 Dodge dash from an otherwise unusable dash (I didn't want him to cut up a usable one). He is going to do that for me (for a price). See the photo below that I sent him. I will use the metal from two adjoining gauges to create the front of the gauge pod, through which my NOS bezels and lenses will poke. I also finally settled on the Autometer custom design using "Graphite" for the gauge face, beige dots for markers, white Antique letters and white pointer, as shown below. It was the best that I could do with their available colours. 3 week delivery time from placing my order this AM. Time to work on other things, of which there are many many many. (ProposedCutOutSectionOf55or56DodgeDashForAuxGaugeProject_small.jpg) (DaveFsAutometerCustomGraphite2GaugeKitDetails.jpg) Attachments ---------------- ProposedCutOutSectionOf55or56DodgeDashForAuxGaugeProject_small.jpg (157KB - 205 downloads) DaveFsAutometerCustomGraphite2GaugeKitDetails.jpg (77KB - 233 downloads) | ||
| |||
| GaryS |
| ||
Expert Posts: 1207 Location: Ponder, TX | Looks good! I'll be anxious to see the finished product. | ||
| |||
| 56D500boy |
| ||
Expert 5K+ Posts: 9903 Location: Lower Mainland BC | Got a section of dash today from John at Big M. I thought for a moment that I was losing my mind because I planned to use the center two holes in the dash but the one of those in the dash section that I got is for the ash tray, not the clock. I guess they moved the ashtray and clock locations between 55 and 56. Not to worry, I can work around that. What I asked John for: What I got (today), with an older gauge module in place for fun. I won't be using the mounting tabs - makes the tach and voltmeter pod too big. I will have to carefully scribe the outer edge of the gauge pod onto the back of the dash section and cut it even more carefully. At worst, I would still have two more adjacent holes to work with (one of them - the ashtray hole - would have to be opened up and made circular first). Thanks again John. Edited by 56D500boy 2018-03-29 5:33 PM (55-56DashSectionFromBigMAndOldGauge Pod.jpg) (BackSideOfDashSectionShowingNormalGaugePodAttachmentPoints.jpg) (55-56DashSectionTrimLines.jpg) Attachments ---------------- 55-56DashSectionFromBigMAndOldGauge Pod.jpg (74KB - 231 downloads) BackSideOfDashSectionShowingNormalGaugePodAttachmentPoints.jpg (95KB - 248 downloads) 55-56DashSectionTrimLines.jpg (204KB - 216 downloads) | ||
| |||
| 56D500boy |
| ||
Expert 5K+ Posts: 9903 Location: Lower Mainland BC | Oh my, this is going to be hard to resist (would have to be based on a hi-res photo of D500 badge, shrunk, printed on a vinyl sticker, trimmed, applied and then clear-coated). Edited by 56D500boy 2018-03-29 9:37 PM (55-56DashSectionTrimLinesWithFlags.jpg) Attachments ---------------- 55-56DashSectionTrimLinesWithFlags.jpg (209KB - 231 downloads) | ||
| |||
| Powerflite |
| ||
Expert 5K+ Posts: 9666 Location: So. Cal | You should put a slight saddle on the top part too to make it symmetric, and to clear more room for your speedometer. I think it would look better that way. Are you going to leave the back open or just butt it up against the dash as much as possible? | ||
| |||
| 56D500boy |
| ||
Expert 5K+ Posts: 9903 Location: Lower Mainland BC | Powerflite - 2018-03-29 10:35 PM You should put a slight saddle on the top part too to make it symmetric, and to clear more room for your speedometer. I think it would look better that way. Are you going to leave the back open or just butt it up against the dash as much as possible? Interesting thought. I will consider it. When I've trialed the pod on the steering column, I've kept it away from the dash. My plan was to get this "spare" dash section, trim it up and then bend some thin sheet steel to the same contour, wide enough that it covers the side of the OE pod and any bits of the gauges that end up hanging out the back. However, since I don't have the gauges from AutoMeter yet (probably another 2 weeks), I can't really finalize that part of the concept. Not like I don't have 15 other sub-projects going on to keep me busy in the meantime. The OE gauge pod has a ridge around its perimeter that I would trim at the bottom but I wasn't planning to do so at the top. Stay tuned. | ||
| |||
| 71charger_fan |
| ||
Elite Veteran Posts: 667 Location: Frederick, MD | I know a guy with a complete '56 Fury dash, including tach. I have no idea if that tach would be of any use to you. PM me if you're interested and I'll give you his email address. | ||
| |||
| 56D500boy |
| ||
Expert 5K+ Posts: 9903 Location: Lower Mainland BC | 71charger_fan - 2018-03-30 5:22 PM I know a guy with a complete '56 Fury dash, including tach. I have no idea if that tach would be of any use to you. PM me if you're interested and I'll give you his email address. Thanks for thinking of me/this project. I considered a Fury tach early on in this project but they are huge and would be difficult to locate on a 56 Dodge dash. Mounted on the steering column, it would very likely obscure the speedo. My proposed gauges will not. And then there is the issue of the sender for the Fury tach. People have Fury tachs for sale on eBay quite often but they never seem to have remembered to save the sender. I've purchased the AutoMeter gauges now, so I am committed to Plan A. Besides I get the voltmeter that I wanted too. Fury tach (I love the crossed flags but....): Edited by 56D500boy 2018-03-30 6:08 PM (1956PlymouthFuryTach.jpg) Attachments ---------------- 1956PlymouthFuryTach.jpg (166KB - 236 downloads) | ||
| |||
| 56D500boy |
| ||
Expert 5K+ Posts: 9903 Location: Lower Mainland BC | Well, the rubber is about to hit the road. After waiting about a month since ordering (March 22), the custom gauges arrived today. I've trialed them behind the NOS bezel/lense but not in the OE gauge housing (yet). Although I hate to think it, I might have to modify these brand new gauges by removing the bezel and glass to get the gauge face closer to the NOS lens. I knew this was a possibility from the get go and even asked if they could NOT put the chrome bezel and glass on the gauge. They said no. Too bad. Another possibility would be to remove the "chrome" (plastic) center from the OE gauge lens that came when I bought a used guage module and glue them on to the Autometer gauge faces and skip the OE NOS lenses (but utilize the new large chrome rings). I can mock-that up without harming the new gauges so that might be the way to start with. Today's photos starting with a repeat of the mock-up I created in paper before ordering.: Edited by 56D500boy 2018-04-20 9:25 PM (ThePaperMockUpsUsedToProofTheConceptBeforeOrdering.jpg) (TheRealGaugesGraphiteFaceWhiteNumbersAndPointerBeigeDotMarkers.jpg) (TheRealGaugesBehindTheNOSBezel.jpg) Attachments ---------------- ThePaperMockUpsUsedToProofTheConceptBeforeOrdering.jpg (124KB - 213 downloads) TheRealGaugesGraphiteFaceWhiteNumbersAndPointerBeigeDotMarkers.jpg (109KB - 216 downloads) TheRealGaugesBehindTheNOSBezel.jpg (139KB - 224 downloads) | ||
| |||
| mstrug |
| ||
Expert 5K+ Posts: 6500 Location: Newark, Texas (Fort Worth) | Looks Great! | ||
| |||
| 56D500boy |
| ||
Expert 5K+ Posts: 9903 Location: Lower Mainland BC | While waiting to make progess on my Powerflite to Torqueflite conversion project, I decided to get back to this gauge cluster project. Over the weekend (so far), I cut out the face for the gauge cluster out of the section of dash that I got from John at Big M (started with a Dremel but quickly switched to my angle grinder and zip cut wheel). After discussing some of the options with my fabricator neighbour, I decided on a sandwich concept with the dash section, then the gauge cluster and its chrome rings, the Autometer custom gauges and finally a backing plate. This is all held together with 10-24 x 3" (to be shortened) studs (threaded through the dash section - to be tacked from the back and then the heads removed and filled), with holes for the 8-32 gauge studs and the gauge lights (tomorrow). That all came together in a rough state today. Ended the day cutting out a 3" diameter saddle on the bottom of the cluster so it sits down on the steering column. Things still to be figured out/completed: 1. Final sizing of the front and rear plates 2. Sizing, cutting and attaching a 2" wide band of metal around the outside of the sandwich. 3. Figuring out a band clamp system to hold the cluster to the steering column. I tried the cluster on the column with one gauge inside but before the saddle was cut and then afterwards without the gauge or backing plate but with the saddle cut out. In both cases, nothing is obscured, i.e. the speedo is not hidden and the heater temp controls and headlight switch are not hidden (despite what the camera is suggesting). Progress on an almost forgotten project. (GaugePodProofOfConcept_1.jpg) (GaugePodProofOfConcept_TheSandwichFromTheTop.jpg) (GaugePodProofOfConcept_TheSandwichFromTheBack.jpg) (GaugePodProofOfConcept_With3inchDiameterSaddleTrimmedOut_1.jpg) (GaugePodProofOfConcept_With3inchDiameterSaddleTrimmedOut_2.jpg) Attachments ---------------- GaugePodProofOfConcept_1.jpg (122KB - 178 downloads) GaugePodProofOfConcept_TheSandwichFromTheTop.jpg (99KB - 178 downloads) GaugePodProofOfConcept_TheSandwichFromTheBack.jpg (115KB - 186 downloads) GaugePodProofOfConcept_With3inchDiameterSaddleTrimmedOut_1.jpg (129KB - 181 downloads) GaugePodProofOfConcept_With3inchDiameterSaddleTrimmedOut_2.jpg (146KB - 174 downloads) | ||
| |||
| 56D500boy |
| ||
Expert 5K+ Posts: 9903 Location: Lower Mainland BC | Cut and bent a token gauge pod surround from painted galvanized metal (that I had on hand) yesterday. Concept was good. However, my neighbour who volunteered to do the welding didn't like the metal. So I got a bit of 22 gauge weldable (no galvanizing) steel today and cut and bent a new surround. Showed it to him and got a thumbs up. Might get it welded tomorrow (or Sunday). Upwards and onwards. BTW, the inspiration for this gauge pod was the 1964.5 Mustang Ralley-Pac that came out in the spring of 1964 (I was 13). https://www.google.com/search?q=1964.5+Mustang+rally+pack+gauges&cli... Edited by 56D500boy 2019-04-26 11:13 PM (GaugePodTrialApril26WithTokenMetalSurround.jpg) (GaugePodTrialApril26WithTokenMetalSurround_2.jpg) (GaugePodTrialApril26With22GaugeMetalSurround_Front.jpg) (GaugePodTrialApril26With22GaugeMetalSurround_Left.jpg) (GaugePodTrialApril26With22GaugeMetalSurround_Right.jpg) Attachments ---------------- GaugePodTrialApril26WithTokenMetalSurround.jpg (148KB - 179 downloads) GaugePodTrialApril26WithTokenMetalSurround_2.jpg (161KB - 178 downloads) GaugePodTrialApril26With22GaugeMetalSurround_Front.jpg (145KB - 190 downloads) GaugePodTrialApril26With22GaugeMetalSurround_Left.jpg (121KB - 192 downloads) GaugePodTrialApril26With22GaugeMetalSurround_Right.jpg (145KB - 175 downloads) | ||
| |||
| 56D500boy |
| ||
Expert 5K+ Posts: 9903 Location: Lower Mainland BC | 56D500boy - 2019-04-26 6:58 PM Cut and bent a token gauge pod surround from painted galvanized metal (that I had on hand) yesterday. Concept was good. However, my neighbour who volunteered to do the welding didn't like the metal. So I got a bit of 22 gauge weldable (no galvanizing) steel today and cut and bent a new surround. Showed it to him and got a thumbs up. Might get it welded tomorrow (or Sunday). Or Monday. Yesterday, I stripped the paint off both sides of the pod face (a section of 55 Dodge dash) and then sanded it in preparation of welding of the 22 gauge pod surround. That happened late this afternoon, with me positioning the surround on the pod face and then my neighbour tacking the surround to the face in strategic locations. Required a bit of manipulation to get things lined up and even a wide-jawwed clamp at one point. Once the tacking was done, I removed the inner pod gauge module (which was being used as a guide for the surround during the tacking). Then my neighbour added additional tacks on the outside but many more on the inside, including the two 10-24 studs that are going to hold everything together. With the welding done, its time to grind (Dremel) and fill the edge (hopefully its stable enough that is won't crack). Today's work: (PodFaceStrippedAndPolishedReadyforWelding.jpg) (PodAfterInitialTackingOfTheSurroundToThePodFace.jpg) (PodAfterFurtherTackingOfTheSurroundToTheFace_Outside.jpg) (PodAfterFurtherTackingOfTheSurroundToTheFace_Inside.jpg) Attachments ---------------- PodFaceStrippedAndPolishedReadyforWelding.jpg (139KB - 191 downloads) PodAfterInitialTackingOfTheSurroundToThePodFace.jpg (100KB - 203 downloads) PodAfterFurtherTackingOfTheSurroundToTheFace_Outside.jpg (69KB - 185 downloads) PodAfterFurtherTackingOfTheSurroundToTheFace_Inside.jpg (95KB - 186 downloads) | ||
| |||
| GaryS |
| ||
Expert Posts: 1207 Location: Ponder, TX | Looks great. I enjoy seeing that there are people as crazy as I am when it comes to personalizing old Mopars while trying to keep them looking like they came that way from the factory! Edited by GaryS 2019-04-30 7:44 AM | ||
| |||
| 1960fury |
| ||
Expert 5K+ Posts: 7400 Location: northern germany | You should have welded the studs to washers first and then the washers to the housing, spreading the stressed area. That way^, tighten the nuts very carefully! | ||
| |||
| 1960fury |
| ||
Expert 5K+ Posts: 7400 Location: northern germany | GaryS - 2019-04-30 7:41 AM Looks great. I enjoy seeing that there are people as crazy as I am when it comes to personalizing old Mopars while trying to keep them looking like they came that way from the factory! I second that. I believe it was you with the Amp to Volt gauge conversion that looked 100% like from the factory, IIRC. Great job! | ||
| |||
| 56D500boy |
| ||
Expert 5K+ Posts: 9903 Location: Lower Mainland BC | GaryS - 2019-04-30 4:41 AM Looks great. I enjoy seeing that there are people as crazy as I am when it comes to personalizing old Mopars while trying to keep them looking like they came that way from the factory! Thanks Gary. That is true. I am shooting for "Hey, I didn't know the factory did.....". I have previously made kick-panels that look OE (plus), installed seat shoulder belts, and did up a rear parcel tray in (my) factory colours (except for the speaker covers) Ignore the geezer doing the seat belt modelling: 1960fury - 2019-04-30 4:47 AM You should have welded the studs to washers first and then the washers to the housing, spreading the stressed area. That way^, tighten the nuts very carefully! I previously drilled and tapped the pod face for the 10-24 studs so they have a thread or two and the welds (outside and inside) to keep them in place. Your idea is good but too late. I will tighten the nuts using the German spec: "Gutentight" Vielen Danke Sid. Edited by 56D500boy 2019-04-30 11:41 AM | ||
| |||
| 56D500boy |
| ||
Expert 5K+ Posts: 9903 Location: Lower Mainland BC | Coming back to the topic, here is today's work (mostly): 1. After filing the back and front gaps with Bondo brand "Plastic Metal" yesterday morning, today I ground, filed and sanded to remove the welding bumps and most of the filler. Made some "Oopses" while using the Dremel (with Zippy cut disc) - not easy to control. Nothing major. Will need some spot putty anyway so no biggy. 2. After getting down to metal, I sprayed the pod with Tremclad (Rustoleum) Professional grade primer and let it dry. I took a photo (below) before I started filling the blemishes with "spot putty". Not sure how that will go. No more photos for today. I'll wait for the spot putty to dry overnight before sanding it down/off and re-priming. I imagine that there will be another round of filling (minor glitches), sanding and then priming with "1K" high build primer before I apply the light blue dash colour paint. Progress. The before (from Monday) Edited by 56D500boy 2019-05-01 8:32 PM (PodAfterFillingWIthBondoPlasticMetalAndThenGrindingFilingAndSanding.jpg) (PodAfterFillingWIthBondoPlasticMetalAndThenGrindingFilingAndSanding_AndACoatOfTremcladProfessionalGradePrimer.jpg) Attachments ---------------- PodAfterFillingWIthBondoPlasticMetalAndThenGrindingFilingAndSanding.jpg (106KB - 194 downloads) PodAfterFillingWIthBondoPlasticMetalAndThenGrindingFilingAndSanding_AndACoatOfTremcladProfessionalGradePrimer.jpg (104KB - 196 downloads) | ||
| |||
| 56D500boy |
| ||
Expert 5K+ Posts: 9903 Location: Lower Mainland BC | Carried on with a round or two of spot putty and at least one coat of 1K high build primer today. Sanded with 220 and then 400. Ended with a coat of 1K. Probably just a little more spot putty on a couple of edge spots and then a final sand and final coat of 1K tomorrow. Then 800 grit sand and blue paint on Saturday. (??) Edited by 56D500boy 2019-05-02 10:04 PM (PodAfter2ndRoundOfSpotPuttyAndSanding_1.jpg) (PodAfter2ndRoundOfSpotPuttyAndSanding_2.jpg) (PodAfter2ndRoundOfSpotPuttyAndSanding_WithCoatOf1Kprimer_1.jpg) Attachments ---------------- PodAfter2ndRoundOfSpotPuttyAndSanding_1.jpg (87KB - 164 downloads) PodAfter2ndRoundOfSpotPuttyAndSanding_2.jpg (104KB - 169 downloads) PodAfter2ndRoundOfSpotPuttyAndSanding_WithCoatOf1Kprimer_1.jpg (60KB - 178 downloads) | ||
| |||
| 56D500boy |
| ||
Expert 5K+ Posts: 9903 Location: Lower Mainland BC | After a long pause in the proceedings (holidays and company visiting), I finally (mostly) installed the "completed" gauge cluster today. I used the NOS bezel bits to complete the housing (that got painted back in May before I went to Europe ). I also riveted a trimmed and painted 4" gear clamp to the housing so it can hold the completed housing to the steering column. I still need to finalize the wiring but in the short run it is working with the tach wiring connected with Marr connectors (to wires to the coil, switched power and a ground). The voltmeter is connected to switched power and ground via spade connectors (and wires). The housing backing plate is made from 1/8" thick aluminum plate to which the gauges are attached before the backing plate is attached to the housing via the 10-24 studs and 10-24 nyloc nuts. The gauges are attached to the plate with 8-32 nyloc nuts. I am probably going to have to take it apart (again) and grind the volt meter mounting holes a bit so I can slide the volt meter up a tad (so I can see the needle better). The tach needle is visible and proved useful to check speed against RPM (50 mph is about 2000-2100 RPM; 60 mph is pretty much bang on 2500 RPM on the flats). The volt meter is showing about 14 volts at that point. Would I do all this again? NO. I started off wanting to know what my battery voltage was at any given time (because I was having starting problems) and wanting to make sure that I limited my RPM to less that 4400 (to protect the engine). Turns out 4400 RPM is way faster than I would ever push the car in either 1st or 2nd of the Powerflite. I would swap the OE ammeter for the custom voltmeter and I would have Autometer make me a custom tach but I would have the tach made as a 3" or 4" and mount it in a housing like Bryon P. (56Furybird did). Here are some photos and info from today: Edited by 56D500boy 2019-07-20 11:09 AM (DaveFsGaugePodReadyForMounting_Front.jpg) (DaveFsGaugePodReadyForMounting_Rear.jpg) (DaveFsGaugePod_Mounted_1.jpg) (DaveFsGaugePod_Mounted_2.jpg) (DaveFsGaugePod_Mounted_3.jpg) (ByronPs56CoronetTach_2.jpg) (56DodgeSpeedInGears_2050RPM.jpg) (56DodgeSpeedInGears_2500RPM.jpg) (56DodgeSpeedInGears_4400RPM.jpg) Attachments ---------------- DaveFsGaugePodReadyForMounting_Front.jpg (114KB - 144 downloads) DaveFsGaugePodReadyForMounting_Rear.jpg (114KB - 149 downloads) DaveFsGaugePod_Mounted_1.jpg (130KB - 158 downloads) DaveFsGaugePod_Mounted_2.jpg (162KB - 145 downloads) DaveFsGaugePod_Mounted_3.jpg (140KB - 147 downloads) ByronPs56CoronetTach_2.jpg (137KB - 150 downloads) 56DodgeSpeedInGears_2050RPM.jpg (28KB - 150 downloads) 56DodgeSpeedInGears_2500RPM.jpg (29KB - 155 downloads) 56DodgeSpeedInGears_4400RPM.jpg (33KB - 161 downloads) | ||
| |||
| 56D500boy |
| ||
Expert 5K+ Posts: 9903 Location: Lower Mainland BC | I had the opportunity today to do a speed/RPM check as I drove my 56 Dodge to Point Roberts WA to pick-up some eBay goodies for it. I tried to "set" it (manually with my foot on the gas pedal) at 2500 RPM (not sure about my accuracy) and then check the speed. The speedometer read about 61-62 mph. I told myself to check my Excel spreadsheet to see how close that was. Eventually (after playing with the LO JUB horn), I remembered. Turns out that I had done that before. Everything seems right. Tells me that the slightly larger 235/75/15 tires (instead of 215/75/15) are helping to compensate for any speedometer errors and as a result, the speedometer is fairly accurate. Edited by 56D500boy 2019-09-26 10:21 PM | ||
| |||
| Jump to page : 1 Now viewing page 1 [50 messages per page] |
| Search this forum Printer friendly version E-mail a link to this thread |
| (Delete all cookies set by this site) | |


