| The Forward Look Network | ||
| ||
 Pre-FL Functional air scoop Pre-FL Functional air scoopJump to page : 1 2 3 Now viewing page 2 [50 messages per page] | View previous thread :: View next thread |
| Forward Look Technical Discussions -> The Exhaust Pipe - Modification & Performance | Message format |
| 1960fury |
| ||
Expert 5K+ Posts: 7468     Location: northern germany | 56D500boy - 2018-03-12 9:31 PM I had a look at the rad support this afternoon and it comes up tight to the hood obviously. To run the toothed factory "scoop" I would have to create a notch in the rad support. But I couldn't go too deep because of the rad top tank. i see, but keep in mind that the cold air channel wouldn't have to be straight all the way, it could sneak along the inner hood towards the AC. Edited by 1960fury 2018-03-12 10:01 PM | ||
| |||
| 56D500boy |
| ||
Exner Expert 10K+ Posts: 10042 Location: Lower Mainland BC | I am pursuing the 59-61 Golden Commando style air cleaner idea with the nice 3" diameter snorkel. Something like this one (but less pretty, and less expensive): There would be 3" flexible ducting from the snorkel to the bulk head. Something like a piece of this flexible, expandable 3" aluminum ducting (8 ft for $9 at Home Depot): 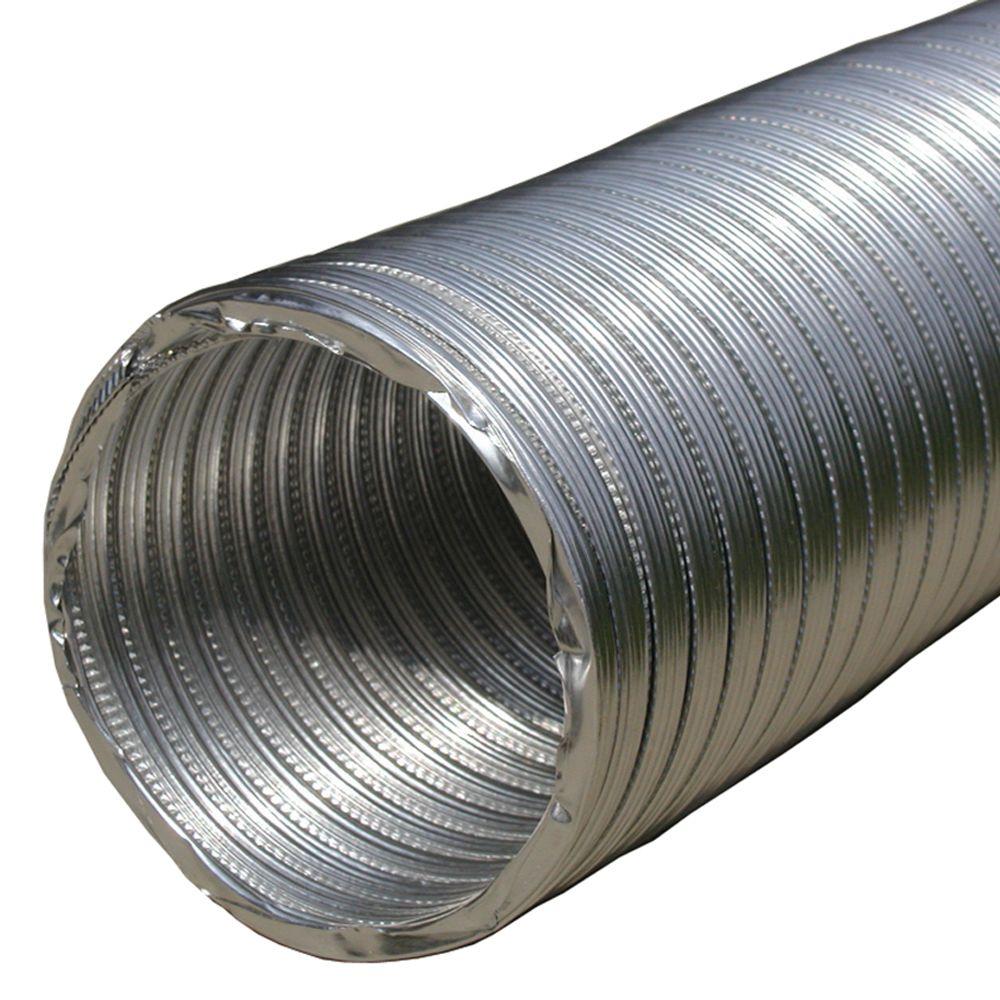 Through the bulkhead/rad support, I envision cutting a 3" hole and inserting a 3" to 4" reducer. I was looking for a nice spun aluminum 3" to 4" reducer to fit at the rad support/ bulkhead. I find them on line but not in person (so far). The spun aluminum option (no price yet, I can't find a supplier): 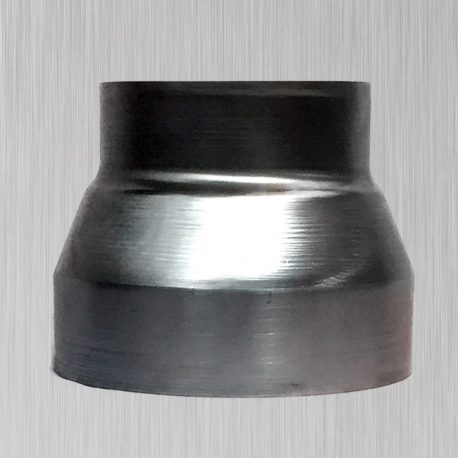 The 26 gauge galvanized option (under $8 at Home Depot): 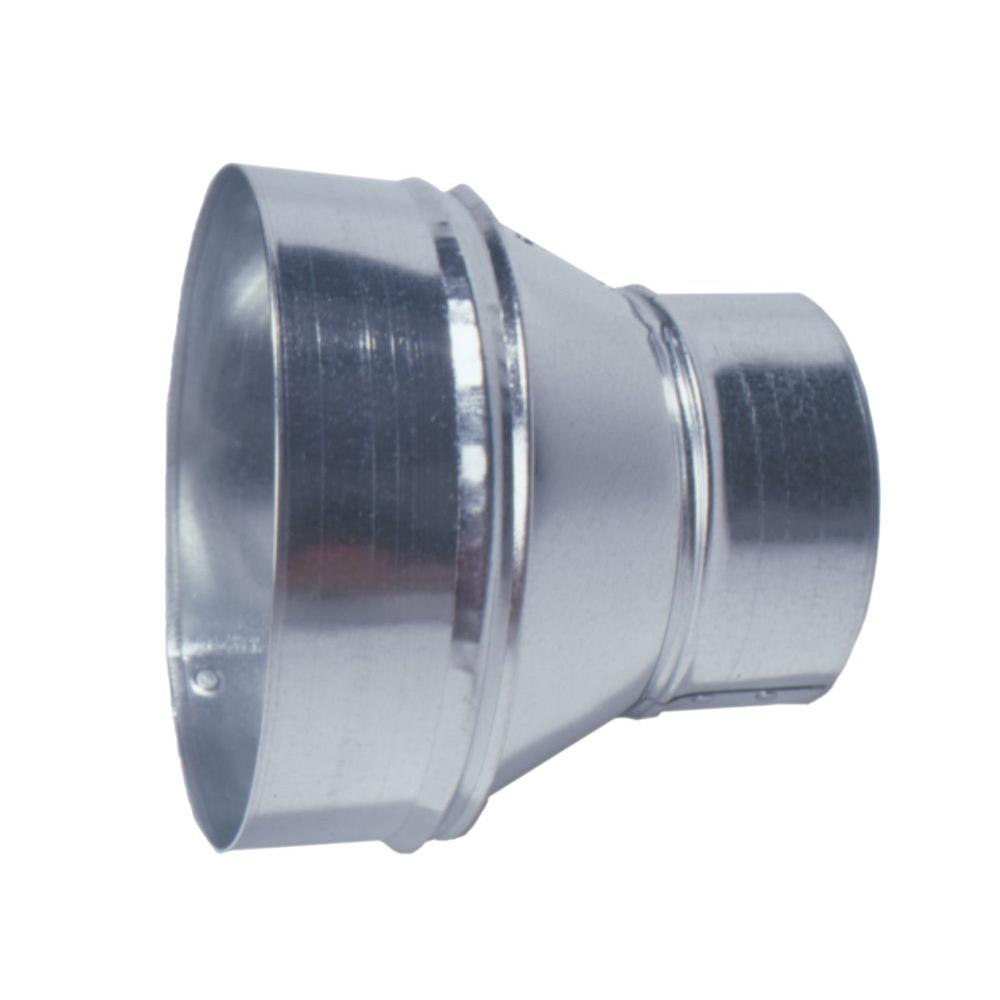 The polypropylene options (under $3 at Home Depot): 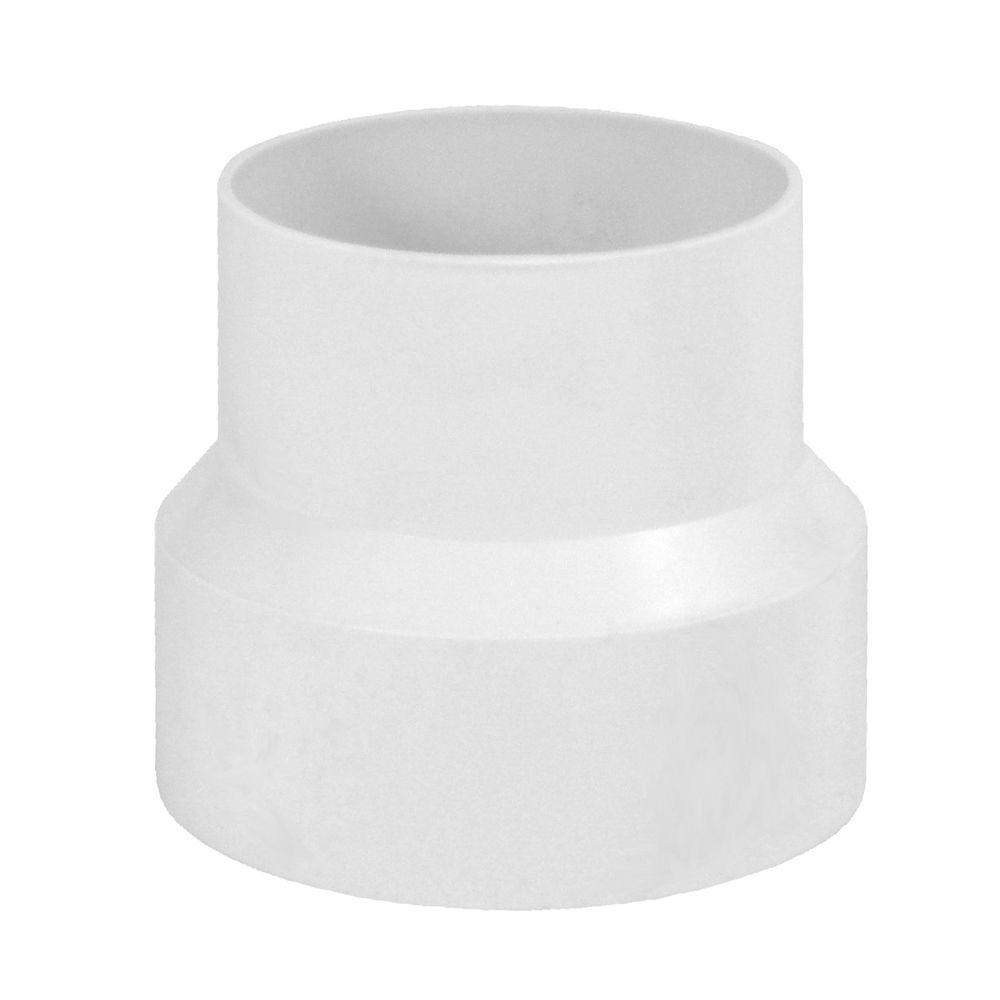 or 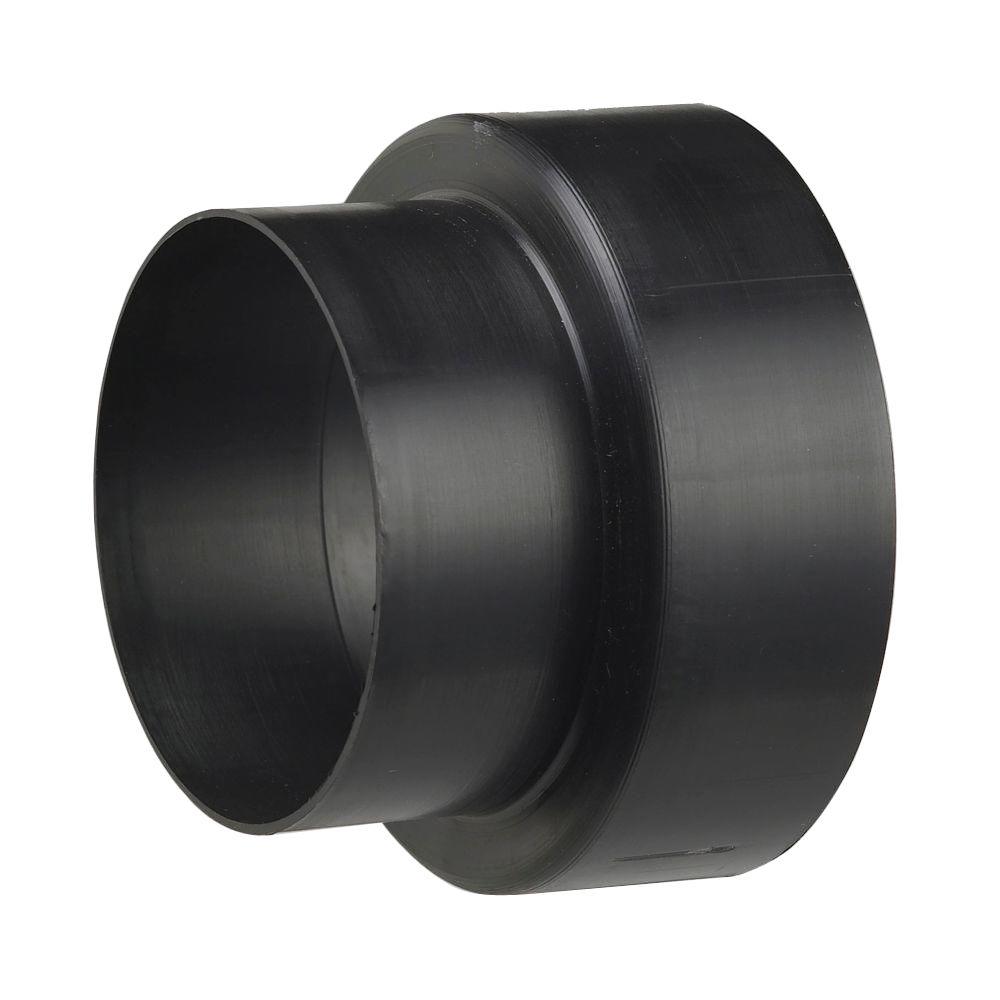 Still working on a prettier intake scoop (for behind the grill) besides the heating boot. Something like this 10" x 3.25" x 4 in (duct diameter) "Stack" boot (< $9 at Home Depot) only prettier and with 1/4" metal mesh to keep the squirrels and little kiddies out of the intake. Edited by 56D500boy 2018-03-13 8:13 PM (10inchX3point25inchX4inchStackBoot.jpg) Attachments ----------------  10inchX3point25inchX4inchStackBoot.jpg (13KB - 586 downloads) 10inchX3point25inchX4inchStackBoot.jpg (13KB - 586 downloads) | ||
| |||
| 1960fury |
| ||
Expert 5K+ Posts: 7468 Location: northern germany | 56D500boy - 2018-03-13 8:09 PM I am pursuing the 59-61 Golden Commando style air cleaner idea with the nice 3" diameter snorkel. you can't find those on US build commandos. only canadian GCs had the snorkel type hsg. | ||
| |||
| 56D500boy |
| ||
Exner Expert 10K+ Posts: 10042 Location: Lower Mainland BC | I bought a plastic 4" to 3" reducer and a 4" x 3.25" x 10" Stack Boot yesterday to test out the possibility of going through the rad support/bulk head. There is plenty of room on the engine bay side for a 3" hole. On the grill side of the bulk head, there are two possibilities for the air scoop: above the grill bar and below the grill bar. I only trialed the below the grill bar possibility. In either case either the stack boot will have to be trimmed or an new purpose built scoop will have to fabricated. In either case, if the scoop is painted flat black it will never be seen by most people. See below: (56DodgeRadSupportDuctOption_0.jpg) (56DodgeRadSupportDuctOption_1.jpg) (56DodgeRadSupportDuctOption_2.jpg) (56DodgeRadSupportDuctOption_3.jpg) (56DodgeRadSupportDuctOption_4.jpg) (56DodgeRadSupportDuctOption_5.jpg) Attachments ---------------- 56DodgeRadSupportDuctOption_0.jpg (215KB - 598 downloads) 56DodgeRadSupportDuctOption_1.jpg (155KB - 597 downloads) 56DodgeRadSupportDuctOption_2.jpg (160KB - 609 downloads) 56DodgeRadSupportDuctOption_3.jpg (151KB - 589 downloads) 56DodgeRadSupportDuctOption_4.jpg (146KB - 612 downloads) 56DodgeRadSupportDuctOption_5.jpg (126KB - 593 downloads) | ||
| |||
| 56D500boy |
| ||
Exner Expert 10K+ Posts: 10042 Location: Lower Mainland BC | While I was out playing with the behind-the-grill scoop option discussed above, I did some further thinking about activating that OE fake air scoop, as per the original purpose of this thread. IF I accept that the rad support would have to be cut to create an air path, it becomes a possibility. I would envision: 1. A slot in the hood behind the fake hood scoop in the grill ornament. 2. A duct of some form (plastic/fibreglas) attached to the underside of the hood running from the new hood opening and terminating just before the rad support. Initially mocked-up with cardboard and then made with ABS or perhaps aluminum or ?? 3. A slot in the rad support 4. A collector box (plastic or fibreglas) on the engine side of the rad support terminating with a 3" nipple to attach 3" flex hose leading to a snorkel air cleaner 5. A snorkel air cleaner with a 3" snorkel, no wider than 16" (as per the OE oil bath air cleaner) - some ball peen hammer work might be needed. Probably more work than the 3" round hole through the rad support option but "prettier" (maybe  ) ) See annotated photos below. Edited by 56D500boy 2018-03-16 4:01 PM (56DodgeWorkingHoodScoopPossibity_1.jpg) (56DodgeWorkingHoodScoopPossibity_2.jpg) (56DodgeWorkingHoodScoopPossibity_3.jpg) (56DodgeWorkingHoodScoopPossibity_4.jpg) (UnderSideOf56DodgeHood.jpg) (UnderSideOf56DodgeHoodShowingAreaForSlotAndDuct_1.jpg) (UnderSideOf56DodgeHoodShowingAreaForSlotAndDuct_2.jpg) Attachments ---------------- 56DodgeWorkingHoodScoopPossibity_1.jpg (198KB - 591 downloads) 56DodgeWorkingHoodScoopPossibity_2.jpg (154KB - 604 downloads) 56DodgeWorkingHoodScoopPossibity_3.jpg (170KB - 607 downloads) 56DodgeWorkingHoodScoopPossibity_4.jpg (168KB - 601 downloads) UnderSideOf56DodgeHood.jpg (109KB - 588 downloads) UnderSideOf56DodgeHoodShowingAreaForSlotAndDuct_1.jpg (221KB - 597 downloads) UnderSideOf56DodgeHoodShowingAreaForSlotAndDuct_2.jpg (210KB - 588 downloads) | ||
| |||
| 1960fury |
| ||
Expert 5K+ Posts: 7468 Location: northern germany | nice, i like your technical threads with all the pictures and drawings, etc. that air box behind the hood inlet with a 90° bend (wall) directly after the opening would make it a cold air system, not a ram air system. is there really no room above the rad? | ||
| |||
| 56RatKing |
| ||
Regular Posts: 65 | You could also use an air cleaner housing from a 5.0 Foxbody, they have dual outlets and the pipes go into the fender wells. Be easy enough to do for a Forward Look car of any year - save you from hacking up your nice steel. | ||
| |||
| 56D500boy |
| ||
Exner Expert 10K+ Posts: 10042 Location: Lower Mainland BC | 1960fury - 2018-03-16 7:06 PM nice, i like your technical threads with all the pictures and drawings, etc. that air box behind the hood inlet with a 90° bend (wall) directly after the opening would make it a cold air system, not a ram air system. is there really no room above the rad? Agree about the lack of rack air with using the hoop "scoop" option. There is NO ROOM above the rad. Well maybe 1/2". Plus the rad cap, etc. is kind of in the way. Possible but not easy.  Edited by 56D500boy 2018-03-16 10:53 PM (ClearanceAboveRaditorToRadSupport.jpg) Attachments ---------------- ClearanceAboveRaditorToRadSupport.jpg (179KB - 615 downloads) | ||
| |||
| 56D500boy |
| ||
Exner Expert 10K+ Posts: 10042 Location: Lower Mainland BC | 56RatKing - 2018-03-16 7:11 PM You could also use an air cleaner housing from a 5.0 Foxbody, they have dual outlets and the pipes go into the fender wells. Be easy enough to do for a Forward Look car of any year - save you from hacking up your nice steel. I am trying to achieve a bit of ram air not just cold air so that Fomoco aircleaner would NOT work for me. Or any Mopar dual snorkel air cleaner for that matter. I "lucked" out and won an auction for a less than pretty 59-61 383/413 single snorkel air cleaner that should work with the through the rad support, behind the grill, air scoop option. The air cleaner was less than 1/5th of the very nice gold Golden Commando 383/413 air cleaner that I posted a photo of earlier. This one needs some work but that is fine. I need to paint it D500 hemi red (I have the official paint) anyway and I won't feel bad if I have to bash the bottom a bit to get the clearances for the fuel filter and the carb choke. The pretty $299 one that was too nice and too much money: https://musclecaraircleaners.com/products/1959-61-chrysler-golden-li... The one I bought today: https://www.ebay.ca/itm/292477495997?ul_noapp=true&autorefresh=true  Edited by 56D500boy 2018-03-16 11:04 PM | ||
| |||
| 1960fury |
| ||
Expert 5K+ Posts: 7468 Location: northern germany | just saw the wheeler dealer episode with the 53 firedome, they said the hood chrome is a cold air inlet too. very nice. https://www.youtube.com/watch?v=s3ju7ve84dU&t=28s Edited by 1960fury 2018-03-20 2:49 PM | ||
| |||
| 56D500boy |
| ||
Exner Expert 10K+ Posts: 10042 Location: Lower Mainland BC | 1960fury - 2018-03-20 2:47 PM just saw the wheeler dealer episode with the 53 firedome, they said the hood chrome is a cold air inlet too. very nice. https://www.youtube.com/watch?v=s3ju7ve84dU&t=28s I could see that that might be possible because the 53 Desoto scoop is so high up on the hood and it might be behind the rad support gasket. After I watched that video, I ended up watching a 1958 Dodge D100 Sweptside 315 Power Giant Hemi video that had cold air induction!! Factory screened slot in the rad support and factory fiberglas scoop. On the down side, they directed the air into the truck cab for ventilation, not to the engine for engine efficiency. Close but no cigars. But it does make me think. https://www.youtube.com/watch?v=mDdofzpa7f0 Edited by 56D500boy 2018-03-20 4:59 PM (315PowerGiantInA1958DodgeSweptSidePickup.jpg) (1958DodgeSweptsideColdAirInductionIntakeforAC.jpg) (1958DodgeSweptsideColdAirInductionIntakeforAC_2.jpg) (1958DodgeSweptsideColdAirInductionIntakeforAC_3.jpg) Attachments ---------------- 315PowerGiantInA1958DodgeSweptSidePickup.jpg (83KB - 590 downloads) 1958DodgeSweptsideColdAirInductionIntakeforAC.jpg (48KB - 595 downloads) 1958DodgeSweptsideColdAirInductionIntakeforAC_2.jpg (39KB - 602 downloads) 1958DodgeSweptsideColdAirInductionIntakeforAC_3.jpg (95KB - 600 downloads) | ||
| |||
| 56D500boy |
| ||
Exner Expert 10K+ Posts: 10042 Location: Lower Mainland BC | Inspired (?!) by that stock Sweptside fibreglass air scoop and after watching some videos about making a fiberglass scoop over a sculpted foam core, I have bought some supplies to make such a scoop. This afternoon, I found yet another empty Raisin Bran box to cut up to create a rough mock-up of scoop that would sit behind the right grill bar and lead to a 3" hole in the rad support which would then lead on to the snorkel on 59 Chrysler 383/413 air cleaner (which arrived today at my US mail drop - pick it up tomorrow). There will be conflicts: I would like the scoop to be bigger than the Raisin Bran box and that would mean that the right horn will have to go or otherwise be turned or (???). Here's a peak at the current concept: (ScoopGrillHornAndRadSupport_Annotated.jpg) (ScoopAndHorn_Annotated.jpg) (BasicBehindTheGrillAirScoop_Annotated.jpg) (BasicScoopToAirCleanerFlow_Annotated.jpg) Attachments ---------------- ScoopGrillHornAndRadSupport_Annotated.jpg (224KB - 590 downloads) ScoopAndHorn_Annotated.jpg (217KB - 593 downloads) BasicBehindTheGrillAirScoop_Annotated.jpg (168KB - 580 downloads) BasicScoopToAirCleanerFlow_Annotated.jpg (229KB - 566 downloads) | ||
| |||
| Powerflite |
| ||
Expert 5K+ Posts: 9787  Location: So. Cal | As shown, you are going to lose most of the benefit from the air drag inside that hose. Is there any way to increase it's diameter dramatically? In general, you want to keep the inside area the same as the inside area that you start with, except that it can decrease a little as the drag slows it down. The slow decrease of area will keep the speed up so you won't lose your dynamic pressure differential. You will lose a lot of air speed once it hits the air filter, but you want to keep the speed up until it reaches that point at least. | ||
| |||
| 56D500boy |
| ||
Exner Expert 10K+ Posts: 10042 Location: Lower Mainland BC | Thanks for the comments Nathan. I haven't got the aircleaner in my hands yet. I will be going to Point Roberts WA tomorrow to pick it up. I am told that the diameter of the snorkel is 3": I could go 4" diameter on the scoop outlet and through the rad support and then use 4" flex hose. But at the end, I have to go down to 3" unless there is enough height on the side of the aircleaner to cut off the 3" snorkel and get a 4" welded on. Alternatively, I could go 3" I.D. hard pipe from a 3" scoop outlet @ the rad support and then over to the air cleaner with only a bit of 3" flex at the end. | ||
| |||
| 56D500boy |
| ||
Exner Expert 10K+ Posts: 10042 Location: Lower Mainland BC | 56D500boy - 2018-03-23 9:32 PM I haven't got the aircleaner in my hands yet. I will be going to Point Roberts WA tomorrow to pick it up. I am told that the diameter of the snorkel is 3" :) Picked up the eBay $55 Golden Lion air cleaner today. It's going to work. I am going to have to beat it a bit with a ball peen hammer to get some clearances for the choke, carb fuel line and the PS pump but I was expecting that. At least I didn't buy the $299 gold air cleaner, that would have hurt to hit with a hammer. This one, no problemo. The snorkel isn't 3".  It is just 2.5" so I am likely going to have to make the inlet snorkel bigger. The side of the can is just over 3.5" so 4" is out but something a bit bigger than 3" might work. I suppose ovalish rectangular is possible too with a modification of the internal baffle that chases the incoming air around the inside of the can. It is just 2.5" so I am likely going to have to make the inlet snorkel bigger. The side of the can is just over 3.5" so 4" is out but something a bit bigger than 3" might work. I suppose ovalish rectangular is possible too with a modification of the internal baffle that chases the incoming air around the inside of the can. The WIX 42041 that I picked up yesterday fits perfectly. Quality piece. Made in Poland, not China. Here are some photos from 30 minutes ago: (eBayGoldenLionAirCleanerOn56D5004bblHemi.jpg) (eBayGoldenLionAirCleanerOn56D5004bblHemi_FitmentAtCarbThroat.jpg) (eBayGoldenLionAirCleanerOn56D5004bblHemi_WithWIX42041Filter.jpg) (eBayGoldenLionAirCleanerOn56D5004bblHemi_WithWIX42041FilterAndOEPiePlate.jpg) (eBayGoldenLionAirCleanerOn56D5004bblHemi_SnorkelToScoopPathway_Annotated.jpg) (eBayGoldenLionAirCleanerOn56D5004bblHemi_SnorkelInsideDiameter2point5inches.jpg) (eBayGoldenLionAirCleanerOn56D5004bblHemi_Snorkel_BaffleAtInnerEnd.jpg) (eBayGoldenLionAirCleanerOn56D5004bblHemi_CanSideHeight3point5Inches.jpg) (eBayGoldenLionAirCleanerOn56D5004bblHemi_InterferencesWithChokeAndFuelLine.jpg) (eBayGoldenLionAirCleanerOn56D5004bblHemi_InterferenceWithPSPump.jpg) (eBayGoldenLionAirCleanerOn56D5004bblHemi_InterferenceWithPSPump_1.jpg) Attachments ---------------- eBayGoldenLionAirCleanerOn56D5004bblHemi.jpg (162KB - 590 downloads) eBayGoldenLionAirCleanerOn56D5004bblHemi_FitmentAtCarbThroat.jpg (82KB - 630 downloads) eBayGoldenLionAirCleanerOn56D5004bblHemi_WithWIX42041Filter.jpg (120KB - 601 downloads) eBayGoldenLionAirCleanerOn56D5004bblHemi_WithWIX42041FilterAndOEPiePlate.jpg (124KB - 594 downloads) eBayGoldenLionAirCleanerOn56D5004bblHemi_SnorkelToScoopPathway_Annotated.jpg (220KB - 598 downloads) eBayGoldenLionAirCleanerOn56D5004bblHemi_SnorkelInsideDiameter2point5inches.jpg (71KB - 583 downloads) eBayGoldenLionAirCleanerOn56D5004bblHemi_Snorkel_BaffleAtInnerEnd.jpg (73KB - 592 downloads) eBayGoldenLionAirCleanerOn56D5004bblHemi_CanSideHeight3point5Inches.jpg (91KB - 596 downloads) eBayGoldenLionAirCleanerOn56D5004bblHemi_InterferencesWithChokeAndFuelLine.jpg (115KB - 591 downloads) eBayGoldenLionAirCleanerOn56D5004bblHemi_InterferenceWithPSPump.jpg (115KB - 594 downloads) eBayGoldenLionAirCleanerOn56D5004bblHemi_InterferenceWithPSPump_1.jpg (115KB - 603 downloads) | ||
| |||
| 56D500boy |
| ||
Exner Expert 10K+ Posts: 10042 Location: Lower Mainland BC |  Well Dave, I see you have a clearance problem, Dave Why yes HAL, I do have a clearance problem, HAL. Well Dave, have you considered making a spacer instead of using a ball peen hammer, to solve your problem, Dave? Well, no HAL, I had not. What do you suggest HAL? Well Dave, have you had a look at the McNichols pipe sizing chart, Dave? Well, not HAL, I have not. Do you mean this one, HAL? http://www.mcnichols.com/?pageCode=pipedims Yes Dave, that is the one. Perhaps you could consider a Schedule 10 Nominal 4 inch pipe. It has a 4.5" outside diameter and a 4.26" inside diameter. I believe you will find that the 4.26" ID will sit on the carburetor nicely Dave and the air cleaner will sit on the 4.5" OD nicely as well, Dave. Well, HAL thank you very much for that. Now, could you please open the Pod bay door. I really, *really*, need to pee. I'm sorry Dave, I'm afraid I can't do that. This conversation can serve no purpose anymore. Good bye Dave.  Edited by 56D500boy 2018-03-25 12:29 AM | ||
| |||
| Powerflite |
| ||
Expert 5K+ Posts: 9787 Location: So. Cal | Why not use the standard choke well instead of that electric choke? I have the standard one hooked up to my '58 Coronet and it works great. Electric chokes are never as good. | ||
| |||
| 56D500boy |
| ||
Exner Expert 10K+ Posts: 10042 Location: Lower Mainland BC | Powerflite - 2018-03-24 6:13 PM Why not use the standard choke well instead of that electric choke? I have the standard one hooked up to my '58 Coronet and it works great. Electric chokes are never as good. My 56 Dodge came with that Echlin Electric choke and no signs of any exhaust-heated mechanical choke mechanism *OR* the tubing/whatever to connect the exhaust manifold to the carb. I don't have this stuff (as shown on this beautiful very correct local 55 Custom Royal early 270 hemi with Powerpack 4 bbl below). I don't think a mechanical choke would solve my current clearance problem. Edited by 56D500boy 2018-03-24 7:32 PM | ||
| |||
| Powerflite |
| ||
Expert 5K+ Posts: 9787 Location: So. Cal | The 315 4bbl manifold should have the provision for it at least, like mine does. (325Poly.jpg) Attachments ---------------- 325Poly.jpg (144KB - 578 downloads) | ||
| |||
| 56D500boy |
| ||
Exner Expert 10K+ Posts: 10042 Location: Lower Mainland BC | Powerflite - 2018-03-24 8:10 PM The 315 4bbl manifold should have the provision for it at least, like mine does. Made me look. But nope. (315HemiIntakeShowingNoChokeHeatPad.jpg) (315HemiRightExhaustManifoldWithPotentialChokeHeatNipple.jpg) Attachments ---------------- 315HemiIntakeShowingNoChokeHeatPad.jpg (136KB - 584 downloads) 315HemiRightExhaustManifoldWithPotentialChokeHeatNipple.jpg (108KB - 575 downloads) | ||
| |||
| Powerflite |
| ||
Expert 5K+ Posts: 9787 Location: So. Cal | Wow, I learn something new everyday. I had no idea there were different versions of a 315-325 4bbl intake. | ||
| |||
| 56D500boy |
| ||
Exner Expert 10K+ Posts: 10042 Location: Lower Mainland BC | It would appear that the 1955 Dodge 4bbl intake, the 1956 non-D500 power package, the 1956 D500 4 bbl intake and the 1957-58 4 bbl intakes all have different PNs. Interestingly, the one in your photo Nathan with the casting number of 1735 774 is indeed the Part Number for the 1957-58 4 bbl power package and D500 intake manifold. Very odd. Edited by 56D500boy 2018-03-25 12:43 AM (IntakeManifoldPNs.jpg) Attachments ---------------- IntakeManifoldPNs.jpg (190KB - 580 downloads) | ||
| |||
| Powerflite |
| ||
Expert 5K+ Posts: 9787 Location: So. Cal | The 270 intake is obviously a different part because it isn't interchangeable with the 315-325. I am surprised you could read my casting number, but you are right. | ||
| |||
| 56D500boy |
| ||
Exner Expert 10K+ Posts: 10042 Location: Lower Mainland BC | Powerflite - 2018-03-25 10:56 AM The 270 intake is obviously a different part because it isn't interchangeable with the 315-325. I am surprised you could read my casting number, but you are right. :) I could read your 58 intake casting number even before I blew the photo up like below. Luck not, skill. I have some 4" nominal ABS black plumbing pipe in the shed that I am going to pull out and see if an inch of it will work as an aircleaner spacer. Then I need to find my electric Styrofoam shaper and start on shaping the inlet air scoop (after I remove the right horn). (58Dodge4bblIntake1735774.jpg) Attachments ---------------- 58Dodge4bblIntake1735774.jpg (101KB - 570 downloads) | ||
| |||
| 56D500boy |
| ||
Exner Expert 10K+ Posts: 10042 Location: Lower Mainland BC | 56D500boy - 2018-03-25 12:02 PM I have some 4" nominal ABS black plumbing pipe in the shed that I am going to pull out and see if an inch of it will work as an aircleaner spacer. Then I need to find my electric Styrofoam shaper and start on shaping the inlet air scoop (after I remove the right horn). Had a few minutes before we went out for Sunday brunch so I found the ABS pipe bit that I have been saving for a rainy day. Didn't measure anything, just cut (very crudely ) what I thought would be needed and trialed it. It was Schedule 40 so the wall thickness is a bit much and would need some trimming at the carb. Might need something else at the top, where the air cleaner sits on it. Nevertheless, it does show that a spacer is probably doable and the way to go. I do have 4 more feet of pipe to cut a nice 1.25" ring if I decide to stick with Schedule 40 (and not Schedule 10 as I thought would work better). The proof of concept photos: Edited by 56D500boy 2018-03-25 5:03 PM (CrudelyCutSchedule40ABSSpacer_1.jpg) (CrudelyCutSchedule40ABSSpacer_2.jpg) (eBayGoldenLionAirCleanerSittingOnTrialSchedule40ABSSpacer.jpg) (CrudelyCutSchedule40ABSSpacerWithEbayGoldenLionAirCleanerShowingClearanceGained.jpg) Attachments ---------------- CrudelyCutSchedule40ABSSpacer_1.jpg (122KB - 584 downloads) CrudelyCutSchedule40ABSSpacer_2.jpg (148KB - 567 downloads) eBayGoldenLionAirCleanerSittingOnTrialSchedule40ABSSpacer.jpg (158KB - 558 downloads) CrudelyCutSchedule40ABSSpacerWithEbayGoldenLionAirCleanerShowingClearanceGained.jpg (108KB - 568 downloads) | ||
| |||
| 1960fury |
| ||
Expert 5K+ Posts: 7468 Location: northern germany | if you are good with metal and a welder that elevated position of the ac hsg will make it easy to fabricate a smooth transition from ac hsg floor to carburetor throat. | ||
| |||
| BigBlockMopar |
| ||
Expert Posts: 3575  Location: Netherlands | With the risc of showing my cheapness here I can say; don't overlook the kitchen utilities like a simple small cooking pan to modify it as a carb/af-housing spacer... 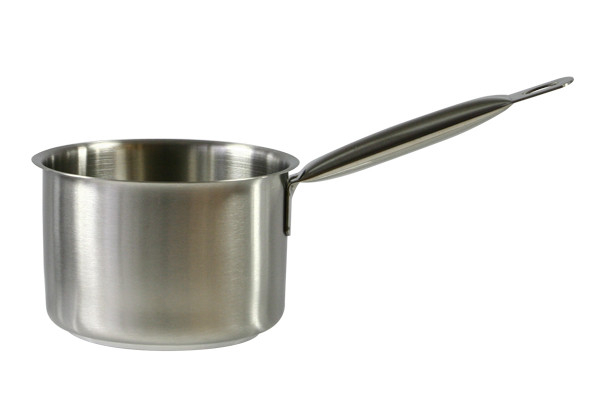 (Been there done that...) | ||
| |||
| 1960fury |
| ||
Expert 5K+ Posts: 7468 Location: northern germany | BigBlockMopar - 2018-03-25 6:26 PM With the risc of showing my cheapness here I can say; don't overlook the kitchen utilities like a simple small cooking pan to modify it as a carb/af-housing spacer... (Been there done that...) :) haha, i have a couple of household items in my car, like a christmas tree ornament peak in my air cleaner cover and an old bucket as an alternator fan shroud and i was even cheaper as i used an old platic bucket as an ac hsg spacer Edited by 1960fury 2018-03-25 7:23 PM | ||
| |||
| 56D500boy |
| ||
Exner Expert 10K+ Posts: 10042 Location: Lower Mainland BC | 1960fury - 2018-03-25 5:38 PM if you are good with metal and a welder that elevated position of the ac hsg will make it easy to fabricate a smooth transition from ac hsg floor to carburetor throat. BigBlockMopar - 2018-03-25 6:26 PM With the risk of showing my cheapness here I can say; don't overlook the kitchen utilities like a simple small cooking pan to modify it as a carb/af-housing spacer... (Been there done that...) :) Thanks for the comments. I like the way you guys think. I don't have any welding or CNC skills (wish I did). What I do have is the type of mind that can see re-purposing something, like a cooking pan, if the size was right. I didn't see either of your two posts guys before I went out to the local Medium-Box Hardware store, "RONA", was the Canadian version of Lowes/Home Depot (now owned by Lowes but still called RONA). I actually went to buy some styrofoam bead board to laminate and to start sculpting the shape of the air scoop. However, I also wandered into the plumbing section where I bought a 4" x 3" (both nominal) ABS black plastic reducing coupling and a 4" x 4" thin-wall PVC coupling. The 4" end of the reducing coupling fits over the 4" nominal Schedule 40 black plastic plumbing pipe *AND* the 4" nominal PVC coupling. The ABS reducer was $7.89 and the PVC coupling was $2.49. The "Transition" glue to bond the ABS and PVC was $4.99. So not much money into it. Got those all home and started to work. First thing was to test the 4" x 4" PVC coupling on the carb. Must be Schedule 10 because it fit perfectly over the carb. Nothing to trim out there (except height). Then I tried the 4" x 3" reducer on the bottom flange/nipple of the Golden Lion aircleaner at the 4" nominal end. A bit tight. Needs some grinding/sanding to fit better. No biggy. Then I cut the 4" x 3" reducer at the 4" nominal end to create a collar to corral the 4" nominal PVC coupling. Cut it about 3/4" high on my table saw (cutting ABS stinks BTW). Sanded off the burrs from sawing and pushed the new collar on to the bottom of the air cleaner. Then I inserted the white PVC coupling into the collar. Fit beautifully. Then, without cutting the white PVC coupling but leaving it in the ABS collar that was pushed onto the air cleaner, I tried the assembly on the carburetor. Definitely got clearance now (LOL). Tomorrow, I will figure out what the real height I need is and then cut the coupling. I have two halves to get it right. Even if I screw both of them up, the coupling was only $2.49 and I can get another one and try again. I might incorporate the remaining bit of the 4" x 3" reducing coupling into the air scoop because the OD of the 3" nominal end is pretty much 4" and 4" flex hose would fit over it. Just need to make the snorkel on the air cleaner appropriately larger. Edited by 56D500boy 2018-03-25 9:00 PM (FourInchNominalPVCCouplingUnCutOn56D500WCFBCarburetor_1.jpg) (FourInchNominalPVCCouplingUnCutOn56D500WCFBCarburetor_2.jpg) (4InchX3InchABSReducingCouplingSittingOnUndersideOfGoldenLionAirCleaner.jpg) (SectionOf4inchX3inchABSReducingCouplingPushedDownOverBottomOfGoldenLionAircleaner.jpg) (FourInchNominalPVCCouplingInsertedIntoSectionOf4inchX3inchABSReducingCouplingOnGoldenLionAirCleaner_1.jpg) (FourInchNominalPVCCouplingInsertedIntoSectionOf4inchX3inchABSReducingCouplingOnGoldenLionAirCleaner_2.jpg) (FourInchNominalPVCCouplingUnCutOn56D500WCFBCarburetor_3.jpg) (FourInchNominalPVCCouplingUnCutOn56D500WCFBCarburetor_4.jpg) Attachments ---------------- FourInchNominalPVCCouplingUnCutOn56D500WCFBCarburetor_1.jpg (101KB - 563 downloads) FourInchNominalPVCCouplingUnCutOn56D500WCFBCarburetor_2.jpg (109KB - 554 downloads) 4InchX3InchABSReducingCouplingSittingOnUndersideOfGoldenLionAirCleaner.jpg (84KB - 547 downloads) SectionOf4inchX3inchABSReducingCouplingPushedDownOverBottomOfGoldenLionAircleaner.jpg (99KB - 567 downloads) FourInchNominalPVCCouplingInsertedIntoSectionOf4inchX3inchABSReducingCouplingOnGoldenLionAirCleaner_1.jpg (83KB - 548 downloads) FourInchNominalPVCCouplingInsertedIntoSectionOf4inchX3inchABSReducingCouplingOnGoldenLionAirCleaner_2.jpg (80KB - 539 downloads) FourInchNominalPVCCouplingUnCutOn56D500WCFBCarburetor_3.jpg (76KB - 547 downloads) FourInchNominalPVCCouplingUnCutOn56D500WCFBCarburetor_4.jpg (127KB - 563 downloads) | ||
| |||
| 1960fury |
| ||
Expert 5K+ Posts: 7468 Location: northern germany | 1960fury - 2018-03-25 5:38 PM if you are good with metal and a welder that elevated position of the ac hsg will make it easy to fabricate a smooth transition from ac hsg floor to carburetor throat. this is what i meant. old salt flat trick. i read many years ago that this will improve noticable HP and topspeed and of course i went all out with that, like i always do some mods inside the carb throat too. Edited by 1960fury 2018-03-26 5:26 PM (ramfuryds2.jpg) (ov_achsgfloor1 (1).jpg) (ov_actop1 (1).jpg) Attachments ---------------- ramfuryds2.jpg (55KB - 541 downloads) ov_achsgfloor1 (1).jpg (69KB - 540 downloads) ov_actop1 (1).jpg (71KB - 548 downloads) | ||
| |||
| 1960fury |
| ||
Expert 5K+ Posts: 7468 Location: northern germany | 1960fury - 2018-03-25 7:20 PM BigBlockMopar - 2018-03-25 6:26 PM With the risc of showing my cheapness here I can say; don't overlook the kitchen utilities like a simple small cooking pan to modify it as a carb/af-housing spacer... (Been there done that...) :) haha, i have a couple of household items in my car, like a christmas tree ornament peak in my air cleaner cover.... of course not for ornamentation, i hate ornamentation and bling-bling in the engine compartment, i just glued the christmas tip to the AC top as it had the perfect shape to improve airflow: (ov_actop (1).jpg) Attachments ---------------- ov_actop (1).jpg (58KB - 540 downloads) | ||
| |||
| 56D500boy |
| ||
Exner Expert 10K+ Posts: 10042 Location: Lower Mainland BC | Good work there Sid. Looks like the airflow would be very smooth. What about covering those little air tubes on the outside of the main carb body? Yours: What are the black flexi-ducts? These little tubes: (SmallAirTubesOnEdgeOf56WCFB.jpg) Attachments ---------------- SmallAirTubesOnEdgeOf56WCFB.jpg (148KB - 542 downloads) | ||
| |||
| 56D500boy |
| ||
Exner Expert 10K+ Posts: 10042 Location: Lower Mainland BC | AIR SCOOP SIZING TRIALS Yesterday I bought a piece of 3" Styrofoam bead board to use to trial an air scoop. I cut it in quarters and laminated two of the pieces together and left the other two pieces loose. I couldn't find my electric Styrofoam shaper "knife" In the following sequence, Mark 1 and 2 are single thickness and Marks 3 and 4 are double thickness. I removed the right side horn for now but I had problems with wiring to the right signal/park light. They ran the wires very awkwardly and they are in the way of the ultimate scoop. I would like to run the wiring better but I think it is a major job to remove the signal light, etc. So for now I left it. As a result of the wiring, the some of the differences between Mk. 1 and 2 and Mk. 3 and 4 are trimming the scoop to avoid the wiring. Mark 1 was a single layer trial with notches to clear the teeth on the grill bar. Mark 2 was based on Mark 1 but was trimmed shorter to avoid the bar grill teeth area. Mark 3 was a double layer scoop based on the Mark 1 plan view but twice the thickness. This gets a bit more air but would require tapering in the vertical at the rear to work better. Mark 4 was Mark 3 with some additional trimming to avoid the signal/park light wiring. The hole in the rad support could be either round or rectangular. I think rectangular and then a transition to round. But who knows. Need to buy more foam and find my electric foam sculpting hot knife for Mk. 5 trials. Edited by 56D500boy 2018-03-27 1:06 AM (56DodgeAirScoopTrials_Mk1_Top.jpg) (56DodgeAirScoopTrials_Mk1_side.jpg) (56DodgeAirScoopTrials_Mk1_Front.jpg) (56DodgeAirScoopTrials_Mk2_Top.jpg) (56DodgeAirScoopTrials_Mk3_Top.jpg) (56DodgeAirScoopTrials_Mk3_Front_1.jpg) (56DodgeAirScoopTrials_Mk3_Front_2.jpg) (56DodgeAirScoopTrials_Mk4_Top.jpg) (56DodgeAirScoopTrials_Mk4_SideView.jpg) (56DodgeAirScoopTrials_Mk4_SideView_ShowingPotentialTapering.jpg) (56DodgeAirScoopTrials_AreaInRadsupportForConnectionHoleToScoop.jpg) (56DodgeAirScoopTrials_Mk4_TopWithPathToAirCleaner.jpg) (56DodgeAirScoopTrials_PotentialMark5TopShape.jpg) (56DodgeAirScoopTrials_PotentialMark5SideShape.jpg) Attachments ---------------- 56DodgeAirScoopTrials_Mk1_Top.jpg (90KB - 547 downloads) 56DodgeAirScoopTrials_Mk1_side.jpg (111KB - 541 downloads) 56DodgeAirScoopTrials_Mk1_Front.jpg (141KB - 544 downloads) 56DodgeAirScoopTrials_Mk2_Top.jpg (104KB - 543 downloads) 56DodgeAirScoopTrials_Mk3_Top.jpg (100KB - 532 downloads) 56DodgeAirScoopTrials_Mk3_Front_1.jpg (136KB - 547 downloads) 56DodgeAirScoopTrials_Mk3_Front_2.jpg (122KB - 536 downloads) 56DodgeAirScoopTrials_Mk4_Top.jpg (123KB - 533 downloads) 56DodgeAirScoopTrials_Mk4_SideView.jpg (128KB - 554 downloads) 56DodgeAirScoopTrials_Mk4_SideView_ShowingPotentialTapering.jpg (189KB - 549 downloads) 56DodgeAirScoopTrials_AreaInRadsupportForConnectionHoleToScoop.jpg (164KB - 547 downloads) 56DodgeAirScoopTrials_Mk4_TopWithPathToAirCleaner.jpg (222KB - 544 downloads) 56DodgeAirScoopTrials_PotentialMark5TopShape.jpg (222KB - 551 downloads) 56DodgeAirScoopTrials_PotentialMark5SideShape.jpg (201KB - 552 downloads) | ||
| |||
| 56D500boy |
| ||
Exner Expert 10K+ Posts: 10042 Location: Lower Mainland BC | Mk 5 Air Scoop Trial I couldn't find my electric foam-cutting wand so I bought another one. (I'll probably find the old one tomorrow LOL). I didn't buy any new foam so I shaped up the Mark 4 version as the Mark 5. Turns out what I had at the bulkhead/rad support was pretty much the diameter of a Schedule 10 4" PVC coupler which as the same OD as the ID of the 4" nominal aluminum flexi pipe so I didn't cut the scoop down to 3" nominal, just left it at 4" nominal. I did add part of a third layer at the front bottom before I tapered the scoop on the bottom side. Turns out that I should have added a full third layer before I did the vertical trimming. Working with the hot foam cutter is tricky. At this point, it is pure concept, not final mould/core so I'm not worried. The photos below show the Mark 5 results and then the ideas that I need to take forward with the Mark 6 version. I need to buy another piece of foam and laminate three layers and then start again. (Mark5FromTheTop.jpg) (Mark5FrontViewWithHalfLayer.jpg) (Mark5FromTheSide.jpg) (Mark5FromTheTop_Annotated.jpg) (Mark5FrontViewWithHalfLayer_Annotated.jpg) (Mark5FromTheSide_Annotated.jpg) (Mark5FromTheSide_AnnotatedWithBetterBottomCurve.jpg) Attachments ---------------- Mark5FromTheTop.jpg (120KB - 562 downloads) Mark5FrontViewWithHalfLayer.jpg (99KB - 544 downloads) Mark5FromTheSide.jpg (152KB - 557 downloads) Mark5FromTheTop_Annotated.jpg (203KB - 549 downloads) Mark5FrontViewWithHalfLayer_Annotated.jpg (183KB - 541 downloads) Mark5FromTheSide_Annotated.jpg (156KB - 543 downloads) Mark5FromTheSide_AnnotatedWithBetterBottomCurve.jpg (163KB - 528 downloads) | ||
| |||
| 56D500boy |
| ||
Exner Expert 10K+ Posts: 10042 Location: Lower Mainland BC | MARK 6 SCOOP TRIAL Bought some more foam and laminated three layers together with PL 300 Construction adhesive (the stuff that is made for foam - PL 400 eats foam - I learned that on a previous project). Also bought a very used electric carving knife from Goodwill for $8 and after the glue had set up enough I went at it with the electric carving knife, the electric foam cutting "knife" and finally a hand held shaper. Worked outside. Bead board is nasty. I can't start my car until I a) vacuum up in the rad support area and b) get the air cleaner back on. I made one mistake along the way today. I inadvertently cut too much on one corner. Solution was to patch in a new chunk of foam and re-cut and reshape. The photos below show today's "progress". Once I get the signal light wire issue sorted, I will try the Mark 6 scoop in place. And then rework as needed. Then I hope to smooth the outside with something (perhaps "Concrete Fill") and then proceed to the fiberglassing stage. (Mark63LayerStartingBlock_1.jpg) (Mark63LayerStartingBlock_2.jpg) (Mark6BlockAfterShaping_1.jpg) (Mark6BlockAfterShaping_2.jpg) (Mark6BlockAfterShaping_3.jpg) (Mark6BlockAfterShaping_4WIthMark5.jpg) Attachments ---------------- Mark63LayerStartingBlock_1.jpg (167KB - 535 downloads) Mark63LayerStartingBlock_2.jpg (207KB - 541 downloads) Mark6BlockAfterShaping_1.jpg (195KB - 557 downloads) Mark6BlockAfterShaping_2.jpg (173KB - 539 downloads) Mark6BlockAfterShaping_3.jpg (145KB - 550 downloads) Mark6BlockAfterShaping_4WIthMark5.jpg (172KB - 537 downloads) | ||
| |||
| 56RatKing |
| ||
Regular Posts: 65 | Have you considered using a range hood adapter ? Seems like the would make one in the size you need and save you some time. Somthing like this https://www.homedepot.com/p/Speedi-Products-12-in-x-3-25-in-x-8-in-G... | ||
| |||
| 56RatKing |
| ||
Regular Posts: 65 | This one would work too, since your hooking it up to a hose anyway https://www.homedepot.com/p/Speedi-Products-14-in-x-3-25-in-x-8-in-W... | ||
| |||
| 56D500boy |
| ||
Exner Expert 10K+ Posts: 10042 Location: Lower Mainland BC | 56RatKing - 2018-03-30 12:23 AM This one would work too, since your hooking it up to a hose anyway https://www.homedepot.com/p/Speedi-Products-14-in-x-3-25-in-x-8-in-W... Sorry, you obviously didn't start at the top of this page. I've already considered and tried such HVAC pre-made tin boots. They're too "Rat Rod" for my tastes, even if they worked (too small). What I am doing is more work but the final product won't embarrass me (hopefully). I'm using this YouTube video as my guide: https://www.youtube.com/watch?v=8QQPRb8CHmA But thanks for the suggestion. My previous trial: Edited by 56D500boy 2018-03-30 1:49 AM | ||
| |||
| 56D500boy |
| ||
Exner Expert 10K+ Posts: 10042 Location: Lower Mainland BC | Spent part of the afternoon polishing sill plates so I could finalize my carpet project and get the carpet held down. When I got tried of that, I went back to the air scoop project. The first thing to do was to re-route the right park/signal light wiring so it didn't interfere with the scoop. The way the factory routed the wire was dumb (IMO). So, being a FL noob in most ways, and coming from a 93-94 Audi background, I figured that I just needed to get at the back of the signal/park light housing and disconnect the wiring there and re-route it. Sounds like a plan until I realize that I'm going to have to remove the housing from the grill bar to get at the back of the housing. Then it snowballs when I realize to do that I will have to remove the grill bar, at least enough so I can pull it out and expose the nuts or whatever at the back of the park/signal light housing. Well about 30 minutes and probably 8 nuts/bolts later have the grill bar loose enough to remove the light housing. *THEN* I realize that there is no connector there to disconnect. Oh man. The can of worms that I opened. Now I have to de-rust the back of the grill bar and paint it. And paint the brackets. And de-rust the nuts and bolts. And clean up and paint the fender behind the end of the grill bar (minor surface rust). I can't put anything back unless I improve it. That is my mantra. FINALLY, FINALLY, it hits me in the face. Hey idiot!! Follow that signal/park light wiring back! Maybe there is a connector. NOPE. No connector. BUT (and this is going to be no surprise to the non-noobs), there is a termination block on the rad support and you can disconnect wiring there and then re-route it at the right fender end. D'OH!! I even previously posted the wiring diagram below (so I can't plead ignorance). Looks like I need to find the yellow and brown wires and temporarily disconnect them. Oh well, I learned something and my car will be better when I put that grill bar back after painting the backside of it and its brackets. Edited by 56D500boy 2018-03-30 9:22 PM | ||
| |||
| 56D500boy |
| ||
Exner Expert 10K+ Posts: 10042 Location: Lower Mainland BC | You'll see why I am calling it "Committment Day" further down. Started off the day disconnecting the Yellow and brown wires to the right parking/signal light at the terminal bar. This allowed me to pull the wires off the top of the rad support and then pull it through the rad support and get it out of the tanglement at the grill bar. With that wire out of the way, I then could try the Mark 6 foam form for fitment. I am quite happy with the result. I will have to add a bit of foam at the top to accommodate the "pipe" connection (Schedule 10 PVC coupler) that, even at its lowest point is still higher than the top of the Mark 6 form. No biggy. I had already mentally allowed for about 1/2" rise on the top when I marked the back of the form for shaping. Turns out that it might be more like an inch. Still no biggy. Then I removed the grill bar completely so I had access to the rad support. I placed the PVC coupler on the engine bay side of the rad support and marked a point at the top where I could drill a pilot hole. Once I had the pilot hole drilled and had a reference point to work from, I placed the coupler in position on the grill side of the rad support and then scribed the circumference of the coupler on the rad support. The I drilled a larger pilot hole, big enough to get the metal blade of my Bosch jig-saw through the hole. At that point I was pretty much committed to this project. As soon as I started cutting the hole with my jig saw, I was really committed. Turns out at I would have never been able to do any of this cutting if I had figured out the wiring issue and had NOT removed the grill bar. I needed the grill bar out in order get enough room for the jig saw. Even then I ran into issues and was only able to use the jig saw to cut between 12 oclock and 10 oclock (anti-clockwise) and from about 6 to 4 oClock (anti-clockwise). Then I ran into impediments with the jig saw. I needed another solution (smaller jig saw?) but I wasn't about to go out and buy another tool. Instead I got out my trusty Dremel and loaded it with an E-Z-Load reinforced cut off disk. Then I carefully ran the cut-off wheel (at about 4 out of 5 on the variable speed) around the inside of the scribe line. I was surprised that I had the steadiness to do that but I did. About 20 minutes and one blade change later, I had a 4"+ hole cut out. A little cleaning with a plug stone on my angle grinder and it was done. Not shown in the photos below, I subsequently sanded the edges of the hole and painted the entire right section of the rad support with Tremclad semi-gloss black. I will sand it a bit tomorrow and give it another coat before moving on. (56DodgeRadSupportTerminalStrip_Before.jpg) (Mark6InPlaceWithoutWiringIssue_1.jpg) (Mark6InPlaceWithoutWiringIssue_2.jpg) (Mark6InPlaceWithoutWiringIssue_Front_1.jpg) (Mark6InPlaceWithoutWiringIssue_Front_2.jpg) (Mark6InPlaceWithoutWiringIssue_Front_3.jpg) (Mark6Commitment_Schedule10HoleInRadSupport_1.jpg) (Mark6Commitment_Schedule10HoleInRadSupport_2.jpg) (Mark6Commitment_Schedule10HoleInRadSupport_3.jpg) (Mark6Commitment_Schedule10HoleInRadSupport_4.jpg) Attachments ---------------- 56DodgeRadSupportTerminalStrip_Before.jpg (143KB - 544 downloads) Mark6InPlaceWithoutWiringIssue_1.jpg (140KB - 568 downloads) Mark6InPlaceWithoutWiringIssue_2.jpg (123KB - 572 downloads) Mark6InPlaceWithoutWiringIssue_Front_1.jpg (136KB - 530 downloads) Mark6InPlaceWithoutWiringIssue_Front_2.jpg (98KB - 542 downloads) Mark6InPlaceWithoutWiringIssue_Front_3.jpg (129KB - 545 downloads) Mark6Commitment_Schedule10HoleInRadSupport_1.jpg (127KB - 544 downloads) Mark6Commitment_Schedule10HoleInRadSupport_2.jpg (151KB - 531 downloads) Mark6Commitment_Schedule10HoleInRadSupport_3.jpg (137KB - 534 downloads) Mark6Commitment_Schedule10HoleInRadSupport_4.jpg (84KB - 534 downloads) | ||
| |||
| 56D500boy |
| ||
Exner Expert 10K+ Posts: 10042 Location: Lower Mainland BC | Since probably before I even bought the green eBay Golden Lion air cleaner shell, I knew that the snorkel was going to be too small for my plan(s). So the other day I bought a couple of pieces of 3.5" OD Pipe that I could work with. The first one had an 1/8" wall thickness - likely too thick. Then I went to my friendly local muffler shop and got a piece of 14 gauge 3.5" exhaust pipe. (Cost me $8). When I got home I show these to my metal fabricator-by-trade neighbour and he suggested using the exhaust pipe and scribing it to the metal can. That was the other day. I had some time while some primer was drying on the car (behind the right grill bar), so I started the removal of the old snorkel. This is what I started with: I used my Dremel with a cut-off wheel to cut off a section of crimped joint between the upper and lower halves of the air cleaner shell. That allowed me to get the exhaust pipe closer to the shell and make the initial scribes. I thought I would be using the Dremel to cut the hole but it was too awkward on the small radius. SO I used my hacksaw to remove as much of the snorkel as possible. That allowed me to use my Bosch jig saw (with metal blade) to cut the initial scribed hole (staying on the inside as much as possible). With that material out, I rescribed the hole to the exhaust pipe and started using my angle grinder and plug stone to grind away the unwanted material. Many tries and re-scribing. Slowly slowly and oops the exhaust pipe slipped into the hole. I am quite pleased with the fit. Now I need to get it tacked in place and welded to the shell. Might be a bit tricky. Will cost me a case of beer. Today's fun: Edited by 56D500boy 2018-04-02 6:30 PM (GoldenLionAirCleanerSnorkelMod_1.jpg) (GoldenLionAirCleanerSnorkelMod_2.jpg) (GoldenLionAirCleanerSnorkelMod_3.jpg) (GoldenLionAirCleanerSnorkelMod_4_annotated.jpg) Attachments ---------------- GoldenLionAirCleanerSnorkelMod_1.jpg (244KB - 525 downloads) GoldenLionAirCleanerSnorkelMod_2.jpg (232KB - 537 downloads) GoldenLionAirCleanerSnorkelMod_3.jpg (143KB - 525 downloads) GoldenLionAirCleanerSnorkelMod_4_annotated.jpg (190KB - 538 downloads) | ||
| |||
| Powerflite |
| ||
Expert 5K+ Posts: 9787 Location: So. Cal | I thought you were going to do 2 snorkels. That 3.5" size is much better. Edited by Powerflite 2018-04-02 7:43 PM | ||
| |||
| 56D500boy |
| ||
Exner Expert 10K+ Posts: 10042 Location: Lower Mainland BC | Powerflite - 2018-04-02 7:42 PM I thought you were going to do 2 snorkels. That 3.5" size is much better. I gave up on the two snorkel idea a while ago. The location of the battery and wiring on the left side and my reluctance to go through the fender liners like Sid did in Germany killed that idea. As a result a single snorkel was the answer. I then set about to find a 383/413 Golden Lion air cleaner because of the throat size (4 7/32") would work on my WCFB carb. The 3.5" diameter for the new snorkel is about as big as I can go. I've been cleaning up and painting in the right front side where the grill bar is located. I needed the grill bar out to cut the 4"+ hole in the rad support and while it was out, I decided to "betterify (tm)" the areas that the grill bar hides because I'm not going to want to go back in there later. Painting is 99% done and drying (two small glitches to fix tomorrow). And then I can start the reassembly and the final mods on the Mark 6 air scoop foam core prior to starting to lay up fiberglass and resin. | ||
| |||
| 56D500boy |
| ||
Exner Expert 10K+ Posts: 10042 Location: Lower Mainland BC | Got through with the grill bar rehab (enough for now anyway) and the painting in the area between the rad support and the grill bar (and a bit of the side fender). Put the grill bar back in and moved the park/signal light wire out of the way (the previous location was making it impossible for me to try the Mark 6 scoop in place properly). With the wires out of the way and the Mark 6 foam scoop form in position, I see that there need to be a Mark 7 with a bit more added at the top to match the 4" hole I cut in the rad support, while leaving the base of the scoop sitting on the "gravel" pan between the rad support and the bumper. And probably some shaping at the bottom to move the exit up an inch or so. Slowly Slowly. (Mark6InPlaceWithNoWireInterference_Above_1.jpg) (Mark6InPlaceWithNoWireInterference_Front.jpg) (Mark6InPlaceWithNoWireInterference_Side.jpg) (Mark6InPlaceWithNoWireInterference_Back.jpg) (Mark7ProfileEstimate_Annotated.jpg) Attachments ---------------- Mark6InPlaceWithNoWireInterference_Above_1.jpg (97KB - 545 downloads) Mark6InPlaceWithNoWireInterference_Front.jpg (130KB - 543 downloads) Mark6InPlaceWithNoWireInterference_Side.jpg (115KB - 537 downloads) Mark6InPlaceWithNoWireInterference_Back.jpg (106KB - 554 downloads) Mark7ProfileEstimate_Annotated.jpg (165KB - 541 downloads) | ||
| |||
| 56D500boy |
| ||
Exner Expert 10K+ Posts: 10042 Location: Lower Mainland BC | My last post included this guesstimate about what the Mark 7 scoop form might look like. To get to Mark 7 from Mark 6, I added a partial layer on the back half(ish) of the top of the Mark 6 form. After the glue (PL 300 Construction FOAM board adhesive) set up, I started cutting away the excess, first with my $8 second hand store electric carving knife and then with my electric foam hot knife (more like a hot "rod" than a blade). Slowly it got to what I had imagined. Then I went at the form with my ancient Stanley Shure-form hand shaper/plane until I was happy with the general shape. Then I bought some artists's Gesso (canvas primer) and painted the form with that and let it dry overnight. Then this morning, I put a thin layer of pre-mixed dry wall mud on the form, in hopes of creating a nice smooth surface. When it dried, I tried it in the car (looked promising) and then I started sanding it with 80 grit. After getting it pretty good, I put it back in the car and took some photos (see below). When I was done with the photos, I put a bit more dry wall mud on in areas that had imperfections that I wanted to eliminate. I will let that dry in the basement bathroom ("my" bathroom) with the electric baseboard heater cranked a bit. Tomorrow I will sand it one last time, and with luck (weatherwise), I will start putting the fiberglass on with epoxy resin. I am using this video as my general guide on this scoop project. https://www.youtube.com/watch?v=8QQPRb8CHmA Today's photos: (Mark7ScoopFormFromAbove_BeforeSanding.jpg) (Mark7ScoopFormFromEngineBaySide.jpg) (Mark7ScoopFormFromAboveCenter_AfterSanding.jpg) (Mark7ScoopFormFromSide_AfterSanding.jpg) Attachments ---------------- Mark7ScoopFormFromAbove_BeforeSanding.jpg (86KB - 561 downloads) Mark7ScoopFormFromEngineBaySide.jpg (115KB - 531 downloads) Mark7ScoopFormFromAboveCenter_AfterSanding.jpg (90KB - 534 downloads) Mark7ScoopFormFromSide_AfterSanding.jpg (85KB - 539 downloads) | ||
| |||
| 56D500boy |
| ||
Exner Expert 10K+ Posts: 10042 Location: Lower Mainland BC | Guess what? The video I was following makes it look so much easier than reality. Who knew? LOL. I had applied another thin layer of dry wall mud on the foam - just to fill in a few divots that I didn't like. After I sanded that off I decided today was the day that the epoxy resin and fibreglass cloth were going to meet the Mark 7 foam form. At the last minute, I panicked about making sure that the scoop would meet up with the PVC coupler properly and decided to glue-gun a coupler to the form. Bad idea - I am not very good with a glue gun. Turns out hot glue can't be easily smoothed, or ground or cut or anything. I did what I could including adding some masking tape to smooth the transition from the foam to the coupler. It's not pretty. I will only need about 1/2" of coupler going through the rad support (it was my template for scribing and cutting that hole) so it might turn out okay (and if it doesn't, its going to be painted black anyway - so most of the "sins" will be hidden). I dry fitted a piece of fiberglass cloth and, without fully figuring things out (bad idea), I mixed up 6 oz of epoxy resin (4 oz of Part A and 2 oz of Part B). Then I started appling the mixed resin to the form where it was going to get cloth. Then I added the cloth and more resin, cutting away unneeded cloth with a pair of my wife's best scissors (That will be okay won't it??)(I kid). I didn't have the top of the form figured out before I started so when I got the bottom and the sides on, I cut another piece of cloth and applied it on top with overhangs down the side (about an inch). At least that is what I should have done. In reality I reused a section of the first piece that I had cut off and then tried to make it work. Not easy. Ended up cutting smaller pieces and adding them (with resin) to cover areas that my "patch" missed. Dumb idea. It's like I am using papier mache' techniques only in fibreglass and resin, not newspaper and paste. At this point I hope that I fix things on the next layer(s). Definitely use one piece for the top, not a lot of little pieces. Live and learn. Nothing ventured, nothing gained. It's not the mistakes you make, it's how you dispose of the witnesses. Today's "mess" (the resin makes the fibreglass cloth completely transparent so you can see the masking tape that I put on to the foam and the PVC coupler): Edited by 56D500boy 2018-04-10 11:13 AM (Mark7ScoopGettingItsFirstLayerOfFibreglasAndEpoxyResin_1.jpg) (Mark7ScoopGettingItsFirstLayerOfFibreglasAndEpoxyResin_2.jpg) (Mark7ScoopGettingItsFirstLayerOfFibreglasAndEpoxyResin_3.jpg) Attachments ---------------- Mark7ScoopGettingItsFirstLayerOfFibreglasAndEpoxyResin_1.jpg (154KB - 543 downloads) Mark7ScoopGettingItsFirstLayerOfFibreglasAndEpoxyResin_2.jpg (101KB - 528 downloads) Mark7ScoopGettingItsFirstLayerOfFibreglasAndEpoxyResin_3.jpg (113KB - 538 downloads) | ||
| |||
| 56D500boy |
| ||
Exner Expert 10K+ Posts: 10042 Location: Lower Mainland BC | Not much to show but I did move on. I used the Dremel with a cut-off/grinding wheel and 100 grit sand paper to smooth off the first layer after it set up. For the second layer, I cut paper templates of the bottom and top of the scoop (with over laps) and once I was happy with them, I laid them on the raw fiberglass cloth and cut the two pieces. Then I mixed up 6 ounces (4 part A and 2 part B) of expoxy resin and laid on the second layer of fiberglass. Discovered that I probably put too much resin on because I got cloth movement and dripping. Live and learn. Today I ground and sanded the second layer and went and bought a pint of Part B hardener but this time "FAST". Cut the raw fibreglass cloth based on the paper template again and mixed up 4.5 oz of resin (3 of part A and 1.5 of part B - fast. Then I applied the third layer of fiberglass. I used push pins on the corners, sticking the pins through the wet fiberglass and into the foam to ensure that I have the cloth in the correct position. Faster set up and less material = less dripping and less (or no?) slippage of the cloth. Tomorrow (or the next sunny day), I will sand/grind off the glitches in the 3rd layer and then apply a single layer of real carbon fiber cloth that I will give several coats of resin (over the next few days) to get the appropriate "depth". Some photos tomorrow. To | ||
| |||
| 56D500boy |
| ||
Exner Expert 10K+ Posts: 10042 Location: Lower Mainland BC | 56D500boy - 2018-04-12 9:08 PM Tomorrow (or the next sunny day), I will sand/grind off the glitches in the 3rd layer and then apply a single layer of real carbon fiber cloth that I will give several coats of resin (over the next few days) to get the appropriate "depth". Rained yesterday so I worked on the rehab of the lighting terminal block in the garage. Today was better. No rain so I could back at the air scoop. Ground off the glitches in the 3rd layer of fiberglass and then sanded. Also trimmed off most of the sacrificial 4" PVC coupler, leaving about 1/2" to see if it and the rest of the scoop would fit back in the car. Nope. I am hoping that I can get down to 3/8" of coupler left - I just need a bit to feed through the hole that I cut in the rad support - then I will install a piece of 4" PVC from the engine bay side - maybe just friction fit. Once I tried the scoop and failed to get the fit, I moved on to the carbon fibre (CF) layer. That stuff is NOT easy to work with, at least the wider weave CF cloth that I chose (there is a tighter weave but I didn't like the look of it). I got the CF on, in two parts, top and bottom. But once again, I probably added to much resin and the cloth wanted to drift due to gravity. Not sure why I can't do minimal resin, i.e. just enough to stick the CF to the fiberglass. Oh well. Live and learn. (I won't be doing this again though) Today's photos (no CF photos yet). (Mark7After3rdLayerAndARoughTrim_1.jpg) (Mark7After3rdLayerAndARoughTrim_2.jpg) (Mark7After3rdLayerAndARoughTrim_TryingTheFit_1.jpg) (Mark7After3rdLayerAndARoughTrim_TryingTheFit_2.jpg) (Mark7After3rdLayerAndARoughTrim_TryingTheFit_3.jpg) Attachments ---------------- Mark7After3rdLayerAndARoughTrim_1.jpg (131KB - 491 downloads) Mark7After3rdLayerAndARoughTrim_2.jpg (118KB - 504 downloads) Mark7After3rdLayerAndARoughTrim_TryingTheFit_1.jpg (108KB - 496 downloads) Mark7After3rdLayerAndARoughTrim_TryingTheFit_2.jpg (112KB - 515 downloads) Mark7After3rdLayerAndARoughTrim_TryingTheFit_3.jpg (105KB - 498 downloads) | ||
| |||
| 56D500boy |
| ||
Exner Expert 10K+ Posts: 10042 Location: Lower Mainland BC | Okay. The Mark 7 with Carbon Fibre (CF) is in place (sort of). I put the CF layer on the other day. New material. New mistakes (which I won't share ). For some reason, even with the faster setting Part B epoxy resin, it took 2 or 3 days to cure up enough that I thought that I could trim it with my Dremel and the E-Z-Cut cutoff blade. I've only done a rough trim so far and will probably go at the edges with the belt sander. I trimmed about 1/8" off the PVC coupler (so now it is only about 3/8" deep) and that seemed to be enough to let me jam the Mark 7 into place for a trial. Not sure how easy it will be to get out. When I get it out I will need to grind away some of the resin around the PVC coupler ring to make the scoop fit better to the hole in the rad support. I will do some more sanding, then gut the shell of the polystyrene bead foam form and then add another layer of resin. I don't think I will try to make it perfect because, it just isn't. Not bad for a first attempt. There won't be another attempt so what I get after another layer of just resin will be what it is. Today's photos (car is outside while I continue to try to finalize the position of the carpet): Edited by 56D500boy 2018-04-18 5:56 PM (Mark7WithOneLayerOfCarbonFiber_1.jpg) (Mark7WithOneLayerOfCarbonFiber_2.jpg) (Mark7WithOneLayerOfCarbonFiber_3.jpg) Attachments ---------------- Mark7WithOneLayerOfCarbonFiber_1.jpg (159KB - 480 downloads) Mark7WithOneLayerOfCarbonFiber_2.jpg (153KB - 484 downloads) Mark7WithOneLayerOfCarbonFiber_3.jpg (122KB - 479 downloads) | ||
| |||
| 57burb |
| ||
Expert Posts: 3967 Location: DFW, TX | It's starting to look like something! Thanks for the (detailed ) updates. | ||
| |||
| Jump to page : 1 2 3 Now viewing page 2 [50 messages per page] |
| Search this forum Printer friendly version E-mail a link to this thread |
| (Delete all cookies set by this site) | |


