
Home | Pics | Christine | Riding the Bullet | Data | History | Links | Wallpaper | Mailing List | '57 Resto | Email me | AIM me
|
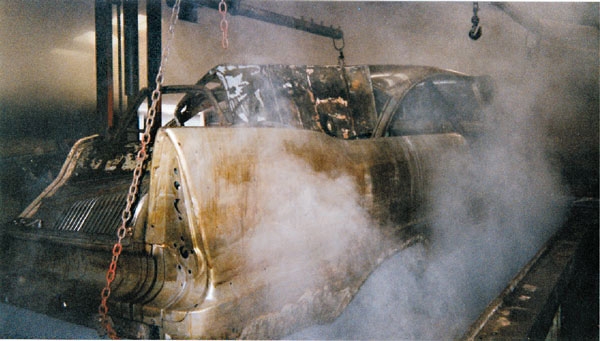
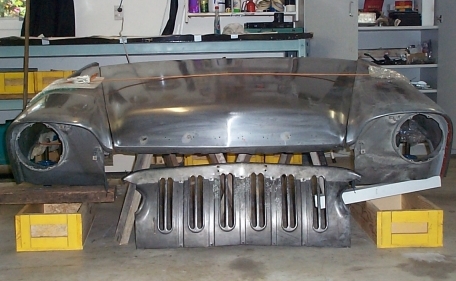
Progress of New Zealand's prize Plymouth '57 resto cont'd. Braces are welded in place across the door openings and front screen in an attempt to prevent unnecessary distortion of the structure. After stripping every single removable item off the Fury, I borrowed a friends old trailer and mounted the body and frame onto the trailer, so that it could be winched onto a truck, and also to make it easy for the dippers to move it around. The only dippers with a good reputation were 200 miles South of my home. This process is not for the faint hearted! It costs around US$1000, and what comes out of the bath is honest truth-no filler, no underseal, and in some cases-no metal. The process used is actually an alkaline process, from USA. I was advised to avoid acid, as it stays in the seams and comes out later on when the car is painted. The body and frame went through a total of 12 separate dips, with lots of manual scraping in between to remove the filler and underseal. Between each dip, the vehicle is water blasted to remove everything possible. After the final dip, it is coated in etch plating which resembles the finish on a rifle barrel. Finally the body and frame were etch primed with a red oxide inside and out, even inside the frame etc with a 360 degree sprayer. The whole dipping process took 6 weeks.
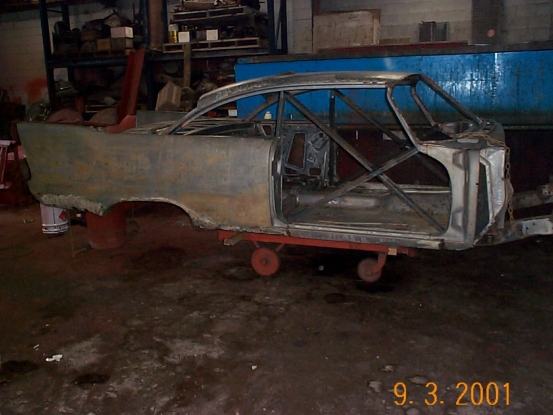
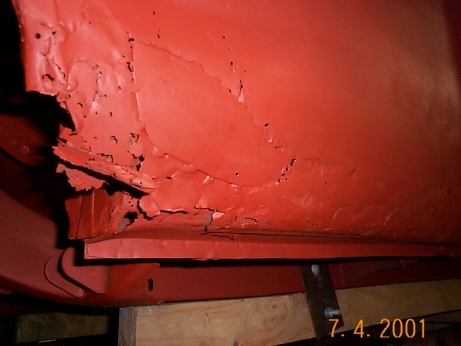
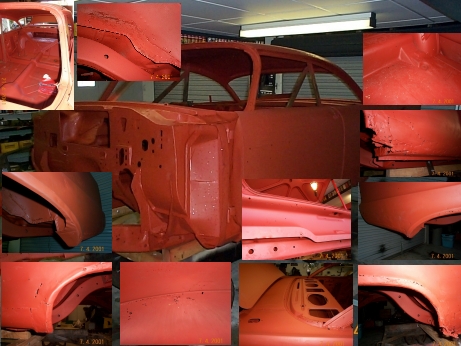
While I was aware that my Fury did have rust, I had no idea to what extent, until the acid dipping had been completed. It basically had rust everywhere from the lower stainless moulding down. Some areas had a massive amount of previous repairs, with rusty home made patches welded on top of rusty panels. In one area I counted over a dozen patches in an area that was only a foot wide. If I had known this damage was there in my Fury before I started, I would have sold the car as it was, and restored another Fury. It was apparent that I was looking down the barrel of a very lengthy body repair job.
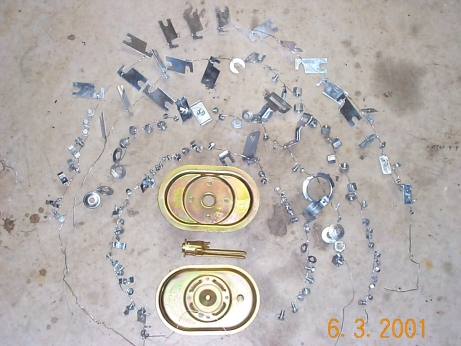
While my Fury was at the acid dippers for a few weeks, it gave me the opportunity to get on with other stages of the resto. The 57 front clip to replace the 58 front clip was rust free, and just required some panel work to the eyebrow areas of the front fenders, where there was accident damage, and then hammered and filed straight. Whenever anything is disassembled, I kill the rust on all nuts/bolts/washers etc, wire wheel them and then zinc plate them with the appropriate plating-bright zinc or gold passivate.
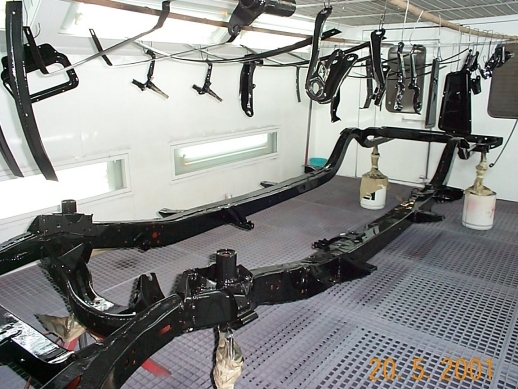
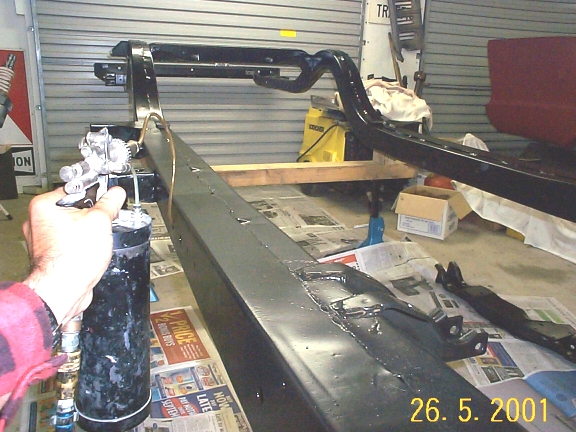
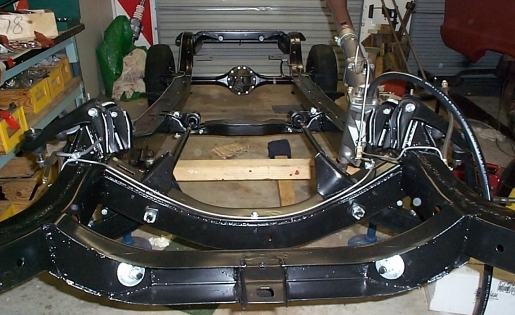
As with the plating of metal components, I find it most economical to prepare and paint as many items as possible at the same time. So when it was time for me to prepare and paint my frame, I also took into the paint booth as many items as I could find that were also to be painted in Satin Black. The surface, after any necessary panel work, is washed with a grease remover, then coated in POR-15 Metal Ready, which is then washed off with water 15 minutes later. A thorough blowing off with the air gun is followed by a 1st coat of POR-15 black. When the 1st� coat is �finger drag� dry, a 2nd coat of POR-15 is applied. When the 2nd coat is �finger drag� dry, the top coat of POR-15 Chassis coat Satin Black is applied, and left in the booth overnight to dry. Once I got the chassis home, I used a spray gun with a long hose and a 360 degree nozzle to thoroughly coat all inside surfaces of the frame with a 50/50 mixture of Tectyll and Fisholine rust protectant. There are lots of holes up the chassis to poke the hose in, to make sure it is protected from front to back. Before painting, locate your frame number, which is the same as your engine number, and is located on the driver�s side, on the top rail about in line with where the rear edge of the front door would be-on 57 Fury anyway-other cars may be different. The stamping is real light, and even when you know where it is, can be very hard to locate.
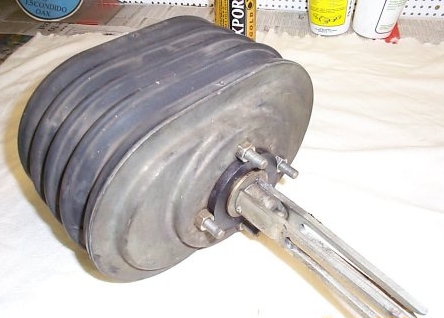
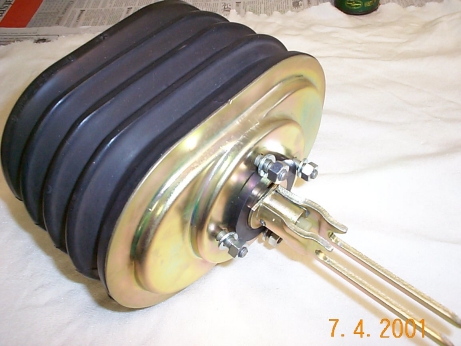
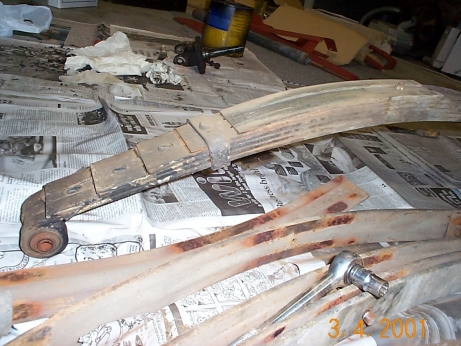
My original 6-leaf rear springs, part number correct for 57 Fury (stamped on the smallest leaf), had obviously been apart before, as the clamp which secures all the leaves together was some home made piece of steel. After disassembling them and knocking out the old eye bushes, I wire brushed them, killed the rust, then wire wheeled them. (Do not acid dip springs.) They received the same POR-15 paint as the chassis. I had a toolmaker make me up some new clamps styled from some second hand ones that I bought but which were not good enough to use. A �G� cramp is useful for compressing the leaves together necessary to fit the new leaf clamps. The bolt that goes through all leaves also had to be remade, as the original was so badly rusted. NOS canvas spring inter-liners fitted between the leaves. NOS lower rubber insulator between the lower leaf and the diff mounting plate. NOS rear spring shackle hangers, bushes and bolts. NOS front eye bushes.
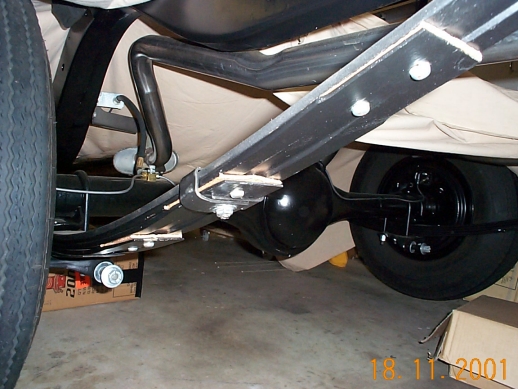
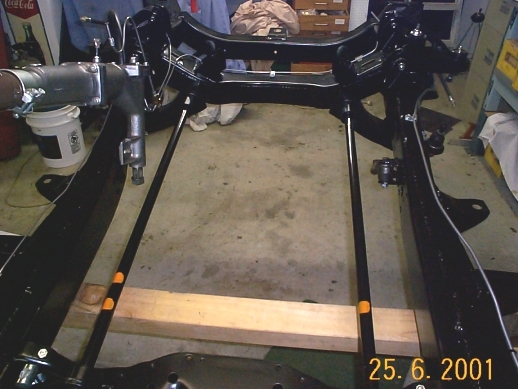
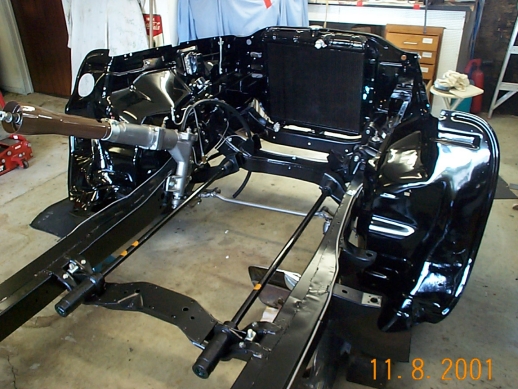
With the chassis painted, it was time to begin installing all those components that I had been working on for the past year. New brake lines and new fuel lines were purchased and using a bending tool, I put all the correct bends back in, as they were on the old rusted lines. I bought & installed new fittings on the ends of the lines. One of the trickiest tools to find was the tool that puts the flare on the end of the fuel line where it meets the flexible rubber gas hose. However I located a quality tool made in USA to do this flare in the end, after much searching. I repainted the orange paint daubs onto the torsion bars as they done originally. Every nut, bolt & bracket was acid dipped, wire wheeled and re-zinc plated where appropriate before being bolted back on to the chassis. The parts that were originally bare metal were wire wheeled, painted in POR-15 and then top coated in VHT cast iron grey. Inner fenders, radiator support panel and radiator are installed next. I painted these parts in a 2 pack black with flatting base to remove some of the gloss, as these parts were not meant to be super glossy.
 
Can you help me locate any of the following parts that I am missing, so that my restoration will proceed through to completion unhindered? You can count on this being current-if a part is on the list then I need it, and you could get to see the part that you supply appear on this page installed onto this very 57 Fury! Fair prices paid for good parts. Any help appreciated. Contact me here. PARTS WANTED For 1957 Plymouth, Fury. Parts colored in green have been found with your help! Shaft to carb linkage, with stud, w/auto 3sp, Fury, Part# 1827-691. (Supplied by Johnny P, Auckland, NZ) Shaft to carb linkage, with slot, w/auto 3sp, Fury, Part# 1822-008. (Missing part turned up) Accelerator pedal lever (what the rubber pedal attaches to) w/auto 3sp, Part# 1734-024. (Supplied by Wendy at glnos@iserv.net) Clips for retaining narrow side stainless mouldings. (Supplied by Ed Sitek, Tolland, Ct.06084) Clips for retaining roof rail stainless mouldings-original-used OK. (supplied by Tim Ridl.) Clips for retaining chrome fin cap mouldings (Supplied by Florida Auto Fastener. 67cayne@gtcom.net. Tony and John.) Clips for retaining stainless moulding that goes directly under trunk lid (Supplied by Florida Auto Fastener. 67cayne@gtcom.net. Tony and John.) Clip that holds windshield washer hose to underside of hood-used OK. (Supplied by John Garofalo, Florida) 6 inch wheel rims (5 needed). Transmission front & lower inspection covers. (2). (Supplied by Tim Ridl, Dickinson, ND 58601) Highway Hi-fi mounting brackets(1957). Highway Hi-fi records. Radiator support to hood bumpers x 2. (Rubber stops with threaded steel). (Supplied by John Garofalo, Florida) Identification tags for carburettors, brass triangular, to suit carbs 2631S & 2632S. (Supplied by Ebay user "Mztercarb.") Fuel pump-Stamped M2501S. (Supplied by Greg Pickens, Ebay user purepony) Ballast resistor, ceramic thing that mounts on coil, want correct one as shown in manual, not later model. Muffler support package-muffler end-dual exhaust, Part # 1843-009 (2) Muffler support & clamp-muffler end-dual exhaust, Part # 1843-008 (2) Exhaust support & clamp-exhaust end-dual exhaust, Part #1843-010 (2) Tail pipe extensions, Part # Clips for retaining chrome hood letters. (Kindly supplied by Louis Guzman from Freeport, New York.) and any NOS parts.
|

Furyworld v5.0 - Plymouth Run is copyright Lion's Gate Web Services 1999-2004.